When I was growing up, the buzzword was preppy. I wanted so badly to be preppy! And to me, nothing screamed prep more than a classic argyle sweater with matching socks. Yes, matching socks. Although I haven’t matched my sweater to my socks in decades, I’ve never lost my fondness for that particular trend. And even though it might not be cool to be preppy anymore, I can still dress my kids up in argyle sweaters and matching socks! At least for a few more years, or until they start to boycott Mom’s choice in favor of what’s actually in style.
This recipe makes two 2-layer cakes.
1 recipe White Cake
1 recipe Chocolate Cake
1 recipe Basic Buttercream
1 recipe Chocolate Buttercream (optional)
Turquoise or pink and brown gel food coloring
SPECIAL EQUIPMENT:
4 6-inch round cake pans; cake leveler or long serrated knife; rotating cake stand (optional); 3-inch round cookie cutter; 3½-inch round cookie cutter; offset spatula; disposable plastic pastry bags; #2 and #4 decorating tips
DIFFICULTY: Medium
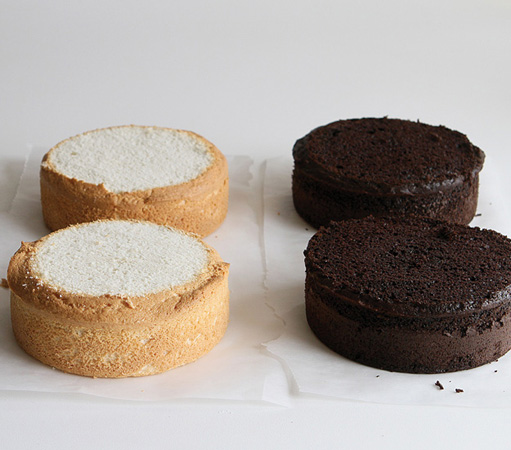
1. Bake 2 layers of white cake and 2 layers of chocolate cake using the 6-inch cake pans (you may need to extend the recommended baking time when using 6-inch pans). Cool the cakes to room temperature.
2. Level all 4 layers to the same height.
3. Refrigerate the layers for 6 hours or freeze them for 1 hour.
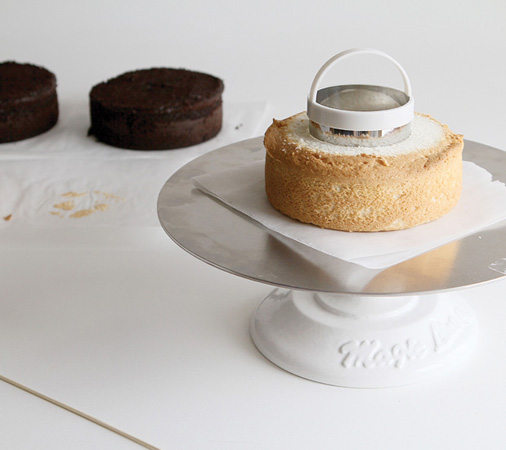
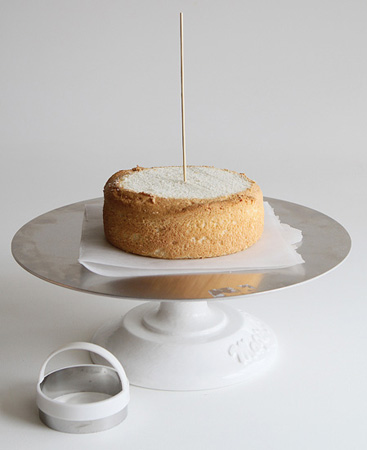
4. Place 1 white layer on a piece of parchment on a flat surface or rotating cake stand. Center a 3-inch round cookie cutter on the layer and press slightly to create a guideline. Repeat with the other 3 layers.
5. Insert a toothpick or skinny skewer into the dead center of the cake on the stand.
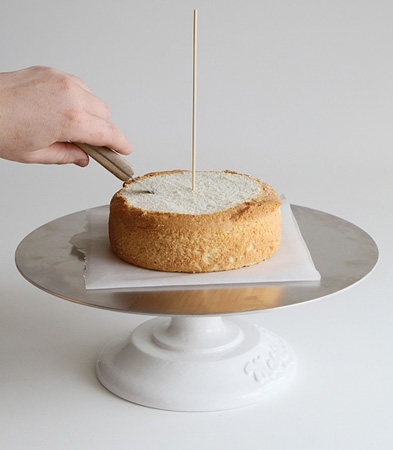
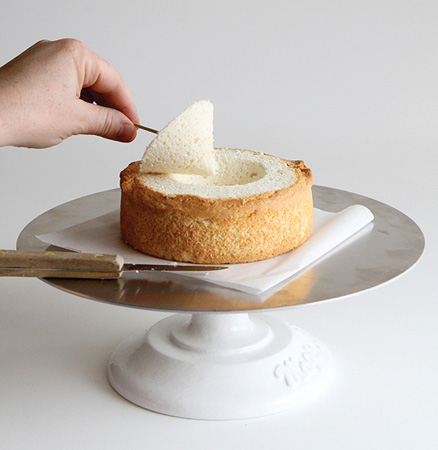
6. Insert a very sharp paring knife into this layer at the guideline at a 45-degree angle. Cut all the way to the skewer. With the knife still in cake, place one hand flat on the cake and slowly cut around, following the guideline. Move as slowly as you need, and be as precise as you can. If the cake feels too soft or crumbly, chill it again to make it easier to work with. Thirty minutes in the freezer should do the trick!
7. Repeat to cut matching cones out of the other 3 layers.
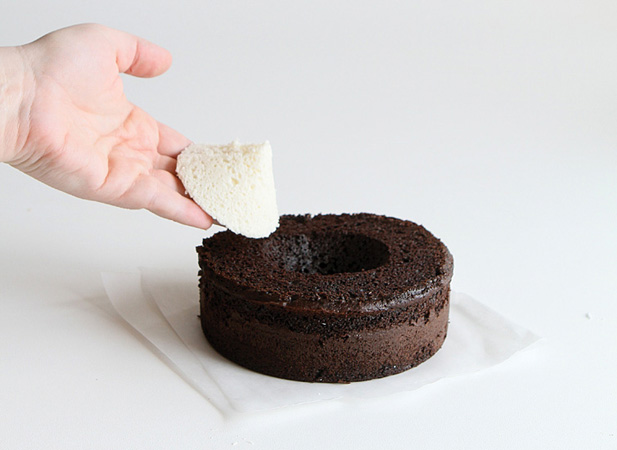
8. Remove the cones and place the white cones into the chocolate layers and vice versa.
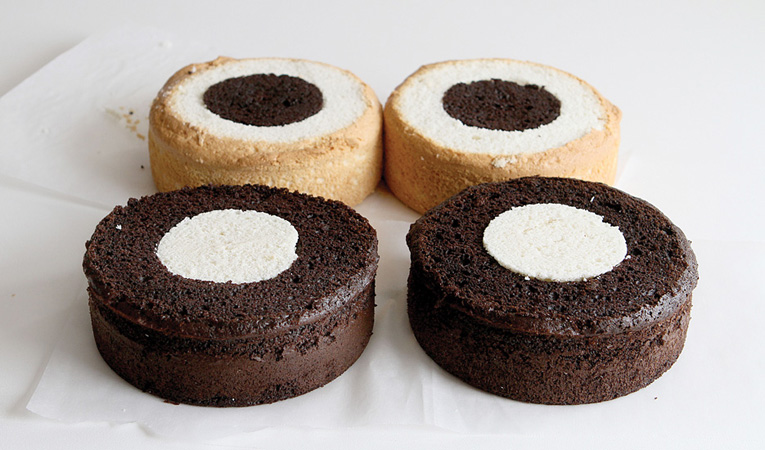
9. Freeze all the layers for at least 1 hour.
10. Prepare the basic buttercream and tint 2 cups of it turquoise (or pink, if you prefer that color scheme).
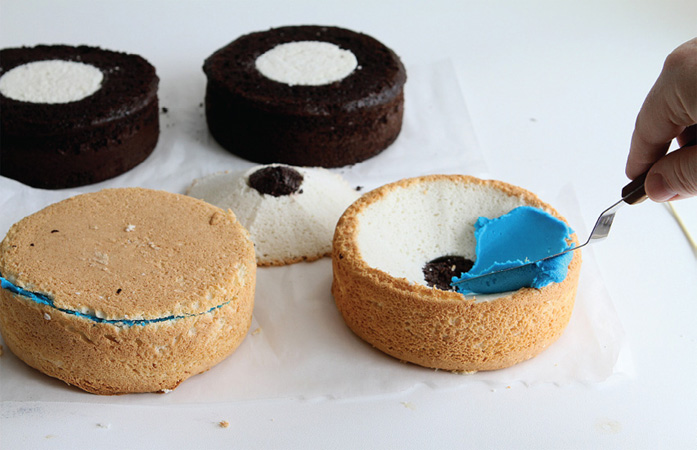
11. Remove the cakes from the freezer and place the layers on parchment paper. Carefully turn the layers over so that the uncut sides are facing up. Then center a 3½-inch round cookie cutter on one layer and press in slightly to create a guideline. Insert a toothpick or skinny skewer into the dead center of the layer.
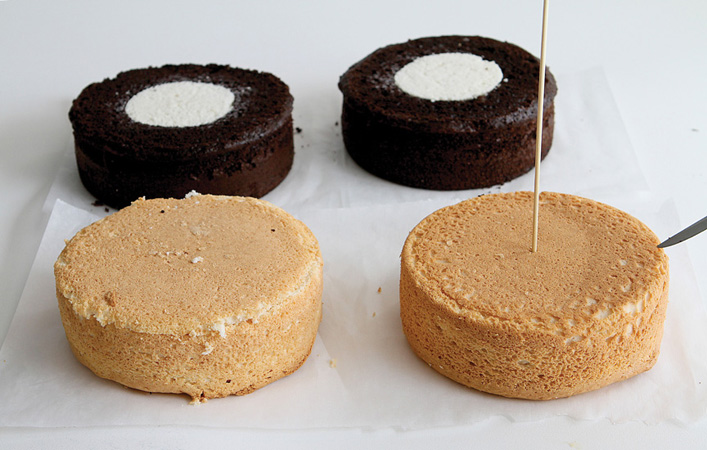
12. Insert a very sharp paring knife into the layer at a 45-degree angle. Cut all the way to the skewer. With one hand flat on the cake, slowly cut around the guideline. Repeat with the other 3 layers.
13. Carefully remove the newly cut section and, using an offset spatula, frost the interior with a thin layer of turquoise buttercream. Replace the cone of cake. Repeat with the remaining 3 layers.
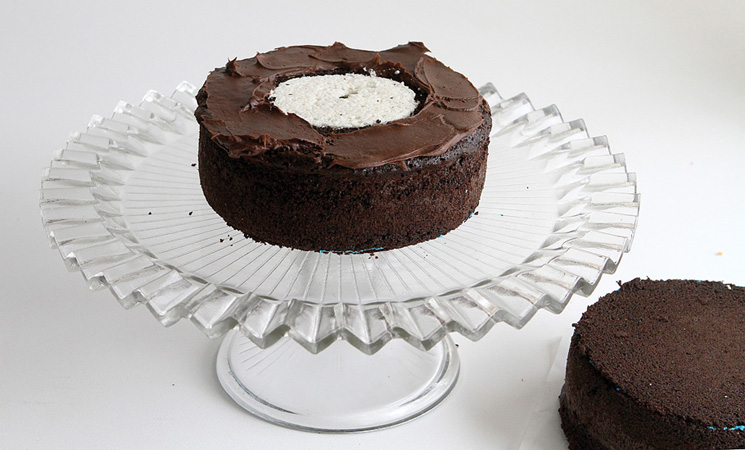
14. Place one white layer on a cake stand with the chocolate center side up. Spread a layer of white buttercream around the top perimeter of the layer, not touching the chocolate center. Carefully set the other white layer on top of the first layer.
15. Cover the cake in a chocolate crumb coat.
16. Create a second 2-layer cake with the chocolate layers, using ¼ cup of chocolate buttercream around the perimeter of the bottom layer.
17. Crumb-coat the cake with white buttercream.
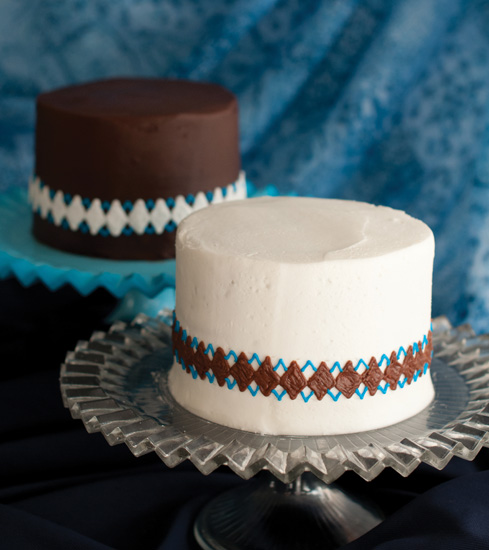
18. Cover the white cake in a smooth layer of chocolate buttercream, and the chocolate cake in a smooth layer of white buttercream.
19. Insert a #4 decorating tip into a disposable pastry bag. Fill a second bag with white buttercream and a third bag with chocolate buttercream. Cut the tip off the bag of white buttercream and slip it into the pastry bag with the #4 tip. Pipe out a row of diamonds around the base of each cake. Pipe out white diamonds on the brown-frosted cake. Replace the bag of white buttercream with the chocolate buttercream and pipe out a bit of frosting until the tip is clear of any white frosting. Pipe out brown diamonds on the white-frosted cake. Insert a #2 tip into a pastry bag and fill it with the turquoise (or pink) buttercream. Pipe Vs and inverted Vs above and below where the diamonds intersect.
20. Chill the cakes before serving.