One of my favorite cookie decorators in the world is Bridget from bakeat350 .blogspot.com. She’s just one of those people you love to love. She oozes Southern charm and grace; and, of course, massive amounts of cookie-decorating talent!
Back in 2008, Bridget posted a sweet little bee cookie. Honestly, I wasn’t even thinking about cakes in 2008. I didn’t even know how to turn on my oven! But for some reason her little bee cookie stuck with me, and when I started making cakes with surprises in them, I knew I wanted to tackle the bee.
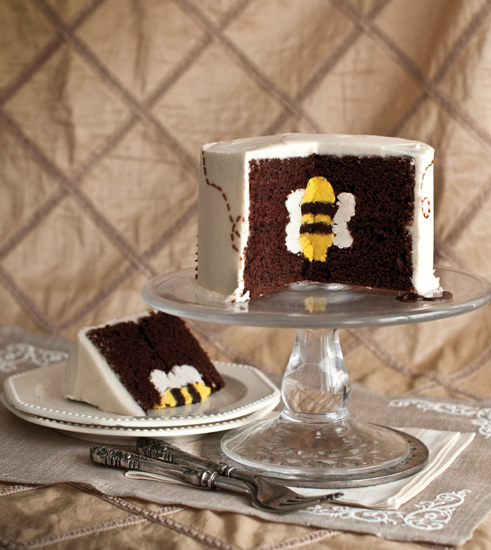
This cake is dedicated to Bridget, who could not bee any sweeter. Could not bee any nicer. Could not bee any friendlier. Thanks so much for bee-ing an amazing friend, Bridget!
1 recipe Chocolate Cake
1 recipe White Cake
1 recipe Honey Buttercream
Yellow and brown gel food coloring
¼ cup chocolate chips
SPECIAL EQUIPMENT:
2 6-inch round cake pans; cake leveler or long serrated knife; 9 × 13-inch cake pan; 2-inch round cookie cutter; paring knife; offset spatula; disposable plastic pastry bag; decorating tip
DIFFICULTY: Challenging
1. Bake the chocolate cake in two 6-inch round cake pans (you may need to add a little extra baking time for 6-inch pans). Cool to room temperature, then freeze for at least 6 hours or preferably overnight.
3. Bake the white cake in a 9 × 13-inch cake pan.
4. Prepare the honey buttercream.
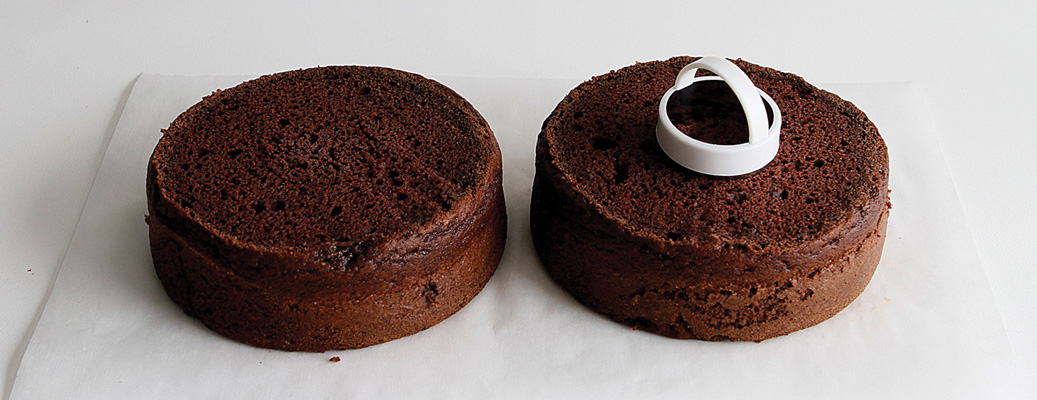
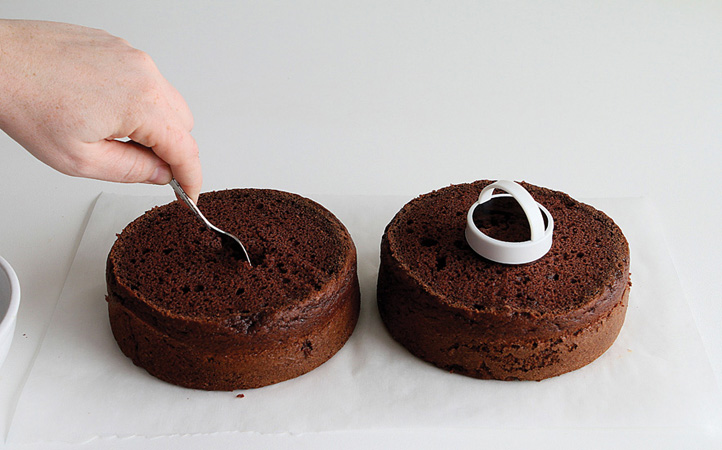
5. Using a 2-inch round cookie cutter, press down lightly on the center of one cake layer to create a guideline. Repeat on the other layer.
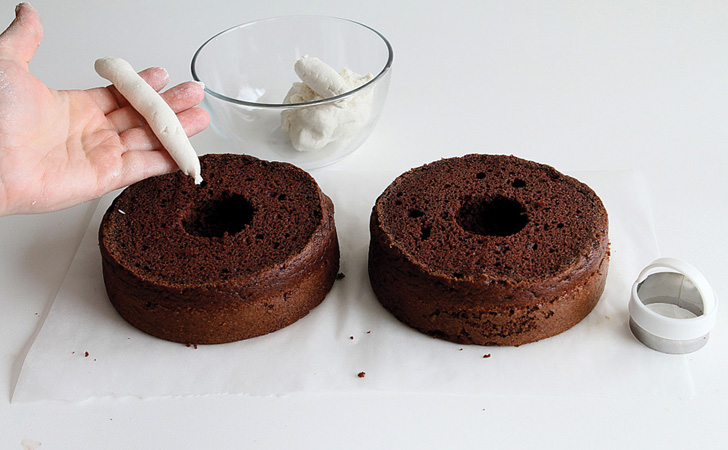
6. Using a small spoon, start carving around the guideline, digging a bit beyond the surface guideline to create the cavity that will be the white wing portion of the bee. Reserve the cutout cake in a bowl.
7. In the center of the hole you’ve made, make a well that’s about 1½ inches across and 1½ inches deep to hold the yellow and black bee body.
8. Repeat the cuts with the second chocolate layer.
9. Tint 1 cup of the honey buttercream with 1 or 2 drops of yellow food coloring to make a yellow buttercream.
10. Make white and yellow cake mixtures using the white cake: Remove any dark or hard spots from the cake—it must be pure white. Then crumble half the cake into a large bowl and add 1 or 2 tablespoons white buttercream. Crumble the other half of the cake into a second bowl and add 1 or 2 tablespoons yellow buttercream. Combine each mixture until it achieves a Play-Doh-like consistency.
11. Make a brown cake mixture out of the reserved chocolate cake scraps mixed with 1 or 2 tablespoons of the buttercream.
12. Roll 1 cup of white cake mixture into a snake that’s about 8 inches long and 1 inch in diameter. Repeat to make a separate snake.
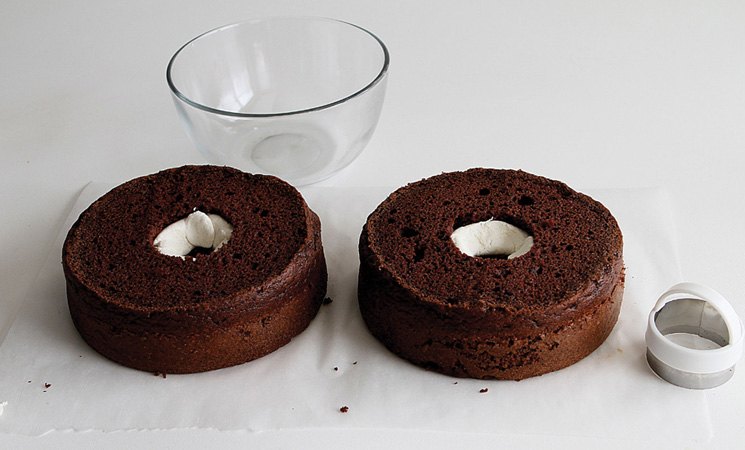
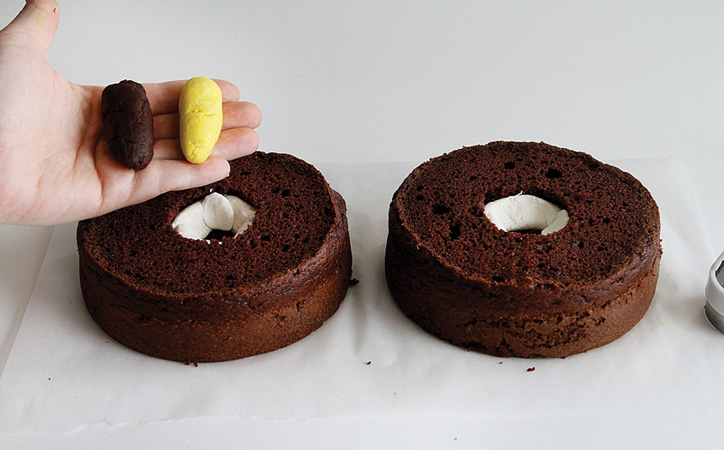
13. Fit the white snake snugly inside the hollowed-out wing portion of the cake. Add more white cake mixture if you need to. The space that remains will hold the bottom half of the body of the bee, so you can see how big you’ll need to make it. Repeat with the second snake and second cake layer.
14. Build matching bee-shaped bodies out of the yellow and brown cake mixtures.
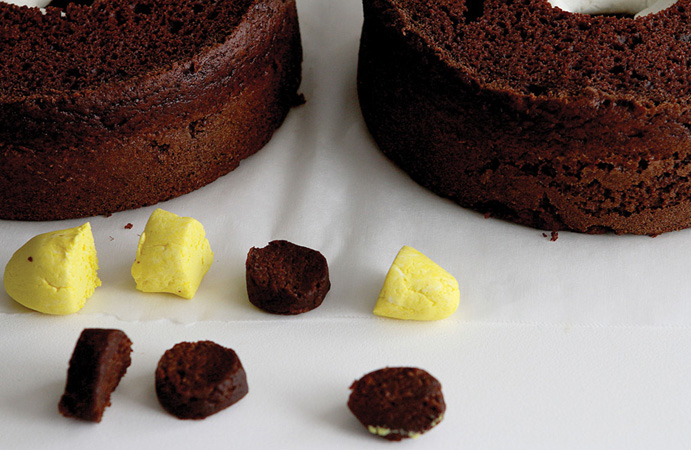
15. Carefully slice the bee bodies so that you can reconstruct a single yellow body with brown stripes.
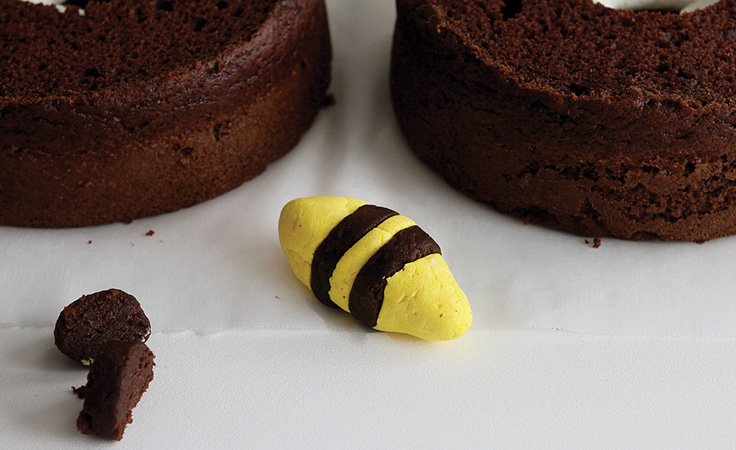
16. To make the bee body wider at the center, flatten and widen the pieces a bit as you assemble it.
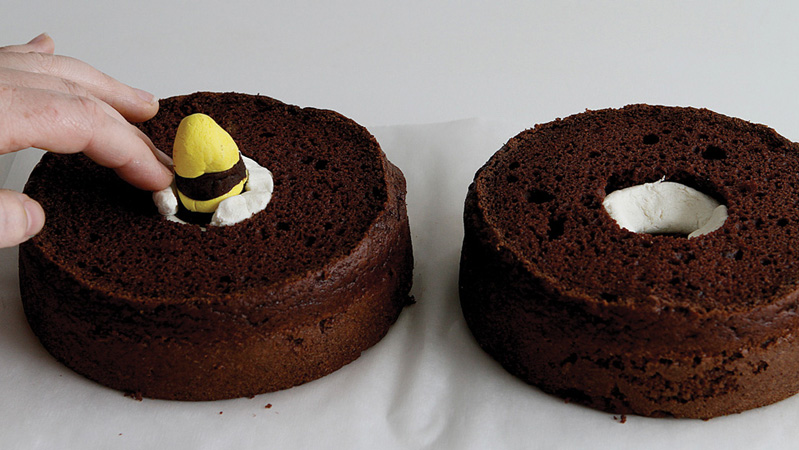
17. Insert the bee body into the cake and build up around it with the white cake mixture.
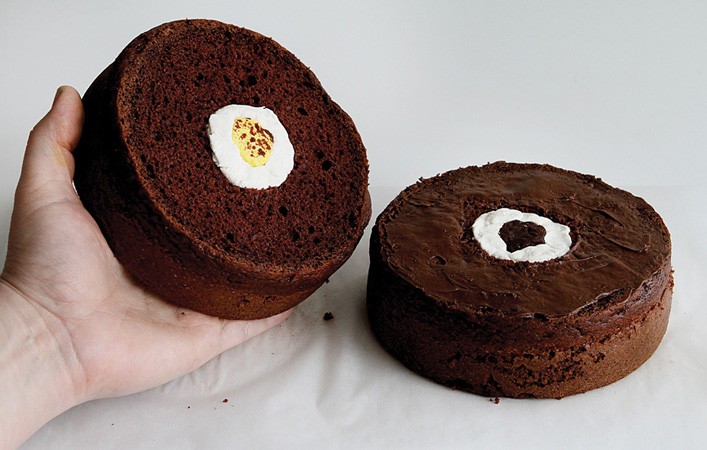
18. When the area around the bee is filled in, remove the top half of the bee body and place it into the other cake layer. Build up the area around that body with more white cake mixture.
19. Tint ¾ cup of the buttercream with brown gel food coloring. Spread ½ cup in a very thin layer around the perimeter of one layer of the cake, avoiding the white cake mixture and the bee body. Gently flip the other layer on top so that the bee meets in the middle.
20. Cover the cake in a crumb coat of honey buttercream and chill for at least 1 hour.
21. Cover the cake in a smooth layer of honey buttercream.
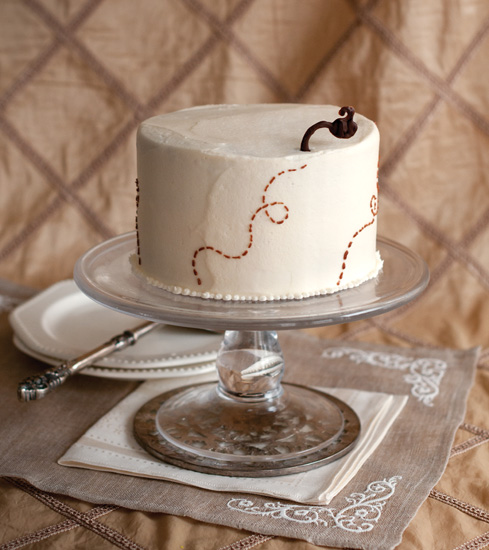
22. Insert a #2 decorating tip into a disposable pastry bag and fill it with the remaining ¼ cup of brown buttercream. Pipe out at least 3 dashed wavy lines on the outside of the cake to represent the path a bee might take as he travels up the side.
23. Put the chocolate chips in a disposable plastic pastry bag. Seal the bag with a rubber band and microwave it in 30-second intervals until the chips are melted. Cut a very small tip from the corner of the bag.
24. Working on a piece of parchment or wax paper on a baking sheet for stability, pipe the melted chocolate into the shape of a small bee (draw the bee on paper first if you want a pattern to follow). Add a line of chocolate below the bee; this will be the bee’s stand. Make the line long enough so that you’ll be able to insert a bit of it into the cake.
25. Place the chocolate bee in the freezer for 2 minutes, until firm.
26. Carefully peel away the paper and insert the stand into the cake where the piped wavy line leaves off.
27. Serve immediately.