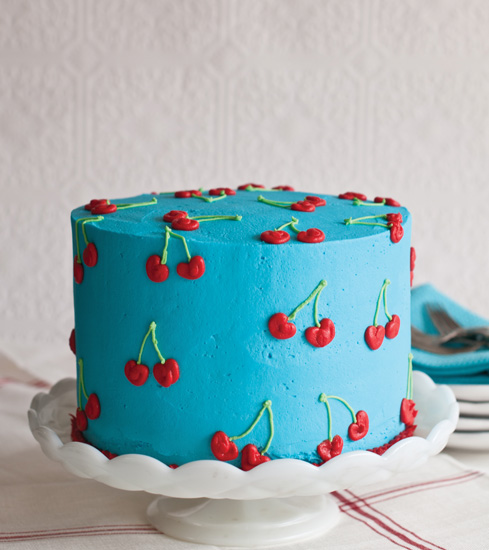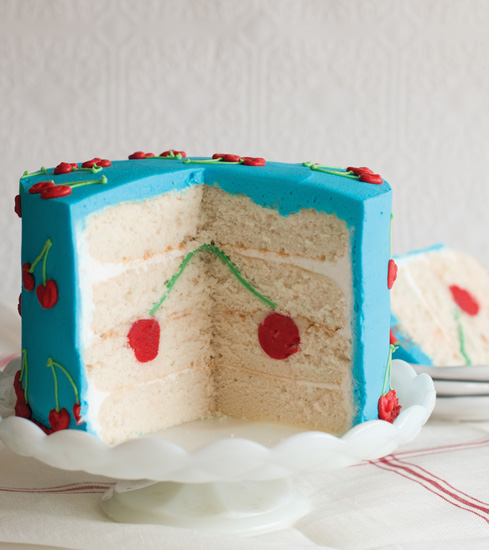
I’ve been on this cherry kick for about five years now, ever since our daughter Audrey came into our lives. There’s just something about a little girl dolled up in a pretty dress covered in cherries that makes my heart happy.
About the only way I can actually eat a cherry is if it’s chocolate-covered, but I thought I might be able to give it a go if it was in cake form. Although I simply used a white cake that was tinted red for my cherry, you can easily add a drop or two of cherry extract to your cake. Then you can actually bite into a cherry-flavored cake cherry!
3 recipes White Cake
Red, green, and turquoise gel food coloring
1 recipe Basic Buttercream
SPECIAL EQUIPMENT:
4 8-inch round cake pans; 9 × 13-inch pan; offset spatula; 4-inch round cookie cutter; paring knife; rolling pin; disposable plastic pastry bags; coupler; #2, #3, #5, and #7 decorating tips
DIFFICULTY: Challenging
1. Bake 4 white cake layers (from 2 recipes of white cake) in 8-inch round cake pans.
2. Prepare the batter for the last recipe of white cake, then add 4 to 6 drops of red gel food coloring, or enough to give you a bright red color. Bake the cake in a 9 × 13-inch pan.
3. Cool all the cakes to room temperature.
4. Make the buttercream.
5. You’ll be making two 2-layer cakes out of the 4 white cake layers. Lay 1 white layer on a piece of parchment. Using an offset spatula, cover the top in a thin coat of buttercream (about ½ cup) and place another white layer on top. Make a second 2-layer cake with the 2 remaining white layers. Refrigerate the 2 cakes for at least 6 hours.
6. Remove any hard edges or brown spots from the red cake and crumble it into a large bowl. Add 2 to 4 tablespoons of buttercream and combine with a fork or your hands until the cake mixture is the consistency of Play-Doh. Refrigerate the cake mixture in a plastic storage bag or container.
7. Cover the side of the cakes in a crumb coat of buttercream.
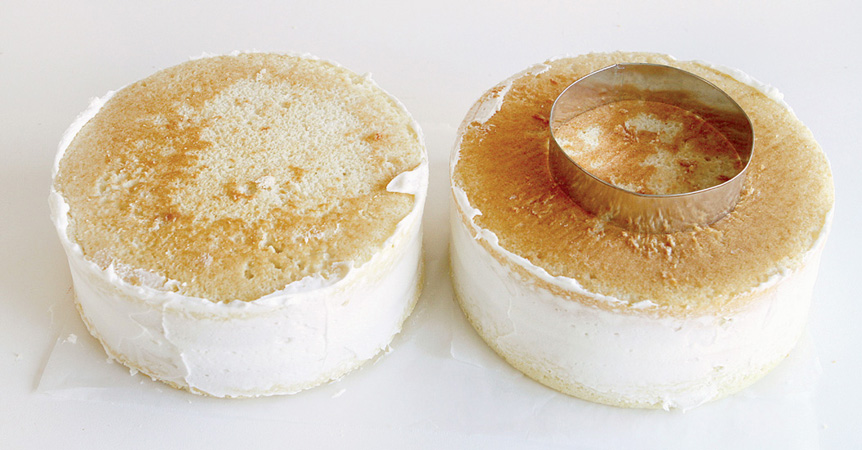
8. Using a 4-inch round cookie cutter, find the center of each cake and press in gently to create a guideline.
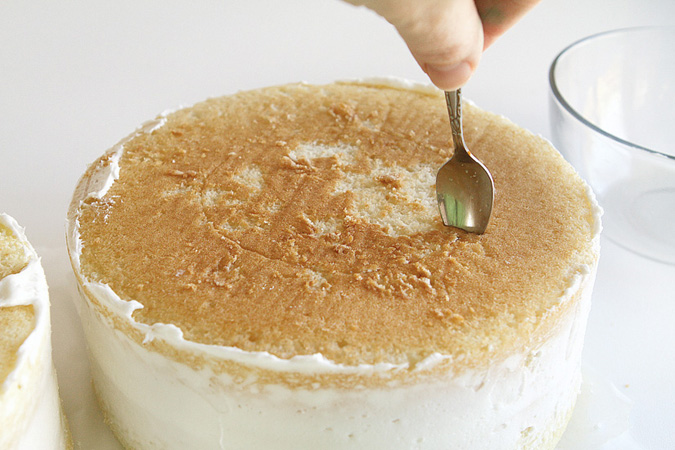
9. Use a small spoon (a baby spoon works great) to carve out a narrow circular channel (about 1 inch wide and 1 inch deep) in one of the white layer cakes.
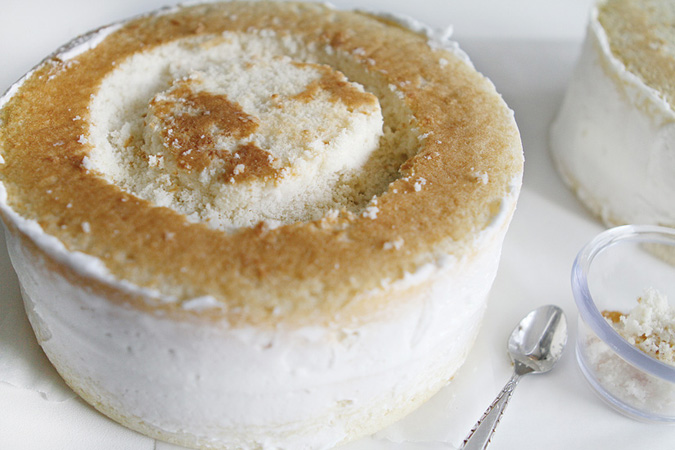
10. Reserve the scraps of cake in a bowl.
11. Add 4 to 6 drops green food coloring to the white cake scraps in the bowl to form the cherry stem. Add buttercream, 1 teaspoon at a time, and combine until the cake mixture is the consistency of Play-Doh.
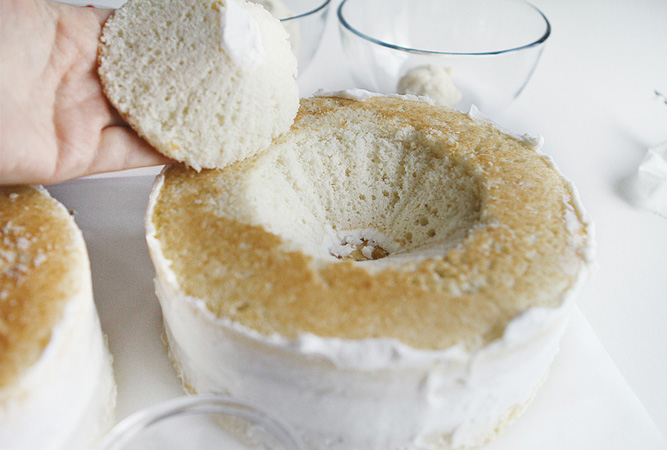
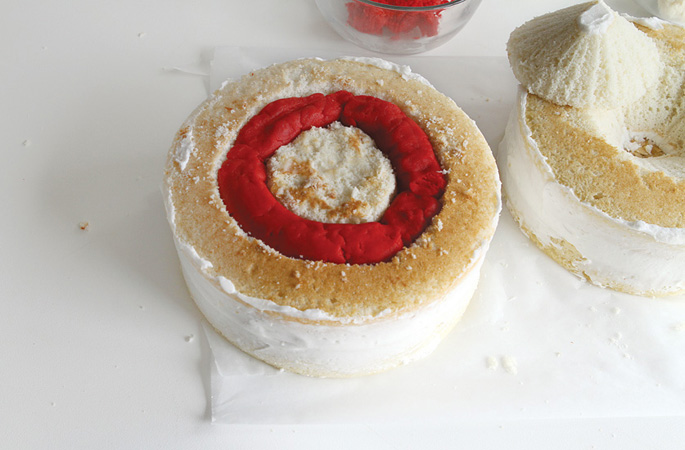
12. Cutting on the guideline you made earlier on the second cake, insert your knife into the cake pointing toward the center at a 45-degree angle (insert a skewer into the center for guidance if you like). Cut around the entire cake and remove the cone shape. Set it aside.
13. Roll out the red cake mixture into small sections and fill the channel in the first cake, tucking it in snugly.
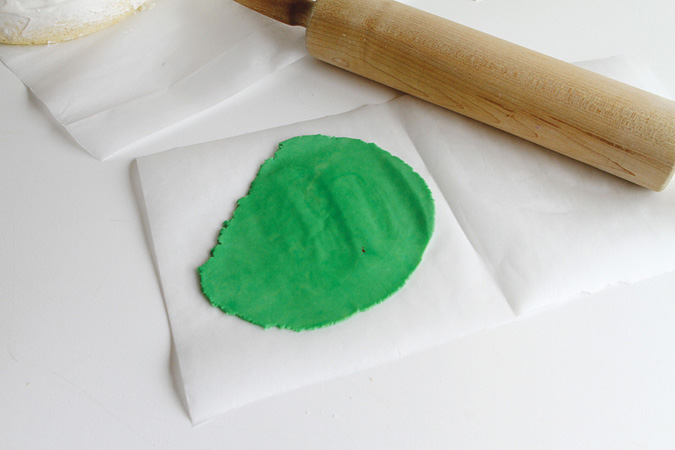
14. Place a handful of the green cake mixture on one side of a large piece of parchment. Fold the parchment over the cake mixture and roll it out to about ¼ inch thick.
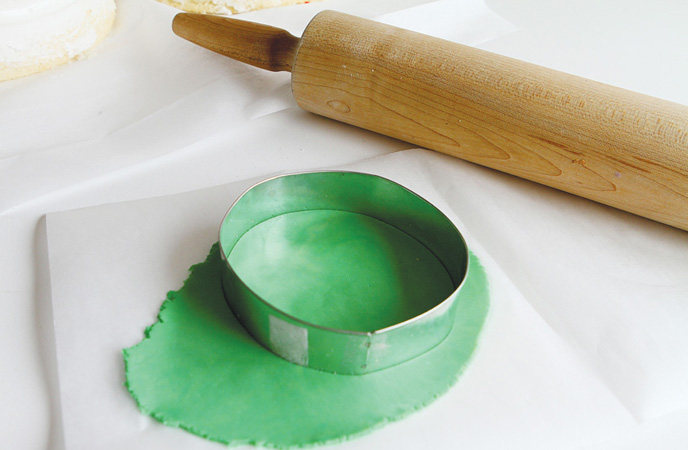
15. Use the 4-inch cookie cutter to cut a circle out of the green cake mixture.

16. Cut a line halfway through the circle.
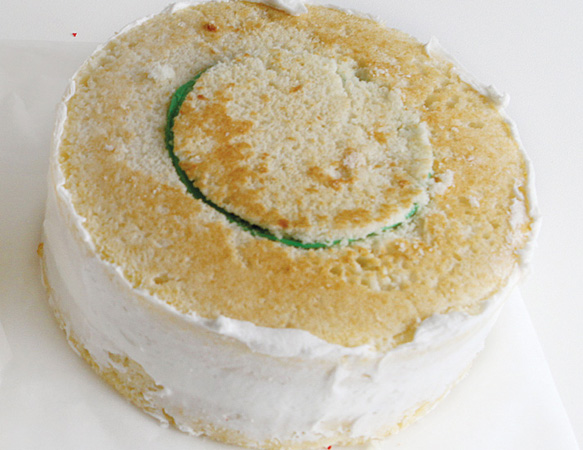
17. Turn the cutout cake cone point side up and drape the green circle over the cone. Wrap it around and make the green layer as smooth as possible; the cut will allow you to overlap the green. Then insert the green cone back into the well in the cake.
18. Spread a thin layer of buttercream on top of the cake with the cherry (just the white part). Gently flip over the green stem cake and lay it on top of the cherry cake (the cone should be facing up within the cake).
19. Refrigerate the cake for 1 hour or freeze it 15 minutes to set the design, then cover the cake with a crumb coat.
20. Chill in the refrigerator until you’re ready to decorate, but at least 1 hour.
21. Tint half of the buttercream turquoise (about 2 cups) and cover the cake in a smooth coat.
22. Place a ½ cup of the remaining buttercream in a small bowl and tint it light green. Tint the remaining buttercream bright red.
23. Insert a coupler into a disposable plastic pastry bag and attach a #3 decorating tip. Fill the bag with the red buttercream. Pipe the outlines of small cherries around the cake. I used groupings of two cherries.
24. Insert a #2 decorating tip into a pastry bag and fill it with green buttercream. Pipe the stems of the cherries.
25. Change the tip on the bag of red buttercream to a #5 or #7 and fill in the cherries.
26. Chill for about 30 minutes, then smooth out any rough spots. I do this with my finger dipped in a little water (not too much!) or with a paper towel.
27. Change to a #5 tip and pipe red buttercream to create a border around the base of the cake. Pipe out a dot, then continue around the entire cake.
28. Chill the cake until serving.