Introduction
Welcome to what we think is just about the most spectacular mountain range in the contiguous 48 states. The Sierra Nevada is a hiker’s paradise filled with huge wilderness areas; thousands of miles of trails; countless lakes, rugged peaks, and canyons; vast forests; giant sequoias; and terrain ranging from deep, forested river valleys to sublime, rugged alpine country.
Updates for the 10th Edition
Welcome, too, to the 10th edition of the inaugural book of Wilderness Press, Sierra North. As always, the authors involved in the update have rotated, and the updates this time have been led by Elizabeth Wenk and Mike White, with assistance from Tim Hauserman.
In the 15 years since the ninth edition was published, GPS units have become commonplace additions to hikers’ gear lists, and the waypoints and trail distances included in this book have (nearly) all been verified by electronic devices. While most of the trips remain the same, there were regions where the hikes included had been unchanged for 52 years but trail networks and use patterns have greatly evolved. Hence, some hike routes have been altered, while a few have been removed and replaced with new hikes. We’ve strived to include the vast majority of the northern Sierra’s trails, as we expect readers want to explore widely. In addition, all-new elevation profiles clearly show junctions and waypoints described in the text.
For this edition, coordinates for waypoints are given as latitude and longitude in decimal degrees, a relatively simple format to enter into digital devices. If you’d like to upload the waypoints embedded in the text directly to a GPS device, visit tinyurl.com/sierranorthgps to download a file that you can view online or on your device. Note: This file does not contain all trail junctions—just trailheads, notable campsites, and the occasional cryptic junction where having a coordinate is particularly useful.
The maps provided in the book are nearly identical to those in previous editions; that is, they are simple sketch maps of the hikes, including prominent nearby place-names. The only notable change is that, where relevant, we reference nearby or overlapping trips, by number, to make it easier for users to merge segments of different described hikes into a unique route of their choosing. Similarly, in the text, at junctions we reference how different trips link together.
As in the ninth edition, Sierra North spans existing and proposed wilderness areas from just north of I-80 south through CA 120 and on to the southern Yosemite National Park boundary, including trailheads to the west, east, and south of Yosemite’s boundaries.
A handful of hikes accessed via Beasore Road and Sky Ranch Road out of Oakhurst have bounced between this book and its companion title, Sierra South. For this edition, the Quartz Mountain, Fernandez, Walton, and Isberg Trailheads (Ansel Adams Wilderness) are back in Sierra North. (Sierra South then covers the Sierra from a little south of Yosemite to the Kern Plateau, including the rest of Ansel Adams Wilderness, John Muir Wilderness, Kings Canyon National Park, Sequoia National Park, and the Golden Trout Wilderness.)
Measuring distances in the backcountry used to be more art than science, but modern GPS units make it possible to accurately determine trail distances. Your authors each have their own methods to measure trail distance, but Lizzy Wenk measures all tracks she walks with a pair of GPS units, verifies the tracks in Google Earth, and generally trusts the resultant distances to within 2%. With a few exceptions, trail distances are still rounded to the closest 0.1 mile.
It’s our hope that this new edition will help you enjoy our magnificent northern Sierra as well as give you an incentive to work to preserve it.
We appreciate hearing from our readers. Many of the changes and updates for this edition are a direct result of readers’ requests and comments. Please let us know what did and didn’t work for you in this new edition, and about any errors you find. You can email us at info@wildernesspress.com or leave comments at our website: go to wildernesspress.com and click “Contact Us” at the top of the page.
Care and Enjoyment of the Mountains
Be a Good Guest: Wilderness and Leave No Trace
The Sierra is home—the only home—to a spectacular array of plants and animals. We humans are merely guests—uninvited ones at that. Be a careful, considerate guest in this grandest of nature’s homes. Indeed, the vast majority of hikes included in this guide lie within one of the Sierra’s many wilderness areas, lands designated by the 1964 Wilderness Act to remain untrammeled, defined in the Oxford English Dictionary as “not deprived of freedom of action or expression; not restricted or hampered.” Moreover, wilderness is defined as areas where humans and their works do not dominate the landscape and indeed where humans are visitors who do not remain.
About 200,000 people camp in the northern Sierra’s wilderness areas each year. The vast majority care about the wilderness and try to protect it, but it is threatened by those who still need to learn the art of living lightly on the land. The solution depends on each of us. We can minimize our impact. The saying “Take only memories (or photos), leave only footprints” sums it up. Hikers or equestrians entering the Sierra’s many wilderness areas must accept that, in order to preserve the wilderness in its natural form, perhaps they cannot enter the trailhead they want because the quota is filled or they might be slightly inconvenienced by packing out toilet paper or not lighting a campfire.
Following the seven Leave No Trace principles is an easy way to ensure you are minimizing your impact when camping in (and out of) wilderness areas. Indeed, if you look carefully at the regulations on your backpacking permit, you will realize that the specific requirements—from human-waste management to campfire regulations to campsite selection and food storage—are all necessary if visitors are going to “leave no trace,” as embodied by these principles:
• Plan ahead and prepare.
• Travel and camp on durable surfaces.
• Dispose of waste properly.
• Leave what you find.
• Minimize campfire impacts.
• Respect wildlife.
• Be considerate of other visitors.
© 1999 by the Leave No Trace Center for Outdoor Ethics: lnt.org.
The information below applies Leave No Trace principles to on-the-ground guidelines for hikers. More than anything else, learn to go light. John Muir, traveling along the crest of the Sierra in the 1870s with little more that his overcoat and his pockets full of biscuits, was the archetype. Muir’s example may be too extreme for many (and he did stay warm by building campfires in locations now deemed unacceptable), but the concept that you should strive to get by with less, not more, is a powerful starting point. A lot of the stuff people take into the mountains is burdensome, harmful to the wilderness, or just plain annoying to other people seeking peace and solitude.
Carry Out Your Trash
• Pack out all trash—do not attempt to burn plastic, foil packaging, or toilet paper. The remnants of foil-lined hot-chocolate packets linger indefinitely in fire pits to the ire of rangers and backpackers alike.
• Anglers, take all your lures, bait, and monofilament out with you. Don’t leave fishing line tangled over trees, shrubs, or logs or floating in the lake.
• Prepare only as much food as you think you will eat in a sitting. Discarded leftovers are likely to attract bears and other wildlife.
Protect the Water
Keeping the Sierra’s water sources pristine is as important for wilderness users as for nature itself. Humans (and stock) can damage Sierra water sources by introducing disease agents through poor sanitation practices, by adding nutrients to the Sierra’s naturally low-nutrient waters, or by increasing streambank erosion. Notably, augmenting nutrient concentrations in the water leads to algal blooms that, in turn, provide habitat for waterborne parasites such as Giardia.
• Wash and rinse dishes, clothes, and yourself a minimum of 100 feet away from water sources; never wash in lakes or streams. Even though a soap may be marketed as biodegradable, it still isn’t OK to put it in the water. A good, lightweight solution is to carry a large zip-top bag for washing clothes and then carry the water away from the creek or lake.
• Do not put any soap in water—even biodegradable soap.
• Follow the sanitation practices described in the next section.
Practice Good Sanitation
• Bury waste 6 inches deep, a minimum of 100 feet from trails, and 200 feet from water sources. Intestinal bacteria can survive for years in feces when they’re buried, but burial reduces the chances that critters will come in contact with them and carry pathogens into the water, or that these pathogens will wash into the water following snowmelt or a thunderstorm.
• Pack out toilet paper. This is now a requirement throughout the Sierra, but one that is poorly complied with by many hikers. Burying your toilet paper does not work—animals rapidly dig it up, and tissue “flowers” are a blossoming problem in popular areas. Also pack out facial tissues, wet wipes, tampons, and sanitary pads.
Place used toilet paper and sanitary products in a heavy-duty zip-top bag. Add a little baking soda to the bag to minimize odors, and/or place the plastic bag in an opaque ditty bag to keep it out of sight.
• Consider using a bidet instead of toilet paper. A growing contingent of Sierra hikers has ditched (or mostly ditched) toilet paper in favor of portable bidets. In addition, many women now carry a “pee cloth” to greatly reduce their backcountry use of toilet paper. You can use a standard cotton bandanna or purchase a dedicated cloth.
Practice Good Campsite Selection
• Whenever possible, camp in an established campsite.
• Otherwise, pick a campsite on a durable surface, such as sand, a polished granite slab, or the forest floor.
• Camp at least 100 feet from water (in some wilderness areas you can camp closer than 100 feet if you are using an established site).
• Never camp in meadows, on lakeshores, or on streamsides. The fragile sod is easily compacted and, once the soil is hardened, meadow grasses are replaced by shrubs and trees.
• Don’t make campsite “improvements” like rock walls or tent ditches. These are illegal.
• For your safety, don’t camp beneath a dead tree or large dead branch. So-called widow-makers are a particular danger in forests hard hit by recent droughts and bark-beetle and leaf-miner infestations.
• Also take care with the vegetation beside your tent—walking back and forth to a water source can also damage riparian vegetation, and moving rocks exposes the roots of nearby plants, possibly killing them.
Avoid Campfires
• Use a modern, lightweight backpacking stove. Campfires waste a precious resource: wood that would otherwise shelter animals and, upon decaying, return vital nutrients to the soil. Campfires can also start—and have started—forest fires. As detailed on your wilderness permit, campfires are prohibited in many areas, especially at high elevations and at lower elevations during the hot midsummer months.
• Each year, campfires are prohibited in ever more popular areas—because some wilderness visitors use the available wood resources irresponsibly. If having a small campfire is an important part of your backcountry experience, take care to build only legal and responsible fires, so that you will have this option on future trips.
• Build a small fire.
• Only build a fire in an existing campfire ring.
• Never leave the fire unattended.
• Make sure your fire is out and cold before leaving your campsite (or retiring to your tent).
• Always obey campfire bans when they are in effect.
• Likewise, do not build a campfire in areas where they are prohibited. This increasingly includes popular subalpine lake basins where previous campers have scoured the landscape for every piece of dead wood, leaving nothing to decompose or as shelter for the animal residents.
• Make sure to pick up a California Campfire Permit at a ranger station (or online) if you don’t need a wilderness permit or if your wilderness permit doesn’t double as a campfire permit.
Protect Your Food from Wildlife
Remember, the wilderness is wildlife’s home, not yours, and you must always respect the wildlife. Avoid trampling on nests, burrows, or other homes of animals. Observe all fishing limits. If you come across an animal, just quietly observe it. Don’t go near any nesting animals and their young. Get “close” with binoculars or telephoto lenses. And most importantly, make sure only you eat your food—letting animals eat your food not only cuts short your trip, but is bad for the animals. They may become too aggressive toward humans, dependent on human food, or sick from eating processed food (and wrappers).
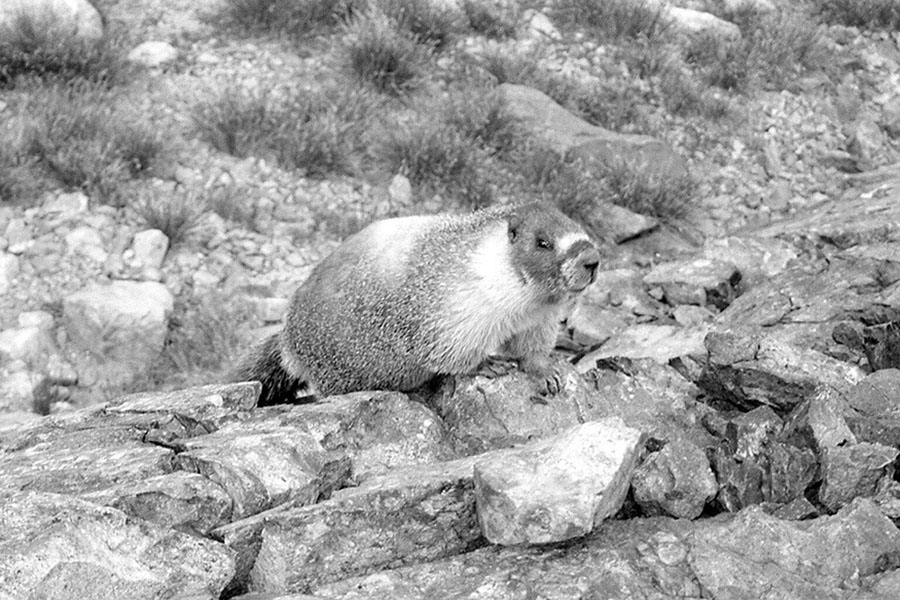
Bears are the animals most likely to attempt to eat your food, but marmots, ravens, and even deer will grab a snack if your food is accessible to them. While most animals can easily be thwarted by hanging your food sloppily in a tree or off a rock, bears are very clever and innovative: mothers give their cubs a piggyback to reach a low-lying bag. Mothers encourage their cubs to climb out on the branch, too flimsy to hold an adult bear’s weight, but perfect for a cub. And even a perfectly hung pair of counterbalanced food bags can be foiled if a bear shakes a tree until one bag drops down.
Bear canisters—plastic, carbon fiber, or metal containers, generally in a cylindrical shape—first appeared on the market in the early 1990s and are now considered the only acceptable way to store your food in some of the Sierra’s wilderness areas (including Hoover and Yosemite). Other wilderness areas (including Carson-Iceberg, Emigrant, Mokelumne, and Desolation) still allow hikers to hang their food using the counterbalance method but strongly recommend the use of canisters. Another alternative, prohibited in Yosemite but currently allowed in all national-forest wilderness areas described in this book, is the Ursack, a Kevlar bag in which you can store your food. Most ranger stations rent bear canisters for a modest fee, so if you don’t own one, you can pick one up together with your wilderness permit.
Marmots love people food, so take precautions to make sure they don’t steal yours.
Photo by Walt Lehmann
In addition, a few established camping areas have food-storage lockers—colloquially known as bear boxes. In Yosemite they are located at the five High Sierra Camps (Glen Aulin, May Lake, Sunrise, Merced Lake, and Vogelsang), in Little Yosemite Valley, and at Lake Eleanor. Food-storage lockers are also located at many Sierra trailheads to store your extra food before a trip. Everyone shares the bear box; you may not put your own locks on one. Never leave a bear box unlatched or open, even when people are around.
Overall:
• Store all food in your bear canister (or hung or in an Ursack, where legal) anytime you leave it unattended.
• All toiletries and fragrant items from your first aid kit must be stored with your food.
• After cooking, clean up food residue and leave your pots out.
• Don’t leave any food in your backpack when you aren’t wearing it.
• Don’t store any food in your tent.
• Do not leave any food in your car at the trailhead. Many trailheads have animal-proof food storage lockers in which to store your extra supplies.
• Never use a backcountry bear box as a food drop; its capacity is needed for people actually camping in its vicinity.
Safety and Well-Being
Hiking in the high country is far safer than driving to the mountains, and a few precautions can shield you from the discomforts and dangers that do threaten you in the backcountry.
Health Hazards
ALTITUDE SICKNESS If you normally live at sea level and you come to the Sierra Nevada to hike, it will take your body several days to adjust. Headaches and a sense of nausea are the most common symptoms of acute mountain sickness (AMS), the least severe and by far most common type of altitude sickness at the northern Sierra’s mostly moderate elevations. Though most cases of altitude sickness occur above 10,000 feet in elevation, 20%–25% of people experience some degree of altitude sickness already at 8,200 feet (2,500 meters). For unknown reasons, some people are much more prone to altitude sickness than others—if you hike often at higher elevations, you will know how susceptible you are and how hard you can plan to push yourself at altitude. While going slowly, staying hydrated, and regularly eating some food are important to reduce the chance you will experience nausea or headache, they aren’t explicitly reducing your AMS symptoms—the only way you can actually reduce the likelihood of altitude sickness is to acclimate. Afterall, acclimation refers to the multiday physiological adjustments to altitude that your body can make only through exposure to high elevation. One of the best things you can do is to stay in a trailhead campground the night before your trip to begin the acclimization process, especially one above 6,000 feet. If you are particularly susceptible to altitude sickness, either avoid the hikes in this guide that suggest a campsite above 9,000 feet for the first night, or spend several nights car camping and day hiking before you begin your backpacking trip.
An Unofficial Acclimatization Guideline: Your High-Altitude Guideline for the John Muir Trail is a handy, inexpensive reference you can read in advance and load onto your mobile device to read on the trail. It covers the symptoms associated with different types of altitude sickness, prophylactic medications, and treatment options. Free copies of this guide are also available in the archives of the Altitude Acclimatization Facebook group: facebook.com/groups/altitudeacclimatization.
WATERBORNE ILLNESS For many decades, hikers in the Sierra Nevada have been advised to filter their water due to the risk of contamination by Giardia lamblia, a waterborne protozoan, and other waterborne pests that cause severe diarrhea and abdominal pain. Aside from areas with cattle grazing and very high stock use, the risk of waterborne illness is actually quite low, but most hikers treat all their drinking water as a precaution. Giardia populations are generally only high in water bodies where algae provide habitat for the cysts. In the Sierra, algal blooms are generally associated with cattle grazing and high stock use, but in the future poor human sanitation or camp practices or warming water temperatures could increase algal prevalence and in turn Giardia risk.
Some hikers are likely asymptomatic Giardia carriers, and their sloppiness in burying waste or cooking for a group can contaminate water sources and infect others, so always assume you’re contagious and sanitize your hands before sharing food. Note that with Giardia, symptoms appear two to three weeks after exposure.
There are additional disease agents that could be present in Sierran lakes and rivers. Cryptosporidium is another, smaller, very hardy pest that causes a disease similar to giardiasis. It’s been found in the streams of the San Gabriel Mountains of Los Angeles and is spreading throughout Southern California; probably it will eventually infest Sierran waters. A recent study has found the feces of the resident yellow-bellied marmots contains strains of Cryptosporidium that could infect humans, although no one has collected evidence that it regularly contaminates water sources.
Viruses do not survive long in the cold, harsh conditions of the alpine environment and are unlikely to infect water in the Sierra. E. coli is uncommon but could be present in lower-elevation Sierra water bodies.

This may look cool and refreshing, but it’s advisable to chemically treat, filter, or boil water before drinking it.
Photo by J. Brian Anderson
Hikers have myriad water-treatment options. Keep in mind that different treatments kill or remove different microbes:
• Chemical purification (for example, iodine or chlorine): This is the easiest method of treating water—simply add drops or a tablet—but you have to wait about 20 minutes to drink your water. Some chemical purification methods leave a distinct chemical flavor, while others do not. In addition, chemical purification might not kill Cryptosporidium, so if this microbe becomes more common in the Sierra, this method will no longer be practical.
• Water filters: Water filters should remove all bacteria and protozoa, but the pores of many filters are too large to remove viruses. The advantages of filtering are removal of all micro-organisms of concern (in the Sierra Nevada) and not leaving a flavor in your water. There are both pump filter and gravity filter setups. The prior requires you to actively pump your water through the filter, while with the latter, filtering is a passive process; you fill a bag with water and return 5 minutes later to find a gallon of freshly filtered water. Another variant of water filters are squeeze filters (for example, Sawyer Mini) that screw straight onto your water bottle. You effectively purify the water as you drink. They are lightweight and allow each person to easily carry his or her own filter, but some brands clog easily and have quite low flow.
• Ultraviolet light purifier (such as SteriPen): Ultraviolet light damages the DNA of all micro-organisms, rendering them harmless. Water must be clear for the ultraviolet light to function, so water with silt must settle or be filtered through a cloth or equivalent. And make sure you have spare batteries with you. (As an aside, a clear, still alpine lake, devoid of algae, is the best place from which to drink if you aren’t purifying your water. The top 6 inches of an alpine lake have been irradiated by the sun to a similar extent as a UV purifier performs.)
• Boiling: This kills all microorganisms but is very time-consuming and uses considerable fuel.
HYPOTHERMIA Hypothermia refers to subnormal body temperature. Caused by exposure to cold, often intensified by wet, wind, and weariness, the first symptoms of hypothermia are uncontrollable shivering and imperfect motor coordination. These are rapidly followed by loss of judgment, so that you yourself cannot make the decisions to protect your own life. “Death by exposure” is death by hypothermia.
To prevent hypothermia, stay warm: carry wind- and rain-protective clothing, and put it on as soon as you feel chilly. Stay dry: carry or wear wool or a suitable synthetic (not cotton), and bring raingear even for a hike with an apparently sunny forecast.
Treat shivering at once: get the victim out of the wind and wet, replace all wet clothes with dry ones, put him or her in a prewarmed sleeping bag with hot water bottles, and give him or her warm drinks.
LIGHTNING Although the odds of being struck are small, almost everyone who goes to the mountains thinks about it. If a thunderstorm comes upon you, avoid exposed places—mountain peaks, passes, open fields, a boat on a lake—and avoid small caves and rock overhangs. The safest place is an area where you are less than 50 feet from, but not directly next to, a much taller object such as a tree.
If you are stuck in flattish terrain above treeline, crouch on top of a rock (but not the highest one, of course) that is somewhat elevated or otherwise detached from the rocks underneath it to protect yourself from any current flowing through the ground. Make sure to get all metal—such as frame packs, hiking poles, tent poles, and so on—away from you. The best body stance is one that minimizes the area where your body touches the ground. The National Outdoor Leadership School recommends squatting on the balls of your feet as low as possible and wrapping your arms around your legs. This position minimizes your body’s surface area, so there’s less chance for a ground current to flow through you, reducing the seriousness of injuries should you be struck. Close your eyes, cover your ears, hold your breath, and keep your feet together to prevent the current from flowing in one foot and out the other. Once a storm is upon you, getting in this position is more important than trying to seek more sheltered ground.
If you get struck by lightning, hope that someone in your party is adept at CPR—or at least artificial respiration if your breathing has stopped but not your heart. Eighty percent of lightning victims are not killed, but it can take hours for a victim to resume breathing on his or her own. As soon as possible, a victim should be evacuated to a hospital; other problems often develop in lightning victims.
SUNBURN Sunburns can be particularly bad at high elevations, where the ultraviolet radiation is greater. You can even get burned on cloudy days because the radiation penetrates clouds. Therefore, always wear a wide-brimmed hat and apply strong sunscreen to all exposed skin. The best sun protection is, of course, long sleeves and long pants—even if you’ve been resistant to long clothing in the past, try some of the new fabrics on the market. Some of them are—finally—true to their advertisement of keeping you pleasantly cool on a hot day.
Wildlife Hazards
RATTLESNAKES Rattlesnakes mainly occur below 7,000 feet but have been seen up to 9,000 feet. They live in a range of habitats but most commonly along canyon bottoms. Watch where you place your hands and feet; listen for the rattle. If you hear a snake rattle, stand still long enough to determine where it is, then leave in the opposite direction. They are frequently curled up alongside a rock or beneath a fallen log—look carefully before stepping across a fallen log or sitting atop a log or rock for a break.
Rattlesnake bites are rarely fatal to an adult, but a bite that carries venom may still cause extensive tissue damage. If you are bitten, get to a hospital as soon as possible. There is no substitute for proper medical treatment.
MOSQUITOES Mosquitoes in the Sierra fall more in the nuisance category than the danger category, but as they may (at lower elevations) carry diseases, it is best to avoid being bitten. That is easier said than done, for mosquitoes are common near stagnant water sources (including many Sierra lakes and slow-flowing rivers) and in moist forest terrain until mid-July. In some years they are only pesky near dusk and other years are an all-day nuisance. Camping in windier, drier, higher-elevation locations is one good way to avoid them—but such campsites don’t appeal to everyone.
The best way to avoid being bitten by mosquitoes is to cover your skin by wearing long sleeves, long pants, and a wide-brim hat, possibly topped by a head net. There are a number of topical solutions hikers carry to thwart mosquitoes on exposed skin. N,N-diethyl-meta-toluamide, known commercially as DEET, is the most common, and products with at least 20% DEET do a very good job of keeping mosquitoes off of you, but also can etch plastics and must be kept far from your mouth, eyes, and so on. You must also never wash yourself in streams or lakes with DEET on your skin—it is toxic to many animals, including frogs. Other products, such as picaridin and lemon eucalyptus, do as well as DEET in trials (commercial trials and your authors’) but must be reapplied more frequently. An alternative (or additional) approach is to, before your hike, spray or soak your clothes in permethrin. Permethrin can be purchased in ready-to-spray formulations or as a concentrate. There are also companies that commercially apply permethrin—and a growing contingent of outdoor clothing retailers that sell pretreated clothing.
Of course, the best method of mosquito prevention is to plan your trips from late July to September.
BLACK BEARS The bears of the Sierra are American black bears; their coats range from black to light brown. American black bears are fast, immensely strong, and very intelligent. They’re not usually aggressive, however, unless they’re provoked, and their normal diet consists largely of plants. In California’s mountains they pose no danger to you, just to your food; some of the black bears in Canada and Alaska are more aggressive. Long ago black bears learned to associate humans with easy sources of food, leading to incessant human–bear conflicts, especially broken-into cars and stolen food. Over past decades steady progress has been made in outsmarting the bears—or, more specifically, educating humans about the need to store food in bear canisters and not leave food in unattended cars. Sadly, a food-habituated bear is usually soon a dead bear.
Don’t let the possibility of meeting a bear keep you out of the Sierra. Respect these magnificent creatures. Just remember, if a bear does get your food, it now belongs to the bear, not you; don’t attempt to get it back, but do realize it is your responsibility to pick up the wrappers that get scattered around.
Terrain Hazards
SNOW BRIDGES AND CORNICES Stay off of these.
STREAMS Stream flows can be dangerous during peak snowmelt or following a severe thunderstorm. When stream flows are high, drowning is the greatest danger facing a backpacker. Peak snowmelt usually occurs in June, but it can extend into July in high snow years. Stream flows can also rise (and drop) rapidly following a summer thunderstorm. If a river is running high, you should not cross it solo, and you should spend considerable effort looking for an alternative (for example, a log or a broader, shallower, less turbulent ford) before starting across. And if a stream is dauntingly high or swift, forget it; the best option is to retreat or wait until the water level subsides. Snowmelt flows are much higher in the evening than the following morning, and thunderstorm flows usually subside within 12 hours.
Here are some suggestions for stream crossing:
• Wear closed-toe shoes, which will protect your feet from injury and give them more secure placement. If you don’t have good water shoes—not flip-flops—wear your hiking boots or shoes.
• Cross in a stance in which you’re angled upstream. If you face downstream, the water pushing against the back of your knees could cause them to buckle. Or, following the other school of thought, face slightly downstream, where you’re not battling against the current.
• Move one foot only when the other is firmly placed.
• Keep your legs apart for a more stable stance. You’ll find a cross-footed stance unstable even in your own living room, much less in a Sierra torrent.
• One or two hiking sticks will help keep you stable while crossing. You can also use a stick to probe ahead for holes and other obstacles that may be difficult to see and judge under running water.
• One piece of advice used to be that you should unfasten your pack’s hip belt in case you fell in and had to jettison the pack. However, modern quick-release buckles probably make this precaution unnecessary. Keeping the hip belt fastened will keep the pack more stable, and this will in turn help your stability. You may wish, however, to unfasten the sternum strap so that you have only one buckle to worry about.
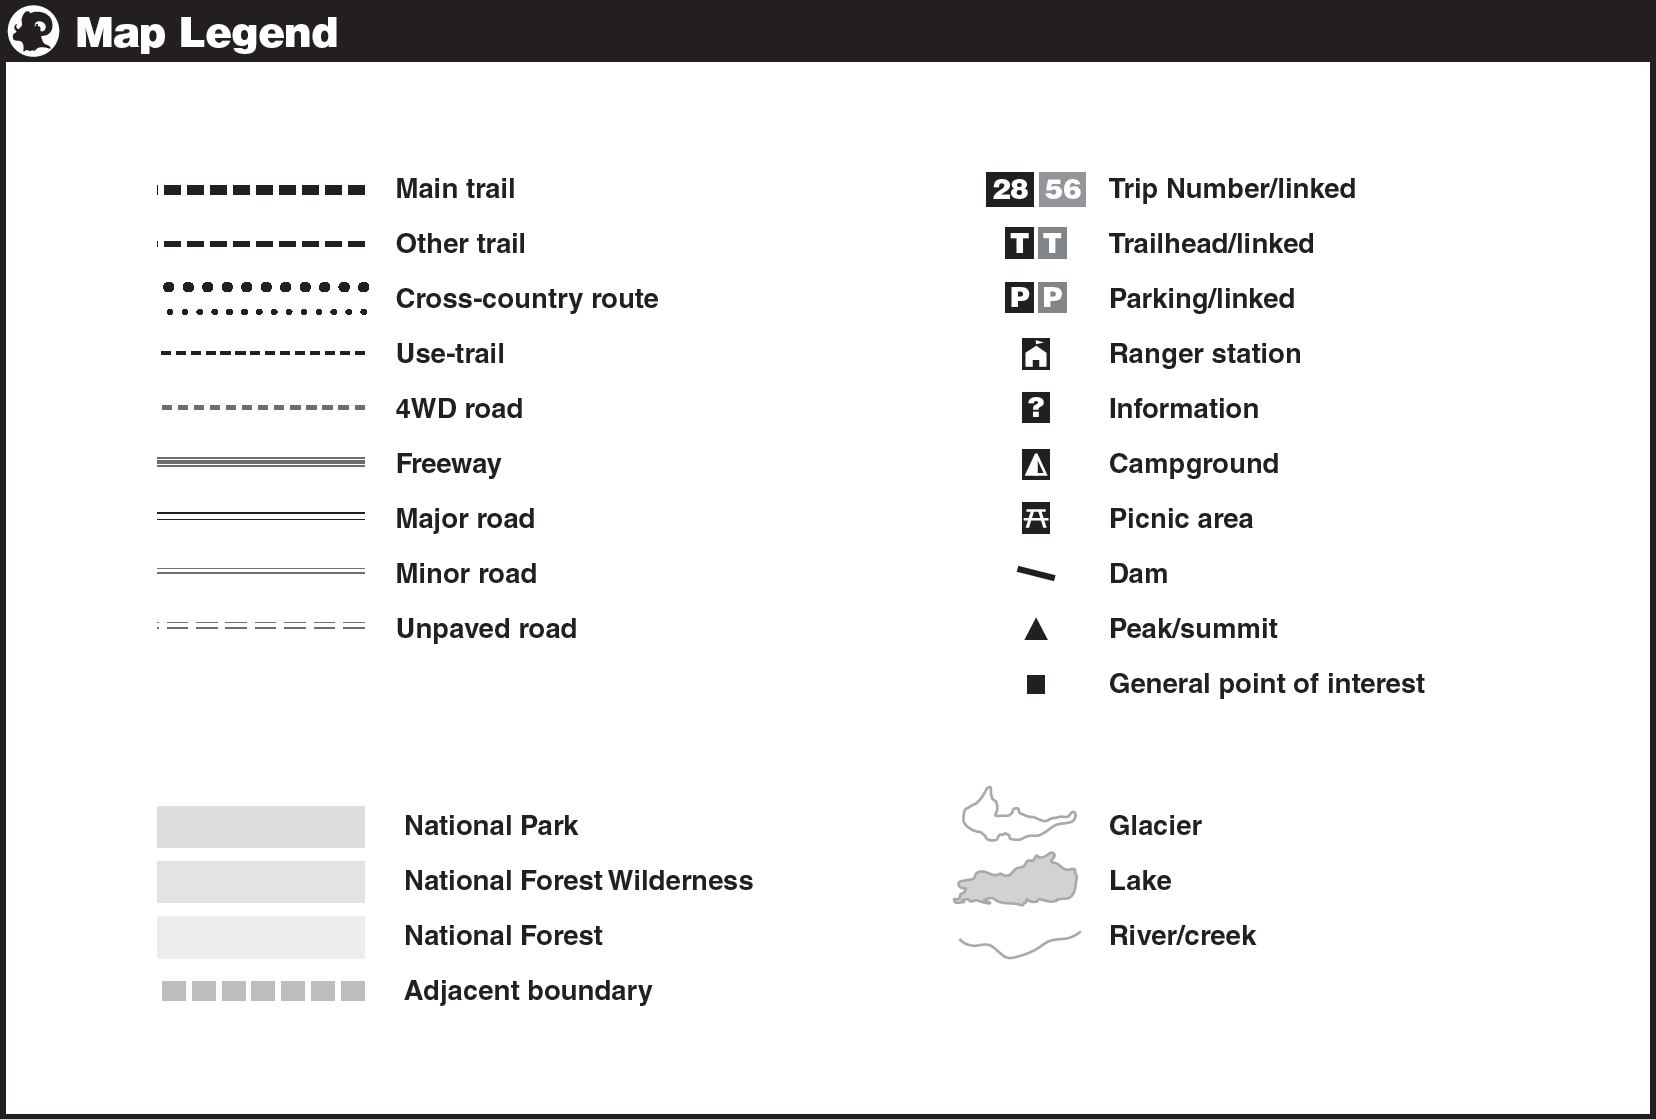
Maps and Profiles
Today’s Sierra traveler is confronted by a bewildering array of maps, and it doesn’t take much experience to learn that no single map fulfills all needs. Three main categories of maps are described below: government-issued topographic maps, trail maps, and online maps. While the book includes grayscale maps for each hike (see for an example), these do not suffice for on-the-trail navigation; they are included only to provide an overview of the regions through which the trip wanders.
USGS Topographic Maps
Topographic maps of various scales exist for all areas covered in this guidebook. The most detailed maps are those produced by the U.S. Geological Survey (USGS), generally referred to as the 7.5-minute (abbreviated henceforth as 7.5´) topo series. These have become increasingly hard to purchase except directly from the USGS, but if you plan to explore off-trail, they are still the gold standard. The data from these maps is available to the public, and you can download the maps to print yourself directly from the USGS: visit the National Map Viewer at usgs.gov/core-science-systems/national-geospatial-program/national-map. The trail locations depicted on the National Map Viewer are more current than those on the print maps.
While some visitor centers still stock USGS 7.5´ (1:24,000-scale) maps for the local area, they are increasingly difficult to find in outdoor-equipment stores. For an off-trail trip when you truly need the detail only provided by USGS maps, plan ahead and order them directly through the USGS website.
Since USGS maps are public domain, they are also used as the base maps by other online services, such as the free CalTopo.com, where you can easily print the pieces of map required for your trip. The USGS maps required for each hike are indicated in the introductory material for that hike. If the hike traverses more than one USGS map, they are listed in the order they are encountered on the walk.
Trail Maps
While USGS topo maps provide the best detail for landscape features, they do not include trail distances, trail names, or similar annotations. The U.S. Forest Service publishes a series of “inch to the mile”–scale (1:63,360-scale) maps for many wilderness areas and national forests. These are excellent resources for driving to trailheads because they include all U.S. Forest Service road names (and numbers) and provide a good overview of the local trail network. However, they lack trail distances, often fail to acknowledge which trails haven’t been maintained in a generation, and are a bit bulky for backpacking. These maps are generally available at ranger stations or can be ordered through store.usgs.gov. (In this book, Granite Chief Wilderness is the only wilderness that lacks such a map.) The content from these maps can also be purchased as georeferenced PDFs from Avenza (avenza.com) for use on digital devices.
In addition, a number of other cartography companies produce topo maps annotated with trail distances. These vary in accuracy, but the two brands most commonly used for Sierra trails are Tom Harrison Maps and National Geographic Trails Illustrated maps, which cover nearly every hike in this book.
Map Apps
The past decade has brought a change in how people navigate in the wilderness. A growing number of people no longer carry paper maps, instead using an app to preload topo maps onto their phones, GPS units, or other digital devices. Of these, the Gaia GPS app is the most widely used and allows you to upload both waypoints (that is, those provided in this book) and USGS 7.5´ topo maps. CalTopo.com offers a similar service.
The benefits of these apps are obvious:
• You’re already carrying a phone, so you now have maps at no additional weight.
• You always know where you are; your location is identified by a little dot on your screen.
• These apps are an easy way to plot waypoints onto a map.
The downsides of these apps should also be obvious—and scare your authors into always carrying a paper map as well:
• Digital devices eventually run out of battery power—and map apps are notorious battery sinks.
• Digital devices can break, get wet, and so on.
• You have a very limited understanding of the broader landscape because you see only a tiny piece of the map at once.
• It is very easy to have the maps for some segment of your trip not download properly—and you won’t realize it until you’re on your trip.
One of your authors (Lizzy) has, over the past five years, transitioned to doing a fair bit of navigating using Gaia GPS. She finds it incredibly convenient for trying to follow a trail across snow and making sure she is aiming for the correct cross-country location. However, she also still carries USGS 7.5' topo maps when hiking off-trail and either a trail or topo map when hiking on trail because she has (1) had her phone’s battery run out faster than expected, (2) been frustrated with herself for forgetting to look at the big picture and made poor big-picture navigation decisions off-trail, and (3) realized the maps downloaded at the wrong scale and were useless for cross-country navigation.
But really, the biggest problem is that people no longer have that wonderful sense of connectedness to the entire landscape that you have if you stare at your entire trip on a giant mosaic of maps.
How to Use This Book
Terms This Book Uses
DESTINATION/COORDINATES In this edition, coordinates are provided in latitude and longitude, in decimal degrees. If you prefer UTM coordinates (which are easier to plot on a paper map), download a copy in that format from tinyurl.com/sierranorthgps or use a GPS coordinate conversion program (many are available online). All the coordinates provided by your authors have been field-checked or checked on a mapping program like Google Earth. The coordinates use the WGS 84 horizontal datum (equivalent to the NAD83 for UTM coordinates).
TRIP TYPE This book classifies a trip as one of four types. An out-and-back trip goes out to a destination and returns the way it came. A loop trip goes out by one route and returns by another with relatively little or no retracing of the same trail. A semiloop trip has an out-and-back part and a loop part; the loop part may occur anywhere along the way. A shuttle trip starts at one trailhead and ends at another; usually, the trailheads are too far apart for you to walk between them, so you will need to leave a car at the ending trailhead, have someone pick you up there, or rely on public transportation to get back to your starting trailhead. The shuttle information indicates whenever public transportation is an option.
BEST SEASON Deciding when in the year is the best time for a particular trip is a difficult task because of California’s enormous year-to-year variation in snowpack and melt-off times. In one year the subalpine and alpine lands are mostly snow free by Memorial Day (late May) and another year you must wait until mid-July to cross the higher passes—and even then you will encounter considerable snow, which may require the use of an ice axe and crampons. On the other end of the season, some years receive their first winter storm in mid-September, and in others you can traverse the high country until late October. Therefore, describing hiking season by month is problematic; if you aren’t sure how the current year tracks the long-term average, visit cdec.water.ca.gov/snowapp/swcchart.action to get a sense.
Hence, instead of describing hikes by month or descriptors like “early summer,” this book uses the terms early, mid, and late season. In an average year, early season is mid-May–June, midseason is July and August, and late season is September–mid-October. Low-country hikes, which are almost always listed as early season, are perfect as warm-up excursions for the itchy hiker who may be stiff from a winter’s inactivity.
And if a hike lists a variety of hiking seasons, in addition to snow pack consider the following to help you decide when to go:
• Mosquitoes can be bad through mid-July; mosquitoes are especially infamous in northern Yosemite and Emigrant Wilderness during these months.
• June–mid-July is the peak wildflower bloom.
• Day length starts to shorten noticeably starting in August, with days becoming quite short by September.
• Temperatures are warmest in mid- to late July.
• Thunderstorms can occur anytime but are most prevalent in July and August, corresponding with monsoon moisture coming north from the Gulf of Mexico and Gulf of California.
• Wildfires become increasingly likely as the summer progresses; these rarely pose a danger to hikers, but they can ruin the views with hazy air or make the air unhealthy to breathe.
PACE For each trip, we give a suggested number of days to spend completing the trip as well as the number of layover days (see below) you might want to take. Galen Clark, Yosemite’s beloved “Old Man of the Valley,” was once asked how he “got about” the park. Clark scratched his beard and then replied, “Slowly!” And that is the philosophy we have adopted in this book. Most trips are divided across enough days to be either leisurely or moderate in pace, depending on where the best overnight camping places are along the route. We also call a few trips strenuous, usually because the terrain requires significant elevation gain on one or more days. In today’s era of lightweight backpacking gear and short vacations, hiking longer days is in vogue—your authors are also guilty of this—but, with extra time, a leisurely pace lets hikers absorb more of the sights, smells, and “feel” of the country they have come to see. If you do choose to hike two of the described days in a single day or come up with your own itinerary, make use of some of the other campsites described in the text. Pace may not be everything, but Old Man Clark lived to the ripe old age of 96, and it behooves us to follow in his footsteps.
LAYOVER DAYS Also called “zero days” by long-distance thru-hikers, these are days when you’ll remain camped at a particular site. You can spend your layover day on a day hike to see other beautiful places around the area, enjoy some adventures like peak bagging, or spend a quiet day fishing or reading in camp. The number of layover days you take will most likely be dictated by how many days you have off work and how much food you can fit in your bear canister. In the text, we often provide suggestions for activities on your layover day, usually an easy peak to ascend or a spur trail that is good to explore.
TOTAL MILEAGE The trips in this book range in length between 7.6 miles and 73.9 miles, and many trips can be shortened or extended, based on your interest and time.
CAMPSITES The trips are divided to spend each night in a location with a decent campsite and, whenever possible, one that can accommodate several groups and that is ecologically robust enough to host campers most nights throughout the summer. Scattered throughout the daily hike descriptions are mentions of other established campsites if you wish to make your day shorter or longer. If you establish your own campsite, make sure you follow both the regulations detailed on your wilderness permit and follow good campsite-selection practices, outlined. Occasionally we reference “packer campsites”; these are generally larger, long-established sites favored by large stock groups, often with log furniture. Some are, to many backpackers, objectionably overused, dusty, and accompanied with piles of dung, but others are very pleasant stopping points and are usually in ecologically appropriate areas. Using this descriptor is not meant to be an explicit slight—it’s simply a description.
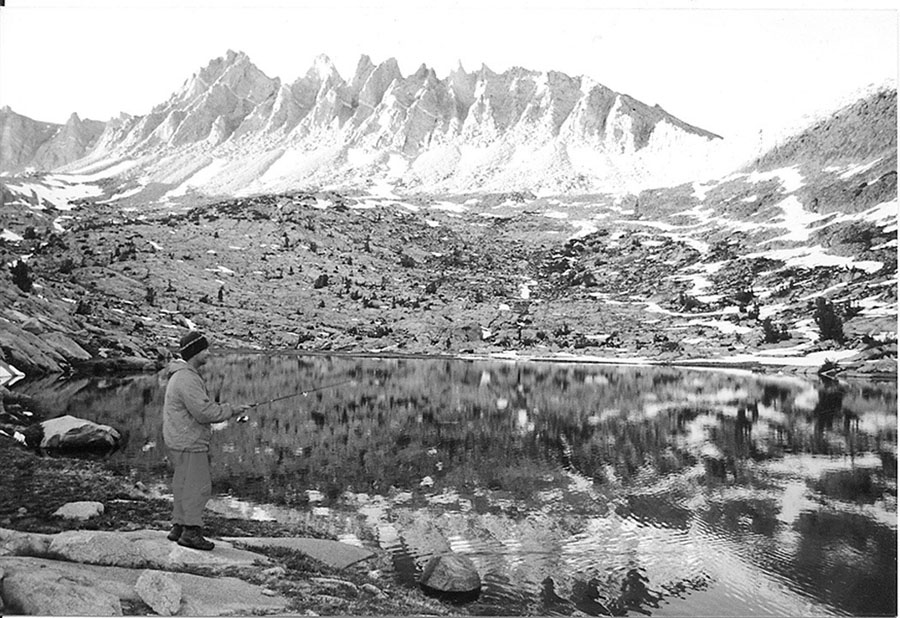
FISHING Angling, for many, is a prime consideration when planning a trip. Many of the lakes in the Sierra were historically stocked and still hold healthy fish populations. Within the scope of Sierra North, all fish in Emigrant Wilderness and Yosemite National Park above the lowest westside valleys were stocked; there were no native fish populations in these lakes. Parts of Hoover Wilderness have native populations of cutthroat trout, but the majority of its lakes were also once fishless.
Today, to protect native frog populations—and to simply comply with wilderness designations—fish are no longer stocked within the Sierra’s wilderness areas. Most lakes that were once stocked still have self-sustaining fish populations, but fish have vanished from some lakes (usually at high elevations, without good spawning habitat), and fish have been explicitly removed from a few other lakes to provide frog habitat (almost always off-trail). While we note the most recent information on which lakes have which fish species, accept that this is a bit of a moving target. For the eastern Sierra south of Sonora Pass, visit fs.usda.gov/activity/inyo/recreation/fishing to download a pamphlet detailing which fish are currently in each water body. And, of course, that indefinable something known as “fisherman’s luck” plays a big role in what you’ll catch. Generally speaking, the old “early and late” adage holds: fishing is better early and late in the day, and early and late in the season.

Photo by Walt Lehmann
Be careful to observe all camping and fishing regulations.
Photo by Bryan Rodgers
STREAM CROSSINGS We mention man-made bridges and other means of crossing streams. We also include descriptions of currently available naturally fallen logs, as these may last for decades or—like some bridges—be washed out during high flows. Asking the rangers about stream-crossing conditions when you pick up your permit is always a good idea. (See for stream-crossing tips.)
TRAIL TYPE AND SURFACE Most of the trails described here are well maintained (the exceptions are noted) and are properly signed. If the trail becomes indistinct, look for blazes (peeled bark at eye level on trees) or cairns (two or more rocks piled one atop another; also called ducks). Trails may fade out in wet areas like meadows, and you may have to scout around to find where they resume. Continuing in the direction you were going when the trail faded out is often, but not always, a good bet.
Two other significant trail conditions are also described in the text: the degree of openness (type and degree of forest cover, if any, or else meadow, brush, or whatever) and underfooting (talus, scree, pumice, sand, duff—a deep ground cover of humus, or rotting vegetation—or other material).
A use trail is an unmaintained, unofficial trail that is more or less easy to follow because it is well worn by use. For example, nearly every Sierra lakeshore has a use trail worn around it by anglers in search of their catch.
LANDMARKS The text contains occasional references to points, peaks, and other landmarks. These places are shown on the appropriate topographic maps cited at the beginning of the trip. For example, “Point 9,426” in the text would refer to a point designated as simply “9426” on the map itself. The actual numbers are an eclectic mix of feet and meters because USGS topo maps vary in the units they use.
FIRE DAMAGE Fire creates a mosaic of habitats throughout the Sierra Nevada. Historically, ground fires were common throughout the Sierra’s montane forests and an essential ecological disturbance. In the process of clearing the ground and understory of thick brush, fire significantly altered the populations of ground-dwelling plants and animals. These fires would rarely have killed most of the canopy trees, allowing the landscape to rapidly recover from the fire. Then, from the late 1800s until 1971 (in Yosemite) or later (for the national forests), fire suppression was a general policy; every fire was extinguished immediately. This led to the accumulation of thick litter, dense brush, and overmature trees—all prime fuel for a hot, destructive blaze when a fire inevitably sparked to life. Foresters now know that natural fires should not be prevented but only regulated.
In recent decades, a combination of controlled burns (mostly alongside road corridors) and large wildfires (started by a combination of lightning strikes, careless campers, and arson) have passed through many of the Sierra’s low- and midelevation forests. The years of fuel accumulation mean many of these fires become behemoths, often decimating the entire forest and killing the vast majority of trees, a very different process to what ecologists hypothesize occurred previously. If most of the trees in a region are killed, there is no longer a seed source, and it can be decades before seedlings establish, dependent on the rare seeds that arrive from afar. A second problem is that the hottest fires burn organic material within the soil and sterilize it, such that even wildflowers and shrubs struggle to establish.
Nonetheless, you should not consider fire as a negative force. Without fires, a plant community evolves toward a climax, an end stage, of plant succession, and only the plant and animal species that thrive in this climax community remain common. The mosaic of burned and unburned patches allows such a diversity of plant and animal species to thrive in the Sierra. For instance, species of the genus Ceanothus rapidly colonize the burned landscape, only to be shaded out by young lodgepoles and Jeffrey pines a few decades later. They are in turn replaced by red and white firs, the main species in the characteristic climax communities of the Sierra’s midelevations.
From a practical hiker’s standpoint, fire-ravished landscapes offer less shade but an abundance of spring wildflowers. Less-traveled trails often become yet more difficult to navigate as mountain whitethorn, a particularly fast-growing, dense, prickly shrub, consumes the trail. We have substituted a few hikes that have become much less traveled after fires but mostly simply note when fire more recently passed across patches of landscape and how much forest remains. We recommend visiting charred landscapes in spring and early summer, for vibrant blooms make up for the lack of shade.
How This Book Is Organized
With one exception, the trips are organized according to the highways that you must take to get to the trailheads in this book: I-80, CA 89, US 50, CA 88, CA 4, CA 108, CA 120, CA 41, and US 395. (The Western Yosemite Trips are not organized around a highway.) Within these major book sections are trailheads.
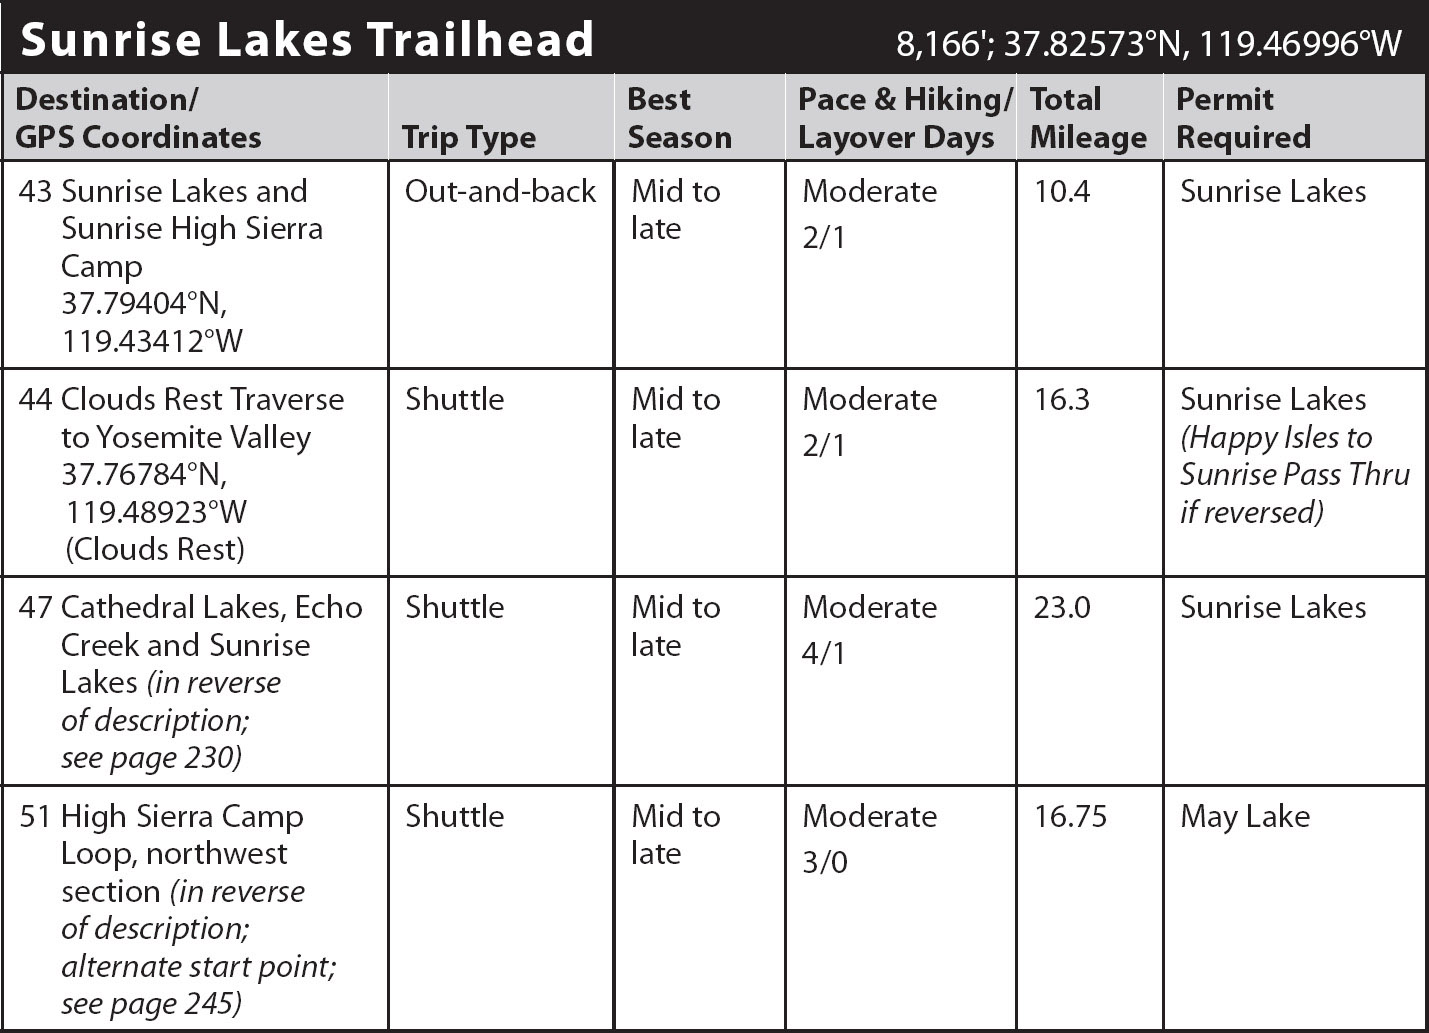
TRAILHEAD AND TRIP ORGANIZATION As previously noted, each trip is located within trailhead sections in the book. These sections begin with a summary table, such as the example below, that uses the trailhead’s name, elevation, and latitude–longitude coordinates as its title. If relevant, the table also includes the names of shuttle trips that start at a different trailhead but end at this trailhead; these are included should you want to walk a described trip in reverse—for example, because you are unable to obtain a permit for the direction as described.
Following the table are details about information and permits, along with driving directions to the trailhead.
Next comes the first trip from this trailhead. The trip data—GPS coordinates, total mileage, and hiking/layover days—is included with each trip entry. All trips include an elevation profile, a list of maps, and highlights. Some include Heads Up!, or special considerations for that trip; shuttle trips include directions to the ending trailhead.
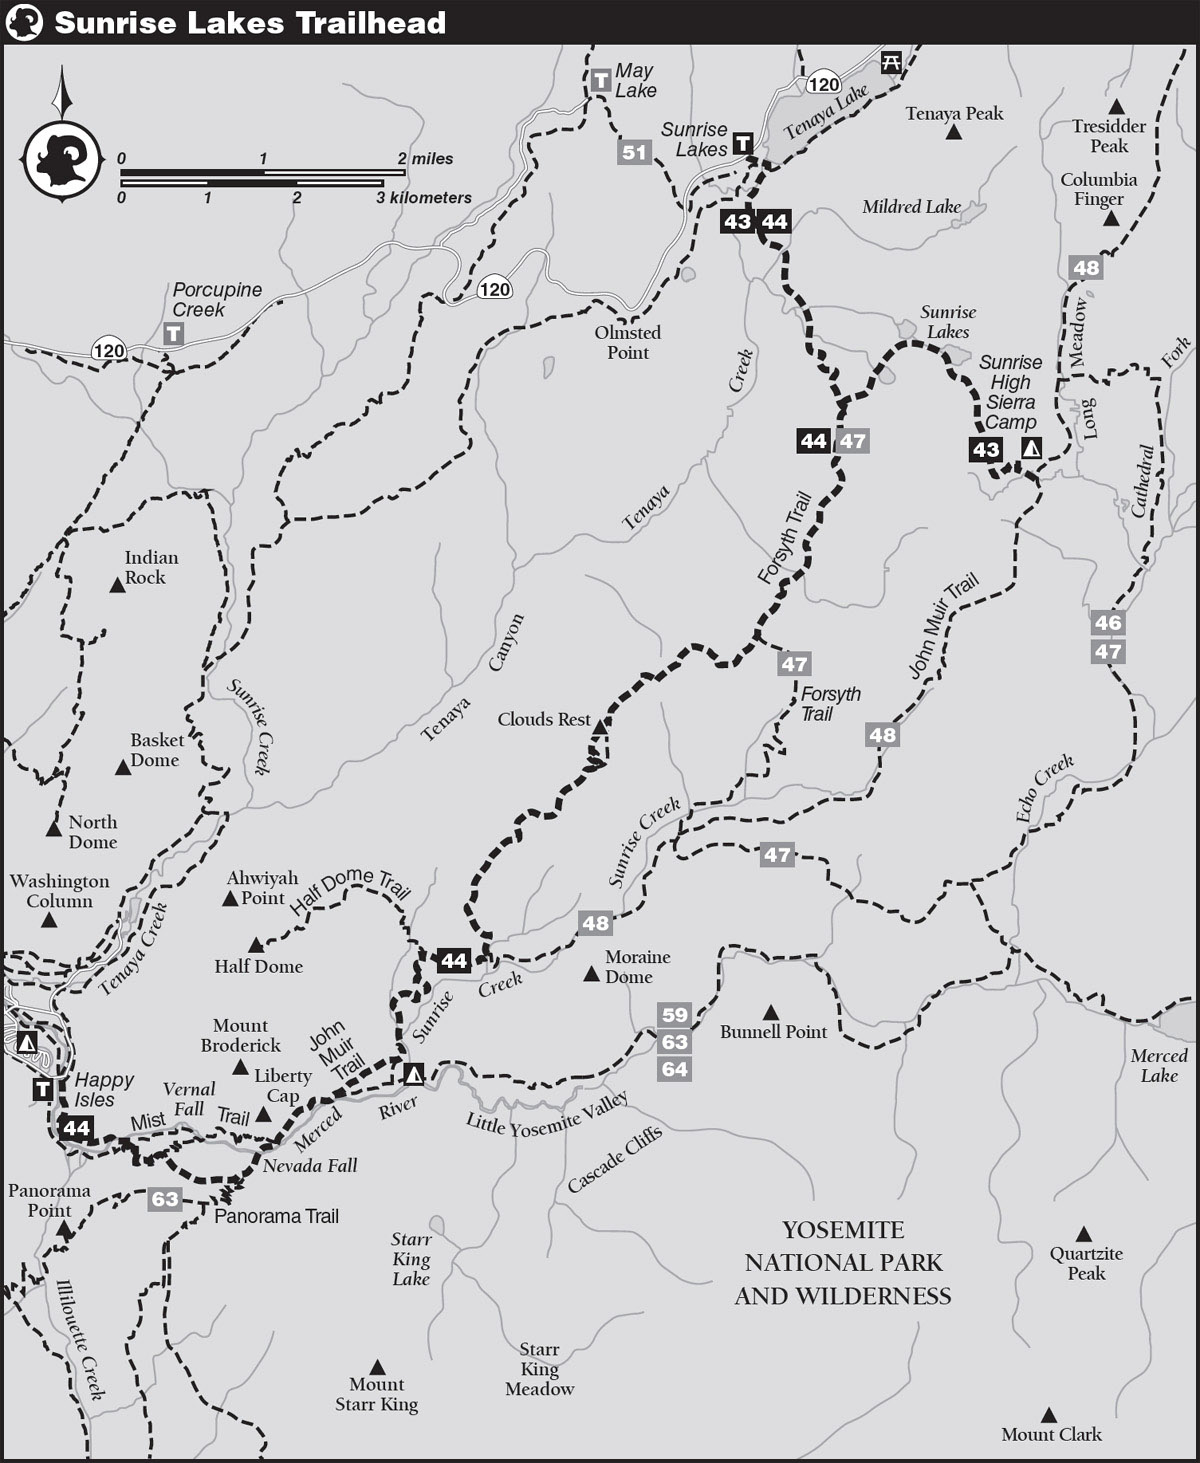
trip 43 Sunrise Lakes and Sunrise High Sierra Camp
Trip Data: |
37.79404°N, 119.43412°W; 10.4 miles; 2/1 days |
Topos: |
Tenaya Lake |
HIGHLIGHTS: This trip follows very popular trails, but the breathtaking scenery you enjoy along the route more than makes up for the lack of solitude. The terrain passed on this quite short hike is varied and scenic, with two superb camping possibilities, the upper Sunrise Lake and Sunrise High Sierra Camp. The former offers sheltered camping beside a scenic subalpine lake, while those at the latter are rewarded with a beautiful sunrise.
Day (Sunrise Lakes Trailhead to Sunrise High Sierra Camp, 5.2 miles): From the trailhead parking area, follow the eastbound trail, after a few steps passing a small spur trail that departs to the right (south) toward May Lake and Olmsted Point, then crossing the usually flowing outlet of Tenaya Lake on large rock blocks (an early-season wade). Just beyond this crossing you reach a trail junction, where left (northeast) leads to Tenaya Lake’s southeastern shore, while you go right (south-southwest) toward Sunrise High Sierra Camp. . . . Just a few steps beyond the backpackers’ camp you intersect the John Muir Trail (JMT) at the edge of Long Meadow.
Day (Sunrise High Sierra Camp to Tenaya Lake Trailhead, 5.2 miles): Retrace your steps.
After this comes the next trip, if any, from this same trailhead. Trips in the same general area, especially multiple trips from the same trailhead, often share the same first day’s hiking. For example, the first trip from a trailhead is usually the shortest—one day out to a destination, the next day back to the trailhead. The second trip will build on—extend—the first trip by following the first trip’s first day and then continuing on a second and subsequent days to more-distant destinations. Rather than repeat the full, detailed description for the first trip’s first day, we simply reference the first day’s description from the first hike.
TRAILHEAD MAPS A simple sketch map is included for each trailhead (see the following page for an example). It shows the location of roads, trailheads, and trails. It shows the route of each described trail and the names of key landmarks, but it is not meant to be a comprehensive hiking map of the area. The goal of these maps is for you to easily be able to find the described route on a larger topographic map or trail map. Gray numbers indicate trips departing from other trailheads that share a trail segment or traverse adjacent trail segments, should you wish to piece together your own route, combining pieces of multiple trail descriptions. Nearby trailheads are also marked and named, again in gray, so you can easily find adjacent trailhead maps.