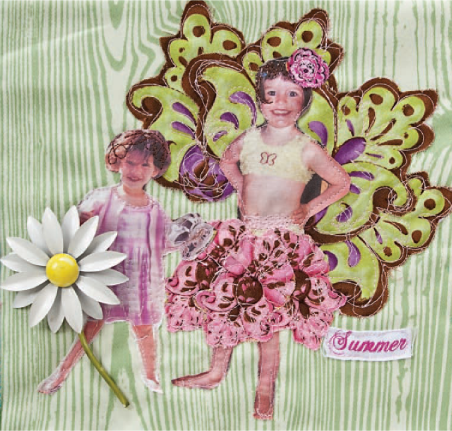
Make a family keepsake with fabric photo transfer and collage. This mini quilt has one block of collage featuring family photos and two blocks with pockets to hold mementos and photos. A fabric pinwheel adds dimension and whimsy.
* 1 square 8¼” × 8¼” each of 4 print fabrics for the blocks
* 2 pieces 5½” × 4½” of 1 block fabric for the rectangular pocket and 1 piece 4” × 9” of the same or another block fabric for the rounded pocket
* 2 squares 6” × 6” of print fabric for the pinwheel
* Floral print fabric scraps, enough to cut at least 6 motifs
* 1 square 16” × 16” of 1 block fabric or another contrasting fabric for the backing
* 1 square 16” × 16” of neutral flannel for the batting
* ¼ yard of 1 block fabric or an additional contrasting fabric for the binding
* Appliqué glue
* Fabric photo transfer paper, such as Printed Treasures
* Fusible web, such as Wonder Under, 1 square 6” × 6” for the pinwheel
* 1 decorative button
* 2 or more family photos, 5”-6” tall, for photo transfers
* Coordinating thread for quilting
* 3 round plastic rings 1” diameter
Patterns are available to print from (http://tinyurl.com/InspiredToSew-Patterns)
* Block fabric for right pocket: Cut 2 of pattern A.
* Floral print fabric scraps: Cut 6 or more motifs.
* Binding fabric: Cut enough 2¼”-wide strips to equal 78” when sewn together end to end.
1. Press the fusible web to the wrong side of 1 of the 6” squares. Peel off the paper backing and press it to the wrong side of the other 6” square to create a double-sided piece of fabric.
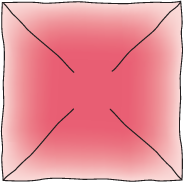
2. Using a quilting ruler and chalk or air erasable marker, draw diagonal lines from corner to corner of the square. Cut from each corner to 1” before the center.

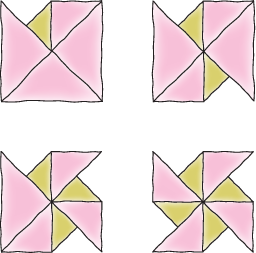
3. Bring a corner to the center and tack it in place with appliqué glue. Then bring its opposite corner to the center. Repeat for the other 2 corners.

4. Set aside and allow the glue to dry while you construct the blocks.
Use your selected family photos to create photo transfers. I do this using Printed Treasures, a lightweight fabric backed in paper that you use in your home computer printer. It is one of many brands, but it happens to be the one I like best. In this project it is used to print out your family photos on fabric. Follow the instructions on the package for best results.

See Sewing Basics on page 20.
1. Sew the 4 block squares together in 2 rows of 2 squares each. Press.
2. Arrange your cut-out fabric motifs and photo transfer fabric pieces on the bottom right block.
3. Set up your machine for free-motion quilting and quilt the pieces in place. See Keeping It Real: Free-Motion Quilting and Fabric Collage (page 63) for instructions.
1. With right sides facing each other, sew the rectangular pocket pieces together, leaving a 2” opening in the bottom.
2. Press your stitching and press the opening in toward the wrong side ¼". Trim the corners, turn right side out, and press.
3. Place the pocket on the horizontal center of the bottom left square. Be sure it is slightly off center vertically, so that once you put photos and other goodies in it, they won’t stick up into the top left block.
4. Pin and topstitch the side and bottom edges of the pocket in place using a ⅛” seam allowance.
5. Create the rounded pocket in the same manner, following Steps 1–4 and sewing the pocket on the top right-hand block.
1. Layer the backing, wrong side up, the flannel batting, and the quilt top, right side up, on a flat surface. Pin the layers together.
2. Follow the instructions on page 81 to bind the mini quilt.
3. Sew a button to the middle of the pinwheel, and sew the pinwheel to the center of the top left square.

4. To hang, sew the 3 plastic rings on the back of the quilt at the top left, top right, and top center. Either tie some ribbon on the rings or hang with picture hooks. Or cover a board or canvas with fabric and hang the mini quilt in the center—you could even frame it for an extra decorative touch.