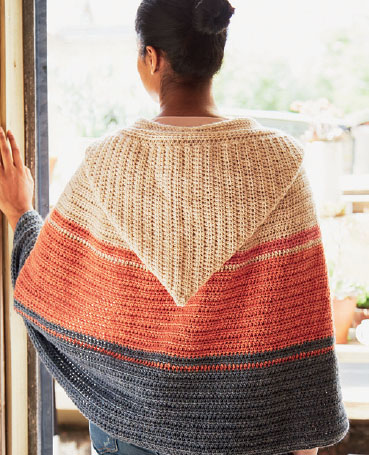
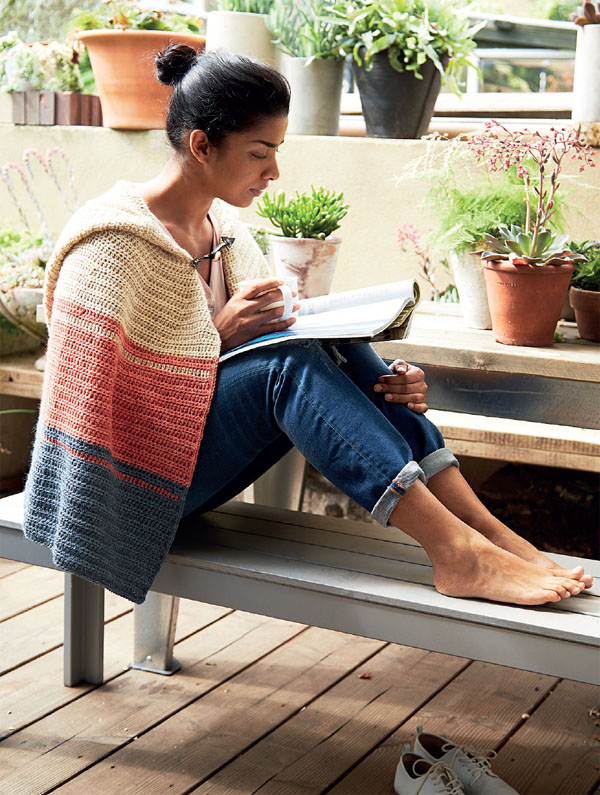
Wrap yourself up in this cosy crochet hooded cape. Worked from the top edge downwards, this colourful striped cape can be made to your preferred length, before adding the hood and a toggle fastening as a finishing touch.

MATERIALS
• Cascade 220 (100% Peruvian highland wool; 200m/220yds per 100g/3½oz skein) aran-weight yarn
3 x 100g (3½oz) skeins in shade 9600 Antiqued Heather (A)
2 x 100g (3½oz) skeins in shade 2451 Nectarine (B)
2 x 100g (3½oz) skeins in shade 8836 Stonewash (C)
• 5mm (US H/8) crochet hook
• 12 locking stitch markers
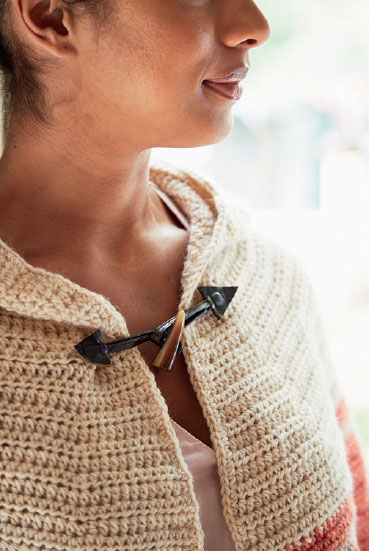
• Toggle 4cm (1½in) long
• Tapestry needle
FINISHED MEASUREMENTS
115cm (45in) wide around shoulders x 66cm (26in) deep
TENSION
16htr and 10 rows to measure 10cm (4in)
ABBREVIATIONS
See page 9.
FOR THE CAPE
Foundation: Using yarn A and 5mm (US H/8) hook, make 78ch.
Row 1: 1dc in second ch from hook, 1dc in each ch to end, turn. (77 sts)
Rows 2-3: 2ch (counts as 1htr throughout), 1htr in each st to end, turn.
Row 4: 2ch, 1htr in each of next 4 sts, 2htr in next st and place locking stitch marker in second of these htr, *1htr in each of next 5 sts, 2htr in next st and place locking stitch marker in second of these htr; rep from * a further 10 times, 1htr in each st to last st, 2htr in last st, turn. (90 sts)
Row 5: 2ch, 1htr in each st to end, moving markers up as you come to them, turn.
Row 6: 2ch, *1htr in st to marked st, 2htr in marked st and move marker to second of these htr; rep from * a further 11 times, 1htr in each st to last st, 2htr in last st, turn.
Rows 5-6 set pattern.
Rows 7–20: Rep Rows 5–6 as set, increasing in marked sts and final st every other row and moving markers up on each row as indicated.
Rows 21–24: 2ch, 1htr in each st to end, removing markers as you come to them, turn.

Make it yours
You can omit the hood from this design and simply finish the neckline edge by continuing the border around the upper section.
Row 25: Change to yarn B. 2ch, 1htr in each st to end, turn.
Row 26: 2ch, 1htr in each st to end, turn.
Row 27: Change to yarn A. 2ch, 1htr in each st to end, turn.
Row 28: Change to yarn B. 2ch, 1htr in each st to end, turn.
Rows 29–44: 2ch, 1htr in each st to end, turn.
Row 45: Change to yarn C. 2ch, 1htr in each st to end, turn.
Row 46: 2ch, 1htr in each st to end, turn.
Row 47: Change to yarn B. 2ch, 1htr in each st to end, turn.
Row 48: Change to yarn C. 2ch, 1htr in each st to end, turn.
Rows 49–64: 2ch, 1htr in each st to end, turn.
Row 65: 2ch, 1htr in each st to end. Fasten off.
FOR THE HOOD
Foundation: Using yarn A and 5mm (US H/8) hook, make 42ch.
Row 1: 1dc in second ch from hook, 1dc in each ch to end, turn. (41 sts)
Rows 2–69: 2ch (counts as 1htr throughout), 1htr in each st to end, turn.
Row 70: 2ch, 1htr in each st to end, do not turn and work border of 70dc evenly along the long edge of the strip, turn.
Rows 71–72: 1ch, 1dc in each of next 2 sts, 1htr in each of next 66 sts, 1dc in each of last 2 sts.
Fasten off.
Next row: With RS facing, re-join yarn A at neckline edge of cape, and work 1ch, 80dc evenly across row, turn.
Next 2 rows: 2ch, 1htr in each st to end, turn.
Next row: Join one short end of hood to the neckline by working 1dc through each corresponding st, then join the other end, folding the hood so that the bordered long end is at the top (this will be the outer edge of the hood) and the unbordered edge is open at the bottom.
Re-join yarn to the base of the hood and join the two open sides together working 1dc in each st to join and create back seam of the pixie hood. Fasten off.
FOR THE BORDER
With RS facing, join yarn A at left neck, 1ch and work 1dc in each row end and st around edge of cape, changing yarn to match each colour section as you come to it and finishing at right neck.
MAKING UP AND FINISHING
Weave in all loose ends and block to measurements. Sew on toggle to neckline of cape to finish.
Tip
To get the perfect placement for the toggles, slip on the cape and pin the two parts of the toggle in position, then simply stitch in place.
Tip
The locking stitch markers will help you keep track of where to work the increases – ensure you move them up with each row that you work to keep the stitch pattern correct.

