DRIVING TOUR # 2
Please be aware that many of the roads on the driving tour are narrow and winding. Use extreme caution.
Cedar Creek and Belle Grove
National Historical Park Visitor Contact Station
7710 Main Street, Middletown, VA 22645
GPS coordinates: 39.03118° N, 78.27557° W
The National Park Service Visitor Contact Station at Cedar Creek and Belle Grove National Historic Site is the starting point for tours of Fisher’s Hill, Tom’s Brook, and Cedar Creek. Inside there are exhibits on the battle of Cedar Creek along with other aspects of the war in the Shenandoah Valley. If you are going to tour the Cedar Creek battlefield, please refer to page 103.

![]() TO TOUR STOP 1
TO TOUR STOP 1
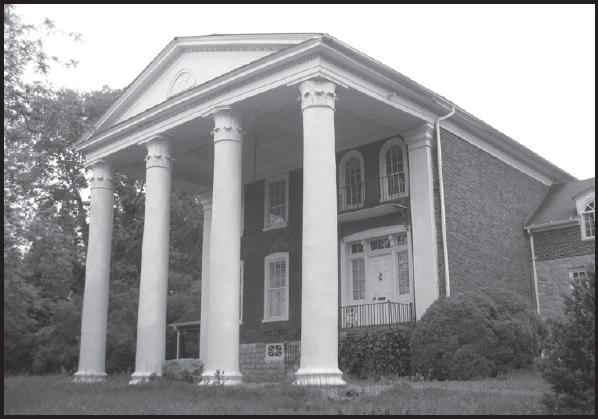
Leaving the Visitor Contact Station, turn left onto Route 11. Follow Route 11 south for 5 miles. You will cross Cedar Creek and pass Burger King and Arby’s. After passing the drug store on the left, you will see a circular driveway to a brick house with large white columns. This is Tour Stop 1. Please stay in your vehicle after you pull into the driveway.
GPS coordinates: 38.99594° N, 78.35340° W
TOUR STOP 1: Hupp House/Sheridan’s Headquarters
This house served as Maj. Gen. Philip Sheridan’s headquarters prior to the battle. In the front yard, Sheridan called a council of war to discuss plans for attacking Fisher’s Hill. Prior to the conference, Maj. Gen. George Crook reconnoitered the left of the Confederate position. Finding the flank vulnerable and a means to move a large force under cover to assail it, he made his proposal. Crook called upon his two division commanders, Cols. Rutherford Hayes and Joseph Thoburn, to lend their weight to the argument. Their views prevailed.
![]() TO TOUR STOP 2
TO TOUR STOP 2
Turn left onto Route 11. Proceed to the first stoplight in Strasburg. Turn right at the light. Proceed 1.9 miles and make a right onto Battlefield Road. Proceed 0.8 miles and make a right onto Green Acres Drive (the “Battlefield Drive” signage here can be confusing). Drive past the brown sign marked “Battlefield” on the right and, after 0.1 miles, make a sharp right-hand turn onto Church Hill Lane. Drive to the top of the hill to the parking lot. This is Tour Stop 2.
GPS coordinates: 38.98580° N, 78.37930° W

TOUR STOP 2: Flint Hill
Off to the right front is a bald hill called “Ramseur’s Hill,” named for Confederate Maj. Gen. Stephen Ramseur, whose troops held the position. The eminence you are standing on is known as Flint Hill. Here, Sheridan observed the attack on the Confederate bastion. On September 21, this ground was held by Rebel skirmishers. During the deployment prior to the engagement, Sheridan ordered Maj. Gen. Horatio Wright to seize this position. Wright chose the 126th Ohio and 139th Pennsylvania Infantry to make the assault. Confederate resistance here was stiff and the Pennsylvanians lost their commander, Maj. Robert Munroe. After the repulse, the 6th Maryland was brought forward to reinforce their comrades. This attack was also turned back. On a third try, Col. James Warner’s Union brigade finally captured the position.

![]() TO TOUR STOP 3
TO TOUR STOP 3
Turn left from the parking lot. At the first stop sign, make a right and follow the brown “Battlefield” signs. The high ground to your right was held by Wright’s VI Corps. Wright’s men would attack the Confederates atop Fisher’s Hill to your left as you are driving through the valley. Continue past the Civil War Trust Property to the intersection of Battlefield Road and the Back Road. Approximately 1.5 miles to your right, the march of the Army of West Virginia reached Little North Mountain at St. Stephen’s Church. Although it is not on the driving tour, feel free to travel to this location. At the stop sign, proceed straight onto the gravel road and continue 0.6 miles to its end. Turn your vehicle around in the circle.
GPS coordinates: 39.00001° N, 78.43094° W
TOUR STOP 3: Little North Mountain
You are now on the crest of Little North Mountain. Looking through the trees to your left, you can see the approach route that the “Mountain Creepers” took along its base. The house and property are private, so please respect the owners’ rights. Crook’s divisions reached this vicinity around 3 p.m. on the afternoon of September 22. In the woods to your right, Hayes and Thoburn formed for the assault. As you proceed to Tour Stop 4, you will be roughly following the attack of the Army of West Virginia.

![]() TO TOUR STOP 4
TO TOUR STOP 4
Return to the Back Road. As you reach the intersection, notice the ridge to your immediate right front. This was the Confederate left flank and the target of Crook’s assault. Retrace your route to the Civil War Trust Property.
GPS coordinates: 38.98583° N, 78.39969° W
TOUR STOP 4: Civil War Trust Property
This is known as Ramseur’s Hill, the location you viewed from Tour Stop 2. Follow the mowed path. There are six stops along the path that provide excellent interpretation into the flow of the battle, while providing maps to show where you are on the battlefield, as you climb the hill. Brochures are provided for reference.
As you reach the top of the hill, you are walking along part of the line held by Brig. Gen. Bryan Grimes’ brigade. Ramseur ordered Grimes to pull men out of the main line to help stem the Union advance. Grimes positioned the 32nd and 45th North Carolina Infantry and the 2nd North Carolina Battalion to face the attack coming from Little North Mountain. Another brigade of North Carolinians, commanded by Brig. Gen. William Cox, moved to support Grimes but got lost amongst the terrain. Cox’ Tarheels did not participate in the battle. Grimes’ resistance was futile and they were overrun by the Mountain Creepers and the attacking VI Corps division of Brig. Gen. James Ricketts.

This is ends the tour for Fisher’s Hill.
![]() TO TOUR STOP 5
TO TOUR STOP 5
To begin the tour of Tom’s Brook, return to the Back Road. Turn left and proceed 2.2 miles to Mount Olive Church. The church is on the left side at the intersection of the Back Road and Mount Olive Road (State Route 651).
GPS coordinates: 38.97854° N, 78.45707° W
TOUR STOP 5: Mount Olive Church
Driving to this stop, you have followed the footsteps of Brig. Gen. George Custer’s division as they moved to engaged Brig. Gen. Thomas Rosser’s division on the morning of the battle. Colonel Alexander Pennington’s brigade led the march, followed by Col. William Wells’ brigade. Here at the intersection, the 5th New York Cavalry opened the battle by engaging pickets from the 4th Virginia Cavalry. The New Yorkers slowly pushed the Virginians back to their main line on Spiker’s Hill.
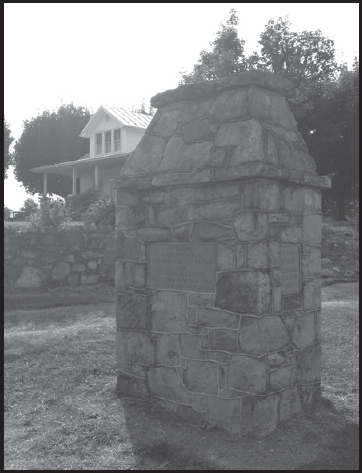
A non-Civil War marker sits alongside the road between Mount Olive Church and St. Matthew’s: Frieden’s Monument, erected in 1945 by the Hottel-Keller Memorial Association to mark the location of a school and church. Frieden’s, “a Union Church, Evangelical Lutheran and German Reformed,” was dedicated in 1824 and vacated in 1877.
![]() TO TOUR STOP 6
TO TOUR STOP 6
Continue on the Back Road for 0.8 miles. Turn left onto Sand Ridge Road and drive to St. Matthew’s Lutheran Church. Pull into the parking lot, get out of your vehicle, and walk to the far right corner of the parking lot near the fence.
GPS coordinates: 38.96725° N, 78.46591° W
TOUR STOP 6: St. Matthew’s Lutheran Church
Directly ahead of you is Spiker’s Hill, the position held by Rosser’s cavalry. In the treeline at the bottom of the hill is Tom’s Brook. From your vantage point, the 4th Virginia Cavalry was positioned at the base of the hill where the Back Road crossed the stream. Above them on the hill, from your right to left, was the 1st, 2nd, and 3rd Virginia Cavalry. Continuing along the hill to your left, Rosser positioned the brigade of Col. William Payne. The “Laurel Brigade” was positioned on Payne’s right.
Custer initiated the fighting by sending Pennington in a mounted charge through the area you are standing in. Pennington sent the 5th New York, 3rd New Jersey, and 2nd Ohio forward to the stream. There, they were met by the 12th Virginia and 35th Virginia Cavalry Battalion and driven back. Custer then committed the 18th Pennsylvania in an attack along the Back Road. The Pennsylvanians were met by the 4th Virginia, reinforced by the 1st, 2nd, and 3rd Virginia and repulsed.
Receiving word that Col. James Kidd’s Michigan Brigade was on the way to reinforce his left, Custer decided to bring up Wells’ regiments. The 8th and 22nd New York, from William Wells’ brigade, along with the 18th Pennsylvania, would move around to strike Rosser’s left flank. As a diversion, the 1st New Hampshire and 1st Vermont engaged the Confederate front. During the ensuing attack, Custer personally led the 5th New York in a charge up Spiker’s Hill. With the New Yorkers and Keystoners pressing his left and Kidd’s Michiganders his right, Rosser’s line collapsed and Custer won the day.
![]() TO TOUR STOP 7
TO TOUR STOP 7
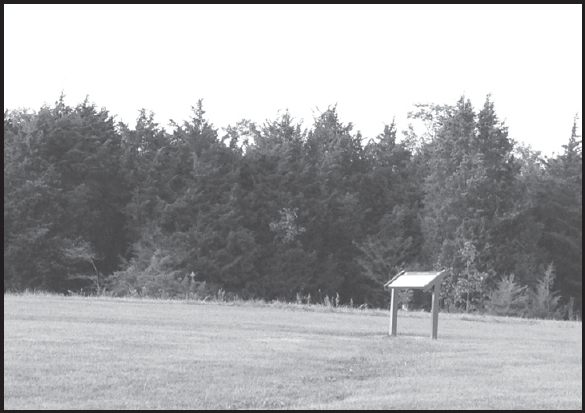
Turn right out of the church parking lot onto Sand Ridge Road. Follow Sand Ridge Road to the intersection of Brook Creek Road. Make a right on Brook Creek Road and follow it for 1.3 miles until you reach the Valley Turnpike. Make a right on Valley Turnpike. After 0.7 miles, you will see a Civil War Trails sign ahead. Make a left-hand turn into Shenandoah County Park. Follow the Civil War Trails sign and drive out around the far side of the tennis courts. Park your car and walk out to the sign, which is on the crest of the far ridge past the small picnic pavilion.
GPS coordinates: 38.93526° N, 78.45377° W
TOUR STOP 7: Shenandoah County Park
You are standing at Maj. Gen. Lunsford Lomax’ position, and the hill ahead with the cell tower is Round Hill. From this position, Sheridan observed the battle. Lomax positioned the brigade of William Thompson to your left, across Route 11. Brigadier General Bradley Johnson extended the line to the east. The 2nd Maryland Battery was positioned on the turnpike. These brigades engaged Brig. Gen. Wesley Merritt’s Reserve Brigade, commanded by Col. Charles Russell Lowell. After repulsing Lomax’ thrust, Lowell led his old regiment, the 2nd Massachusetts Cavalry, against the Confederate line. Off to your left, the 1st New York Dragoons and the 5th U.S. Cavalry began to turn Lomax’ flank. This maneuver forced the Confederates to abandon their line and withdraw. Pursued by the Federals, the withdrawal quickly became a rout.
This concludes the driving tour for Tom’s Brook.
