“Into your last glass of white wine after luncheon slice a peeled yellow peach. Leave it a minute or two. Eat the peach and then drink the wine.”
Elizabeth David, Italian Food 1954
The rhythm of a traditional Italian meal, with its risotto or pasta course, has enough carbohydrate highs without needing anything elaborate to follow, so the typical Italian dessert repertoire tends to be more humble than that of other cultures. Actually. I love English desserts like sticky toffee pudding and bread and butter pudding, but not alter an Italian meal. Then all I really want is fruit, which in Italy is considered noble enough to be a dessert in itself.
Of course, every region has its cakes and pastries, but these are things we eat out, perhaps in the afternoon at the café or pasticceria (pastry shop), or keep for Sundays with all the family, or for special celebrations. Because we never miss the chance of a feast or a carnival, for every harvest or saint’s day or important occasion in the church calendar there will be something special – torta (cake), frittelle (fritters), biscotti (cookies), or a sweet such as torrone (nougat). Maybe it is just that Italians feel guilty about eating a dessert as well as three other courses, so we justify our favorite things by associating them with saints.
Perhaps the biggest festival of eating and drinking is the Panarda held in Abruzzo, most famously in the village of Villavallelonga. On the feast of Sant Antonio Abbate (abbate means “abbot”), on January 17, an incredible parade of anything from 30 to 50 dishes goes on all night, finishing up with pastries like fiadoni, little envelopes filled with fruit and ricotta. One of the legends – as ever. Italians can never agree on such things – is that a local woman went to draw some water, and when she came home, she found that a wolf had picked up her baby in his mouth. So she prayed for help from Saint Anthony. He was the founder of monasticism, a hermit who was supposed to be a great naturalist and protector of animals, and so the people of Villavallelonga would pray to him to help protect them against wolves. When the wolf let go of the baby, she made a big feast to say thank you to the saint.
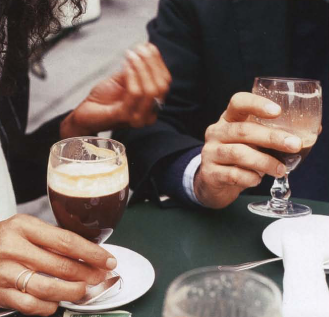
Italians are not ashamed to buy their desserts, so on Sunday mornings the family will go to church and on the way home stop off at a pastry shop like my uncle’s in Gallarate to buy a cake to take home and have after lunch. Going out for a pastry or an ice cream is also a social thing, so in the summer everyone might sit down and have a meal together in the evening, then go out for a walk and end up at the gelateria for an ice cream and a coffee. In America, the tradition is that the ice cream trucks come around and play tunes that appeal to the kids, but in Italy, it has always been considered a grown-up, civilized thing to go out for an ice cream. Sometimes the men will go to the bar or a social club, but the clever places are the ones that combine the bar and the gelateria, so everyone is happy.

At home, my father never finishes a meal without an apple, or whatever fruit is in season. Even if he goes out to a restaurant, that is what he asks for. In our house in Corgeno there is always a big fruit bowl in the kitchen and, if you were to come over for dinner, dessert might be just black and green grapes, in a bowl filled with water and ice. Though there is a school of thought that fruit at the end of the day creates too much acidity in the stomach, my family have all lived long lives eating fruit after dinner.
If you look at old menus and books, it is clear that fruit has always been significant in our religion and culture. We don’t talk about forbidden cakes, do we? The Romans were crazy about exotic fruits and brought them in from all over the world, so we have them to thank for cherries (though some people think they were already known in Italy), for peaches (which originated in China and were brought to Italy from Iran, or Persia as it was then) and for figs. Figs are so important in our history that the story is that Romulus and Remus, the legendary founders of Roma, were nursed by a she-wolf under a fig tree, which was later considered to be sacred. There is also an idea that the forbidden fruit in the Garden of Eden was originally a fig, and that much later the Catholic Church changed the story, because apples represented the evil fruit of the Romans who, like the druids before them, celebrated their pagan rituals and festivals by getting high on cider. I like to think of figs as the fruits of Paradise, and I like to serve them as simply as possible – perhaps just with some Mint sorbet (see page 560) and some fresh mint leaves.
In Italy, because we love fruit so much, we have a great respect for its seasonality and locality. When you go to the market, the fruit there will have been grown in orchards and fields nearby, and because it is picked ripe, it must be sold by the end of the day, or it is wasted. You see the people touching and smelling everything, because a peach isn’t just a peach, a cherry isn’t just a cherry. If you have ever tasted and smelled a peach at that perfect point of ripeness, straight from the tree, you will understand that such a fruit is something beautiful, not just a commodity that can be grown anywhere in the world to the perfect size, shape, color and degree of fake ripeness that the supermarket demands. Fruit shouldn’t be harvested underripe, then kept chilled while it is transported so that it still has a “shelf life” of many more days, but never ripens to the same extent. What sort of mind games are being played with us, when we see these fruits that look ready but are hard enough to play tennis with?
Every fruit has a place in the year that seems to make sense, and that can be appreciated and looked forward to. When I was little everyone had vines, so there would be grapes in the autumn, and each year we would go to visit a friend of my granddad near Asti, famous for its Moscato Bianco (white Muscat) grapes, to have a big lunch and celebrate the start of the harvest. In the north, there is also a big production of pears, and there would be a special dispensation during the apple and pear harvest when the secondary school would close for a week, so everyone could help. I love pears – particularly small ones – possibly even more than peaches, especially the way you can fry them very fast with some sugar and they will be crunchy and colored on the outside, and on the inside soft, but granular, in their peculiar way. And I love the way pears work as generously when you add them to a savory’ dish as in a dessert. There is a famous saying in Italy, “Al contadino non far sapere quanto è buono il formaggio con le pere,” which translates roughly as: “Never tell the fanner how good a pear is with cheese” (or he will charge you more). And it is true: a hard, rich, salty cheese is perfect with a sweet pear after a meal – Parmesan in the north, pecorino farther south. Or it can be a meal in itself. I remember when I was little, seeing people going skiing, and instead of sandwiches, they would take a pear and a piece of Parmesan to eat up on the slopes.

Sometimes we also picked the fruit of the wild apple trees, which we called ranetta (little frogs) because their skins were so rough, like sandpaper. My grandmother would make them into frutta cotta (jam) for a crostata, a very thin, crispy base of pastry with the jam spread over it, or she would cook them with a little sugar and water to make a “fruit cheese’’ or paste, to eat with Parmesan after dinner. When the first oranges came in from Sicilia, you would see people filling big baskets at the markets, and when the cherries and peaches came into season there would be more excitement. In the summer, too, you would see guys selling pieces of watermelon in the street (in the country, they would often keep the melons cool in the river) because, when you are in the blistering sunshine, it is the right time to eat something so refreshing – not imported born South America and packed in baskets al Christmastime.
What relatively few recipes there are for fruit desserts throughout Italy are usually simple transformations incorporating local ingredients but preserving the shape and essence of the fruit, such as pere cotte al vino (pears poached in wine, see page 524), traditional in Piemonte, or pesche ripiene, peaches stuffed with almonds (and/or amaretti biscuits). Two of my favorite fruit desserts are actually French: Poire Belle Hélène, which I eat whenever I go to Paris in a café near l’Opéra, where they do it brilliantly – hot chocolate sauce, ice cream, pear … fantastic; and Peach Melba (see page 528), the most famous of all peach recipes. Both of them have a connection with opera. Poire Belle Hélène was supposed to have been created in Paris to celebrate the opening of the operetta by Offenbach about Helen of Troy, La Belle Hélène; and Peach Melba was created by the famous chef Auguste Escoffier in honor of the opera singer Dame Nellie Melba.
In Italy, the tradition of preserving seasonal food also applies to fruit. Especially in the south, where there is a massive production of citrus fruits, much of it goes into candied fruits and peel, a major ingredient in pastries and desserts. It must have been amazing 100 years ago to eat oranges, lemons and cherries in winter. If you go to shops in Sicilia, they have mountains of candied fruit in glass containers on the counter, which they scoop out for you. Sometimes they are whole, so you cut them up yourself.
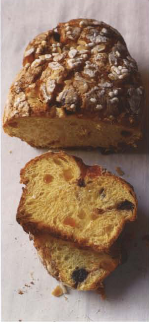
Many of our celebratory cakes like panettone (our famous Christmas cake from Milano), pandoro (the Venetian answer to panettone) and panforte from Toscana travel all over the world and are considered “Italian”; other cakes are only famous locally – perhaps made in a particular village café or bar. In Varese in Lombardia, there is a bakery where they make a brilliant torta di Varese: a French-style sablé with nuts in it. Not far away in Gallarate, at the Bar Bianchi, they make their own specialty, torta del Bianchi, which is made with hazelnuts, almonds, eggs and flour, a little like frangipane, but very moist and crumbling at the same time. There are hundreds of different recipes, which might be as humble as pan tramvai (raisin bread, see page 158) or as elaborate as torta alla Milanese, a traditional pie filled with something like old-style English mincemeat: minced roast or stewed beef or veal, mixed with sugar, butter, chocolate, pine nuts, golden raisins and candied fruit.

Even though these days northern and southern Italians have moved around the country and are all mixed up, our cakes and pastries still reflect the way that, as with all Italian food, ideas varied from region to region, depending on local ingredients and influences. In the northeast, especially around Milano, Torino and Venezia, which are so close to the borders of Austria and Germany, you have a great excitement over patisserie, which you eat with coffee or hot chocolate in more bohemian Viennese- or Parisian-style cafés. Whereas in the south, around Palermo and Napoli, they also have fantastic pastries, but they have their place in the more multicultural bars: perhaps just one or two local pastries made in their own kitchens.

In the north you can see the mark of French and mid-European patisserie in the use of locally produced cream and butter, and puff pastry (pasta sfoglia). To make puff pastry successfully it needs to be kept cold, so in the days before refrigeration was available to everyone you would find this kind of rich pastry only in the north. In the hotter south, pastry made with pork fat (lard) was more normal. In Trentino-Alto Adige and Friuli-Venezia-Giulia, close to the border with Austria, Strudel is a typical thing, and at Easter time in Friuli they make a Strudel called presnitz, stuffed with candied fruit and spices. In 1891, in Science in the Kitchen and the Art of Eating Well, Pellegrino Artusi included a recipe for Strudel, warning Italians in other regions, “Do not be alarmed if this dessert seems to you to be a strange concoction, or if it looks like some ugly creature such as a giant leech or a shapeless snake after you cook it; you will like the way it tastes.”
In the north, in addition to cream and butter, you see a great use of chestnuts (see page 576) and chestnut flour. Chestnuts were an important staple for people during the war, and typical desserts are castagnoli con crema (fritters filled with chestnut cream), castagnaccio (a cake made with chestnut flour, often with golden raisins, walnuts and pine nuts added, and sometimes topped with rosemary) and torta di pasta alle castagne (pasta made with chestnut flour, cooked in a syrup and pressed and set hard into a solid cake, which is very, very good). Since “light” is not a word we use often in the north, you find all kinds of torte di tagliatelle, and also torte di riso (rice cakes), which reflect our love affair with rice.

Further north, in the Valle d’Aosta, they are famous for montebianco, named after the highest mountain of the Alps: chestnuts cooked with milk, sugar and vanilla, then puréed, flavored with rum, piled up to look like a mountain, and chilled. Before serving, the “mountain” is smothered in whipped cream to look like a snowy peak. In Piemonte, they are also known for pannacotta, which literally means “cooked cream,” and another important dessert is the bonèt, which is made with amaretti cookies, eggs, sugar, cream, cocoa and rum in a bain-marie, and served cold. One story is that it is called bonèt because the bain-marie it is made in looks like a hat; other people say that because it was served at the end of a meal, it was called after the hat your friends would put on to go home afterward. Or, I think, because of the local French influence, it could be that it just means the “very good” dessert. Tiramisù (see page 554), which means literally “pick-me-up,” is one of our most loved northern desserts, though it isn’t a traditional recipe at all. It is supposed to have been invented by a restaurateur in Treviso in Veneto in the sixties.

After such excitement over patisserie in the north, as you work down the regions, traditionally desserts become a little boring. Toscana, for example, a region that has produced some of the great classics of Italian cooking, and contributed so much to shaping the idea of Italian food all over the world, is quite poor on desserts. And what there is, like the medieval panforte, tends to be visually a little on the brown side, like the distinctive colors of the land around.
In Abruzzo, they go for cakes like the parrozzo, made with almonds and covered with chocolate. Its name, which comes from pan rozzo, the local round country bread, was given to it by the poet D’Annunzio, who was a friend of the cake maker who created it. Then, when you reach the south, what amazes me about the desserts is that, though you might expect them to be refreshing because of the heat, apart from the gelati (ice cream) and sorbetti (sorbets), in fact they are very sugary and rich, often filled with ricotta (which replaces the mascarpone of the north), candied fruits and nuts. In Napoli you find the Easter pastiera, an elaborate tart of sweet pastry (pasta frolla) spread with ricotta, candied fruits and spices, topped with a lattice of more pastry and baked (see page 548 ). Napoli is also the home of rum baba, which is supposed to have been created by King Stanislao Leszczynsky of Poland, who was the father-in-law of Louis XV of France. While he was exiled in Lorraine, he used to soak stale kugelhupf, the local cake, in rum, and he called his concoction the Ali Baba, because he loved to read The Arabian Nights. When the house of Bourbon took over Napoli, the dessert came too, but just became known as baba.
Sardegna is famous for its honey desserts, and you can see the influence of the Arab invasion in regions like Calabria and Sicilia, where candied fruit figures in many of the local desserts, such as cannoli (see page 545), the famous pastry tubes (made with pork fat) flavored with cocoa, then fried and filled with sweetened ricotta, candied peel, pistachio nuts and pieces of chocolate. Or cassata, a complicated cake made again with ricotta, vanilla, chocolate and candied peel, covered with almond paste and decorated with more candied fruit. Cassata gelata is an iced dessert with similar flavors, which we used to make at Zafferano.
In the south they also play a lot with sweet-and-sour flavors, so you might find desserts made with eggplants and chocolate. In Sicilia, they have their own typical pastries, such as sfogliatelle, sheets of puff pastry, again made with lard, which are rolled up, then shaped around a filling of cooked semolina, ricotta and candied fruits, so that when they are baked they look like clamshells. Like many of our traditional pastries, they were initially made by monks and nuns. Apparently, sfogliatelle were first made in the eighteenth century for guests at the monastery of Croce di Lucca, but they were made famous much later by an innkeeper, Pasquale Pintauro, who prepared them fresh throughout the day, and they were so good, people lined up for them all the way down the streets.
Sicilians also make spectacular use of sculpted almond paste or marzipan (pasta reale). They are crazy about it. When you go into the pastry shops, you find dramatic, kitsch displays of marzipan shapes, which make you want to laugh sometimes. When we go on vacation to Sicilia, even in the villages in the middle of nowhere – so remote and hot, that if there is a puff of wind, the dry branches go rolling down the street as if in a spaghetti western – you can have three coffees in the morning at three different pastry shops, and each shop will be full of different elaborate creations.
Frittelle – fritters, which are more often sweet than savory – are something we have in common from the north to the south of Italy. My grandmother never made cakes, but she would make chiacchiere, which were fried pieces of sweet lard pastry. Usually she made them when we had fish to fry for dinner. She would put a big pot of clean oil on the stove first, and cook the chiacchiere, and then afterward put the fish into the same oil. At one time not everybody had ovens, so frittelle were easy to make, especially for many people in the village square, or at stalls on city streets for festivals or at carnevale. Personally, though I don’t think deep-fried food is generally a good idea, these things are so pleasurable, you just have to forget about what is good for you for a little while.

Every village, town or city has its festa or sagra. The festa is a saint’s day or a national holiday, whereas the sagra is dedicated to an ingredient, or celebrates a local harvest, such as the Sagra del Miele (honey festival) in Sardegna, the Lazio strawberry festival in June, or the Sagra del Dolci Eoliani (festival of typical Aeolian island sweets). At this last, the pasticceria are full of things like piparelli, made with honey, almonds, vanilla and spice, for dipping into the local Malvasia wine; and nacatuli, which are pasta parcels with a filling made with almonds, vanilla, cinnamon and tangerine juice. When I was young, I remember all the stalls being set up in the villages dedicated to different ways to cook and eat whatever ingredient was being celebrated, whether it was pumpkin or honey. In small communities, the festivities would often be around the church; and there would be music and dancing.

Often the feste celebrate very local historical events or saints. Since every saint seems to have his own frittelle, and virtually every day of the year is a different saint’s day, you can imagine how many different frittelle are made all over Italy. Some festivals are celebrated throughout Italy – though, even so, each community will have its own particular cakes, fritters, sweets and biscuits. Carnevale, for example, begins on January 17 and ends on Ash Wednesday, and all the kids have parties at school, so this is a time when the mothers all make special frittelle and they are all looking at each others’, thinking, “mine is better than yours.” In Lombardia, we celebrate with special chiacchiere di carnevale, sweet fritters, flavored with Marsala and dusted with sugar; while in Venezia they have galani, flavored again with Marsala or grappa, but made in the shape of a bow.
On March 19 Italians celebrate the Feast of San Giuseppe (St. Joseph), which is our Father’s Day, and, if you were in Bologna, the pasticceria would be full of ravioli di San Giuseppe, fried sweet pastries filled with jam or almond paste; in Napoli you would find zeppole di San Giuseppe, cream-filled rings of dough, which are fried for you on the streets and decorated with flowers and branches, and in Sicilia, sfingi di San Giuseppe, shells of puff pastry filled with ricotta and lemon and orange zest.
In Lombardia, on October 4, we celebrate the feast of St. Francis of Assisi, who looked after the animals, with mostaccioli, a special cake made with almonds, honey, sugar, spices, vanilla and sometimes orange peel. They say this cake is the only earthly food that St. Francis loved, and he is supposed to have asked for it on his deathbed. At Easter time we have our own special Easter cake, colomba pasquale, which is similar to panettone but made in the shape of a dove, covered with sugar crystals and almonds. Sometimes we serve it a bit like the French pain perdu (French toast), sliced and fried in butter, with ice cream. One of the things I remember most when I was growing up was the pan dei morti, a soft, dry kind of bread, made dark with chocolate, I suppose to signify death, which we eat on Il Giorno dei Morti (the Day of the Dead) on November 2. This is the day when everyone goes to the cemetery to lay flowers on the graves of family and friends; then we remember them and celebrate their lives with big feasts and parties. In other regions they have fave del morti, biscuits made in the shape of black fava beans, which, according to Pellegrino Artusi, were offered to the Fates, Pluto and Persephone, at the gates of Hell, because the beans were believed to contain the souls of the dead.
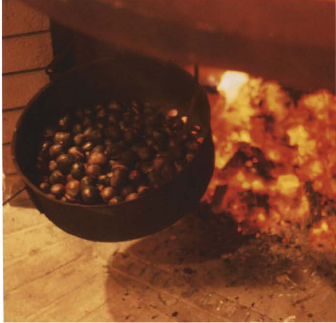
November 11 is another significant day, the Feast of St. Martino, which marks the end of the season of harvesting and preserving for the winter months, and also the first tasting of the new season’s wine, vino novello, which is often celebrated in festivals along with roasted chestnuts. St. Martino is said to be the protector of drunks, since he cut his cape in half and gave one half to a drunken man on a freezing night, and special biscuits are made to different recipes all over the country. Some of the most interesting are the Venetian biscuits, which are shaped like the saint on horseback.
Christmas, of course, is one of the biggest times for all kinds of traditional sweets, featuring local ingredients. Napoli is famous for its festive struffoli – fried dough balls dipped in a syrup of honey, spices and candied peel, then piled up all together in the shape of a wreath, and sprinkled with diavolilli, colored candied almonds. In Liguria, they make fried ravioli, stuffed with marrow, candied pumpkin and citrus peels; in Basilicata, sweet panzerotti, which are sweet ravioli filled with pureed chickpeas, chocolate and cinnamon; and in Sardegna their fried ravioli are filled with fresh pecorino and covered with honey.
The other things Italians have a big love affair with are biscotti (biscuits or cookies) – the word comes from the Medieval Latin biscotus, meaning “twice cooked.” I sometimes wonder when do we eat all these cookies? We must have hundreds of different recipes around the country. In the north, many biscuits became fashionable as Torino was a big center of commerce (and later in the nineteenth century, the capital of all Italy), so in the afternoons the merchants would break for tea or hot chocolate.

At the Venier pastry and coffee shop in Torino you can still see big cabinets filled with little cookies made by the chef Luciano to traditional Piedmontese and Campagnola recipes.
In Toscana, it is a custom to dip almond cantucci biscotti into the sweet wine, vin santo, and all over Italy, biscuits like savoiardi (ladyfingers) will be served with ice cream or creamy desserts. In any one region, you might have 25 different biscotti recipes, which, like those for our cakes, are mostly all variations on the same ingredients – nuts (almonds or hazelnuts), sugar and golden raisins. These range from the famous almond macaroons, amaretti, from my region of Lombardia, to ricciarelli, the typical almond and honey cookie of Siena, flavored with orange zest, spicy spezzatini or pepatelli, made with black pepper, both typical of Toscana, baci di dama (lady’s kisses), to which chocolate is added, and Umbrian pinoccate, cookies made with pine nuts.
Pellegrino Artusi even includes a recipe for cookies for “birthing mothers’’ that were supposed to be eaten with a spoon and were made with sugar, vanilla sugar, cocoa powder, butter and egg yolks. The recipe was given to him by a lady from Conegliano, and she considered the results “nourishing and delicate, just the thing for restoring the strength of women who have grown weak bringing a baby into the world.”
Then there is a big fight with the French over who invented savoiardi (savoyarde) biscotti – these are the sponge fingers often served with ice cream and traditionally used in tiramisù. The French say they created them in Yenne in the Savoy region, but in Italy people say they were first made in Torino in around 1348 for Amadeus VI of Savoy, who was called Il Conte Verde, the Green Count, because he and his ensign always wore green. Since Torino first came under the control of the French house of Savoy in the thirteenth century, who really knows who influenced whom?
At Locanda, it is hard to put a simple fruit salad on the menu, or the kind of typical tarts or cakes we used to make at Olivo, because most people who come to eat consider a more complex dessert to be a highlight of a restaurant meal. And, anyway, Plaxy wouldn’t allow me to have a dessert menu without at least one chocolate dish on it. On the other hand, especially at lunchtime, we find that people want something light and easy to digest, and then, like Italians, they lean toward fruit, as long as it is presented in an interesting way, with some extra elements and different textures. So what we do is follow the same philosophy as for the rest of the kitchen, and take another look at the typical regional cakes, cookies, ice creams and combinations of fruit that all Italians know and understand, then rework them, give them a new twist, or bring together four or five different ideas on one plate; so we keep the spirit of Italian desserts, but with respect for the different appetites of our customers.
Every major restaurant kitchen has a pastry chef who is in charge of his own section, and concentrates only on the desserts. While I don’t like to see complicated presentation in our starters and main courses, I feel that you have to let pastry chefs spread their wings and fly. Antonio Carluccio once said to me that when you get to the dessert course at Locanda it is almost like going to another restaurant – but I am happy with that, because it means our desserts are a talking point.
Pastry chefs are a different breed from the rest of us in the kitchen. When you are working at the stoves, of course you do as much of the preparation as possible in advance, but when someone orders a piece of fish, you must cook it for them then and there, and it is all about speed, immediacy and spontaneity – no two fish are ever exactly the same; there is always an edge of unpredictability. And if you overwork and fuss over the garnishes and sauces, it is an obstacle to the quality of the finished dish, which gets confused and colder the more you meddle with it.
When you work on the pastry section, though, it is exactly the opposite. Everything is about thinking, planning, weighing, measuring and preparing, quietly and meticulously, so that all the elements look – as well as taste – beautiful, and only need to be assembled at the last moment. And once you have designed a dish the way you want it, that is it – you can repeat it again and again, and it should always be perfect.
Personally, I never liked working on the pastry section much; I am too impatient. I like to work with handfuls of parsley, not spend my time weighing out every crystal of sugar or every gram of cream – which is what you must do to ensure that the chemistry works. Of course I have my ideas and my opinions, and I taste everything and sometimes, when the boys on the pastry get too carried away, I tell them that all that chocolate and vanilla must have gone to their brains and made them crazy. But we are lucky in that we have had two brilliantly creative pastry chefs at Locanda, who have given a real sense of excitement to what we do. In the beginning, it was Damian Allsop, who was in charge of the pastry and who first came up with all sorts of dramatic desserts. Then he went off to work with the Italian chocolate maker Amedei, and Ivan Icra took over. Ivan is Catalan, from Barcelona, which is a hotbed of new ideas in cooking, and especially desserts. In Barcelona, one of the most talked-about restaurants is Espai Sucre (sugar space), where the whole menu is devoted to desserts. Ivan is one of a new wave of pastry chefs who is excited and influenced by the brilliant Spanish chef Ferran Adrià at El Bulli, with his way of questioning and deconstructing dishes, and building up different textures with jellies and foams – which are easy to do at home; you just need the kind of chargeable siphon you can buy for whipping cream.

Of course, Catalunya is culturally quite close to Italy, because it was once a principality of Aragon, and the Aragonese invaded northern Italy in the fifteenth century. In Alghero, the northern city of Sardegna, which was part of the Catalan kingdom for more than 400 years, many people still speak Catalan, and you find Catalan food in the restaurants. We share a love of many of the same ingredients, like tomatoes and almonds, and we all treasure our special dishes for festival days – so our ideas are very much in sympathy. Though, of course, that doesn’t stop the constant Catalan versus Italian banter that goes on in the kitchen.
As always, though, what we do in the restaurant and what I would do at home are two different things. At home, I wouldn’t make a cake and ice cream and cookies, and a foam and a sauce, all for one dessert. I also think it is important that, if you have cooked a meal for six people, you don’t kill yourself over the pudding; so unless you are feeling ambitious or you really, really love making desserts, you don’t need to do all the elements that we bring together at the restaurant. Maybe just make a cake or a tart, or poach some peaches or pears, and, if you like, you can buy some good ice cream to serve alongside. Or just make an ice cream, and perhaps a cookie. It’s up to you.
Sorbetto di melone, fragole selvatiche, salsa all’arancio
1 pint wild strawberries
For the orange sauce:
1 cup fresh orange juice
⅓ cup superfine sugar
To serve:
Melon sorbet (see page 560)
When wild strawberries are in season, we serve them with melon sorbet and orange sauce. To make the sauce, simmer the fresh orange juice with the superfine sugar, until you have a spooning consistency, then leave to cool. Arrange the wild strawberries in the center of your plates. Put a scoop of melon sorbet on top of the strawberries and spoon some of the orange sauce around. If you like, you can garnish the sorbet with Melon crisps (see page 581).
This is a lovely fresh dessert that might sound complicated but is actually very straightforward – and the advantage is that you make it the day before you want to serve it. We first made it by chance, really. We have some friends who have a farm near Mumbai in India, and we always give them some seeds of things like arugula to experiment with and, in return, when they visit us they bring us some fruit. One year they came over with about five boxes of mangoes – what were we going to do with them? At the time, we were searching for different ways of serving fruit for the lunchtime menu, and so we came up with this idea of a “fruit lasagne” – layers of fruit, which are pressed. We serve it with a scoop of vanilla ice cream (or sometimes Amaretto ice cream; see page 564) on top of a square of caramel sponge (though if you like, you could substitute a sweet cookie). For this recipe, you need two plastic containers of the same size, roughly 6 x 4 ½ inches and about 2 ½ inches deep.
4 ripe mangoes
14 ounces (about 2 ½ cups) strawberries
For the caramel sponge:
1 ¼ cups tin of condensed milk
⅔ cup (3 large eggs) beaten eggs
¾ cup flour
1 heaping teaspoon baking powder
½ cup butter
2 tablespoons golden syrup
pinch of mixed spices, such as ground cinnamon, cloves, star anise (optional)
a little flour and butter for preparing the baking dish
To serve:
Vanilla ice cream (see page 561)
4 Candied vanilla beans (optional, see page 583)
The day before you want to serve the lasagne, peel the mangoes and slice very thin. Wash, hull and dry the strawberries and slice them lengthwise, just slightly thicker than the mangoes. Keep the trimmings from around the mango stones and blend these with a hand blender to make a smooth puree. Keep in the fridge.
Line one of the two containers with plastic wrap, enough to come over the sides.
Line the base with about a fifth of the mango slices, making sure there are no gaps between the pieces (when it is turned out, this will be the top layer of your “lasagne”). Next, make a layer of strawberries, using about a quarter of the slices. Repeat the layering three more times and finish with a layer of mango slices.
Cover with a large sheet of plastic wrap – again big enough to overhang the sides. Have a flat plate or tray ready that is big enough to put the containers on top of one another, and fit into the fridge. Put the second container on top of the first, hold firmly and flip the two containers over together onto the tray. Put a weight on top (a milk bottle or some cans will do). The idea is that the excess juices from the fruit will drain out onto the tray, so cut away the excess plastic wrap, so that it doesn’t get in the way. Put in the fridge for 12 hours.
To make the sponge, first make a caramel, see page 522.
Preheat the oven to 300°F, grease a rectangular baking dish with butter and dust it with flour.
Whisk the caramel with the rest of the sponge ingredients until you have a smooth mixture. Pour the mixture into the prepared baking dish and bake for 25 minutes, until springy to the touch and a sharp knife inserted in the center comes out dry (if it is moist, keep the sponge in the oven for a little longer).
Turn the sponge out on to a cooling rack and leave to cool, then cut into squares.
When ready to serve the lasagne, take off the weights and remove it from the fridge. Turn the two containers back over together and remove the top one. Put a chopping board over the top of the remaining container and, holding it firmly, turn both board and container over together, so that you turn out the lasagne on to the board. Trim the edges if necessary, cut it into 4 and place a square on each of 4 plates.
If you have a kitchen blowtorch, dust the top of each slab of lasagne with sugar and glaze it quickly with the torch.
Scoop some ice cream on top of each square of sponge, spoon the reserved mango puree around and garnish with strips of candied vanilla pod, if using them.
For this kind of caramel, which we use in lots of desserts, we have a trick that is famous in South America and used in things like banoffee pie.
All we do is put a can of condensed milk into a pan of boiling water and let it simmer away for about 3 to 3 ½ hours, topping up with more water if necessary.
The sugar in the milk caramelizes and when you take out the can (carefully) and open it, you will find a thick, dark toffee, known as dulce de leche, which is much more dense than you could easily make with whipping cream and sugar – and much easier.
The toffee makes a wonderful “glue,” if for example we want to stick a cookie or a piece of pineapple to a plate, so that it doesn’t slide when the waiter carries it - such considerations are very important in a restaurant!

Pere cotte al vino rosso e bianco
We had a big pear tree in our garden in Corgeno and, in the season, we had pears coming out of our ears, so my grandmother often used to poach them in wine. We add some spices and, when we serve them, we go to town a bit, building up different flavors and textures to set off the fruit, with various sorbets and ice creams and cookies. However, you can serve the pears very simply with vanilla ice cream, and, if you like, some sweet biscuits, such as Sablé (see page 578).
4 medium-sized ripe pears
1 ¼ cups white wine
½ cup superfine sugar
2 cloves
2 cardamom pods
1 ¼ cups red wine
1 cinnamon stick
1 star anise
To serve (optional):
Vanilla ice cream and cookies, such as sablé (to make your own, see pages 561 and 578)
Or:
8 Frangipane wafers, in rounds (see page 575)
4 Frangipane wafers, twisted into balls (see page 575)
Mascarpone ice cream (see page 562)
Cinnamon ice cream (see page 569)
Peel the pears and cut them in half, remove the cores, then cut each half lengthwise into thirds.
Put half the pear pieces in a pan with the white wine, half the sugar, the cloves and cardamom pods. Put the rest of the pear pieces in another pan with the red wine, the rest of the sugar, the cinnamon and star anise.
Heat both pans very, very slowly on as low a heat as possible for around 10 minutes – the wine shouldn’t even reach a simmer, as you want to cook the pears through, without their falling apart. When the wine begins to get hot, test the pears with a sharp knife. If it slides into the pears easily, they are ready. Take off the heat and leave to cool.
Lift out the pears (keeping them separate), then boil up each liquid separately (to 250°F, if you have a thermometer) and reduce to a thick syrup – remembering that it will thicken more when it is cold. To check if it is the right consistency, put a spoonful on top of a piece of marble or a cold plate – within seconds it will be cold. If it is watery, it needs to be boiled for a little longer, but if it spreads a little but holds its shape, it is ready.
Serve 3 pieces of each type of poached pear in each bowl, with vanilla ice cream, drizzled with the two different colored syrups, and cookies. Or, if you want to be more elaborate, arrange the two pears separately on plates, drizzled with their respective sauces, together with 2 rounds of frangipane wafers on each plate. Top one cookie with mascarpone ice cream, the other with cinnamon ice cream, and garnish with frangipane wafers.
Pere cotte e crude con zabaione a moscato
If possible, use organic, free-range eggs (we use Italian eggs, the yolks of which are very deep orange-yellow); and try to find really juicy pears. The ones we use are Italian Forelle, which are very beautiful, small and juicy, with a fantastic yellow and crimson skin.
4 pears
¾ cup plus 1 tablespoon Moscato wine
superfine sugar, for dusting
¼ pound puff pastry
For the zabaglione:
8 egg yolks
¾ cup Moscato wine
3 ¼ tablespoons superfine sugar
Preheat the oven to 250°F.
To make the confit, cut two of the pears into dice (about ¼ inch) and put in a pan with the Muscat wine. Cook very slowly until the pear is soft. Leave to cool.
Dust a work surface with superfine sugar and roll out the pastry as thin as you can, sprinkling with more sugar as you go, then cut it into strips about ¼ inch wide (you need 2 or 3 per person), and twist them like loose corkscrews.
Lay the strips of pastry on a baking sheet and put into the oven for 4 to 6 minutes, or until golden. Leave to cool.
Peel the remaining pears, slice them very thin, preferably on a mandoline grater, and keep to one side.
To make the zabaglione, bring a pan of water to a boil and turn down the heat. Put the egg yolks, Muscat wine and sugar into a round-bottomed bowl, start to whisk a little, then put the bowl over the pan of water and continue whisking until you can form a figure eight with the mixture that will hold for a few moments.
Lift the confit pears into a fine sieve and drain off the juice (you could chill it and serve it as a drink, mixed with Prosecco).
Arrange some of the drained pear dice in each of four bowls, then spoon some zabaglione on top. Arrange the slices of fresh pear around the outside, and crisscross the strips of puff pastry over the top.
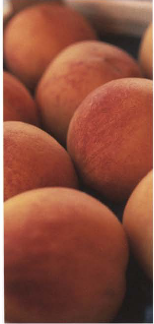
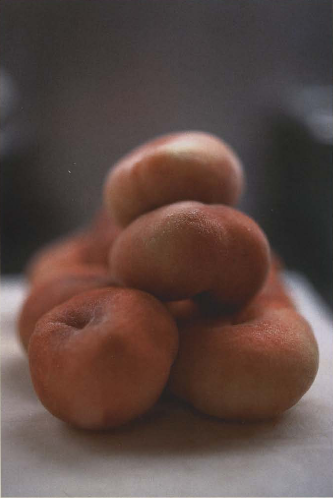
“Such beautiful, sensual fruits, aren’t they?”
All Italians grow up with a love of peaches, which arrived from China in Roman times via Persia (now Iran), and we have a great respect for their seasonality and locality: the relationship of a particular variety to its native climate and territory. Most of the fruit on sale is grown locally, and the variety among peaches is amazing. The white peaches of the north are probably the most famous. These are the ones we bake stuffed with amaretti, and that are used in the Bellini, the famous drink “invented” in Harry’s Bar in Venezia. (I am sure someone, somewhere made such a drink before – how could you not put two such marvelous ingredients together?)
Nothing compares to a peach plucked straight from the tree – they’re such beautiful, sensual fruits, aren’t they? I love to take the kids to pick them, and see them growing in their natural surroundings. Near Corgeno, next to Lake Monate, there is a consortium that grows Pesche del Lago di Monate: very small trees, hundreds of years old, with each tree giving around 25 to 30 peaches – gorgeous, juicy yellow ones with a quite firm texture, which you can buy from stalls on the roadside.
One of the best peach desserts I have ever eaten was not in Italy at all but Anton Edelmann’s peach melba at the Savoy. It is a dish that generally has a bad reputation in England, since it is often made with canned fruit and ice cream, but the version at the Savoy, served inside a caramel cage, was a complex, perfectly balanced mix of crunch and gorgeous fruit. There they made it with white peaches, but I love to do it with the Pesche del Lago di Monate, because the slight crunch of the peaches is fantastic with the softness of the ice cream. First, you make a tuile basket for each person (see page 574) and some raspberry sauce. For four people you need to puree 10 ½ ounces (about 1 ⅓ pints) raspberries in a blender, add 2 teaspoons lemon juice and 4 ¼ tablespoons confectioner’s sugar, and put the sauce through a fine sieve. Set aside while you poach 4 whole peaches in sugar syrup for about a minute, or until the skin comes off easily, then peel them, let them cool, cut in half and remove the pits. Now you need to make your caramel cage. Mix 1 ¼ cups superfine sugar with ⅓ cup plus 1 tablespoon water and 1 ½ teaspoons corn syrup in a pan, and put it on high heat. Brush the sides of the pan with water regularly to prevent the sugars from crystallizing, and cook to “hard crack” stage (300°F on a candy thermometer). Leave to cool until the syrup becomes thick.

Oil the outside of the bowl of a 4-inch-diameter ladle and lay it (round side facing upward) on your work surface. Dip 2 forks into the syrup and pull fine threads of it over the ladle in opposite directions to give a lattice effect. Finish with a thin line of syrup around the edge of the ladle to form the base of the cage. As soon as the syrup cools, carefully remove the cage from the ladle and keep it somewhere cool and dry. Repeat for 3 more cages.
To serve, pour a little of the raspberry sauce onto 4 plates, place a tuile basket in the center, scoop in some vanilla ice cream, top with a peach half, then spoon over a little more sauce. Carefully put a sugar cage over the top.
Spun sugar might seem a bit “eighties’’ now, but I have never thought of this dessert as at all pretentious, and I have never found a better way to serve peaches. All of us in the kitchen at the Savoy were so in love with this dessert – we were always trying to get the pastry cooks to let us have one. When I was in Paris and came back to London for a visit, I went to the Savoy to eat, and when they asked what I wanted, I said. “I don’t care, as long as I have a peach melba.”
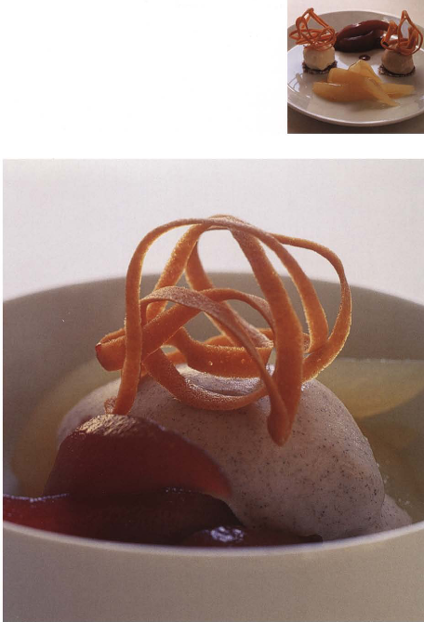
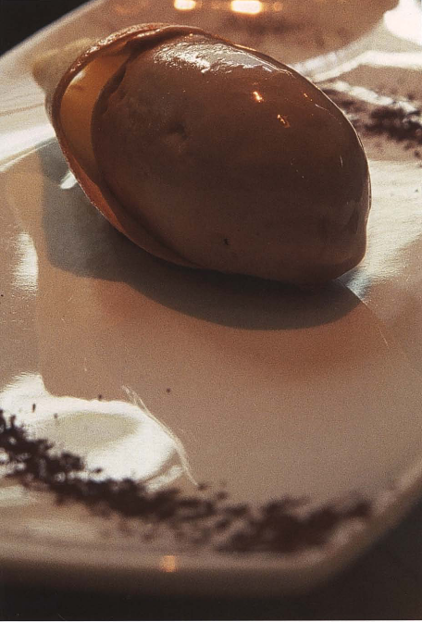
Pesche sciroppate, semifreddo di menta e gelatina d’Amaretto
To make the molds for the nougat glace we use clear PVC tape (6cm wide), which you can buy in specialty kitchen shops. We roll it into cylinders about 1 ¼ inches in diameter, secure with tape, then put these inside small pastry cutters of the same size to hold them steady. Alternatively, you could use 4 flexible molds around 2 ½ inches tall and 1 ¼ inches in diameter – or even use a deep ice cube tray and give everyone 3 cubes each.
3 firm but ripe peaches
1 ¾ cups superfine sugar
½ cinnamon stick
1 star anise
8 mint leaves, to garnish
For the nougat glace:
¾ cup plus 1 tablespoon whipping cream
1 bunch (about 1 ounce) fresh mint
whites of 3 large eggs
¼ cup superfine sugar
For the Amaretto jelly:
1 ½ ounces water
2g gelatine leaves, soaked in water and squeezed
3 tablespoons plus 1 tablespoon Amaretto liqueur
For the ginger custard:
¼ cup egg yolks (from about 3 large eggs)
¼ teaspoon ground ginger
2 ½ tablespoons superfine sugar
½ cup milk
½ cup whipping cream
The day before you want to make this dessert, put the whipping cream for the nougat glace into a pan with the fresh mint and heat until it starts to steam (175°F if you have a thermometer). Take off the heat, allow to cool and put in the fridge for a day to let the flavor infuse.
Take the cream and mint mixture from the fridge and pass through a fine sieve, pressing the mint leaves down to extract the maximum flavor. Put into a mixer and whip until it makes firm peaks, then transfer to a bowl.
Clean the bowl of the mixer thoroughly, then put in the egg whites and whisk until they start to foam and white bubbles appear around the bowl. Very slowly, add the sugar, whisking continually until the mixture makes stiff peaks. Stop the machine and carefully fold in the reserved mint cream, keeping as much air inside the mixture as possible. Spoon the mixture into the molds (as described above), smoothing the top. Put into the freezer for at least 4 hours.
To poach the peaches, cut them in half, leaving the skin on, and remove the pits, then cut each into 4 segments. Put the sugar, cinnamon and star anise into a pan with 2 cups water, add the peach pieces and heat very, very slowly on as low a heat as possible for around 10 minutes – the wine shouldn’t even reach a simmer, as you want to cook the fruit through without its falling apart. When the wine begins to get hot, test the peaches with a sharp knife. If it slides into the flesh easily, they are ready. Take off the heat and leave to cool.
To make the Amaretto jelly warm the water in a pan and melt the gelatin into it. Stir in the Amaretto and pour into a bowl. Put into the fridge for around an hour to set.
To make the ginger custard, put the egg yolks, ginger and sugar into a bowl with 1 ¾ tablespoons of the milk. Put the rest of the milk and cream in a pan on the burner, and when almost boiling add the egg yolk mixture and cook (at 185°F if you have a thermometer) until thick enough to coat the back of a wooden spoon.
It should leave a clean mark if you run your finger across it. If not, cook it a little longer. Take off the heat and leave to cool. Lay a piece of plastic wrap over the surface to stop a skin from forming and put into the fridge until you need it.
To serve, spoon some custard on to each of 4 plates, take your cylinders of nougat glace from the freezer and arrange 2 per person on top of the custard. Put a mint leaf on top of each – it will stick to the cream. Lift the peaches from their juice, and arrange alongside, together with scoops of the Amaretto jelly.
Macedonia di nespole e sanguinelle, gelatina di violetta e schiuma allo yogurt
This is a fresh, colorful salad of fruit that is easy to make – you just need a half-liter (2-cup) siphon (the kind used for whipping cream) to make the foam.
8 fresh loquats, peeled and put into a bowl of water with a few drops of lemon juice, to keep the color
8 blood oranges, peeled and separated into segments
For the violet jelly:
2 tablespoons plus 1 teaspoon superfine sugar
½ cup plus 1 tablesoon water
violet coloring, optional
violet essence, to taste
2g gelatine leaves
For the yogurt foam:
⅓ cup whipping cream
scant ½ cup superfine sugar
1 gelatin leaf, soaked in water
345g plain yogurt
0.5-liter (2-cup) siphon, plus 1 charge
To make the violet jelly, put the sugar in a pan with the water and bring to the boil. Take off the heat and add the coloring, if using.
When cold, add the violet essence to taste. Put a little of the mixture into a pan and heat gently. Add the gelatin, let it dissolve, then add to the rest of mixture and stir. Pour into a deep container and put into the fridge for 1 to 2 hours until set.
To make the foam, put the cream and sugar in a pan and heat until the sugar has dissolved. Take off the heat and add the gelatin. When it has dissolved, add to the yogurt and mix together. Pass through a fine sieve, and put into the siphon. Charge and put into the fridge for 2 hours.
Serve in deep plates or bowls: arrange the loquats and blood orange segments around the outside, with a square of jelly in the center and the foam on top.
I don’t want to give this an Italian name, because it is a dish that arrived with Ivan and is based on a recipe by Albert Adrià, brother of Ferran Adrià of El Bulli, who runs the restaurant’s famous laboratory in Barcelona. For me, a chef who is trying to impress, and be creative, will always be happiest when he works with ideas and ingredients that he understands – just as when you cook at home, you are always most comfortable when you cook something you know for friends rather than trying something new for the first time. So, of course, the idea of reinventing the famous crème Catalan dessert was quite natural; and we are very proud of it, because what was quite a thick creamy dessert is now transformed into something light and frothy, yet the essence and the recognizable taste are still there. And, you know, in reality I could call this a Milanese cream foam, because the ingredients, the flavor, the creaminess, everything about it chimes with the spirit of Lombardia.
1 pint mixed berries (strawberries, raspberries, blueberries, etc.)
8 tuile biscuits (to make your own, see page 574)
Crème Catalan ice cream (see page 561)
For the Catalan cream foam:
¾ cup whipping cream
¾ cup milk
½ vanilla bean
½ cinnamon stick
peel of ½ orange
peel of ½ lemon
yolks from 4 large eggs
2 heaping teaspoons cornstarch
¼ cup superfine sugar, plus extra to caramelize
0.5-liter (2-cup) siphon, plus 1 charge
First make the Catalan cream foam: put the cream and milk in a pan with the vanilla bean, cinnamon stick and the orange and lemon peel. Bring to a boil. Take from the heat and leave for 30 minutes to infuse. Pass through a fine sieve.
Put the egg yolks, cornstarch and sugar into a bowl and whisk together, then add ¼ cup of the milk and cream mixture, and whisk again.
Have a large bowl of iced water ready. Put the rest of the cream and milk mixture back on the burner and, when it is almost boiling, add the egg yolk mixture and whisk very quickly.
When you see the first bubbles appearing (if you have a thermometer this will be 185°F), take from the heat quickly and put the base of the pan into the ice water to cool it down as quickly as possible.
Before it is completely cold, blend with a hand blender until completely smooth, then put into the fridge until cold. Pass through a fine sieve and then into the siphon. Charge it, and then put the siphon into the fridge for 2 hours.
To serve, arrange some berries on each plate, then the ice cream and foam on top, and some tuile biscuits on the side, which you can use like spoons for the foam. Sprinkle the foam with superfine sugar and use a blowtorch to caramelize it quickly.
Sorbetto di menta, frutta della passione e schiuma di cocco
This is a quite soft jelly that we layer up with the sorbet and foam in a martini glass. Together the three flavors are unbelievable; very different, something you really have to taste for yourself – though some people, I know, don’t like the flavor of real coconut. I have had people tell me that it reminds them of soap or body lotion. I am so against the idea of soaps and shampoos and even household cleaners being made to smell of fruit – because it is so misleading, especially for kids. They think of apple as the aroma of a shampoo, instead of the real thing. I say only food should smell of food.

4 scoops of mint sorbet (to make your own, see page 560)
For the passion fruit jelly:
¼ cup water
⅔ cup superfine sugar
1 ¼ cups passion fruit juice
4g gelatin leaves, soaked in cold water and squeezed
For the coconut foam:
2 cups frozen coconut puree
6g gelatin leaves, soaked in cold water and squeezed
0.5-litre (2-cup)siphon, plus 1 charge
First make the jelly. To make the syrup, put the water in a pan with the sugar, bring to a boil, stirring to ensure all the sugar is dissolved, and then take off the heat and leave to cool. Mix the passion fruit juice and syrup together in a bowl. Warm 3 tablespoons of the mixture in a small pan. Remove from the heat, add the gelatin leaves and stir until dissolved. Add to the rest of the juice and syrup mixture, and stir well. Chill in the fridge for 2 hours until set.
To make the foam, warm 3 tablespoons of the coconut puree in a pan, then take off the heat, add the gelatin leaves and stir to dissolve. Add to the rest of the coconut puree. Put through a fine sieve.
Spoon the mixture into the siphon, charge it and put into the fridge for 2 hours.
Just before you want to use it, take the jelly from the fridge and break it up with a spoon.
To serve, put a scoop of sorbet into the bottom of a martini glass (or similar) and press down to make a neat layer. Add a spoonful of the broken-up jelly, then shake the siphon and squirt some coconut foam on top. Do this gently, to keep it from mixing with the jelly – the idea is to keep the three different-colored layers of sorbet, jelly and foam separate.
This is a very good, easy pastry that isn’t difficult to work with and won’t break if you roll it. We use it to line a nonstick tart pan and bake it “blind,” i.e., empty, so that it can cook a little and crisp up before you add a wet topping of fruit, frangipane, etc. We use ovenproof plastic wrap, filled with rice, dried peas or beans to weight it down, rather than baking paper, as it is tricky to keep this touching the pastry everywhere and keep it completely flat, whereas plastic wrap immediately sticks to it. Make sure you leave enough overlapping the edges to lift it out easily. Six minutes at 340°F is enough to start setting the pastry, then you can take out the plastic wrap and weights and return the tart case to the oven for about 15 minutes, until just golden, or whatever is required for your recipe. Make sure you preheat your oven for a good half hour before you start. It is easier to make double or even triple the quantity you need, as a larger volume will mix better, and you can freeze what you don’t use immediately.
Makes enough for two
11 -inch tarts or eight
4-inch tarts
1 cup butter
1 cup confectioner’s sugar
2 eggs
3 cups plus 2 tablespoons flour
With the paddle attachment on the mixer, blend the butter until soft. Add the sugar and continue to mix until the mixture turns pale. Add the eggs one by one, and when they are incorporated, add the flour. Continue to mix until all the flour is incorporated. Divide into 2 balls.
When the cherry season is over, you can make this with fresh red plums. You can also make one large 11-inch tart if you prefer.
Makes four 4-inch tarts
½ recipe quantity Sweet pastry
2 ½ cups fresh cherries (or plums), halved and pitted
about 2 tablespoons superfine sugar
For the frangipane:
7 tablespoons butter
½ cup superfine sugar
2 eggs
1 cup ground almonds (or hazelnuts)
3 ½ teaspoons flour
Roll out the pastry and use it to line four 4-inch nonstick tart tins. Then put the tins in the fridge for 2 hours to keep the pastry from shrinking in the oven.
Toward the end of that time, preheat the oven to 340°F. Line the chilled pastry cases with plastic wrap, fill with rice or dried peas or beans and bake blind for 4 minutes. Take out the weights, remove the plastic wrap, and put back into the oven for around 5 minutes (7 to 10 for a large tart), until baked but only very lightly colored (the base should feel firm when you touch it). Take out and turn the oven up to 180°C.
To make the frangipane, put the butter into a mixer with a paddle attachment and mix until soft. Add the sugar and continue mixing until the mixture turns pale. Add the eggs one by one until all are incorporated. Turn the speed to low and add the ground almonds and flour. Mix well, then turn the speed up to maximum for 1 to 2 minutes, no more, to incorporate some air, which will make the frangipane a little lighter and fluffier in texture (the mixture will turn paler and expand in volume a little).

Spread the frangipane over the tarts and arrange the cherries (or plums) cut side down over the top. Press the fruit down gently until it is completely embedded in the frangipane mixture.
Put back into the oven for about 12 minutes (15 to 20 for a larger one), during which time the frangipane will rise and turn golden. Halfway through the cooking time, sprinkle with the superfine sugar and return to the oven – some of the sugar will melt and caramelize, and give the tarts a rustic look.
Serve at room temperature.
Peaches and amaretti biscuits are a classic match that you will find in different variations all over Italy. The amaretto cream is really frangipane, with the addition of what, in the north of Italy, we talk about as bitter almonds (see page 576), but are actually bitter apricot kernels. They come not from the apricots we have in the fruit bowl but from immature fruit that looks very like almonds and are cultivated specifically for their kernels. You can buy them in specialty stores and health food shops.
Makes four 4-inch tarts
½ recipe quantity Sweet pastry (see page 536)
1 cup crushed amaretti cookies
10 small peaches
For the amaretto cream:
1 ¼ cups bitter apricot kernels
1 cup plus 2 tablespoons butter
1 ¾ cups superfine sugar
5 eggs
2 tablespoons plus 2 teaspoons flour, plus more for dusting
1 ½ cups ground almonds
Preheat the oven to 340°F
To make the amaretto cream, put the bitter apricot kernels into a food processor and grind to a powder. Put the butter in the bowl of an electric mixer with a paddle attachment and soften it. Add the sugar and mix for a minute or so until the mixture turns pale. Add the eggs one by one, mixing each one in well before adding the next. Switch off the machine and, with a spatula, scrape around the edges of the bowl until all the mixture is incorporated.
Mix together the flour, ground almonds and bitter apricot kernels, and stir into the butter mixture. Mix at a slow speed until everything is incorporated, then turn the speed up to maximum for 2 minutes to incorporate air. You will see that the mixture turns paler and expands in volume a little.
Roll out the pastry on a floured surface and use it to line four 4-inch nonstick tart tins, or one 11-inch one. Line the pastry shell with plastic wrap, weight with rice or dried peas or beans, and bake blind for 4 minutes. Take out the weights, remove the plastic wrap, and cook for 5 more minutes (7 to 10 minutes for a larger one), until lightly colored around the edges. Turn up the oven to 355°F.
Spoon the amaretto cream into the pastry cases in a layer about ¼ inch thick, smooth with a spatula and sprinkle the crushed amaretti cookies over the top. Halve the peaches and take out the pits. Arrange them alternately, one cut side up, then one cut side down, in a ring around each tart, and press down slightly into the cream.
Put into the oven and bake for about 12 minutes (or 15 to 20 for a larger one), until the amaretto cream is golden and has puffed up around the peaches.
Serve at room temperature.

This is a very thin and crispy tart, so thin we could almost call it pizza di mele – and have a bit of a game with words and serve it alongside the fruit lasagne (see page 521). It is the kind of French-influenced Milanese tart with a “wow factor” that we used to make at Olivo in the mornings, so it would look as though we had a pastry chef, when there were only three of us in the kitchen. You can make one big one or four individual ones. I find it is better to use a conventional oven rather than a convection oven, as you want the heat to be concentrated on the bottom of the pastry rather than circulating around it, so it crisps up quickly and uniformly. In summer, we also make this with halved cherries. Serve it with vanilla ice cream.

Makes four 4-inch tarts or one 11-inch tart
½ pound puff pastry
8 Granny Smith apples
about 2 tablespoons superfine sugar
For the pastry cream:
⅓ cup superfine sugar
½ cup cornstarch
yolks from 6 large eggs
13 ½ ounces milk
⅓ cup plus 1 tablespoon whipping cream
1 cinnamon stick
peel of 1 lemon (in a strip)
To serve:
Vanilla ice cream (optional, to make your own see page 561)
Preheat the oven to 355°F
To make the pastry cream, whisk the sugar, cornstarch and egg yolks together in a bowl until pale. Put the milk and cream in a pan with the cinnamon stick and lemon peel. Bring to a boil, then immediately take off the heat and leave to stand for 20 minutes for the flavors to infuse.
Slowly whisk the milk mixture into the sugar and egg mixture. Return to the heat, and when you see the first bubble, remove from the heat. Take out the cinnamon stick and lemon peel, and pass the mixture through a fine sieve.
Roll out the pastry into 4 circles of 4-inch diameter, or 1 of 11-inch diameter, and around ⅛ inch thick. Prick all over with a fork. Spread with pastry cream.
Halve the apples and remove their cores. Slice them about 1/16 inch thick (if the apples are just slightly thinner than the pastry, they should both cook properly in the same time). Arrange them in concentric circles, skin side up, embedding them well into the pastry cream – if they stick out they are likely to burn.
Put into the oven for about 20 to 30 minutes (another 5 minutes or so for a larger one), until the pastry is golden and crisp. Halfway through baking time, sprinkle with the superfine sugar, which will melt and caramelize a little to give the tarts a nice sheen – if the apples appear to be cooking too quickly, add a little extra sugar, as this will act as a barrier to the heat.
Serve at room temperature, with ice cream if you like.
Because the lemon and mascarpone mixture for this is quite liquid when it is first mixed, we completely cook the pastry case first, then turn the oven down, so that the topping can set without the pastry cooking further.
Serves 6–8
½ recipe quantity of Sweet pastry (see page 536)
2 egg yolks, beaten
confectioner’s sugar, to finish
For the filling:
1 ⅓ cups mascarpone cheese
¼ cup whipping cream
¼ cup milk
⅓ cup plus 1 tablespoon lemon juice
½ cup superfine sugar
½ cup egg yolks (from about 7 large eggs)
Preheat the oven to 340°F. Roll out the pastry and line an 11-inch nonstick tart tin with it. Line with ovenproof plastic wrap, fill with rice or dried peas or beans and bake blind for 4 minutes. Take out the weights, remove the plastic wrap and cook for around 10 to 12 minutes, until golden – the color you want it to be at the end.
Take out of the oven, brush the pastry all over with the beaten egg yolks and return to the oven for another 2 minutes. This forms a skin, so that even if there are tiny holes in the pastry, the topping won’t seep through and burn.
Turn the oven down to 230°F. The pastry is now cooked, so all you need to do is set the topping.
To make the topping, mix together the mascarpone, cream, milk, lemon juice and sugar in a bowl. Whisk the egg yolks separately, then add to the mascarpone mixture and incorporate quickly with a hand blender.
Spoon into the pastry and put into the oven for 20 to 25 minutes until the center is set but still the slightest bit wobbly. Leave to cool, during which time the topping will firm up.
To finish, dust the top with the confectioner’s sugar and caramelize it with a blowtorch. Serve at room temperature.
A true cheese is made with the milk of a cow, goat or sheep, but ricotta is made with the by-product of cheese making, whey. The story is that a long time ago, a shepherd left a pot on the fire with some whey in it after he had heated the milk to separate the curds from the whey to make a primitive cheese. When he returned, he found that the whey had been “recooked,” which is what ricotta means, and formed into lumps that tasted sweet.
These days ricotta is still made in a similar fashion, with the whey left over from making cheese such as provolone being reheated to a temperature of around 185°F. This causes the proteins to separate from the whey and rise to the surface in little lumps, which are skimmed off and left in rush baskets to drain. This is ricotta fresca (fresh ricotta), which is pure white, looks a little like cottage cheese, and is sold in tubs all over Italy but is traditional in southern cakes and desserts, such as Cannoli (see page 545) and the Easter tart, Pastiera Napoletana (see page 548) – where it takes the place of the mascarpone or cream of the north. Ricotta fresca is also fantastic in salads, or for mixing with herbs or spinach to fill ravioli.
Most of the ricotta we have in the north, where the production centers around Piemonte, is made with whey from cow’s milk and is very creamy, but it can also be made with the whey from sheep’s milk, which can have a much stronger flavor that isn’t really suitable for desserts, though it can also be quite mild (gentile). The most famous is ricotta romana, which traditionally comes only from the Agro Romano area of Lazio but has become a generic name for most ricotta – even cheese made with cow’s milk.
The curds can also be dry-salted and pressed, then matured in the curing room, so that the ricotta is semi-hard (ricotta salata) and can be grated over savory dishes such as the Sicilian maccheroni alla Norma, pasta with tomato, eggplant and basil. When it is aged more, it is called stagionata, and becomes more pungent and yellow in color, with a slightly piccante flavor. Dry-salted ricotta is also smoked (ricotta affumicata) by shutting it in a room where an aromatic fire is burning. In the north, beech wood is often used; in Abruzzo and Molise, where they make ricotta with the whey from pecorino production, they like juniper wood (ricotta al fumo di ginepro), and in Sardegna, herbs (ricotta mustia). I sometimes use smoked ricotta in a salad with baby onions in balsamic vinegar (see page 82). In Sicilia they do something different again, called ricotta infornata: sea salt is added to the whey, and when the cheese has chained, it is sprinkled with black pepper and baked in a stone oven for about half an hour.

Once when I was in Sicilia with the family, as if in a re-creation of the rustic origins of ricotta, we got talking to a shepherd, who made some ricotta from sheep’s milk for us for lunch over a fire in a field, using a wooden stirrer, and we ate it while it was still warm, or at least Plaxy and I did. As I say, sheep’s milk can be very strong. I thought it was quite incredible, I loved it, but the kids wouldn’t eat it, because they said it tasted too much of the animal. Jack still says it was the worst cheese he ever ate in his life.
I think this is the nicest of all the tarts and cakes we make in the restaurant. On the Amalfi coast in Campania (and also in Sicilia), they produce the cedro (citron), a bigger relative of the lemon that has a thick, nubby, aromatic zest, which is used to make candied peel. You can buy citron confit ready-made from Italian delicatessens – and sometimes, in season, the whole fruit, so you can make your own, as we do in the restaurant. The inspirational Patricia Michelson has them at her treasure trove of a shop and café, La Fromagerie in Marylebone (and High-bury) in London; or you could try Italian delis and also Jewish grocers and delis, as the particular variety of citron known as the etrog has a great significance in Jewish culture. Of course, you can make confit from normal lemons, but they won’t have quite such a distinctive flavor.
The way we do our confit is to make holes all over the skin of the cedri with a skewer, then put the whole fruits into a big pan with enough sugar syrup to cover. We then cook them very slowly over a gentle heat for about 4 hours (make the syrup using a ratio of 70 percent sugar to water, i.e., just under ¾ cup sugar for 1 cup of water). When the pan comes off the heat, we lay some parchment paper over the top of the cedri and place something heavy, such as another saucepan, on top to keep the fruit pressed down under the syrup. They stay like this for 5 to 6 hours, then we check that they are ready by taking one and cutting it in half. The flesh should be completely soft and the pith a uniform dark yellow. At this point, you can put the cedri into a sterilized jar (use disposable kitchen gloves to handle them, so you don’t transfer any bacteria into the jar) and cover with the syrup. That way they will keep for up to a year.

When you want to use the cedri, carefully cut off the peel (discarding the flesh) and cut it into strips. It will have a texture almost like marmalade, and the most fantastic rich flavor, which is beautiful with this ricotta tart.
When cherries are in season, we make this tart in the same way but substitute 1 ½ cups of fresh cherries, pitted and halved, for the citron – you don’t need any garnish.
Serves 6–8
½ recipe quantity Sweet pastry (see page 536)
1 ⅓ cups fresh ricotta cheese
2 eggs, plus 2 extra egg yolks
2 tablespoons plus 2 teaspoons honey
1 teaspoon ground cinnamon
1 tablespoon plus 1 ¼ teaspoons Marsala
2 tablespoons plus 2 teaspoons caster sugar
1 cup citron or lemon confit (see above), plus more for garnish (optional)
For the meringue:
⅓ cup egg whites (from about 2 large eggs)
2 tablespoons plus 2 teaspoons caster sugar
Preheat the oven to 340°F.
Roll out the pastry and use it to line a 10-inch square tart tin. Line the pastry shell with ovenproof plastic wrap, fill with rice or dried peas or beans and bake blind for 5 minutes. Take out the weights, remove the plastic wrap and cook for 5 more minutes, until lightly colored around the edges. Turn down the oven to 300°F.
Put the ricotta, eggs and extra yolks, honey, cinnamon, Marsala and sugar into a bowl and whisk everything together, then chop the citron or lemon confit and mix that in.
Make the meringue by whisking the egg whites until you can make a trace with the whisk. Add the sugar very slowly until the mixture is firm and forming stiff peaks.
Take one-third of the meringue and fold it into the ricotta mixture, then fold in the rest very lightly.
Spread the mixture over the pastry base and cook for 15 to 20 minutes until golden. Allow to cool to room temperature to serve, and garnish with more thinly sliced citron or lemon confit if you like.
Traditionally, cannoli are made with strutto – snow-white pork fat that has a clean, quite neutral flavor – but you can use duck fat instead, or lard. You need a clean metal (¾ inch diameter) tube for this – it must be metal, as it has to go into hot oil. We serve this with Amaretto ice cream (see page 564) and Frangipane wafers twisted into corkscrew shapes (see page 575), and make a lighter lemon confit than in the previous recipe.
1 ⅓ cups plus 2 tablespoons flour
1 tablespoon plus 2 teaspoons sugar
2 tablespoons plus 2 teaspoons strutto, duck fat or lard
1 egg, plus a little more beaten egg for sealing the cannoli
3 tablespoons Muscat wine
vegetable oil, for deep-frying
For the lemon confit (optional):
1 lemon
1 ½ cups water
1 ¼ cups superfine sugar
For the vanilla syrup:
⅓ cup plus 1 tablespoon water
½ cup sugar
1 vanilla bean
For the filling:
1 cup ricotta cheese
4 ¼ tablespoons candied lemon peel, diced small
4 ¼ tablespoons candied orange peel, diced small
⅓ ounce dark chocolate (70 percent cocoa solids), cut in a similar size to the peel
5 roasted hazelnuts, cut in a similar size to the peel
¼ cup superfine sugar
¼ cup whipping cream
For the chocolate sauce (optional):
¼ cup water
2 heaping tablespoons sugar
2 tablespoons plus 1 teaspoon cocoa powder
⅓ cup plus 1 tablespoon whipping cream
To serve:
confectiner’s sugar, for dusting
4 scoops of ice cream, preferably Amaretto
4 Frangipane wafers or cookies of your choice
Make the lemon confit a few horns ahead: peel the lemon (making sure not to include the bitter white pith) and cut the peel into julienne strips. Have ready a bowl of ice water. Bring a pan of water to a boil, then put in the strips of peel and blanch for 30 to 60 seconds. Lift out with a slotted spoon and plunge into the iced water. Discard the water in the pan, pour in some fresh boiling water and put in the peel to blanch again – just for 5 seconds this time, then lift out and put into the cold water again. This process will take out some of the bitterness.
Put 1 ½ cups water into a pan with 1 ¼ cups superfine sugar and heat. When the sugar is dissolved, add the blanched lemon and cook gently for 10 minutes until soft. Take off the heat and cool.
Make the cannoli a few hours ahead. To make the vanilla syrup, put ⅓ cup plus 1 tablespoon water in a pan with the sugar and vanilla bean, bring to a boil, stirring to dissolve the sugar, then take off the heat. Put the flour, sugar and fat into a mixer with a dough hook and mix for 2 minutes on medium until it resembles bread crumbs. Add the egg and mix some more, then add 2 ¼ teaspoons of vanilla syrup and the Muscat wine, and mix into a dough. Wrap in plastic and let rest for a few hours in the fridge.
When ready to use, roll out the dough as thin as possible and cut into 12 squares, about 2 ¾ x 2 ¾ inches. Wrap one square around the tube (see previous page) and seal with a little beaten egg.
Heat some vegetable oil in a deep-fat fryer or a large pan (no more than one-third full) and, with the help of a fish slice or skimmer, carefully lower the tube into the hot oil and fry until the cannolo turns golden brown. Lift out carefully with the fish slice or skimmer and drain on paper towels. When it has cooled just enough for you to touch it, slide the cannolo off the metal cylinder, and wrap the next square around it. Deep-fry as before. Repeat until all the cannoli are done.
Make the filling by mixing all the ingredients together.
To make the chocolate sauce, put the ¼ cup water and the sugar in a pan, bring to a boil, then add the cocoa powder. Bring back to a boil, add the cream, bring back to a boil again, then reduce the heat and cook slowly until the sauce is thick, dark and shiny. To test when it is ready, spoon a little onto a cold surface. It should keep its shape and set. Take the sauce off the heat and leave to cool – but don’t put it in the fridge, or it will lose its shine and become too hard.
Spoon the filling into a piping bag, and fill the cannoli. Dust with confectioner’s sugar. Arrange two small mounds of lemon confit on each plate (you could pack a small pastry cutter with the confit, to make a neat circle). Place a cannolo on one mound of confit, and a ball of ice cream on the other. Dot the chocolate sauce around. Top the ice cream with a Frangipane wafer or other cookie.
This is the traditional tart made in Napoli for the Easter festivities, and was originally made with grains of wheat, but is sometimes now made with pearl barley (soaked overnight and cooked according to instructions). The combination of ingredients may seem strange, but they are associated with ancient Roman celebrations of the rite of spring: flowers, eggs for new life, ricotta from the sheep, wheat and flour from the land – though the tart as we know it today is said to have been created, like so many of our sweet dishes, by a nun in a local convent. One of the many legends associated with the dish involves a mermaid called Partenope. One of the best stories is that she lived in the Gulf of Napoli, and to celebrate the arrival of spring each year she would come and sing to the inhabitants. One year, to say thank you for her songs, they offered her local gifts: ricotta, flour, eggs, wheat, perfumed orange flowers and spices. She was so delighted, she took them to her kingdom under the sea, where the gods mixed them together into a cake.

Serves 8–10
a little melted butter
1 pound (approximately ¾ recipe quantity) Sweet pastry (see page 536)
confectioner’s sugar to dust
For the filling:
¾ cup wheat grains (bulgur)
1 cup milk
pared peel from ½ lemon, left whole, the rest grated
2 pinches of ground cinnamon
½ cup superfine sugar
pinch of salt
1 cup fresh ricotta cheese
4 teaspoons orange flower water
⅓ cup candied citron (or lemon) peel and candied orange peel, chopped
3 eggs, separated
Put the wheat in a pan, cover with water (no salt) and boil for 20 minutes. Leave to cool in its own water, then drain in a sieve.
Bring the milk to a boil in a pan. Then add the drained wheat, the piece of lemon peel, 1 pinch of cinnamon, a tablespoon of the superfine sugar and the salt. Cook really slowly until all the milk has been absorbed (around an hour). Take the lemon peel out and spread the mixture on a plate to cool.
Put the ricotta into a sieve to drain off its liquid. Mix it with the rest of the sugar, the grated lemon zest, another pinch of cinnamon, the orange flower water and the candied fruit. Add the egg yolks a little at a time, mixing in well. Stir in the cooled wheat mixture.
Whip 2 of the egg whites until stiff, and incorporate into the mixture.
Brush a 13-inch round (2 inches deep) tart tin with melted butter. Divide the pastry into 2 balls, one slightly bigger than the other. Roll out the larger piece and use to line the tart tin. Spoon in the wheat mixture and trim the pastry around the rim of the tin. Leave to rest in the fridge for about 30 minutes.
Preheat the oven to 355°F. Roll out the other ball of pastry and cut into strips. Lay these over the top of the tart to make a lattice design, sealing well at the outer edges. Bake for about an hour until colored, then turn down the heat to 250°F, and bake until a skewer inserted into the center of the filling comes out clean (around 10 minutes). Cool inside the tin and dust with confectioner’s sugar.
When I was a kid and waiting for the school bus in the morning, I used to see the farmers go into the local bar, where the guys would make a tonic with red wine and egg yolks, which was supposed to give you strength, and which now reminds me of Vov, the liqueur made with egg yolks and Marsala, which you drink after a coffee when you are skiing. The barman would warm up the red wine like milk, with the steam from the coffee machine, then put some sugar in a cappuccino cup, add the egg yolks, whip them up until they were almost white, and then pour in the hot wine. The drink was called rusumada and when I was writing this, I called my mum to ask her what it meant. Of course, there were big discussions with whoever was around, but nobody really knew where the word came from. The best we could think of was that it comes from riesumare, which means “to take a body out of the ground,” i.e., exhume it, because it is a drink that is supposed to revive you when you feel dead on your feet. It was especially popular in the times when Mussolini decided he must increase the export of tea and coffee, so only the rich people could afford what was left – the rest of the people boiled up orzo (barley) instead of coffee, and instead of tea we had carcade, which was made from the red calyx and fruit of a particular hibiscus plant. But if you kept chickens and were lucky enough to have eggs, you could take one down to the bar, and they would make you rusumada.
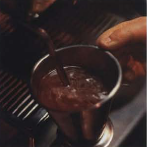
If you add the whisked egg whites to the rusumada it makes a good dessert, very similar to zabaglione, which, like Vov, is made with egg yolks and Marsala wine (or Muscat wine in Asti) – and which the French say they invented and named after St. Pascal Baylon, one of the many patron saints of cooks. In Italy, of course we say we invented it. One story is that it was invented by Bartolomeo Scappi, the personal cook of Pope Pius V, who wrote an enormous cooking manual containing five books, called Opera, in 1570. Others say it was an invention of the court of the Medici in Florence. Then again, the great Italian food writer Anna Del Conte has a different theory. Anna is an amazing fount of knowledge about all of our food, its history, and the way each region does things differently. When I started out in London and needed to know how to explain my dishes correctly in English, I used to phone Anna up, because she has lived in this country since the fifties, and she would always put me right. According to her, zabaglione is said to have been invented when the chef of Duke Carlo Emanuele I of Savoy accidentally poured some fortified wine into an egg custard in the seventeenth century. How often we have mistakes to thank for the best things.

Mix the egg yolks with the sugar and whisk until almost white.
In a separate bowl, whisk the egg whites, then gently fold into the yolk mixture and whisk in the wine.
Serve with a spoon and with cookies, if you like.
6 very fresh eggs, separated
6 tablespoons superfine sugar
2–3 tablespoons red wine, such as Barbera or Barbaresco
Zuppa di pomodoro dolce, gelatina di balsamica e sorbetto al basilico
When Italian people come into the restaurant they are not sure about this at first – but when you coax them into tasting it, it is amazing to see the way they react, because when the tomatoes are at their perfect moment of sweetness, you experience a real intensity of sugar, and the aroma is so fresh, it is as though you were walking into a garden full of tomato vines. Because the tomatoes have to be so good, we might have this on the menu only five or six times a year. You need very ripe tomatoes, left on the vine so they can dry out a little to concentrate the sugar. On warm days, you could even put them on the window ledge in the sun for a few hours. The ideal scenario is to have tomatoes so sweet that you don’t need any sugar syrup at all, because the more complex you make the soup, the more you lose the amazing freshness. However, if the tomatoes are not as sweet as you would like, have a little syrup ready.
We serve the soup with a sablé biscuit (see page 578) “stuck” to the bottom of a shallow soup dish with toffee, topped with Basil sorbet (see page 560 ), which rises up above the soup and is garnished with Candied basil leaves (page 581 ). The slightly salty biscuit intensifies the sweetness of the soup.
14 ounces (about l3A cups) very sweet cherry tomatoes (see above), such as Pachino from Sicilia or San Marzano
about 5 fresh mint leaves
about 2 tablespoons syrup (made with a tablespoon of water boiled with a tablespoon of sugar, then taken off the heat)
For the balsamic jelly:
2 teaspoons balsamic vinegar
1 tablespoon plus 2 teaspoons sugar
3g gelatin leaves, soaked in water and squeezed
To serve:
toffee made with a can of condensed milk (see page 522)
4 Salted special sablé biscuits (see page 578)
Basil sorbet (see page 560)
8 Candied basil leaves, for garnish (see page 581, optional)
Prepare both soup and jelly a few hours ahead. To make the soup, put the tomatoes in a blender and blend until they are completely liquid, adding the mint halfway through. Pass through a fine sieve and chill in the fridge for about 3 hours. The juice will separate – the bubbles that you introduced during the blending will cause any small particles of tomato to rise, so you can spoon them off and discard them.
Taste the soup and, if necessary, stir in a little syrup. Go gently, because the soup should taste tomato-sweet, not sugar-sweet. Put back in the fridge until ready to serve.
To make the jelly, put the balsamic vinegar and sugar in a pan and bring to a boil. Allow to bubble and reduce by about two-thirds (to around ⅓ cup). Take off the heat and mix in the gelatin leaves until they dissolve. Pour into a shallow dish, leave to cool and then put into the fridge for around 2 hours until set. When set firmly cut into 16 pieces.
To serve, put a little toffee into the base of each of 4 deep soup plates and stick a salted sablé biscuit on top. Pour the soup around, so that it comes just to the top of the biscuit, and add 4 cubes of jelly to each soup. Scoop out 4 balls of Basil sorbet and place on top of the biscuits. If you like, finish by sticking 2 candied basil leaves into each ball of ice cream.
Soufflé di riso carnaroli al limone
The rice of the northern Lomellina region and the big Sorrento lemons from the southern Amalfi coast (see page 416) brought together in a soufflé – for me this is an incredible dessert. We use carnaroli rice because it becomes very creamy but retains its shape and bite. Technically, of course, we could make a more perfect, symmetrically risen soufflé in a ramekin dish, but the flavor that infuses into the rice when you cook the soufflé inside the halved lemons is just beautiful – this is really one of those dishes that people go mad for whenever it is on the menu. If you can’t find Sorrento lemons, look for big, thick-skinned ones that are all the same size, so that the soufflés cook for a similar length of time – or, if you like, you can use oranges.
Serves 6
1 cup plus 2 tablespoons carnaroli rice
8 ½ cups milk
½ vanilla bean, split lengthwise
1 tablespoon plus 2 teaspoons orange juice
¼ cup superfine sugar
¼ cup unsalted butter
3 large similar-sized lemons (preferably Sorrento) or oranges
½ cup cornstarch
3 gelatin leaves, soaked in water and squeezed
For the meringue:
1 cup egg whites (from 7–8 large eggs)
1 scant cup superfine sugar
Put a tray into the fridge so that it gets really cold. Preheat the ovento390°F.
Put ⅓ cup plus 1 tablespoon of the rice into a pan with half the milk, bring to a boil, then turn down to a simmer and “overcook,” i.e., until the rice is really soft. Blend the rice and milk with an immersion blender until smooth, and pass through a fine sieve. Set aside.
Put the rest of the milk in a pan, add the vanilla bean, scraping in the seeds, and bring to a boil. Add the remaining rice and this time cook until it is al dente (just firm to the bite). Drain through a fine sieve, take out the vanilla bean and spread the rice out on the tray you have chilled in the fridge – this will stop it from cooking any more. Leave in a cool place (though not in the fridge) so that it cools as quickly as possible.
Warm the orange juice and sugar in a pan. When the sugar has dissolved, take off the heat, add the butter, and whisk until it is properly incorporated. Leave this at room temperature while you prepare your lemons or oranges.
Trim each end of the fruit until flat, then cut in half across the width. Scoop out all the flesh with a spoon and discard it, leaving you with 6 fruit “ramekins.” Put in the fridge for 30 minutes to an hour.
Brush the inside and rims of the fruit with the orange juice mixture, making sure every bit is completely covered – this is to make sure that the inside, and particularly the rims, are completely sealed and smooth, so that the soufflé doesn’t catch as it rises. Lay upside down on a tray lined with a sheet of parchment paper and put back in the fridge for about 5 minutes, so that any excess syrup can drain off, then turn them upright again and leave in the fridge until you need them.

With a knife, chop through the cooled rice grains to produce finer pieces and put into a bowl.
Put the reserved rice “milk” back on the heat, keeping back about 4 tablespoons. Mix this with the cornstarch. When the rice mixture comes to the boil, add the cornstarch mixture, stirring all the time, and simmer for about a minute to cook out the flavor of the flour. Take off the heat and add the gelatine. When the gelatine has dissolved, pour the mixture over the rice grains, stirring all the time, as the mixture will now be very thick.
To make the meringue, put the egg whites into a mixer and whisk until you can make a trace with the whisk. Add the sugar very slowly, until you can form firm peaks. Very carefully and lightly, begin to fold the meringue into the rice mixture – incorporate a third of it first and fold it in completely, then, again, but very lightly, fold in the rest. It is important not to overwork the mixture, as you are trying to trap as much air into it as possible, to enable the soufflé to rise.
The easiest way to fill your fruit containers evenly is to spoon the mixture into a piping bag with a large hole and pipe it in to about ¼ inch below the rim. Alternatively, you can just spoon it in. Put the soufflés into the oven for around 8 minutes until they are puffed up and golden. Don’t open the oven door before then.

Tiramisù is the dessert that most people associate with Italy; perhaps because it is made with coffee, which is considered a very Italian thing. However, a real tiramisù at the end of the meal is a killer – very heavy to digest. It is made all over the country, but it is one of those dishes that you have when all the family comes together for a long convivial lunch and so much food that you think you will never eat it, but the meal takes so many hours that at the end you are feeling hungry again. In London, however, I felt it was too heavy, so we experimented with a lighter version.
8 Savoiardi (ladyfingers)
just enough espresso coffee to soak the ladyfingers – a little over ⅓ cup
1 ½ bananas
For the mascarpone mousse:
¾ cup whipping cream
1 large whole egg, plus yolks of 3 large eggs
¼ cup sugar
2 tablespoons Grand Marnier
2g gelatine leaves, soaked in water and squeezed
¾ cup mascarpone cheese
For the Frangipane wafer:
25g ground almonds 2 tablespoons plus 1 teaspoon flour
⅓ cup confectioner’s sugar
scant ¼ cup melted butter
2 ⅔ tablespoons egg whites
1 teaspoon Amaretto liqueur
For the chocolate sauce:
3 ½ tablespoons water
2 heaping tablespoons sugar
2 tablespoons good cocoa powder, plus more for sprinkling
⅓ cup plus 1 tablespoon whipping cream
To serve:
Licorice ice cream (see page 566)
Preheat the oven to 320°F.
To make the mascarpone mousse, first whip the cream until it forms stiff peaks and put into the fridge. Put the eggs, extra egg yolks and sugar into a mixer and mix until pale and tripled in volume.
Heat the Grand Marnier gently in a pan, add the gelatin and let it dissolve. Take off the heat and mix in the mascarpone. With a spatula, fold in the chilled cream mixture a little at a time and return to the fridge.
Make the Frangipane wafer mixture as described on page 575. Line a baking tray with waxed paper and spread the mixture thinly in 4 rectangles, each roughly 8 x 3½ inches, leaving a good space between each one. Put in the oven for about 4 minutes until light golden, then take out one at a time and roll around a tall, square bottle to make a “tower.’’ Seal the “seam” by pressing the bottle down on to your work surface, then slide the “tower” off quickly and stand it on its end.
To make the chocolate sauce, put 3 tablespoons of the water and the sugar in a pan and bring to a boil, then add the cocoa powder. Bring back to the boil, add the cream, bring back to a boil again, then reduce the heat and cook slowly until the sauce becomes thick, dark and shiny. To test when it is ready, spoon a little onto a cold surface; it should keep its shape and set. Take the sauce off the heat and leave to cool – but don’t put it in the fridge, or it will lose its shine and become too hard.
Dip the ladyfingers in the espresso just long enough for them to turn pale coffee color. Peel the bananas and cut them into small dice.
To serve, dot the chocolate sauce around the 4 plates, put a cylinder of frangipane wafer upright in the center of each one, then start to layer up the tiramisù inside: first some of the soaked ladyfingers, then a layer of banana, then some of the mascarpone mousse. Repeat this layering three times, finishing with mousse, then sprinkle the top with cocoa powder. Serve with the ice cream. We make 4 small quenelles of this and balance one on the edge of each cylinder.
The Italians are one hundred percent the inventors of ice cream as we know it today (a frozen confection made with milk and/or cream and often egg yolks). Definitely. No contest. But who actually made the first ice cream? As always with Italians, in every region there is somebody who makes a claim, and everybody reckons they have the answer. One of the best-known stories is that it was a Sicilian from Palermo, named Francesco Procopio dei Coltelli, who set up Le Procope in Paris in 1686, serving ice cream in cups with stems to fashionable Parisians. Some people dispute this, saying that it was only sorbet (frozen fruit syrup or pulp) that he served. Others say that ice cream was already known for over a century before, when Catherine di Medici taught her pastry chefs how to make it at the French court when she married Henry II in 1533. This too, though, is the subject of a big debate. Certainly, by 1775, when the first book dedicated to frozen confectionery, De’sorbetti, by Filippo Baldini, was published in Napoli, it had a chapter on “milky sorbets,” so some kind of ice cream as we know it was being made by then.
Of course, the use of ice, and the idea of mixing it with flavored liquids or fruits, goes back to ancient times. The Romans dug out pits, which they insulated with straw, then packed in ice and snow and covered it with more straw, to keep throughout the summer. In my home village of Corgeno you can still find the place near the palazzo where they built a whole refrigerated room, like an igloo, in which they stored ice from the lake in winter, which would be used for the whole community.
The Chinese are supposed to have been the first to discover that ice could be mixed with salt, which lowered its temperature to below freezing point, so that you could freeze liquids. As always there is a story about Marco Polo – that he saw the Chinese freezing syrups in vessels buried in a mixture of salt and ice, and brought the idea home, but like most Marco Polo stories it is probably a myth.
Others say that as far back as A.D. 64, the Roman emperor Nero used to send slaves to collect snow and ice from the Appennine mountains, to mix with fruit and honey; or that the Arabs brought the idea of storing ice and snow and mixing it with fruit pulp to Sicilia – they called such drinks sherbet, which became sorbetto (sorbet).
In Napoli, you still find places where they make the most pure and primitive kind of granita (which we think of as frozen juice or coffee, crushed into thin flakes) by literally chipping shards of ice from a big block and adding a squeeze of Sorrento lemon or citrus juice, or some pureed fruit. They are better than anything for quenching your thirst, but in the searing heat of the summer you have to be careful not to eat them too quickly, because you feel the coldness so strongly inside your body that you almost pass out.
These days anyone can make ice cream at home, thanks to all kinds of home ice cream machines. Choose a big one with a powerful motor and a small cylinder, if possible, as the idea is to churn the mixture as little as is needed to bring it all together. Even if you don’t have a machine, of course you can put the ice cream into a container, put it into the freezer, and stir it with a fork every 20 minutes during the first 2 hours, so that you break up any crystals, and it will still be much more flavorful and wholesome than any commercial oversweetened ice cream.
At Locanda, however, we are always in search of perfection. Also, we can’t make ice cream every single day in every flavor, so we have perfected a formula that means that two weeks later when we take the ice cream out of the freezer it is still beautifully soft, with no crystallization. In order to achieve this, we use different sugars with different properties of sweetness and “nonfreezing power.” Sugars don’t freeze, but they have different levels of resistance to freezing, so by playing around with the ratio of sugars, you can alter the freezing point of your mixture, and therefore control the texture, as well as the sweetness.
In addition to sucrose, which is the sugar that everybody knows, extracted from cane or beet, we use invert sugar, which is made by heating sucrose and water with sodium bicarbonate. This sugar has anticrystallizing properties and helps make ice cream softer, especially when it has a high solid content, for example, chocolate or nuts. We also use dextrose, which is extracted from maize during a process in which the starch (a chain of glucose molecules) is broken down until only pure glucose is left. Because of its mild sweetening power, it allows fresh flavors to come through strongly. Also, we use some dextrose that still contains starch. This is glucose syrup, which, in its powdered form (easier to use in ice cream making), is known as atomized glucose, and works a bit like cornstarch, in that it has the power to thicken an ice cream mixture. In addition to whole milk and heavy cream, we also use some powdered milk (with 0 percent fat) to give a more pronounced milk flavor. Some of the recipes include eggs, which contain lecithin, a natural emulsifier; in others, we sometimes use a stabilizer made from natural ingredients (such as plants, including algae) to make sure the ice cream keeps its ultrasoftness and smoothness – but there is no need for this at home.
The lead is being taken in this technological field by an Italian, Angelo Corvitto, who has lived in Spain for many years – as you can imagine, Ivan, our pastry chef, likes to say that he had to go to Spain to learn how to make ice cream properly. Corvitto has devised a complex computer-based program for commercial ice cream makers. Ivan has studied all the new techniques, and then modified the ideas to suit our idea of what a fantastic ice cream should be about.
The recipes here have all been adapted to work in home ice cream makers, and, if you prefer, instead of using the different sugars, you can simply add up the total amount of sugar each recipe calls for, then make this up using one-third dextrose, which is easily available, and two-thirds superfine sugar.
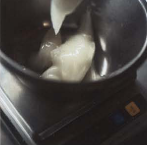
Each recipe follows the same basic method, but the ratio of ingredients varies with each one, in order to achieve the best possible consistency and flavor. For someone like me, who likes to work with handfuls of this and that (which is, after all, the Italian way), it can seem pedantic to have to weigh out quantities so minutely – in the kitchen Ivan measures everything down to 1 or 2 grams, though for the recipes here we have rounded the amounts for American kitchens. But this is one area of the kitchen where we have to forget about spontaneity, because accuracy really makes a difference. That is why we have given the quantities for the ice cream recipes in grams and ounces – if you weigh your milk, sugar, etc., it is far more precise than trying to judge the level in a measuring cup. You also need to use a candy thermometer, so that you can measure the temperature at the crucial stages of the recipes.

Points to remember
Once you have heated the mixture, you must take it off the heat, cool it down and get it into the fridge as quickly as you can. This is because there is a critical point between 59°F and 113°F, at which it is easy for bacteria to reproduce. The best way to cool it down quickly is to put the base of the pan into a bowl of ice, and keep stirring as it cools down. Make sure it goes into the fridge within 30 minutes of coming off the heat.
Also, it is important that your mixture spend 6 to 12 hours in the fridge before you churn it, because during this time not only do all the flavors come together but the water in the mixture spreads all the way through it and amalgamates with the fat, so the ice cream will be smoother and lighter and the water won’t crystallize.
Where a recipe calls for different sugars, such as invert sugar or atomized sugar, if you like, you can instead just add up the total quantity of sugar, and use one-third dextrose and two-thirds superfine sugar.
Makes 1kg
(about 2 ½ quarts)
745g (25.19 fluid ounces) melon juice (puree the melon in a food processor, or put through a juicer, then strain it through a fine sieve)
180g (6.35 ounces) dextrose
20g (.71 ounce) superfine sugar
5g (.18 ounce) sorbet stabilizer (optional)
50g (1.76 fluid ounces) lemon juice
Put 200g (6 ¾ fluid ounces) of the juice into a pan, add the dextrose, mix with a hand blender and bring to 104°F (40°C). Whisk in the sugars and stabilizer, if using. Bring up to 185°F (85°C), then take off the heat and cool as quickly as you can, so that you don’t encourage bacteria.
When the mixture is cold, mix in the rest of the melon juice and the lemon juice. Put into the fridge for 6 to 12 hours. Put into an ice cream maker and churn according to instructions.
Makes 1kg
(about 2 ½ quarts)
605g (20.46 fluid ounces) water
20g (.71 ounce) fresh mint leaves, chopped
50g (1.76 ounces) atomized glucose
155g (5.47 ounces) dextrose
110g (3.88 ounces) superfine sugar
5g (.18 ounce) sorbet stabilizer (optional)
50g (1.76 fluid ounces) lemon juice
With a hand blender, mix the water with the mint and atomized glucose, if using, and the dextrose until smooth. Put into a pan and bring to 104°F (40°C). Whisk in the sugar and stabilizer, if using. Bring up to 185°F (85°C), take off the heat and cool as quickly as you can, so that you don’t encourage bacteria.
When the mixture is cold, use a hand blender to mix in the lemon juice. Put into the fridge for 6 to 12 hours. Put into an ice cream maker and churn according to instructions.
Makes 1kg
(about 2 ½ quarts)
625g (21.13 fluid ounces) water
10g (.35 ounce) chopped basil leaves
50g (1.76 ounces) atomized glucose
160g (5.64 ounces) dextrose
110g (3.88 ounces) superfine sugar
5g (.18 ounce) sorbet stabilizer (optional)
50g (1.76 fluid ounces) lemon juice
With a hand blender, mix the water with the basil and atomized glucose, if using, and the dextrose until smooth. Put into a pan and bring to 104°F (40°C). Whisk in the sugar and stabilizer, if using. Bring up to 185°F (85°C), take off the heat, and cool as quickly as you can, so you don’t encourage bacteria.
When the mixture is cold, use a hand blender to mix in the lemon juice. Put into the fridge for 6 to 12 hours. Put into an ice cream maker and churn according to instructions.
Makes 1kg
(about 2 ½ quarts)
545g (18.43 fluid ounces) whole milk
85g (2.87 fluid ounces) whipping cream
50g (1.76 ounces) powdered milk
170g (6 ounces) dextrose
40g (1.41 ounces) superfine sugar
10g (.35 ounce) invert sugar
100g (3.38 fluid ounces) egg yolks
2 vanilla beans
With a hand blender, mix the milk, cream, powdered milk and dextrose until smooth. Put into a pan and bring to 104°F (40°C).
Whisk in the sugars and egg yolks, and put in the vanilla beans (halved) and scrape in the seeds. Bring up to 185°F (85°C),take off the heat and cool as quickly as you can, so that you don’t encourage bacteria. Put into the fridge for 6 to 12 hours. Remove the vanilla beans.
Put into an ice cream maker and churn according to instructions.
Makes about 1kg
(about 2 ½ quarts)
565g (19.1 fluid ounces) whole milk
170g (5.75 fluid ounces) whipping cream
40g (1.41 ounces) powdered milk
135g (4.76 ounces) dextrose
50g (1.76 ounces) superfine sugar
25g (.88 ounce) invert sugar
5g (.18 ounce) ice cream stabilizer (optional)
With a hand blender, mix the milk, cream, milk powder and dextrose until smooth. Put into a pan and bring to 104°F (40°C). Whisk in the sugars and stabilizer, if using.
Bring up to 185°F (85°C), then take off the heat and cool as quickly as you can, so that you don’t encourage bacteria. Put into the fridge for 6 to 12 hours.
Put into an ice cream maker and churn according to instructions.
Makes 1kg
(about 2 ½ quarts)
545g (18.43 fluid ounces) whole milk
85g (2.87 fluid ounces) whipping cream
50g (1.76 ounces) powdered milk
150g (5.29 ounces) dextrose
50g (1.76 ounces) superfine sugar
20g (.71 ounce) invert sugar
100g (3.38 fluid ounces) egg yolks
strip of lemon peel
strip of orange peel
1 cinnamon stick
1 vanilla bean
For the caramel:
100g (3.53 ounces) superfine sugar
First make the caramel: put the sugar into a pan and heat slowly until it turns to a golden caramel. Pour onto a sheet of waxed paper. Leave to set and then smash into small pieces.
With a hand blender, mix the milk, cream, milk powder and dextrose until smooth. Put into a pan and bring to 104°F (40°C).
Whisk in the sugars and egg yolks, then add the citrus peel, cinnamon stick and vanilla bean (halved) and scrape in the seeds. Bring up to 185°F (85°C) and take off the heat. Cool as quickly as you can, so that you don’t encourage bacteria. Put into the fridge for 6 to 12 hours.
Put through a fine sieve, then into an ice cream maker and churn according to instructions.
Mix in the pieces of caramel and serve.
I think people are a bit confused by mascarpone and mozzarella – but before you say “Well, you couldn’t make an ice cream with mozzarella,’’ we did: with olive oil and Parmesan too, and it was fantastic; but so is this ice cream made with mascarpone, our famous gorgeously creamy “cheese’’ from Lombardia, which is used in desserts and savory dishes. In fact, like ricotta, it isn’t a true cheese at all but is made in a similar way to yogurt, with cream from cows fed on a special diet of grasses, herbs and flowers. The cream is heated, then citric, tartaric or acetic acid is added and it is allowed to rest and separate, before being drained through cloth. Some say the name comes from the word mascarpa, which means the whey of an aged cheese (stracchino); or perhaps from mascarpia, which is the local dialect word for “ricotta,’’ its close relation. Others say that, since the Spanish ruled in Lombardia in the sixteenth and seventeenth centuries, the name comes from the Spanish expression “mas que bueno,’’ which means “more than good.’’
Makes about 1kg
(2 ½ quarts)
265g (8.96 fluid ounces) whole milk
160g (5.41 fluid ounces) whipping cream
40g (1.41 ounces) powdered milk
145g (5.11 ounces) dextrose
50g (1.76 ounces) superfine sugar
25g (.88 ounces) invert sugar
5g (.18 ounce) ice cream stabilizer (optional)
300g (10.71 ounces) mascarpone cheese
With a hand blender, mix the milk, cream, powdered milk and dextrose until smooth. Put into a pan and bring to 104°F (40°C). Whisk in the sugars and stabilizer, if using.
Bring up to 185°F (85°C), then take off the heat, and cool as quickly as you can, so that you don’t encourage bacteria.
When the mixture is cold, mix in the mascarpone. Put into the fridge for 6 to 12 hours.
Put into an ice cream maker and churn according to instructions.
Makes 1kg
(about 2 ½ quarts)
615g (8.96 fluid ounces) whole milk
125g (4.23 fluid ounces) whipping cream
40g (1.41 ounces) powdered milk
160g (5.64 ounces) dextrose
40g (1.41 ounces) fresh lemon thyme leaves
25g (.88 ounce) superfine sugar
25g (.88 ounce) invert sugar
5g (.18 ounce) ice cream stabilizer (optional)
With a hand blender, mix the milk, cream, milk powder and dextrose until smooth. Add the lemon thyme. Put into a pan and bring to 104°F (40°C). Whisk in the sugars and stabilizer, if using.
Bring up to 185°F (85°C), take off the heat, pass through a fine sieve, and then cool as quickly as you can, so that you don’t encourage bacteria. Put into the fridge for 6 to 12 hours.
Put into an ice cream maker, and churn according to instructions.
Makes about 1kg
(about 2 ½ quarts)
430g (14.54 fluid ounces) whole milk
95g (3.35 fluid ounces) whipping cream
55g (1.94 ounces) powdered milk
145g (5.11 ounces) dextrose
80g (2.82 ounces) superfine sugar
100g (3.38 fluid ounces) egg yolks
90g (3.04 fluid ounces) Amaretto liqueur
100g (3.53 ounces) crushed amaretti cookies
With a hand blender, mix the milk, cream, powdered milk and dextrose until smooth. Put into a pan and bring to 104°F (40°C). Whisk in the sugar and egg yolks.
Bring up to 185°F (85°C), take off the heat, and cool as quickly as you can, so that you don’t encourage bacteria.
When the mixture is cold, mix in the Amaretto with the hand blender. Put into the fridge for 6 to 12 hours.
Put into an ice cream maker and churn according to instructions. Stir in the crushed amaretti cookies before serving.
Mirto is the name not only for myrtle in Italy but for the liqueur made from the myrtle berry, which is traditional in Sardegna. (There is also a dryer white Mirto, made with the leaves.) You should be able to find it in specialty liquor stores or Italian importers, or you could replace it with black currant liqueur.
Makes 1kg
(about 2 ½ quarts)
515g (17.41 fluid ounces) whole milk
115g (3.89 fluid ounces) whipping cream
35g (1.23 ounces) powdered milk
70g (2.47 ounces) dextrose
30g (1.06 ounces) superfine sugar
20g (.71 ounce) invert sugar
90g (3.04 fluid ounces) egg yolks
120g (4.06 fluid ounces) Mirto (myrtle liqueur)
For the myrtle sauce:
100ml (3.38 fluid ounces) Mirto (myrtle liqueur)
30g (1.06 ounces) dextrose
With a hand blender, mix the milk, cream, powdered milk and dextrose until smooth. Put into a pan and bring to 104°F (40°C). Whisk in the sugars and egg yolks.
Bring up to 185°F (85°C), take off the heat, then cool as quickly as you can, so that you don’t encourage bacteria.
When the mixture is cold, mix in the Mirto. Put into the fridge for 6 to 12 hours.
Meanwhile, make the myrtle sauce. Put the liqueur and dextrose in a pan, bring to a boil and let it reduce to the consistency of caramel.
Put the ice cream mixture into an ice cream maker and churn according to instructions.
Serve the ice cream with some of the myrtle sauce drizzled over the top.
Limoncello is the famous liqueur made with Sorrento lemons.
Makes about 1kg
(2 ½ quarts)
545g (18.43 fluid ounces) whole milk
95g (3.35 fluid ounces) whipping cream
35g (1.23 ounces) powdered milk
70g (2.47 ounces) dextrose
50g (1.76 ounces) superfine sugar
20g (.71 ounce) invert sugar
90g (3.04 fluid ounces) egg yolks
110g (3.72 fluid ounces) Limoncello liqueur
20g (.68 fluid ounce) lemon juice
With a hand blender, mix the milk, cream, powdered milk and dextrose until smooth.
Put into a pan and bring to 104°F (40°C). Whisk in the sugars and egg yolks. Bring up to 185°F (85°C), take off the heat, then cool as quickly as you can, so that you don’t encourage bacteria.
When the mixture is cold, mix in the Limoncello and lemon juice. Put into the fridge for 6 to 12 hours.
Put into an ice cream maker and churn according to instructions.
Truffle honey (honey with slivers of white truffles) is a specialty of Toscana, which you can find in delicatessens.
Makes about 1kg
(2 ½ quarts)
535g (18.09 fluid ounces) whole milk
85g (2.87 fluid ounces) whipping cream
50g (1.76 ounces) powdered milk
45g (1.59 ounces) dextrose
20g (.71 ounce) sugar
120g (4.06 fluid ounces) egg yolks
105g (3.05 fluid ounces) honey
40g (1.41 fluid ounces) truffle honey
With a hand blender, mix the milk, cream, powdered milk and dextrose until smooth. Put into a pan and bring to 104°F (40°C). Whisk in the sugar and egg yolks, then add the honeys.
Bring up to 185°F (85°C), take off the heat, then cool as quickly as you can, so that you don’t encourage bacteria. Put into the fridge for 6 to 12 hours.
Put into an ice cream maker and churn according to instructions.
We serve this with Milk wafers (see page 578).
Makes about 1kg
(2 ½ quarts)
315g (10.65 fluid ounces) whole milk
195g (6.59 fluid ounces) whipping cream
60g (2.12 ounces) powdered milk
140g (4.94 ounces) dextrose
60g (2.12 ounces) superfine sugar
25g (.88 ounce) invert sugar
5g (.18 ounce) ice cream stabilizer (optional)
200g (6.76 fluid ounces) espresso
With a hand blender, mix the milk, cream, powdered milk and dextrose until smooth. Put into a pan and bring to 104°F (40°C). Whisk in the sugars and stabilizer, if using. Bring up to 185°F (85°C), take off the heat, then cool as quickly as you can, so that you don’t encourage bacteria.
When the mixture is cold, mix in the espresso. Put into the fridge for 6 to 12 hours.
Put into an ice cream maker and churn according to instructions.
True licorice root is a forgotten thing in this country. I love it. The real thing looks and smells beautiful and it is so pure-tasting – sweet yet not sweet – so different from the shiny black stuff you see in candy stores shaped into shoelaces and so on, which is made by cooking the root until it forms a black syrup, sweetening it with sugar and adding starch. We buy our licorice from the Amarelli family in Calabria, whose great plantations of licorice plants are about 600 years old and are grown on big stones, so the roots hit them and turn upward and can be harvested easily. When I was little, I used to see the old men sitting outside in the afternoons, chatting and chewing on pieces of licorice root, and I read in an Italian newspaper that since Italy introduced a smoking ban in public places, people have been rushing to buy licorice sticks to put in their mouths as a substitute.
Makes 1kg
(about 2 ½ quarts)
575g (19.44 fluid ounces) whole milk
170g (5.75 fluid ounces) whipping cream
40g (1.41 ounces) powdered milk
150g (5.29 ounces) dextrose
45g (1.59 ounces) licorice root powder
30g (1.06 ounces) superfine sugar
25g (.88 ounce) invert sugar
5g (.18 ounce) ice cream stabilizer (optional)
With a hand blender, mix the milk, cream, powdered milk, dextrose and licorice until smooth. Put into a pan and bring to 104°F (40°C). Whisk in the sugars and stabilizer, if using. Bring up to 185°F (85°C), take off the heat, pass through a fine sieve, then cool as quickly as you can, so that you don’t encourage bacteria. Put into the fridge for 6 to 12 hours.
Put into an ice cream maker and churn according to instructions.
You can buy ready-made hazelnut paste (praline) or make your own by putting 50g (1.76 ounces) roasted hazelnuts into a food processor with 50g (1.76 ounces) superfine sugar and blending to a paste.
Makes about 1kg
(2 ½ quarts)
255g (8.62 fluid ounces) whole milk
60g (2.12 ounces) powdered milk
140g (4.94 ounces) dextrose
300g (10.14 fluid ounces) water
10g (.35 ounce) superfine sugar
100g (3.53 ounces) invert sugar
5g (.18 ounce) ice cream stabilizer (optional)
20g (.68 fluid ounce) egg yolks
100g (3.53 ounces) hazelnut paste (see above)
With a hand blender, mix the milk, powdered milk and dextrose with the water until smooth. Put into a pan and bring to 104°F (40°C). Whisk in the sugars, stabilizer, if using, egg yolks and hazelnut paste. Bring up to 185°F (85°C), take off the heat, then cool as quickly as you can, so that you don’t encourage bacteria.
When the mixture is cold, put into the fridge for 6 to 12 hours.
Put into an ice cream maker and churn according to instructions.
Preheat the oven to 320°F. Put half the nuts on a baking tray and let them dry out and roast a little in the oven for about 5 minutes. Take out, allow to cool, chop and keep to one side.
Makes 1kg
(about 2 ½ quarts)
200g (7.05 ounces) pistachio nuts
320g (10.82 fluid ounces) whole milk
60g (2.12 ounces) powdered milk
140g (4.94 ounces) dextrose
340g (11.99 ounces) water
60g (2.12 ounces) superfine sugar
25g (.88 ounce) invert sugar
5g (.18 ounce) ice cream stabilizer (optional)
40g (1.35 fluid ounces) egg yolks
Put the rest of the nuts into a food processor and whiz until they become oily. Keep this paste to one side.
With a hand blender, mix the milk, powdered milk and dextrose with the water until smooth. Put into a pan and bring to 104°F (40°C). Whisk in the sugars, stabilizer, if using, egg yolks and pistachio paste. Bring up to 185°F (85°C), take off the heat, then cool as quickly as you can, so that you don’t encourage bacteria.
When the mixture is cold, put into the fridge for 6 to 12 hours.
Put into an ice cream maker and churn according to instructions.
Sprinkle with the chopped pistachio nuts before serving.
Marco Polo tea is quite spicy and floral, but you could make this with any tea you find that has a fantastic flavor and aroma, perhaps a fruit tea or chai. Something quite potent, like mango – you don’t want anything too delicate, as freezing has the effect of closing down flavor a little, and too subtle a tea might get lost. Good-quality green tea is also very good and refreshing.
Makes about 1kg
(2/½ quarts)
565g (19.1 fluid ounces) whole milk
170g (5.75 fluid ounces) whipping cream
40g (1.41 ounces) powdered milk
135g (4.76 ounces) dextrose
50g (1.76 ounces) superfine sugar
25g (.88 ounce) invert sugar
5g (.18 ounce) ice cream stabilizer (optional)
40g (1.41 ounces) Marco Polo (or similar) tea leaves
With a hand blender, mix the milk, cream, powdered milk and dextrose until smooth. Put into a pan and bring to 104°F (40°C). Whisk in the sugars and stabilizer, if using.
Bring up to 185°F (85°C), then take off the heat. Add the tea leaves and cool as quickly as you can, so that you don’t encourage bacteria. Put into the fridge for 6 to 12 hours.
Pass through a fine sieve, then put into an ice cream maker and churn according to instructions.
With a hand blender, mix the milk, cream, powdered milk and dextrose until smooth. Put into a pan and bring to 104°F (40°C). Whisk in the sugars, stabilizer, if using, and cinnamon. Bring up to 185°F (85°C), take off the heat, then cool as quickly as you can, so that you don’t encourage bacteria. Put into the fridge for 6 to 12 hours.
Makes 1kg
(about 2½ quarts)
520g (17.58 fluid ounces) whole milk
190g (6.42 fluid ounces) whipping cream
60g (2.12 ounces) powdered milk
140g (4.94 ounces) dextrose
60g (2.12 ounces) superfine sugar
25g (.88 ounce) invert sugar
5g (.18 ounce) ice cream stabilizer (optional)
10g (1.41 ounces) ground cinnamon
Put into an ice cream maker and churn according to instructions.
This is something we make in the restaurant at Christmastime – and it is a fantastic thing to do with leftover panettone at home, using the Vanilla ice cream recipe on page 561.
All you do is tear the panettone into shreds, then, the day before, soak them in the milk you are going to use for the ice cream. Pass through a fine sieve, reserving the panettone. Make the vanilla ice cream as usual, but when it has been churned add the pieces of reserved panettone. The sweet, spicy-citrus slivers of panettone give the ice cream a fascinating flavor.
“Bread was what most people still ate at Christmastime, but panettone was what they dreamed of eating.”

When my cousins at the bakery in Gallarate begin the production of panettone in the weeks before Christmas, the smell in the morning when you walk into the bakery is the best, really the best. The dough is put into the molds, and then into the proofers, so the mixture rises up almost to the top, like a mushroom. Then, after they come out of the oven – 150 or so at a time – they are lifted up on massive ladders, so that they can cool slowly upside down – this is what “stretches” the warm cake and gives it its characteristic dome shape.
The only things that we can say for sure about panettone – our Italian Christmas cake that is really more like a bread – is that it was invented in Lombardia and most probably in Milano, since this was the rich capital, where the wealthy people built their houses away from the malaria of the rice fields. The rest is the subject of myth and legend.
One story is that there was a young nobleman from Milano, named Ughetto degli Antellari, who fell in love with a baker’s daughter named Toni, and to impress her father, he blustered his way into the bakery kitchen, pretending to be an apprentice, and made a huge, sumptuous bread shaped like a dome, using an abundance of rich ingredients like eggs, butter and fruit. He called it Pan de Toni (Toni’s bread) and it became all the rage.
In another version of the story, it was the baker who was named Toni. Then again, other people say that panettone was first created by a kitchen boy called Toni, at the court of the Duke of Milano, Ludovico il Moro. He is supposed to have come to the rescue when the cook ruined the Christmas dessert, by improvising a sweet bread with leftover dough and fruit, which the duke loved so much, he ordered it to be brought to him for breakfast, lunch and dinner. In yet another tale, the nobleman Ughetto turns into a nun named Sister Ughetta, who added fruit to the usual bread and made a cross in the top for Christmas.
The less romantic idea is that panettone evolved from a dark country bread that was typical in Lombardia back in the tenth or eleventh century. On Christmas night, the ritual was that the family poured red wine and juniper onto burning logs in the fireplace, and then distributed the loaf. In medieval times, as white flour became more popular and ingredients such as butter and eggs, raisins, sugar and candied fruit became more available to the wealthier people, the recipe changed and became more elaborate. I like to imagine that in the early days of its evolution, bread was what most people still ate at Christmastime, but panettone was what they dreamed of eating.

I love panettone. It is such a fantastic present to give at Christmastime, in a big box with a ribbon. But it must be a good panettone. These days you can buy all sorts of variations: made with champagne creams, chocolate and coffee, but for me the traditional recipe is the best. A good panettone seems quite firm when you first open it, but as soon as it comes to room temperature, the fantastic aromas and flavors of vanilla and fruit open out, and when you bite into it, it becomes soft and buttery. I find the best ones usually come simply wrapped. The more flutes and frills and excess packaging that you have, the more you suspect that the money has been diverted away from the ingredients for the cake.
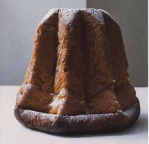
Because there is now such a big market for panettone all over the world, the big-brand companies make the cakes on a large scale, often putting in added flavorings and preservatives so that the cake will last for a long time, whereas the panettone that comes from the smaller, family bakeries, like the Gnocchi Bakery of my cousins, is made only one month before Christmas, so that the cake matures at just the right time, and it contains no preservatives, because it is meant to be eaten only during the Christmas and New Year festivities.
For a panettone of this quality, you need to pay a bit more money. Look at the ingredients: butter, fruit, etc. – it is impossible to produce a 2-pound cake cheaply, unless you are using inferior produce. I would use cheaper ones only to make bread pudding. I don’t know who started making such a traditional English dessert with panettone, but I remember we did it at Olivo, and it was very fashionable.
At home in Corgeno, the local tradition was that every family would buy two or three panettone at Christmastime. Not all of them would be sweet. You also find salted panettone (or pandoro in Venezia), which you cut crosswise and then layer up with ham and cheese, and maybe some smoked salmon, which is popular in Italy at Christmas. Then you cut slices, so that, a bit like a club sandwich, each mouthful tastes different. This is what you would make to share with friends on Christmas morning, when they come to your house for the first drink; and you also see it done in bars over the holidays, for everybody to eat with a glass of wine.
Always we would keep one sweet panettone until the third of February, the feast day of St. Biago (protector of the throat). Then everyone would take their cake to the church and the priest would bless it. By now the panettone would be quite dry, so naturally you had to have a drink to go with it – or perhaps some Muscat to dip the panettone into. So that was how we celebrated the day of St. Biago: with panettone and Muscat.
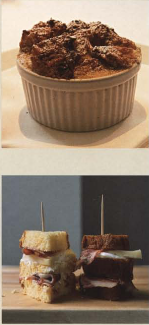
Perhaps the most famous Italian macaroons all over the world are amaretti. I was even given them at the end of a meal in Tokyo. The name amaretti means “little bitter ones” because traditionally bitter almonds (see page 576) are used to make them. For me, they are essential. Without them, the cookies would be too sweet. With them, the flavor of the sweet almonds is enhanced, and you get the full, characteristic, intensely almondy taste that everyone loves. However, like salami, amaretti are one of the cultural expressions of the people that really show the tastes of a particular region, because the recipe and style change with the territory.

Even though we are talking about the same basic ingredients – eggs, sugar, almonds (or hazelnuts), sometimes bitter almonds, and flour – you would be amazed at the differences you can create by varying the ratio. There must be 200 recipes all over Italy, though they are originally from the north.
The biscuits most people know are amaretti di Saronno, from Lombardia, which are the hard, crunchy ones, usually made commercially and wrapped in papers, which travel well around the world. But there are also beautiful soft amaretti, which my uncle makes in his bakery in Gallarate. In this area, the cows graze on the flat land, so milk and butter are plentiful, and both ingredients are used in the amaretti instead of egg white, which is what gives the macaroons their special softness. If you happen to live in a community that raises lots of chickens, you might use more eggs, and in areas where hazelnuts are plentiful, they are used instead of almonds, or there will be a mixture of both nuts.
Sometimes you might even add walnuts, if these are abundant. At some bakeries, the almonds might be crushed still in their skins, so the biscuits become more golden brown. It is the usual regional and local Italian story: little differences everywhere you go, and everybody protesting that their way is the best.
At Locanda, we make two batches of fresh soft amaretti cookies every day, following a recipe similar to the one my uncle uses in Gallarate, using both almonds and hazelnuts. Because the mixture needs to rest and dry out a little for 12 hours before baking, we pipe out one batch first thing in the morning, ready for dinner, and then every evening we make more, which we leave to dry overnight, ready to be baked in the morning and served for lunch. Before the amaretti are baked, we crush them a little with our fingers to give the characteristic bumpy shape that in northern Italy we call “brutti ma buoni’’ – ugly but good. Such a beautiful name, isn’t it? It could apply to so many foods – and people. It makes me laugh sometimes when someone says, “How lovely!,’’ when they don’t know about this name, or that the shape they like so much is the result of being squashed.

The biscuits that we don’t use we leave to dry out further, and then smash them up and use them in a Peach and amaretto tart (see page 538) or Amaretto ice cream (see page 564).
Makes about 35 amaretti
20 roasted hazelnuts
1 scant cup blanched almonds
1 cup apricot kernels
2/½ cups superfine sugar
½ cup egg whites (from 3-4 large eggs)
confectioner’s sugar for dusting
Crush the nuts and apricot kernels to fine crumbs in a food processor. Add the sugar and egg whites and process until the mixture all comes together. Spoon the mixture into a pastry bag.
Line 1 or 2 baking sheets with waxed paper and pipe the mixture into rounds on them, spacing them out well. Dust liberally with confectioner’s sugar. Leave for 12 hours so that the mixture can dry out slightly. After this time, they will have formed a “skin.” Pinch the biscuits lightly with the fingers to break this and give a bumpy appearance.
A good half hour or so before you are ready to bake the cookies, preheat the oven to 355°F, then bake them for 11 minutes until light golden.
Makes about 12 tuiles
⅔ cup confectioner’s sugar
1 tablespoon plus 1 ¼ teaspoons all-purpose flour
1 tablespoon plus 2 teaspoons melted butter
¼ cup egg whites (from 1–2 large eggs)
1 ⅓ cups chopped almonds
Preheat the oven to 330°F.
Line a baking sheet with waxed paper. Put the confectioner’s sugar and flour into a food processor and blend. Add the melted butter and the egg whites, and blend again to a paste. Spoon into a pastry bag.
Pipe or spread the mixture quite thin on the paper into any shapes you like, leaving generous space between each biscuit. Scatter some chopped almonds on top of each one.
Bake for about 4 minutes, until golden. To make baskets, form them inside a ramekin while still warm.
Preheat the oven to 330°F.
Makes about 12 tuiles
⅓ cup flour
¼ cup ground hazelnuts
1 tablespoon plus 1 teaspoon dextrose
¼ cup water
⅓ cup plus 1 tablespoon superfine sugar
3 tablespoons plus ¼ teaspoons butter
Mix the flour and ground hazelnuts together. Put the dextrose, water and sugar into a pan. Bring to the boil, then take off the heat and whisk in the butter. When it has melted, whisk in the flour and nuts until smooth (it is a good idea to use a hand blender). Put into the fridge until cold.
Line a baking sheet with waxed paper. Either spoon the mixture into a piping bag and pipe into strips of about 6 inches, or spread with a spoon.
Bake for about 5 minutes until light golden – the mixture will flatten out into biscuit shapes.
If you like, you can twist or roll each biscuit into another shape, such as a “cigar,” while still warm (see specific recipes, such as the Cannoli di ricotta on page 545 or the Tiramisu on page 554 for ideas). Other variations include using a pastry bag with a very small opening to pipe the mixture onto the waxed paper in thin strips, making hairpin-like shapes. When they come out of the oven and are still warm, twist them into balls. Alternatively, you can brush the mixture onto the waxed paper in whatever shapes you like, using a pastry brush, and the biscuits will come out looking like lace. The thinner the mixture, the less time it needs in the oven, so keep an eye on it, and take it out as soon as it turns pale gold.
Makes about 12 wafers,
depending on shape
¼ cup ground almonds
1 tablespoon plus 1 ¼ teaspoons flour
⅓ cup confectioner’s sugar
3 tablespoons plus 1 teaspoon melted butter
2 tablespoons plus 2 teaspoons egg whites
1–1 ¼ teaspoons Amaretto liqueur
Put the ground almonds, flour and sugar into a food processor and blend. Add the melted butter and blend again.
When well incorporated, add the egg whites, blend again and, when they are incorporated, add the Amaretto and blend again. Leave to cool. If you want to pipe the biscuits, put the mixture into a pastry bag, then put the bag into the fridge for about 30 minutes.
Preheat the oven to 330°F. Line a baking sheet with waxed paper.
Spread or pipe the mixture quite thin into whatever shapes you like (or whatever a specific recipe calls for), leaving a good space between each one.
Bake for about 4 minutes until golden.
Preheat the oven to 330°F.
Makes about 15 wafers
⅓ cup plus 1 tablespoon sugar
1 tablespoon plus 1 ¼ teaspoons flour
1 tablespoon plus 1 ¼ teaspoons milk
a few hazelnuts, chopped
Line a baking tray with waxed paper.
Mix the confectioner’s sugar and flour together in a bowl. Add the milk and mix with a spatula until you have a thick paste. Brush the paste on to the waxed paper in long crisp shapes (or whatever shapes you like). Sprinkle each one with chopped hazelnuts.
Bake for about 4 to 5 minutes. The mixture will bubble up and look quite transparent, then turn pale gold.
Mandorle, nocciole, noci e castagne
The French may talk about their pâte d’amande (almond paste) for pastries, but it was the Italians who showed them how to use almonds via Catherine de’ Medici. In Italy, the production of nuts is incredible; everywhere you see people growing, selling or buying them, and they appear all over the country in desserts, cakes, biscuits, torrone (nougat, made with egg white, sugar and nuts), in Amaretto liqueur, or just candied, like the sugared almonds (confetti) that are typical of Abruzzo.
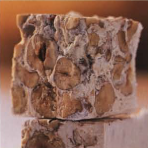
Even in the north, I never saw anyone pay for almonds, hazelnuts or walnuts. Everyone has a tree in the garden, and, around the time of picking, the atmosphere is so intense with the scent that we have to keep my daughter, Margherita, away, or she will have an allergic reaction. When I was growing up, in November there would be huge cloths laid out in the courtyards in Corgeno, where everyone spread out the nuts to dry in the sun.
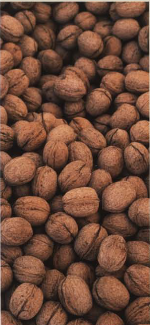
The almonds everyone grows are sweet, but there is a second type, the bitter almond, that contains prussic acid – a deadly poison. When the almonds are heat-treated and processed, they become safe. In Italy, we tend to use the crushed kernels of a specially grown apricot instead (these are also heat-treated before they are sold, and can be toxic in very high doses) – though we still call them “bitter almonds.” The crushed kernels are often used together with sweet almonds in confectionery to boost the flavor.
Further up in the mountains around our house in Corgeno, there would be only hazelnuts. Almonds cannot survive if the temperature goes to zero, so if there is a frost, the nuts can be lost, whereas hazelnuts thrive on cold. The harder it is in winter, the better the fruit next year, my granddad used to say. The best hazelnuts in the world, for size and flavor, are the tonda gentile, “round and tender,” nuts from the Langhe area of Piemonte, home of Barolo wine, with its Alpine territory and very cold winters.
In the north, chestnuts are also very important, and in Cuneo in Piemonte there is a big chestnut festival each October, which lasts for five days. In the time of Mussolini, the partisans hiding in the mountains would probably have died without chestnuts. They grow in the woods all along the spine of the Appennines, and there are over fifty different varieties. In Lombardia and Piemonte, we use the nuts to make chestnut flour or we cook and puree them in everything from desserts to savory dishes and stuffings.

The most prized chestnut is the marrone, which is big and light brown inside a spiky shell, and has a thin skin, so that you can peel it easily. This is the chestnut that is made into the famous marrons glacés, candied chestnuts, which I absolutely love. In the lead-up to Christmas, if I am in Milano, I buy the cracked ones in the jar and by the time the plane lands in London I’ve eaten them all, so I feel sick by the time I arrive. I know what is going to happen, but I can’t help myself – I do it every time.
Makes about 15–20
200g butter
2 ¾ cups plus 2 tablespoons flour
½ teaspoon baking powder
¾ cup cornstarch
1 ¼ cups confectioner’s sugar
2 egg yolks pinch of salt
Half an hour before you need it, take the butter out of the fridge.
Mix the flour, baking powder, salt and corn starch in a bowl.
Put the butter into a mixer with a paddle attachment and mix. When soft, add the confectioner’s sugar and keep mixing until the mixture turns pale. Add the egg yolks and mix in briefly. Add the flour mixture and continue to mix until it is almost incorporated.
Spread the mixture in a flat tray, about ¾ inch deep, and leave in the fridge for about 5 hours until the mixture sets.
A good half hour before you are ready to bake, preheat the oven to 340°F and line a baking sheet with waxed paper. With a cookie cutter about 1 inch in diameter, cut the mixture out into round biscuits and arrange on the lined baking sheet.
Bake the biscuits for 13 minutes, until golden and slightly puffed. Leave to cool (if you like, while they’re still warm, you can use the same cutter to neaten and trim the biscuits into more perfect rounds).
Similar to the biscuits above but a little saltier, these work well with something sweet, such as the Sweet tomato soup on page 550, as the salt contrasts with – and helps intensify – the sweetness of the tomatoes.
Makes about 10
7 tablespoons butter, at room temperature
¼ cup milk
1 ½ cups plus 2 tablespoons flour
½ teaspoon baking powder
1 teaspoon salt
Put the butter into a mixer with a paddle attachment and work until soft. Add the milk slowly and, when it is fully incorporated, add the flour, baking powder and salt, a little at a time.
When everything is all mixed in, spread the mixture in a flat tray, as above, leave to set and bake in the same way.
Biscotti al latte
These are the best cookies. I love them. The flavor is fantastic and, when they are warm, you can shape them any way you like. If you want to spoil your kids, make them into ice cream cones (you can make up lots of them and keep them in an airtight container). That is what we do on Sundays, when families come into the restaurant and we take the kids into the kitchen to choose their ice cream, which we scoop into the cones for them to hold in their hands. We also serve the wafers with coffee ice cream, as they really accentuate the flavor of the coffee.
or small wafers
1 ¼ cups powdered milk
2 tablespoons plus 2 teaspoons sugar
½ cup plus 2 tablespoons egg whites (from 4–5 large eggs)
⅓ cup plus 2 tablespoons melted butter
pinch of salt
Mix the powdered milk, sugar and salt together, then whisk in the egg whites and melted butter, and put into the fridge for 12 hours.
Preheat the oven to 340°F.
Line a baking sheet with waxed paper. You can either spoon the mixture into small mounds and spread it, using a palette knife or rubber spatula, into whatever shape you like, or do as we do and make the biscuits into cones. From the center of a sheet of waxed paper we measure 5 ½ inches vertically. From this point we measure 3 ½ inches at a right angle, and make a mark. Then we go back to the original point, measure 1 ½ inches horizontally, and make a second mark. Then we join the two marks together to make a geometric shape approximately 5 ½ x 3 ½ x 6 x 1 ½ inches. We cut this out of the paper and discard it, lay the template firmly on top of a lined baking sheet and spread some of the mixture over the top, then lift off the template. Repeat with the rest of the mixture – you will probably need to do this in a few batches, depending on how many baking sheets you have.
Bake for about 5 minutes, until the biscuits begin to color.
When they come out of the oven, while still warm, starting with the corner where the 5 ½-inch side meets the 3 ½-inch side, roll into a cone shape. Gently lay the cones on a tray to cool.
Makes about 20 wafers,
depending on shape
½ cup corn syrup
250g sugar fondant
1 ounce lemon thyme, chopped very fine
Heat the glucose and fondant in the pan until it starts to look golden (if you have a candy thermometer this should be 316°F, just below caramel, which forms at 325°F ).
Have ready a baking sheet lined with waxed paper. Take the pan off the heat and pour the syrup over the paper. Sprinkle with the chopped lemon thyme. Put another sheet of waxed paper over the top and roll with a rolling pin until you have a flat layer about ¼ inch thick. Leave until completely cold, then break into pieces. You can store them in an airtight container until you need them.
When you want to use them, preheat the oven to 310°F. Take however many pieces you need, put them on a baking sheet lined with waxed paper, spaced well apart, and put into the oven, until just soft, like butter.
Take out of the oven and cover with waxed paper, then roll out each wafer again until really thin and transparent. Leave to cool.
Slice some fruit thin or take a few herbs such as basil, dip in syrup, let them dry out and crisp up in a cool oven, and you have an impressive decoration for anything from ice cream to a tart.
If you make these crisps more than a few hours before you need them, keep them in an airtight container until you are ready to use them (but don’t keep them for more than a day). They should stay crisp; but, if not, you can put them back into the oven again – though they won’t be quite as crisp as the first time.
Makes about 10 crisps
3 tablespoons plus 1 teaspoon sugar
4 tablespoons water
juice of ½ lemon
1 Granny Smith apple
Put the sugar in a pan with the water and heat until the sugar dissolves. Take off the heat and leave to cool. Mix in the lemon juice.
Slice the apple (skin on) as thin as possible, preferably using a man-doline grater. Put the slices into the syrup and leave for an hour.
Preheat the oven to 125°F or 140°F (if you have a gas oven, have it as low as it will go). Line a baking sheet with waxed paper.
Lift the apple slices from the syrup, shaking off the excess, and lay them on the prepared baking sheet. Put in the oven for about 3 hours, until completely dry and crisp, but not colored.
Take out and leave to cool down on top of the oven, or nearby, to maintain the crispness.
Variations
Melon Crisps (makes 4) : Make in the same way, but use 4 very, very thin slices of very cold honeydew melon instead of the apple.
Blood Orange Crisps (makes 4) : Make in the same way, but increase the quantity of sugar to 4 tablespoons plus 2 teaspoons, and use 4 thin slices of blood orange.
Candied Basil (makes 8) : Make in the same way, but use ½ cup sugar and ⅓ cup plus 1 tablespoon water, and let it cool before you put in the basil. Shake off the excess syrup before laying them on your lined baking tray. They will need around 4 hours until they become crisp.
Makes 8–10
3 tablespoons plus 1 ½ teaspoons egg whites
10 mint leaves
2 tablespoons plus ½ teaspoon sugar
pinch of salt
Preheat the oven to 285°F.
Whisk the egg whites with the salt and pass through a fine sieve. Dip the mint leaves into the mixture, shake off the excess, and lay on a sheet of waxed paper.
Dust with the confectioner’s sugar and put into the oven for about 20 minutes, checking regularly, until the egg white starts to bubble up and color very slightly. To check whether the leaves are ready, take one out and leave to cool slightly. If it is crunchy, it is ready: if not, discard that one and give the others 5 minutes more, then take another one out and check again. If still not ready, give the remaining leaves another 5 minutes. Hopefully, you should end up with 8 to 10 perfectly crunchy leaves.
For some desserts we make at the restaurant, such as the poached pears served with ice cream on page 524, we candy the vanilla beans, then chop them in a food processor until they turn into a powder, which we dust over the ice cream.
4 vanilla beans
¾ cup plus 2 tablespoons water
⅔ cup sugar
Preheat the oven to about 125°–140°F.
Cut the vanilla beans into thin strips lengthwise.
Put the sugar and water in a pan and heat until the sugar dissolves. Put in the strips of vanilla bean, bring the syrup to a boil, then turn down the heat and simmer very slowly for 30 minutes.
Line a baking sheet with waxed paper.
Take the vanilla strips out of the syrup, shaking off the excess, lay them on the tray and put in the oven until they have become completely dry, about 5 hours. To check whether they are ready, take out a strip, leave it to get cold, then break it. It should snap very easily; if not, leave the strips in the oven a little longer.
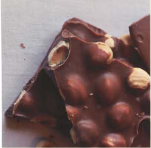
In Italy, we see chocolate in a very different way than they do in England or America. We don’t have newsstands full of thousands of different candy bars to pick up and eat as a snack. Of course, we like chocolate, but you are more likely to see it used to cover almonds and sold in the pasticceria or a specialty cioccolateria, or used in desserts or even savory dishes, such as Caponata (see page 59). I have to confess, though, that I loved the gianduia bars we used to have at home in Corgeno – Gianduia was a famous marionette who loved food, wine and girls, and was the King of the Torino carnival. The bars were made with chocolate and almond liqueur and hazelnuts, and I used to steal them from the kitchen and stuff them in my pockets. Then they would melt, so I had to wash them out to hide the evidence, and walk around with wet trousers.
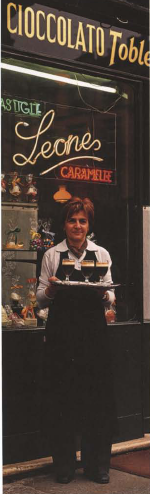
The idea of mixing toasted hazelnut paste and chocolate was made famous in 1865 by a Torino chocolate maker, Michele Prochet, who created the city’s specialty, gianduiotto chocolates wrapped in gold papers, to celebrate the carnival season, shaping them like the hat worn by the Gianduia character. The idea was born out of scarcity – the Napoleonic Wars meant that the chocolate makers of Torino couldn’t get enough cocoa beans, so Prochet made the chocolate go further by adding the local Tonda Gentile hazelnuts. But Piemonte is probably most famous for Nutella, which was created in the forties by another genius, Pietro Ferrero (of Ferrero Rocher), in Alba. Chocolate was scarce again during the war, so he added the local hazelnuts to make a paste, which he called Pasta Gianduia, and wrapped it in foil, so that it could be sliced and eaten on a piece of bread. Eventually, in the sixties, it became even more spreadable – supercrema – and was sold in a jar and renamed Nutella.
Sometimes at Locanda we make a chocolate fondant with a filling of a chocolate and hazelnut liqueur called Bicerin di Gianduiotto (see page 594), which is now being exported and reminds me of those flavors. Bicerin is another famous Torinese speciality, a drink that has been made for centuries and that you will find in most bars. As always, there is a big debate about who makes it the best way – but it contains layers of chocolate, milk and sugar heated together, hot coffee and whipped cream, and the most famous bar to drink it in is Al Bicerin in Piazza della Consolata.
Real, pure chocolate is a world apart from the sweetened bars the British and Americans love so much. The big, multinational chocolate companies put their money into cultivating high-yield varietals of beans such as Forestero in West Africa, which can be produced on a massive scale. Then they either buy cocoa “mass’’ or “liquor,’’ or they blend beans from different countries to a recipe that means their chocolate always tastes the same. However, there are a growing number of small, serious chocolate makers who are excited about showing off the individual characteristics of different varieties, grown in particular geographical conditions, which can be compared to the way we think of coffee beans in the same way as the single “crus” of the wine world. Often they look to the ancient plantations of South America, and particularly the Criollo bean, which is difficult to grow and produces only enough for around 2 percent of the world’s cocoa production. You can see a great similarity between the production of great chocolate and that of great wine. Sara Jayne-Stanes, a director of the Academy of Culinary Arts and an expert on chocolate, talks about roundness and aftertaste, and length in the mouth, and describes the flavors of individual chocolates in terms of ripe red fruits and plums, wood, tobacco, tea, spice, leather and earth, just as a wine taster might. According to her, the cocoa bean has more than 400 distinct aromas and 300 different tastes.
One of our most popular desserts at Locanda is a tasting plate using two different styles of chocolate from the house of Amedei in Pontedera, near Pisa, which we use in many different ways, from parfait to foam to nougat: the idea is to create different textures to show off the different properties of the chocolate.
Most of the chocolate we use at Locanda is made by Alessio Tessieri and his sister Cecilia, the master chocolate makers at Amedei, and we work with them developing ideas and sending our pastry chefs out to Italy to learn about how to use the chocolate – because these are people who, like us, are truly in love with what they do.
The story of Alessio and Cecilia is fantastic. When they took over a small praline business, they wanted to buy some wonderful chocolate to coat the pralines. So Alessio went to Lyon, to the head office of Valrhona, the famous French chocolatiers, to see if they could buy their chocolate, and they were told “no” – because Italy was not ready to accept chocolate of this quality. You can imagine how Alessio felt – but it made him more determined to find his own chocolate, and the goal was the famous Criollo cocoa beans from Chuao in Venezuela, which at the time were sold, via middlemen, only to a few chocolatiers such as Valrhona.
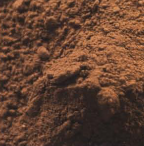
This is cocoa that is being grown on the edge of nowhere, beyond mountains and rain forests, where the people of the little town of Chuao are descended from the slaves brought over by the Spanish conquistadors in the seventeenth century, but the cocoa is considered to be very, very complex and sophisticated, and in the hands of Amedei, it produces chocolate that has a fantastically powerful, rich and fruity flavor.
Trading cocoa is often a dirty, corrupt business, in which poor farmers have traditionally been squeezed by the big players, who decide how much their beans are worth – and what else can they do but sell? So Alessio offered to pay the farmers directly, giving them a higher price, taking on their debts and committing himself to increasing the productivity of the plantation, in return for exclusive rights to the Chuao plantation. It was quite something to pull off, and not only that, but he also managed to gain exclusive rights to the even rarer Porcelana beans, which are grown near the border with Colombia, and which make a very delicate chocolate, often described as having notes of roast almonds. The production is so limited that each box is numbered. They also make selections of chocolate from Venezuela, Madagascar, Jamaica, Trinidad, Ecuador and Grenada, as well as Toscano Black, which is their special, rich, spicy blend of Criollo and Trinitario (a cross between Criollo and Forestero) and which we use alongside the Chuao in our desserts.
What is special about Alessio and Cecilia is that they watch over and control every stage of production, right from the processing, fermentation and drying (which is done in the country of origin) to the roasting and grinding, which is done back in Pisa in their old granite mill. To make the chocolate so smooth, each granule is no more than 15 microns, compared to the standard for the chocolate industry of 30 microns. Apparently, the human mouth is able to detect granules only over 18 microns, which shows you how particular they are about every detail. Not only have they made Italy famous for chocolate but they produce it in a way that supports and looks after the people who grow the beans.
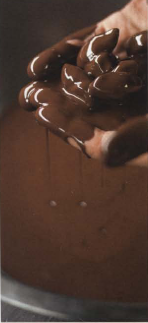
Note: When you melt chocolate, either do it gently in a bowl over a pan of barely simmering water (don’t let the bowl touch the water), or put it in the microwave, using the defrost setting. Don’t put it straight into a pan over direct heat, let any boiling water come in contact with it, or use the microwave on full power as you might burn the cocoa, which will give the chocolate a bitter edge and cause it to “seize,” i.e., turn thick and gritty.
This is part of our Amedei Tasting Plate, but it is fantastic to serve on its own, with or without the chocolate foam. For the foam, you need a 0.5-liter (2-cup) siphon. Of course, you can use any good chocolate (at least 70 percent cocoa solids), but we use Toscano Black for the foam because it has a deep, strong flavor that holds up well in the foam, gives you a big hit in the mouth, and then fades; whereas the Chuao, which we use for the parfait, has a rich and more persistent flavor that works well with the egg whites and cream, is able to come through strongly despite the coldness of the parfait (cold can dull flavors) and lasts longer in the mouth. I love this parfait, which we make using a meringue in which the sugar is heated with the egg whites before whipping (sometimes called Swiss meringue), but is very straightforward to do. Even if you don’t want to add the foam, you can just make the parfait, keep it in the freezer and then slice it and serve it with some cream.
1 cup whipping cream
6 ounces Amedei Chuao or Valrhona chocolate (at least 70 percent cocoa solids)
⅓ cup egg whites
⅓ cup superfine sugar
2 tablespoons plus 1 ½ teaspoons dextrose
For the chocolate foam:
8 ounces Amedei Toscano or Valrhona chocolate (at least 70 percent cocoa solids)
1 tablespoon plus 2 ½ teaspoons sugar
1 cup plus 1 tablespoon still mineral water
Whisk the cream until it is firm and holds in peaks. Put into the fridge.
Melt the chocolate in the microwave on defrost, or very gently in a bowl over a pan of barely simmering water (make sure the base of the bowl isn’t actually in contact with the water). Set aside.
Put the egg whites and sugars in a separate bowl over the simmering water, whisking all the time, until the sugar has melted and the mixture is hot to the touch (122°F if you have a candy thermometer). Take off the heat and continue to whisk (use an electric mixer if you like) until the meringue is cold and firm, and will stand up in peaks.
With a spatula, begin to fold the meringue into the chocolate. Mix in one-third first, then the rest, then add the cream. Fold that in lightly, trapping as much air into the mixture as possible.
Line a metal or plastic tray with plastic wrap, spoon in the mixture, smooth with a spatula and freeze for at least 3 hours until firm.
To make the foam, first melt the chocolate in the same way as above. Put the sugar and mineral water into a pan and bring to the boil. Take off the heat and whisk in the melted chocolate, a little at a time, like making mayonnaise: otherwise the mixture might split.
Take off the heat and pass through a fine sieve, then into the soda siphon. Close up and charge with the gas, while the liquid is still hot. Shake and put into the fridge for about 2 hours until cold. Keep cold until the moment you want to serve it; otherwise it will collapse.
When ready to serve, turn out the parfait, remove the plastic wrap and cut it into slices. Serve with the foam squirted alongside.
Torta al cioccolato e mandorle
This tart has a fantastic sheen from the chocolate glaze, which we pour over it while it is still warm. Then we sprinkle it with grué de cacao – chopped or ground “nibs” (raw cocoa beans without their shells), which are very chocolatey and bitter tasting.
Serves 6–8
½ recipe quantity of Sweet pastry (see page 536)
14 ounces good dark chocolate (at least 70 percent cocoa solids), finely chopped
1 scant cup whipping cream
1 egg plus 1 extra egg yolk
¾ cup milk
11 toasted almonds (or roasted hazelnuts), chopped
For the glaze:
½ cup superfine sugar
¼ cup water
1 ¾ ounces good dark chocolate (at least 70 percent cocoa solids), finely chopped
1 tablespoon corn syrup
¼ cup good cocoa powder
2 tablespoons plus ½ teaspoon whipping cream
To finish:
grué de cacao (optional, see above)
cocoa powder, to dust
Preheat the oven to 345°F
Roll out the pastry and use to line a 11-inch nonstick tart tin. Line with ovenproof plastic wrap, fill with rice or dried peas or beans and bake blind for 4 minutes. Remove the weights and plastic wrap, and return to the oven for around 7 to 10 minutes, until cooked but only very lightly colored (the base should feel firm when you touch it). Take out and turn the oven down to 285°F.
Melt the chocolate (either gently in a bowl over a pan of simmering water, or on the defrost setting of the microwave).
Put the cream in a pan and, when it comes to a boil, remove from the heat and add to the chocolate, mixing well
.In a separate bowl, whisk the egg, extra egg yolk and the milk, then add to the bowl of chocolate cream. Stir in the chopped nuts.
Spoon the mixture into the pastry and put back into the oven for 6 to 7 minutes, until the sides are set but the center moves a bit if you gently shake the tin (don’t touch the topping or you will leave marks). The mixture will set as it cools, so if you leave it in the oven until it is completely firm, by the time it is cool it will be dry.
Allow to cool slightly, remove from the tin and put on a serving plate.
To make the glaze, first make a syrup, by putting the sugar into a pan with the water and heating until the sugar dissolves. Take off the heat and leave to cool. Put the chopped chocolate into a bowl. Put the syrup and corn syrup in a pan with 1 tablespoon plus 2 teaspoons water and bring to a boil. Add the cocoa powder, carefully, a sprinkle at a time, or it will spit, and bring back to the boil. Take off the heat and pour over the chopped chocolate, stirring until it is melted. Add the cream and mix well, then pass through a fine sieve to make sure it is completely smooth.
While the tart is still warm, spread the glaze over the top with a palette knife or rubber spatula to form a dark, shiny surface and leave to cool completely. Sprinkle with grué de cacao (if using) and dust with cocoa powder.
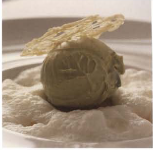
Here the sablé biscuit is really just to raise the ice cream, which sits in the soup – you can either make the cookie as described on page 578, or buy some good ones, or something similar – and the caramel, which we make with condensed milk, helps to stick the biscuit to the base of the serving bowl to prevent it from sliding around when the waiter carries it.
Sometimes, for a change, we make a milk chocolate soup, rather than white chocolate. We melt 6 ¾ ounces good milk chocolate (at least 70 percent cocoa solids), then put 3 ¼ ounces whipping cream in a pan with 3 ¼ ounces milk and bring to a boil, take off the heat and then gradually whisk into the melted chocolate, finally whisking in ½ cup water at room temperature. We cool it and leave overnight or for 12 hours in the fridge. Instead of the orange and passion fruit jelly, we make a jelly with caramelized honey. We use 3 tablespoons plus 1 ½ teaspoons white clover honey, which we heat to 325°F, then take off the heat and very slowly and carefully whisk in ⅓ cup hot water, taking care not to let it splash and burn the skin. Then we squeeze out 2g gelatin leaves that have been soaked in water and add them to the honey, and leave it to cool and set in the fridge – again overnight or for 12 hours. We serve the soup in the same way, substituting a Hazelnut wafer (see page 575) for the sablé biscuit, and Hazelnut ice cream (see page 568) for the Pistachio ice cream.
3 ¾ ounces white chocolate
1 cup whipping cream
5 tablespoons plus 1 teaspoon milk
⅓ cup plus 1 tablespoon yogurt
For the orange and passion fruit jelly:
¼ cup orange juice
1 tablespoon plus 2 ¼ teaspoons passion fruit juice
sugar to taste
2g gelatin leaves, soaked in water and squeezed
To serve:
one 14-ounce can condensed milk, for the toffee
4 sablé biscuits, bought (or make your own as described on page 578)
Pistachio ice cream (page 568)
4 Apple crisps (page 581)
Make the toffee using a can of condensed milk (see page 522).
To make the soup, melt the chocolate in the microwave on the defrost setting or in a bowl set over a pan of barely simmering water. Don’t let the base of the bowl touch the water.
Combine the cream and milk in a pan, and bring to a boil. Remove from the heat.
Pour the mixture in a slow stream onto the chocolate, whisking continuously (as you would for mayonnaise), until it is all incorporated. You need to do this slowly so the mixture emulsifies properly.
Leave to cool, then mix in the yogurt. Leave in the fridge for at least 3 hours, and until 10 minutes before serving.
To make the jelly, reduce the orange juice down to 2 tablespoons. Cool, put in a bowl and add the passion fruit juice and sugar to taste.
Heat a tablespoon of the juice mixture in a pan, then add the squeezed gelatin leaves and stir until dissolved. Take off the heat and stir into the rest of the juice mixture. Put in the fridge for at least 30 minutes until set.
When ready to serve, put a little toffee in the center of each of 4 soup plates, with a biscuit on top.
Take the chocolate mixture from the fridge and froth with a hand blender, to give a bubbly, cappuccino effect. Spoon the soup into the plates, just up to the level of the biscuit – don’t pour it over the top or the ice cream won’t stick to the biscuit.
Scoop a ball of ice cream on top of each biscuit. With a teaspoon, scoop out 16 small pieces of jelly (you want only little pieces, as the jelly is quite sharp and acidic, to cut through the creaminess of the chocolate). Arrange 4 pieces, like jewels, around each plate. If you like, top each ball of ice cream with an Apple crisp (see page 581).
The idea of these chocolate fondants is that, when you cook them, the creamy center stays cold. We serve them with Milk ice cream, garnished with a Hazelnut tuile – but you can use vanilla ice cream and a cookie of your choice, or just serve the fondants as they are. You can make them up to four days in advance, and have them in the fridge, ready to go.
⅓ cup plus 1 teaspoon all-purpose flour
½ heaping teaspoon baking powder
3 ½ teaspoons cocoa powder
3 ½ ounces dark chocolate (at least 70 percent cocoa solids)
7 tablespoons unsalted butter, softened
2 large eggs
⅓ cup superfine sugar
For the chocolate sauce:
25g superfine sugar
2 tablespoons plus 1 teaspoon cocoa powder
⅓ cup plus 1 tablespoon whipping cream
For the saffron filling:
5 tablespoons milk
1 ⅓ teaspoons cornstarch
5 tablespoons whipping cream
generous pinch saffron threads
1 ½ ounces white chocolate, chopped
To serve (optional):
Milk ice cream (see page 561)
4 Hazelnut tuiles (see page 574)
To make the sauce: bring 3 tablespoons plus 1 ½ teaspoons water and the sugar to a boil in a pan. Whisk in the cocoa powder very slowly – just a sprinkle at a time – so that it doesn’t spit. When it is all incorporated and boiling again, add the cream, bring back to a boil and then turn the heat down and reduce for 5 to 10 minutes very slowly, whisking occasionally, until you have a thick sauce. To check it is the right consistency, spread a spoonful onto a plate; it should hold its shape and look dark and shiny.
To make the saffron filling, mix a little of the milk with the cornstarch to make a paste. Mix the rest of the milk with the cream and the saffron in a pan. When almost boiling, add the cornstarch. Bring to a boil. Boil for 1 to 2 minutes to cook out the starchy flavor.
Take off the heat and add the white chocolate. Whisk until the chocolate has melted. Pour into a container, to make a layer ¾ inch deep. Put in the freezer.
When it is solid, take a pastry cutter 4 inches in diameter and cut out 4 cylinders. Put back into the freezer.
To make the fondant, mix the flour, baking powder and cocoa powder together, and pass through a fine sieve.
Put the chocolate in a bowl set over a pan of barely simmering water (don’t let the base touch the water) until the chocolate melts. Take off the heat and stir in the softened butter.
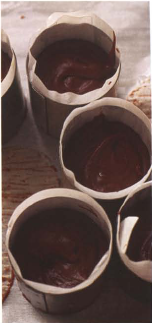
Beat the eggs and sugar together until pale, then mix into the chocolate mixture with a spatula.
Slowly fold in the flour and cocoa powder until they are incorporated.
Take 4 pastry rings, 2 ½ inches deep and 2 inches in diameter, and lay them on a sheet. Grease them with butter, then line them with buttered parchment paper, to come about ¾ inch above the rim. Pipe in the mixture to halfway up each ring, then put one of the disks of saffron filling that you have been keeping in the freezer on top. Press down (the cold will set the walls of the fondant around it) and pipe the rest of the mixture over the top, up to three-quarters of the height of the ring. Don’t fill it any higher, as it will rise in the oven. Keep in the fridge for 2 hours until the fondant is completely cold and solid (by now the filling will have defrosted and be liquid).
Preheat the oven to 355°F and put in the fondants for 9 minutes until they have risen and taken a little color.
While the fondants are in the oven, have your plates ready, decorated with some chocolate sauce. If you like, at the last minute you can add a scoop of ice cream and decorate that with a hazelnut tuile. Loosen the fondants from their rings, remove and put one on each plate. Serve immediately.

Variation
Sometimes we serve them with a filling made with basil rather than saffron.
The day before, we put 1 ¾ ounces basil into a pan with the milk, then warm it up to infuse the flavors, leave it to cool down, pass it through a fine sieve and put it into the fridge. Then we make the filling in exactly the same way, omitting the saffron.
In addition to the milk ice cream, we make a little green apple compote to go with it. We peel ½ green apple slices and cut them into small cubes, then put 2 tablespoons sugar and 1 ½ teaspoons into a pan, and heat to make a light golden caramel, then we add a teaspoon of lemon juice and the apple, and cook it slowly until the apple is soft. Then we cool it and put it into the fridge to chill before serving.

This is a very straightforward dessert that uses a different technique that has become a classic. You simply make your chocolate mixture with a low ratio of flour to chocolate and, in this case, the Bicerin di Gianduiotto liqueur that is famous in Torino (see page 584) and is now available online.
The cleverness of desserts like this is that they are “self-saucing” – when they are in the oven the center remains liquid and will ooze out when you put your spoon into the fondant.
Make the fondant in the same way as for the previous recipe, but using ¾ cup flour. Sieve with the ½ heaping teaspoon baking powder and 3 ½ teaspoons cocoa powder and set aside.
Melt 2 ⅛ ounces dark chocolate (at least 70 percent cocoa solids) and mix it with 7 tablespoons softened butter, together with ¾ cup plus 2 tablespoons Bicerin di Gianduiotto.
Beat 2 large eggs with ⅓ cup superfine sugar until the mixture becomes pale, incorporate this into the chocolate mix using a spatula, and finally fold in the flour and cocoa.
Grease 4 pastry rings, lay them on a baking tray, spoon in the mixture, and bake in an oven preheated to 390°F for 7 minutes. Lift out with a spatula and slide off the rings to serve.
Sformato d’arancia e cioccolato, pannacotta all’acqua di rose
We make this with what everyone in the kitchen now calls Margherita’s chocolate sponge – it is the one we make for my daughter that doesn’t contain eggs, as she is allergic to them.
The chocolate sponge is layered with caramelized blood orange segments, and topped with rosewater pannacotta. We also serve it with lemon thyme ice cream.
It is difficult to make small quantities of sponge, so you will end up with more than you need for this dessert, but it is so good, I am sure it won’t be wasted.
We use a little white wine vinegar in the mixture, which might sound odd, but its acidity helps to relax the protein in the flour, with the result that the sponge becomes lighter.
butter for the cake pan
1 ½ cups plus 1 tablespoon flour, plus more for the cake pan
3 scant tablespoons cocoa powder
½ heaping teaspoon baking powder
½ heaping teaspoon bicarbonate of soda
¼ cup superfine sugar
⅓ cup vegetable oil
⅓ cup water
¼ cup white wine vinegar
For the rosewater pannacotta:
⅓ cup plus 1 tablespoon milk
½ vanilla bean, split lengthwise
1 heaping tablespoon superfine sugar
2g gelatin leaves, soaked in water and squeezed
2 teaspoons rosewater
For the blood orange segments:
8 blood oranges
fresh orange juice (blood orange juice if you can find it)
⅓ cup superfine sugar
1 heaping tablespoon pectin
For the chocolate glaze:
½ cup superfine sugar
⅓ cup water
2 ½ teaspoons corn syrup
¼ cup cocoa powder
1 ¾ ounces chocolate (70 percent cocoa solids), finely chopped
2 tablespoons plus ½ teaspoon whipping cream
To serve (optional):
4 Lemon thyme caramel wafers (see page 580)
4 Blood orange crisps (see page 581)
Lemon thyme ice cream (see page 562)
Preheat the oven to 340°F and butter and flour a 6-inch square cake pan.
Make the sponge by sieving the dry ingredients in a bowl, combining all the liquid ingredients, and mix the two until smooth.
Pour the mixture into the prepared pan and bake for 18 minutes, until a skewer inserted into the center comes out clean. Leave to cool in the pan. Then, when cold, transfer to the freezer for an hour to firm up the sponge and make it easier to cut.
Use a 2 ½-inch diameter pastry cutter to cut out 4 disks from the sponge, then carefully cut each disk horizontally to give 4 thin rounds from each one. Keep the discs in the fridge until von need them.
To make the pannacotta, warm the milk in a pan with the vanilla bean (scraping in the seeds) and add the sugar. When it has dissolved, add the gelatin. Heat gently until hot to the touch (if you have a candy thermometer this will be 150°F), let cool a little (to 113°F), then add the rosewater (if the mixture is too hot, the alcohol will evaporate, and the flavor will disappear with it). Pour into a bowl, cool as quickly as possible, remove the vanilla bean and put in the fridge until set.
To prepare the blood orange segments, segment the blood oranges, spread out on a tray or plate that will go in the fridge, and set aside. Discard the pith and squeeze what is left of the oranges to extract as much juice as you can. Make this up to 2 cups plus 2 tablespoons with fresh orange juice. Mix the sugar with the pectin (mixing them will stop the mixture from turning lumpy when you add them to the juice). Heat the orange juice in a pan, and, when it is just smoking (150°F), add the sugar and pectin, whisk in and bring to a boil for just 1 minute. Pour over the orange segments and leave on a counter to cool.
To make the chocolate glaze, put the sugar in a pan with 3 tablespoons plus 1 ½ teaspoons water and heat until the sugar dissolves. Take off the heat and leave the syrup to cool. Put into a pan with the corn syrup and 5 ¼ teaspoons water and heat. When it starts to boil, add the cocoa powder very slowly, just a sprinkle at a time to prevent it from spitting and splashing. Bring back to the boil, then take off the heat. Add the chopped chocolate, let it melt, then add the cream. Pass through a fine sieve and leave to cool.
To serve, place a clean 2 ½-inch diameter pastry cutter in the center of each of 4 plates. Put a disk of chocolate sponge in the bottom of each, then spoon in some of the orange segments, add another disk of sponge, and some more orange, then repeat, ending with sponge. Carefully slide off the pastry cutters, spoon on some glaze and serve with a scoop of pannacotta. Garnish with a lemon thyme caramel wafer (optional). If you like, you can arrange a blood orange crisp alongside, and top with a scoop of lemon thyme ice cream.
Frittelle di cioccolato e banana
Life would be miserable without beignets, which is just a fancy way of describing doughnuts; there is nothing better. You need to put them in the freezer (in ice cube trays) for several hours or overnight to harden before you fry them, but you can make large amounts and then cook them from frozen any time you like. We sometimes serve the beignets with a milk wafer cone (see page 578) filled with coffee ice cream (see page 566).
Makes around 20
small beignets
1 small (6-inch) peeled banana
2 ½ teaspoons superfine sugar
⅓ cup plus 1 tablespoon milk
7 tablespoons unsalted butter
100g (3.53 ounces) all-purpose flour
3 eggs
around 40 (about 3 ½ ounces) plain chocolate pastilles (55 percent cocoa solids)
To serve (optional):
4 Milk crisp cones (see page 578)
Coffee ice cream (see page 566)
In a blender, puree the bananas with the sugar. Put the milk and butter in a pan and bring to the boil. Add the banana puree, bring back to a boil, then add the flour and fold in. The mixture will come together like a dough. Cook for a minute, then put into a mixer with a paddle attachment and, while still hot, add the eggs slowly, one at a time, until they are all incorporated.
With a pastry bag, pipe the mixture into soft flexible ice cube trays, filling each compartment three-quarters full. Press 2 pastilles of chocolate into the middle of each one. Make sure that the chocolate is completely surrounded by dough, as the mixture is going to be deep-fried and, if the chocolate isn’t encased inside, it will disappear into the oil. Pipe a little more dough on top to bring the level up to the top of the tray. You should have enough mixture for about 22 beignets – you need a couple of extra to use as testers, to see whether they are ready when you deep-fry them. Cover with plastic wrap and put in the freezer for several hours or overnight until hard.
Heat some oil in a deep-fat fryer to 340°F or use a pan (no more than one-third full). Check the temperature by putting in a beignet. After 5 minutes, take it out and cut it in half. The chocolate should have begun to melt and the dough will be cooked. If it is too golden on the outside, and not cooked inside, lower the heat a little.
Fry your beignets in batches, for 5 minutes each. Drain them briefly on paper towels, then arrange about 5 on each plate. Serve, if you like, with the cones and ice cream.
Like salami, the regional cheeses we have in Italy tell a story about the way many people were living until the beginning of the last century. In some of the most remote places, particularly in the north, very little has changed: shepherds still spend part of the year in the mountains, tending a few cows, sheep or goats, with only spartan places to sleep and eat. Mountain communities have traditionally been poor in terms of money but rich in tradition and values. Cheese was bartered for other foods, paid as rent to landlords, and of course cheese is what everyone ate. There is a cheese called Bitto, from my region of Lombardia, the oldest cheese in Italy made with cow’s milk, something that was introduced by the Celts. Bitto is a big, solid block of cheese, and the name means “forever’’ in the Celtic language. The idea was that you gave people this cheese, they could put it in their bag and travel through the mountains, and it would last “forever.’’
All over the world there has been a big revival of interest in artisan produce, and in many regions, traditional cheeses are protected by vigorous consorzio, who give the PDO stamp only to high-quality cheesemakers following particular criteria in a designated region. At the same time, though, for many families who have been making cheeses in a small way for generations, it has been hard to keep going in the face of EU regulations and demands for modern equipment, so it is very important that we continue to support them or their traditions will be lost. We buy our cheeses from Marco Vineis, who has a fantastic shop called Gastronomica next to Borough Market in London. Marco used to work in a bank to satisfy his parents, but the moment he could break free, he started his little business, indulging his love of cheese (he also sells wonderful salumi, bread – including my favorite, the rosetta panini – mustard fruits, etc.). He jokes that he talks about cheese so much he has no friends. He knows everything about the cheeses, the animals, what they eat, and the old stories about how each one came to be made in the first place. Whether they are true, who knows, but as he says, “Why spoil a romantic story with reality?”
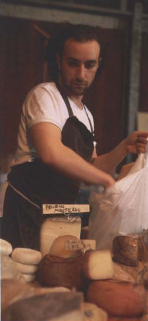
Marco, who, like me, is from the north of Italy, has established links with small cheesemakers in the mountains, some of whom we have come to know well, and we believe that by having their beautiful cheeses on our board at Locanda we are not only giving people a taste of something a little different but helping to regenerate the economy of the mountains. There are supposed to be more than 400 cheeses in Italy, but in reality, there are many more. For example, in Piemonte alone there are 100 valleys, each with its own version of the traditional Toma cheese (very similar to the cheese made on the French side of the border, Tomme de Savoie). It is funny to think that if you were to walk into Gastronomica you could taste more Italian cheeses than most Italians have ever tasted, because if you go to a cheese shop in Torino or Toscana, you will find only what is made locally.
These are just a selection of the cheeses we have at any one time at Locanda, along with Ovinfort (see page 69) and Castelmagno (see page 244).

Caprino Lo Puy
These are beautiful little creamy goat cheeses, made by a family who live in an old church they are protecting from falling into ruin, high up where eagles fly, overlooking a valley. They have 52 goats and all the cheeses are made with their own milk, in shapes from pyramids to rounds, matured at a slightly different rate, so they have different characters.
Formaggio di Fossa
These are not “easy” cheeses, but they are fascinating and I love them. They are made in Romagna and their name comes from the way they are matured, in underground pits near the river Rubicon. In the Middle Ages they dug out lines of wells at the side of the river in order to contain the water when the river rose too high, and to stop it from flooding the local villages. Much later, when the course of the river had changed, the partisans used them as underground cellars to hide cheese and grain from invading armies. These days they are lined with straw and fitted with wooden shelves and used to mature fresh sheep’s milk cheeses inside cloth bags. Once the cheeses are inside, covers are put over the top. Traditionally the cheeses went in at the end of August and came out on St. Catherine’s day, November 24. Now the cheeses are so popular it is much more of a continual process. Even so, you can imagine the smell as the covers are removed after several months, because inside all the pungent aromas from the cheeses have been building up like a bomb, but the cheeses themselves are quite light and crumbly, and according to the time spent in the fosse, have an aroma that develops as you eat: a mix of pure animal, autumn woodland, mushrooms and truffles … all my favorite things.

Gorgonzola
This is one of our most famous Lombardia cheeses. At one time in England everyone knew it as Dolcelatte, which is actually the name of a manufacturer of sweet, young Gorgonzola, matured for only 20 days, which we call dolce, as opposed to mature Gorgonzola, matured for 90 days, and known as piccante. There is a story that the first Gorgonzola was actually a Stracchino (the pure white soft cheese of Lombardia), which an innkeeper left for a few weeks in the kitchen, then realized it had become blue with mold. It tasted good, so it began to be made in this way.
Gran Sardo
This is one of the newer style of cheeses that they are beginning to make in Sardegna, from sheep’s milk. In this region they have one of the highest populations of sheep in Italy – over 7 million – and the milk is usually used to make Pecorino Romano, much of which is exported to America to put on top of pizza. But now they are beginning to experiment with slightly different styles, and this one is more like a Parmesan.

Nostrano Val di Fassa
This is a very distinctive cheese, very strong-smelling, and different from most Italian cheeses as it is made up in the Dolomites in the Tyrolean region, close to Trentino–Alto Adige, so in character it is quite close to an Austrian or Swiss cheese. During the maturation, the cheeses are washed regularly with a solution of water and salt, which softens their quite pungent smell. The cheese is fantastic on its own with a glass of wine, or it can be melted over polenta, or in a sauce for gnocchi.
Pecorino di Pienza
Pienza is a small town in Toscana, close to Siena, that is famous for pecorino, and if you go there it is like stepping back 2,000 years in time. The pure sheep’s milk cheeses are produced from December to September, then there are a couple of months when the sheep need more milk to feed their lambs, so at this time a little cow’s milk is added to the cheese. The very young, fresh cheese is a creamy color, then when it is semi-mature, at around 40 days, the rind is painted with oil that has been colored with tomato and, when it is more mature, painted with oil colored with black olives.
Piave
Produced in Veneto, in the valley of the Piave river, which is famous for a battle the Italians won against the Austrians during the First World War, the cheese has the consistency of Parmigiano-Reggiano, but it is younger and has a slightly different flavor, a little like Montasio. It is good shaved over bresaola as well as for eating as it is. When it has been “medium” aged, it is called mezzana, but the best is the stravecchio, the aged cheese.
Sola
Sometimes called Sora, the cheese is made with a mixture of raw cow’s and goat’s milk, and is roughly square and a little flat. Some say the name was given because the cheese looks like the sole of a shoe, others that the cheeses are this shape because they used to stack them like slabs of stone. According to another story, the shepherds would bring the cheeses down from the mountains by donkey, bumping along in saddlebags, so by the time they reached the bottom they had become flat and square.
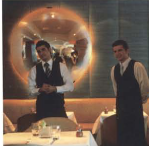
We have a saying in Italy, “The cobbler always has holes in his shoes.” Chefs are always hungry because we are so busy cooking for other people, if we’re not careful, we forget to feed ourselves. So we have beans on toast in front of the television at two o’clock in the morning, when we have finally locked up the kitchen for the night and crept home, long after people with normal lives are in bed. But we think about food all the time, we cook for our friends and families and eat out on our time off, and we dream about food and agonize and argue about it … a new way to prepare something that makes you crazy because you didn’t know about it before, a fish so beautiful it brings tears to your eyes …
I like to see people excited about food, awake, switched on to the possibilities every time a box of fantastic ingredients comes into the kitchen. If you look at chefs who are really successful, they have all had some experience of life outside the kitchen too – music or football or motorcycles or art … they are not the ones who come in to work, do their job quietly all day, then get the number 147 bus straight home.

I became a chef in the first place because in my uncle’s kitchen at La Cinzianella the chefs were not only more colorful but more independent than anyone else who worked there. My dad always said to me. “Don’t be a waiter – be a chef, then you can cook your food and go home; you have only to relate to your ingredients; not the customers.’’ It was true. At ten o’clock the kitchen was winding down, but outside in the restaurant the people were still there and the waiters had to be saints because you know. Italians will sit talking for hours on end, and they keep on asking for a bit of this, a glass of that; and the waiting staff had to pander to them. And in the back Auntie Luisa and Cousin Maurizio would be having an argument, because everyone was tired and just waiting to go home.
Later in life. I realized that you can have the kind of detachment my father talked about only when you are younger and without the responsibilities of your own restaurant. When you have your own place, you can do everything right all evening in the kitchen, but outside in the restaurant it only takes the credit card machine to tell some guy he can’t pay his bill, he gets angry, and the evening is spoiled. But when you have your own place, you are also in control of your own destiny, and that is worth everything.

Kitchens have their own unique microclimate and they can be hard places, extreme. But it isn’t true, as people who have read Anthony Bourdain’s book Kitchen Confidential might think, that kitchens are all full of crazy people, high on drugs or drink, getting mad at each other. Sometimes, though, you do have chefs with massive personalities who like to transmit their power and their ego all the time, and it’s a terrible shame when you see them bullying and putting people down in front of everyone. I really believe that a kitchen, even if it is tough sometimes, should be fair. These days, we love to hand out awards and make big stars out of chefs, but it isn’t right that one guy should get all the credit and the glory, because it is the team that does the job. You teach young chefs, of course, you get your kitchen to work in a certain way, and you check and taste everything, but everyone is important and none of us ever stops learning. Guys like Federico Sali, my sous chef, who is from Toscana, and our Catalan pastry chef, Ivan Icra, bring with them the ideas of their own regions, or the knowledge of a particular ingredient, and they influence what you do.
There are people who say you shouldn’t show your recipes to new guys in the kitchen until you trust them not to steal them and take them to the next kitchen, but for me cooking is about sharing. You eat in someone’s restaurant, and you see something that gives you an idea; you sit around talking shop with other chefs; sometimes you learn from raw kids who are just starting out. You can do something for twenty years and you can’t see it in any other way, then an eighteen-year-old comes in fresh to the restaurant world, and says. “Why don’t you do it like this?’’ and the moment he says it, you think. “What an idiot I am; why did I never see that before?’’

Every kitchen has its own rhythm. In the morning, when you are preparing, everyone is relaxed; there is a lot of banter and jokes. Then there are the two moments in the day when the people come in for lunch and dinner, and you kick off, Suddenly you have to get everybody’s attention focused, quick, ready to go, because you all have to react and work for each other.
In the old hotel style of cooking, everything was put on a plate and sat there with a cloche on top, waiting for the rest of the dishes to be done. In the modern way, each dish comes together at the last minute, and each table’s orders must be ready at the same time. You have to shout across the noise of the kitchen, so the person who is sautéing the fish is ready at exactly the same time as the one who is making the sauce, and the one who is doing the salad or making the pasta for someone else at the same table. So, like the build-up to a goal, we are talking about the collaboration of four or five people, and precision and timing are of the essence. You are sweating, out of breath, trying to keep your concentration, and if one person is asleep, or being too cocky, then the work of everyone else can be ruined.

You go through nightmares sometimes, because none of the customers has appeared when they are supposed to, then you have four tables that arrive together, and you can’t go out and say. “Sorry; some of you will have to wait half an hour more.’’ Everybody’s food has to go out now, and you have to get it right. It doesn’t matter how many times you cooked it previously and it was fantastic every time, because the people in the restaurant are going to judge you only on the dish they eat at that time.
At Locanda, just as I always promised myself we would be, we are one team. Everybody. Everyone eats together, holds meetings together, and tastes and discusses every new dish, so whenever a customer says. “What should I eat?.” all the staff really know what they are talking about.
Sadly, we recently lost a treasured chef at Locanda, Mario Bonaccorsi, who had been with us since the days at Zafferano and was in his sixties when he died just before this book was published. Mario was from Toscana, like Federico, and was like a father figure to us all. A real character, he had done so many things in his life and been a playboy in his time, and his stories were brilliant. Even after he was supposed to have retired, he missed the kitchen so much that he still insisted on coming in to do the butchering and he always helped us to teach the young boys. Mario was extraordinary in that he knew so much about the history of Italian cooking and ingredients; and he would always prepare the meals for the staff – because neither he, nor I, wanted them to be like cobblers with holes in their shoes.
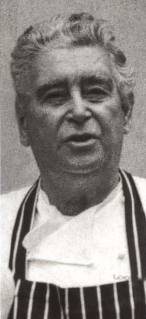
I’ve seen chefs in kitchens get nothing but cornflakes for lunch, or a piece of white bread with a bit of cheese on top to put under the grill. Or they live on burgers, because that is all they can find when they finish work late, or they don’t earn enough to eat out in restaurants. But if you get used to that flat, universal flavor of burgers, how are you ever going to come to really love and understand food? You can’t describe a flavor or a texture. You have to experience it. I learned that sitting outside La Tour d’Argent in Paris on a trash can, eating sausages, while the customers tucked into the three-star Michelin dishes I had helped prepare but never tasted.
With success, your life changes. There are times when I think a little wistfully about Corgeno, about La Cinzianella with its view over the lake. Sometimes I go into the kitchen at Locanda on a Sunday, when the restaurant is closed and it is so, so quiet, and I think back to the country rhythm I grew up with. Everyone was so much less stressed. What was the occasional argument between Auntie Luisa and Cousin Maurizio? During the week, trade would be gentle, and then busy on the weekends, and in the autumn and winter it would be especially quiet. On Tuesdays. La Cinzianella would be closed, and my grandmother would cook her special meal for the whole family at our house at the top of the hill; and every summer, everyone would go on vacation and simply shut the restaurant for two weeks.
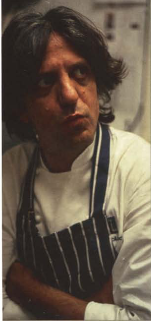
When we changed the menu for the month at La Cinzianella, we would do it on a Wednesday and have two gentle days to test and perfect the new dishes before the restaurant became busy on Friday. At Locanda, the menu evolves all the time; and if we decide on a new dish in the morning, because some fantastic prawns or mushrooms or artichokes have come into the kitchen, at lunchtime 80 people will try it, and another 120 at dinner.
When we go on vacation as a family to Sicilia, we stay in a tiny village, where there is a little restaurant called Da Vittorio. Vittorio, who is originally from the north of Italy, does all the cooking – and there is no menu. You just go in and he gives you whatever he has that is best – usually fish straight from the boats, and his own Limoncello. If he has enough people, and he doesn’t want to work anymore he will just say. “Shut the gates.” What a life – tempting? Not really, because the truth is, being still for too long is something I have never been good at, and when I look at what we have, Plaxy and I, and Margherita and Jack, it is fantastic.
I think of myself as an Italian who cooked in France but came of age in London. This is where I `grew up’ as a cook. Olivo was what I did in my twenties. Zafferano in my thirties; and now at Locanda, this is me at forty. One of my few regrets is that my granddad and my grandmother didn’t live long enough to see me and my family here at Locanda. One of the best presents I could have had would have been for them to come here, just for one day for one meal, to see what we do.
We are in this business, like my uncle at La Cinzianella, to serve people. If I didn’t love welcoming everyone to Locanda, cooking for them, trying to see that they have a good time, I might as well get a job as an executive chef in a factory producing pies. I could go to work at nine, come back at four, and have an easy life, and earn roughly the same amount of money. But here, at Locanda, you enter into people’s lives, and they enter yours.
This is what is exciting about we do: it is an important thing, which makes you feel very, very good. I tell the boys in the kitchen this all the time; it isn’t just the food, it is about conviviality, sharing, about giving something special, the best you can give. Of course, there are people who will eat here tomorrow, in another restaurant the next day, somewhere else the next, and only want to cross Locanda Locatelli off their restaurant list. But for every one of those, there is someone who has become a friend, and someone else who might pass you in the street and not remember your name, but they remember a dish, a meal, an occasion, or a moment that they will treasure for the rest of their lives. Really for the rest of their lives.