
CHAPTER 1


Mrs. Rowe’s is the house that pies built. No one has ever managed to put more inches of meringue on a pie—ever: homemade meringue, no less.
—Larry Bly, Roanoke Times
Along with luscious pie toppings, this section offers basic crust recipes and creative options for home bakers who are either strapped for time or crust-shy for other reasons. Experiment with the easy cookie crusts, which are not only quick and delicious, but also completely child-friendly. Both the Chocolate Cookie Crust and the Gingersnap Crust complement many fillings. Try the Chocolate Cookie Crust with the Smoothest Ever Peanut Butter Pie or the Gingersnap Crust with Willard’s Chocolate Pie. Imagine the possibilities and don’t be afraid to mix and match unexpected crusts and toppings—you might just come up with a winner.
A tiny, ball of energy of a woman, Mildred Rowe made everything seem easy with her quick wit and magic hands. But she was well practiced, having grown up on a farm in the Allegheny Highlands where everything was made from scratch or plucked straight from the earth. Not everybody grew up baking pies like Mrs. Rowe, but with practice and patience, it’s a skill easily learned.
Because pie has become an increasingly important niche at Mrs. Rowe’s Restaurant and Bakery and Mrs. Rowe’s Country Buffet, the ritual of making and even cutting the pie is taken seriously at both restaurants. Indeed, it’s a rite of privilege and honor to be trained to cut the pie. “You have to work here awhile before we even consider training you on cutting pie,” says Mike DiGrassie, smiling, about the Staunton Mrs. Rowe’s. “Cutting six equal slices is not as easy as it seems.” He also points out that slicing through a mound of meringue neatly is a bit tricky for the novice. The crust is also an important focus according to Mike, who notes, “If the crust doesn’t get cut through just right, the pie will tear and we won’t be able to serve it.” He recommends waiting until the pie has fully cooled, then cutting it with a blunt-tip serrated knife dipped in hot water.
At Mrs. Rowe’s Country Buffet, the focus is more on variety and less on huge portions. Slices of fruit pies are cut smaller, allowing two more slices out of each pie. Ten-inch cream pies allow ten slices. “The nature of a buffet is that people keep going back for more,” explains Aaron DiGrassie. “With the pie, they want to try each kind, so we keep the slices a little smaller.”
The toppings and sauces at both restaurants provide an extra hint of sweetness or smoothness, or a blast of flavor, on top of a slice of pie that’s already delicious.
Placing beans on the crust before inserting into the oven is a good way to keep the crust from popping up unevenly.
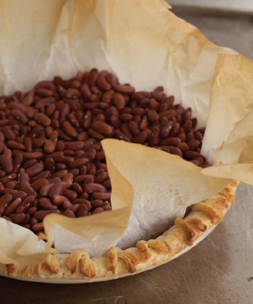
Handle the dough as little as possible.
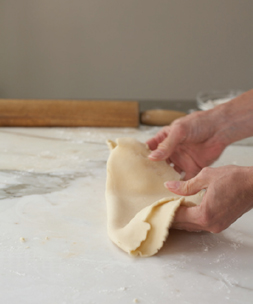
Roll the pie crust dough as flat and smooth as possible.

Smooth the crust gently into the pie plate.

You can use pastry scissors, other clean scissors, or your fingers to trim the crust.
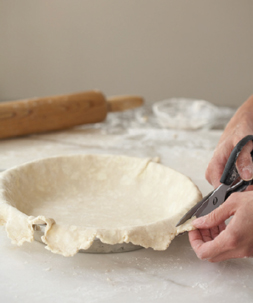
Gather the dough into a border and squeeze into shape.
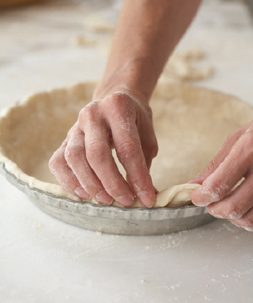
MAKES TWO 9- OR 10-INCH CRUSTS
Mildred’s light touch took years to master. Too much flour will make the dough tough. Use just enough to keep it from sticking to the rolling pin. Make the dough ahead of time and place it in the refrigerator wrapped tightly in plastic wrap. If you don’t have a pastry blender, you can use a fork here, as well as your fingers—if you start with cold hands and work fast. The more the shortening melts, the less flaky the crust will be.
2 cups all-purpose flour
1 teaspoon salt
⅔ cup vegetable shortening
5 to 7 tablespoons cold whole milk
Sift the flour and salt into a bowl. Cut in the shortening with a pastry blender until it is the size of small peas. Sprinkle 1 tablespoon of the milk over part of the flour mixture. Gently toss with a fork and push to the side of the bowl. Sprinkle another tablespoon over another dry part, toss with a fork and push to the side of the bowl. Repeat with the remaining milk until all of the flour mixture is moistened.
Press the dough together to form 2 equal balls, then flatten into disks. Roll out the crusts right away, or wrap the dough tightly, smoothing out any little wrinkles or air pockets, and refrigerate for up to 2 weeks. On a lightly floured surface, roll out each ball to a thickness of ⅛ inch. Use a light touch and handle the dough as little as possible.
To prebake an empty crust, preheat the oven to 400°F. Press 1 rolled-out crust into a 9- or 10-inch pie plate. Line with parchment paper and weigh the crust down with dry beans or pie weights to keep the crust from bubbling or shrinking. Bake for 10 minutes, until firm and lightly browned. Take the crust out of the oven and carefully remove the pie weights. Place the crust back into the oven. To parbake the crust, remove it from the oven after about 10 to 20 minutes, when you first see a golden hue to the crust. To fully bake the crust, continue baking until golden brown, about 10 to 15 minutes more.
HOW PIES ARE CUT:
Cut all fruit pies and Boston cream pies into eight slices. This includes peach, apple, all sugar-free pies, strawberry rhubarb, cherry, red raspberry, blueberry, French apple, Boston cream. And egg custard.
Cut all meringue pies and pecan pies into ten slices. This includes lemon, coconut, chocolate, peanut butter, and butterscotch.
I think that sometimes the best part of the pie is the crust. And we Southerners know that our Southern, soft-wheat flour is the best for making flaky pie crust. If you have a bad crust, it almost doesn’t matter if the filling is good.
—Lorna Reeves, editor, Taste of the South Magazine
MAKES TWO 9-INCH CRUSTS
The vinegar in this crust is a flavorless stabilizer, making the dough more forgiving and patchable. In addition to being easy to work with, it also tastes great—even butter-loving pastry fans enjoy the flavor.
2 cups all-purpose flour
½ teaspoon salt
1 cup plus 1 tablespoon vegetable shortening
1½ teaspoons distilled white vinegar
1 egg, lightly beaten
4 to 6 tablespoons ice water
Sift the flour and salt into a bowl. Cut in the shortening with a pastry blender until it is the size of small peas. Add the vinegar, egg, and just enough ice water to moisten the dry ingredients.
Form the dough into 2 equal balls, then flatten into disks. Roll out the crusts right away, or wrap the dough tightly and refrigerate for up to 2 weeks. On a lightly floured surface, roll out each ball to a thickness of ⅛ inch.
To prebake an empty crust, preheat the oven to 400°F. Press 1 rolled-out crust into a 9- or 10-inch pie plate. Line with parchment paper and weight the crust down with dry beans or pie weights to keep the crust from bubbling or shrinking. Bake for 10 minutes, until firm and lightly browned. Take the crust out of the oven and carefully remove the pie weights. Place the crust back into the oven. To parbake the crust, remove it from the oven after 10 to 20 minutes, when you first see a golden hue to the crust. To fully bake the crust, continue baking until golden brown, about 10 to 15 minutes more.
MAKES ONE 9-INCH CRUST
This crust, which has a nice tangy flavor, can be used in any recipe that calls for Plain Pie Pastry or Vinegar Pie Crust. It’s a good idea to chill the crust for at least 15 minutes before baking; this will help the crust stick together better.
½ cup cream cheese, at room temperature
½ cup unsalted butter, at room temperature
1½ cups all-purpose flour
Mix the cream cheese and butter together with an electric mixer on low speed until thoroughly combined. Add the flour a little at a time and continue mixing until thoroughly combined. The dough will be very crumbly. Press the dough together and smooth it over with your hands.
Shape the dough into a round disk and roll it out between 2 sheets of waxed paper to a thickness of ⅛ inch. Mend any cracks as you go along. If you have time, freeze the crust for 10 to 15 minutes before placing it in a pie plate for parbaking. If you don’t have time to freeze, it’s okay, but you still need to parbake this crust.
Preheat the oven to 350°F. Lift off the top sheet of waxed paper and use the bottom sheet to flip the dough into the pie plate. Remove the second sheet of waxed paper and prick the center of the crust with a fork. To parbake the crust, remove it from the oven after 10 to 20 minutes, when you first see a golden hue to the crust. To fully bake the crust, leave in the oven for another 10 minutes or until the crust is golden brown.
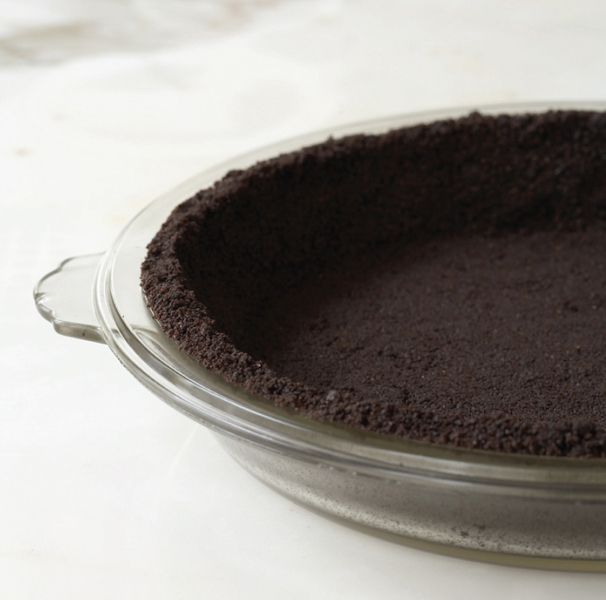
MAKES ONE THICK 9-INCH CRUST OR ONE THIN 10-INCH CRUST
A simple pie crust with countless creative possibilities, the Chocolate Cookie Crust has been paired with the Frozen Strawberry Margarita Pie and Grasshopper Pie in this book, but also consider using it with any of the lemon or peanut butter pies, or even the Spicy Pumpkin Pie. You can crush the crumbs using a food processor, rolling pin, or kitchen mallet. This crust should be baked before filling.
2 cups crushed plain chocolate cookies (without icing or filling)
6 tablespoons unsalted butter, melted
Preheat the oven to 375°F.
Combine the crumbs and butter and mix well. Firmly and evenly press the mixture into a 9- or 10-inch pie plate.
Bake for 8 to 10 minutes, until the crust darkens to a deeper (almost black) brown, then cool on a wire rack for at least 30 minutes before filling. This crust can be made a day ahead and stored in the refrigerator.
When I have leftover cookies, I often use them in my crust.
—Susan Simmons, baker at Mrs. Rowe’s Catering
MAKES ONE 9-INCH CRUST
This versatile crust, which is extremely easy to make, adds zip to any pie, and its enticing flavor offers many intriguing possibilities. In this book it’s paired with the Never Fail Lemon Pie, but you can also try it with pies like Cinnamon Sugar, Willard’s Chocolate, German Chocolate, Peanut Butter Custard, Peanut, or Layered Ice Cream. You can crush the crumbs using a food processor, rolling pin, or kitchen mallet. This crust should be baked before being filled.
½ cup plus 2 tablespoons fine gingersnap crumbs
¾ cup plus 2 tablespoons fine graham cracker crumbs
2 tablespoons sugar
¼ cup unsalted butter, melted
Preheat the oven to 325°F.
Put the crumbs in a small bowl and stir in the sugar. Pour the melted butter over the crumbs and mix thoroughly. Press the mixture evenly into a 9-inch pie plate.
Bake for 5 to 6 minutes, until slightly darker, then cool on a wire rack for at least 30 minutes before filling. This crust can be made a day ahead and stored in the refrigerator.
“Pie crust promises … easily made and easily broken.”
—Mary Poppins
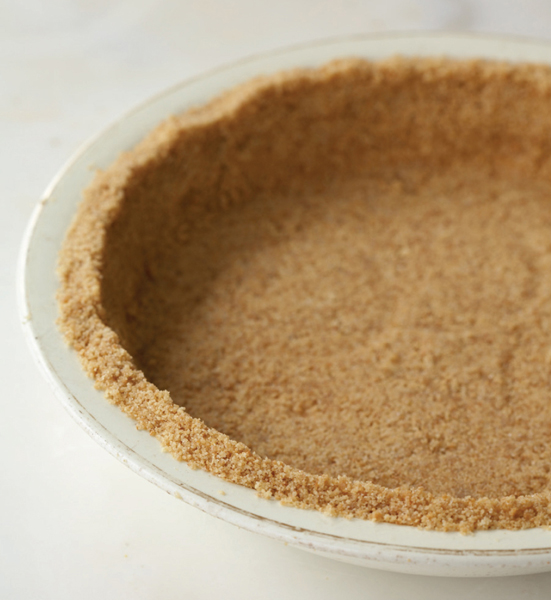
MAKES ONE 9-INCH CRUST
You can crush the crumbs using a food processor, rolling pin, or kitchen mallet, whichever you prefer. This crust should be baked before filling. If you use pie weights or beans to keep the crust from bubbling during baking (highly recommended), remove the paper and weights for the last few minutes of baking so the crust will brown well.
1½ cups fine graham cracker crumbs
¼ cup sugar
6 tablespoons unsalted butter, melted
Preheat the oven to 350°F.
Put the crumbs in a small bowl and stir in the sugar. Pour the melted butter over the crumbs and mix thoroughly. Press the mixture evenly into a 9-inch pie plate.
Bake the empty crust for 8 to 10 minutes, until a dark golden brown (it will continue to harden as it cools). Cool the crust on a wire rack for at least 30 minutes before filling. This crust can be made a day ahead and stored in the refrigerator.
MAKES ENOUGH TO COVER ONE 9-INCH PIE
Pile this meringue on as thick as you can for a splendid-looking pie. Meringue is a perfect opportunity for the home baker to get creative with the spatula. You can smooth it over, swirl it around, or make fancy peaks. No one way is better than the other. Mrs. Rowe insisted on using a chilled bowl for the mixing. It’s a bit of a mystery why, as modern bakers claim it’s unnecessary. Maybe her eggs were so fresh that they were still warm and she needed to bring them down to room temperature by using a chilled bowl. In any case, the bakers at Mrs. Rowe’s restaurants still use chilled bowls.
Weeping can happen with any meringue. A “weeping” meringue occurs when the sugar solution comes out of the meringue in drops. Sometimes a weeping meringue makes a slimy layer on top of the filling. The meringue will still taste yummy, but it won’t be as pretty. Sealing the edges of the meringue is an important step in helping to prevent weeping; it also helps assure that the filling won’t spill over. Just add some water to your fingers and press the meringue to the crust along the rim.
4 egg whites, at room temperature
¼ teaspoon cream of tartar
3 tablespoons sugar
Combine the egg whites and cream of tartar in a chilled bowl and beat with an electric mixer on slow to medium speed until soft peaks form. Add the sugar 1 tablespoon at a time and continue beating on slow to medium speed until the whites form stiff peaks but aren’t dry. The meringue is now ready to pile lightly over a pie.
MAKES ENOUGH TO COVER ONE 9-INCH PIE
Less puffy and showy, but just as delicious as Mrs. Rowe’s Meringue, this family recipe is a tougher breed. The salt and cornstarch fuse and stabilize it, making it easier to manage and giving it a harder glaze once it’s baked, which means less likelihood of weeping.
1 tablespoon cornstarch
8 tablespoons sugar
¼ to ½ cup hot water
3 egg whites, at room temperature
Pinch of salt
In a saucepan, stir together the cornstarch, 2 tablespoons of the sugar, and enough of the hot water to make a smooth paste. Bring to a simmer over low heat and cook, stirring constantly, until thickened and clear. Set aside to cool.
Combine the egg whites and salt in a chilled bowl and beat with an electric mixer on medium speed until soft peaks form. Add the cooled cornstarch mixture, and then the remaining 6 tablespoons sugar, 1 tablespoon at a time, and continue to beat until the whites form stiff peaks but aren’t dry. The meringue is now ready to pile lightly over a pie.
I’m not sure what “Southern” pie is, but I’ll give it some thought. Could it have something to do with blue hair bouffants and lofty meringue?
—John T. Edge, author and Southern food expert
MAKES 1 CUP
If you have never made your own whipped cream, you’ll be surprised by how easy it is—and by how much better the flavor is. Soft peaks barely hold together and make a lovely plop on the pie, but the cream doesn’t hold up well in this state, so use it quickly. Medium peaks will peak but flop over a bit, and stiff peaks will stand up straight. Stiff is what you want if you are folding it into something else. If you have any left over—most people don’t because it’s so delicious and easy to eat—it can keep in the refrigerator for a few days in any storage container, but you might have to whisk it a bit before serving.
1 cup heavy cream
1 to 2 tablespoons granulated sugar
1 tablespoon vanilla, optional
Beat the cream with an electric mixer on medium-high speed until frothy and beginning to thicken. Slowly add the sugar in a thin stream. Add the vanilla. Continue whipping until the cream is at the desired consistency.
MAKES 2 CUPS
This sauce is a must for the Layered Ice Cream Pie, where it meshes with the cookie crust and ice cream for a sinfully delicious combination of textures and flavors. If you’re adventurous, this sauce could top off almost any pie.
⅓ cup unsalted butter
1 cup firmly packed brown sugar
⅛ teaspoon salt
1 cup half-and-half
2 teaspoons cornstarch
2 teaspoons vanilla extract
Combine the butter, sugar, salt, and ¾ cup of the half-and-half in a double boiler. Cook, stirring constantly, until the sugar dissolves, about 10 minutes. Combine the cornstarch and the remaining ¼ cup half-and-half and stir to form a smooth paste. Gradually stir the cornstarch paste into the sugar mixture and continue cooking and stirring until the sauce thickens, about 20 minutes. Stir in the vanilla, then continue to cook, stirring frequently, for 30 minutes. Cool for at least 30 minutes before using.
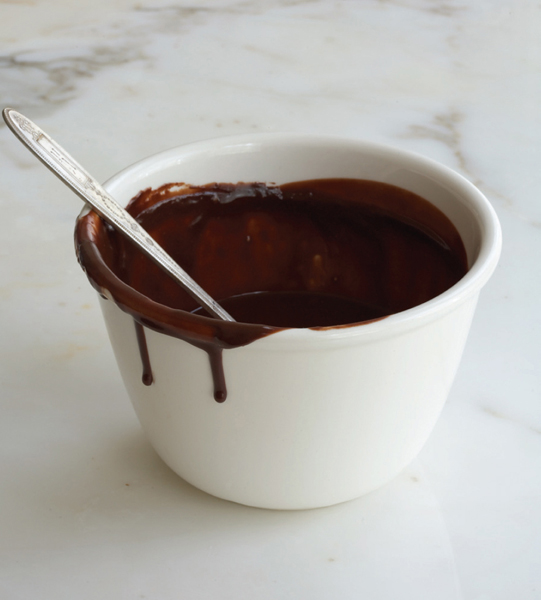
MAKES 1 CUP
The miniature marshmallows are a great time-saving device in this recipe. Full-size marshmallows also work, but they’re more difficult to measure and don’t melt as quickly.
1 cup semisweet chocolate chips
⅔ cup miniature marshmallows
1 (5-ounce) can evaporated milk
Combine all of the ingredients in a saucepan over medium heat and cook, stirring frequently, until melted and thoroughly combined, about 6 minutes. Let the mixture cool for at least 20 minutes before using.