Enough theory—it's time to put some words on the stage. Just as Flash has tools for adding shapes and lines to your drawings, it also has a tool specifically designed to let you add text to your drawings—the Text tool (T). The following steps describe the basic method for putting read-only text on the stage.
To use the Text tool:
In the Tools panel, select the Text tool.
Flash highlights the Text tool; when you mouse over to the stage, your cursor changes to crosshairs accompanied by a miniature letter "T," as shown in Figure 6-4.
Using the two menus at the top of the Properties panel, choose TLF Text and then, below, choose Read Only.
Armed with this information, Flash is ready to create a text field that meets those specs. By choosing Read Only, you create text that can't be changed by your audience. It works well for simple labels or headlines.
In the Character subpanel, choose a family, style, and size.
These are the familiar settings that you use every time you create text. The choices are similar to those you'd use in your word processor. In Figure 6-5 the settings are for Verdana family, bold style, and 50-point type size.
Click the stage and drag to create a text field.
If you simply click once, Flash displays a squished-up, empty text field. If you drag, you create a rectangle. Either method works, because the box resizes as you type your text, and you can resize the box at any time.
Type some headline text, like Breaking News!
Your text appears on the stage, showing the specs you chose in step 3.
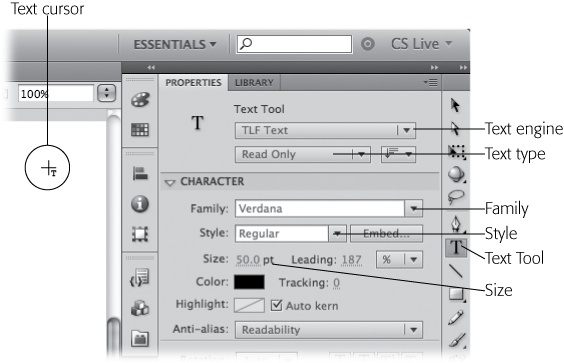
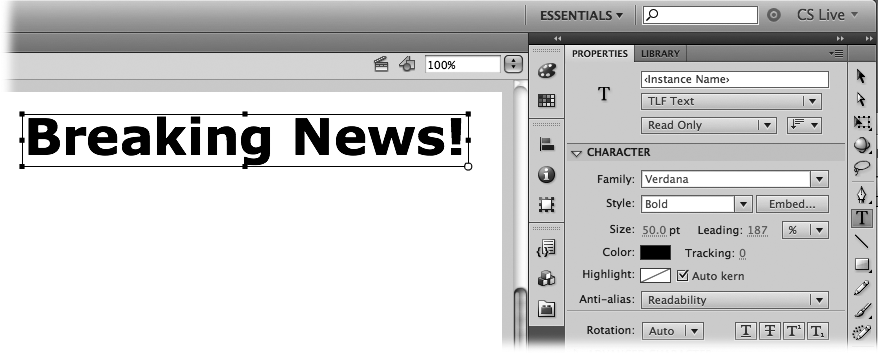
Figure 6-5. You can modify text using several different subpanels in the Properties panel. The Position and Size settings work the same as they do with other objects on the stage. Using the Character and Paragraph subpanels, you can fine-tune your type as you would in a page layout program.
Tip
If the type you specified looks different on someone else's computer, then you've got a font-embedding problem. It most often happens when you let your audience add or edit text, or when you create text with ActionScript. Font embedding is covered in the chapter on animating text with ActionScript, Embedding Fonts in Your SWF file.
Once you have a block of text on the stage, you can make changes as you would with any other graphic element.
To move the text field, use the Selection tool (V). Drag to reposition the text.
To resize the text field, use the Selection tool (V) to drag one of the handles around the edge of the box.
To stretch or squash the type, use the Free Transform tool (Q) and drag one the handles, as shown in Figure 6-6.
When resizing the text field, you can drag the handles whether you're using the Text tool or the Selection tool (solid arrow). The container holds the text and changes size, but the text itself remains the same size. Some text fields can be changed to automatically expand to accommodate the text they hold. When you resize a text field that's set to automatically expand, Flash changes it to a fixed-width field. To change a fixed-width text field to one that automatically resizes to fit the text, double-click the hollow square handle. The handle changes to a hollow circle.
As with shapes and other graphics, you can make position and dimension changes directly in the Properties panel. Want to change the height of the text field? Just type a new number. TLF text and Classic text fields behave in the same way when you move them or change their width and height.
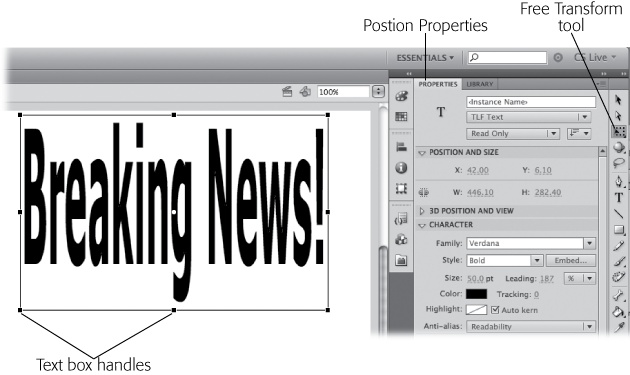
Figure 6-6. You can use the same tools to position and transform blocks of text that you use to work with other graphics. Here, the headline was stretched dramatically by increasing the Height property for the text field. Note, however, that the font size is still 50. Transforming distorts the text but doesn't change the underlying typographic properties.
Naturally, Flash lets you spin your type around in different directions—after all, it is an animation program. To spin text in two dimensions, use the Transform tool (Q). Select the text, and then move the cursor near one of the corners. When you see a circular arrow, click and drag. The steps are similar for skewing text, except that you position the cursor near one of the edges of the text field. A slanted double-arrow appears when it's time to click and drag.
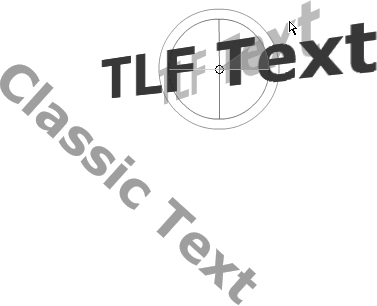
If you want to rotate a text field in 3-D, you need to use TLF text, as shown in Figure 6-7. Then, you can use the 3D Rotation tool (W) and the 3D Translation tool (G), as you would with any other graphic. The 3D Translation tool lets you move the text field in 3-D space, as in text zooming in at you from far away.
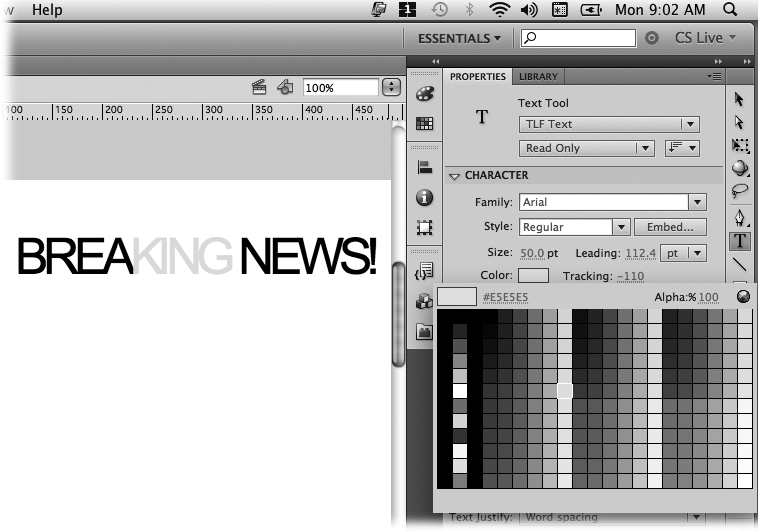
Colorful text puts pizzazz into your animation; just make sure you don't sacrifice readability. You can change the color of an entire block of text, or you can choose certain characters and change their color, as shown in Figure 6-8.
To change the color of an entire block of text, use the Selection tool (V) and click the text. Once you see the familiar text box and handles, head over to the Properties panel. In the Character subpanel, click the Color swatch. A color picker opens, similar to the ones you use to specify colors for shapes. You won't see any gradient settings for text, but you can change its opacity using the Alpha percentage in the upper-right corner.
To change the color of individual characters, use the Text tool (T). Click the text block, and you see a blinking line similar to ones used in word processors. This line marks the insert position. So, if you start typing, new characters appear in the text. Just as in a word processor, you drag to select text. Select the text you want to change, and then choose a color in Properties→Character→Color.
With text, you set the color for the entire character—unlike shapes, where you choose separate stroke and fill colors. However, TLF text gives you an extra color option called Highlight. As the name implies, this gives you a way to make your text stand out through the use of a background color, as if you had highlighted the text with a marker.
Tip
You can create additional color effects using the Color Effect, Display, and Filters subpanels at the bottom of the Properties panel. These settings work the same for shapes, objects, and text, and they're described on Color Effect (TLF Text Only).
You can add hyperlinks to your text with or without using ActionScript to generate the code. Using TLF text, you can add a link to an entire text block, or you can add the link to a few words or characters. Hyperlinks often open web pages or documents, but with some ActionScript code, they can they can perform other feats, too. To link to open a web page or document, you provide a URL address. URL stands for Universal Resource Locator. You usually hear this term in relation to the Internet, but a URL can just as well point to a file on your computer. The key is in the prefix: Instead of beginning with http://, a link that points to a file on your computer begins with file://.
Here are the steps for creating a link when you're using TLF text:
Use the Select tool (V) to select an entire text block, or use the Text tool (T) to select text inside a text block.
Either method determines the clickable link text your audience clicks to open a web page or a document.
In Properties→Advanced Character→Link, type the complete URL, such as www.missingmanuals.com.
You can use other standard URLs to open files or, to create emails such as file:///documents/missingmanual.txt or mailto://george@washington.edu.
Optional: In Properties→Advanced Character→Target, choose an option.
Target options are used, as they are in HTML, to tell the browser how to open the linked web page: _self (the standard option) opens the page in the current browser window; _blank opens the page in a new window; _parent opens the page in the parent of the current frame; and _top opens the page in the top-level frame of the current window. If you don't choose an option, the menu remains set to None, and the standard behavior is to open the page in the current browser window.
Press Ctrl+Enter (⌘-Return) to test your movie.
Flash plays your movie. When you move your cursor over the linked text, it changes to the pointing finger, indicating a link. Click the text, and your linked web page, document, or addressed email message should appear.
Creating a link using Classic text is a little more convoluted than with TLF text. As is often the case with Classic text, static text behaves one way and non-static text (dynamic text and input text) behaves differently. If you want to highlight a couple of words inside a paragraph of text, you need to use static text, as shown in Figure 6-9. When you add a hyperlink to dynamic text, Flash applies a link to the entire text field. You can get around this behavior by selecting the text and then, in the Properties→Character panel, clicking the "Render text as HTML" button. (There's no text label for the button, which looks like HTML angle brackets: < >.)

Figure 6-9. If you want to add a hyperlink to a couple of words within a block of text, you need to use static text. With dynamic or input text, you need to use ActionScript to create a link within HTML text, as explained on page 574.
Here are the steps for applying a link to Classic static text:
With the Text tool, drag to select the words within the static text you want to link.
If you prefer to navigate by keyboard, you can use the Shift and arrow keys to select text, too—just as in a word processor.
In Properties→Options→Link, type the link details.
You need to include the path for the file, unless you're certain that it's going to be in the same folder as the .swf file when the animation runs. A complete link to a file on the Internet might look like this:
http://www.missingmanuals.com/cds/flashcs5tmm/text_scram_finished.fla
If you want your link to open in a new browser window or tab, select Properties→Options→Target→_blank.
If you don't change the target setting, the new page replaces your animation in your audience's browser. The other target settings let you open documents in different sections of an HTML page using frames—a web design technique that's fallen out of fashion.
Highlight the hyperlinked text so your audience knows it's a link.
If you want the linked words to be highlighted so your audience will know they're a link, you'll have to do it yourself by changing the text color. Don't be fooled; when you create a link, you see a line beneath the linked words in the Flash authoring program, but when your animation runs in Flash Player, there's no line, no highlight, no indication that the words are linked. The only clue your audience has that the words are linked is the changing cursor if they chance to move the mouse over the words.
If you want to link an entire block of dynamic text, the technique is similar. You can use the Selection tool (arrow) to select the text field, and then provide the link details in the Properties→Options→Link box.
Tip
You can create an email link—great for a "contact us" button. Instead of http://, type mailto:, and then add your email address to the end. For example, a complete address might look like this: mailto:harry@stutzmotors.com. When your audience clicks the link, their email program of choice starts and creates an email using that address in the link.