Flash's Test mode shows you a closer approximation of how your animation will actually appear to your audience than testing on the stage. When you fire up the Test Movie command, your animation plays in the Flash Player that comes with Flash CS5. Test mode is your best bet if your animation contains movie clips, buttons, scenes, hidden layers, or ActionScript, since it shows you all the parts of your animation—not just the parts currently visible on the stage.
Note
Motion paths (the lines) don't appear when you test your animation in Flash Player, for good reason: Flash designed them to be invisible at runtime. If you want to see your motion paths in action, you need to test your animation on the stage.
To test your animation in Flash Player:
Select Control→Test Movie→in Flash Professional.
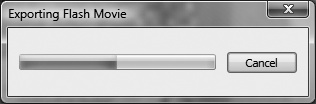
The Exporting Flash Movie dialog box in Figure 19-2 appears, followed by your animation running in the Flash Player test window, similar to the one in Figure 19-3.
Note
If you're working on a project for a handheld device, you can choose Control→Test Movie→in Device Central. Likewise, if you're working on an AIR project, you can choose one of the AIR options: in AIR Debug Launcher (Desktop) or in AIR Debug Launcher (Mobile). Flash remembers your selection, so the next time you can test your animations with Ctrl+Enter (⌘-Return).
Figure 19-2. When you see this dialog box, you know Flash is exporting your animation and creating an .swf file. If you've tested this particular animation before, Flash erases the .swf file it previously created and replaces it with the new one. Finishing an export can be fast or slow depending on the size and complexity of your animation and your computer's processing speed and memory.
To control playback—to stop the animation, and then rewind it, for example—choose options from the Control menu.
In you're running Windows, the Control menu appears in Flash Player; on a Mac, you get the Control menu in Flash itself. (In Windows you can also see the Control menu in Flash itself if you turn on tabbed viewing in Preferences. See the box on Test Multiple Animations for details.)
Figure 19-3. Normally, when you select Control→Test Movie or Control→Test Scene, Flash opens up Flash Player in its own window. To control playback, you have a couple of choices: You can choose options from the File, View, Control, and Debug menus, or you can right-click the window if you're running Windows (Control-click if you're running Mac), and then choose options from the shortcut menus that appear.
To close Flash Player, select File→Close or click the X in the upper-right corner of the window (Windows) or the red button in the upper-left corner of the window (Mac).

Note
Testing your animation in Flash Player gives you a great sense of what your audience will see. But factors like connection speed and hardware differences come into play when you actually publish your animation, so you'll want to test your animation in a real-life production setting (using the same kind of computer, same connection speed, and same version browser as you expect your audience to use) before you go live (see Testing Download Time).