Validating User Input with JavaScript
JavaScript validation should be considered an assistance more to your users than to your websites because, as I have already stressed many times, you cannot trust any data submitted to your server, even if it has supposedly been validated with JavaScript. This is because hackers can quite easily simulate your web forms and submit any data of their choosing.
Another reason you cannot rely on JavaScript to perform all your input validation is that some users disable JavaScript, or use browsers that don’t support it.
So, the best types of validation to do in JavaScript are checking that fields have content if they are not to be left empty, ensuring that email addresses conform to the proper format, and ensuring that values entered are within expected bounds.
The validate.html Document (Part One)
Let’s start with a general signup form, common on most sites that offer memberships or registered users. The inputs being requested will be forename, surname, username, password, age, and email address. Example 16-1 provides a good template for such a form.
<html><head><title>An Example Form</title>
<style>.signup { border: 1px solid #999999;
font: normal 14px helvetica; color:#444444; }</style>
<script>
function validate(form) {
fail = validateForename(form.forename.value)
fail += validateSurname(form.surname.value)
fail += validateUsername(form.username.value)
fail += validatePassword(form.password.value)
fail += validateAge(form.age.value)
fail += validateEmail(form.email.value)
if (fail == "") return true
else { alert(fail); return false }
}
</script></head><body>
<table class="signup" border="0" cellpadding="2"
cellspacing="5" bgcolor="#eeeeee">
<th colspan="2" align="center">Signup Form</th>
<form method="post" action="adduser.php"
onSubmit="return validate(this)">
<tr><td>Forename</td><td><input type="text" maxlength="32"
name="forename" /></td>
</tr><tr><td>Surname</td><td><input type="text" maxlength="32"
name="surname" /></td>
</tr><tr><td>Username</td><td><input type="text" maxlength="16"
name="username" /></td>
</tr><tr><td>Password</td><td><input type="text" maxlength="12"
name="password" /></td>
</tr><tr><td>Age</td><td><input type="text" maxlength="3"
name="age" /></td>
</tr><tr><td>Email</td><td><input type="text" maxlength="64"
name="email" /></td>
</tr><tr><td colspan="2" align="center">
<input type="submit" value="Signup" /></td>
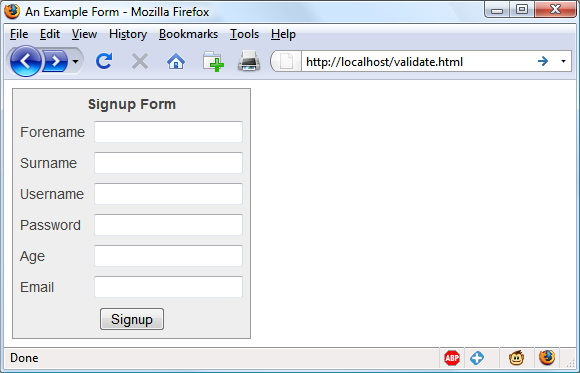
</tr></form></table>As it stands, this form will display correctly but will not self-validate, because the main validation functions have not yet been added. Even so, if you type it in and save it as validate.html, when you call it up in your browser it will look like Figure 16-1.
How it works
Let’s look at how this document is made up. The first three lines set up the document and use a little CSS to make the form look a little less plain. The parts of the document related to JavaScript come next and are shown in bold.
Between the <script>
and </script> tags lies a
single function called validate
that itself calls up six other functions to validate each of the
form’s input fields. We’ll get to these functions shortly. For now,
I’ll just explain that they return either an empty string if a field
validates, or an error message if it fails. If there are any errors,
the final line of the script pops up an alert box to display
them.
Upon passing validation, the validate function returns a value of
true; otherwise, it returns
false. The return values from
validate are important, because if
it returns false, the form is
prevented from being submitted. This allows the user to close the
alert pop-up and make changes. If true is returned, no errors were encountered
in the form’s fields and so the form is allowed to be
submitted.
The second part of this example features the HTML for the form,
with each field and its name placed within its own row of a table.
This is pretty straightforward HTML, with the exception of the
onSubmit="return validate(this)"
statement within the opening <form> tag. Using onSubmit, you can cause a function of your
choice to be called when a form is submitted. That function can
perform some checking and return a value of either true or false to signify whether the form should be
allowed to be submitted.
The this parameter is the
current object (i.e., this form) and is passed to the validate function just discussed. The
validate function receives this
parameter as the object form.
As you can see, the only JavaScript used within the form’s HTML
is the call to return buried in the
onSubmit attribute. Browsers with
JavaScript disabled or not available will simply ignore the onSubmit attribute, and the HTML will
display just fine.
The validate.html Document (Part Two)
Now we come to Example 16-2, a set of six
functions that do the actual form field validation. I suggest that you
type in all of this second part and append it to the first half, which
you should already have saved as validate.html. It’s fine to include multiple
<script> sections in a single
HTML file, but if you prefer, you can incorporate the additional code
into the first <script> section
from Example 16-1.
<script>function validateForename(field){ if (field == "") return "No Forename was entered.\n" return "" }function validateSurname(field){ if (field == "") return "No Surname was entered.\n" return "" }function validateUsername(field){ if (field == "") return "No Username was entered.\n" else if (field.length < 5) return "Usernames must be at least 5 characters.\n" else if (/[^a-zA-Z0-9_-]/.test(field)) return "Only a-z, A-Z, 0-9, - and _ allowed in Usernames.\n" return "" }function validatePassword(field){ if (field == "") return "No Password was entered.\n" else if (field.length < 6) return "Passwords must be at least 6 characters.\n" else if (!/[a-z]/.test(field) || ! /[A-Z]/.test(field) || !/[0-9]/.test(field)) return "Passwords require one each of a-z, A-Z and 0-9.\n" return "" }function validateAge(field){ if (isNaN(field)) return "No Age was entered.\n" else if (field < 18 || field > 110) return "Age must be between 18 and 110.\n" return "" }function validateEmail(field){ if (field == "") return "No Email was entered.\n" else if (!((field.indexOf(".") > 0) && (field.indexOf("@") > 0)) || /[^a-zA-Z0-9.@_-]/.test(field)) return "The Email address is invalid.\n" return "" } </script></body></html>
We’ll go through each of these functions in turn, starting with
validateForename, so you can see how
validation works.
Validating the forename
validateForename is quite a
short function that accepts the parameter field, which is the value of the forename
passed to it by the validate
function.
If this value is the empty string, an error message is returned; otherwise, an empty string is returned to signify that no error was encountered.
If the user entered spaces in this field, it would be accepted
by validateForename, even though
it’s empty for all intents and purposes. You can fix this by adding an
extra statement to trim whitespace from the field before checking
whether it’s empty, use a regular expression to make sure there’s
something besides whitespace in the field, or—as I do here—just let
the user make the mistake and allow the PHP program to catch it on the
server.
Validating the surname
The validateSurname function
is almost identical to validateForename in that an error is
returned only if the surname supplied was the empty string. I chose
not to limit the characters allowed in either of the name fields to
allow for non-English and accented characters, etc.
Validating the username
The validateUsername function
is a little more interesting, because it has a more complicated job.
It has to allow through only the characters a-z, A-Z,
0-9, _ and -,
and ensure that usernames are at least five characters long.
The if...else statements
commence by returning an error if field has not been filled in. If it’s not
the empty string but is less than five characters in length, another
error message is returned.
Then the JavaScript test
function is called, passing a regular expression (which matches any
character that is not one of those allowed) to be
matched against field (see the section
Regular Expressions later in this chapter).
If even one character that isn’t one of the acceptable characters is
encountered, the test function
returns true, and so validateUser returns an error string.
Validating the password
Similar techniques are used in the validatePassword function. First the
function checks whether field is
empty, and an error is returned if it is. Next, an error message is
returned if the password is shorter than six characters.
One of the requirements we’re imposing on passwords is that they
must have at least one each of a lowercase, uppercase, and numerical
character, so the test function is
called three times, once for each of these cases. If any one of them
returns false, one of the
requirements was not met and so an error message is returned.
Otherwise, the empty string is returned to signify that the password
was okay.
Validating the age
validateAge returns an error
message if field is not a number
(determined by a call to the isNaN
function), or if the age entered is lower than 18 or greater than 110.
Your applications may well have different or no age requirements.
Again, upon successful validation the empty string is returned.
Validating the email address
Lastly, and most complicatedly, the email address is validated
with validateEmail. After checking
whether anything was actually entered, and returning an error message
if it wasn’t, the function calls the JavaScript indexOf function twice. The first time a
check is made to ensure there is a dot (.) somewhere in the field from the second
character onwards, and the second checks that an at sign (@) appears, again from the second character
onwards.
If those two checks are satisfied, the test function is called to see whether any
disallowed characters appear in the field. If any of these tests fail,
an error message is returned. The allowed characters in an email
address are uppercase and lowercase letters, numbers, and the _, -,
., and @ characters, as detailed in the regular
expression passed to the test
method. If no errors are found, the empty string is returned to
indicate successful validation. On the last line, the script and
document are closed.
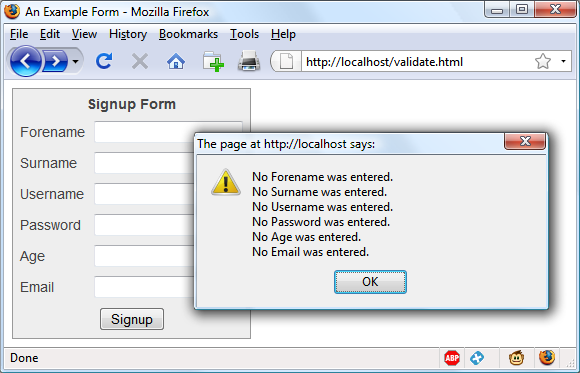
Figure 16-2 shows the result of clicking on the Signup button without having completed any fields.
Using a separate JavaScript file
Of course, because they are generic in construction and could
apply to many types of validations you might require, these six
functions make ideal candidates for moving out into a separate
JavaScript file (remember to remove any <script> or </script> tags!). You could name the
file something like validate_functions.js and include it right
after the initial script section in Example 16-1, using the
following statement:
<script src="validate_functions.js"></script>