Chapter 6. Staining
Equipment and Materials
You’ll need the following items to complete this lab session. (The standard kit for this book, available from www.thehomescientist.com, includes the items listed in the first group.)
Materials from Kit
Goggles
Coverslips
Pipettes
Slides (flat)
Stain, eosin Y
Stain, Gram’s iodine
Stain, Hucker’s crystal violet
Stain, methylene blue
Stain, safranin O
Stirring rod (optional)
Materials You Provide
Gloves
Butane lighter (or other flame source)
Ethanol, 70%
Microscope and illuminator
Paper towels
Toothpicks
Water, distilled
Background
As we learned in the last lab session, staining is an essential tool for optical microscopy because it allows viewing structural details that would otherwise be difficult or impossible to discriminate. A biological stain (or biostain) is selectively absorbed or adsorbed to some parts of a specimen’s structure, but not others. The resulting color contrast makes structural details jump out at you.
There are literally thousands of biostains and many staining protocols, of which dozens are used frequently and hundreds are used in specific circumstances. Simple staining, which we’ll use in the first procedure, uses a single stain to selectively stain only some parts of a cell (or some types of cell in a mixed specimen). More complex staining protocols, one of which we’ll use in the second procedure, use two or more stains to produce contrasting colors for different structural elements or types of cells.
Procedure I-3-1: Simple Staining
Transfer one drop of distilled water to the center of a slide.
Use the flat end of a toothpick to scrape (gently) the inside of your cheek.
Immerse the end of the toothpick in the drop of water and stir to transfer the epithelial cells to the water. Position a coverslip over the specimen. If there are bubbles under the coverslip, press gently on the coverslip with your forceps to force the bubbles out from under the coverslip.
Position the slide in the stage clips or mechanical stage, rotate the 4X objective into position, turn on the illuminator, adjust the illumination, and focus on the slide.
Center an epithelial cell or a group of cells in the field of view and then rotate the 10X objective into position. Again center a cell or group of cells, and then rotate the 400X objective into position and focus critically.
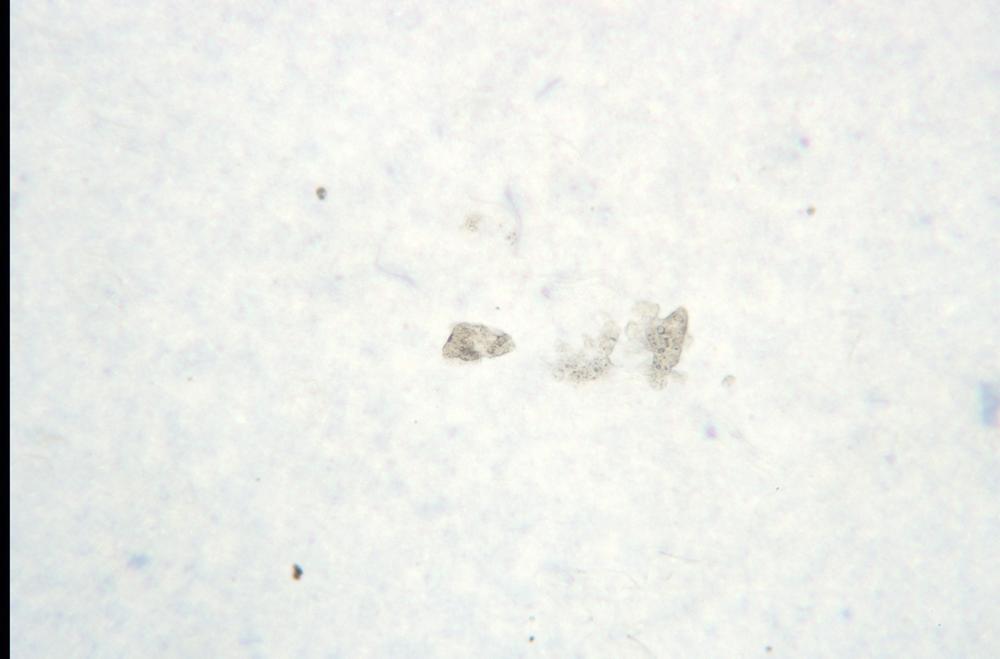
Adjust the brightness and diaphragm setting to reveal the most image detail possible. Note the difficulty of resolving nearly transparent cell structures against the bright field, as shown in Figure 6-1.
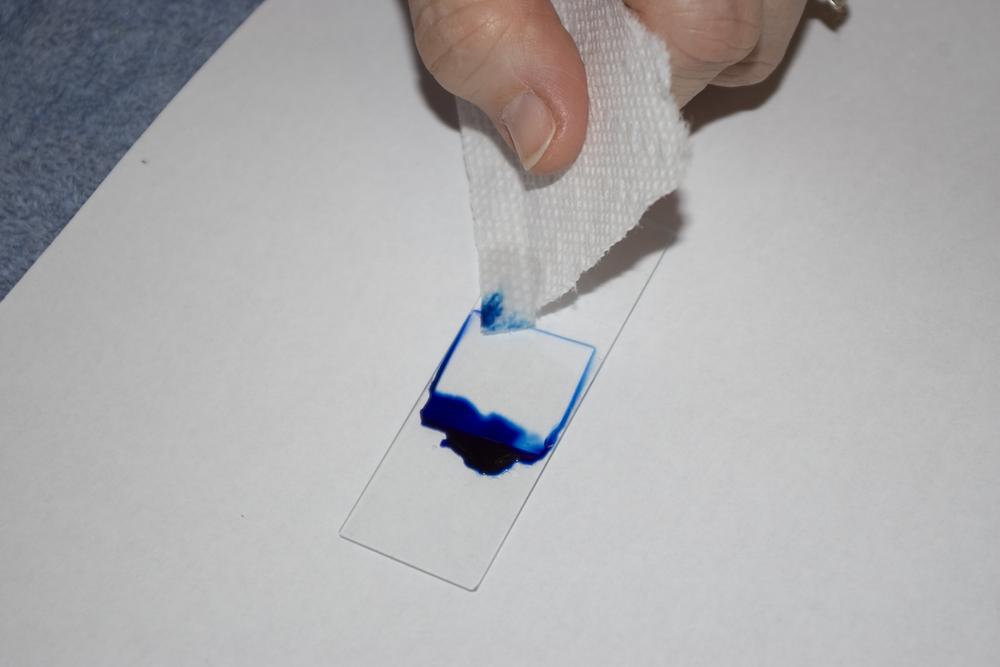
Place one drop of methylene blue stain at one edge of the coverslip. Touch the corner of a paper towel to the slide at the opposite edge of the coverslip, as shown in Figure 6-2. The paper towel wicks the water from under the coverslip, drawing the drop of methylene blue stain under the coverslip (and around the edges).
Allow the stain to work for 30 seconds or so and then observe the cells. If the cell or group of cells you had centered has drifted out of the field of view, reposition the slide to bring them back into the field.
Adjust the brightness and diaphragm to reveal as much detail in the cells as possible. Record your observations and conclusions in your lab notebook, including your estimate of cell size.
Repeat steps 7 through 9, substituting a drop of eosin Y stain. Note which parts of the cells are stained by the methylene blue and which by the eosin Y. Record your observations in your lab notebook.
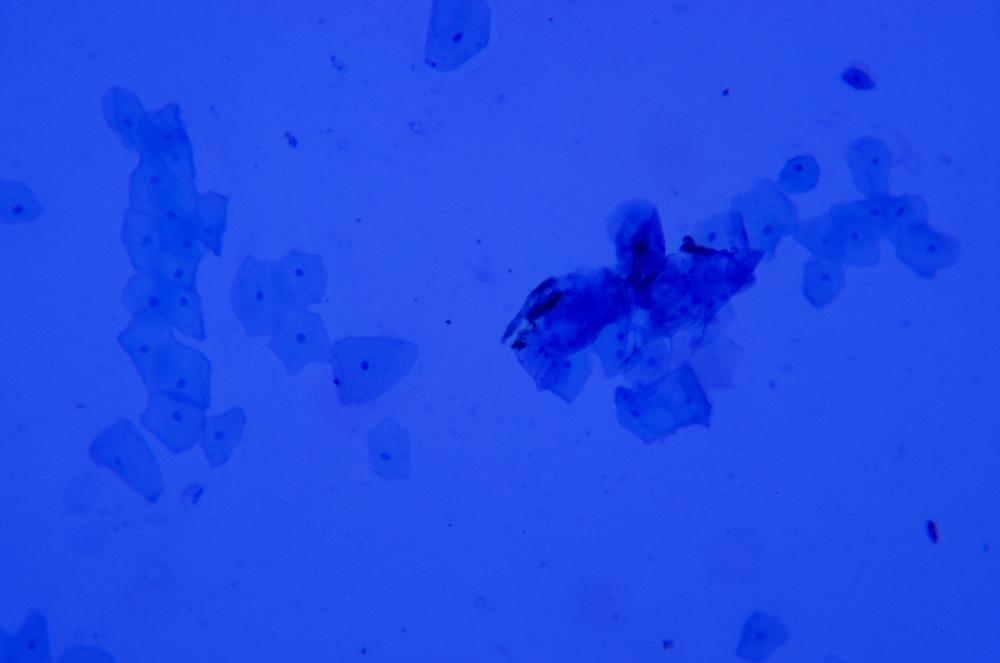
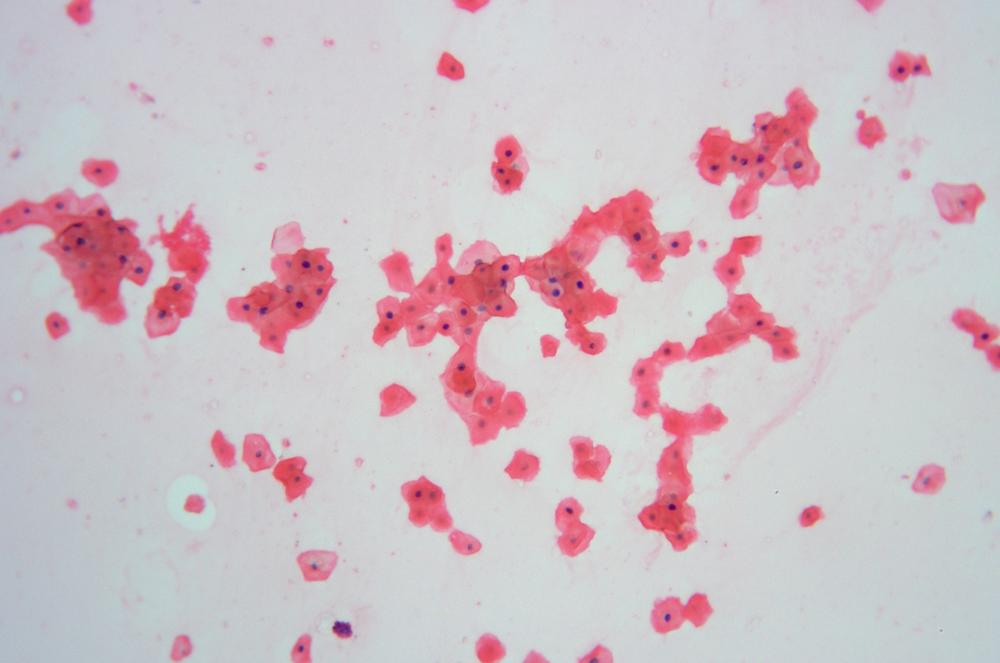
Figure 6-3 shows squamous epithelial cells stained with methylene blue (with stain still present under the coverslip), and Figure 6-4 shows squamous epithelial cells stained with methylene blue and then counterstained with eosin Y (after rinsing the stains by drawing water under the coverslip). Note the different structure elements revealed by the two stains.
Procedure I-3-2: Gram Staining
Gram staining is the mostly frequently used bacteriology staining protocol. When Danish bacteriologist Hans Christian Joachim Gram developed this protocol in 1884, he envisioned it only as a means of making tiny bacteria more visible. He soon realized, however, that his protocol allowed bacteriologists to discriminate among different types of bacteria that otherwise appear identical. This newfound ability had great implications for the diagnosis and treatment of bacterial diseases.
Even today, Gram staining is often the first step in identifying an unknown bacterium, particularly in less-developed countries. Modern instrumental methods provide much more information, but in addition to being cheap, the Gram staining protocol has the inestimable advantage of speed, providing at least some useful information very quickly. A skilled technician can make a smear mount, Gram stain it, and be on the phone to the physician with the results within a few minutes. If the patient has a virulent bacterial infection, these quick results may be the difference between life and death.
Gram staining depends on a difference in the cell walls of different types of bacteria that affects their retention of stains. Bacteria of both types are stained purple by crystal violet during the first step. The second step, Gram’s iodine, acts as a mordant to fix the violet stain in bacteria of one type, called Gram-positive bacteria. The third step, decolorizing with ethanol, does not affect the stain in Gram-positive bacteria, but removes it from Gram-negative bacteria. If you examine the smear after this step, the Gram-positive bacteria are purple and the Gram-negative bacteria colorless. The final step, counterstaining with safranin O, stains all of the bacteria pink, although the pink coloration is not visible in the intensely purple Gram-positive bacteria. The result is a smear with Gram-positive bacteria stained purple and Gram-negative bacteria stained pink.
Place the heat-fixed slide you produced in the preceding procedure on a clean, flat surface. Use a paper towel to catch any spills.
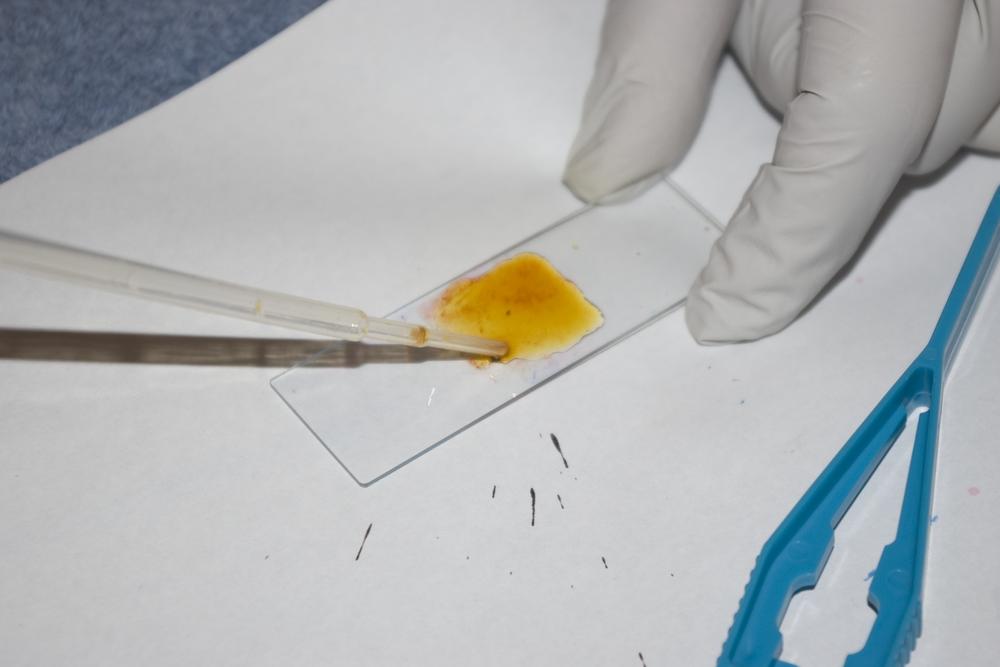
Use a clean pipette to place a drop or two of Hucker’s crystal violet stain on the smear. Use the tip of the pipette gently to spread the stain until it covers the entire smear, as shown in Figure 6-5. Do not touch the smear with the tip of the pipette.
Allow the Hucker’s crystal violet stain to remain in contact with the smear for one minute.
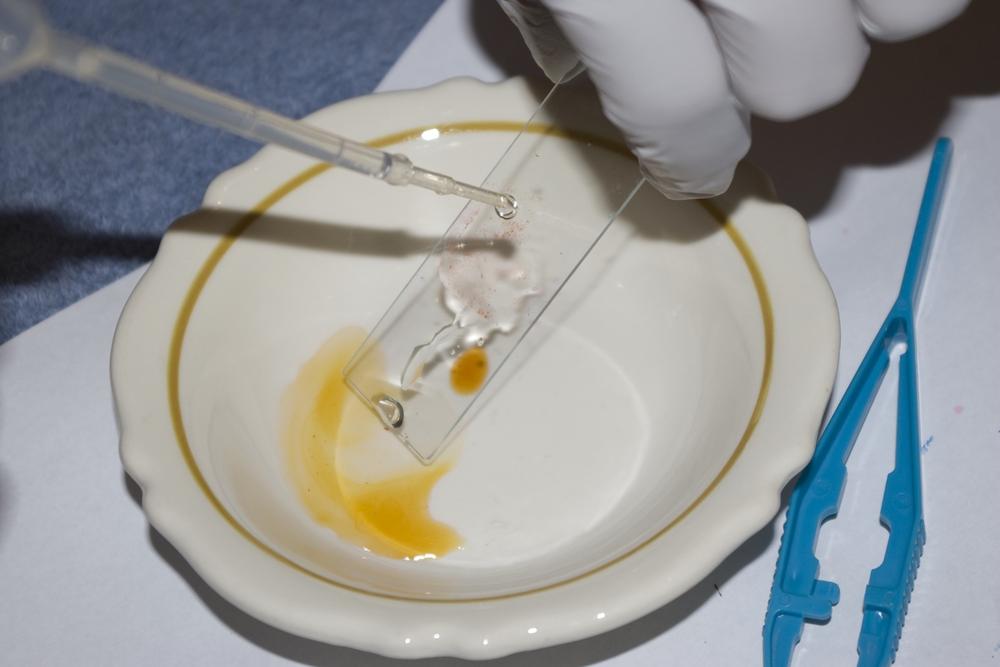
Rinse the slide, smear-side down under a faucet set to provide a trickle of water, as shown in Figure 6-6. Don’t allow the water to fall directly on the smear; instead tilt the slide gently to flood the smear with water. Rinse for at most a second or two.
Drain the slide and place it flat on the paper towel.
Use a clean pipette to place a drop or two of Gram’s iodine stain on the smear. Again, use the tip of the pipette carefully to spread the stain over the entire smear.
Allow the Gram’s iodine stain to remain in contact with the smear for one minute.
Fill a clean pipette with ethanol (drugstore 70% ethanol is fine). Hold the slide at an angle over the sink and gently flood the smear with the ethanol. Continue until the ethanol runs colorless.
Repeat step 4 to rinse all of the ethanol from the slide. (It’s important to remove all of the ethanol, because the following step won’t work if ethanol is still present.) Drain the slide and place it flat on the paper towel.
Use a clean pipette to place a drop or two of safranin O stain on the smear. Use the tip of the pipette carefully to spread the stain over the entire smear.
Allow the safranin O stain to remain in contact with the smear for one minute.
Repeat step 9 to rinse excess safranin O stain from the slide.
Allow the slide to air-dry. If you’re in a hurry, you can gently pat the slide dry with a lint-free cloth or tissue. Do not rub the smear area.
Position the slide on the stage—you needn’t use a coverslip—and use the 4X objective to locate an interesting area of the smear. Change to 400X magnification and observe the smear. If you have an oil-immersion objective, put one drop of immersion oil on that area of the smear, and carefully rotate the 100X objective into position, making sure it comes into contact only with the oil drop. Use the fine-focus knob very carefully to focus critically, and observe the bacteria.
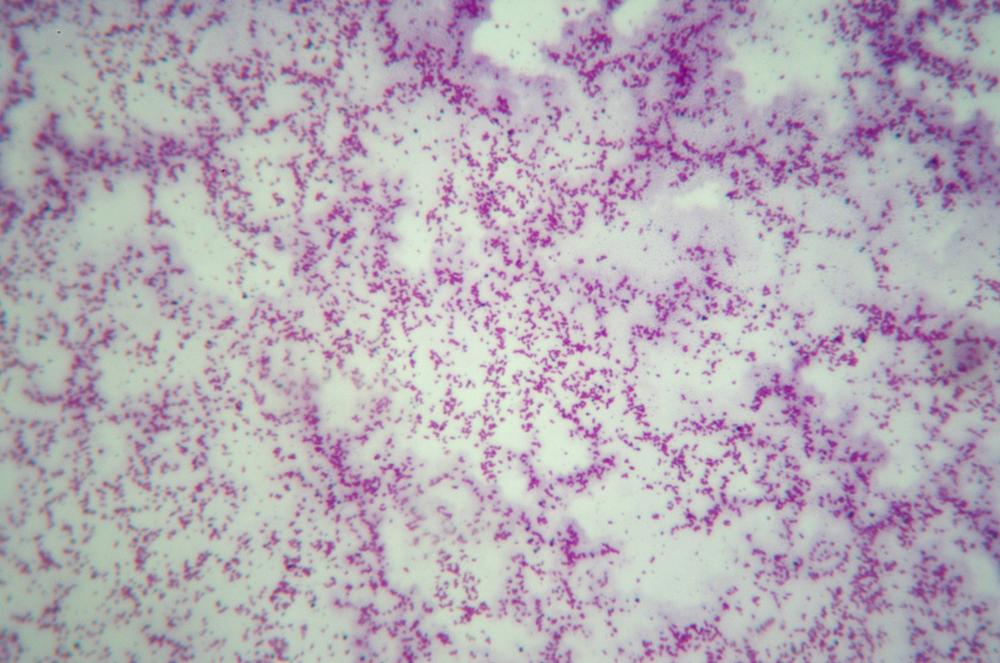
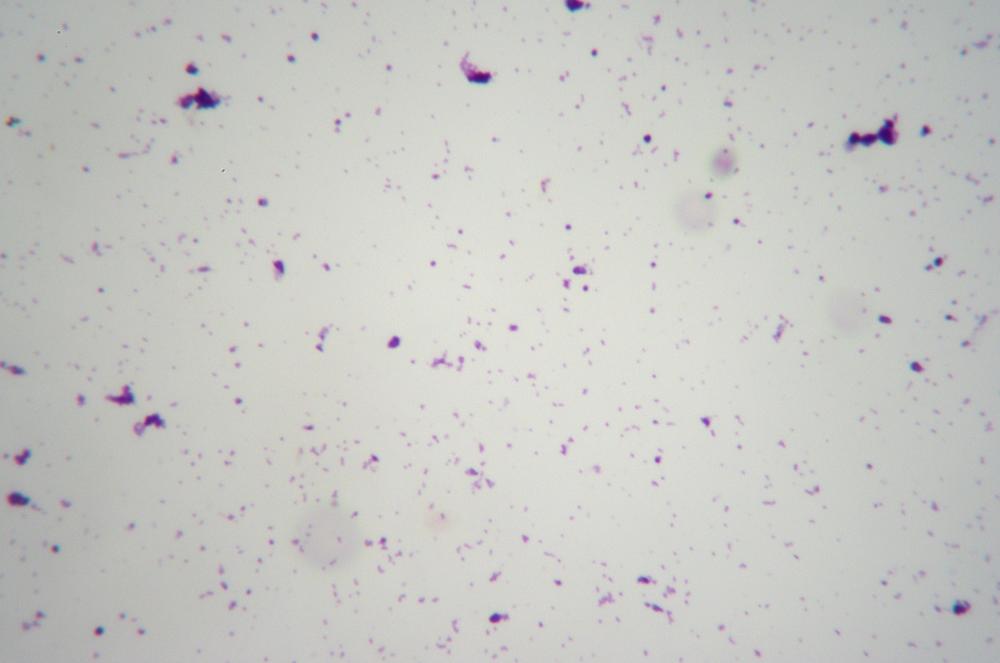
Adjust the diaphragm and illuminator brightness to reveal the maximum detail in the bacteria. Gram-negative bacteria appear pink or red, as shown in Figure 6-7, and Gram-positive bacteria appear violet, as shown in Figure 6-8.
Note
These two figures illustrate why it’s important to have an oil-immersion objective if you intend to do much work in microbiology or to pursue AP Biology. Even at 400X (actually, even at 1,000X) there is very little detail visible in prokaryotic cells and other tiny microscopic items. Using the microscope at 400X, we were barely able to identify the bacteria in the first image as bacilli (rods) and those in the second image as cocci (spheres). At 1,000X, it was much easier to identify the shape of the bacteria.
