Chapter 35. Investigating Arthropods
Equipment and Materials
You’ll need the following items to complete this lab session. (The standard kit for this book, available from www.thehomescientist.com, includes the items listed in the first group.)
Materials from Kit
Centrifuge tubes (as collection containers)
Coverslips
Forceps
Magnifier
Needles, teasing
Scalpel
Slides, flat
Slides, deep cavity
Stain: eosin Y
Stain: methylene blue
Thermometer
Materials You Provide
Ethanol, 70%
Food for mealworm beetles (see text)
Jars (see text)
Microscope
Refrigerator
Slides, prepared, Arthropoda (see text)
Specimens, assorted arthropods (see text)
Specimens, mealworm (see text)
Stereo microscope (optional)
Background
The phylum Arthropoda, whose members are called arthropods, comprises invertebrate animals including insects, arachnids (spiders, scorpions, mites, ticks, and related creatures), crustaceans (crabs, crayfish, lobsters, shrimp, and related creatures), and related subphyla and classes. With more than 1,000,000 described species and possibly several million more species as yet unclassified, Arthropoda is by far the largest phylum in Kingdom Animalia, making up more than three quarters of all classified Animalia species.
Arthropods are characterized by their chitinous exoskeletons, jointed appendages, and bodies made up of jointed segments, each with a pair of appendages. Each segment is covered by a cuticle made up of chitin, with numerous setae present on the surface. More than any other lifeform, arthropods look as if they were built from an Erector Set. In fact, this jointed structure is characteristic of arthropods, and is the origin of the phylum name: arthro (jointed) + pod (foot).
Internal organs are usually also jointed segments contained within the hemocoel (body cavity) present in the body segments, through which blood circulates. Their simple nervous systems comprise a central pair of ventral nerve cords that run through and join the segments, extending to form paired ganglia in each segment. Their simple brains are a mass of ganglia from the fused segments that make up their heads. The excretory and respiratory systems of arthropods differ significantly from species to species, depending on the environments for which they are adapted.
In this lab session, we’ll begin with a survey, looking at as many examples of whole arthropods as possible and comparing/contrasting their external structures. In the second procedure, we’ll observe insect metamorphosis, the process by which arthropods develop from eggs to mature adults. Some arthropods undergo three-stage hemimetabolism, also called incomplete metamorphosis, during which they develop from eggs through the immature (nymph) stage to the adult imago stage. Other arthropods undergo four-stage homometabolism, also called complete metamorphosis, during which they develop from the egg/embryo stage through the infantile (larval) stage to the immature (pupal) stage and finally to the adult imago stage.
For the first procedure, you’ll need specimens of as many arthropods as possible. You can collect live specimens of a huge variety of arthropod species from around your house and yard, from a local park, and so on. Unless you live in an area with severe winters, you can collect widely diverse specimens year-round—ants, flies, bees, spiders, caterpillars, butterflies, mosquitoes, fleas, grasshoppers, and so on. Visit the supermarket for fresh crabs or shrimp.
Use appropriate collection vessels for each species. Test tubes or centrifuge tubes are suitable for smaller specimens and foam cups with lids suffice for larger ones. (Remember that live arthropods are by no means defenseless, and take appropriate precautions while collecting and handling them. Some of them, such as the brown recluse and black widow spiders and many scorpion species, have bites or stings that are always dangerous and potentially lethal.) To kill your specimens humanely and preserve them for later use, simply add 70% ethanol to the collection vessel that contains the specimen.
If you live in an area with severe winters and will do this lab session during winter, you have a few alternatives. First, you can collect your specimens during warmer weather. The ethanol that kills them will also preserve them indefinitely. Second, you can use commercial prepared slides and specimens. Third, if you have a local botanical gardens with indoor facilities, if you ask politely and explain your purpose, the staff may be willing to allow you to collect some specimens.
For the second procedure, we’ll use mealworm beetles in egg, larval, pupal, and adult stages. These can be purchased at most pet stores, where they are sold as food for reptiles, fish, and birds. You can also purchase mealworms in any bait store, at many stores that carry bird feeders, or on the Internet. If you start with mealworm beetles in all four stages, you can complete this procedure over the course of two to three weeks. If you wish, you can start with only mealworm beetle eggs or larvae (usually sold as just “mealworms”) and watch the process over the course of three or four weeks to perhaps three months, depending on temperature and other variables.
The mealworm beetle life cycle begins with eggs, which typically require 4 to 14 days to hatch as larvae. The larval stage, during which the larvae feed continuously and molt several times as they outgrow their exoskeletons, may last from two weeks to seven or eight weeks, after which the larvae emerge as pupae. After three days to three or four weeks, the pupae emerge as adult mealworm beetles.
To raise mealworm beetles, you need only some containers and sources of food and water. Nearly any container can be used, but 500 mL (pint) or 1 L (quart) tall wide-mouth glass or plastic jars work well and are readily available. Cover the containers with something that will allow adequate ventilation while preventing the mealworms from escaping. Mealworms thrive on nearly any grain. Plain (no sugar) breakfast cereals such as crushed corn flakes, oatmeal, and so on are convenient food sources. The mealworms also require a source of water, such as small chunks of potato or orange placed in the container and removed as soon as they start becoming moldy. We’ve even used a small piece of kitchen sponge dampened frequently.
Procedure XI-3-1: Observing and Comparing Arthropod Structures
As you perform this procedure, record your observations in your lab notebook. Sketch or shoot images of any significant features you observe.
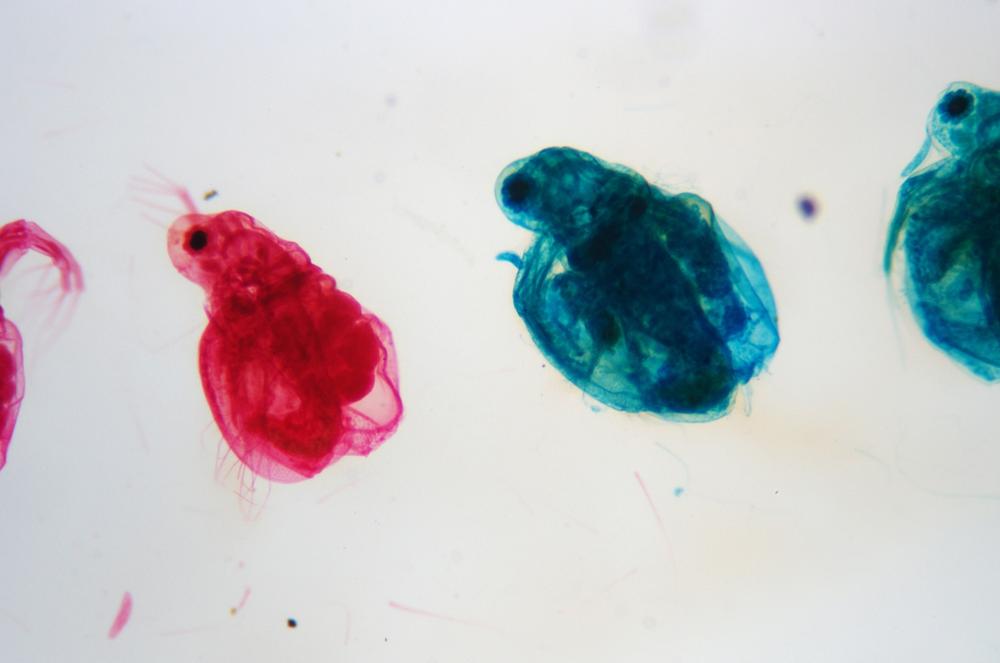
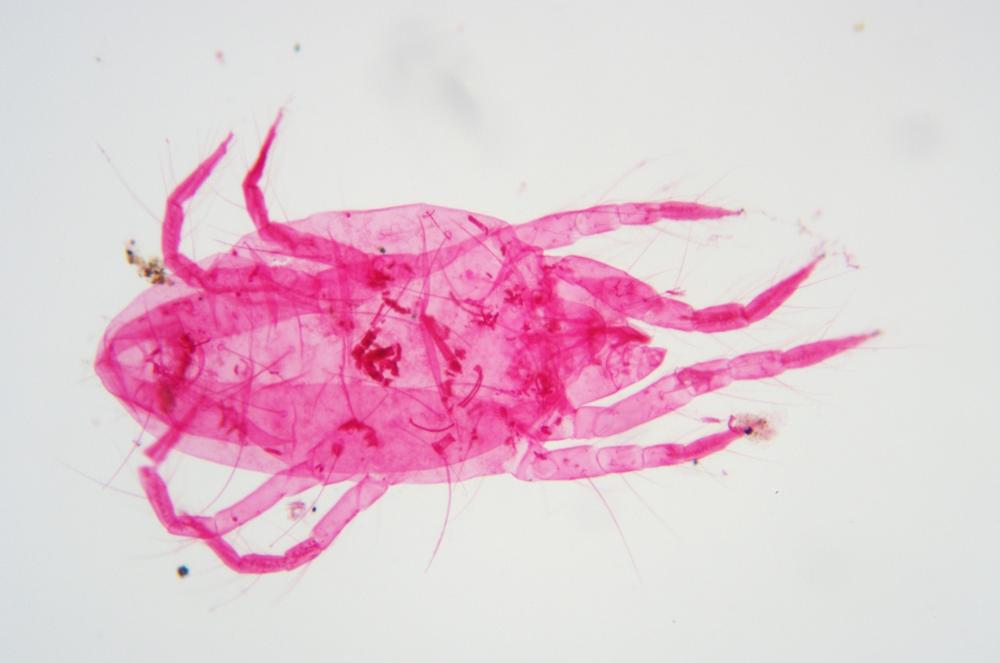
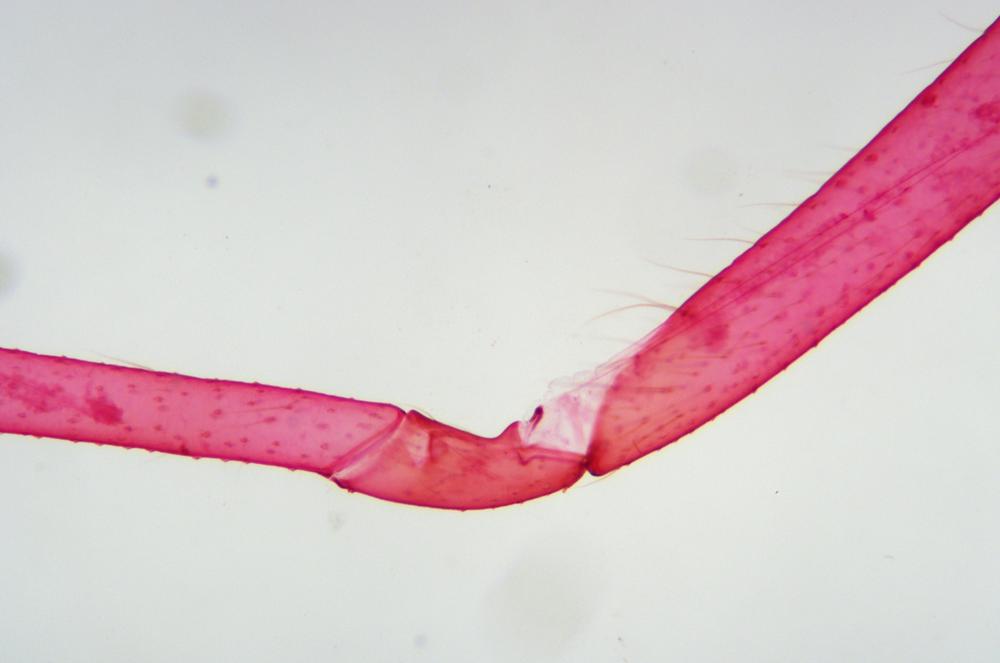
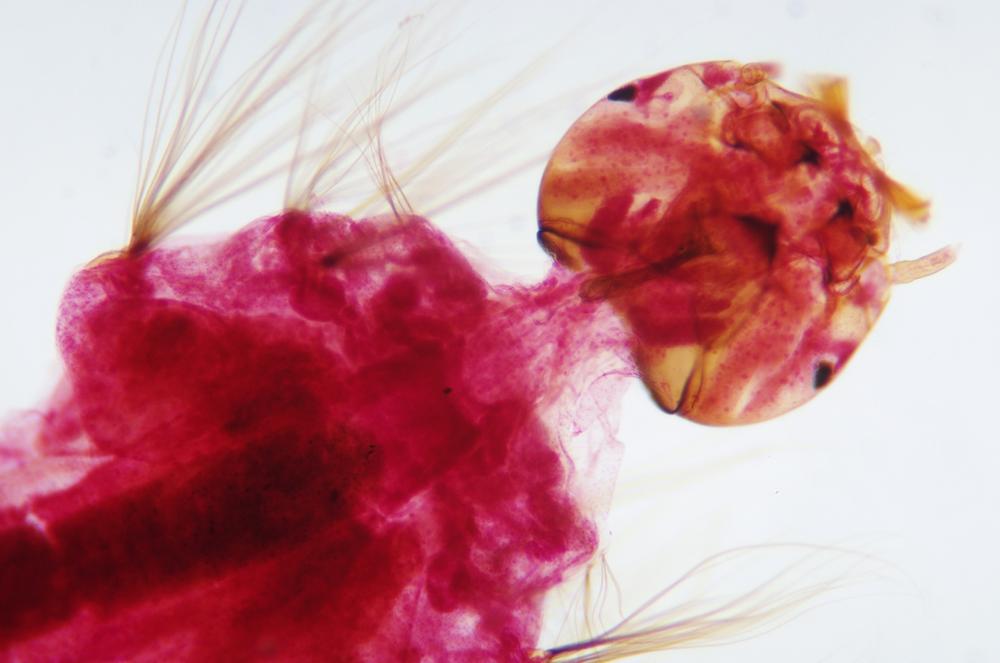
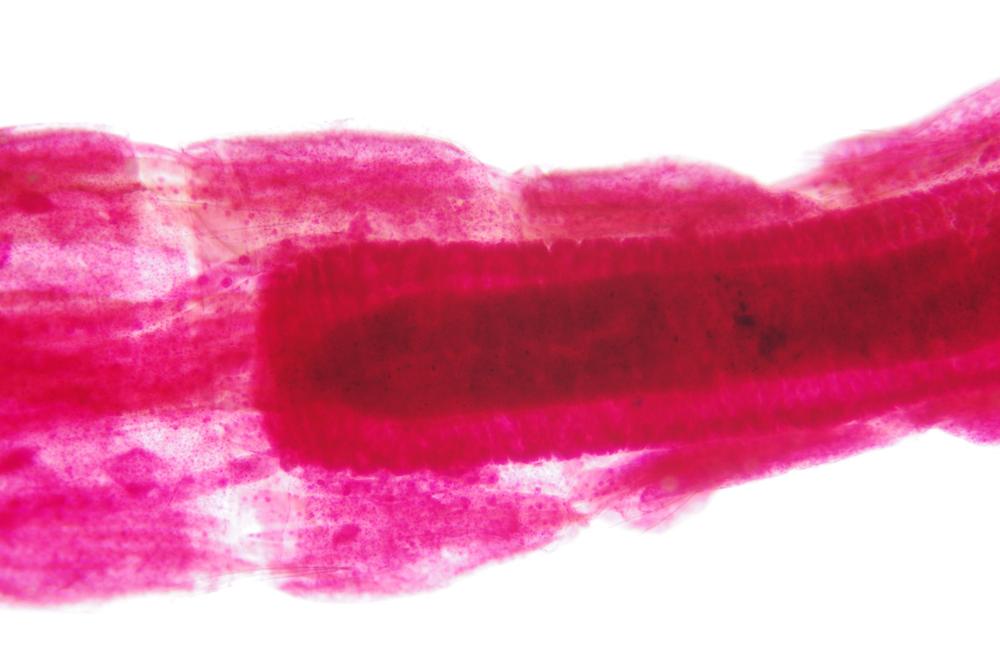
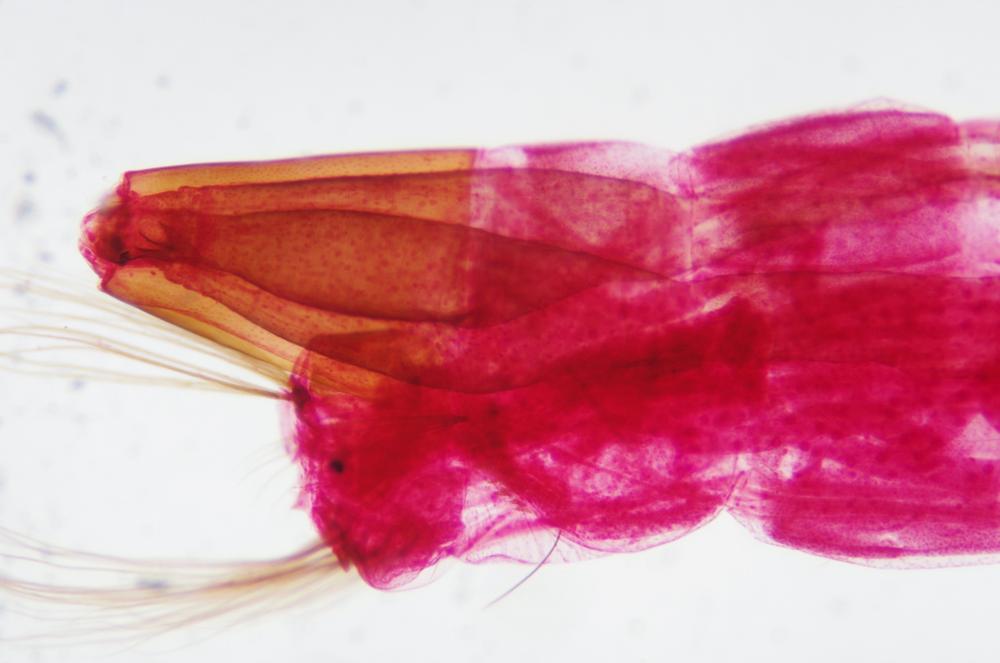
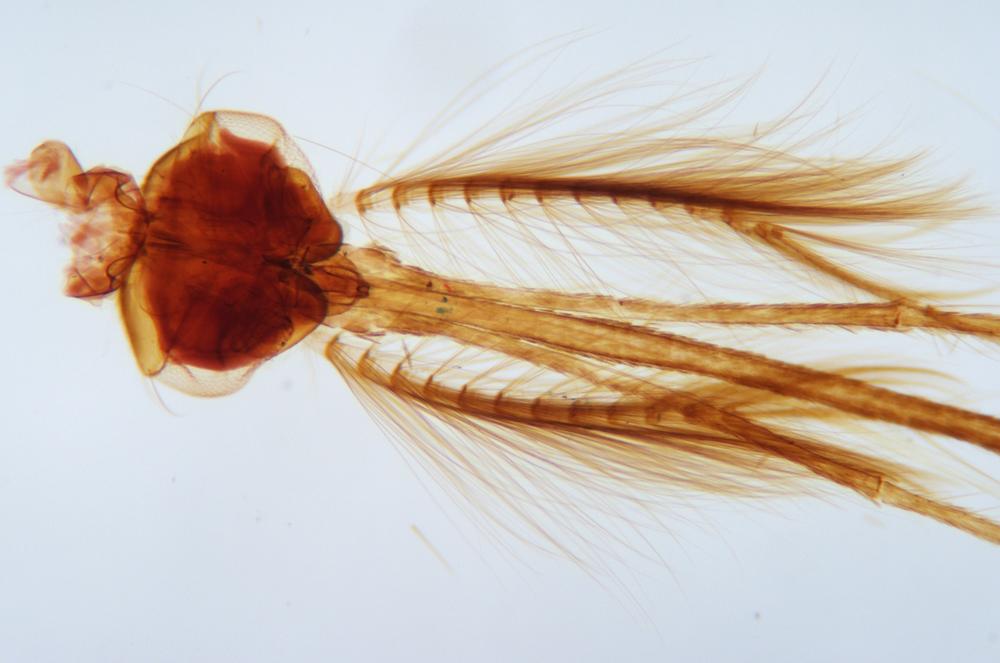
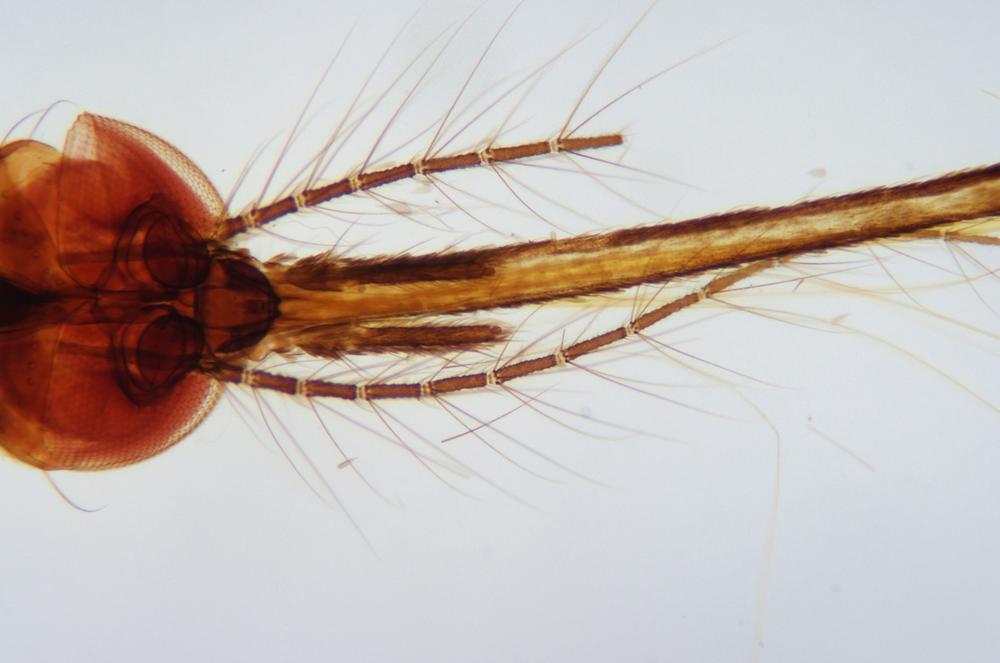
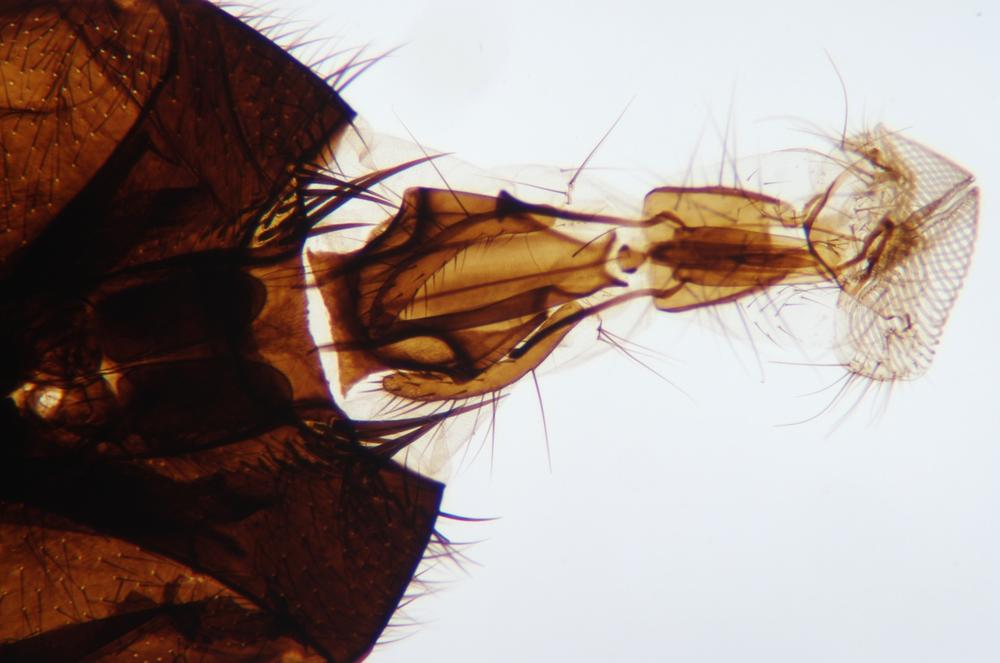
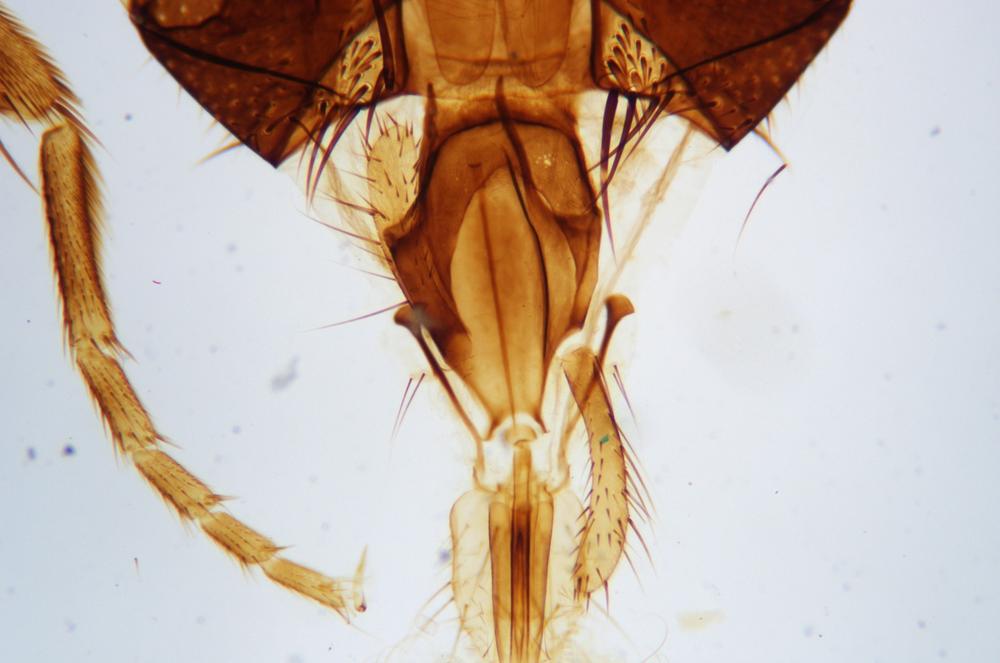
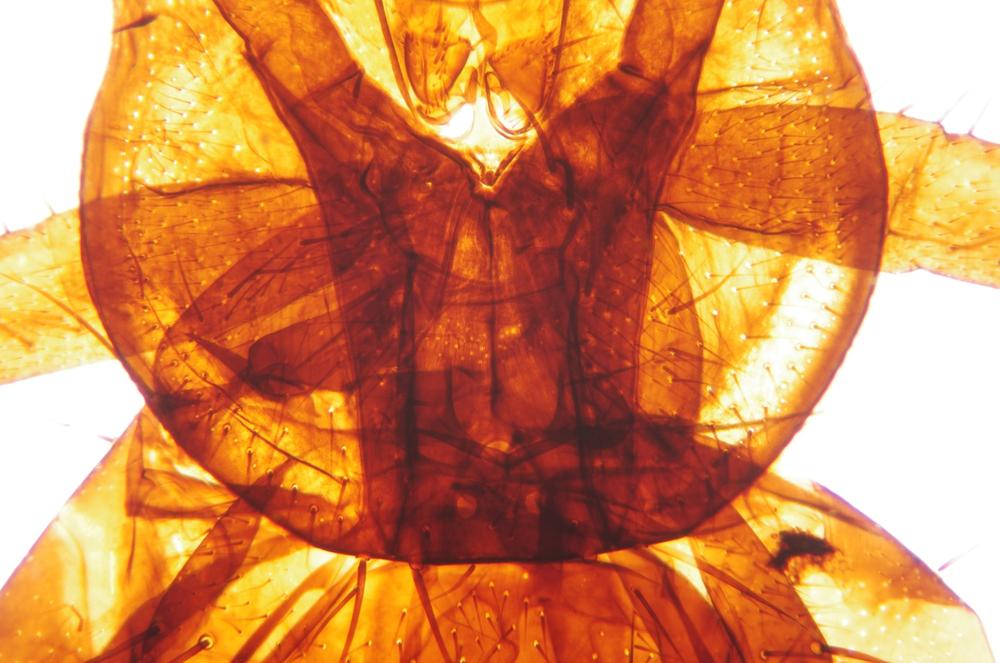
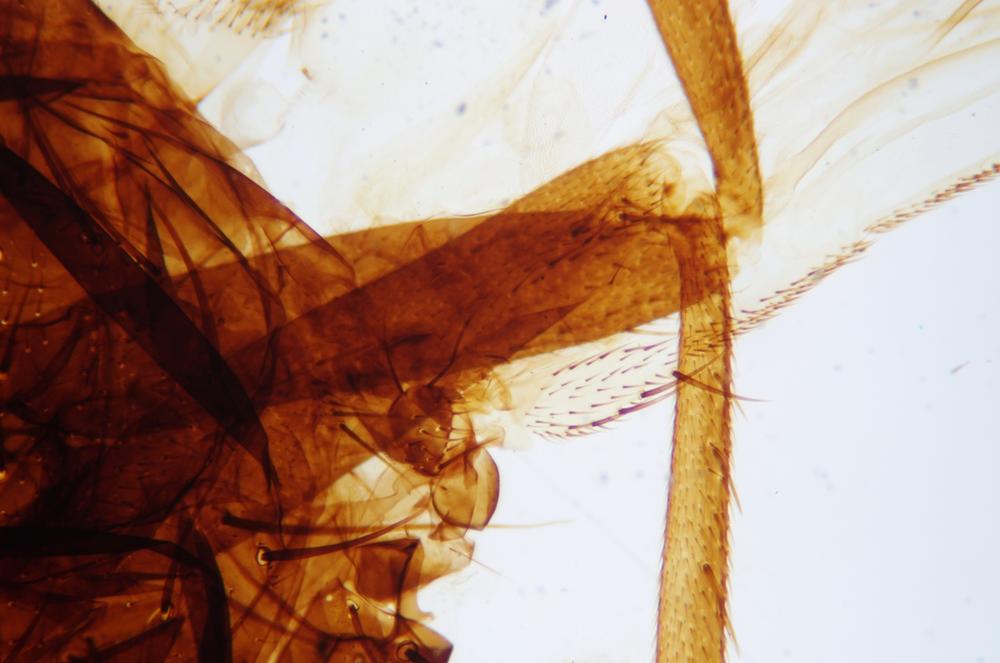
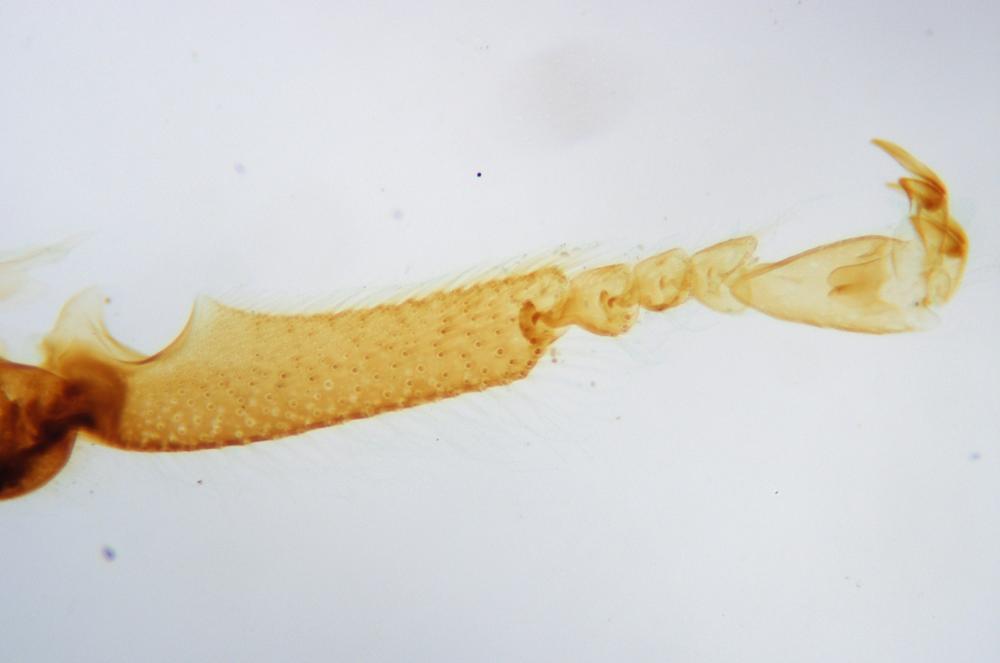
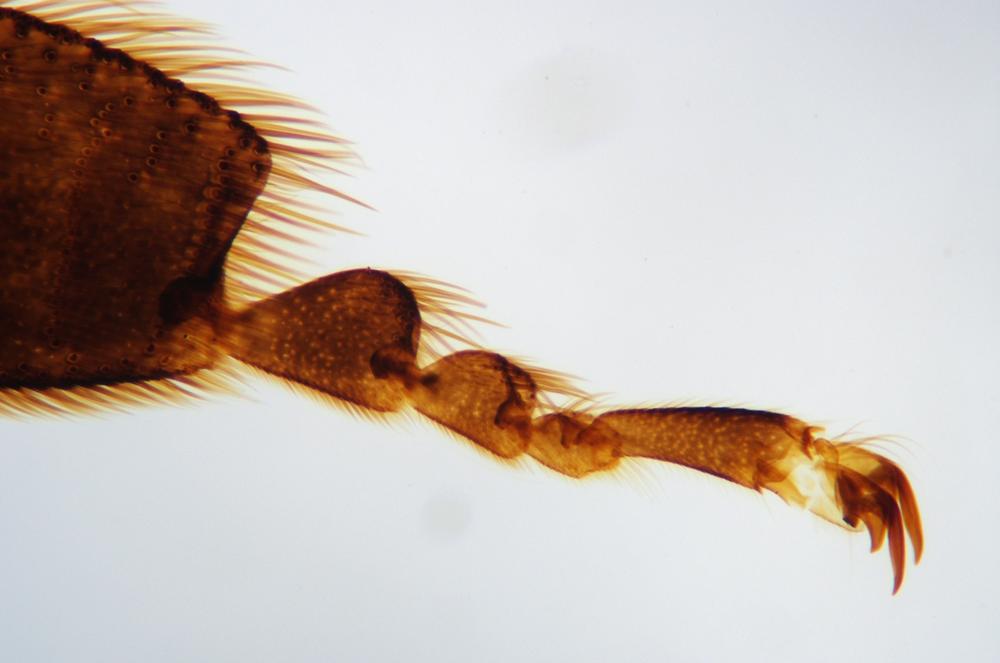
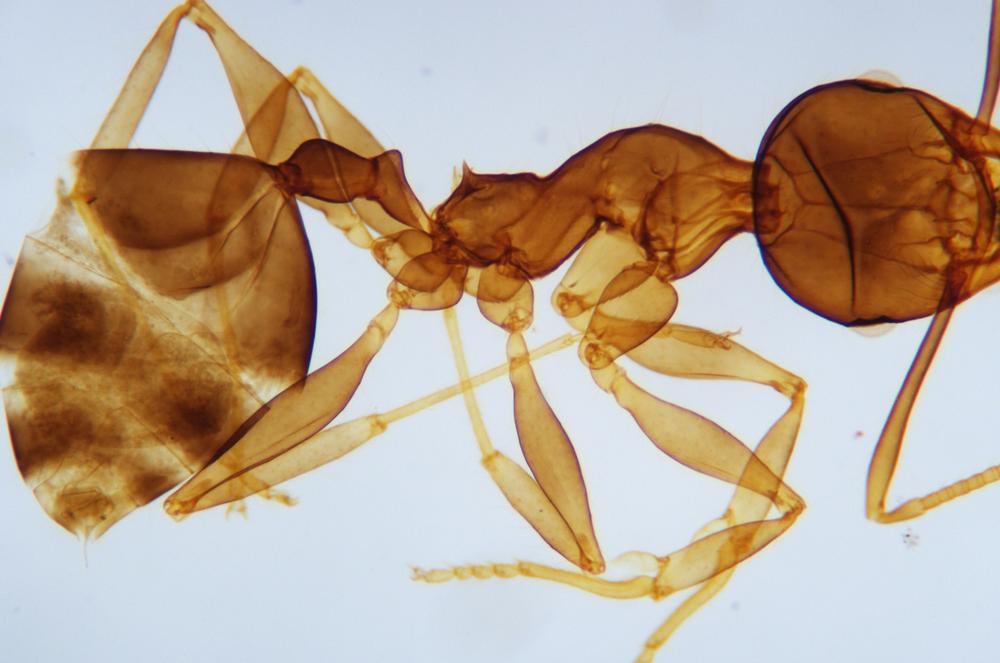
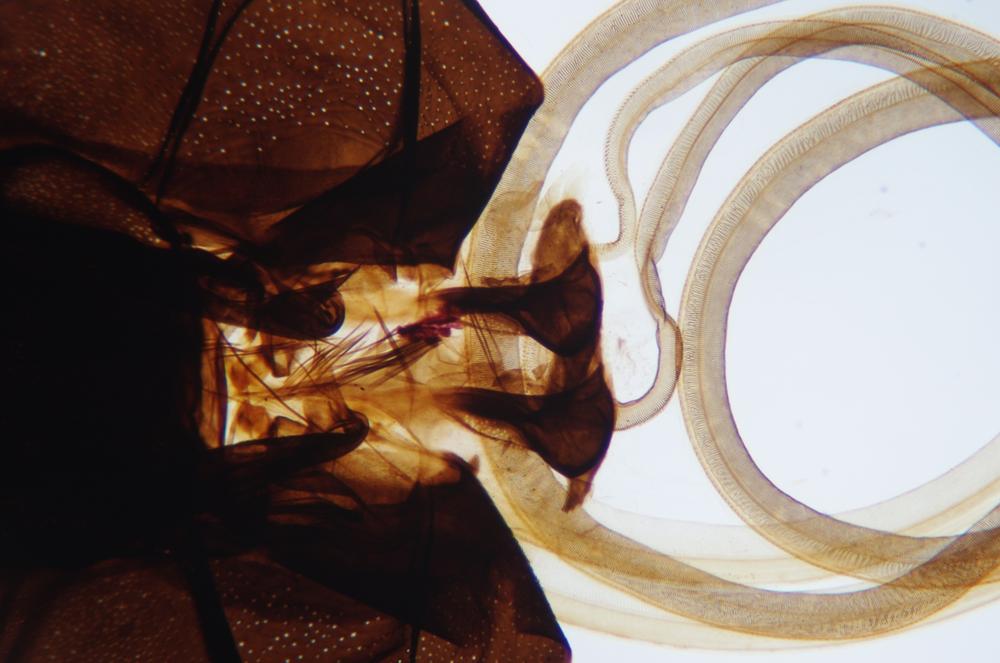
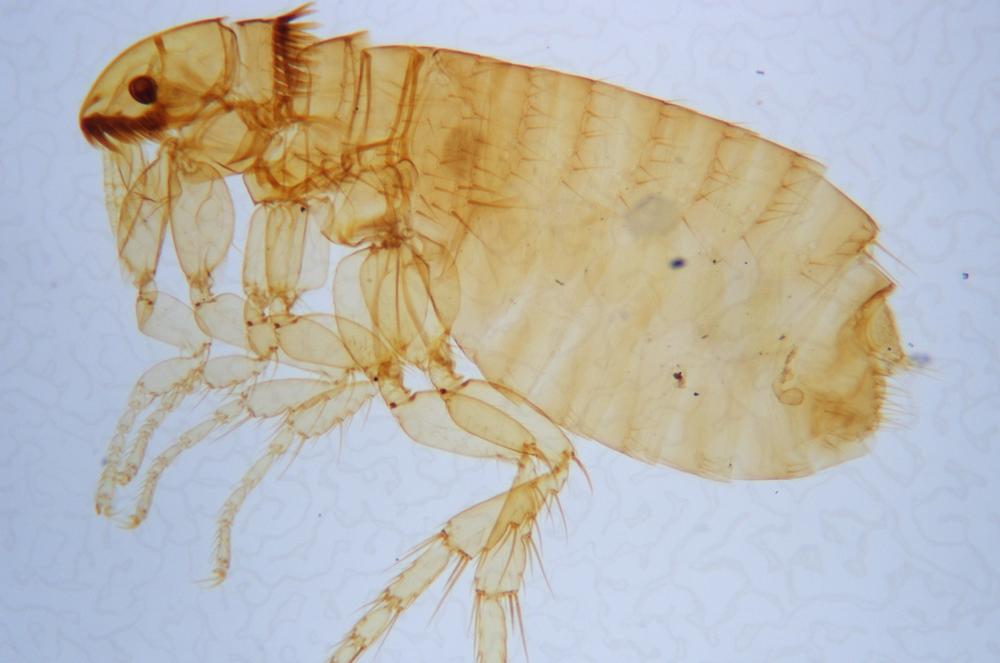
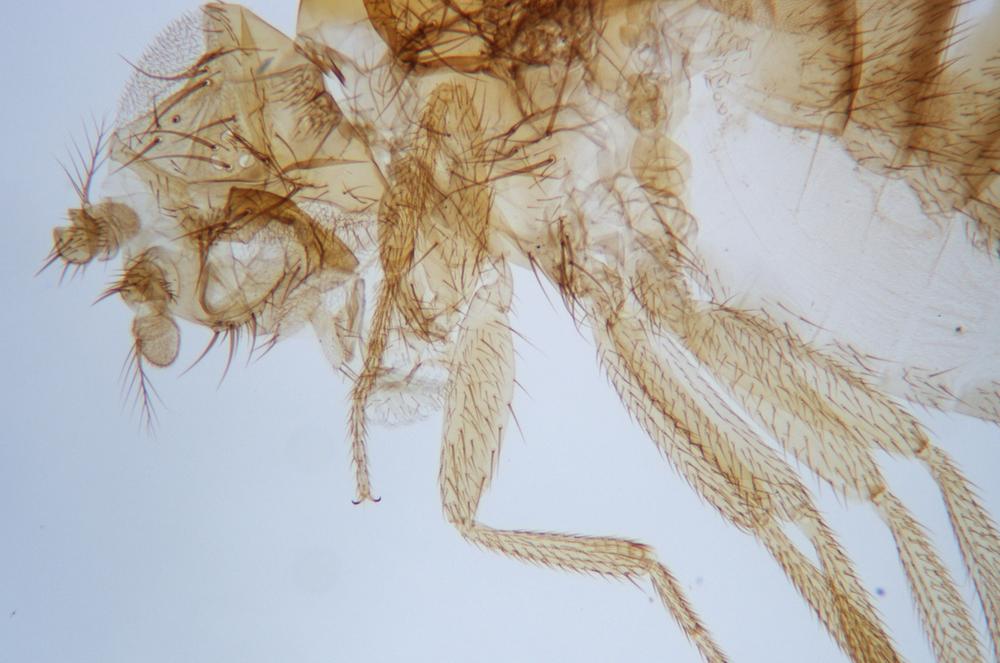
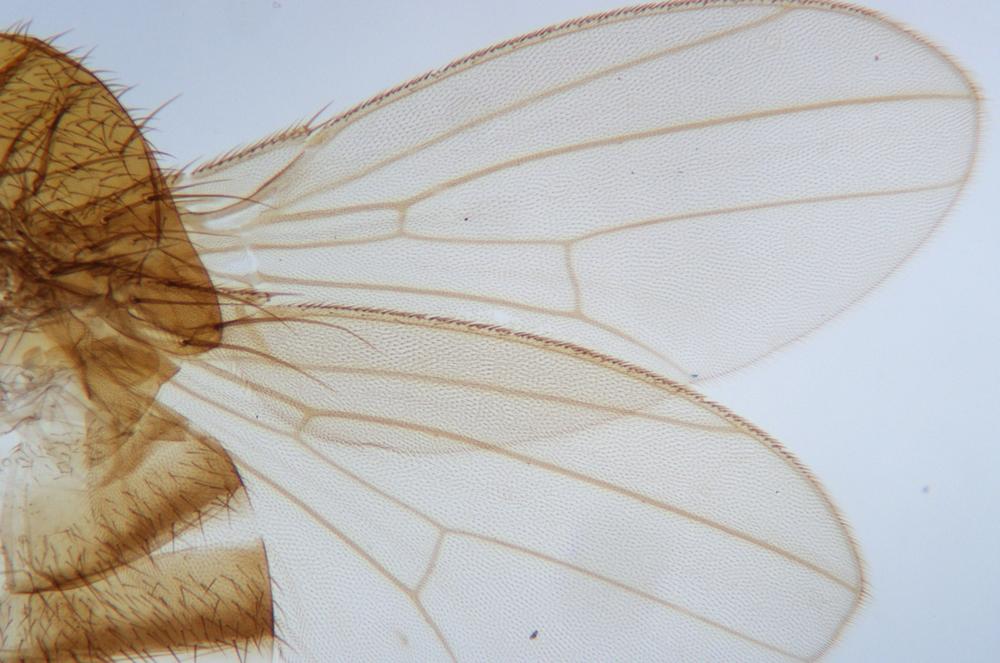
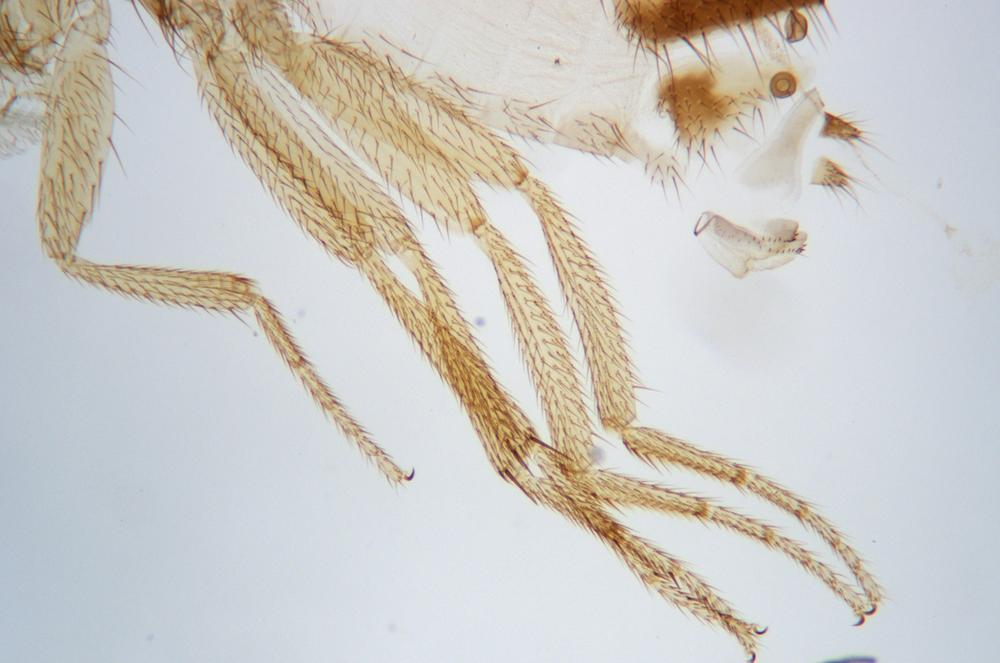
Examine as many whole arthropod specimens as you have available (or prepared slides of the same) using your naked eye, the magnifier, and your microscope, as appropriate for the size of the specimen. Pay particular attention to the structures of the body, head, tail, and appendages (legs, wings, antennae). Figure 35-1 through Figure 35-22 are whole mount images of small arthropod specimens of the sort that are readily available locally for collection.


Procedure XI-3-2: Observing Insect Metamorphosis
In this procedure, we’ll observe metamorphosis in the mealworm beetle and determine the effect of temperature, if any, on the rate of metamorphosis by observing specimen groups kept at different temperatures. The specific temperatures are not important as long as there is a significant difference, say 15 to 18 °C or more, with the lower temperature above freezing. For most people, the easiest way to accomplish this is to keep one group at room temperature (typically 20 to 25 °C) and a second in a standard refrigerator (typically ~2 °C).
If you have the means to do so, also observe a third group kept at an elevated temperature (we suggest 37 to 40 °C). If you do this procedure during the cold weather months, that can be as simple as keeping the container close to a heating vent, heat strip, or radiator. Otherwise, you can weight the container and keep it partially immersed in a warm water bath maintained with an aquarium heater.
Note
Mealworm beetles are primarily nocturnal, so keep their environment darkened as much as possible.
To introduce a second variable, we’ll also observe metamorphosis of specimens at different temperatures using different food sources. For example, you might observe three containers at each temperature, one with oatmeal as the food source, a second with crushed corn flakes, and a third with crushed wheat bran.
As you perform this procedure, examine specimens regularly with your naked eye, magnifier (or stereo microscope) and microscope, and record your observations in your lab notebook. Sketch or shoot images of any significant features you observe. We will assume that you are beginning with mealworms in the larval stage. You can modify these instructions according to the time you have available and the life stage you begin with.
Prepare containers for each of the food/temperature combinations you intend to use. Place a layer of the chosen food on the bottom of each container and distribute a few small chunks of potato or orange to provide a water source for the worms. (Keep an eye on these chunks over the course of the procedure, and replace them when they start to become moldy.)
Using forceps or a small spatula, gently transfer the same number of mealworm larvae to each of the containers. (Don’t squish the larvae.) Judge the number according to the size of the container. You want as many larvae as possible without crowding the container. Record the number of larvae transferred to each container.
Note
As an interesting extension to the experiment, consider using two similar containers, each with the same food and kept at the same temperature. To one of these containers, transfer just enough larvae to populate the container well without crowding. To the second container, transfer several times as many larvae, crowding the larvae. Observe the metamorphosis of the larvae in both containers and note any differences based on competition for resources.
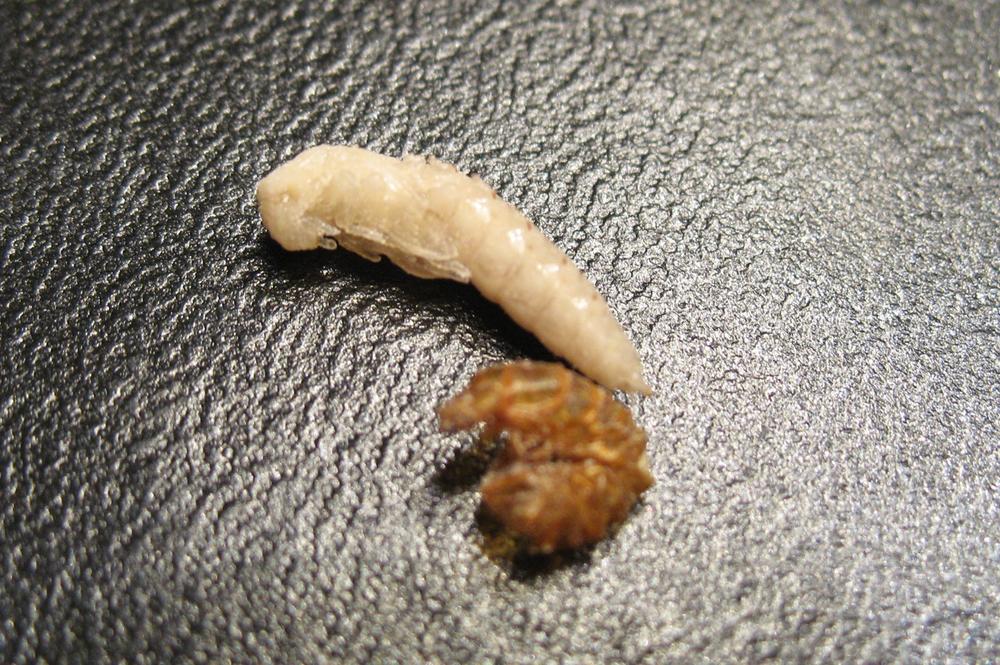
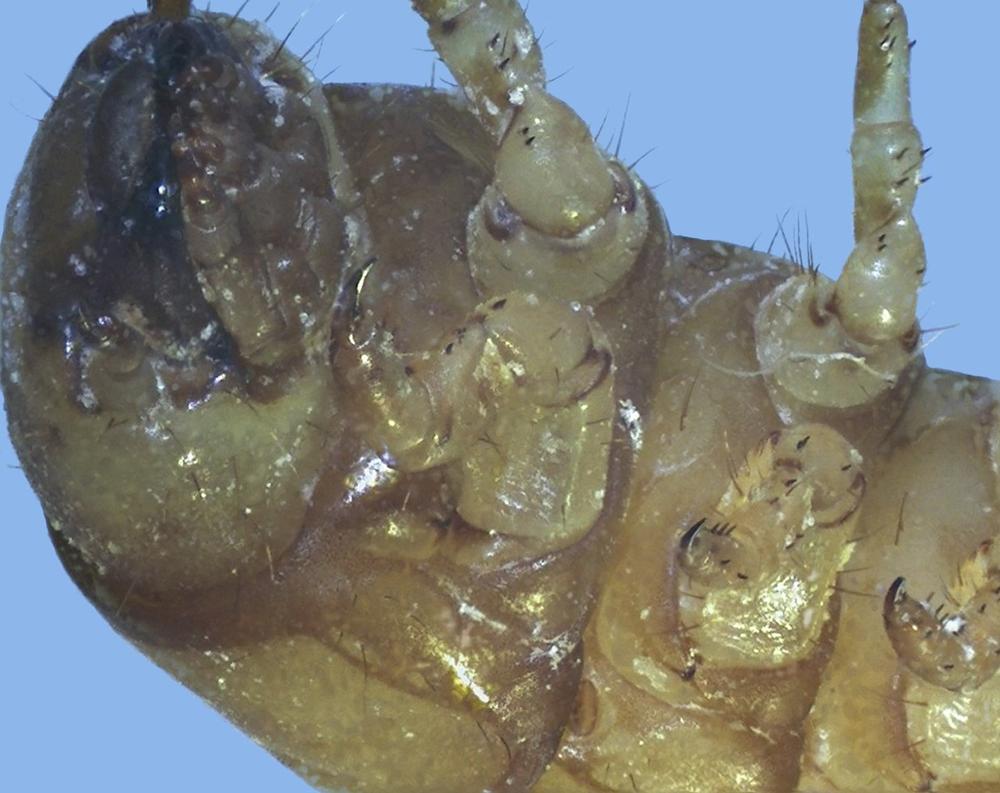
For the first week, observe the containers daily at the same time each day. Note any changes in appearance of the larvae and count the number of larvae that are undergoing or have undergone a visible change. Beginning with the second week, you can change your observations and counts to every other day. Continue these observations until the first larvae begin to emerge as pupae, shown in Figure 35-23 and Figure 35-24, and then return to the daily schedule.
As the larvae emerge as pupae, transfer the pupae to additional containers, and continue to observe both the original and new containers. Note any differences between newly emerged pupae and those that are several days or more old.
As the pupae begin to emerge as adult beetles, transfer the adult beetles to new containers and continue to observe the containers of all three stages.
There is, of course, no natural ending point for this procedure. Eggs become larvae, which become pupae, which become adult beetles, which lay eggs, which become larvae, and so on. That’s why it’s called a life cycle.
When you have observed the mealworm beetle life cycle long enough to have seen all stages, conclude the procedure. Use your detailed notes to determine what, if any, effect temperature and/or food has on the timing of the life cycle.
Review Questions
Q1: What unique features and similarities did you observe in your arthropod specimens?
Q2: What similarities might mislead a student to mistake mealworm beetle larvae for Annelida? What external anatomical features allow the larvae to be distinguished from Annelida?
Q3: How can you distinguish newly emerged pupae from older pupae?
Q4: What external anatomical features that characterize them as insects do the adult mealworm beetles share with the other insects you observed in the preceding procedure?
Q5: Are mealworm beetles hemimetabolic or homometabolic? Why?
Q6: What characteristic of mealworm beetles suggests that temperature may affect the timing of their life stages? Did you observe such an effect?
Q7: How would you expect climate to affect the mealworm beetle life stages in the wild?
Q8: Did you observe any variations in the life cycle with different foods?