2
Writing a C# Program
THE VISUAL STUDIO 2017 DEVELOPMENT ENVIRONMENT
When you begin the installation of Visual Studio Community 2017 you are prompted with a window similar to Figure 2‐1 . It provides a list of Workloads, Individual components, and Language packs to install along with the core editor.
Install the following Workloads and click the Install button.
- Windows —Universal Windows Platform development
-
Windows
—.Net desktop development
- .NET Framework 4.7 development tools
- Web & Cloud —ASP.NET and web development
- Web & Cloud —Azure development
- Other Toolsets —.NET Core cross‐platform development
After installation is complete, when Visual Studio is first loaded, it immediately presents you with the option to Sign in to Visual Studio using your Microsoft Account. By doing this, your Visual Studio settings are synced between devices so that you do not have to configure the IDE when using it on multiple workstations. If you do not have a Microsoft Account, follow the process for the creation of one and then use it to sign in. If you do not want to sign in, click the “Not now, maybe later” link, and continue the initial configuration of Visual Studio. We recommend that at some point you sign in and get a developer license.

If this is the first time you've run Visual Studio, you will be presented with a list of preferences intended for users who have experience with previous releases of this development environment. The choices you make here affect a number of things, such as the layout of windows, the way that console windows run, and so on. Therefore, choose Visual C# from the drop‐down; otherwise, you might find that things don't quite work as described in this book. Note that the options available vary depending on the options you chose when installing Visual Studio, but as long as you chose to install C# this option will be available.
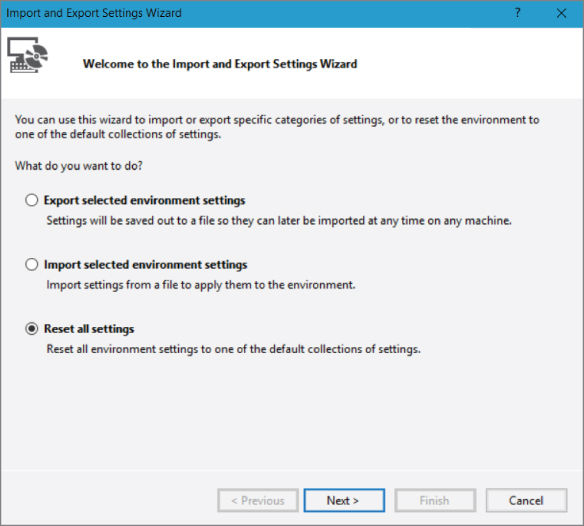
If this isn't the first time that you've run Visual Studio, and you chose a different option the first time, don't panic. To reset the settings to Visual C#, you simply have to import them. To do this, select Tools  Import and Export Settings, and choose the Reset All Settings option, shown in Figure 2‐2
.
Import and Export Settings, and choose the Reset All Settings option, shown in Figure 2‐2
.
Click Next, and indicate whether you want to save your existing settings before proceeding. If you have customized things, you might want to do this; otherwise, select No and click Next again. From the next dialog box, select Visual C#, shown in Figure 2‐3 . Again, the available options may vary.

Finally, click Finish, then Close to apply the settings.
The Visual Studio environment layout is completely customizable, but the default is fine here. With C# Developer Settings selected, it is arranged as shown in Figure 2‐4 .

The main window, which contains a helpful Start Page by default when Visual Studio is started, is where all your code is displayed. This window can contain many documents, each indicated by a tab, so you can easily switch between several files by clicking their filenames. It also has other functions: It can display GUIs that you are designing for your projects, plain‐text files, HTML, and various tools that are built into Visual Studio. You will come across all of these in the course of this book.
Above the main window are toolbars and the Visual Studio menu. Several different toolbars can be placed here, with functionality ranging from saving and loading files to building and running projects to debugging controls. Again, you are introduced to these as you need to use them.
Here are brief descriptions of each of the main features that you will use the most:
- The Toolbox window pops up when you click its tab. It provides access to, among other things, the user interface building blocks for desktop applications. Another tab, Server Explorer, can also appear here (selectable via the View
Server Explorer menu option) and includes various additional capabilities, such as Azure subscription details, providing access to data sources, server settings, services, and more.
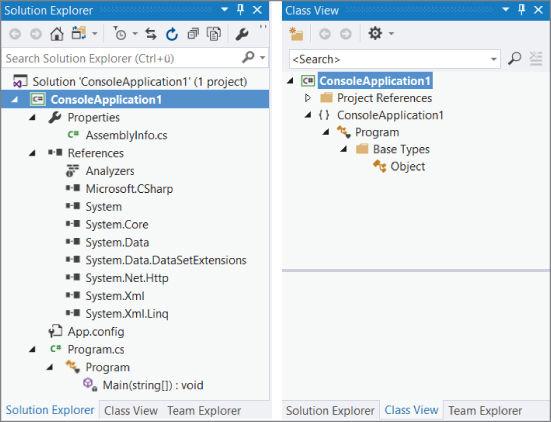
- The Solution Explorer window displays information about the currently loaded solution . A solution, as you learned in the previous chapter, is Visual Studio terminology for one or more projects along with their configurations. The Solution Explorer window displays various views of the projects in a solution, such as what files they contain and what is contained in those files.
- The Team Explorer window displays information about the current Team Foundation Server or Team Foundation Service connection. This allows you access to source control, bug tracking, build automation, and other functionality. However, this is an advanced subject and is not covered in this book.
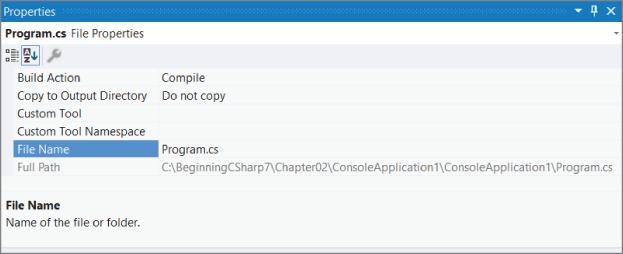
- Just below the Solution Explorer window you can display a Properties window, not shown in Figure 2‐4
because it appears only when you are working on a project (you can also toggle its display using View
Properties Window). This window provides a more detailed view of the project's contents, enabling you to perform additional configuration of individual elements. For example, you can use this window to change the appearance of a button in a desktop application.
- Also not shown in the screenshot is another extremely important window: the Error List window, which you can display using View
Error List. It shows errors, warnings, and other project‐related information. The window updates continuously, although some information appears only when a project is compiled.
This might seem like a lot to take in, but it doesn't take long to get comfortable. You start by building the first of your example projects, which involves many of the Visual Studio elements just described.
CONSOLE APPLICATIONS
You use console applications regularly in this book, particularly at the beginning, so the following Try It Out provides a step‐by‐step guide to creating a simple one.

 WHAT YOU LEARNED IN THIS CHAPTER