Interior Repairs
In this chapter:

• Replacing a Damaged Floorboard
• Replacing Sections of Wood Floors
• Repairing Ceramic Tile Flooring
• Sealing Interior Concrete Floors
• Installing a Reclaimed Floor
• Repairing Water-damaged Walls & Ceilings
• Removing Wall & Ceiling Surfaces
• Final Inspection & Fixing Problems
• Preparation Tools & Materials
• Ceiling & Wall Painting Techniques
• Replacing a Broken Stair Tread
 Repairing Floors
Floor coverings wear out faster than other interior surfaces because they get more wear and tear. Surface damage can affect more than just appearance. Scratches in resilient flooring and cracks in grouted tile joints can let moisture into the floor’s underpinnings. Hardwood floors lose their finish and become discolored. Loose boards squeak.
Underneath the finished flooring, moisture ruins wood underlayment and the damage is passed on to the subfloor. Bathroom floors suffer the most from moisture problems. Subflooring can pull loose from joists, causing floors to become uneven and springy.
You can fix these problems yourself, such as squeaks, a broken stair tread, damaged baseboard and trim, and minor damage to floor coverings, with the tools and techniques shown on the following pages.

A typical wood-frame floor consists of layers that work together to provide the required structural support and desired appearance: 1. At the bottom of the floor are the joists, the 2 × 10 or larger framing members that support the weight of the floor. Joists are typically spaced 16" apart on center. 2. The subfloor is nailed to the joists. Most subfloors installed in the 1970s or later are made of 3/4" tongue-and-groove plywood; in older houses, the subfloor often consists of 1"-thick wood planks nailed diagonally across the floor joists. 3. On top of the subfloor, most builders place a 1/2" plywood underlayment. Some flooring materials, especially ceramic tile, require cementboard for stability. 4. For many types of floor coverings, adhesive or mortar is spread on the underlayment before the floor covering is installed. Carpet rolls generally require tackless strips and cushioned padding. 5. Other materials, such as snap-fit laminate planks or carpet squares, can be installed directly on the underlayment with little or no adhesive.
Tips for Evaluating Floors
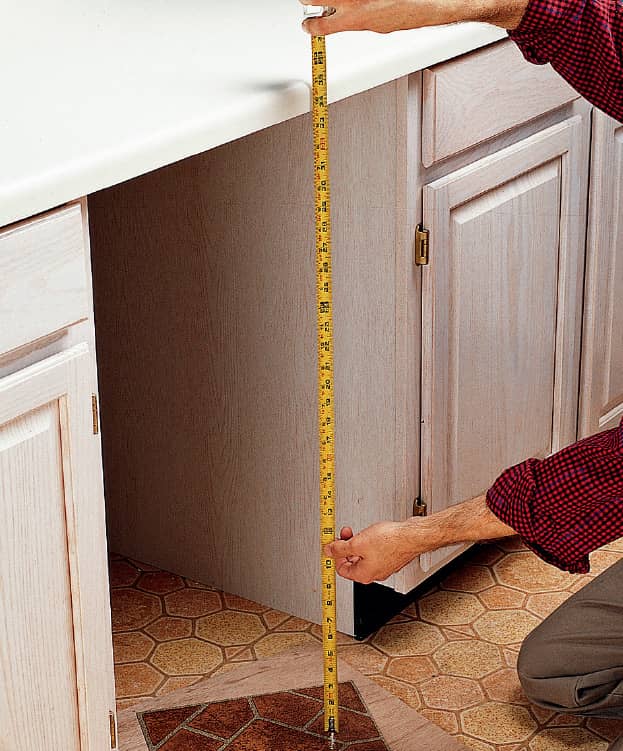
When installing new flooring over old, measure vertical spaces to make sure enclosed or under-counter appliances will fit once the new underlayment and flooring are installed. Use samples of the new underlayment and floor covering as spacers when measuring.
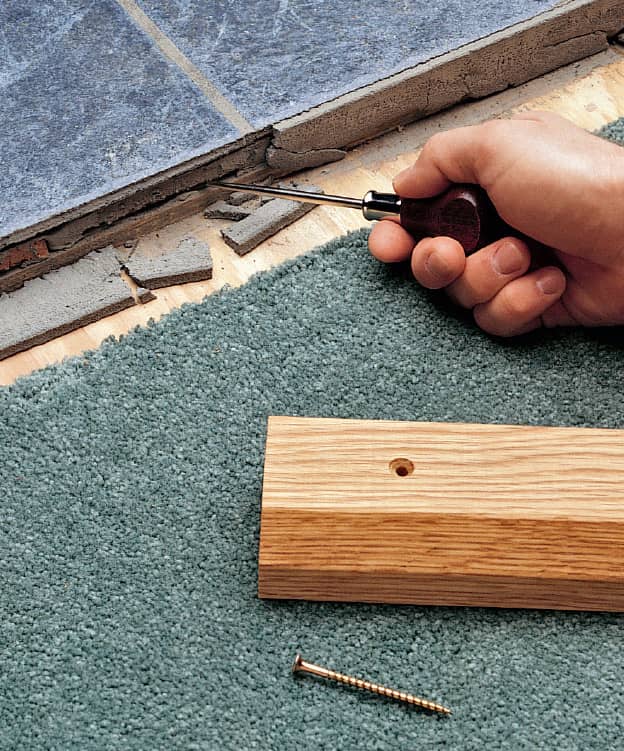
High thresholds often indicate that several layers of flooring have already been installed on top of one another. If you have several layers, it’s best to remove them before installing the new floor covering.
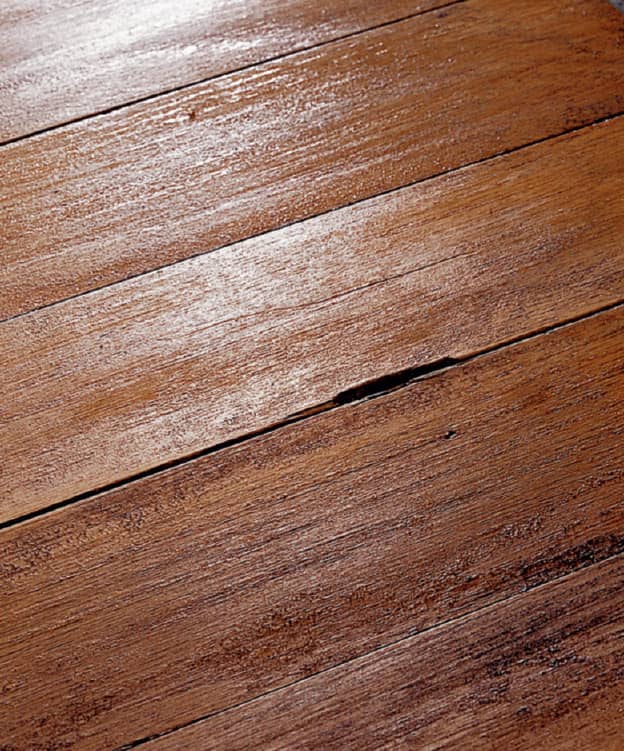
Buckling in solid hardwood floors indicates that the boards have loosened from the subfloor. Do not remove hardwood floors. Instead, refasten loose boards by drilling pilot holes and inserting flooring nails or screws. New carpet can be installed right over a well-fastened hardwood floor. New ceramic tile or resilient flooring should be installed over underlayment placed on the hardwood flooring.
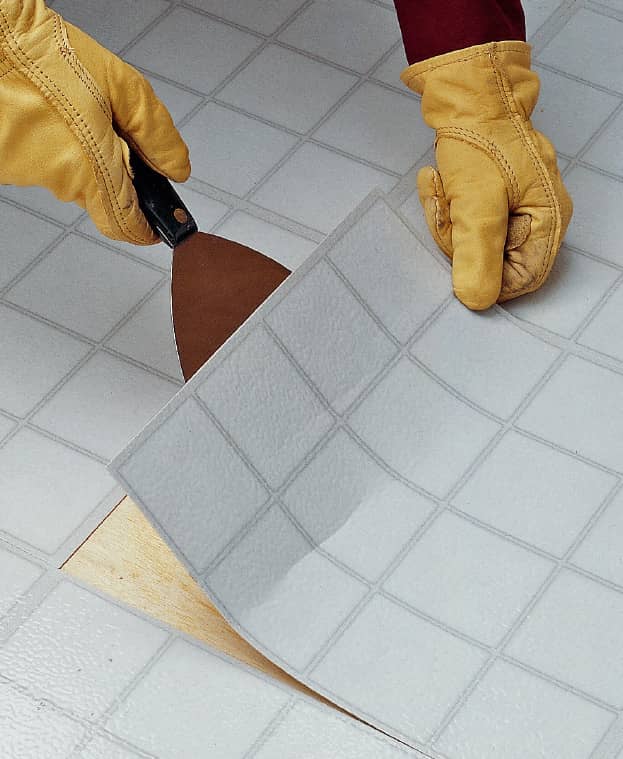
Loose tiles may indicate widespread failure of the adhesive. Use a wallboard knife to test tiles. If tiles can be pried up easily in many different areas of the room, plan to remove all of the flooring.
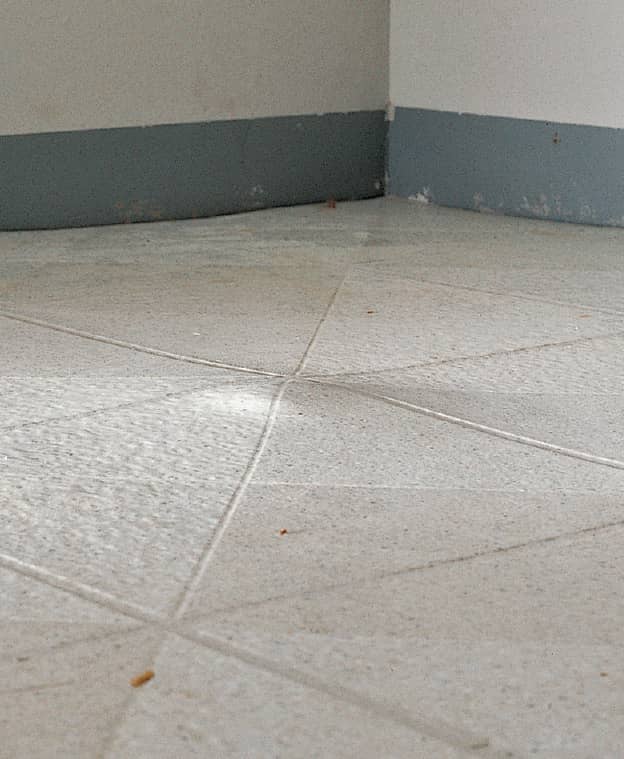
Air bubbles trapped under resilient sheet flooring indicate that the adhesive has failed. The old flooring must be removed before the new covering can be installed.
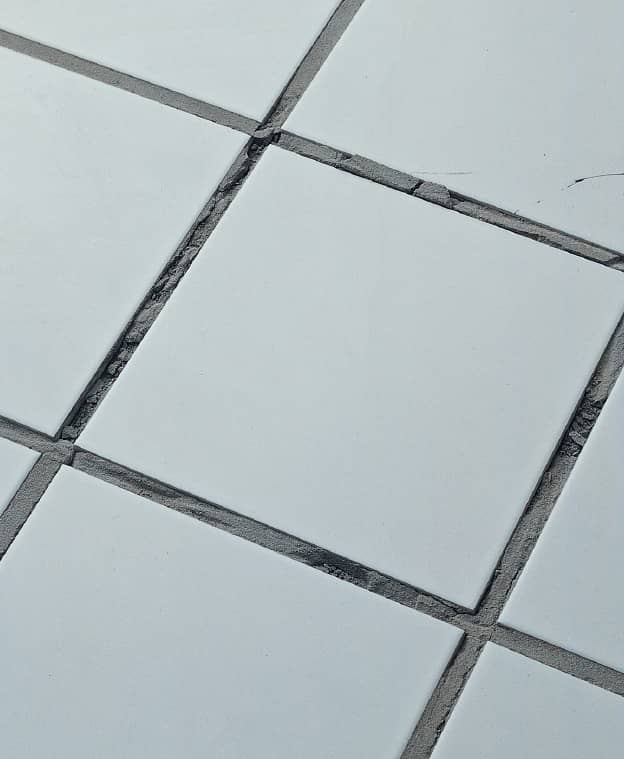
Cracks in grout joints around ceramic tile are a sign that movement of the floor covering has caused, or has been caused by, deterioration of the adhesive layer. If more than 10% of the tiles are loose, remove the old flooring. Evaluate the condition of the underlayment (see opposite page) to determine if it also must be removed.
 Repairing Joists
A severely arched, bulged, cracked, or sagging floor joist can only get worse over time, eventually deforming the floor above it. Correcting a problem joist is an easy repair and makes a big difference in your finished floor. It’s best to identify problem joists and fix them before installing your underlayment and new floor covering.
One way to fix joist problems is to fasten a few new joists next to a damaged floor joist in a process called sistering. When installing a new joist, you may need to notch the bottom edge so it can fit over the foundation or beam. If that’s the case with your joists, cut the notches in the ends no deeper than 1/8" of the actual depth of the joist.
How to Repair a Bulging Joist
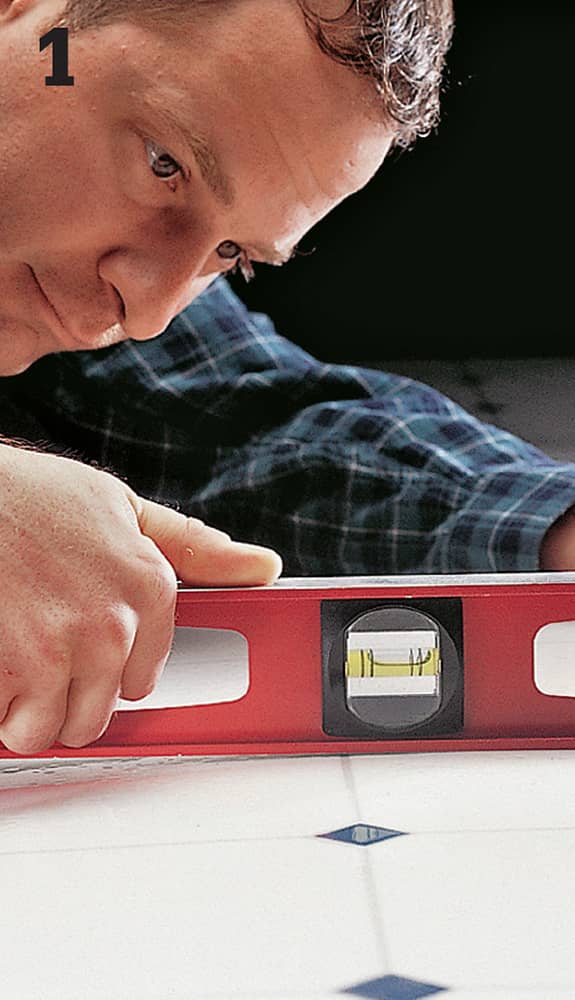
Find the high point of the bulge in the floor using a level. Mark the high point and measure the distance to a reference point that extends through the floor, such as an exterior wall or heating duct.
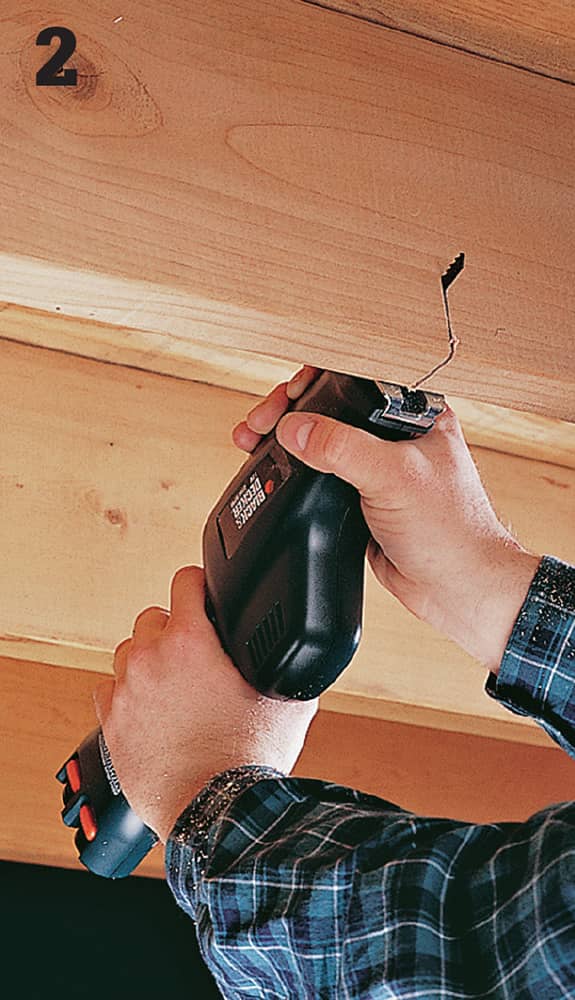
Use the measurement and reference point from the last step to mark the high point on the joist from below the floor. From the bottom edge of the joist, make a straight cut into the joist just below the high point mark using a reciprocating saw. Make the cut 3/4 of the depth of the joist. Allow several weeks for the joist to straighten.
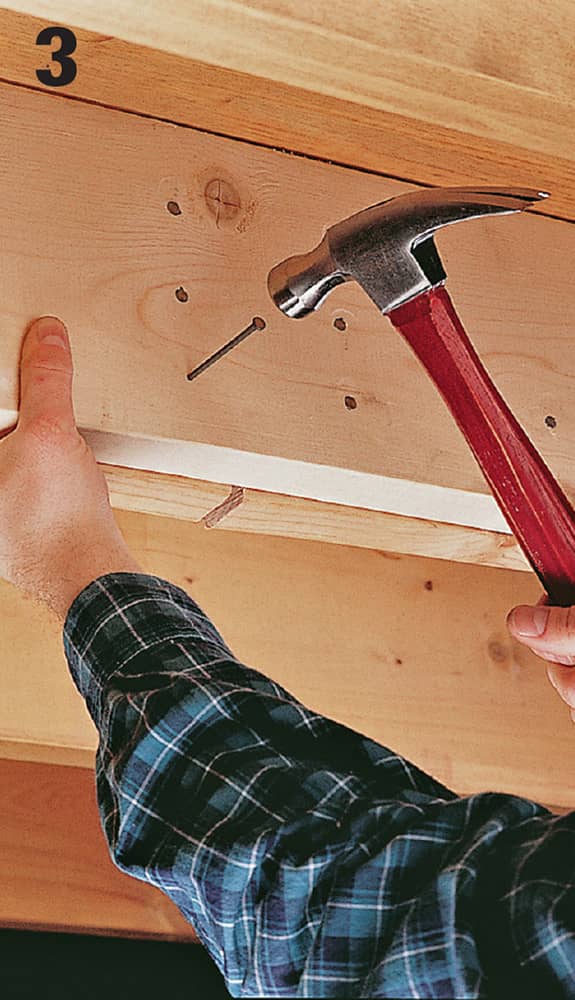
When the joist has settled, reinforce it by centering a board of the same height and at least 6 ft. long next to it. Fasten the board to the joist by driving 12d common nails in staggered pairs about 12" apart. Drive a row of three nails on either side of the cut in the joist.
How to Repair a Cracked or Sagging Joist
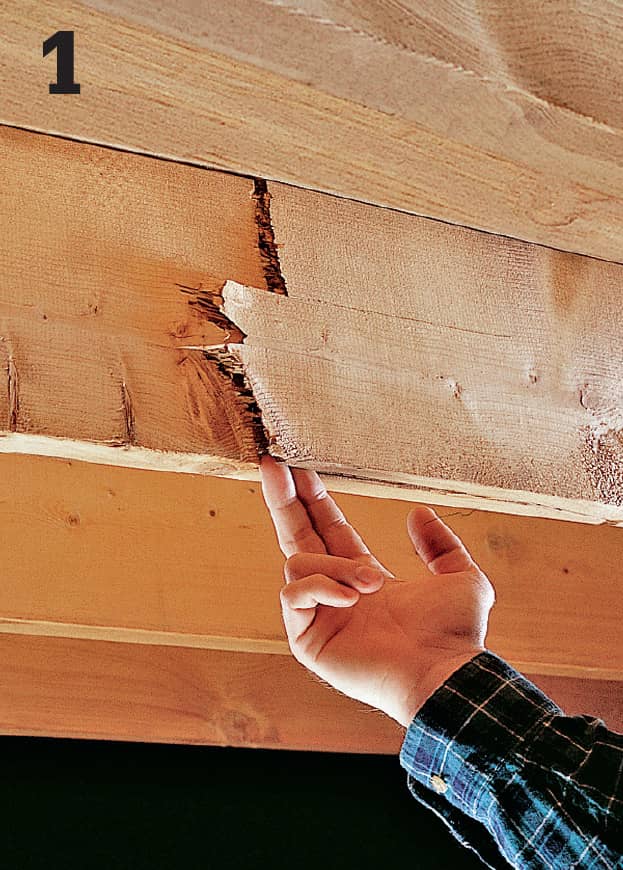
Identify the cracked or sagging joist before it causes additional problems. Remove any blocking or bridging above the sill or beam where the sister joist will go.
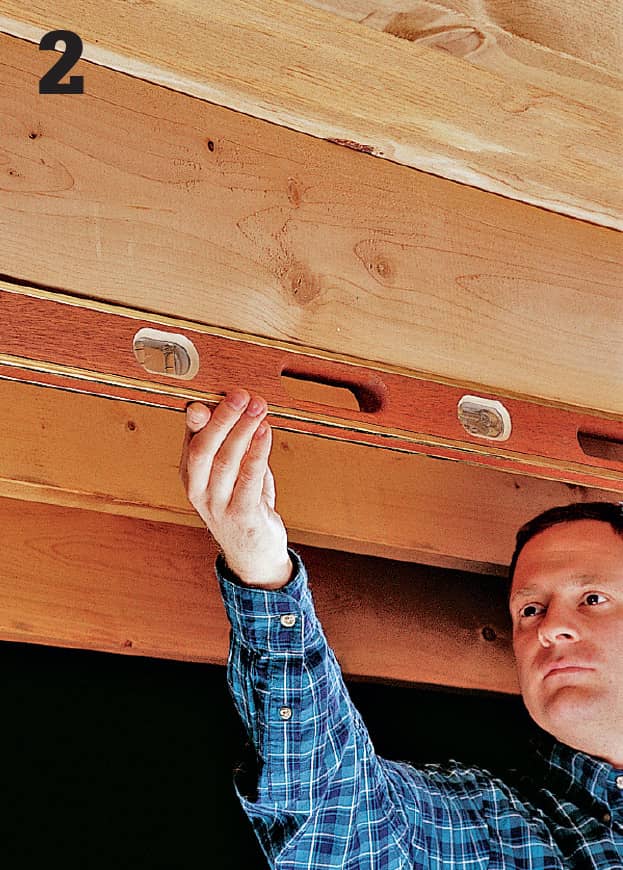
Place a level on the bottom edge of the joist to determine the amount of sagging that has occurred. Cut a sister joist the same length as the damaged joist. Place it next to the damaged joist with the crown side up. If needed, notch the bottom edge of the sister joist so it fits over the foundation or beam.
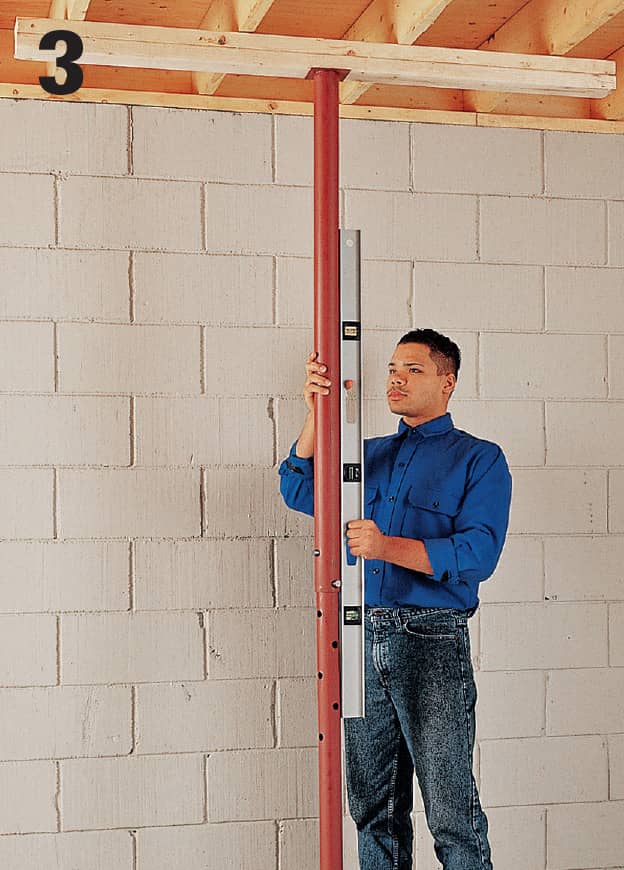
Nail two 6-ft. 2 × 4s together to make a cross beam, then place the beam perpendicular to the joists near one end of the joists. Position a jack post under the beam and use a level to make sure it’s plumb before raising it.
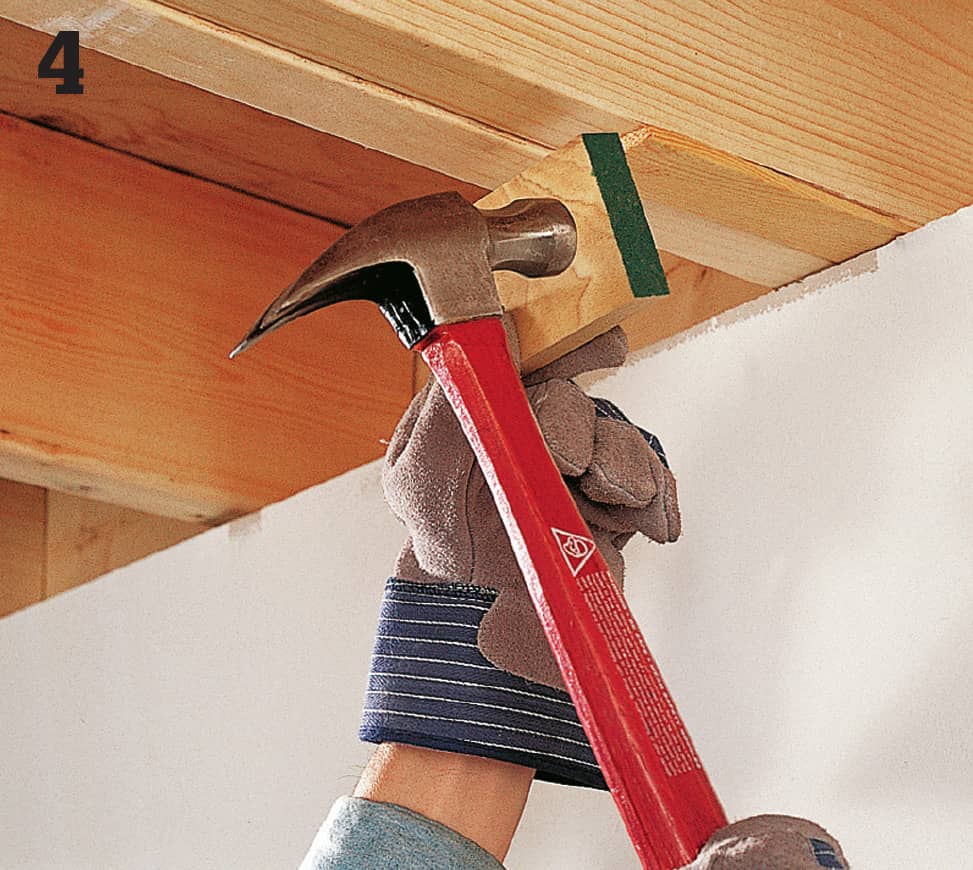
Raise the jack post by turning the threaded shaft until the cross beam is snug against the joists. Position a second jack post and cross beam at the other end of the joists. Raise the posts until the sister joist is flush with the subfloor. Insert tapered hardwood shims at the ends of the sister joist where it sits on the sill or beam. Tap the shims in place with a hammer and scrap piece of wood until they’re snug.
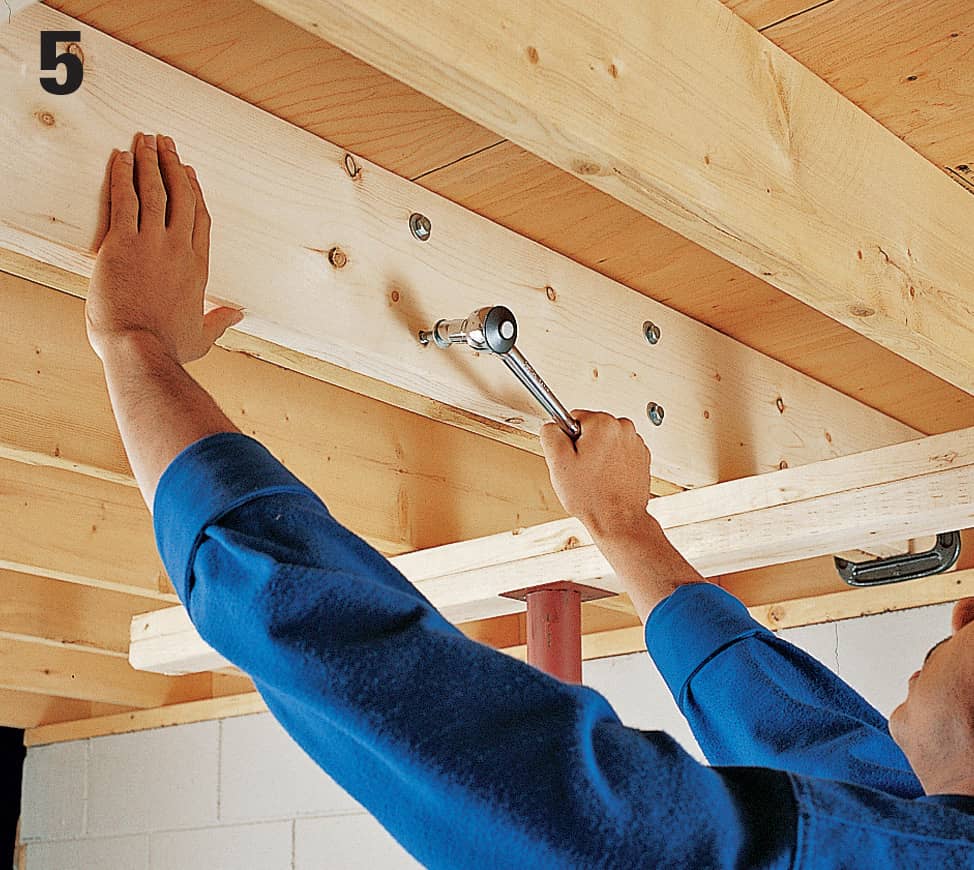
Drill pairs of pilot holes in the sister joist every 12", then insert 3" lag screws with washers in each hole. Cut the blocking or bridging to fit and install it between the joists in its original position.
 Eliminating Floor Squeaks
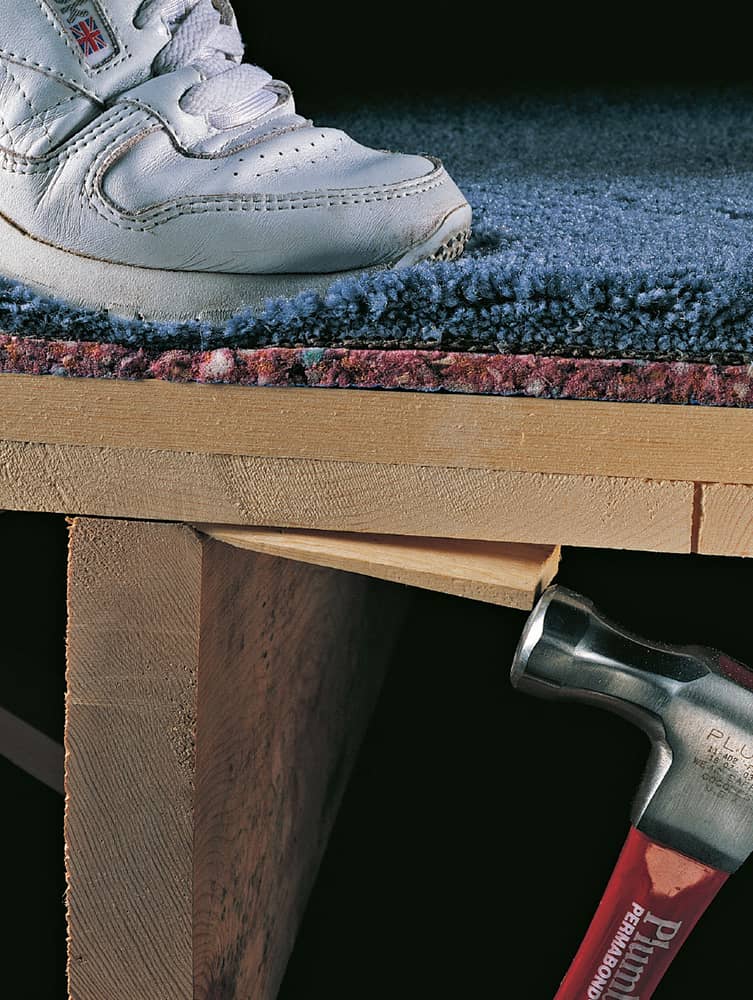
Floors squeak when floorboards rub against each other or against the nails securing them to the subfloor. Hardwood floors squeak if they haven’t been nailed properly. Normal changes in wood make some squeaking inevitable, although noisy floors sometimes indicate serious structural problems. If an area of a floor is soft or excessively squeaky, inspect the framing and the foundation supporting the floor.
Whenever possible, fix squeaks from underneath. Joists longer than 8 feet should have X-bridging or solid blocking between each pair. If these supports aren’t present, install them every 6 feet to stiffen a noisy floor.
How to Eliminate Floor Squeaks
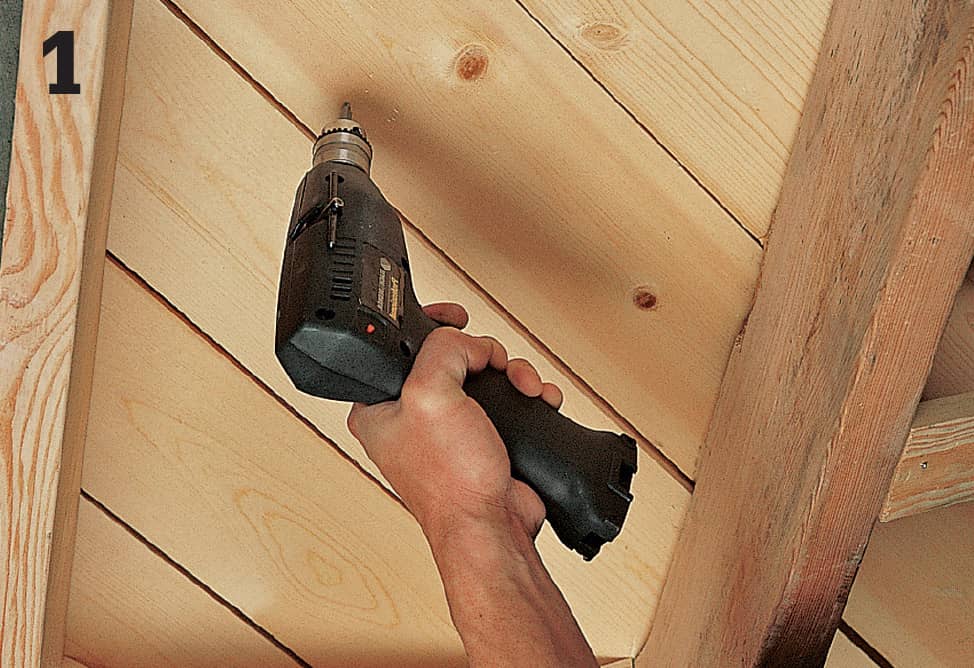
If you can access floor joists from underneath, drive wood screws up through the subfloor to draw hardwood flooring and the subfloor together. Drill pilot holes and make certain the screws aren’t long enough to break through the top of the floorboards. Determine the combined thickness of the floor and subfloor by measuring at cutouts for pipes.
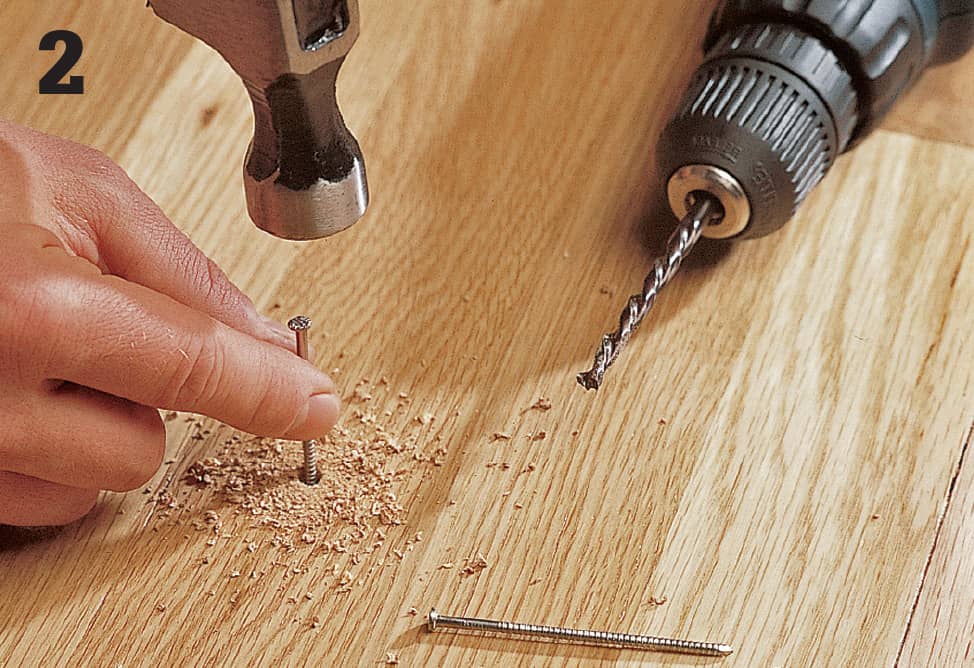
When you can’t reach the floor from underneath, surface-nail the floor boards to the subfloor with ring-shank flooring nails. Drill pilot holes close to the tongue-side edge of the board and drive the nails at a slight angle to increase their holding power. Whenever possible, nail into studs. Countersink the nails with a nail set and fill the holes with tinted wood putty.
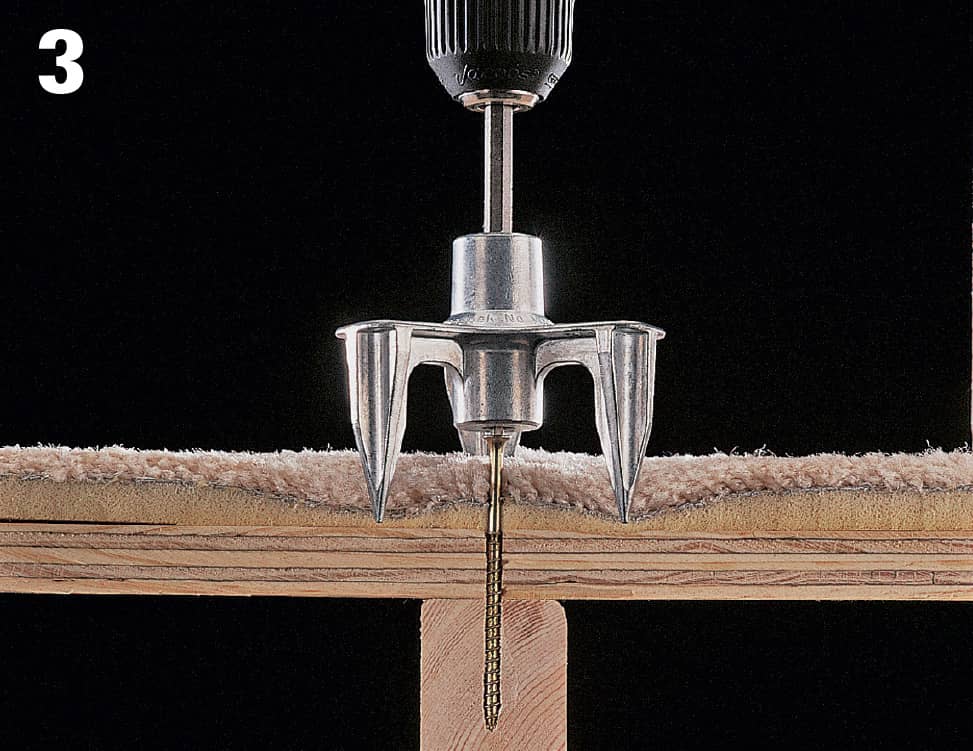
Eliminate squeaks in a carpeted floor by using a special floor fastening device, called a Squeeeeek No More, to drive screws through the subfloor into the joists. The device guides the screw and controls the depth. The screw has a scored shank, so once it’s set, you can break the end off just below the surface of the subfloor.
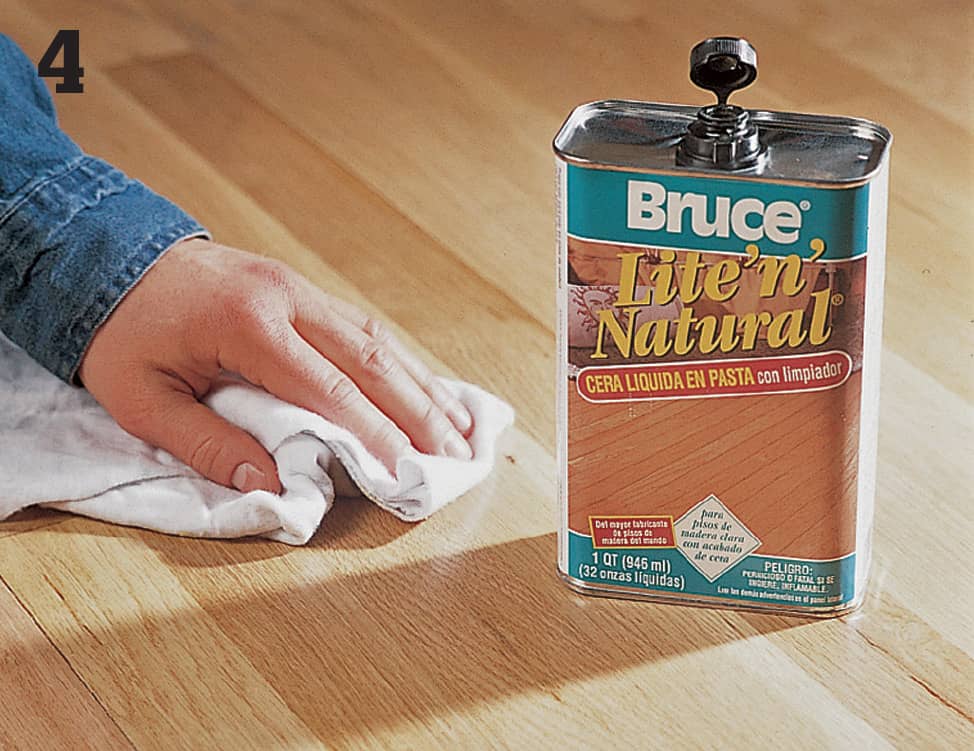
Eliminate squeaks in hardwood floors with graphite powder, talcum powder, powdered soap, mineral oil, or liquid wax. Remove dirt and deposits from joints, using a putty knife. Apply graphite powder, talcum powder, powdered soap, or mineral oil between squeaky boards. Bounce on the boards to work the lubricant into the joints. Clean up excess powder with a damp cloth. Liquid wax is another option, although some floor finishes, such as urethane and varnish, are not compatible with wax, so check with the flooring manufacturer. Use a clean cloth to spread wax over the noisy joints, forcing the wax deep into the joints.
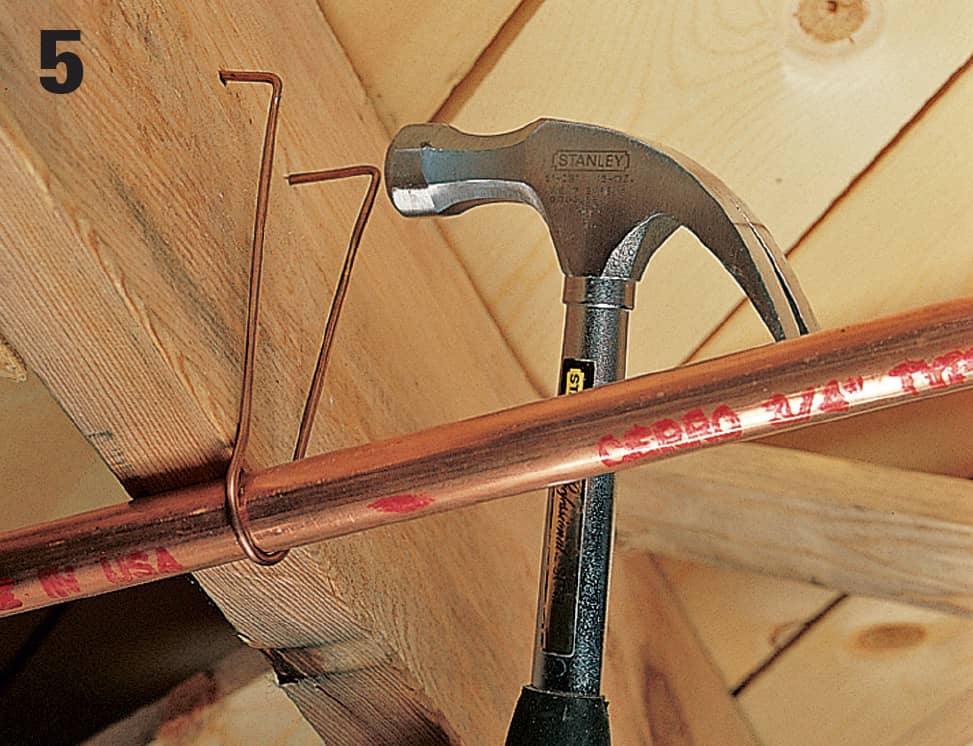
In an unfinished basement or crawl space, copper water pipes are usually hung from floor joists. Listen for pipes rubbing against joists. Loosen or replace wire pipe hangers to silence the noise. Pull the pointed ends of the hanger from the wood, using a hammer or pry bar. Lower the hanger just enough so the pipe isn’t touching the joist, making sure the pipe is held firmly so it won’t vibrate. Renail the hanger, driving the pointed end straight into the wood.
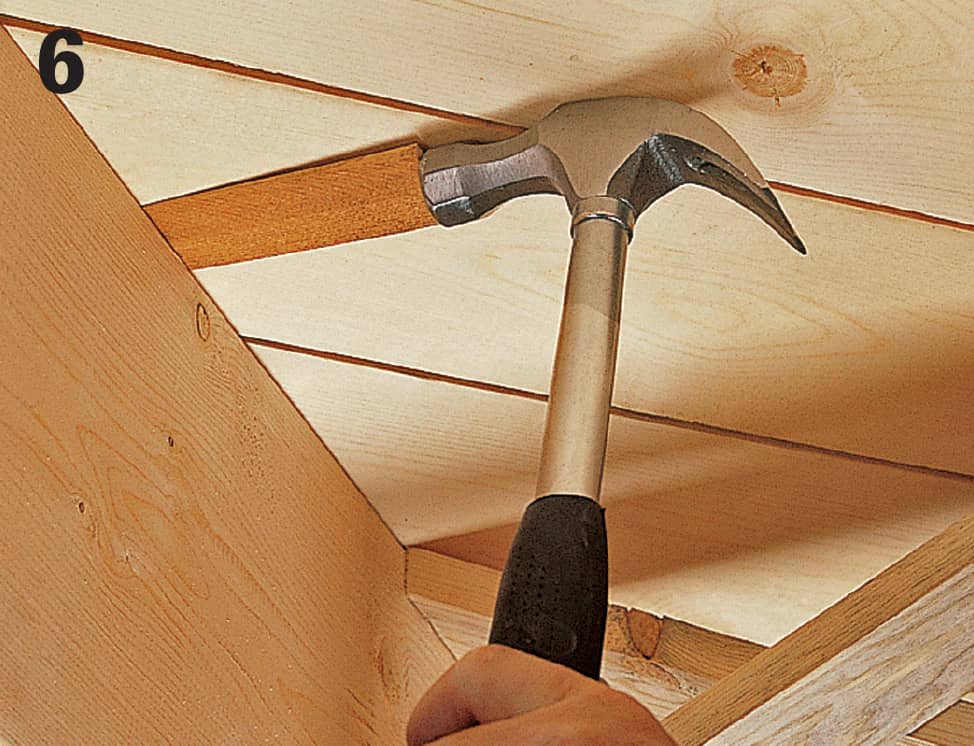
The boards or sheeting of a subfloor can separate from the joists, creating gaps. Where gaps are severe or appear above several neighboring joists, the framing may need reinforcement, but isolated gapping can usually be remedied with hardwood shims. Apply a small amount of wood glue to the shim and squirt some glue into the gap. Using a hammer, tap the shim into place until it’s snug. Shimming too much will widen the gap, so be careful. Allow the glue to dry before walking on the floor.
 Replacing Trim Moldings
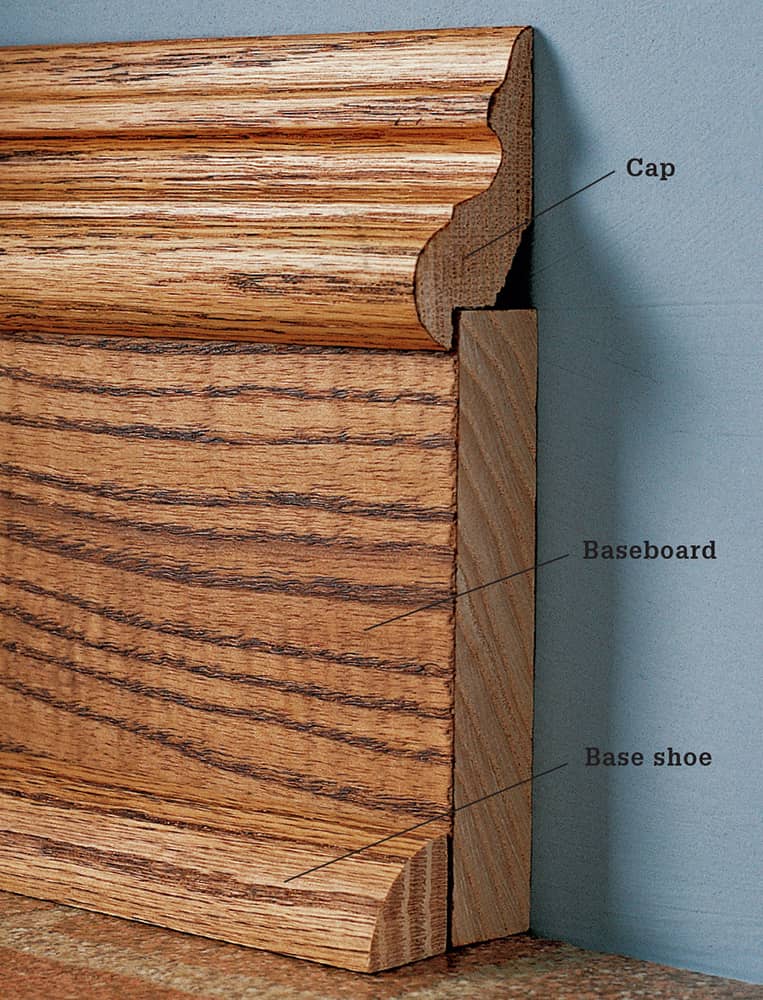
There’s no reason to let damaged trim moldings detract from the appearance of a well-maintained room. With the right tools and a little attention to detail, you can replace or repair them quickly and easily.
Home centers and lumber yards sell many styles of moldings, but they may not stock moldings found in older homes. If you have trouble finding duplicates, check salvage yards in your area. They sometimes carry styles no longer manufactured. You can also try combining several different moldings to duplicate a more elaborate version.
How to Remove Damaged Trim
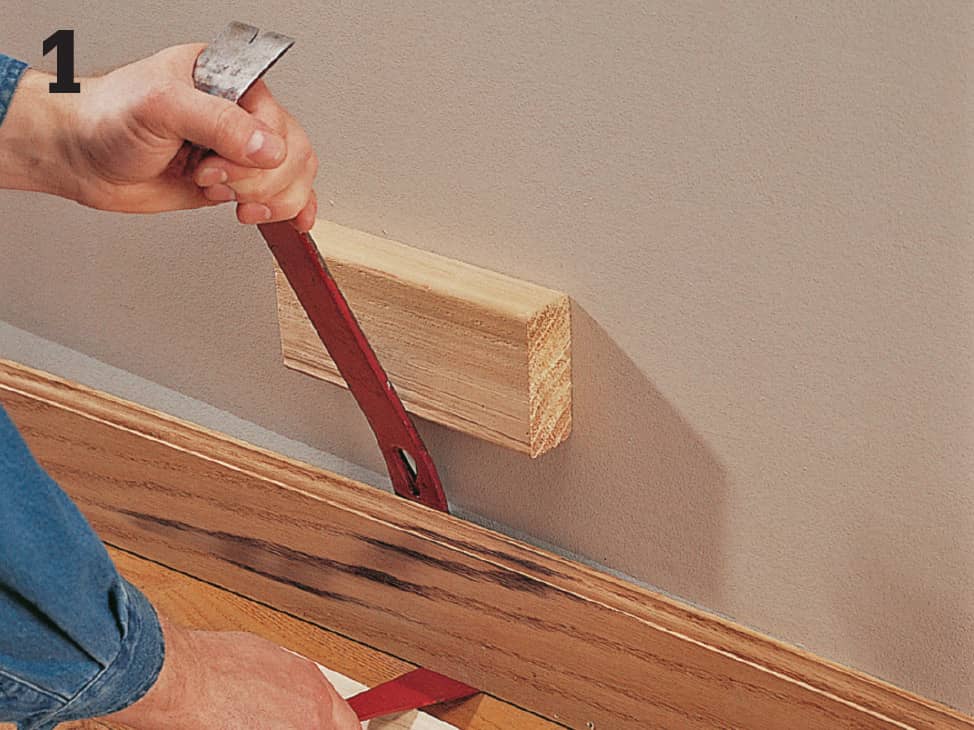
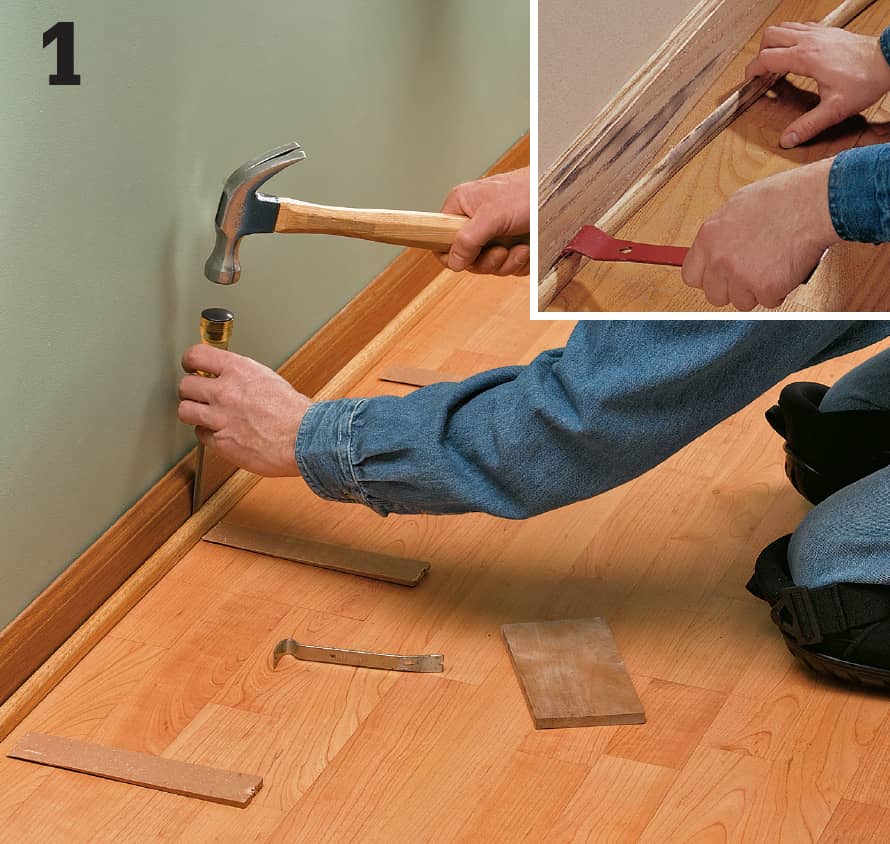
Even the lightest pressure from a pry bar can damage wallboard or plaster, so use a large, flat scrap of wood to protect the wall. Insert one bar beneath the trim and work the other bar between the baseboard and the wall. Force the pry bars in opposite directions to remove the baseboard.
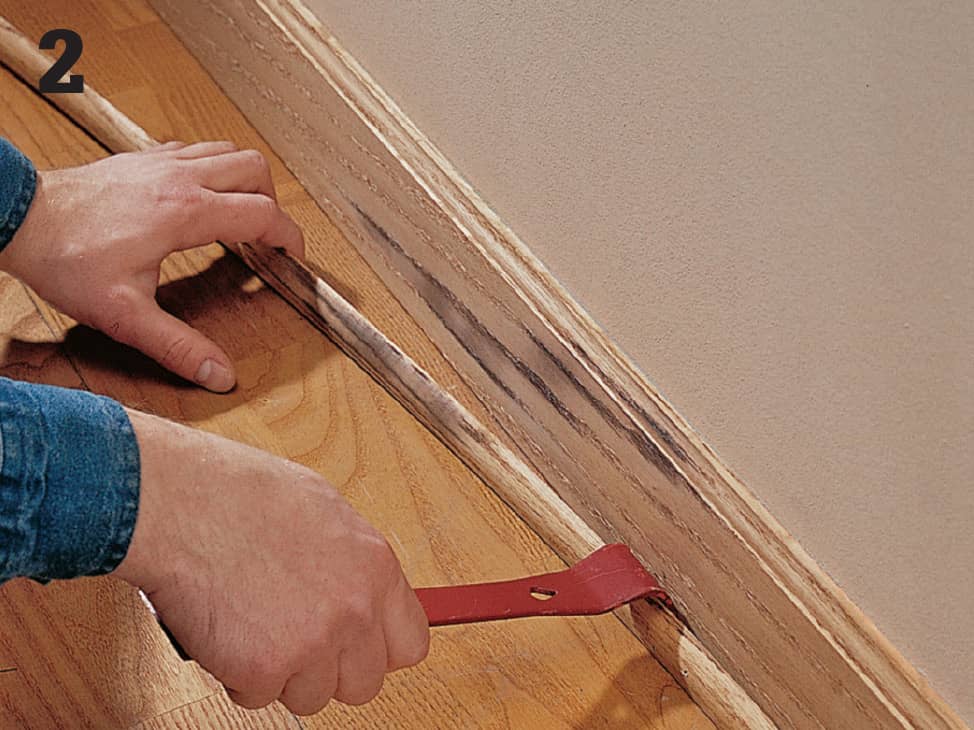
To remove baseboards without damaging the wall, use leverage rather than force. Pry off the base shoe first, using a flat pry bar. When you feel a few nails pop, move farther along the molding and pry again.
How to Install Baseboards
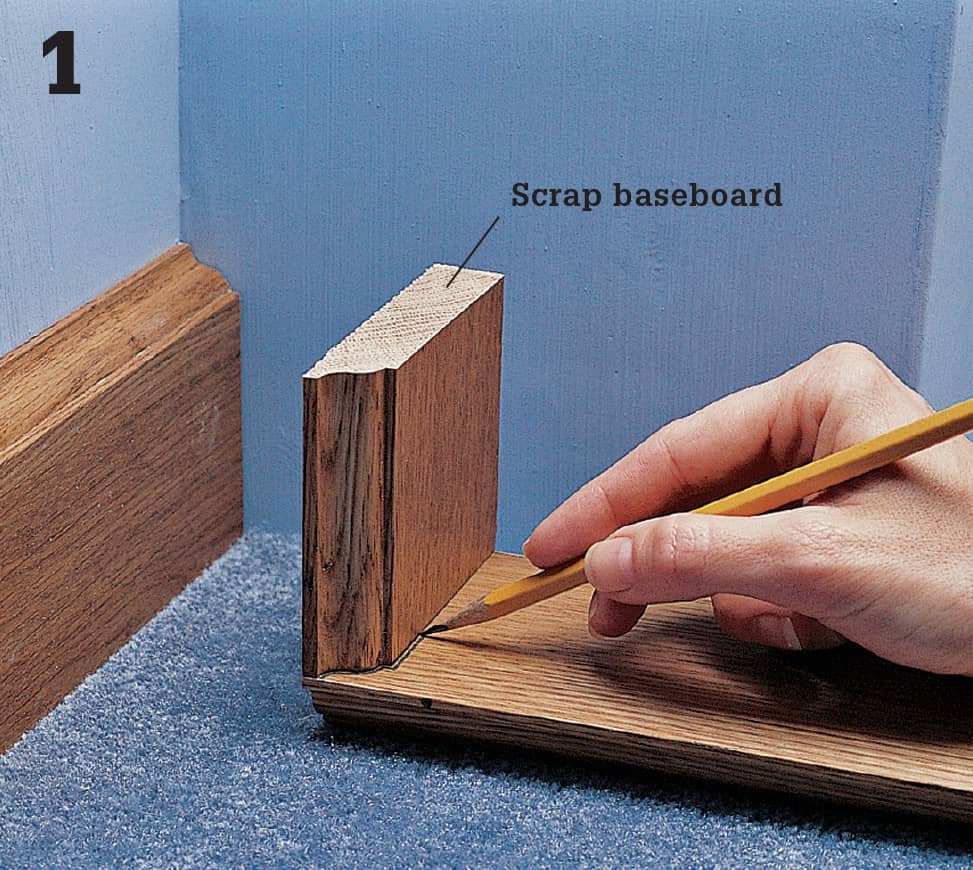
Start at an inside corner by butting one piece of baseboard securely into the corner. Drill pilot holes, then fasten the baseboard with two 6d finish nails, aligned vertically, at each wall stud. Cut a scrap of baseboard so the ends are perfectly square. Cut the end of the workpiece square. Position the scrap on the back of the workpiece so its back face is flush with the end of the workpiece. Trace the outline of the scrap onto the back of the workpiece.
Cut along the outline on the workpiece with a coping saw, keeping the saw perpendicular to the baseboard face. Test-fit the coped end. Recut it, if necessary.
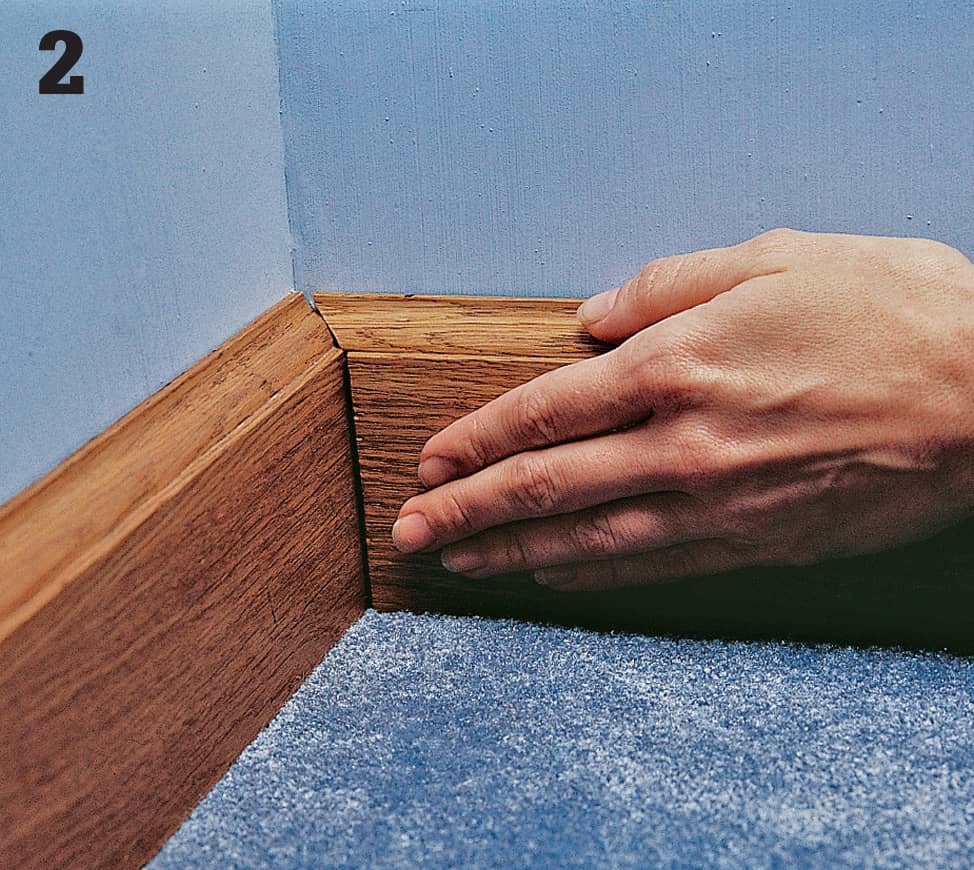
To cut the baseboard to fit at outside corners, mark the end where it meets the outside wall corner. Cut the end at a 45° angle, using a power miter saw. Lock-nail all miter joints by drilling a pilot hole and driving 4d finish nails through each corner.
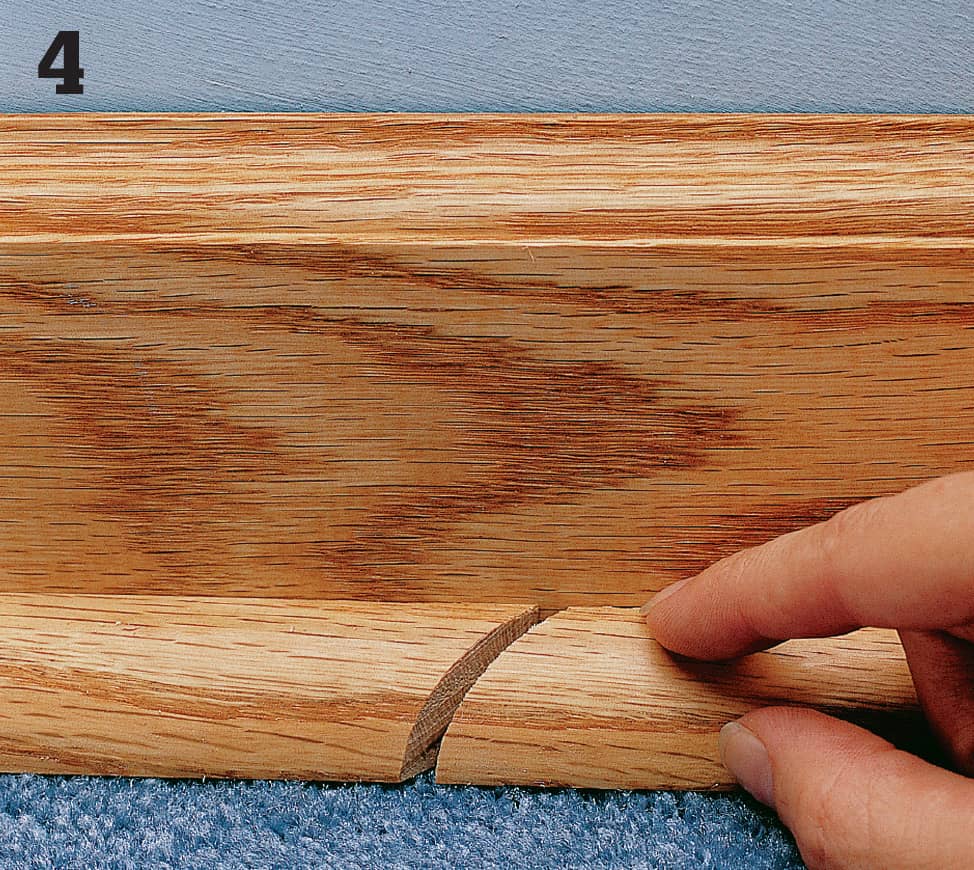
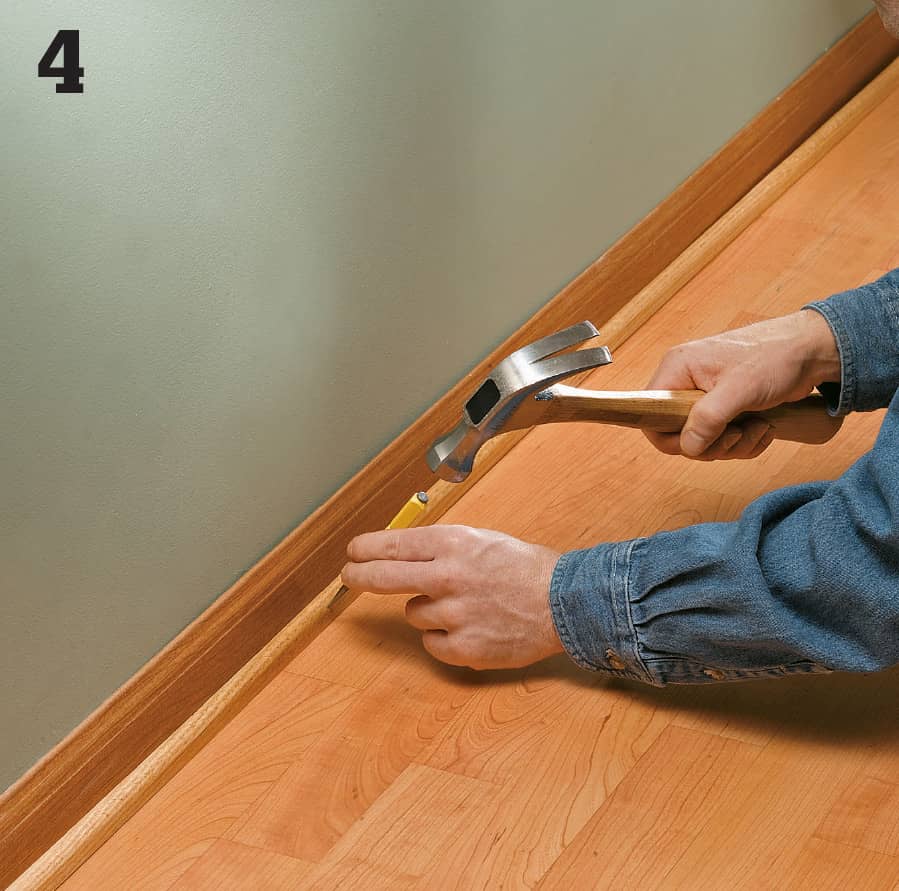
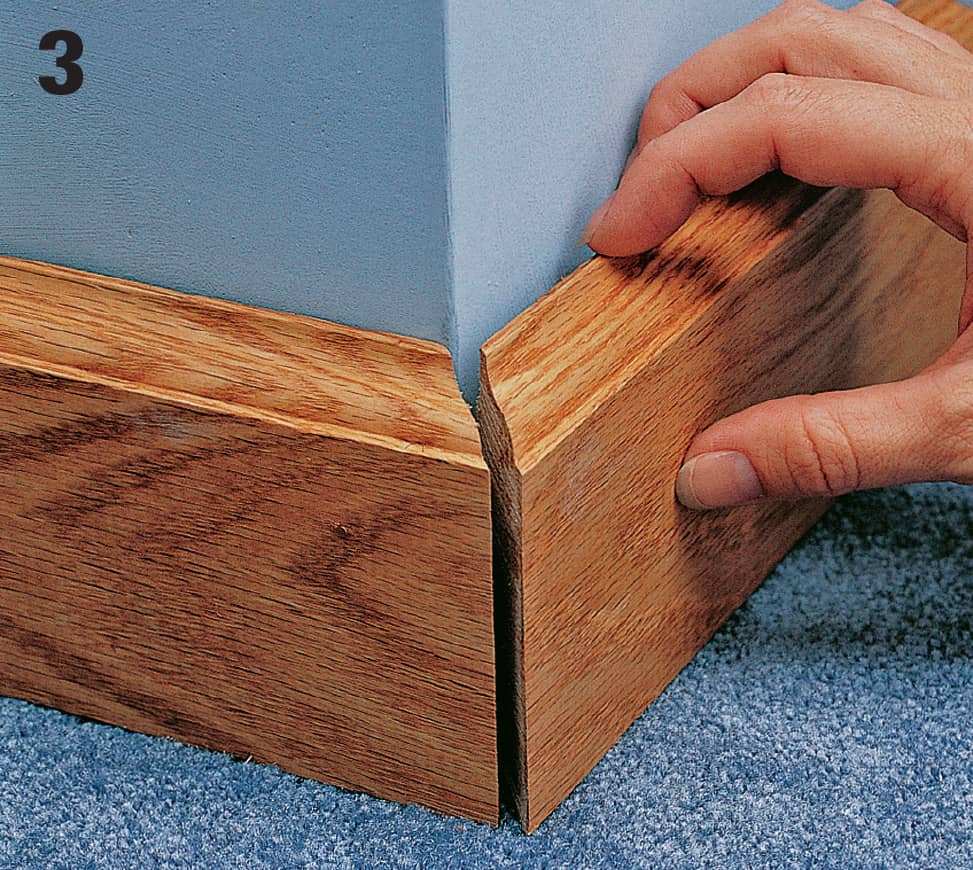
Install base shoe molding along the bottom of the baseboards. Make miter joints at inside and outside corners, and fasten base shoe with 2d finish nails. Whenever possible, complete a run of molding using one piece. For long spans, join molding pieces by mitering the ends at parallel 45° angles. Set nail heads below the surface using a nail set, and then fill the holes with wood putty.
 Repairing Hardwood
A darkened, dingy hardwood floor may only need a thorough cleaning to reveal an attractive, healthy finish. If you have a fairly new or prefinished hardwood floor, check with the manufacturer or flooring installer before applying any cleaning products or wax. Most prefinished hardwood, for example, should not be waxed.
Water and other liquids can penetrate deep into the grain of hardwood floors, leaving dark stains that are sometimes impossible to remove by sanding. Instead, try bleaching the wood with oxalic acid, available in crystal form at home centers or paint stores. When gouges, scratches, and dents aren’t bad enough to warrant replacing a floorboard, repair the damaged area with a latex wood patch that matches the color of your floor.
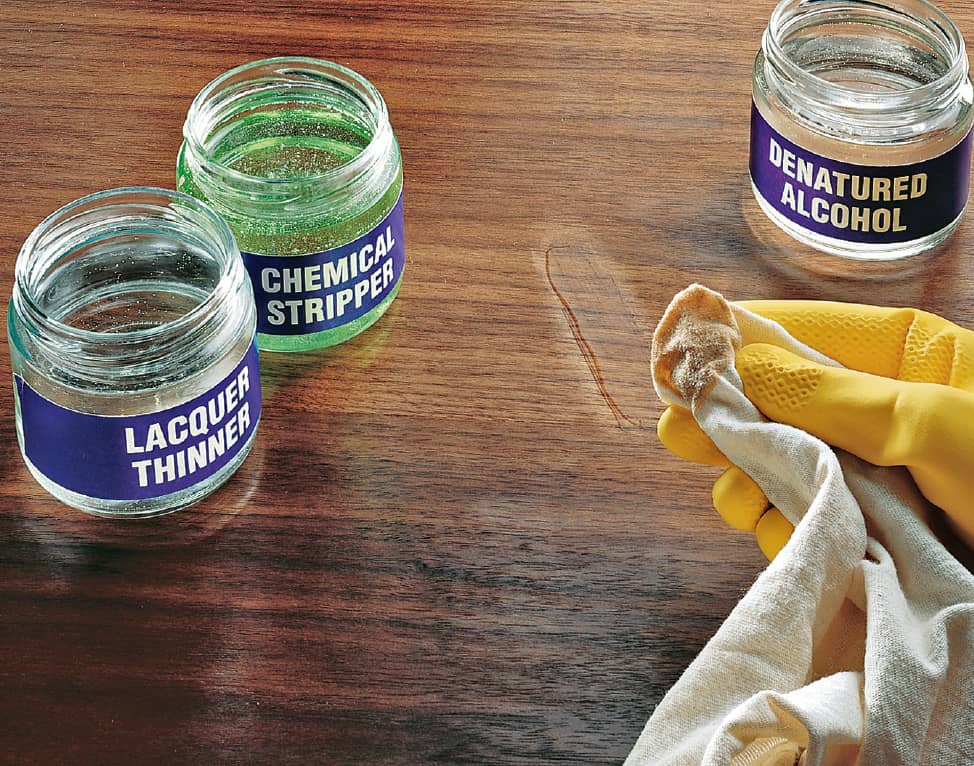
Identify surface finishes using solvents. In an inconspicuous area, rub in different solvents to see if the finish dissolves, softens, or is removed. Denatured alcohol removes shellac, while lacquer thinner removes lacquer. If neither of those work, try nail polish remover containing acetone, which removes varnish but not polyurethane.
How to Clean & Renew Hardwood
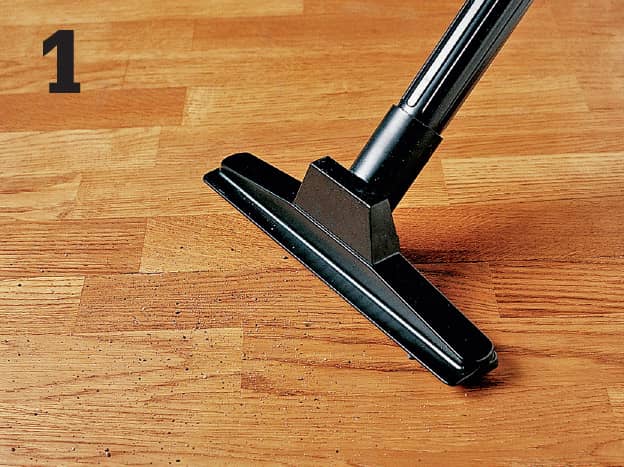
Vacuum the entire floor. Mix hot water and dishwashing detergent that doesn’t contain lye, trisodium phosphate, or ammonia. Working on 3-ft.-square sections, scrub the floor with a brush or nylon scrubbing pad. Wipe up the water and wax with a towel before moving to the next section.
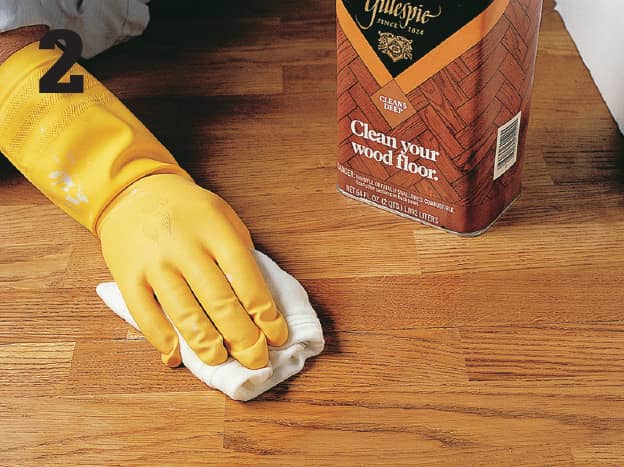
If the water and detergent don’t remove the old wax, use a hardwood floor cleaning kit. Use only solvent-type cleaners, as some water-based products can blacken wood. Apply the cleaner following the manufacturer’s instructions.
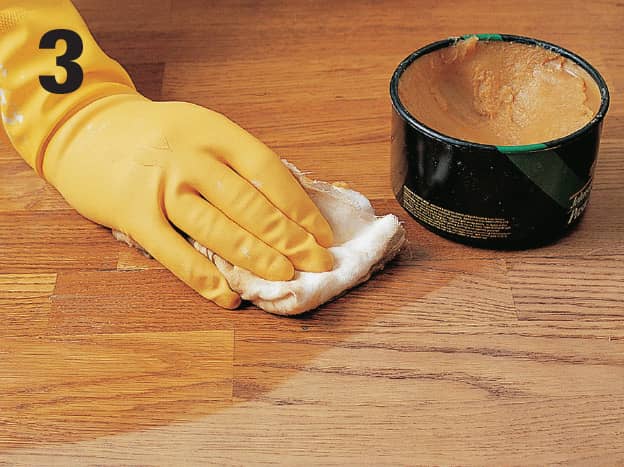
When the floor is clean and dry, apply a high-quality floor wax. Paste wax is more difficult to apply than liquid floor wax, but it lasts much longer. Apply the wax by hand, then polish the floor with a rented buffing machine fitted with synthetic buffing pads.
How to Remove Stains
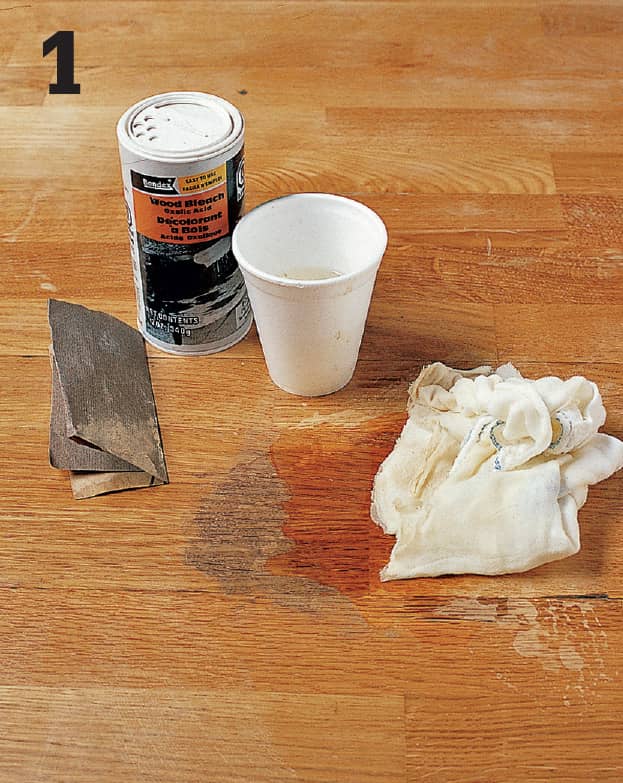
Remove the finish by sanding the stained area with sandpaper. In a disposable cup, dissolve the recommended amount of oxalic acid crystals in water. Wearing rubber gloves, pour the mixture over the stained area, taking care to cover only the darkened wood.
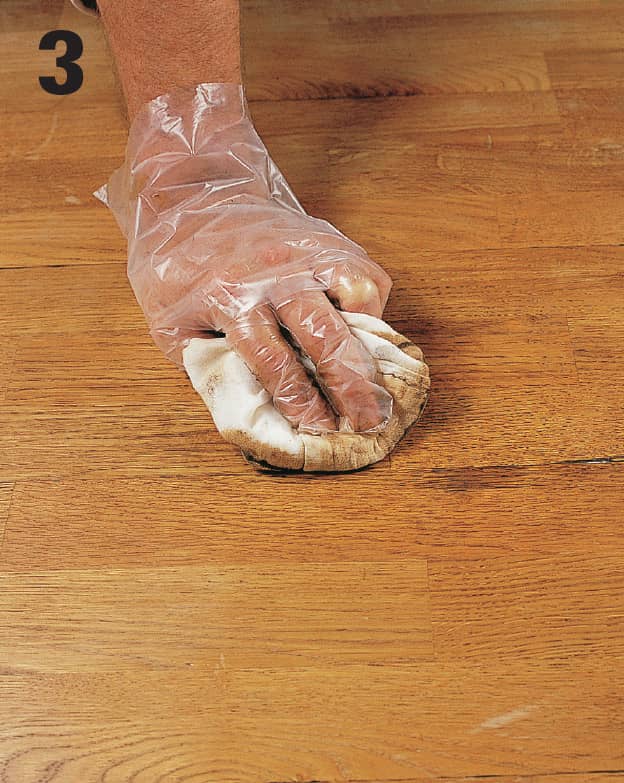
Let the liquid stand for one hour. Repeat the application, if necessary. Wash with 2 tablespoons borax dissolved in one pint water to neutralize the acid. Rinse with water, and let the wood dry. Sand the area smooth.
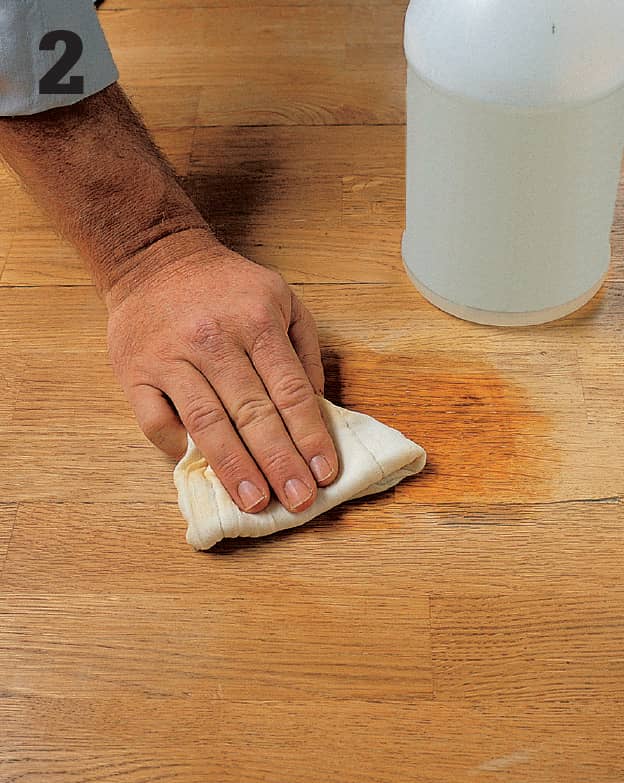
Apply several coats of wood restorer until the bleached area matches the finish of the surrounding floor.
How to Patch Scratches & Small Holes
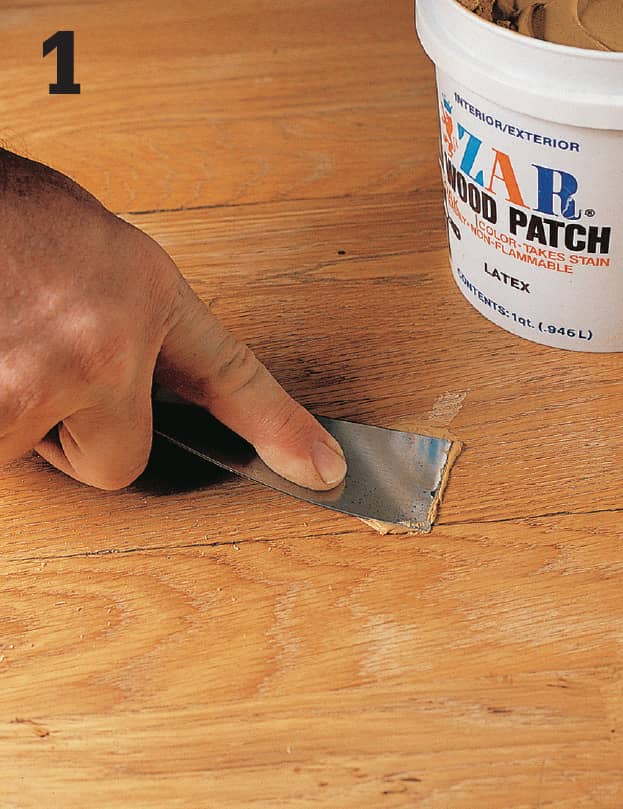
Before filling nail holes, make sure the nails are securely set in the wood. Use a hammer and nail set to drive loose nails below the surface. Apply wood patch to the damaged area, using a putty knife. Force the compound into the hole by pressing the knife blade downward until it lies flat on the floor.
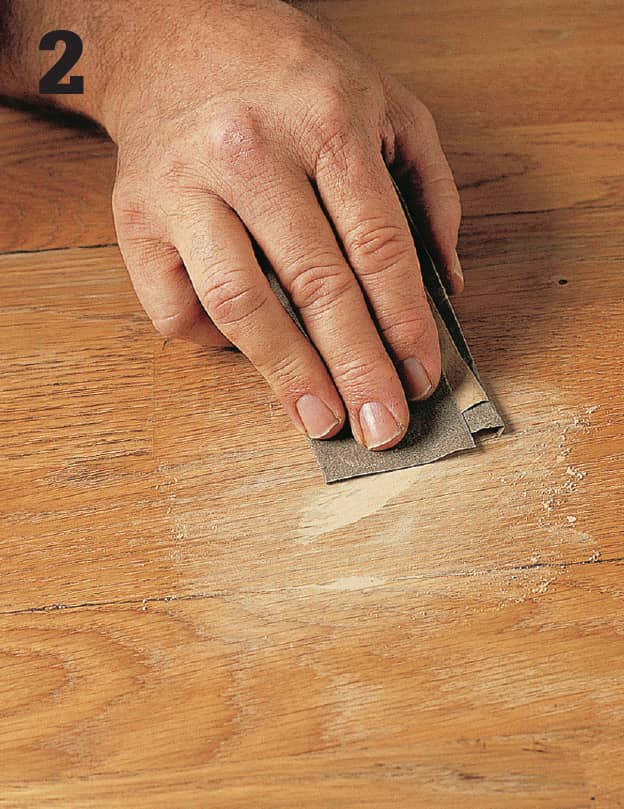
Scrape excess compound from the edges, and allow the patch to dry completely. Sand the patch flush with the surrounding surface. Using fine-grit sandpaper, sand in the direction of the wood grain.
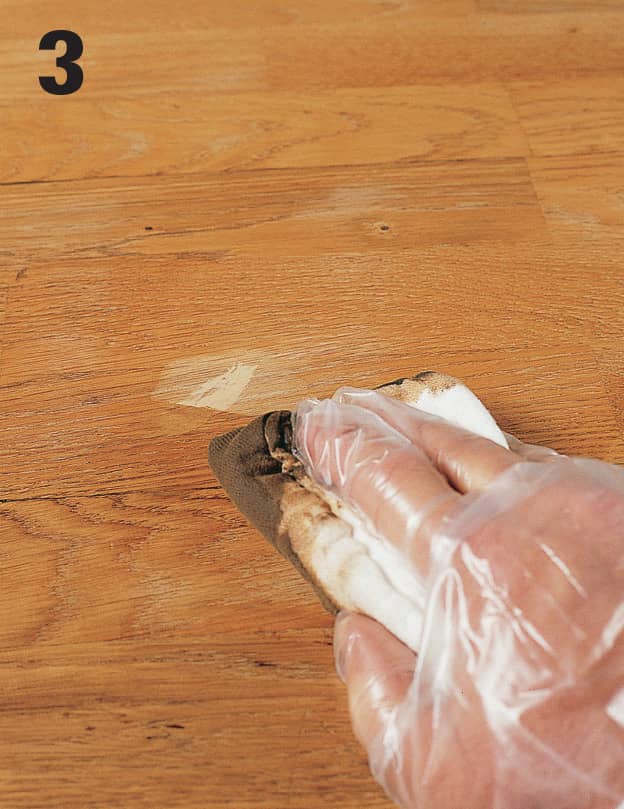
Apply wood restorer to the sanded area until it blends with the rest of the floor.
 Replacing a Damaged Floorboard
When solid hardwood floorboards are beyond repair, they need to be carefully cut out and replaced with boards of the same width and thickness. Replace whole boards whenever possible. If a board is long, or if part of its length is inaccessible, draw a cutting line across the face of the board, and tape behind the line to protect the section that will remain.
How to Replace Damaged Floorboards
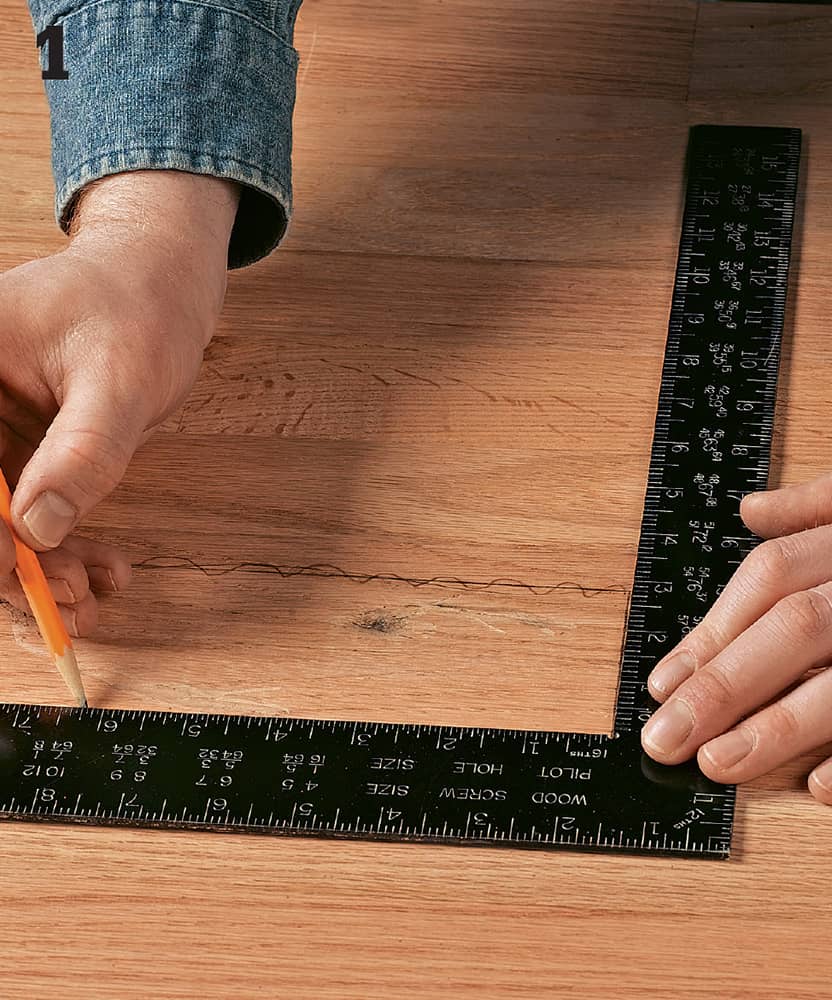
Draw a rectangle around the damaged area. Determine the minimal number of boards to be removed. To avoid nails, be sure to draw the line 3/4" inside the outermost edge of any joints.
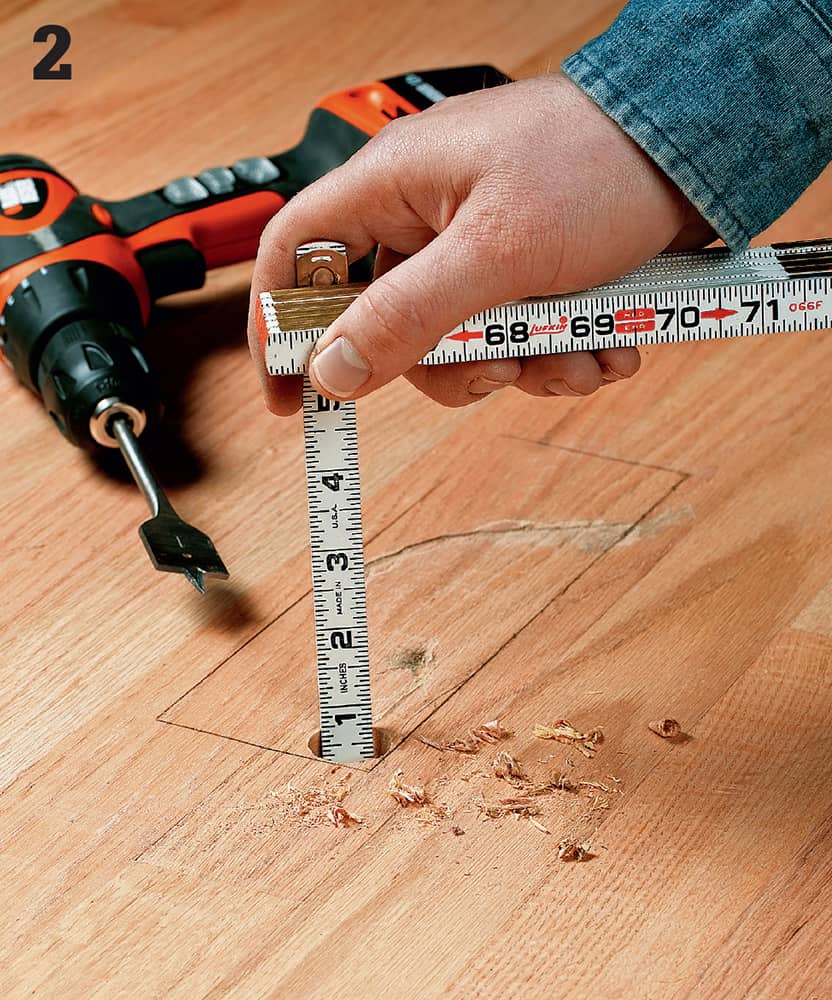
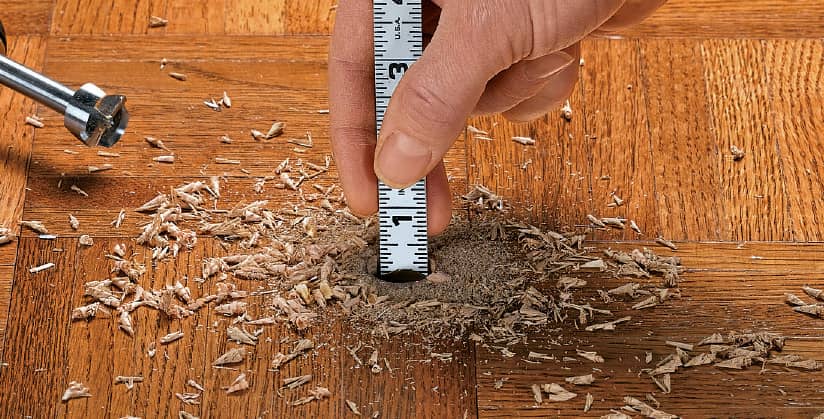
Determine the thickness of the boards to be cut. With a drill and 3/4"-wide spade bit, slowly drill through a damaged board. Drill until you see the top of the subfloor. Measure the depth. A common thickness is 5/8" and 3/4". Set your circular saw to this depth.
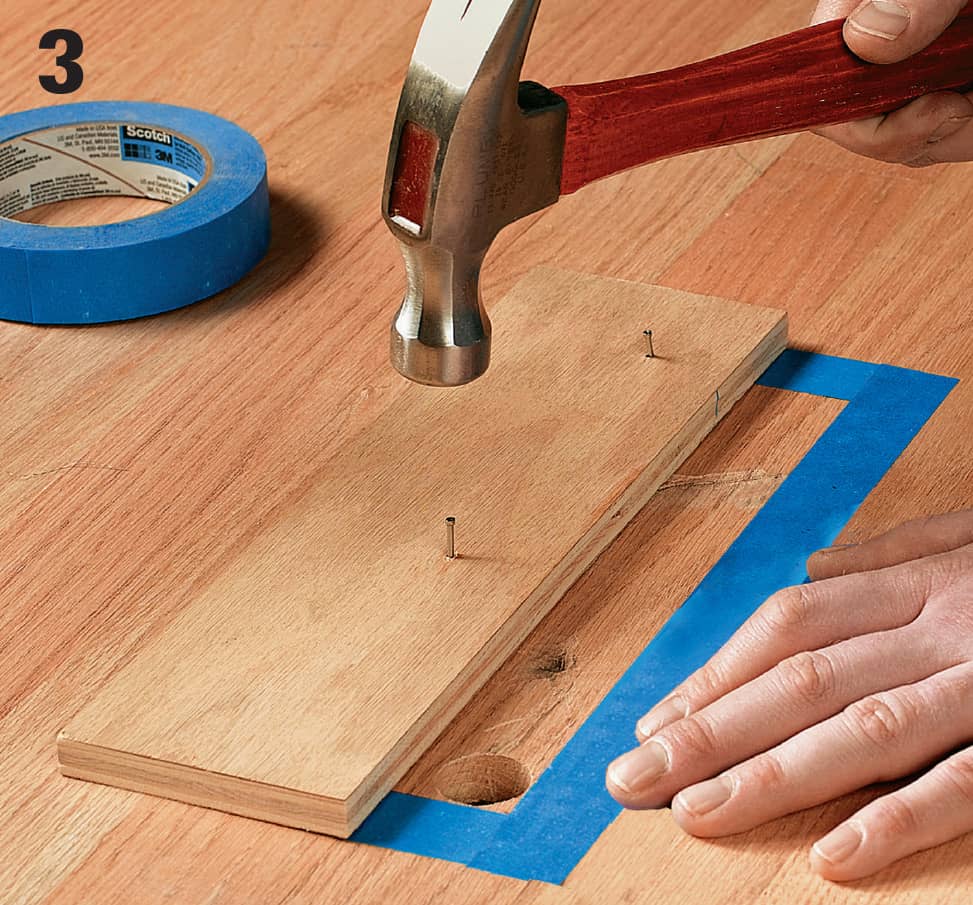
To prevent boards from chipping, place masking tape or painter’s tape along the outside of the pencil lines. To create a wood cutting guide, tack a straight wood strip inside the damaged area (for easy removal, allow nails to slightly stick up). Set back the guide the distance between the saw blade and the guide edge of the circular saw.
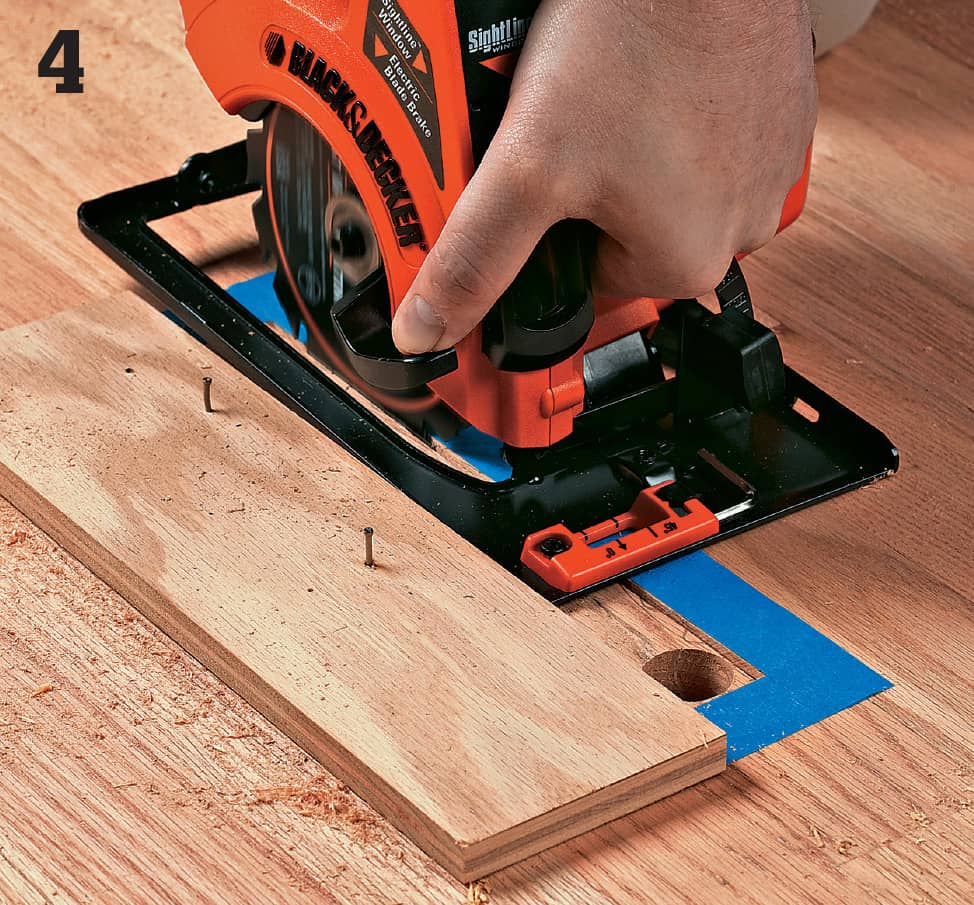
Align the circular saw with the wood cutting guide. Turn on the saw. Lower the blade into the cutline. Do not cut the last 1/4" of the corners. Remove cutting guide. Repeat with other sides.
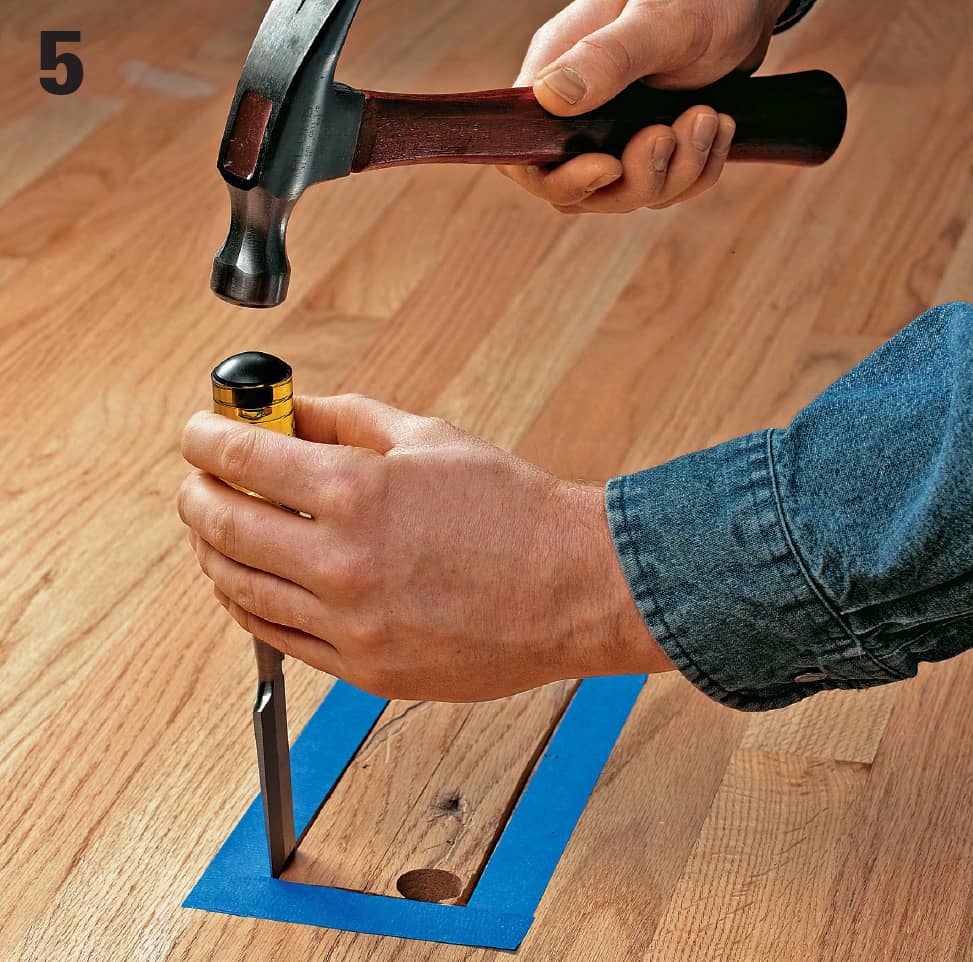
Complete the cuts. Use a hammer and sharp chisel to completely loosen the boards from the subfloor. Make sure the chisel’s beveled side is facing the damaged area for a clean edge.
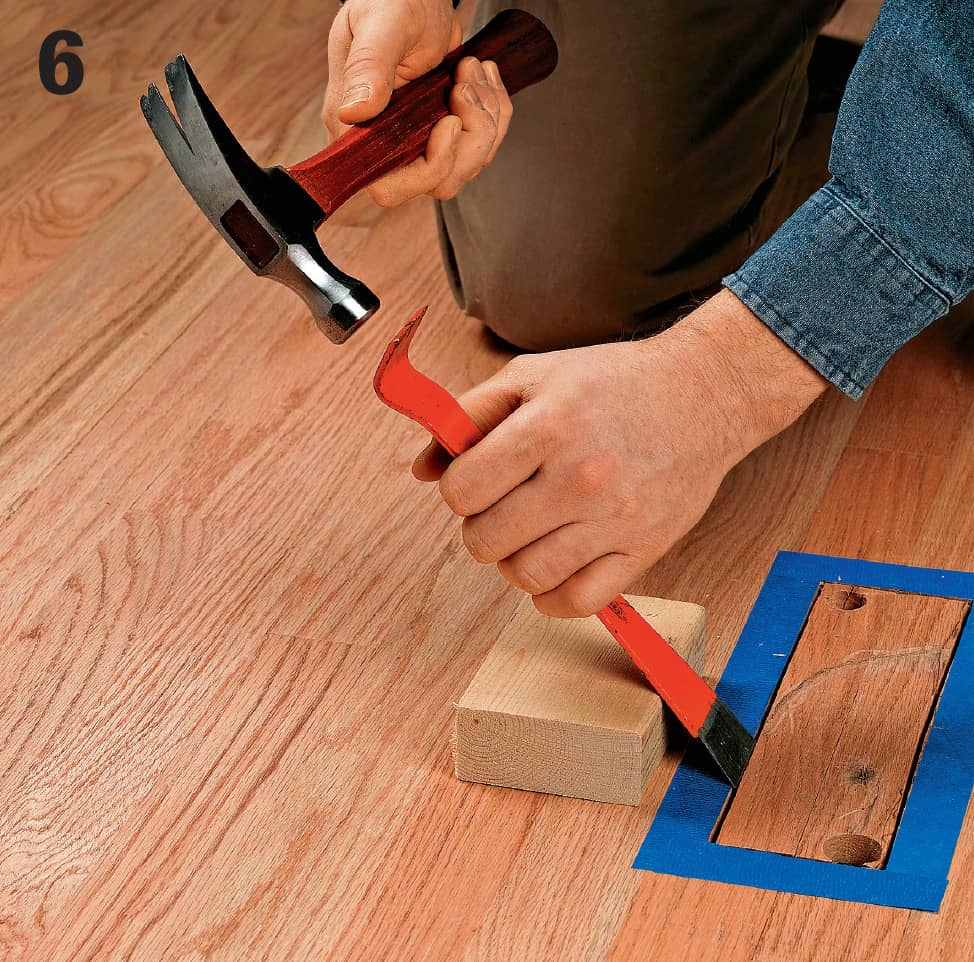
Remove split boards. Use a scrap 2 × 4 block for leverage and to protect the floor. With a hammer, tap a pry bar into and under the split board. Most boards pop out easily, but some may require a little pressure. Remove exposed nails with the hammer claw.
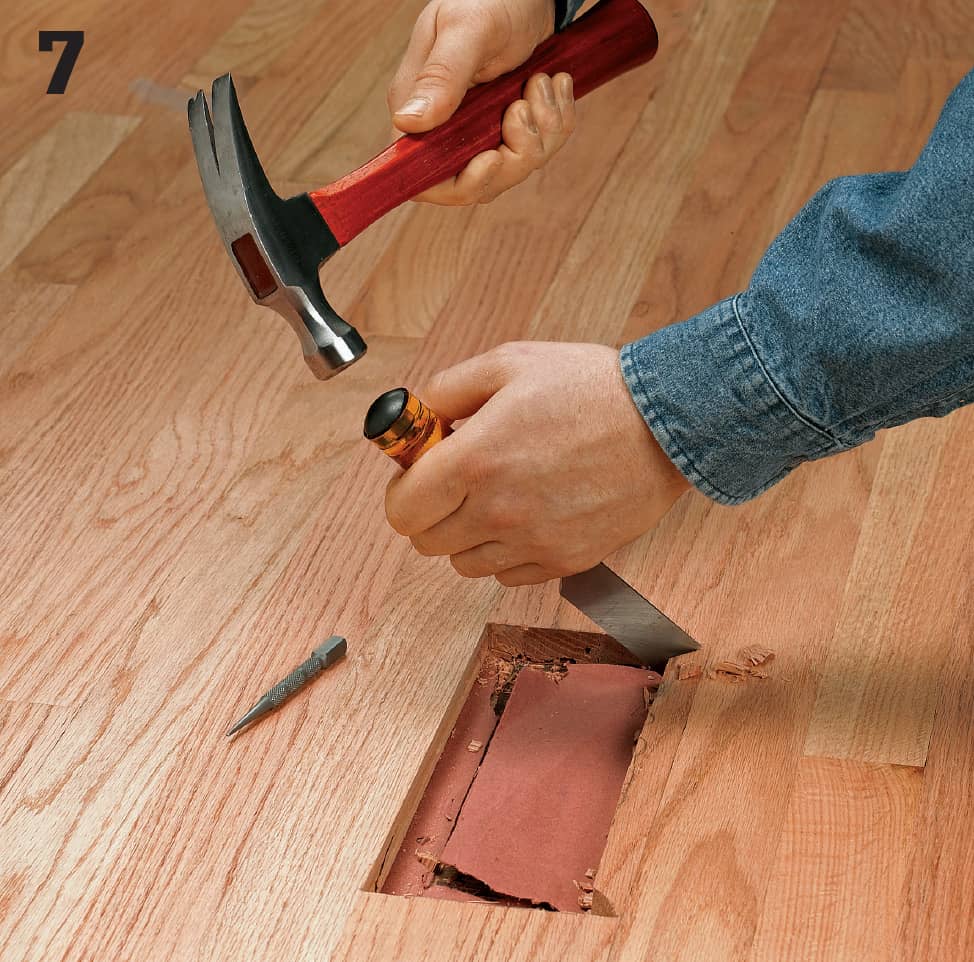
Use a chisel to remove the 2 remaining strips. Again, make sure the bevel side of the chisel is facing the interior of the damaged area. Set any exposed nails with your nail set.
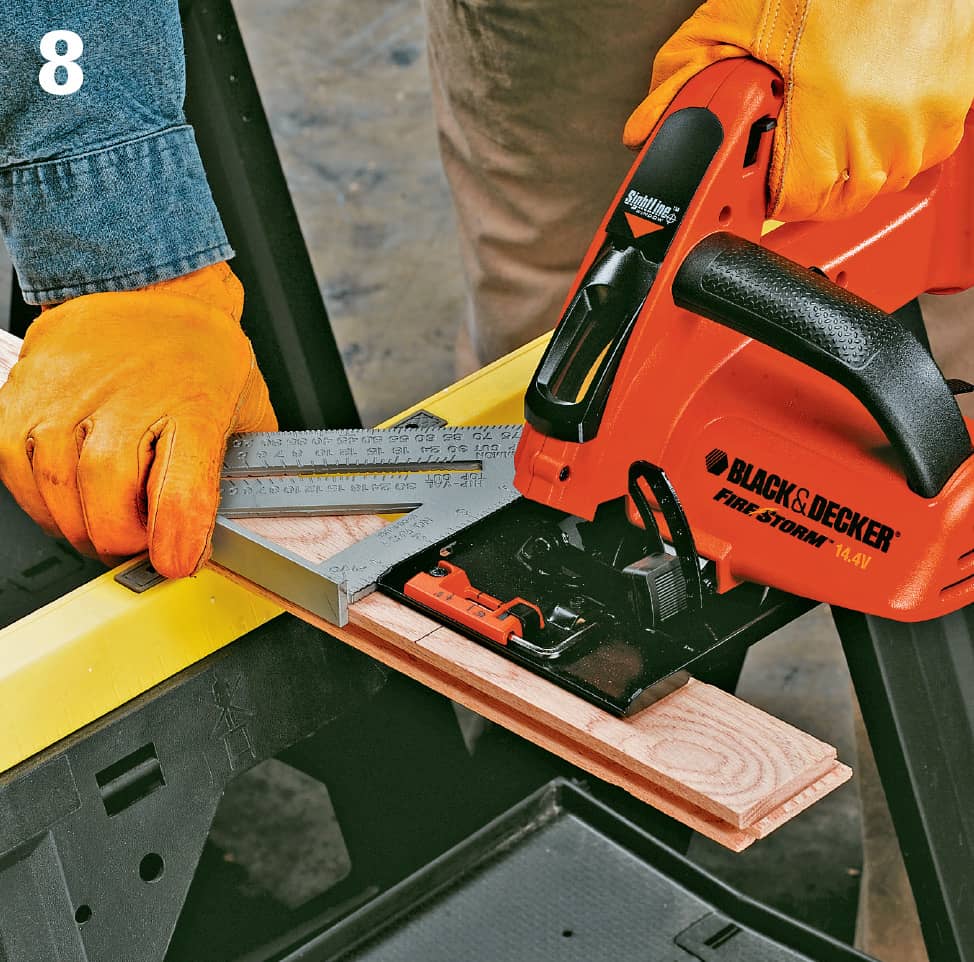
Cut new boards. Measure the length and width of the area to be replaced. Place the new board on a sawhorse, with the section to be used hanging off the edge. Draw a pencil cutline. With saw blade on waste side of mark, firmly press the saw guide against the edge of a speed square. Measure each board separately.
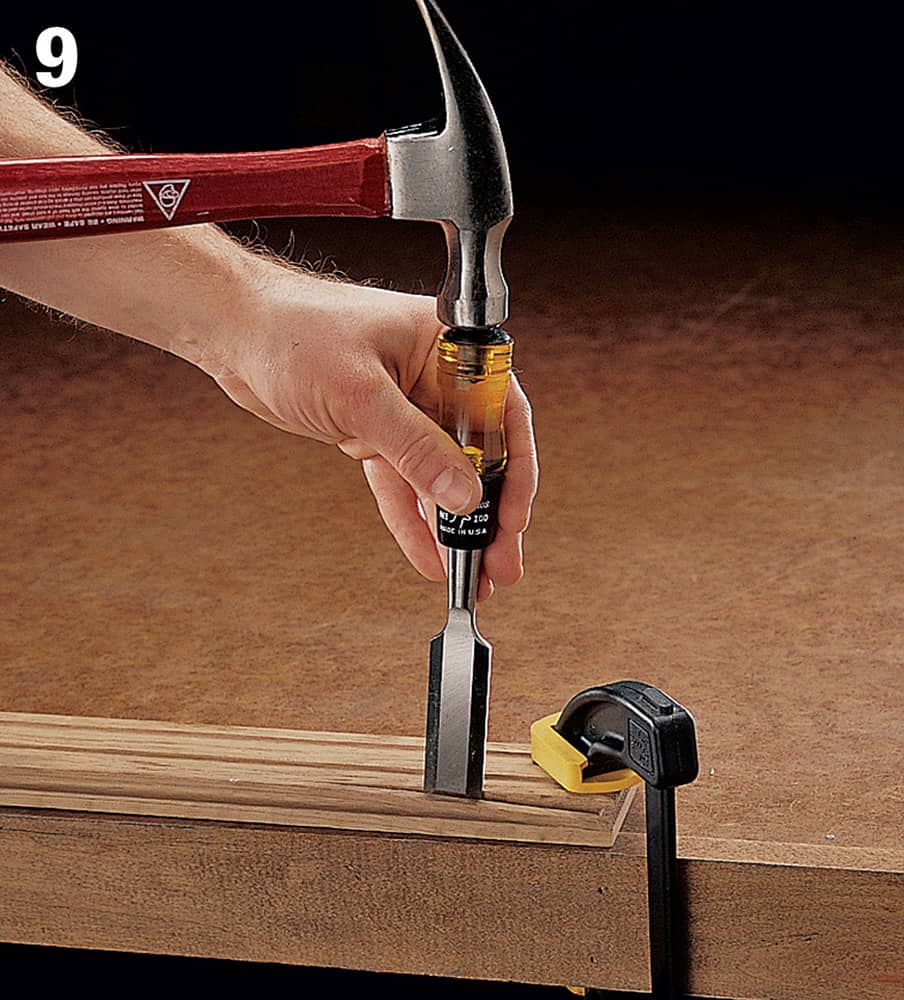
To install the last board, chisel off the lower lip of the groove. Remove the tongue on the end of the board, if necessary. Apply adhesive to the board, and set it in place, tongue first.
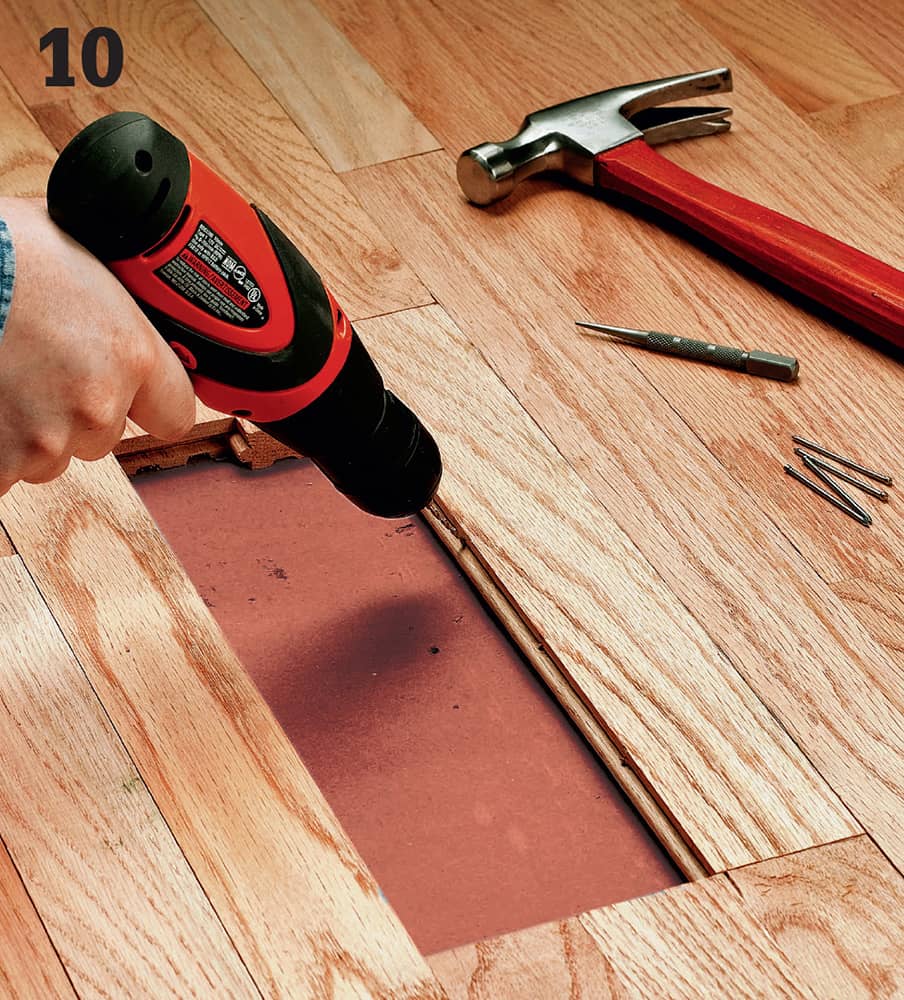
Pick a drill bit with a slightly smaller diameter than an 8-penny finish nail, and drill holes at a 45° angle through the corner of the replacement piece’s tongue every 3" to 4" along the new board. Hammer a 1 1/2"-long, 8d finish nail through the hole into the subfloor. Use a nail set to countersink nails. Repeat until the last board.
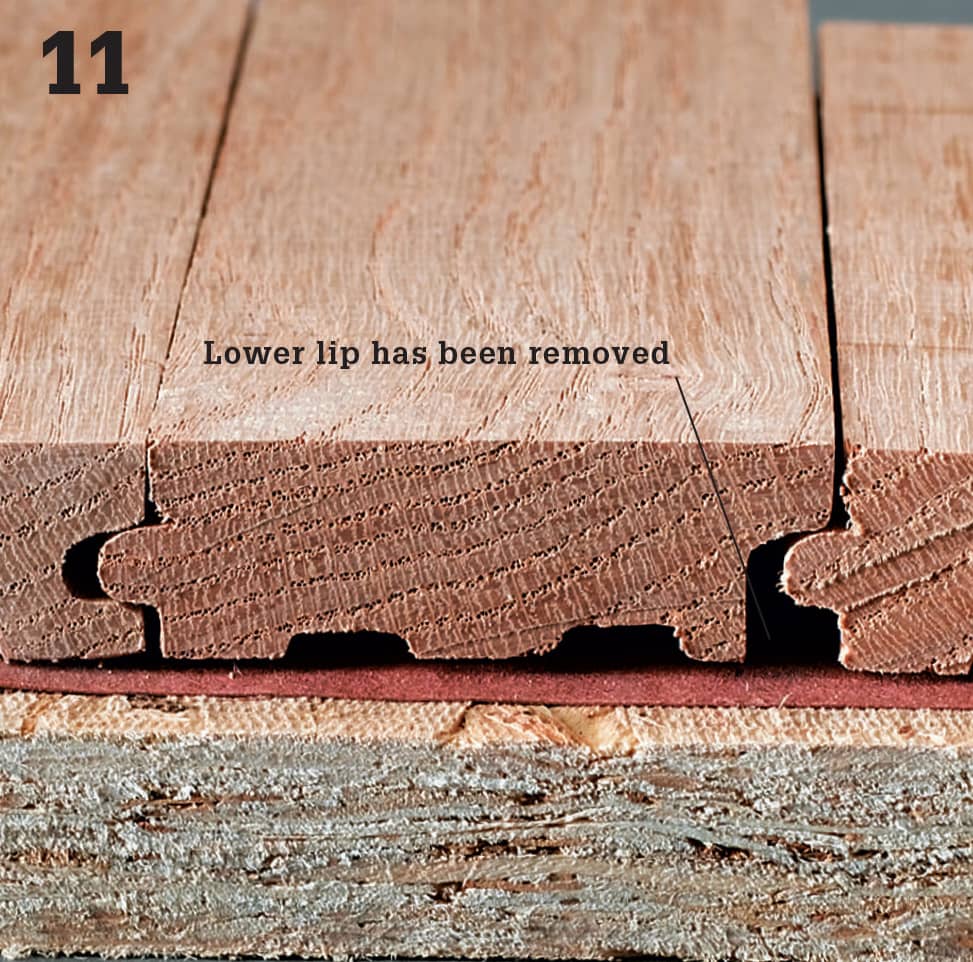
Lay the last board face down onto a protective 2 × 4 and use a sharp chisel to split off the lower lip. This allows it to fit into place.
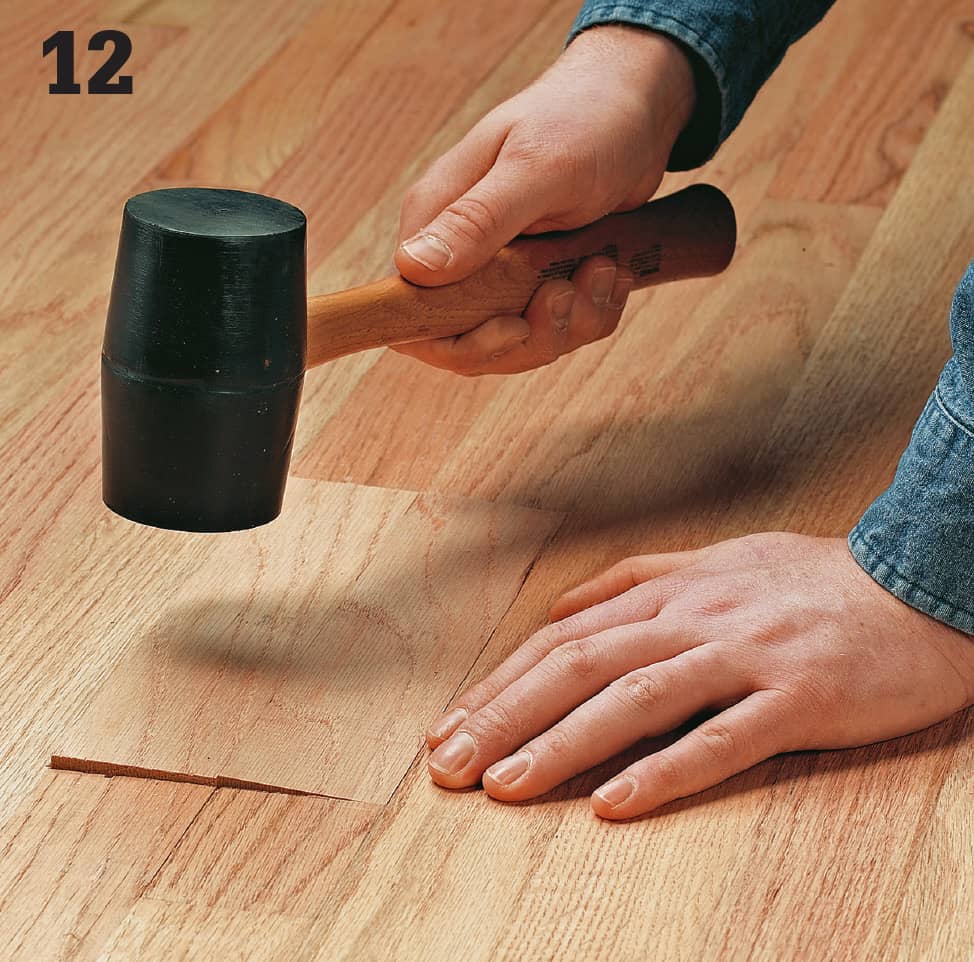
To install the last board, hook the tongue into the groove of the old floor and then use a soft mallet to tap the groove side down into the previous board installed.
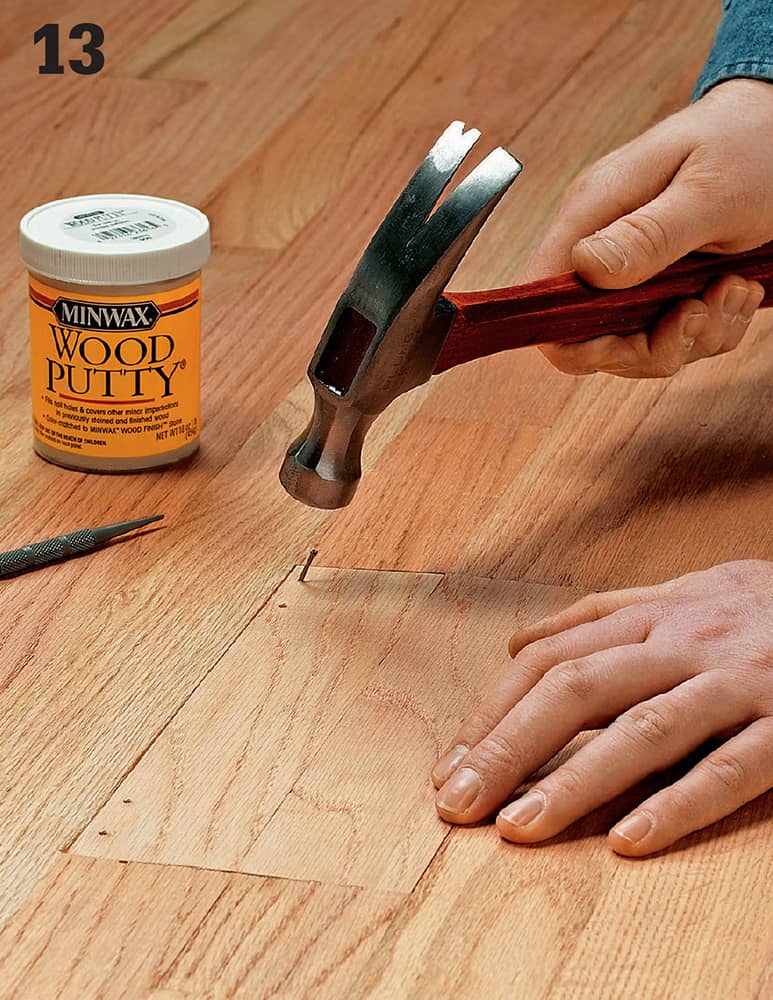
Drill pilot holes angled outward: two side-by-side holes about 1/2" from the edges of each board, and one hole every 12" along the groove side of each board. Drive 1 1/2"-long, 8d finish nails through the holes. Set nails with a nail set. Fill holes with wood putty.
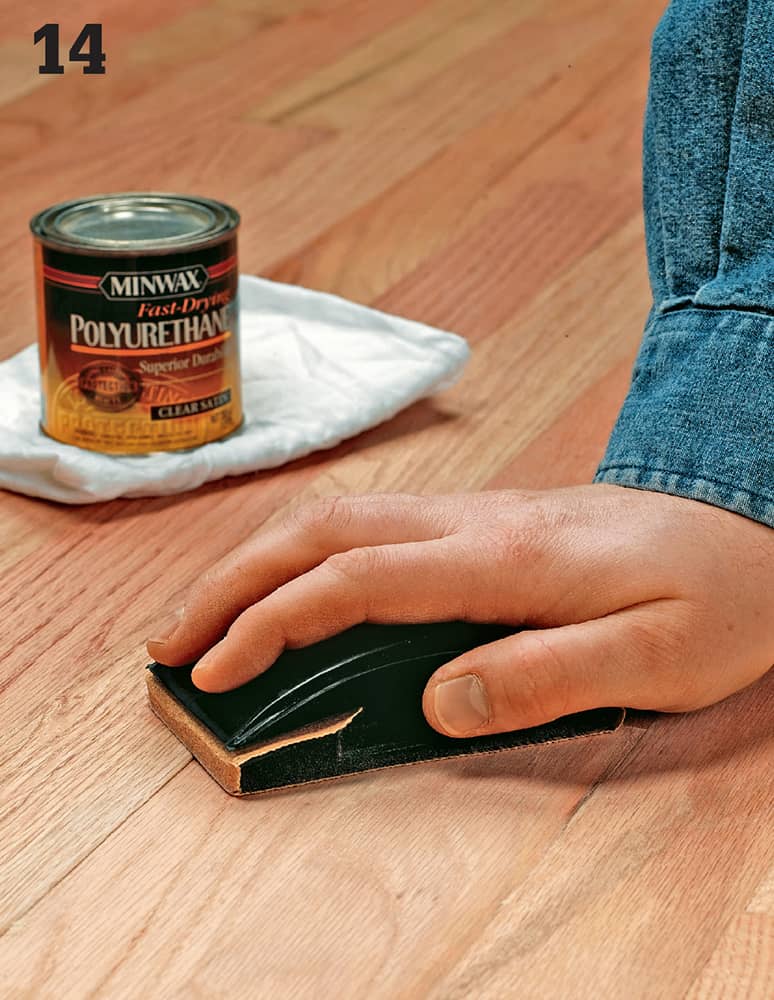
Once the putty is dry, sand the patch smooth with fine-grit sandpaper. Feather-sand neighboring boards. Vacuum and wipe the area with a clean cloth. Apply matching wood stain or restorer, then apply 2 coats of matching finish.
How to Repair Splinters
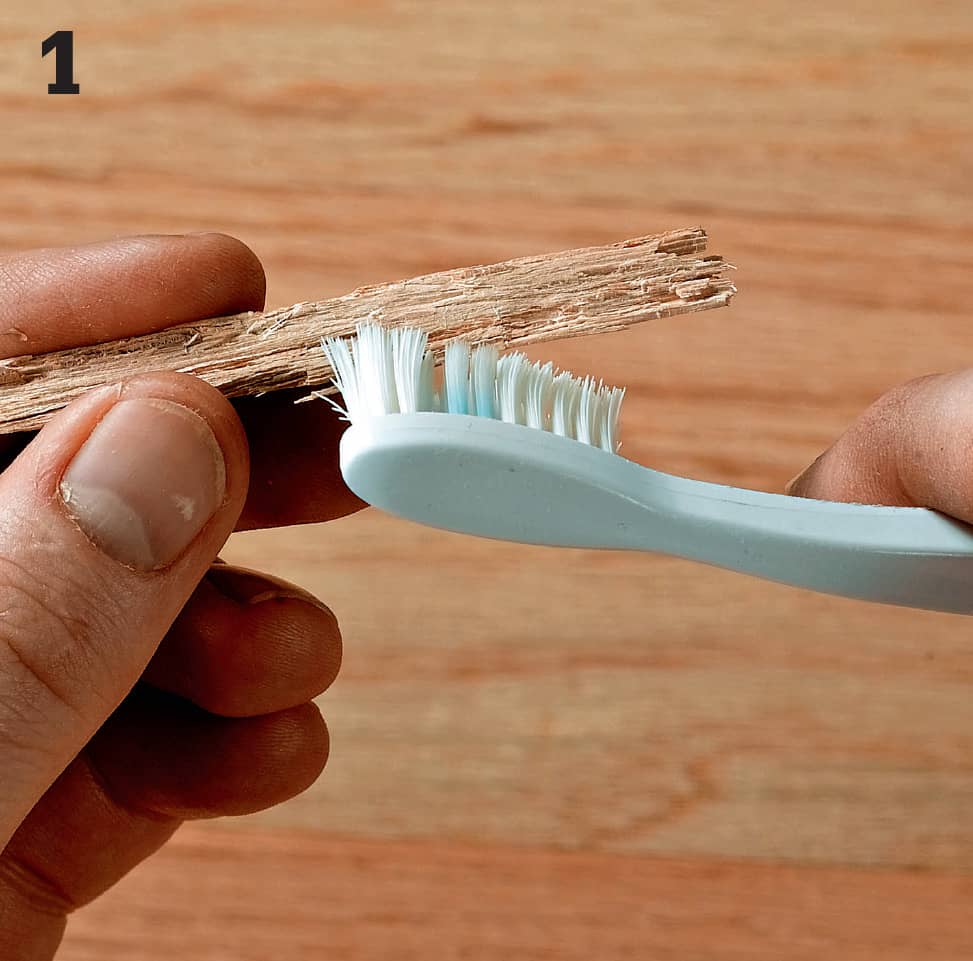
If you still have the splintered piece of wood, but it has been entirely dislodged from the floor, it’s a good bet that the hollowed space left by the splinter has collected a lot of dirt and grime. Combine a 1:3 mixture of distilled white vinegar and water in a bucket. Dip an old toothbrush into the solution and use it to clean out the hole left in the floor. While you’re at it, wipe down the splinter with the solution, too. Allow the floor and splinter to thoroughly dry.
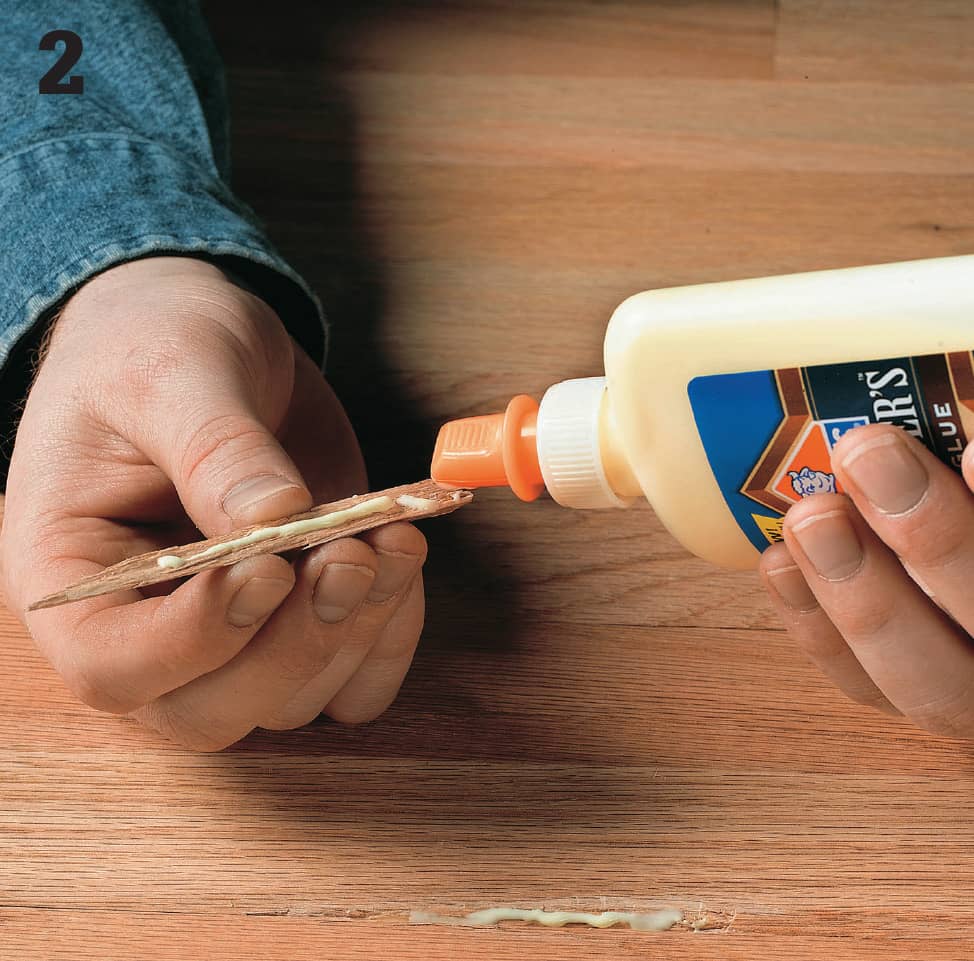
If the splinter is large, apply wood glue to the hole and splinter. Use a Q-Tip or toothpick to apply small amounts of wood glue under smaller splinters. Soak the Q-Tip in glue; you don’t want Q-Tip fuzz sticking out of your floor once the glue dries.
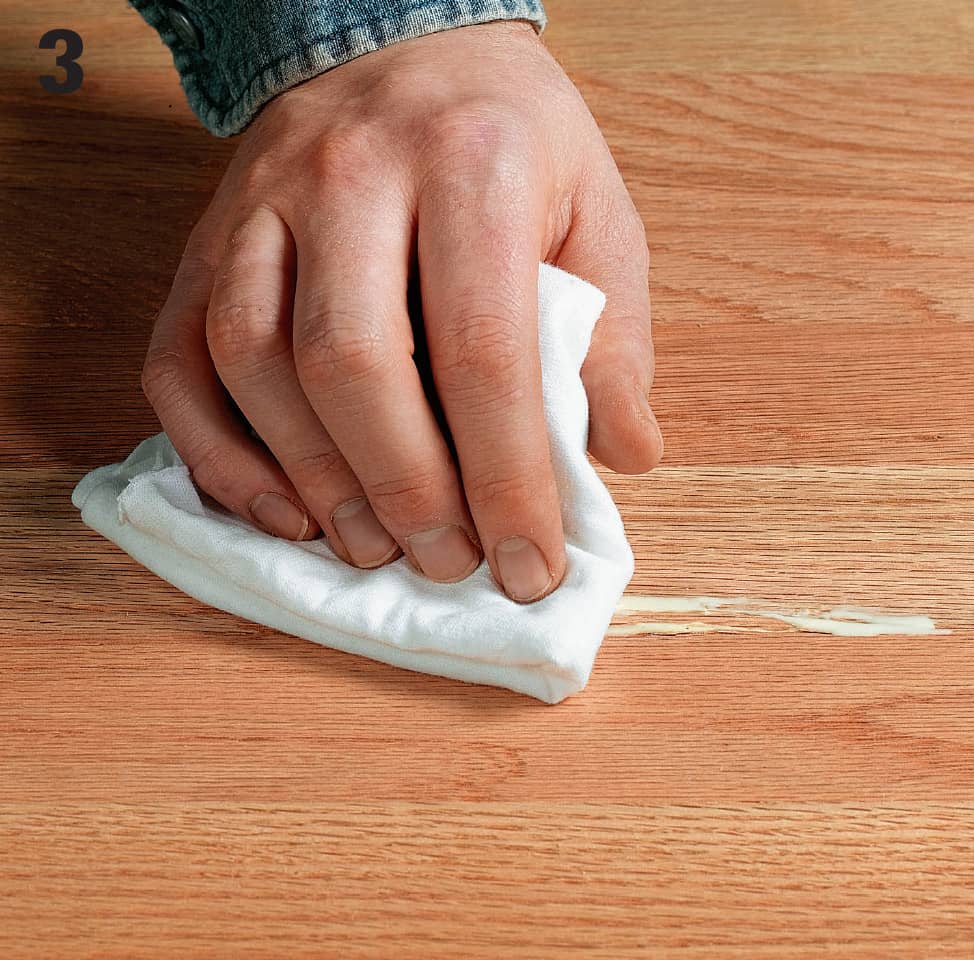
Press the splinter back into place. To clean up the excess glue, use a slightly damp, lint-free cloth. Do not oversoak the cloth with water.
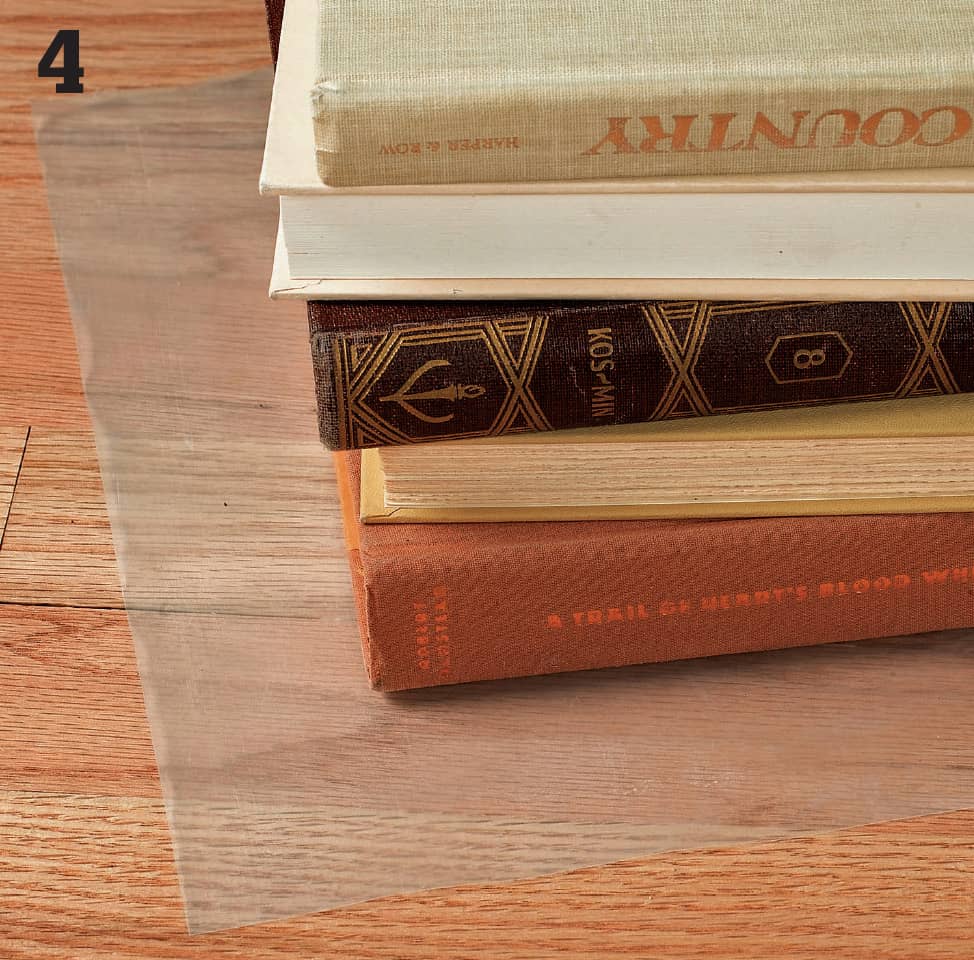
Allow the adhesive to dry. Cover the patch with wax paper and a couple of books. Let the adhesive dry overnight.
How to Patch Small Holes in Wood Floors
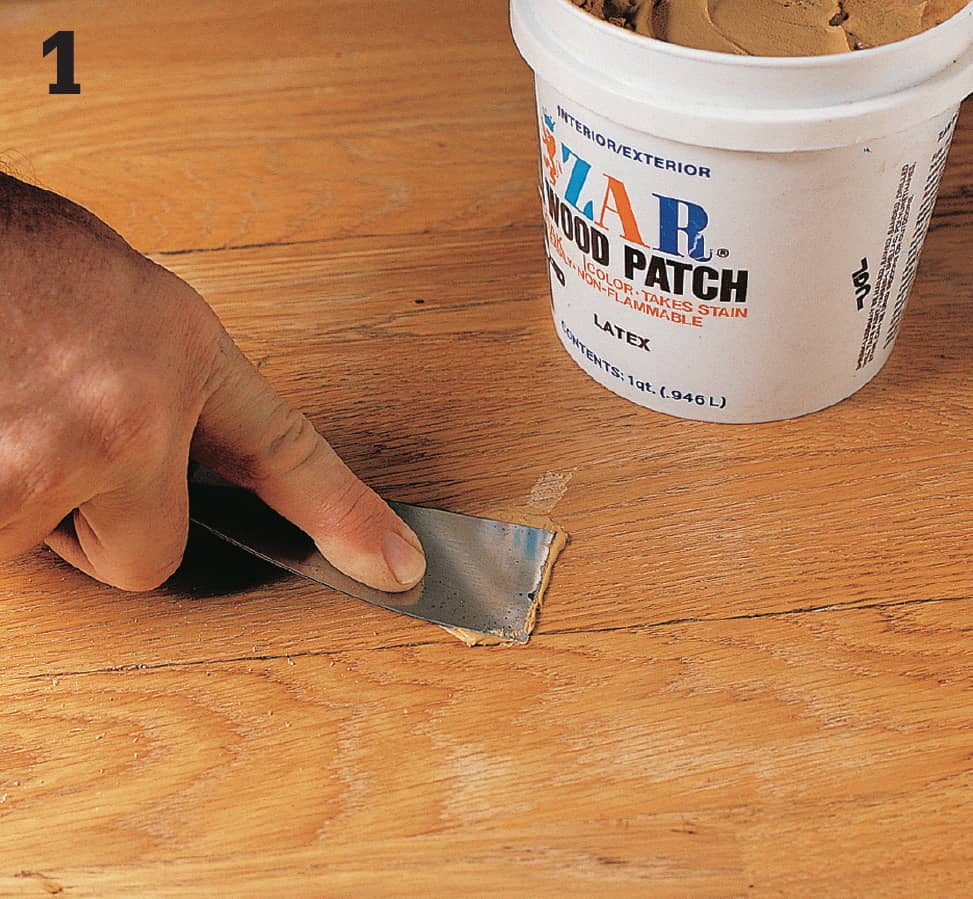
Repair small holes with wood putty. Use putty that matches the floor color. Force the compound into the hole with a putty knife. Continue to press the putty in this fashion until the depression in the floor is filled. Scrape excess compound from the area. Use a damp, lint-free cloth while the putty is still wet to smooth the top level with the surrounding floor. Allow to dry.
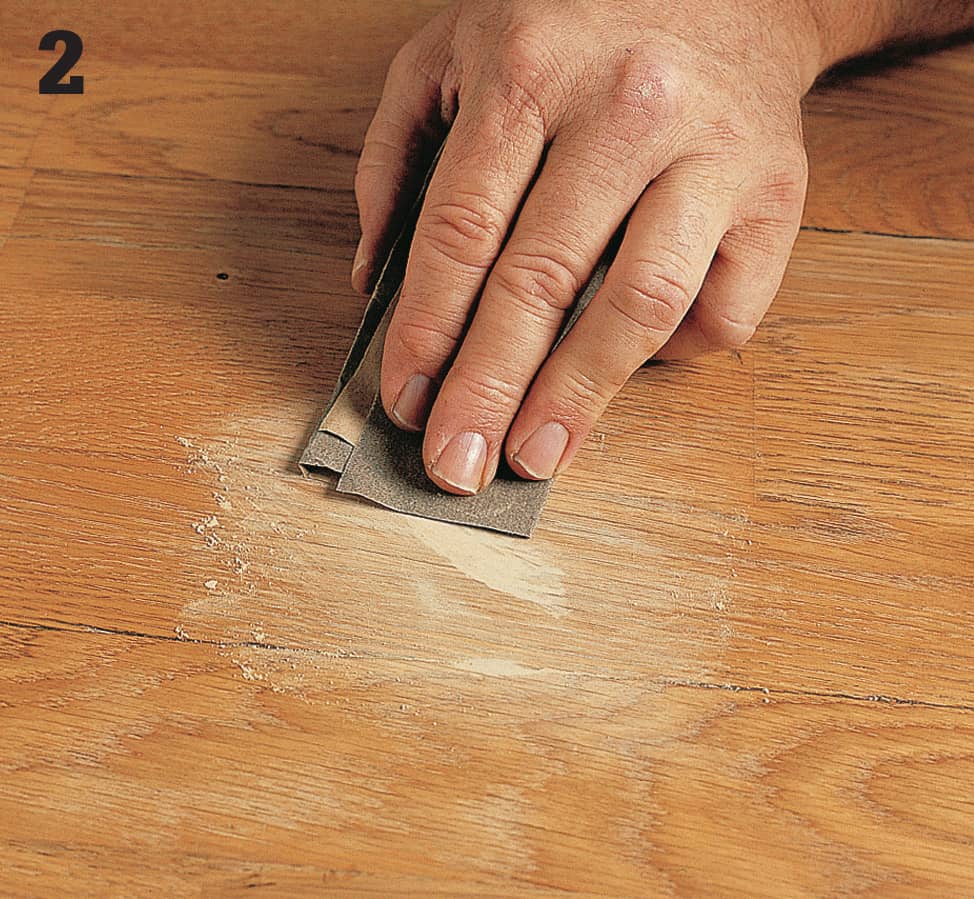
Sand the area with fine (100- to 120-grit) sandpaper. Sand with the wood grain so the splintered area is flush with the surrounding surface. To better hide the repair, feather sand the area. Wipe up dust with a slightly damp cloth.
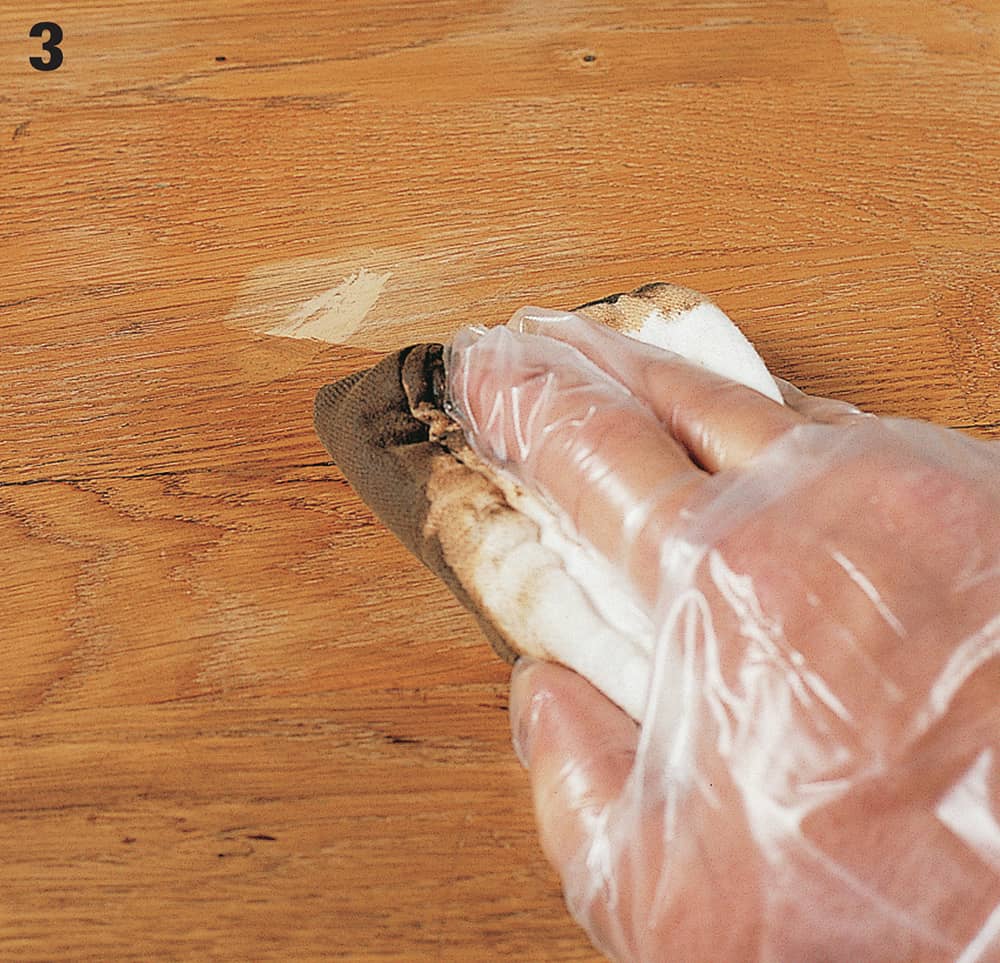
With a clean, lint-free cloth, apply a matching stain (wood sealer or “restorer”) to the sanded area. Read the label on the product to make sure it is appropriate for sealing wood floors. Work in the stain until the patched area blends with the rest of the floor. Allow area to completely dry. Apply two coats of finish. Be sure the finish is the same as that which was used on the surrounding floor.
 Replacing Sections of Wood Floors
When an interior wall or section of wall has been removed during remodeling, you’ll need to patch gaps in the flooring where the wall was located. There are several options for patching floors, depending on your budget and the level of your do-it-yourself skills.
If the existing flooring shows signs of wear, consider replacing the entire flooring surface. Although it can be expensive, an entirely new floor covering will completely hide any gaps in the floor and provide an elegant finishing touch for your remodeling project.
If you choose to patch the existing flooring, be aware that it’s difficult to hide patched areas completely, especially if the flooring uses unique patterns or finishes. A creative solution is to intentionally patch the floor with material that contrasts with the surrounding flooring (opposite page).
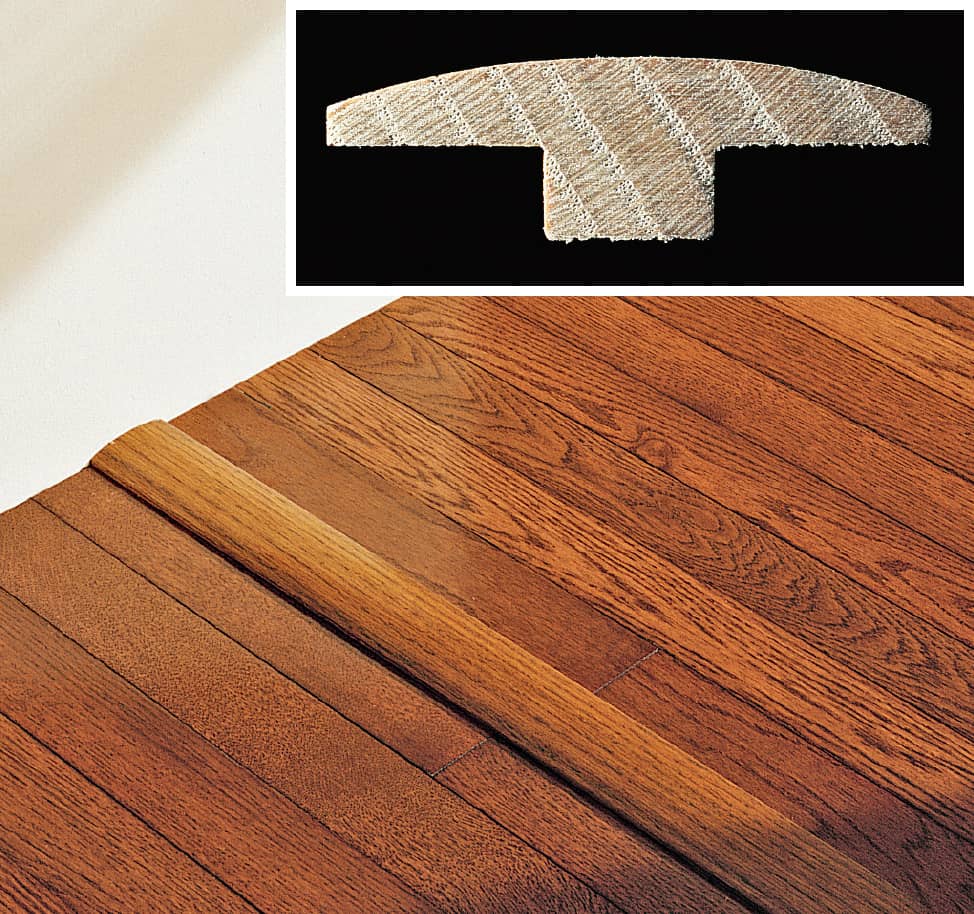
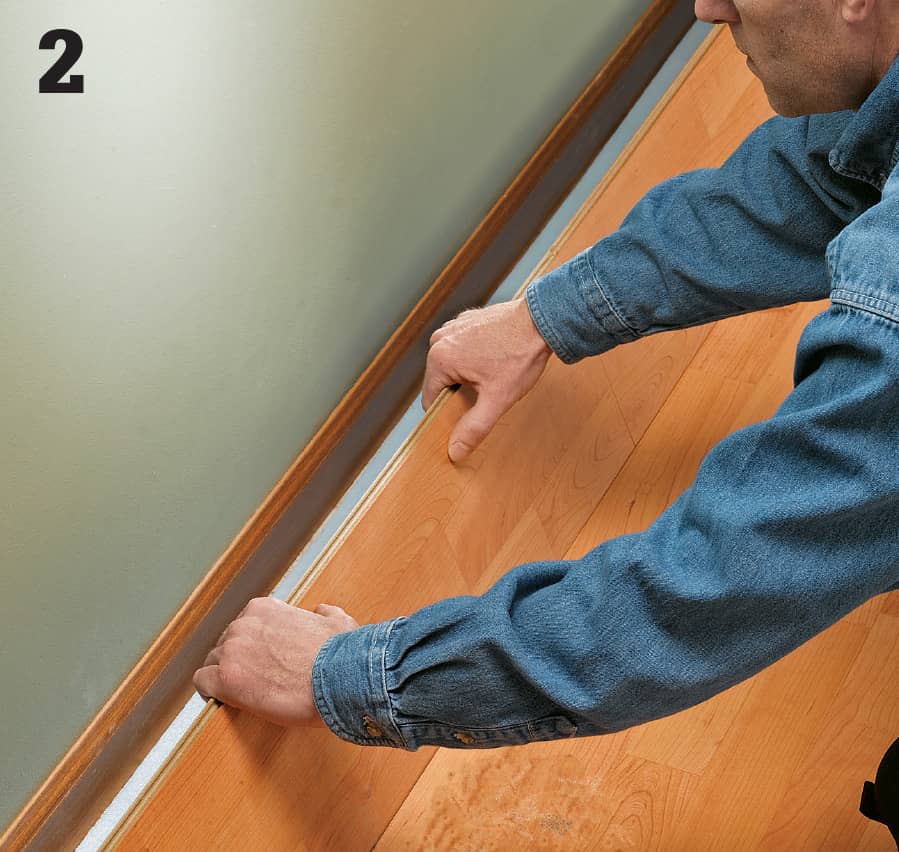
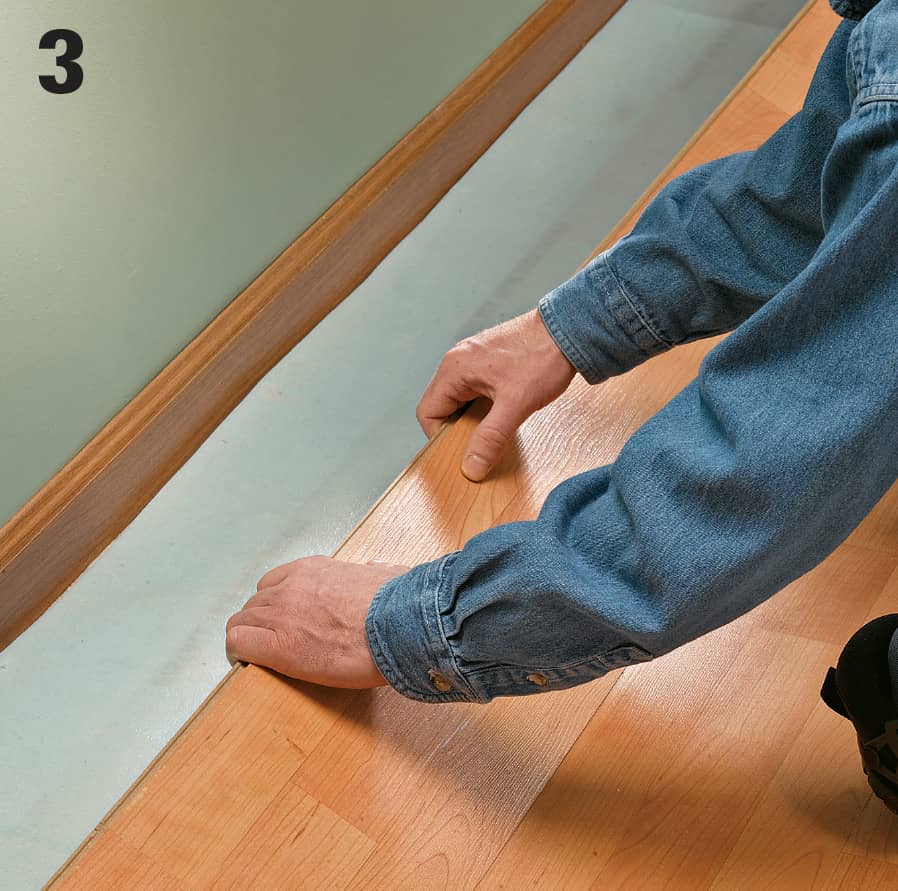
A quick, inexpensive solution is to install T-molding to bridge a gap in a wood strip floor. T-moldings are especially useful when the surrounding boards run parallel to the gap. T-moldings are available in several widths and can be stained to match the flooring.
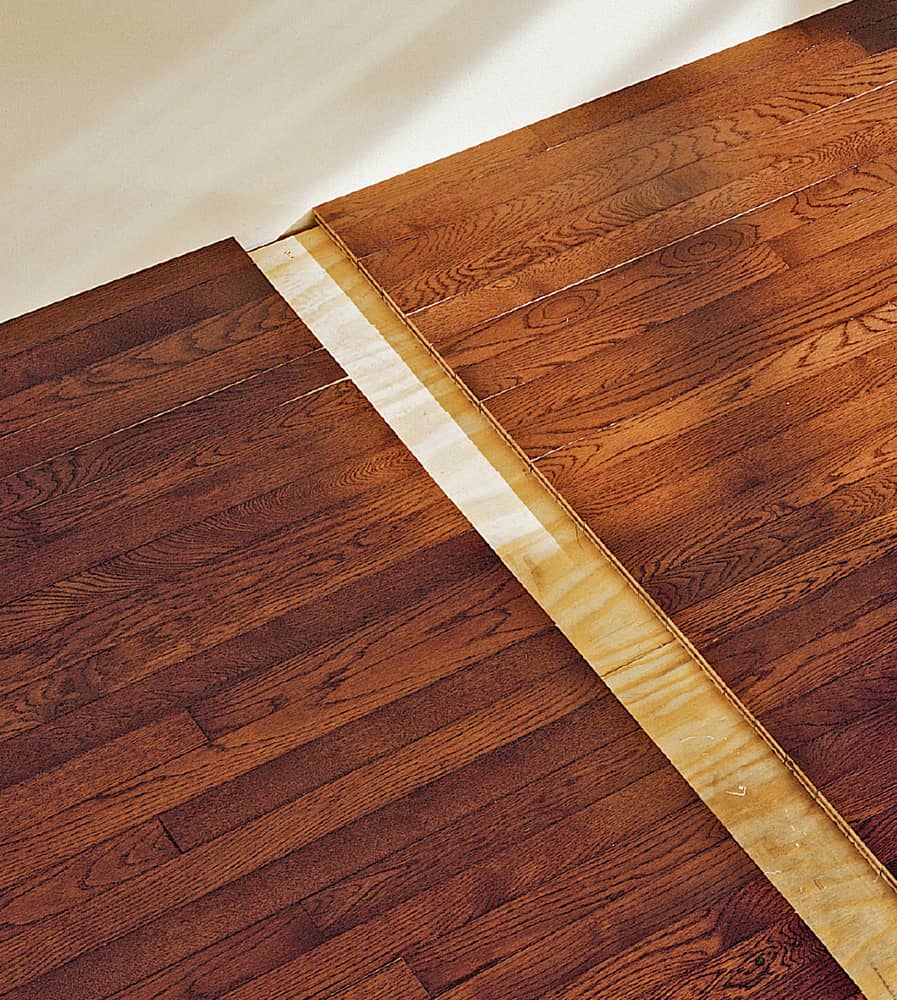
When patching a wood-strip floor, one option is to remove all of the floor boards that butt against the flooring gap using a pry bar and replace them with boards cut to fit. This may require you to trim the tongues from some tongue-and-groove floorboards. Sand and refinish the entire floor so the new boards match the old.
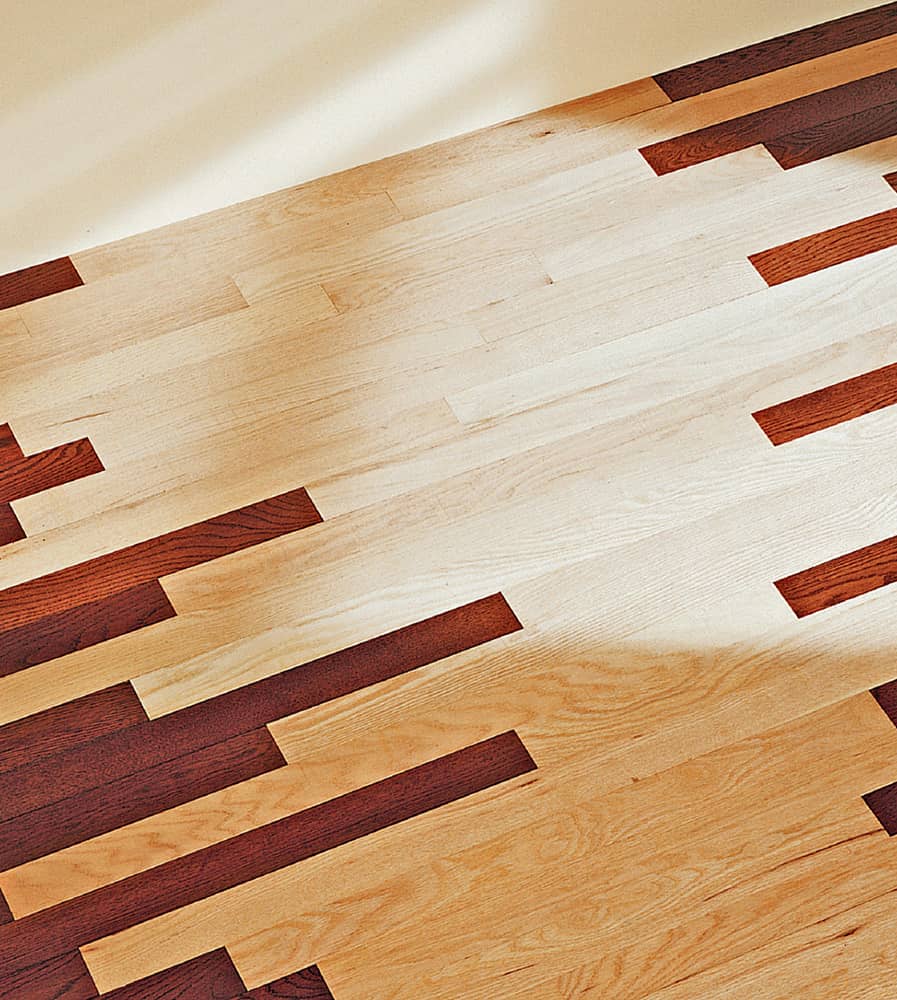
How to Use Contrasting Flooring Material
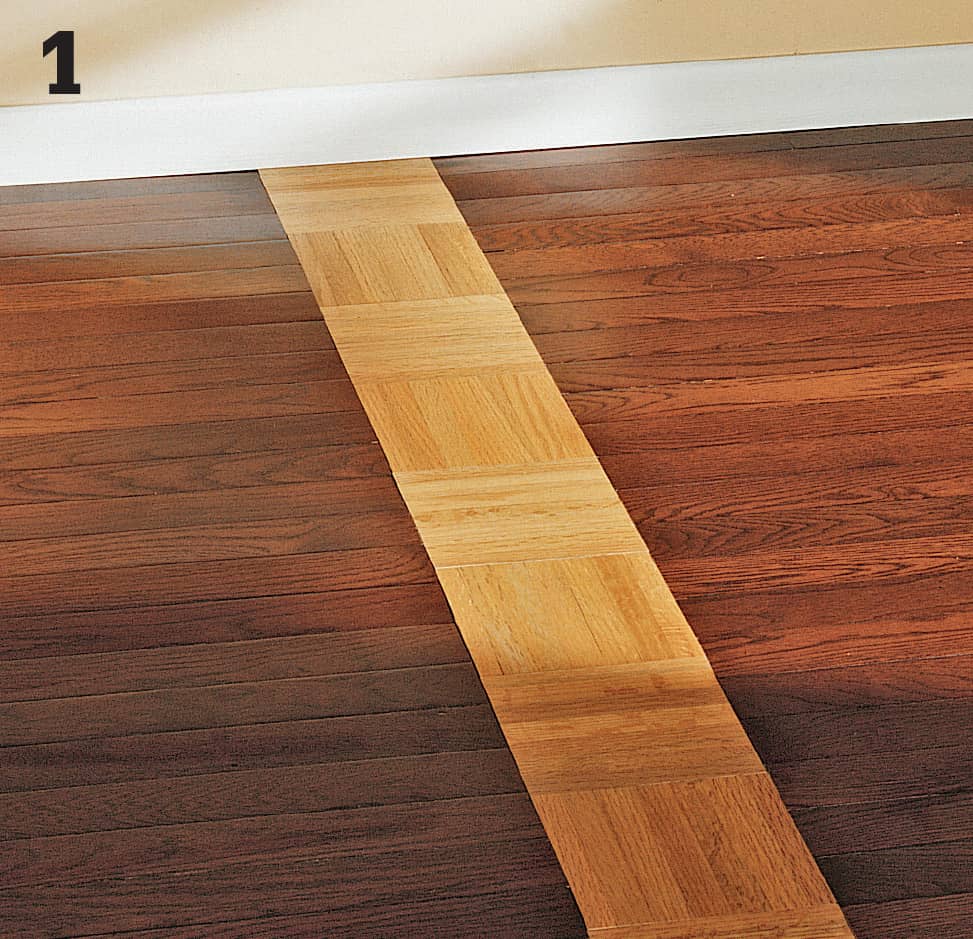
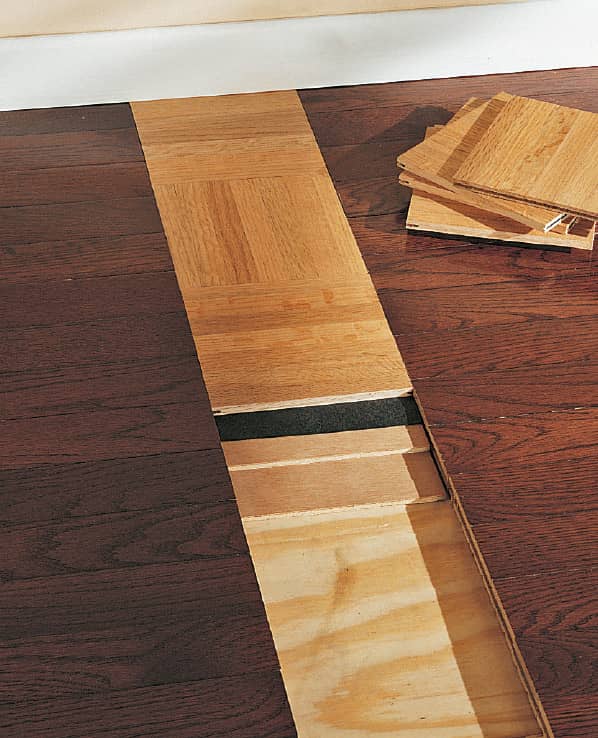
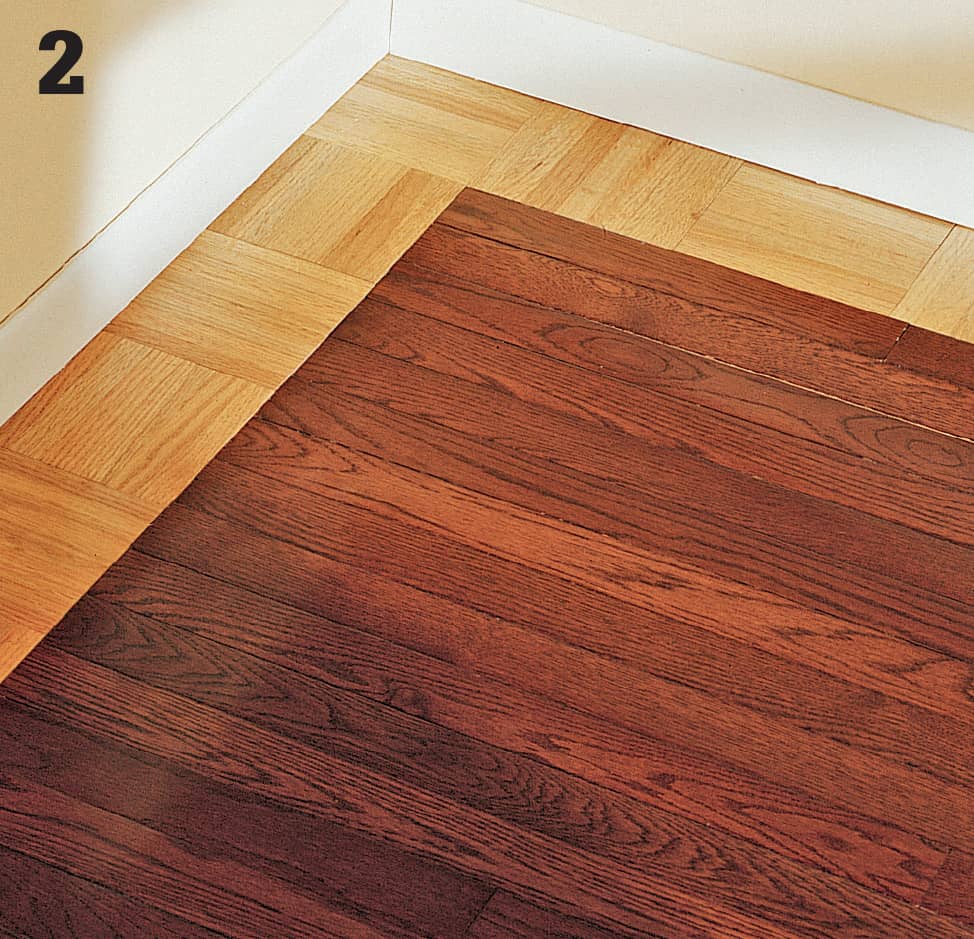
Fill gaps in floors with materials that have a contrasting color and pattern. For wood floors, parquet tiles are an easy and inexpensive choice (above). You may need to widen the gap with a circular saw set to the depth of the wood covering to make room for the contrasting tiles. To enhance the effect, cut away a border strip around the room and fill these areas with the same contrasting flooring material (below).
 Replacing Laminate Flooring
In the event that you need to replace a laminate plank, you must first determine how to remove the damaged plank. If you have a glueless “floating” floor it is best to unsnap and remove each plank starting at the wall and moving in until you reach the damaged plank. However, if the damaged plank is far from the wall, cut out the damaged plank. Fully-bonded laminate planks have adhesive all along the bottom of the plank and are secured directly to the underlayment. When you remove the damaged plank you run the risk of gouging the subfloor, so we recommend calling in a professional if you find that your laminate planks are completely glued to the subfloor.
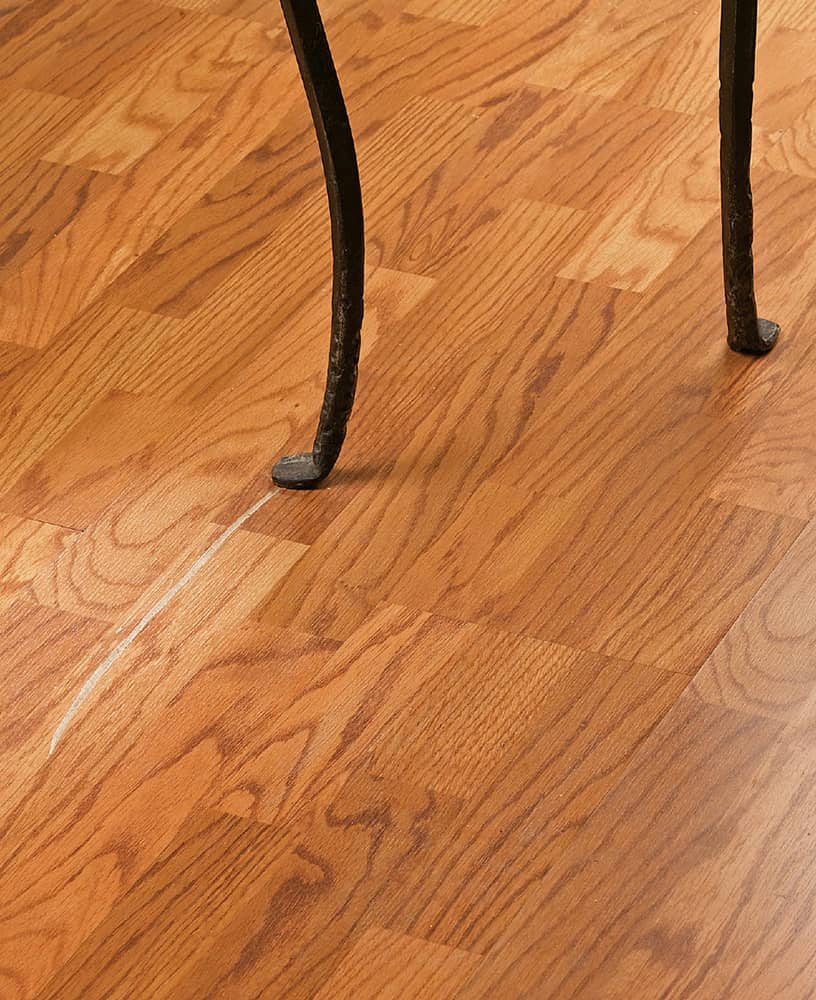
As indestructible as laminate floors may seem, minor scratches caused by normal day-to-day wear and tear are unavoidable. Whether the damaged plank is close to a wall or in the middle of the floor, this project will show you how to replace it.
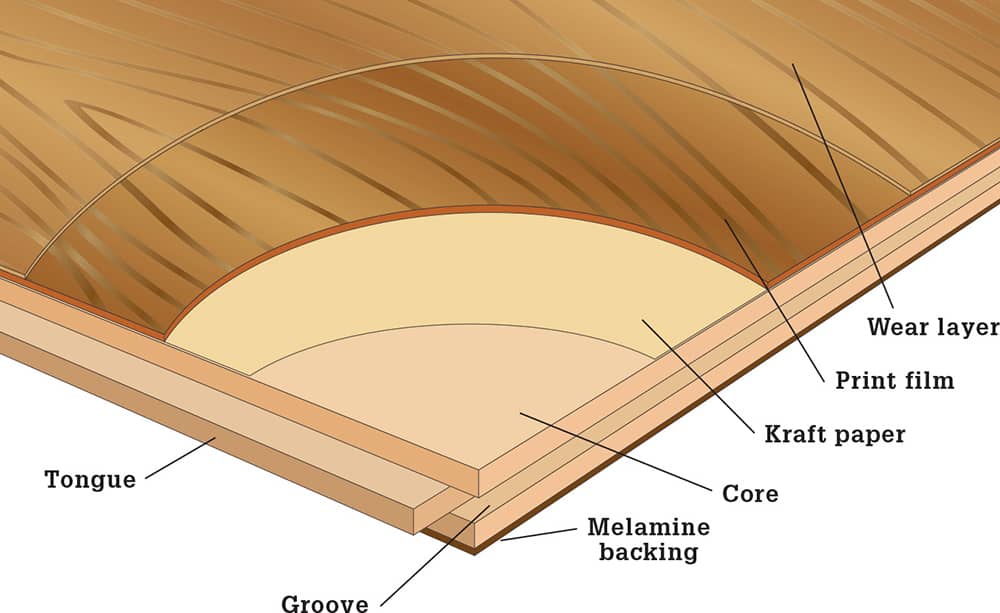
From bottom to top, laminate planks are engineered to resist moisture, scratches, and dents. A melamine base layer protects the inner core layer, which is most often HDF (high-density fiberboard). This is occasionally followed by kraft paper saturated in resins for added protection and durability. The print film is a photographic layer that replicates the look of wood or ceramic. The surface is a highly protective wear layer. The tongue-and-groove planks fit together tightly and may be (according to manufacturer’s instructions) glued together for added stability.
How to Replace Laminate Planks
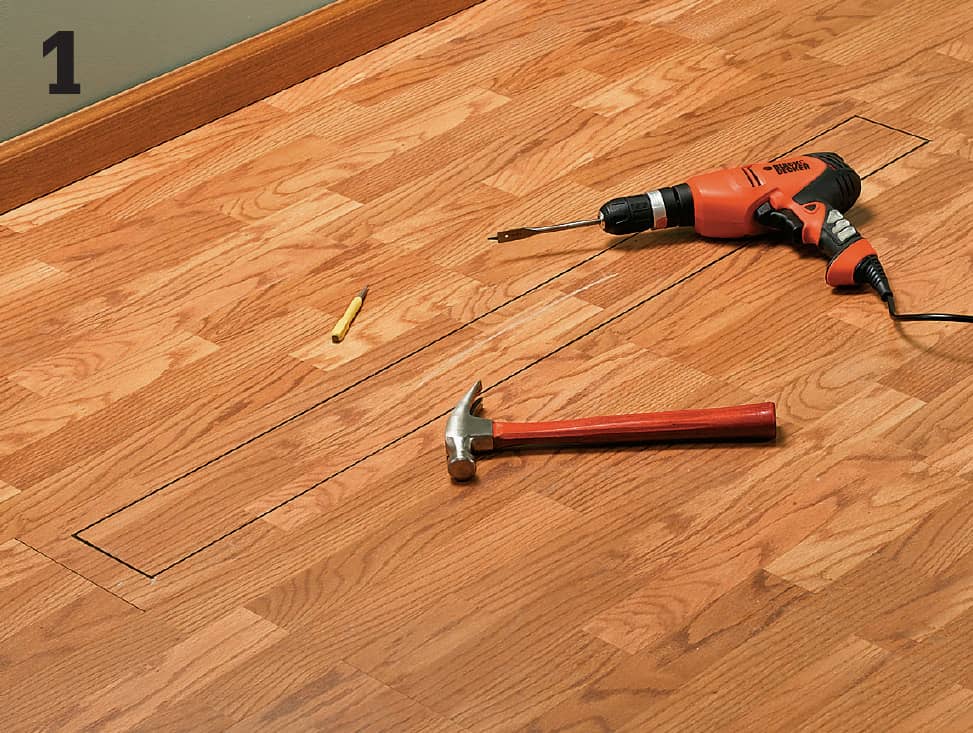
Draw a rectangle in the middle of the damaged board with a 1 1/2" border between the rectangle and factory edges. At each rectangle corner and inside each corner of the plank, use a hammer and nail set to make indentations. At each of these indentations, drill 3/16" holes into the plank. Only drill the depth of the plank.
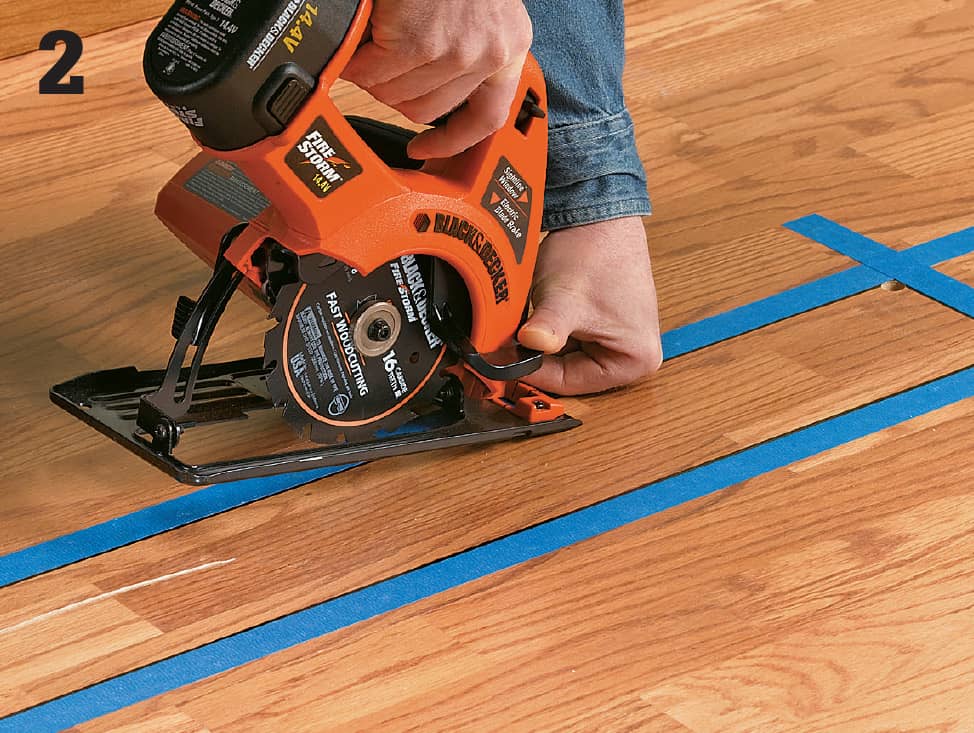
To protect the floor from chipping, place painter’s tape along the cutlines. Now, set the circular saw depth to the thickness of the replacement plank. (If you don’t have a replacement plank, see page 20, Step 2 to determine the plank thickness.) To plunge cut the damaged plank, turn on the saw and slowly lower the blade into the cutline until the cut guide rests flat on the floor. Push the saw from the center of the line out to each end. Stop 1/4" in from each corner. Use a hammer to tap a pry bar or chisel into the cutlines. Lift and remove the middle section. Place a sharp chisel between the two drill holes in each corner and strike with a hammer to complete each corner cut. Vacuum.
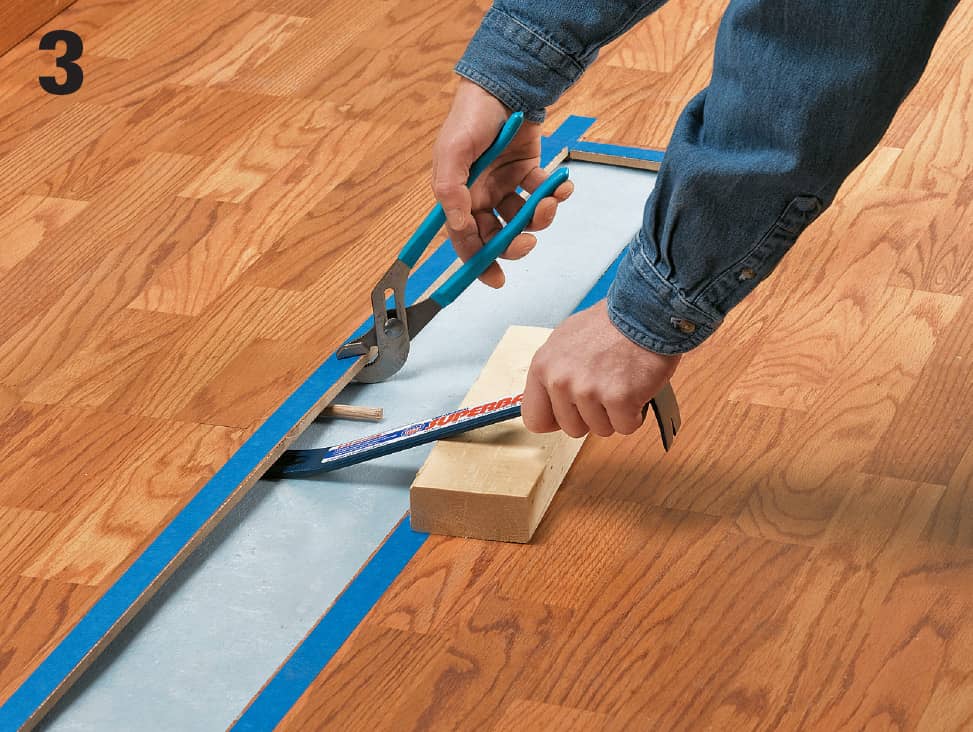
To remove the remaining outer edges of the damaged plank, place a scrap 2 × 4 wood block along the outside of one long cut and use it for leverage to push a pry bar under the flooring. Insert a second pry bar beneath the existing floor (directly under the joint of the adjacent plank) and use a pliers to grab the 1 1/2" border strip in front of the pry bar. Press downward until a gap appears at the joint. Remove the border piece. Remove the opposite strip and then the two short end pieces in the same manner.
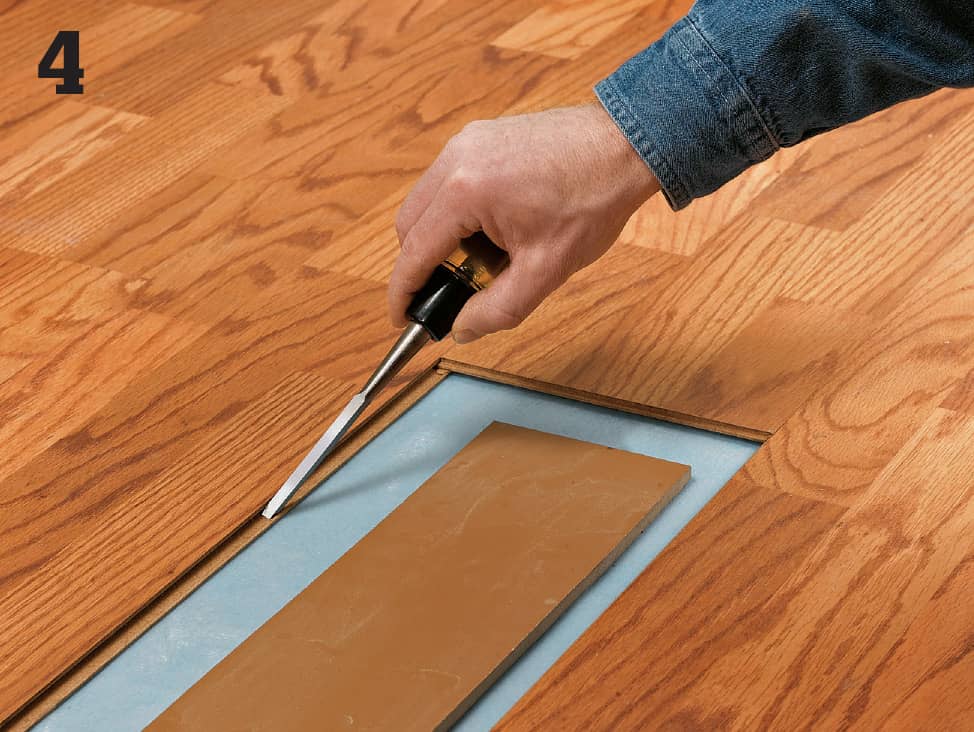
Place a scrap of cardboard in the opening to protect the underlayment foam while you remove all of the old glue from the factory edges with a chisel. Vacuum up the wood and glue flakes.
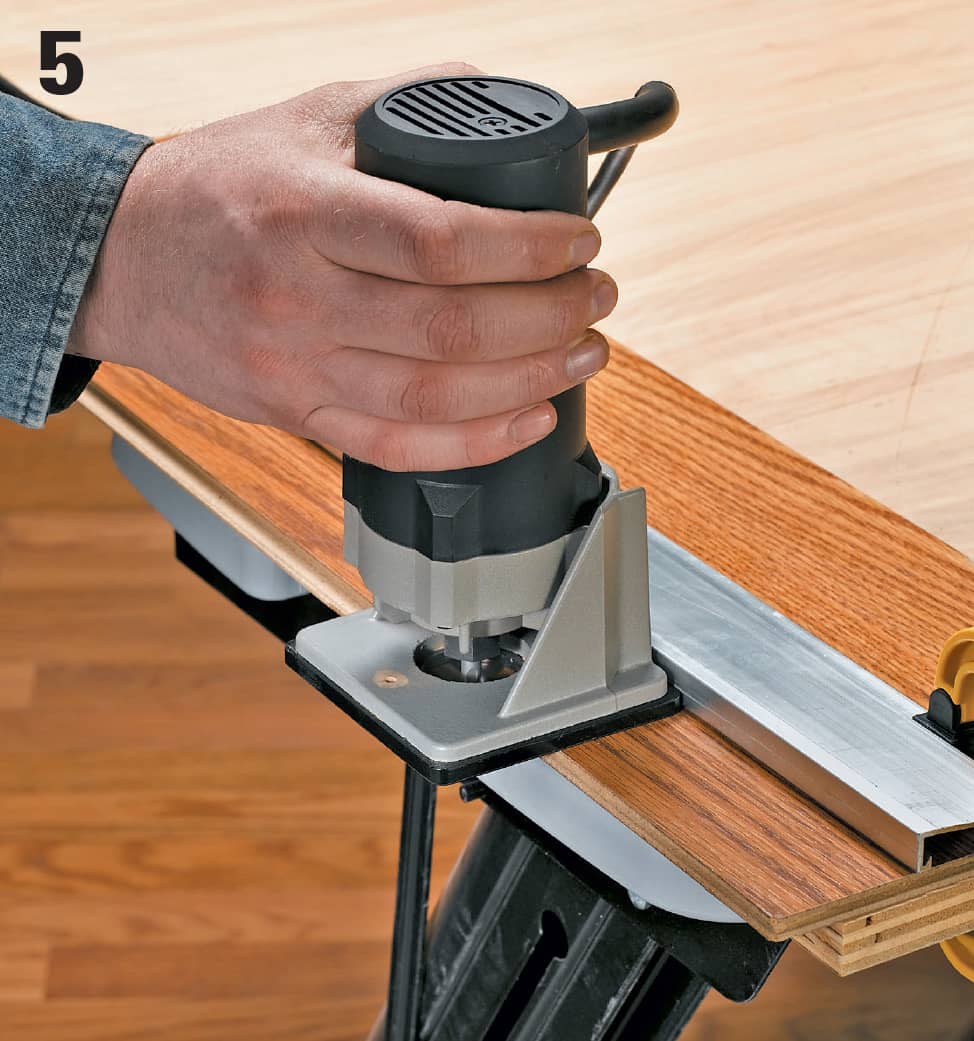
To remove the tongues on one long and one short end, lay the replacement plank face down onto a protective scrap of plywood (or 2 × 4). Clamp a straight cutting guide to the replacement plank so the distance from the guide causes the bit to align with the tongue and trim it off. Pressing the router against the cutting guide, slowly move along the entire edge of the replacement plank to remove the tongue. Clean the edges with sandpaper.
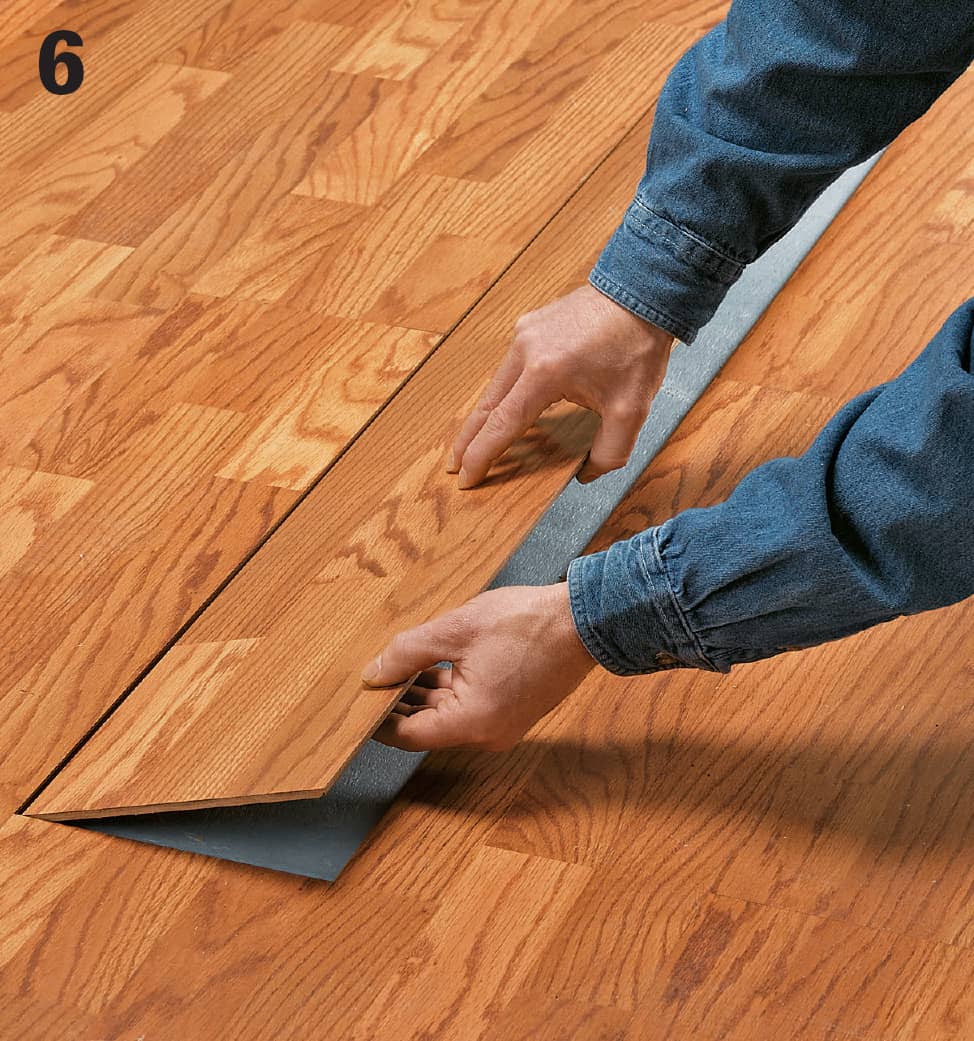
Dry-fit the grooves on the replacement board into the tongues of the surrounding boards and press into place. If the board fits snugly in between the surrounding boards, pry the plank up with a manufacturer suction cup. If the plank does not sit flush with the rest of the floor, check to make sure you routered the edges off evenly. Sand any rough edges that should have been completely removed and try to fit the plank again.
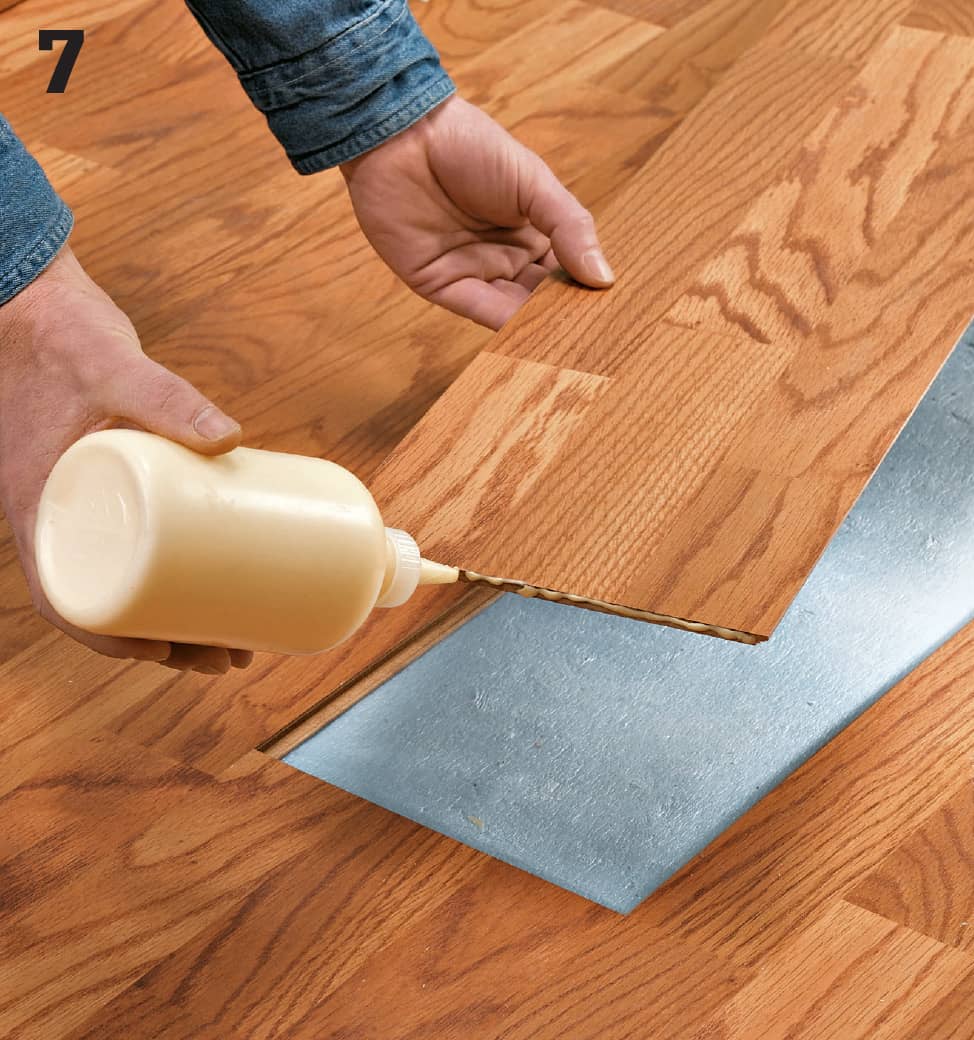
Set the replacement plank by applying laminate glue to the removed edges of the replacement plank and into the grooves of the existing planks. Firmly press the plank into place.
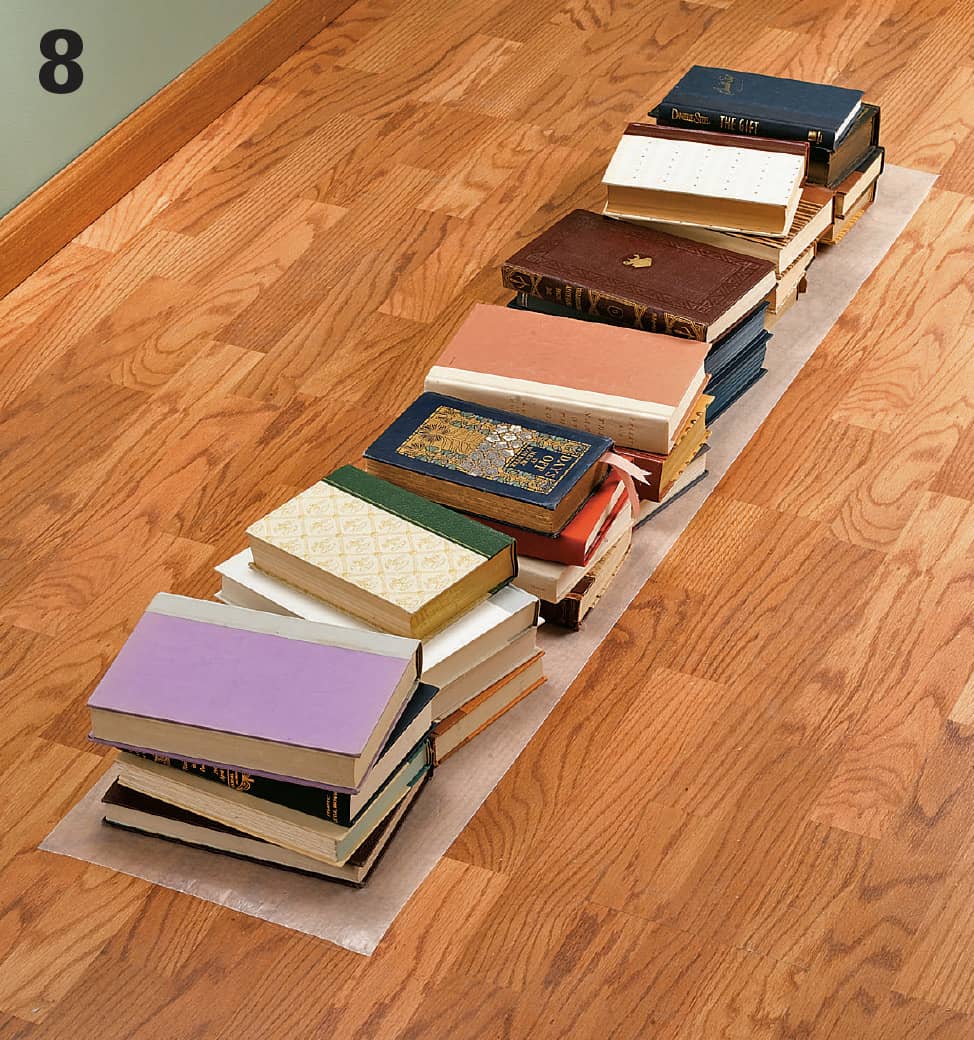
Clean up glue with a damp towel. Place a strip of wax paper over the new plank and evenly distribute some books on the wax paper. Allow the adhesive to dry for 12 to 24 hours.
How to Replace a Parquet Tile
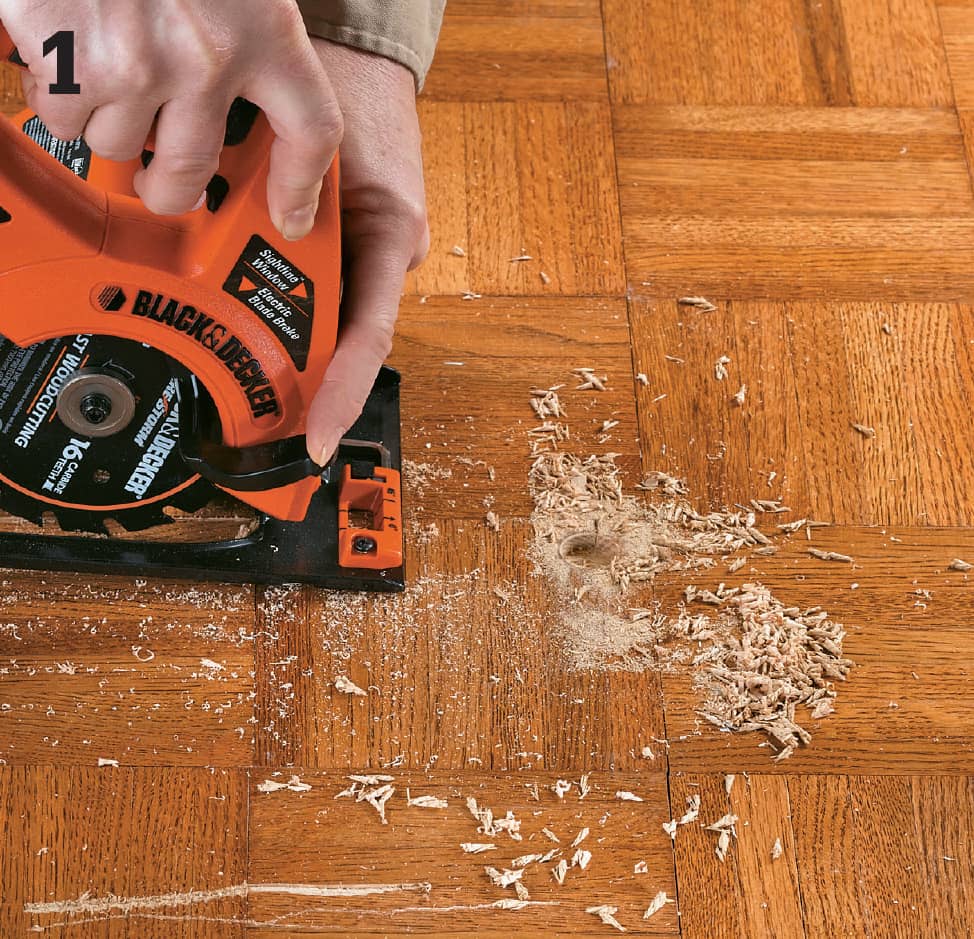
For the initial plunge cut, set the depth of a circular saw to the thickness of the parquet tile. (If you don’t know the thickness, see Here’s How, this page.) Hold the saw so that only the top of the guide plate touches the surface of the wood; the blade, when lowered, will cut into the damaged wood block. Turn on the saw. Slowly lower the blade into the cutting line until the saw’s cut guide rests flat on the floor. Make a series of four plunge cuts into the damaged tile—1" inside each edge—to make a square cutout.
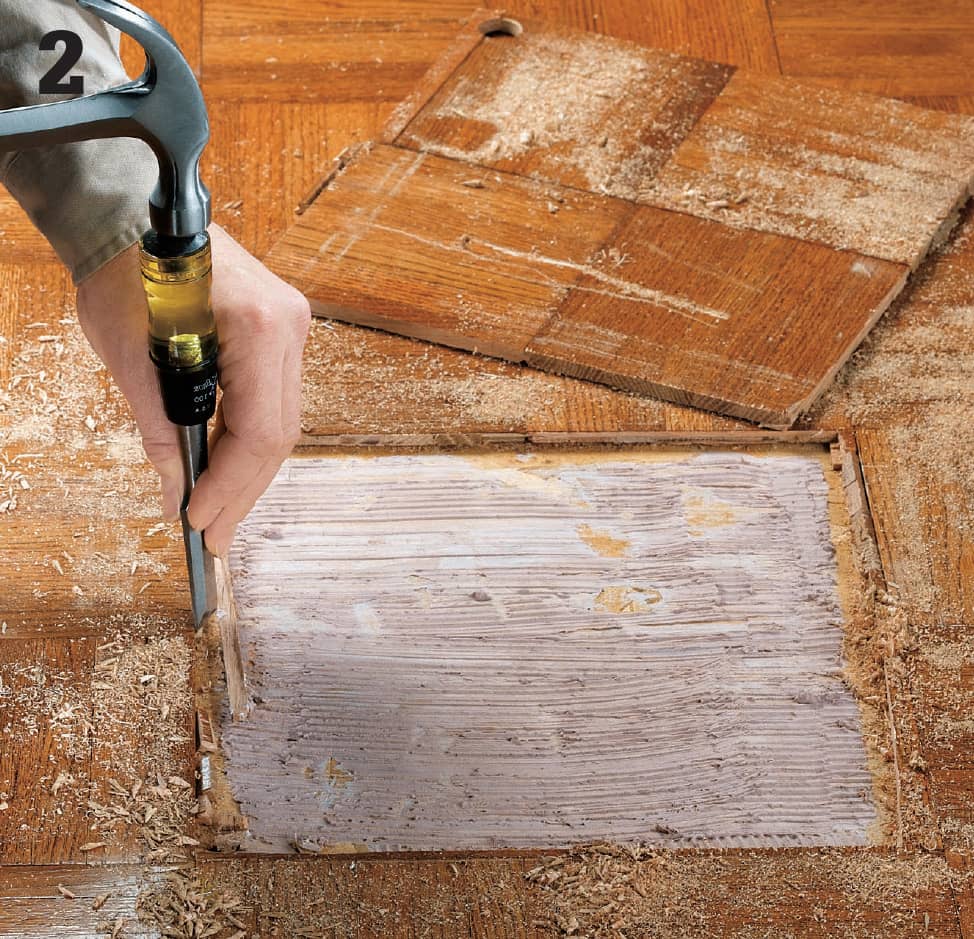
Use a hammer and a sharp, 1"-wide chisel to chip out the cut pieces in the center of the damaged tile. When you’re removing the pieces around the edge of the cutout, make sure the beveled side of the chisel is facing the damaged area so that a clean flat edge is left along the adjacent tiles. If you need some elbow grease to remove the center pieces, use a hammer to tap a pry bar under the damaged cutout and then lean it over a scrap of 2 × 4 for leverage.
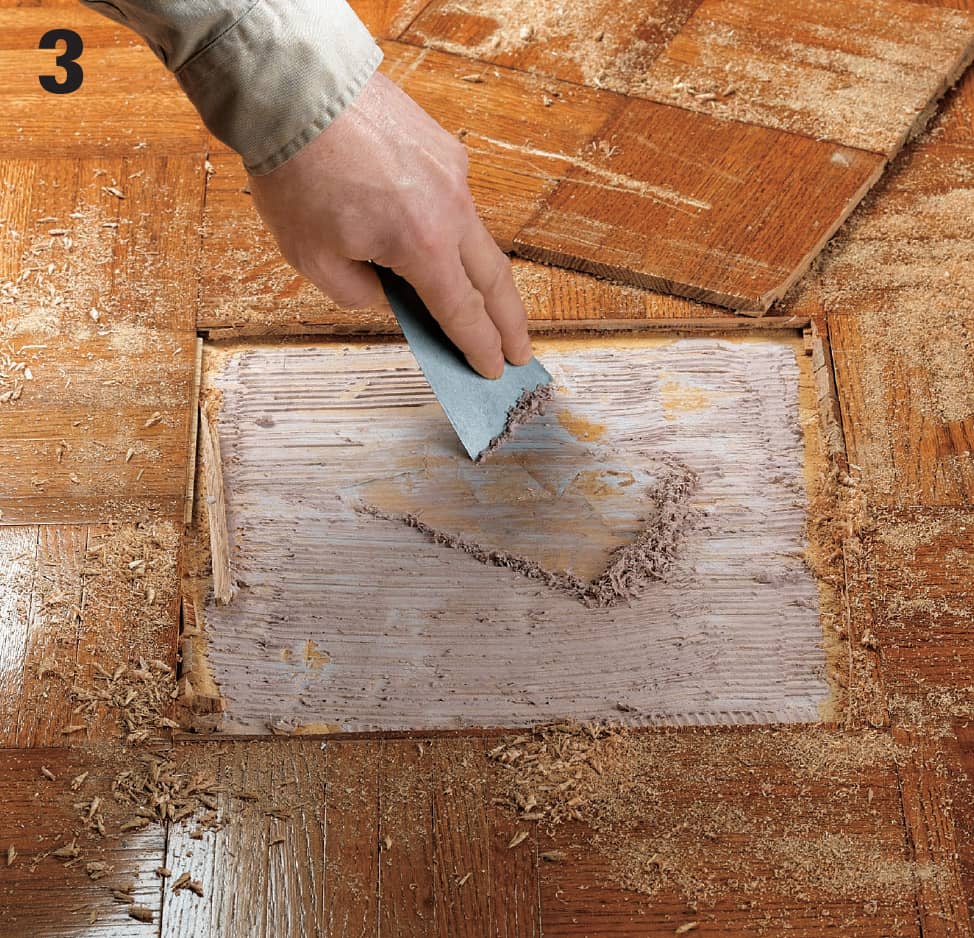
Use a putty knife to scrape away the remaining adhesive on the underlayment so that the new tile will sit flush with the surrounding floor.
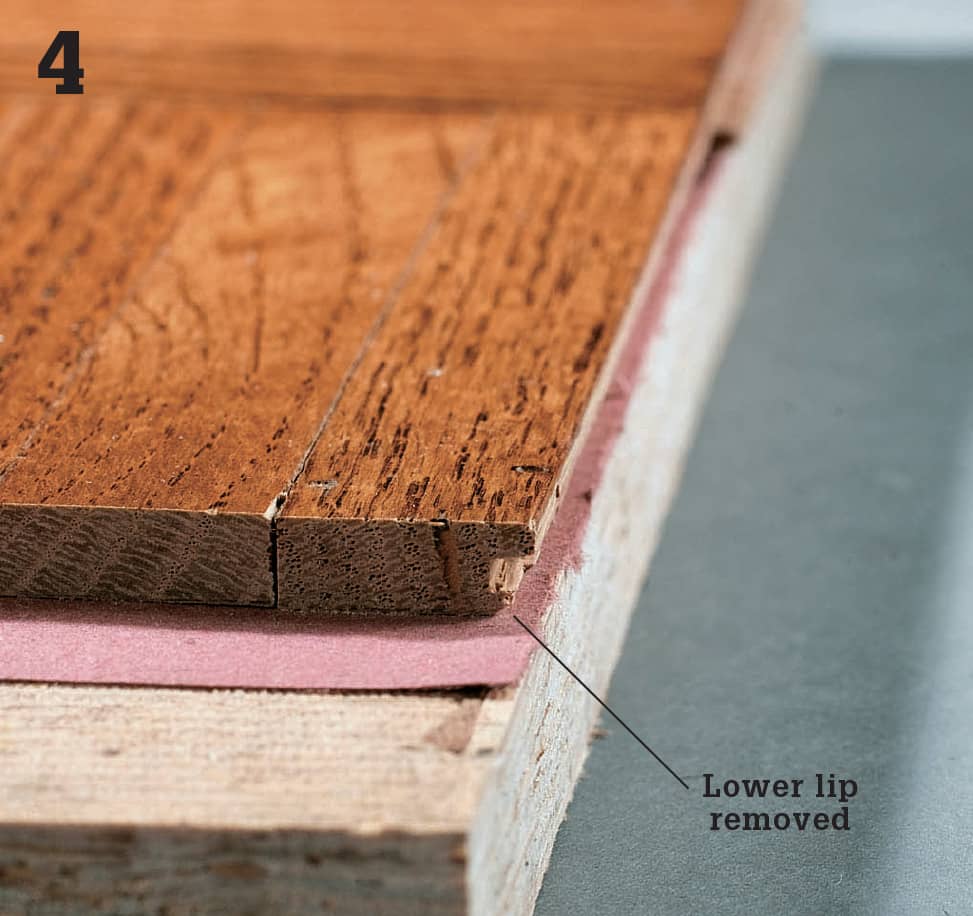
Remove lower lip of groove in replacement tile. If the replacement wood block has a tongue-and-groove structure, remove the lower lip of the groove so that you can press it into place. Lay the replacement block face down onto a protective scrap of wood and use a sharp chisel to split off the lower lip. Lightly sand the edges.
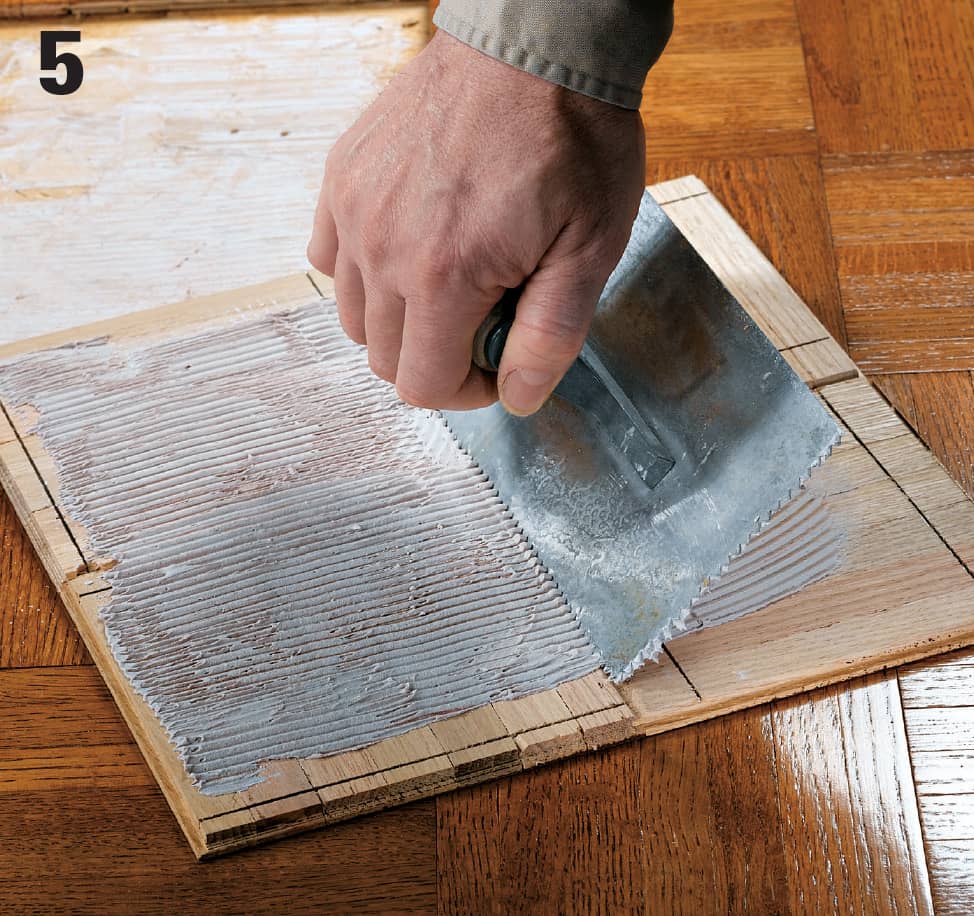
Apply adhesive. Use a 1/8" notched trowel to spread a thin layer of floor adhesive onto the back of the replacement tile and the floor. The ridges should be about 1/8" high on the replacement tile. The adhesive on the floor is only to make sure the tiles are completely covered on all edges. You want a secure bond, but you do not want adhesive to squeeze up between the tiles.
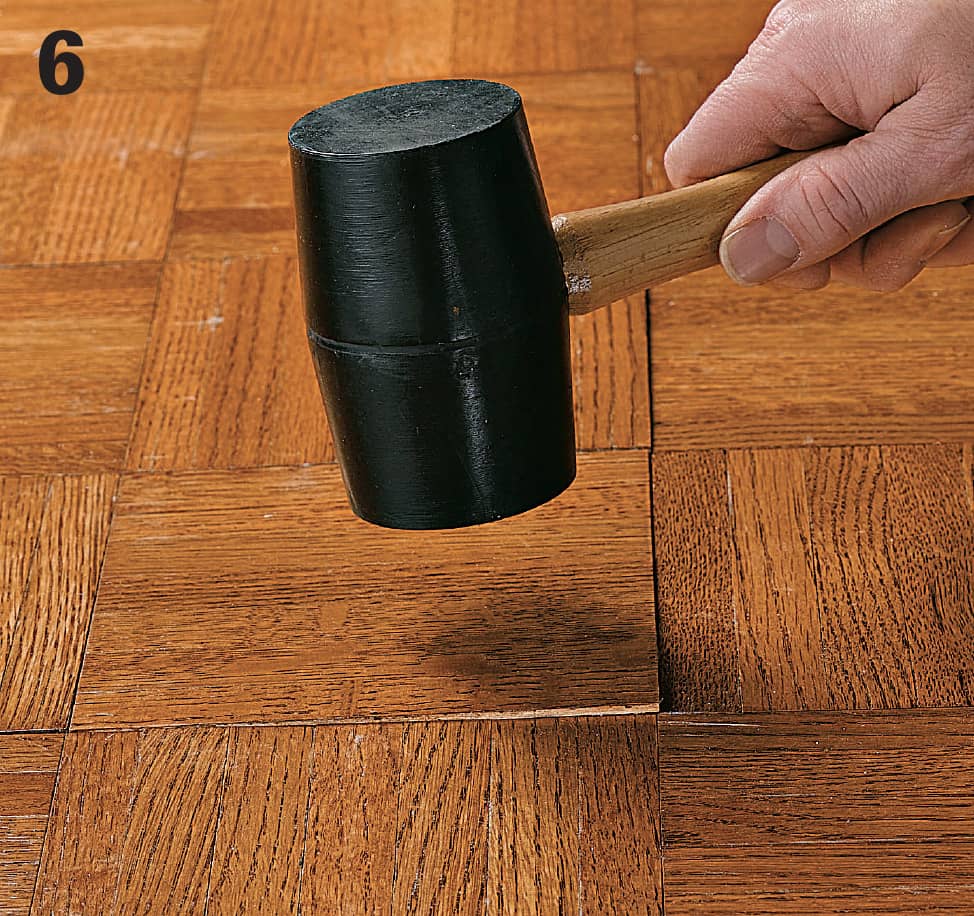
Install replacement block. Hook the tongue of the replacement block into the groove of an adjacent block and then use a soft mallet to gently tap the groove side of the new block down into place. If adhesive happens to squeeze up onto any of the block, clean it immediately with the cleaning solvent recommended by the adhesive manufacturer. You’re done!
 Repairing Vinyl Flooring
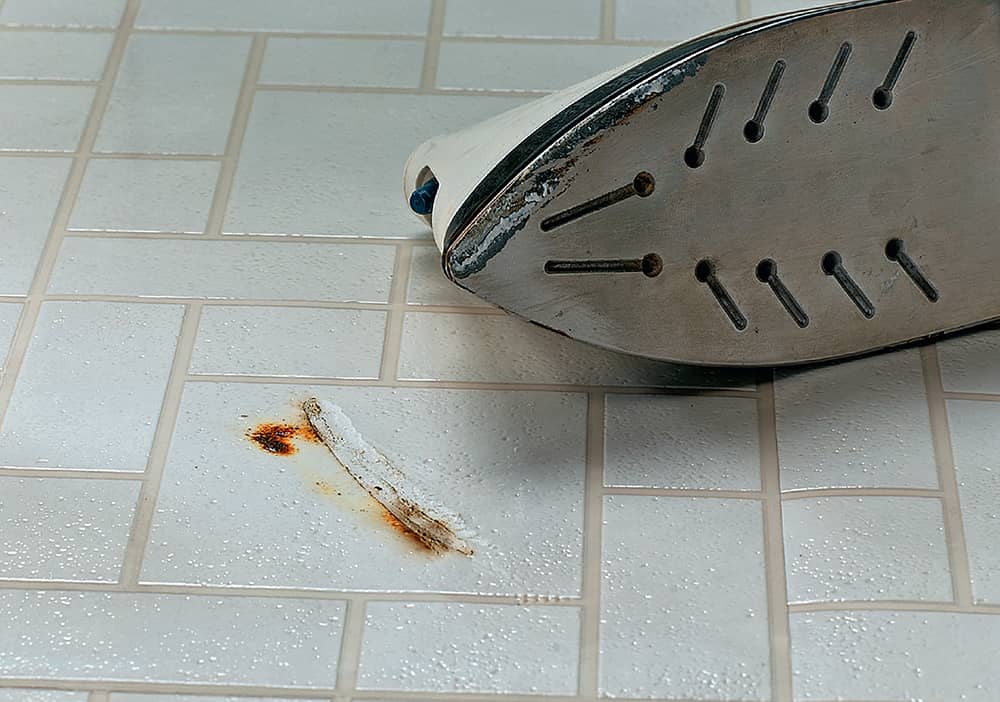
Repair methods for vinyl flooring depend on the type of floor as well as the type of damage. With sheet vinyl, you can fuse the surface or patch in new material. With vinyl tile, it’s best to replace the damaged tiles.
Small cuts and scratches can be fused permanently and nearly invisibly with liquid seam sealer, a clear compound that’s available wherever vinyl flooring is sold. For tears or burns, the damaged area can be patched. If necessary, remove vinyl from a hidden area, such as the inside of a closet or under an appliance, to use as patch material.
When vinyl flooring is badly worn or the damage is widespread, the only answer is complete replacement. Although it’s possible to add layers of flooring in some situations, evaluate the options carefully. Be aware that the backing of older vinyl tiles made of asphalt may contain asbestos fibers. Consult a professional for their removal.
How to Patch Sheet Vinyl
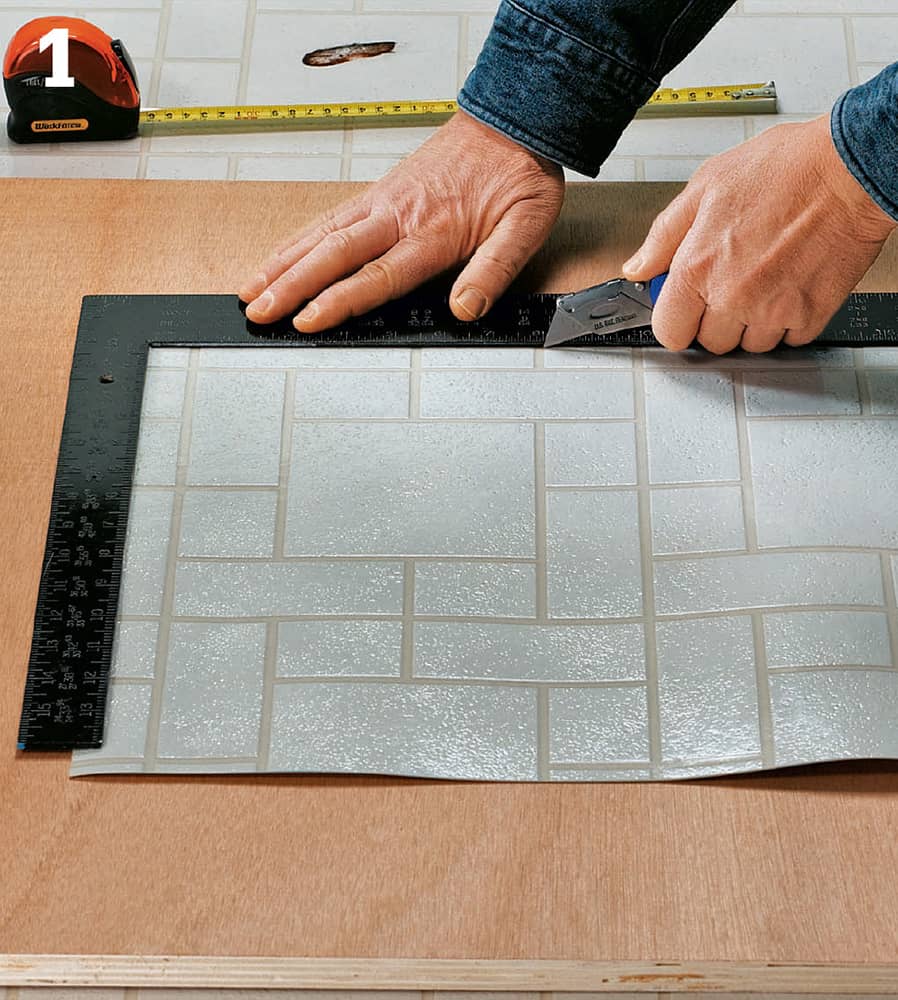
Measure the width and length of the damaged area. Place the new flooring remnant on a surface you don’t mind making some cuts on—like a scrap of plywood. Use a carpenter’s square for cutting guidance. Make sure your cutting size is a bit larger than the damaged area.
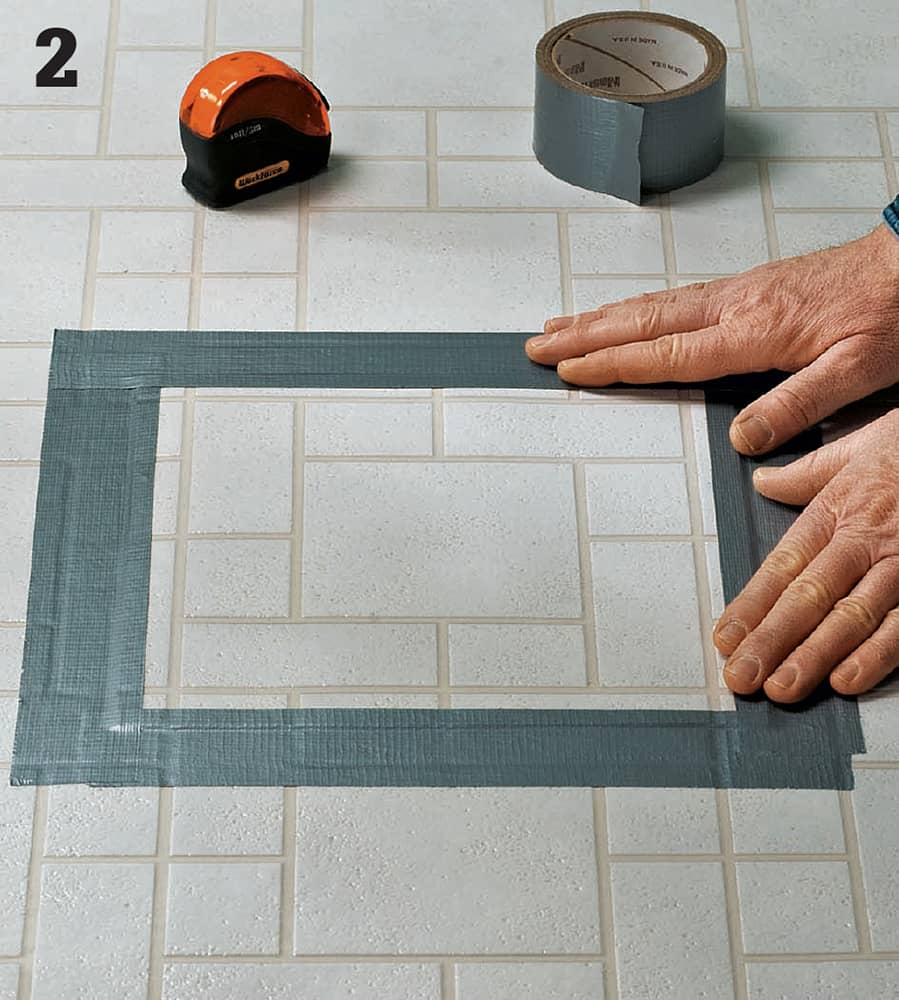
Lay the patch over the damaged area, matching pattern lines. Secure the patch with duct tape. Using a carpenter’s square as a cutting guide, cut through the new vinyl (on top) and the old vinyl (on bottom). Press firmly with the knife to cut both layers.
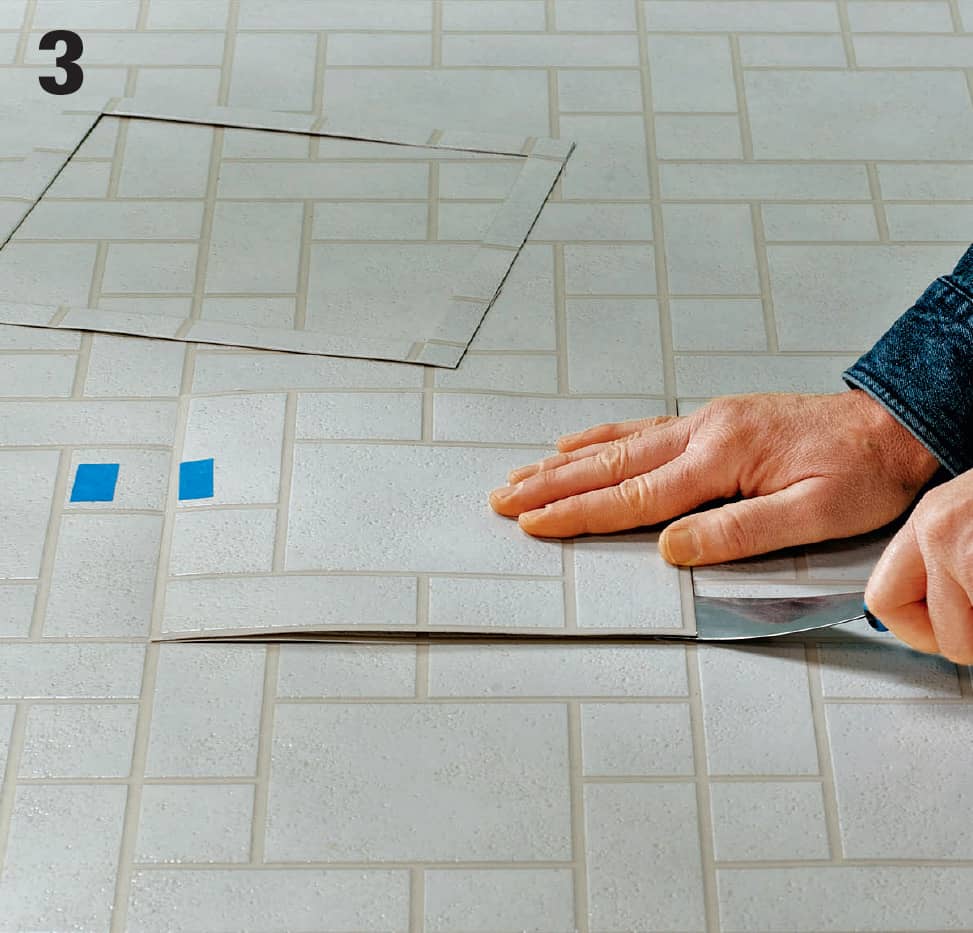
Use tape to mark one edge of the new patch with the corresponding edge of the old flooring as placement marks. Remove the tape around the perimeter of the patch and lift up.
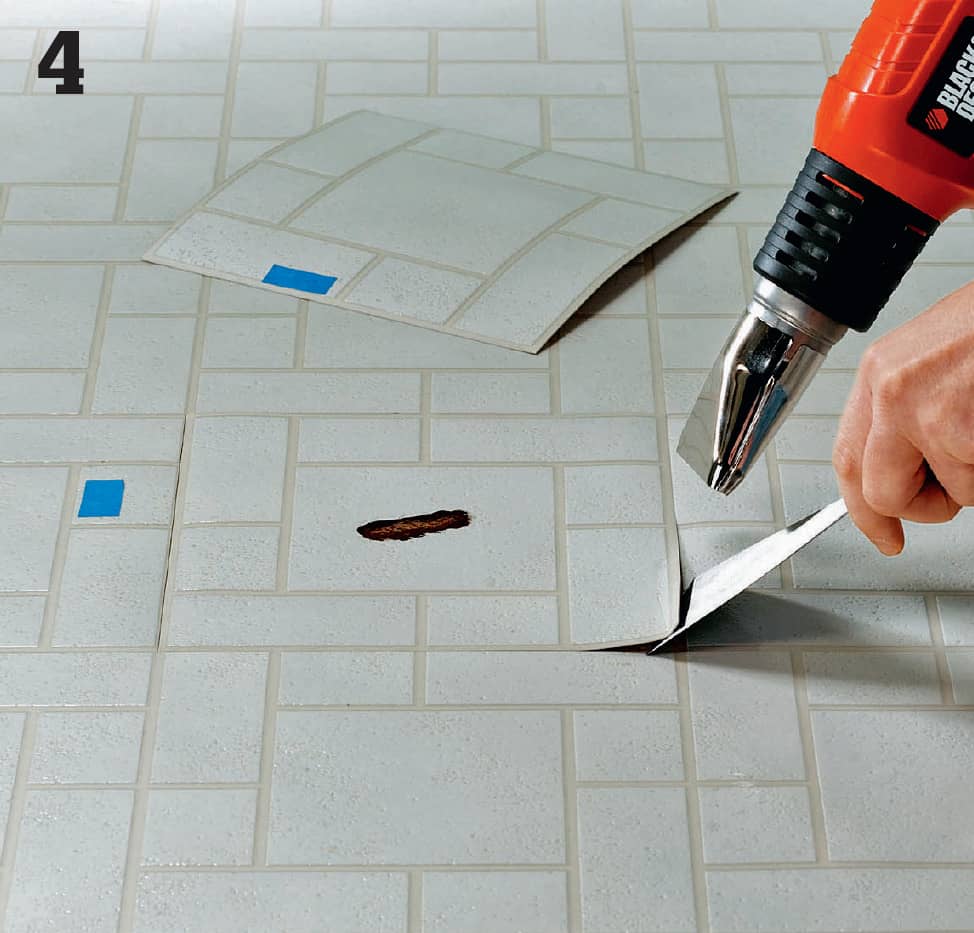
Soften the underlying adhesive with an electric heat gun and remove the damaged section of floor. Work from edges in. When the tile is loosened, insert a putty knife and pry up the damaged area.
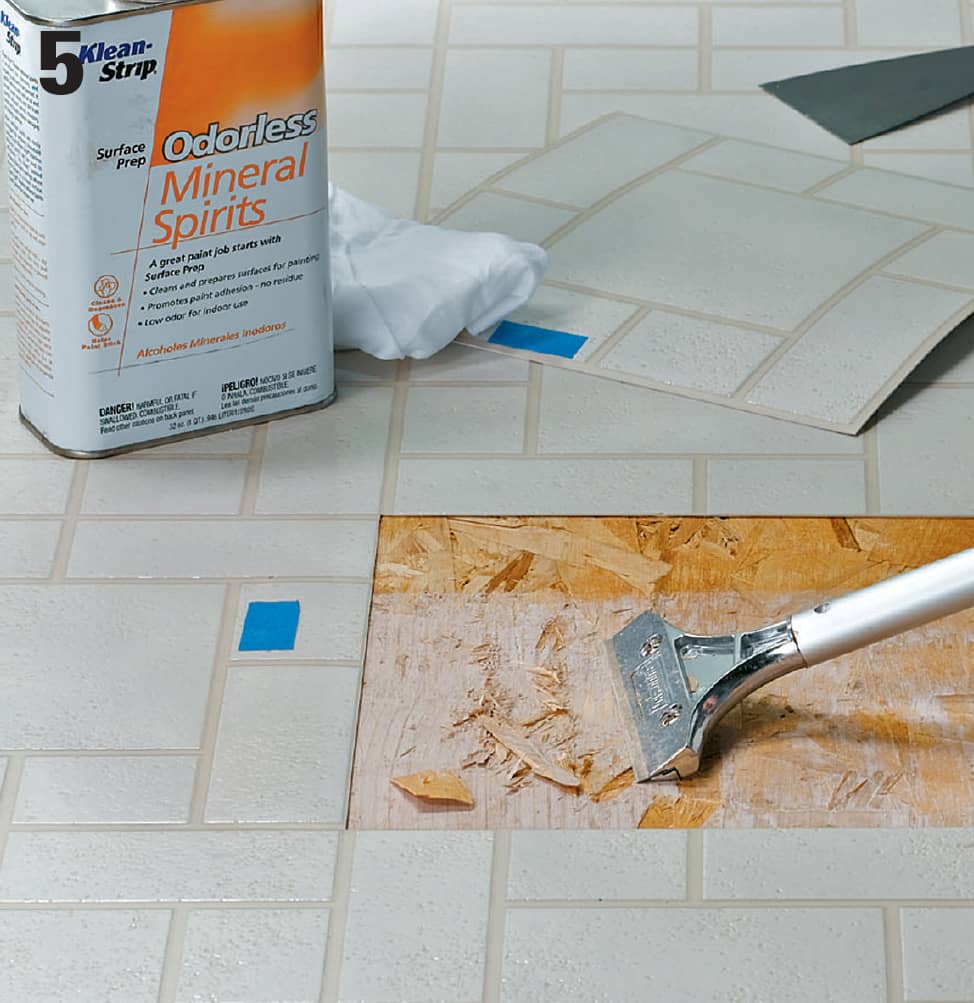
Scrape off the remaining adhesive with a putty knife or chisel. Work from the edges to the center. Dab mineral spirits (or Goo Gone) or spritz warm water on the floor to dissolve leftover goop, taking care not to use too much; you don’t want to loosen the surrounding flooring. Use a razor-edged scraper (flooring scraper) to scrape to the bare wood underlayment.
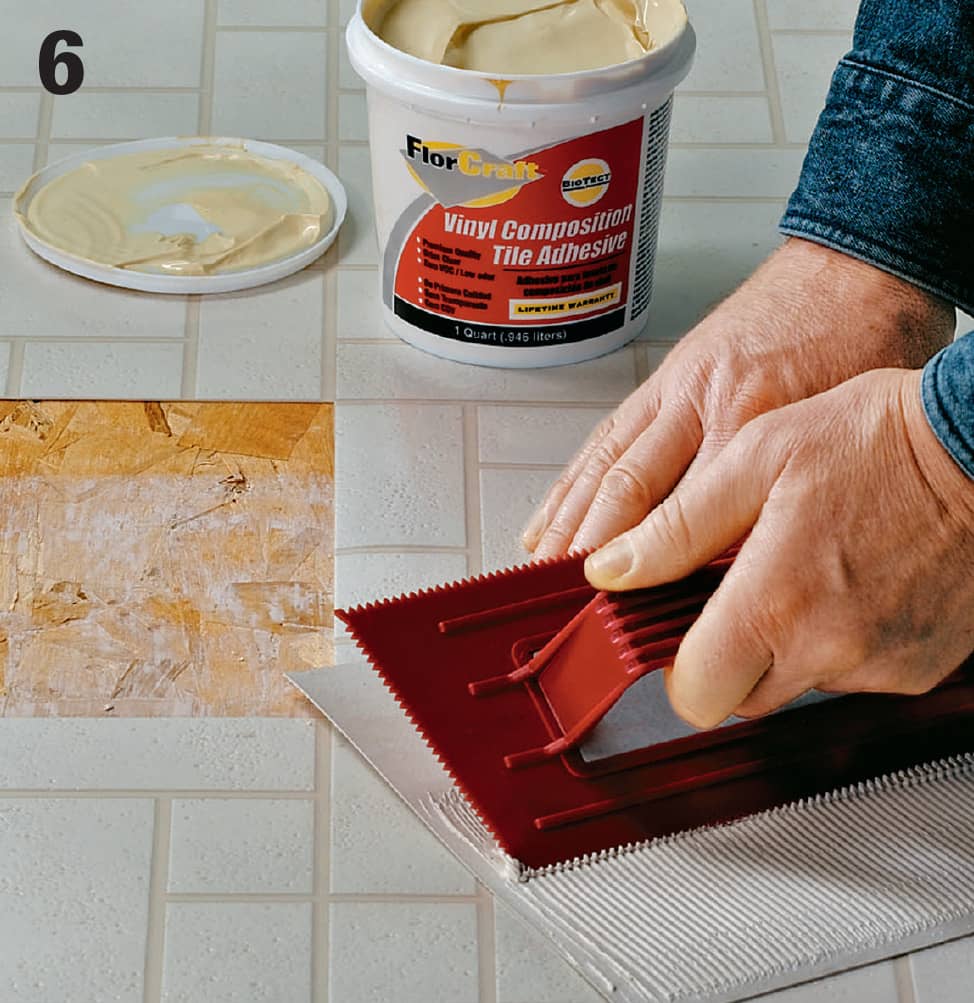
Apply adhesive to the patch, using a notched trowel (with 1/8" V-shaped notches) held at a 45° angle to the back of the new vinyl patch.
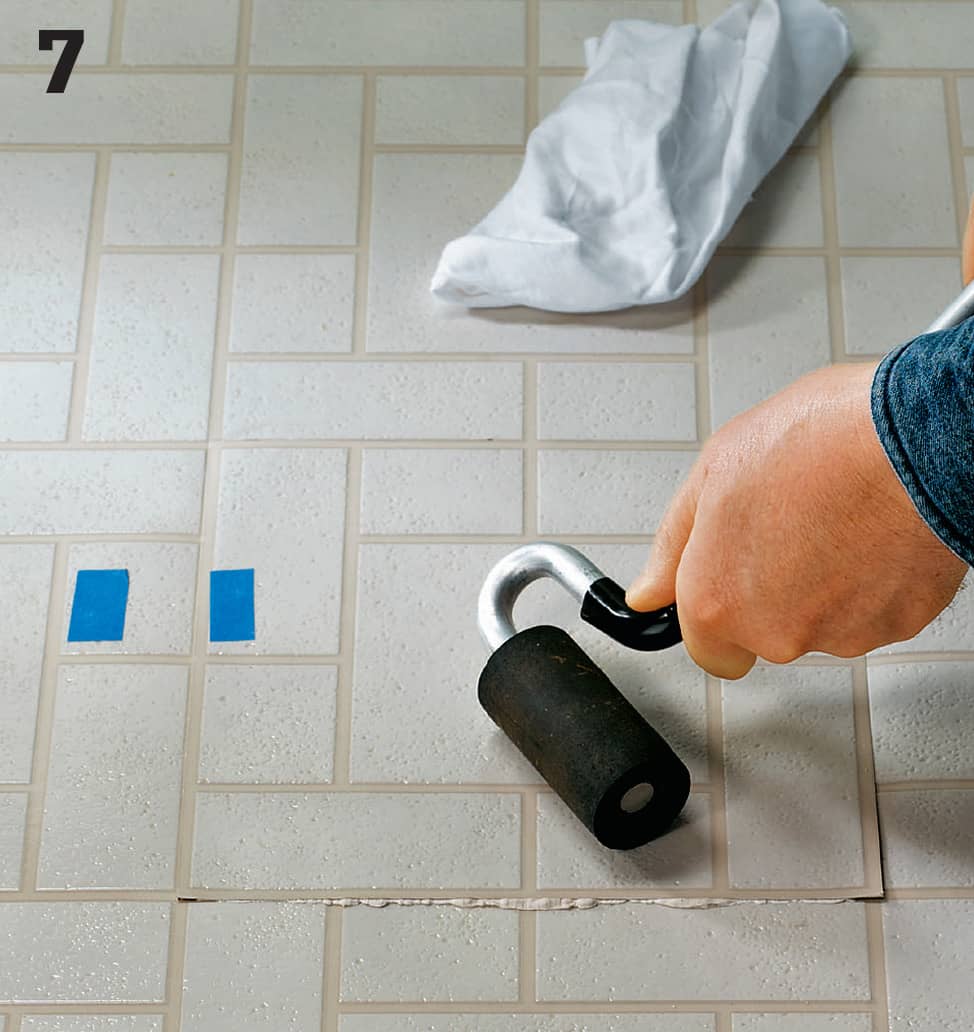
Set one edge of the patch in place. Lower the patch onto the underlayment. Press into place. Apply pressure with a J-roller or rolling pin to create a solid bond. Start at the center and work toward the edges, working out air bubbles. Wipe up adhesive that oozes out the sides with a clean, damp cloth or sponge.
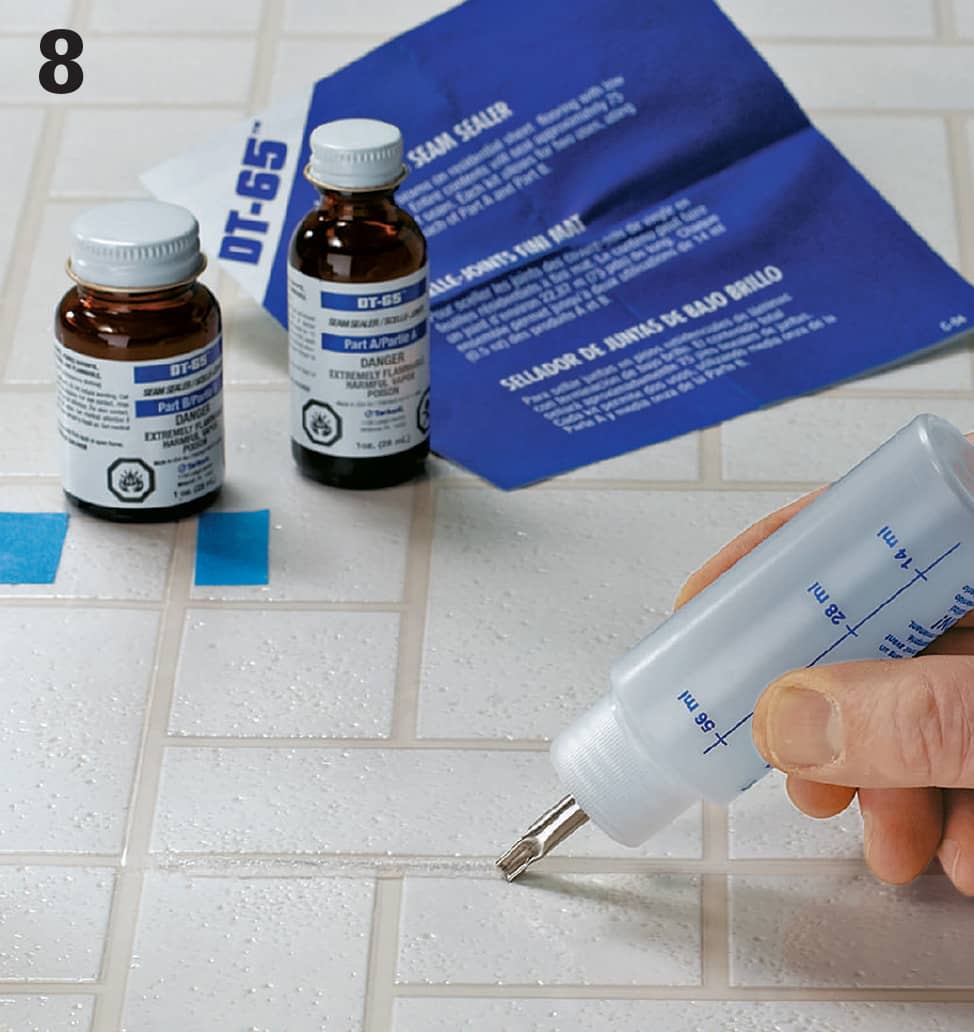
Let the adhesive dry overnight. Use a soft cloth dipped in lacquer thinner to clean the area. Mix the seam sealer according to the manufacturer’s directions. Use an applicator bottle to apply a thin bead of sealer onto the cutlines.
How to Replace Resilient Tile
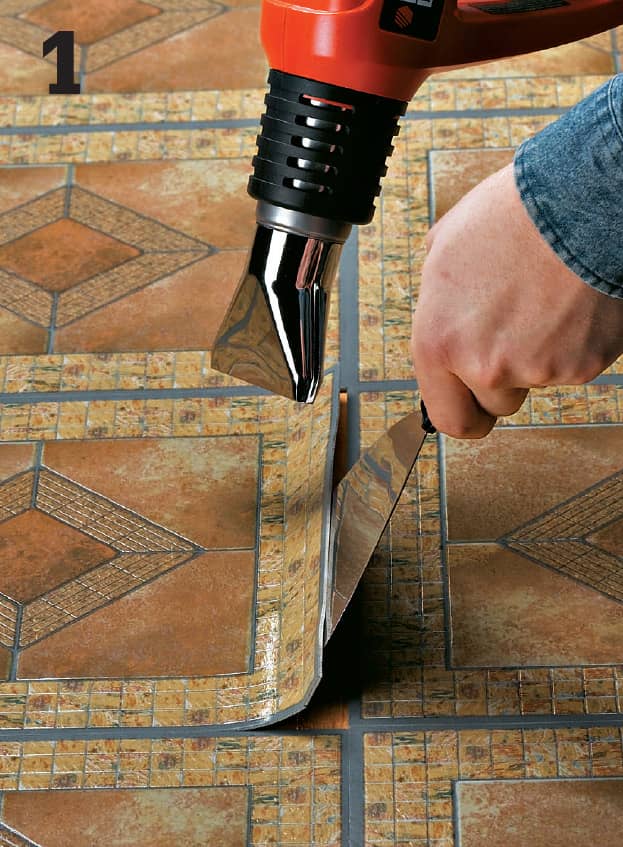
Use an electric heat gun to warm the damaged tile and soften the underlying adhesive. Keep the heat source moving so you don’t melt the tile. When an edge of the tile begins to curl, insert a putty knife to pry up the loose edge until you can remove the tile. Note: If you can clearly see the seam between tiles, first score around the tile with a utility knife. This prevents other tiles from lifting.
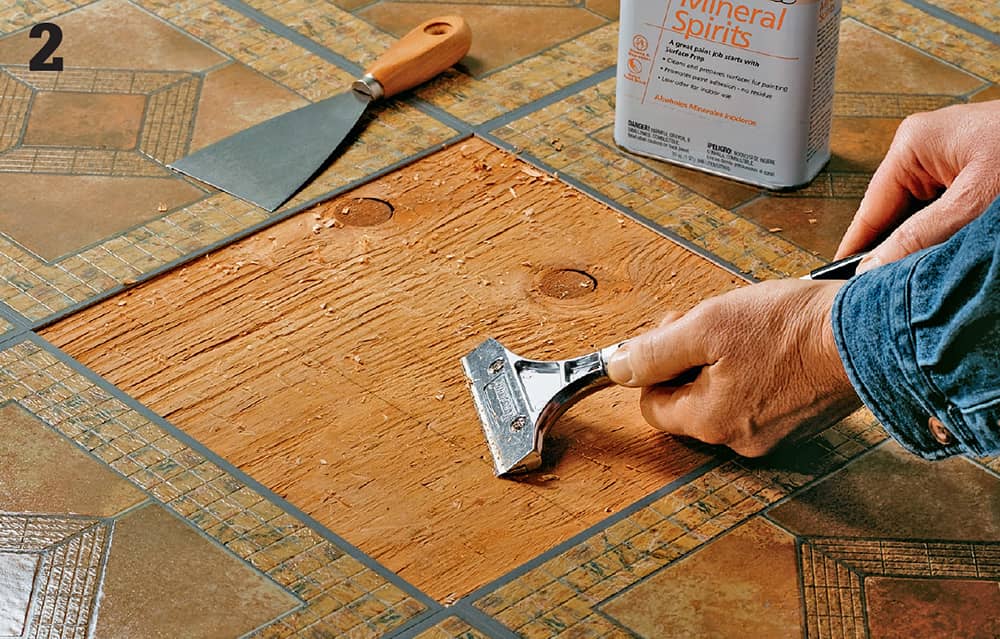
Scrape away remaining adhesive with a putty knife or, for stubborn spots, a floor scraper. Work from the edges to the center so that you don’t accidentally scrape up the adjacent tiles. Use mineral spirits to dissolve leftover goop. Take care not to allow the mineral spirits to soak into the floor under adjacent tiles. Vacuum up dust, dirt, and adhesive. Wipe clean.
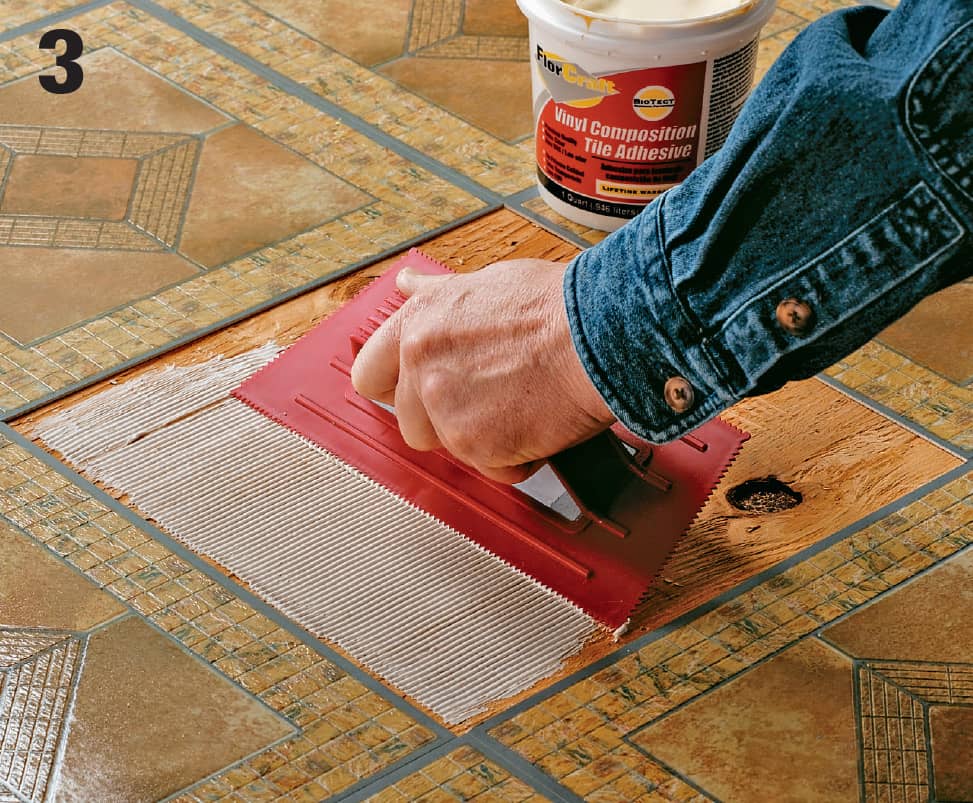
When the floor is dry, use a notched trowel—with 1/8" V-shaped notches—held at a 45° angle to apply a thin, even layer of vinyl tile adhesive onto the underlayment. Note: Only follow this step if you have dry-back tiles.
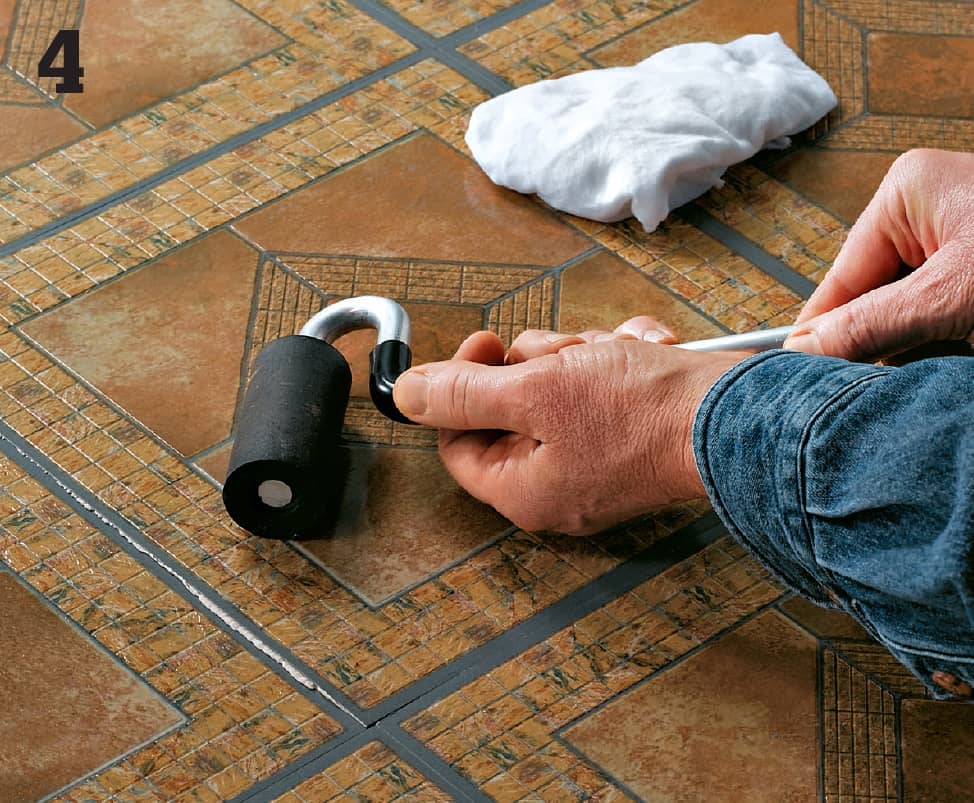
Set one edge of the tile in place. Lower the tile onto the underlayment and then press it into place. Apply pressure with a J-roller to create a solid bond, starting at the center and working toward the edge to work out air bubbles. If adhesive oozes out the sides, wipe it up with a damp cloth or sponge. Cover the tile with wax paper and some books, and let the adhesive dry for 24 hours.
 Repairing Ceramic Tile Floors
Although ceramic tile is one of the hardest floor coverings, problems can occur. Tiles sometimes become damaged and need to be replaced. Usually, this is simply a matter of removing and replacing individual tiles. However, major cracks in grout joints indicate that floor movement has caused the adhesive layer beneath the tile to deteriorate. In this case, the adhesive layer must be replaced in order to create a permanent repair.
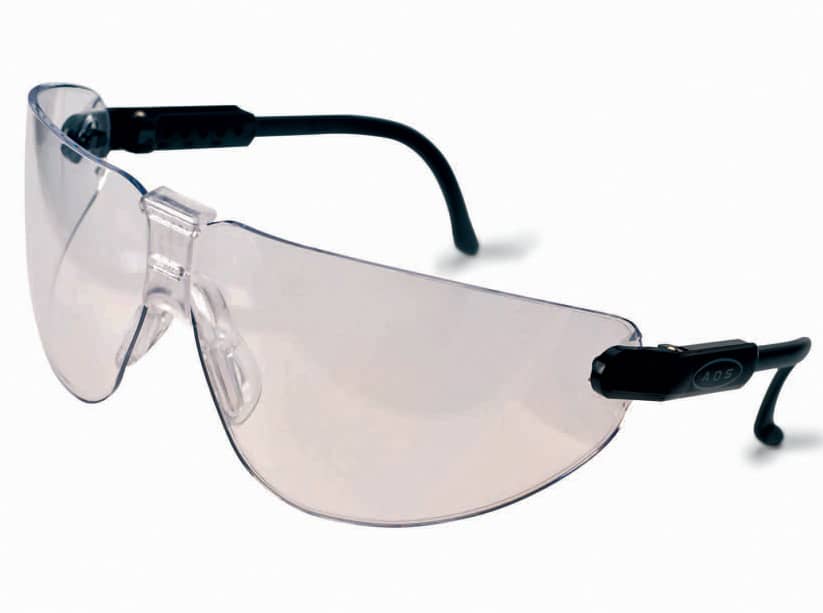
Any time you remove tile, check the underlayment. If it’s no longer smooth, solid, and level, repair or replace it before replacing the tile. When removing grout or damaged tiles, be careful not to damage surrounding tiles. Always wear eye protection when working with a hammer and chisel. Any time you are doing a major tile installation, make sure to save extra tiles. This way, you will have materials on hand when repairs become necessary.
How to Replace Ceramic Tiles
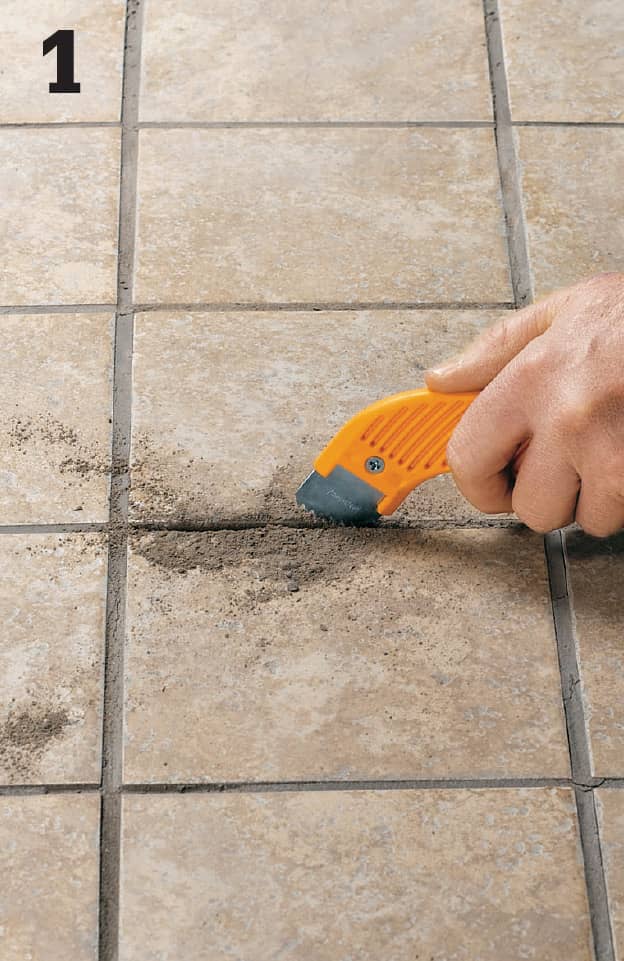
With a carbide-tipped grout saw, apply firm but gentle pressure across the grout until you expose the unglazed edges of the tile. Do not scratch the glazed tile surface. If the grout is stubborn, use a hammer and screwdriver to first tap the tile (Step 2).
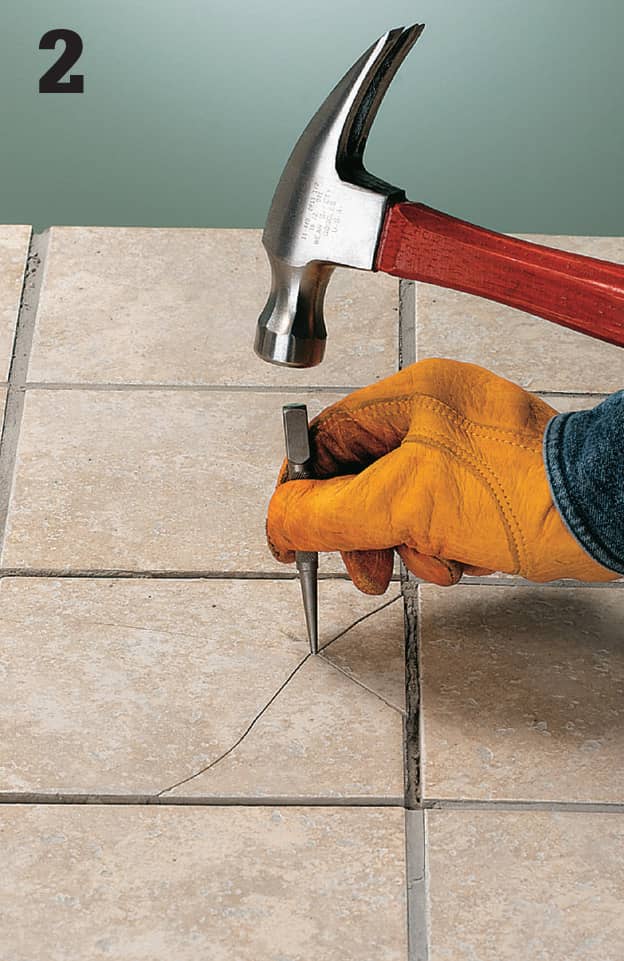
If the tile is not already cracked, use a hammer to puncture the tile by tapping a nail set or center punch into it. Alternatively, if the tile is significantly cracked, use a chisel to pry up the tile.
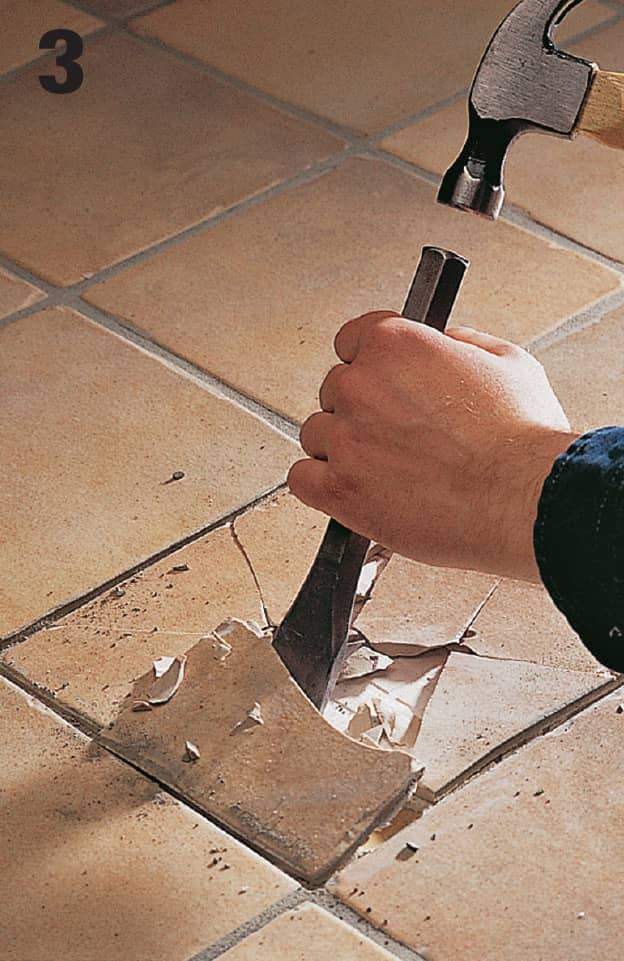
Insert a chisel into one of the cracks and gently tap the tile. Start at the center and chip outward so you don’t damage the adjacent tiles. Be aware that cement board looks a lot like mortar when you’re chiseling. Remove and discard the broken pieces.
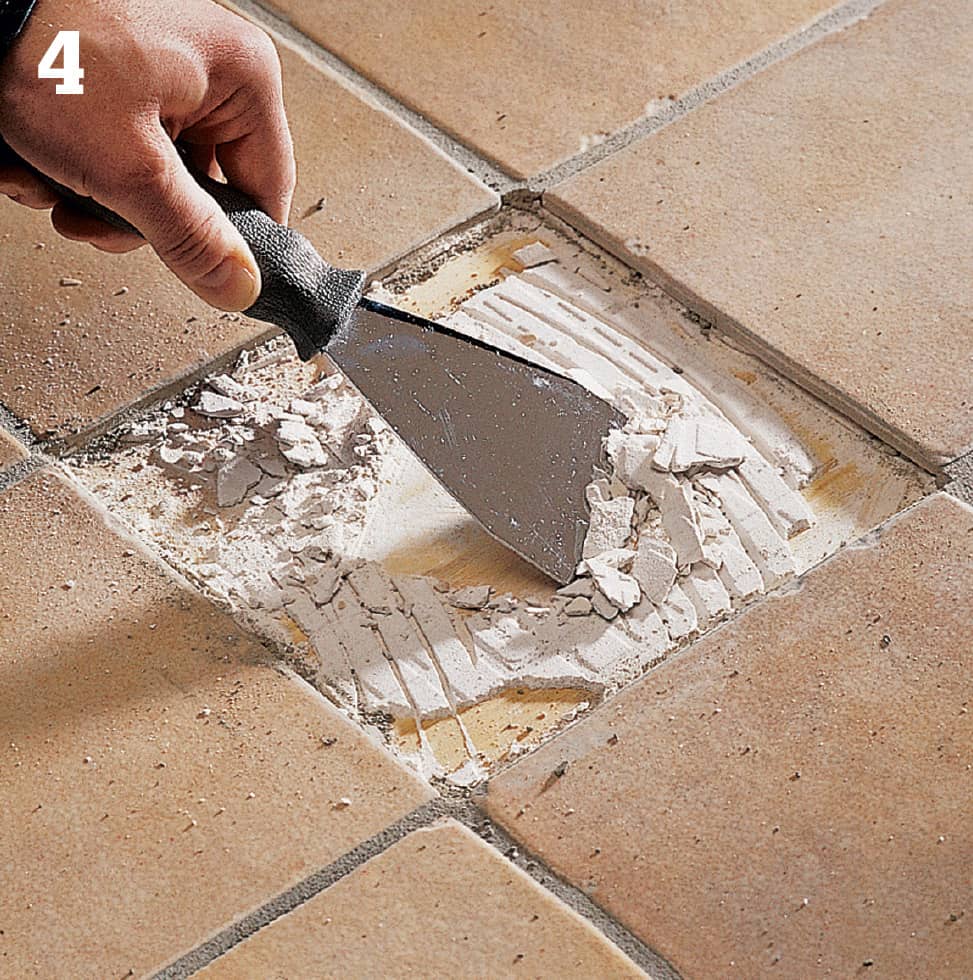
Use a putty knife to scrape away old thinset adhesive; use a chisel for poured mortar installation. If the underlayment is covered with metal lath, you won’t be able to get the area smooth; just clean it out the best you can. Once the adhesive is scraped from the underlayment, smooth the rough areas with sandpaper. If there are gouges in the underlayment, fill them with epoxy-based thinset mortar (for cementboard) or a floor-leveling compound (for plywood). Allow the area to dry completely.
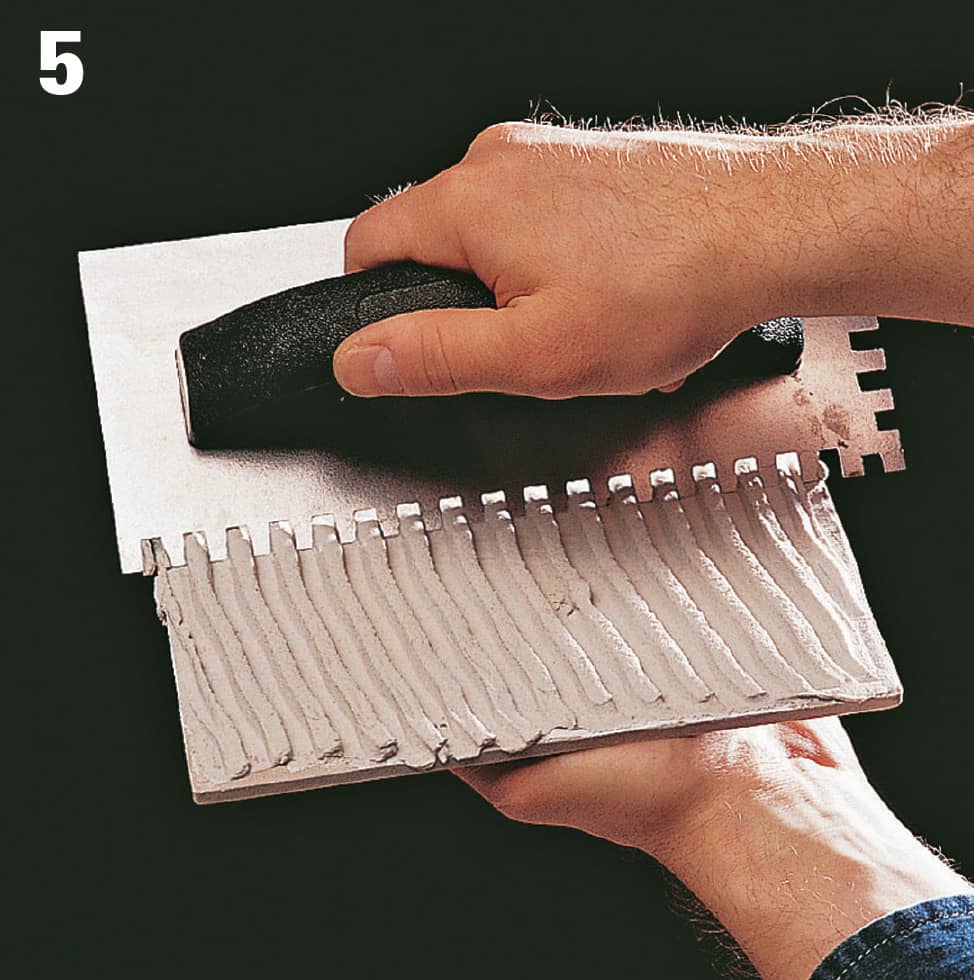
Use a 1/4" notched trowel to apply thinset adhesive to the back of the replacement tile. Set the tile down into the space, and use plastic spacers around the tile to make sure it is centered within the opening.
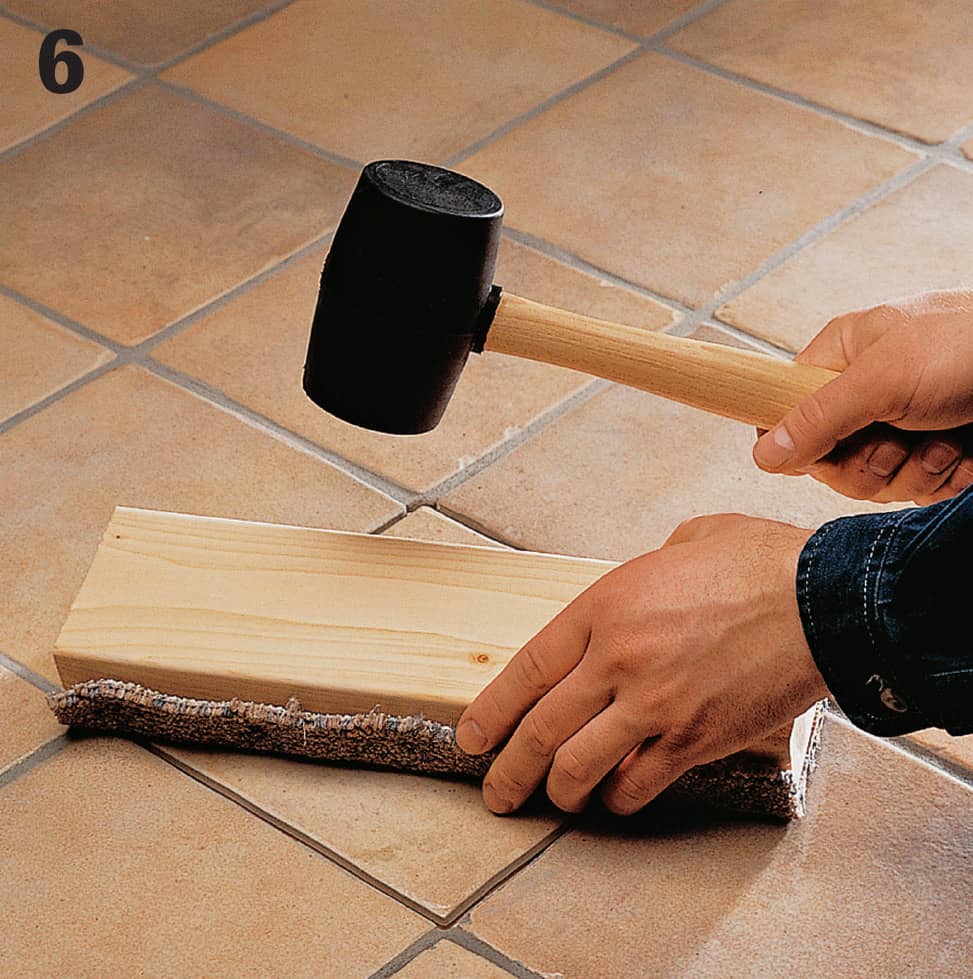
Set the tile in position and press down until it is even with the adjacent tiles. Twist it a bit to get it to sit down in the mortar. Use a mallet or hammer and a block of wood covered with cloth or a carpet scrap to lightly tap on the tile, setting it into the adhesive.
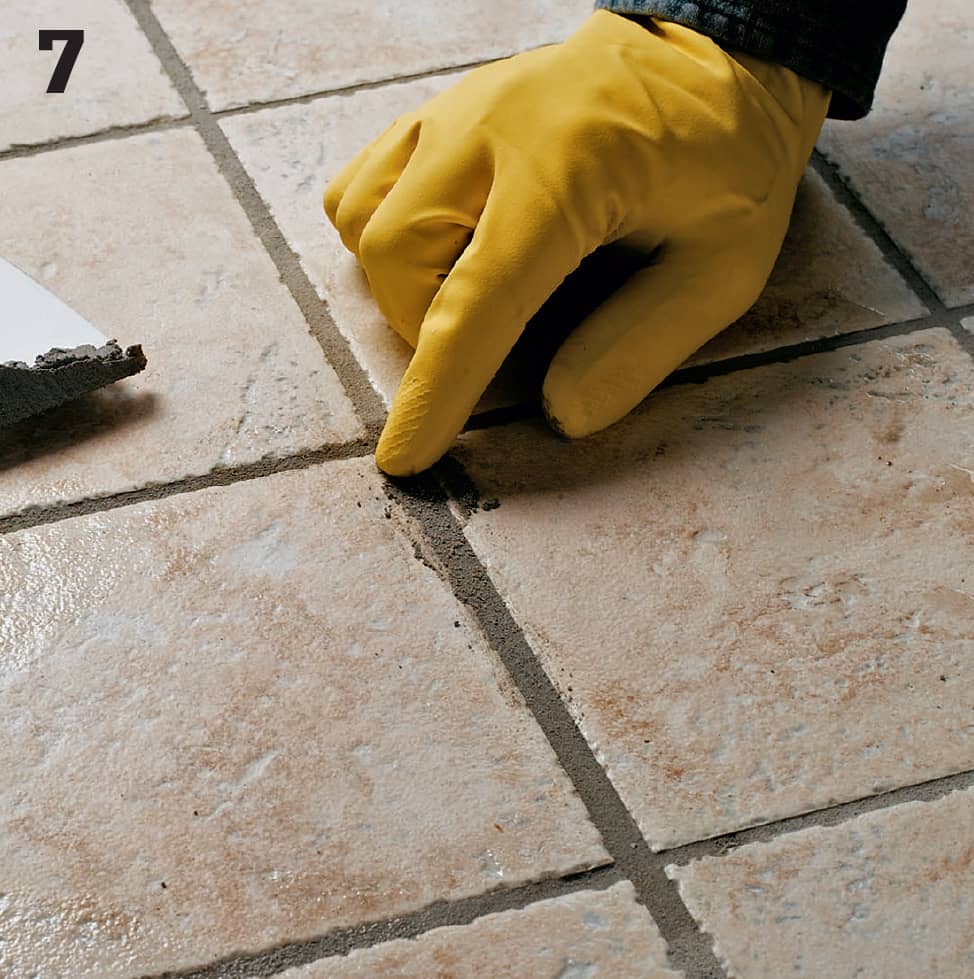
Use a putty knife to apply grout to the joints. Fill in low spots by applying and smoothing extra grout with your finger. Use the round edge of a toothbrush handle to create a concave grout line, if desired. You must now grout the joint.
 Repairing Carpet

Burns and stains are the most common carpeting problems. You can clip away the burned fibers of superficial burns using small scissors. Deeper burns and indelible stains require patching by cutting away and replacing the damaged area.
Another common problem, addressed on the opposite page, is carpet seams or edges that have come loose. You can rent the tools necessary for fixing this problem.
How to Repair Spot Damage
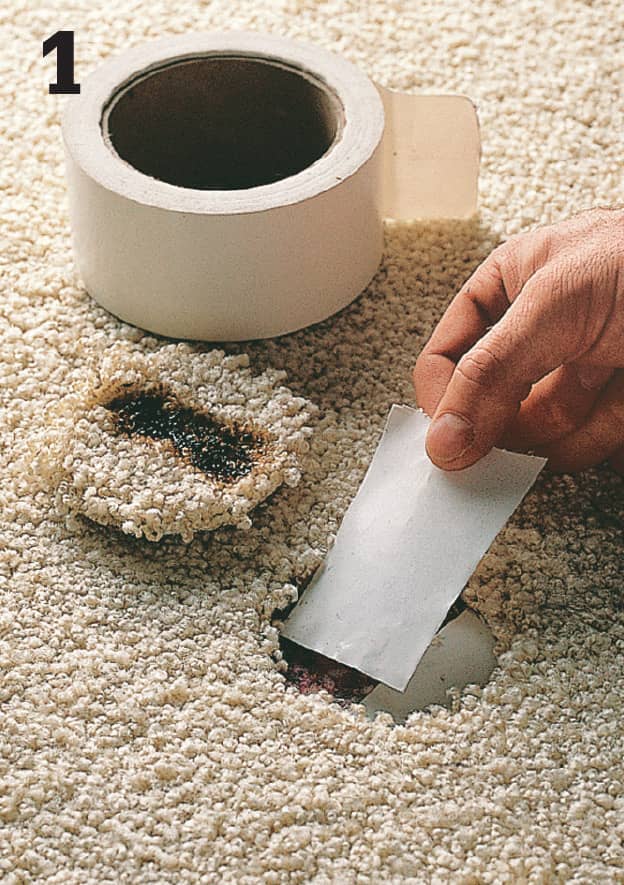
Remove extensive damage or stains with a “cookie-cutter” tool, available at carpeting stores. Press the cutter down over the damaged area and twist it to cut away the carpet.
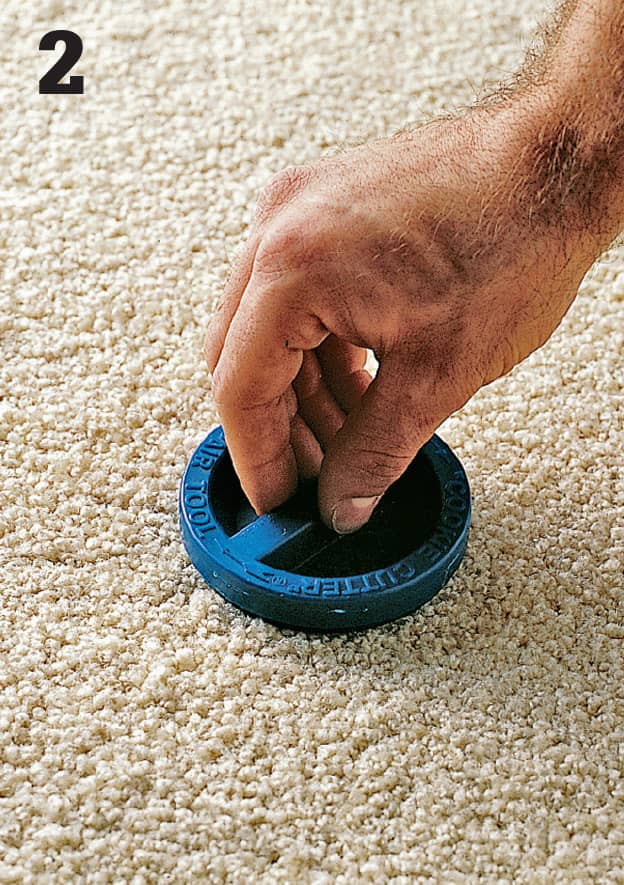
Using the cookie-cutter tool again, cut a replacement patch from scrap carpeting. Insert double-face carpet tape under the cutout, positioning the tape so it overlaps the patch seams.
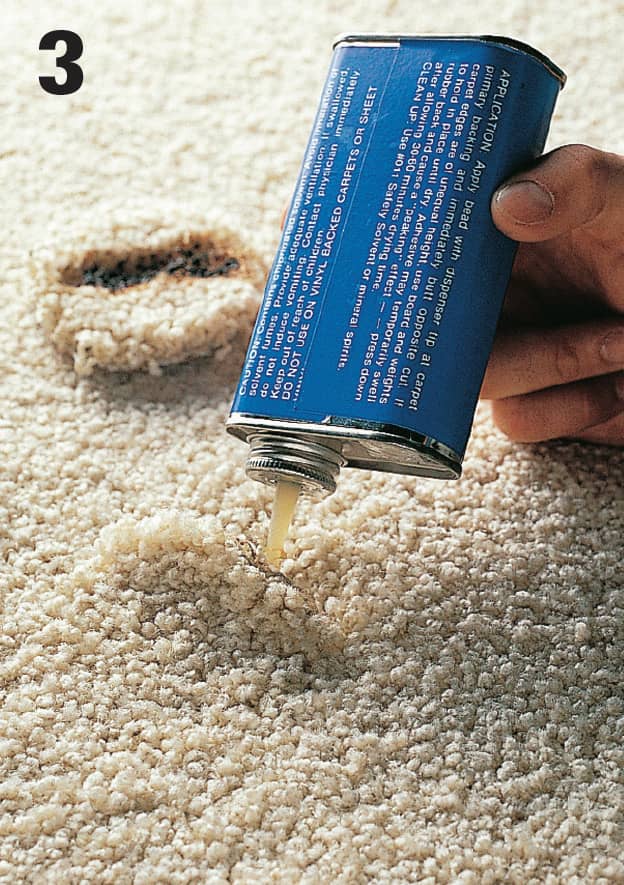
Press the patch into place. Make sure the direction of the nap or pattern matches the existing carpet. To seal the seam and prevent unraveling, apply seam adhesive to the edges of the patch.
How to Restretch Loose Carpet
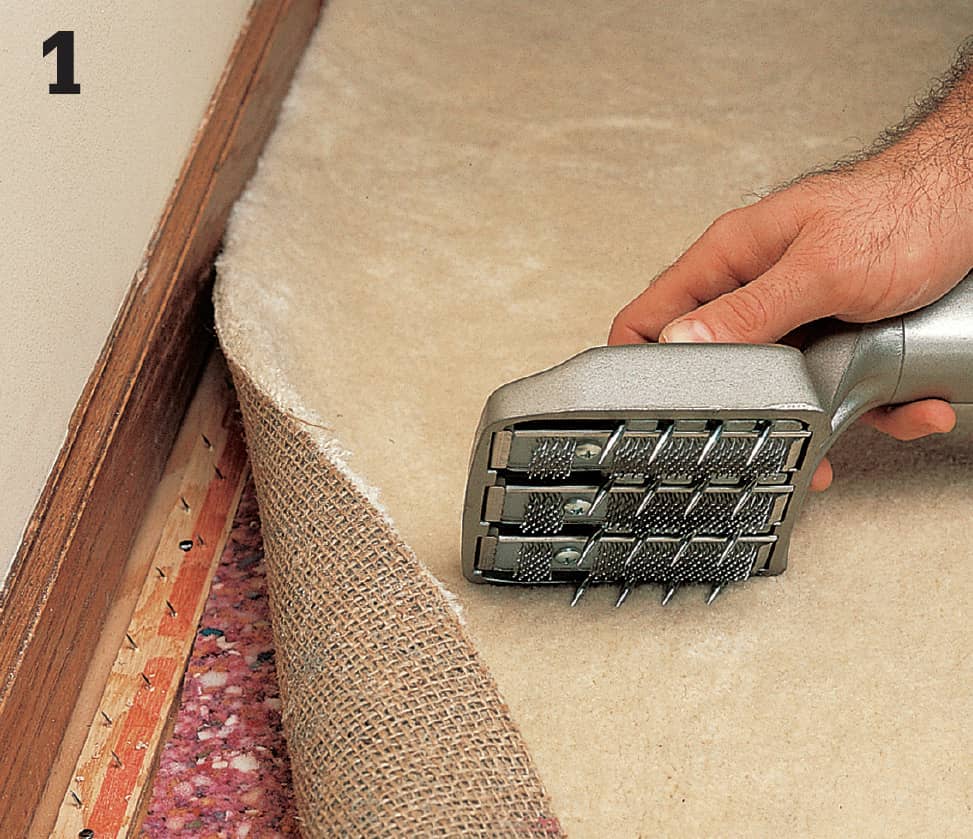
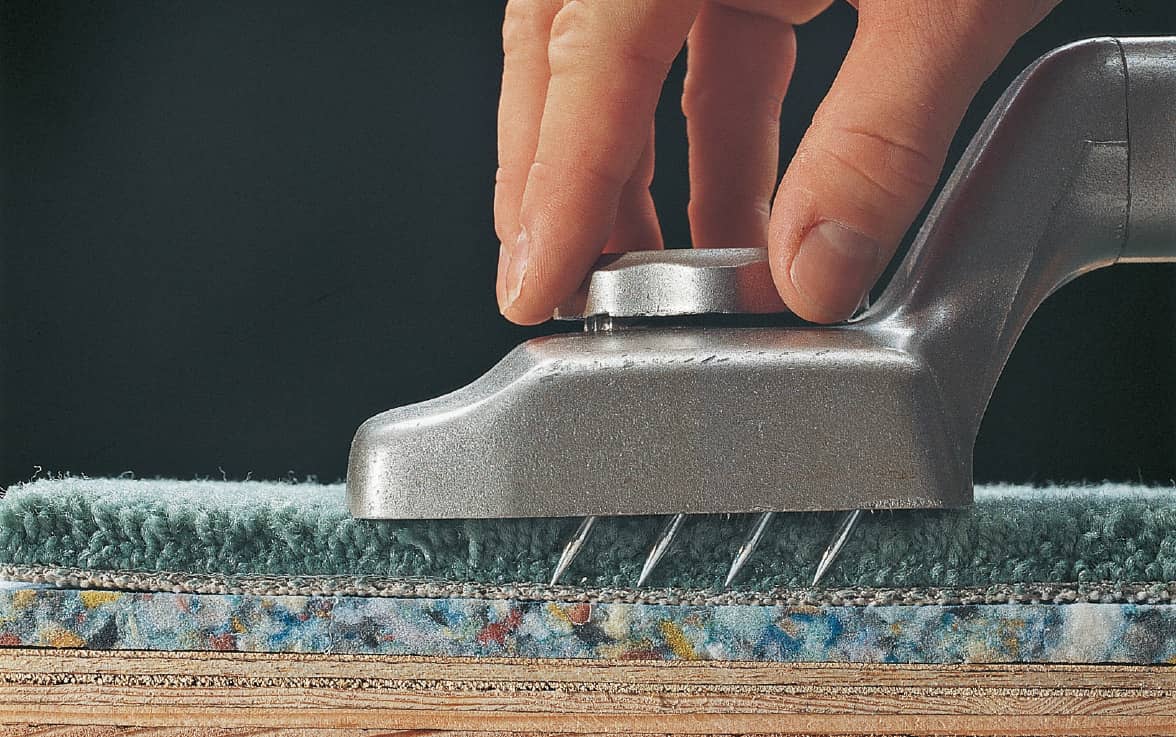
Adjust the knob on the head of the knee kicker so the prongs grab the carpet backing without penetrating through the padding. Starting from a corner or near a point where the carpet is firmly attached, press the knee kicker head into the carpet, about 2" from the wall.
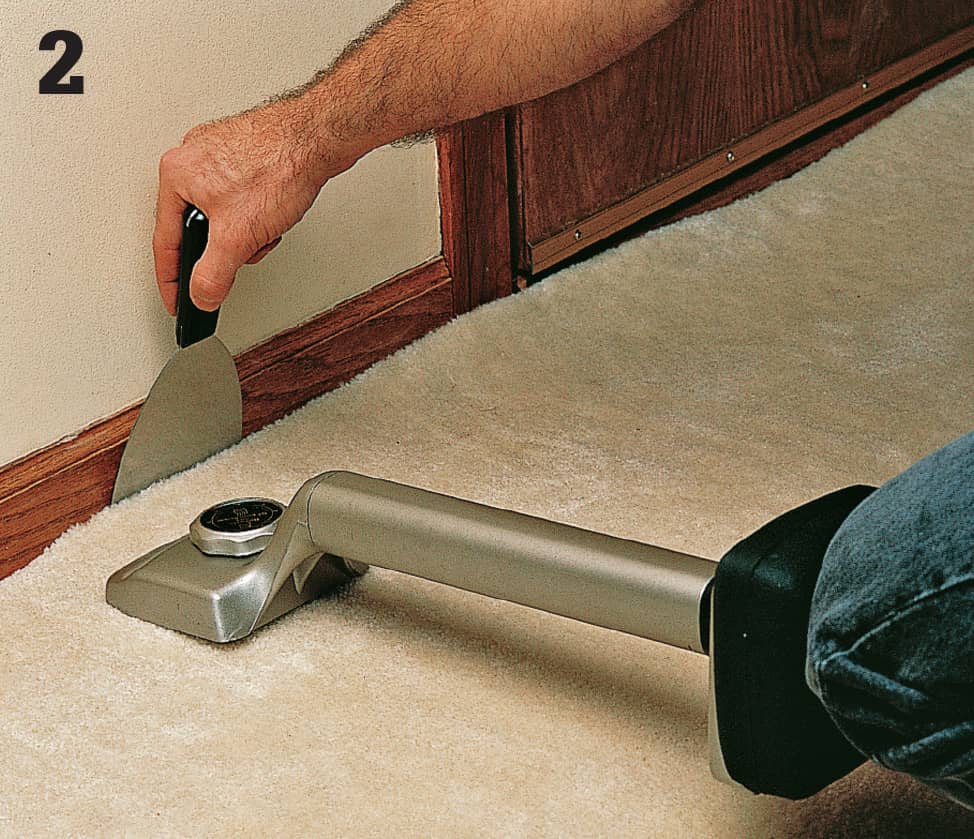
Thrust your knee into the cushion of the knee kicker to force the carpet toward the wall. Tuck the carpet edge into the space between the wood strip and the baseboard using a 4" wallboard knife. If the carpet is still loose, trim the edge with a utility knife and stretch it again.
How to Glue Loose Seams
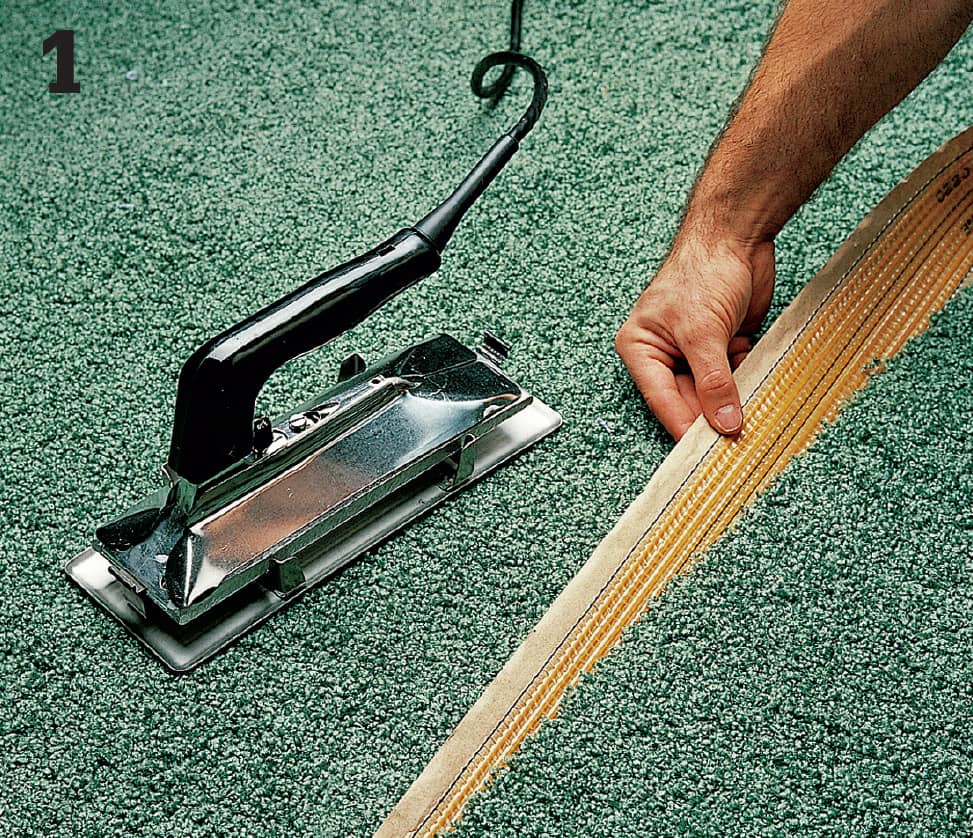
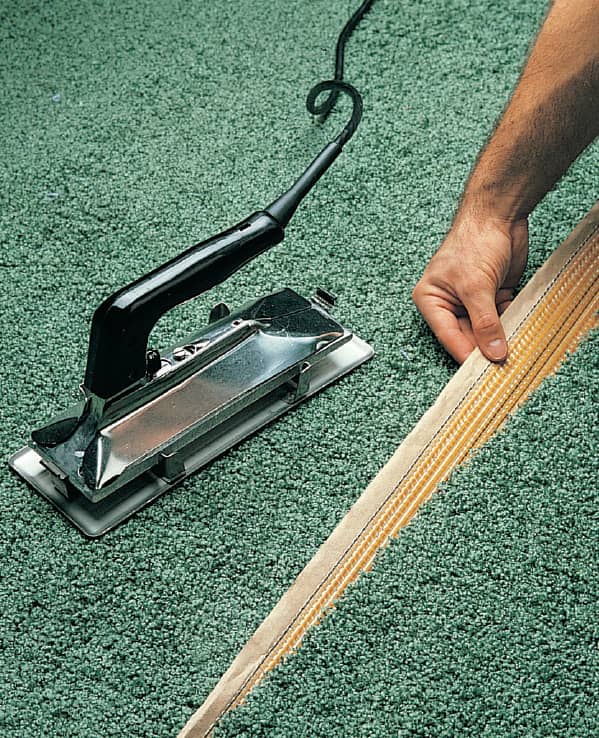
Remove the old tape from under the carpet seam. Cut a strip of new seam tape and place it under the carpet so it’s centered along the seam with the adhesive facing up. Plug in the seam iron and let it heat up.
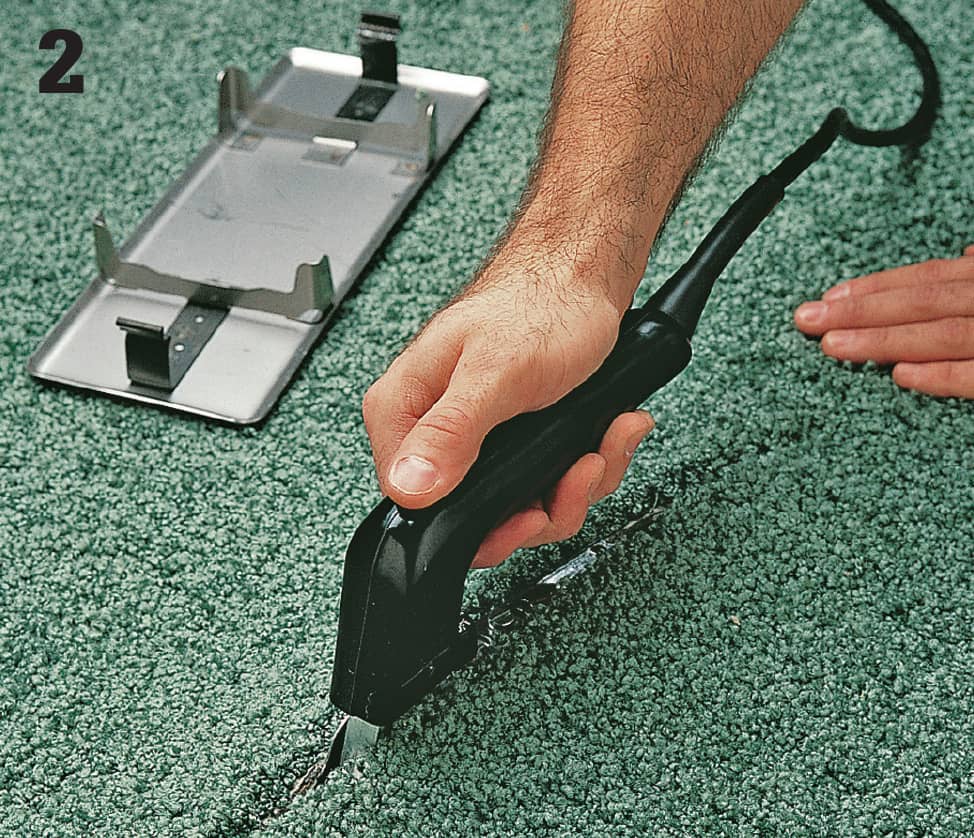
Pull up both edges of the carpet and set the hot iron squarely onto the tape. Wait about 30 seconds for the glue to melt. Move the iron about 12" farther along the seam. Quickly press the edges of the carpet together into the melted glue behind the iron. Separate the pile to make sure no fibers are stuck in the glue and the seam is tight. Place weighted boards over the seam to keep it flat while the glue sets. Remember, you have only 30 seconds to repeat the process.
How to Patch Major Carpet Damage
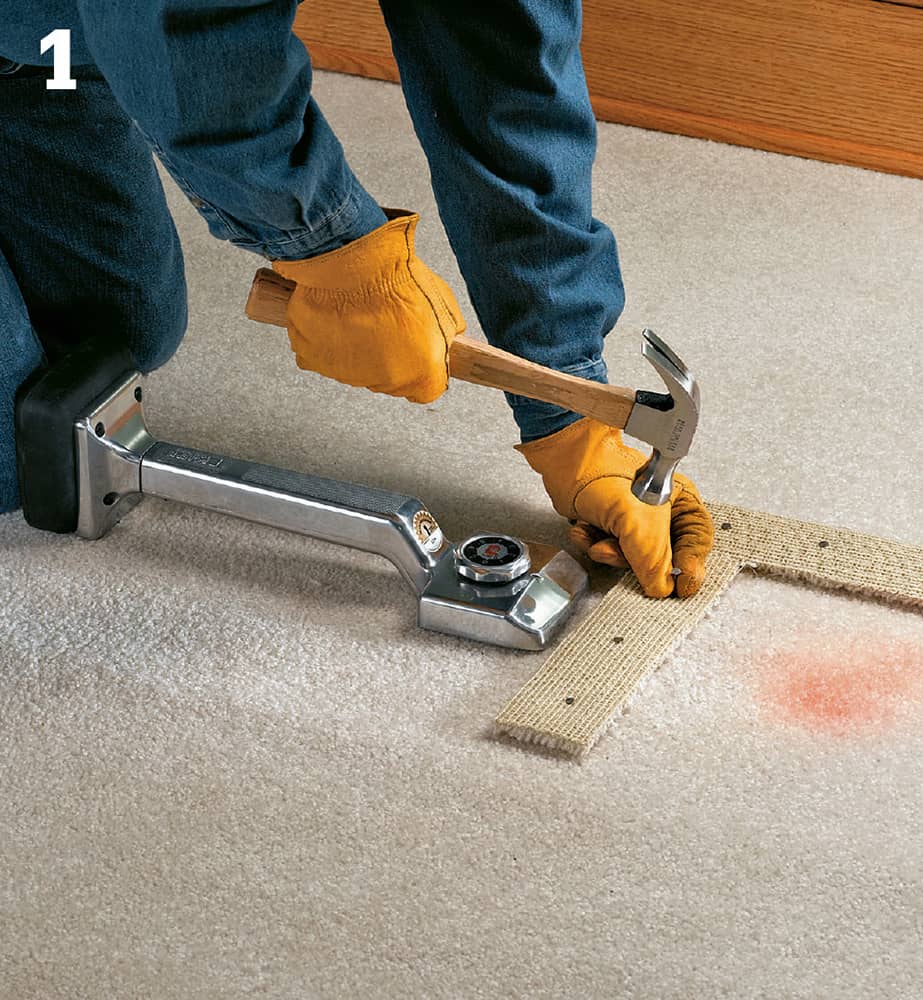
Use a utility knife to cut four strips from a carpet remnant, each a little wider and longer than the cuts you plan to make around the damaged part of your carpet. Most wall-to-wall carpet is installed under tension; so to relieve that tension, set the knee kicker 6" to 1 ft. from the area to be cut out and nudge it forward (toward the patch area). If you create a hump in the carpet, you’ve pushed too hard and need to back off. Now place one of the strips upside down in front of the knee kicker and tack it to the floor at 2" to 4" intervals. Repeat the same process on the other three sides.
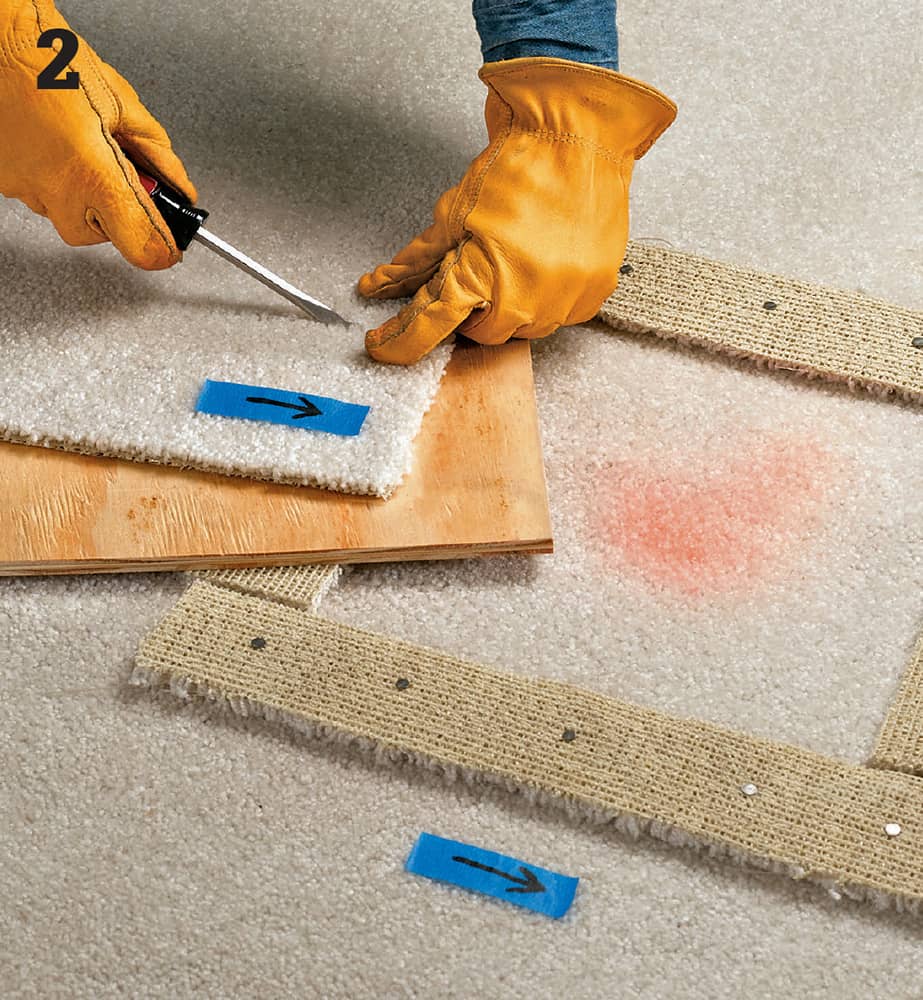
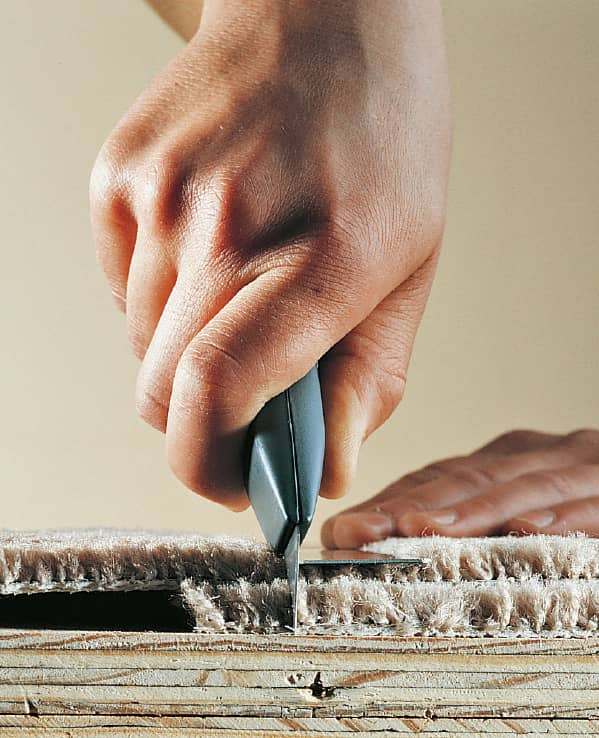
Use a marker to draw arrows on tape. Fan the carpet with your hand to see which direction the fibers are woven, and then use the pieces of tape to mark that direction on both the carpet surrounding the damaged area and the remnant you intend to use as a patch. Place a carpet remnant on plywood and cut out a carpet patch slightly larger than the damaged section, using a utility knife. As you cut, use a Phillips screwdriver to push carpet tufts or loops away from the cutting line. Trim loose pile, and then place the patch right side up over the damaged area.
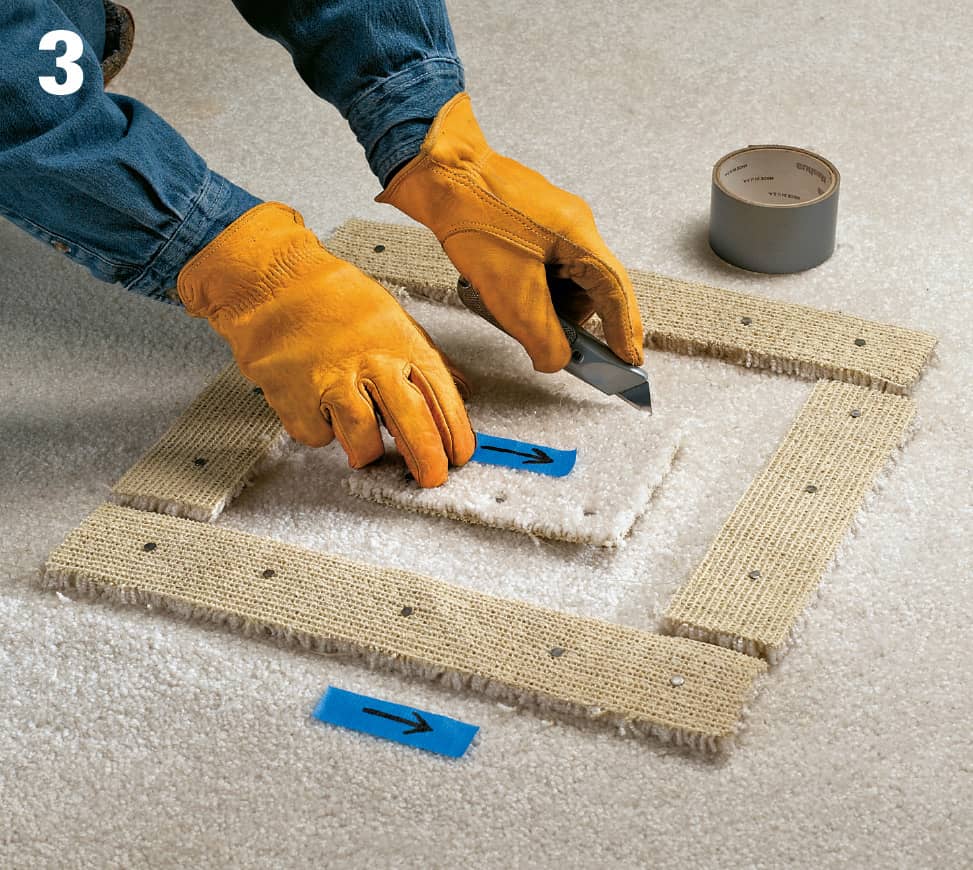
Tack one edge of the patch through the damaged carpet and into the floor, making sure the patch covers the entire damaged area. Use a utility knife to cut out the damaged carpet, following the border of the new patch as a template. If you cut into the carpet padding, use duct tape to mend it. Remove the patch and the damaged carpet square.
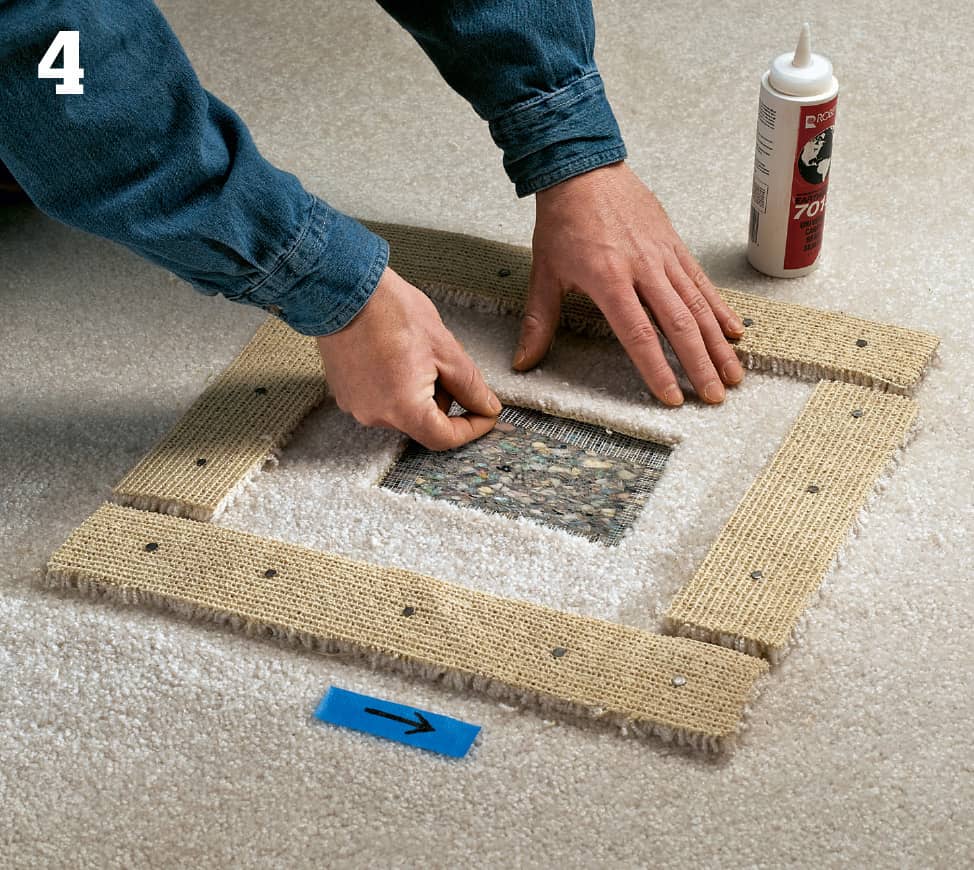
Cut four lengths of carpet seam tape, each about 1" longer than an edge of the cut out area, using a utility knife or scissors. Cover half of each strip with a thin layer of seam adhesive and then slip the coated edge of each strip, sticky side up, along the underside edges of the original carpet. Apply more adhesive to the exposed half of tape, and use enough adhesive to fill in the tape weave.
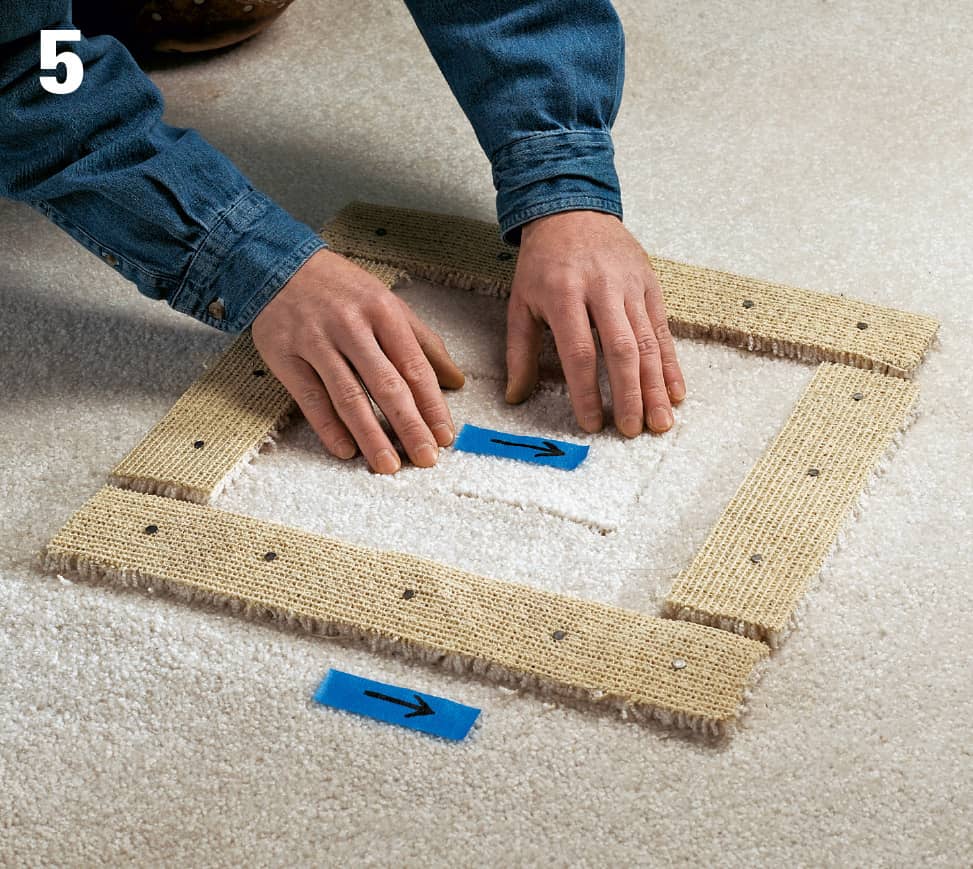
Line up your arrows and press the patch into place. Take care not to press too much, because glue that squeezes up onto the newly laid carpet creates a mess. Use an awl to free tufts or loops of pile crushed in the seam. Lightly brush the pile of the patch to make it blend with the surrounding carpet. Leave the patch undisturbed for 24 hours. Check the drying time on the adhesive used and wait at least this long before removing the carpet tacks.
 Sealing Interior Concrete Floors
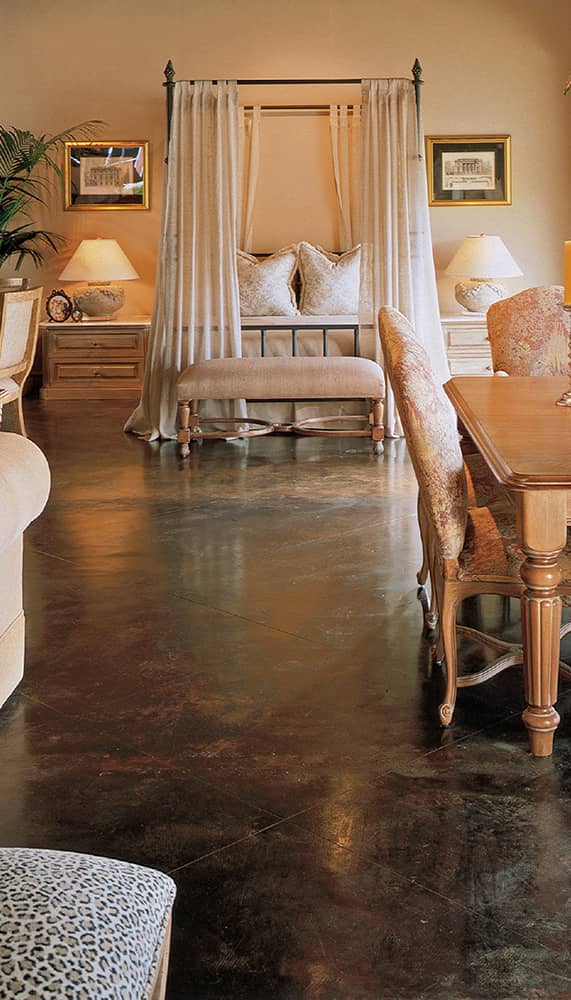
Concrete is a versatile building material. Most people are accustomed to thinking of concrete primarily as a utilitarian substance, but it can also mimic a variety of flooring types and be a colorful and beautiful addition to any room.
Whether your concrete floor is a practical surface for the garage or an artistic statement of personal style in your dining room, it should be sealed. Concrete is a hard and durable building material, but it is also porous. Consequently, concrete floors are susceptible to staining. Many stains can be removed with the proper cleaner, but sealing and painting prevents oil, grease, and other stains from penetrating the surface in the first place; thus, cleanup is considerably easier.
Prepare the concrete for sealer application by acid etching. Etching opens the pores in concrete surfaces, allowing sealers to bond with it. All smooth or dense concrete surfaces, such as garage floors, should be etched before applying stain. The surface should feel gritty, like 120-grit sandpaper, and allow water to penetrate it. If you’re not sure whether your floor needs to be etched or not, it’s better to etch. If you don’t etch when it is needed, you will have to remove the sealer residue before trying again.
Tips for Acid Etching Concrete Floors
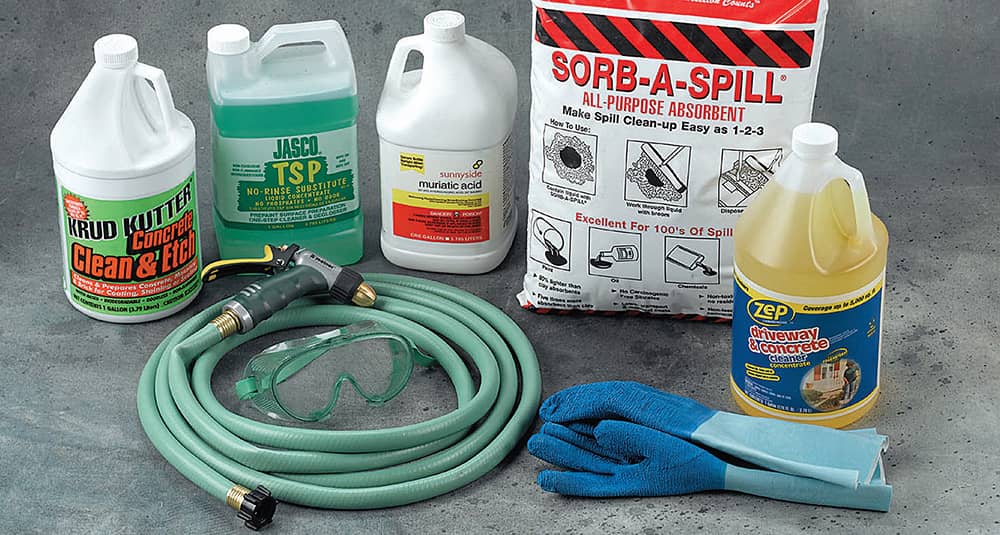
A variety of acid etching products is available: Citric acid is a biodegradable acid that does not produce chlorine fumes. It is the safest etcher and the easiest to use, but it may not be strong enough for some very smooth concretes. Sulfamic acid is less aggressive than phosphoric acid or muriatic acid, and it is perhaps the best compromise between strength of solution and safety. Phosphoric acid is a stronger and more noxious acid than the previous two, but it is considerably less dangerous than muriatic acid. It is currently the most popular etching choice. Muriatic acid (hydrochloric acid) is an extremely dangerous acid that quickly reacts and creates very strong fumes. This is an etching solution of last resort. It should only be used by professionals or by the most serious DIYers. Never add water to acid—only add acid to water.
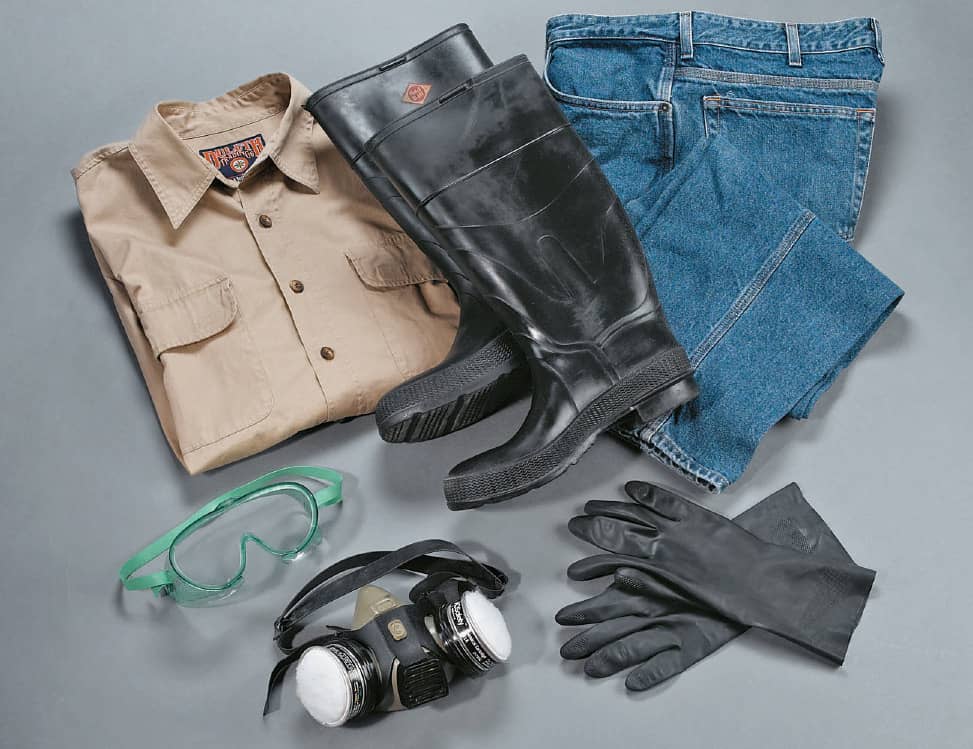
Acids of any kind are dangerous. Use caution when working with acid etches; it is critical that there be adequate ventilation and that you wear protective clothing, including: safety goggles, rubber gloves, rubber boots, long pants, and a long-sleeve shirt. In addition, wear a chlorine respirator—the reaction of any base and acid can release chlorine or hydrogen gas.
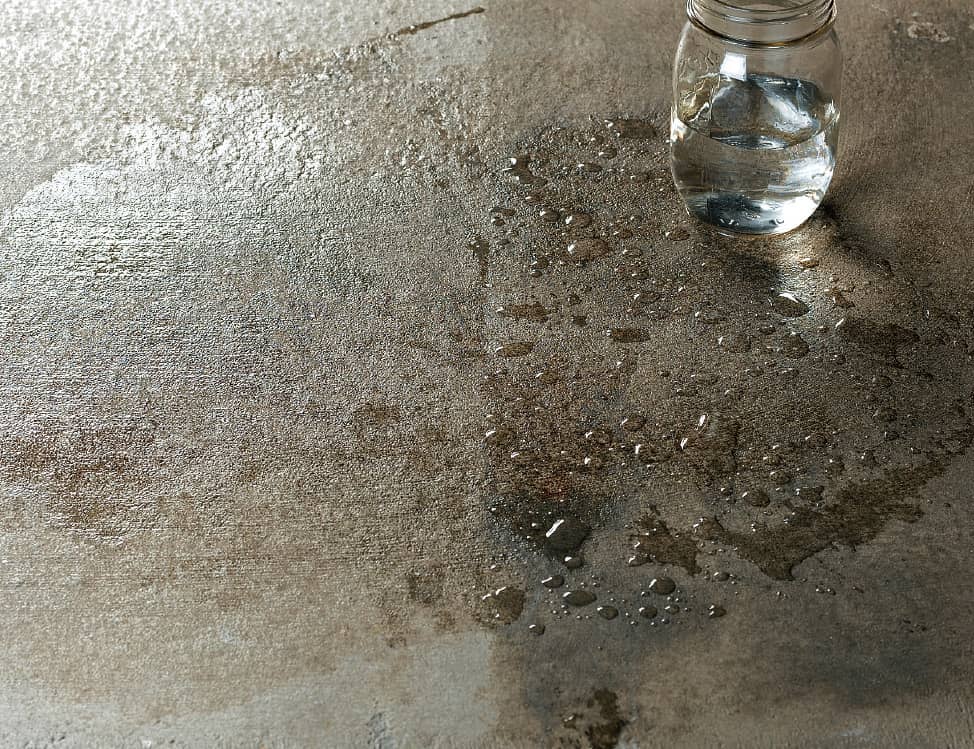
Even after degreasing a concrete floor, residual grease or oils can create serious adhesion problems for coatings of sealant or paint. To check whether your floor has been adequately cleaned, pour a glass of water on to the floor. If it is ready for sealing, the water will soak into the surface quickly and evenly. If the water beads, clean the floor again.
How to Acid Etch a Concrete Floor
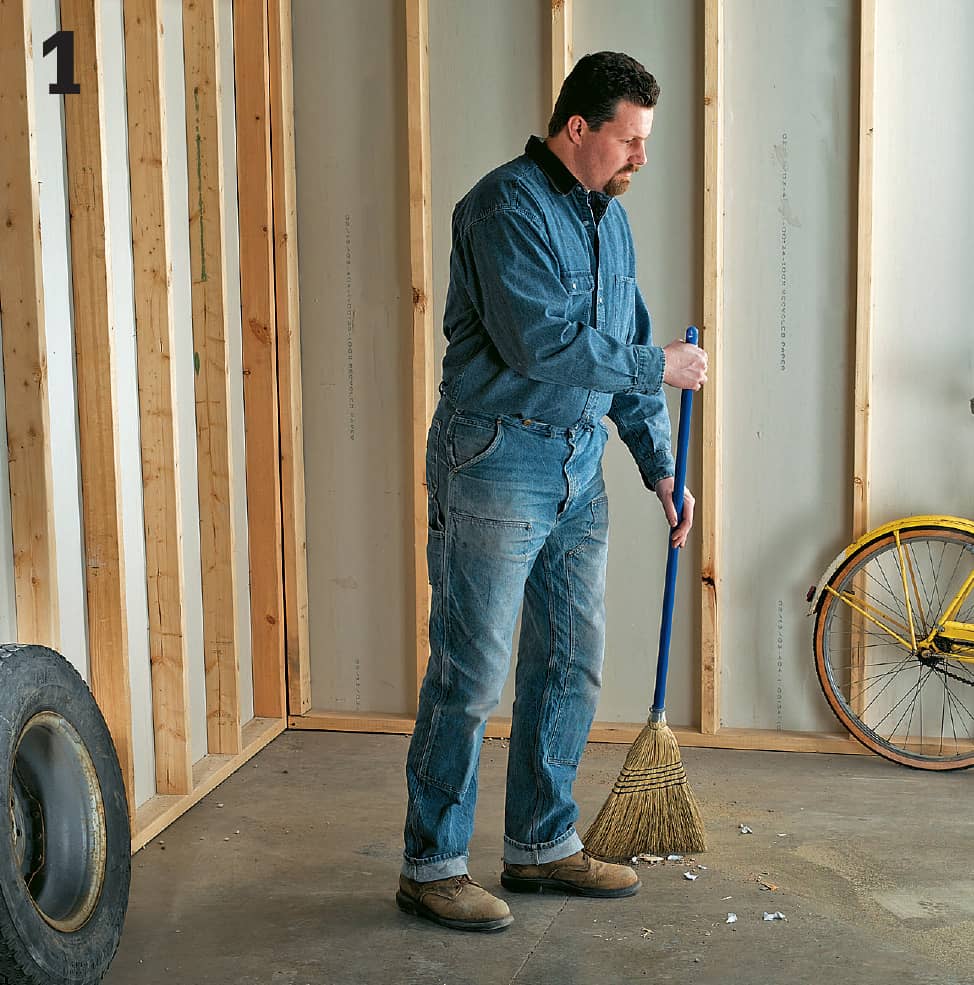
Clean and prepare the surface by first sweeping up all debris. Next, remove all surface muck: mud, wax, and grease. Finally, remove existing paints or coatings.
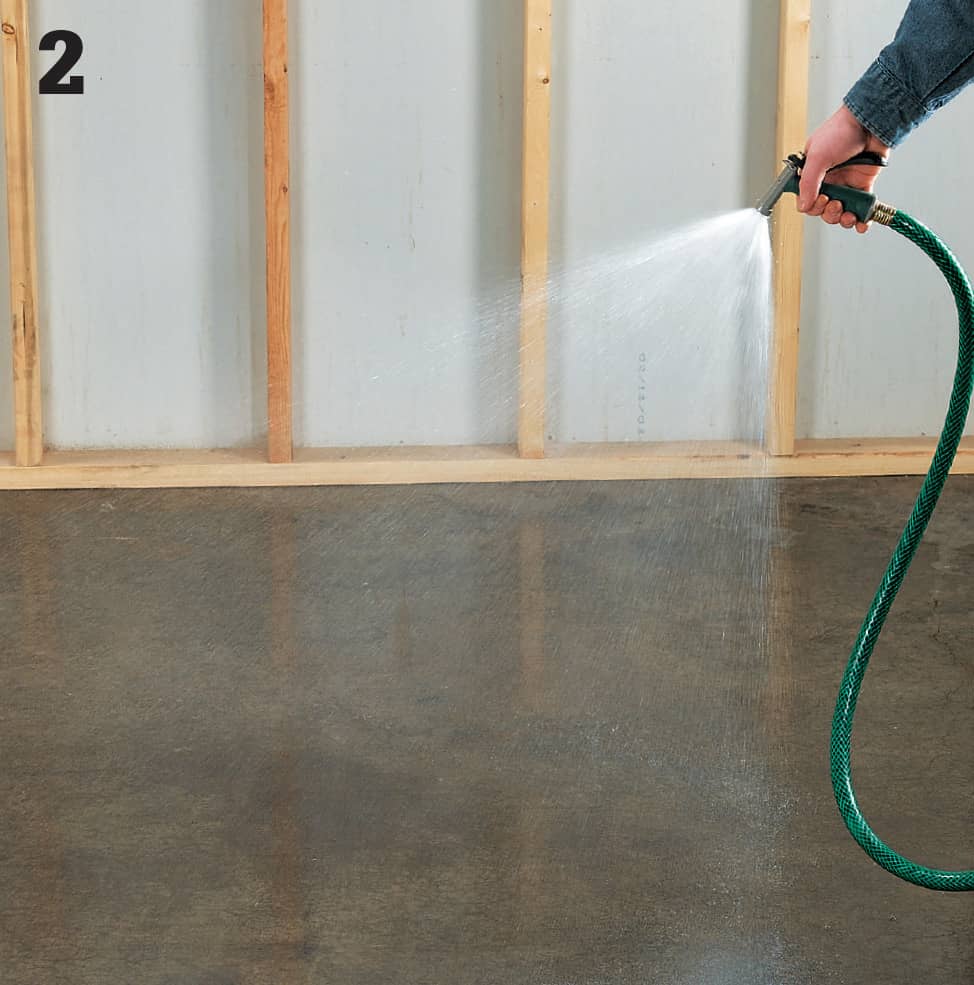
Saturate the surface with clean water. The surface needs to be wet before acid etching. Use this opportunity to check for any areas where water beads up. If water beads on the surface, contaminants still need to be cleaned off with a suitable cleaner or chemical stripper.
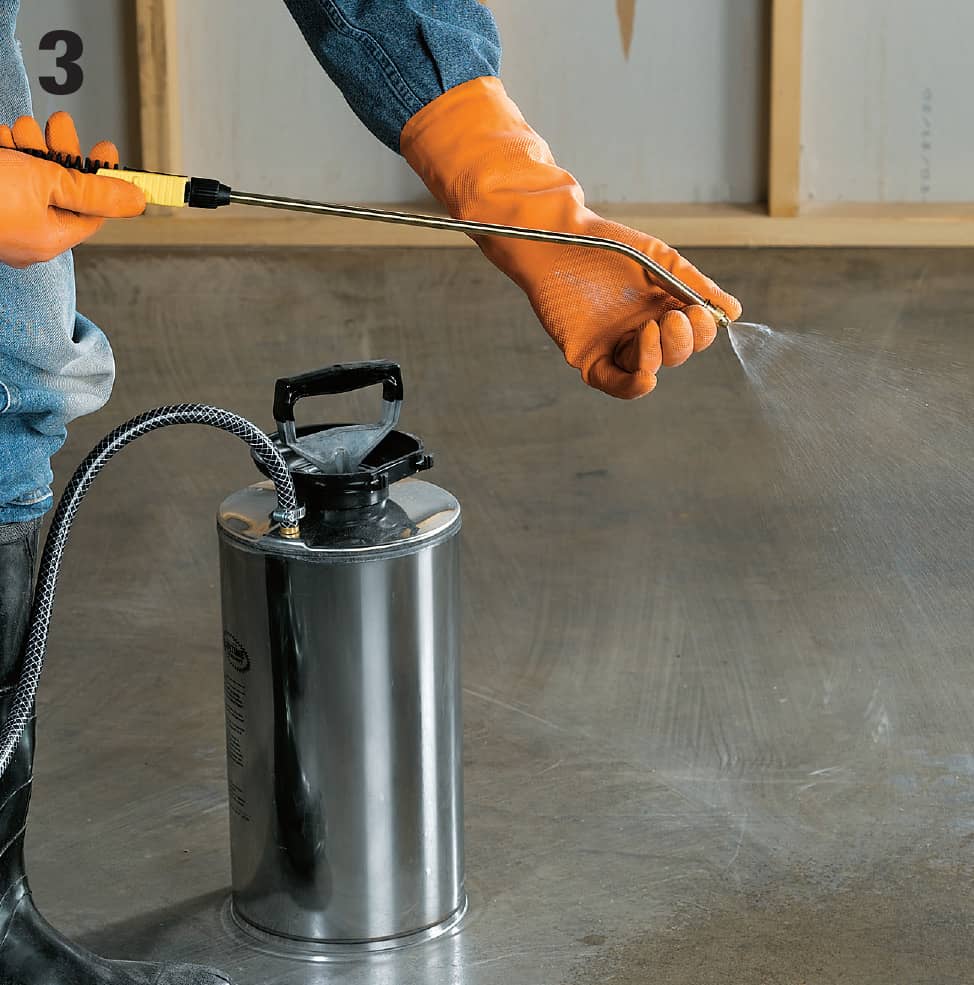
Test your acid-tolerant pump sprayer with water to make sure it releases a wide, even mist. Once you have the spray nozzle set, check the manufacturer’s instructions for the etching solution and fill the pump sprayer with the recommended amount of water.
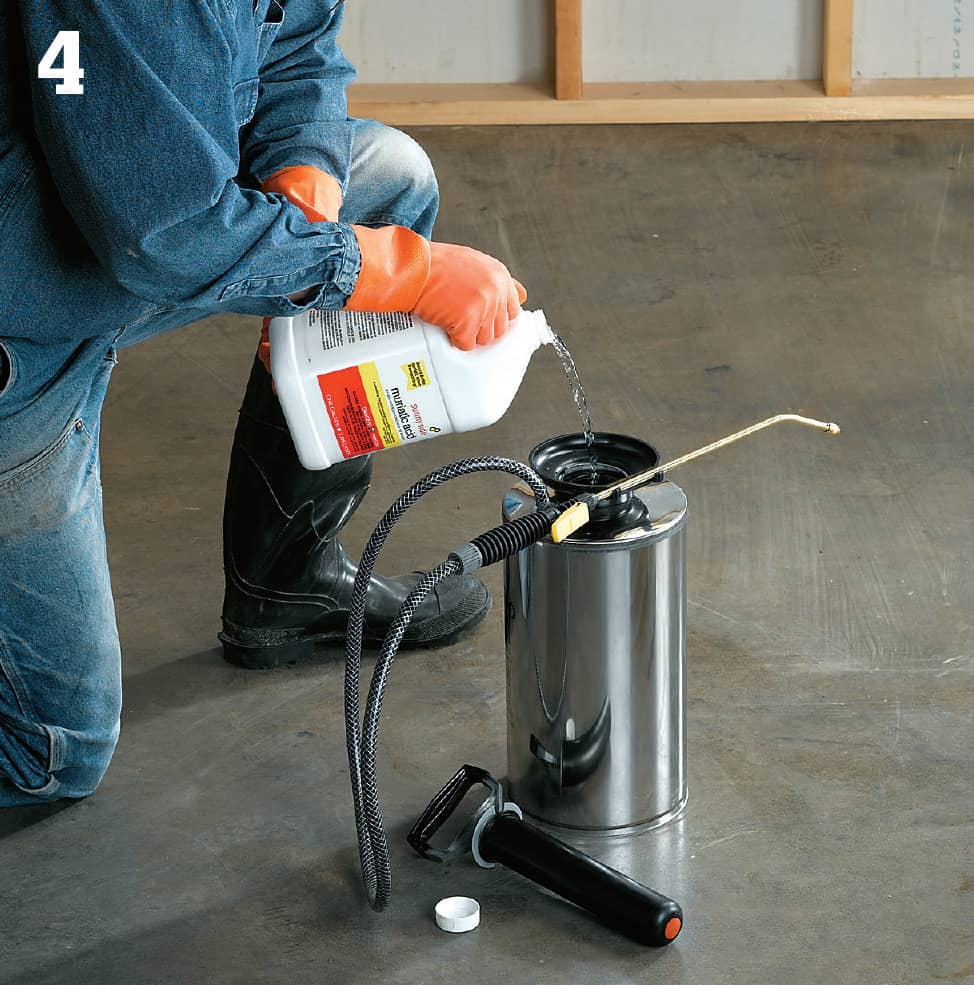
Add the acid etching contents to the water in the acid-tolerant pump sprayer (or sprinkling can). Follow the directions (and mixing proportions) specified by the manufacturer. Use caution.
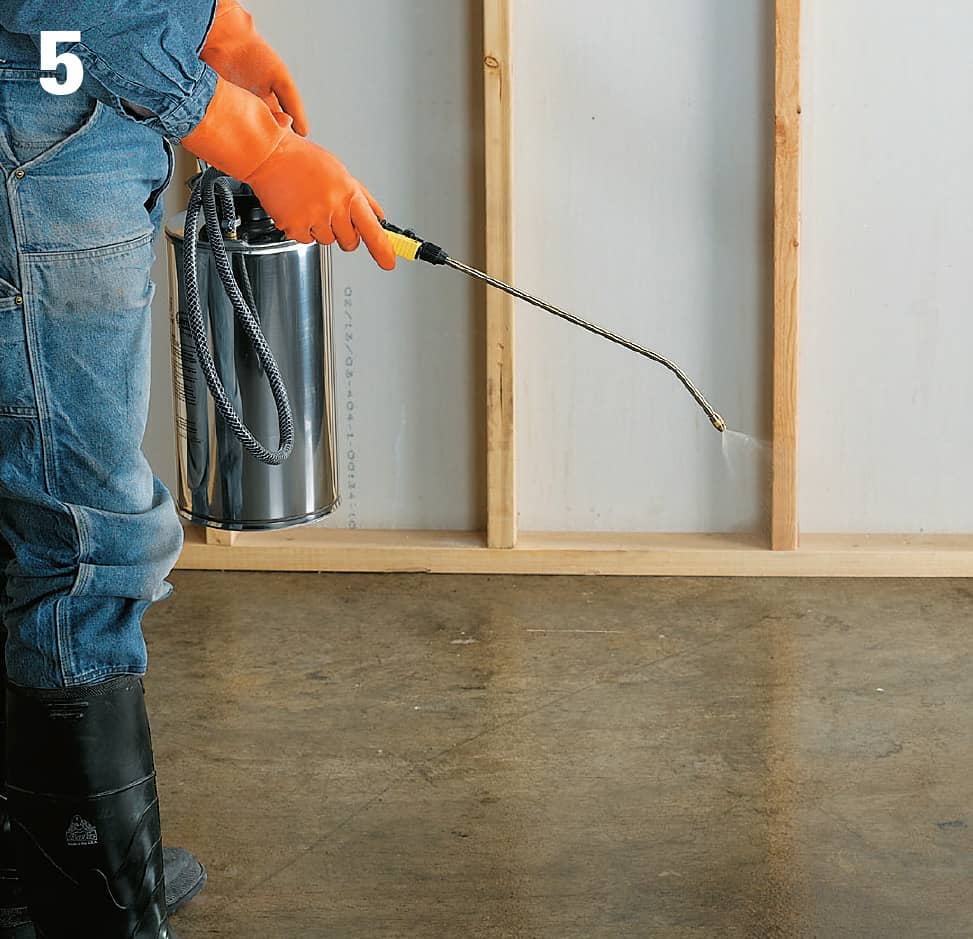
Apply the acid solution. Using the sprinkling can or acid-tolerant pump spray unit, evenly apply the diluted acid solution over the concrete floor. Do not allow acid solution to dry at any time during the etching and cleaning process. Etch small areas at a time, 10 × 10 ft. or smaller. If there is a slope, begin on the low side of the slope and work upward.
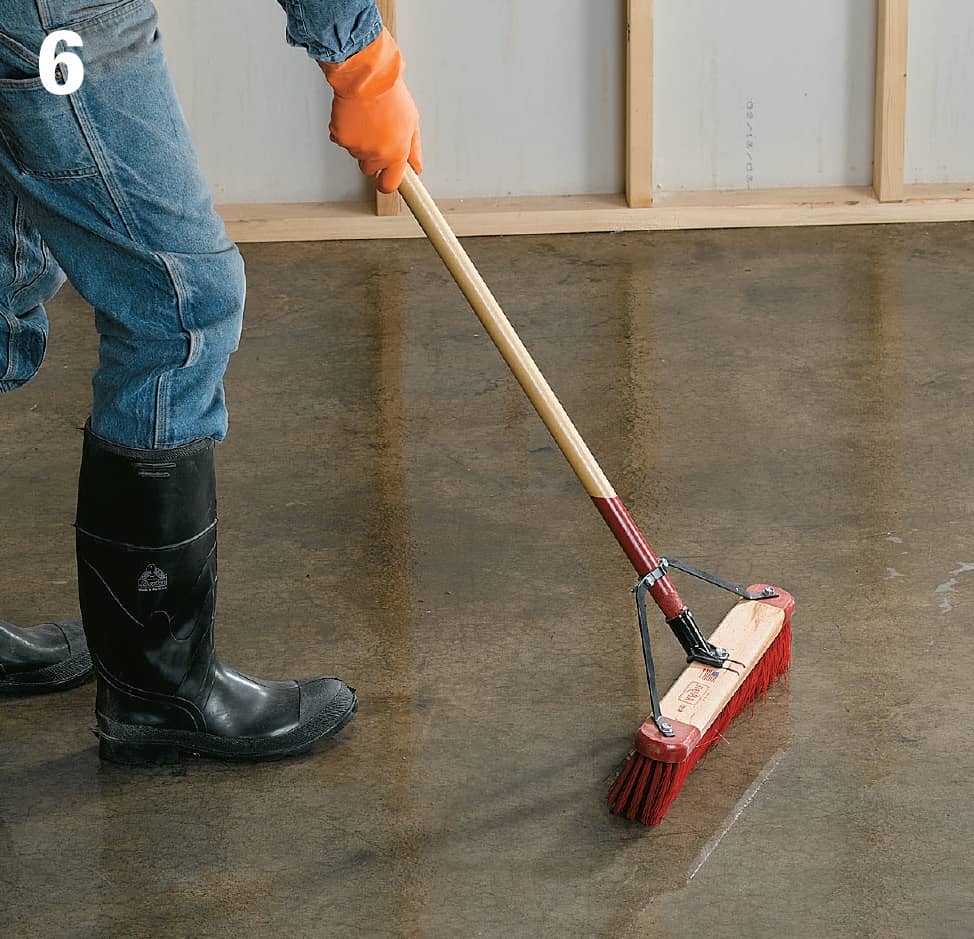
Use a stiff bristle broom or scrubber to work the acid solution into the concrete. Let the acid sit for 5–10 minutes, or as indicated by the manufacturer’s directions. A mild foaming action indicates that the product is working. If no bubbling or fizzing occurs, stop the process and re-clean the surface thoroughly.
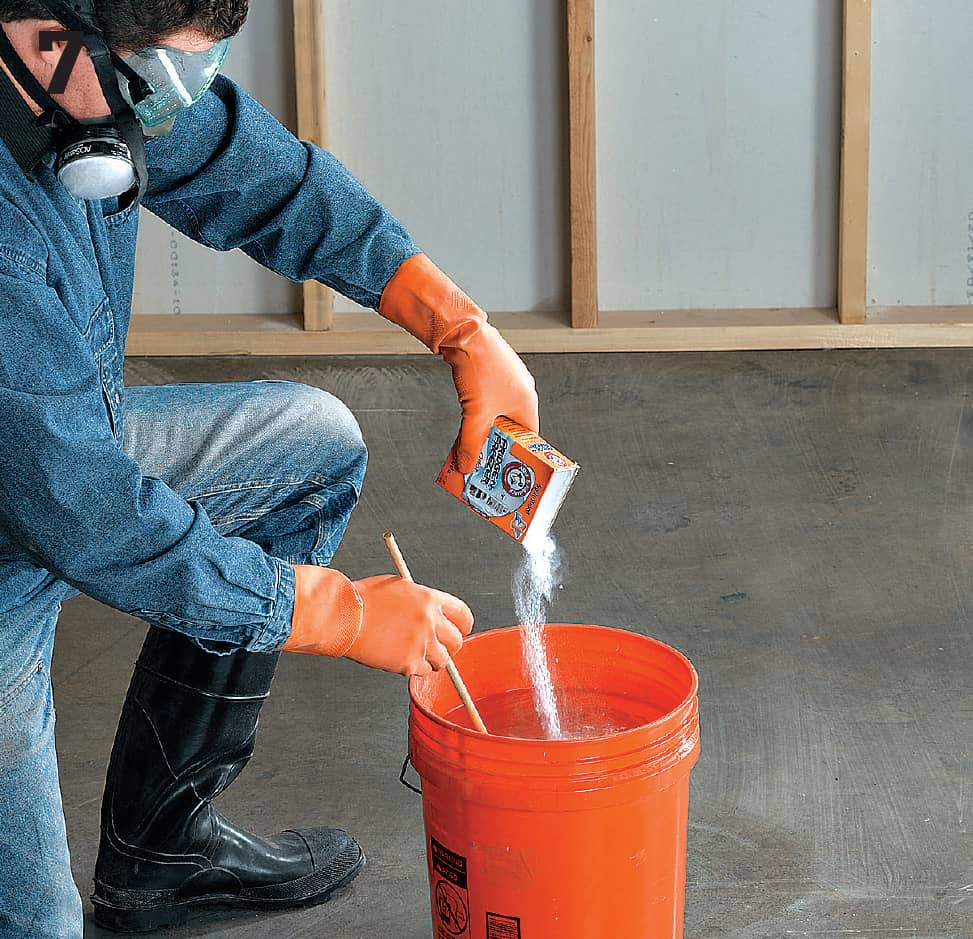
When the fizzing stops, the acid has finished reacting with the alkaline concrete surface. Neutralize any remaining acid by adding a gallon of water to a 5-gallon bucket and then stirring in an alkaline-base neutralizer (options include 1 cup ammonia, 4 cups gardener’s lime, a full box of baking soda, or 4 oz. of “Simple Green” cleaning solution).
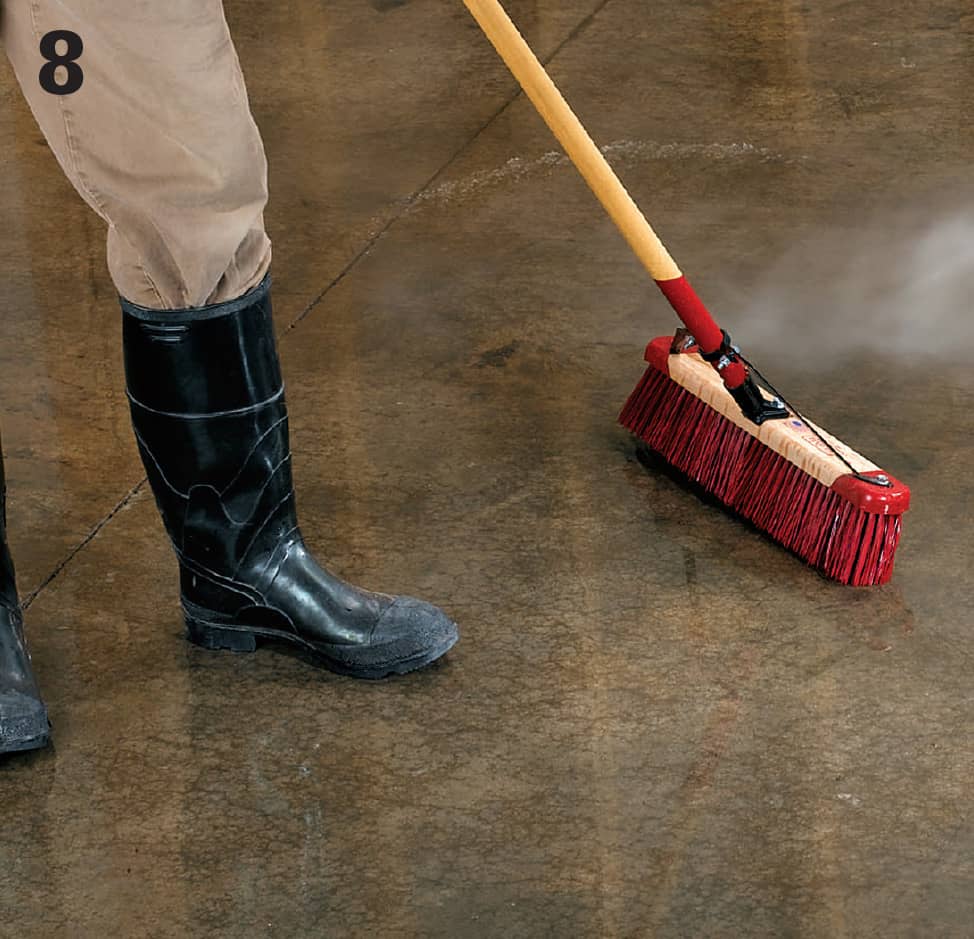
Use a stiff bristle broom to distribute the neutralizing solution over the entire floor area. Sweep the water around until the fizzing stops and then spray the surface with a hose to rinse it.
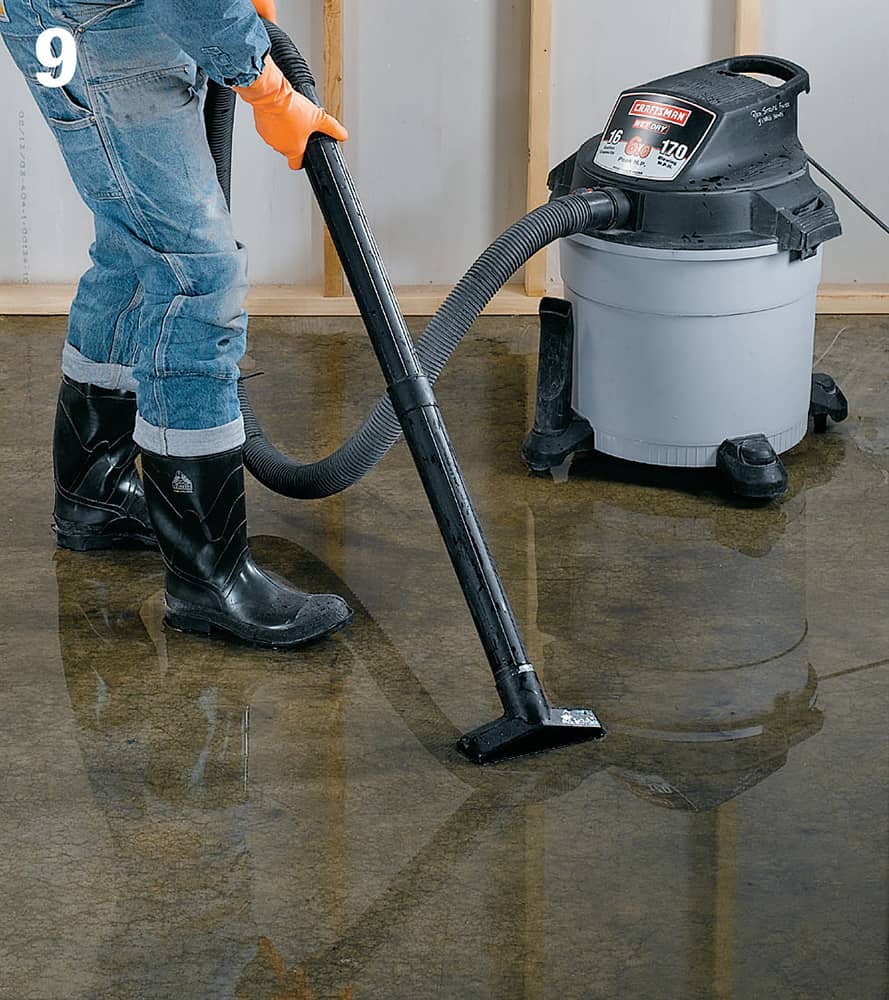
Use a wet-dry shop vacuum to clean up the rinse water. Although the acid is neutralized, it’s a good idea to check your local regulations regarding proper disposal of the neutralized spent acid.
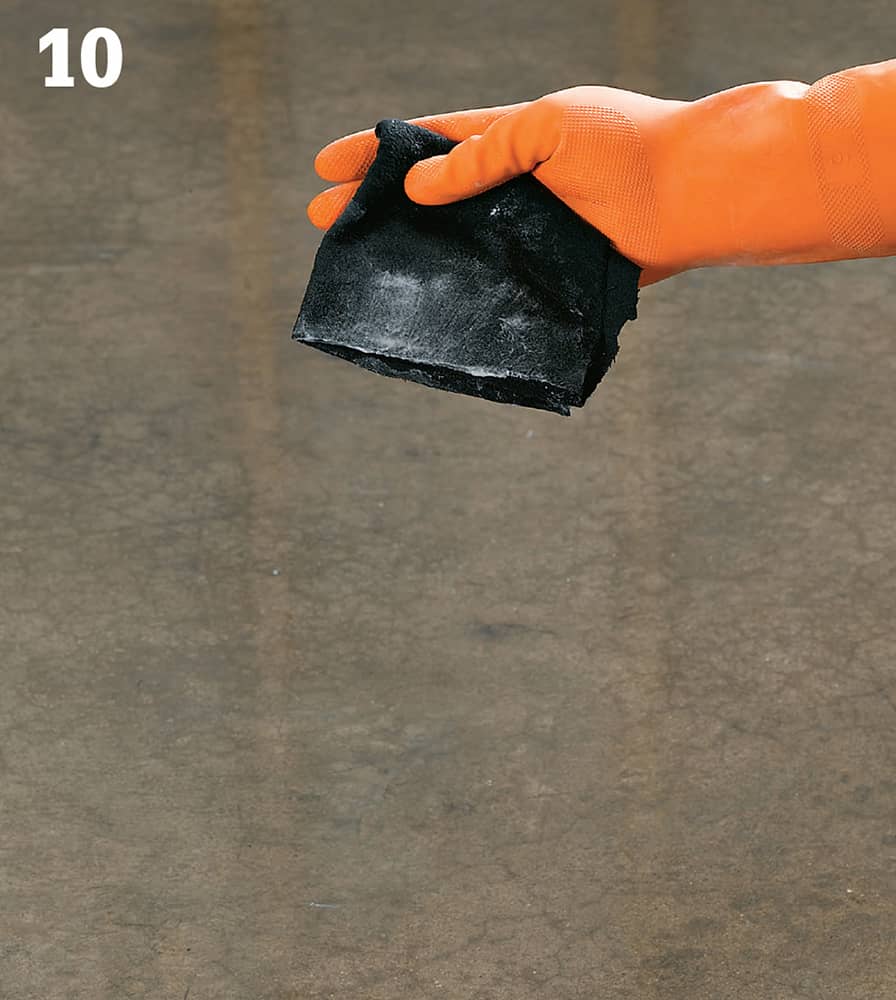
When the floor dries, check for residue by rubbing a dark cloth over a small area of concrete. If any white residue appears, continue the rinsing process. Check for residue again. An inadequate acid rinse is even worse than not acid etching at all when it’s time to add the sealant.
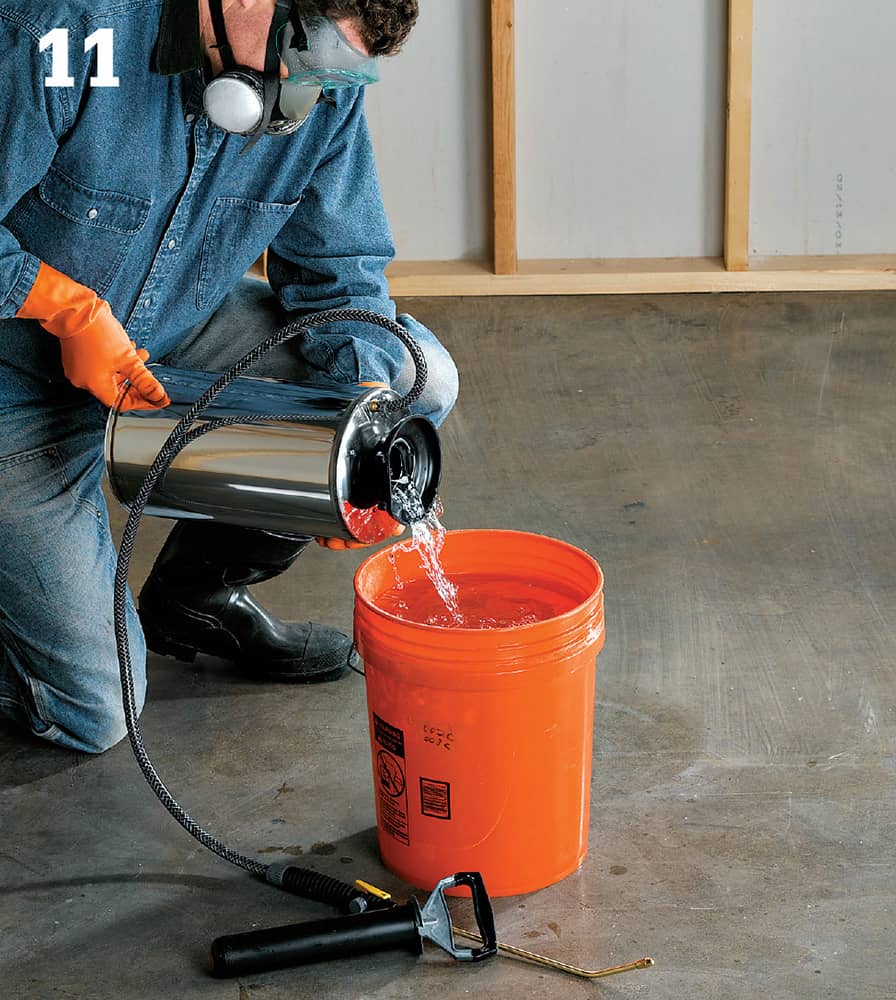
If you have any leftover acid you can make it safe for your disposal system by mixing more alkaline solution in the 5-gallon bucket and carefully pouring the acid from the spray unit into the bucket until all of the fizzing stops.
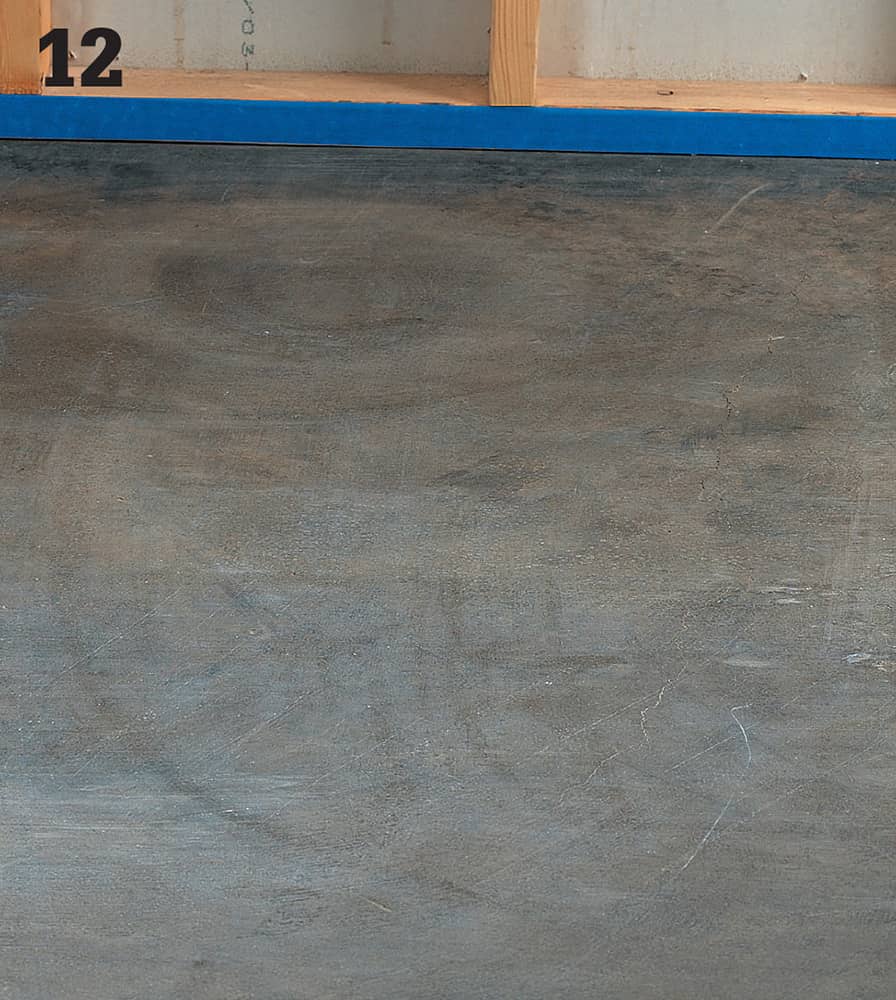
Let the concrete dry for at least 24 hours and sweep it thoroughly. The concrete should now have the texture of 120-grit sandpaper and be able to accept concrete sealant. Mask any exposed sill plates or base trim before sealing.
How to Seal a Concrete Floor
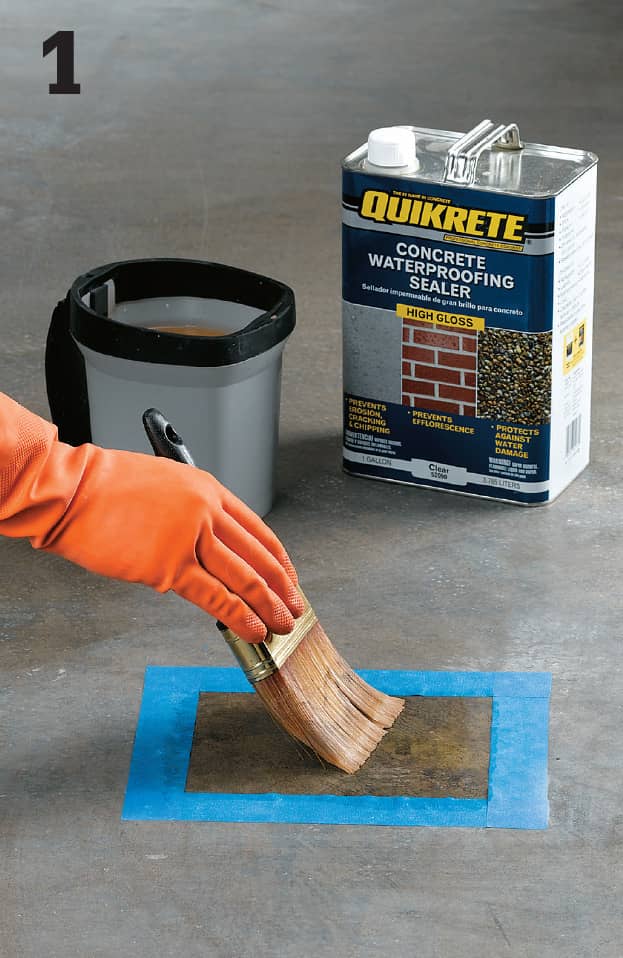
Etch, clean, and dry concrete. Mix the sealer in a bucket with a stir stick. Lay painter’s tape down for a testing patch. Apply sealer to this area and allow to dry to ensure desired appearance.
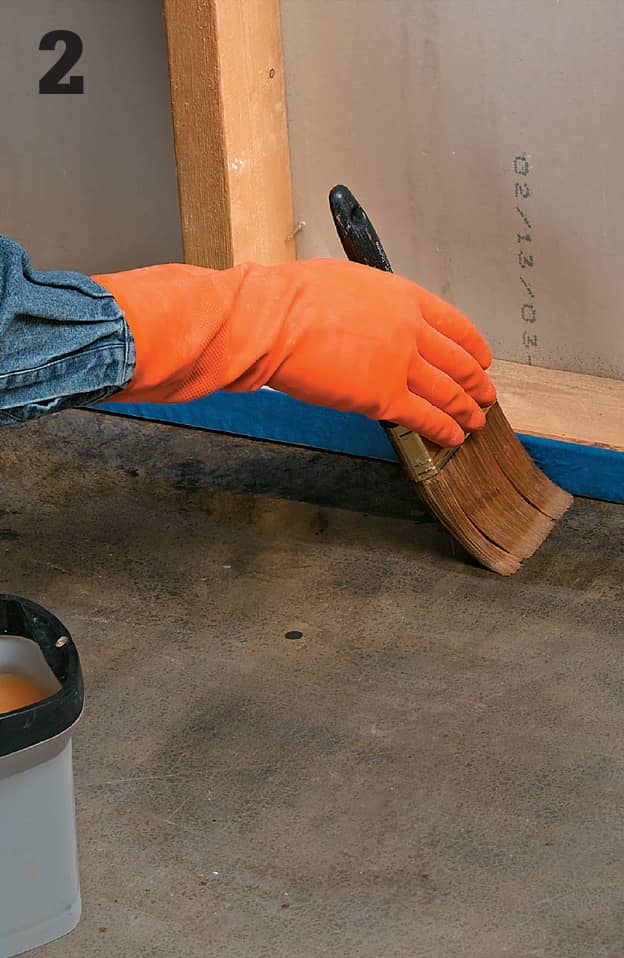
Use wide painter’s tape to protect walls and then, using a good quality 4"-wide synthetic bristle paintbrush, coat the perimeter with sealer.
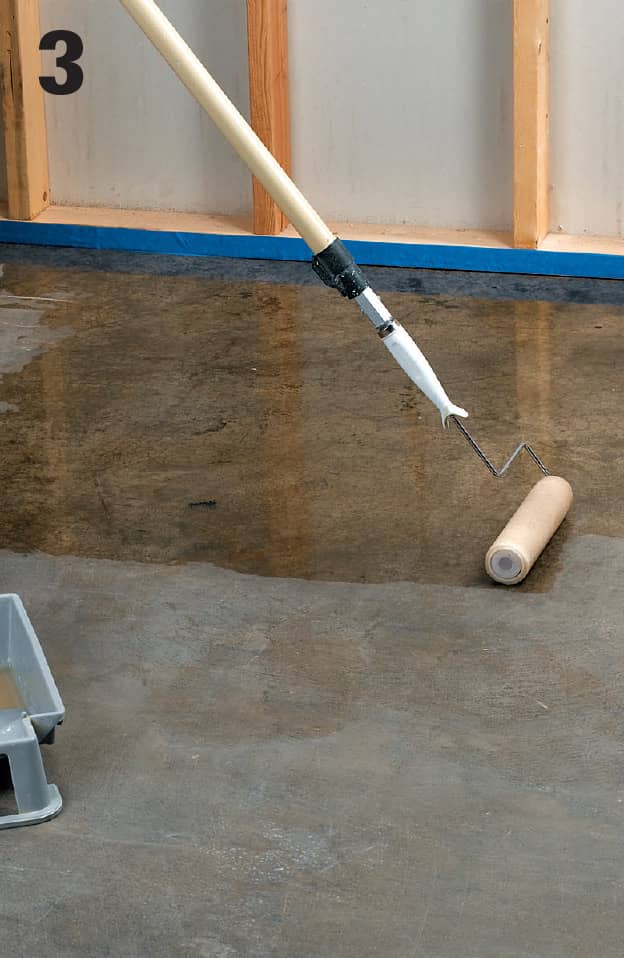
Use a long-handled paint roller with a 1/2" nap sleeve to apply an even coat to the rest of the surface. Do small sections at a time (about 2 × 3 feet). Work in one orientation. Avoid lap marks by always maintaining a wet edge. Do not work the area once the coating has partially dried. Allow surface to dry, usually 8 to 12 hours.
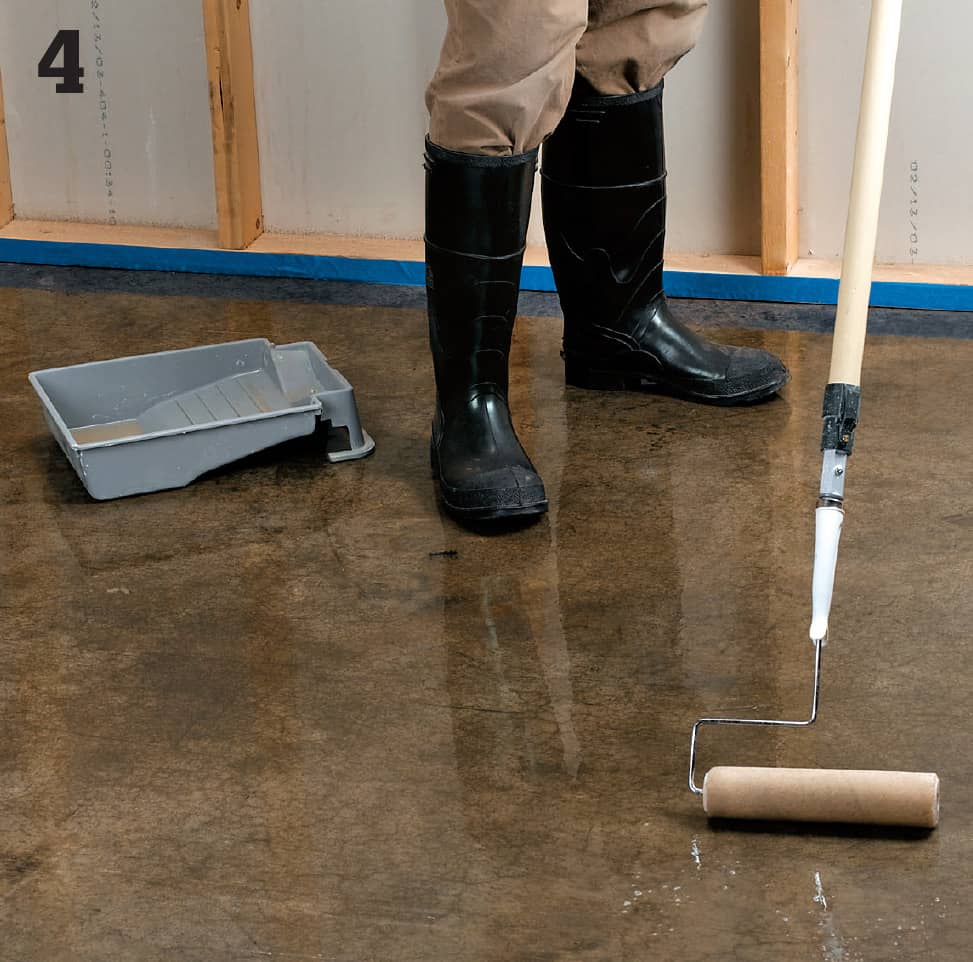
After the first coat has dried, apply the second coat at an orientation 90° from the first coat.
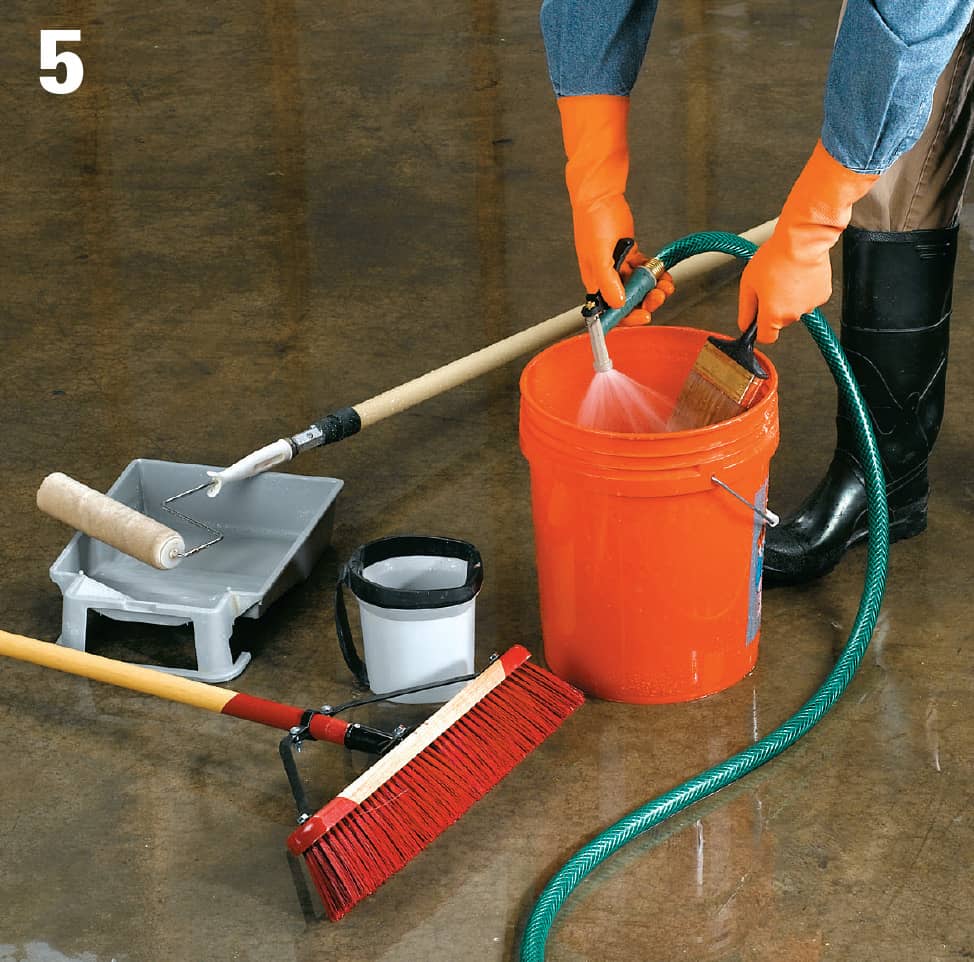
Clean tools according to manufacturer’s directions.
 Salvaging Lumber
One of the biggest challenges to home repair is getting rid of things. Rather than hiring a dumpster or cutting the old supplies into little bits and throwing them out with your normal trash stream, consider re-using them. Not only is it cheaper, it’s also environmentally friendly.
Any time you do demolition work around your home, you generate plenty of salvageable “waste.” In fact, you’ll have a wealth of different members and wood pieces from which to select. For instance, plank boards from siding are often milled to add a tongue and groove so that they can be used as flooring. You can use the same process to rip plank flooring down to strips, if that’s the look you’re after. Looking for 4 × 4s to create a chunky, eye-catching trestle table? If you can’t find just the right pieces, consider laminating reclaimed 2 × 4s instead. Keep in mind that much of the older lumber in buildings or salvage yards is not nominal and will be hard to adapt to a project that mixes old and new wood. It’s usually best to use reclaimed lumber by itself. Be prepared to change your plans as well, because you may not be able to find certain sizes or species no matter how hard you look. Being adaptable and creative is key to successfully reclaiming any building material, especially wood. You should be ready to take advantage of what you find—even if it isn’t necessarily what you were looking for.
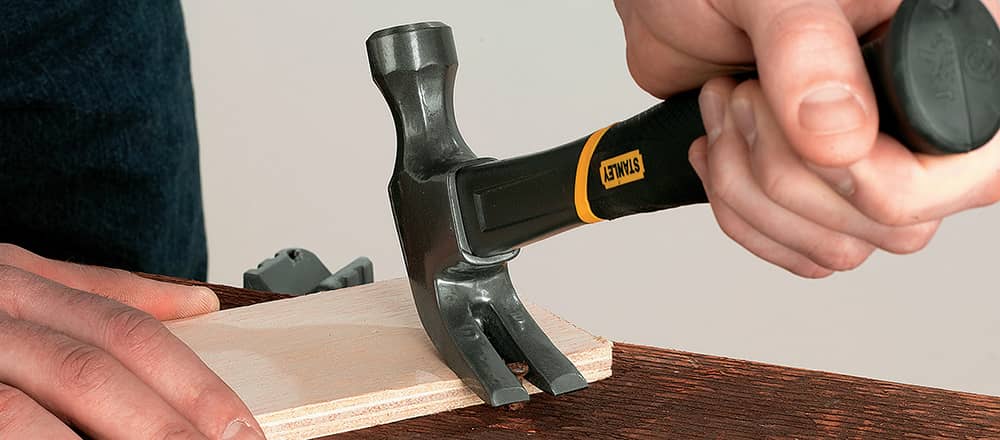
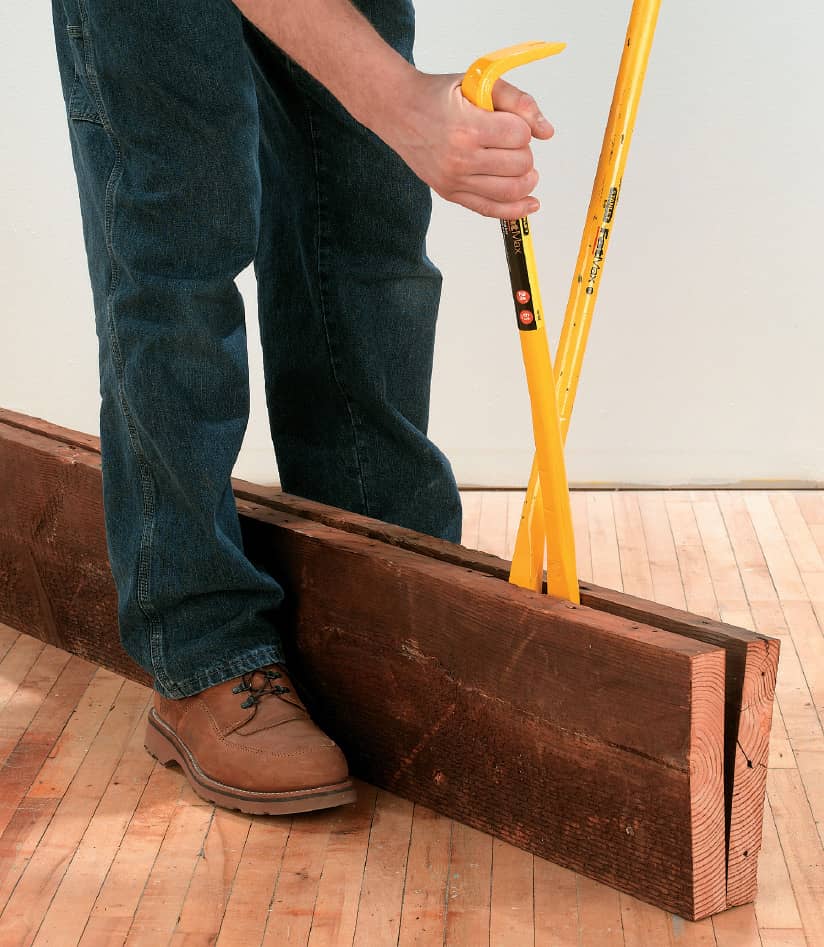
The time-tested method of prying nails out with the claw of a claw hammer works as effectively with reclaimed wood as it does with new lumber. Use a scrap of plywood or other soft pad under the head of the hammer to increase leverage and protect the surface of the wood.
Types of Reclaimed Lumber
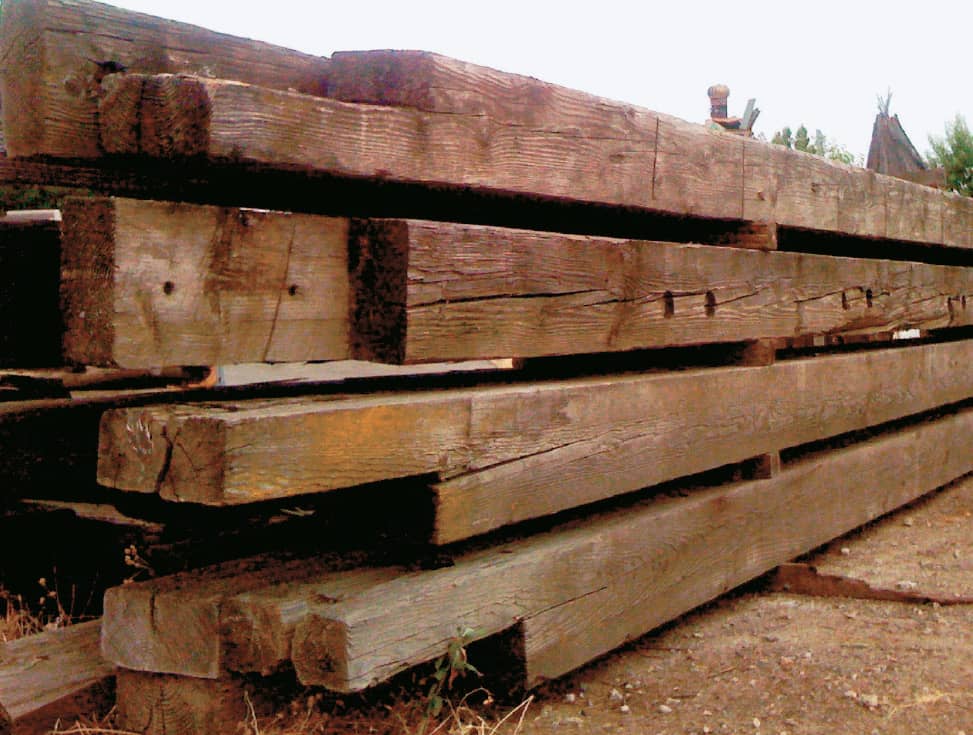
Timbers and Beams. The most plentiful reclaimed lumber comes in the form of various-sized structural members. The timbers can run 2 foot square or larger and are sometimes 20 feet long. Smaller beams can be just as impressive, and headers 4 to 6 inches thick are common as well. The beauty of large timbers is that they can fill both practical and aesthetic roles. They can be used in their original form for a rough, rustic look or resurfaced and refinished to serve as a sleek exposed structural element in a home. Smaller members are often used for making tables or other furnishings, including built-ins such as bookshelves. Framing members of intriguing wood species can be laminated, sawn, and finished to craft remarkable countertops.
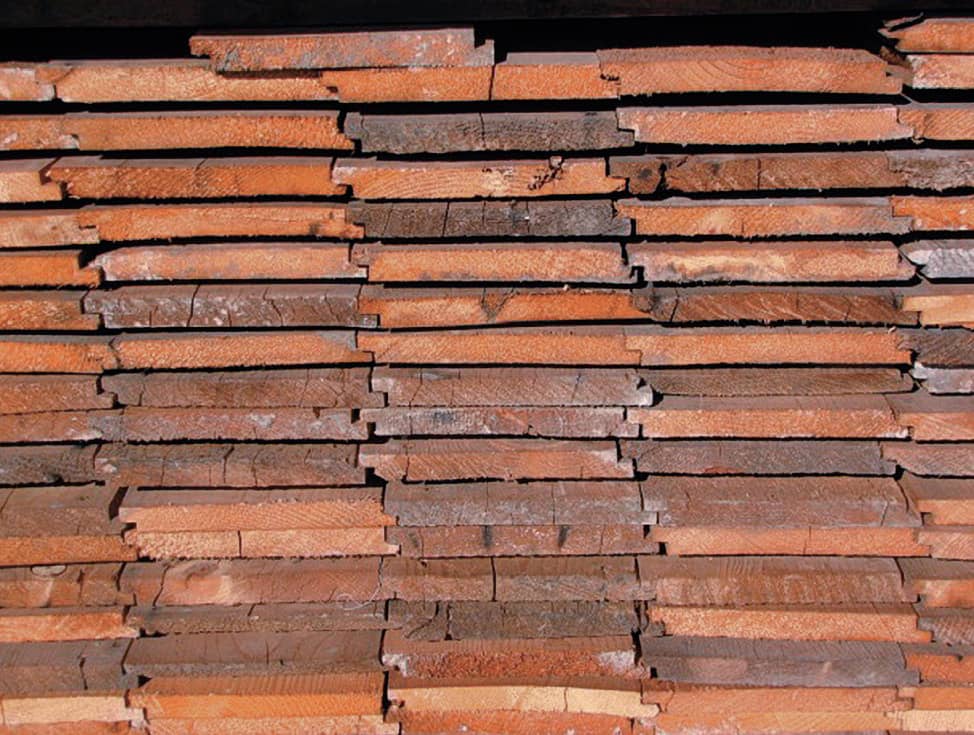
Planks. Wood planks are reclaimed from floors, subfloors, and siding. The planks can be used in a number of ways. Depending on where the planks come from, how they were originally cut, and what surface appearance aging has left on them, the planks can be used as is, lightly surfaced and refinished to retain the marks of age, or completely resurfaced to recapture the original grain pattern and color. Planks are most often squared off or milled shiplap. But plain planks can be milled to serve as tongue-and-groove flooring or paneling. They can also be ripped to produce strip flooring.
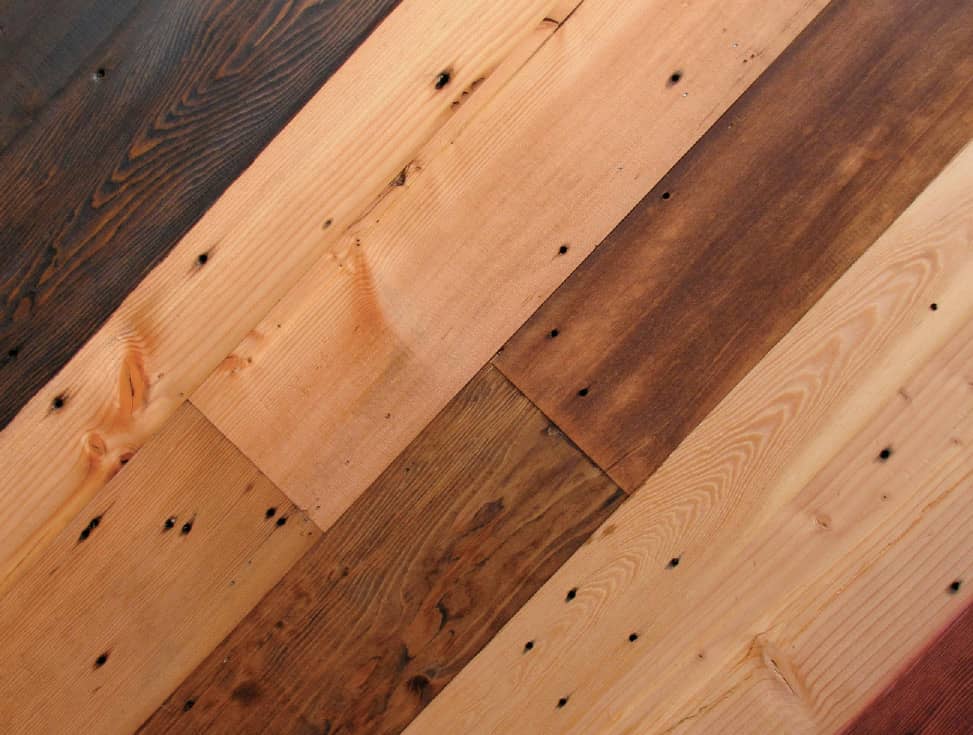
Flooring. Much of the usable wood recovered from older buildings is flooring. Because plank flooring was the more common style prior to the mid-twentieth century, most reclaimed wood flooring comes in the form of planks. The planks can be tongue-and-groove, shiplapped, or butt joined. Shiplapped is more common the older the building is, because it was easier to manufacture. Older, wide planks are also usually longer than today’s strips, often running 8 feet or longer. Squared planks such as siding are generally milled with a tongue-and-groove before being used for a new floor. Think twice before ripping planks to create strip floors; the wider surface of a plank allows for more of the grain and coloring to show.

Doors. Reclaimed doors can add flair to different areas of a home, from the kitchen to the front entryway. Doors salvaged from older buildings are usually solid wood, but styles are nearly limitless. Doors to fit more standard openings are available in just about every panel configuration imaginable. You’ll find older interior doors as well, including solid pocket doors, and doors with leaded glass inserts. The trick to reusing any found door is choosing one that is the right shape and close to the measurements of the opening you’re looking to fill. Then it’s just a case of trimming and refitting the door for its new role or enlarging or shrinking the door rough opening. Or, use the door to build a coffee table or other re-purposeful furnishing.
Tips for Removing Nails from Wood
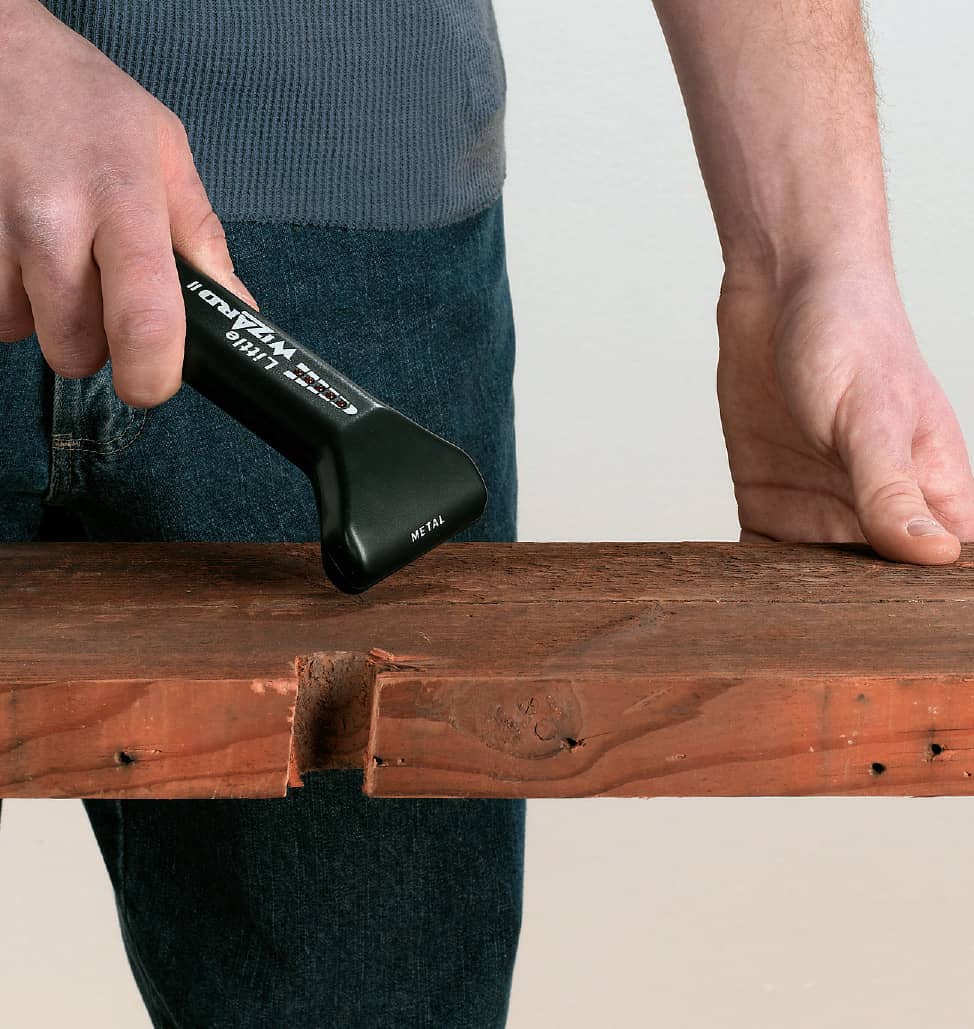
Finding the nail is the first step in removing it. That’s why a handheld metal detector is a must for checking reclaimed lumber. A hidden nail or screw can destroy a saw blade and cause serious injury to the operator.
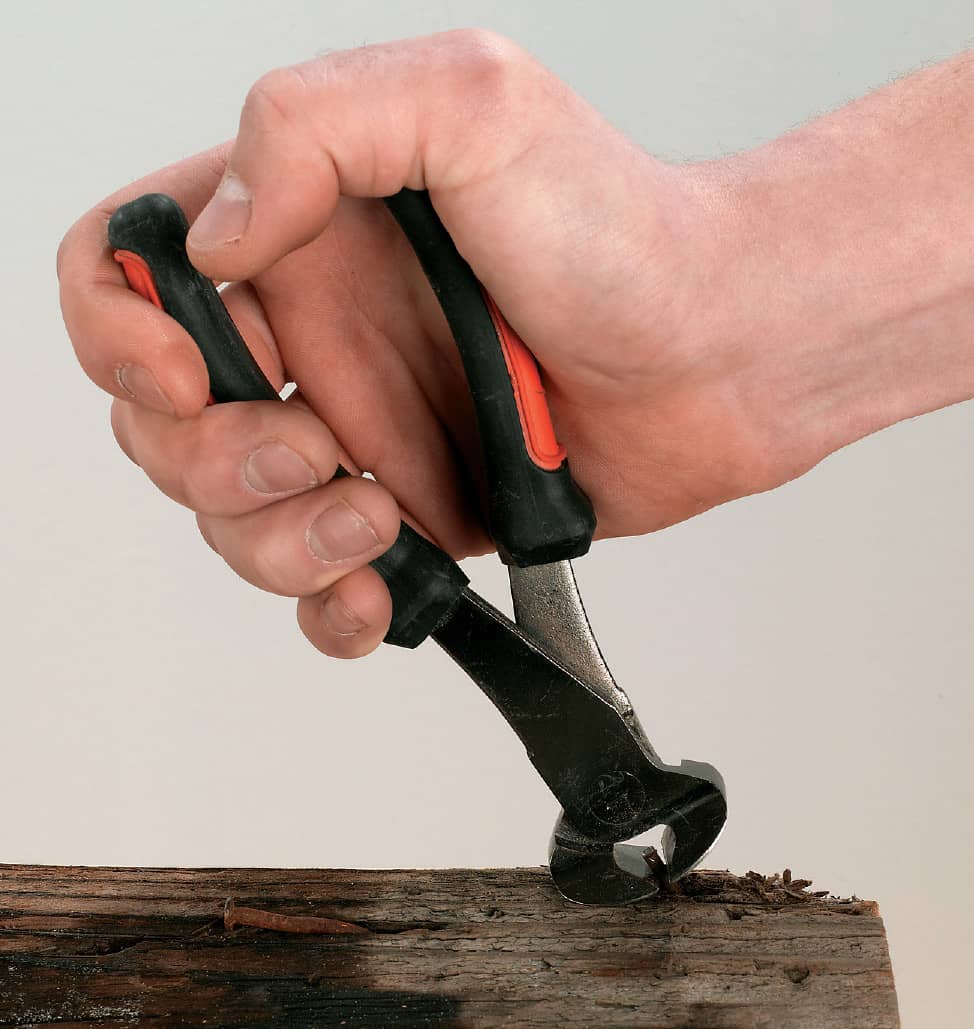
Nippers are a good choice for removing nails carefully, to limit damage to the board face. However, they will not work on sunken nails or flush nail heads because the pinchers need room to close over the nail body to pull it out.
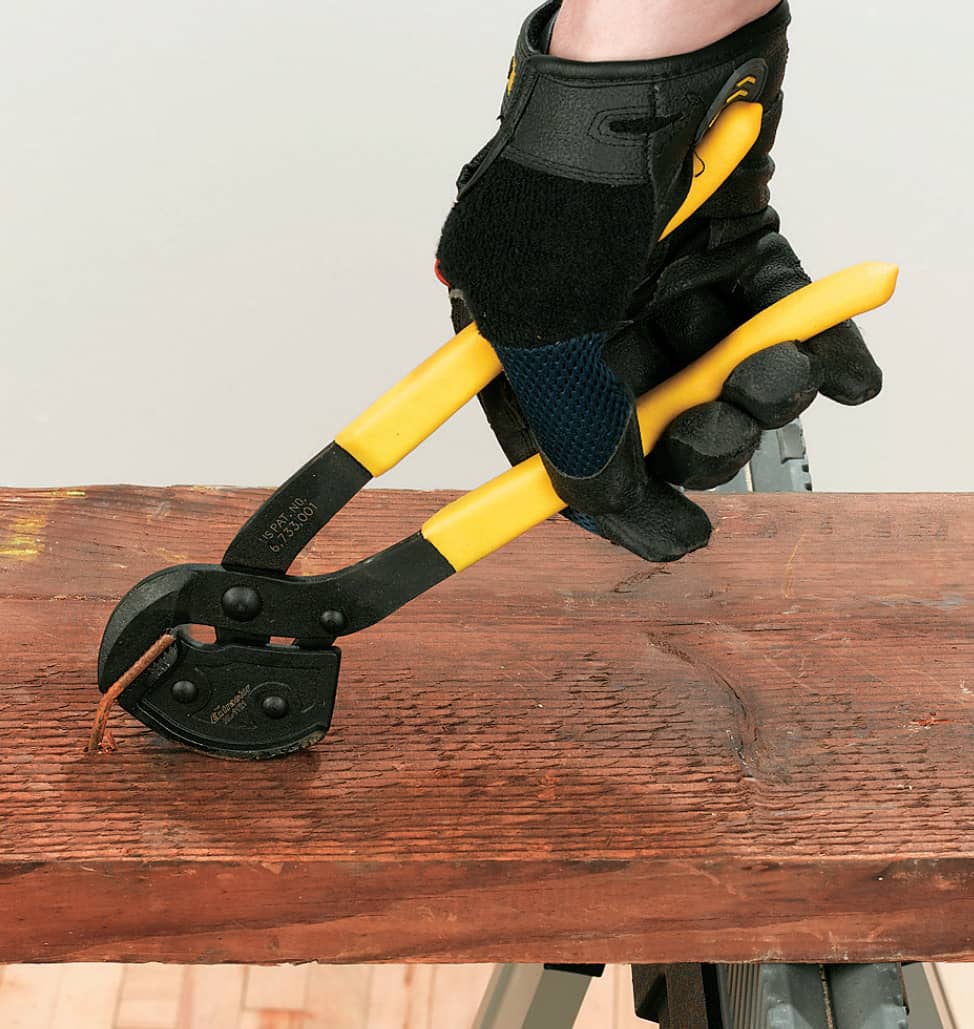
Extractor pulling pliers are specifically designed for maximum leverage. They are quite effective for removing nails and other fasteners with a minimum amount of damage to the face of the wood. They are also easy and quick to use but less effective on stubborn nails in hardwood.
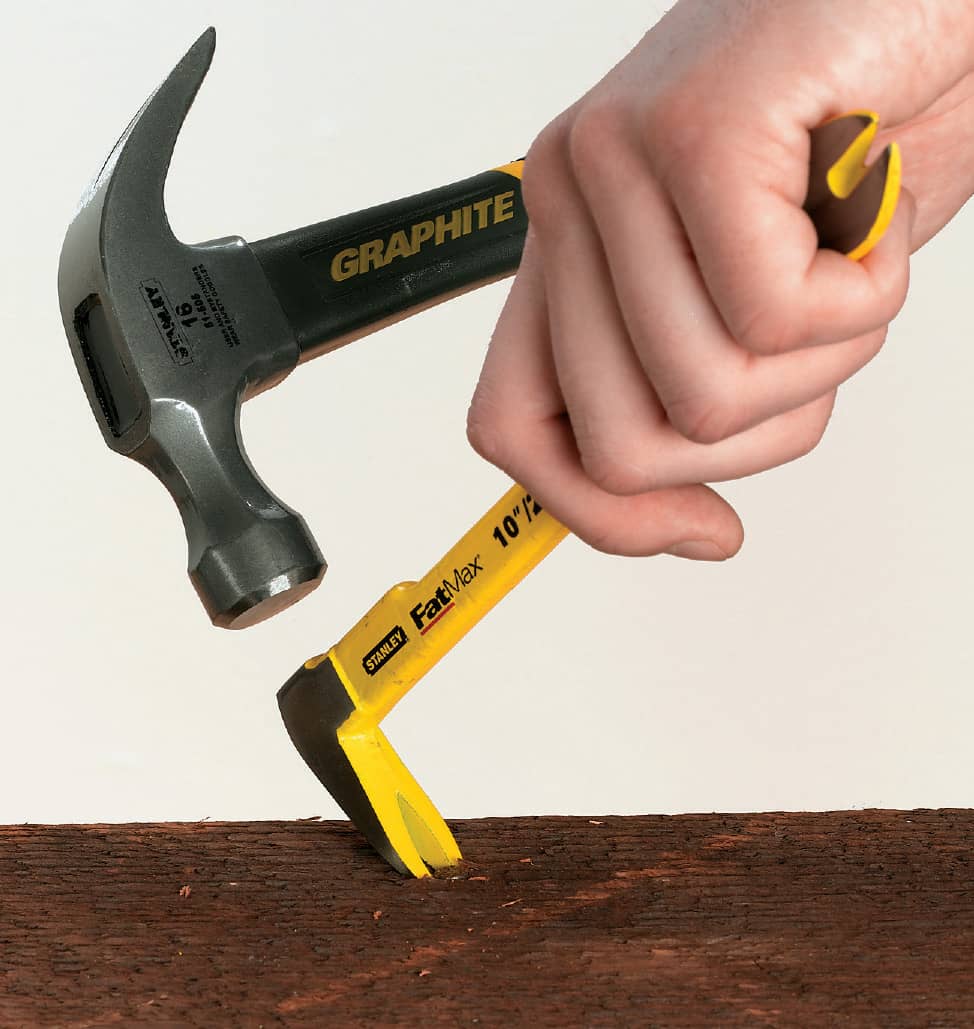
Use a cat’s paw for large, stubborn, embedded nails. Tap the slot of the tool under the nail head by rapping on it with a hammer. Pull back on the handle. Use a scrap of wood under the cat’s paw head for extra leverage. A cat’s paw is a blunt instrument and a last recourse, usually reserved for rough or hand-hewn timbers because it will likely mar the surface.
How to Install Reclaimed Floorboards
Reclaiming some wood building materials directly from an existing structure can be a challenge. Structural members such as timbers and beams must be extracted carefully to prevent wholesale collapse. Others, such as siding, are arduous to remove and will need exceptional amounts of prep to be reused. But wood flooring is one of the easiest and most rewarding materials to salvage. Do it right, and you may not even need to refinish the reclaimed flooring after you re-install it.
The process is fairly straightforward and is basically the reverse of installing a wood floor. Start by clearing the room you’re working in and remove shoe or other base moldings. Remove the first and possibly second row of boards on the tongue side of the floor. This may require destroying one or more boards to gain access. Do that by using a pry bar on damaged flooring, or a circular saw and pry bar, to cut into and tear out boards so that you have clear access for prying out the adjacent rows.
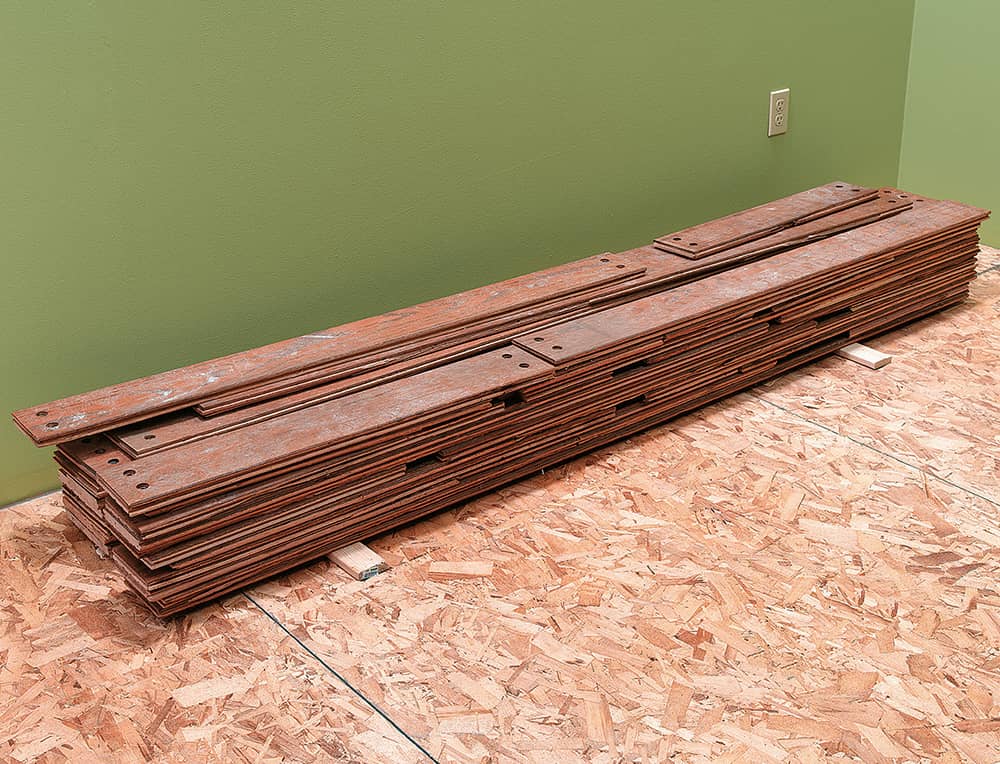
Removing planks from that point is relatively easy. Slide the tongue of a pry bar under the tongue of the plank next to a nail, and pry the nail up. Do this at each nail location until the plank is completely loose. Then pry up and toward you to release it from the next row. Continue removing planks, taking care not to damage the tongues as you remove the boards. Remove all the nails as you work, and check boards for nails before finally placing them neatly in stacks separated by bolsters.
How to Mill Tongues and Grooves into Reclaimed Planks
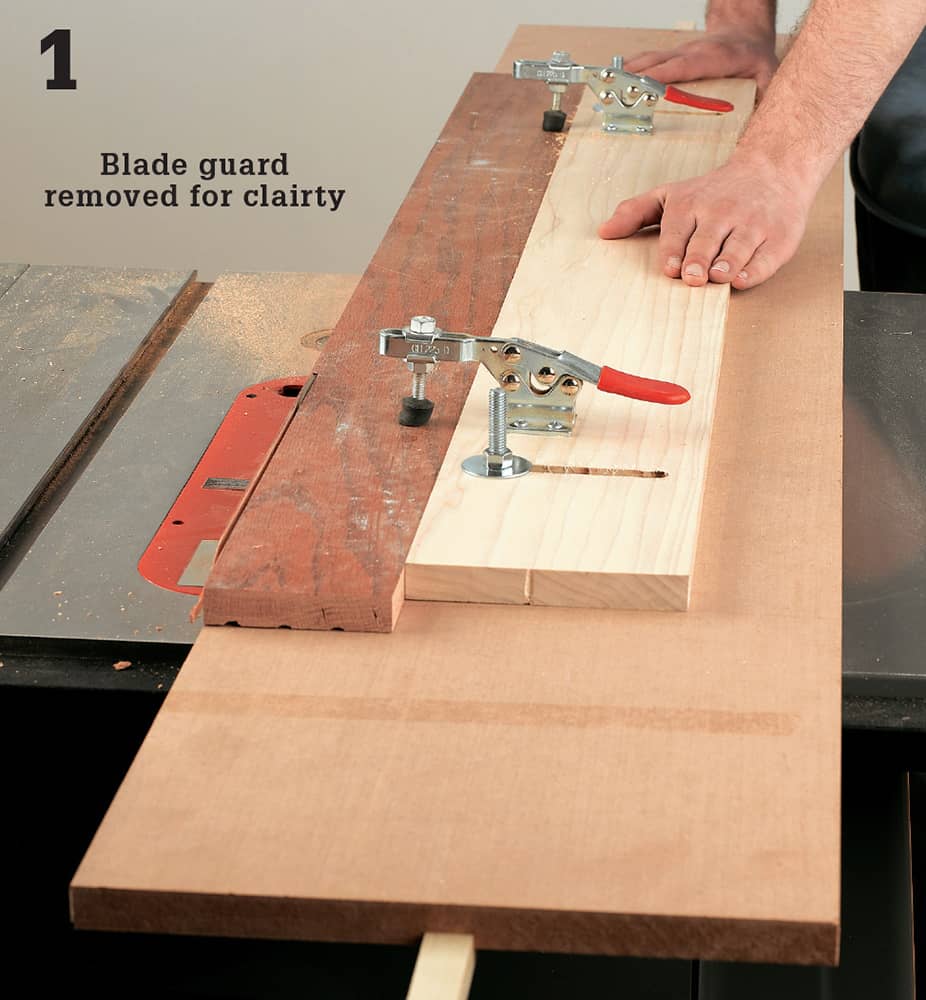
Joint one edge of each plank using a jointer. If you don’t have a jointer, you can joint the edge using a table saw with a jointer jig. A properly jointed edge will be necessary for the boards to fit snugly together when laid as a floor.
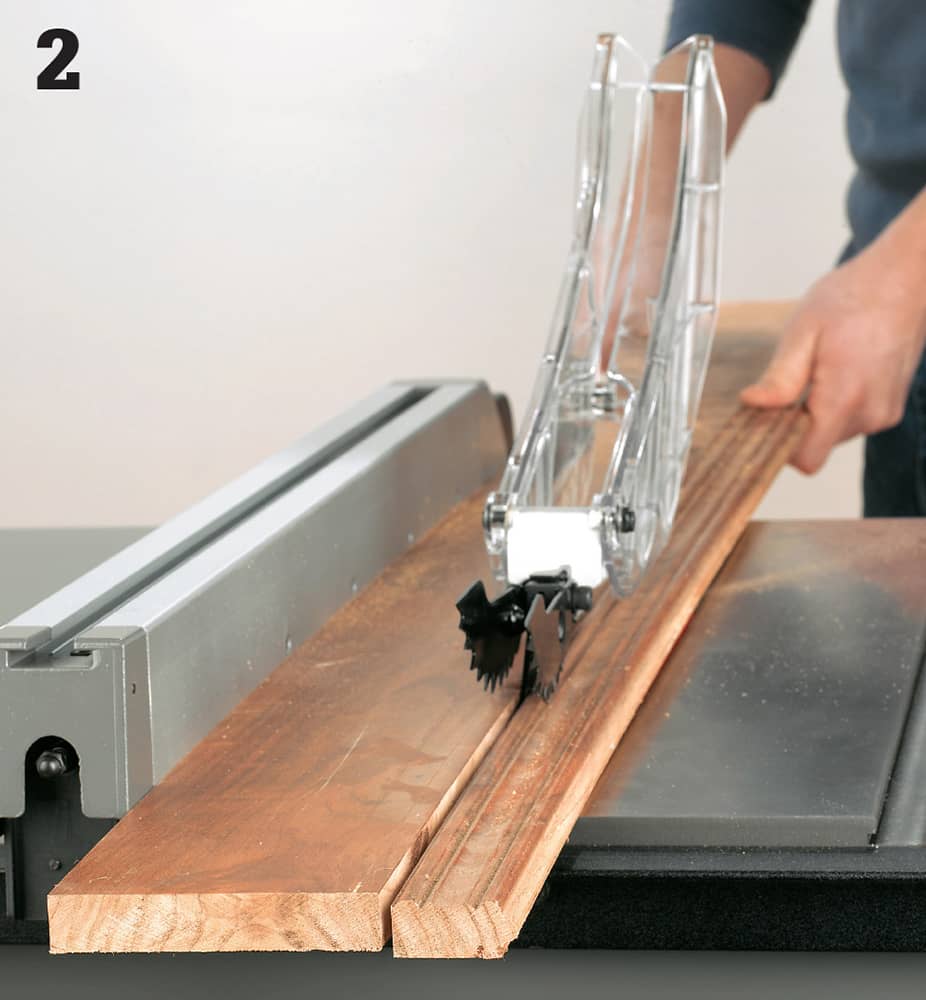
Use your table saw to rip the opposite edge of each board so that it is perfectly parallel to the jointed edge.
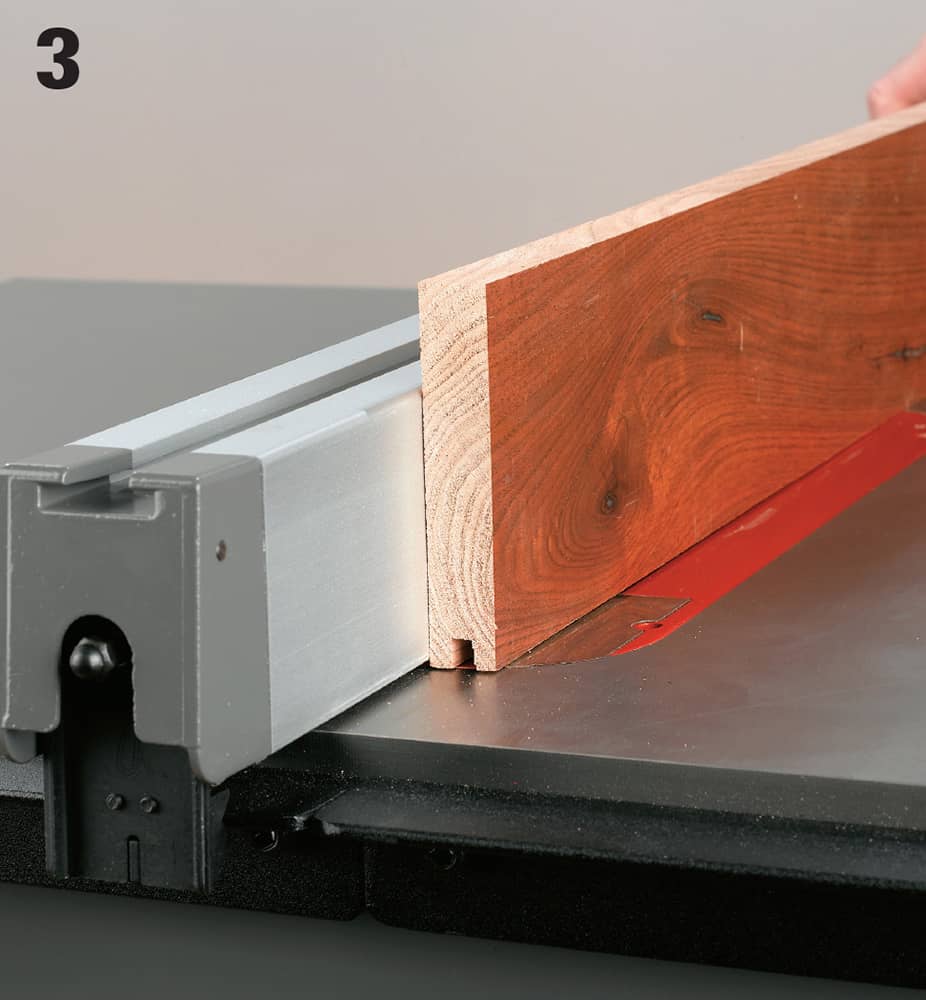
Saw the grooves first. Set a dado blade to the appropriate height, and set the table saw fence so that the groove runs along the middle of the edge. Stack dado blades as necessary to cut wider grooves in thicker stock. Cut the first groove in a test piece.
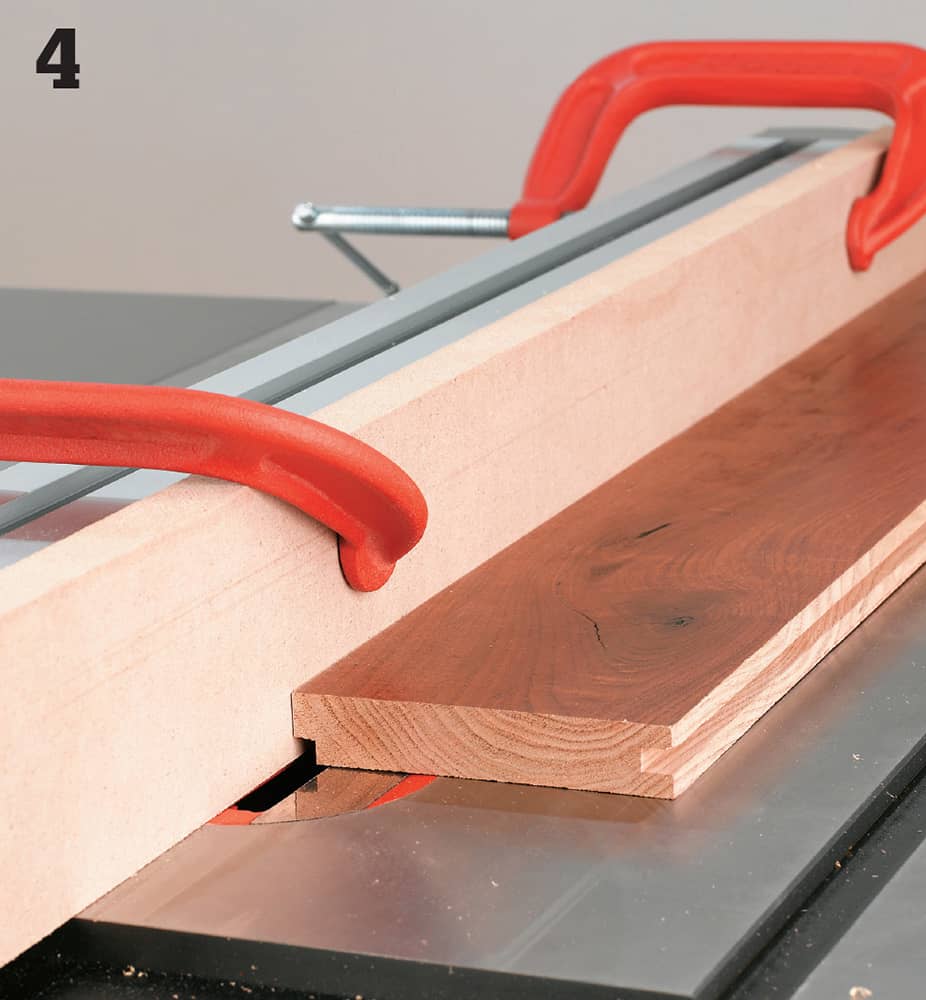
Reset the fence to cut the tongues. Use a short or scrap piece to cut the first tongue. Err on the side of cutting tongues too thick because you can always cut more off, but you’ll be in trouble if the tongues do not fit snugly.
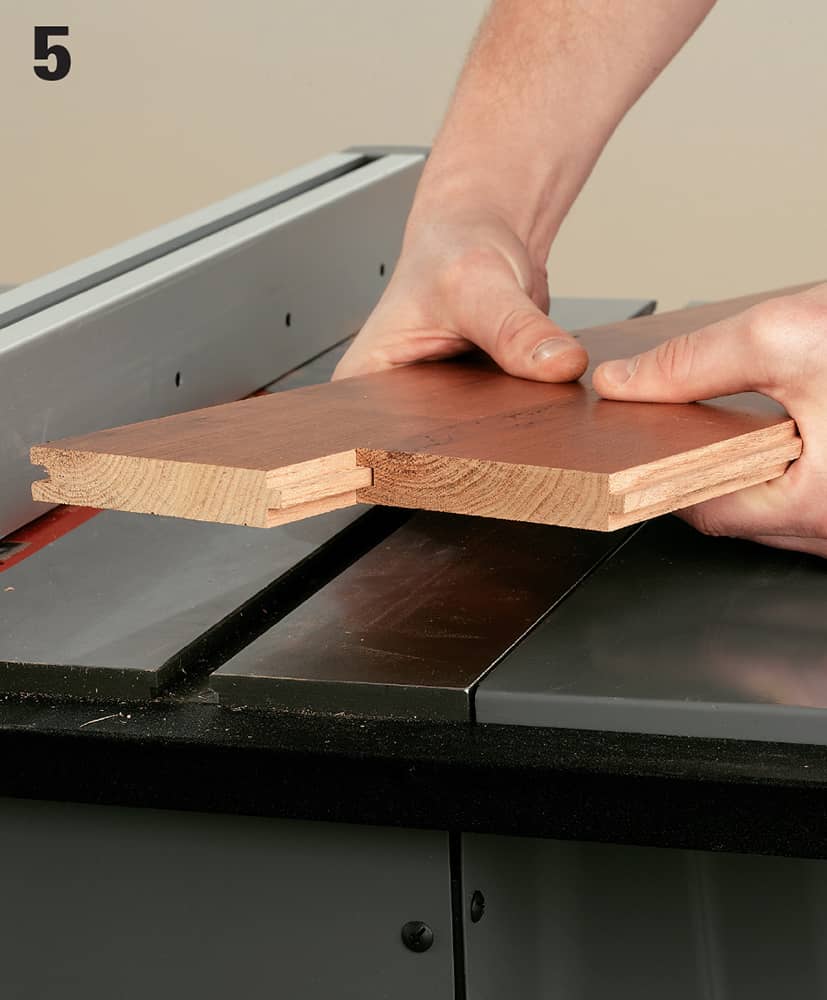
Check the fit of the tongue into the groove, with both pieces lying flat. The fit should be snug enough that you have to apply some force to join the two pieces.
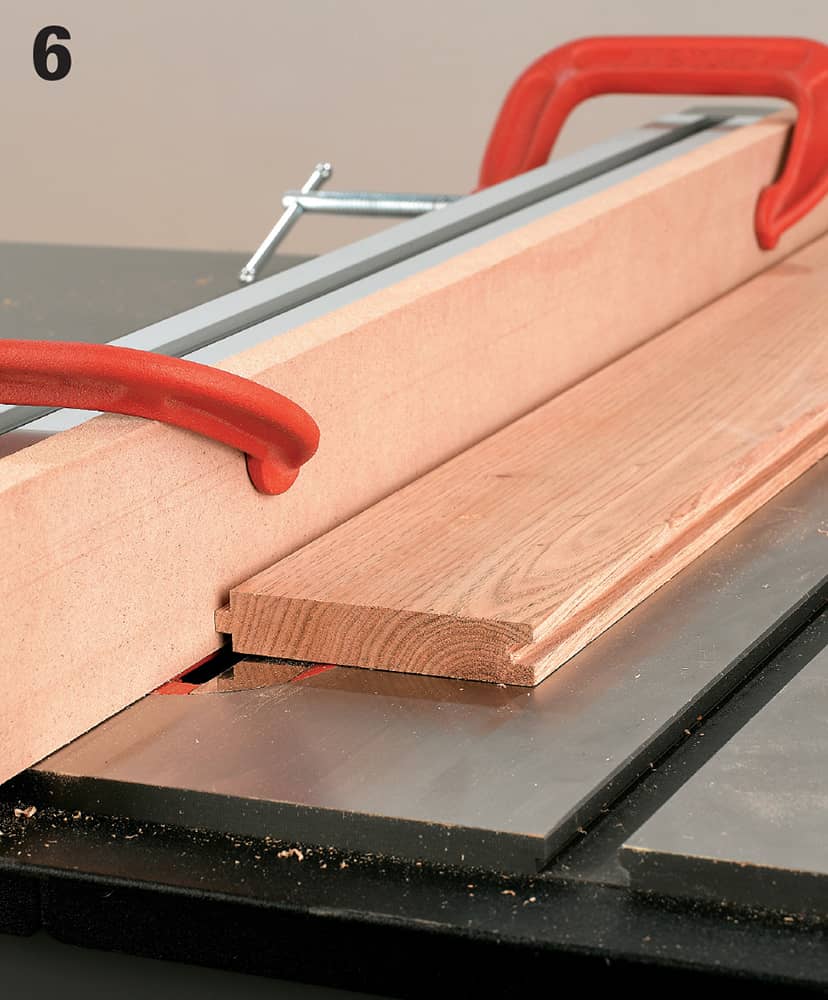
Once you’re certain that the measurements are all correct, cut all the grooves first. Check each for fit, using the tongue on the scrap piece. Finally, cut all the tongues on the other edges of the planks.
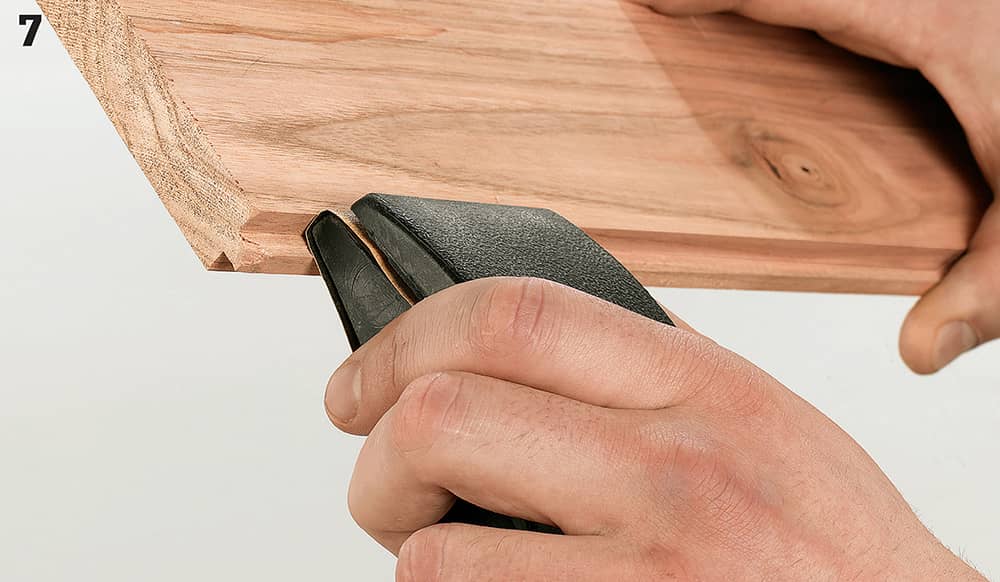
Check all the planks one last time, paying special attention to any burrs or imperfections in the tongues and grooves. Sand down any spots that might prove troublesome when installing the floor.
 Installing a Reclaimed Floor
Perhaps the most common use for reclaimed wood is as flooring. And the most common type of reclaimed floor is a wide plank floor. In fact, the planks can be as wide as 10 inches. Although this means that the planks can be a little more cumbersome to handle than modern hardwood strip flooring, take heart: wide plank floors go down much quicker than their strip counterparts.
The look of a wide plank floor is impressive. It can make a space seem larger, and a plank floor can visually anchor the room. Keep in mind that each plank presents much more visual area than a strip would. An oddly colored or patterned strip over the span of a wood floor would hardly get noticed; in a plank floor, an odd duck will stick out like a sore thumb. You can minimize the impact any unusual-looking plank has on the floor’s overall appearance by shuffling it to an outside edge of the floor. If you’re lucky, you may even need to rip it down to fit, minimizing its impact even more.
The finish you choose may affect how you work with the wood during installation. If you’re planning on sanding and refinishing the floor entirely, you can proceed to work as quickly and efficiently as possible. However, if you’ve chosen your planks for their historical finish, you’ll want to work with soft gloves and be careful with tools, such as power nailers, which sit right on the surface of planks. Also be careful in moving planks around as you pull them off the stack. Any noticeable scratches will probably rule out keeping the vintage finish.
Lastly, it’s a good idea to face-nail and plug wide planks if they were previously pegged, or if you expect that the space will experience regular variations in temperature. A cupped or warping plank floor will not be the showcase for which you chose reclaimed wood in the first place.
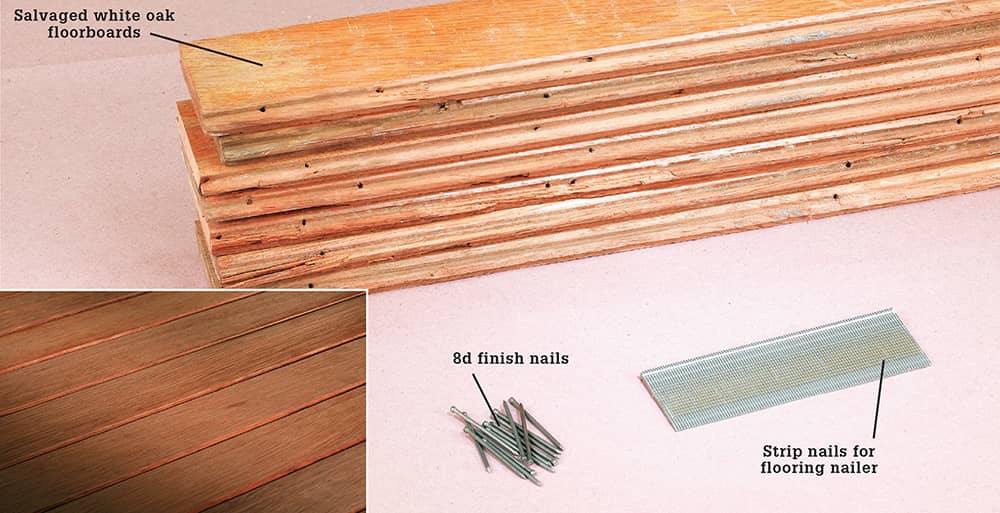
Salvaged floorboards come in varieties and sizes that can be hard to find in new material, such as the quartersawn white oak flooring seen here. Sanded and finished, it has a rich color (inset).
How to Install Reclaimed Floorboards
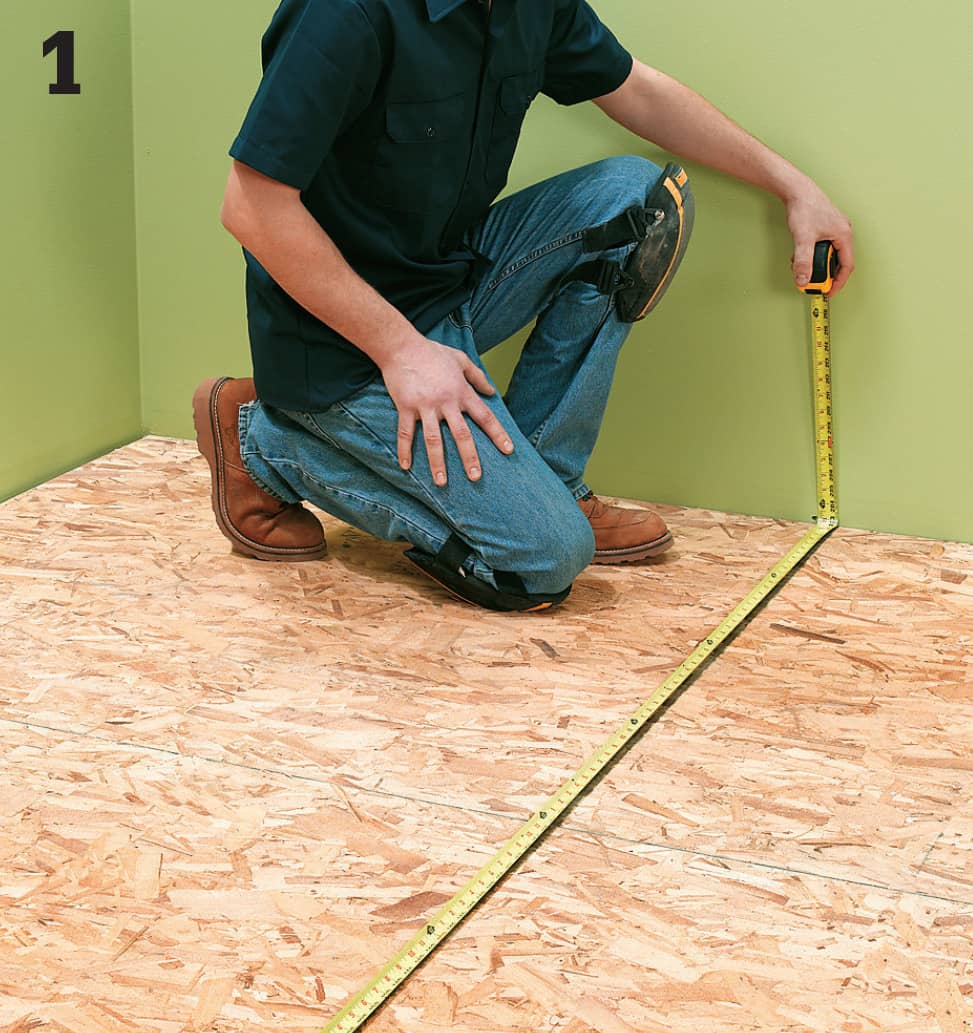
Measure the room and double-check that you have all the planks you’ll need to cover the surface and account for waste. Make sure the subfloor is clean and free of loose nails or other debris. If the boards have a distinctive pattern or coloration that will affect positioning, decide on the positions and number the planks.
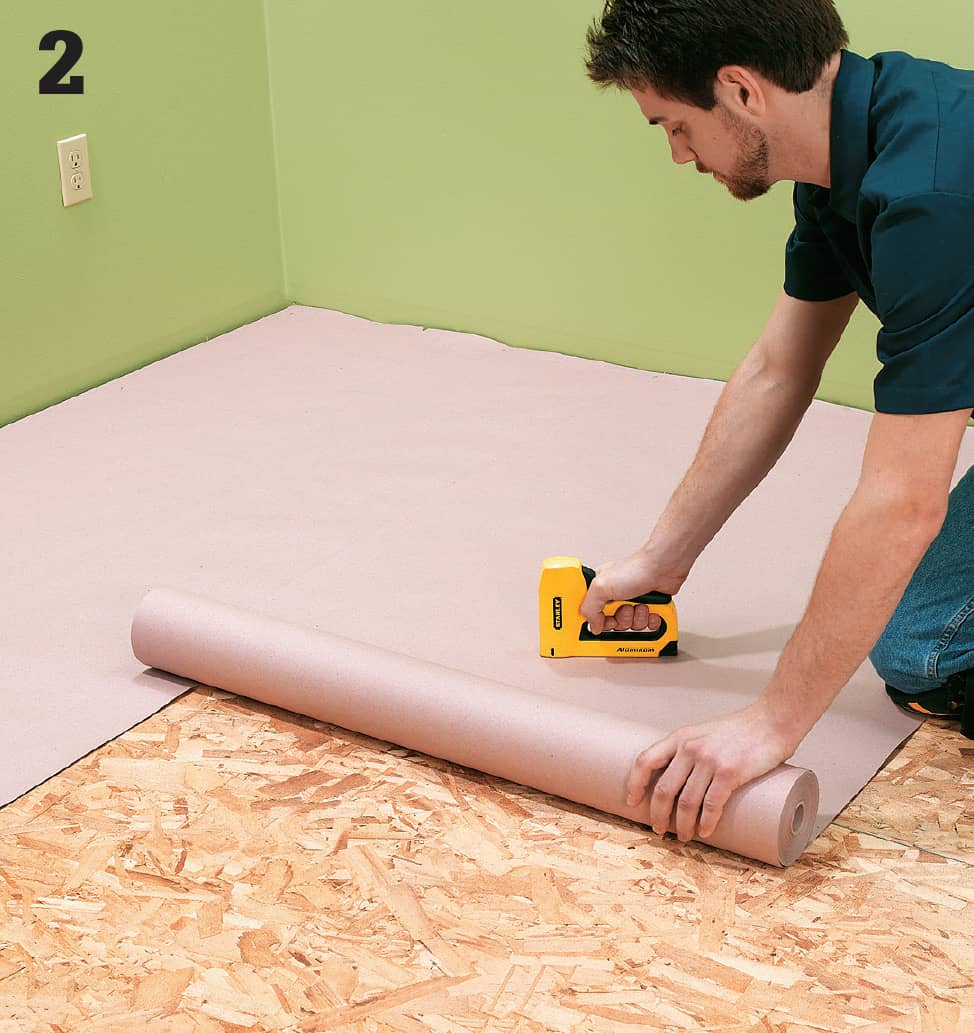
Roll underlayment out to cover the subfloor surface. Staple it to the subfloor with a staple gun. Overlap each strip by several inches, and cut as necessary with a utility knife equipped with a new blade.
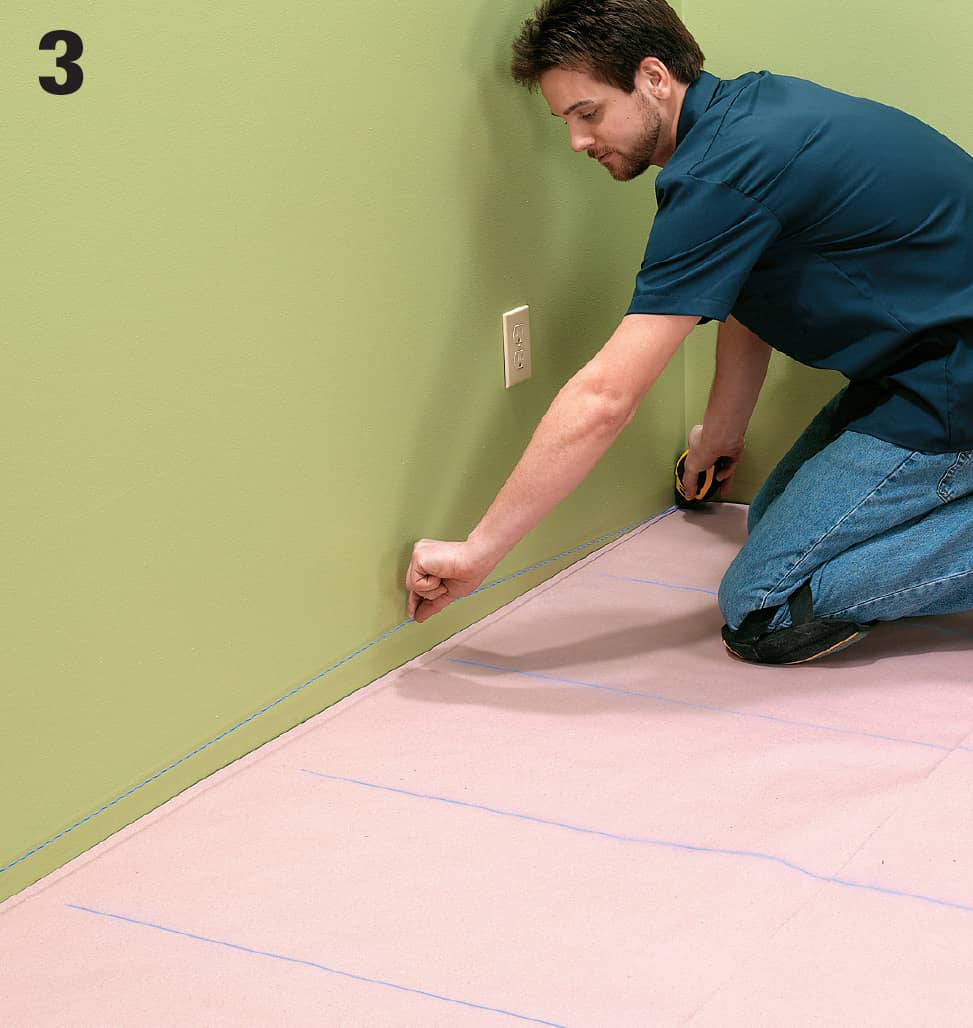
Locate floor joists, nail a brad at each end, and snap chalk lines over the centerline of each floor joist. Nail and snap another chalk line perpendicular to these lines, between 1/4" and 1/2" from the edge of the starting wall.
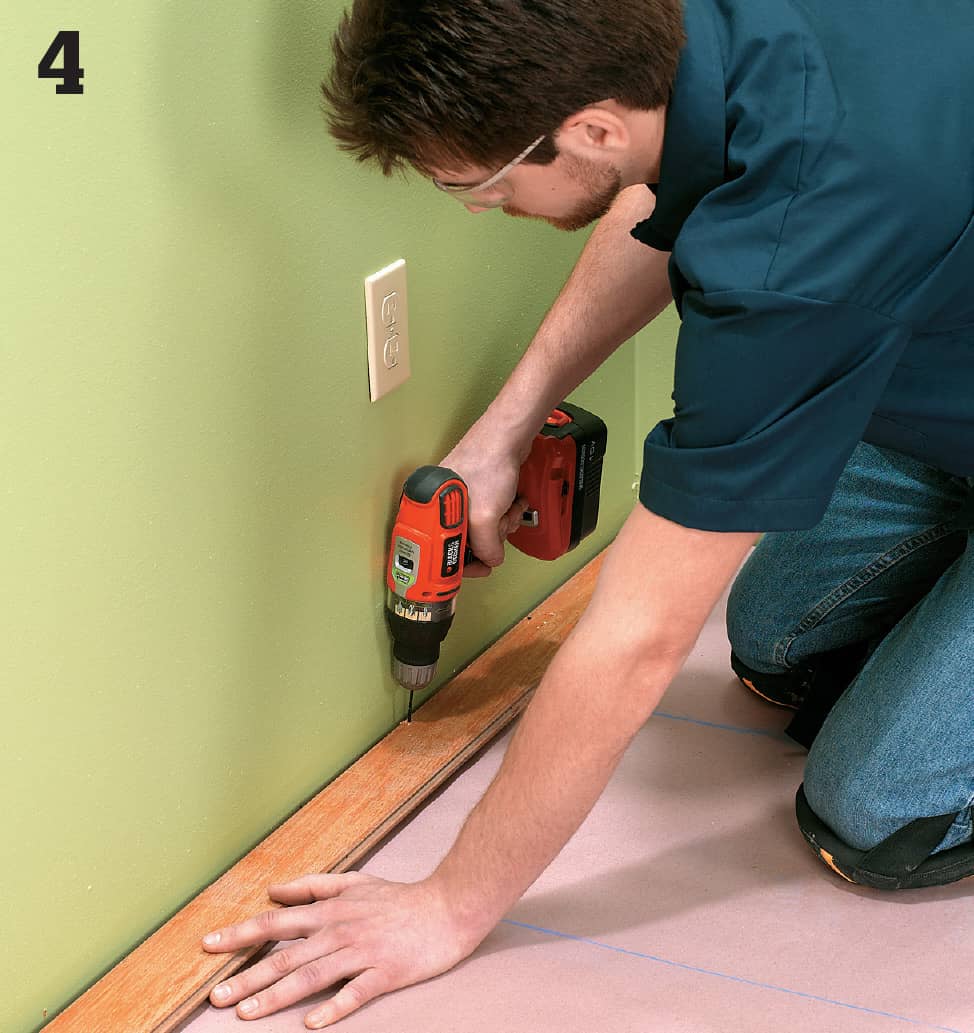
Drill pilot holes every 8" to 10" along the length of the planks that you’ll use as a starter row. Drill the holes in the face, along the inside groove edge that will face the wall. This is to prevent any cracking or damage during face-nailing of the first row.
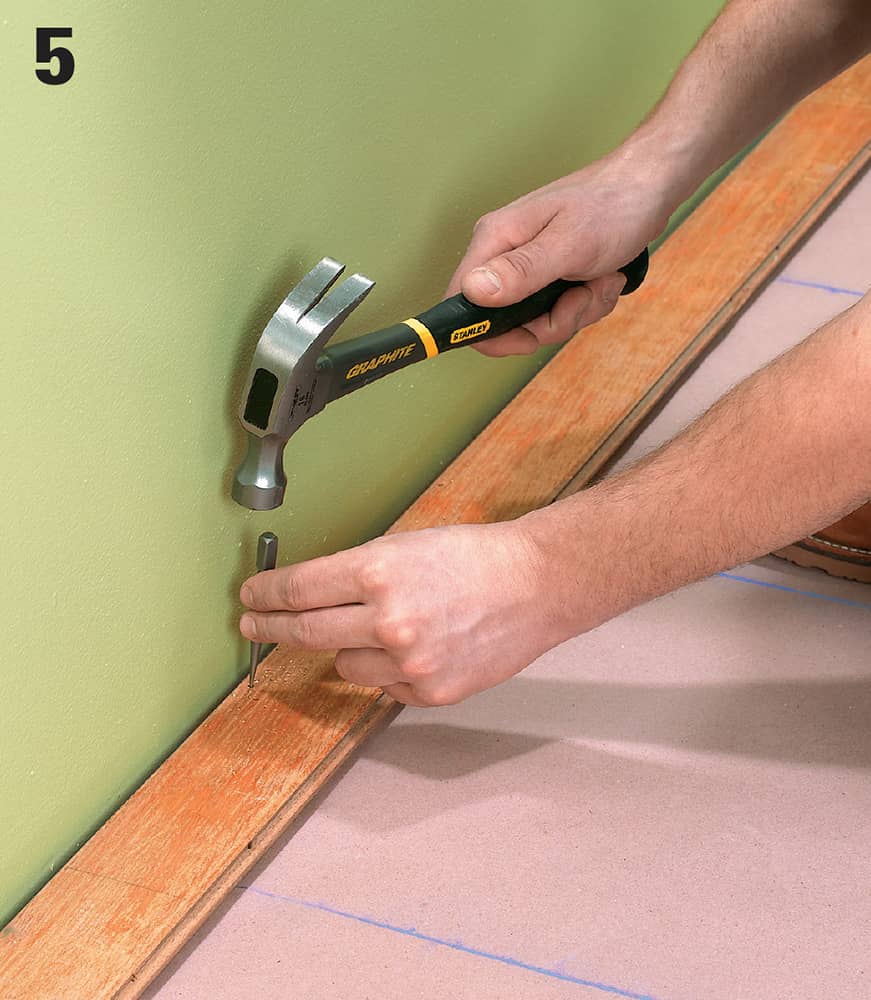
Ensure that the first plank is properly positioned with its inside edge along the starter chalk line. Hammer finish nails through the pilot holes, until the heads are just above the surface. Sink the nails using a nailset.
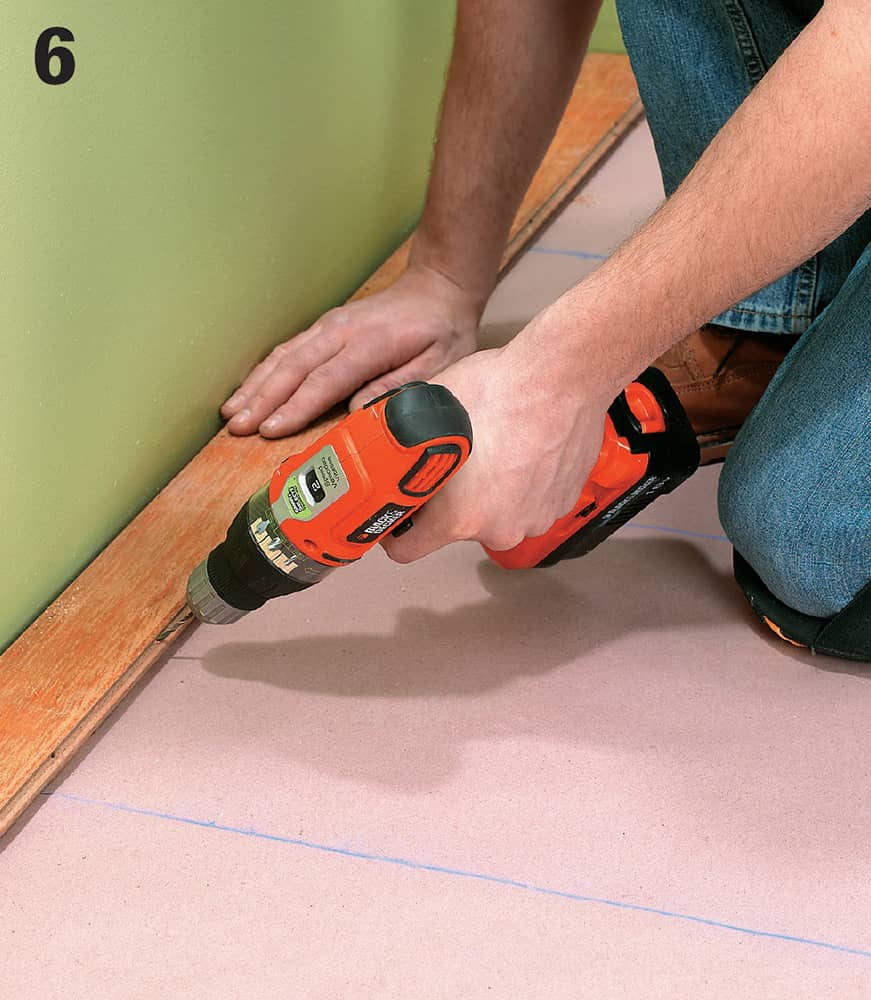
Drill pilot holes in the first plank’s tongue, every 8" to 10" along its length. Drill at a 45° angle into the joist locations. Blind nail a finish nail into each hole, and use a nailset to sink it.
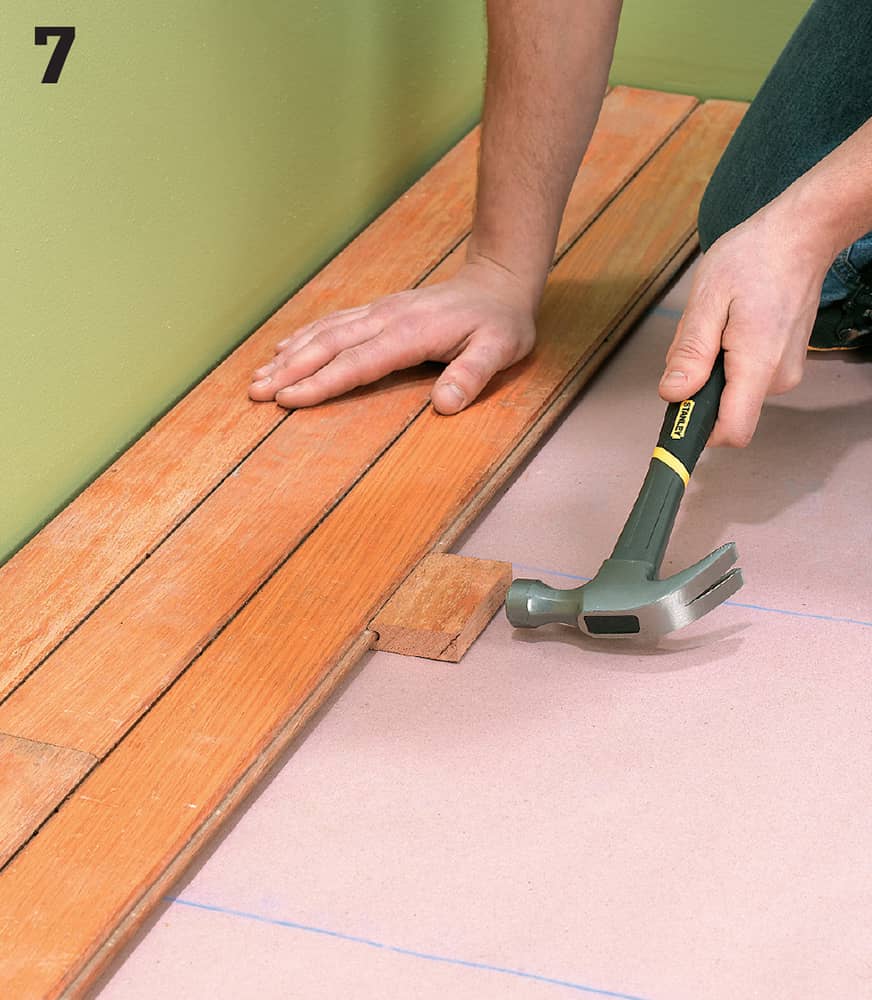
Snug new rows in place with a scrap piece (milled with a groove slightly larger than the tongues on your planks) set against the tongue. Tap the piece lightly with a wood mallet until the new plank is tight against the existing row.
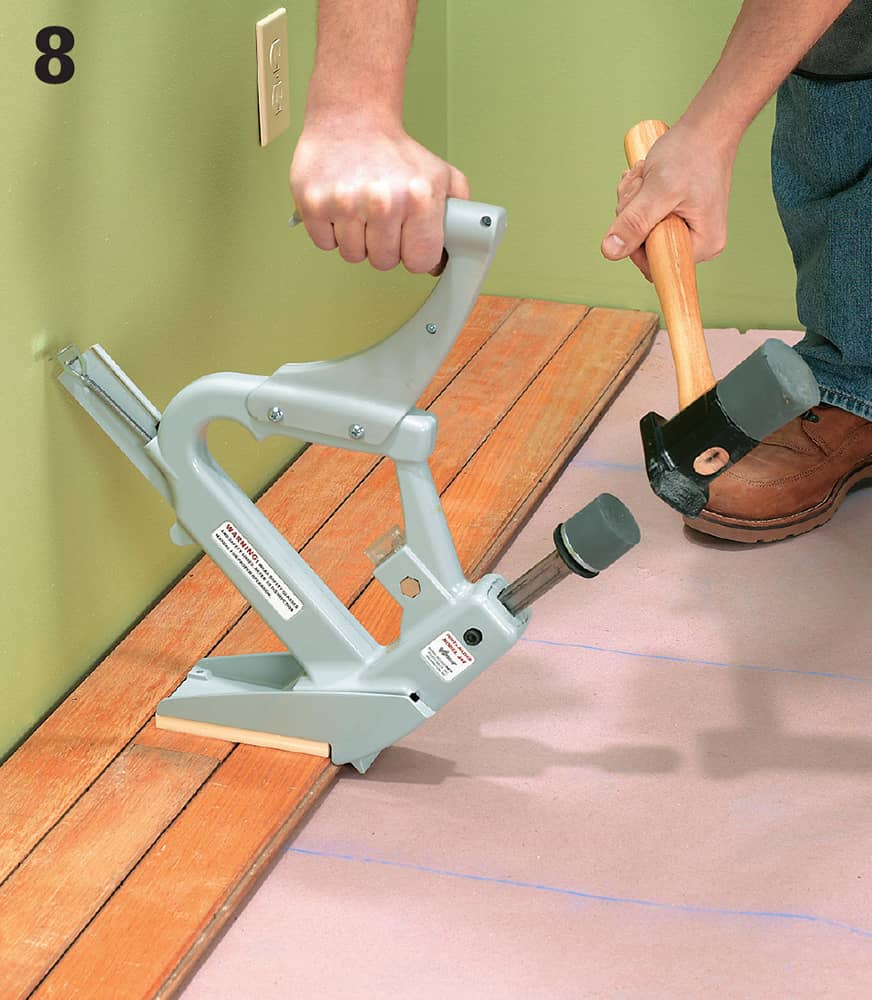
After the first row, nail planks into place with a power nailer. Position the lip over the edge of the plank, and hit the strike button with a rubber mallet.
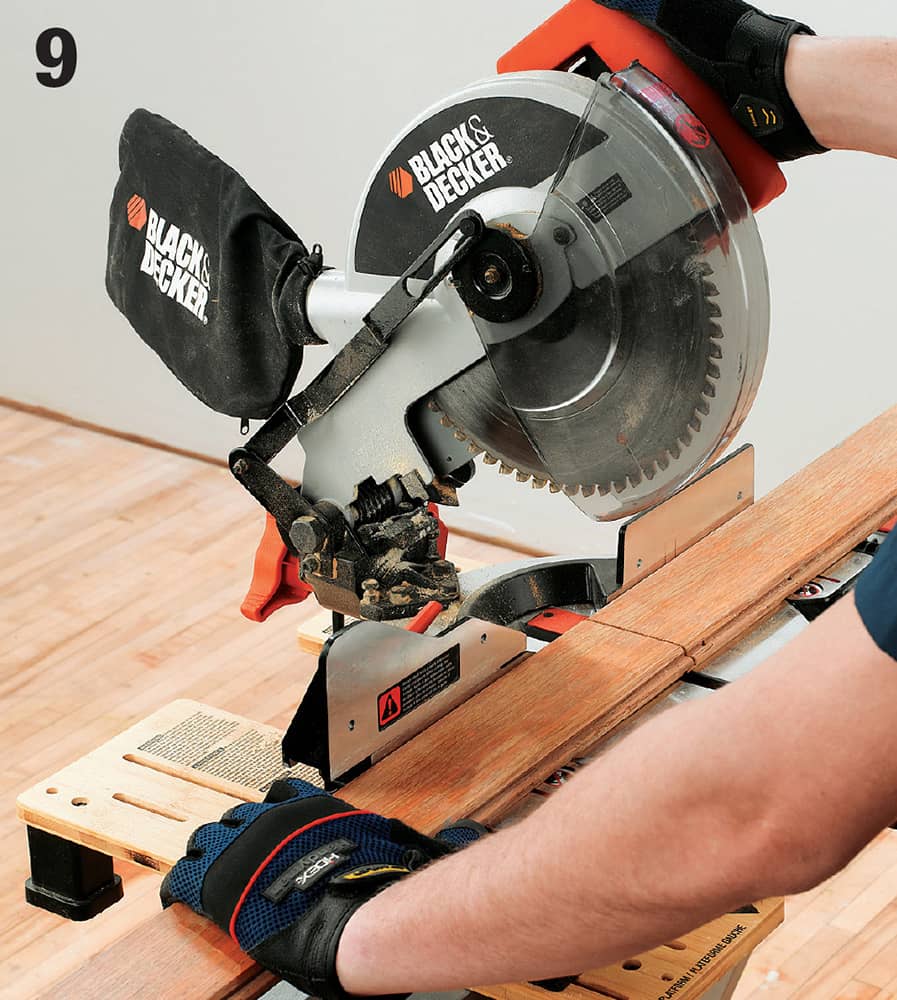
Stagger the planks to create a brickwork pattern. Cut planks face up, using a miter saw equipped with an 80-tooth blade. Saw end planks so that the cut end will face the wall.
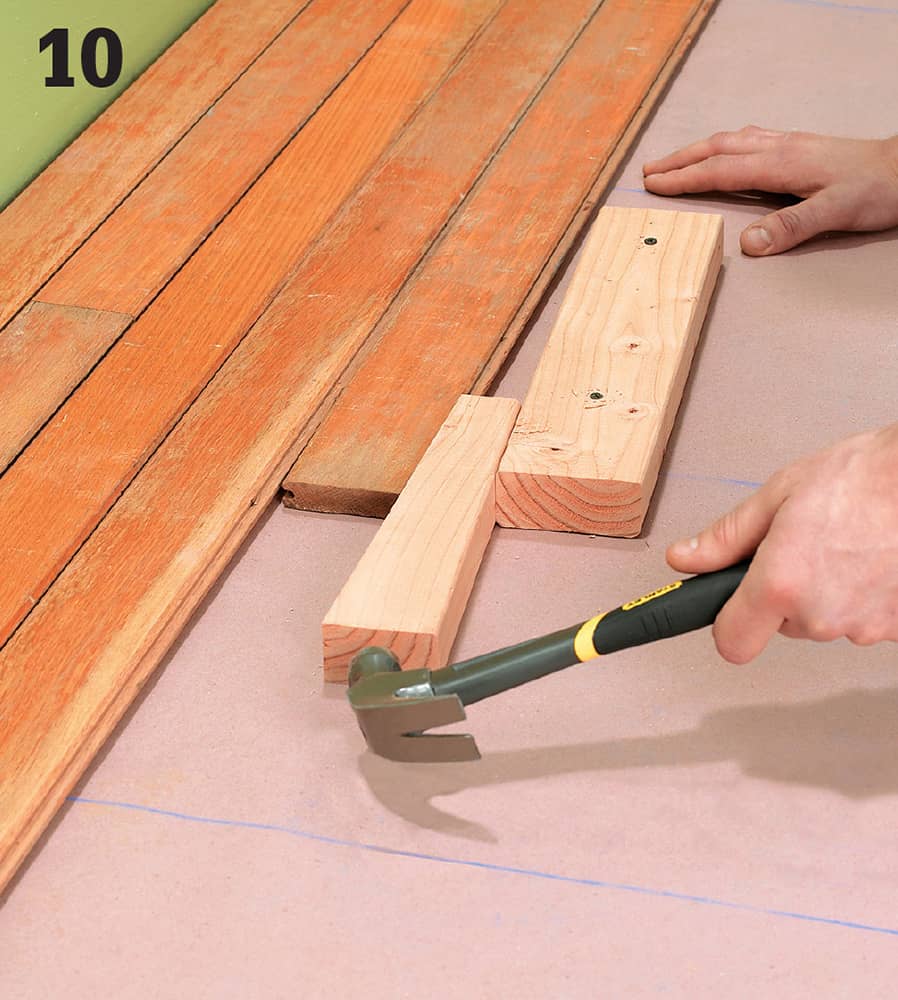
If you encounter a plank that is bowed or warped and won’t easily snug up to the preceding row, make a wedge from a scrap 2 × 4 by sawing diagonally from one corner to the other. Nail a 2 × 4 scrap to the floor, and tap the wedge into position to force the plank into place for nailing.
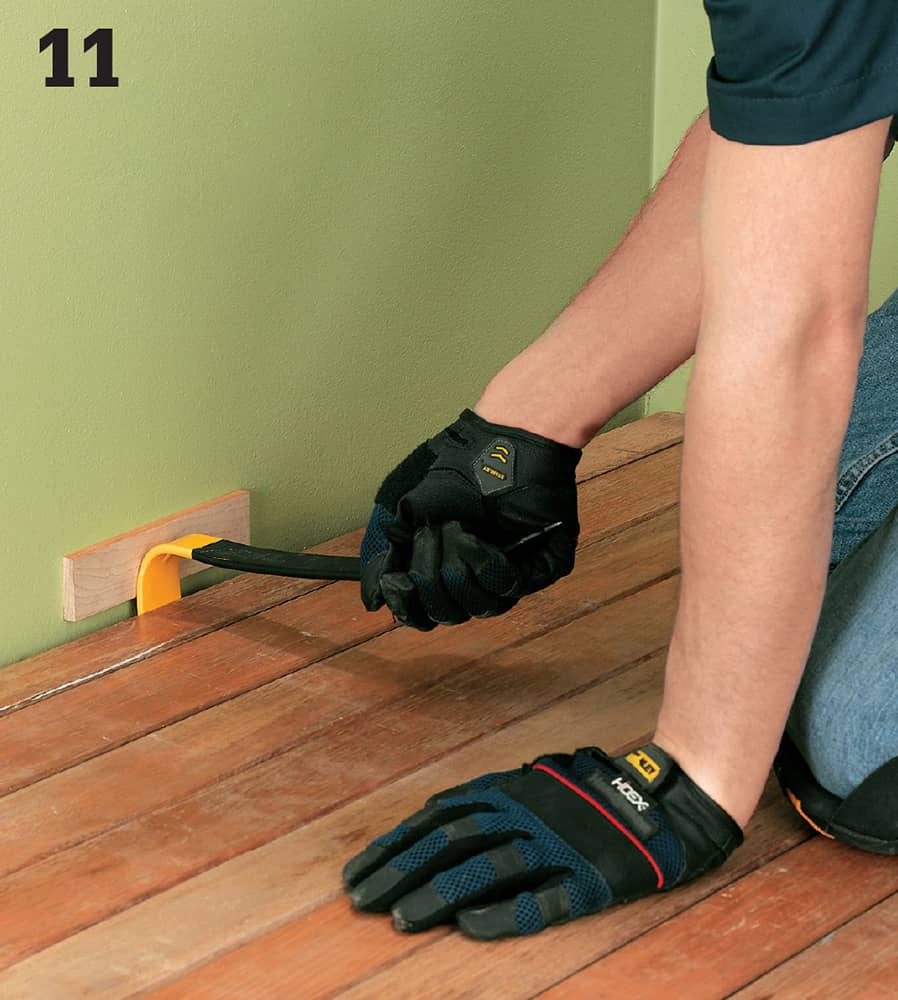
Rip final-row planks to the width necessary to fit them between the next-to-last row of planks and the wall, leaving an expansion gap of between 1/4" and 1/2". Pull the plank into place with a pry bar, and then face-nail using the same process you used on the first row.
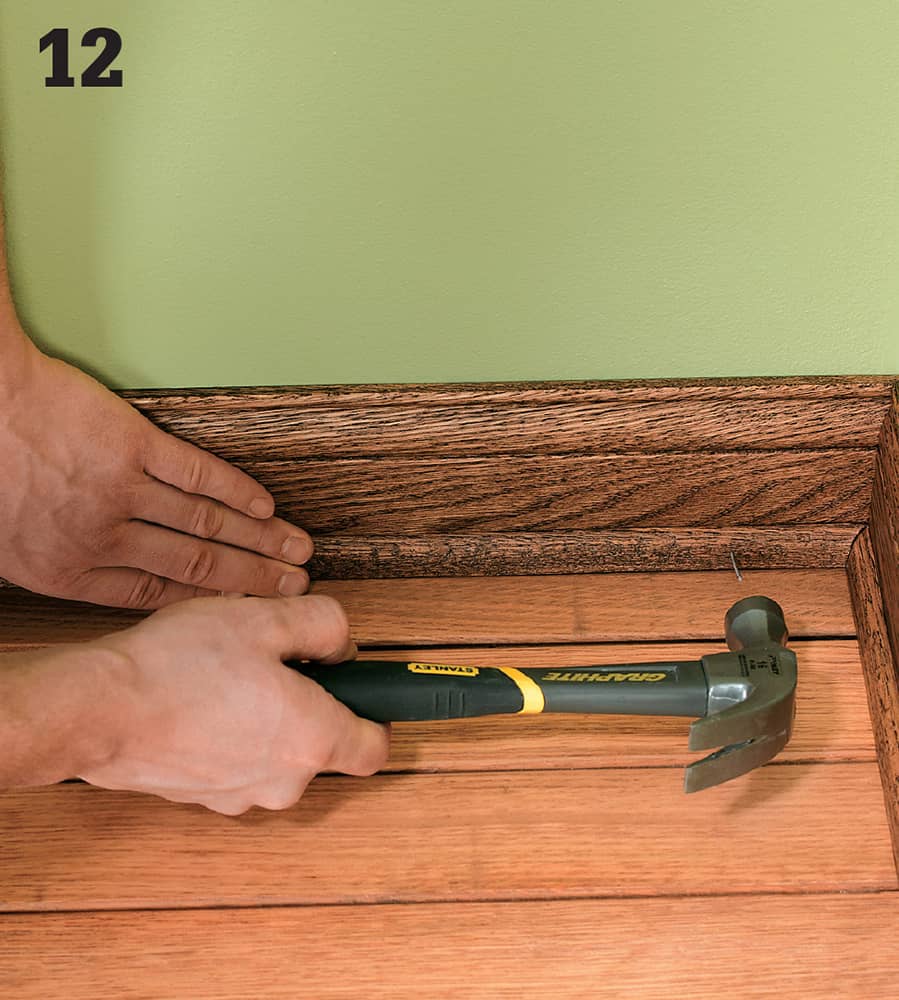
Sand and finish the floor as desired, or leave a pre-finished or distressed surface as is. Stain or finish shoe molding as necessary, and nail it into place around perimeter of room.
 Repairing Drywall
Patching holes and concealing popped nails are common drywall repairs. Small holes can be filled directly, but larger patches must be supported with some kind of backing, such as plywood. To repair holes left by nails or screws, dimple the hole slightly with the handle of a utility knife or drywall knife and fill it with spackle or joint compound.
Use joint tape anywhere the drywall’s face paper or joint tape has torn or peeled away. Always cut away any loose drywall material, face paper, or joint tape from the damaged area, trimming back to solid drywall material.
All drywall repairs require three coats of joint compound, just like in new installations. Lightly sand your repairs before painting, or adding texture.
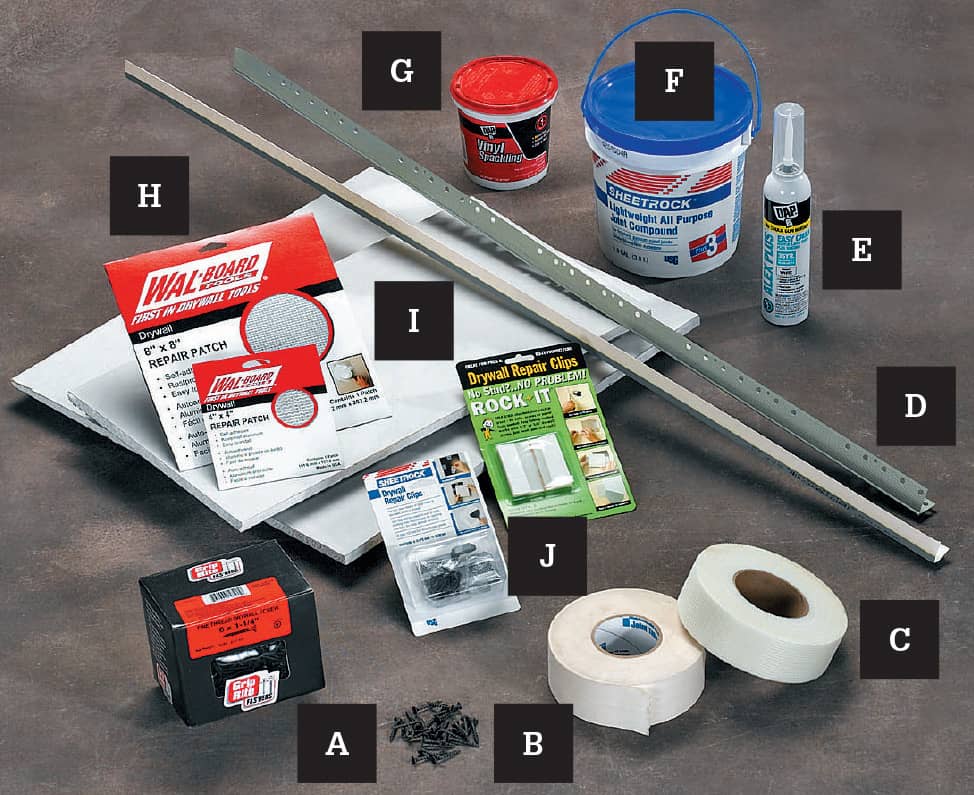
Most wallboard problems can be remedied with basic wallboard materials and specialty materials: (A) wallboard screws; (B) paper joint tape; (C) self-adhesive fiberglass mesh tape; (D) corner bead; (E) paintable latex or silicone caulk; (F) all-purpose joint compound; (G) lightweight spackling compound; (H) wallboard repair patches; (I) scraps of wallboard; (J) and wallboard repair clips.
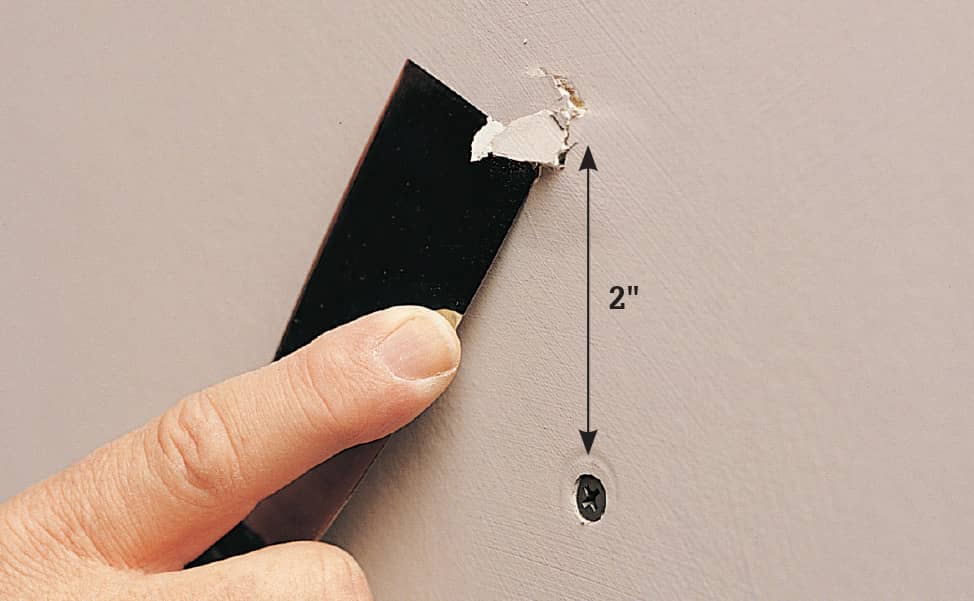
To repair a popped nail, drive a wallboard screw 2" above or below the nail, so it pulls the panel tight to the framing. Scrape away loose paint or compound, then drive the popped nail 1/16" below the surface. Apply three coats of joint compound to cover the holes.
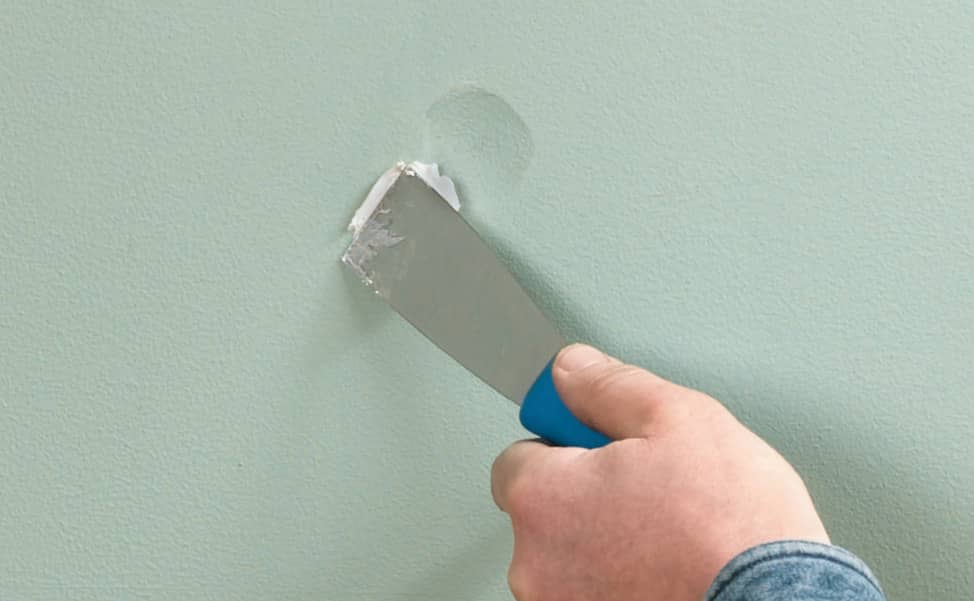
If wallboard is dented, without cracks or tears in the face paper, just fill the hole with lightweight spackling or all-purpose joint compound, let it dry, and sand it smooth.
How to Repair Cracks & Gashes
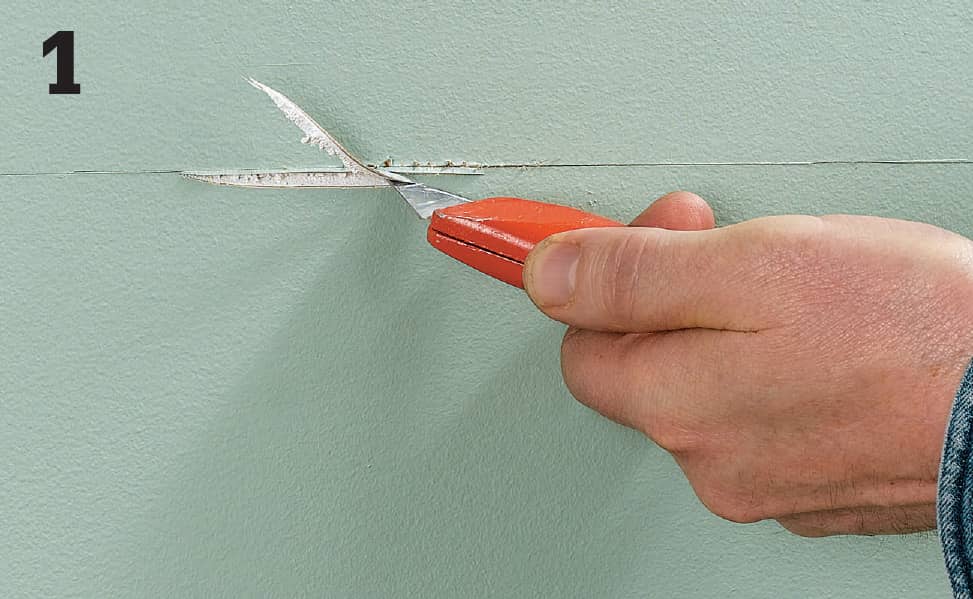
Use a utility knife to cut away loose drywall or face paper and widen the crack into a “V”; the notch will help hold the joint compound.
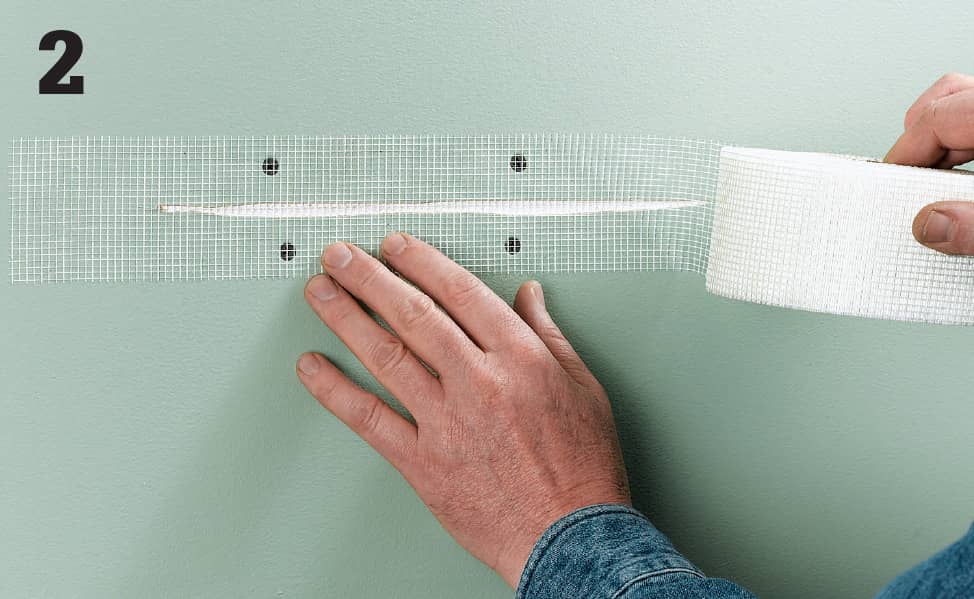
Push along the sides of the crack with your hand. If the drywall moves, secure the panel with 1 1/4" drywall screws driven into the nearest framing members. Cover the crack and screws with self-adhesive mesh tape.

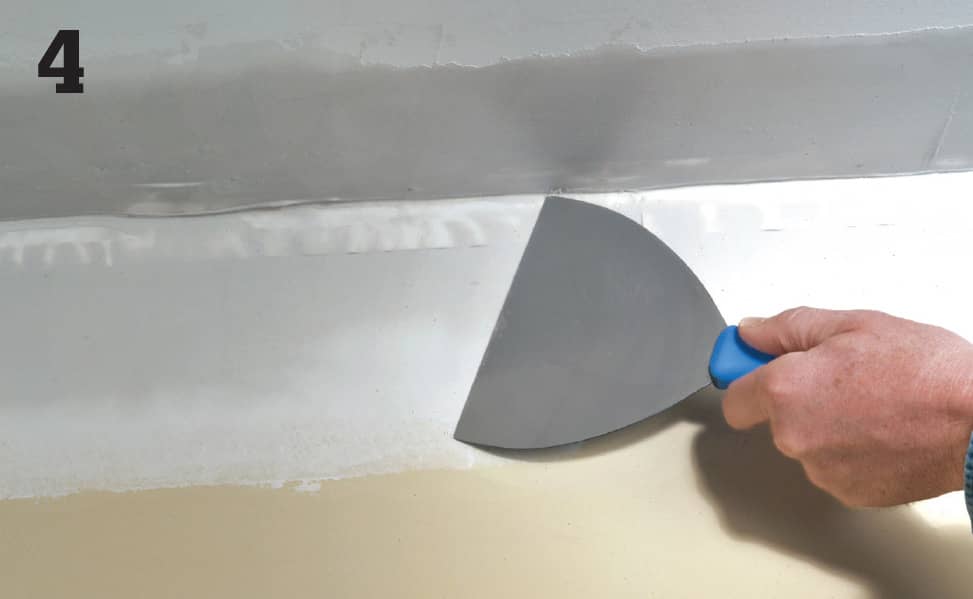
Cover the tape with compound, lightly forcing it into the mesh, then smooth it off, leaving just enough to conceal the tape. Add two more coats, in successively broader and thinner coats to blend the patch into the surrounding area.
For cracks at corners or ceilings, cut through the existing seam and cut away any loose drywall material or tape, then apply a new length of tape or inside-corner bead and two coats of joint compound.
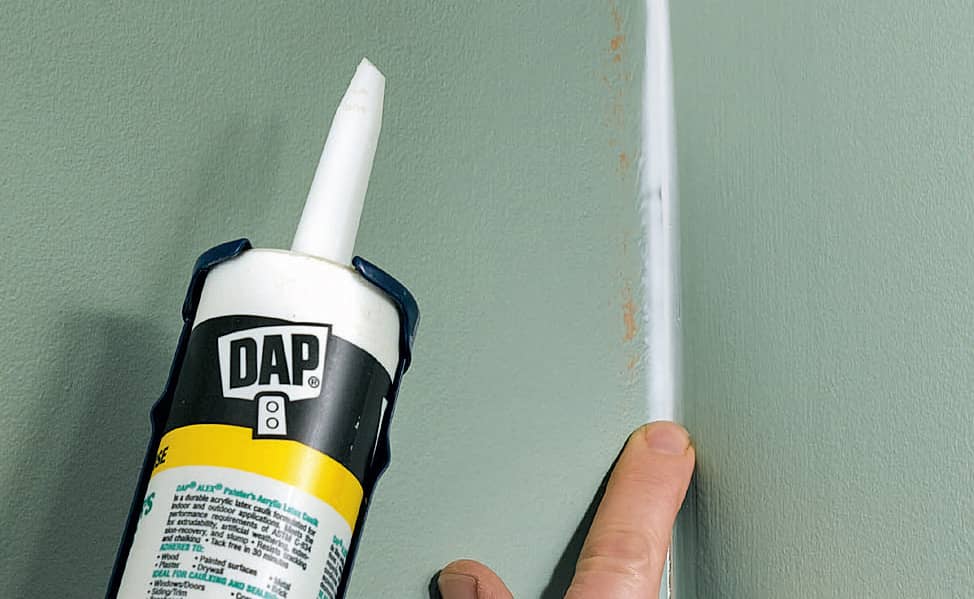
Variation: For small cracks at corners, apply a thin bead of paintable latex or silicone caulk over the crack, then use your finger to smooth the caulk into the corner.
How to Patch Small Holes in Drywall
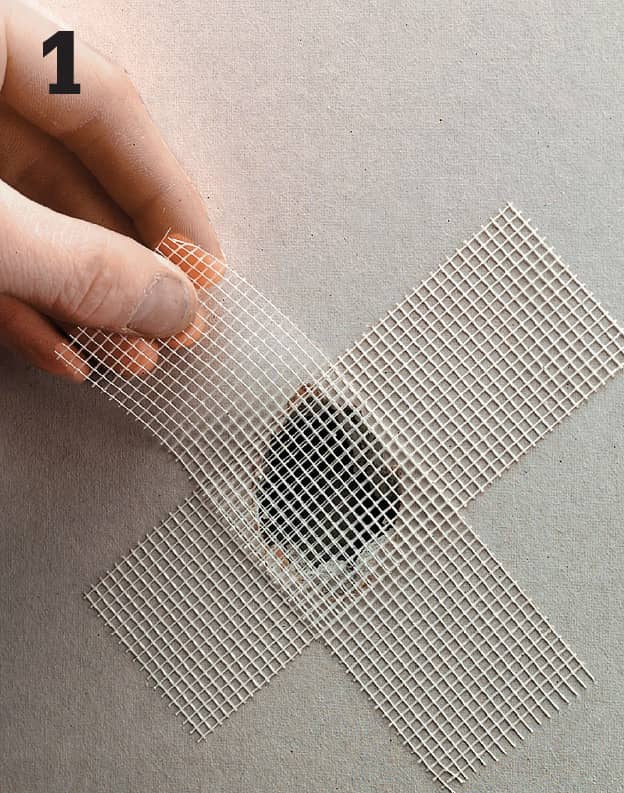
Trim away any broken drywall, face paper, or joint tape around the hole, using a utility knife. Cover the hole with crossed strips of self-adhesive mesh tape.
Cover the tape with all-purpose joint compound, lightly forcing it into the mesh, then smooth it off, leaving just enough to conceal the tape.
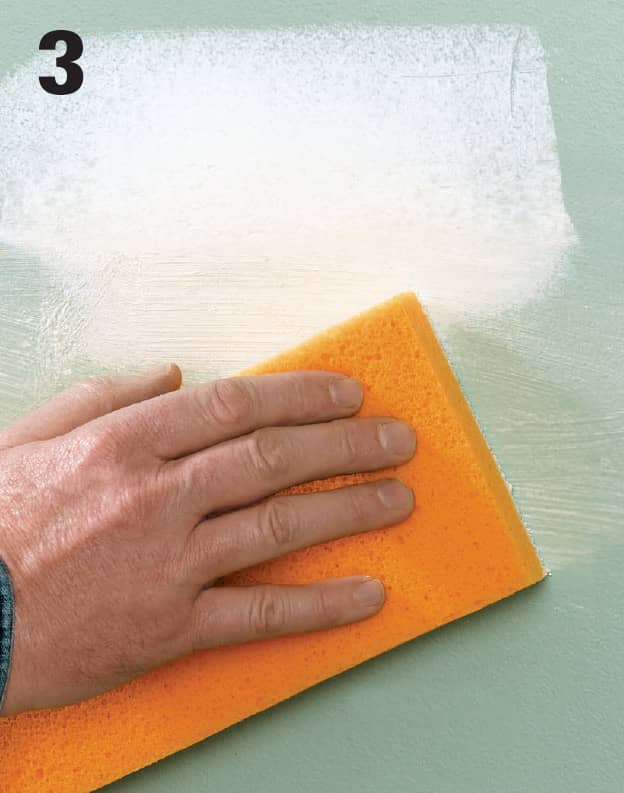
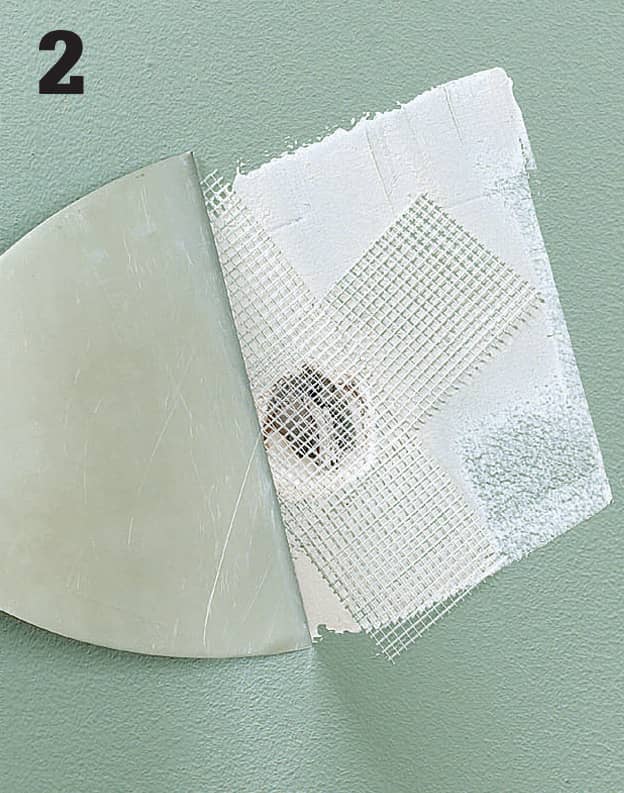
Add two more coats of compound in successively broader and thinner coats to blend the patch into the surrounding area. Use a drywall wet sander to smooth the repair area.
Other Options for Patching Small Holes in Drywall
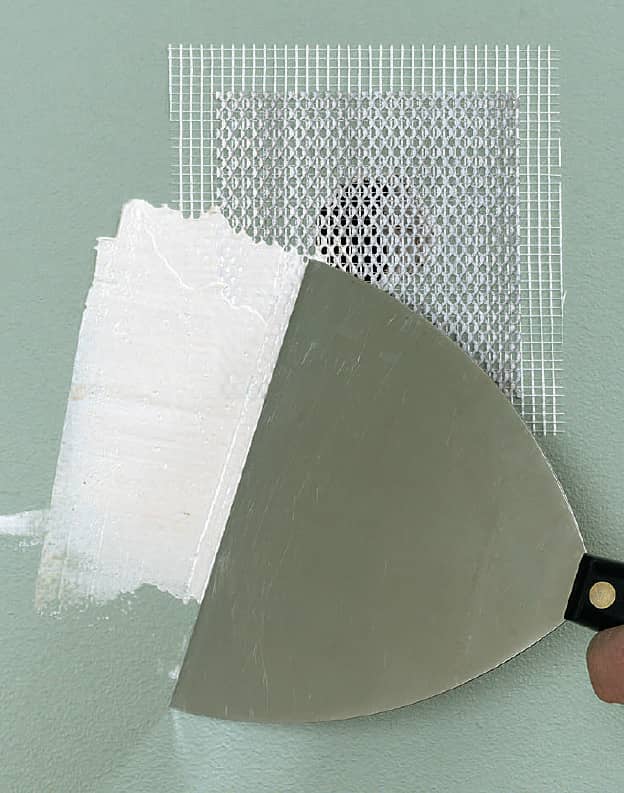
Drywall repair patches: Cover the damaged area with the self-adhesive patch; the thin metal plate provides support and the fiberglass mesh helps hold the joint compound.
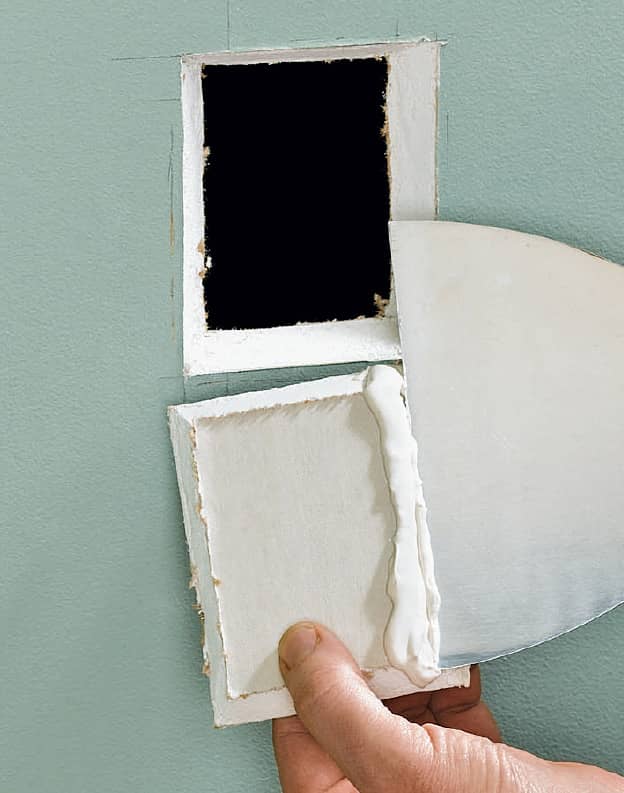
Beveled drywall patch: Bevel the edges of the hole with a drywall saw, then cut a drywall patch to fit. Trim the beveled patch until it fits tight and flush with the panel surface. Apply plenty of compound to the beveled edges, then push the patch into the hole. Finish with paper tape and three coats of compound.
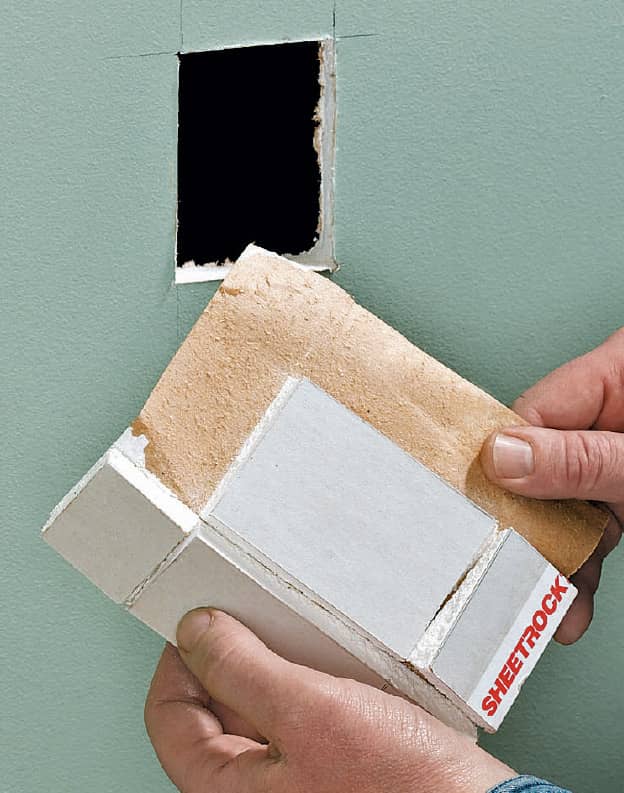
Drywall paper-flange patch: Cut a drywall patch a couple inches larger than the hole. Mark the hole on the backside of the patch, then score and snap along the lines. Remove the waste material, keeping the face paper “flange” intact. Apply compound around the hole, insert the patch, and embed the flange into the compound. Finish with two additional coats.
How to Patch Large Holes in Drywall
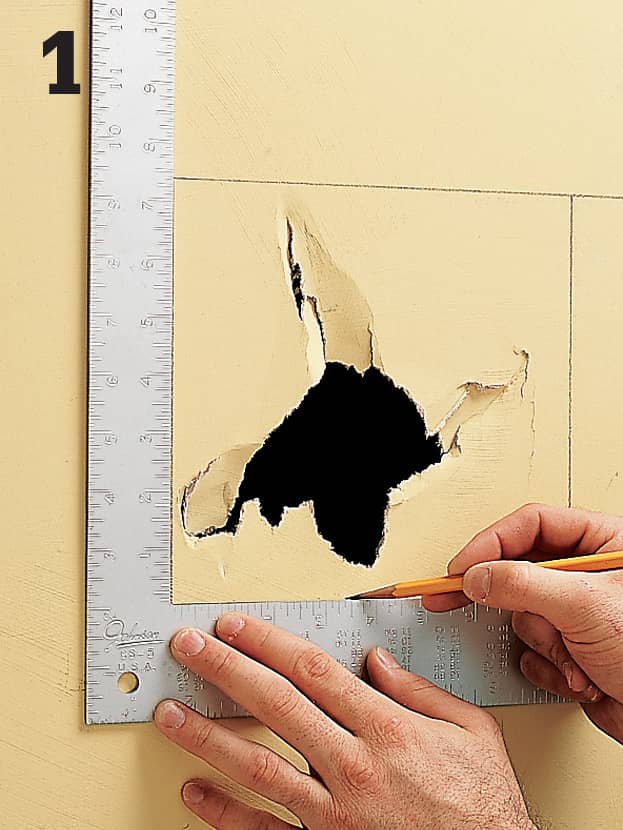
Outline the damaged area, using a framing square. (Cutting four right angles makes it easier to measure and cut the patch.) Use a drywall saw to cut along the outline.
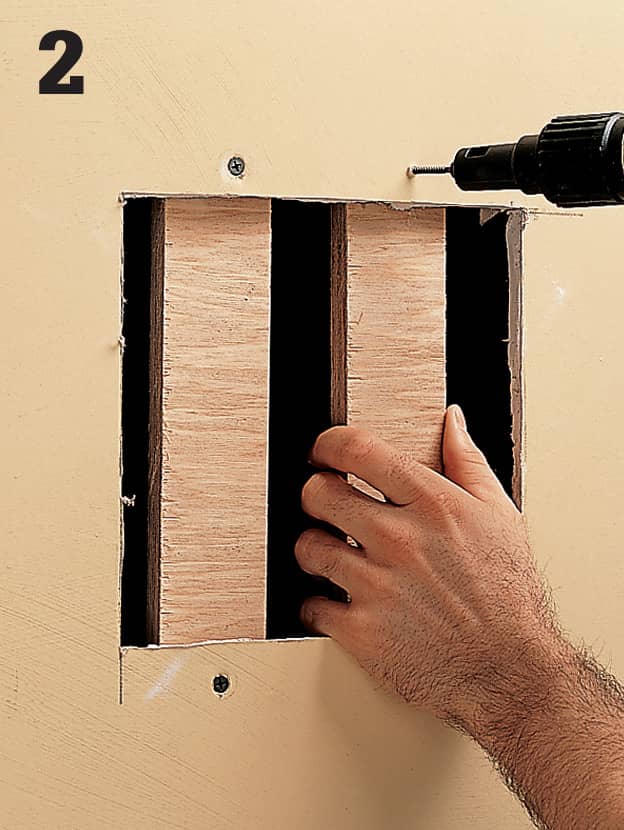
Cut plywood or lumber backer strips a few inches longer than the height of the cutout. Fasten the strips to the back side of the drywall, using 1 1/4" drywall screws.
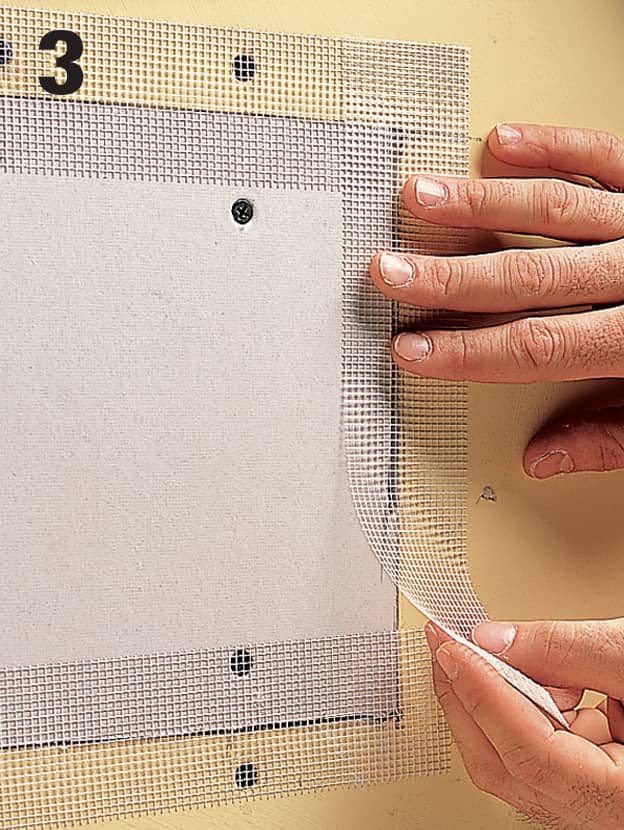
Cut a drywall patch 1/8" smaller than the cutout dimensions, and fasten it to the backer strips with screws. Apply mesh joint tape over the seams. Finish the seams with three coats of compound.
How to Patch Large Holes with Repair Clips
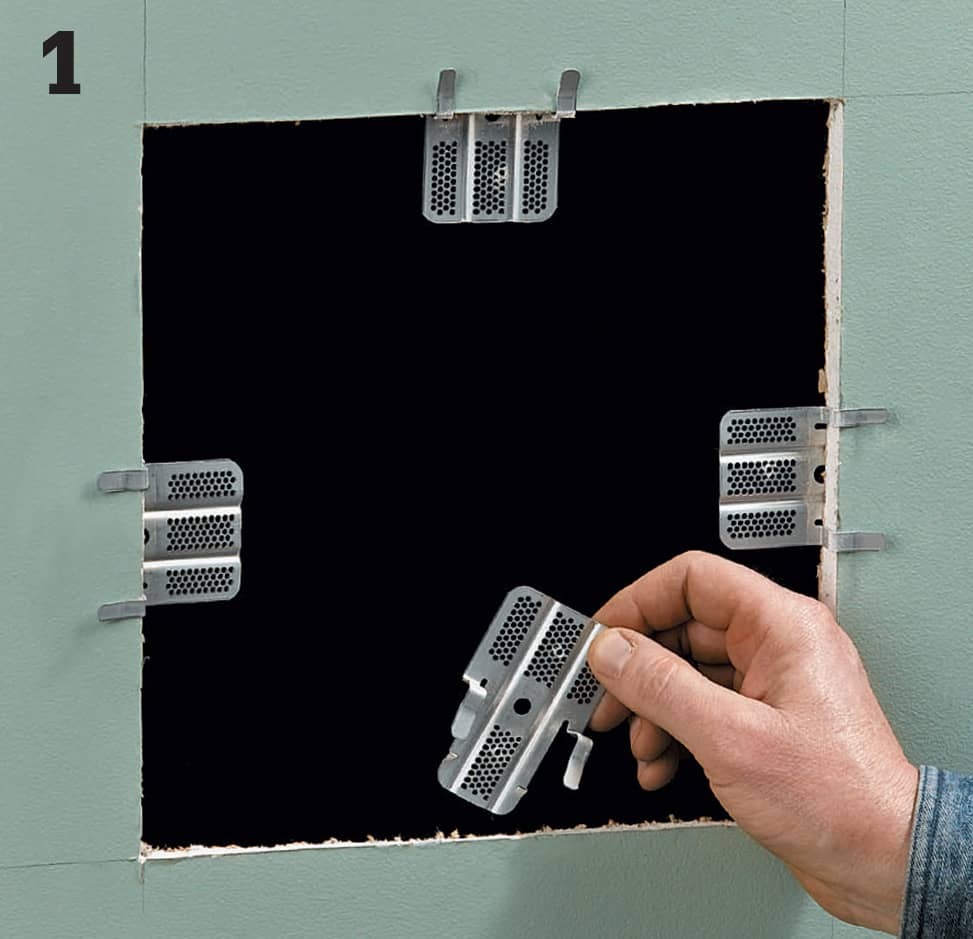
Cut out the damaged area, using a drywall saw. Center one repair clip on each edge of the hole. Using the provided drywall screws, drive one screw through the wall and into the clips; position the screws from the edge and centered between the clip’s tabs.
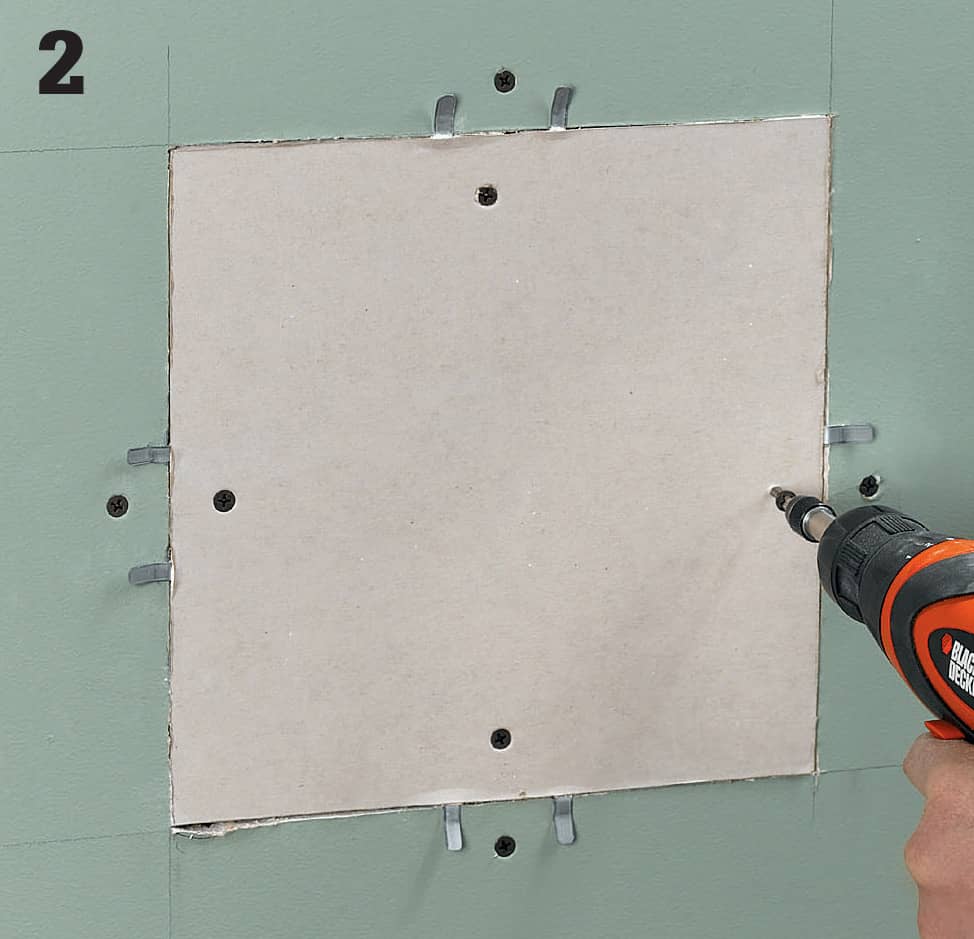
Cut a new drywall patch to fit in the hole. Fasten the patch to the clips, placing drywall screws adjacent to the previous screw locations and 3/4" from the edge. Remove the tabs from the clips, then finish the joints with tape and three coats of compound.
How to Patch Over a Removed Door or Window
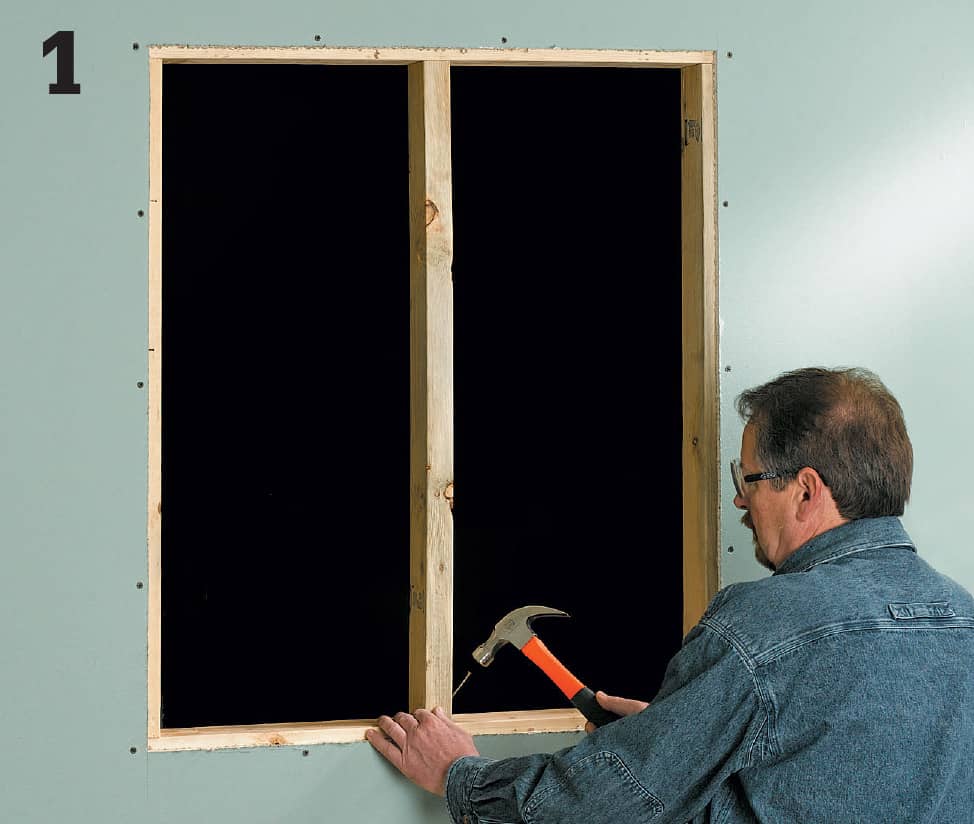
Frame the opening with studs spaced 16" O.C. and partially beneath the existing drywall—the new joints should break at the center of framing. Secure the existing drywall to the framing with screws driven every 12" around the perimeter. If the wall is insulated, fill the stud cavity with insulation.
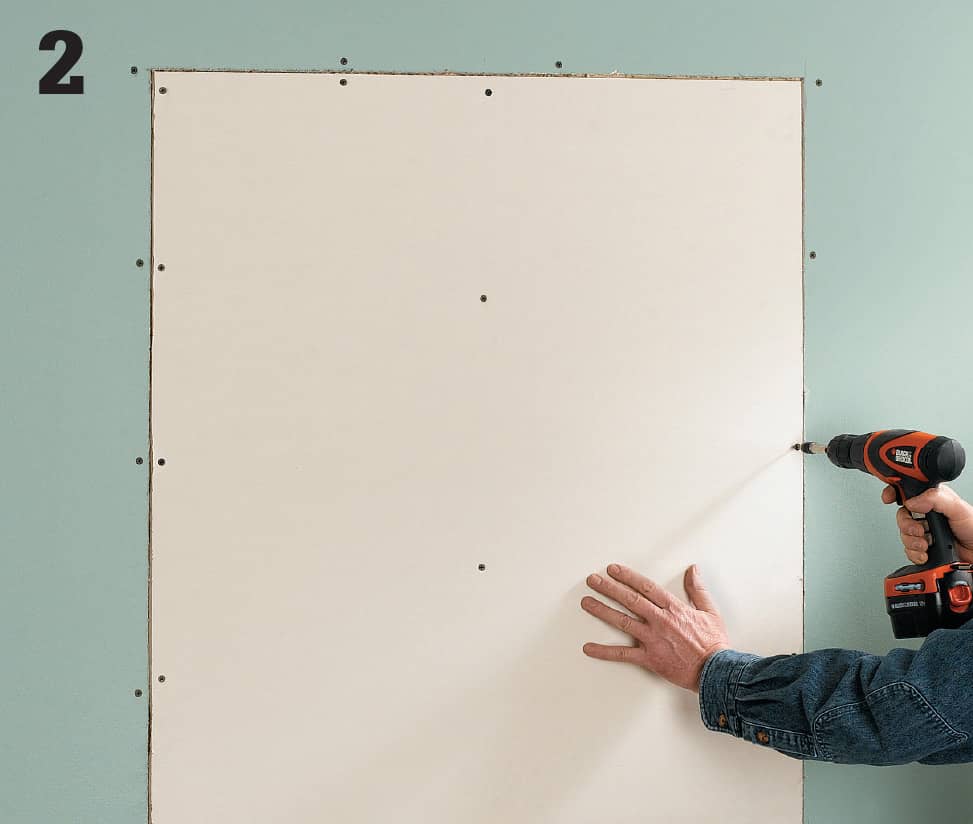
Using drywall the same thickness as the existing wall, cut the patch piece about 1/4" shorter than the opening. Position the patch against the framing so there is a 1/8" joint around the perimeter, and fasten in place with drywall screws every 12". Finish the butt joints with paper tape and three coats of compound.
How to Repair Metal Corner Bead
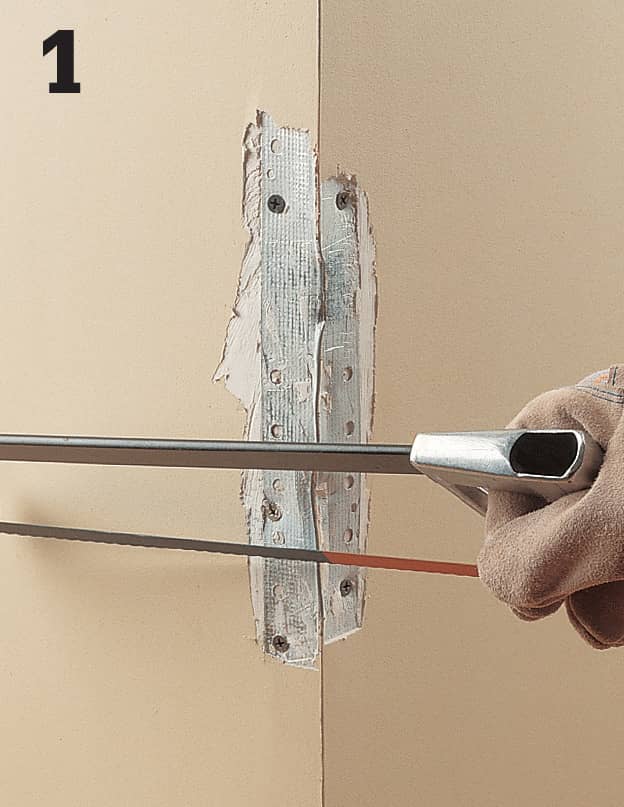
Secure the bead above and below the damaged area with 1 1/4" drywall screws. To remove the damaged section, cut through the spine and then the flanges, using a hacksaw held parallel to the floor. Remove the damaged section, and scrape away any loose drywall and compound.
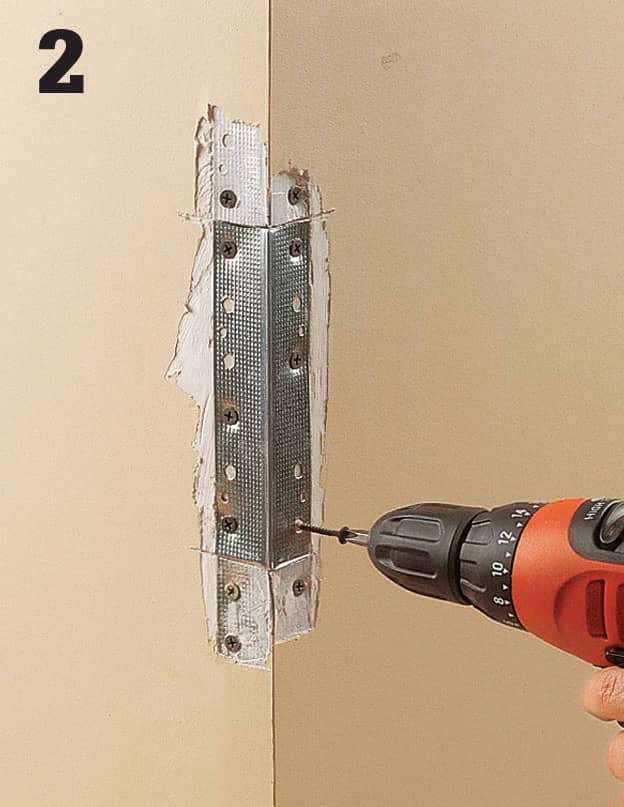
Cut a new corner bead to fit the opening exactly, then align the spine perfectly with the existing piece and secure with drywall screws driven 1/4" from the flange edge; alternate sides with each screw to keep the piece straight.
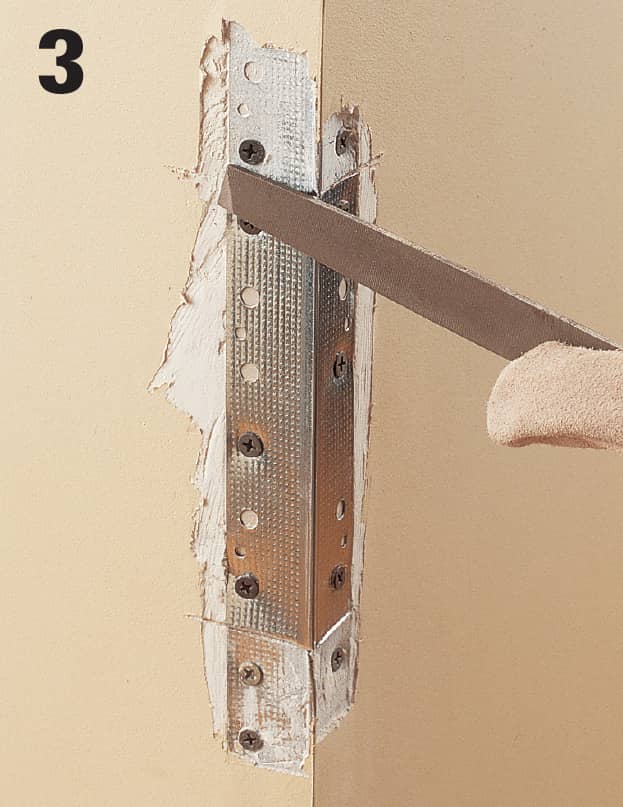
File the seams with a fine metal file to ensure a smooth transition between pieces. If you can’t easily smooth the seams, cut a new replacement piece and start over. Hide the repair with three coats of drywall compound.
 Repairing Plaster
Plaster walls are created by building up layers of plaster to form a hard, durable wall surface. Behind the plaster itself is a gridlike layer of wood, metal, or rock lath that holds the plaster in place. Keys, formed when the base plaster is squeezed through the lath, hold the dried plaster to the ceiling or walls.
Before you begin any plaster repair, make sure the surrounding area is in good shape. If the lath is deteriorated or the plaster is soft, call a professional.
Use a latex bonding liquid to ensure a good bond and a tight, crack-free patch. Bonding liquid also eliminates the need to wet the plaster and lath to prevent premature drying and shrinkage, which could ruin the repair.
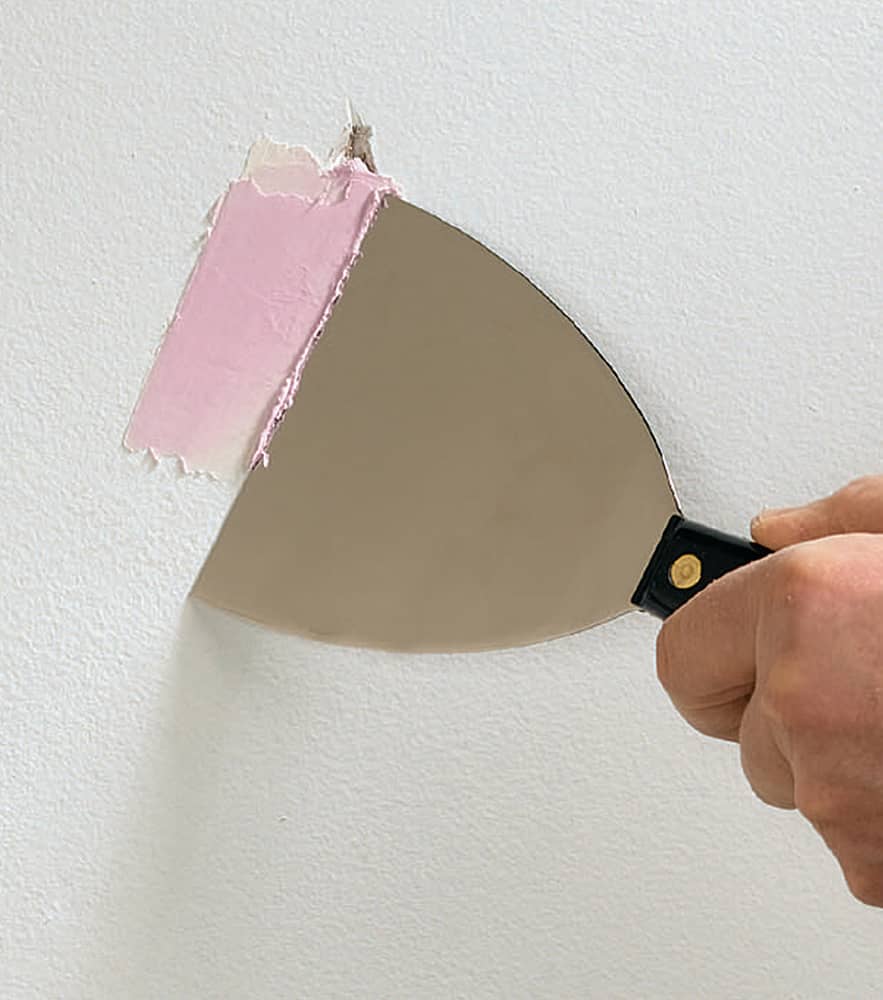
Spackle is used to conceal cracks, gashes, and small holes in plaster. Some new spackling compounds start out pink and dry white so you can see when they’re ready to be sanded and painted. Use lightweight spackle for low-shrinkage and one-application fills.
How to Fill Dents & Small Holes in Plaster
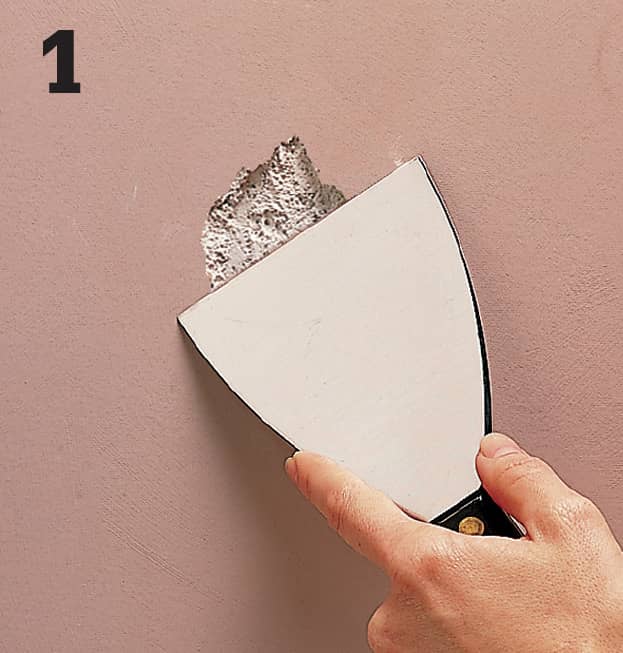
Scrape or sand away any loose plaster or peeling paint to establish a solid base for the new plaster.
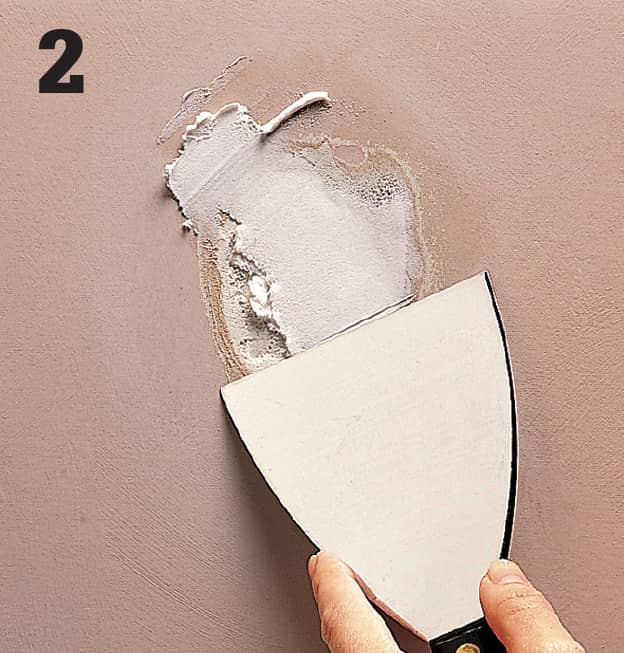
Fill the hole with lightweight spackle. Apply the spackle with the smallest knife that will span the damaged area. Let the spackle dry, following the manufacturer’s instructions.
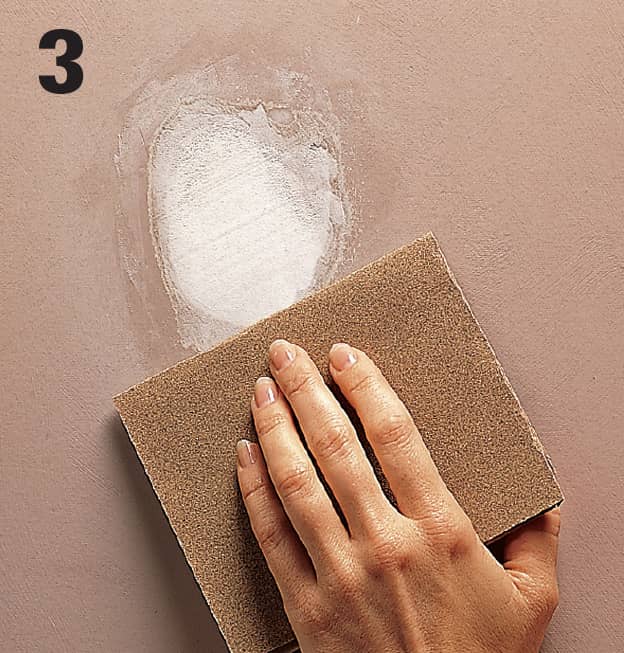
Sand the patch lightly with 150-grit production sandpaper. Wipe the dust away with a clean cloth, then prime and paint the area, feathering the paint to blend the edges.
How to Patch Large Holes in Plaster
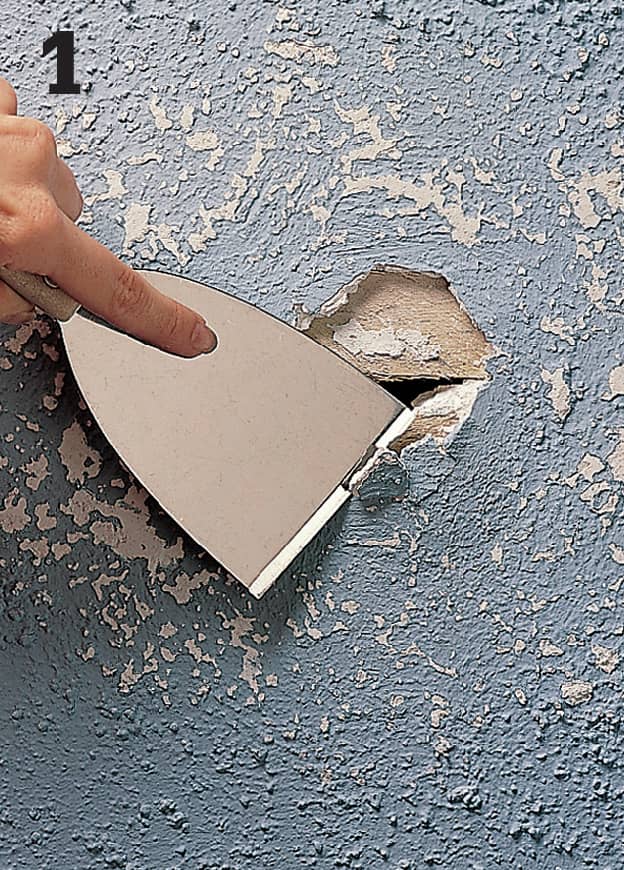
Sand or scrape any texture or loose paint from the area around the hole to create a smooth, firm edge. Use a wallboard knife to test the plaster around the edges of the damaged area. Scrape away all loose or soft plaster.
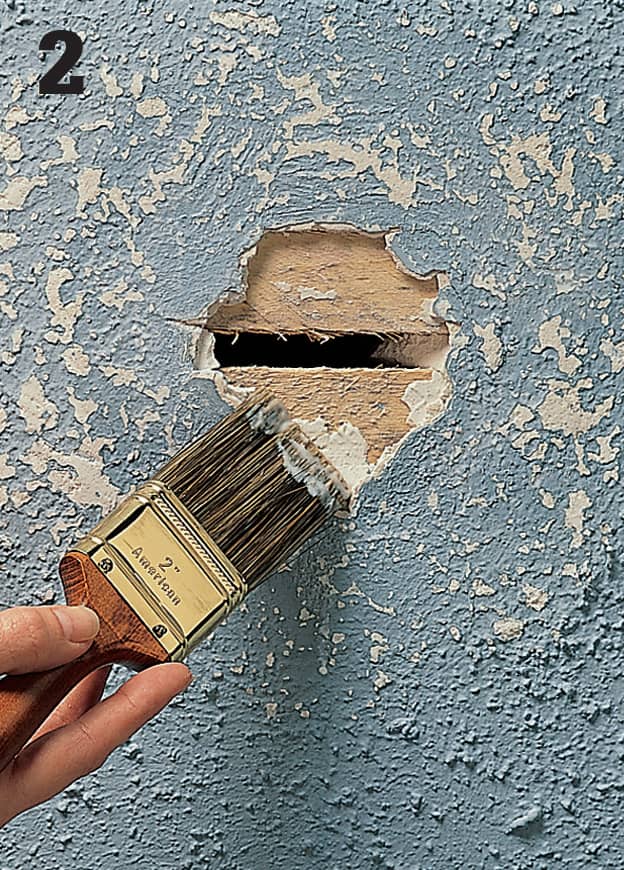
Apply latex bonding liquid liberally around the edges of the hole and over the base lath to ensure a crack-free bond between the old and new plaster.
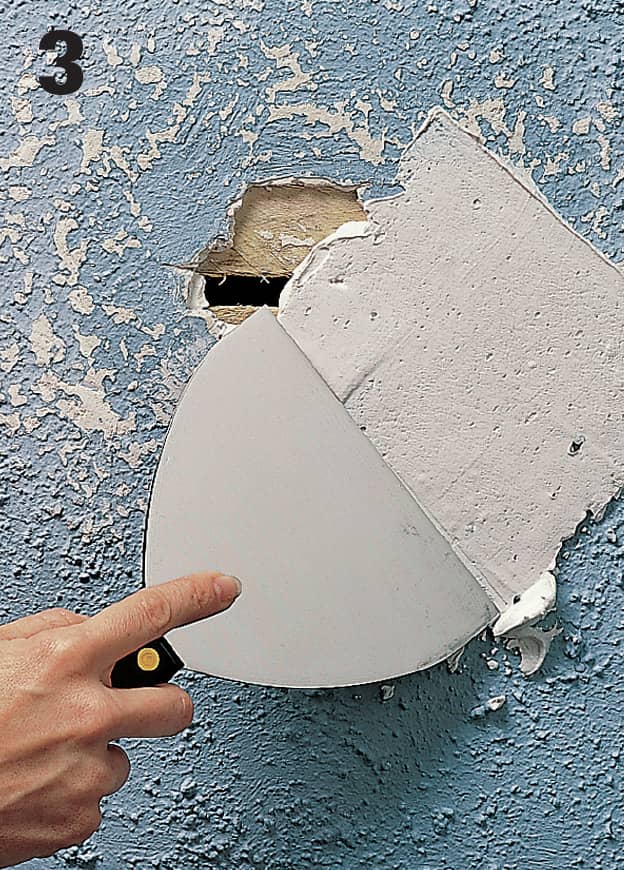
Mix patching plaster as directed by the manufacturer, and use a wallboard knife or trowel to apply it to the hole. Fill shallow holes with a single coat of plaster.
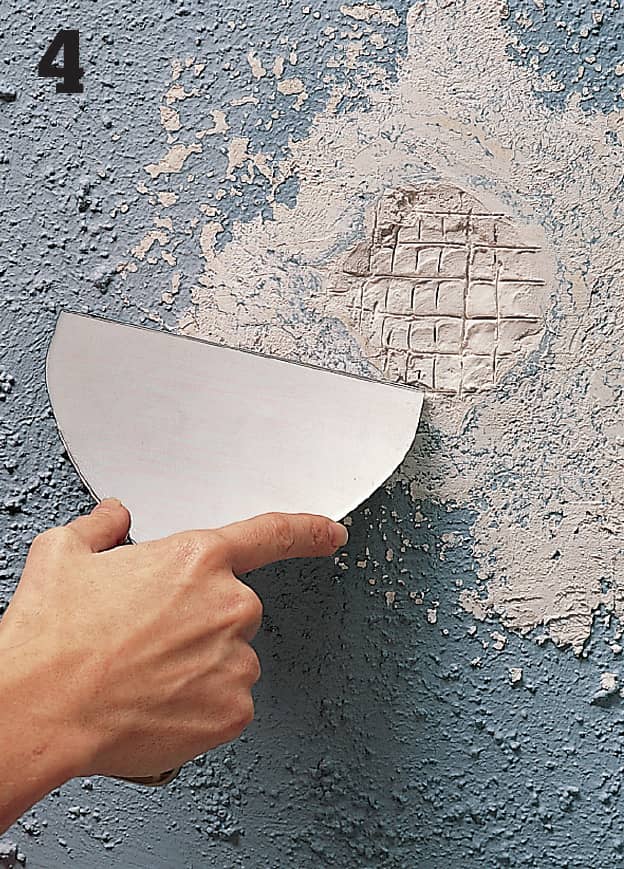
For deeper holes, apply a shallow first coat, then scratch a crosshatch pattern in the wet plaster. Let it dry, then apply second coat of plaster. Let the plaster dry, and sand it lightly.
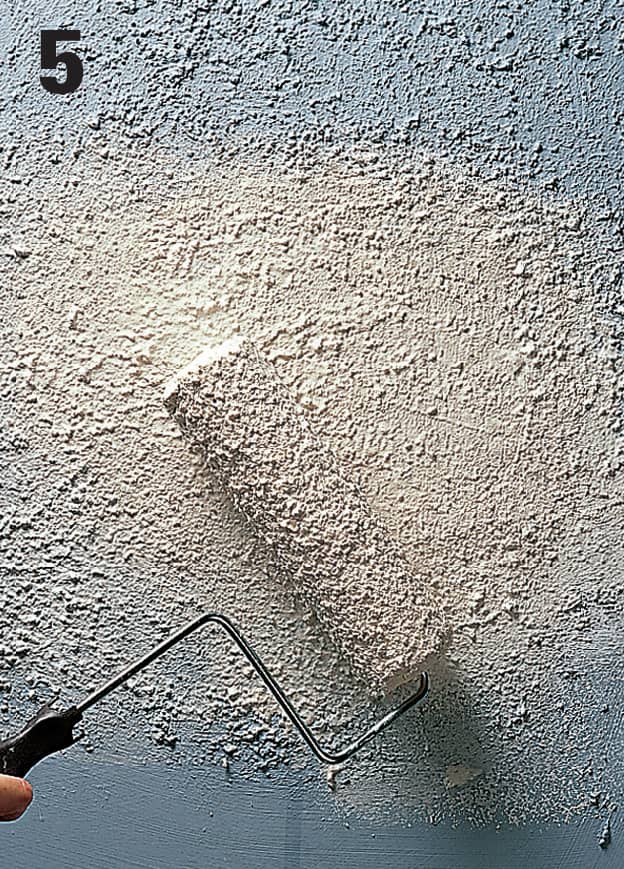
Use texture paint or wallboard compound to recreate any surface texture. Practice on heavy cardboard until you can duplicate the wall’s surface. Prime and paint the area to finish the repair.
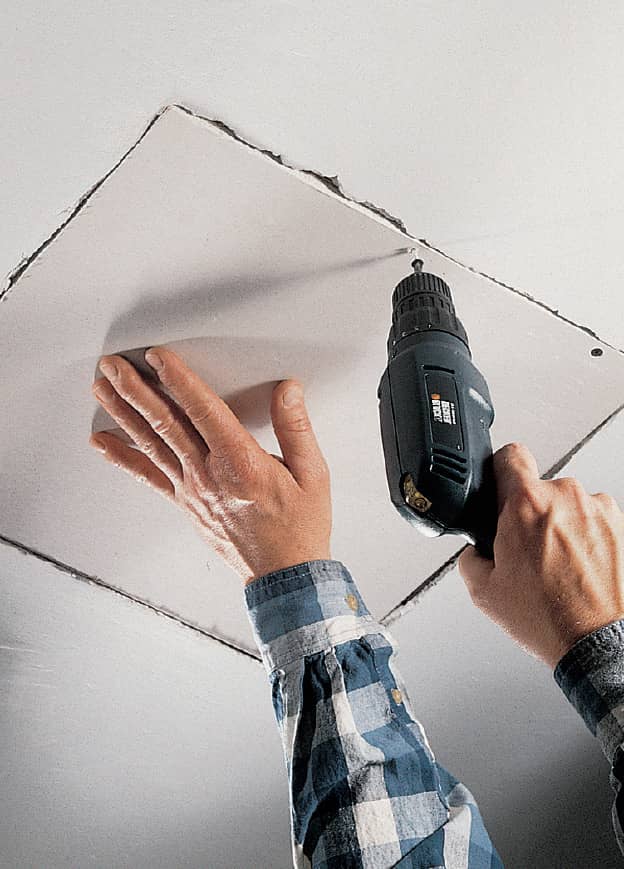
Variation: Holes in plaster can also be patched with wallboard. Score the damaged surface with a utility knife and chisel out the plaster back to the center of the closest framing members. Cut a wallboard patch to size, then secure in place with wallboard screws driven every 4" into the framing. Finish joints as you would standard wallboard joints.
How to Patch Holes Cut in Plaster
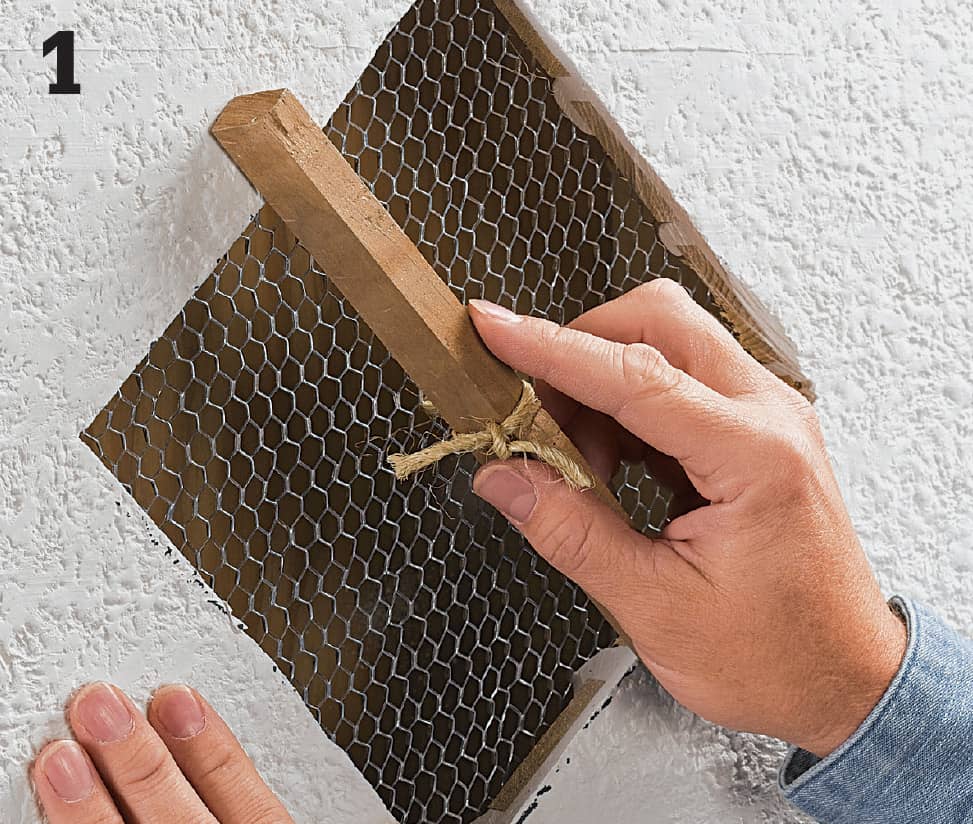
Cut a piece of wire mesh larger than the hole, using aviation snips. Tie a length of twine at the center of the mesh and insert the mesh into the wall cavity. Twist the wire around a dowel that is longer than the width of the hole, until the mesh pulls tight against the opening. Apply latex bonding liquid to the mesh and the edges of the hole.
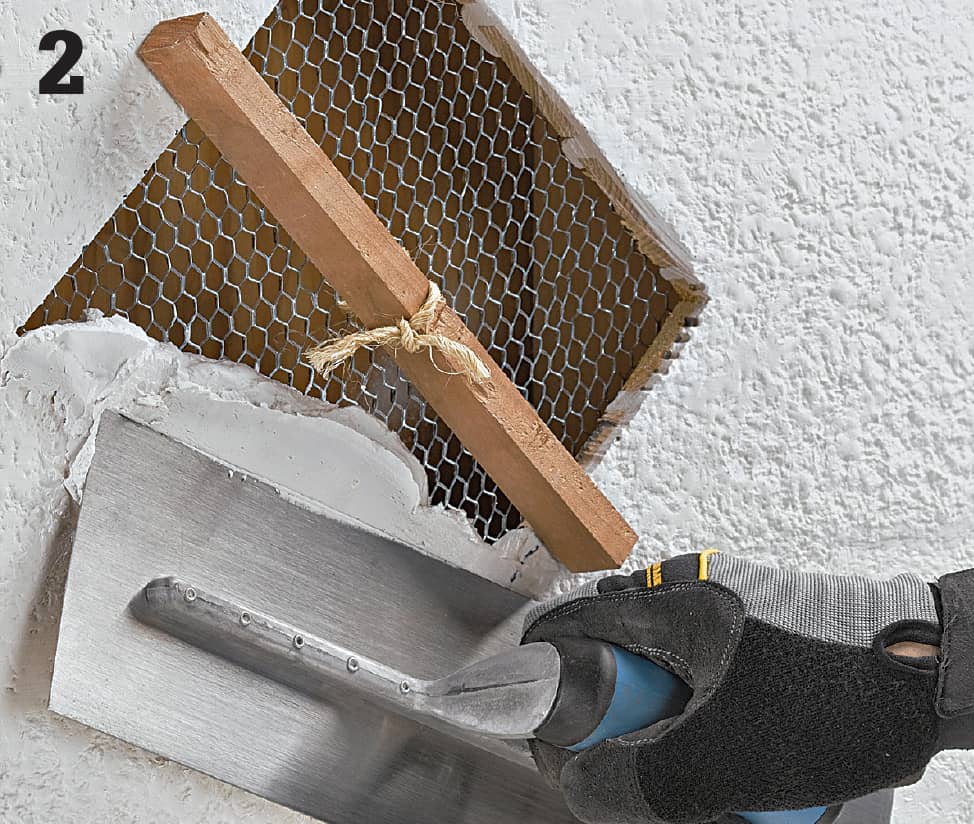
Apply a coat of patching plaster, forcing it into the mesh and covering the edges of the hole. Scratch a cross-hatch pattern in the wet plaster, then allow it to dry. Remove the dowel and trim the wire holding the mesh. Apply a second coat, filling the hole completely. Add texture. Let dry, then scrape away any excess plaster. Sand, prime, and paint the area.
How to Repair Cracks in Plaster
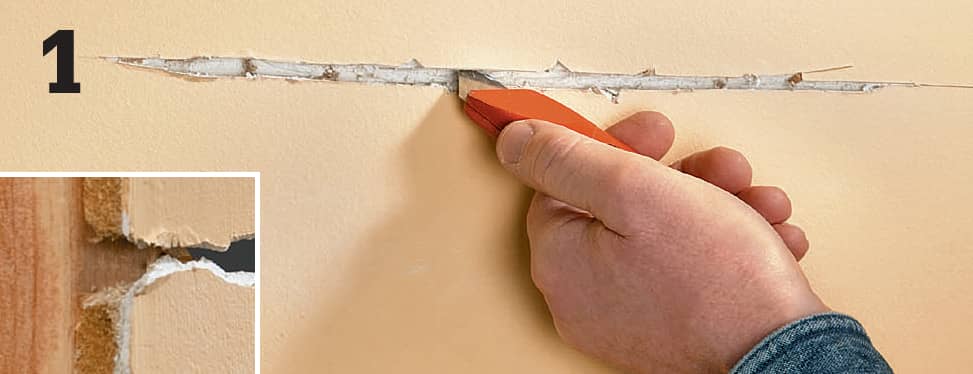
Scrape away any texture or loose plaster around the crack. Using a utility knife, cut back the edges of the crack to create a keyway (inset).
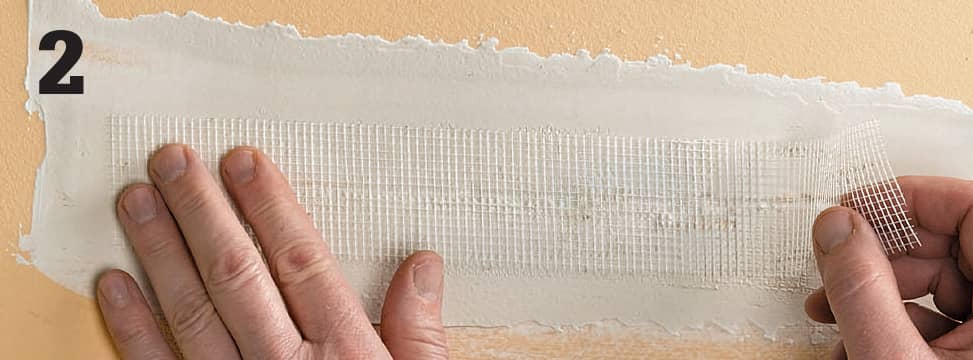
Work joint compound into the keyway using a 6" knife, then embed mesh tape into the compound, lightly forcing the compound through the mesh. Smooth the compound, leaving just enough to conceal the tape.
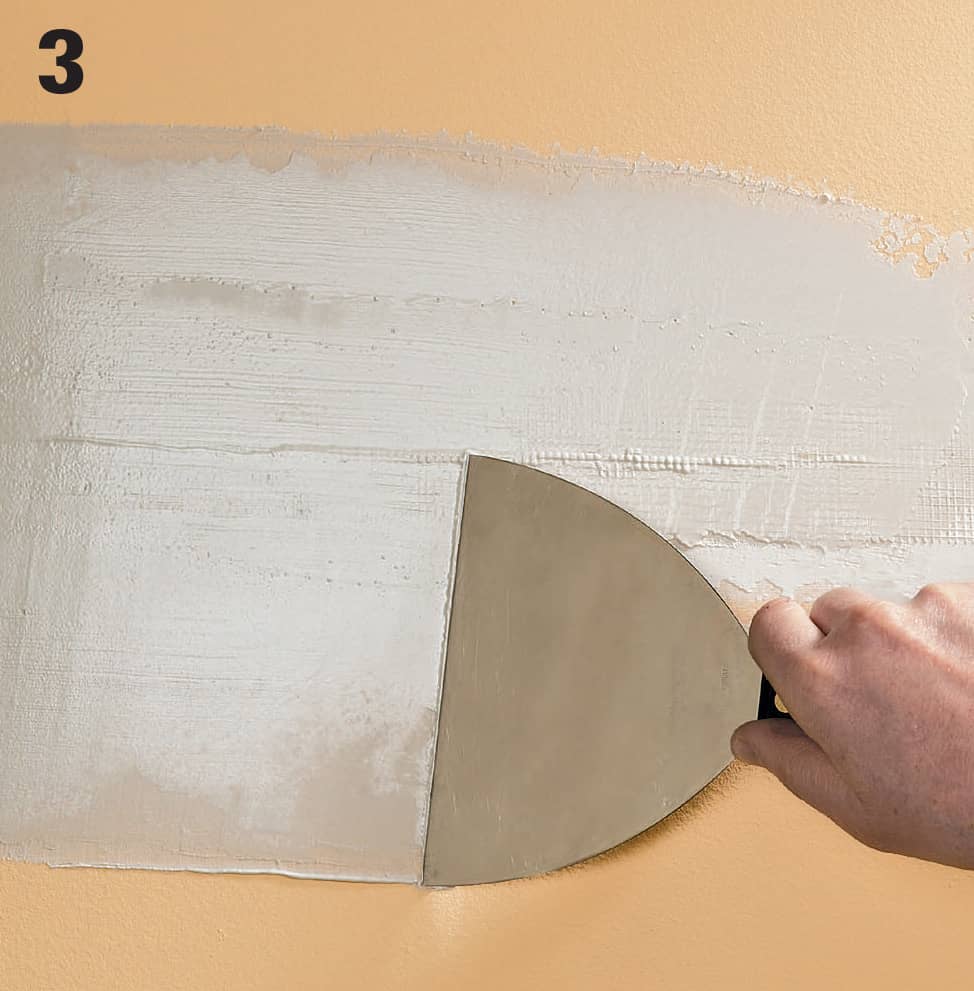
Add two more coats of compound, in successively broader and thinner coats, to blend the patch into the surrounding area. Lightly sand, then retexture the repair area to match the wall. Prime and paint it to finish the repair.
 Replacing Paneling
Despite its durability, prefinished sheet paneling occasionally requires repairs. Many scuff marks can be removed with a light coat of paste wax, and most small scratches can be disguised with a touchup stick.
Paneling manufacturers do not recommend trying to spot-sand or refinish prefinished paneling.
The most common damage to paneling are water damage and punctures. The only way to repair major damage is to replace the affected sheets.
If the paneling is more than a few years old, it may be difficult to locate matching pieces. If you can’t find any at lumber yards or building centers, try salvage yards. Buy the panels in advance so that you can condition them to the room before installing them. To condition the paneling, place it in the room, standing on its long edge. Place spacers between the sheets so air can circulate around each one. Let the paneling stand for 24 hours if it will be installed above grade, and 48 hours if it will be installed below grade.
Before you go any further, find out what’s behind the paneling. Building Codes often require that paneling be backed with wallboard. The support provided by the wallboard keeps the paneling from warping and provides an extra layer of sound protection. However, if there is wallboard behind the paneling, it may need repairs as well, particularly if you’re dealing with water damage. And removing damaged paneling may be more difficult if it’s glued to wallboard or a masonry wall. In any case, it’s best to have a clear picture of the situation before you start cutting into a wall.
Finally, turn off the electricity to the area and remove all receptacle covers and switch plates on the sheets of paneling that need to be replaced.
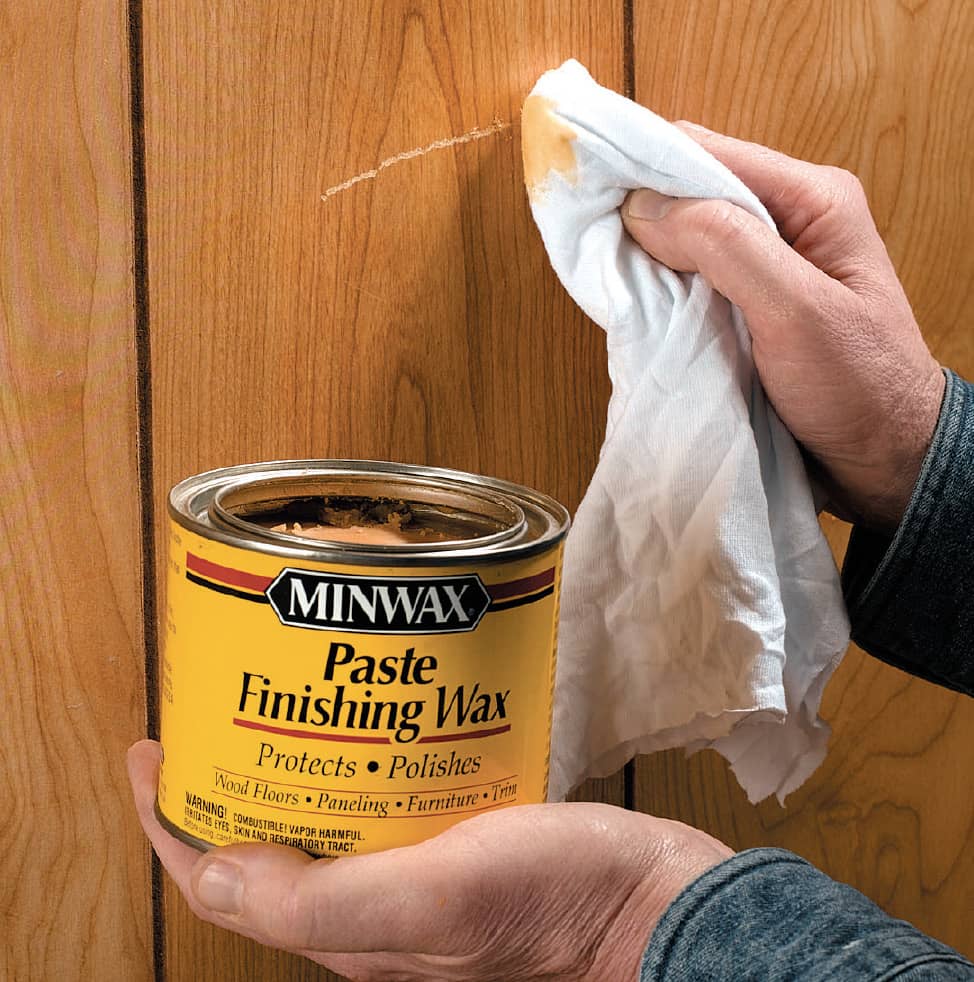
Most scuffs in paneling can be polished out using paste wax. To use, make sure the panel surface is clean and dust free, then apply a thin even coat of paste wax using a clean soft cloth. Work in small areas using a circular motion. Allow to dry until a paste becomes hazy (5 to 10 minutes), then buff with a new cloth. Apply a second coat if necessary.
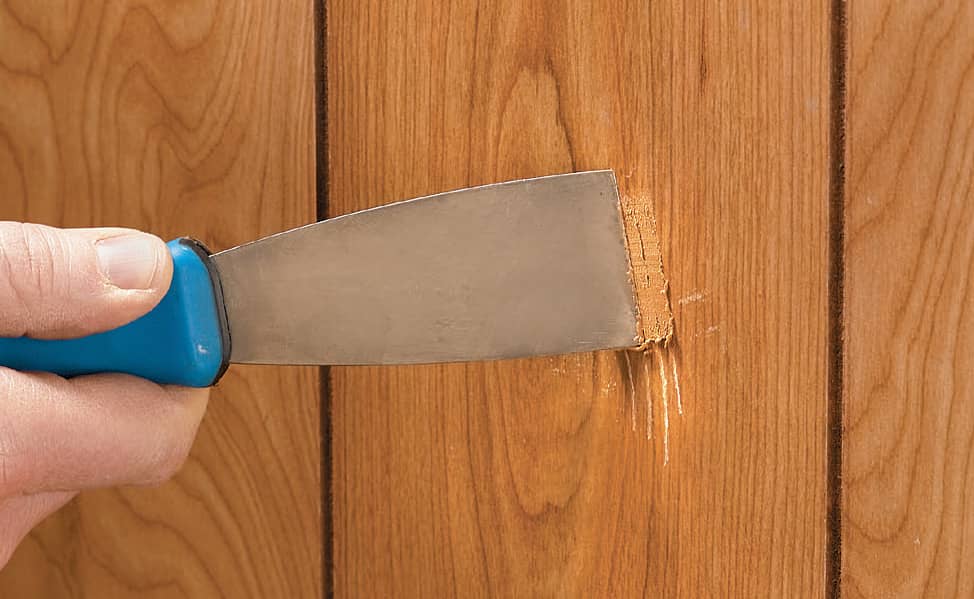
Touch-up and fill sticks can help hide most scratches in prefinished paneling. Wax touch-up sticks are like crayons—simply trace over the scratch with the stick. To use a fill stick, apply a small amount of the material into the surface and smooth it over the scratch using a flexible putty knife. Wipe away excess fill with a clean, soft cloth.
How to Replace a Strip of Paneling
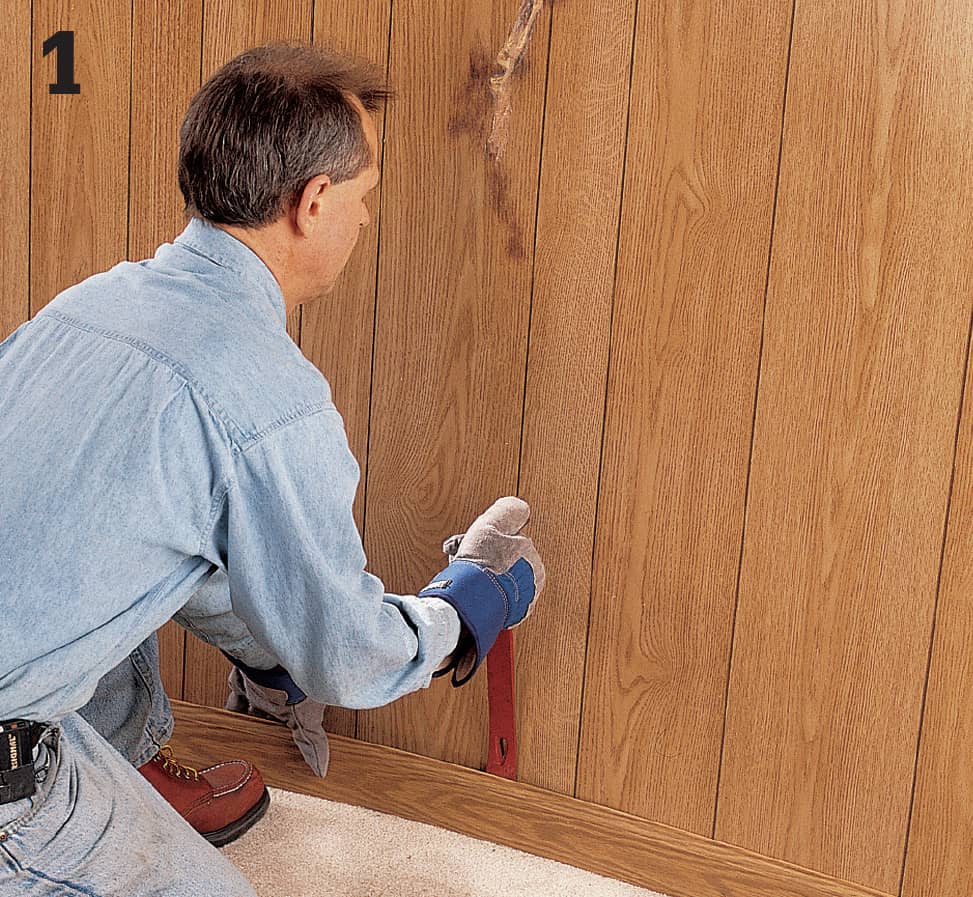
Carefully remove the baseboard and top moldings. Use a wallboard or putty knife to create a gap, then insert a pry bar and pull the trim away from the wall. Remove all the nails.
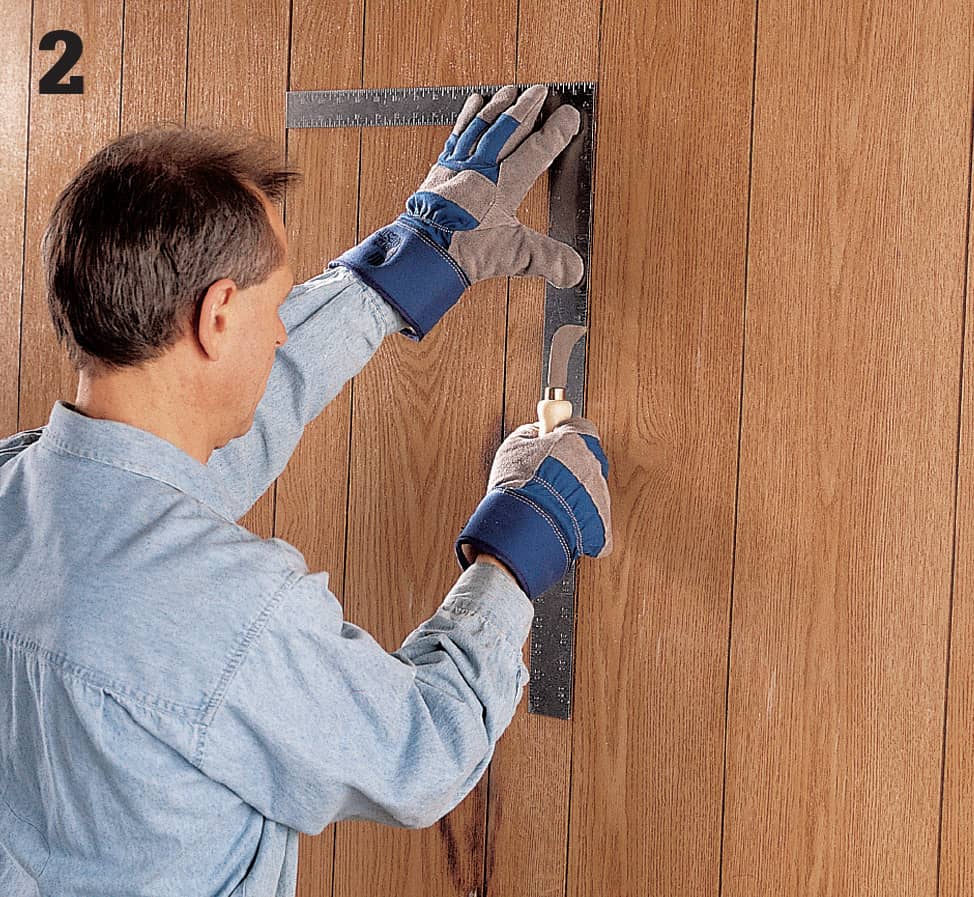
Draw a line on the panel from top to bottom, 3-in. to 4-in. from each edge of the panel. Hold a framing square along the line and cut with a linoleum knife. Using a fair amount of pressure, you should cut through the panel within two passes. If you have trouble, use a hammer and chisel to break the panel along the scored lines.
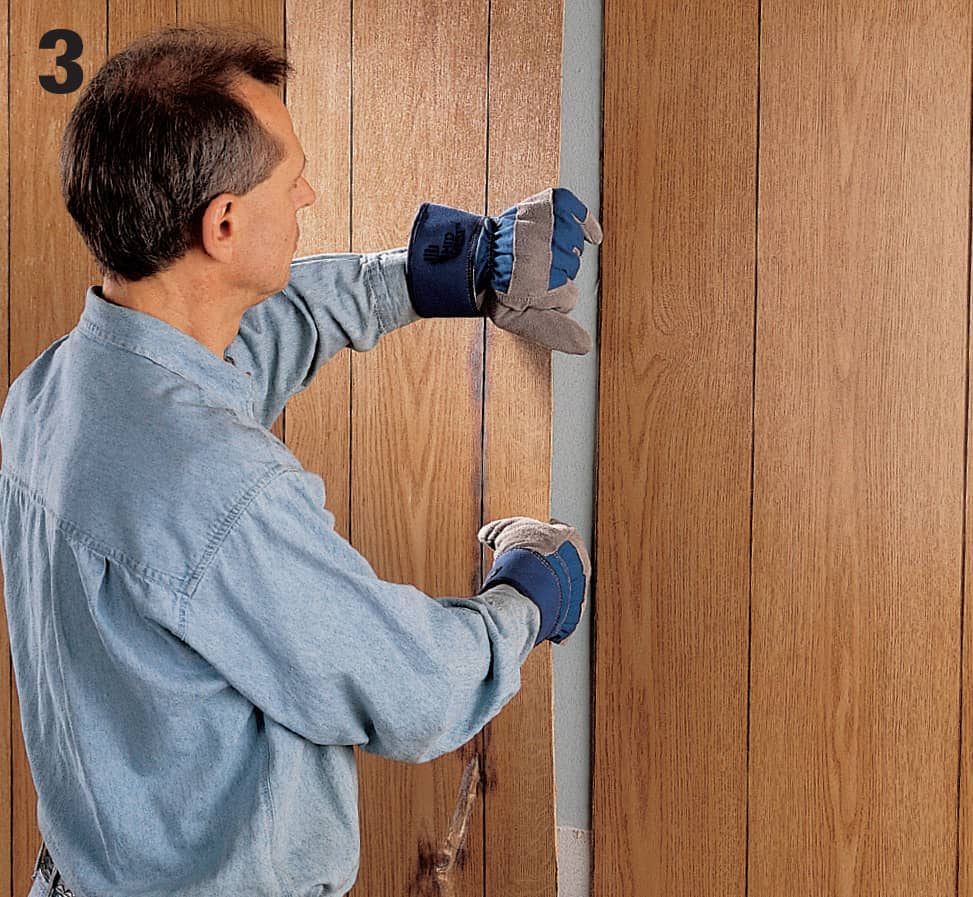
Insert a pry bar under the panel at the bottom, and pull up and away from the wall, removing nails as you go. Once the center portion of the panel is removed, scrape away any old adhesive, using a putty knife. Repair the vapor barrier if damaged; below-grade applications may require a layer of 4mil polyethylene between outside walls and paneling. Measure and cut the new panel, including any necessary cutouts, and test-fit the panel.
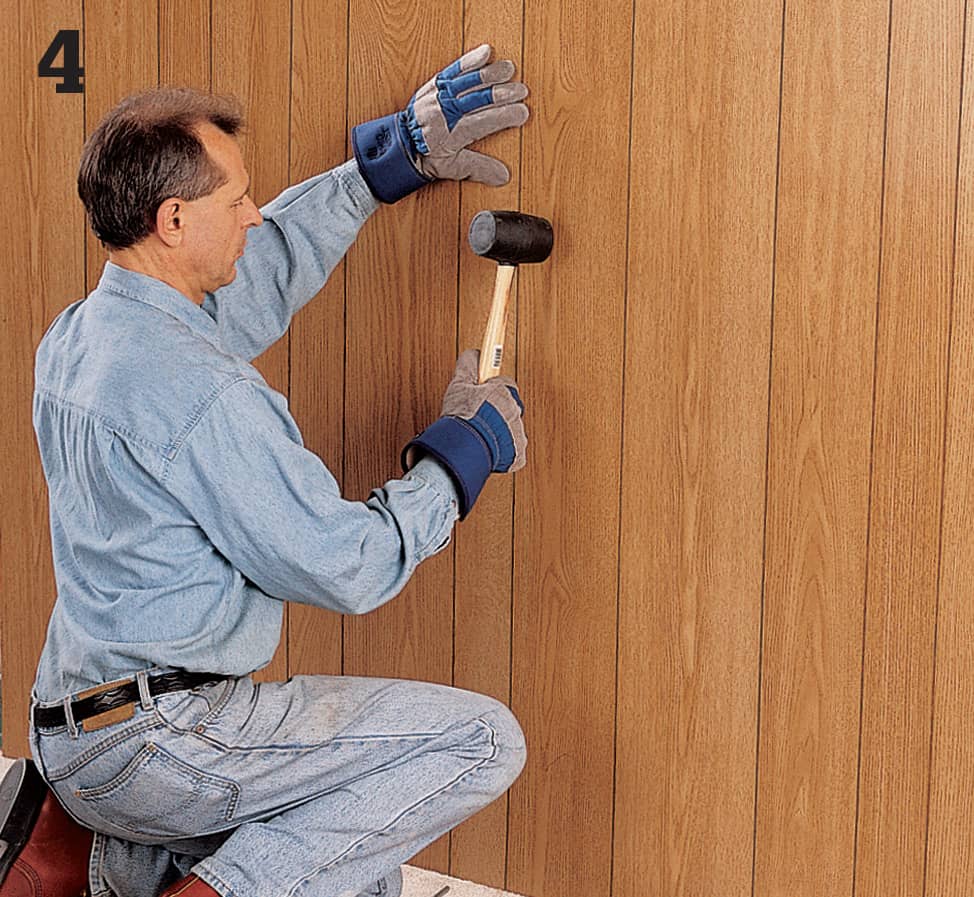
On the back of the panel, apply zigzag beads of panel adhesive from top to bottom every 16", about 2" in from each edge, and around cutouts. Tack the panel into position at the top, using color-matched paneling nails. When the adhesive has set up, press the panel to the wall and tap along stud lines with a rubber mallet, creating a tight bond between the adhesive and wall. Drive finish nails at the base of the panel to hold it while the adhesive dries. Replace all trim pieces and fill nail holes with wood filler.
 Maintaining Wall Tile
As we’ve said throughout this book, ceramic tile is durable and nearly maintenance-free, but like every other material in your house, it can fail or develop problems. The most common problem with ceramic tile involves damaged grout. Failed grout is unattractive, but the real danger is that it offers a point of entry for water. Given a chance to work its way beneath grout, water can destroy a tile base and eventually wreck an entire installation. It’s important to regrout ceramic tile as soon as you see signs of damage.
Another potential problem for tile installations is damaged caulk. In tub and shower stalls and around sinks and backsplashes, the joints between the tile and the fixtures are sealed with caulk. The caulk eventually deteriorates, leaving an entry point for water. Unless the joints are recaulked, seeping water will destroy the tile base and the wall.
In bathrooms, towel rods, soap dishes, and other accessories can work loose from walls, especially if they weren’t installed correctly or aren’t supported properly. For maximum holding power, anchor new accessories to wall studs or blocking. If no studs or blocking are available, use special fasteners, such as toggle bolts or molly bolts, to anchor the accessories directly to the surface of the underlying wall. To hold screws firmly in place in ceramic tile walls, drill pilot holes and insert plastic sleeves, which expand when screws are driven into them.
How to Regrout Wall Tile
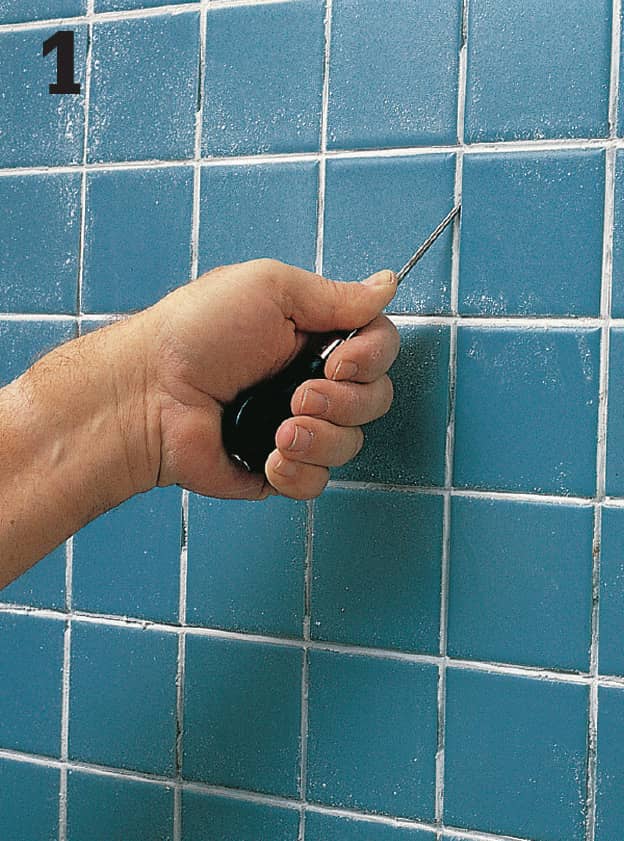
Use an awl or utility knife to scrape out the old grout completely, leaving a clean bed for the new grout.
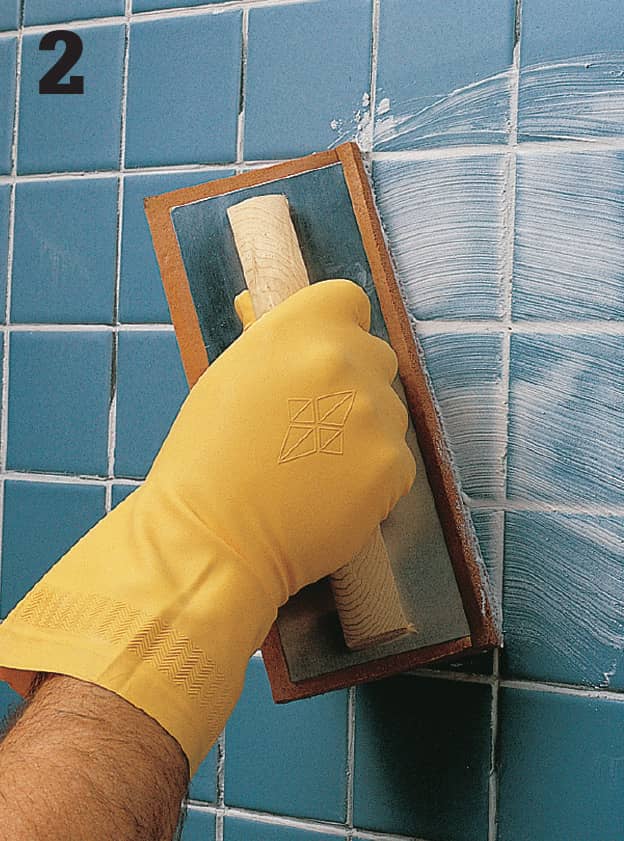
Clean and rinse the grout joints, then spread grout over the entire tile surface, using a rubber grout float or sponge. Work the grout well into the joints and let it set slightly.
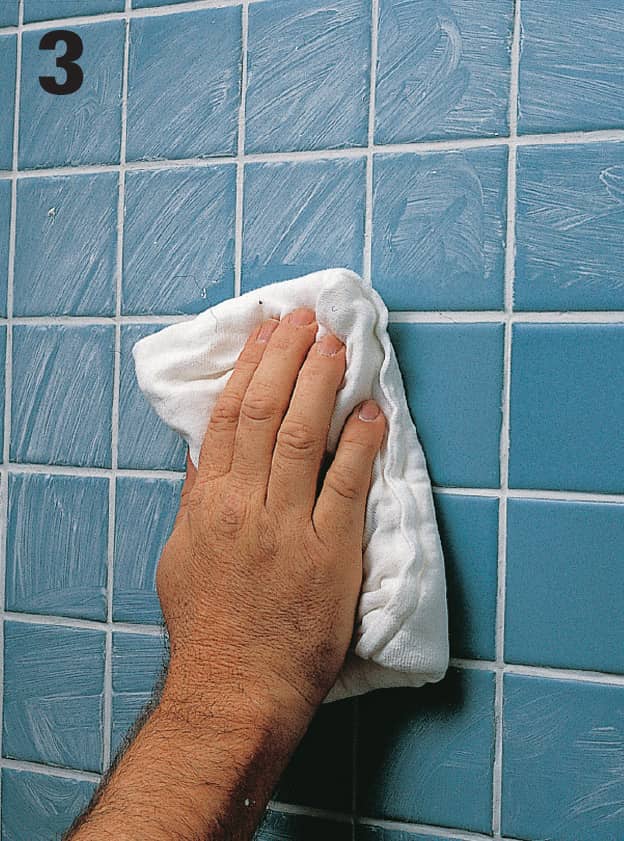
Wipe away excess grout with a damp sponge. When the grout is dry, wipe away the residue and polish the tiles with a dry cloth.
How to Recaulk a Joint
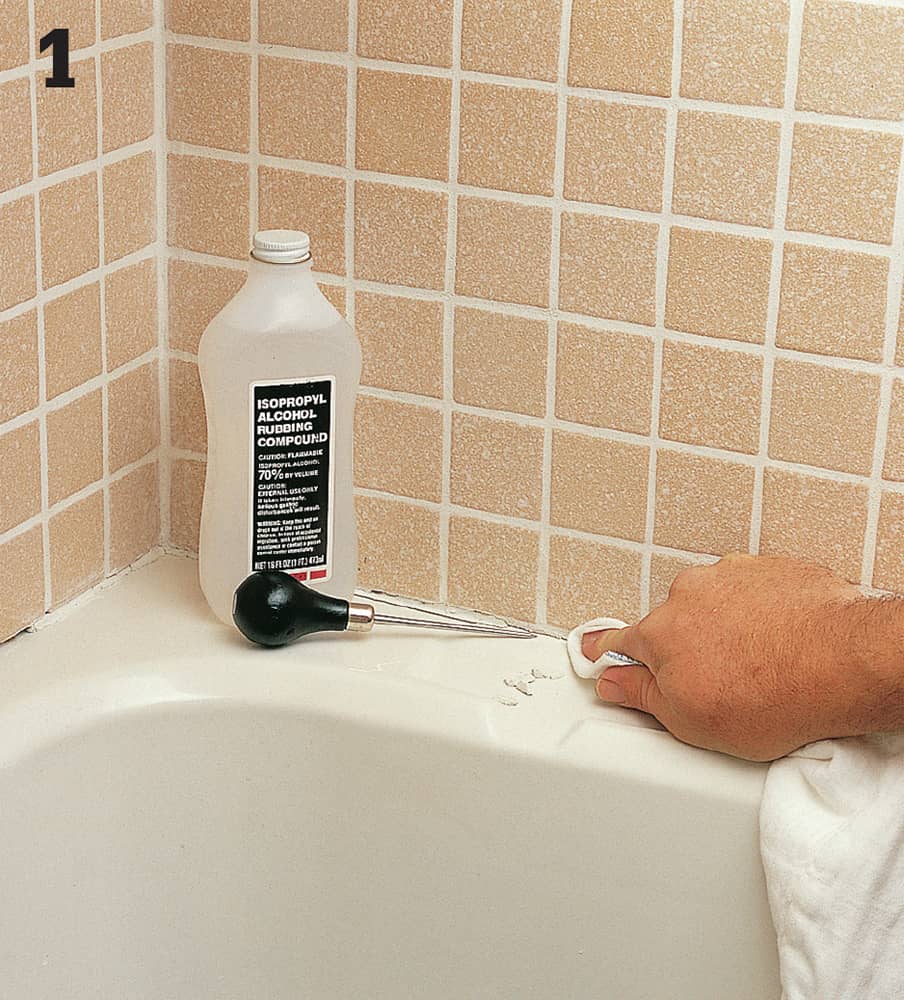
Start with a completely dry surface. Scrape out the old caulk and clean the joint with a cloth dipped in rubbing alcohol. If this is a bathtub or sink, fill it with water to weight it down.
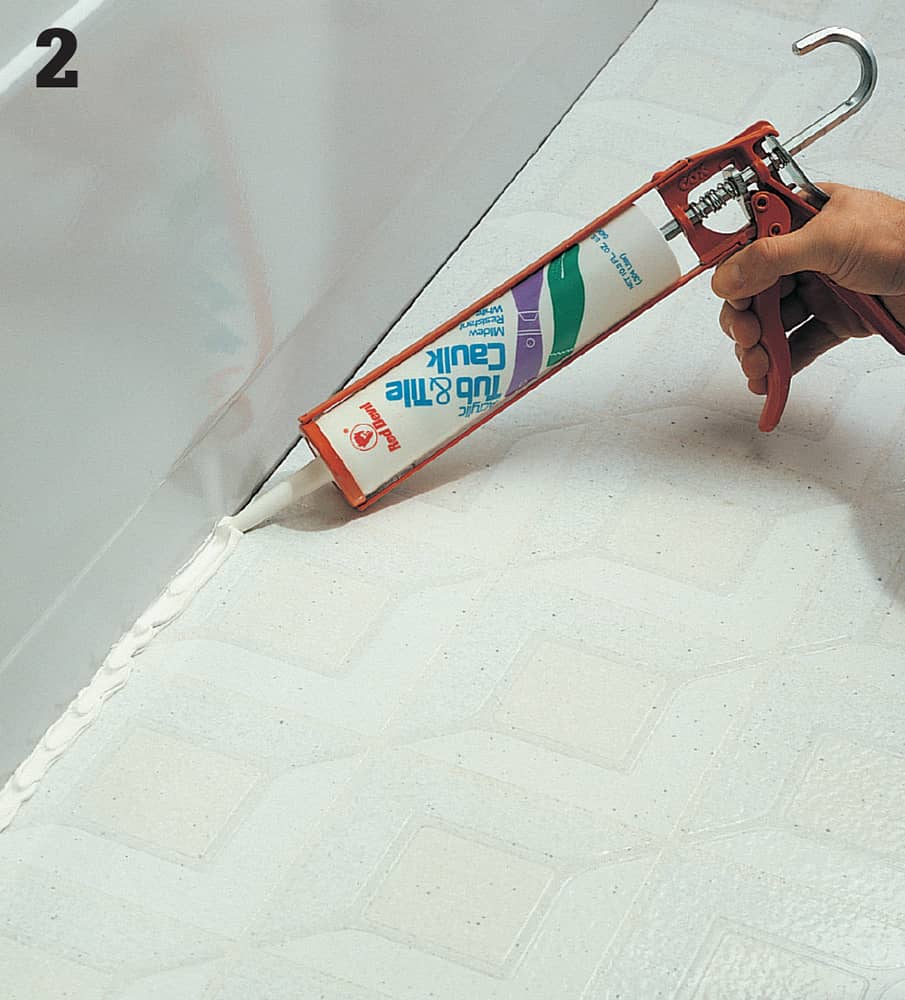
Cut the tip off caulk cartridges at a 45° angle and then make a flat cut at the top with a utility knife. This will allow you to deliver a smooth bead that is not too thin or too heavy.
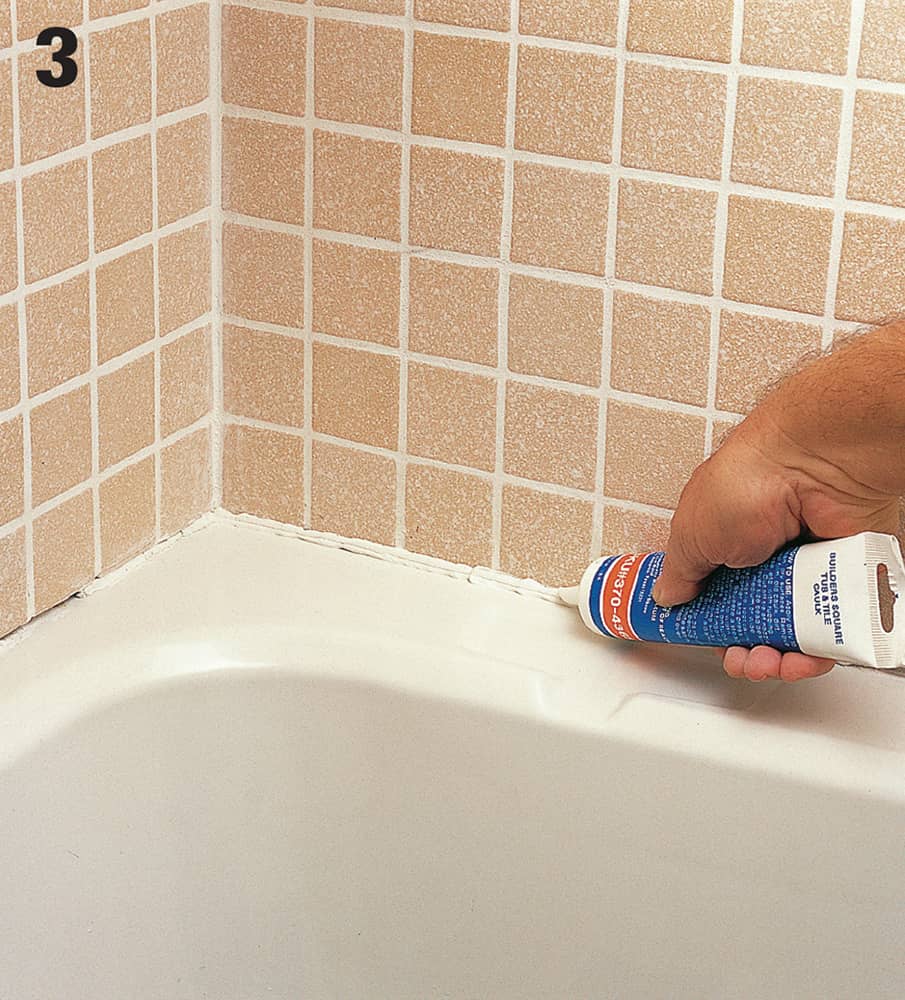
Clean the joint with a product that kills mildew spores; let it dry. Fill the joint with silicone or latex caulk.
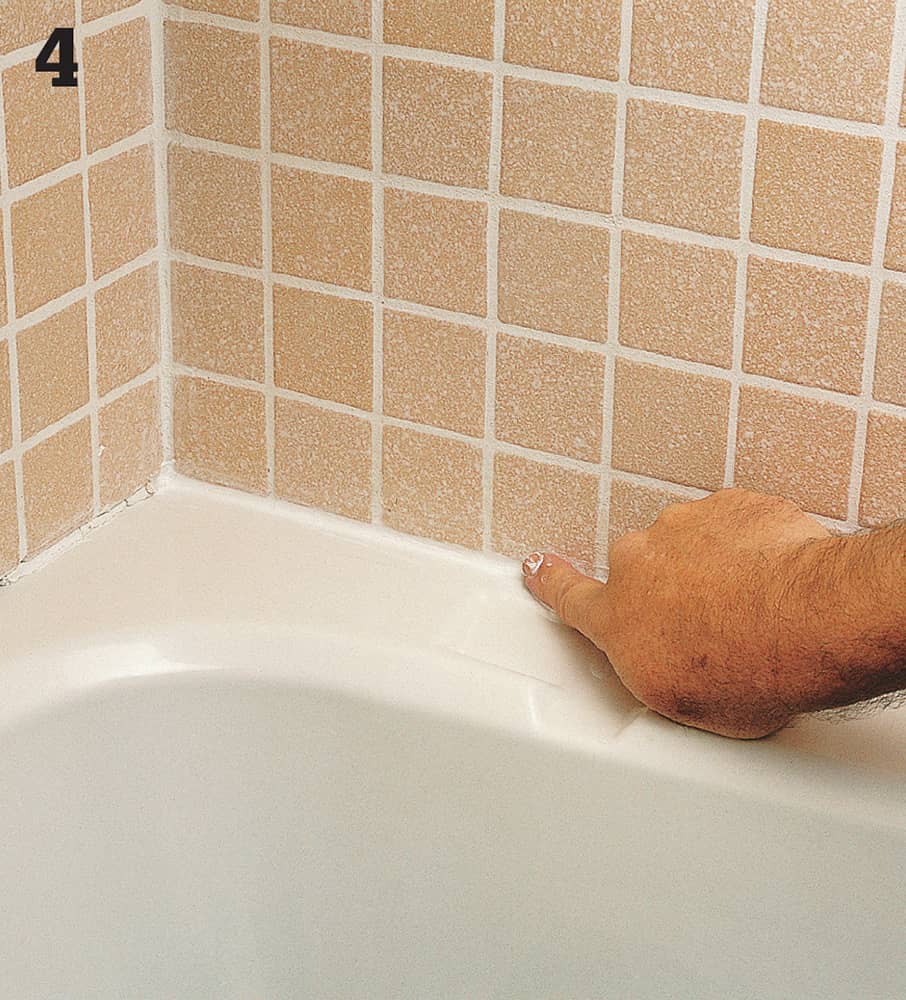
Wet your fingertip with cold water, then use your finger to smooth the caulk into a cove shape. After the caulk hardens, use a utility knife to trim away any excess.
How to Replace Built-in Wall Accessories
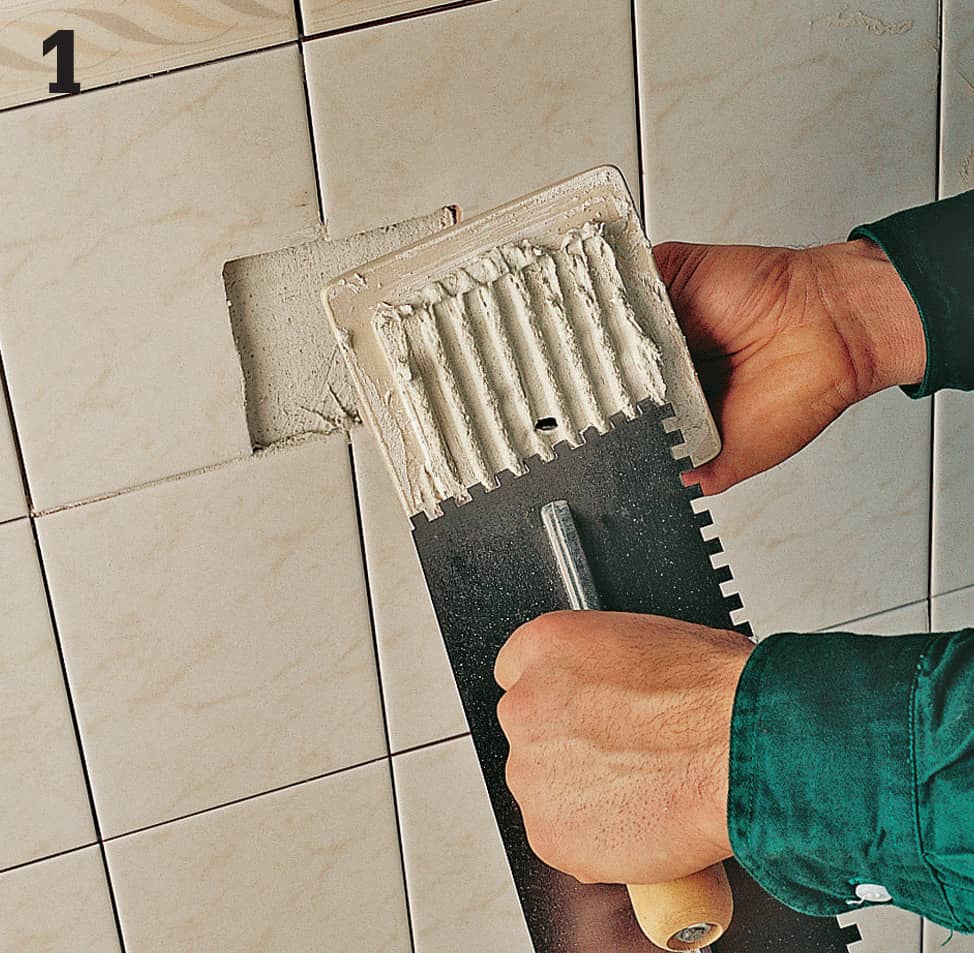
Carefully remove the damaged accessory. Scrape away any remaining adhesive or grout. Apply dry-set tile adhesive to the back side of the new accessory, then press it firmly in place.
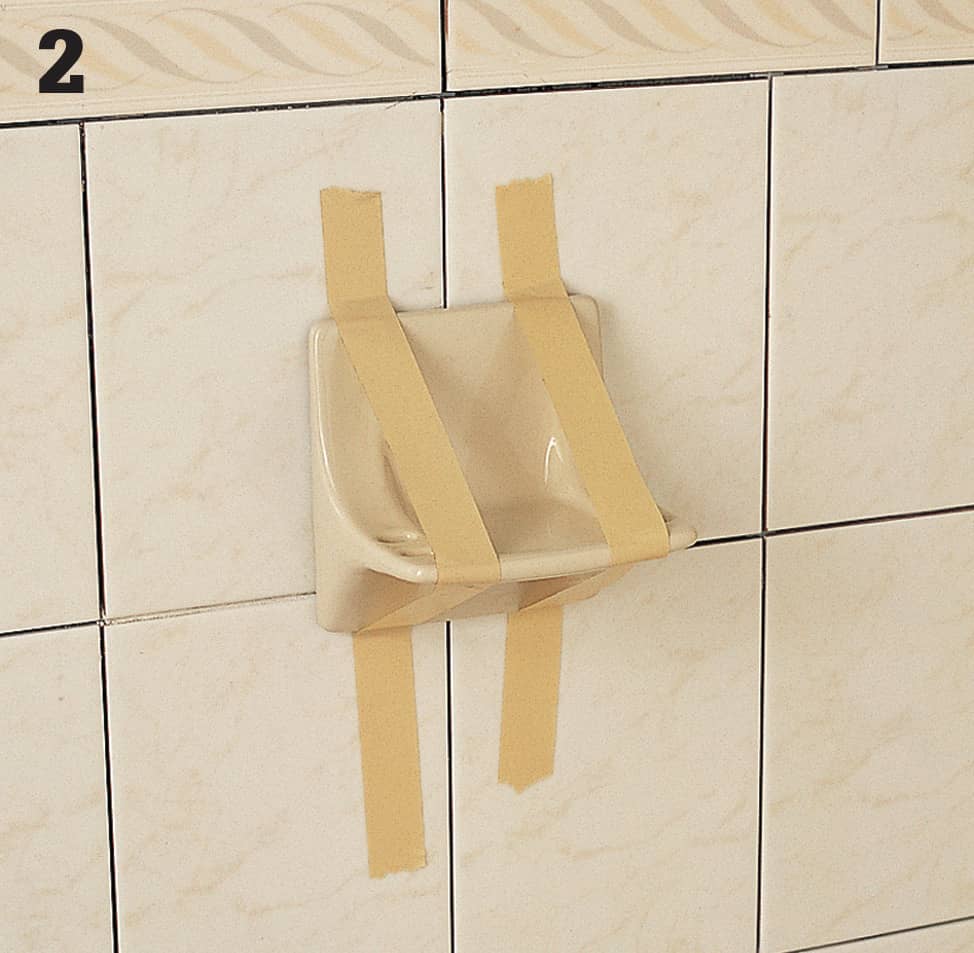
Use masking tape to hold the accessory in place while the adhesive dries. Let the mortar dry completely (12 to 24 hours), then grout and seal the area.
How to Replace Surface-mounted Accessories
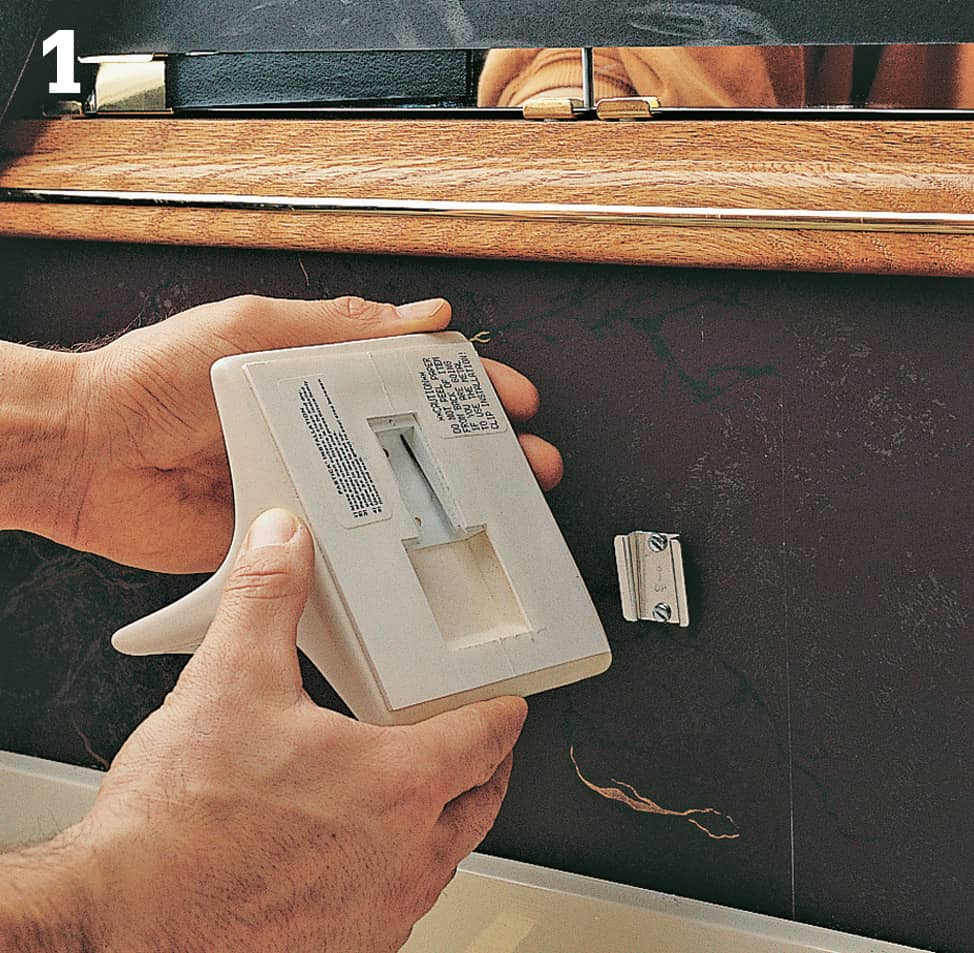
Lift the accessory up and off the mounting plate. If the mounting plate screws are driven into studs or blocking, simply hang the new accessory. If not, add hardware such as molly bolts, toggle bolts, or plastic anchor sleeves.
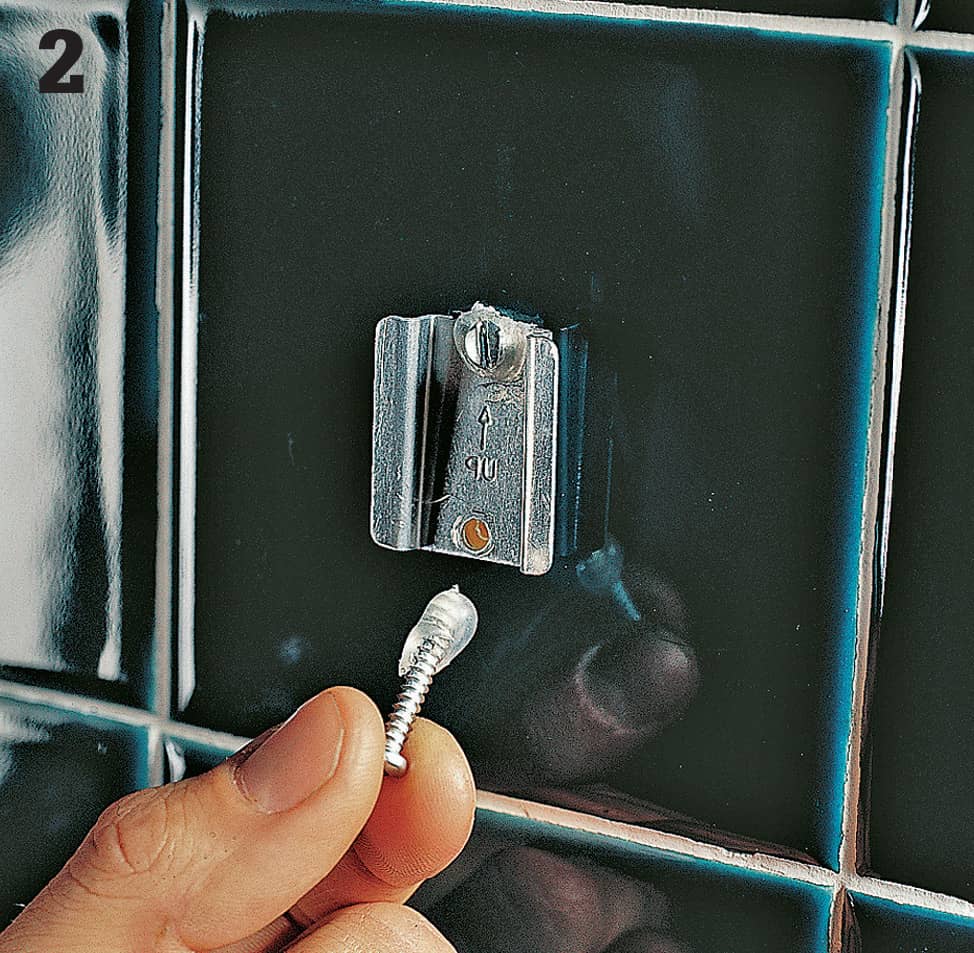
Put a dab of silicone caulk over the pilot holes and the tips of the screws before inserting them. Let the caulk dry, then install the new fixture on the mounting plate.
How to Remove & Replace Broken Wall Tiles
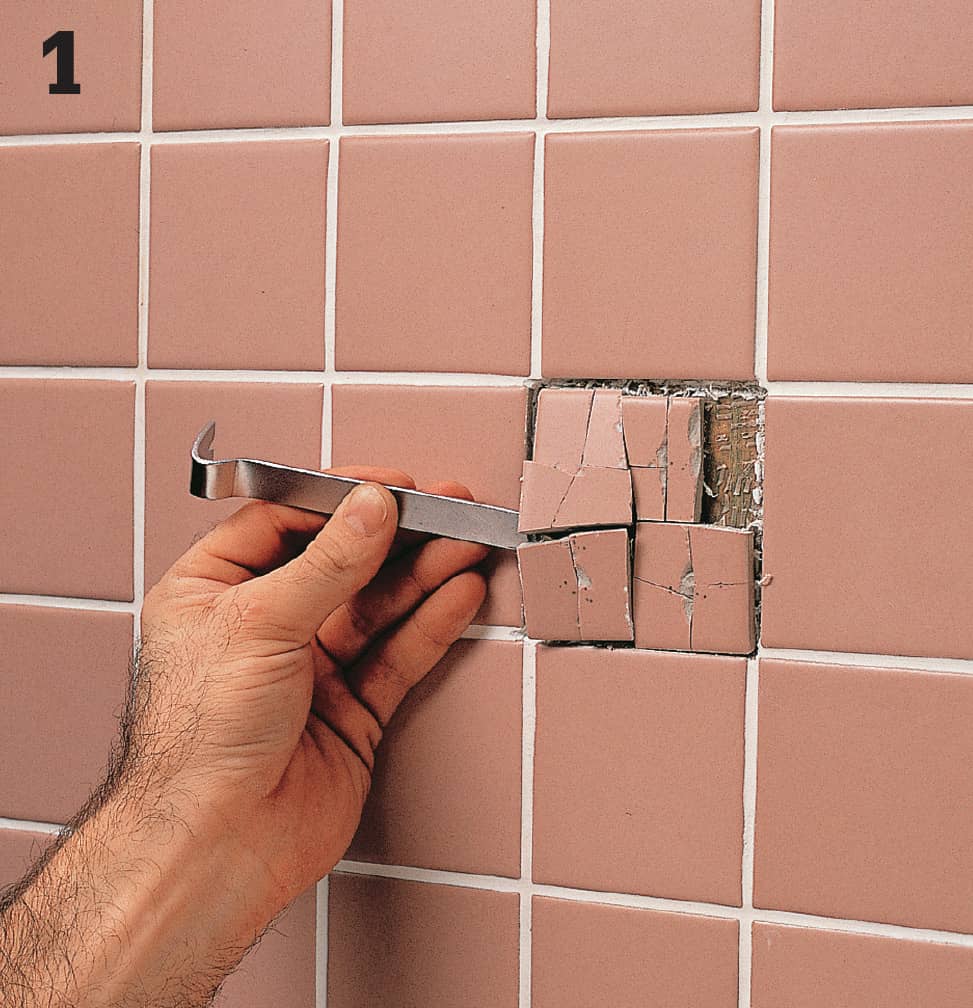
Carefully scrape away the grout from the surrounding joints, using a utility knife or an awl. Break the damaged tile into small pieces, using a hammer and chisel. Remove the broken pieces, then scrape away debris or old adhesive from the open area.
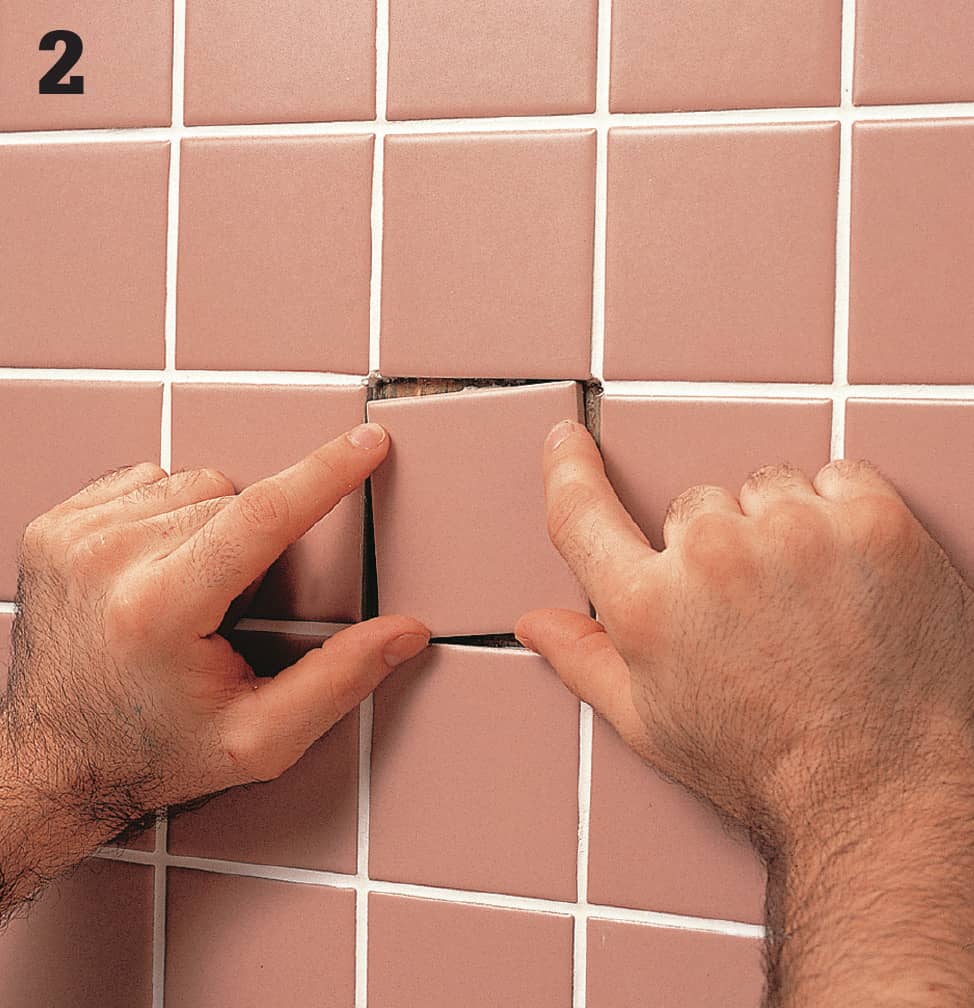
If the tile to be replaced is a cut tile, cut a new one to match. Test-fit the new tile and make sure it sits flush with the field. Spread adhesive on the back of the replacement tile and place it in the hole, twisting it slightly. Use masking tape to hold the tile in place for 24 hours so the adhesive can dry.
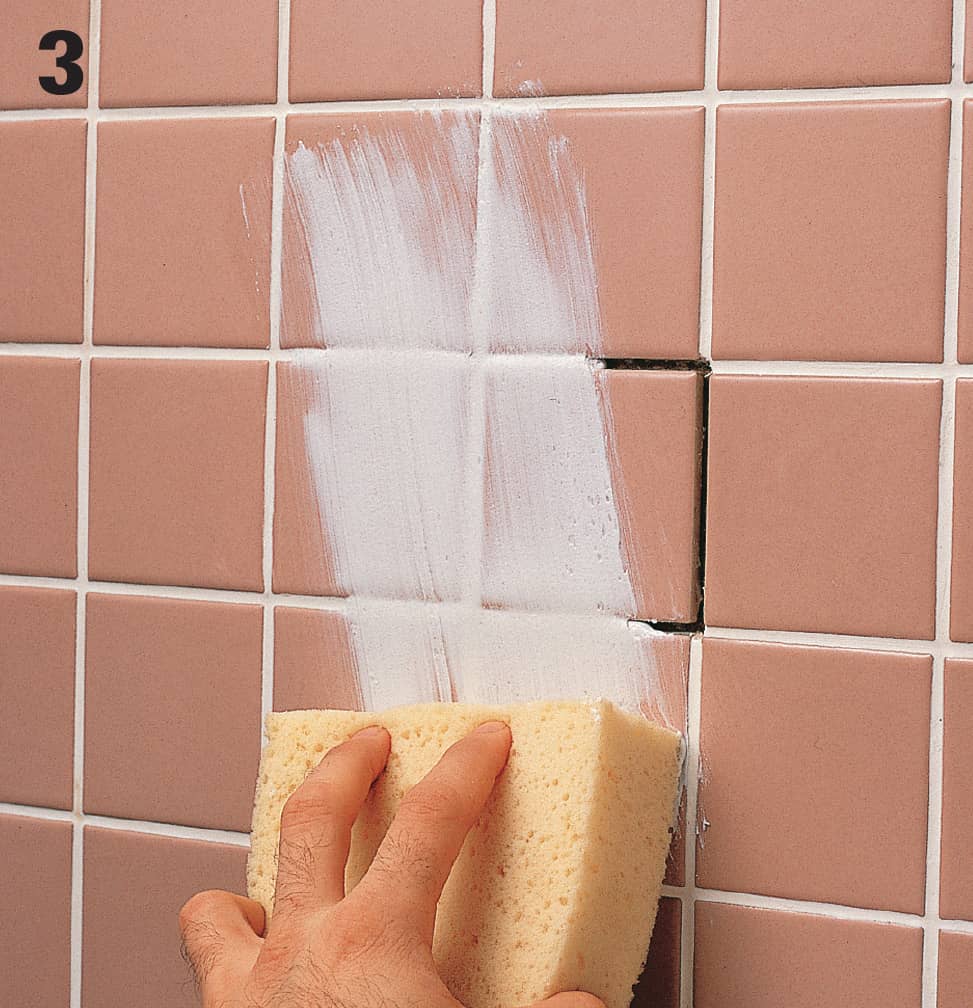
Remove the tape, then apply premixed grout, using a sponge or grout float. Let the grout set slightly, then tool it with a rounded object such as a toothbrush handle. Wipe away excess grout with a damp cloth.
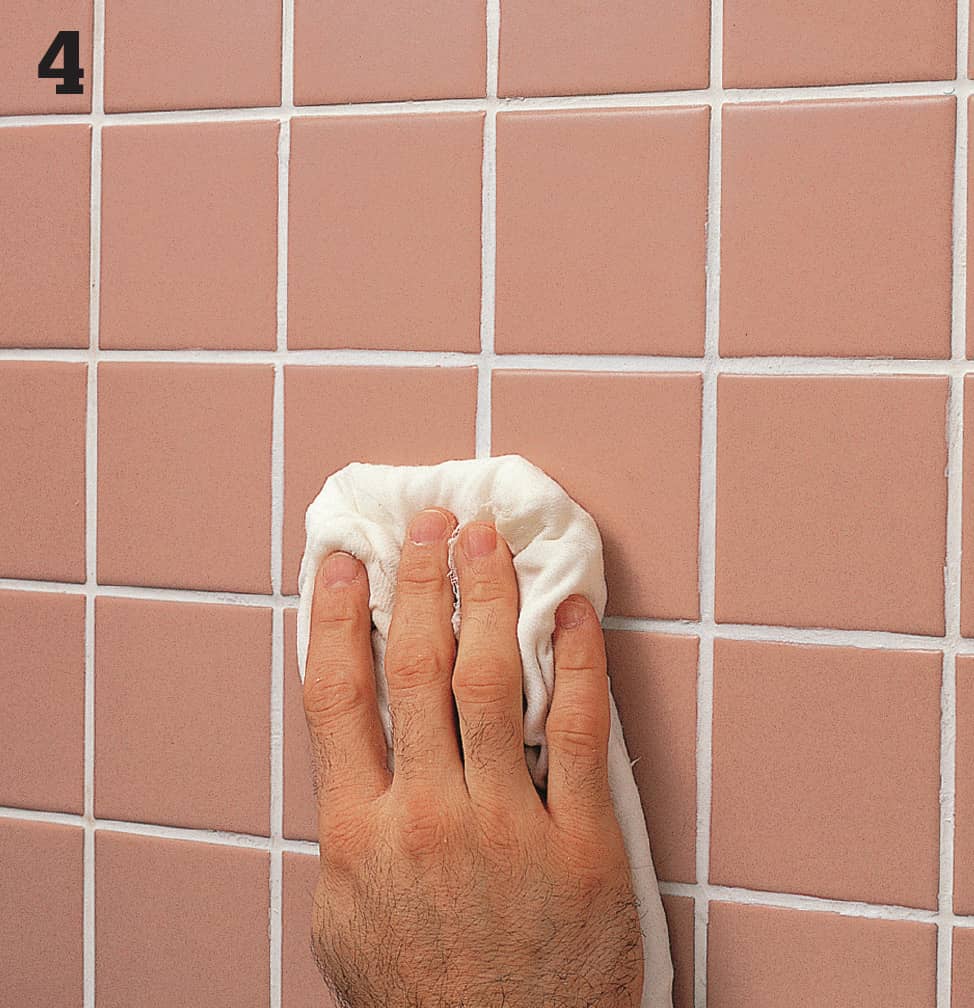
Let the grout dry for an hour, then polish the tile with a clean, dry cloth.
 Repairing Wallcoverings
Loosened seams and bubbles are common wallcovering problems, but both are easy to remedy using a little adhesive and a sponge. For papers that are compatible with water, use a clean, damp sponge. For other types of papers (grasscloth or flocked wallcoverings, for example), clean fingers are probably the best choice.
Scratches, tears or obvious stains can be patched so successfully that the patch is difficult to spot. Whenever you hang wallcoverings, save remnants for future repairs. It’s also a good idea to record the name of the manufacturer as well as the style and run numbers of the wallcoverings. Write this information on a piece of masking tape and put it on the back of a switchplate in the room.
If you need to patch an area of wallcovering but don’t have remnants available, you can remove a section of wallcovering from an inconspicuous spot, such as inside a closet or behind a door. You can camouflage the spot by painting the hole with a color that blends into the background of the wallcovering.
How to Fix a Bubble
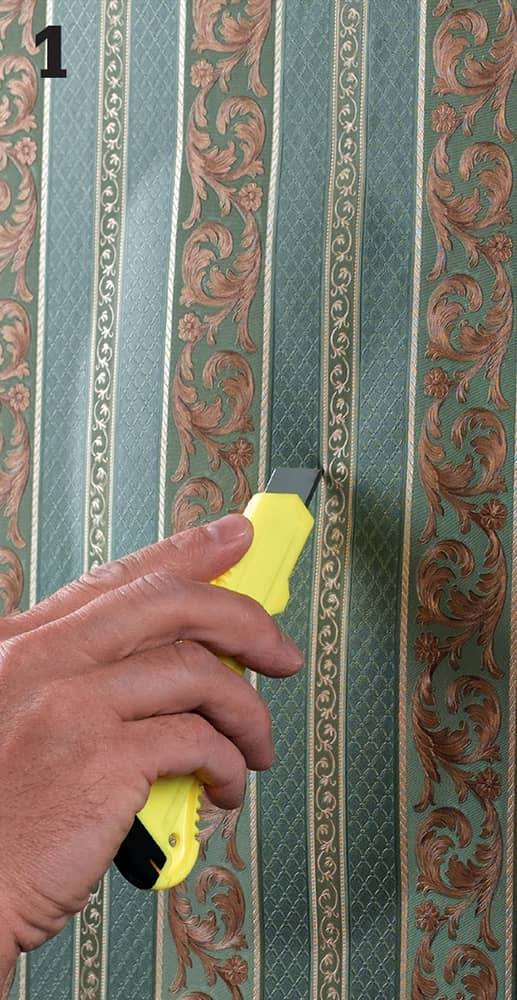
Cut a slit through the bubble, using a sharp razor knife. If there is a pattern in the wallcovering, cut along a line in the pattern to hide the slit.
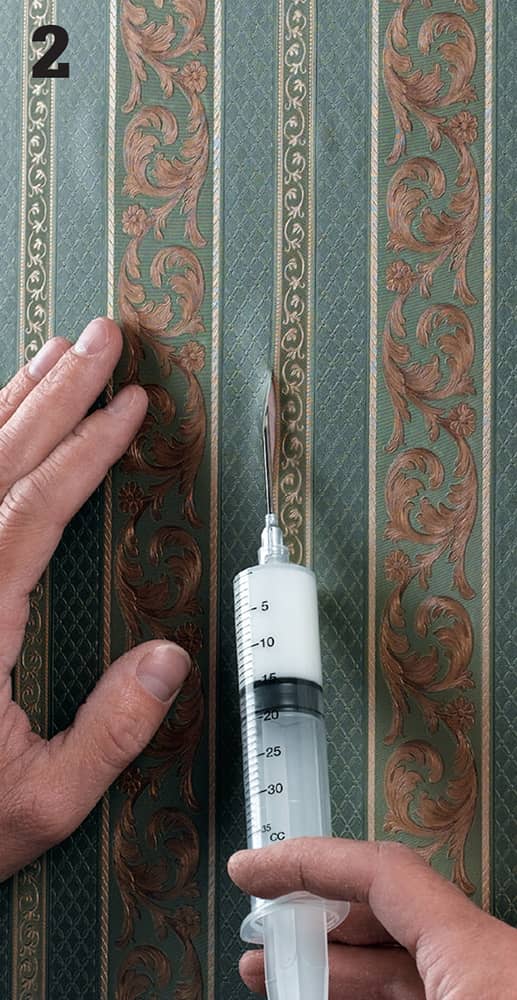
Insert the tip of a glue applicator through the slit and apply adhesive sparingly to the wall under the wallcovering.
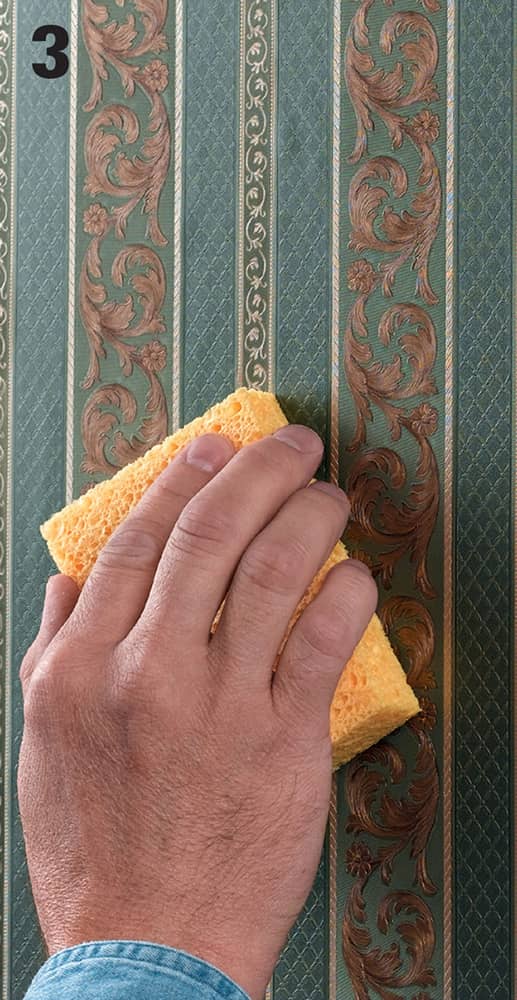
Press the wallcovering gently to rebond it. Use a clean, damp sponge to press the flap down and wipe away excess glue.
How to Patch Wallcovering
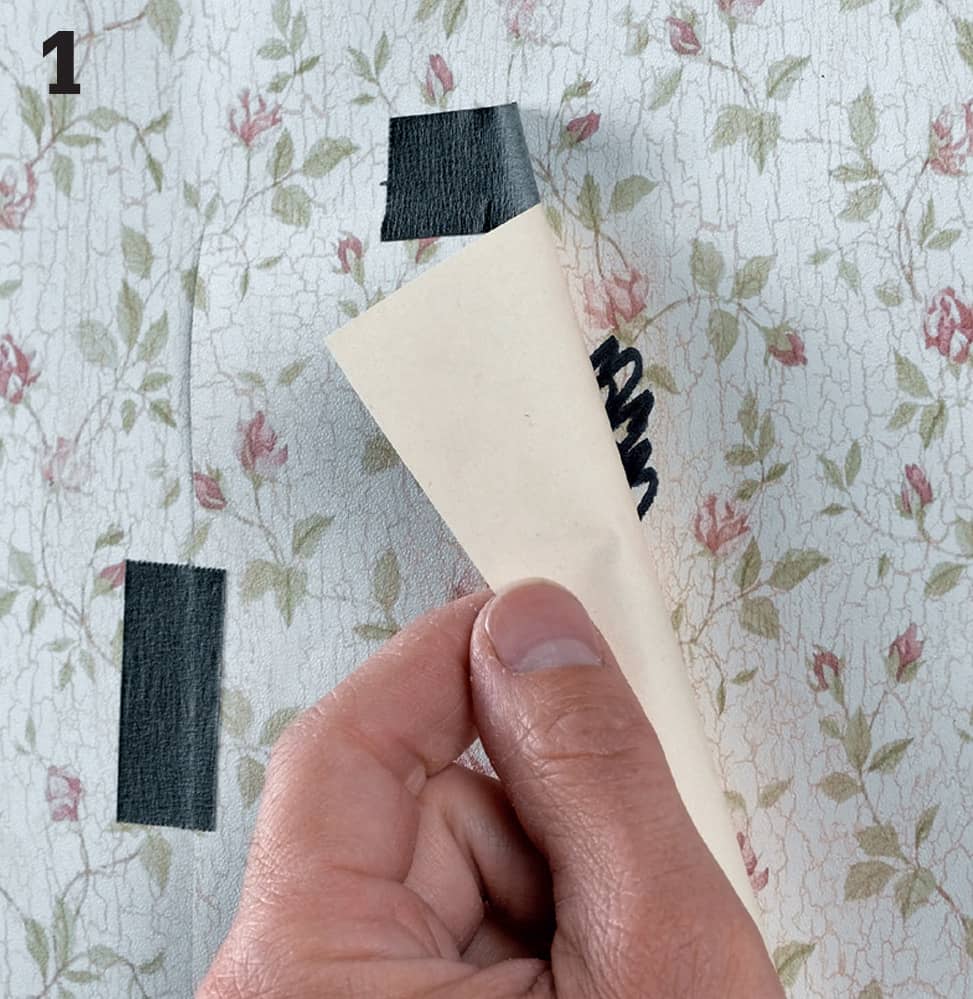
Fasten a scrap of matching wallcovering over the damaged portion with drafting tape, so that the patterns match.
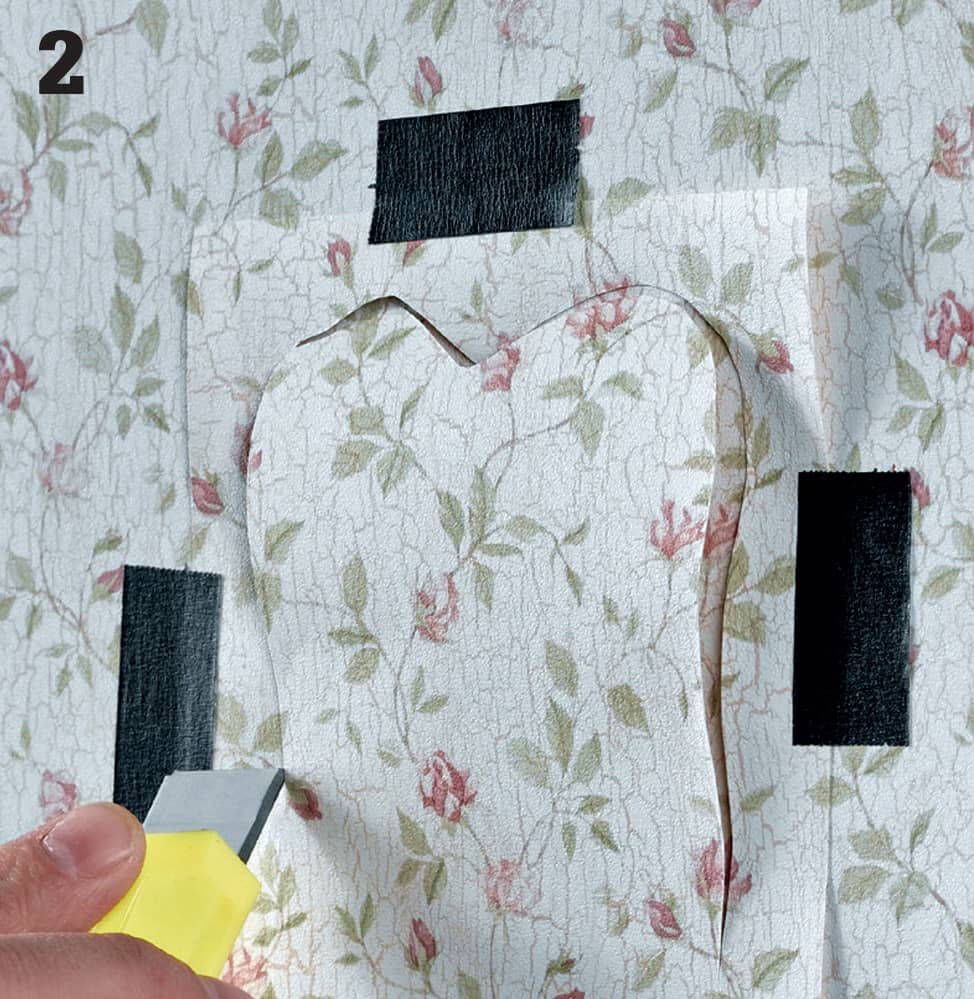
Holding a utility knife blade at a 90° angle to the wall, cut through both layers of wallcovering. If the wallcovering has strong pattern lines, cut along the lines to hide the seams. With less definite patterns, cut irregular lines.
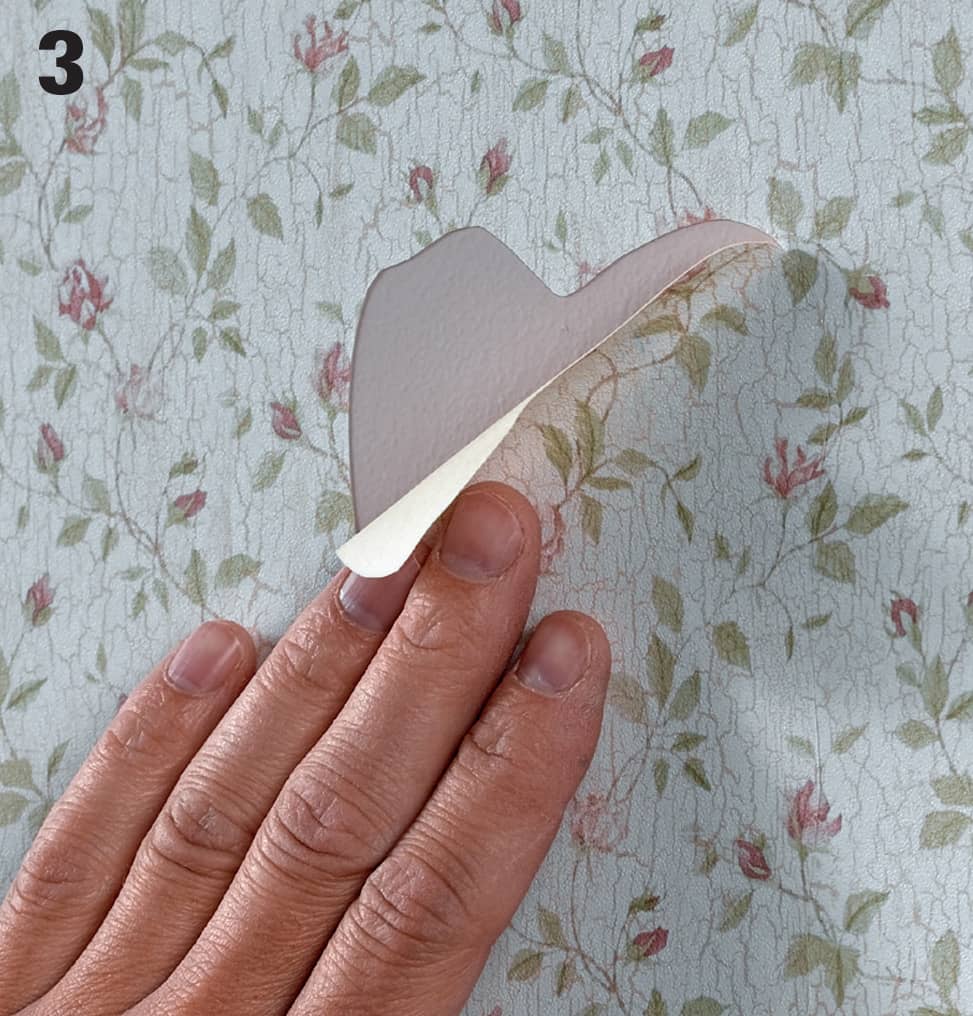
Remove the scrap and patch, then peel away the damaged wallcovering. Apply adhesive to the back of the patch and position it in the hole so that the pattern matches. Rinse the patch area with a damp sponge.
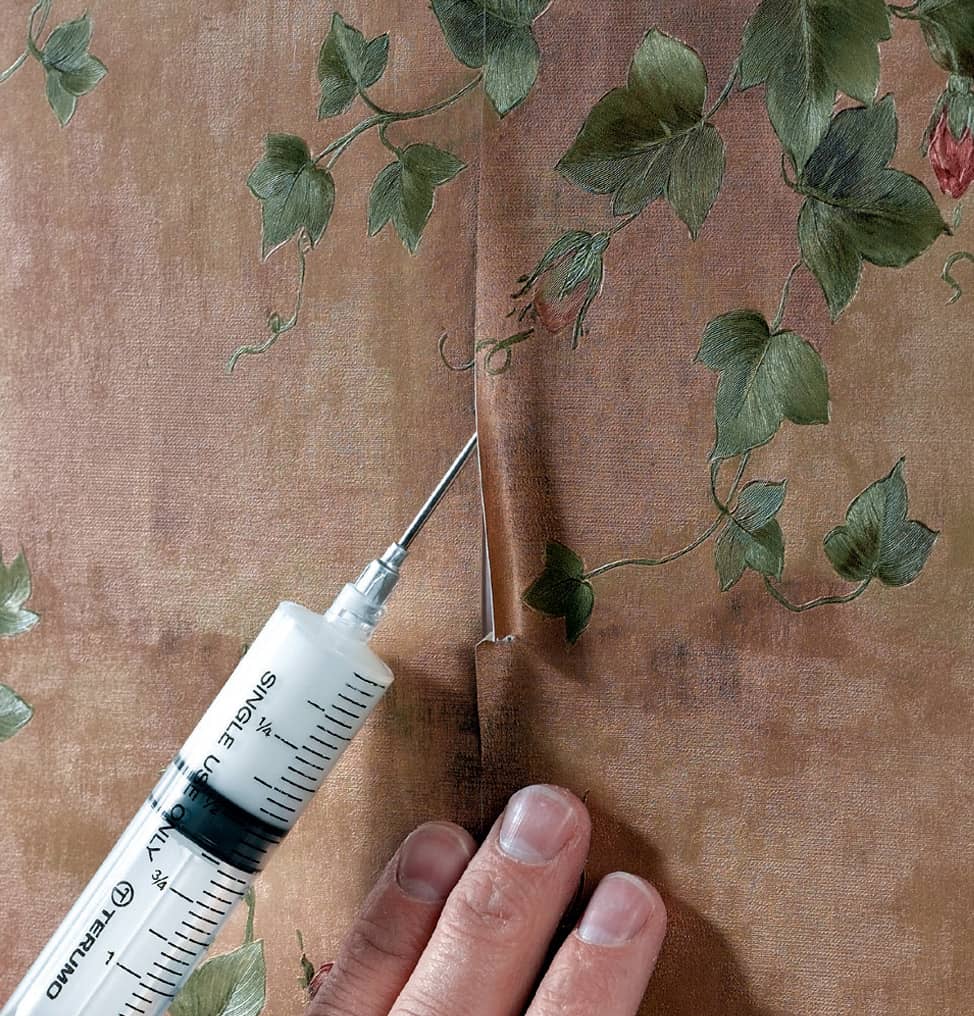
VARIATION: Lift the edge of the wallcovering seam and insert the tip of a glue applicator under it. Squirt adhesive onto the wall and gently press the seam flat. Let the repair stand for 1/2 hour, then smooth the seam lightly with a seam roller. Wipe the seam lightly with a damp sponge.
 Repairing Ceilings
Most ceiling repairs are relatively simple: the techniques used to repair wallboard walls apply to ceilings as well, while sagging panels can be refastened or replaced easily; the edges of acoustical tiles make it easy to remove and replace a single tile; and textures can be matched with a little practice on a scrap of cardboard or simply removed altogether.
However, plaster, by contrast, is difficult to work with, and replastering is not an option for most homeowners. While minor repairs are manageable, widespread failure can be dangerous. If you find large spongy areas or extensive sags consult a professional.
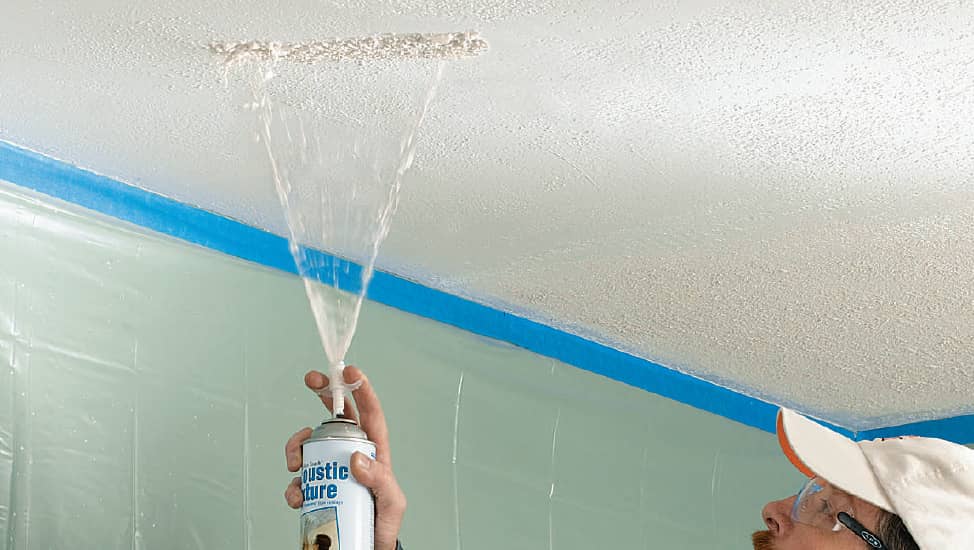
Aerosol touch-up products are available for small repairs to ceilings with popcorn and orange peel textures. Use a wallboard knife to scrap away the existing texture at the damaged area and slightly around it. Make any necessary repairs, then spray on the aerosol texture carefully to blend the new texture with the existing ceiling.
How to Remove Popcorn Ceiling Texture
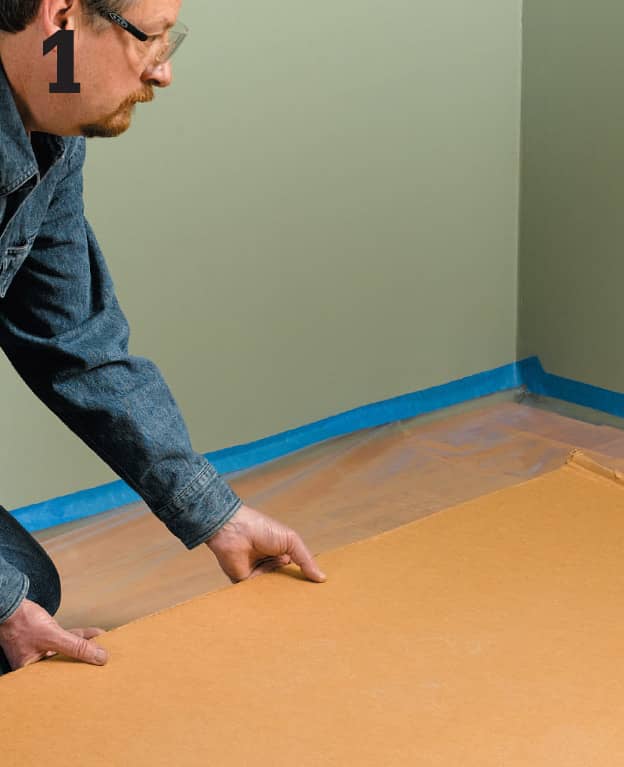
To protect floors and ease cleanup later, line floors with 6-mil plastic, then cover with corrugated cardboard to provide a non-slip surface. Caution: Popcorn ceilings in houses built prior to 1980 may contain asbestos. Contact your local building department for regulations governing asbestos removal.
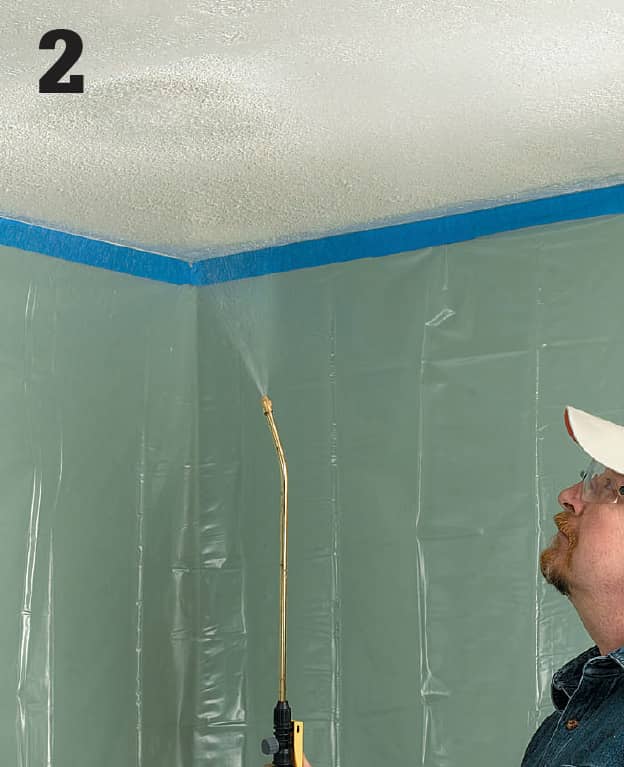
Using a pressure sprayer, dampen the ceiling with a mixture of a teaspoon of liquid detergent per gallon of water. Allow 20 minutes for the mixture to soak in, rewetting as necessary.
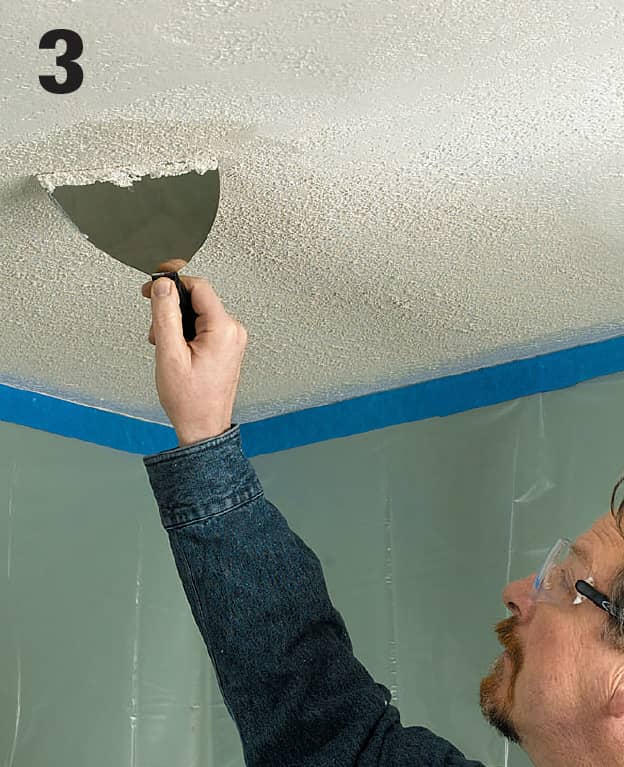
Scrape texture from the ceiling using a 6-in. wallboard knife. Be careful not to cut into the wallboard surface. After all texture is removed, sand rough spots, then carefully roll up and dispose of the plastic and debris. Patch any damaged areas with joint compound, then prime and paint.
How to Replace Acoustical Ceiling Tile
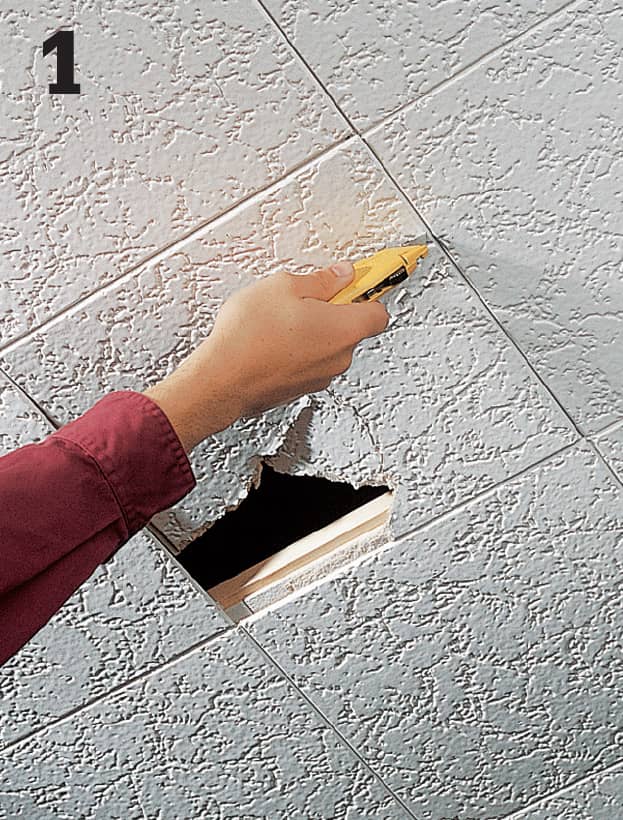
Cut out the center section of the damaged tile with a utility knife. Slide the edges away from the surrounding tiles.
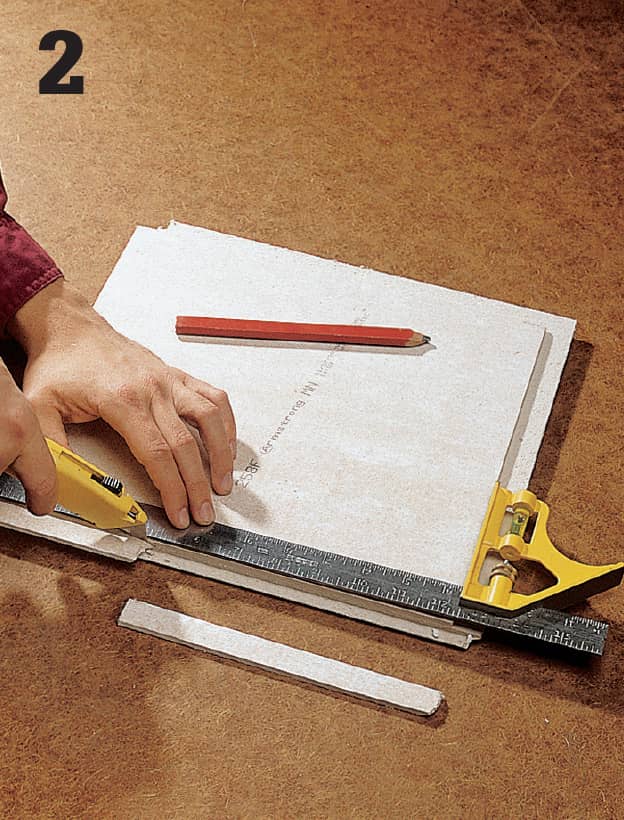
Trim the upper lip of the grooved edges of the new tile, using a straightedge. If necessary, also remove one of the tongues.
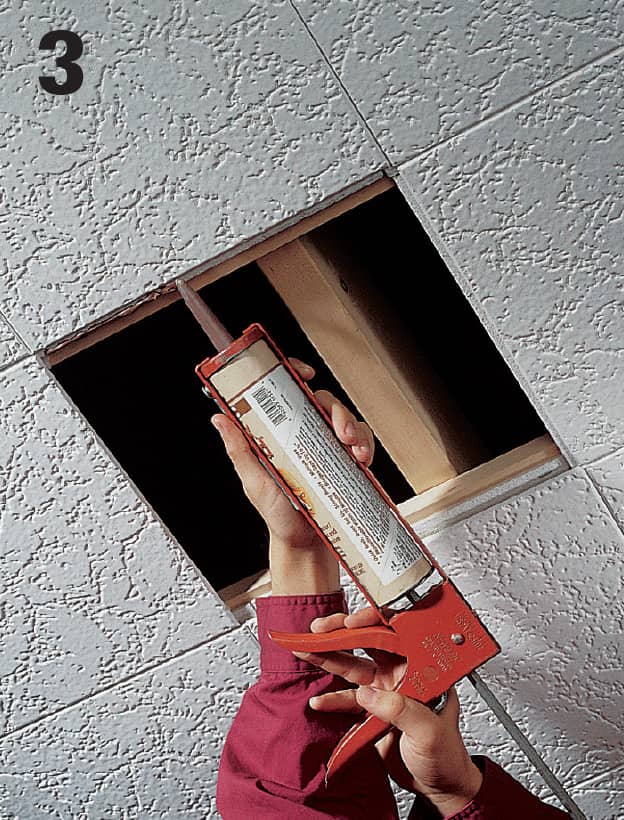
At the ceiling, apply construction adhesive to the furring strips. Install the new tile, tongue first, and press it into the adhesive. TIP: To hold large tiles in place while the glue dries, lay a flat board across the tile, then prop a 2 × 4 post between the board and the floor.
How to Raise a Sagging Wallboard Ceiling
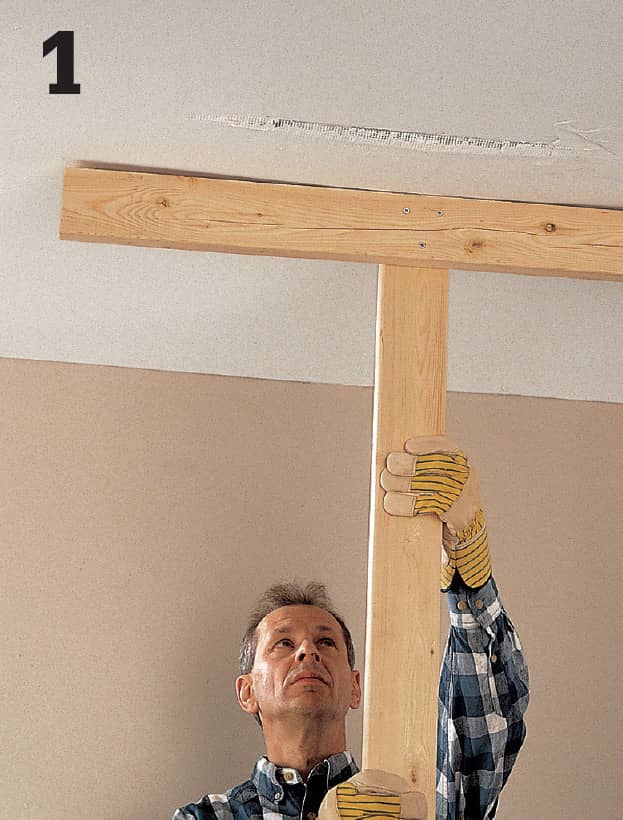
Position a T-brace under the lowest point of the sagging area with the bottom end on a piece of plywood or hardboard on the floor. Nudge it forward until the sagging panels are tight to the joists. If fasteners pop through the surface, drive them back in.
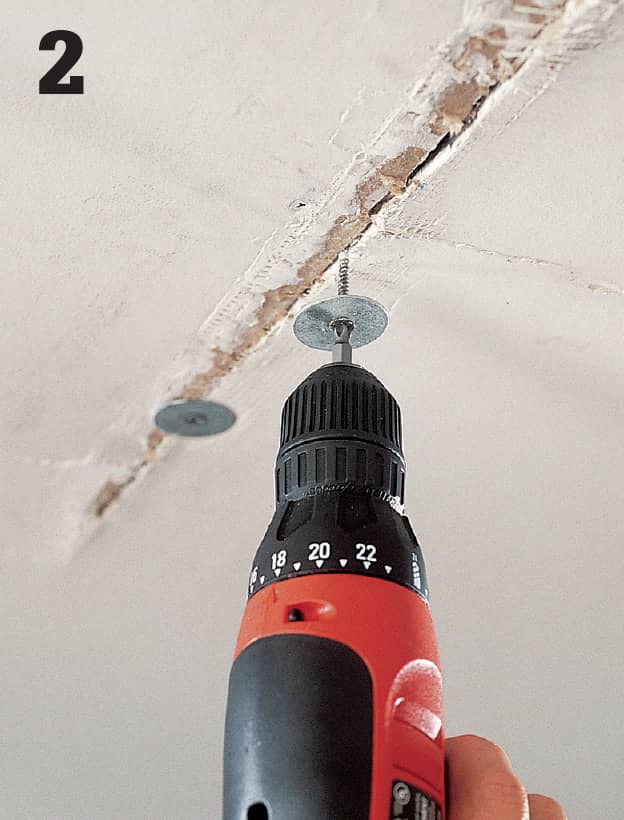
Remove loose tape and compound at joints between loose panels. Starting at one end, drive wallboard screws with broad, thin washers every 4" through the center of the joint and into the joists. In the field of panel, drive screws 2" from existing fasteners.
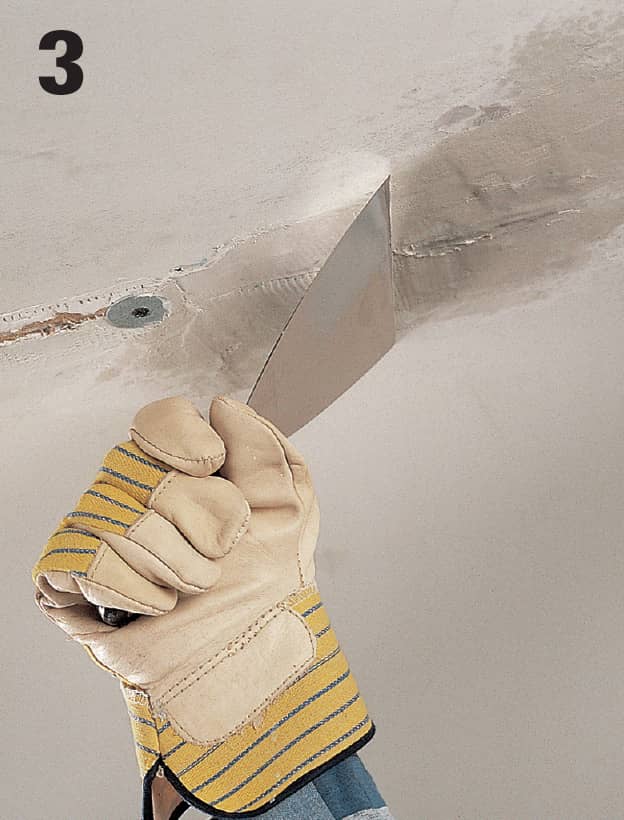
When the area is securely fastened, remove the T-brace. Scrape off any loose chips of paint or wallboard around joints and screws, then fill with compound. Cover large cracks or gaps with fiberglass tape before applying the compound.
 Repairing Water-damaged Walls & Ceilings
A sure sign of a water problem is discoloration and bubbling on the ceiling surface. Water from a leaky roof or pipe above will quickly find a low spot or a joint between wallboard panels, soaking through to a visible surface in a matter of minutes. Water in joints is especially damaging because it ruins the edges of two panels at once. If you have a water problem, be sure to fix the leak and allow the damaged wallboard to dry thoroughly before making any repairs.
Whenever water or moisture infiltrates a house, there is always a concern regarding mold. Mold grows where water and nutrients are present—damp wallboard paper can provide such an environment. You can use a damp rag and baking soda or a small amount of detergent to clean up small areas of mold (less than one square yard), though you should wear goggles, rubber gloves, and a dust mask to prevent contact with mold spores. If mold occupies more area than this, you may have a more serious problem. Contact a mold abatement specialist for assessment and remediation. To help prevent mold growth, use exhaust fans and dehumidifiers to rid your home of excess moisture and repair plumbing leaks as soon as they are found.
If damaged wallboard requires extensive repair, resurfacing walls and ceiling with a layer of new wallboard may be the best option. Resurfacing is essentially the same installation as hanging multiple layers of wallboard, and results in a smooth, flat surface. However, the added wall thickness can affect the appearance of window and door trim, which may need to be extended. Use 3/8" wallboard for resurfacing—while 1/4" wallboard is thinner, it’s fragile and can be difficult to work with.
How to Repair Water Damaged Wallboard
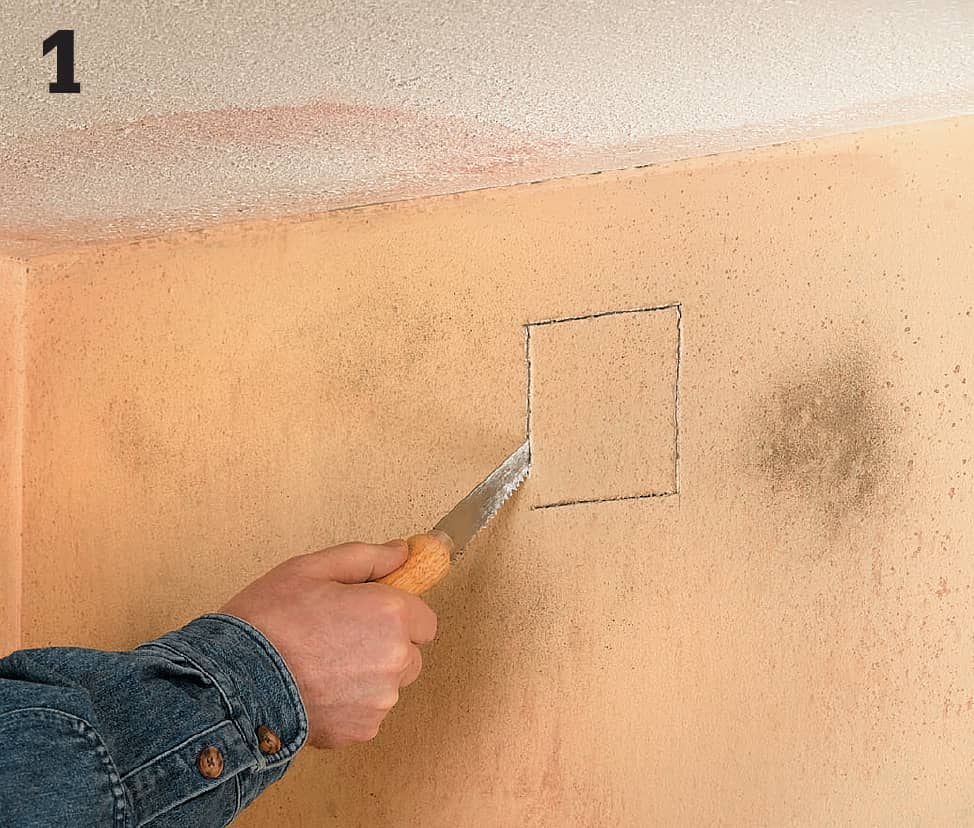
After the source for the water leak has been fixed, cut 4-in. holes at each end of joist and stud bays to help ventilation. Where possible, remove wet or damp insulation to dry out. Use fans and dehumidifiers to help speed up the drying process.
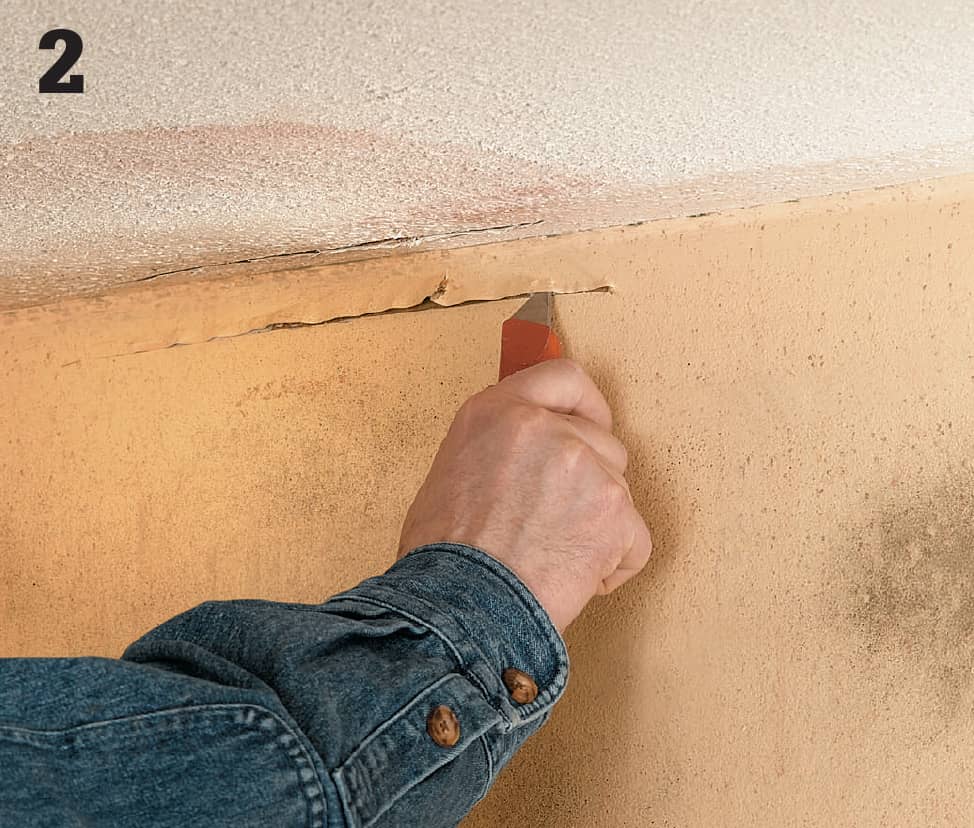
Remove loose tape and compound using a utility knife. Cut back areas of soft wallboard to solid material. To prevent sagging, prop waterlogged ceiling panels against joists with T-braces.
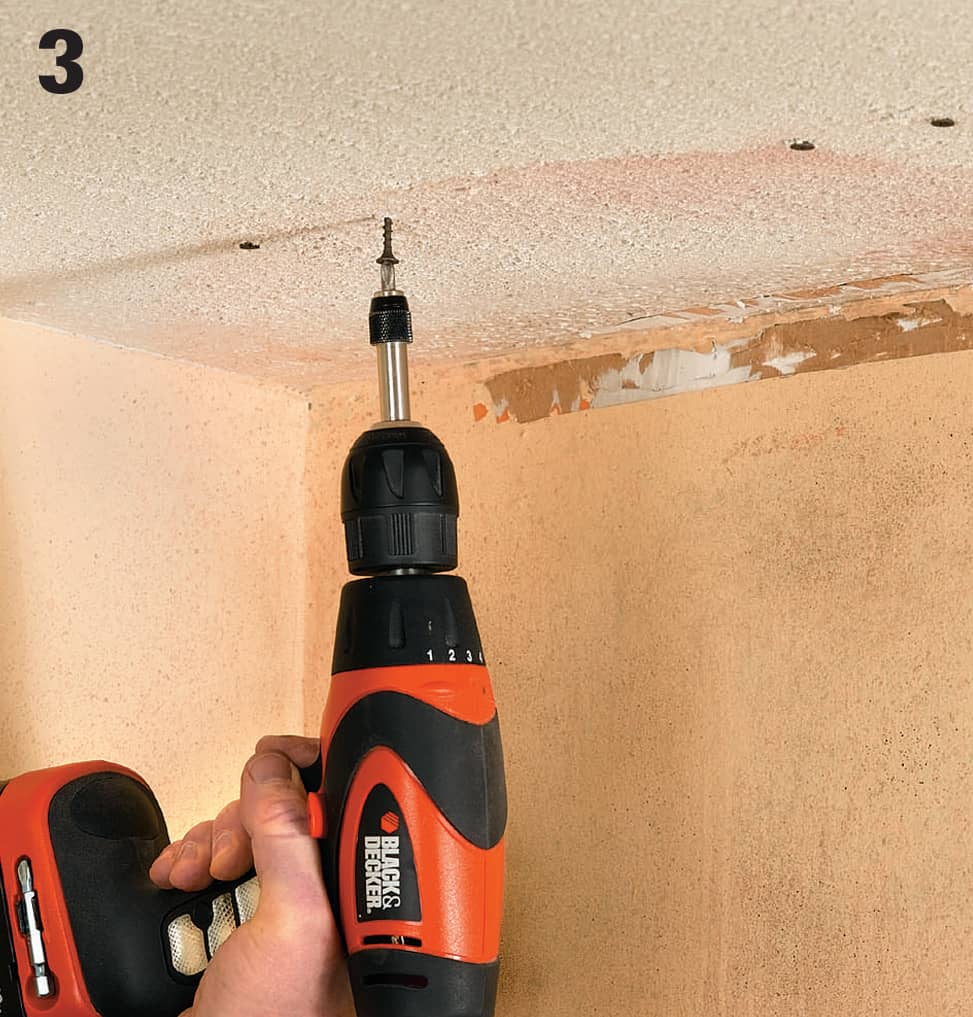
Once wallboard is dry, refasten ceiling panels to framing or remove panels that are excessively bowed. Reinforce damaged wall panels with wallboard screws driven 2 in. from the existing fasteners.
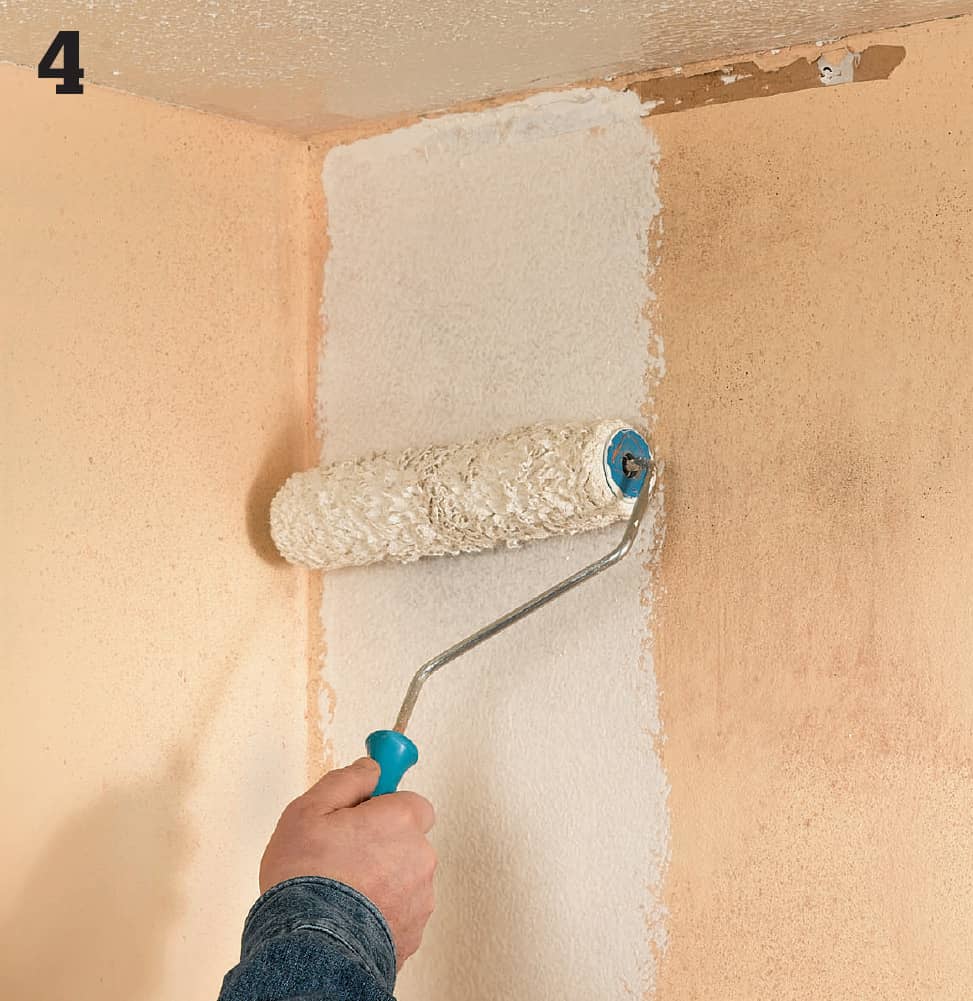
Patch all vent holes and damaged areas with wallboard and replace insulation. Apply a quality stain-blocking primer/sealer to the affected area. Use an oil-based sealer; latex-based sealers may allow water stains to bleed through.
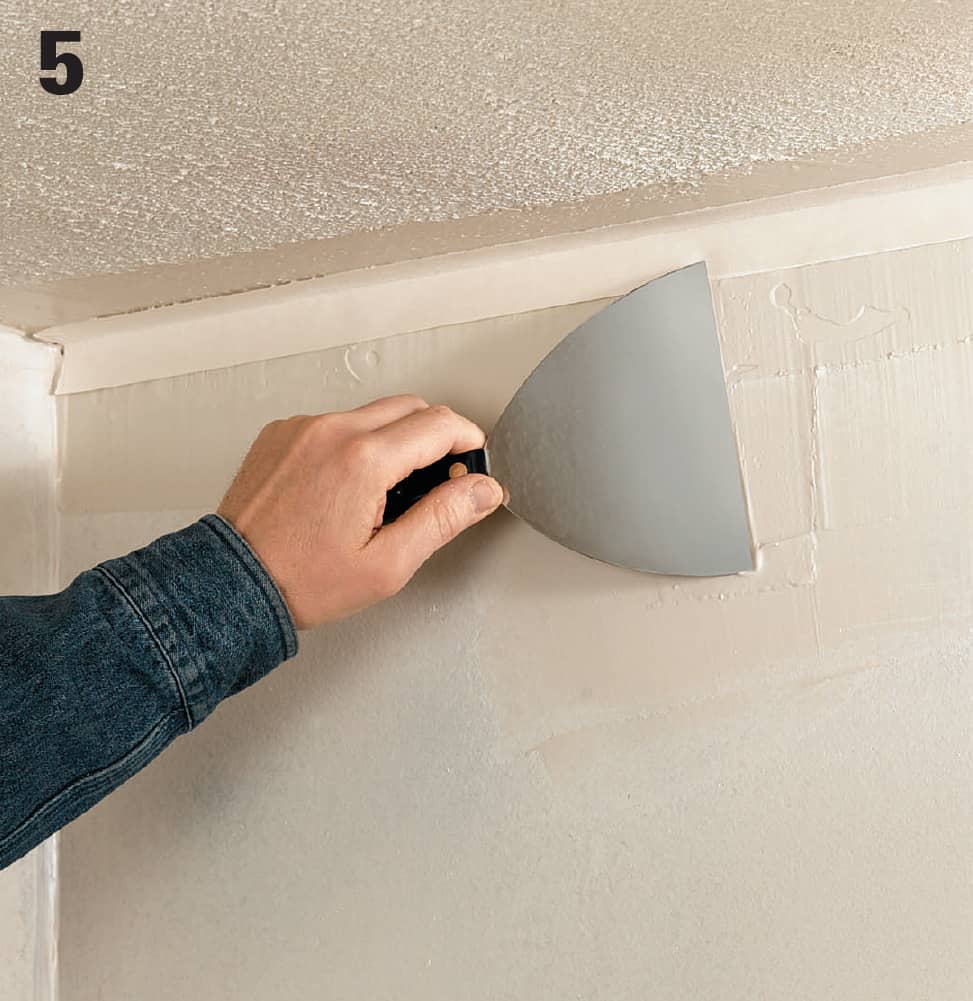
After the primer/sealer has dried, finish all joints and repairs with paper tape and three coats of compound. If water stains bleed through, reseal prior to final priming and painting.
 Removing Wall & Ceiling Surfaces
If a wall or ceiling surface is damaged or deteriorated beyond repair or if your remodeling project requires framing alterations or additional utility lines, you may need to remove the wall and ceiling surfaces.
Removing any wall surface is a messy job, but it’s not a difficult one. But before you tear into a wall with a hammer or power saw, you need to know what lies inside. Start by checking for hidden mechanicals in the project area. Wiring that’s in the way can be moved fairly easily, as can water supply pipes and drain vents. If it’s gas piping, drain pipe, or ducting, however, you’ll probably have to call a professional before you can move to the next step.
When you’re ready to begin demolition, prepare the work area to help contain dust and minimize damage to flooring and other surfaces—tearing out wallboard and plaster creates a very fine dust that easily finds its way into neighboring rooms. Cover doorways (even closed ones) and openings with plastic sheeting. Tape plastic over HVAC registers to prevent dust from circulating through the system. Protect floors with cardboard or hardboard and plastic or drop cloths. Also, carefully remove any trim from the project area, cutting painted joints with a utility knife to reduce the damage to the finish.
As an added precaution, turn off the power to all circuits in the work area, and shut off the main water supply if you’ll be making cuts near water pipes.
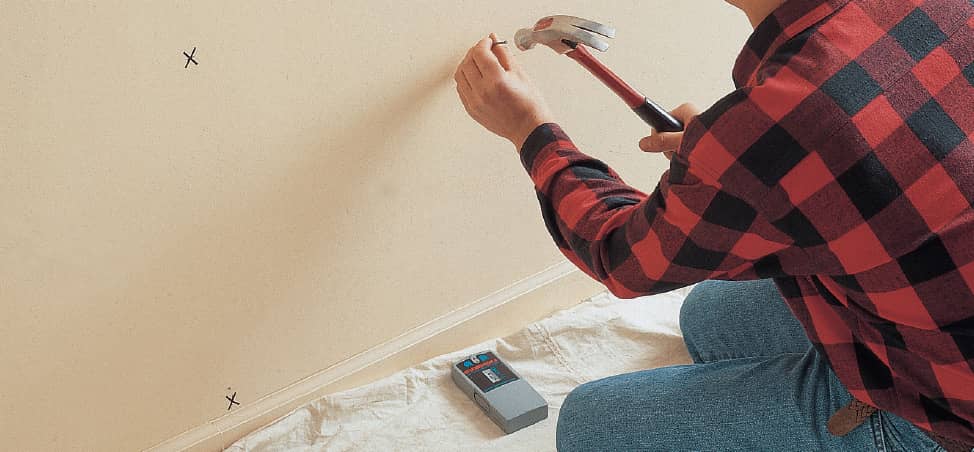
Locate framing members using a stud finder or by knocking on the wall and feeling for solid points. Verify the findings by driving finish nails through the wall surface. After finding the center of one stud, measure over 16" to locate neighboring studs.
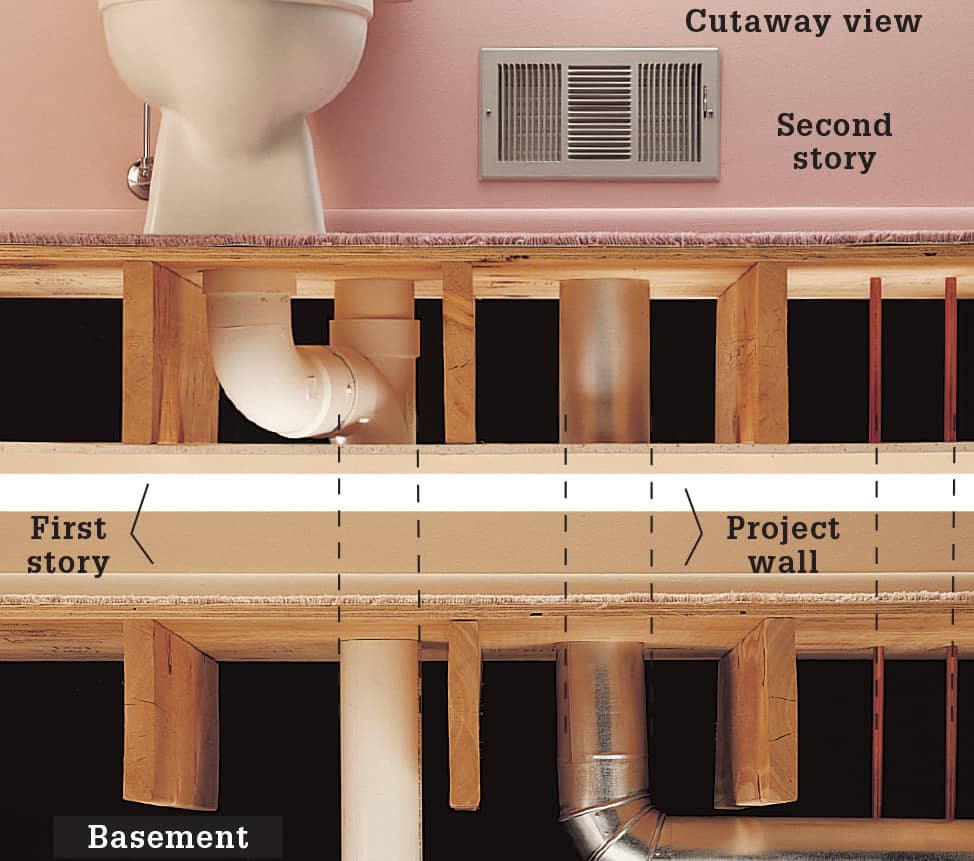
Check for hidden plumbing lines, ductwork, wiring, and gas pipes before cutting into a wall. To locate the lines, examine the areas directly below and above the project wall. In most cases, pipes, utility lines, and ductwork run through the wall vertically between floors. Original blueprints for your house should show the location of many of the utility lines.
How to Remove Wallcovering
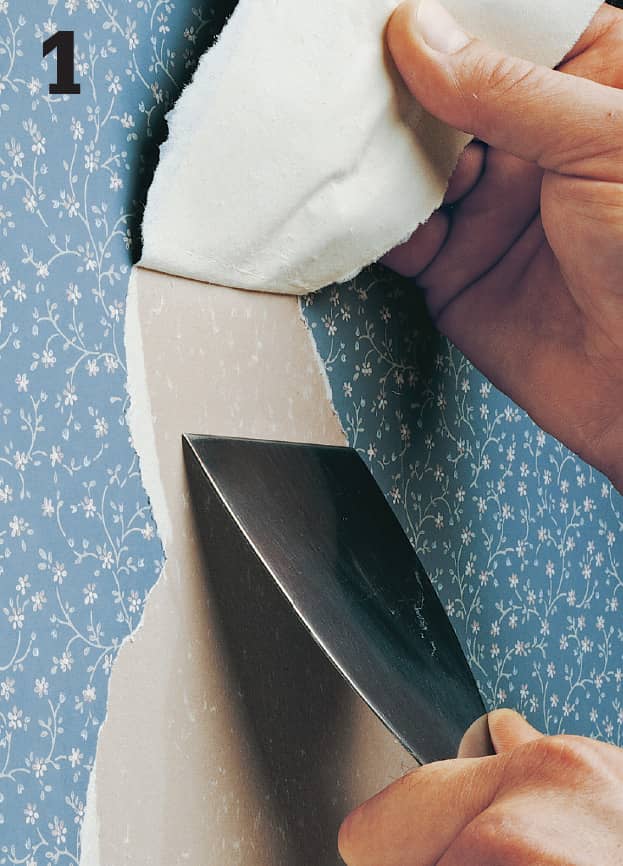
Find a loose edge and try to strip off the wallcovering. Vinyls often peel away easily. If the wallcovering does not strip by hand, cover the floor with layers of newspaper. Add wallcovering remover fluid to a bucket of water, as directed by the manufacturer.
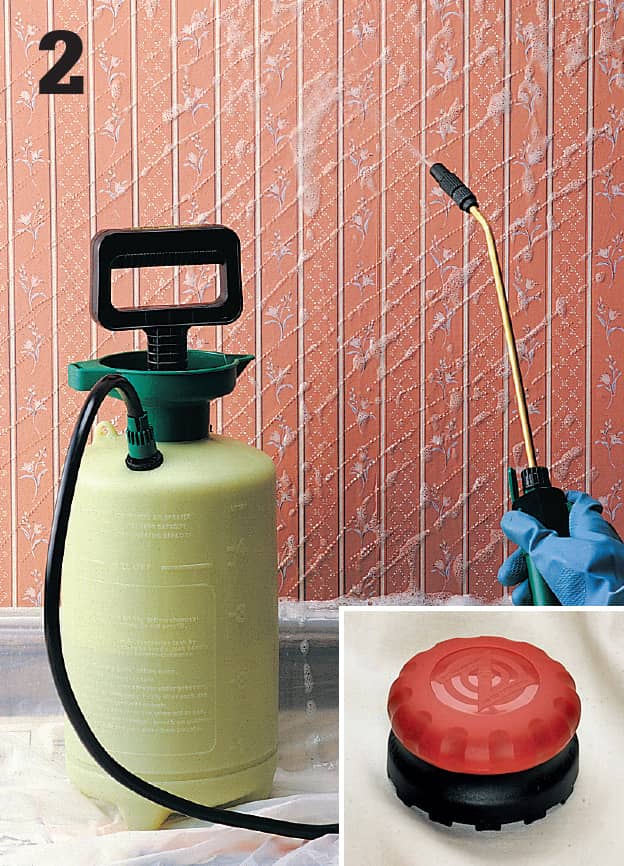
Pierce the wallcovering surface with a wallpaper scorer (inset) to allow remover solution to enter and soften the adhesive. Use a pressure sprayer, paint roller, or sponge to apply the remover solution. Let it soak into the covering, according to the manufacturer’s directions.
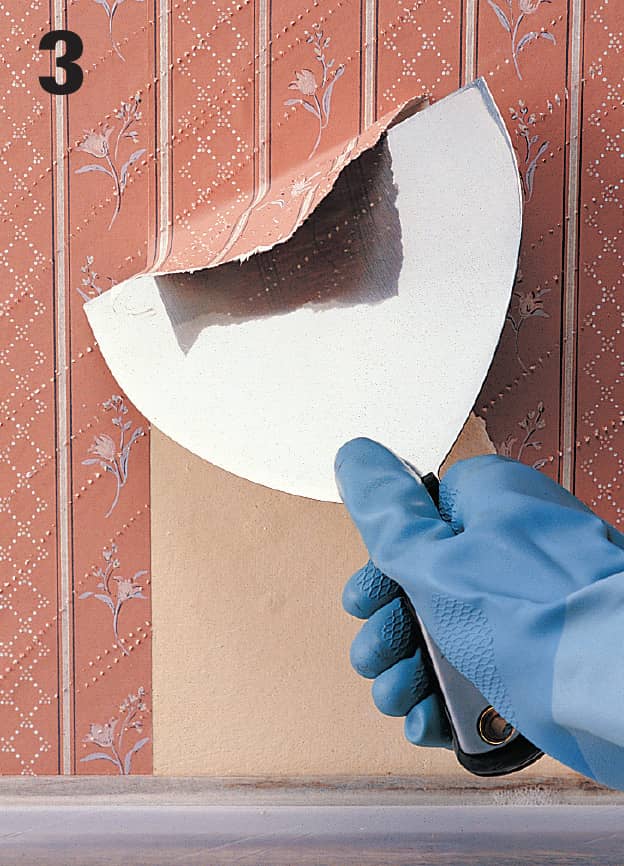
Peel away loosened wallcovering with a 6-in. wallboard knife. Be careful not to damage the plaster or wallboard. Remove all backing paper. Rinse adhesive residue from the wall with remover solution. Rinse with clear water and let the walls dry completely.
How to Remove Ceramic Wall Tile
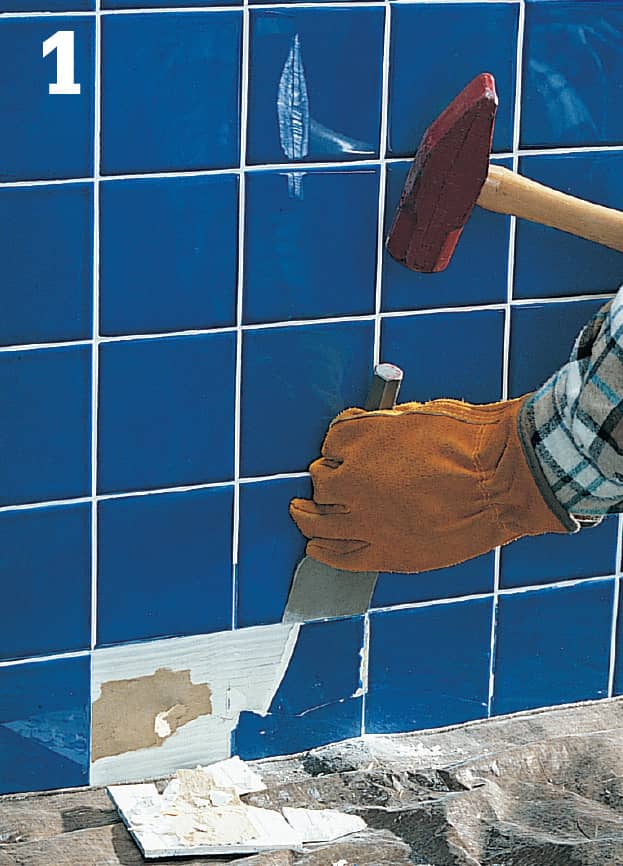
Be sure the floor is covered with a heavy tarp, and the electricity and water are shut off. Knock a small starter hole into the bottom of the wall, using a maul and masonry chisel.
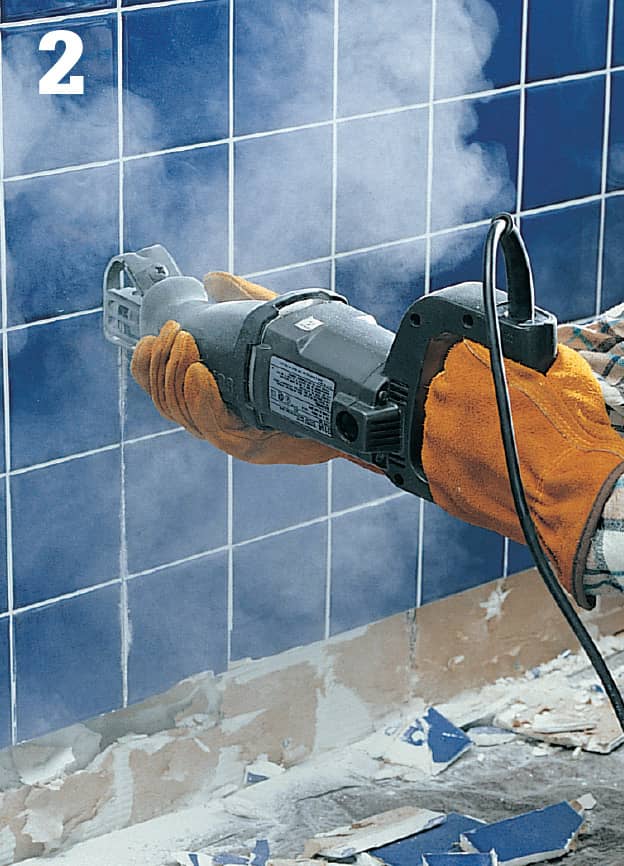
Begin cutting out small sections of the wall by inserting a reciprocating saw with a bimetal blade into the hole, and cutting along grout lines. Be careful when sawing near pipes and wiring.
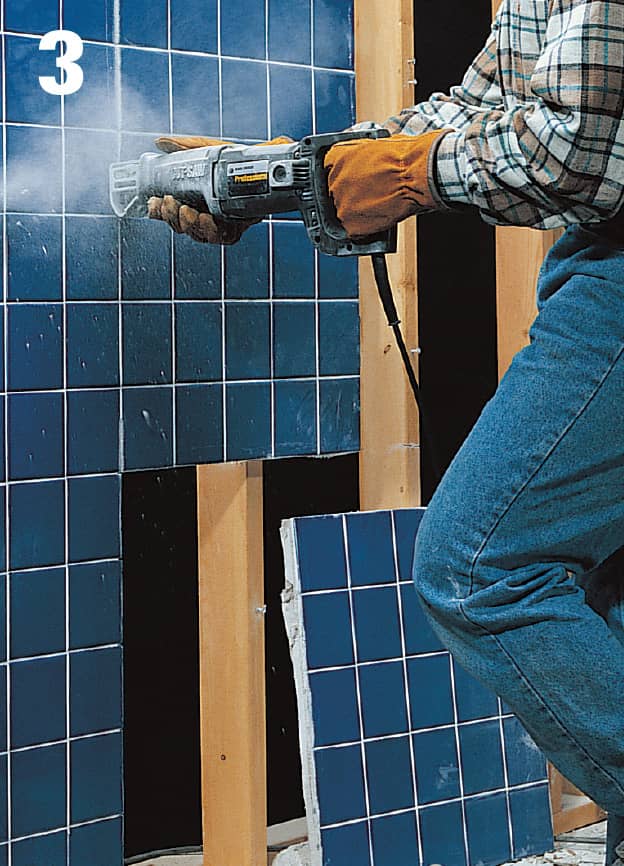
Cut the entire wall surface into small sections, removing each section as it is cut. Be careful not to cut through studs.
How to Remove Wallboard
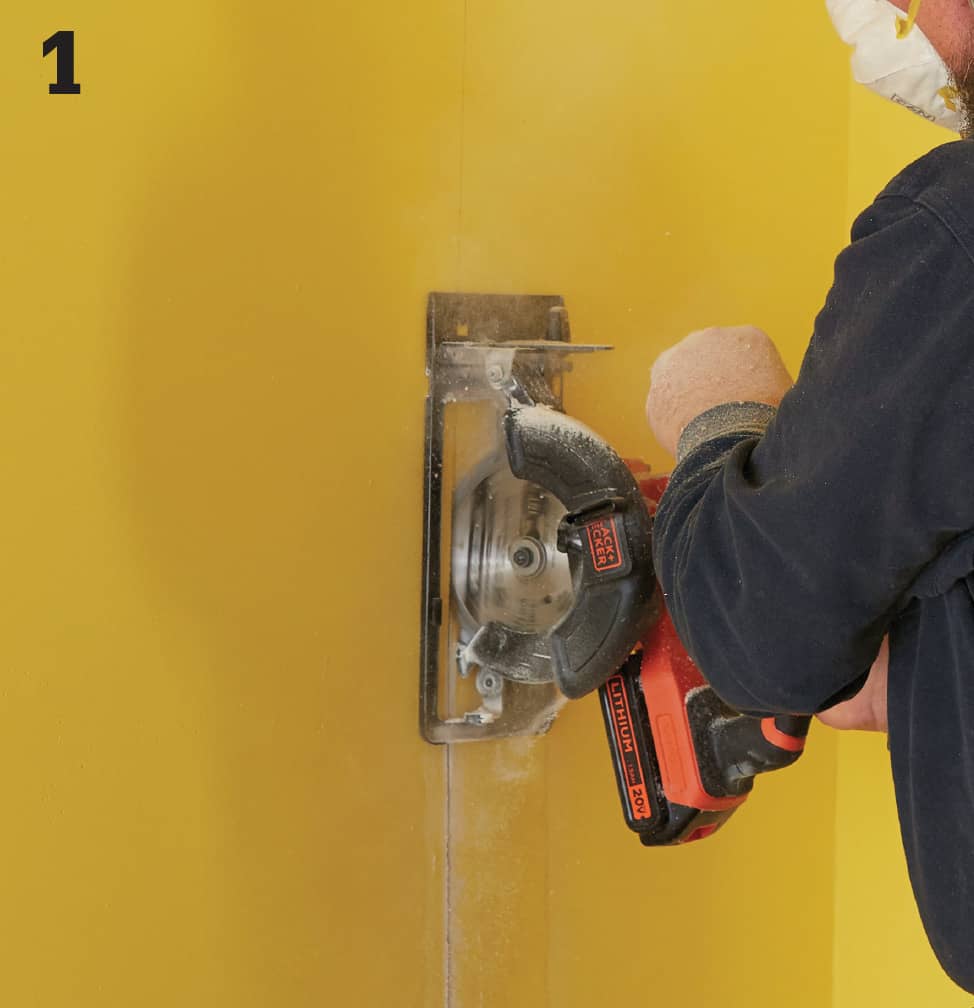
Remove baseboard and other trim, and prepare the work area. Set a circular saw to the thickness of the wallboard, then cut from floor to ceiling. Use a utility knife to finish the cuts at the top and bottom and to cut through the taped horizontal seam where the wall meets the ceiling surface.
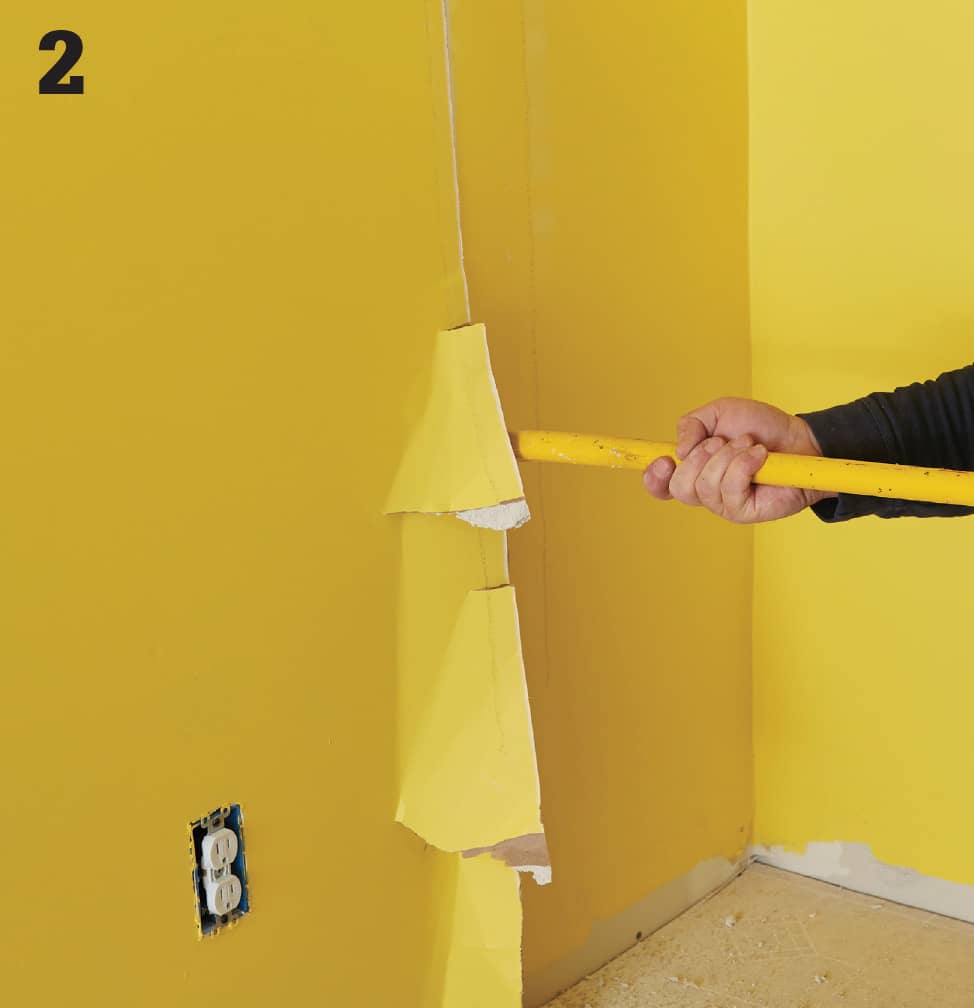
Insert the end of a pry bar into the cut, near a corner of the opening. Pull the pry bar until the wallboard breaks, then tear away the broken pieces. Take care to avoid damaging the wallboard outside the planned rough opening.
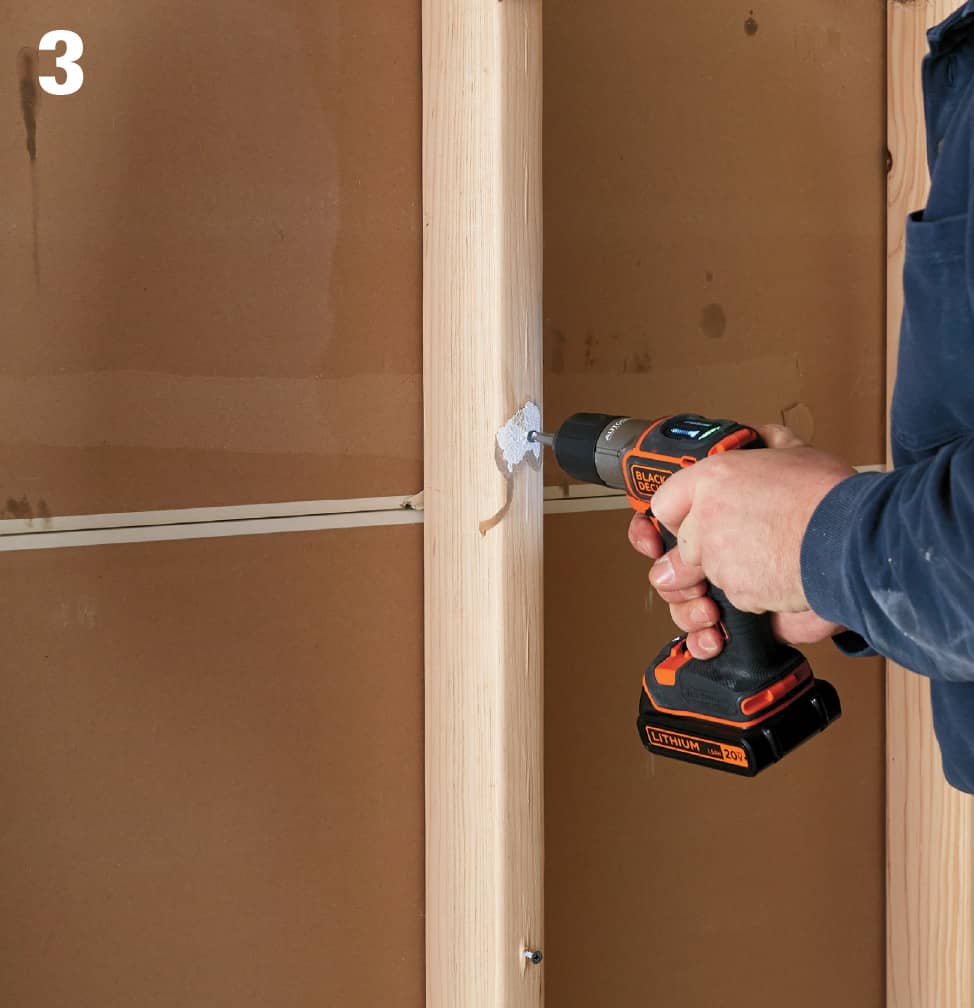
Remove nails, screws, and any remaining wallboard from the framing members, using a pry bar or drill (or screwgun). Check any vapor barrier and insulation for damage and replace if necessary.
How to Remove Plaster
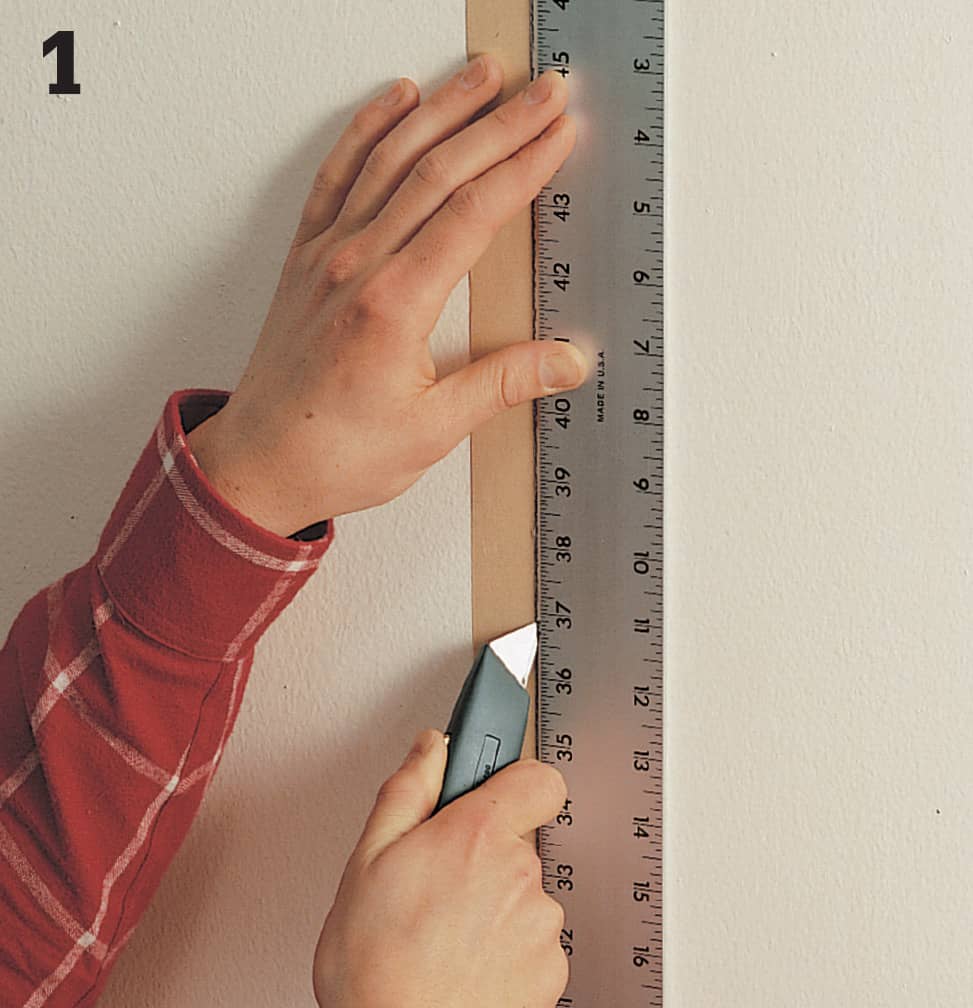
Remove baseboards and other trim and prepare the work area. Score the cutting line several times with a utility knife, using a straightedge as a guide. The line should be at least 1/8" deep.
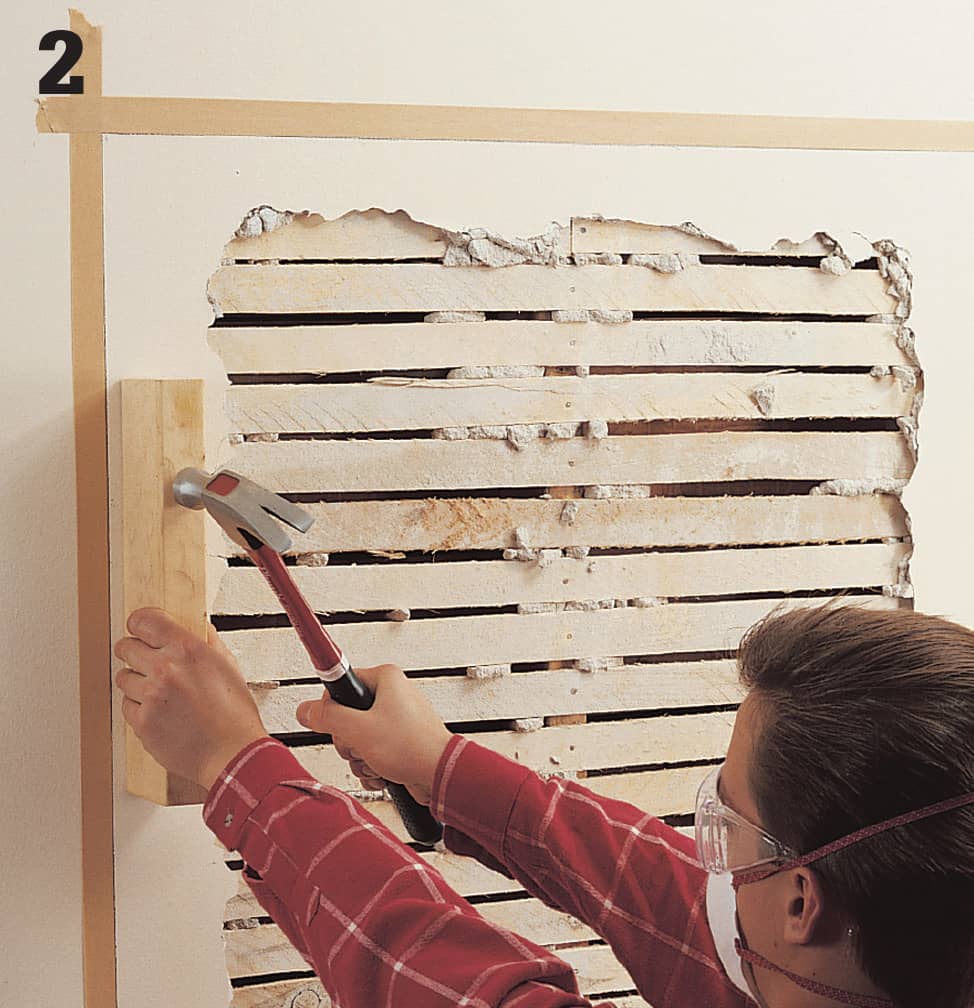
Break the plaster along the edges by holding a scrap piece of 2 × 4 on edge just inside the scored lines, and rapping it with a hammer. Use a pry bar to remove the remaining plaster.
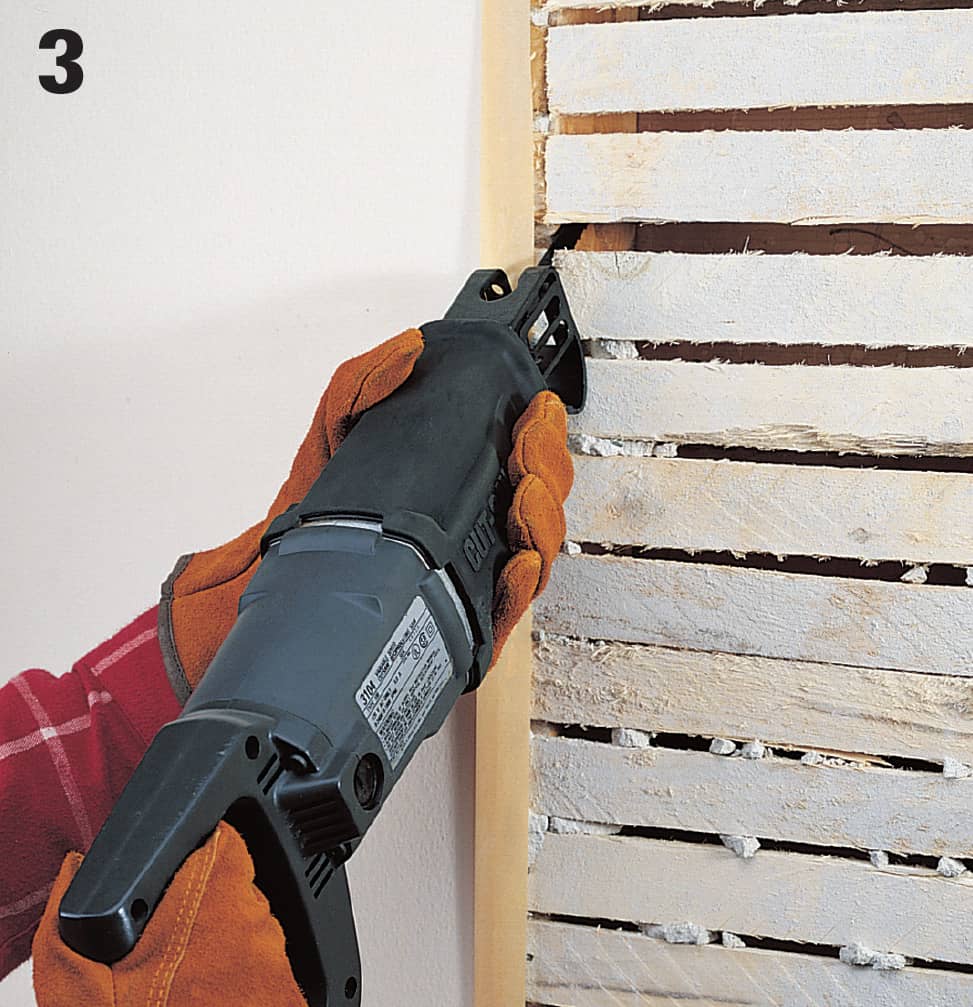
Cut through the lath along the edges of the plaster, using a reciprocating saw or jigsaw. Remove the lath from the studs using a pry bar. Pry away any remaining nails. Check the vapor barrier and insulation for damage and replace if necessary.
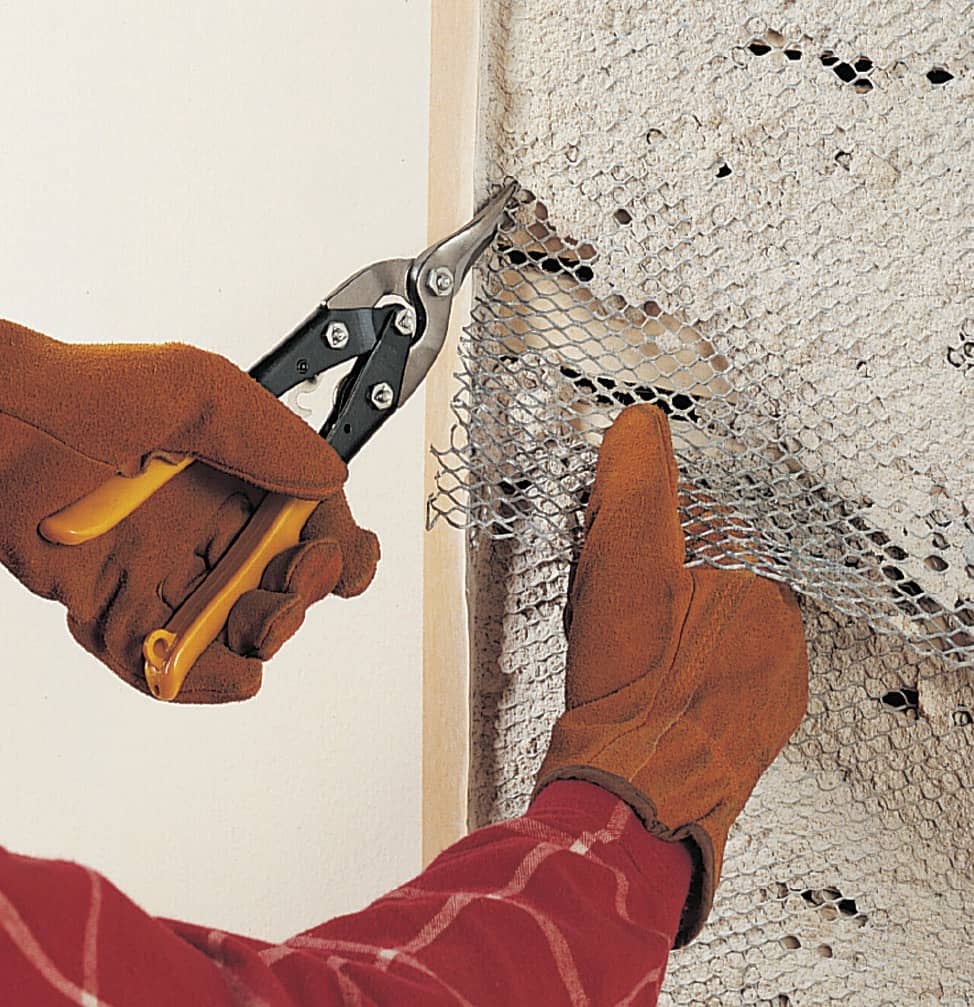
VARIATION: If the wall has metal lath laid over the wood lath, use aviation snips to clip the edges of the metal lath. Press the jagged edges of the lath flat against the stud. The cut edges of metal lath are very sharp; be sure to wear heavy work gloves.
 Final Inspection & Fixing Problems
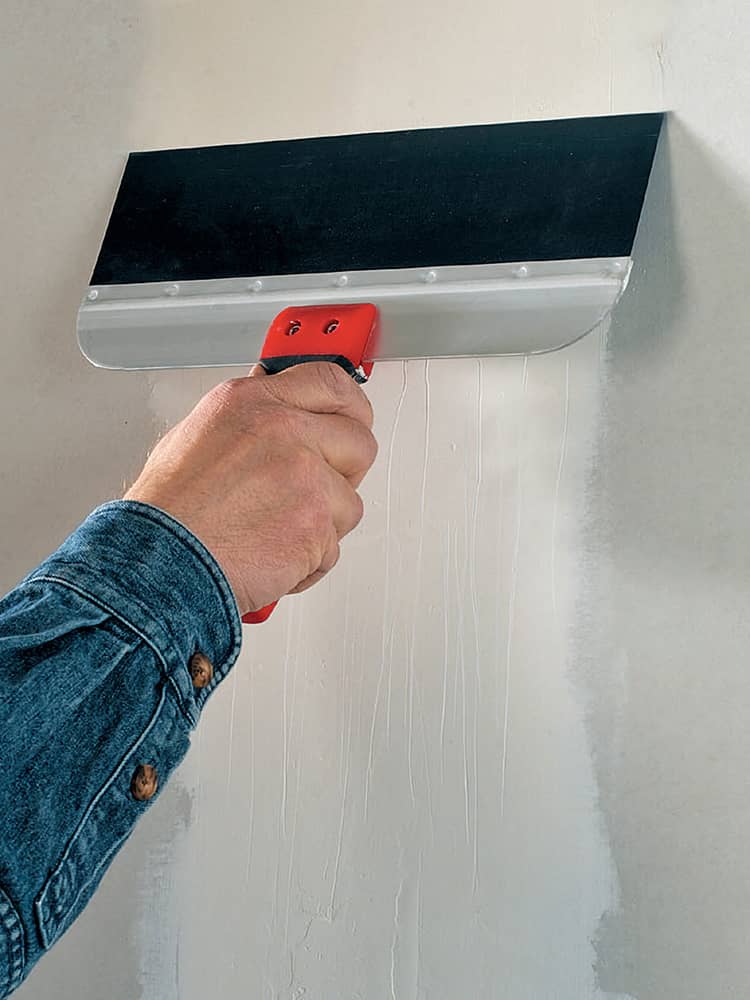
After the final coat of joint compound has dried but before you begin sanding, inspect the entire finish job for flaws. If you discover scrapes, pitting, or other imperfections, add another coat of joint compound. Repair any damaged or overlooked areas such as cracked seams and over-cut holes for electrical boxes prior to sanding.
During your inspection, make sure to check that all seams are acceptably feathered out. To check seams, hold a level or 12-in. taping knife perpendicularly across the seam; fill concave areas with extra layers of compound and correct any convex seams that crown more than 1/16".
How to Fix Common Taping Problems
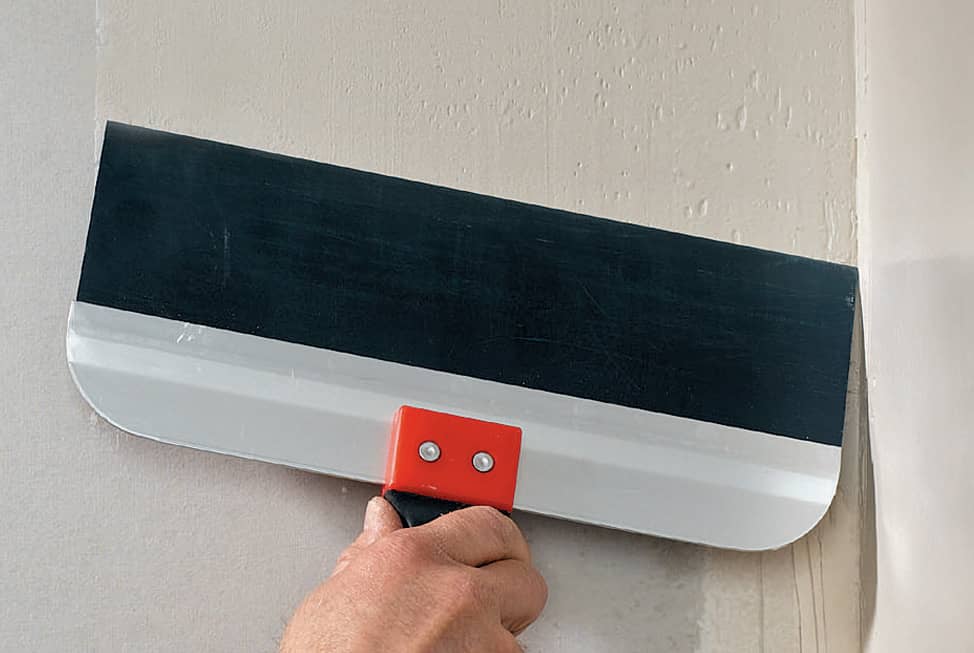
Pitting occurs when compound is overmixed or applied with too little pressure to force out trapped air bubbles. Pitting can be corrected easily with a thin coat of compound. If trapped air bubbles are present, sand lightly before covering with compound.
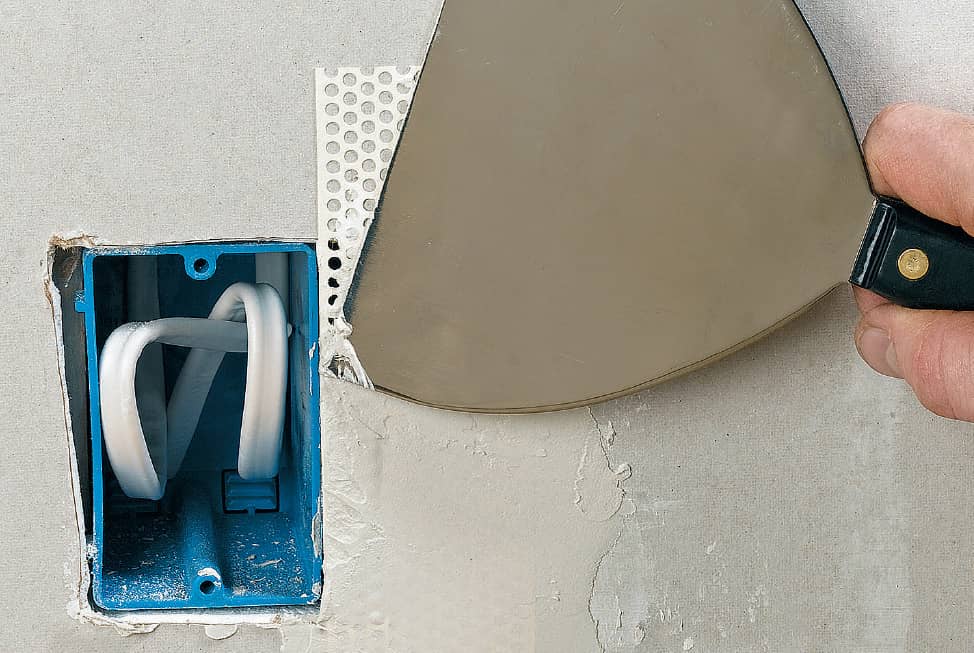
Mis-cut holes for electrical boxes can be flat-taped. Cover the gap with self-adhesive mesh tape and cover with three coats of all-purpose compound. Pre-cut repair patches are also available.
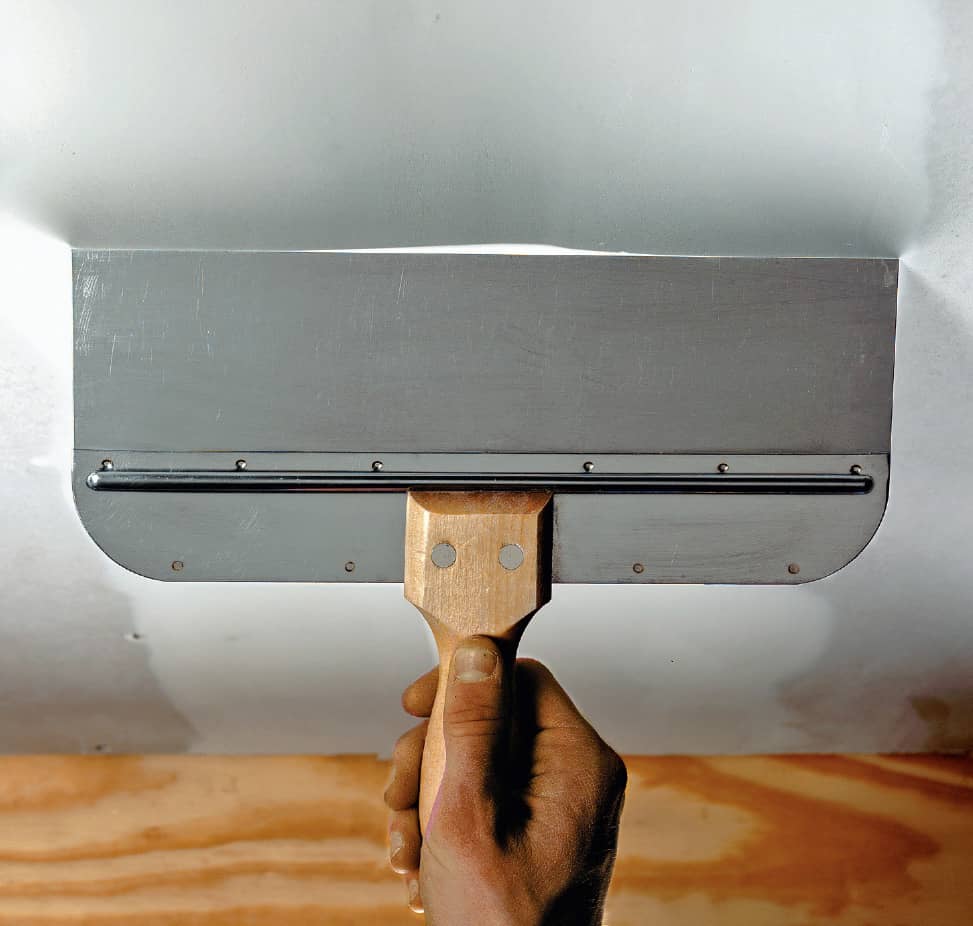
Concave seams can be filled with an extra layer or two of all-purpose compound. Let dry and sand lightly between coats.
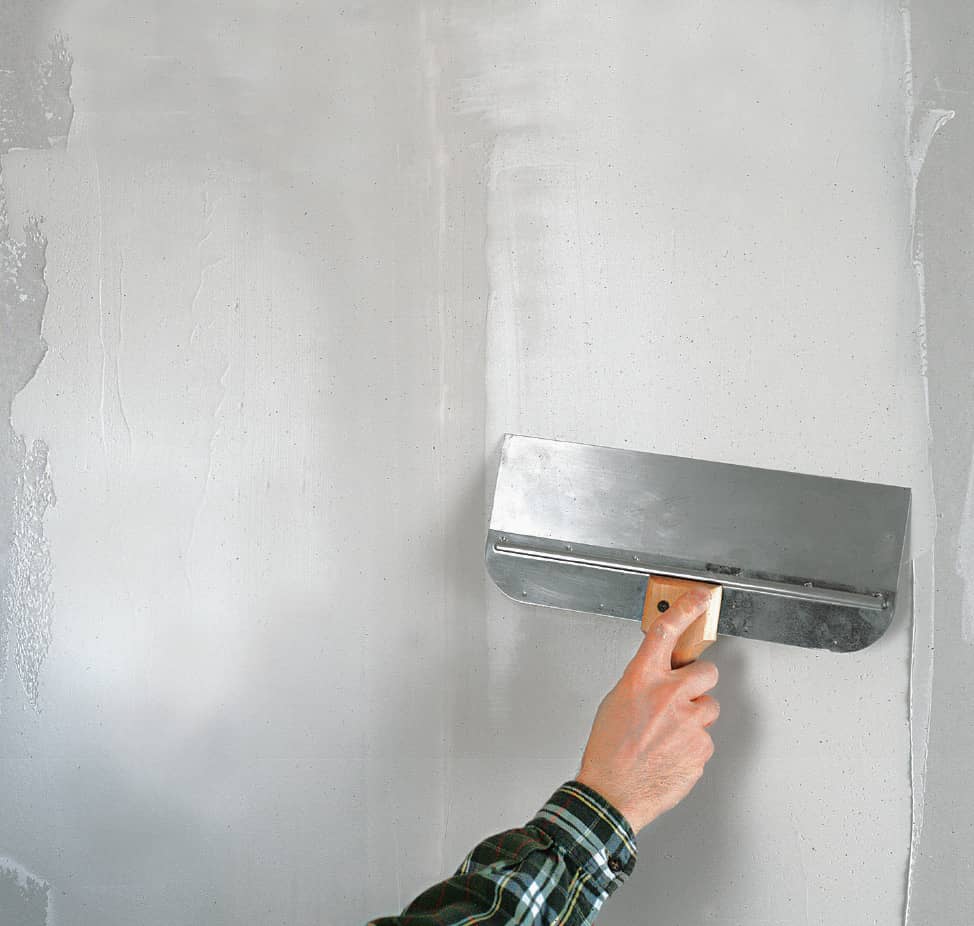
For seams crowned more than 1/16", carefully sand along the center, but do not expose the tape. Check the seam with a level. If it’s still crowned, add a layer of compound with a 12" knife, removing all of it along the seam’s center and feathering it out toward the outside edges. After it dries, apply a final coat, if necessary.
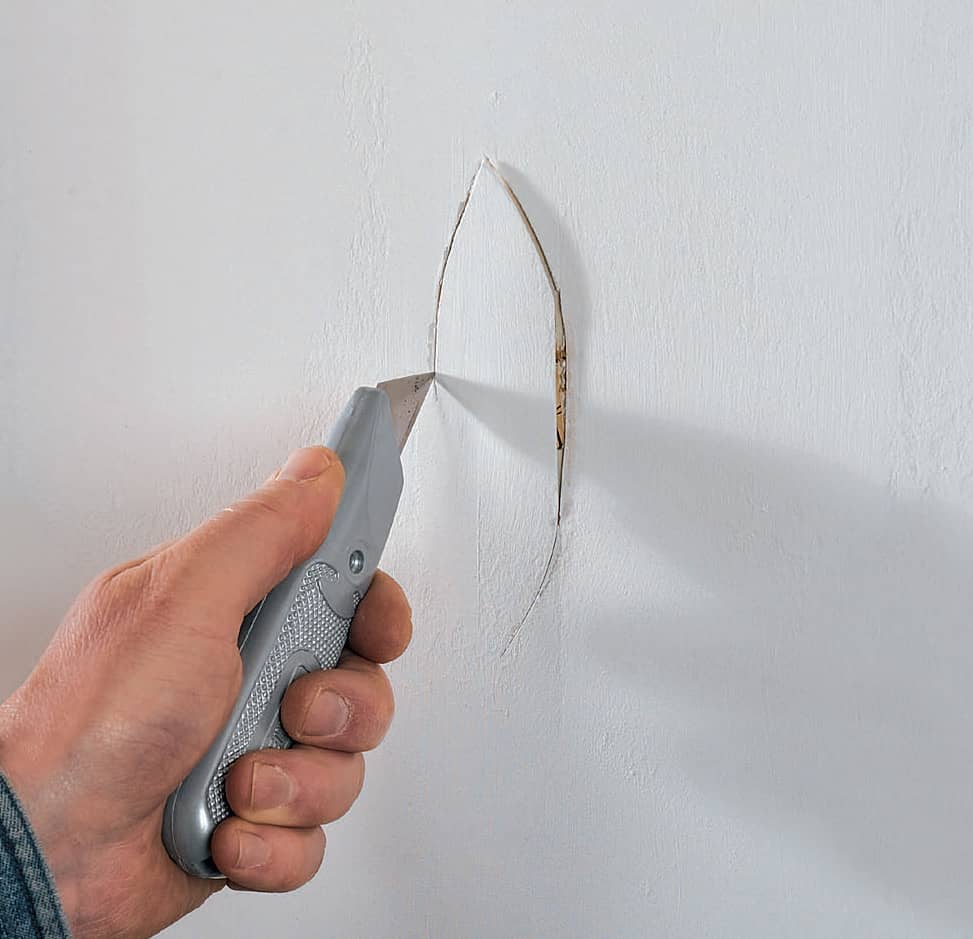
Bubbled or loose tape occurs when the bed layer is too thin, which causes a faulty bond between the tape and compound. Cut out small, soft areas with a utility knife and retape. Large runs of loose tape will have to be fully removed before retaping.
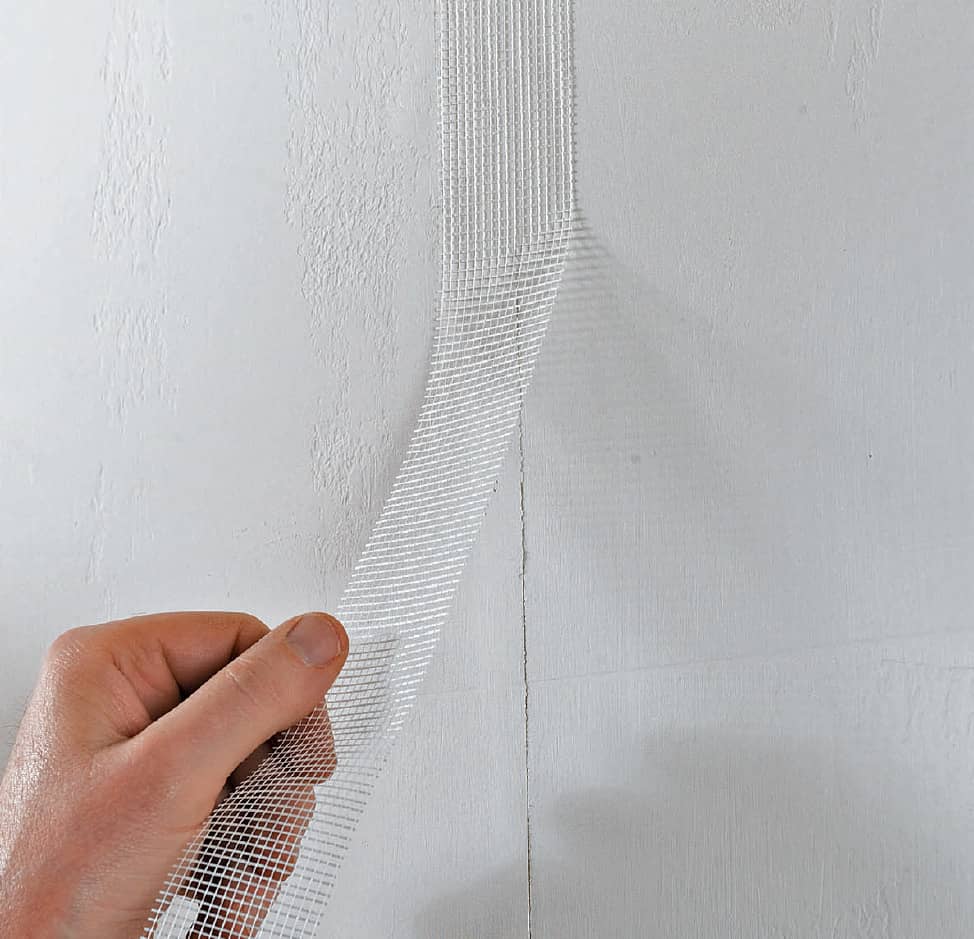
Cracked seams are often the result of compound that has dried too quickly or shrunk. Retape the seam if the existing tape and compound is intact; otherwise, cut out any loose material. In either case, make sure to fill the crack with compound.
 Ladders
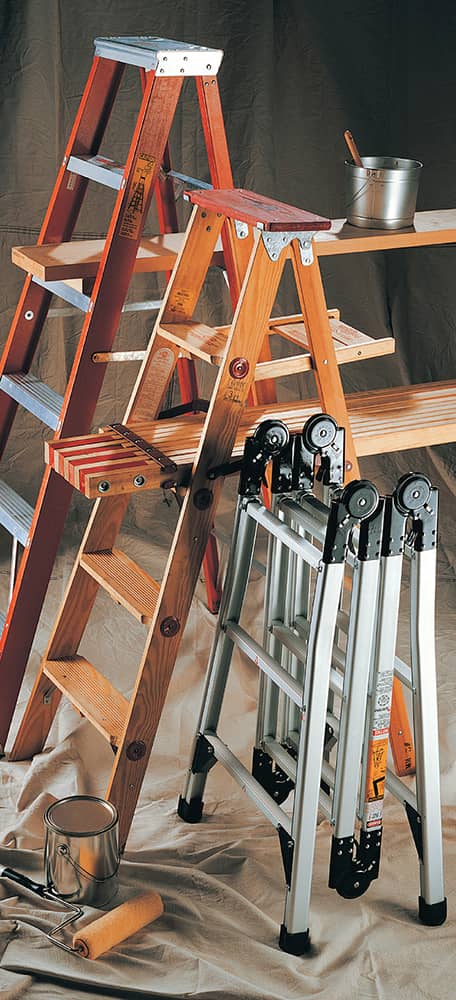
Two quality stepladders and an extension plank are all you need to paint most interior surfaces. For painting high areas, build a simple scaffold by running the plank through the steps of two stepladders. It can be easy to lose your balance or step off the plank, so choose tall ladders for safety; the upper part of the ladders can help you balance and will keep you from stepping off the ends of the plank. Buy a strong, straight 2" × 10" board no more than 12 feet long, or rent a plank from a material dealer or rental outlet.
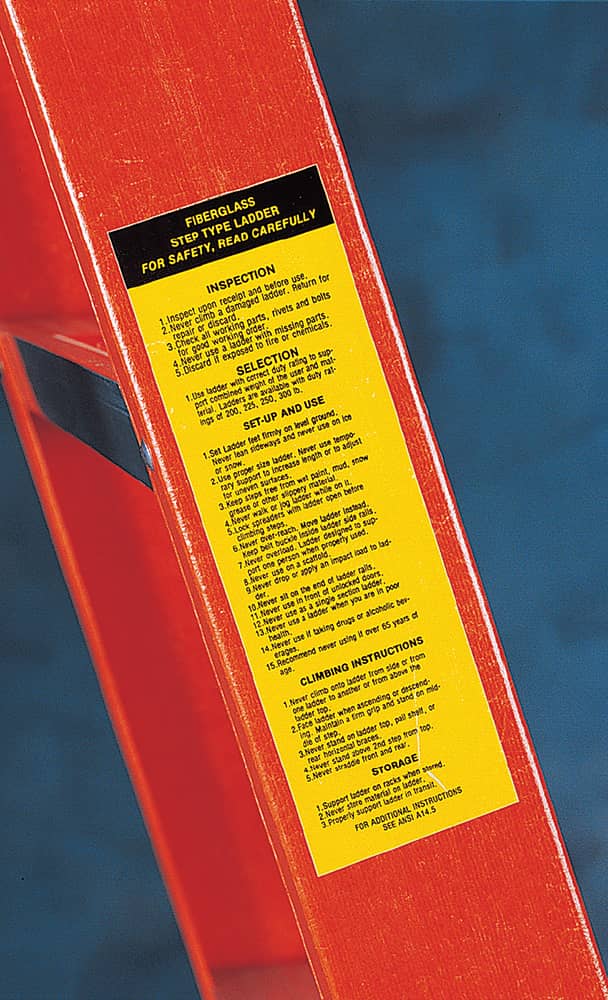
A manufacturer’s sticker provides weight ratings and instructions for the correct use of the ladder. Read it carefully when shopping for a ladder. Choose a ladder that will easily accommodate your weight plus the additional weight of any tools or materials you plan to carry up the ladder.
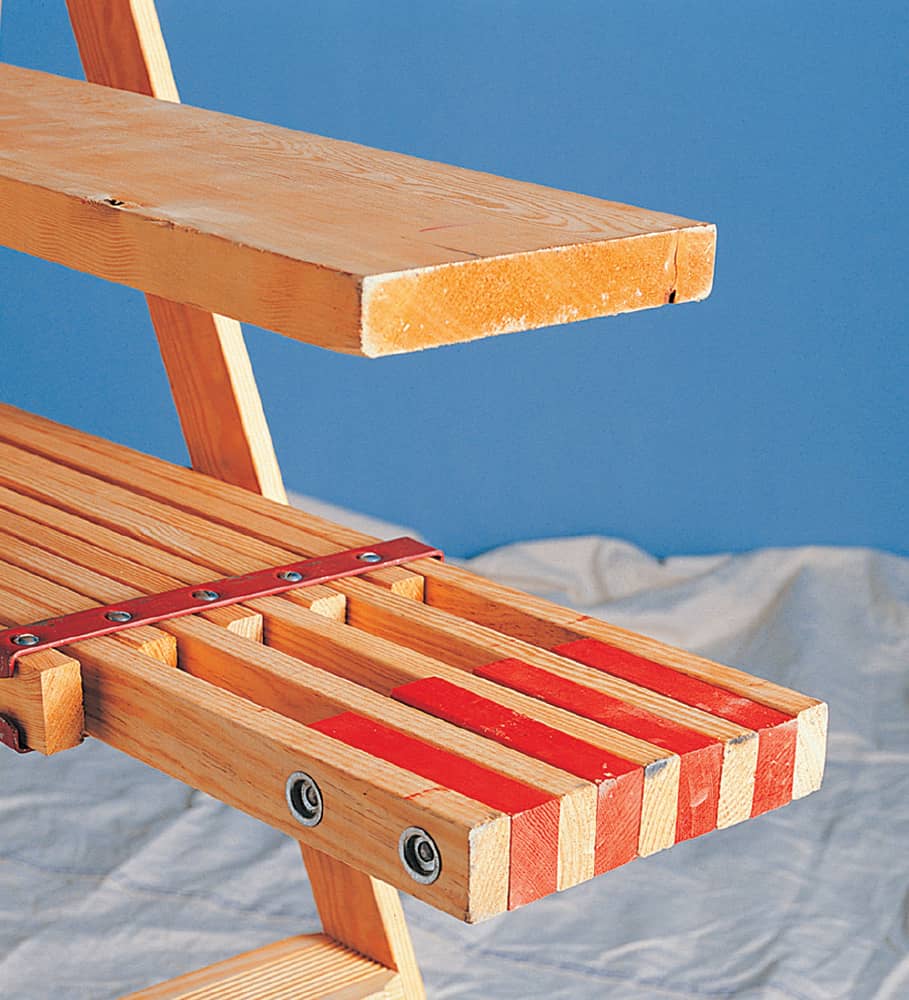
Rent extension planks from a paint dealer or from a rental center.
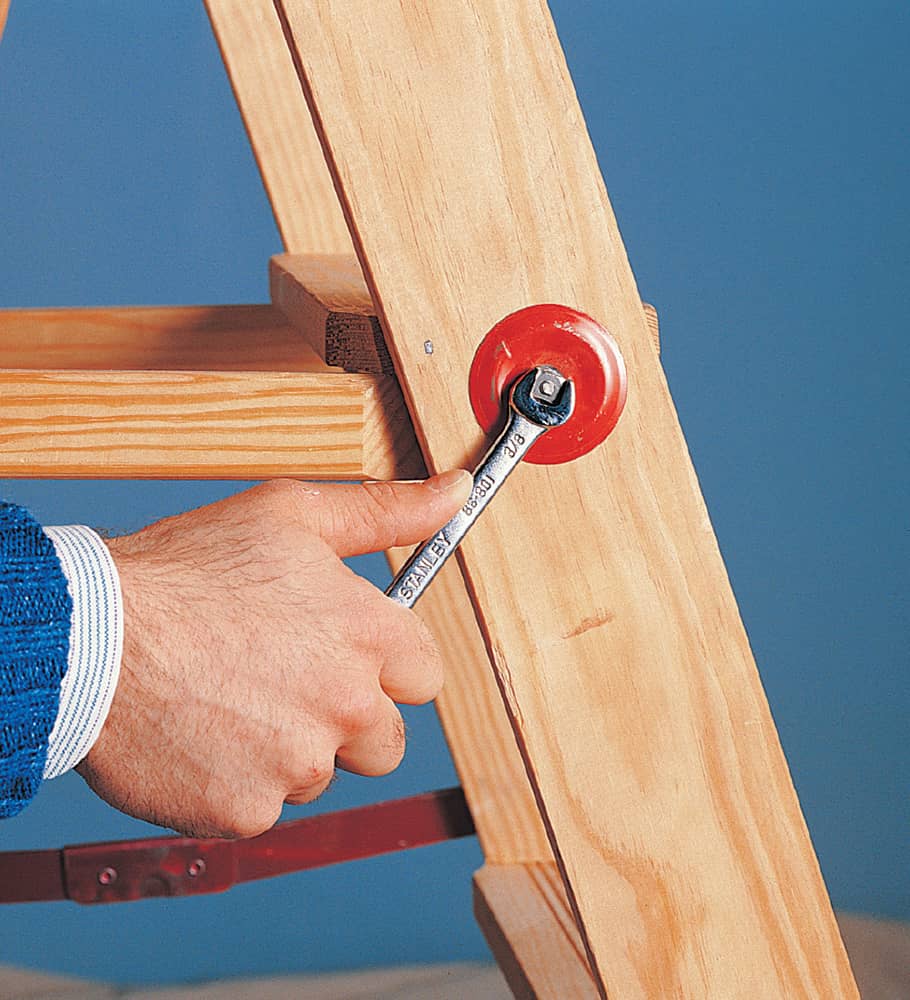
Keep steps tight by periodically checking them and tightening the braces when they need it.
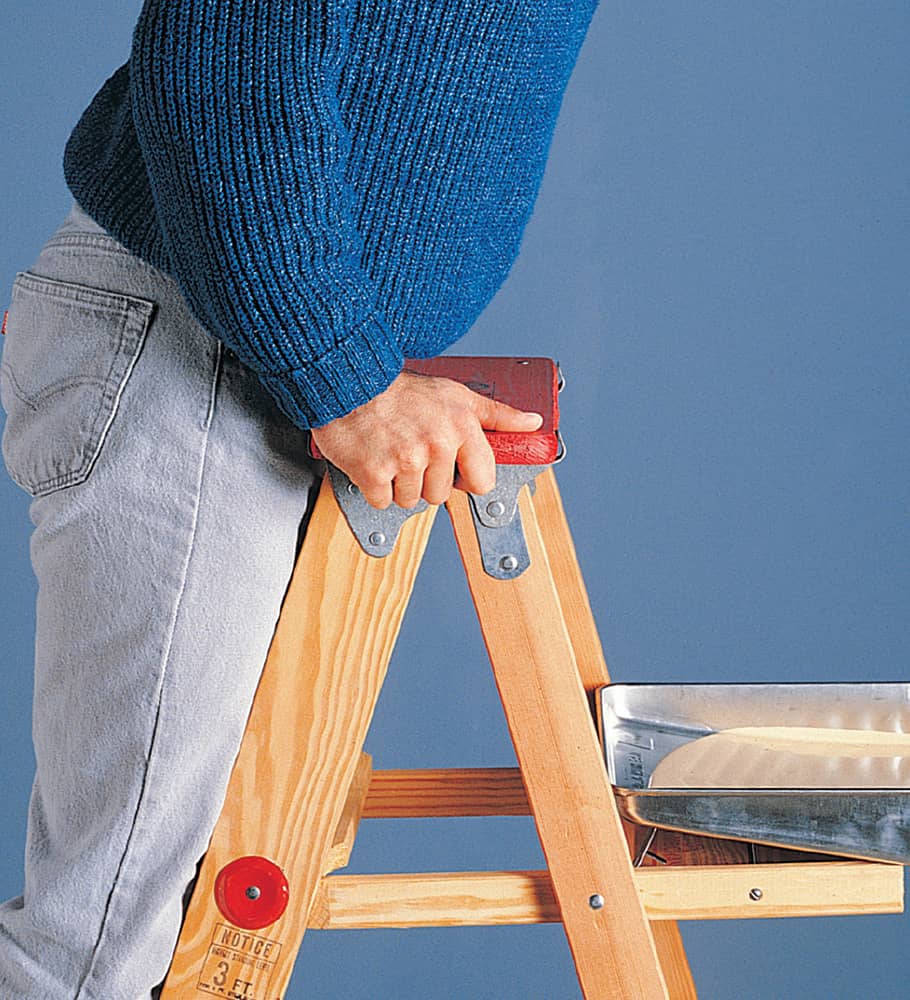
Keep the ladder in front of you when working. Lean your body against the ladder for balance.
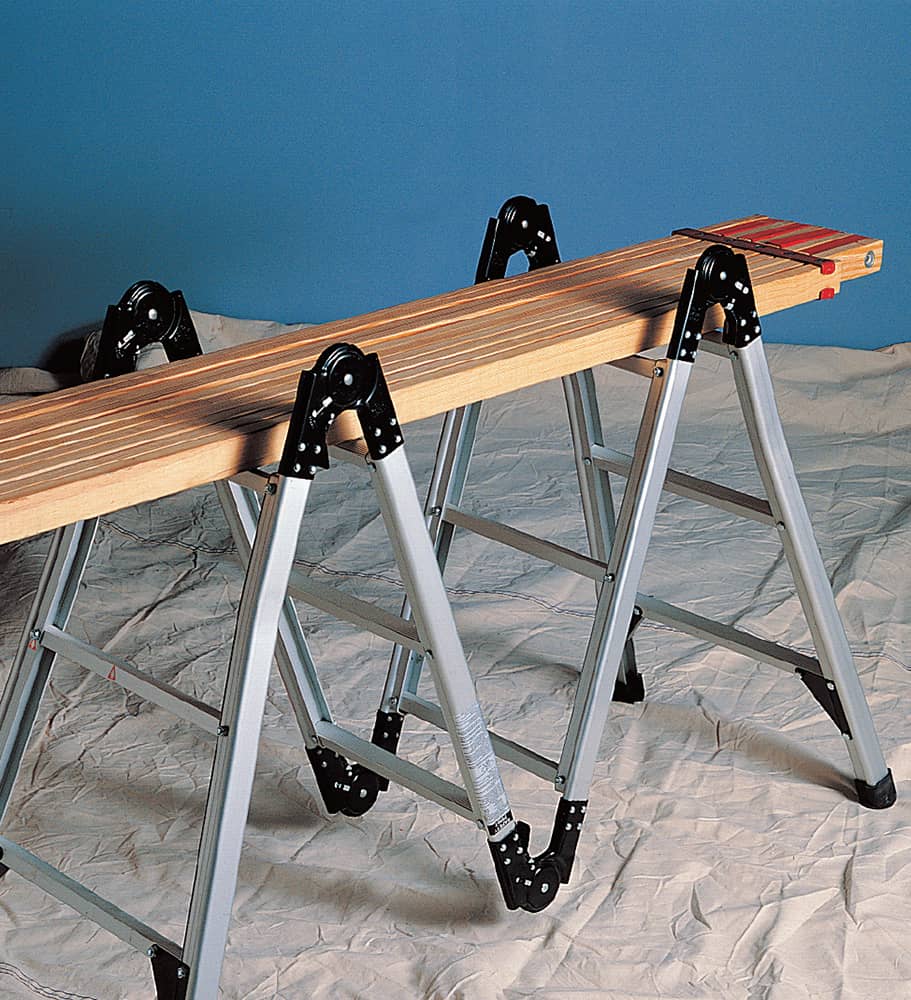
An adjustable ladder adapts to many different work needs. It can be used as a straight ladder, a stepladder, or a base for scaffold planks.
 Paint Safety
Always read and follow the label information on paint and solvent containers. Chemicals that pose a fire hazard are listed (in order of flammability) as: combustible, flammable, or extremely flammable. Use caution when using these products and remember that the fumes are also flammable.
The warning “use with adequate ventilation” means that there should be no more vapor buildup than there would be if you were using the material outside. Open doors and windows, use exhaust fans, and wear an approved respirator if you can’t provide adequate ventilation.
Save a small amount of paint for touchups and repairs, and then safely dispose of the remainder. Dispose of alkyd (oil-based) paint according to local regulations regarding hazardous materials; if possible, recycle latex paint at your local hazardous waste disposal facility or allow it to dry out completely and set it out with your regular trash.
Paint chemicals do not store well. Buy only as much as is needed for the project and keep them away from children and pets.
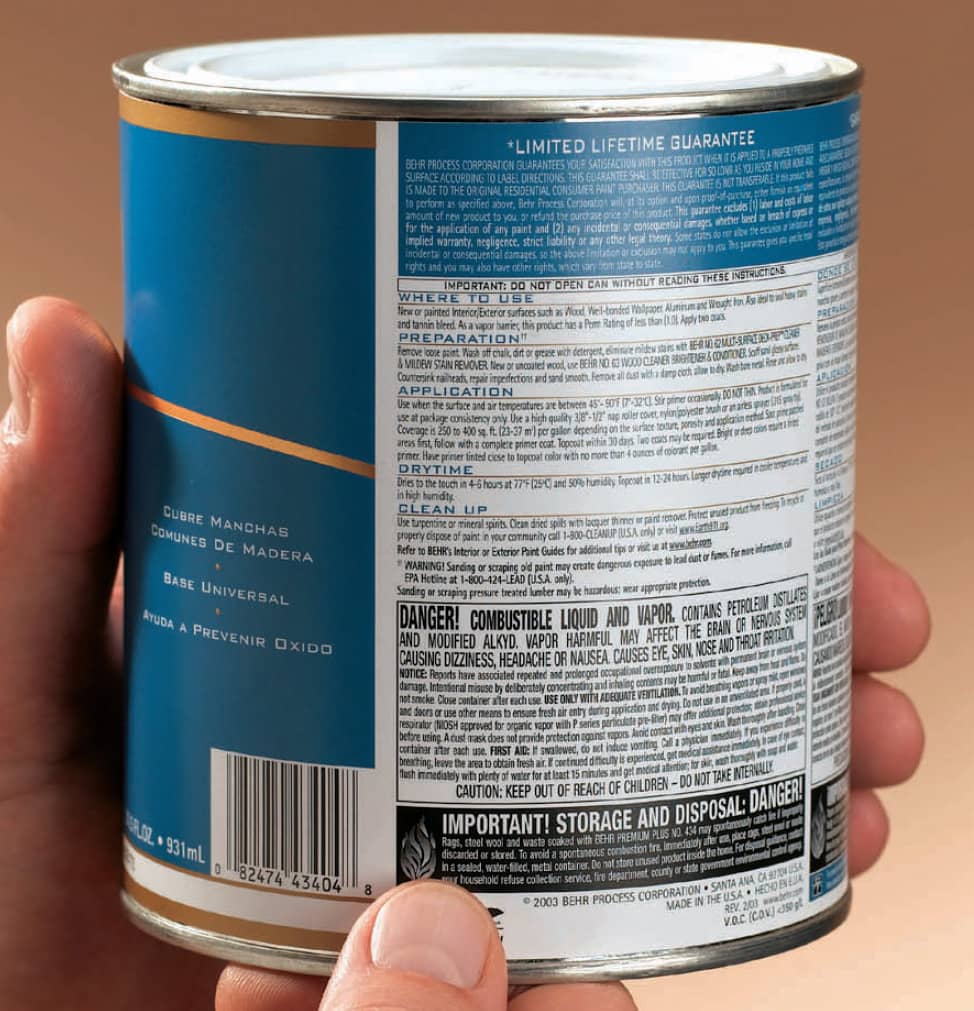
Read label information. Chemicals that are poisonous or flammable are labeled with warnings and instructions for safe handling.

Wear safety goggles when using chemical stripper or cleaning products. Use goggles when painting overhead.
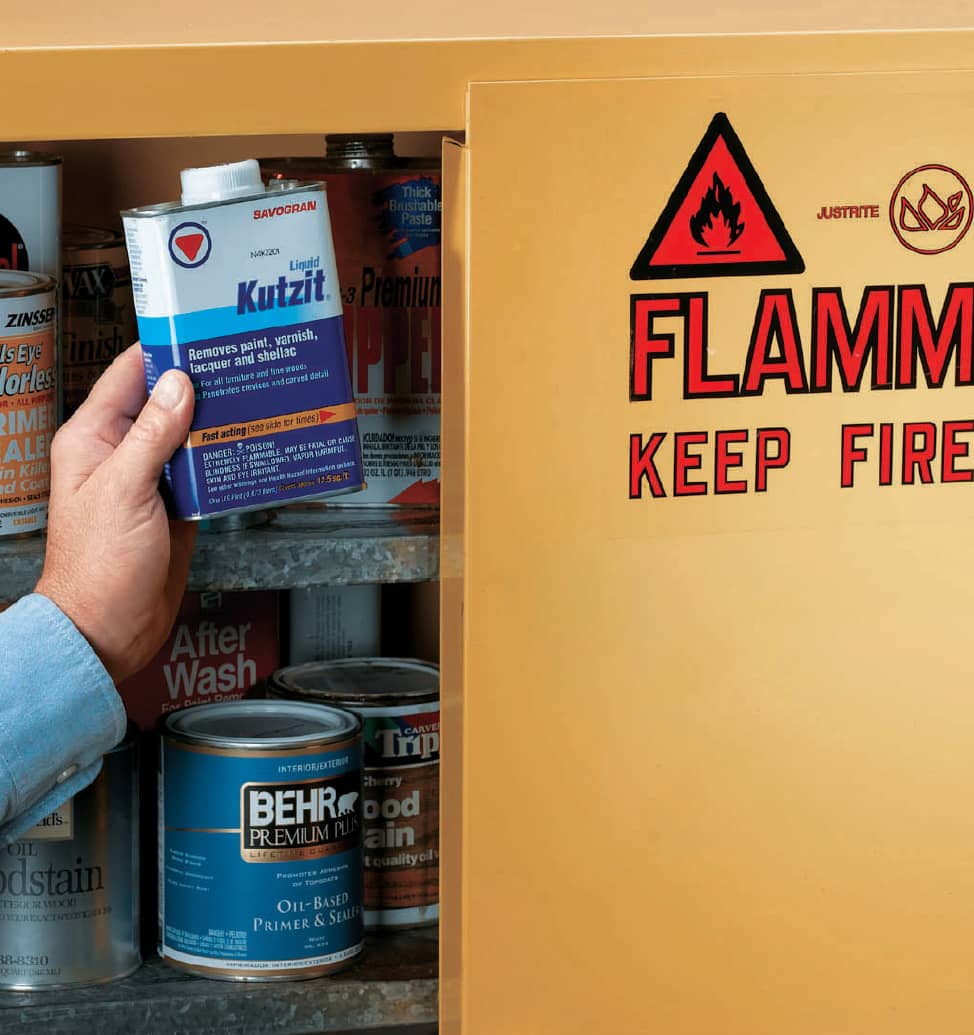
Do not use chemicals that are listed as combustible or flammable, such as paint strippers, near an open flame. Store paint chemicals out of the reach of children and away from appliances with pilot lights, such as a furnace or gas oven.
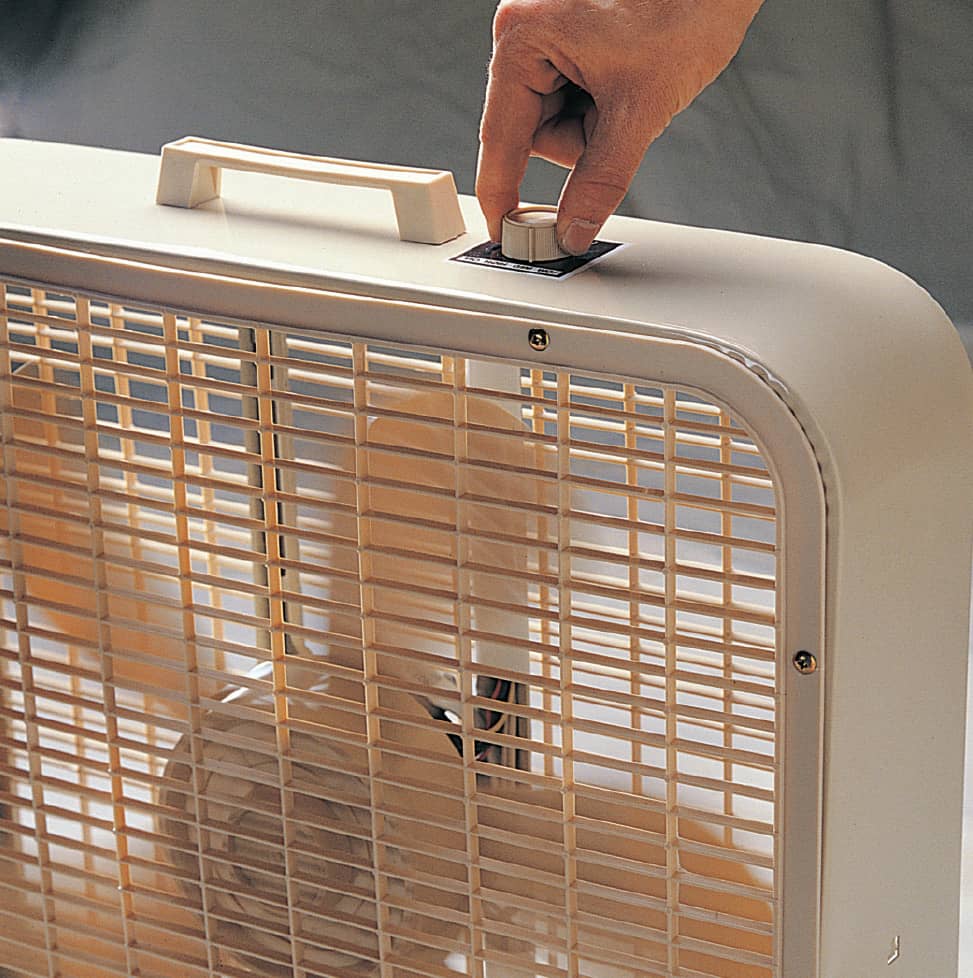
Open windows and doors and use a fan for ventilation when painting indoors. If a product label has the warning “harmful or fatal if swallowed,” assume that the vapors are dangerous to breathe.

Wear a respirator to filter vapors if you cannot ventilate a work area adequately. If you can smell vapors, the ventilation is not adequate.
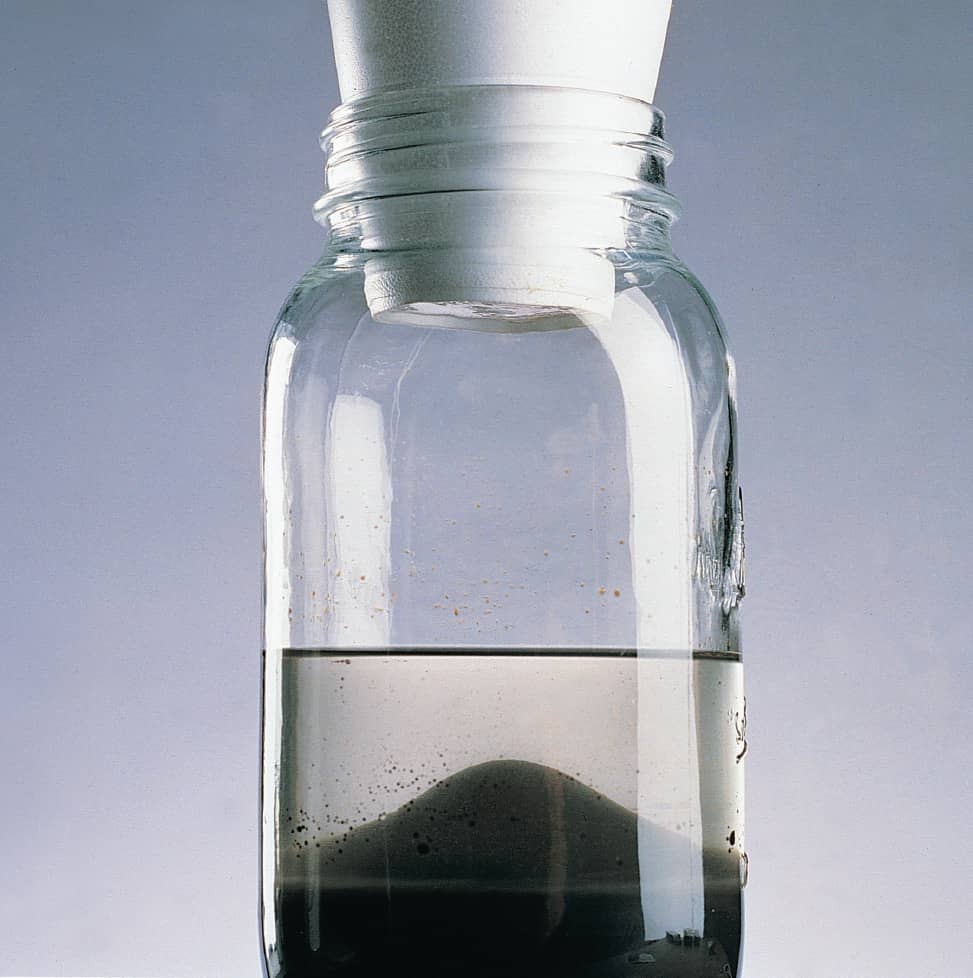
Pour paint thinner into a clear jar after use. When the solid material settles out, pour off the clear thinner and save it to reuse later. Dispose of the sediment as hazardous waste.
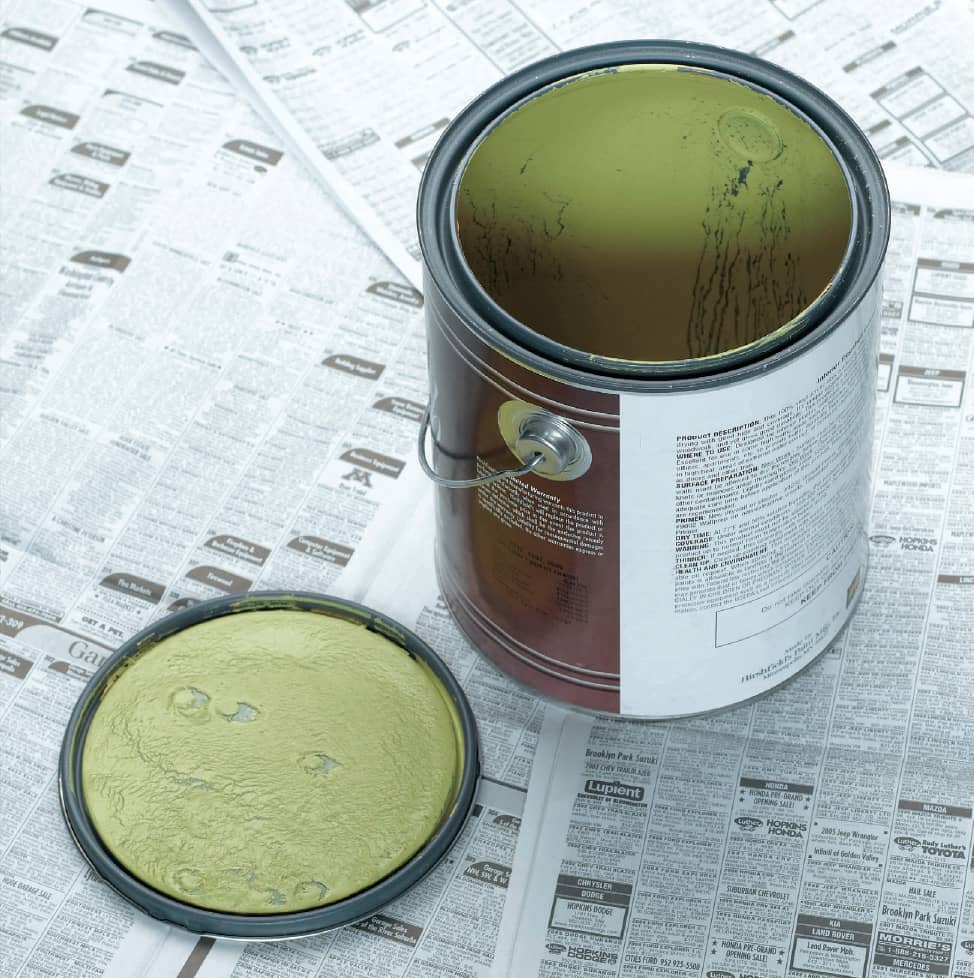
Dispose of leftover latex primers and paint safely. Let the container stand uncovered until the paint dries completely. In most communities, dried latex paint can be put into the regular trash. (Alkyd primers and paint must be disposed of as hazardous waste.)
 Preparation Tools & Materials
It’s as simple as it is unavoidable: Good preparation produces a professional-looking job. In the old days, preparation could be difficult and time consuming, but with the help of the new tools and materials on the market today, it’s easier than ever.
New cleaners and removal agents help prepare surfaces for paint and wallcovering; new patching products help you create virtually invisible wall repairs; ingenious new masking and draping materials take the tedium out of keeping the paint where it belongs; primers and sealers provide good coverage and help paint bond properly. While you’re in the planning stages of a painting or decorating project, take a stroll down the aisles at a local home center or hardware store. Consider the project ahead of you and evaluate which products will make the job simpler and more enjoyable.
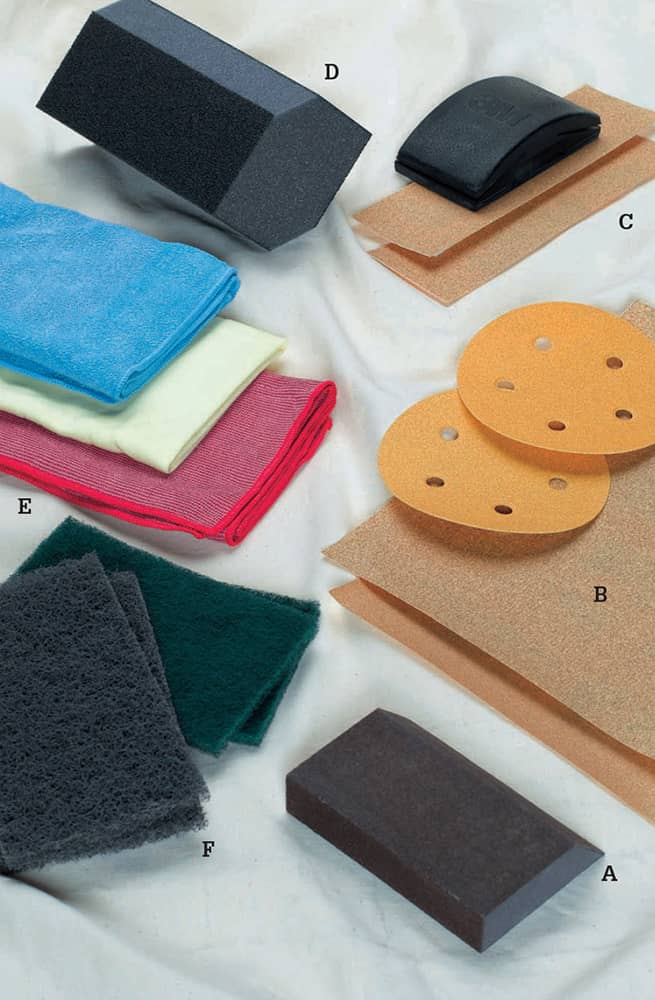
Smooth, even surfaces are easy to achieve with tools such as these: sanding sponges (A), sandpaper (B), sanding block (C), a drywall-corner sanding sponge (D), microfiber tack cloth (E), and synthetic steel wool (F).
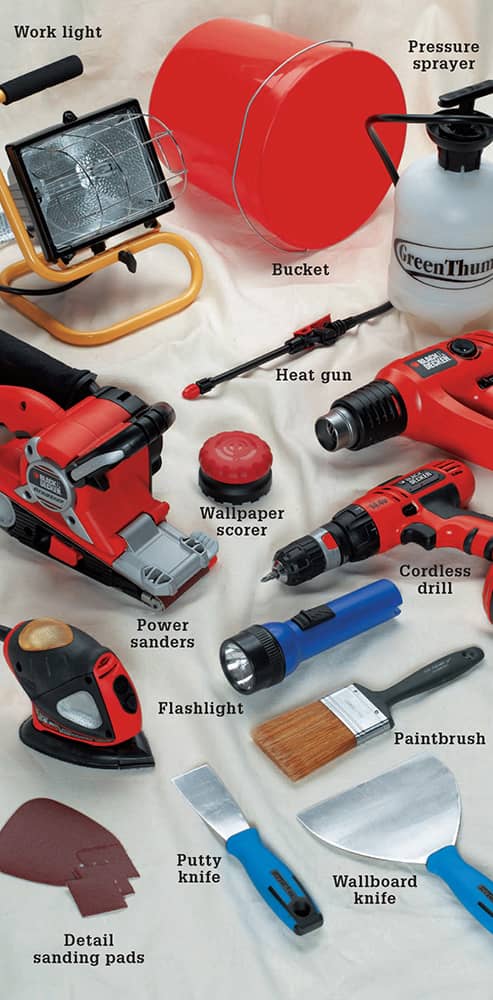
Tools for preparation include some ordinary home workshop tools and some specialty items. All are available at home improvement centers, as well as at better decorating supply stores.
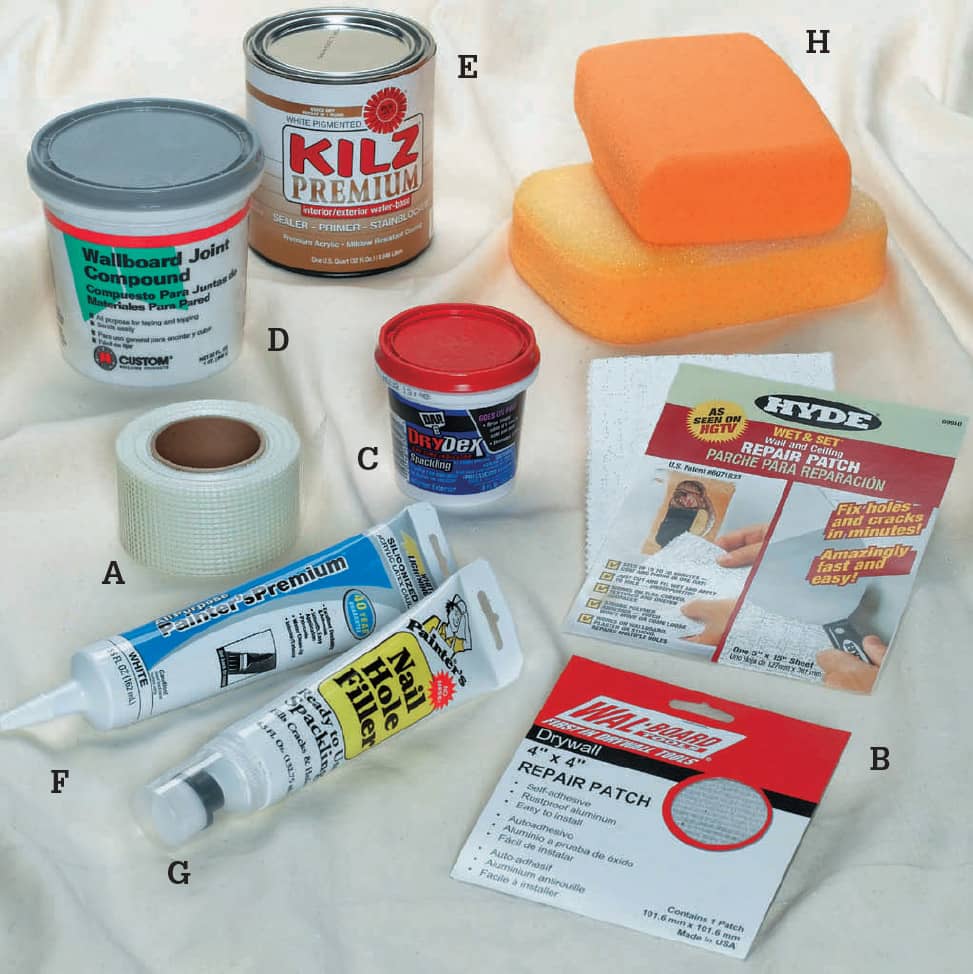
Wall repair materials include: self-adhesive seam tape (A), hole-patching kits (B), crack-repair compound (C), joint compound (D), stainblocking primer/sealer (E), and sink and tub caulk (F). Some new spackling compounds (G) start out pink and dry white so you can see when they’re ready to be sanded and painted. Sponges (H) are useful for smoothing damp joint compound to reduce the amount of sanding that’s necessary later.
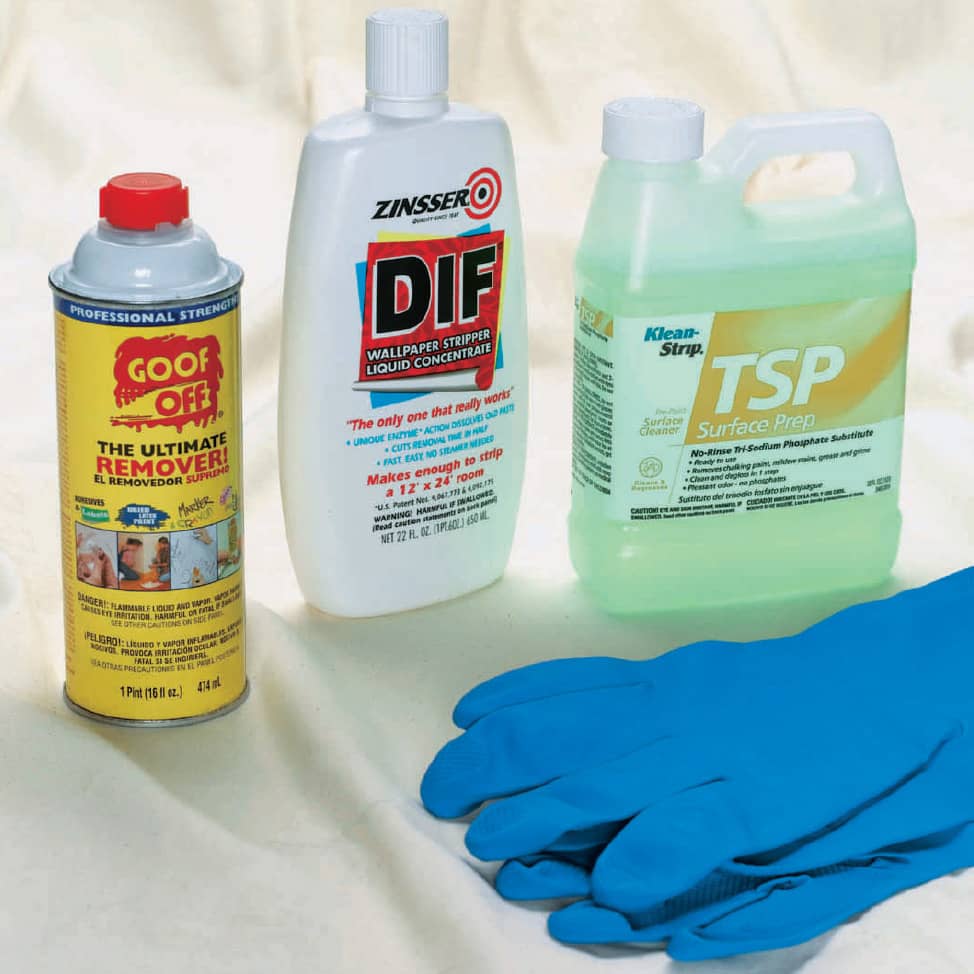
Walls must be clean, smooth, and free of grease before a painting project. If wallpaper is to be removed, a wallpaper removal agent is extremely helpful. Clockwise from top left are: cleanup solution to remove old drips and splatters, wallcovering remover to strip old wallcoverings, trisodium phosphate (TSP) for washing the walls, and rubber gloves, which should be worn when using chemicals such as these.
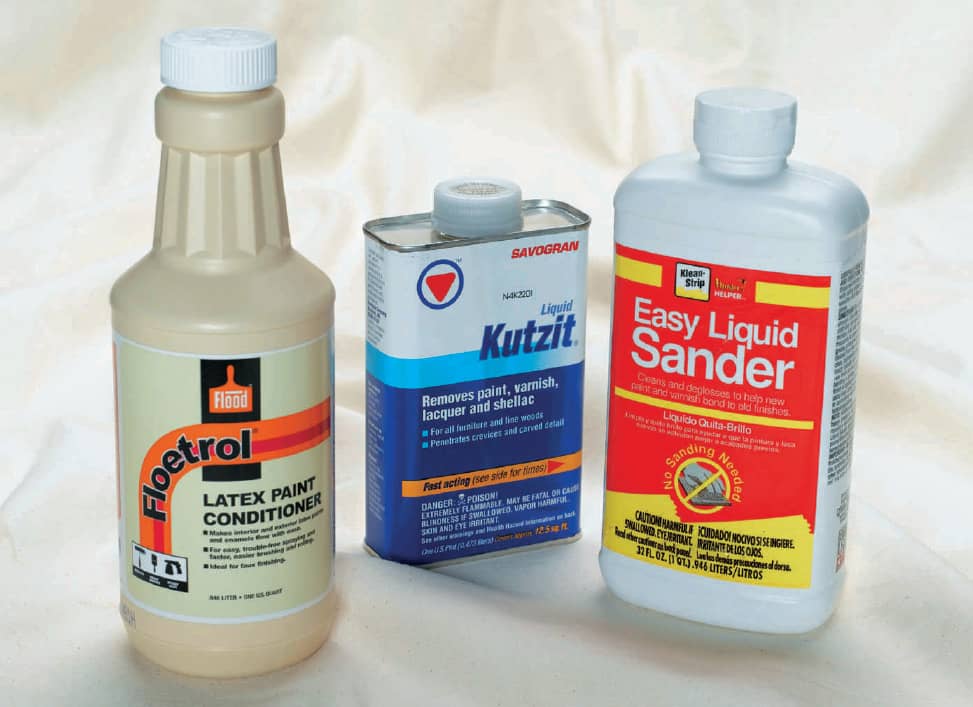
Preparation liquids include latex bonding agent for plaster repairs; paint remover; and liquid deglosser, for dulling glossy surfaces prior to painting.
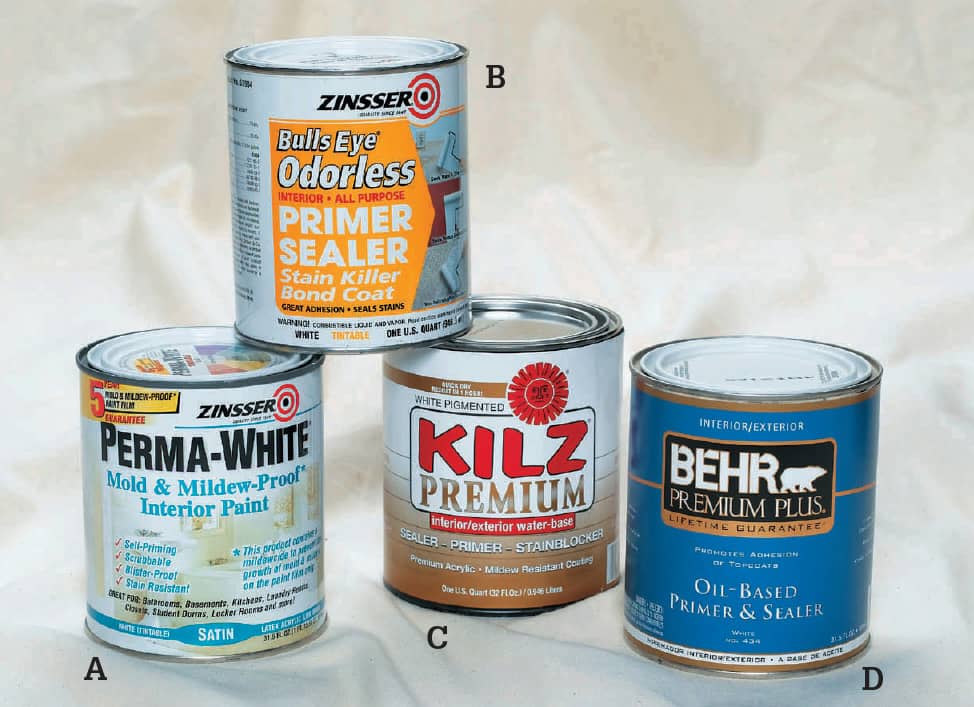
Primers provide maximum adhesion for paint on any surface. There are many specialty primers available, including mold-resistant primers that are especially useful in areas that tend to be damp, such as bathrooms (A), primers made for plaster and new drywall (B), stainblocking primers (C), and tinted primers that reduce the need for multiple coats of paint (particularly for deep colors) (D).
 Room Preparation
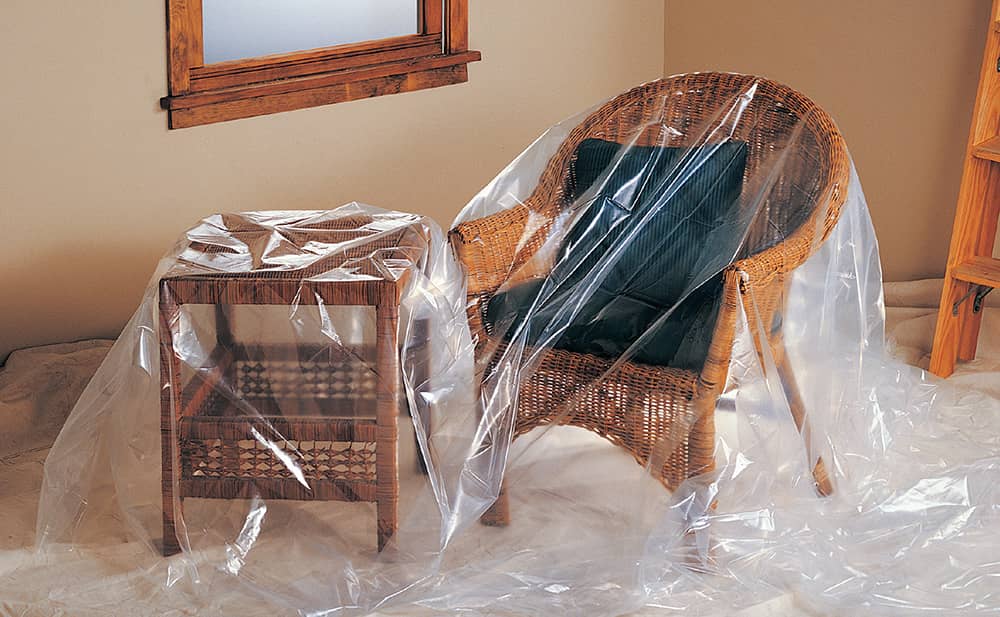
Before painting, your first step is to protect everything that could be covered by dust or splattered by paint. Remove all window and door hardware, light fixtures, and coverplates on outlets and wall switches. Drape furniture and cover the floors. Remove heating and air conditioning duct covers. Mask off wood moldings with self-adhesive paper or masking tape. Painting time can be a good opportunity to upgrade with new hardware, like window pulls and cabinet knobs.
How to Prepare a Room
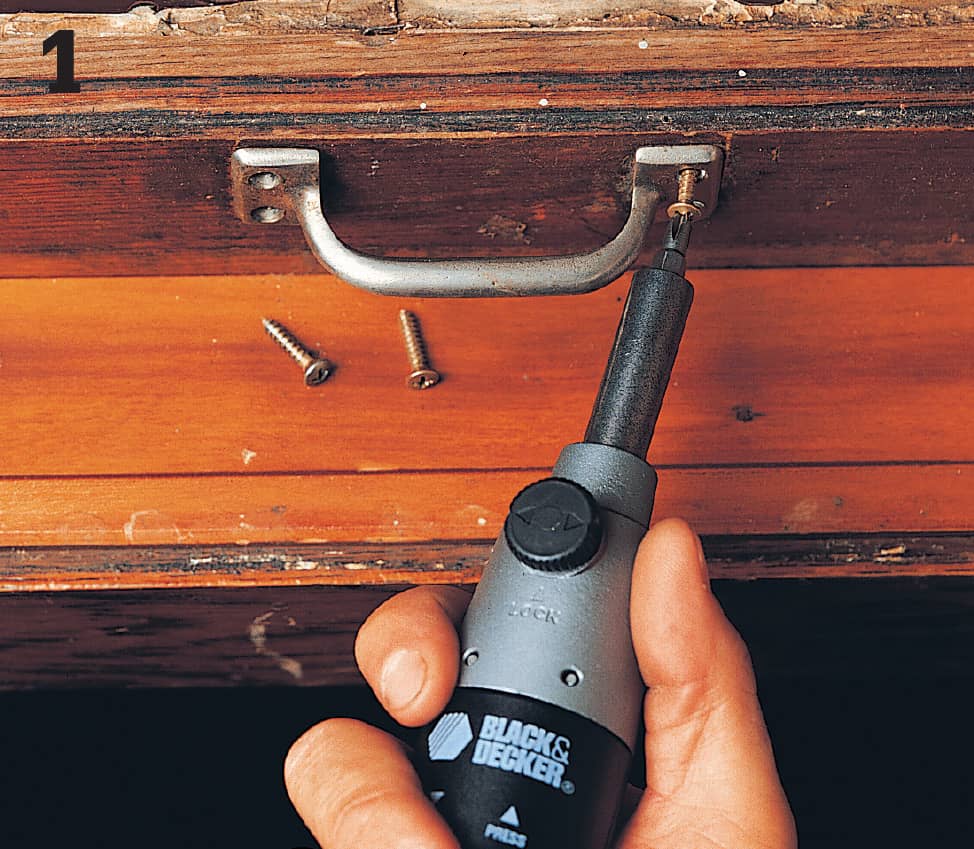
Remove all hardware, such as window handles and cabinet catches, from surfaces to be painted. If you will be installing new hardware, buy it now and drill new screw holes if needed.
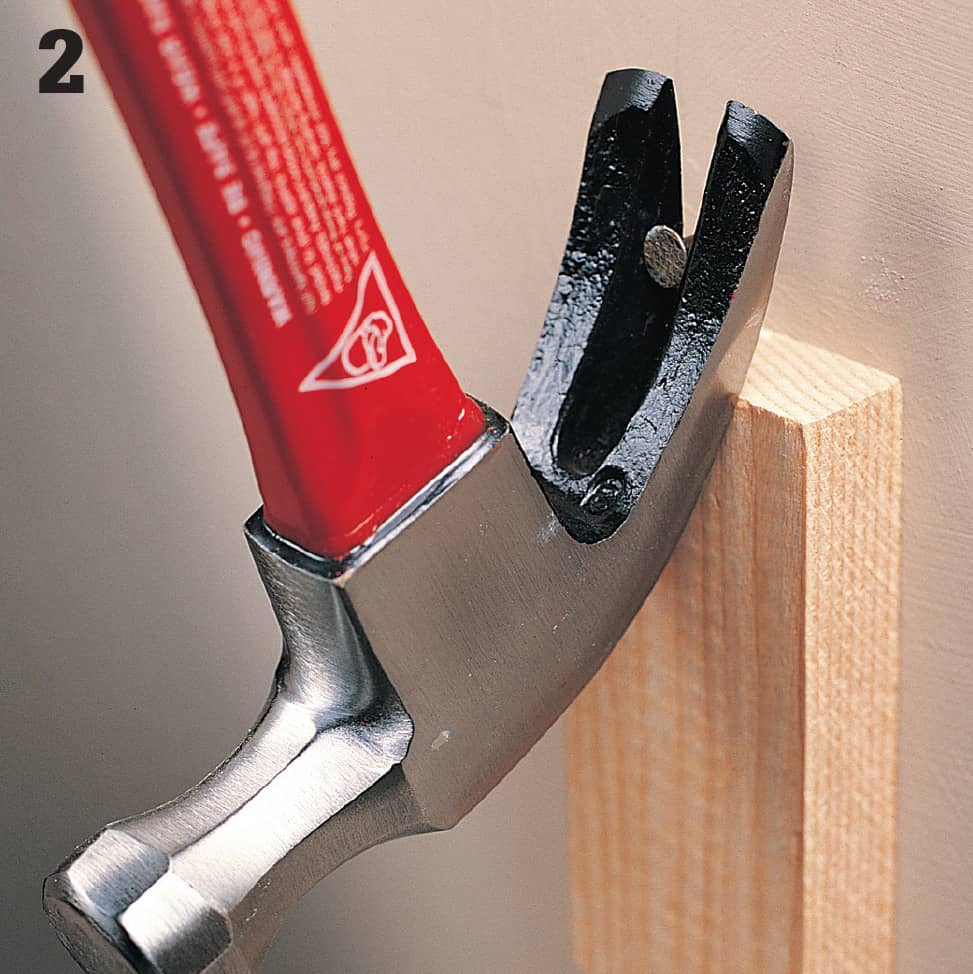
Remove all nails, screws, and picture hangers from surfaces to be painted. To prevent damage to the plaster or wallboard, use a block of wood under the head of the hammer.
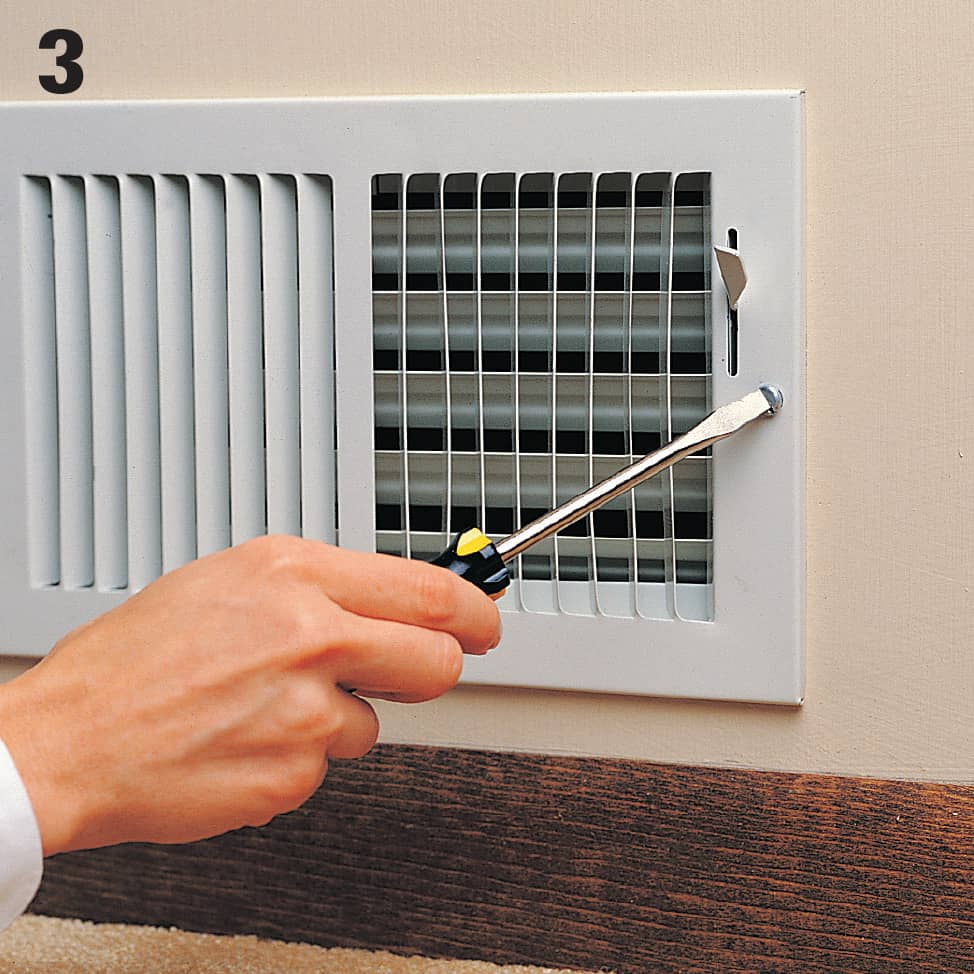
Remove covers from heating and air-conditioning ducts to protect them from splatters. Remove thermostats, or use masking tape to protect them against paint drips.
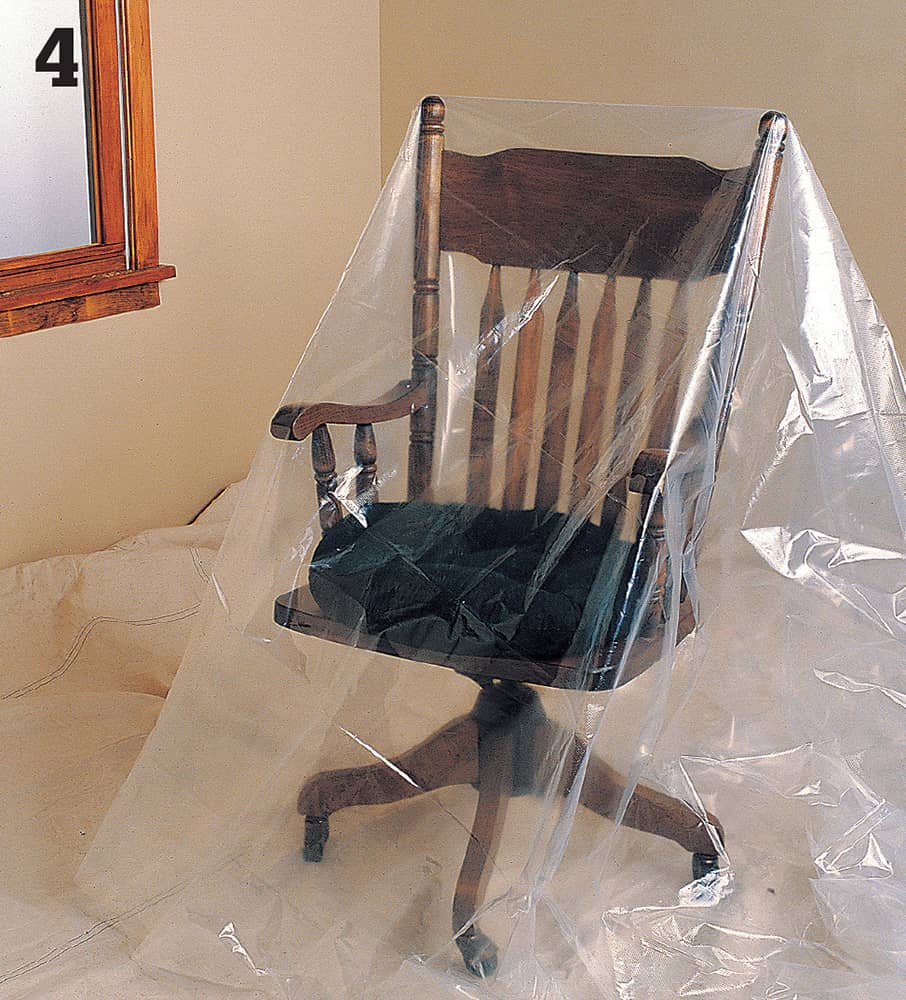
Move furniture to the center of the room and cover it with plastic sheets. In large rooms, leave an alley through the center for access if you are painting the ceiling. Cover floors with 9-ounce canvas drop cloths. Canvas absorbs paint spills.
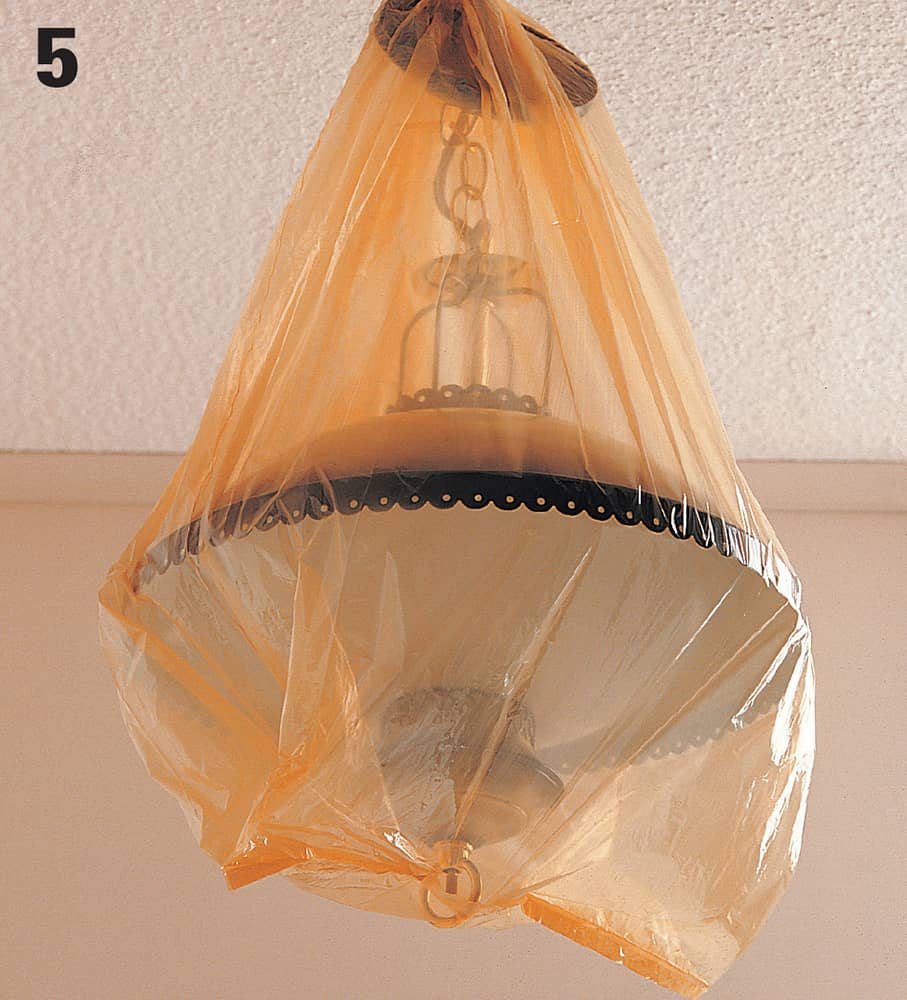
Turn off the electricity. Remove the coverplates from outlets and switches, then replace the cover screws. Lower light fixtures away from electrical boxes, or remove the fixtures. Cover hanging fixtures with plastic bags.
 Primers & Sealers
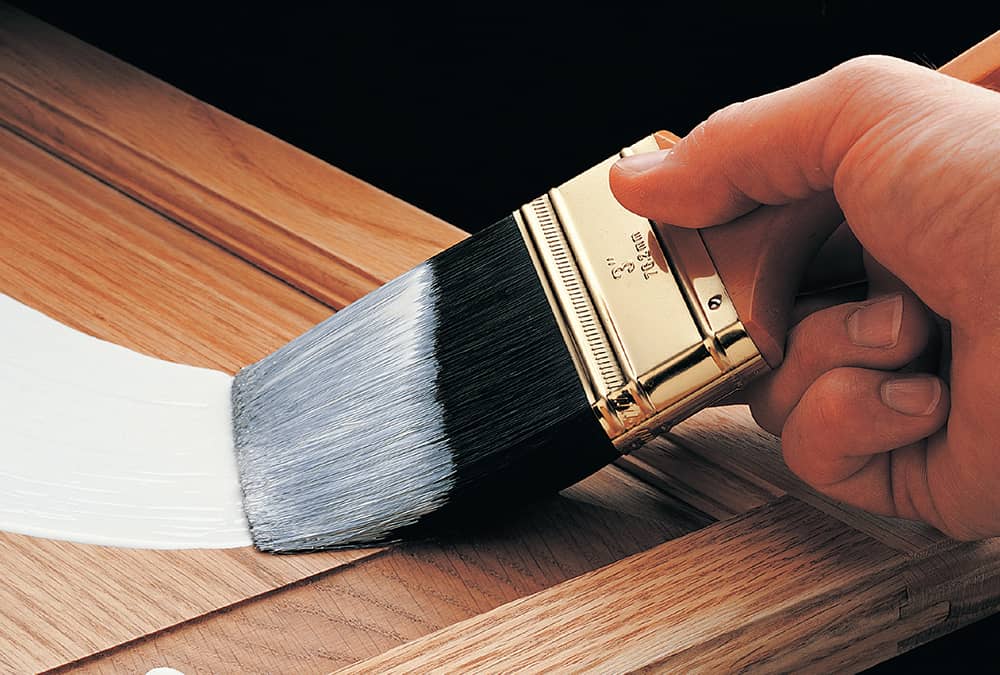
A sealer should be applied to wood surfaces before they are varnished. Wood often has both hard and soft grains, as well as a highly absorbent end grain. Applying a sealer helps close the surface of the wood so the varnish is absorbed evenly in different types of wood grain. If the wood is not sealed, the varnish may dry to a mottled finish.
Primers are used to seal surfaces that will be painted. Wallboard seams and patched areas absorb paint at a different rate than surrounding areas. Joints and patch areas often show or “shadow” through the finished paint if the walls are not adequately primed.
Choose a primer designed for the project: mildew-resistant primers are excellent for bathrooms and laundry rooms, stain-blocking primers cover smoke and other hard-to-cover stains, and tinted primers provide good bases for deep colors, such as red or purple.
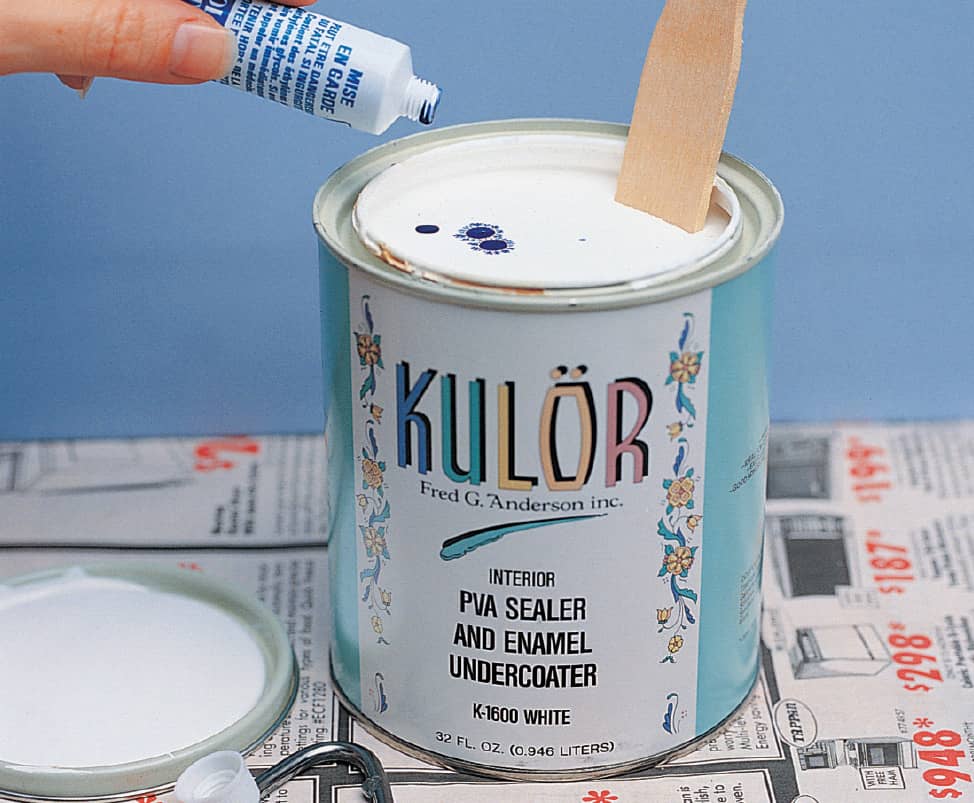
Tinted primers provide an excellent base for finish coats, especially for deep colors that might otherwise require several coats to cover adequately. Color base is available to tint white primers if necessary.
How to Use a Paint Roller
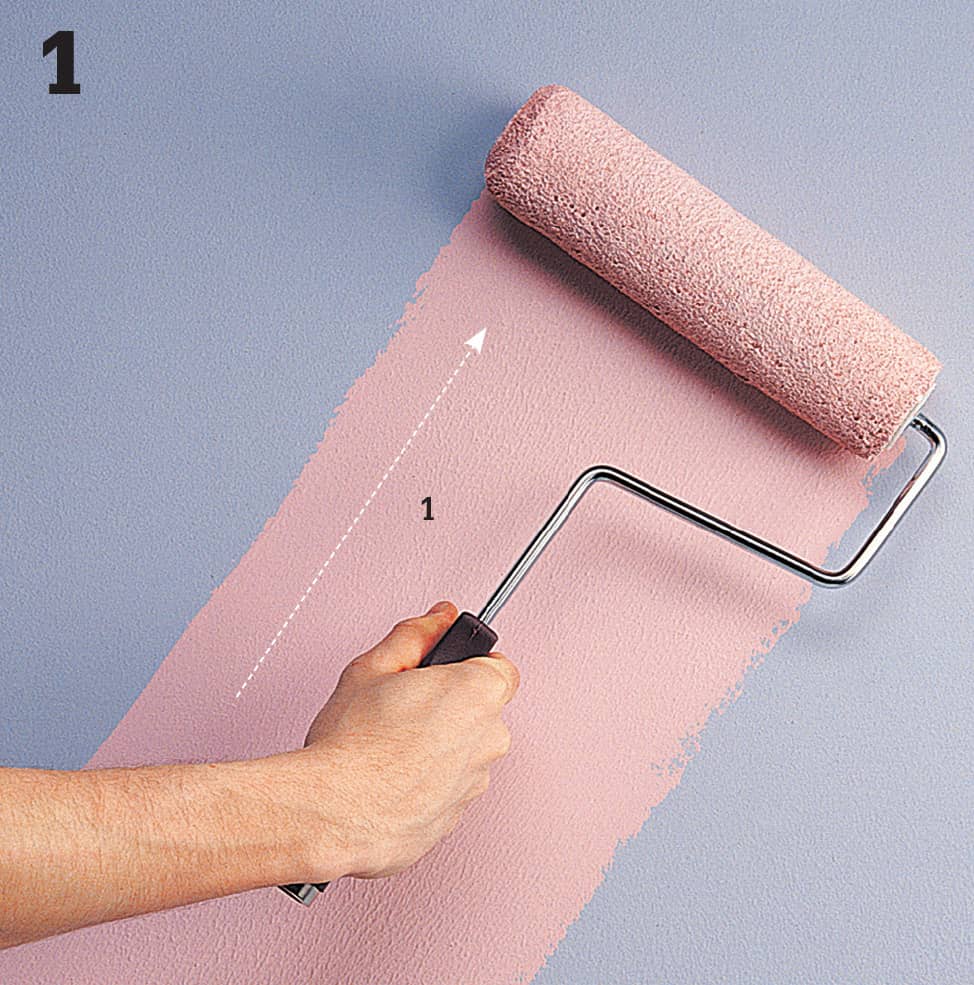
Wet the roller cover with water (for latex paint) or mineral spirits (for alkyd enamel), to remove lint and prime the cover. Squeeze out excess liquid. Dip the roller fully into the paint pan reservoir and roll it over the textured ramp to distribute the paint evenly. The roller should be full, but not dripping. Make an upward diagonal sweep about 4 ft. long on the surface, using a slow stroke to avoid splattering.
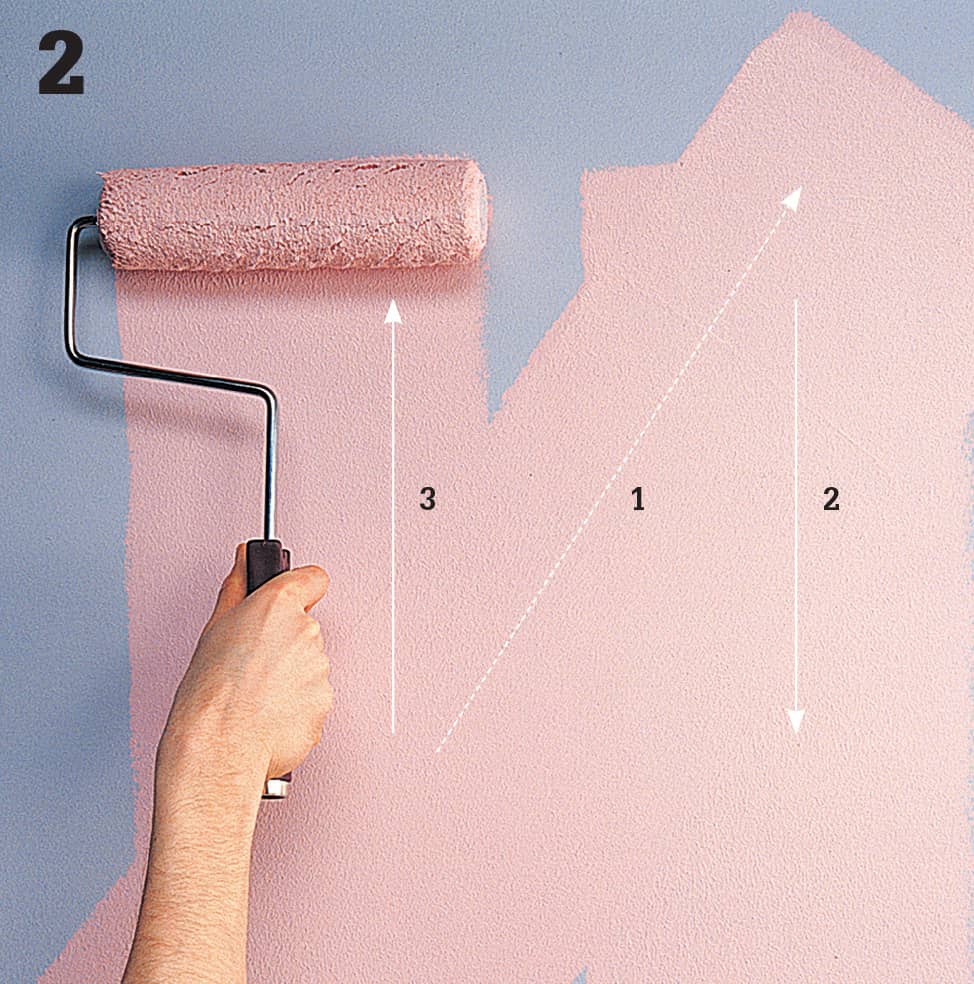
Draw the roller straight down (2) from the top of the diagonal sweep made in step 1. Lift and move the roller to the beginning of the diagonal sweep and roll up (3) to complete the unloading of the roller.
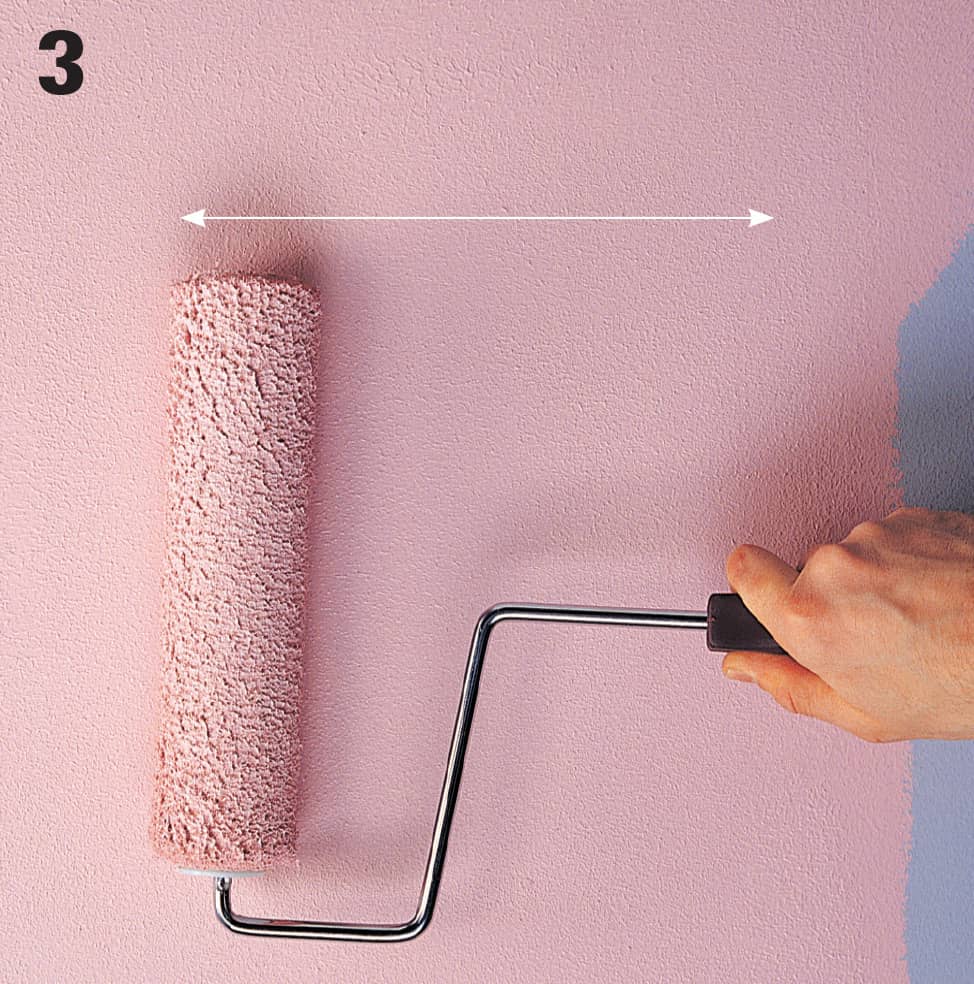
Distribute the paint over the rest of the section with horizontal back-and-forth strokes.
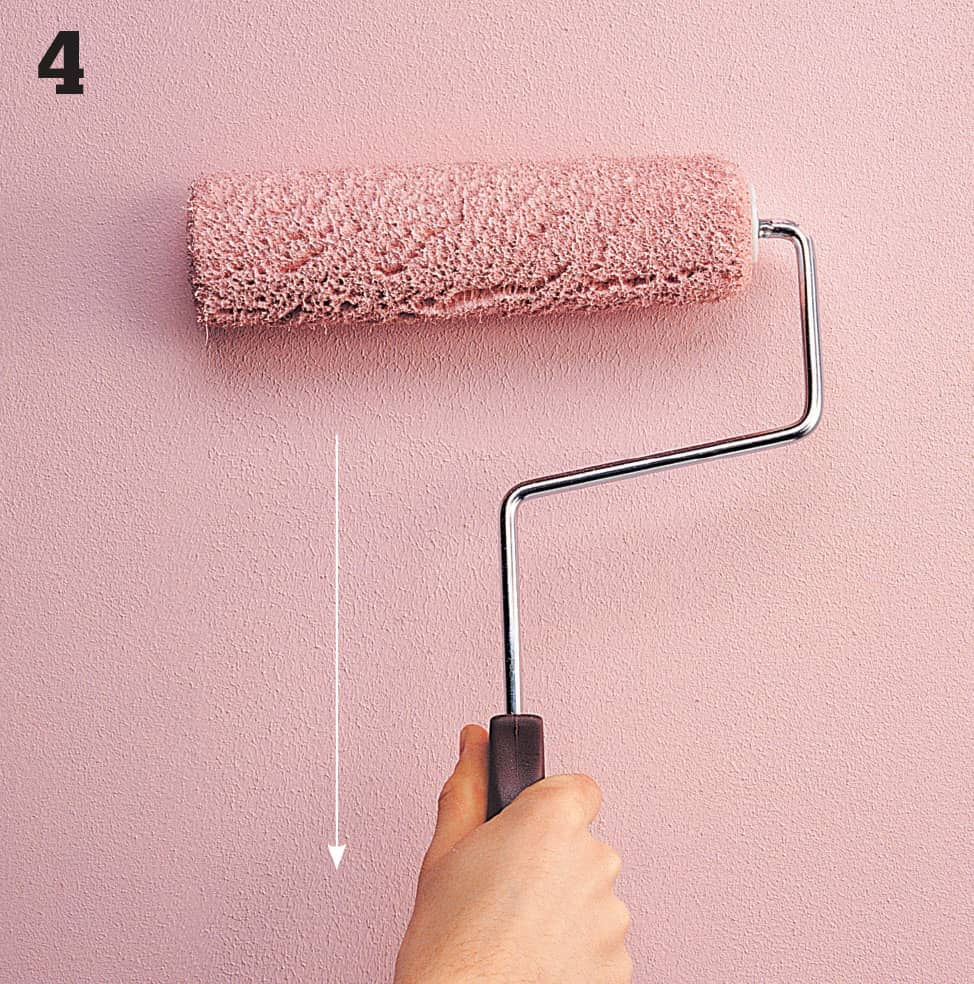
Smooth the area by lightly drawing the roller vertically from the top to the bottom of the painted area. Lift the roller and return it to the top of the area after each stroke.
How to Use a Paintbrush
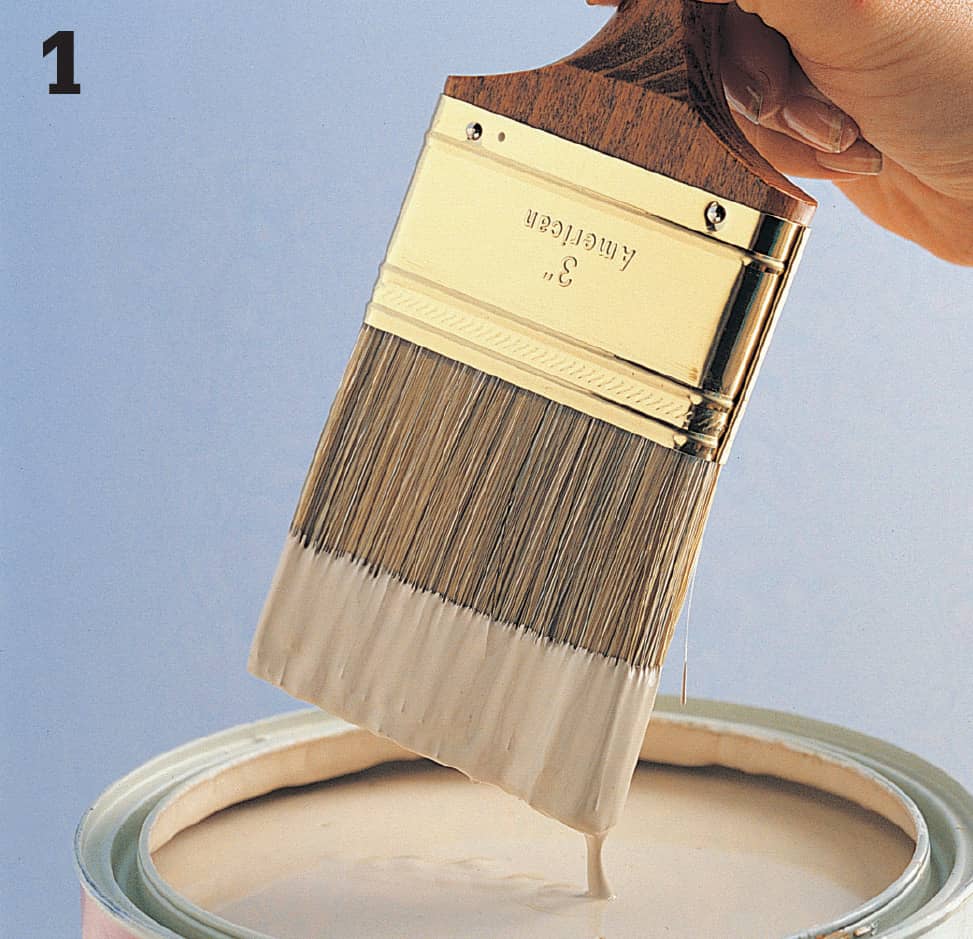
Dip the brush into the paint, loading one-third of its bristle length. Tap the bristles against the side of the can to remove excess paint, but do not drag the bristles against the lip of the can.
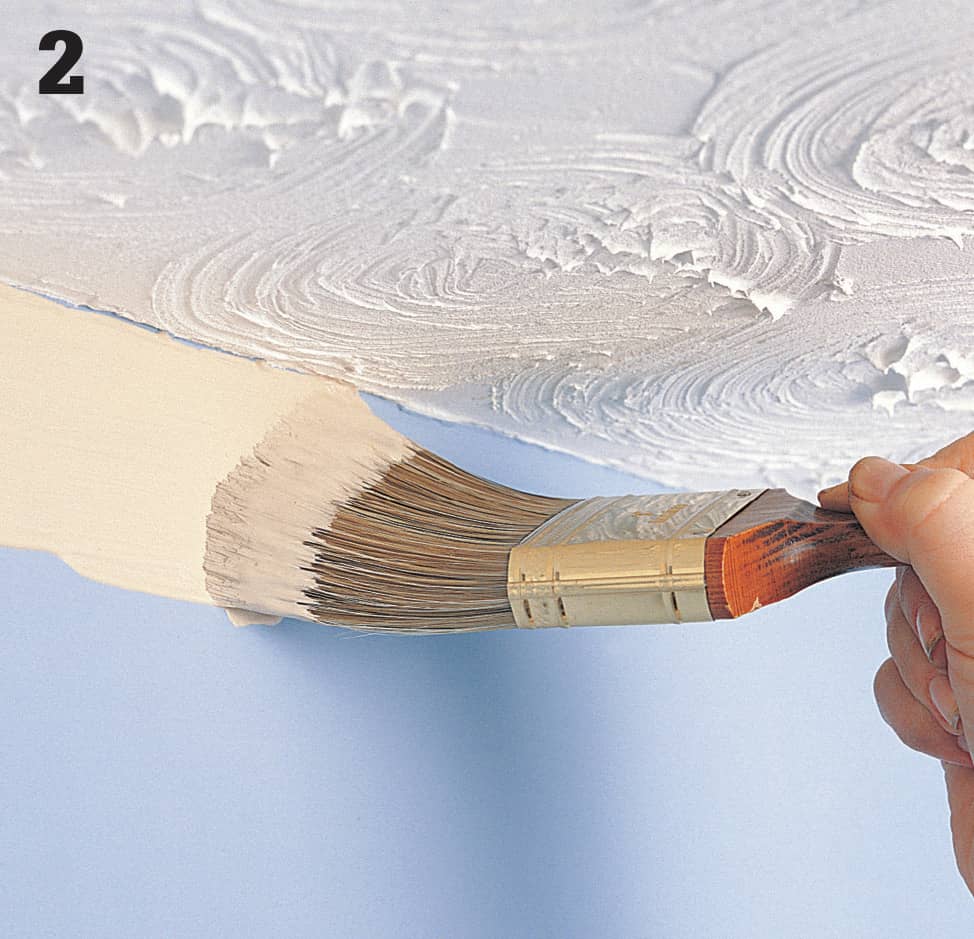
Paint along the edges (called “cutting in”) using the narrow edge of the brush, pressing just enough to flex the bristles. Keep an eye on the paint edge, and paint with long, slow strokes. Always paint from a dry area back into wet paint to avoid lap marks.
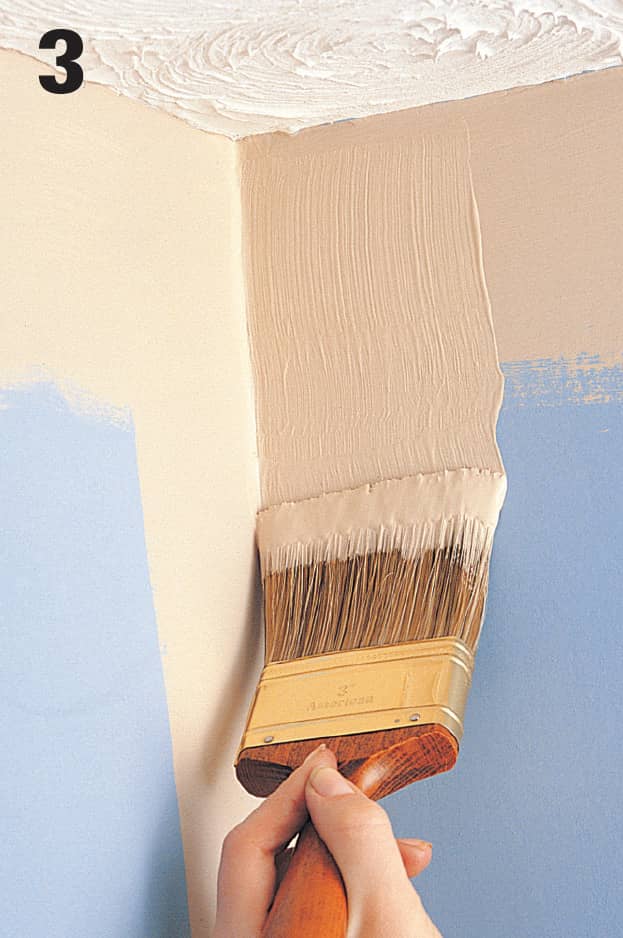
Brush wall corners using the wide edge of the brush. Paint open areas with a brush or roller before the brushed paint dries.
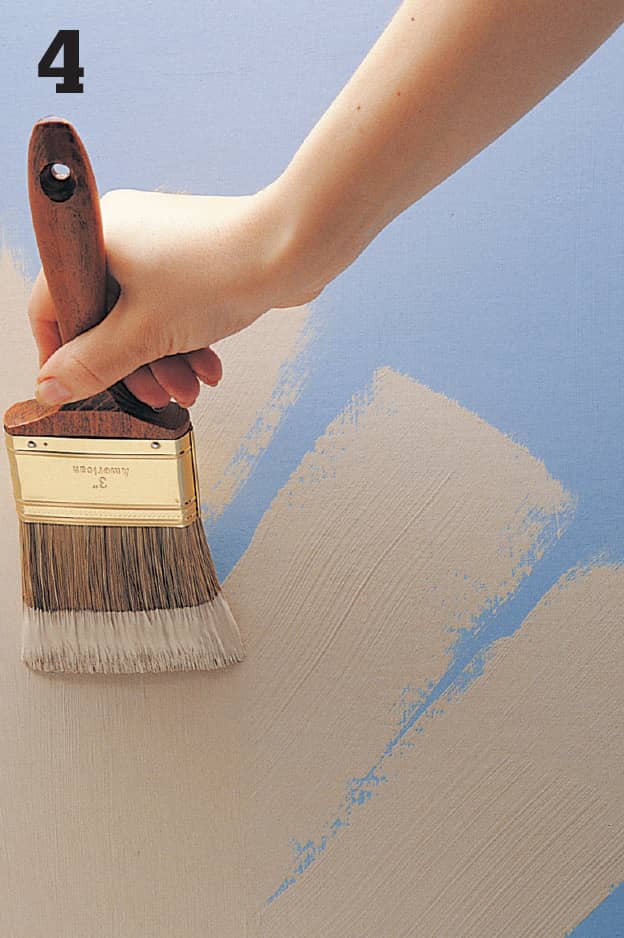
To paint large areas with a brush, apply the paint with 2 or 3 diagonal strokes. Hold the brush at a 45° angle to the work surface, pressing just enough to flex the bristles. Distribute the paint evenly with horizontal strokes.
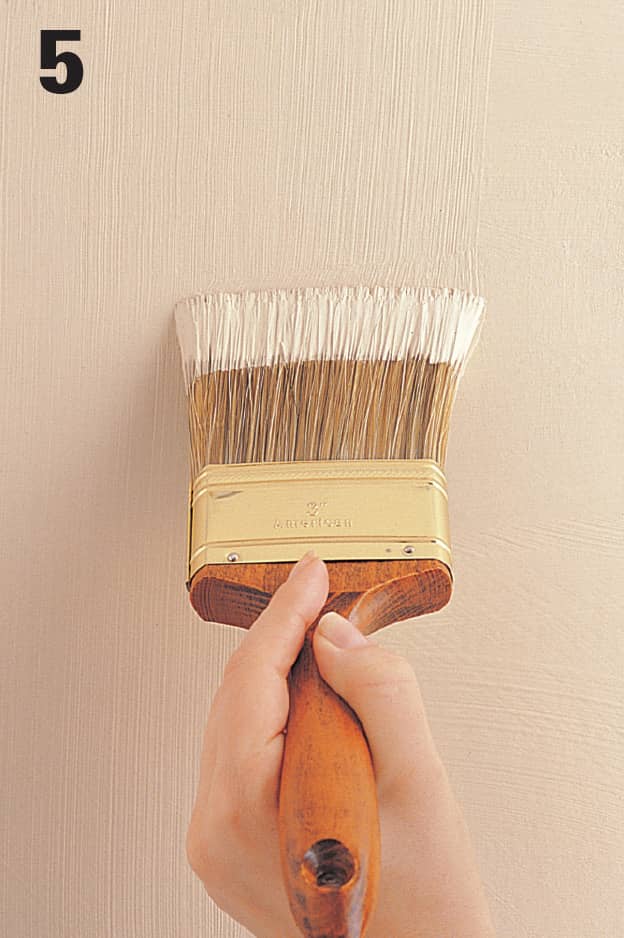
Smooth the surface by drawing the brush vertically from the top to the bottom of the painted area. Use light strokes and lift the brush from the surface at the end of each stroke. This method is best for slow-drying alkyd enamels.
 Trim Painting Techniques
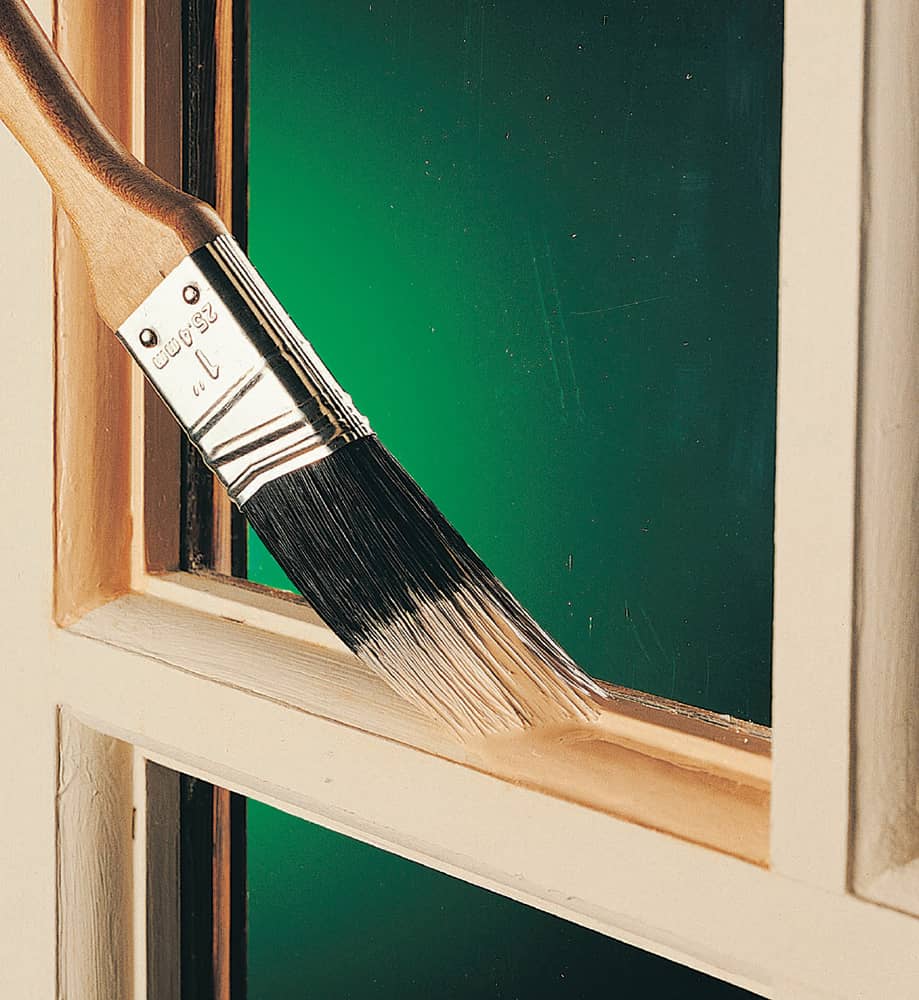
When painting an entire room, paint the wood trim first, then paint the walls. Start by painting the inside portions of the trim, and work out toward the walls. On windows, for instance, first paint the edges close to the glass, then paint the surrounding face trim.
Doors should be painted quickly because of the large surface. To avoid lap marks, always paint from dry surfaces back into wet paint. On baseboards, cut in the top edge and work down to the flooring. Plastic floor guards or a wide broadknife can help shield carpet and wood flooring from paint drips.
Alkyds and latex enamels may require two coats. Always sand lightly between coats and wipe with a tack cloth so that the second coat bonds properly.
How to Paint a Window
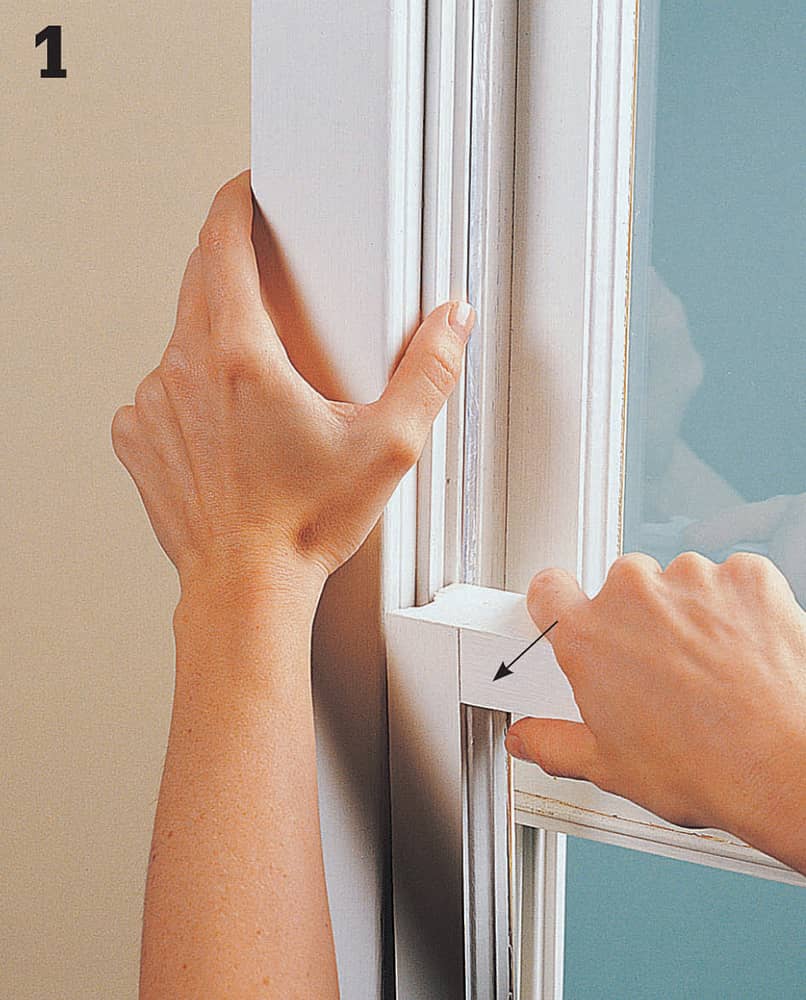
To paint double-hung windows, remove them from their frames if possible. Newer, spring-mounted windows are released by pushing against the frame (see arrow).
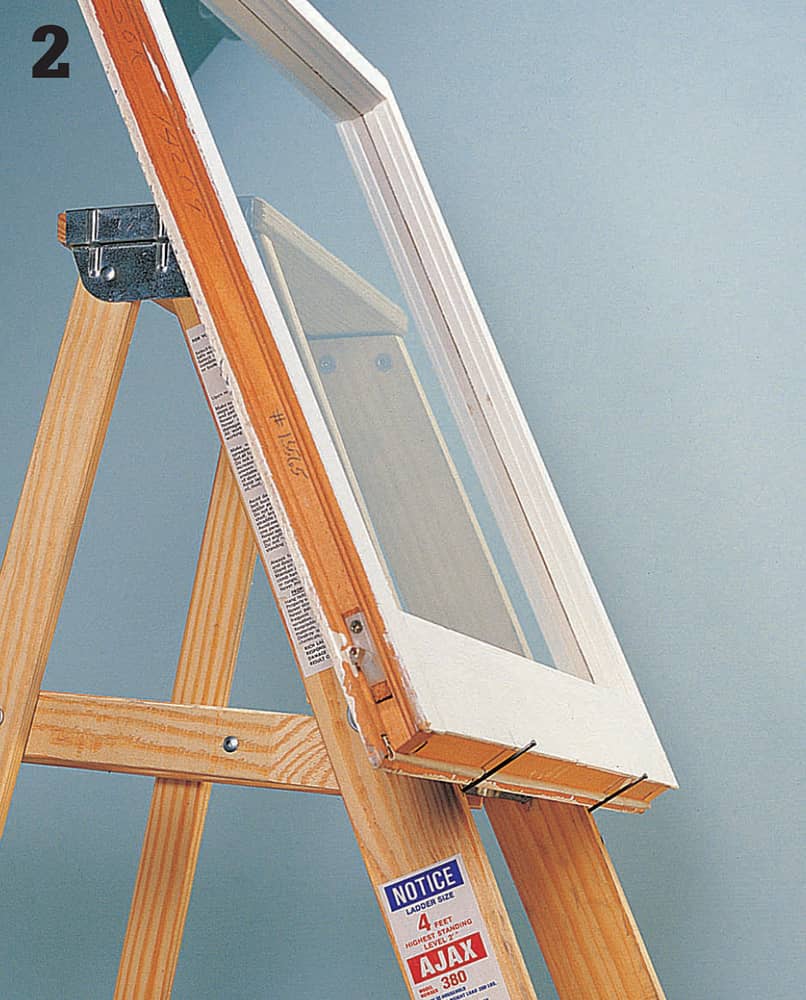
Drill holes and insert two 2" nails into the legs of a wooden step ladder. Mount the window easel-style for easy painting. Or, lay the window flat on a bench or sawhorses. Do not paint the sides or bottom of the window sashes.
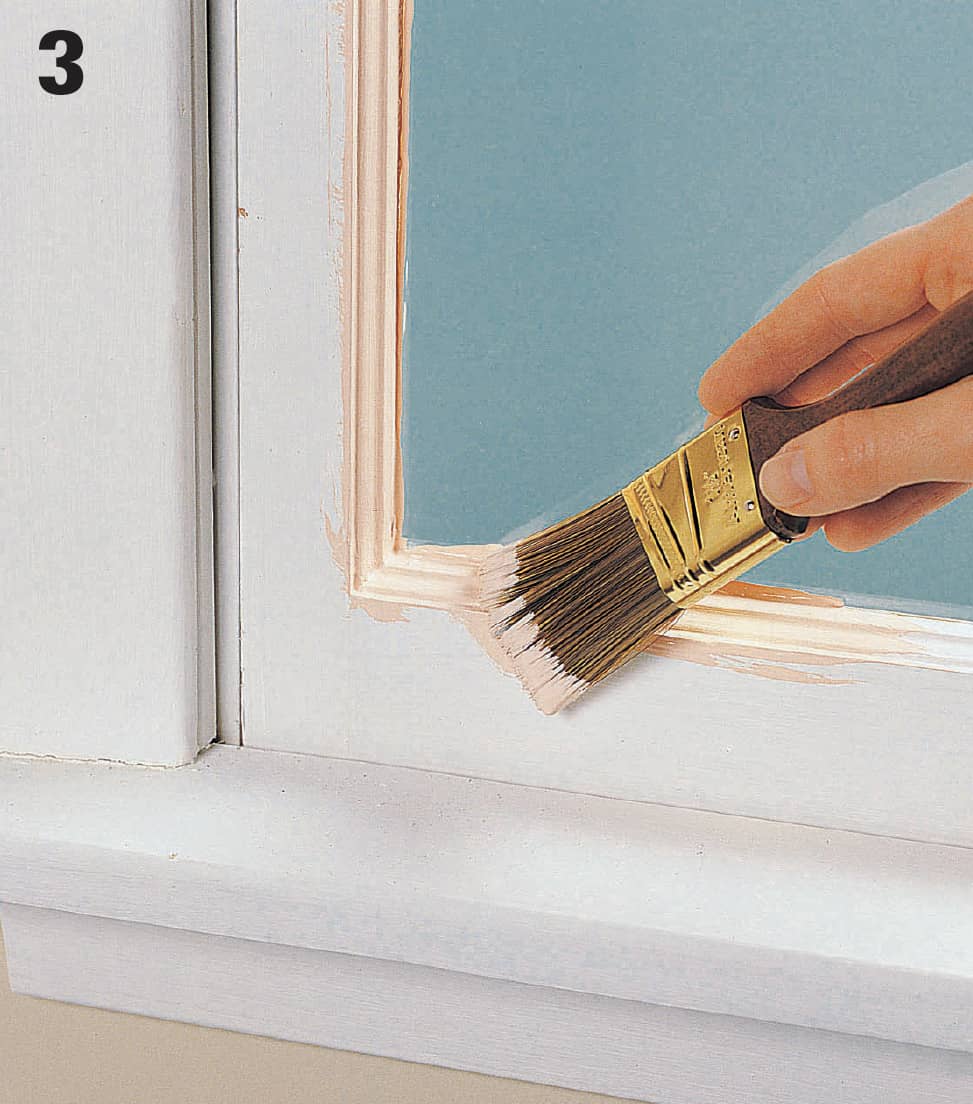
Using a tapered sash brush, begin by painting the wood next to the glass. Use the narrow edge of the brush, and overlap the paint onto the glass to create a weatherseal.
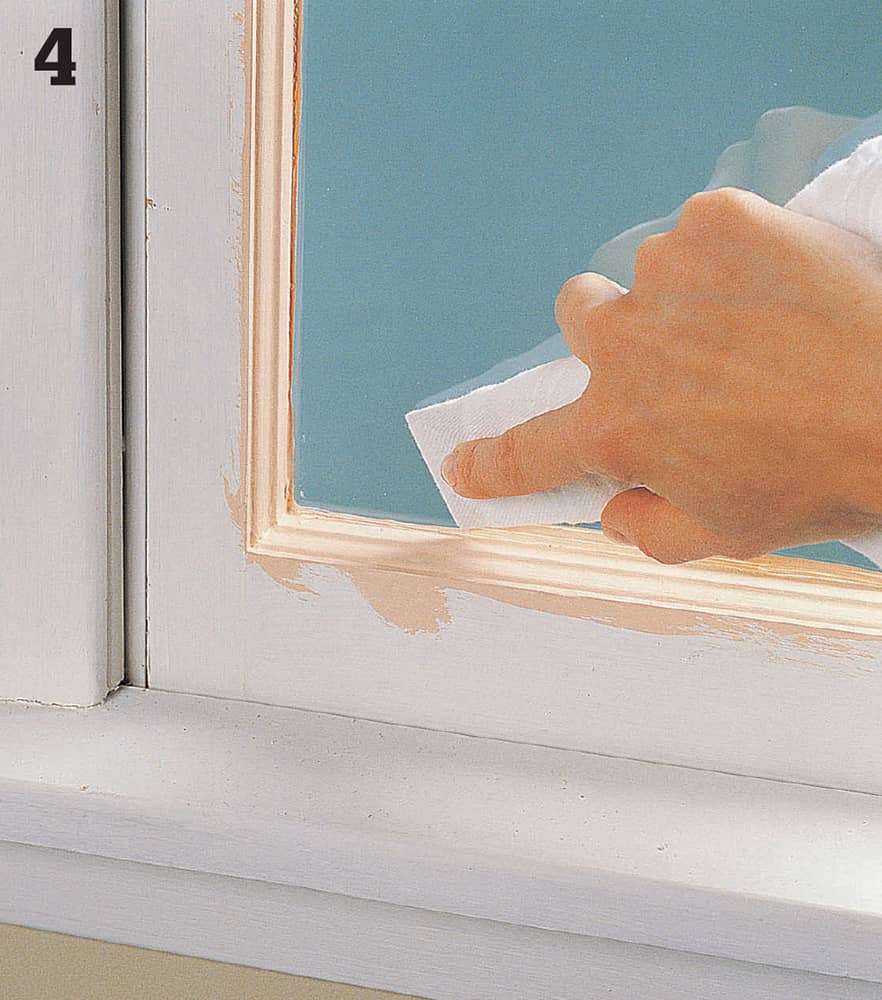
Remove excess paint from the glass with a putty knife wrapped in a clean cloth. Rewrap the knife often so that you always wipe with clean fabric. Overlap paint from the sash onto the glass by 1/16".
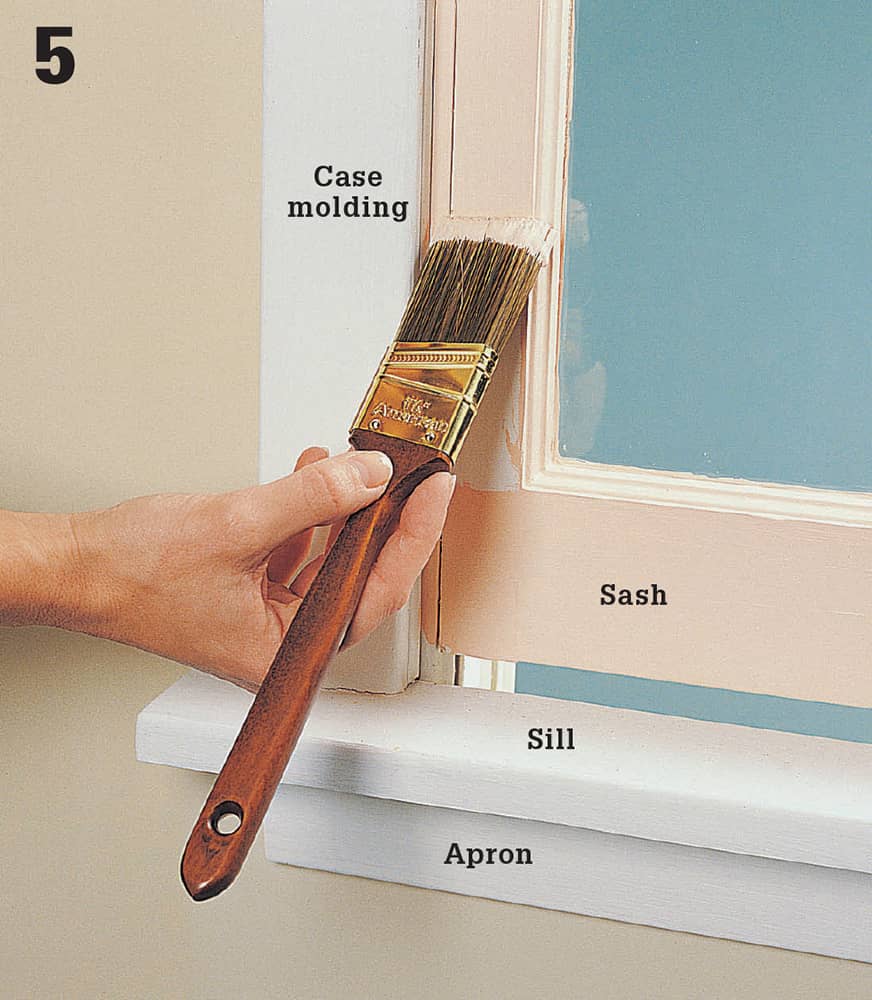
Paint all flat portions of the sashes, then the case moldings, sill, and apron. Use slow brush strokes, and avoid getting paint between the sash and the frame.
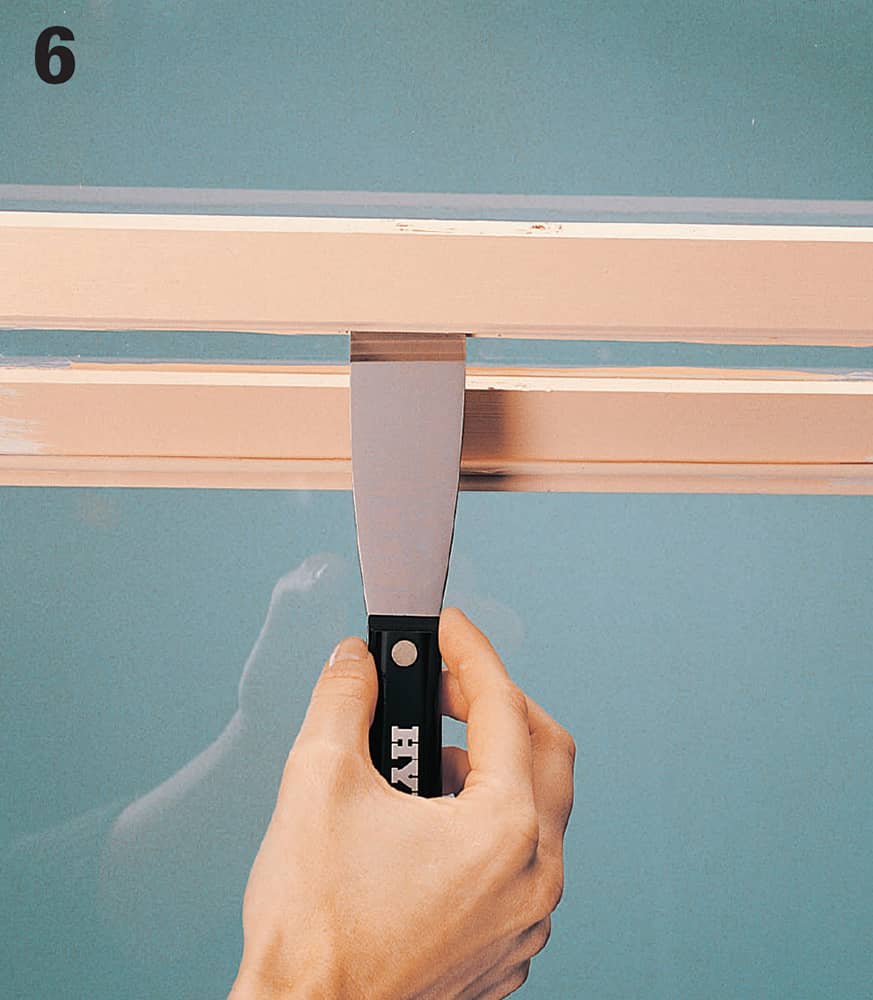
If you must paint windows in place, move the painted windows up and down several times during the drying period to keep them from sticking. Use a putty knife to avoid touching the painted surfaces.
How to Paint Doors
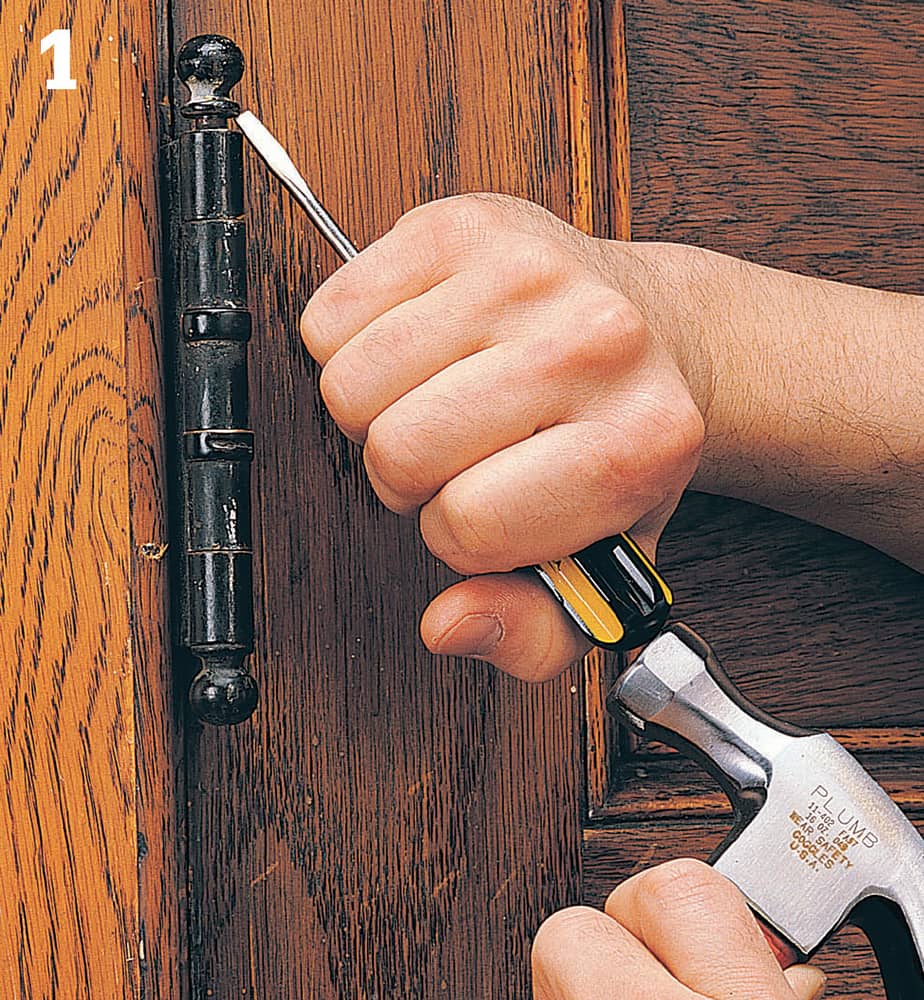
Remove the door by driving out the lower hinge pin with a screwdriver and hammer. Have a helper hold the door in place. Then, drive out the middle and upper hinge pins.
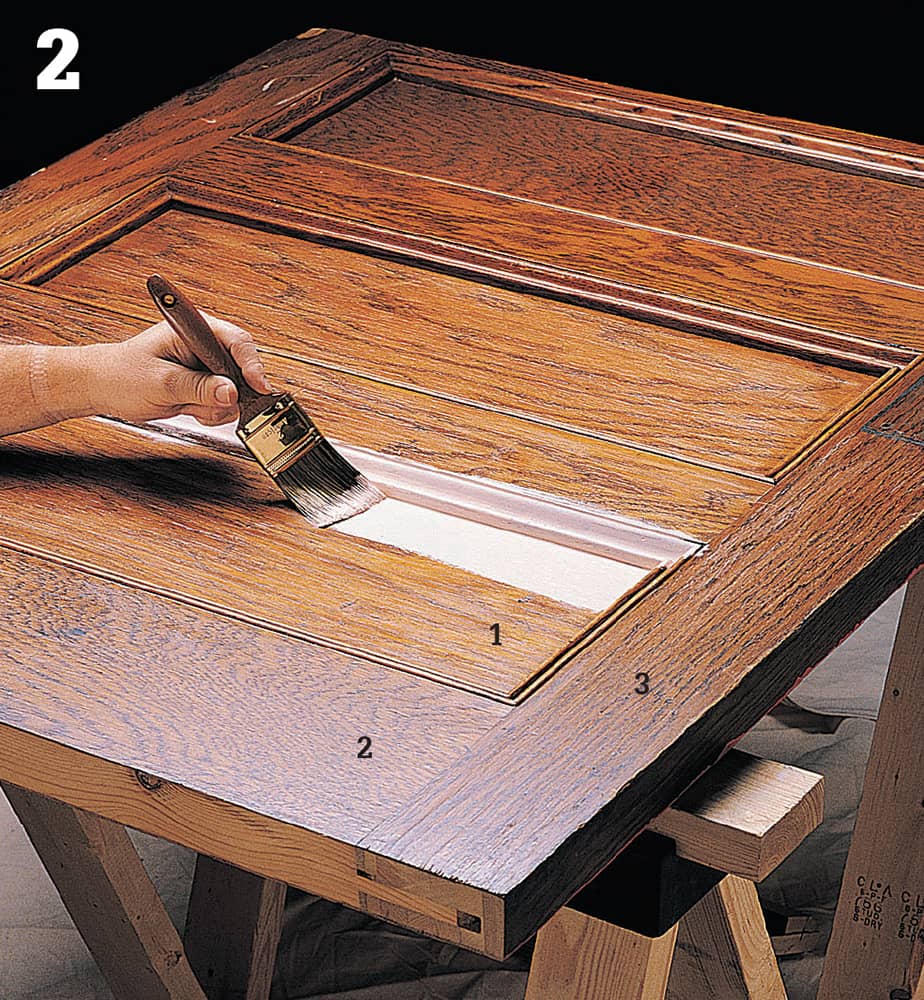
Place the door flat on sawhorses for painting. On paneled doors, paint in the following order, using a brush rather than a roller: 1) recessed panels, 2) horizontal rails, and 3) vertical stiles.
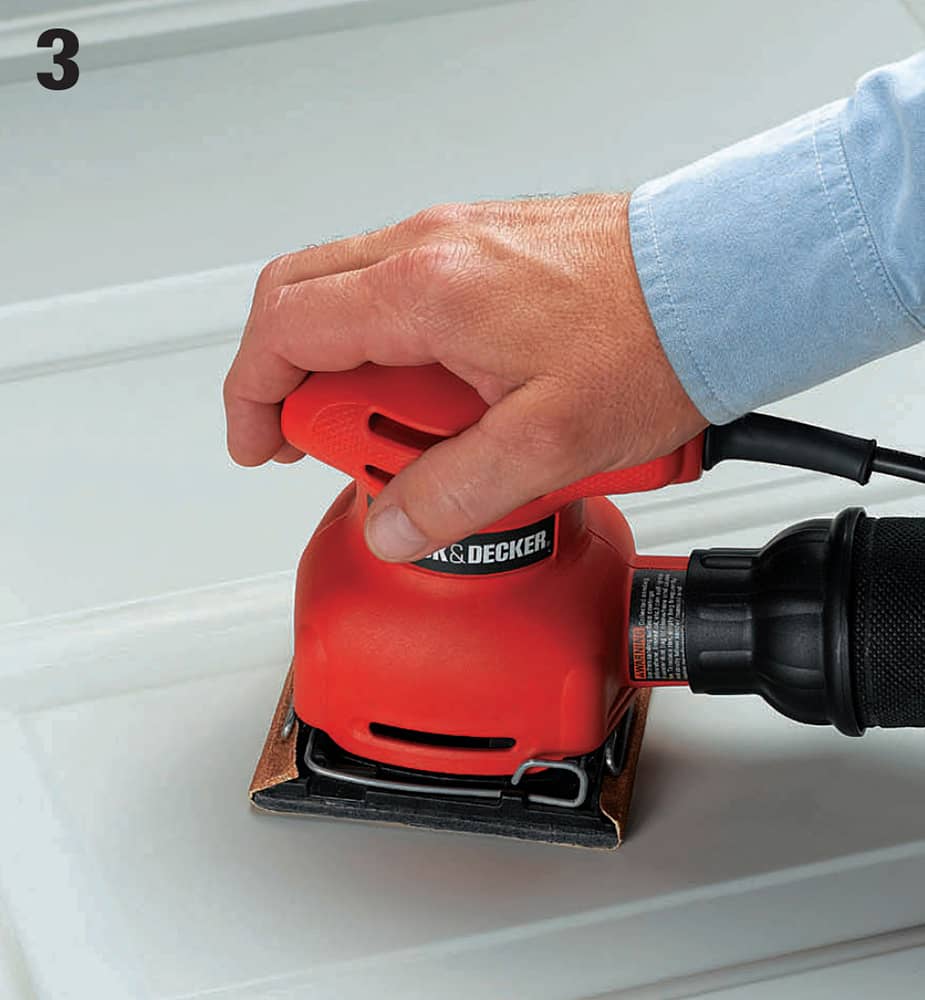
Let the painted door dry. If a second coat of paint is needed, sand the first coat lightly and wipe the door with tack cloth before repainting.
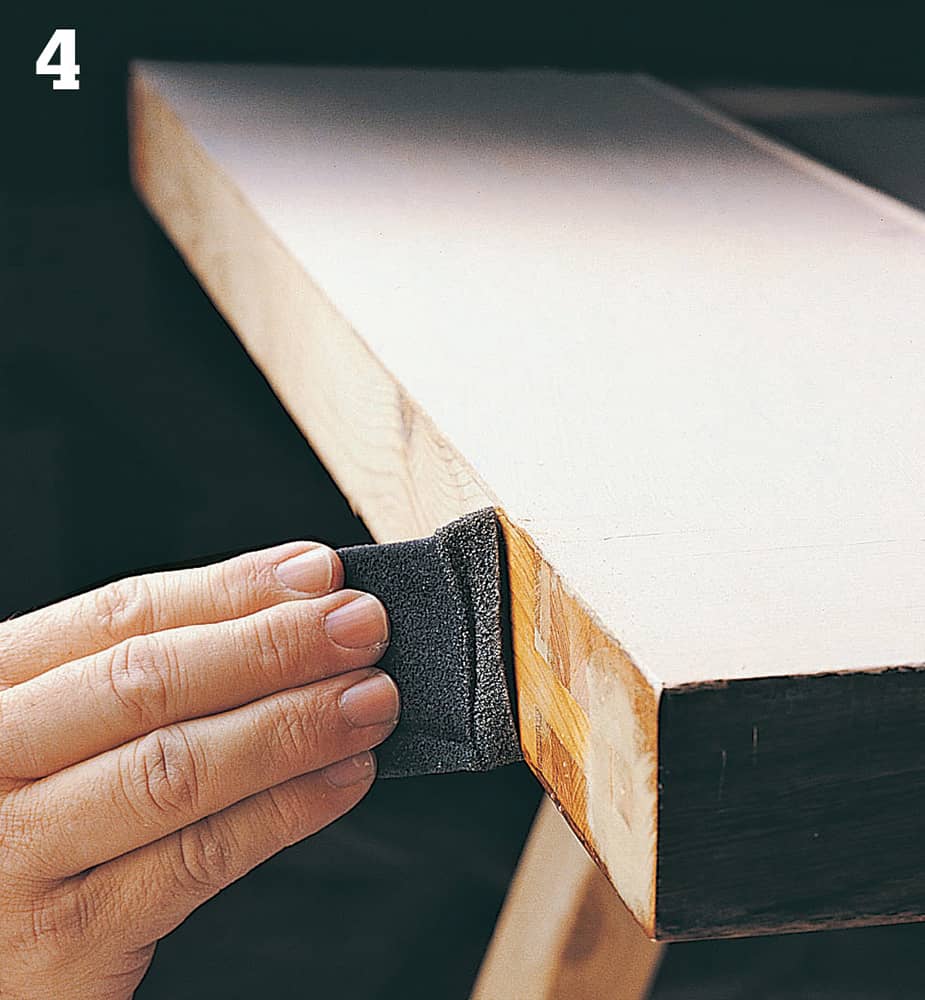
Seal the unpainted edges of the door with a clear wood sealer to prevent moisture from entering the wood. Water can cause wood to warp and swell.
 Ceiling & Wall Painting Techniques
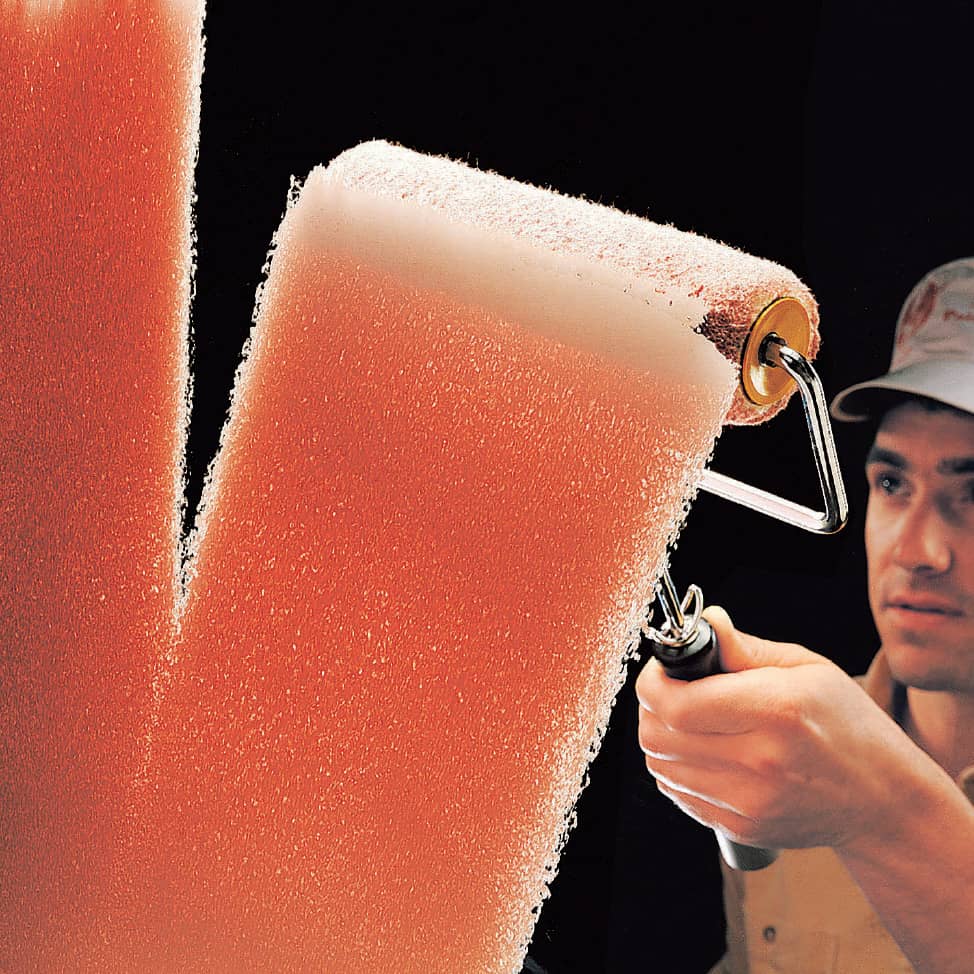
For a smooth finish on large wall and ceiling areas, paint in small sections. It’s best to paint both the edges and expanses of each wall, one at a time, rather than edge the entire room before rolling. First use a paintbrush to cut in the edges, then immediately roll the section while it is still wet before moving on. If brushed edges dry before the area is rolled, lap marks will be visible on the finished wall. Working in natural light makes it easier to spot missed areas.
Choose high-quality paint and tools and work with a full brush or roller to avoid lap marks and to ensure full coverage. Roll slowly to minimize splattering.
How to Paint Ceilings

Paint ceilings with a roller handle extension. Use eye protection while painting overhead. Start at the corner farthest from the entry door. Paint the ceiling along the narrow end in 3 × 3' sections, cutting in the edges with a brush before rolling. Apply the paint with a diagonal stroke. Distribute the paint evenly with back-and-forth strokes. For the final smoothing strokes, roll each section toward the wall containing the entry door, lifting the roller at the end of each sweep.
How to Paint Walls
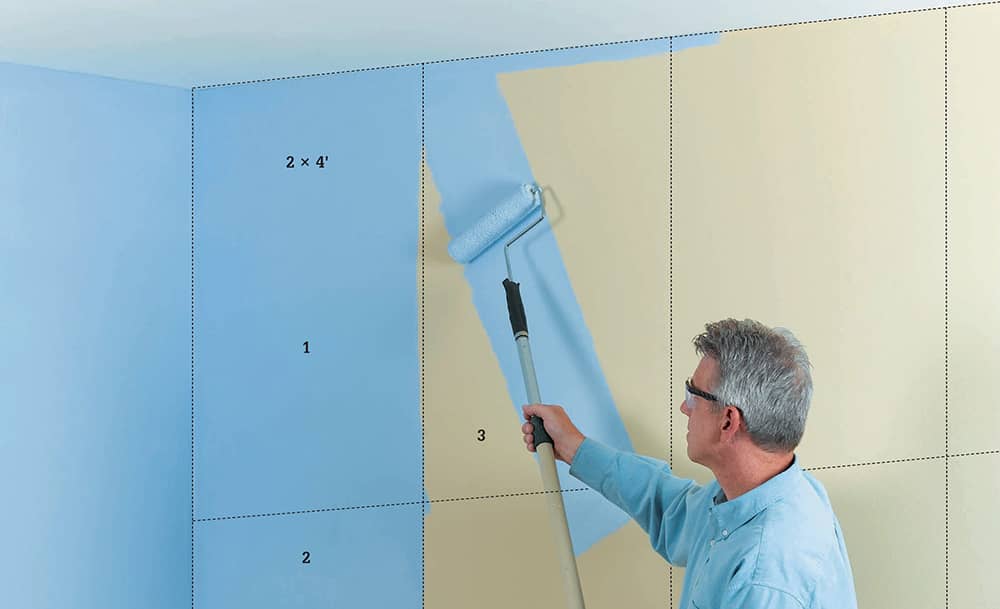
Paint walls in 2 × 4' sections. Start in an upper corner, cutting in the ceiling and wall corners with a brush, then rolling the section. Make the initial diagonal roller stroke from the bottom of the section upward, to avoid dripping paint. Distribute the paint evenly with horizontal strokes, then finish with downward sweeps of the roller. Next, cut in and roll the section directly underneath. Continue with adjacent areas, cutting in and rolling the top sections before the bottom sections. Roll all finish strokes toward the floor.
 Painting Cabinets
If your kitchen cabinets are in good shape structurally and you are happy with their configuration but not their appearance, a coat of paint may be all it takes to update your kitchen in a dramatic way. You can brighten dark wood, freshen up previously painted cabinet surfaces, or create a new look with faux finish techniques. Any wood, metal or previously painted cabinets can be painted.
As with any painting project, your final results depend on careful and thorough preparation and use of high-quality products. Remove doors, drawers, and all hardware so you can paint the surfaces in a flat position, eliminating many drips and sags.
Choose a high-quality enamel paint in satin, low-luster, or semi-gloss finish. A high gloss finish will highlight surface defects and create glare. Latex paint is suitable for this project. Using an alkyd (oil-based) paint may result in a smoother finish with fewer brush marks, but the cleanup is more involved and the fumes may require that you wear a respirator.
Cabinets with matte surfaces in good condition need only be washed with trisodium phosphate (TSP) or another appropriate detergent for preparation. But if the surface is smooth or glossy, as when varnished or painted with a gloss enamel, you’ll need to sand and/or chemically degloss before you apply paint. An undercoat of primer improves adhesion and reduces stain-through. If the previous paint was dark or a highly saturated color, or bare wood has been exposed, an undercoat is also necessary. Do not spot-prime because the top coat will not cover evenly in those areas. Avoid applying two layers of top coat, but if you do, make sure to sand or degloss the first coat to get good adhesion of the second coat.
If you are also changing hardware, determine whether you will be using the same screw holes. If not, fill the existing holes with wood putty before sanding.
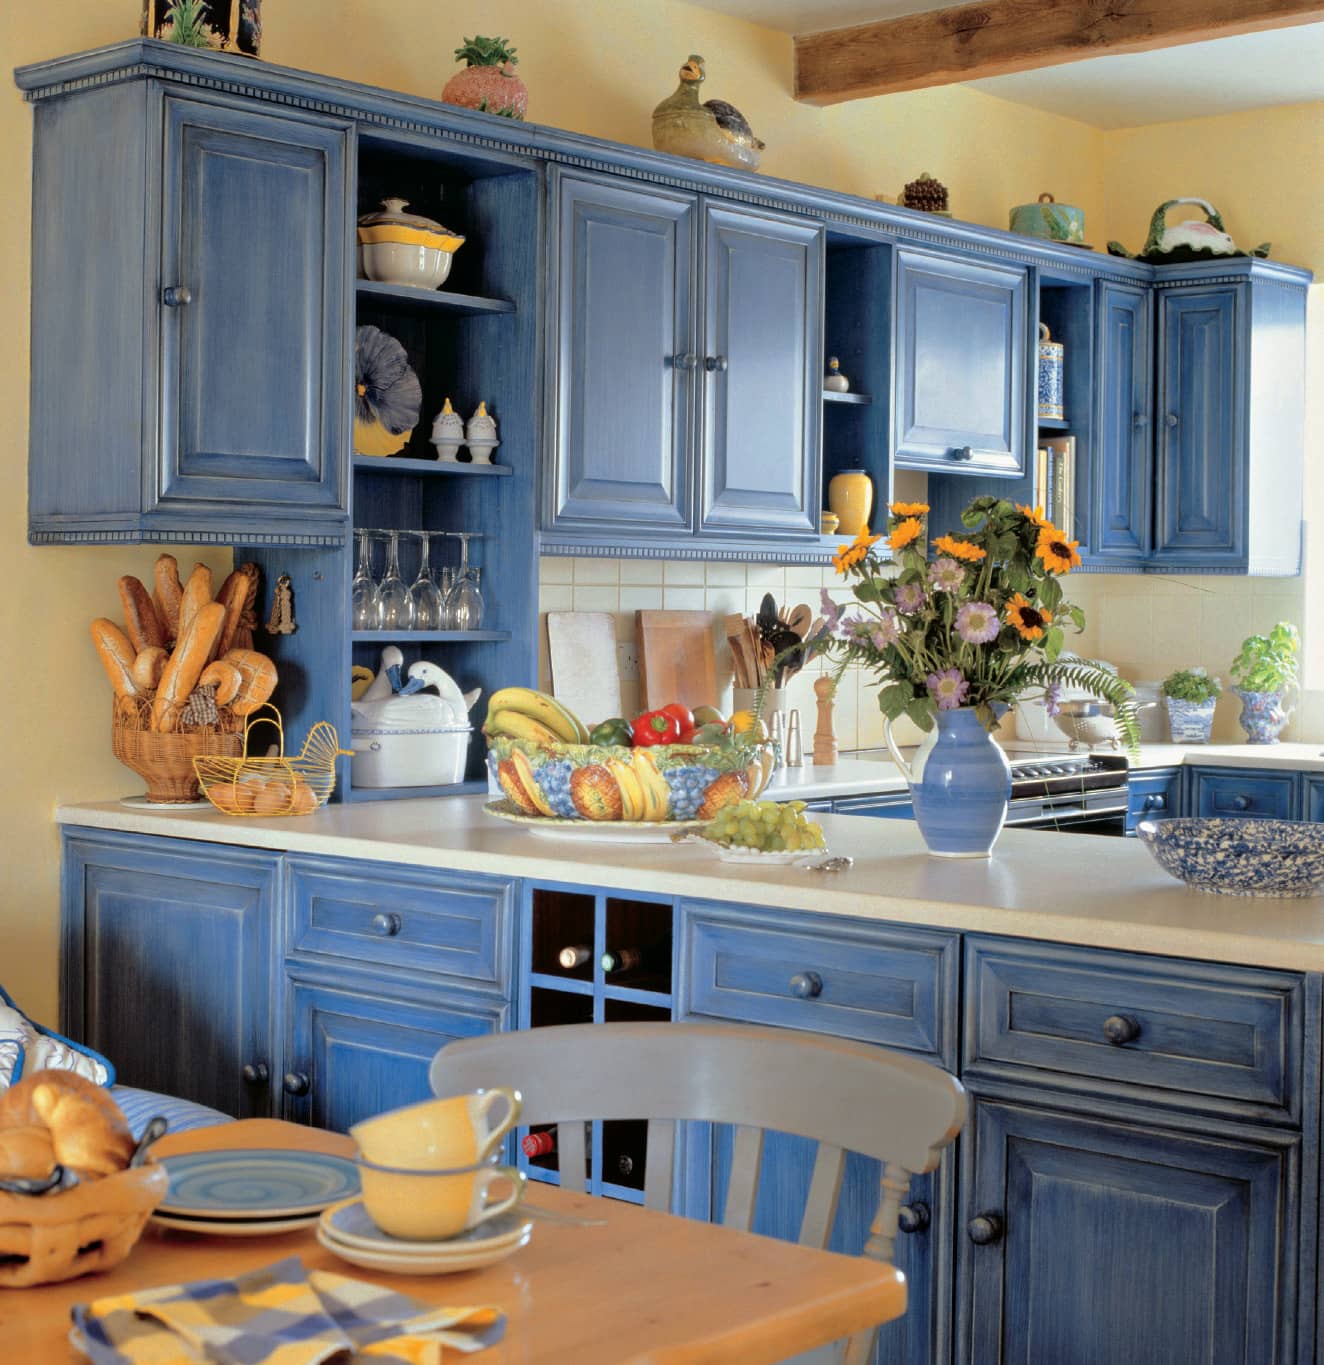
Painted cabinets are re-emerging as a popular design element in kitchens. Bright paint adds liveliness and fun, while more neutral tones are soothing and let other kitchen elements have the spotlight.
How to Paint Cabinets
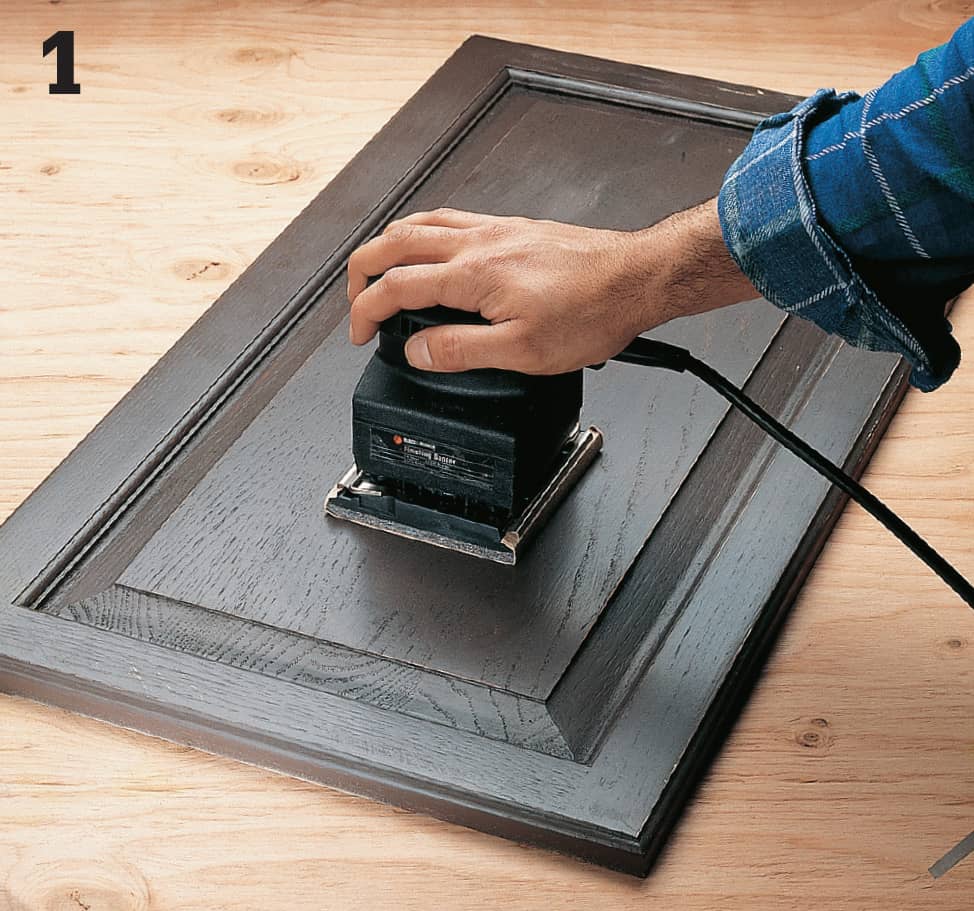
Remove doors and drawers. Wash all surfaces to be painted with TSP or other degreaser. Scrape off any loose paint. Sand or chemically degloss all surfaces. Wipe away sanding dust and prime varnished surfaces, dark colors, or bare wood with primer.
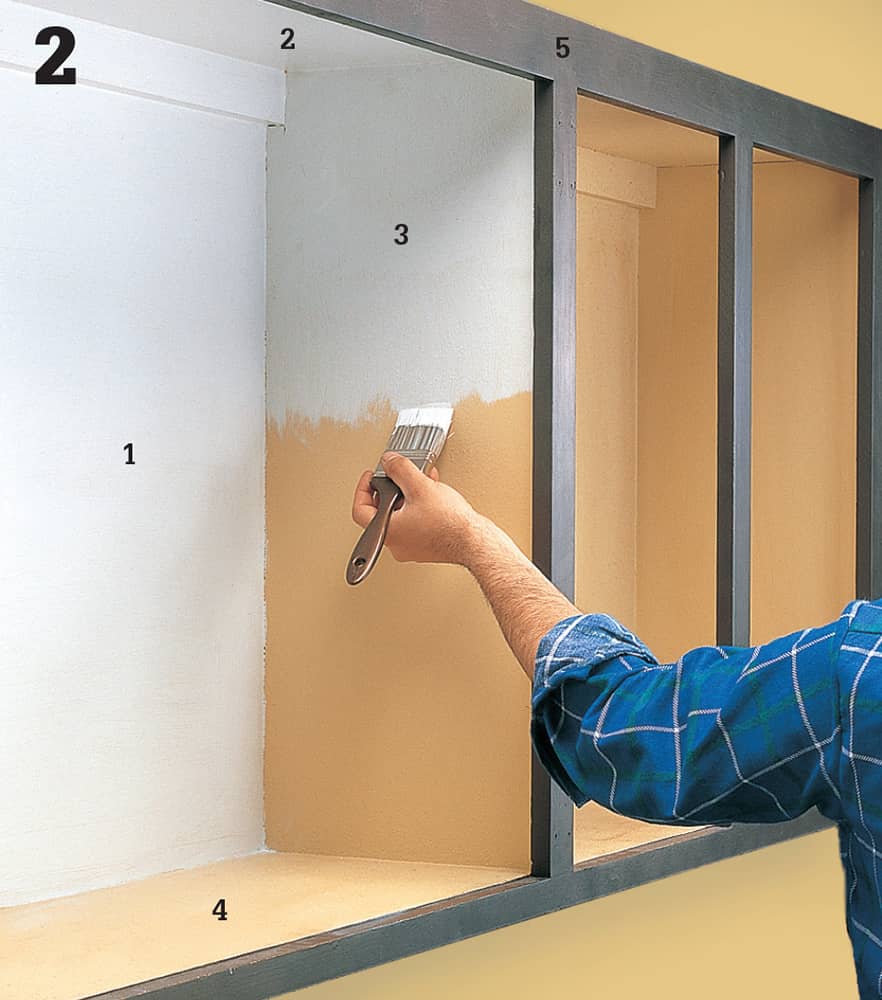
Remove shelves, when possible, to create access for painting cabinet interiors. Paint the cabinet backs first, followed by the tops, sides and then the bottoms. Paint the face frames last (so you won’t need to reach over them when painting the interior).
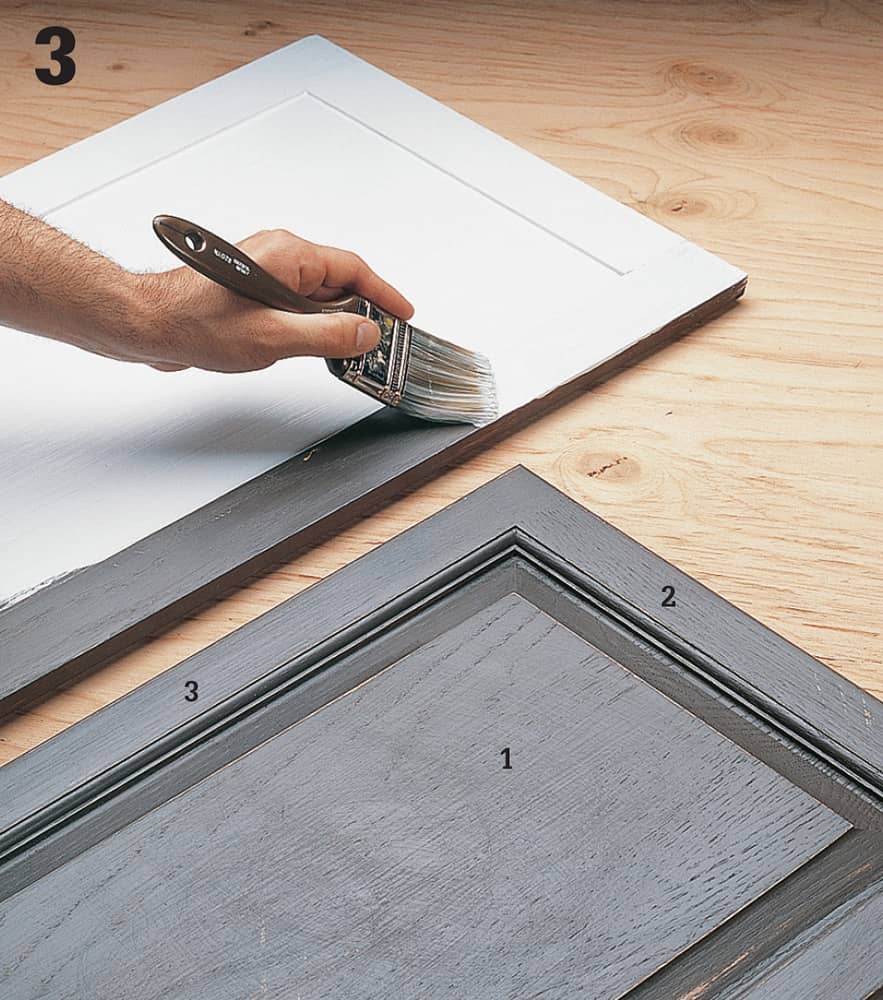
Paint both sides of doors beginning with the interior surfaces. With raised panel doors, paint the panel inserts first, then the horizontal rails. Paint the vertical stiles last.
 Eliminating Stair Squeaks
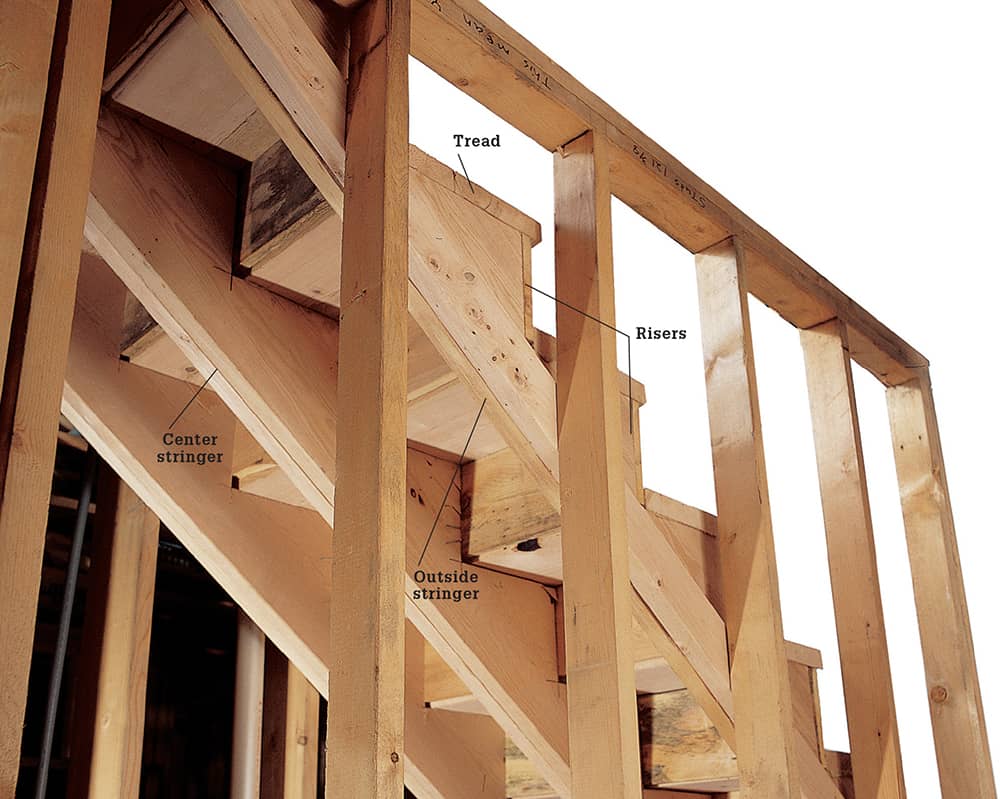
This staircase has center stringers to help support the treads. The 2 × 4s nailed between the outside stringers and the wall studs serve as spacers that allow room for the installation of skirt boards and wall finishes.
Like floors, stairs squeak when the lumber becomes warped or loose boards rub together. The continual pounding of foot traffic takes its toll on even the best built staircases. An unstable staircase is as unsafe as it is unattractive. Problems related to the structure of a staircase, such as severe sagging, twisting, or slanting, should be left to a professional. However, you can easily complete many common repairs.
Squeaks are usually caused by movement between the treads and risers, which can be alleviated from above or below the staircase.
How to Eliminate Squeaks from Below the Stairs
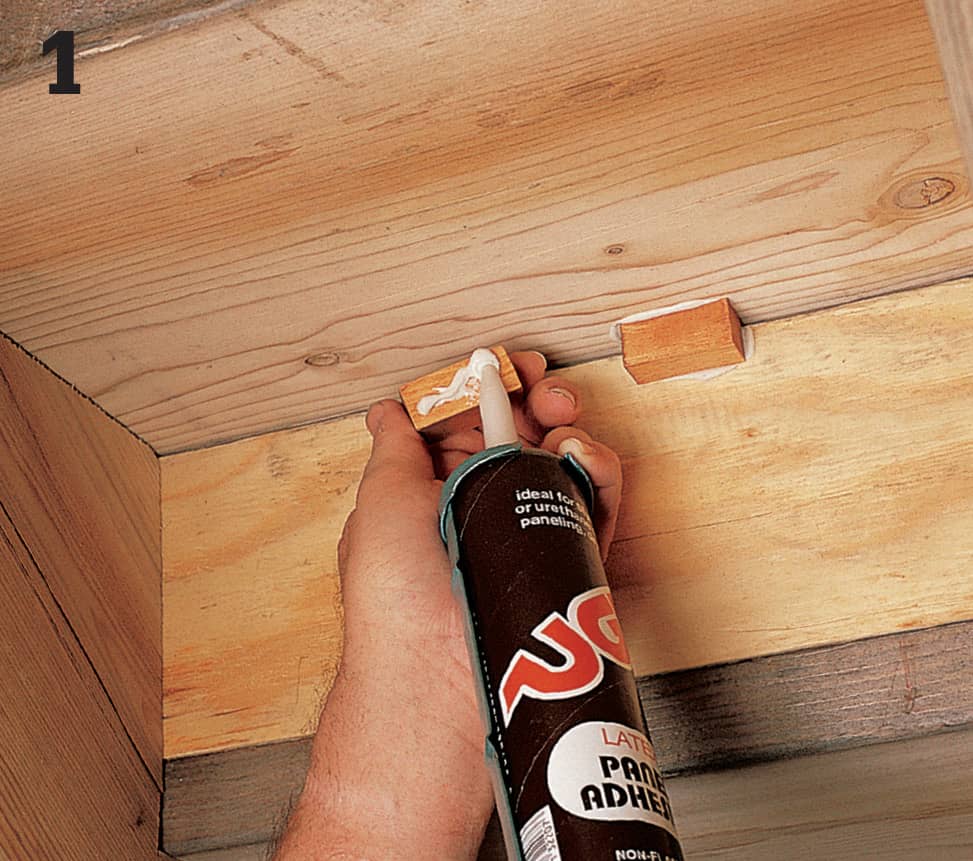
Glue wood blocks to the joints between the treads and risers with construction adhesive. Once the blocks are in place, drill pilot holes and fasten them to the treads and risers with wood screws. If the risers overlap the back edges of the treads, drive screws through the risers and into the treads to bind them together.
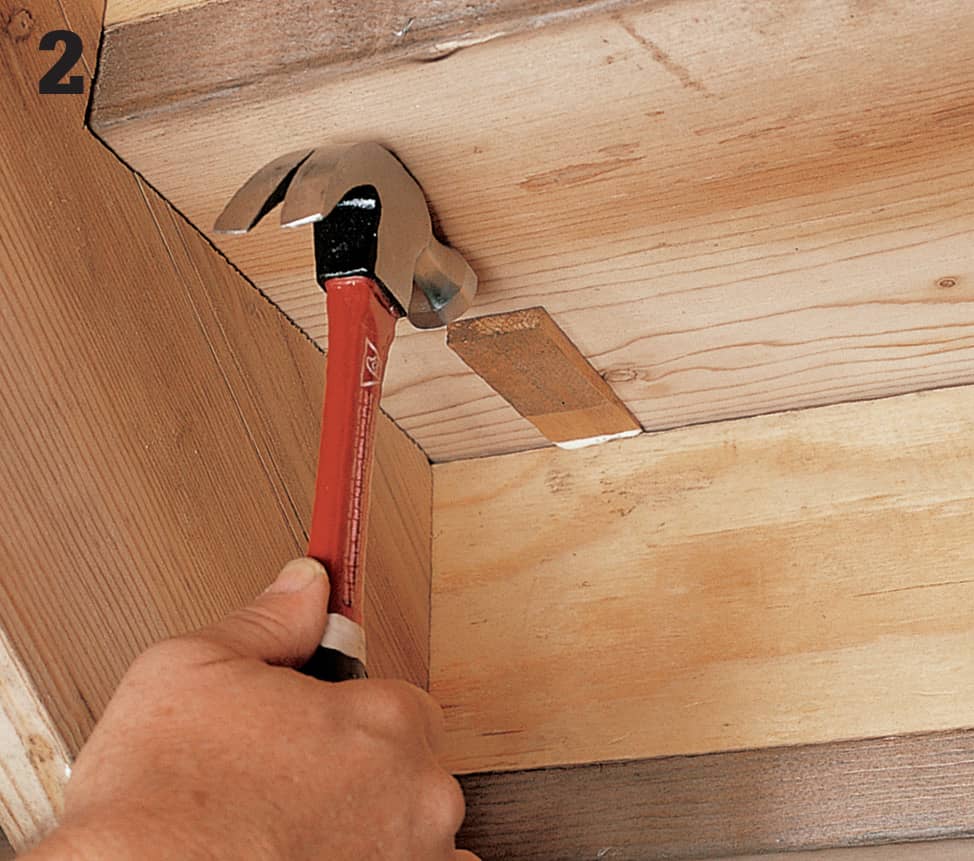
Fill the gaps between stair parts with tapered hardwood shims. Coat the shims with wood glue and tap them into the joints between treads and risers until they’re snug. Shimming too much will widen the gap. Allow the glue to dry before walking on the stairs.
How to Eliminate Squeaks from Above the Stairs
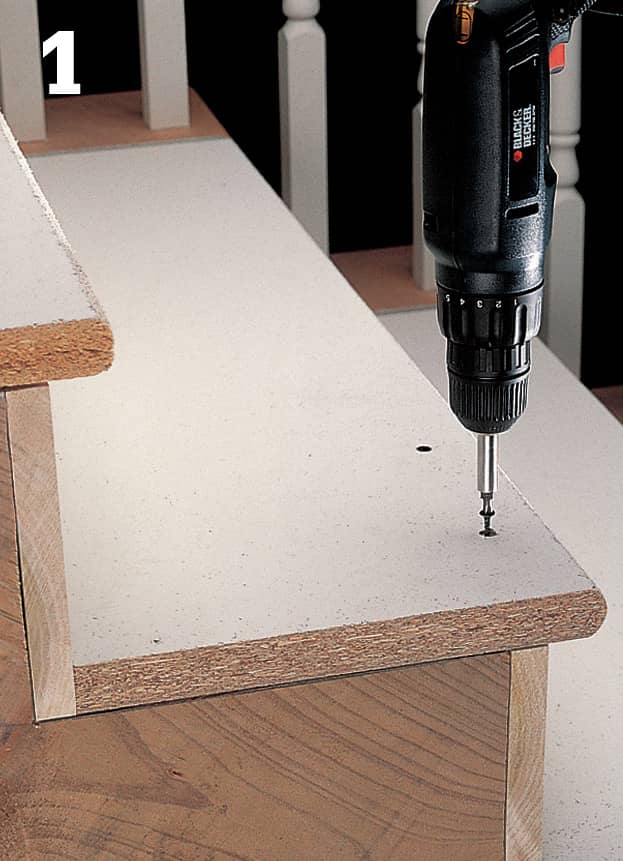
When the underside of a staircase is inaccessible, silence noisy stairs from above. Drill pilot holes and drive screws down through stair treads into the risers. Countersink the screws and fill the holes with putty or wood plugs.
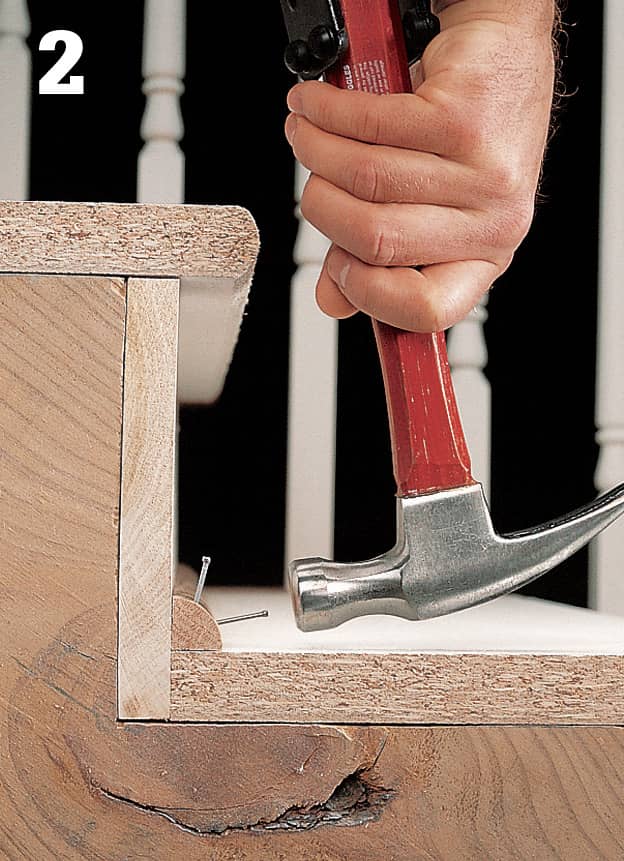
Support the joints between treads and risers by attaching quarter-round molding. Drill pilot holes and use finish nails to fasten the molding. Set the nails with a nail set.
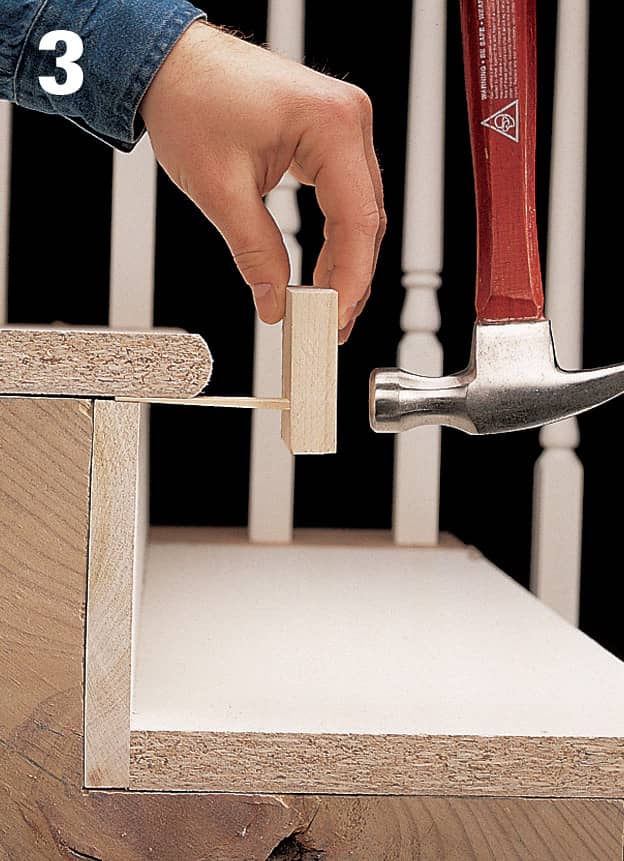
Tap glued wood shims under loose treads to keep them from flexing. Use a block to prevent splitting, and drive the shim just until it’s snug. When the glue dries, cut the shims flush, using a utility knife.
 Replacing a Broken Stair Tread
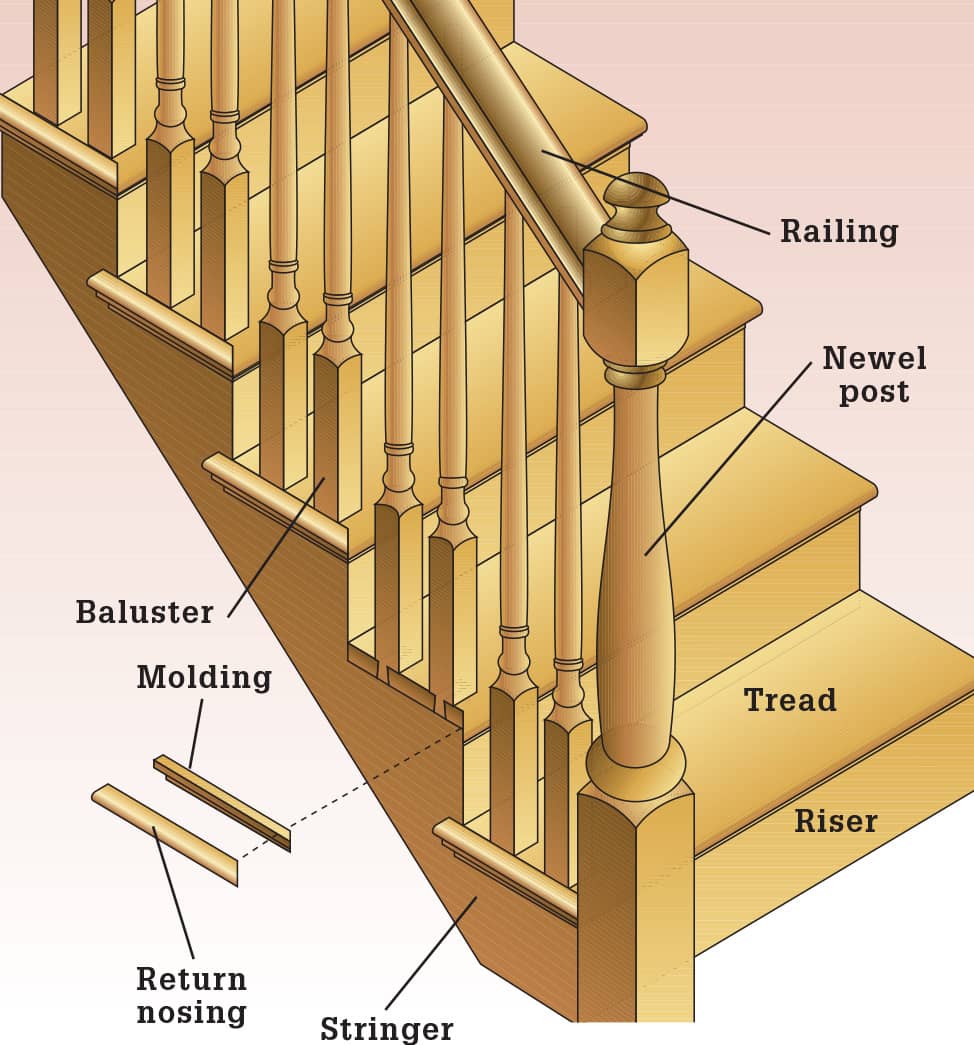
A broken stair tread is hazardous because we often don’t look at steps as we climb them. Replace a broken step right away. The difficulty of this job depends on the construction of your staircase and the accessibility of the underside. It’s better to replace a damaged tread than to repair it. A patch could create an irregular step that surprises someone unfamiliar with it.
How to Replace a Broken Stair Tread
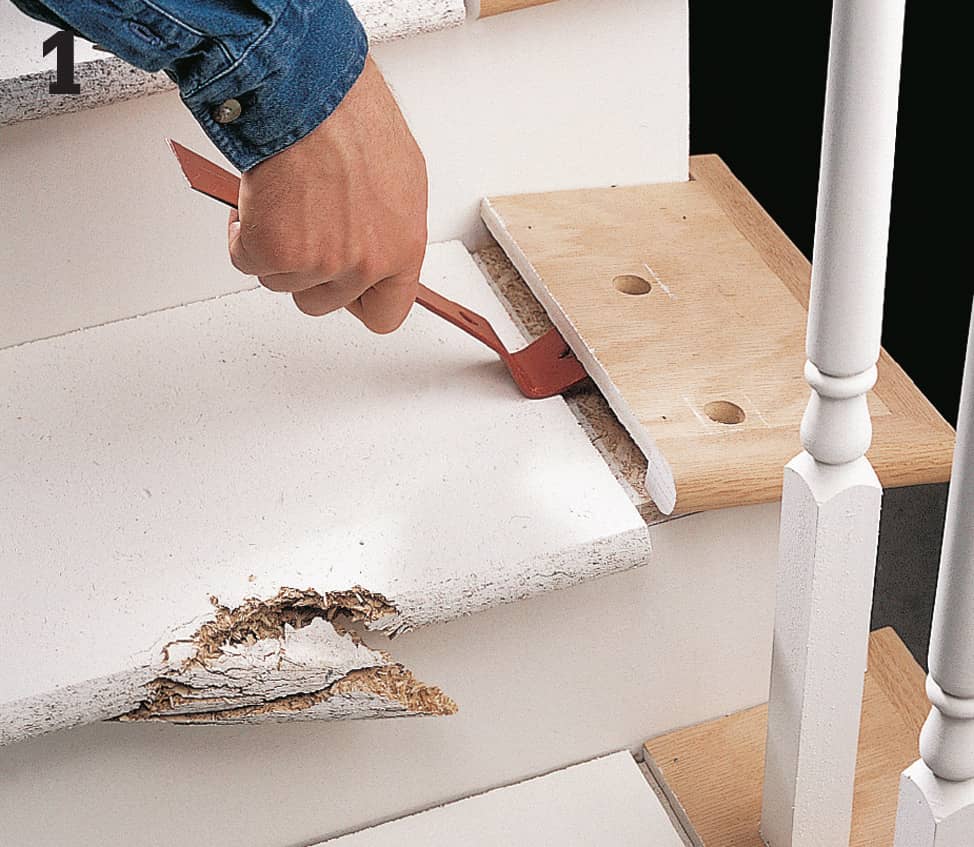
Carefully remove any decorative elements attached to the tread. Pull up carpeting and roll it aside. Remove trim pieces on or around the edges of the tread. Remove the balusters by detaching the top ends from the railing and separating the joints in the tread. Some staircases have a decorative hardwood cap inlaid into each tread. Remove these with a flat pry bar, taking care to pry from underneath the cap to avoid marring the exposed edges.
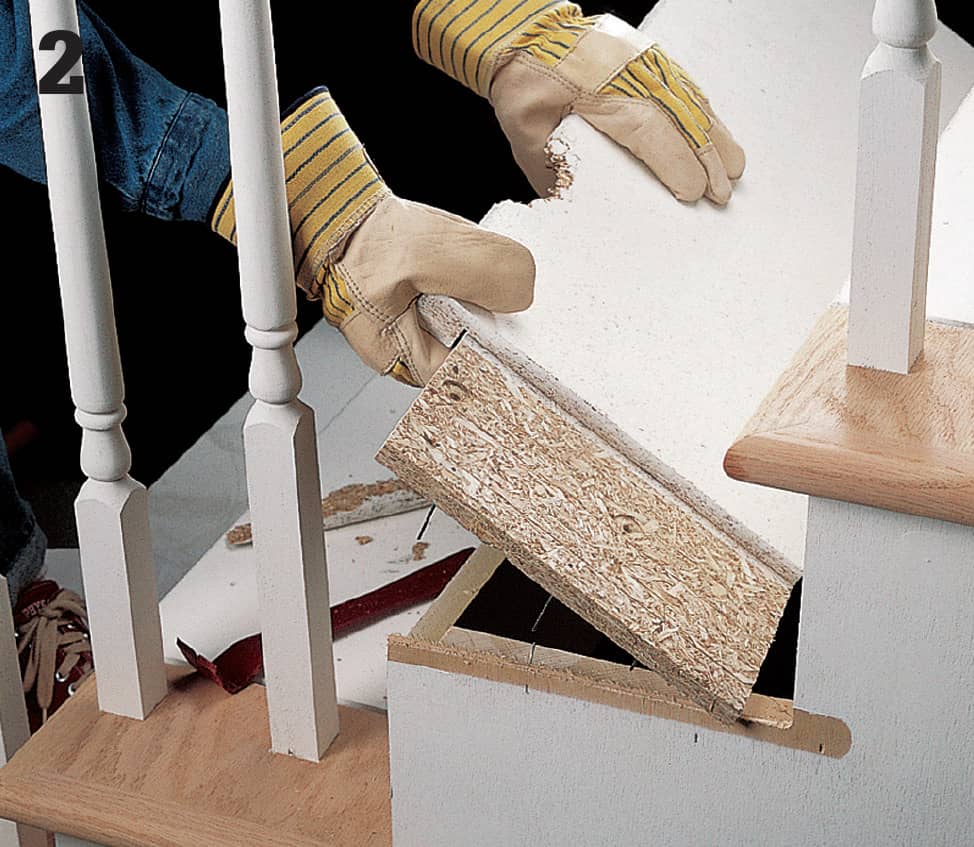
If possible, hammer upward from underneath the stairs to separate the tread from the risers and stringers. Otherwise, use a hammer and pry bar to work the tread loose, pulling nails as you go. Once the tread is removed, scrape the exposed edges of the stringers to remove old glue and wood fragments.
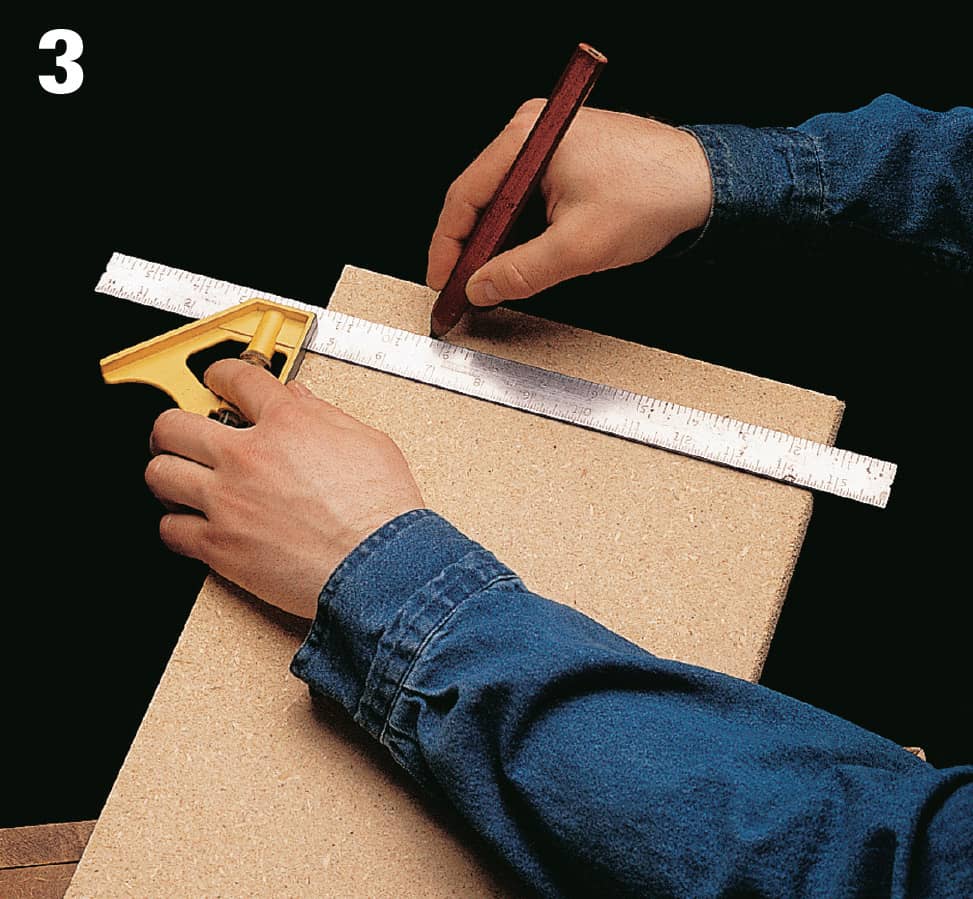
Measure the length for the new tread and mark it with a combination square so the cut end will be square and straight. If the tread has a milled end for an inlay, cut from the plain end. Cut the new tread to size, using a circular saw, and test-fit it carefully.
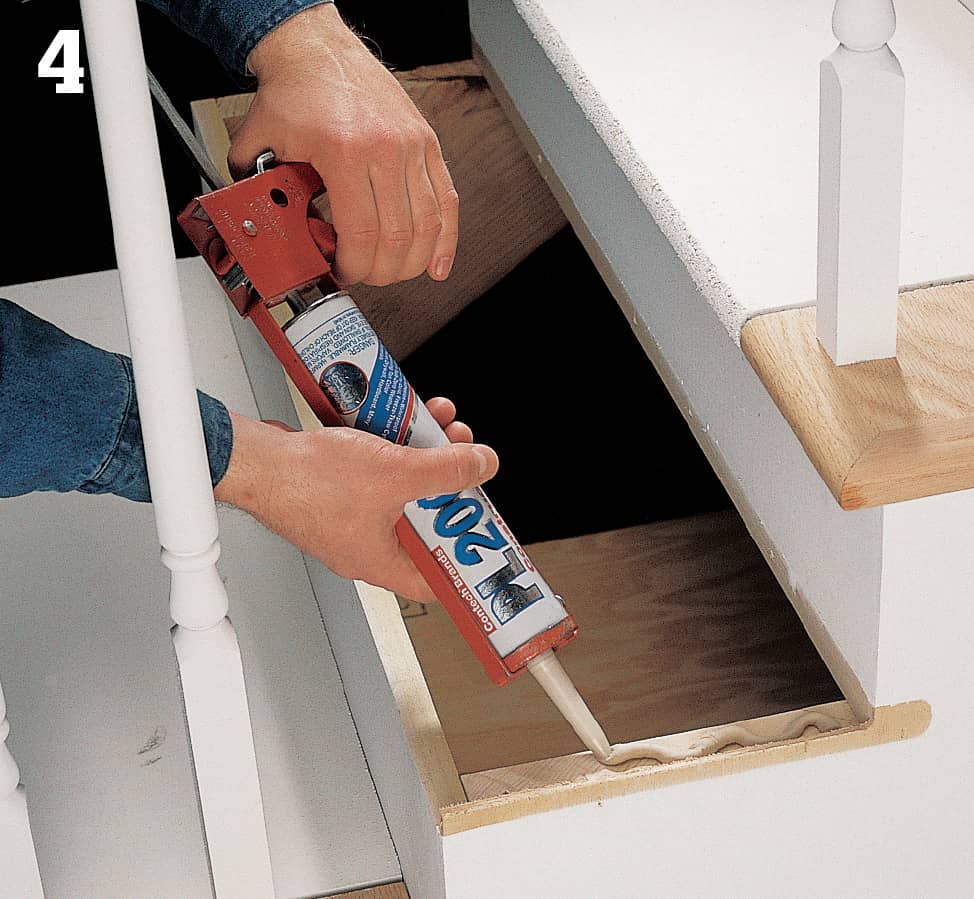
Apply a bead of construction adhesive to the exposed tops of the stringers. The adhesive will strengthen the bond between the tread and stringer and will cushion the joint, preventing the parts from squeaking.
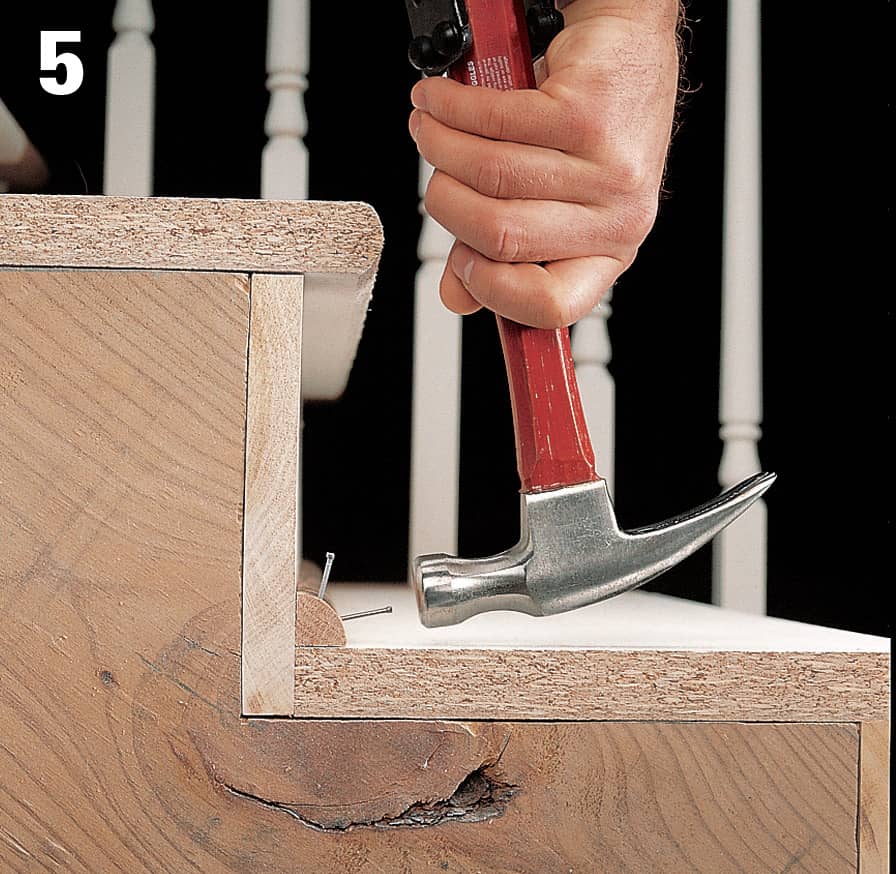
Set the tread in place. If you have access to the step from underneath, secure the tread to the riser above it by driving screws through the riser into the back edge of the tread. To fasten it from the top side, drill and countersink pilot holes and drive two or three screws through the tread into the top edge of each stringer. Also drive a few screws along the front edge of the tread into the riser below it. Fill the screw holes in the tread with wood putty or plugs.
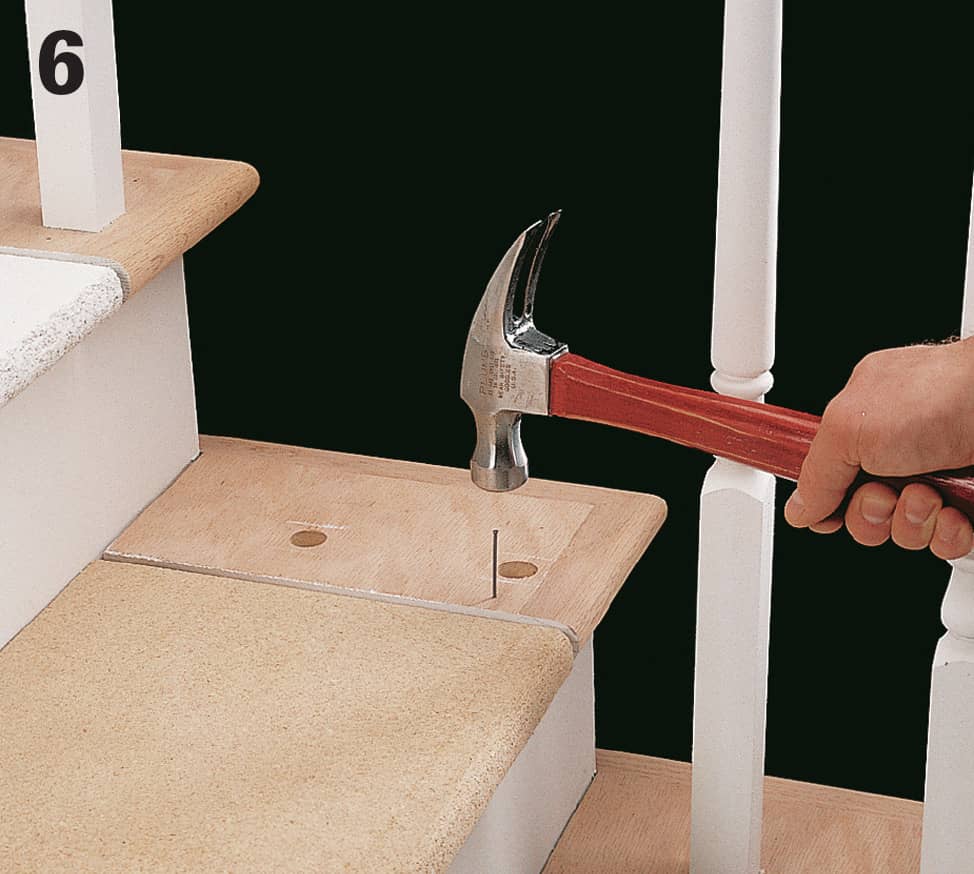
Reinstall any decorative elements, using finish nails. Set the nails with a nail set. Reinstall the balusters, if necessary.


