Exterior Repairs
In this chapter:
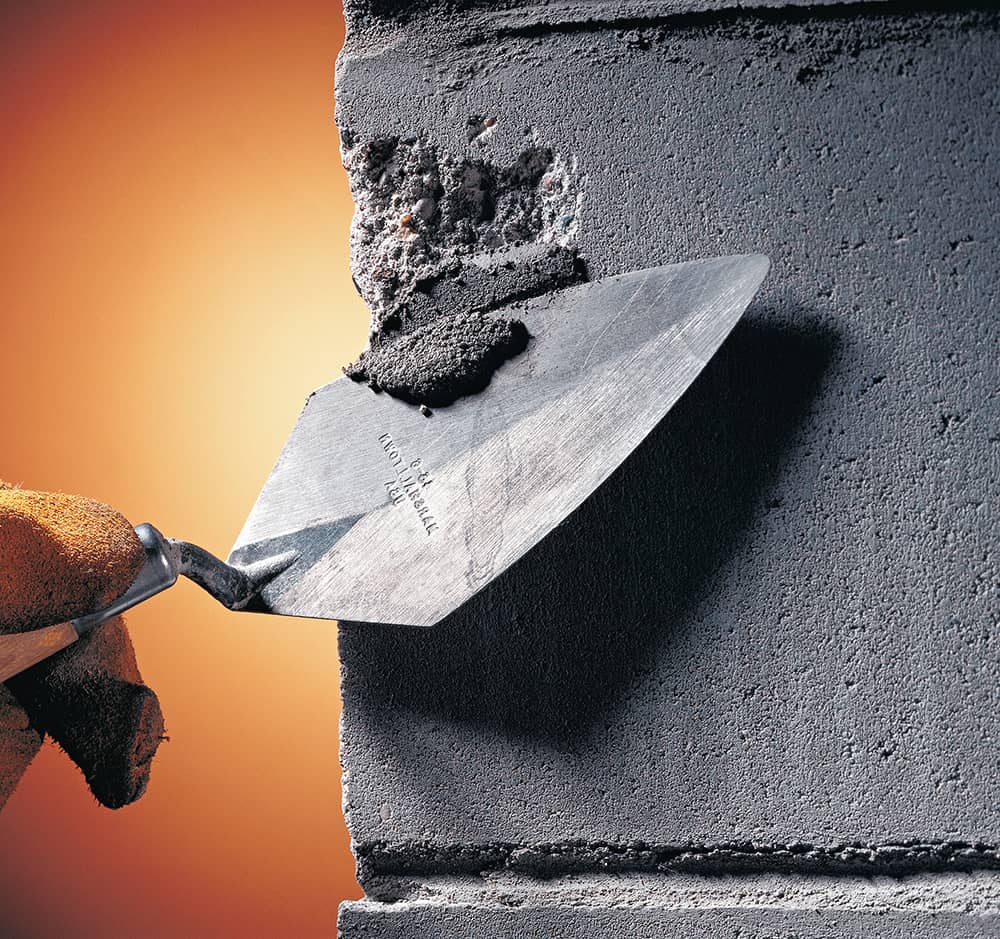
• Inspecting & Repairing a Roof
• Repairing Wood Fascia & Soffits
• Identifying Exterior Paint Problems
• Preparing to Paint Your House
• Using Paint-spraying Equipment
• Identifying Problems with Concrete
• Miscellaneous Concrete Repairs
• Resurfacing a Concrete Walkway
• Resurfacing a Concrete Patio
• Identifying Brick & Block Problems
• Repairing Brick & Block Walls
• Repairing an Asphalt Driveway
 Inspecting & Repairing a Roof
A roof system is composed of several elements that work together to provide three basic, essential functions for your home: shelter, drainage, and ventilation. The roof covering and flashing are designed to shed water, directing it to gutters and downspouts. Air intake and outtake vents keep fresh air circulating below the roof sheathing, preventing moisture and heat buildup.
When your roof system develops problems that compromise its ability to protect your home—cracked shingles, incomplete ventilation, or damaged flashing—the damage quickly spreads to other parts of your house. Routine inspections are the best way to make sure the roof continues to do its job effectively.
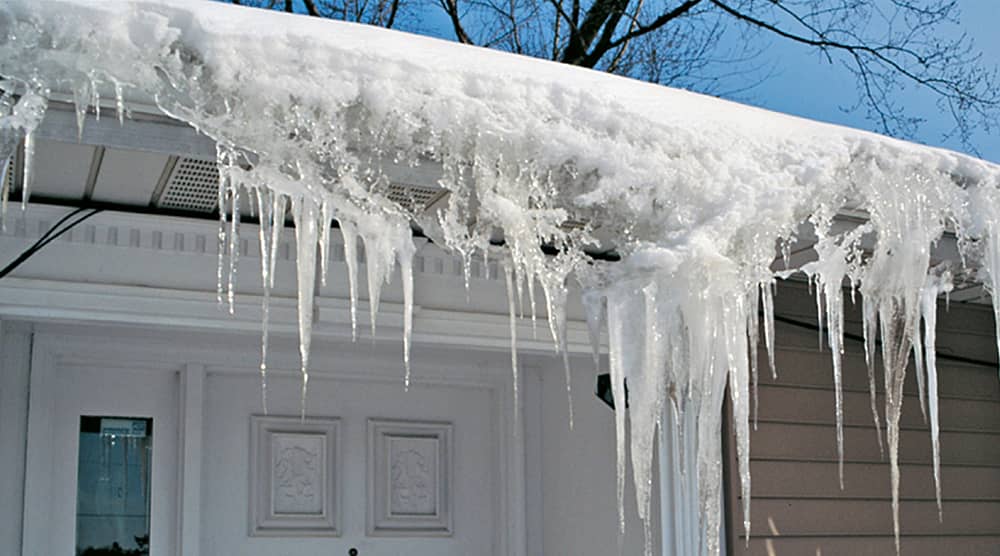
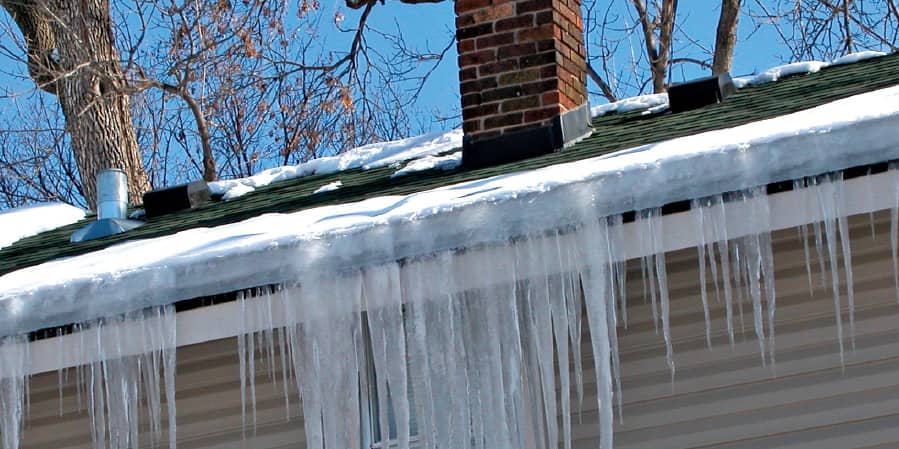
Ice dams above entries pose a danger to everyone entering and leaving the house. To permanently solve ice damming problems, like the one shown here, improve roof ventilation to reduce attic temperatures.
Shingle Maintenance Tips
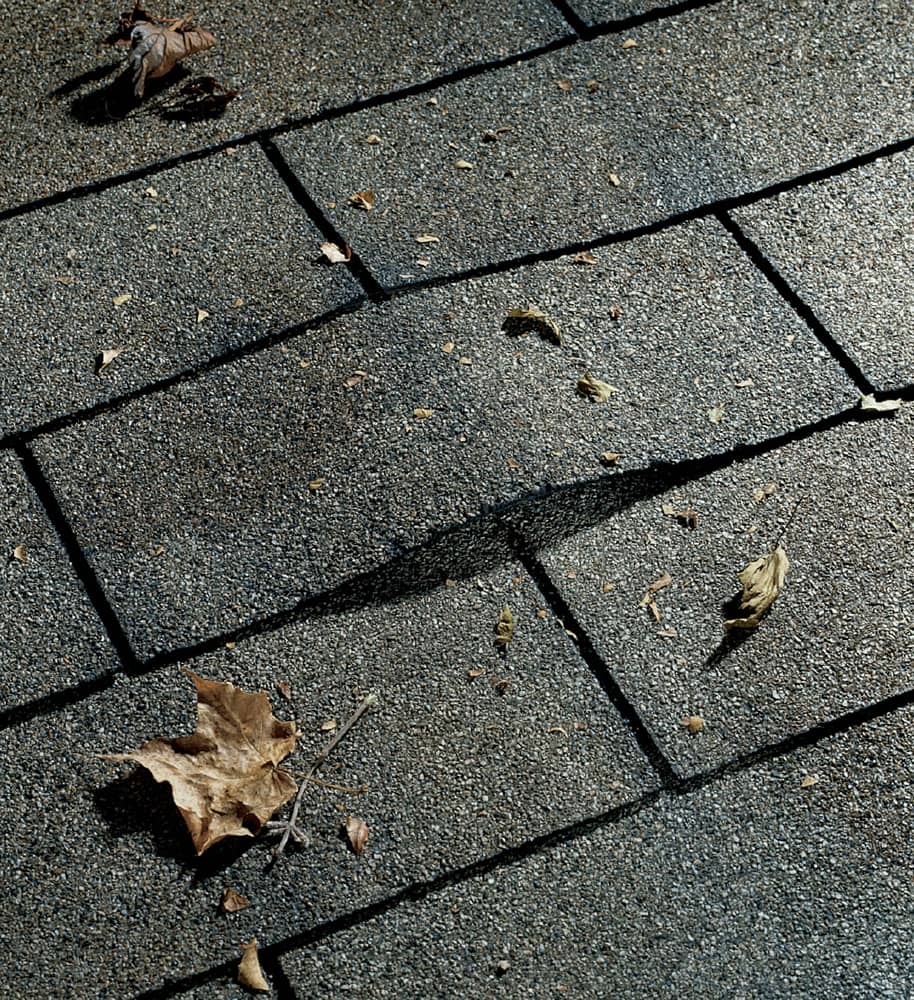
Buckled and cupped shingles are usually caused by moisture beneath the shingles. Loosened areas create an entry point for moisture and leave shingles vulnerable to wind damage.
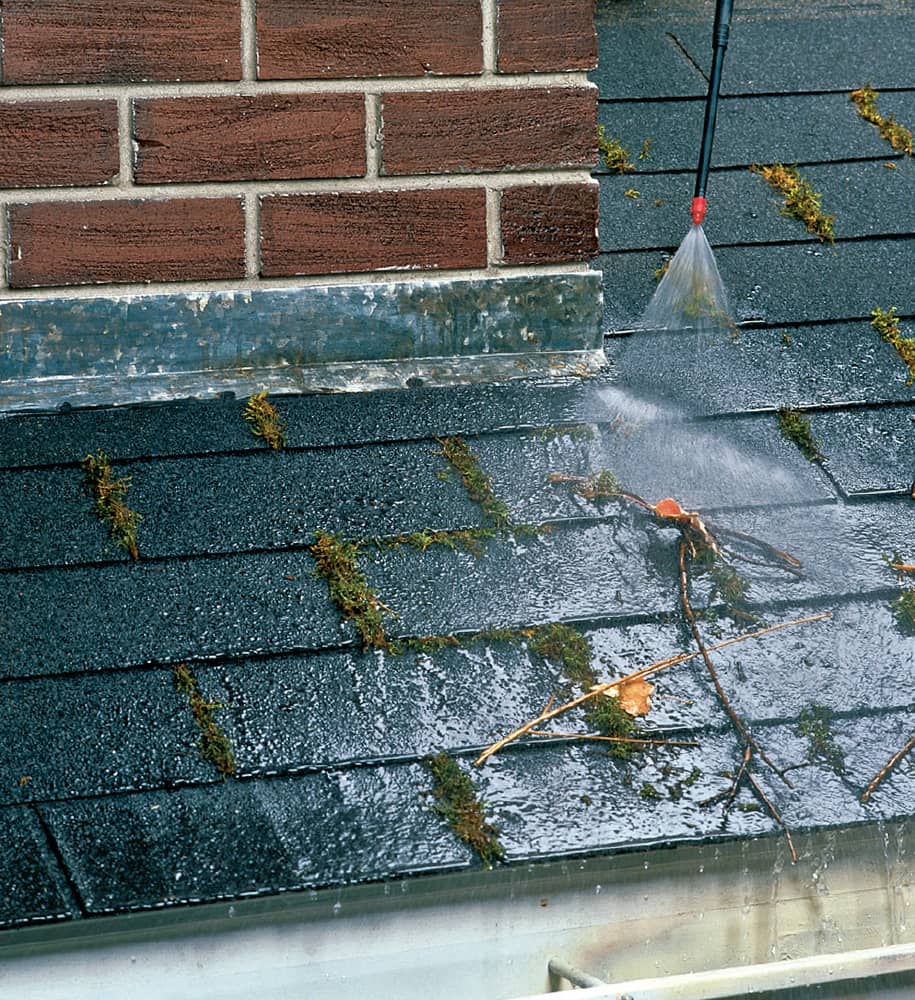
Dirt and debris attract moisture and decay, which shorten a roof’s life. To protect shingles, carefully wash the roof once a year, using a pressure washer. Pay particular attention to areas where moss and mildew may accumulate.
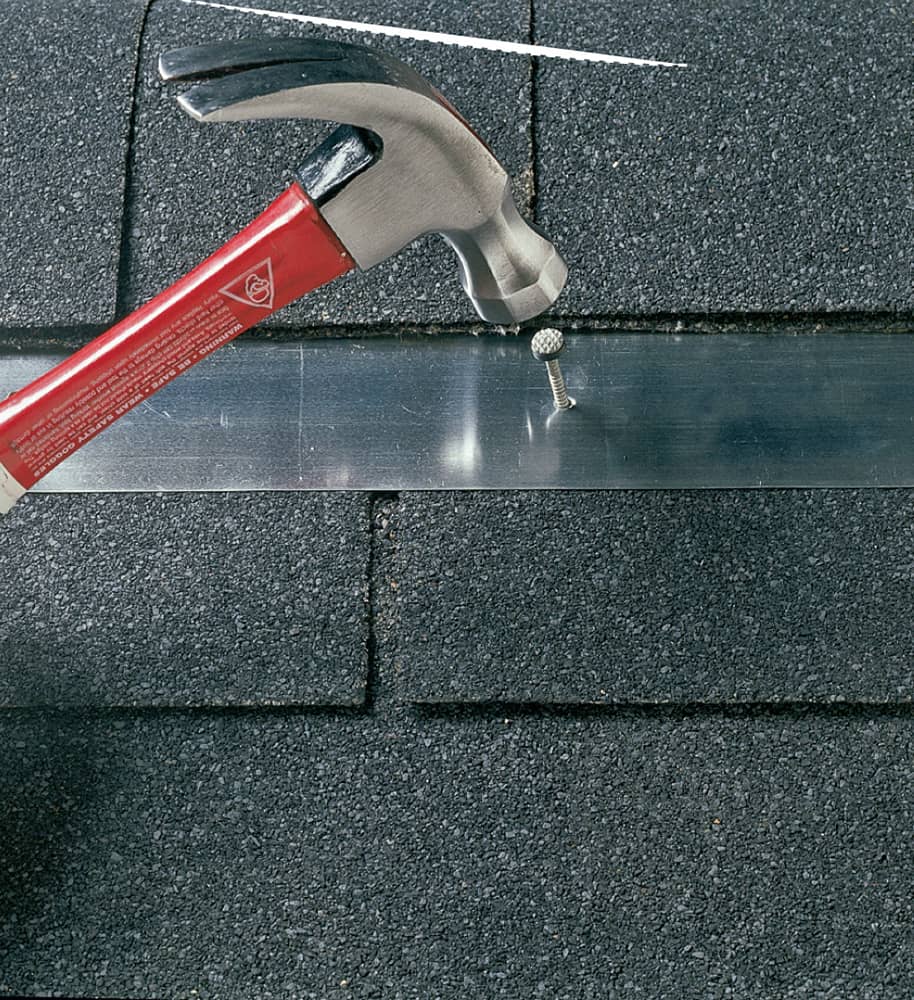
In damp climates, it’s a good idea to nail a zinc strip along the center ridge of a roof, under the ridge caps. Minute quantities of zinc wash down the roof each time it rains, killing moss and mildew.
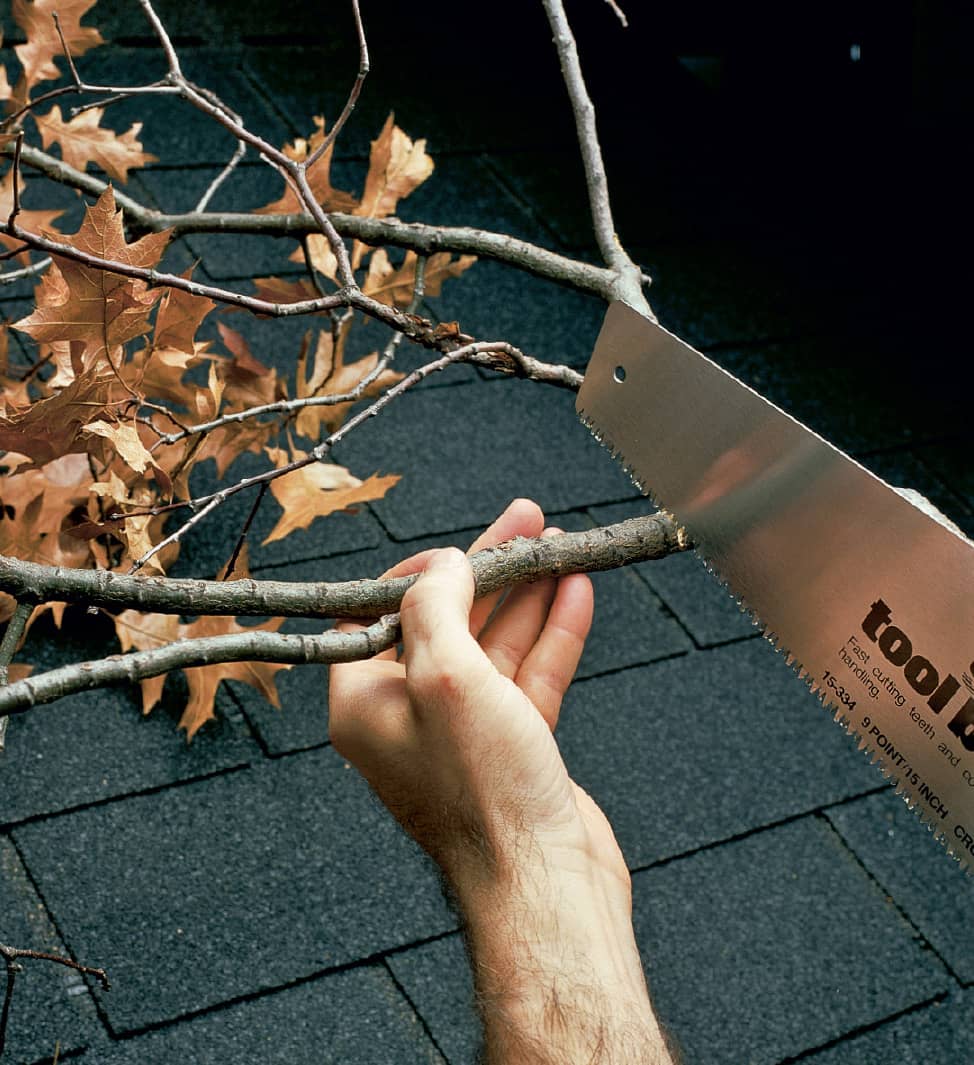
Overhanging tree limbs drop debris and provide shade that encourages moss and mildew. To reduce chances of decay, trim any limbs that overhang the roof.
How to Locate & Evaluate Leaks
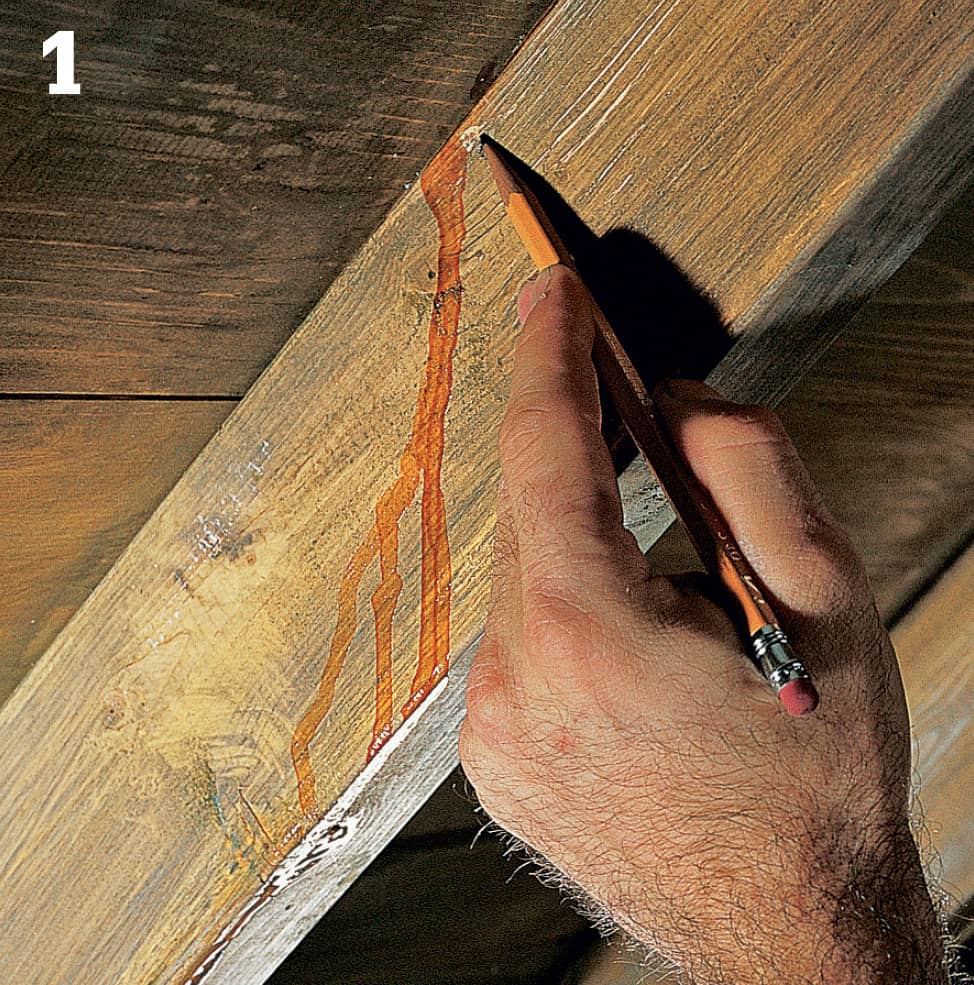
If you have an unfinished attic, examine the underside of your roof with a flashlight on a rainy day. If you find wetness, discoloration, or other signs of moisture, trace the trail up to where the water is making its entrance.
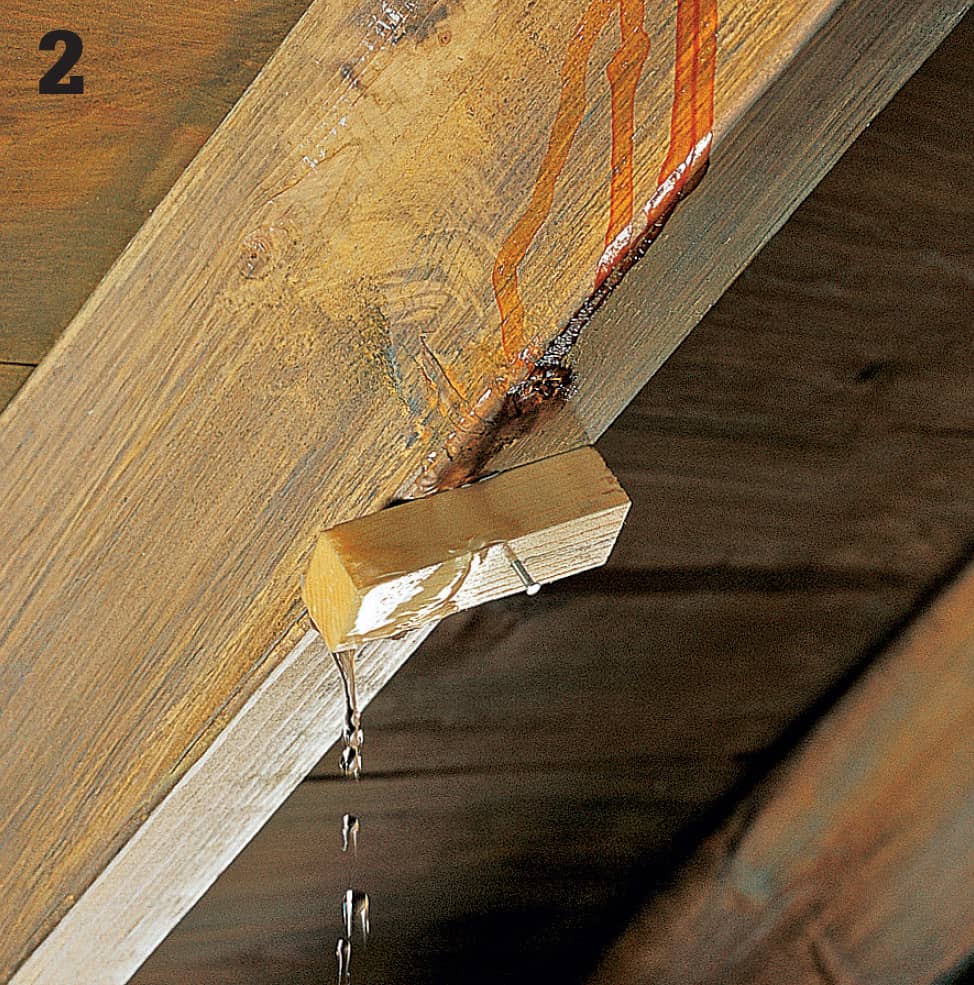
Water that flows toward a wall can be temporarily diverted to minimize damage. Nail a small block of wood in the path of the water, and place a bucket underneath to catch the drip. On a dry day, drive a nail through the underside of the roof decking to mark the hole.
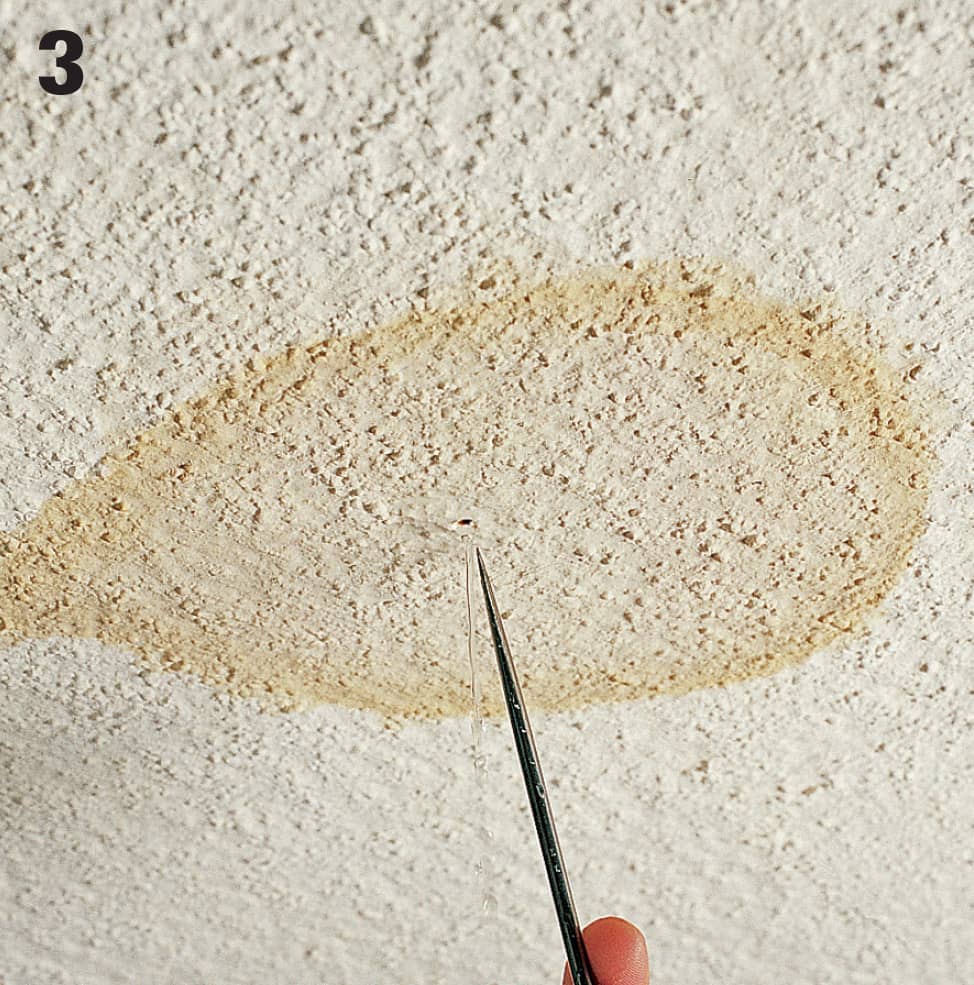
If the leak is finding its way to a finished ceiling, take steps to minimize damage until the leak can be repaired. As soon as possible, reduce the accumulation of water behind a ceiling by poking a small hole in the wallboard or plaster and draining the water.
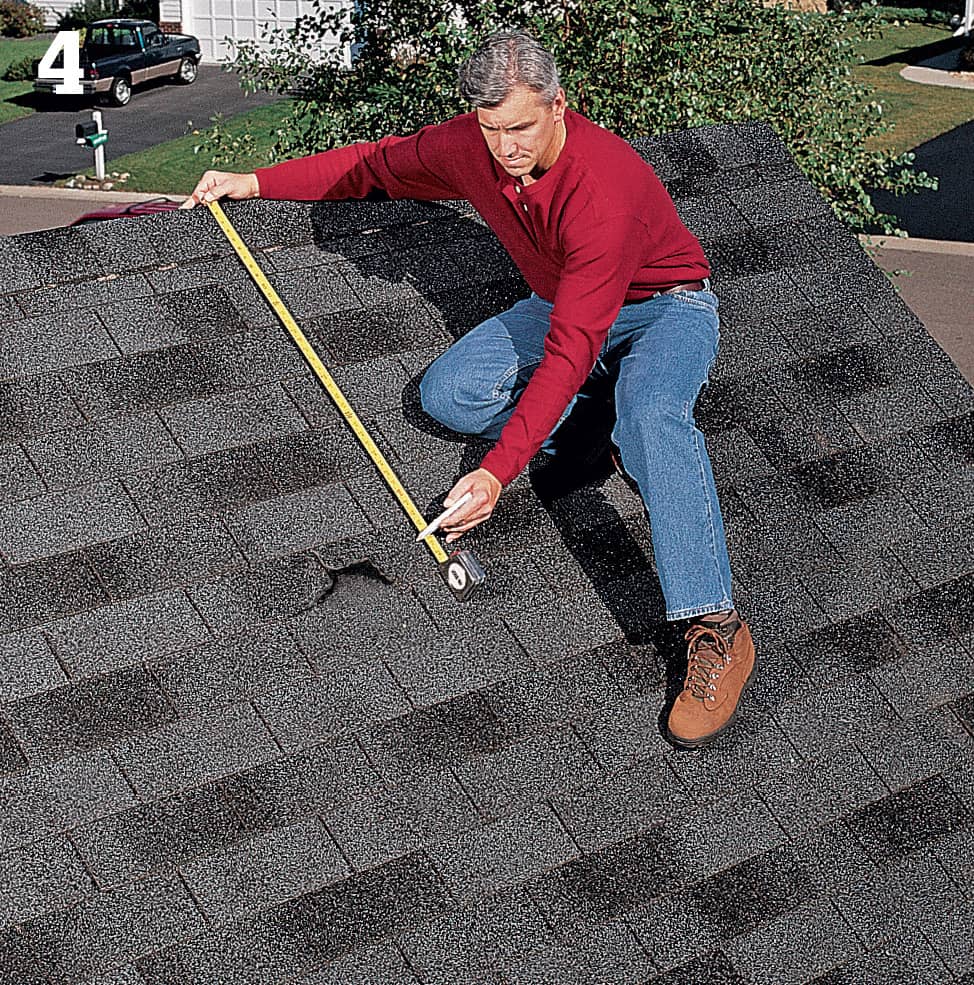
Once you mark the source of a leak from inside, measure from that spot to a point that will be visible and identifiable from outside the house, such as a chimney, vent pipe, or the peak of the roof. Get up on the roof and use that measurement to locate the leak.
How to Make Emergency Repairs
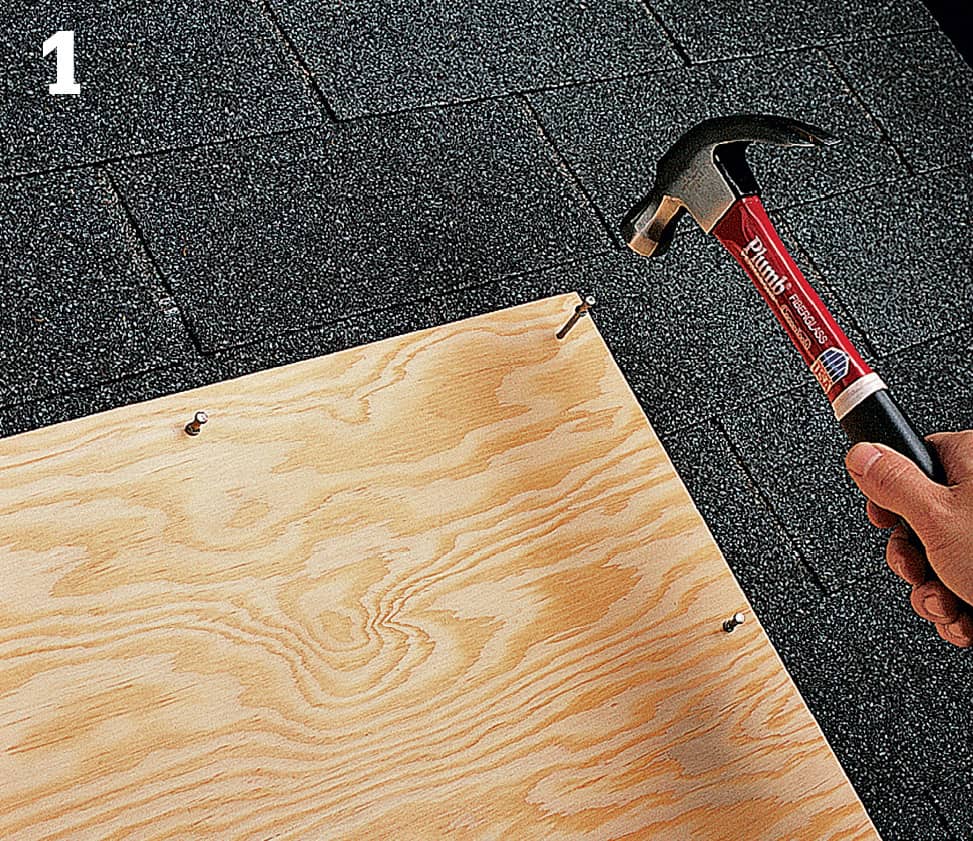
If your roof is severely damaged, the primary goal is to prevent additional damage until permanent repairs are made. Nail a sheet of plywood to the roof to serve as emergency cover to keep out the wind and water.
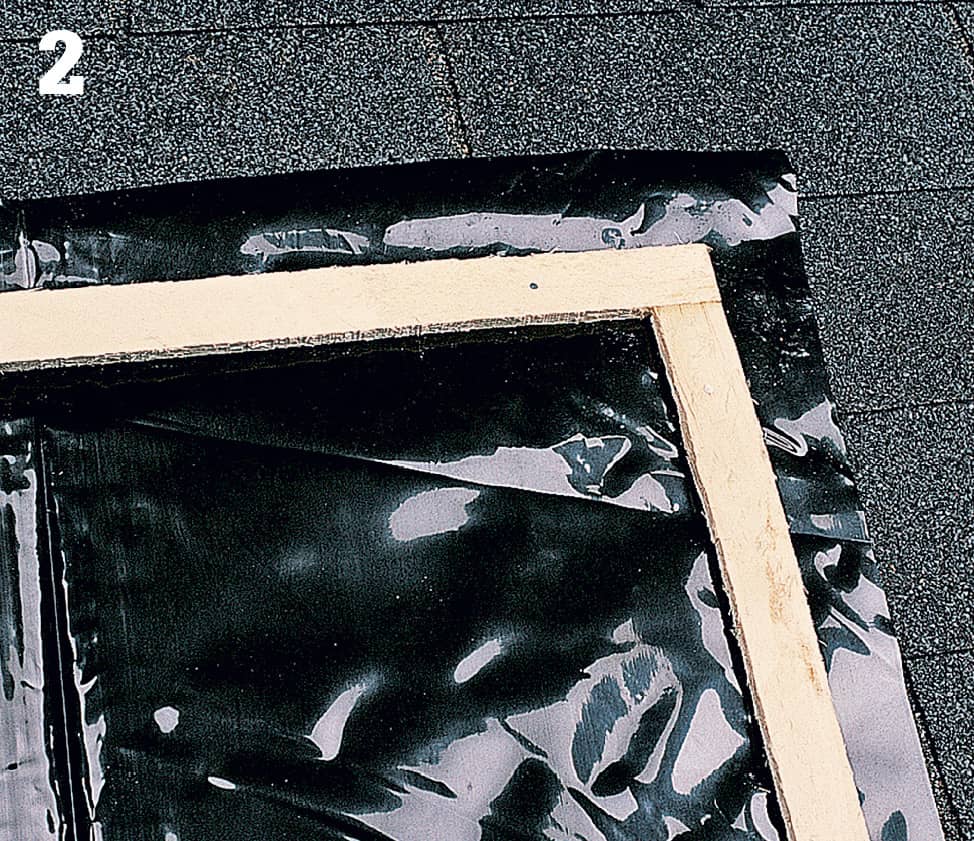
Cover the damaged area by nailing strips of lath around the edges of a plastic sheet or tarp. Tip: For temporary repairs, use double-headed nails, which can be easily removed. Fill nail holes with roofing cement when the repair is complete.
How to Make Spot Repairs with Roofing Cement
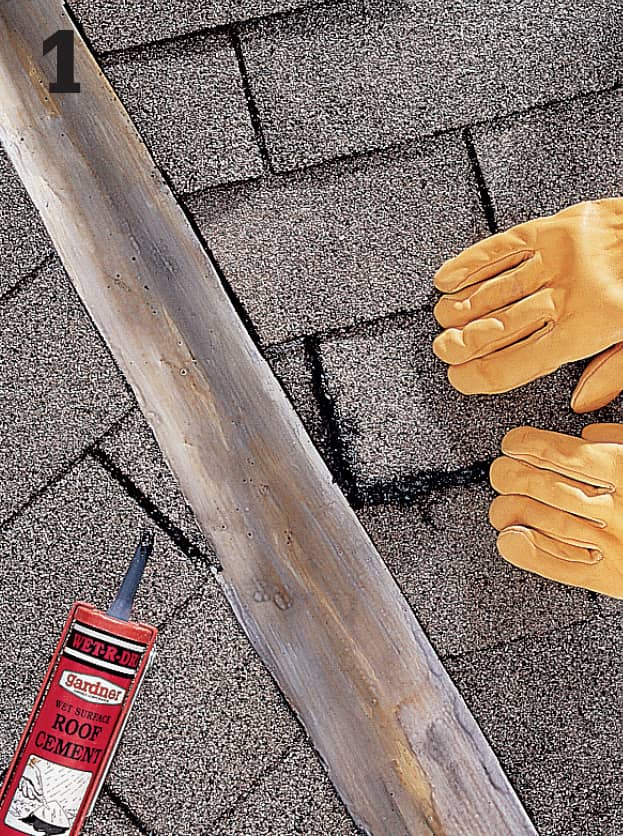
To reattach a loose shingle, wipe down the felt paper and the underside of the shingle. Let each dry, then apply a liberal coat of roofing cement. Press the shingle down to seat it in the bed of cement.
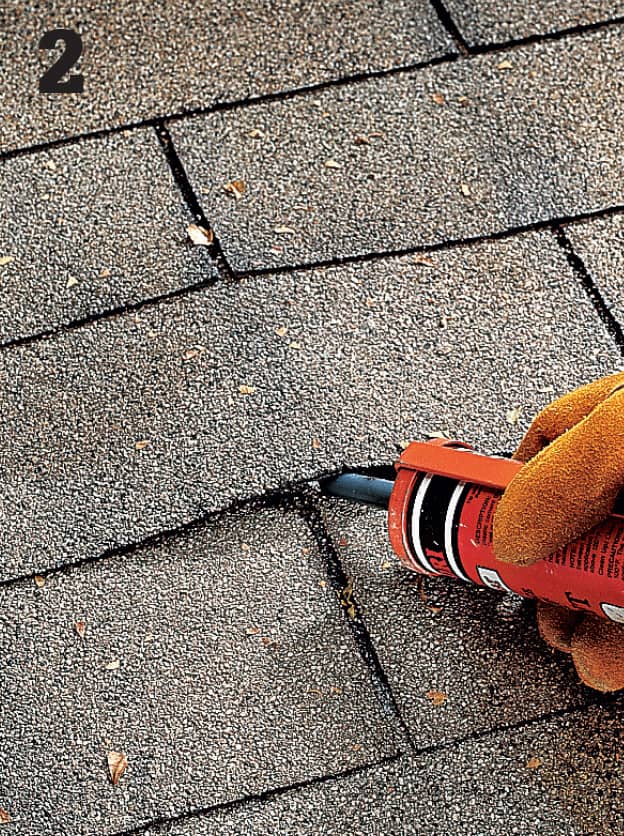
Tack down buckled shingles by cleaning below the buckled area. Fill the area with roofing cement, then press the shingle into the cement. Patch cracks and splits in shingles with roofing cement.
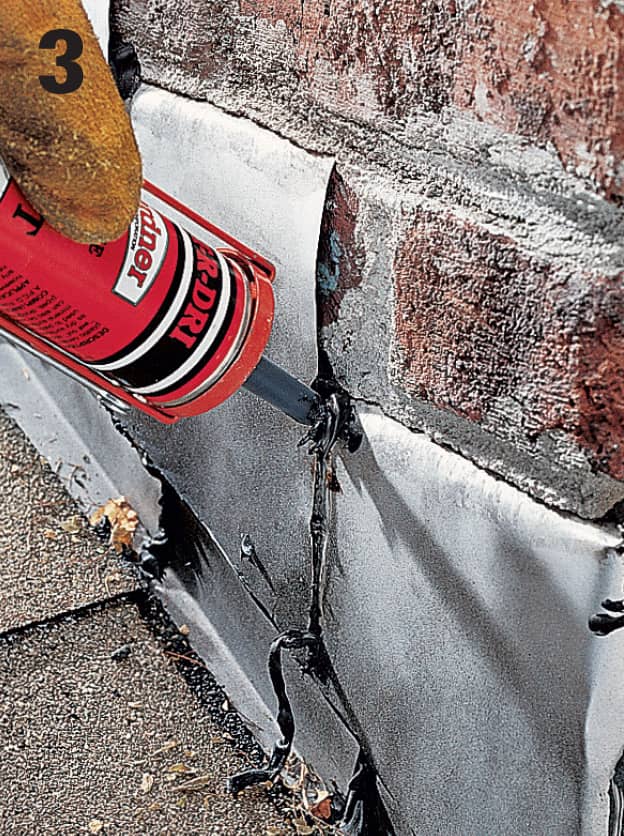
Check the joints around flashing, which are common places for roof leaks to occur. Seal any gaps by cleaning out and replacing any failed roofing cement. Tip: Heat softens the roof’s surface, and cold makes it brittle. If needed, warm shingles slightly with a hair dryer to make them easier to work with and less likely to crack.
How to Replace Asphalt Shingles
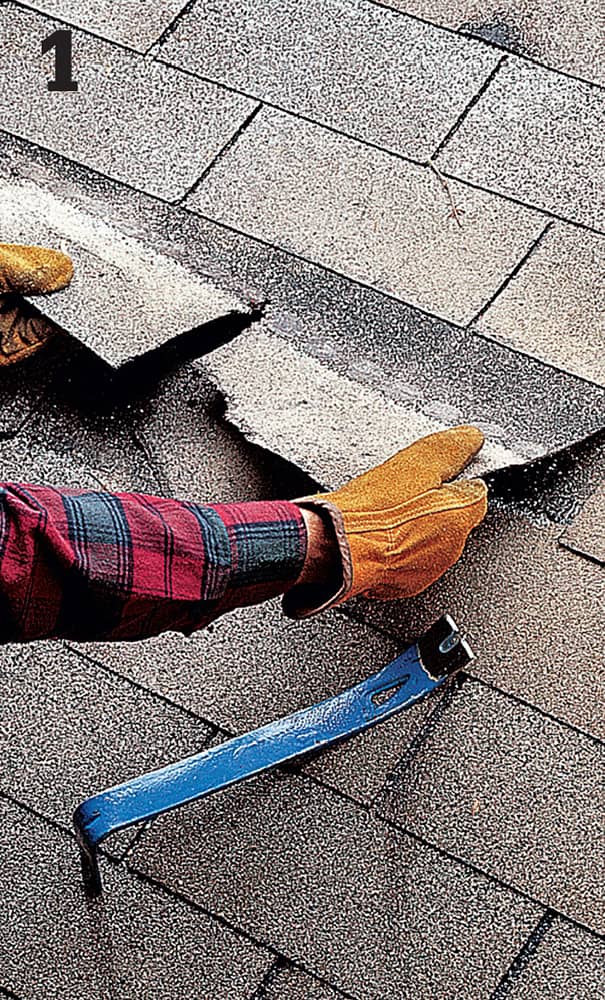
Pull out damaged shingles, starting with the uppermost shingle in the damaged area. Be careful not to damage surrounding shingles that still are in good condition.
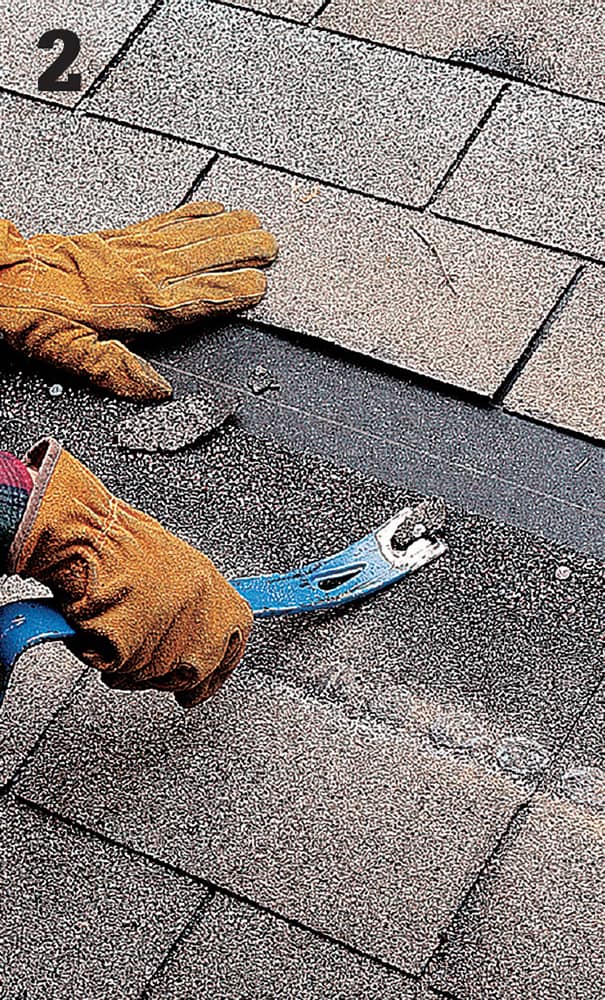
Remove old nails in and above the repair area, using a flat pry bar. Patch damaged felt paper with roofing cement.
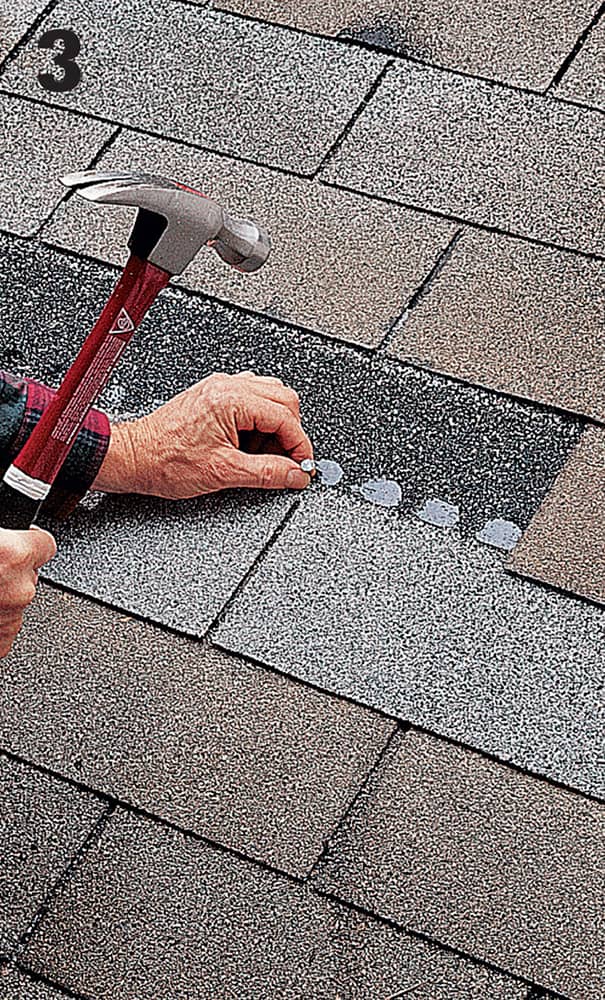
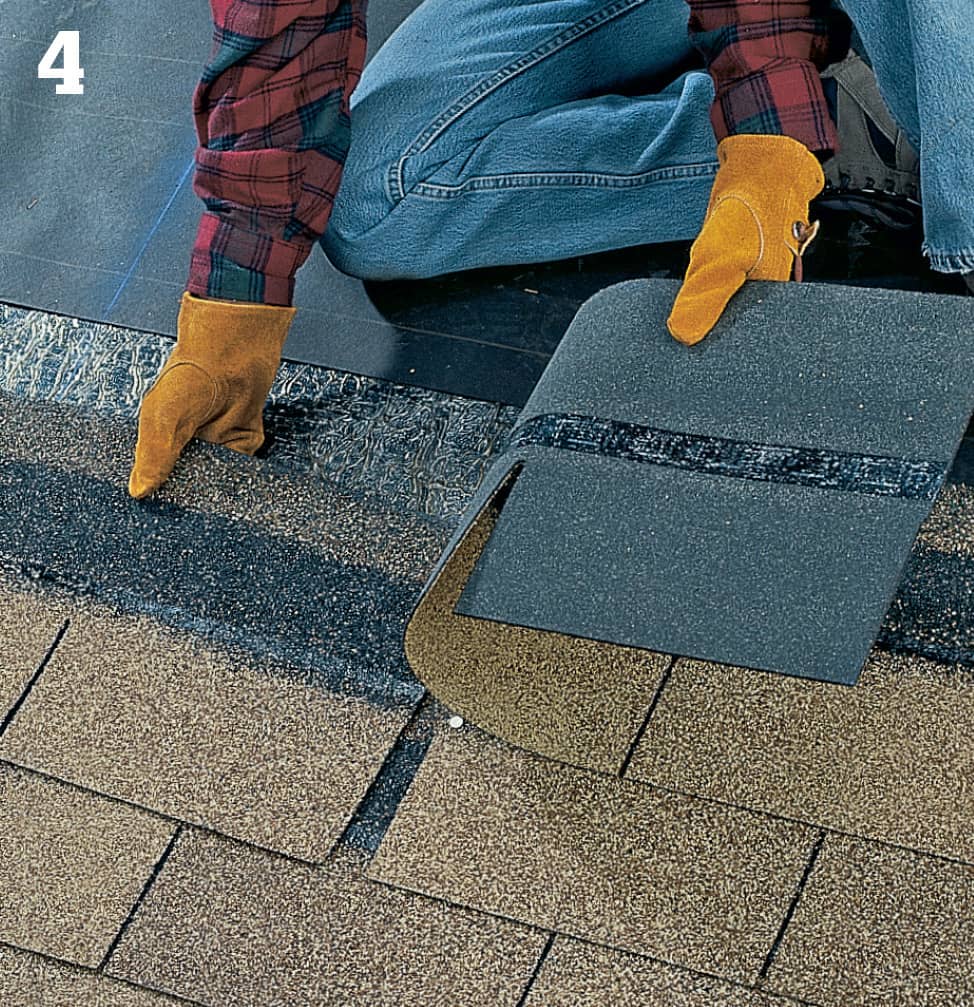
Install the replacement shingles, beginning with the lowest shingle in the repair area. Nail above the tab slots, using 7/8" or 1" roofing nails.
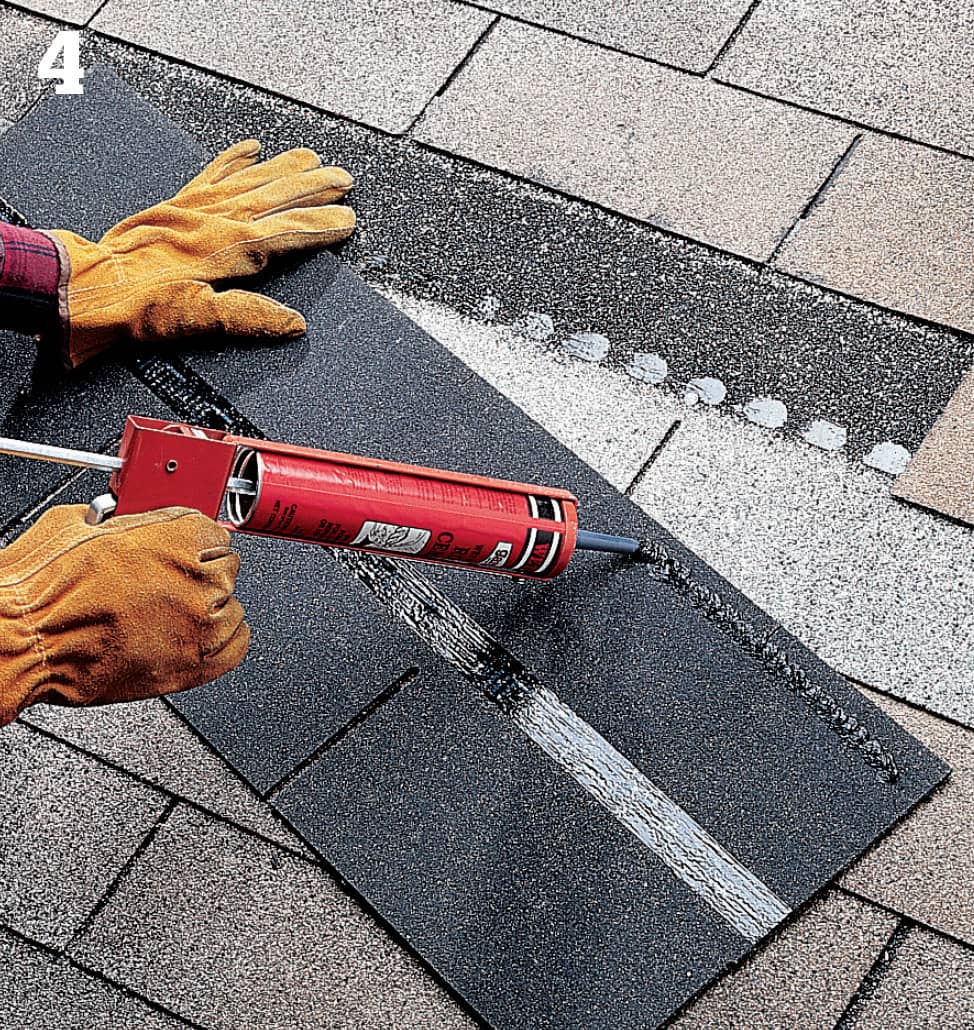
Install all but the top shingle with nails, then apply roofing cement to the underside of the top shingle, above the seal line.
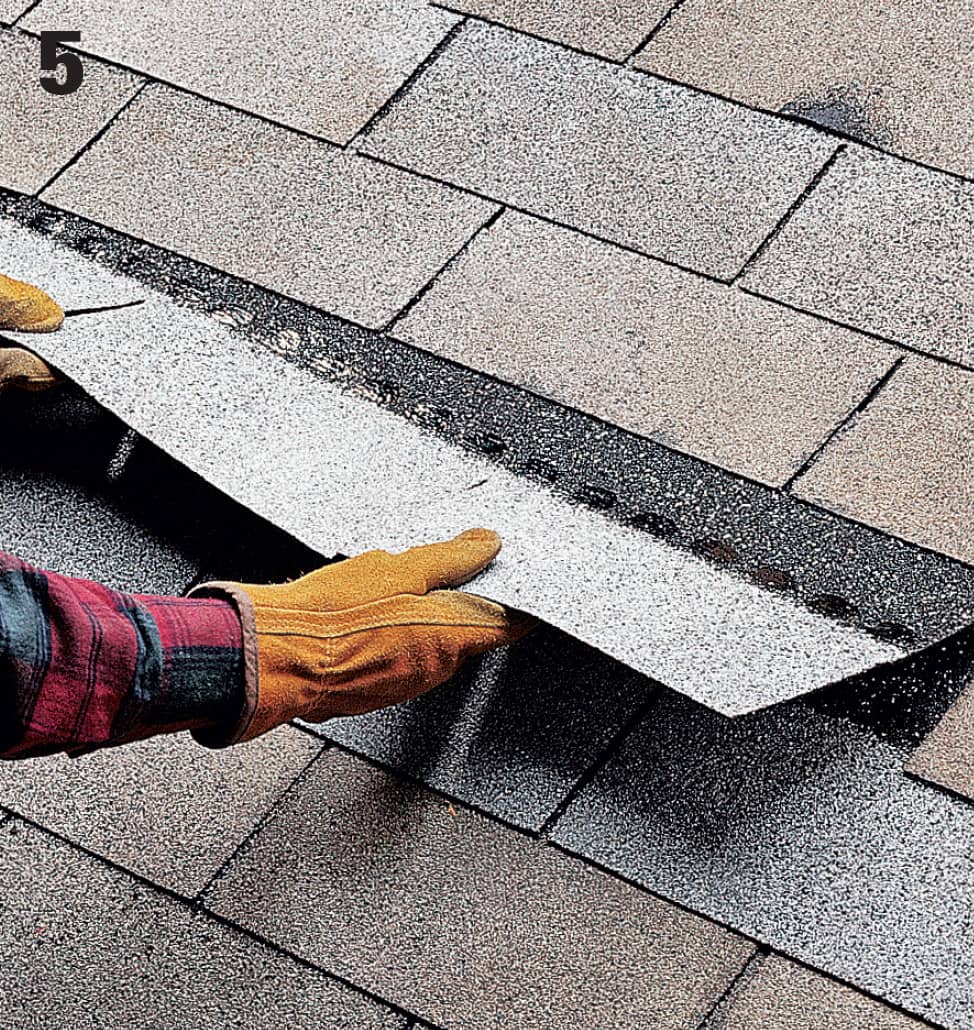
Slip the last shingle into place, under the overlapping shingle. Lift the shingles immediately above the repair area, and nail the top replacement shingle.
How to Replace Wood Shakes & Shingles
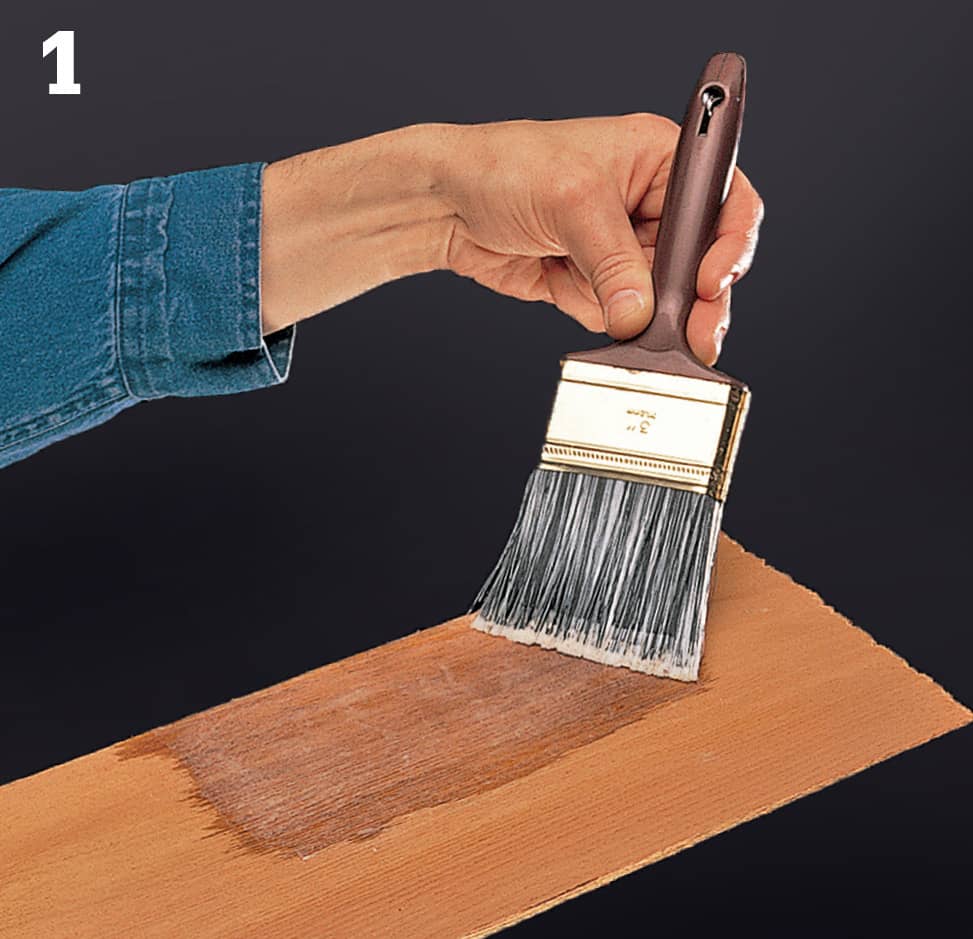
To age new shakes and shingles so they match existing ones, dissolve 1 pound of baking soda in 1 gallon of water. Brush the solution onto the shakes or shingles, then place them in direct sunlight for four to five hours. Rinse them thoroughly and let dry. Repeat this process until the color closely matches the originals.
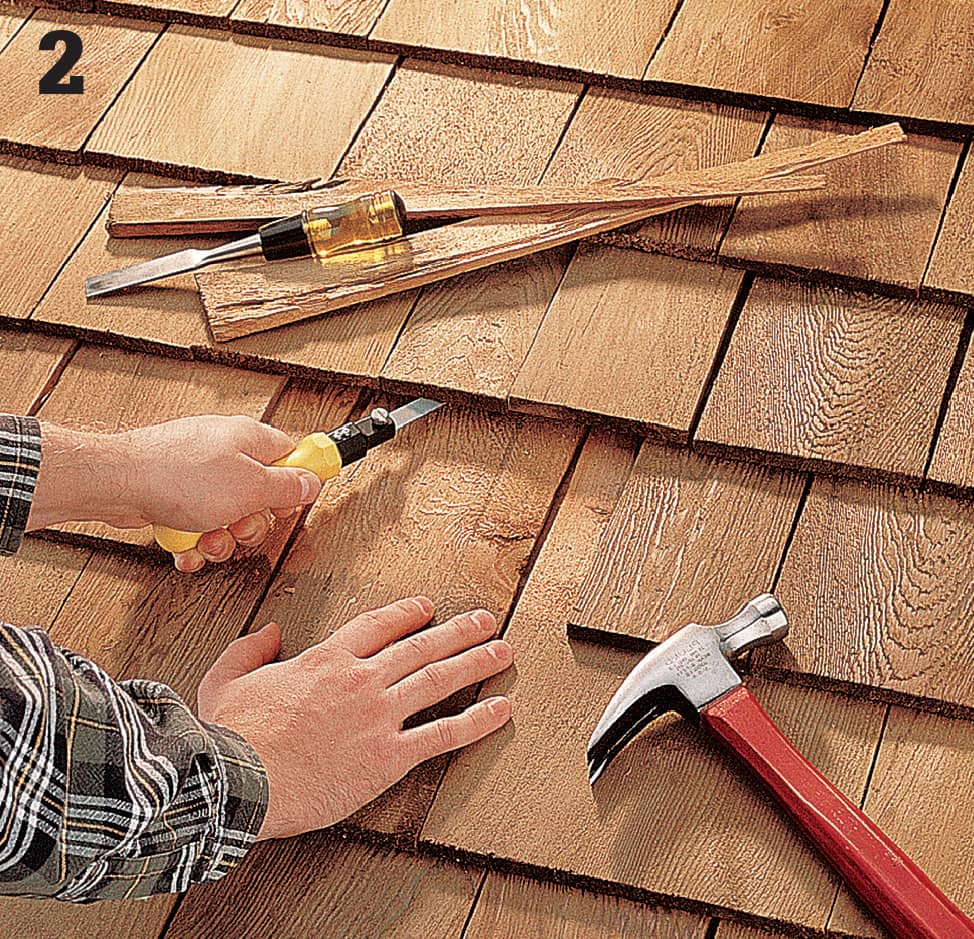
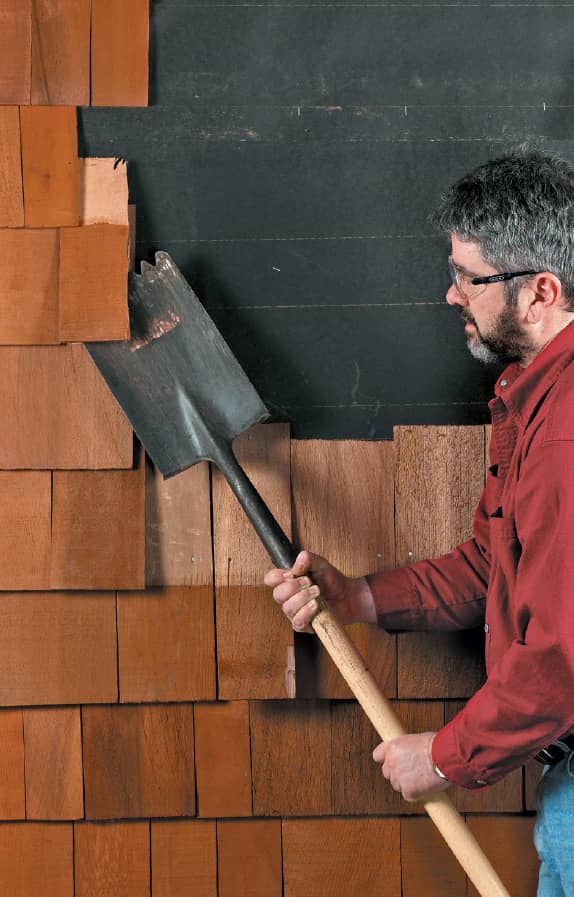
Split the damaged shakes or shingles, using a hammer and chisel. Remove the pieces. Slide a hacksaw blade under the overlapping shingles and cut the nail heads. Pry out the remaining pieces of the shakes or shingles.
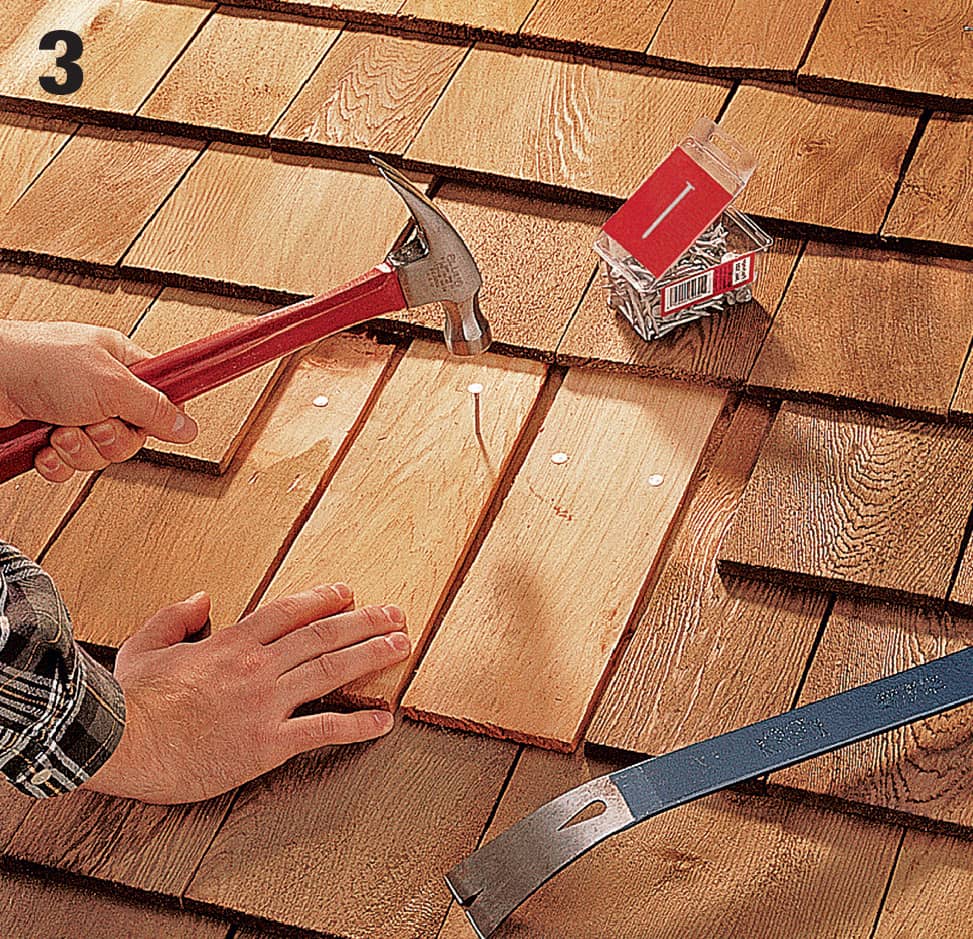
Gently pry up, but don’t remove, the shakes or shingles above the repair area. Cut new pieces for the lowest course, leaving a 3/8" gap between pieces. Nail replacements in place with ring-shank siding nails. Fill in all but the top course in the repair area.
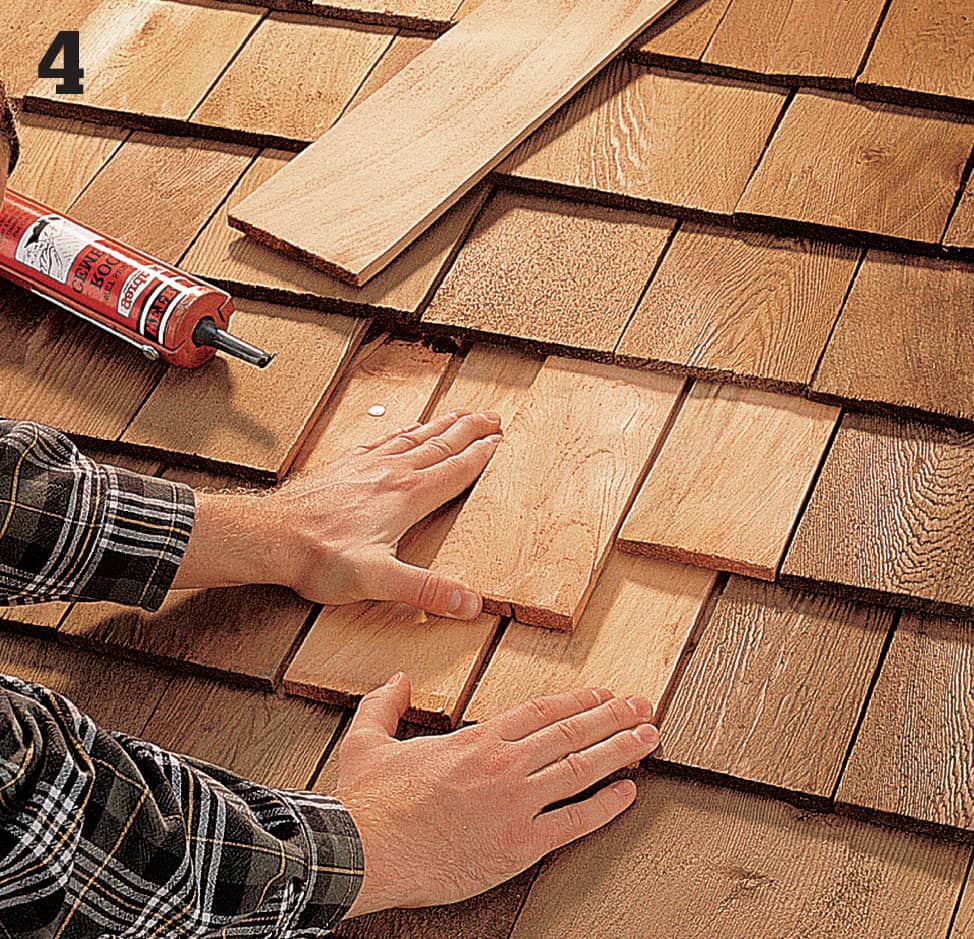
Cut the shakes or shingles for the top course. Because the top course can’t be nailed, use roofing cement to fasten the pieces in place. Apply a coat of roofing cement where the shakes or shingles will sit, then slip them beneath the overlapping pieces. Press down to seat them in the roofing cement.
How to Patch Valley Flashing
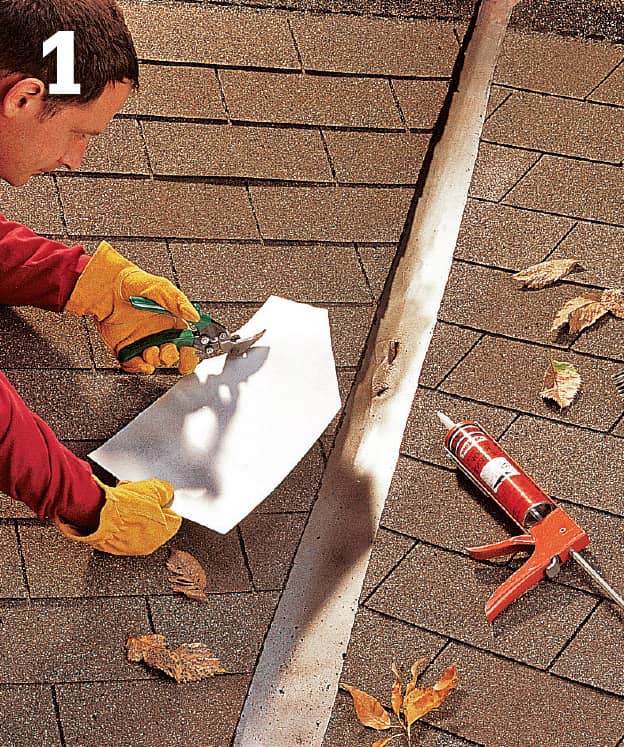
Measure the damaged area and mark an outline for the patch. Cut a patch wide enough to fit under shingles on both sides of the repair area, and tapered to a point at one end. Using a trowel or flat pry bar, carefully break the seal between the damaged flashing and surrounding shingles.
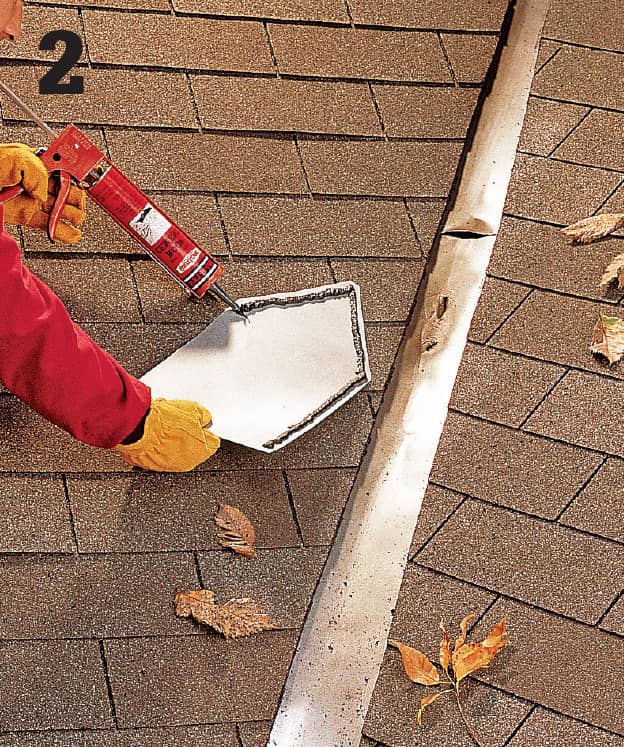
Scrub the damaged flashing with a wire brush, and wipe it clean. Apply a heavy bead of roofing cement to the back of the patch. Cut a slit in the old flashing. Insert the tapered end of the patch into the slit, and slip the side edges under the shingles. Tip: Use the same material for your patch as the original flashing. When dissimilar materials are joined, corrosion accelerates.
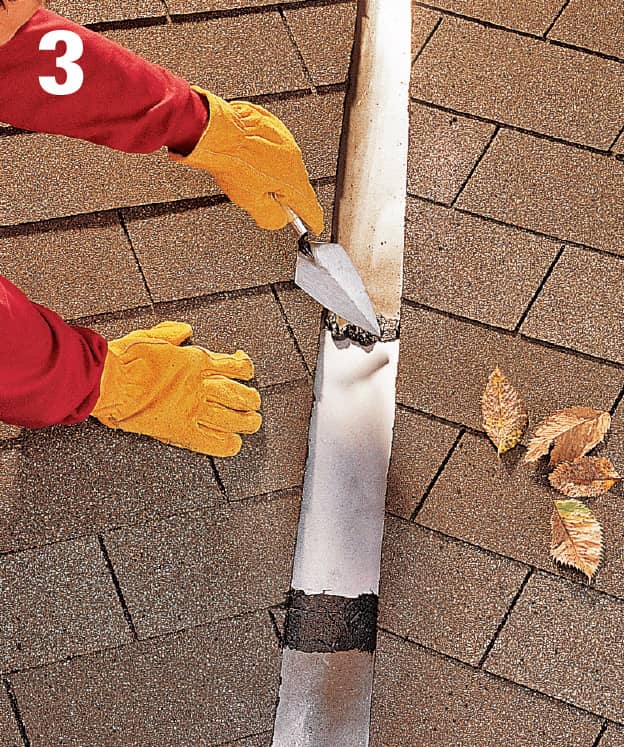
Rest the square end of the patch on top of the old flashing, and press it firmly to seal the roofing cement joint. Add roofing cement to the exposed seams. Using a trowel, feather out the cement to create a smooth path for water flow.
How to Replace Vent Flashing
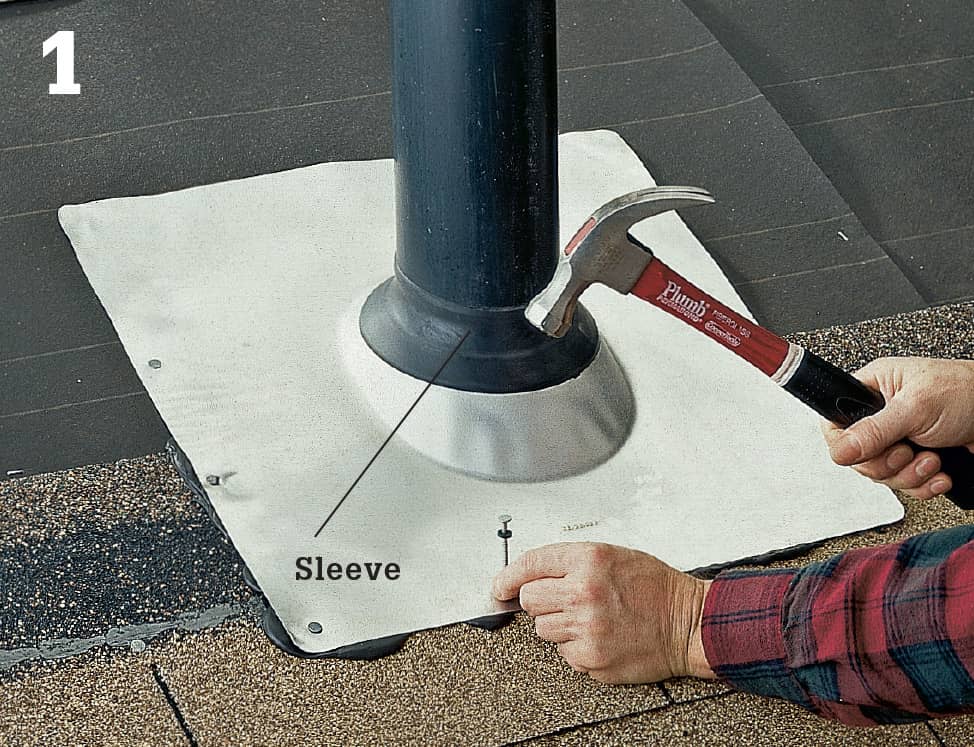
Remove the shingles above and on the sides of the vent pipe. Remove the old vent flashing, using a flat pry bar. Apply a heavy, double bead of roofing cement along the bottom edge of the flange of the new flashing. Set the new flashing in place so it covers at least one course of shingles. Nail around the perimeter of the flange, using rubber-gasket nails.
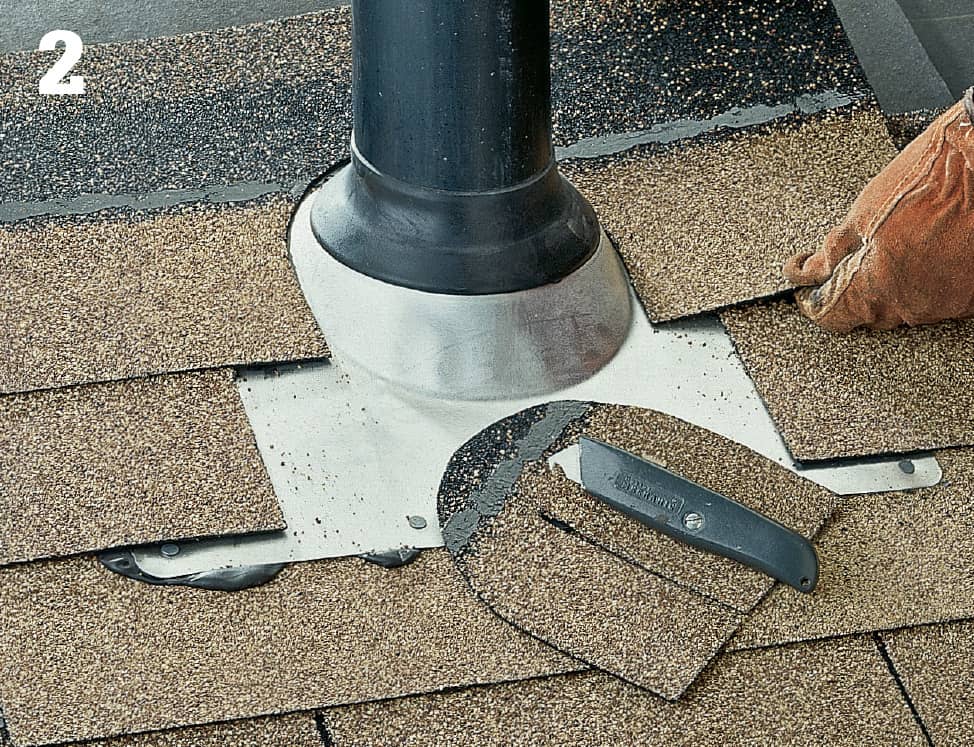
Cut the shingles to fit around the neck of the flashing so they lie flat against the flange. Apply roofing cement to the shingle and flashing joints, and cover any exposed nail heads.
How to Replace Step Flashing
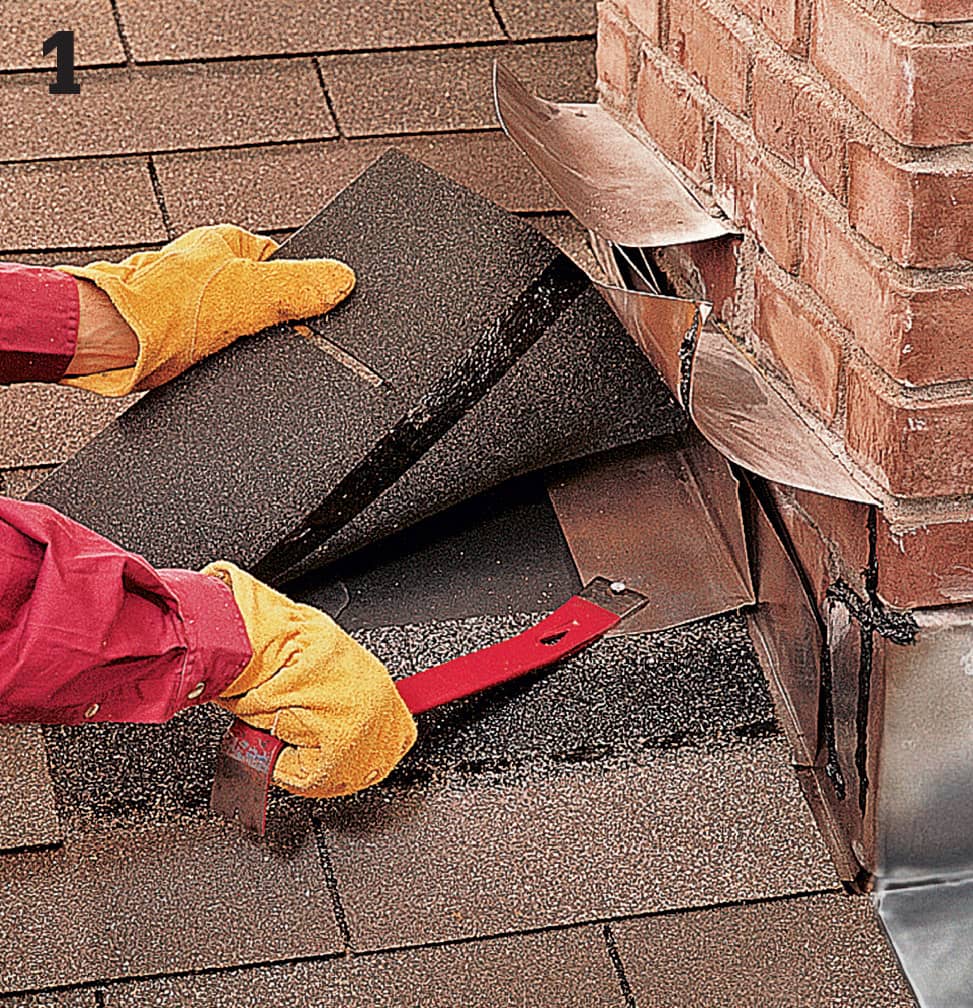
Carefully bend up the counterflashing or the siding covering the damaged flashing. Cut any roofing cement seals, and pull back the shingles. Use a flat pry bar to remove the damaged flashing. Tip: When replacing flashing around masonry, such as a chimney, use copper or galvanized steel. Lime from mortar can corrode aluminum.
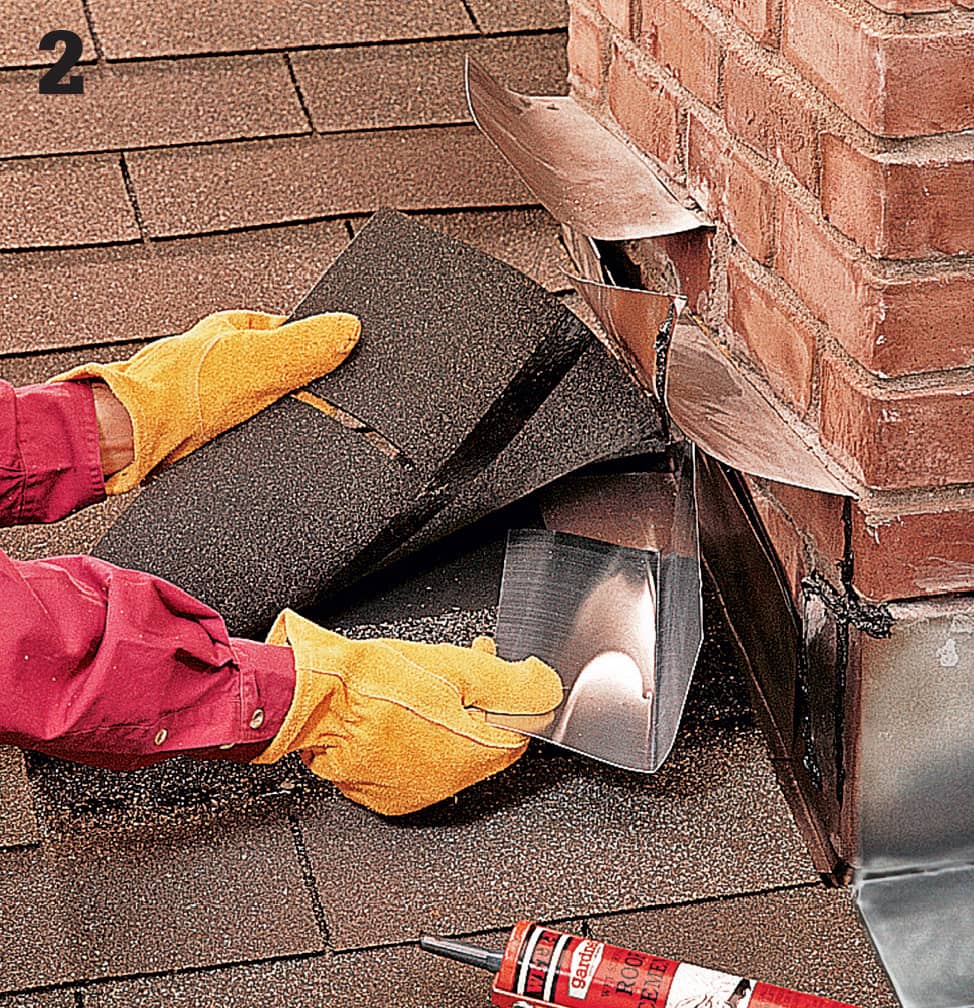
Cut the new flashing to fit, and apply roofing cement to all unexposed edges. Slip the flashing in place, making sure it’s overlapped by the flashing above and overlaps the flashing and shingle below.
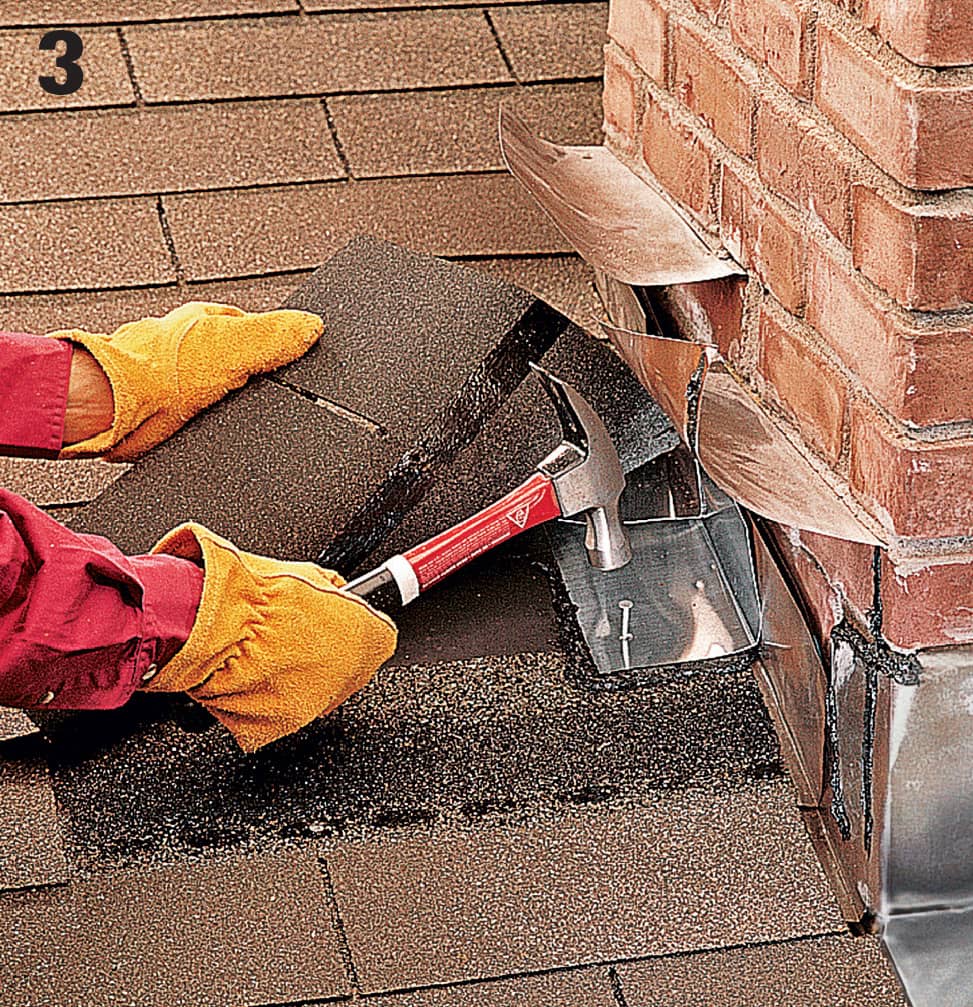
Drive one roofing nail through the flashing, at the bottom corner, and into the roof deck. Do not fasten the flashing to the vertical roof element, such as the chimney.
Reposition the shingles and counterflashing, and seal all joints with roofing cement.
 Repairing Wood Fascia & Soffits
Fascia and soffits add a finished look to your roof and promote a healthy roof system. A well-ventilated soffit system prevents moisture from building up under the roof and in the attic.
Most fascia and soffit problems can be corrected by cutting out sections of damaged material and replacing them. Joints between fascia boards are lock-nailed at rafter locations, so you should remove whole sections of fascia to make accurate bevel cuts for patches. Soffits can often be left in place for repairs.
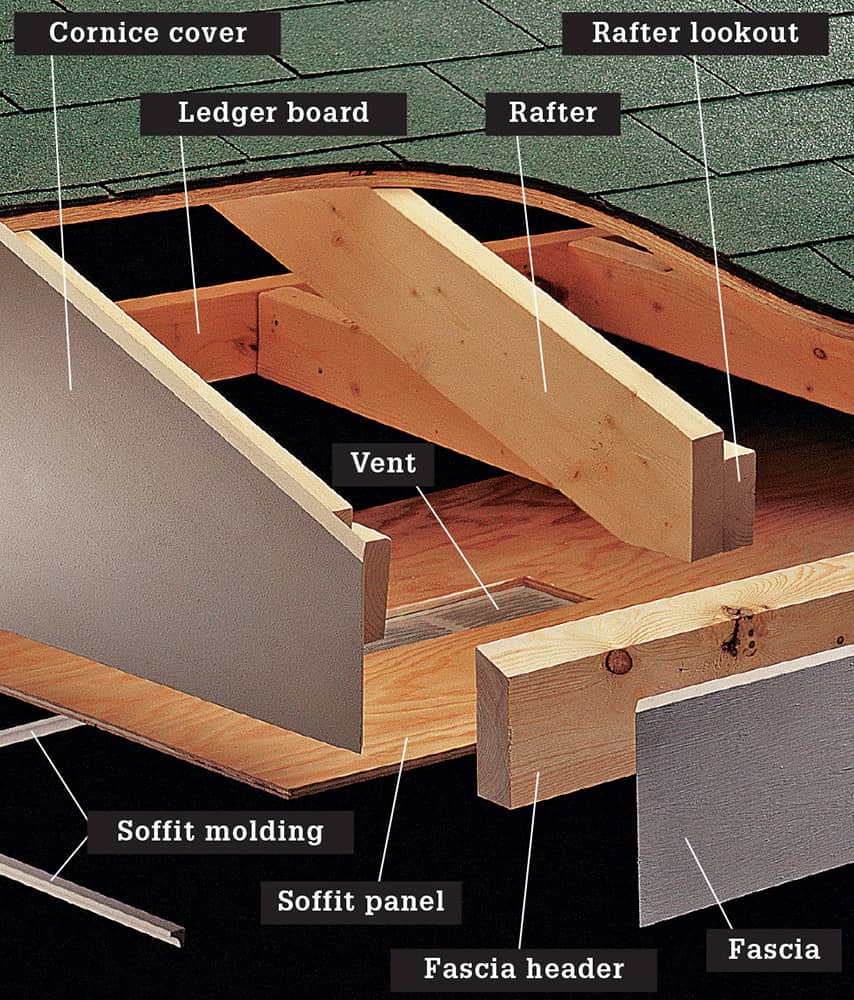
Fascia and soffits close off the eaves area beneath the roof overhang. The fascia covers the ends of rafters and rafter lookouts, and provides a surface for attaching gutters. Soffits are protective panels that span the area between the fascia and the side of the house.
How to Repair Wood Fascia
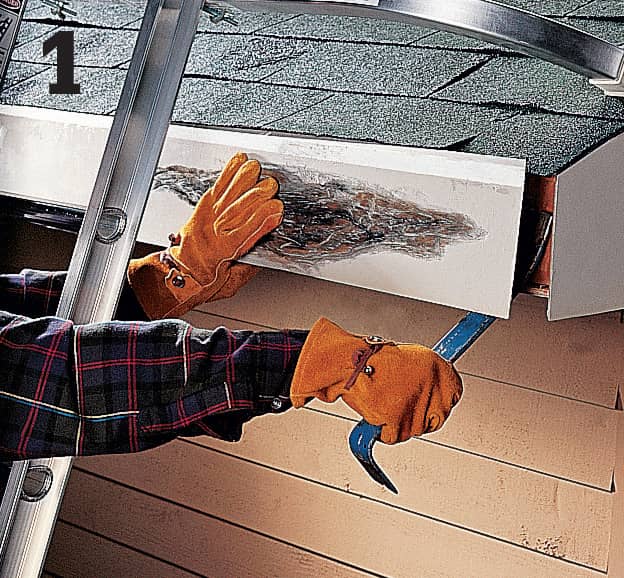
Remove gutters, shingle moldings, and any other items mounted on the fascia. Carefully pry off the damaged fascia board, using a pry bar. Remove the entire board and all old nails.
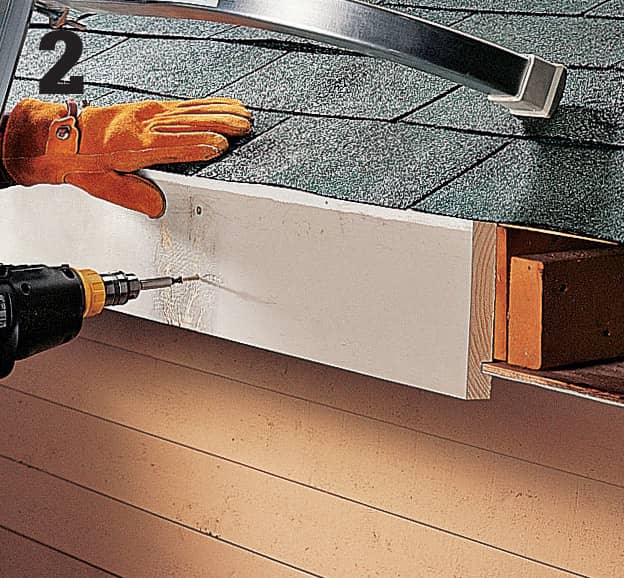
Set your circular saw for a 45° bevel, and cut off the damaged portion of the fascia board. Reattach the undamaged original fascia to the rafters or rafter lookouts, using 2" deck screws. Bevel-cut a patch board to replace the damaged section.
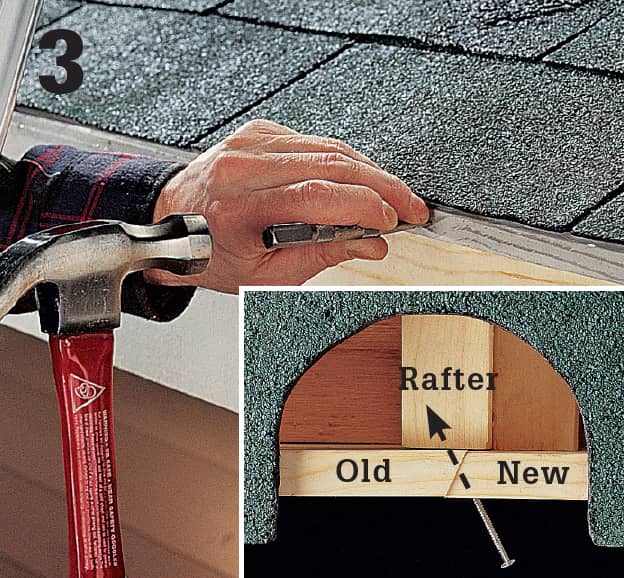
Set the patch board in place. Drill pilot holes through both fascia boards into the rafter. Drive nails in the holes to create a lock-nail joint (inset). Replace shingle moldings and trim pieces, using 4d casing nails. Set the nail heads. Prime and paint the new board.
How to Repair Wood Panel Soffits
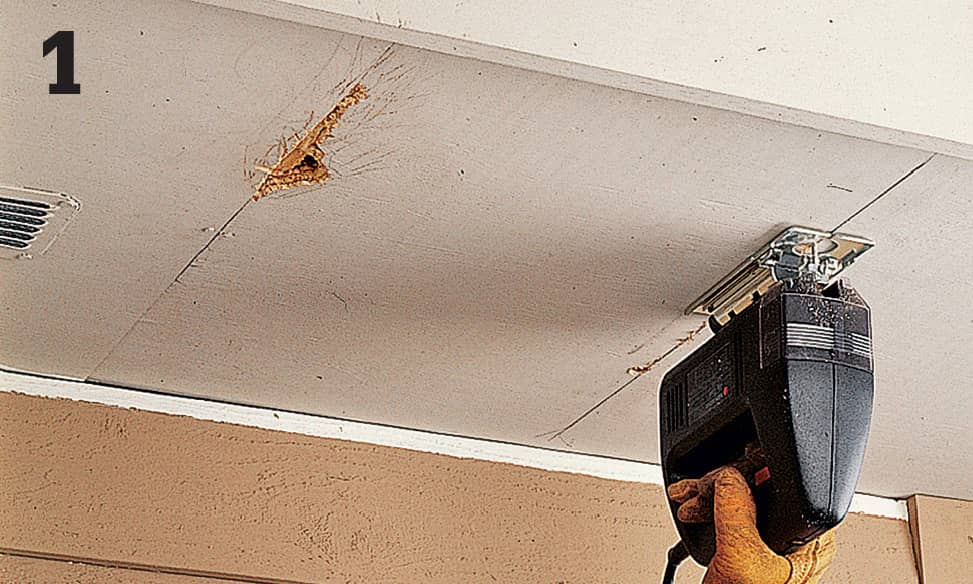
In the area where soffits are damaged, remove the support moldings that hold the soffits in place along the fascia and exterior wall. Drill entry holes, then use a jigsaw to cut out the damaged soffit area. Tip: Cut soffits as close as possible to the rafters or rafter lookouts. Finish cuts with a chisel, if necessary.
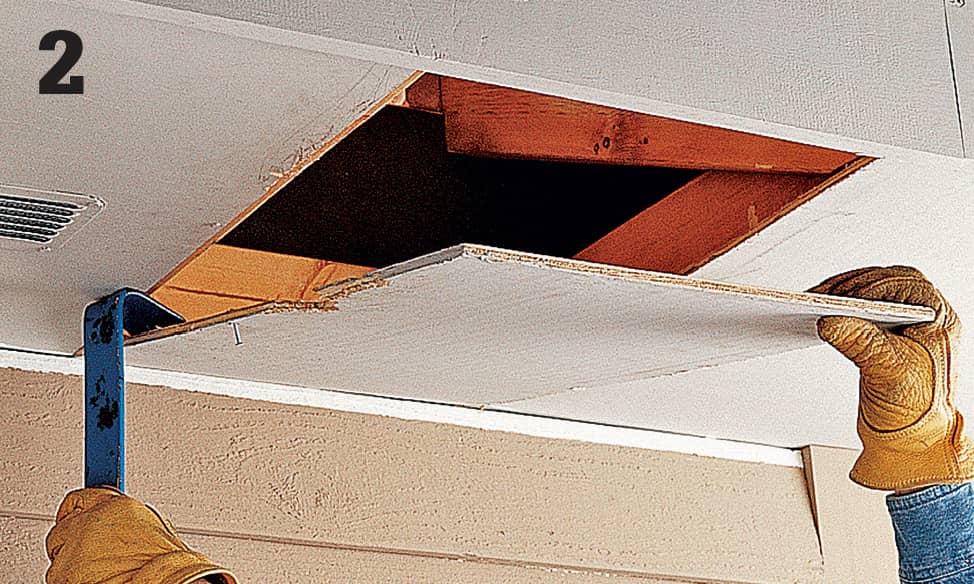
Remove the damaged soffit section, using a pry bar. Cut nailing strips the same length as the exposed area of the rafters, and fasten them to the rafters or rafter lookouts at the edges of the openings, using 2 1/2" deck screws.
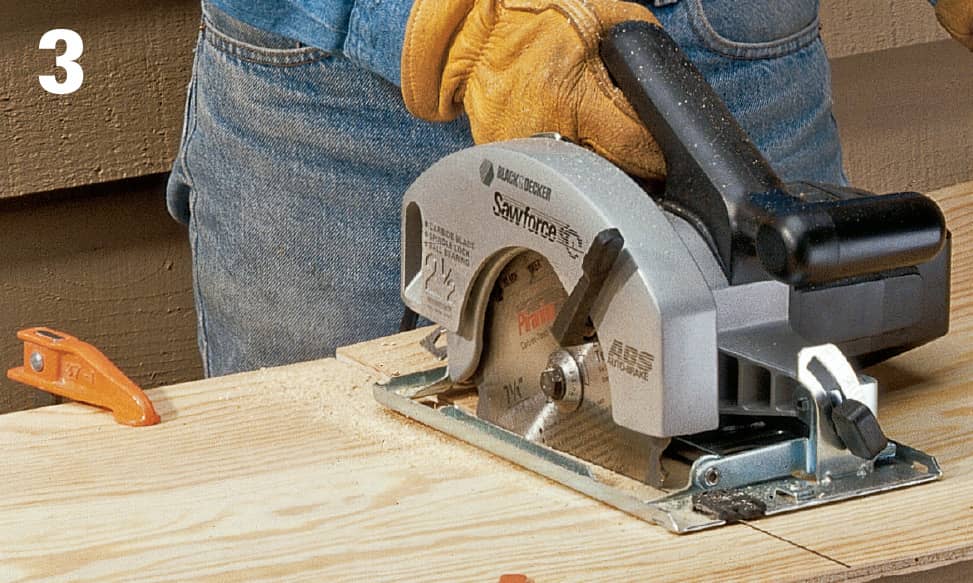
Using soffit material similar to the original panel, cut a replacement piece 1/8" smaller than the opening. If the new panel will be vented, cut the vent openings.
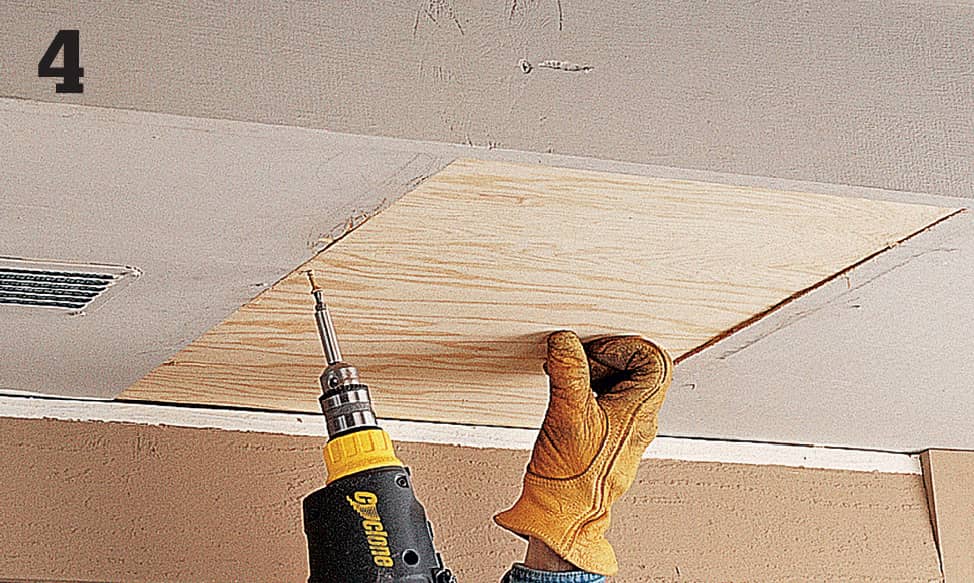
Attach the replacement panel to the nailing strips, using 2" deck screws. If you are not going to paint the entire soffit after the repair, prime and paint the replacement piece before installing it.
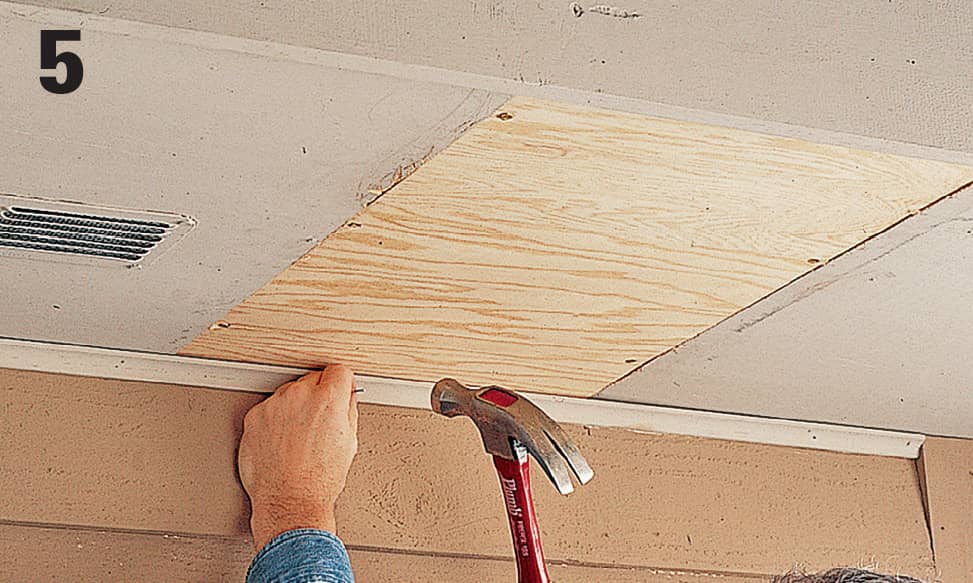
Reattach the soffit molding, using 4d casing nails. Set the nail heads.
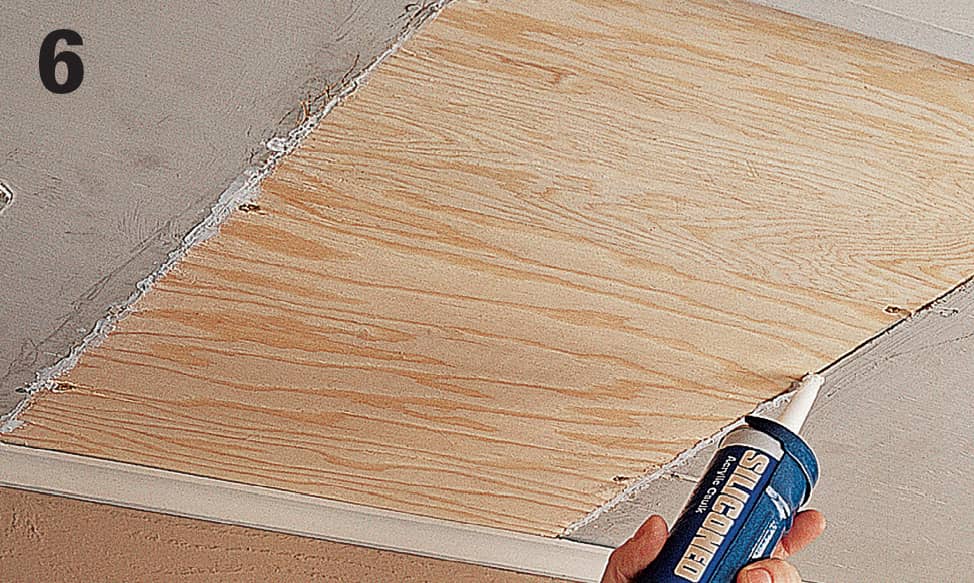
Using siliconized acrylic caulk, fill all nail holes, screw holes, and gaps. Smooth out the caulk with a putty knife until the caulk is even with the surface. Prime and paint the soffit panels.
 Repairing Gutters
Gutters perform the important task of channeling water away from your house. A good gutter system prevents damage to your siding, foundation, and landscaping, and it helps prevent water from leaking into your basement. When gutters fail, evaluate the type and extent of damage to select the best repair method. Clean your gutters and downspouts as often as necessary to keep the system working efficiently.
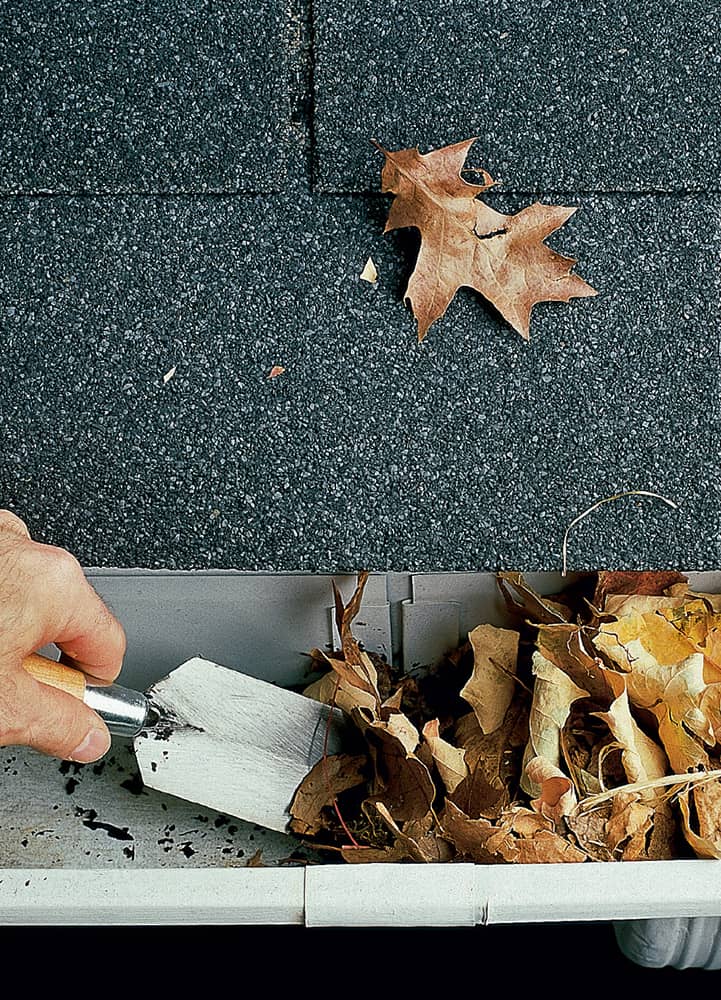
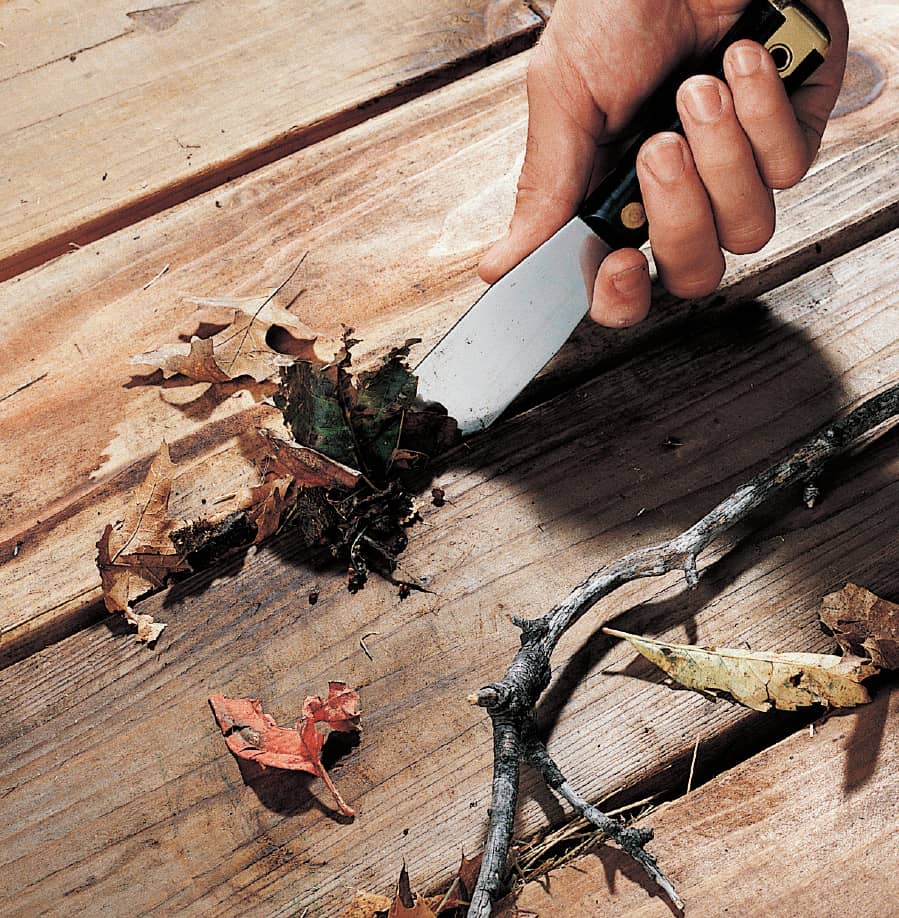
Use a trowel to clean leaves, twigs, and other debris out of the gutters before starting the repairs.
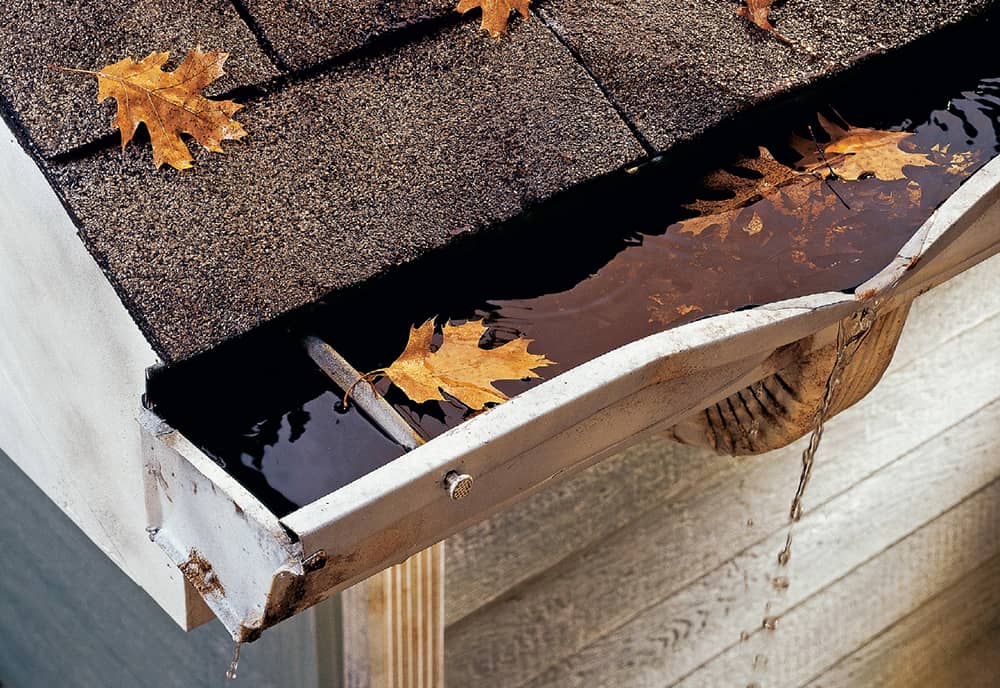
Keep gutters and downspouts clean so rain falling on the roof is directed well away from the foundation. Nearly all wet basement problems are caused by water collecting near the foundation, a situation that can frequently be traced to clogged and overflowing gutters and downspouts.
How to Unclog Gutters
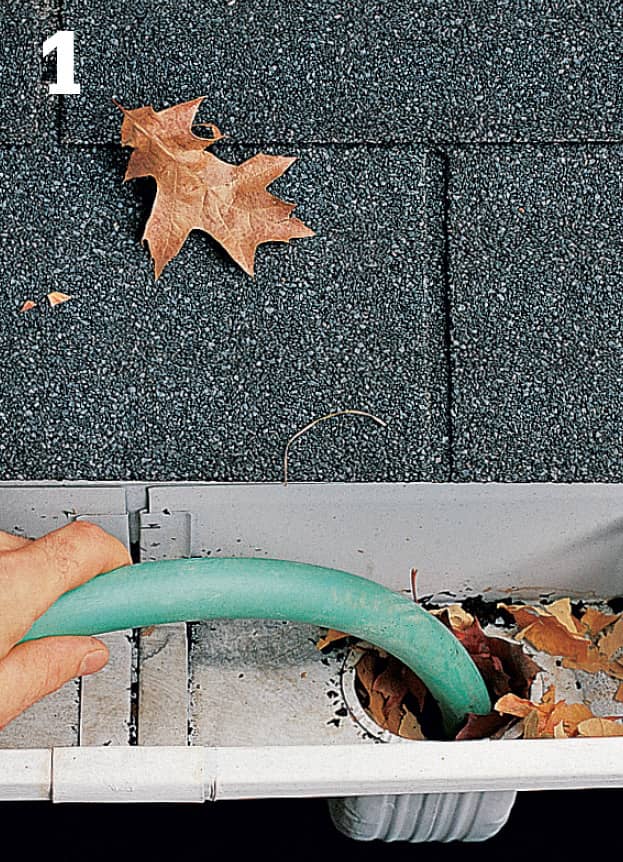
Flush clogged downspouts with water. Wrap a large rag around a garden hose and insert it in the downspout opening. Arrange the rag so it fills the opening, then turn on the water full force.
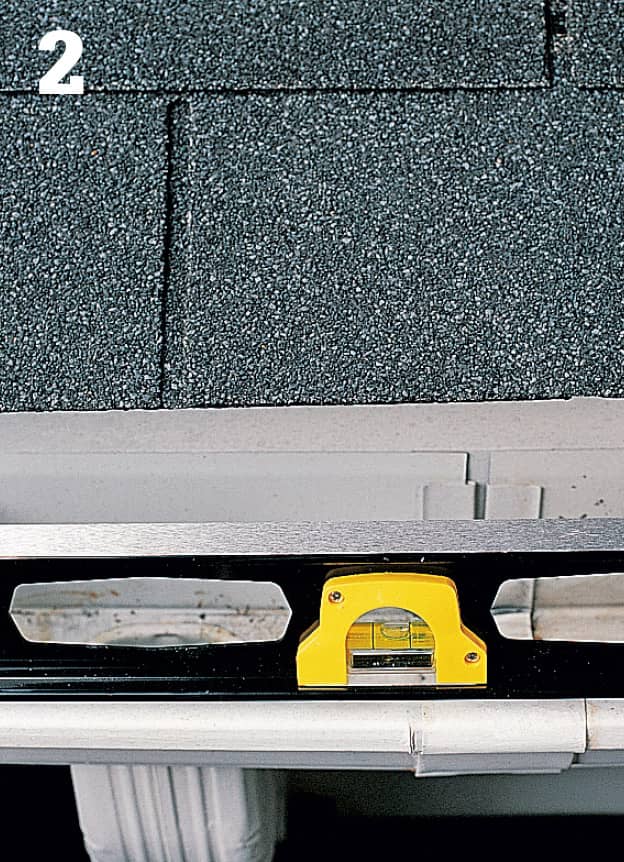
Check the slope of the gutters, using a level. Gutters should slope slightly toward the downspouts. Adjust the hangers, if necessary.
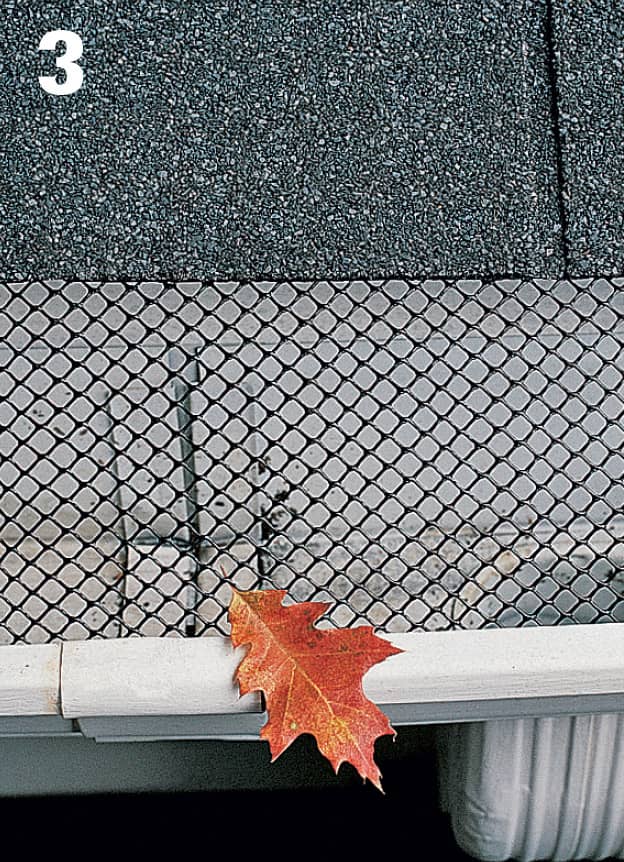
Place gutter guards over the gutters to prevent future clogs.
How to Rehang Sagging Gutters & Patch Leaks
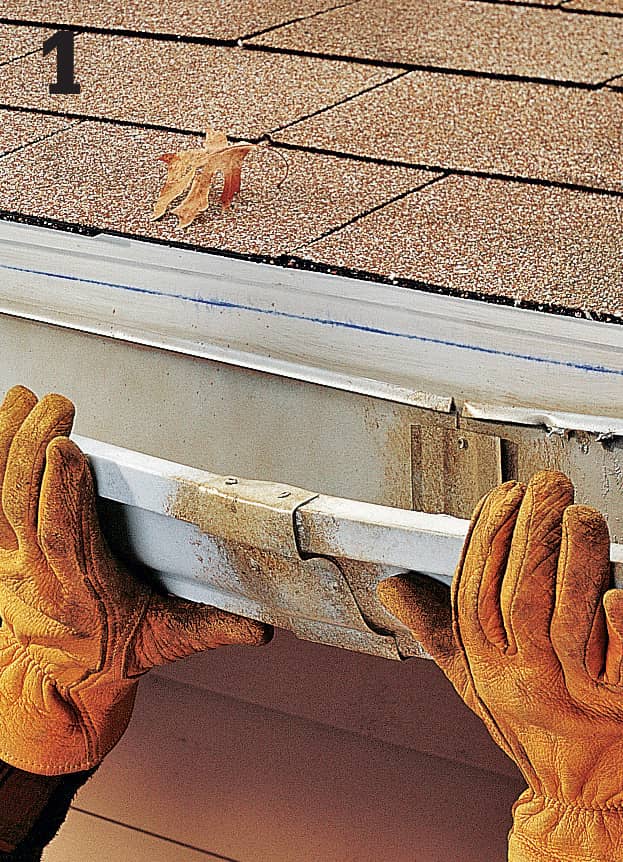
For sagging gutters, snap a chalk line on the fascia that follows the correct slope. Remove hangers in and near the sag. Lift the gutter until it’s flush with the chalk line. Tip: A good slope for gutters is a 1/4" drop every 10 ft. toward the downspouts.
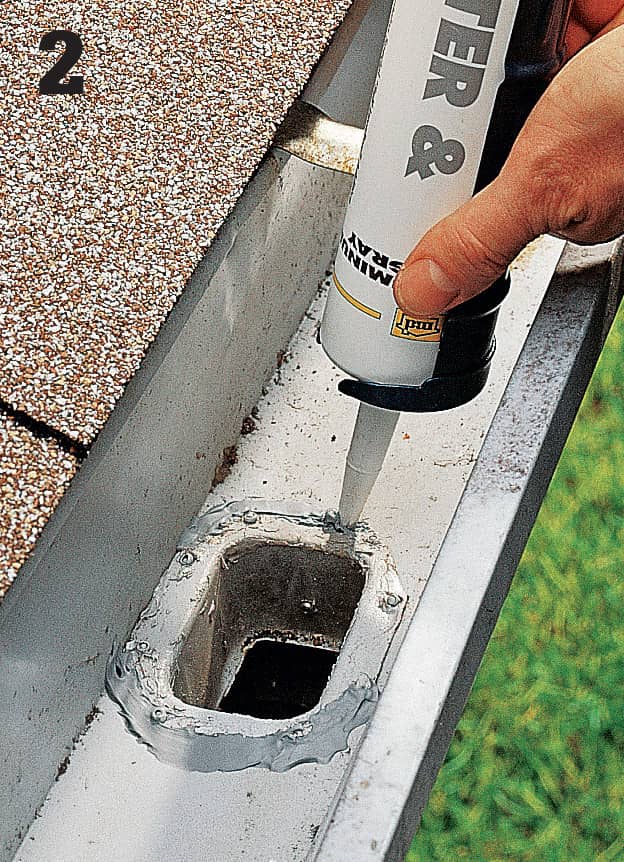
Reattach hangers every 24", and within 12" of seams. Use new hangers, if necessary. Avoid using the original nail holes. Fill small holes and seal minor leaks, using gutter caulk.
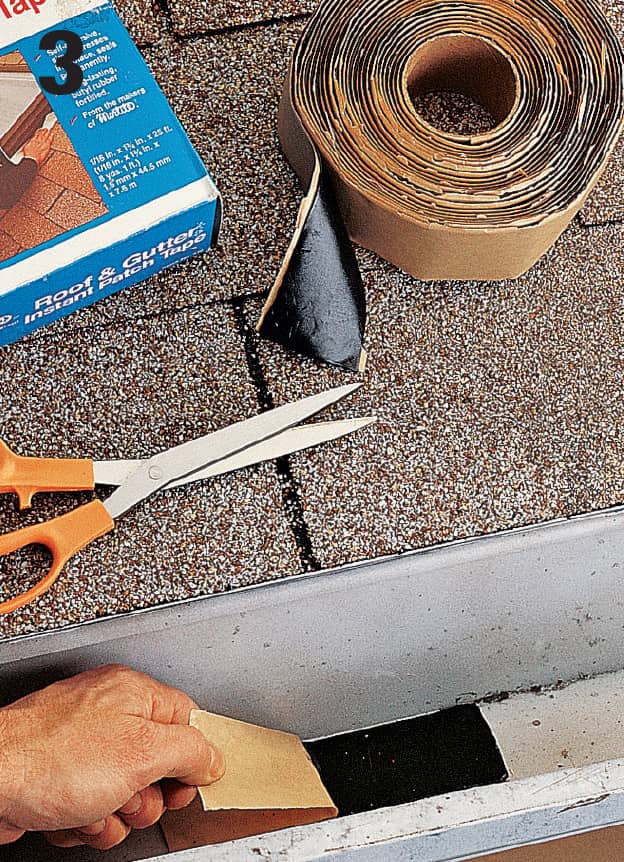
Use a gutter patching kit to make temporary repairs to a gutter with minor damage. Follow manufacturer’s directions. For permanent repairs, see pages 200 to 201.
How to Repair Leaky Joints
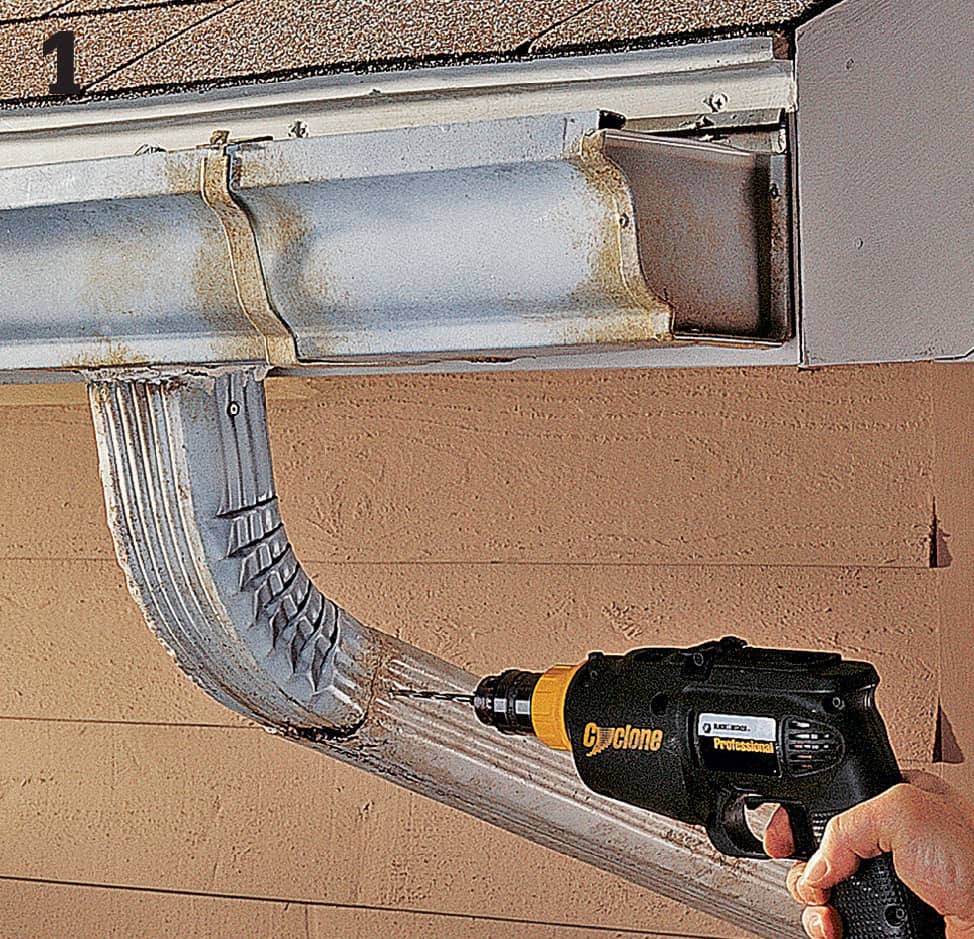
Drill out the rivets or unfasten the metal screws to disassemble the leaky joint. Scrub both parts of the joint with a stiff-bristled brush. Clean the damaged area with water, and allow to dry completely.
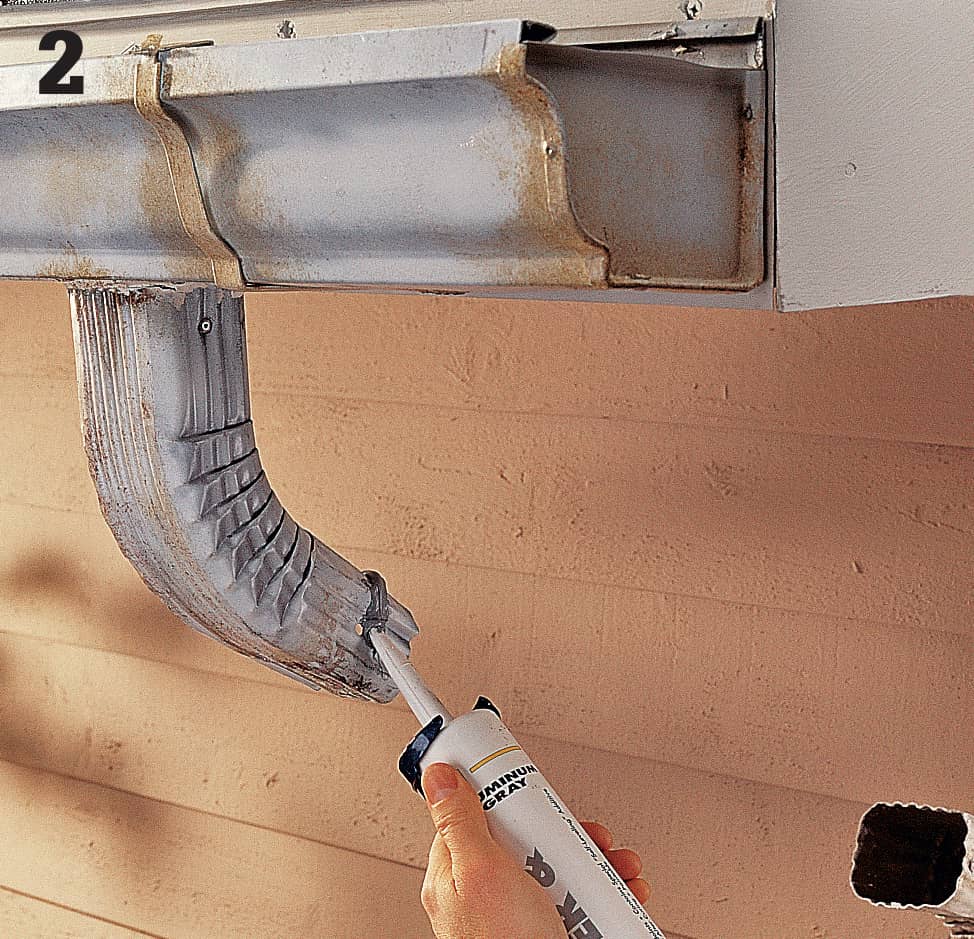
Apply caulk to the joining parts, then reassemble the joint. Secure the connection with pop rivets or sheet-metal screws.
How to Patch Metal Gutters
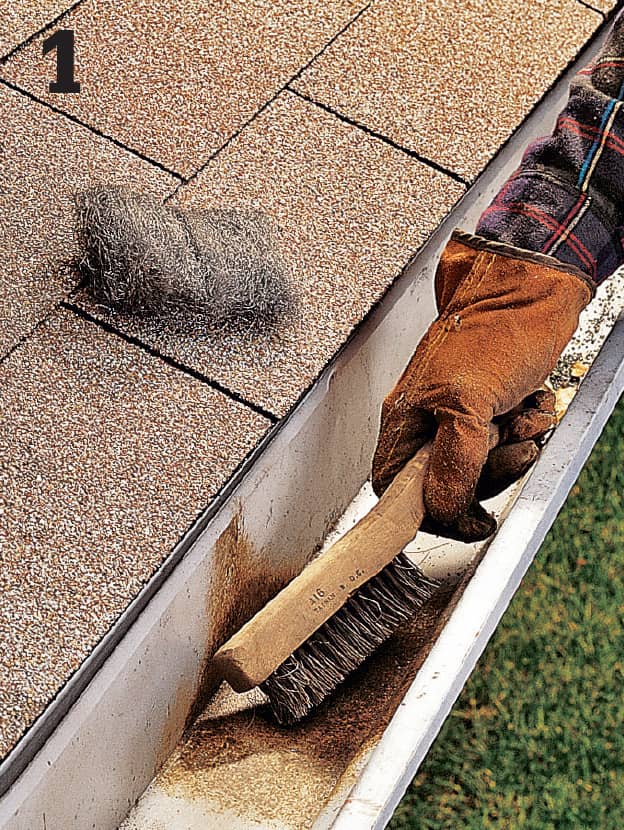
Clean the area around the damage with a stiff-bristled brush. Scrub it with steel wool or an abrasive pad to loosen residue, then rinse it with water.
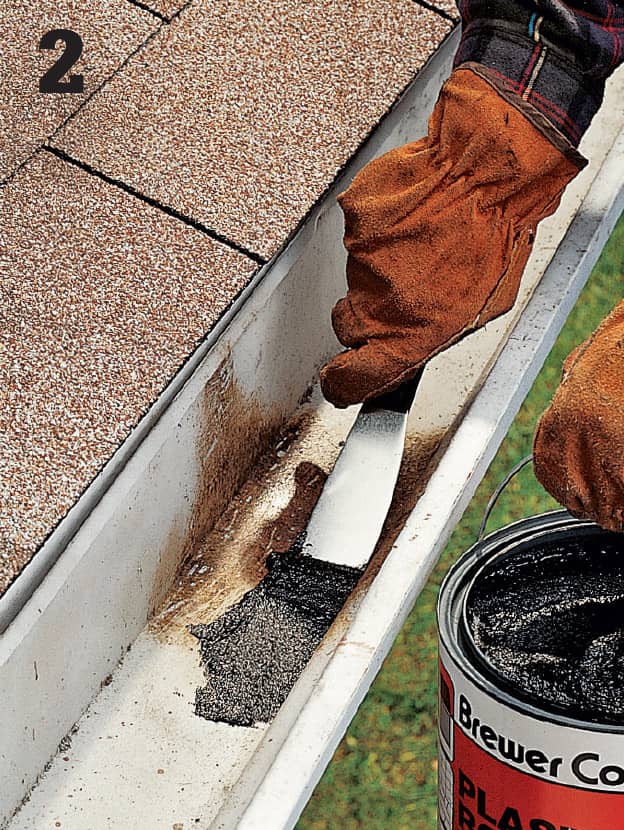
Apply a 1/8"-thick layer of roofing cement evenly over the damage. Spread the roofing cement a few inches past the damaged area on all sides.
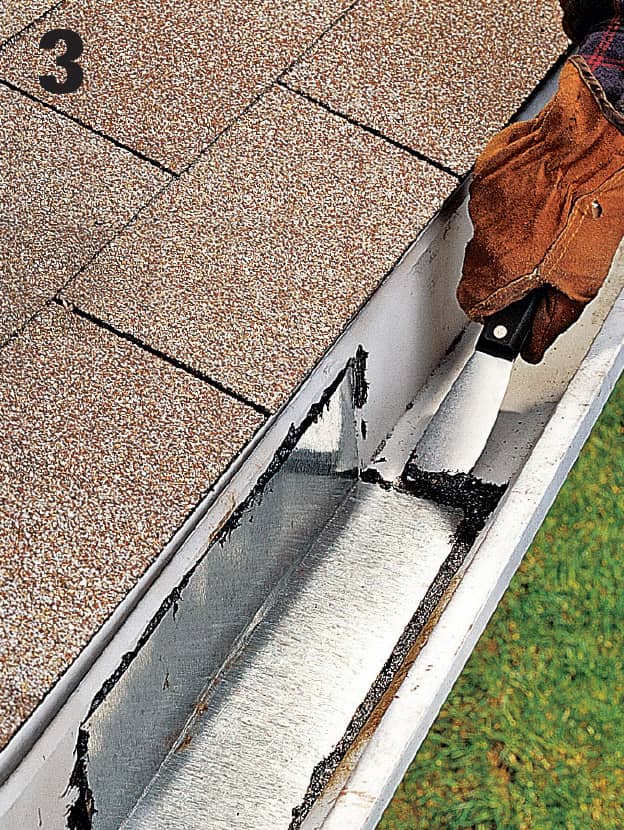
Cut and bend a piece of flashing to fit inside the gutter. Bed the patch in the roofing cement. Feather out the cement to reduce ridges so it won’t cause significant damming. Tip: To prevent corrosion, make sure the patch is the same type of metal as the gutter.
How to Replace a Section of Metal Gutter
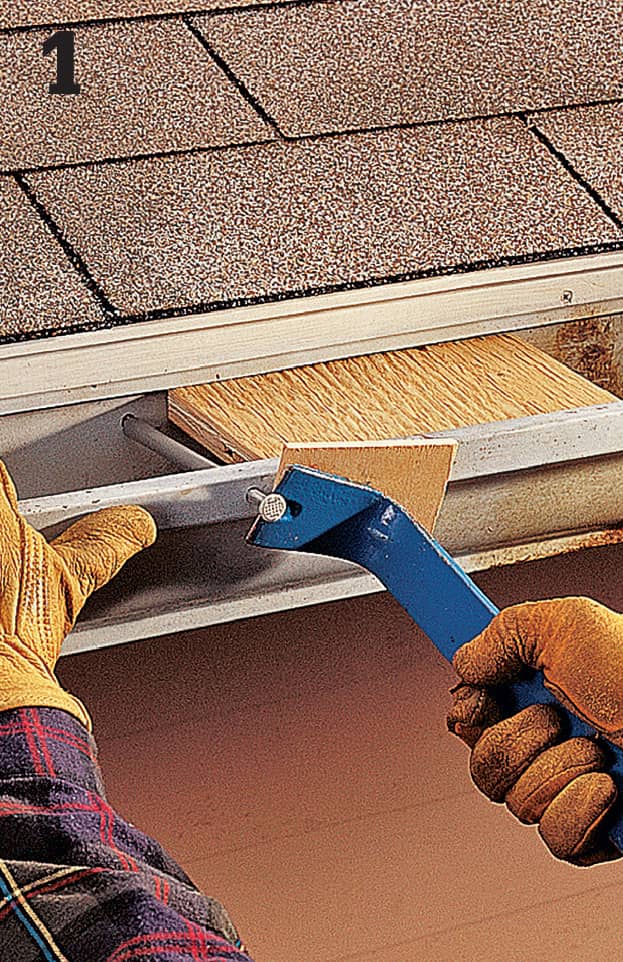
Remove gutter hangers in and near the damaged area. Insert wood spacers in the gutter, near each hanger, before prying. Tip: If the damaged area is more than 2 ft. long, replace the entire section with new material.
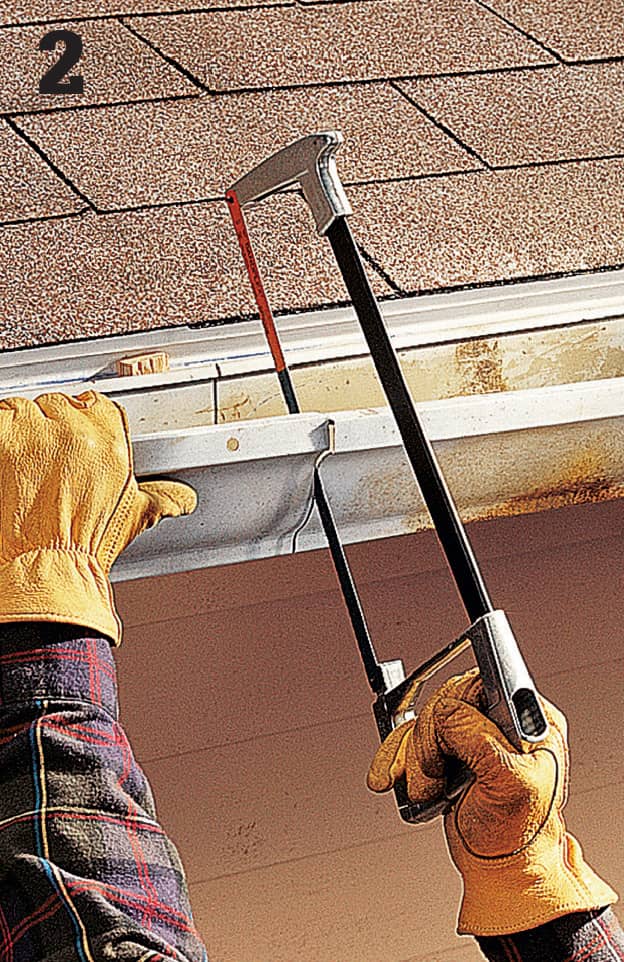
Slip spacers between the gutter and fascia, near each end of the damaged area, so you won’t damage the roof when cutting the gutter. Cut out the damaged section, using a hacksaw.
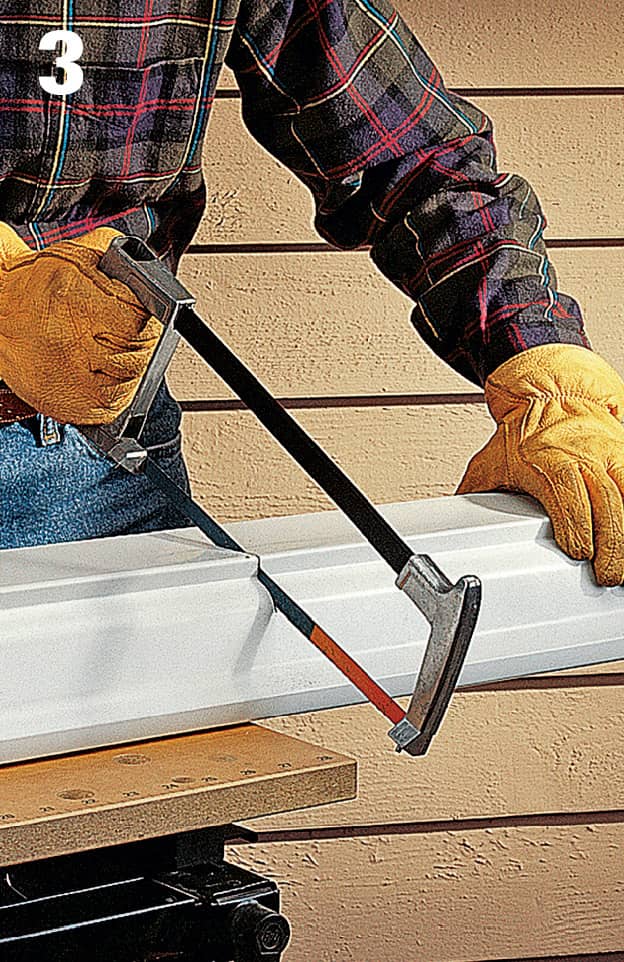
Cut a new gutter section at least 4" longer than the damaged section.
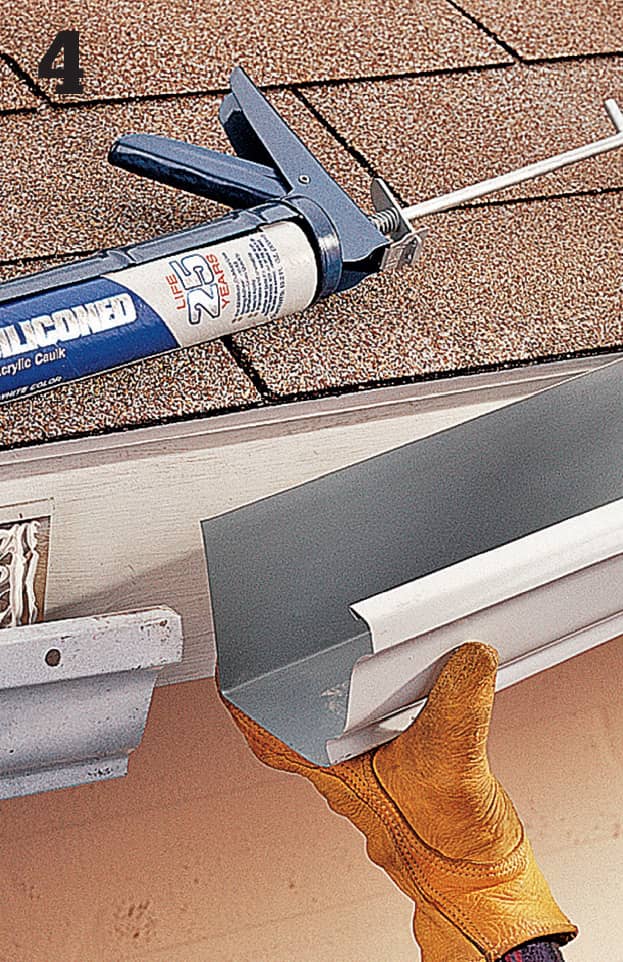
Clean the cut ends of the old gutter, using a wire brush. Caulk the ends, then center the gutter patch over the cutout area and press into the caulk.
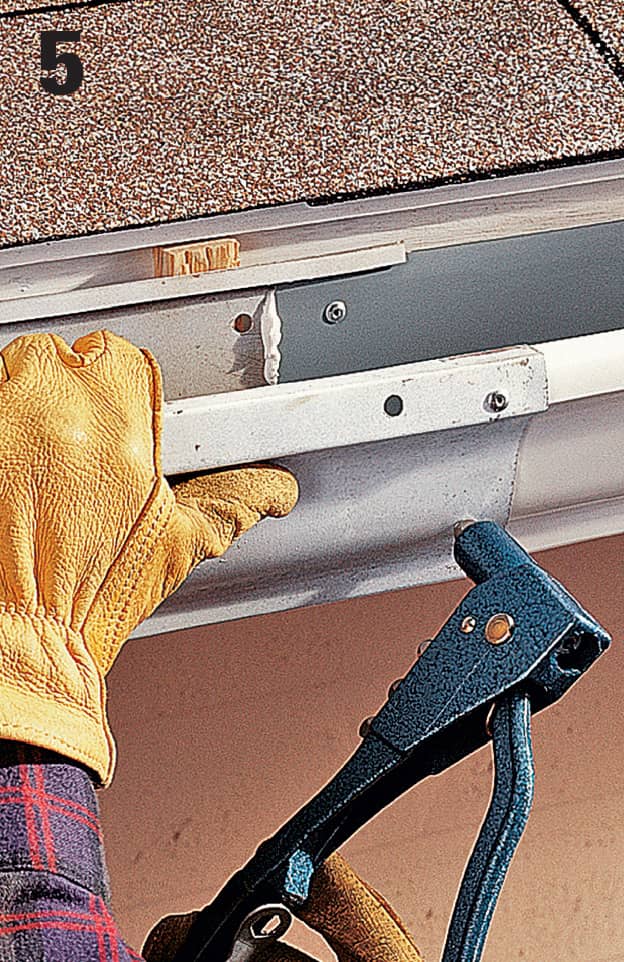
Secure the gutter patch with pop rivets or sheet-metal screws. Use at least three fasteners at each joint. On the inside surfaces of the gutter, caulk over the heads of the fasteners.
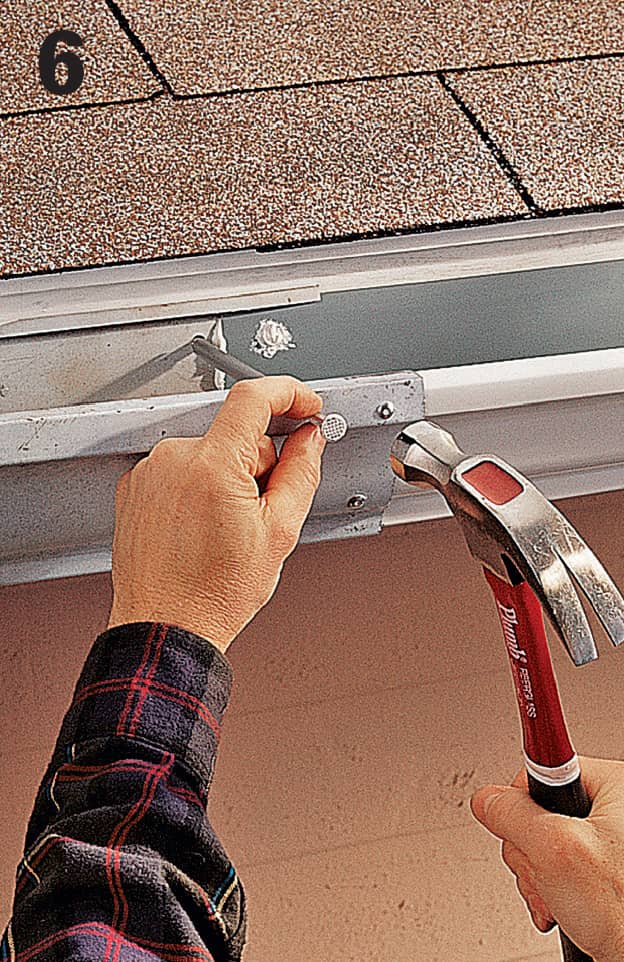
Reinstall gutter hangers. If necessary, use new hangers, but don’t use old holes. Prime and paint the patch to match the existing gutter.
 Removing Exterior Siding
Although it’s sometimes possible to install new siding over old if the old siding is solid and firmly attached to the house, it’s often better to remove the siding, especially if it’s damaged. Taking off the old siding allows you to start with a flat, smooth surface. And because the overall thickness of the siding will remain unchanged, you won’t have to add extensions to your window and door jambs.
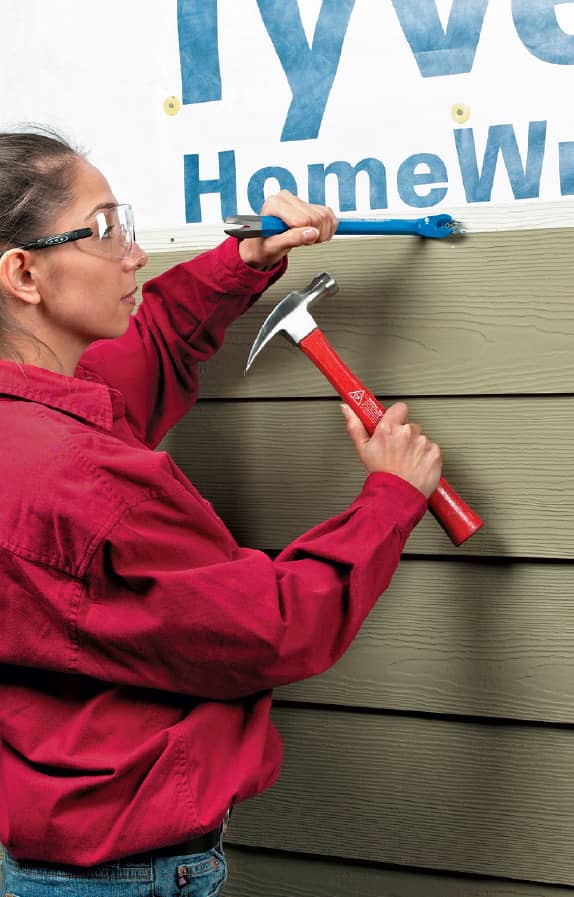
There’s no “right” way to remove siding. Each type of siding material is installed differently, and consequently, they have different removal techniques. A couple of universal rules do apply, however. Start by removing trim that’s placed over the siding, and work from the top down. Siding is usually installed from the bottom up, and working in the opposite direction makes removal much easier. Determine the best removal method for your project based on your type of siding.
Strip one side of the house at a time, then re-side that wall before ripping the siding off another section. This minimizes the amount of time your bare walls are exposed to the elements. Take care not to damage the sheathing. If you can’t avoid tearing the housewrap, it can easily be replaced, but the sheathing is another story.
While the goal is to remove the siding quickly, it’s also important to work safely. Take care when working around windows so the siding doesn’t crack or break the glass. Invest the necessary time to protect the flowers and shrubs before starting the tear-off.
Renting a dumpster will expedite the cleanup process. It’s much easier to dispose of the siding as soon as it’s removed. When you’re finished with your cleanup, use a release magnet to collect the nails on the ground.
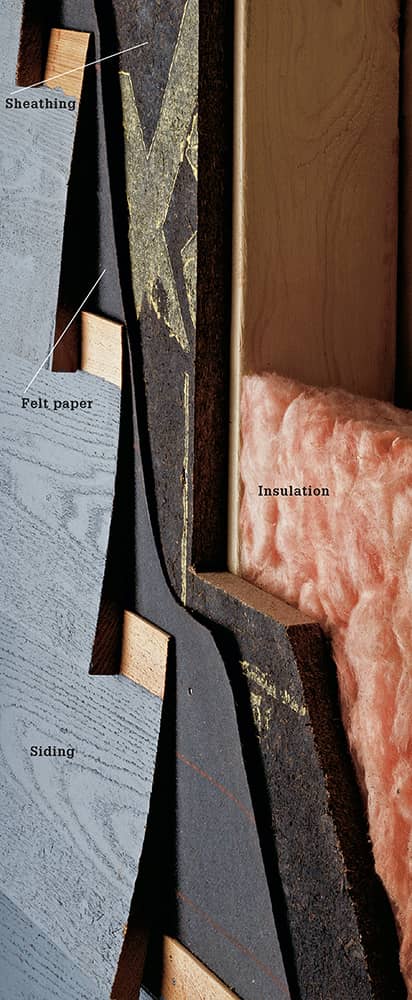
The exterior wall is composed of siding, housewrap or felt paper, and sheathing. Remove the siding without disturbing or damaging the sheathing.
 Replacing Wall Sheathing
After removing the old siding, inspect the sheathing to make sure it’s still in good condition. If water penetrated behind the siding, there’s a good chance the sheathing is warped, rotted, or otherwise damaged, and will need to be replaced. You’ll only need to replace the section of sheathing that’s damaged. Before cutting into the wall, make sure there are no wires, cables, or pipes under the sheathing.
Older homes typically have planks or plywood sheathing, while new homes may have a nonstructural sheathing. The replacement material doesn’t have to be the same material as the original sheathing, but it does have to be the same thickness.

Although the sheathing isn’t visible, a smooth, solid sheathing installation is essential to a professional looking siding finish.
How to Replace Wall Sheathing
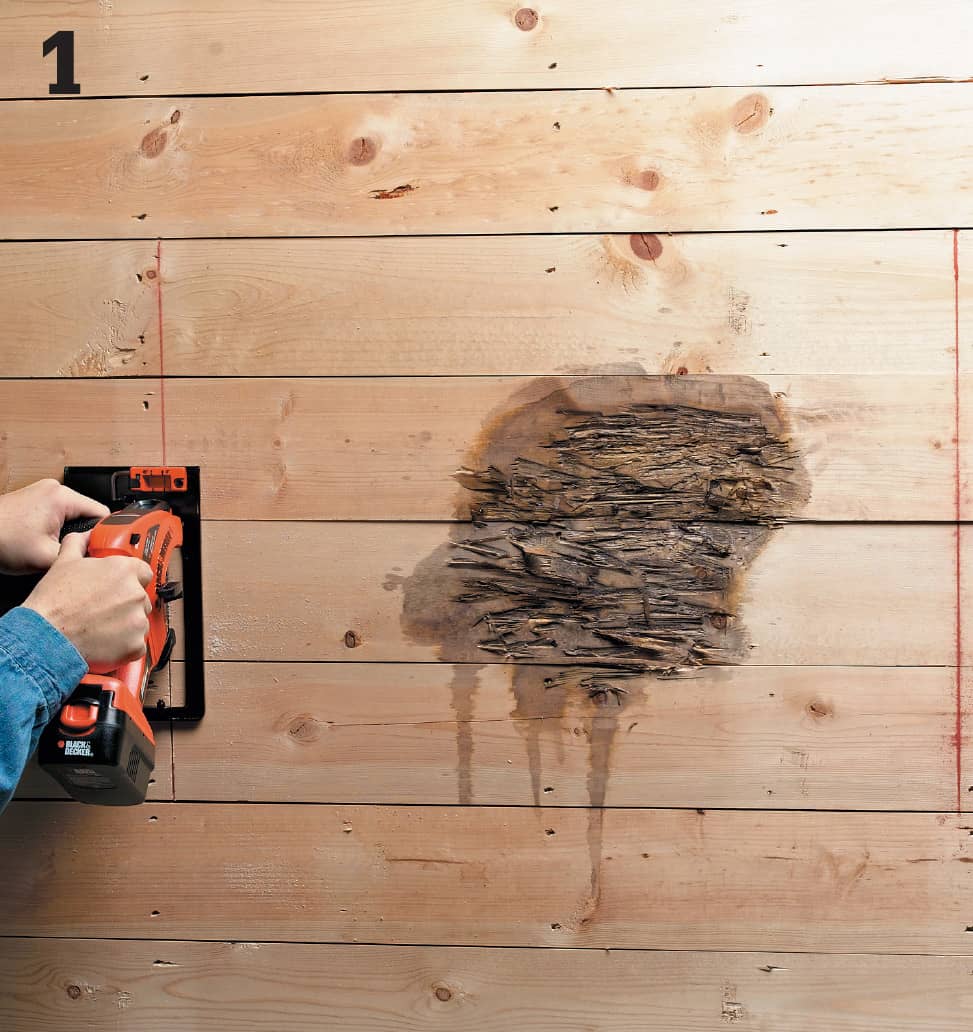
Snap chalk lines around the area of damaged sheathing, making sure the vertical lines are next to wall studs. Remove any nails or staples in your path. Set the depth of the circular saw blade to cut through the sheathing, but not cut the studs.
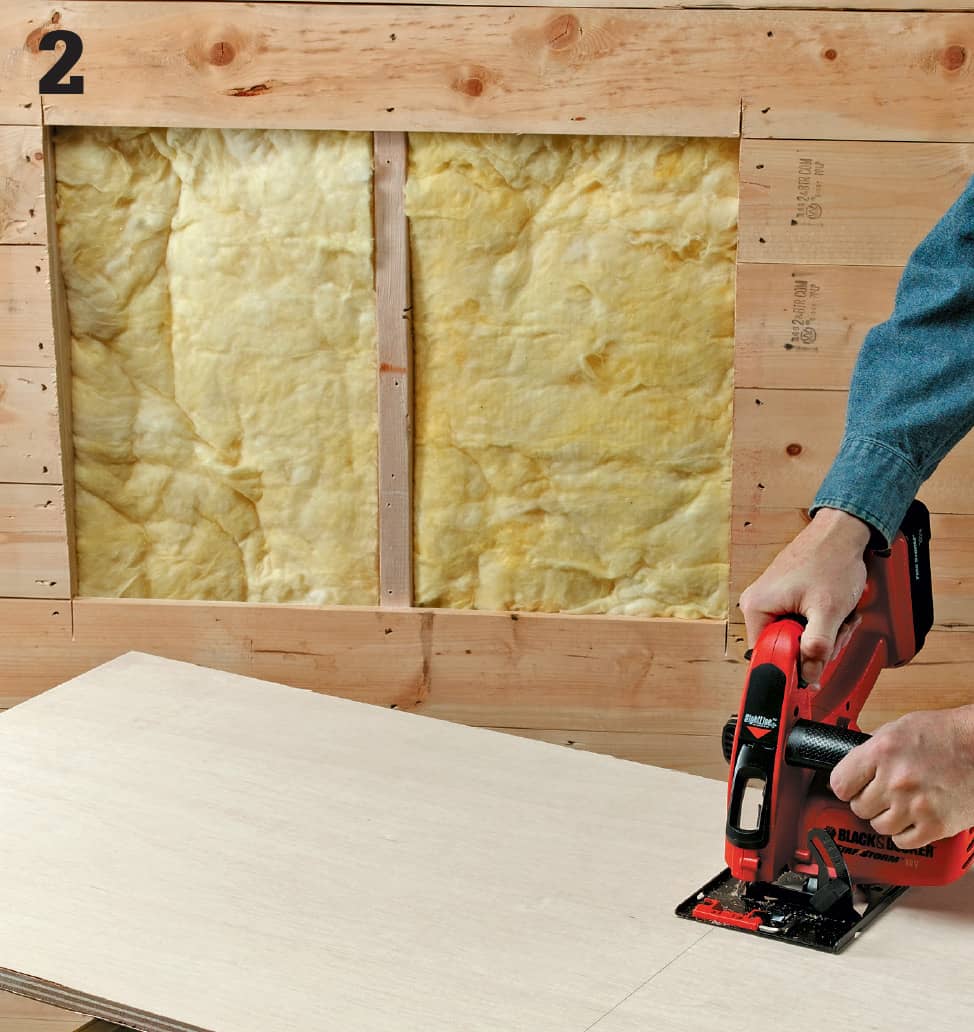
Pry off the damaged sheathing. Remove any remaining nails or staples in the studs. Measure the opening, subtract 1/8" from each side, then cut a piece of sheathing to size.
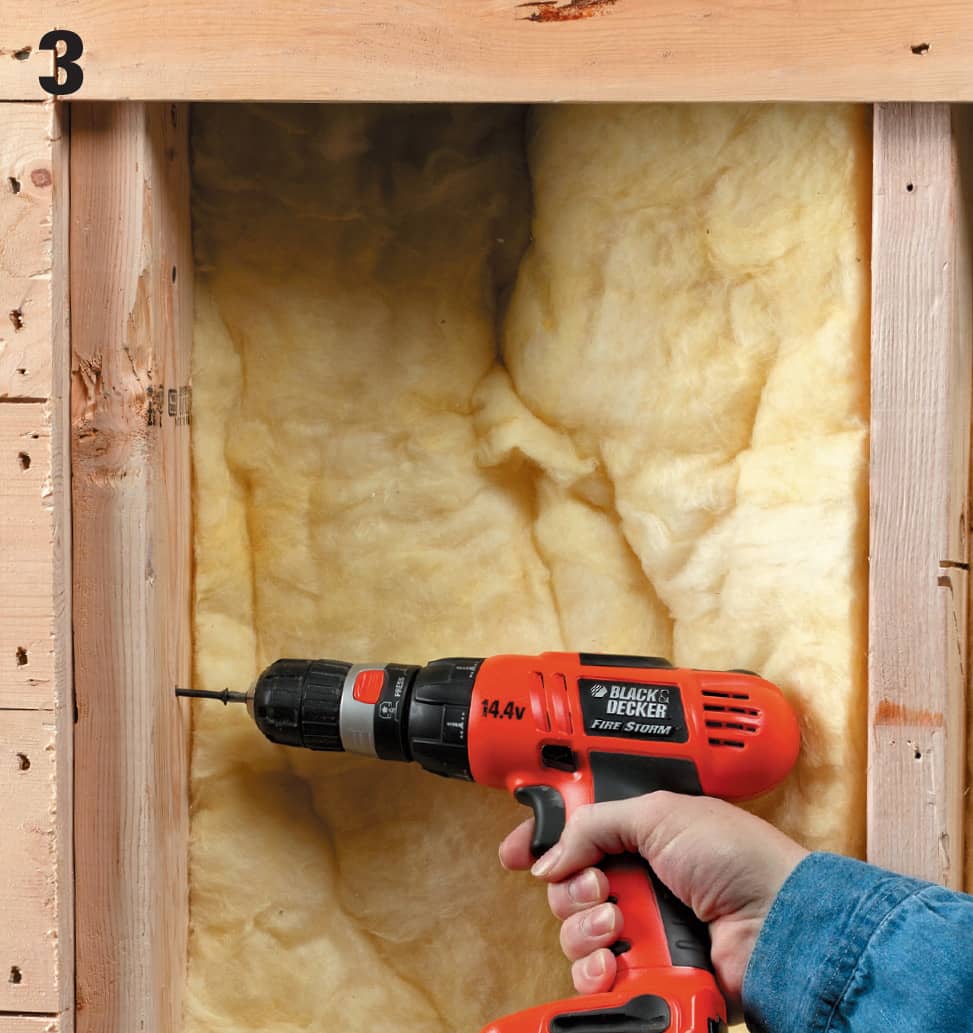
Align 2 × 4 nailing strips with the edges of the wall studs. Fasten the strips in place, using 3" deck screws.
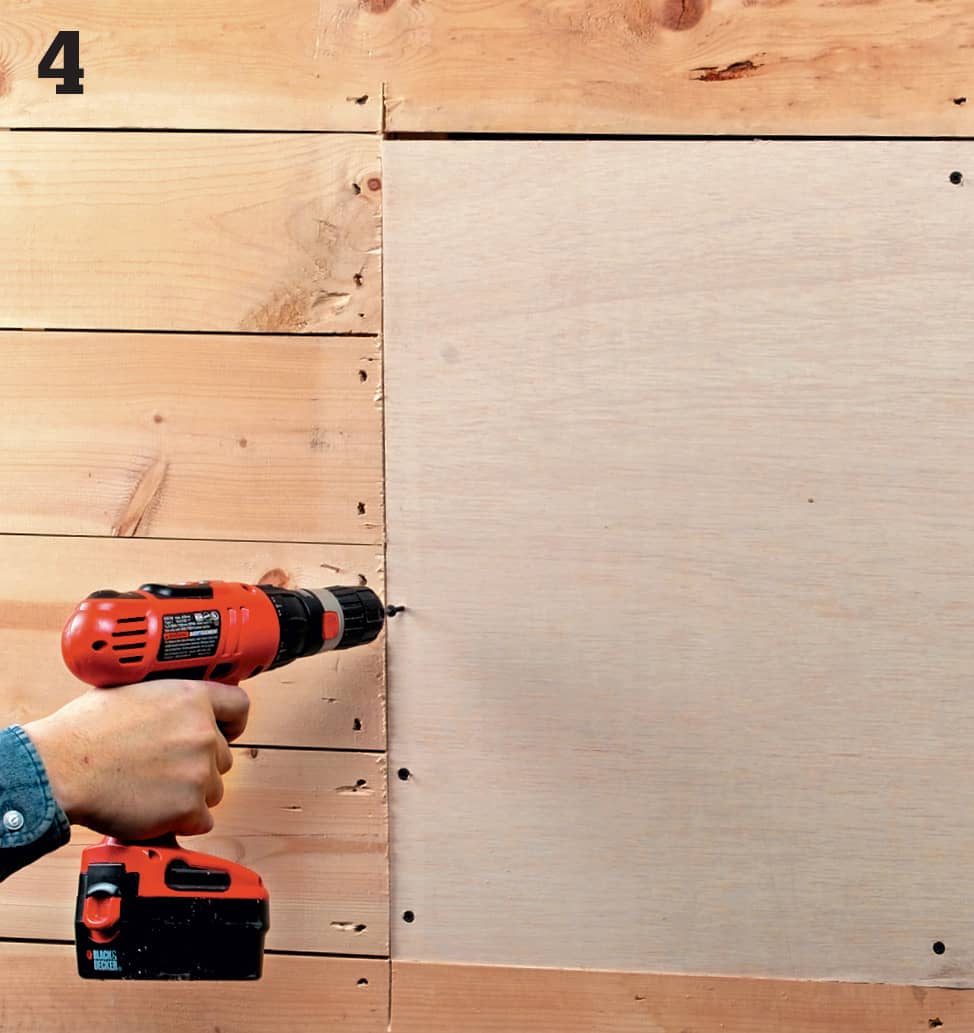
Place the new piece of sheathing in the opening, keeping a 1/8" gap on each side to allow for expansion. Attach the sheathing to the nailing strips and studs, using 2 1/4" deck screws driven every 12".
 Repairing Siding
Damage to siding is fairly common, but fortunately, it’s also easy to fix. Small to medium holes, cracks, and rotted areas can be repaired with filler or by replacing the damaged sections with matching siding.
If you cannot find matching siding for repairs at building centers, check with salvage yards or siding contractors. When repairing aluminum or vinyl siding, contact the manufacturer or the contractor who installed the siding to help you locate matching materials and parts. If you’re unable to find an exact match, remove a section of original siding from a less visible area of the house, such as the back of the garage, and use it for the patch. Cover the gap in the less visible area with a close matching siding, where the mismatch will be less noticeable.
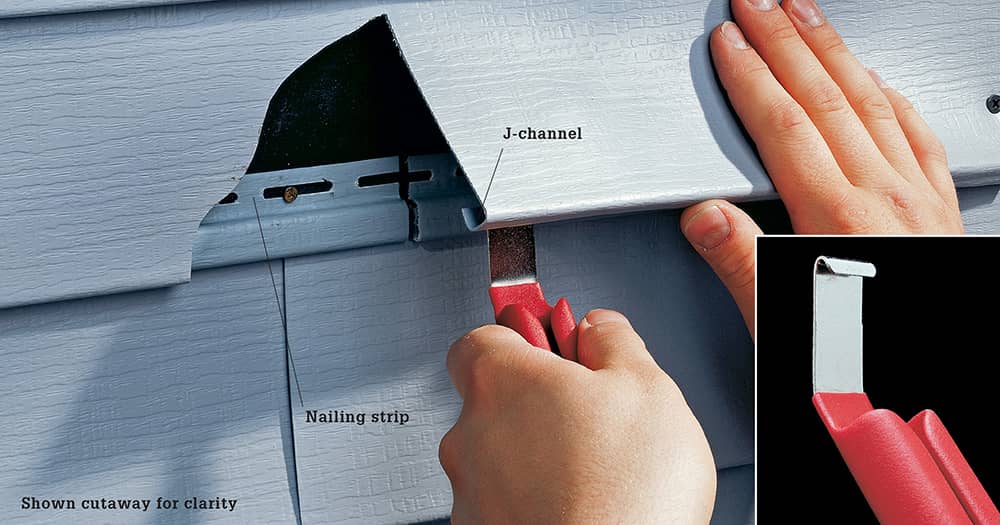
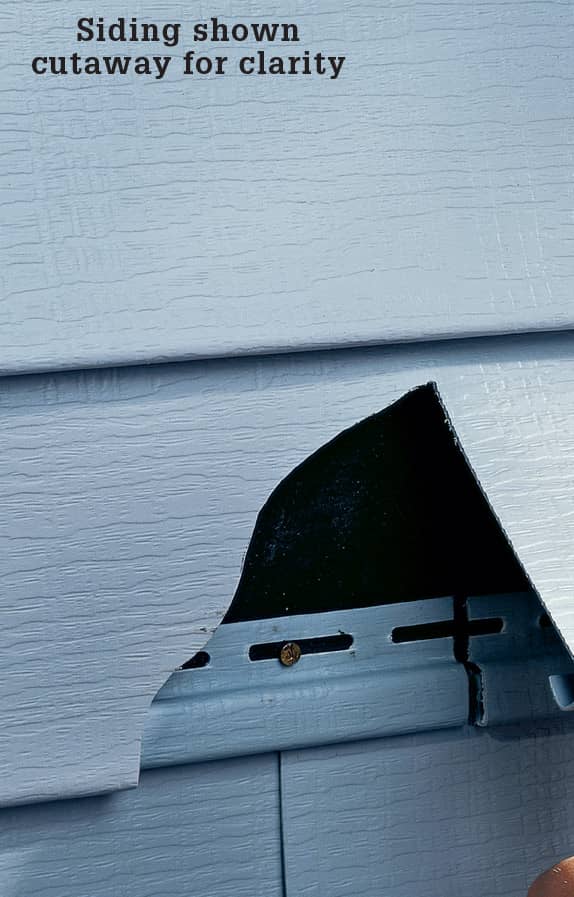
Vinyl and metal siding panels have a locking J-channel that fits over the bottom of the nailing strip on the underlying piece. Use a zip-lock tool (inset) to separate panels. Insert the tool at the seam nearest the repair area. Slide it over the J-channel, pulling outward slightly, to unlock the joint from the siding below.
How to Repair Vinyl Siding
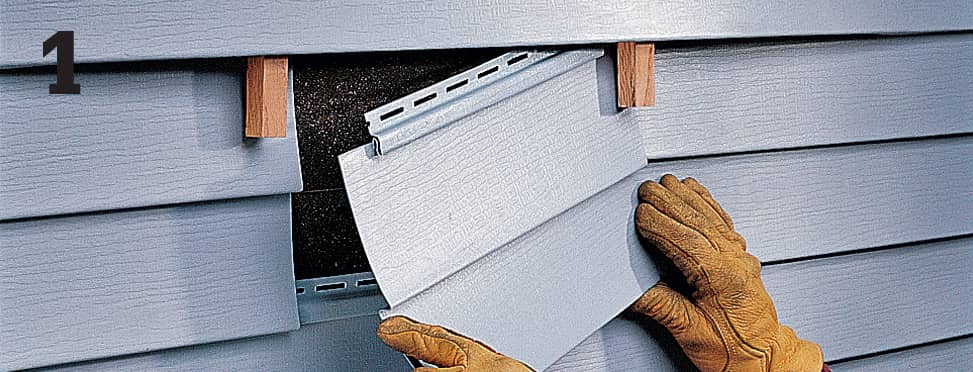
Starting at the seam nearest the damaged area, unlock interlocking joints, using a zip-lock tool. Insert spacers between the panels, then remove the fasteners in the damaged siding, using a flat pry bar. Cut out the damaged area, using aviation snips. Cut a replacement piece 4" longer than the open area, and trim 2" off the nailing strip from each end. Slide the piece into position.
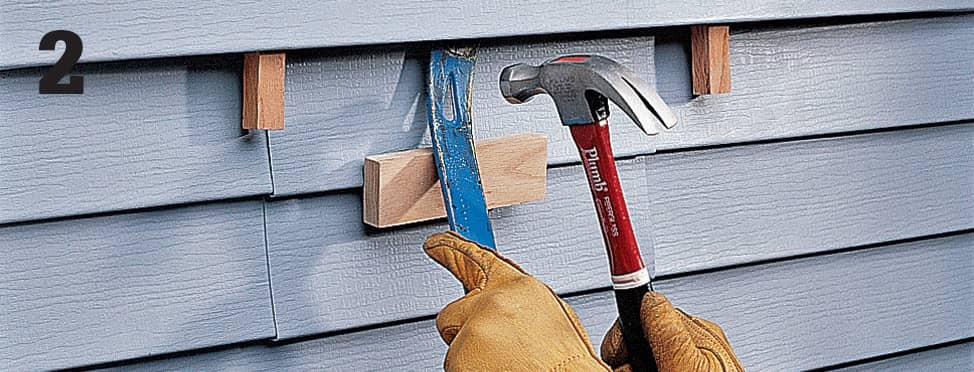
Insert siding nails in the nailing strip, then position the end of a flat pry bar over each nail head. Drive the nails by tapping on the neck of the pry bar with a hammer. Place a scrap piece of wood between the pry bar and siding to avoid damaging the siding. Slip the locking channel on the overlapping piece over the nailing strip of the replacement piece. Tip: If the damaged panel is near a corner, door, or window, replace the entire panel. This eliminates an extra seam.
How to Patch Aluminum Siding
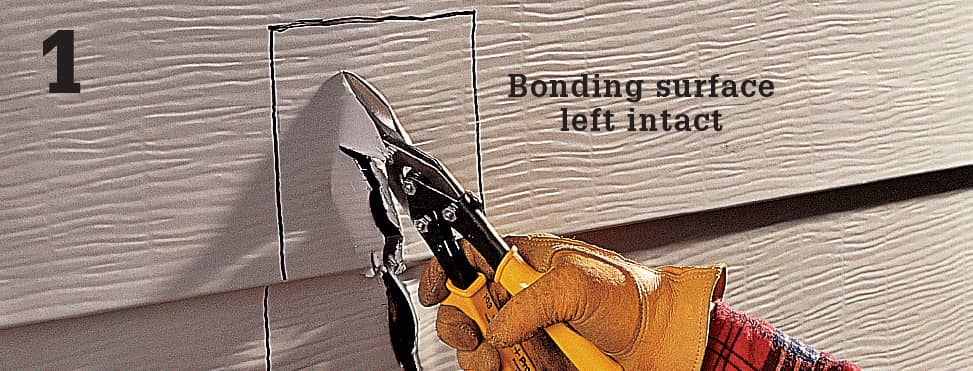
Cut out the damaged area, using aviation snips. Leave an exposed area on top of the uppermost piece to act as a bonding surface. Cut a patch 4" larger than the repair area. Remove the nailing strip. Smooth the edges with metal sandpaper.
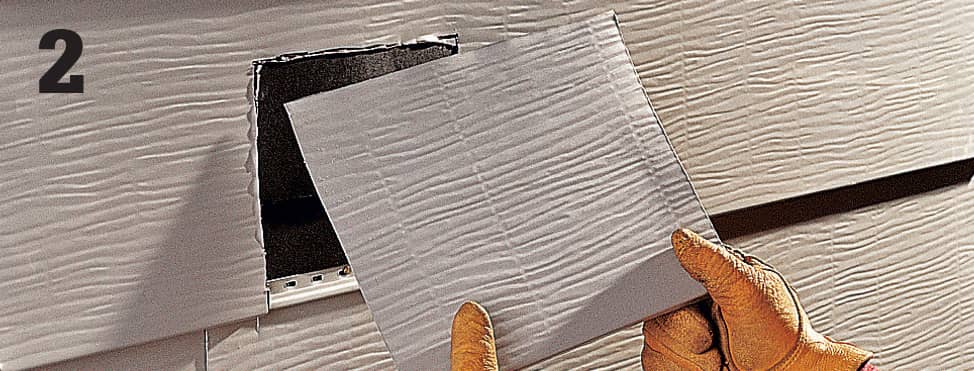
Nail the lower patch in place by driving siding nails through the nailing flange. Apply roofing cement to the back of the top piece, then press it into place, slipping the locking channel over the nailing strip of the underlying piece. Caulk the seams.
How to Replace Aluminum End Caps
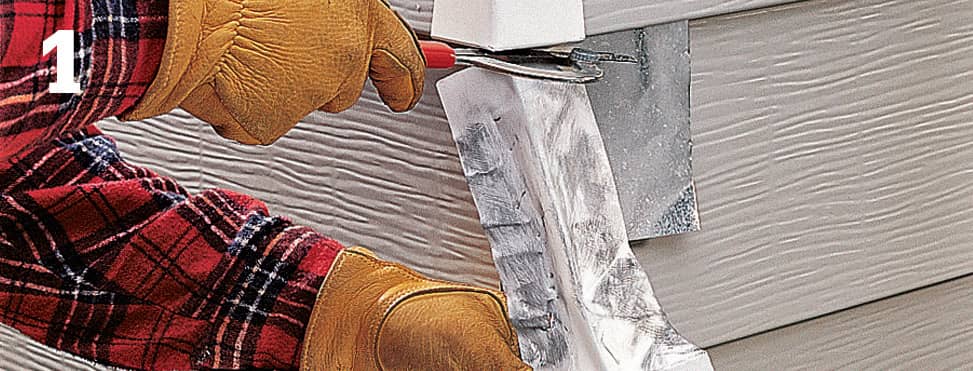
Remove the damaged end cap. If necessary, pry the bottom loose, then cut along the top with a hacksaw blade. Starting at the bottom, attach the replacement end caps by driving siding nails through the nailing tabs and into the framing members.
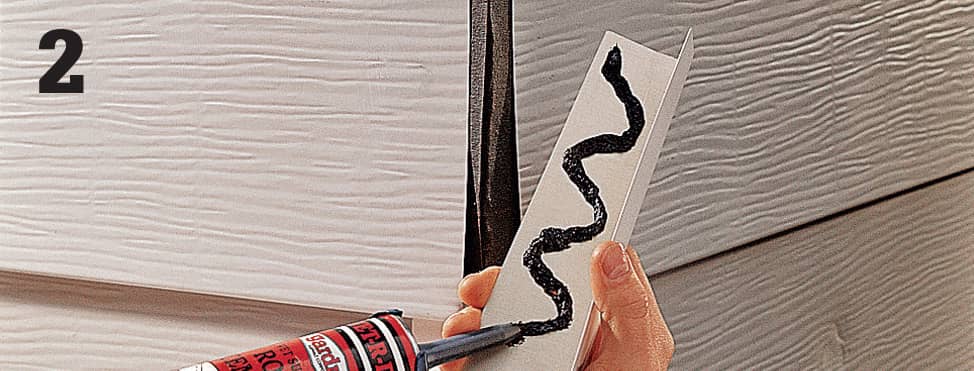
Trim the nailing tabs off the top replacement cap. Apply roofing cement to its back. Slide the cap over the locking channels of the siding panels. Press the top cap securely in place.
How to Replace Board & Batten Siding
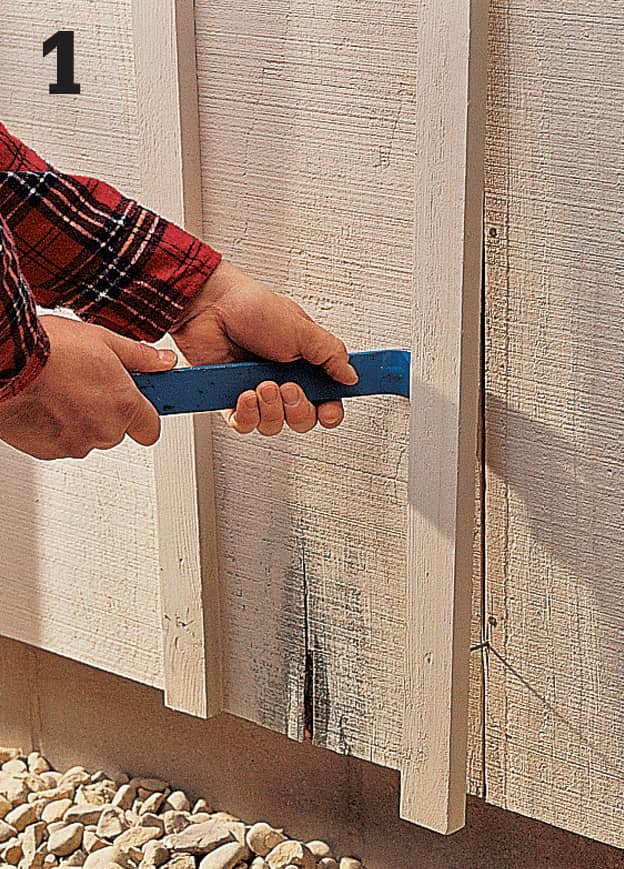
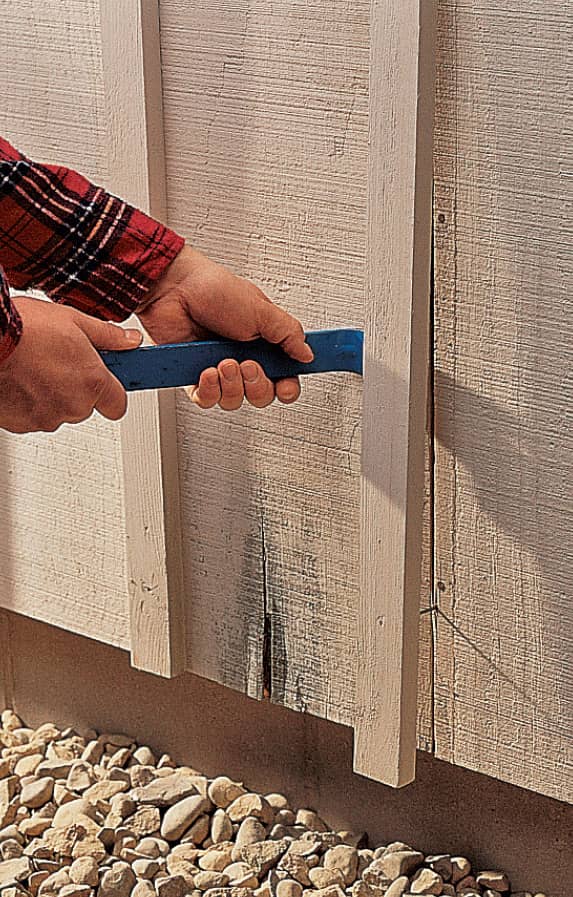
Remove the battens over the damaged boards. Pry out the damaged boards in their entirety. Inspect the underlying housewrap, and patch if necessary.
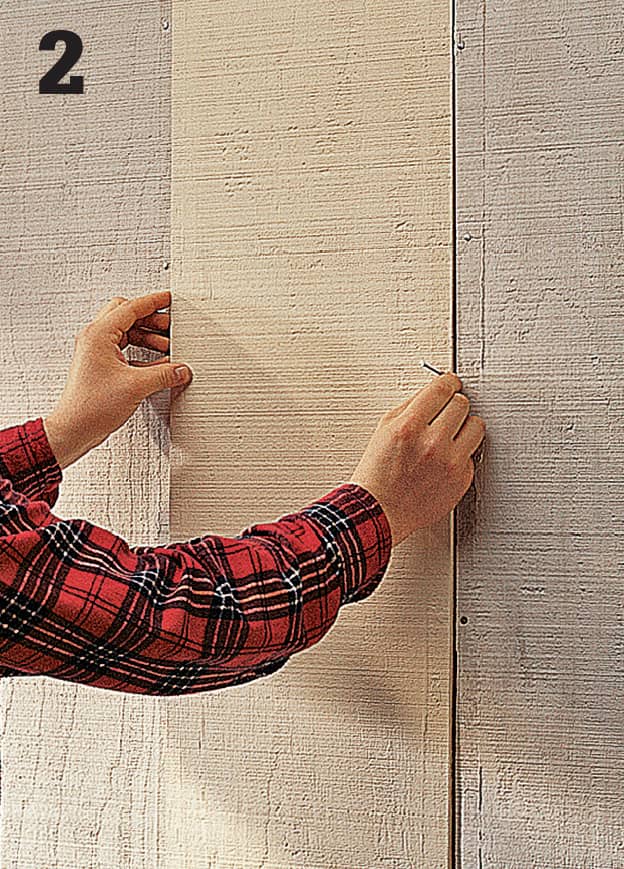
Cut replacement boards from the same type of lumber, allowing a 1/8" gap at the side seams. Prime or seal the edges and the back side of the replacement boards. Let them dry.
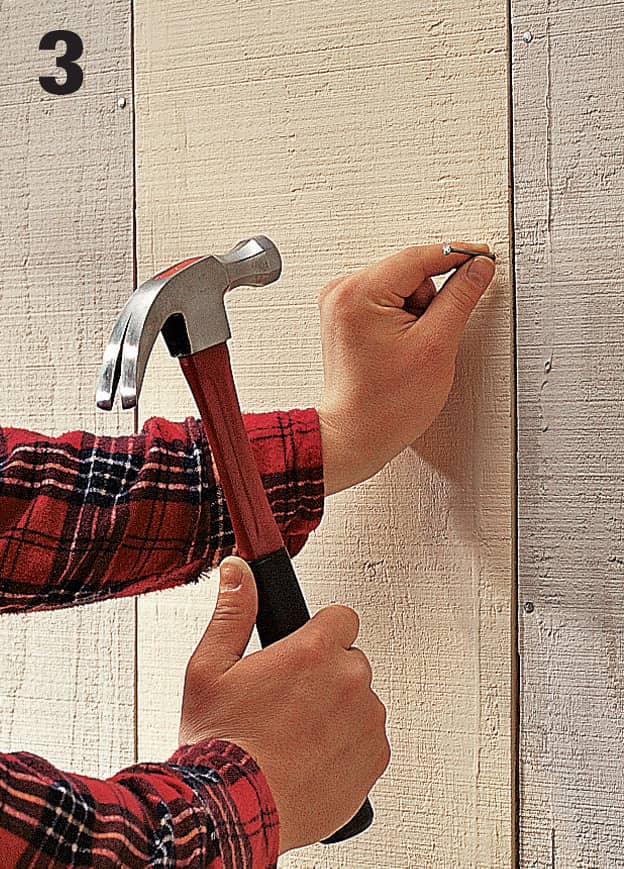
Nail the new boards in place, using ring-shank siding nails. Replace the battens and any other trim. Prime and paint or stain the new boards to blend with the surrounding siding.
How to Replace Wood Shakes & Shingles
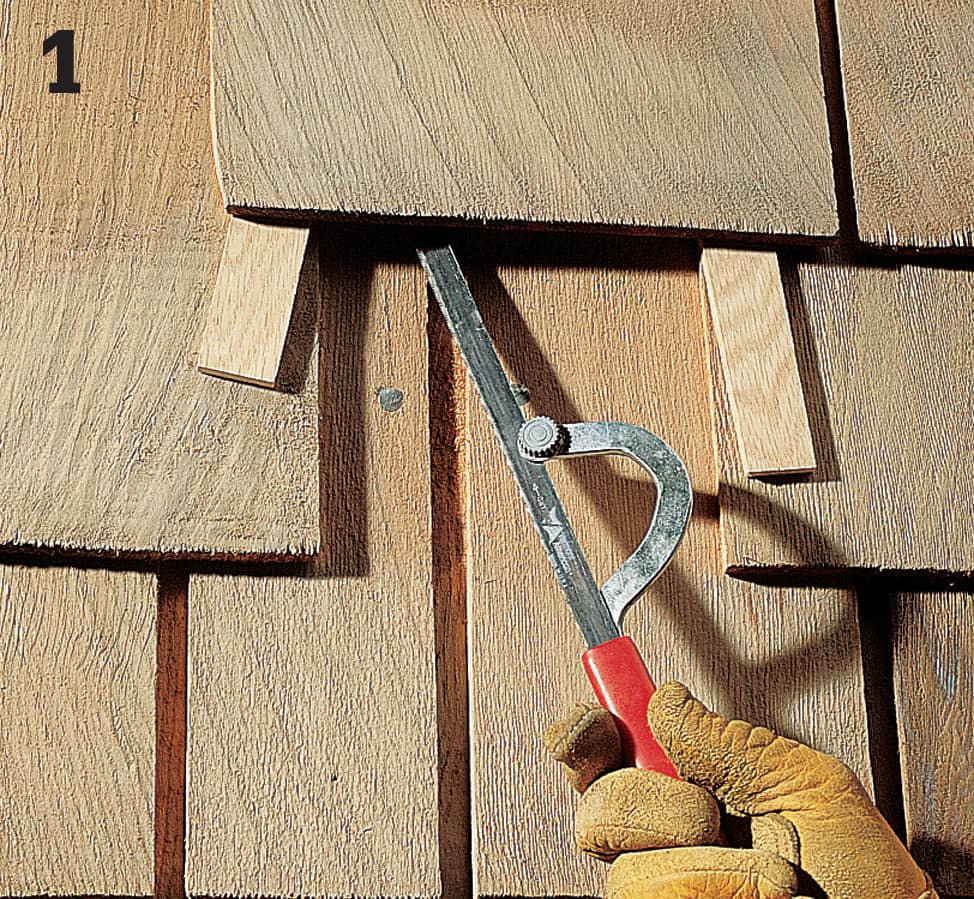
Split damaged shakes or shingles with a hammer and chisel, and remove them. Insert wood spacers under the shakes or shingles above the repair area, then slip a hacksaw blade under the top board to cut off any remaining nail heads.
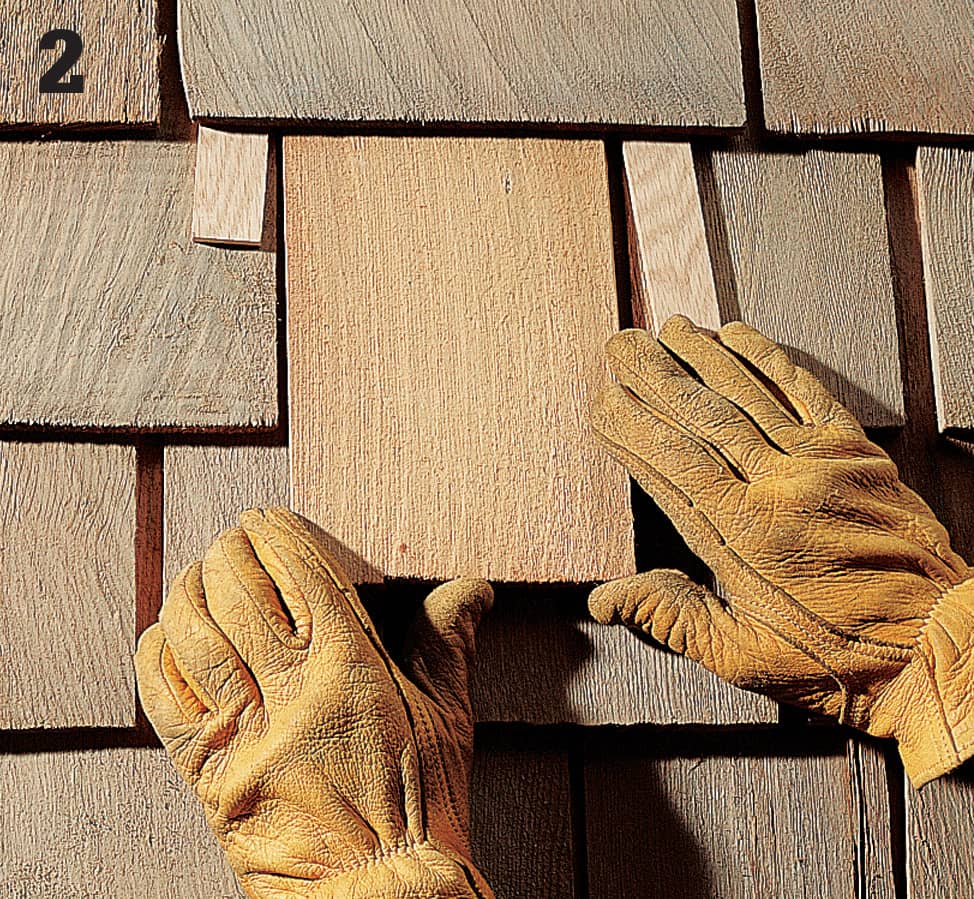
Cut replacement shakes or shingles to fit, leaving a 1/8"- to 1/4"-wide gap at each side. Coat all sides and edges with wood preservative. Slip the patch pieces under the siding above the repair area. Drive siding nails near the top of the exposed area on the patches. Cover nail heads with caulk. Remove the spacers.
How to Replace Lap Siding
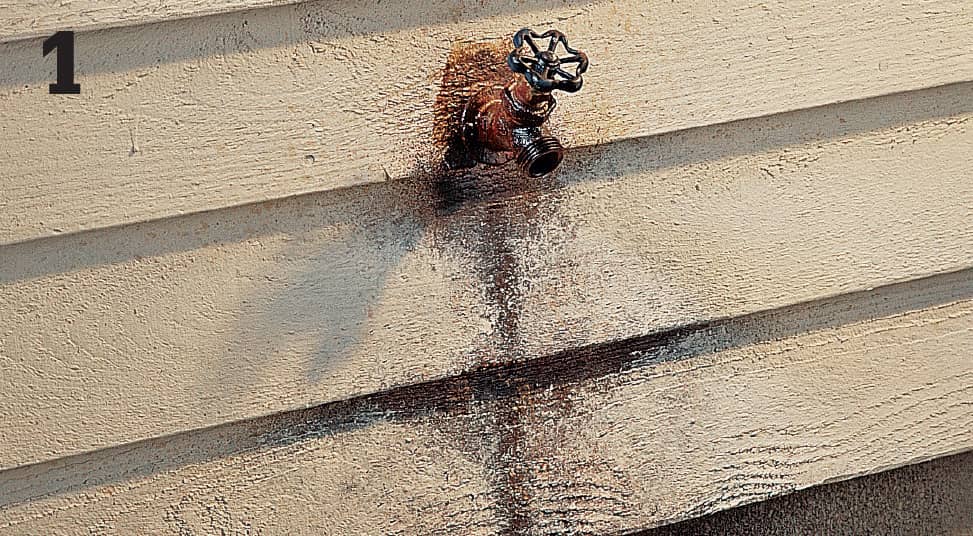
If the damage is caused by water, locate and repair the leak or other source of the water damage.
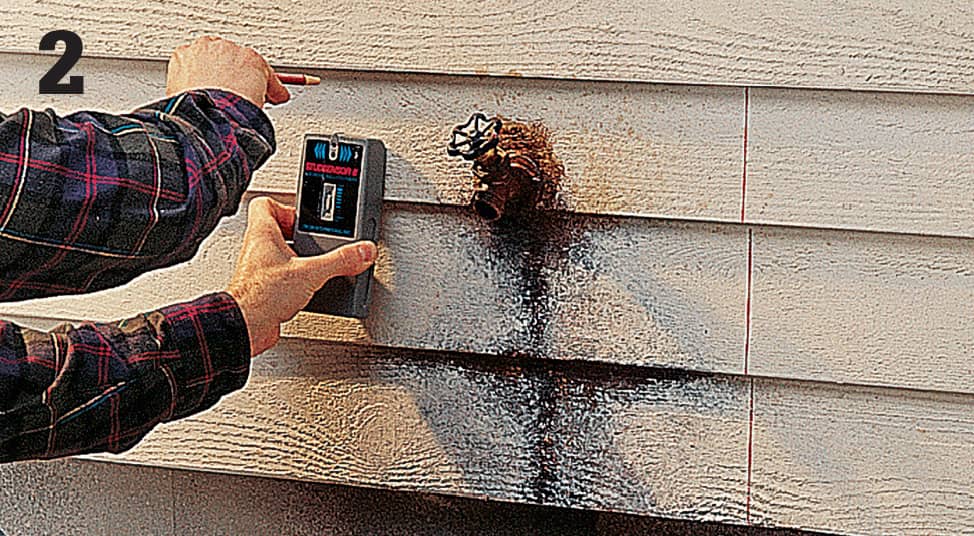
Mark the area of siding that needs to be replaced. Make the cutout lines over the center of the framing members on each side of the repair area, staggering the cuts to offset the joints. Tip: Use an electronic studfinder to locate framing members, or look for the nail heads.
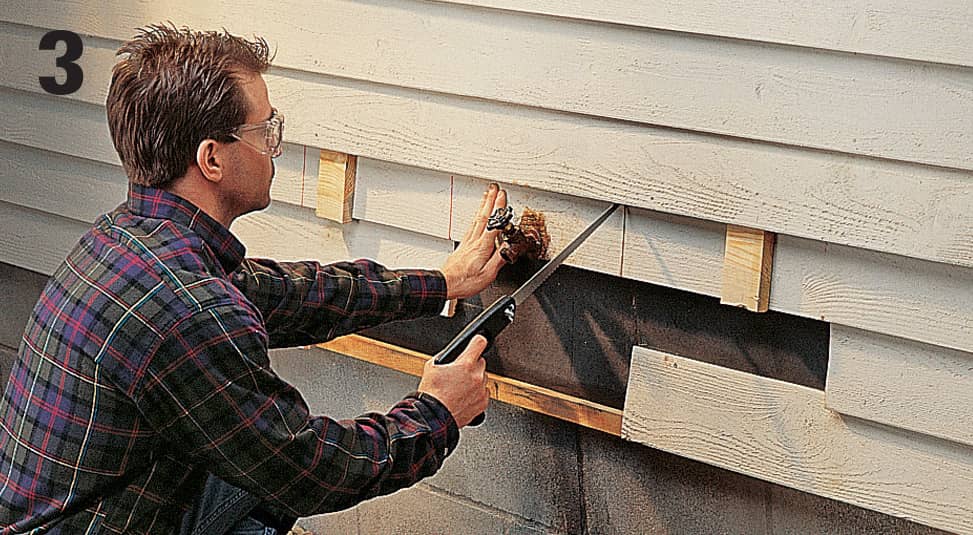
Insert spacers beneath the board above the repair area. Make entry cuts at the top of the cutting lines with a keyhole saw, then saw through the boards and remove them. Pry out any nails or cut off the nail heads, using a hacksaw blade. Patch or replace the sheathing and building paper, if necessary.
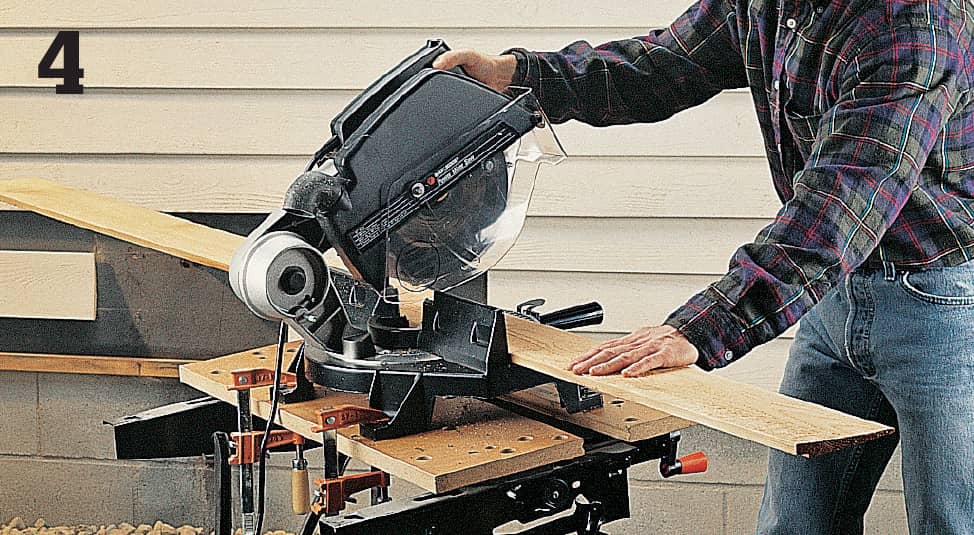
Measure and cut replacement boards to fit, leaving an expansion gap of 1/8" at each end. Use the old boards as templates to trace cutouts for fixtures and openings. Use a jigsaw to make the cutouts. Apply wood sealer or primer to the ends and backs of the boards. Let them dry.
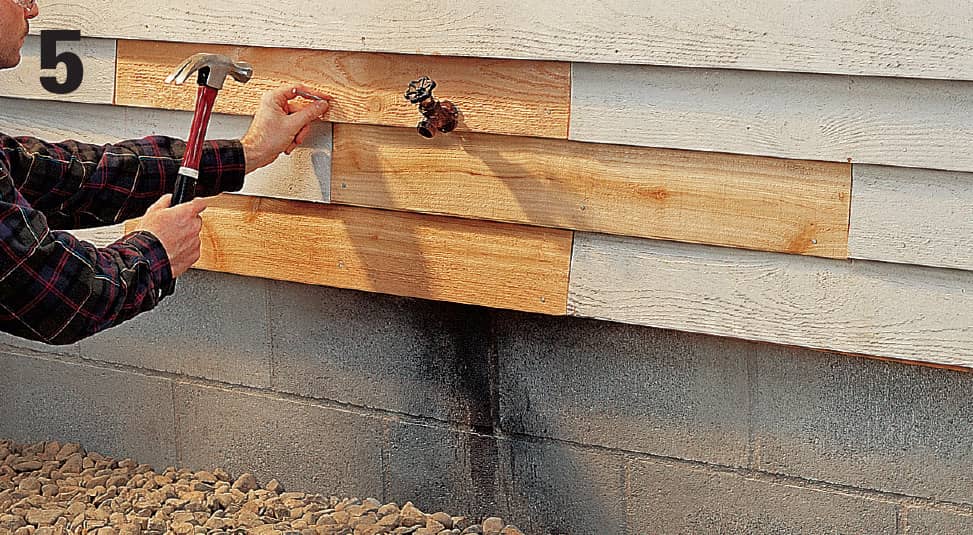
Nail the new boards in place with siding nails, starting with the lowest board in the repair area. At each framing member, drive nails through the bottom of the new board and the top of the board below. Tip: If you removed the bottom row of siding, nail a 1 × 2 starter strip along the bottom of the patch area.
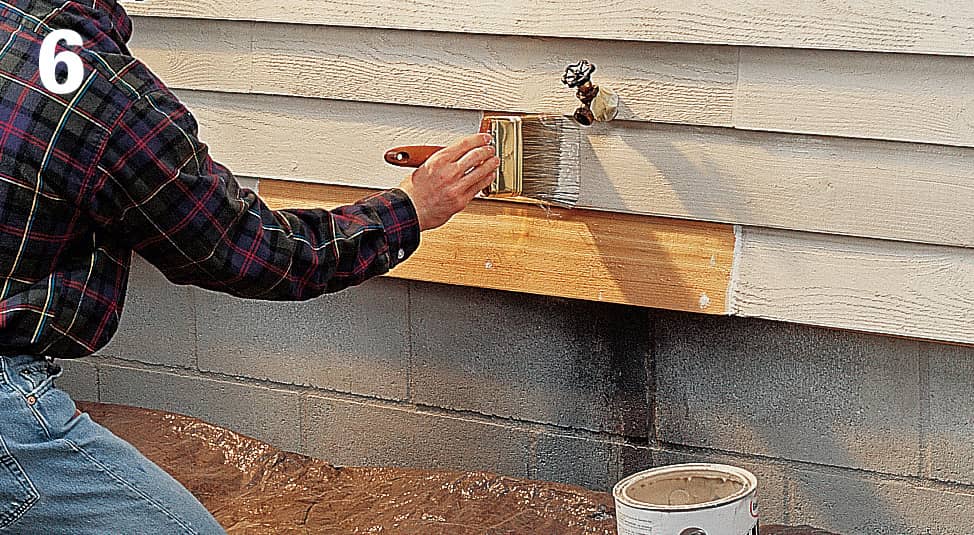
Fill expansion joints with caulk (use paintable caulk for painted wood or tinted caulk for stained wood). Prime and paint or stain the replacement boards to match the surrounding siding.
 Repairing Exterior Trim
Some exterior trim serves as decoration, like gingerbread and ornate cornice moldings. Other trim, such as brick molding and end caps, works with siding to seal your house from the elements. Damaged brick molding and corner boards should be patched with stock material similar to the original.
If you cannot find matching replacement parts for decorative trim at home improvement stores, check salvage shops or contact a custom millworker.
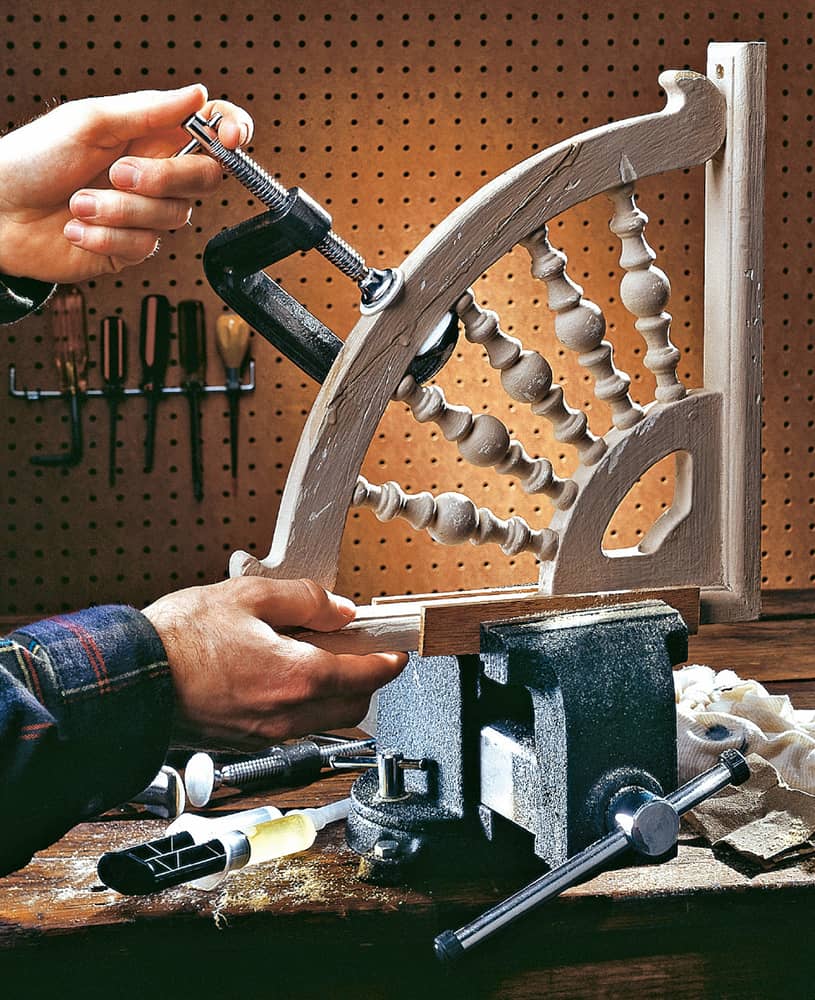
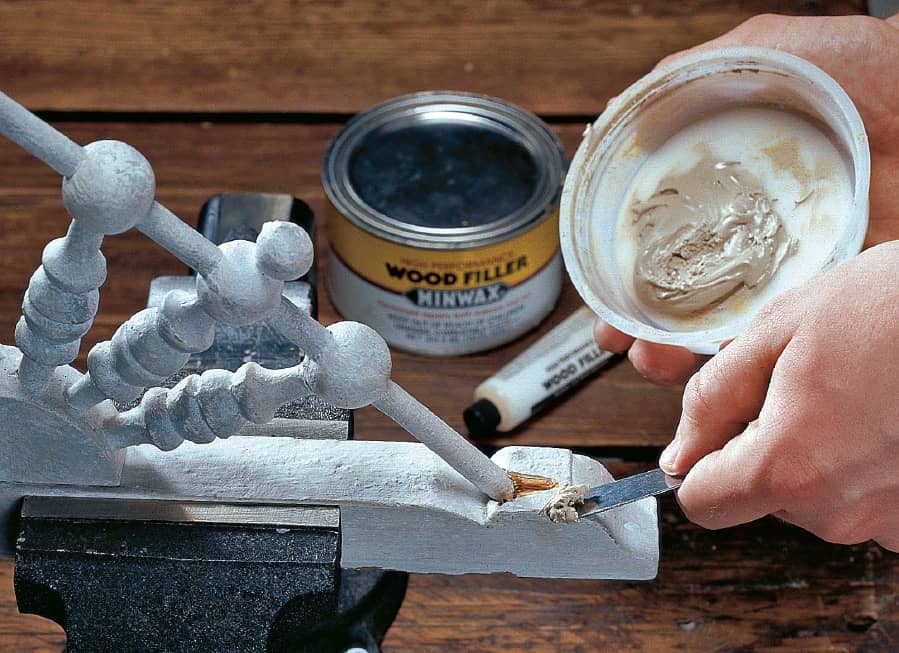
Repair delicate or ornamental trim molding in your workshop, whenever possible. You’ll get better results than if you try repairing it while it’s still attached.
How to Replace Brick Molding
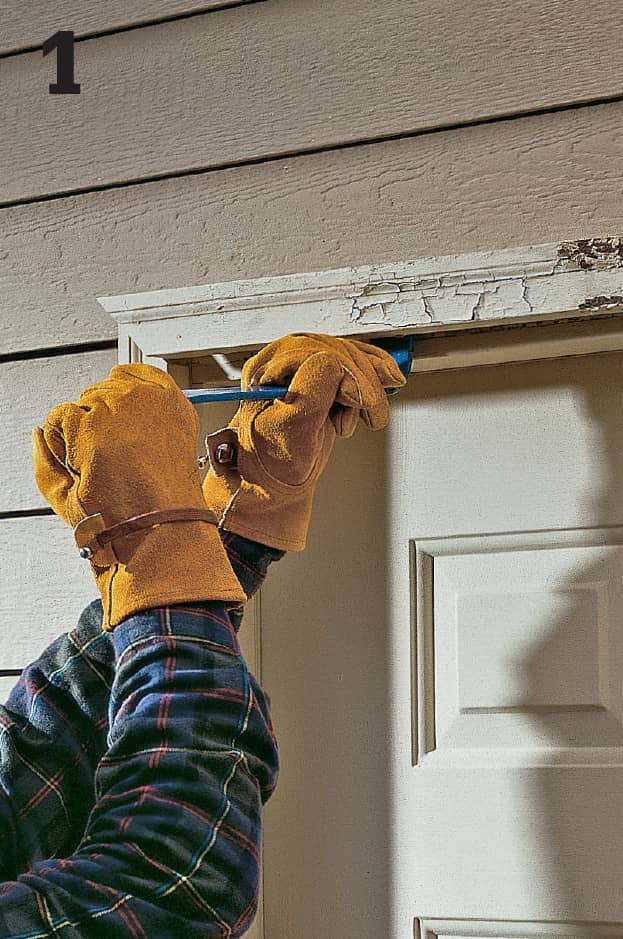
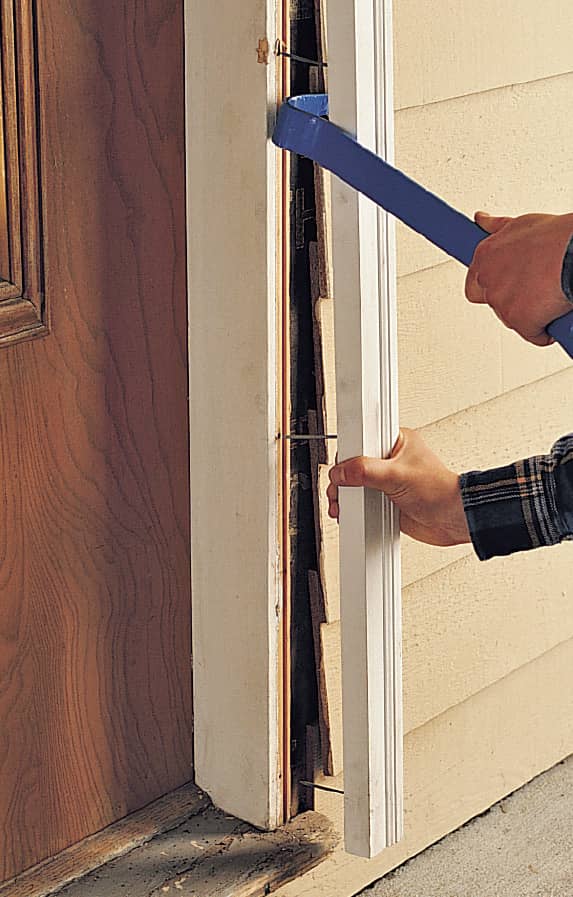
Pry off old brick molding around windows and doors, using a flat pry bar. Remove any old drip edge. Inspect and repair the building paper.
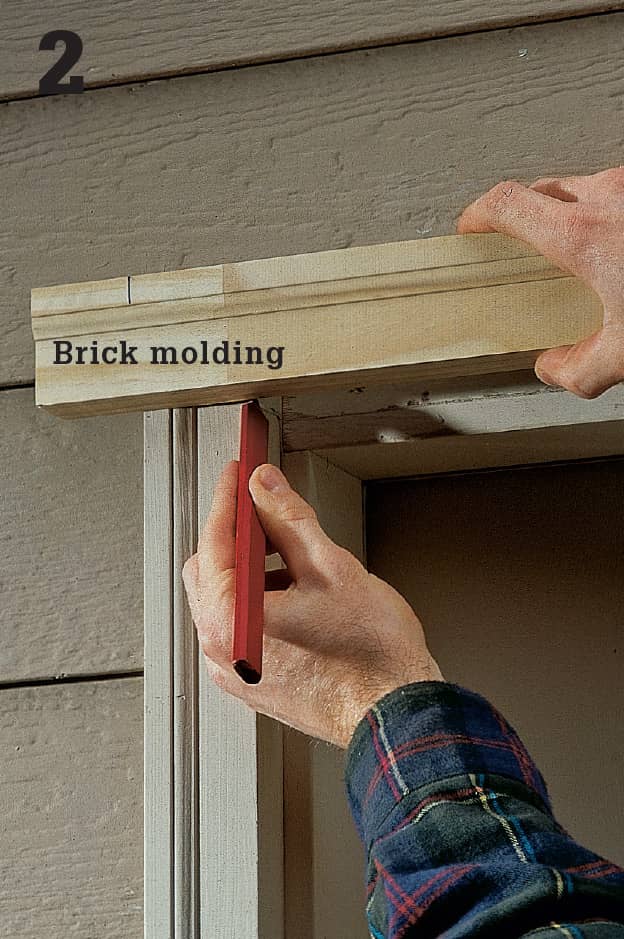
Hold a replacement piece of brick molding, slightly longer than the original piece, across the opening. Mark cutting lines to fit the opening. Cut the replacement molding at the marks, matching any miter cuts.
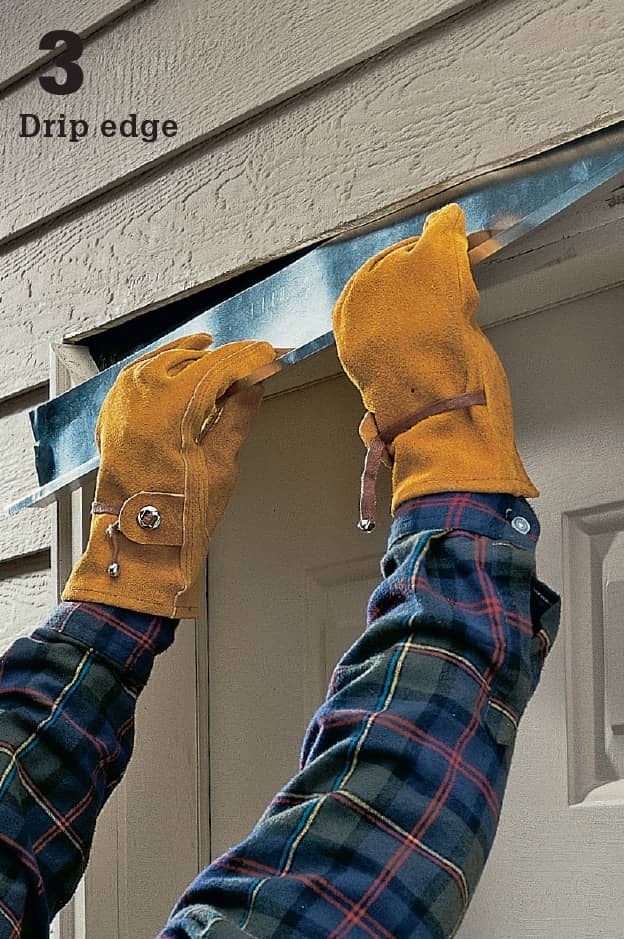
Cut a 3"-wide piece of flashing to fit between the jambs, then bend it in half lengthwise to form the new drip edge (preformed drip edge is also available). Slip it between the siding and building paper, above the door or window. Do not nail the drip edge in place.
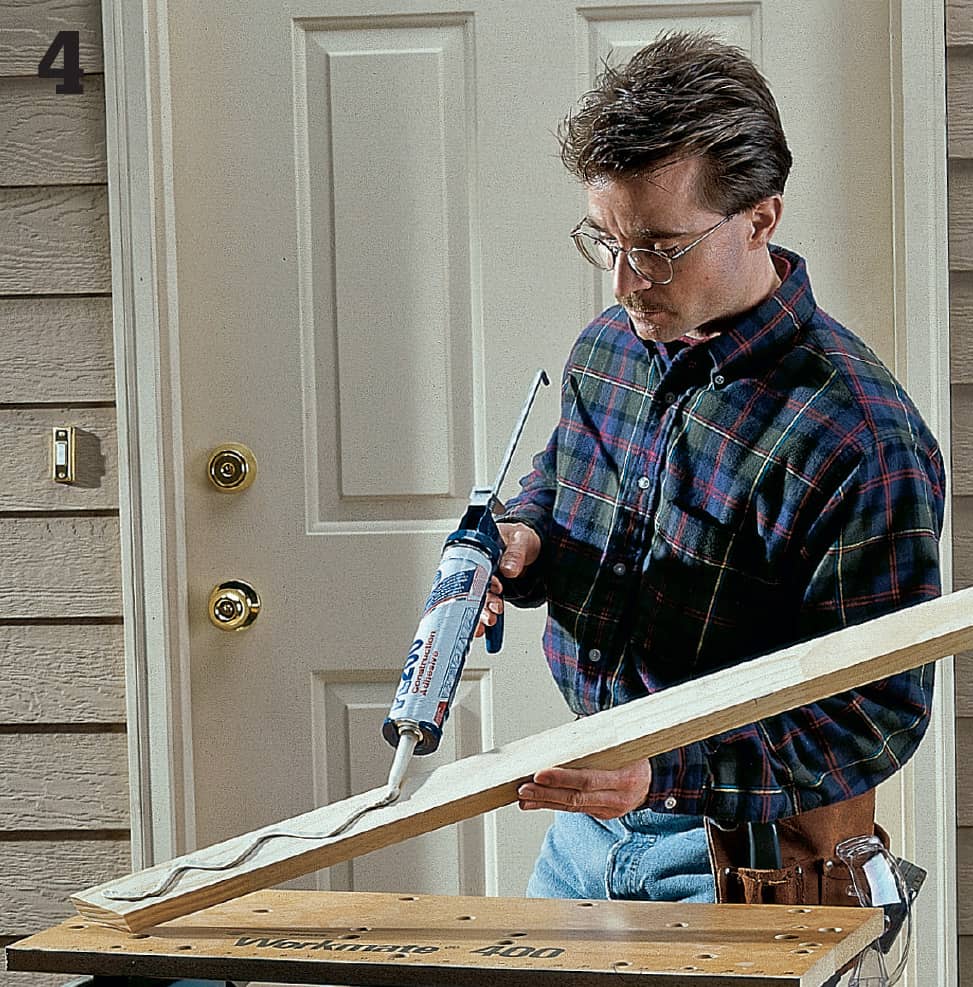
Test-fit the replacement piece of brick molding, then apply exterior-grade panel adhesive to the back side. Follow the manufacturer’s directions for allowing the adhesive to set.
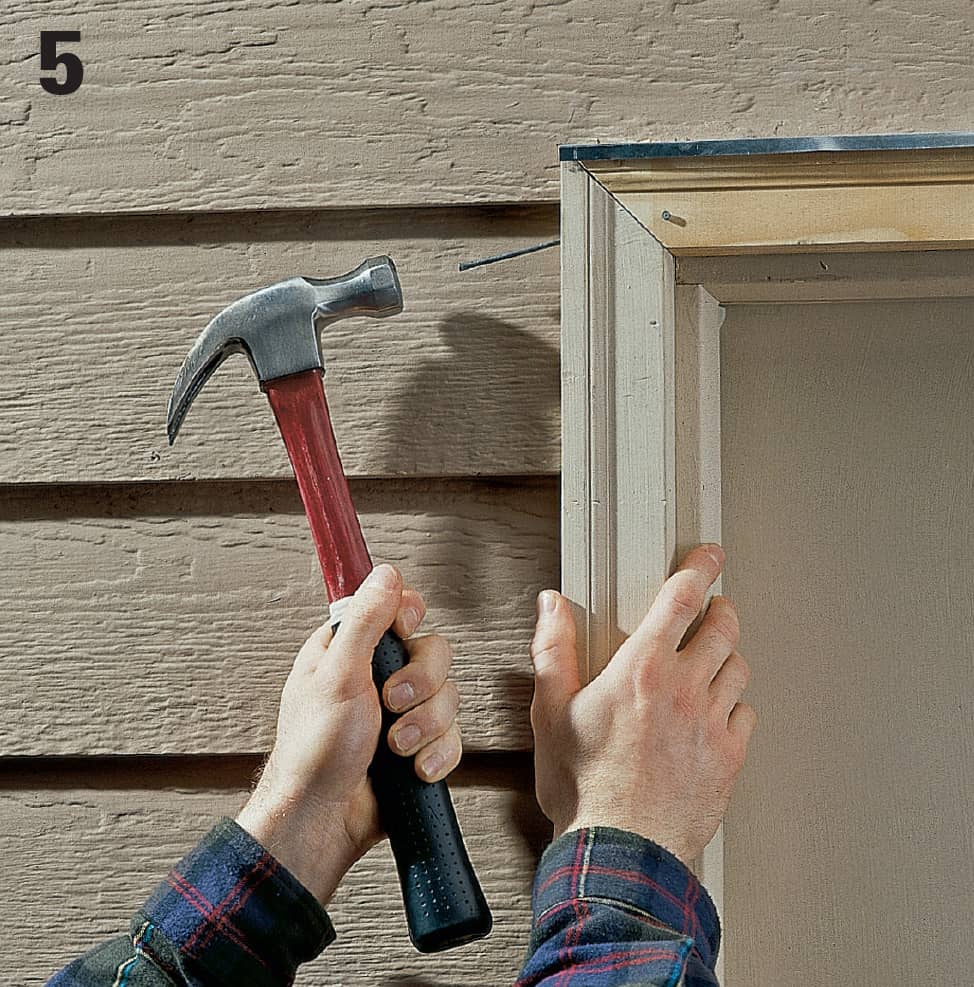
Nail the brick molding to the door header, using 10d galvanized casing nails. Lock-nail the miter joints, and set all nail heads. Seal joints, and cover nail holes with caulk. Prime and paint when the caulk dries.
 Identifying Exterior Paint Problems
Two enemies work against painted surfaces—moisture and age. A simple leak or a failed vapor barrier inside the house can ruin even the finest paint job. If you notice signs of paint failure, such as blistering or peeling, take action to correct the problem right away. If the surface damage is discovered in time, you may be able to correct it with just a little bit of touch-up painting.
Evaluating the painted surfaces of your house can help you identify problems with siding, trim, roofs, and moisture barriers. The pictures on these two pages show the most common forms of paint failure, and how to fix them. Be sure to fix any moisture problems before repainting.
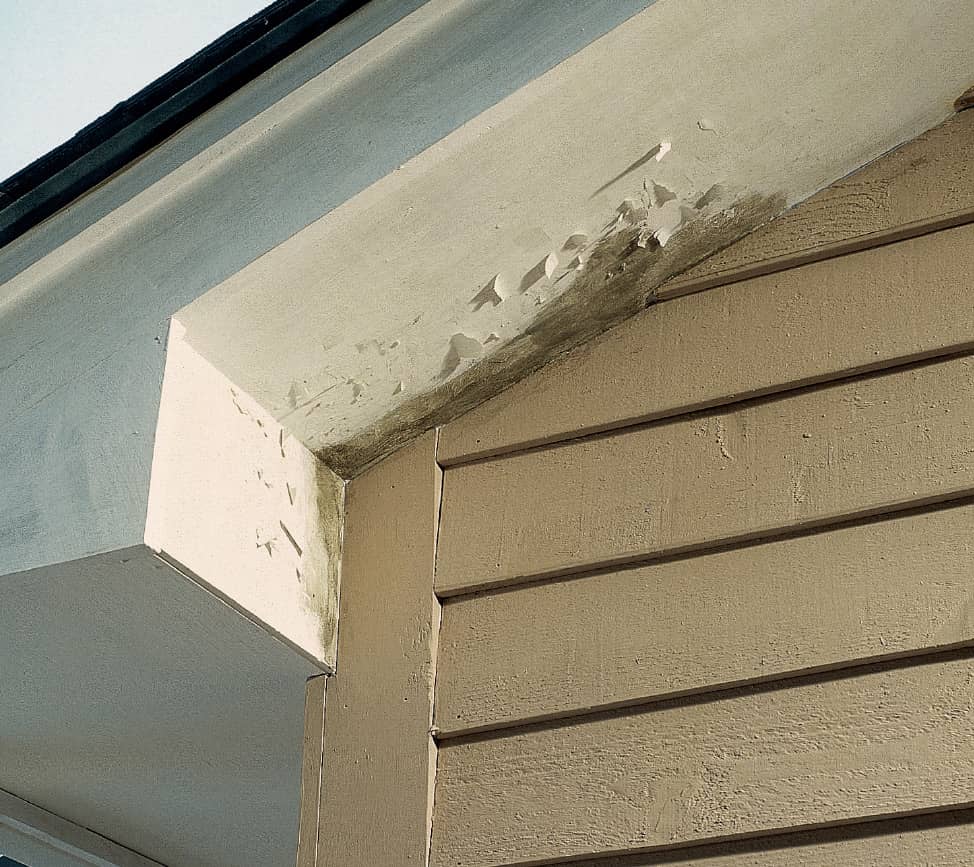
Evaluate exterior painted surfaces every year, starting with areas sheltered from the sun. Paint failure will appear first in areas that receive little or no direct sunlight and is a warning sign that similar problems are developing in neighboring areas.
Common Forms of Paint Failure
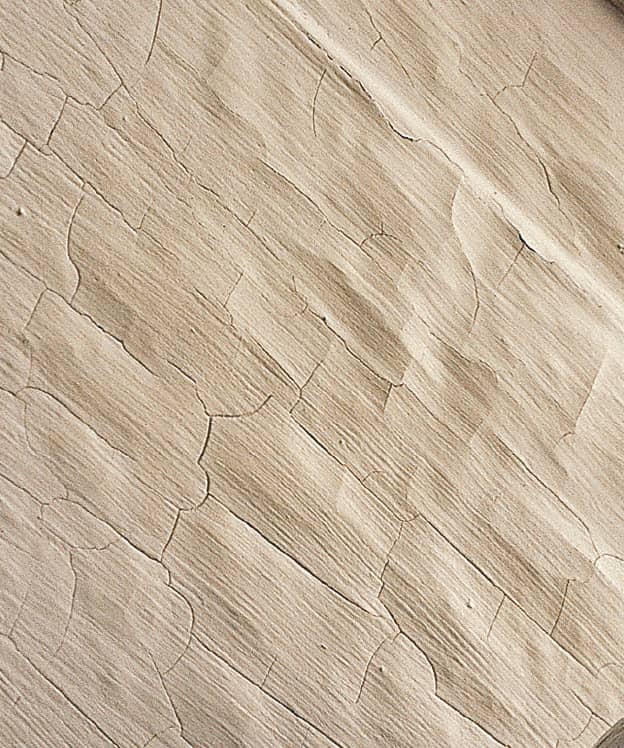
Blistering appears as a bubbled surface. It results from poor preparation or hurried application of primer or paint. The blisters indicate trapped moisture is trying to force its way through the surface. To fix isolated spots, scrape and touch up. For widespread damage, remove paint down to bare wood, then apply primer and paint.
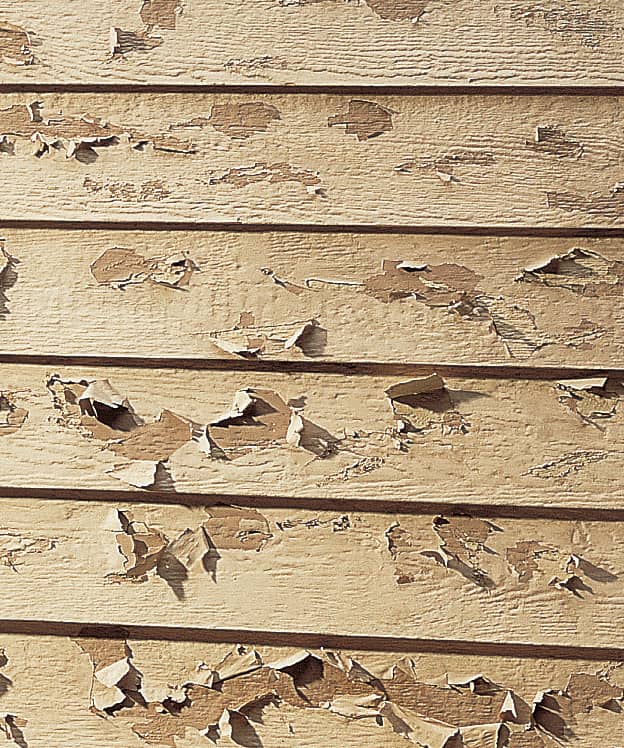
Peeling occurs when paint falls away in large flakes. It’s a sign of persistent moisture problems, generally from a leak or a failed vapor barrier. If the peeling is localized, scrape and sand the damaged areas, then touch up with primer and paint. If it’s widespread, remove the old paint down to bare wood, then apply primer and paint.
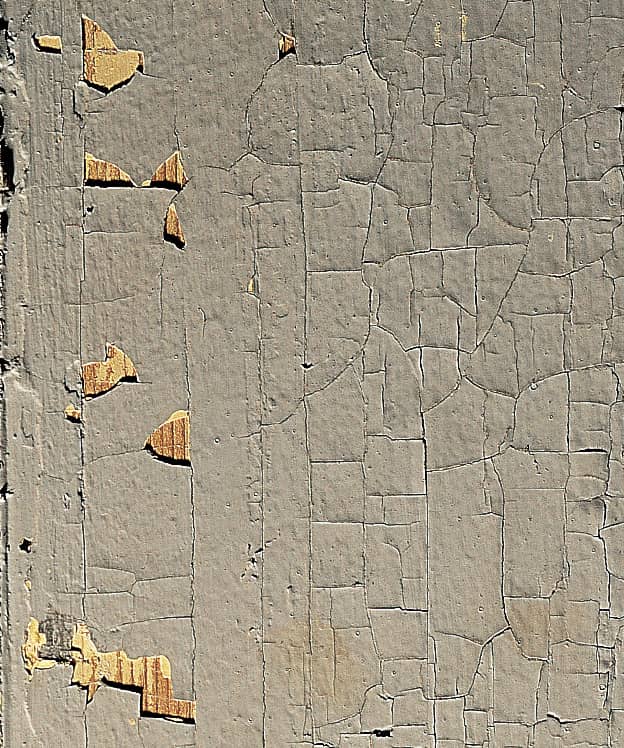
Alligatoring is widespread flaking and cracking, typically seen on surfaces that have many built-up paint layers. It can also be caused by inadequate surface preparation or by allowing too little drying time between coats of primer and paint. Remove the old paint, then prime and repaint.
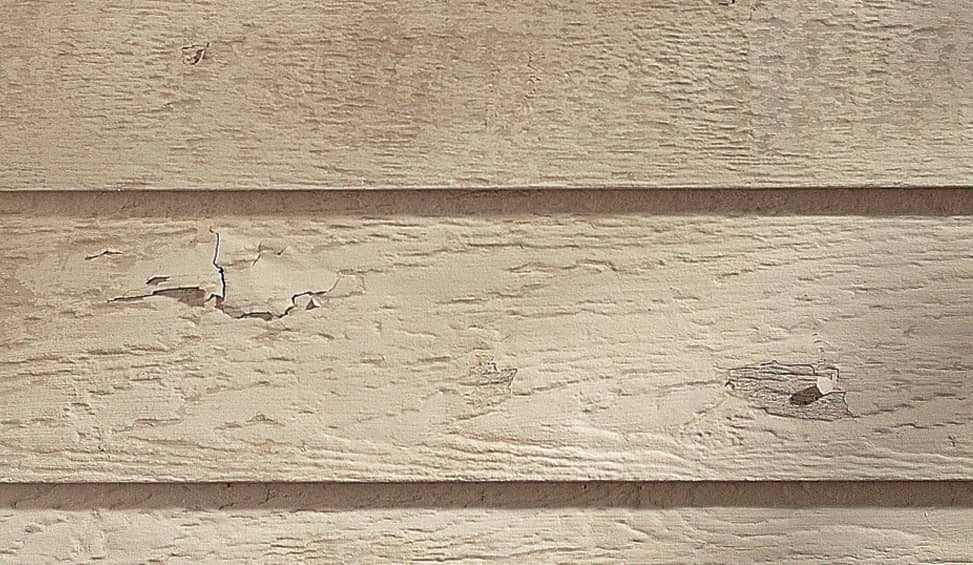
Localized blistering and peeling indicates that moisture, usually from a leaky roof, gutter system, or interior pipe, is trapped under the paint. Find and eliminate the leak, then scrape, prime, and repaint the area.
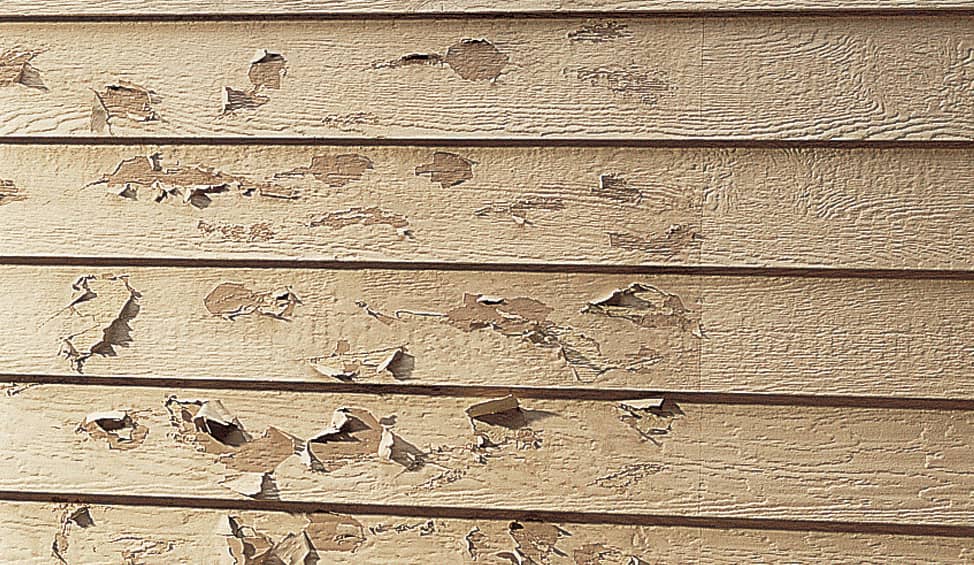
Clearly defined blistering and peeling occurs when a humid room has an insufficient vapor barrier. If there’s a clear line where an interior wall ends, remove the siding and replace the vapor barrier.

Mildew forms in cracks and in humid areas that receive little direct sunlight. Wash mildewed areas with a 1:1 solution of household chlorine bleach and water, or with trisodium phosphate (TSP).
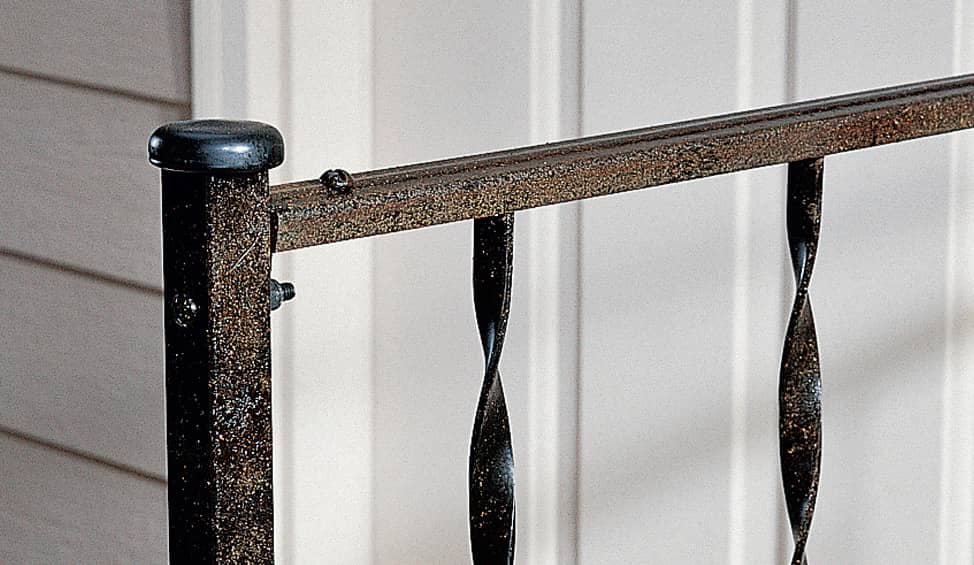
Rust occurs when moisture penetrates paint on iron or steel. Remove the rust and loose paint with a drill and wire brush attachment, then prime and repaint.
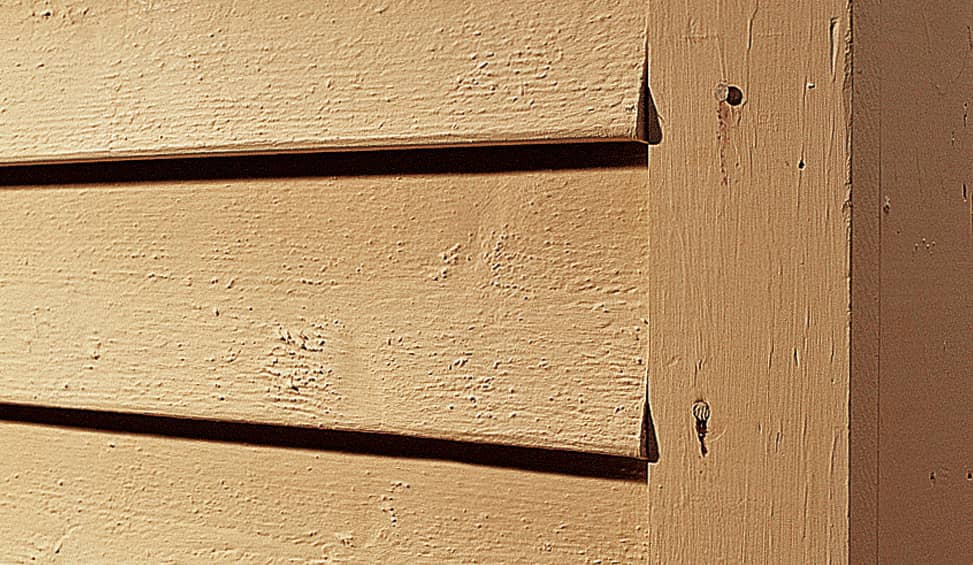
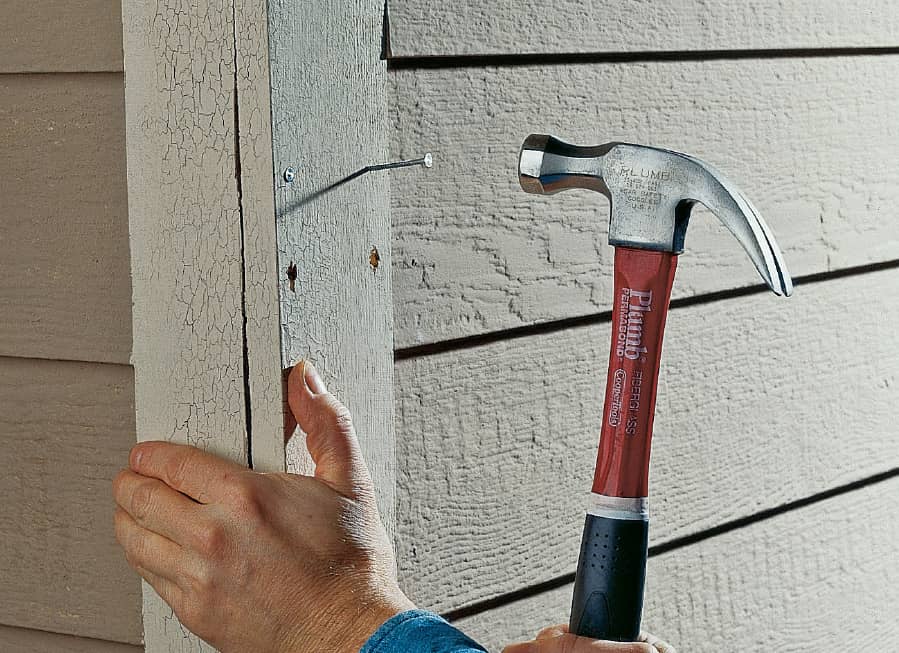
Bleeding spots occur when nails in siding begin to rust. Remove the nails, sand out the rust, then drive in galvanized ring-shank nails. Apply metal primer, then paint to blend in with the siding.
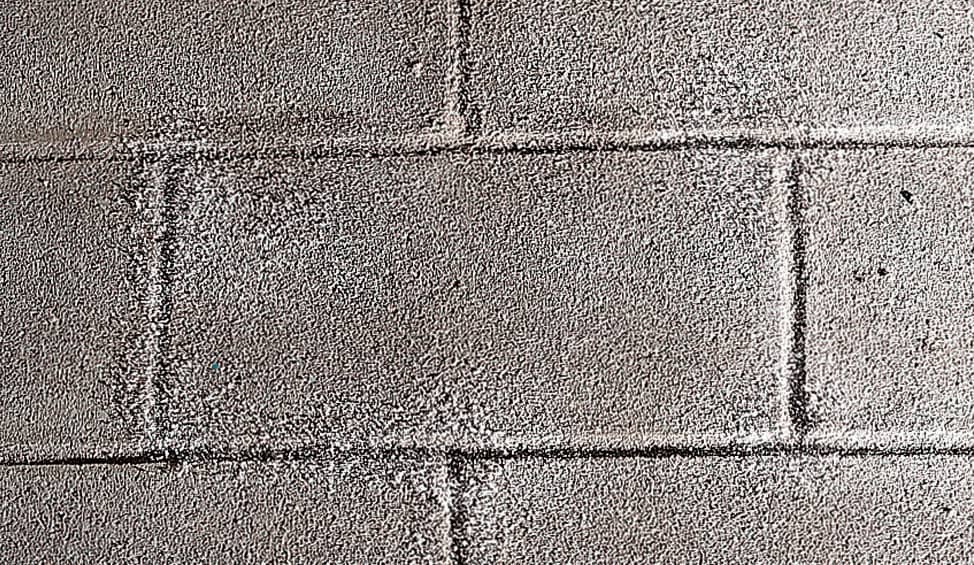
Efflorescence occurs in masonry when minerals leech through the surface, forming a crystalline or powdery layer. Use a scrub brush and a muriatic acid solution to remove efflorescence before priming and painting.
 Preparing to Paint Your House
The key to an even paint job is to work on a smooth, clean, dry surface. Generally, the more preparation work you do, the smoother the final finish will be and the longer it will last.
For the smoothest finish, sand all the way down to the bare wood with a power sander. For a less time-consuming (but rougher) finish, scrape off any loose paint, then spot-sand rough areas. Pressure washing will remove some of the flaking paint, but by itself, won’t create a smooth surface for painting.
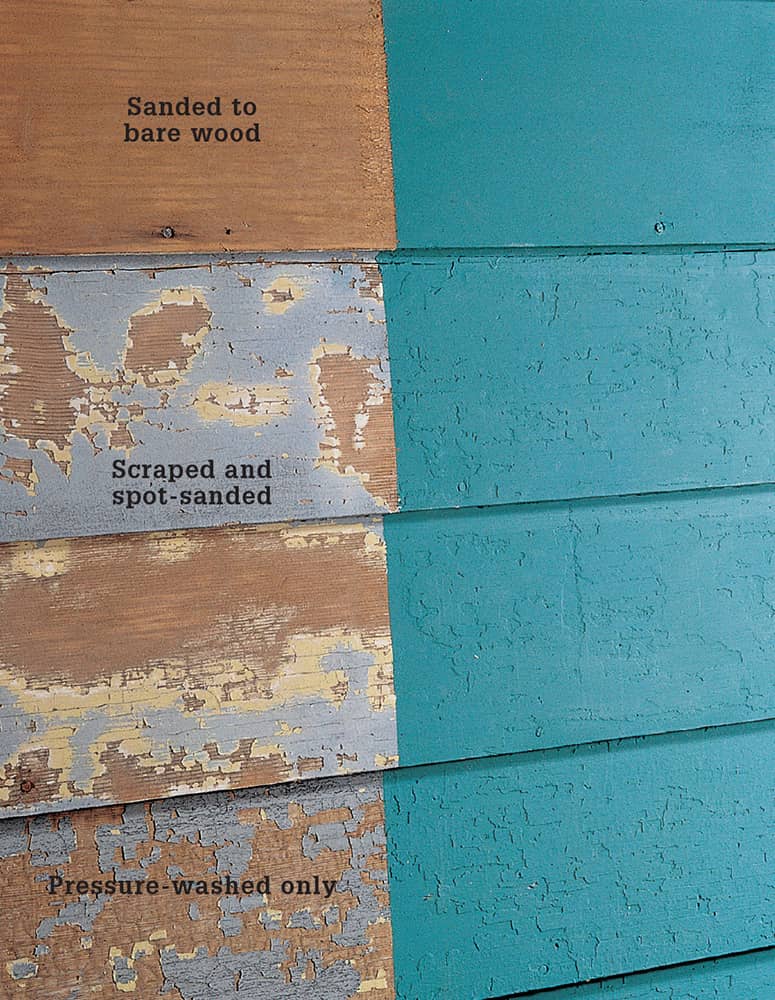
The amount of surface preparation you do will largely determine the final appearance of your paint job. Decide how much sanding and scraping you’re willing to do to obtain a finish you’ll be happy with.
How to Remove Paint
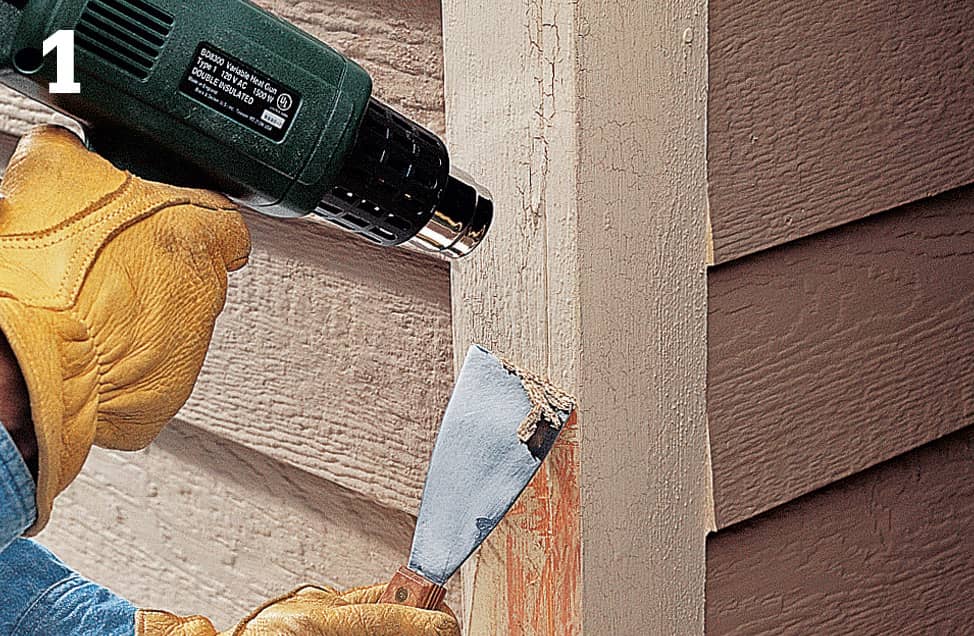
Use a heat gun to loosen thick layers of old paint. Aim the gun at the surface, warm the paint until it starts to bubble, then scrape the paint as soon as it releases.
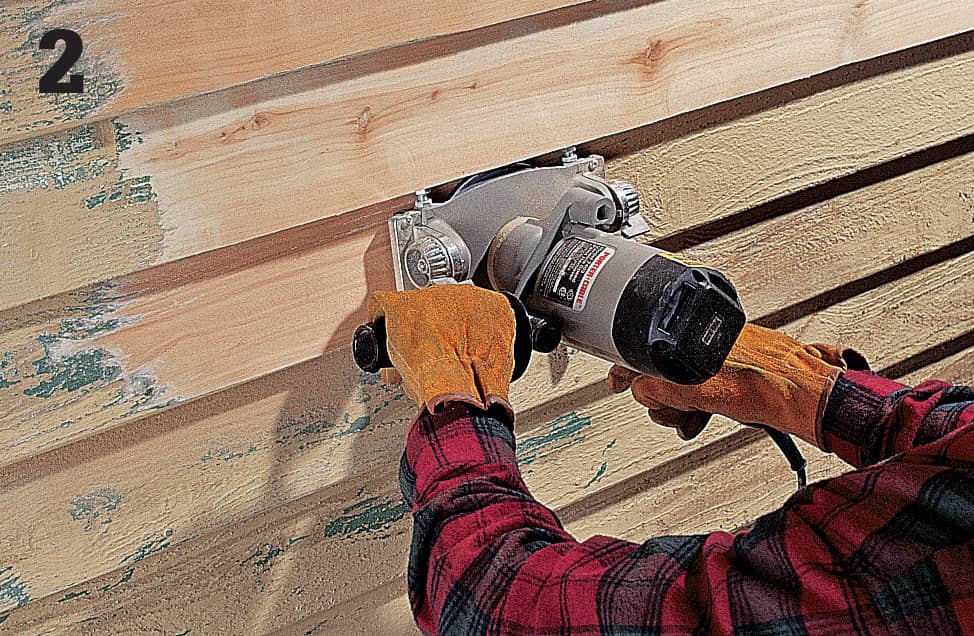
To remove large areas of paint on wood lap siding, use a siding sander with a disk that’s as wide as the reveal on your siding.
How to Prepare Surfaces for Paint
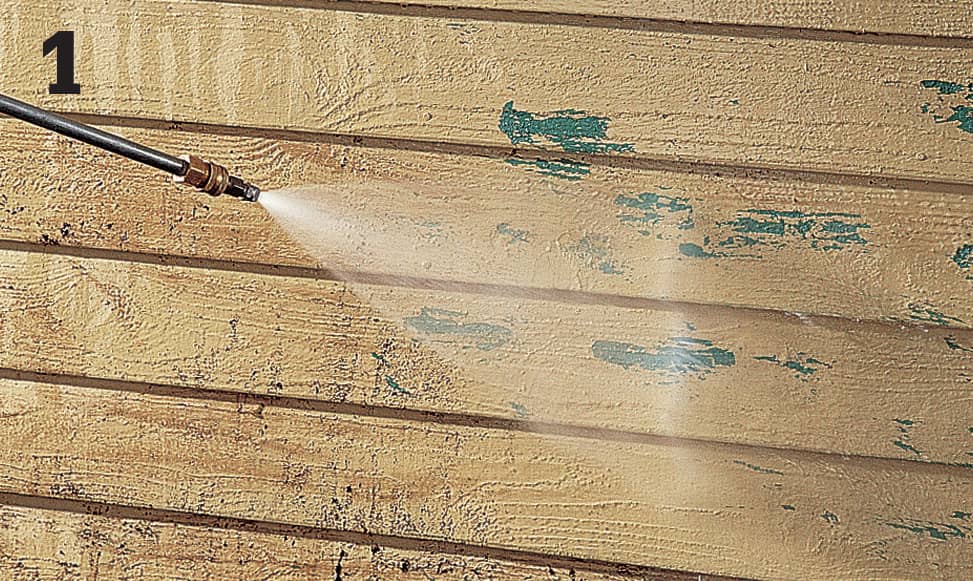
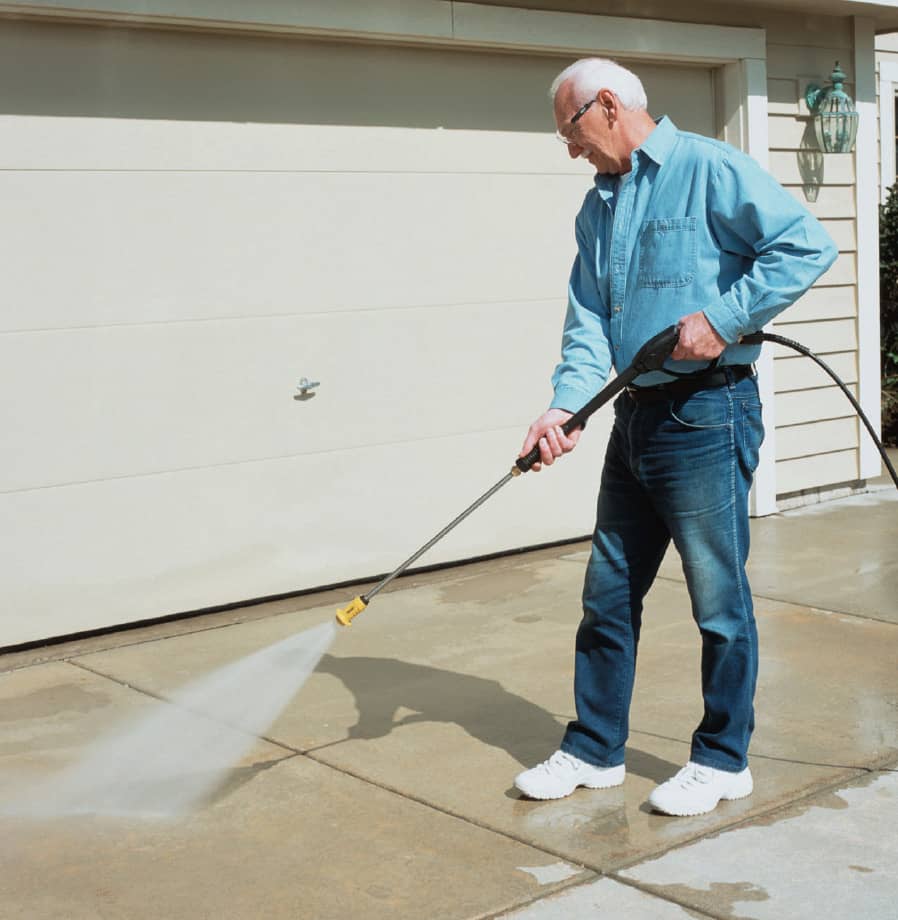
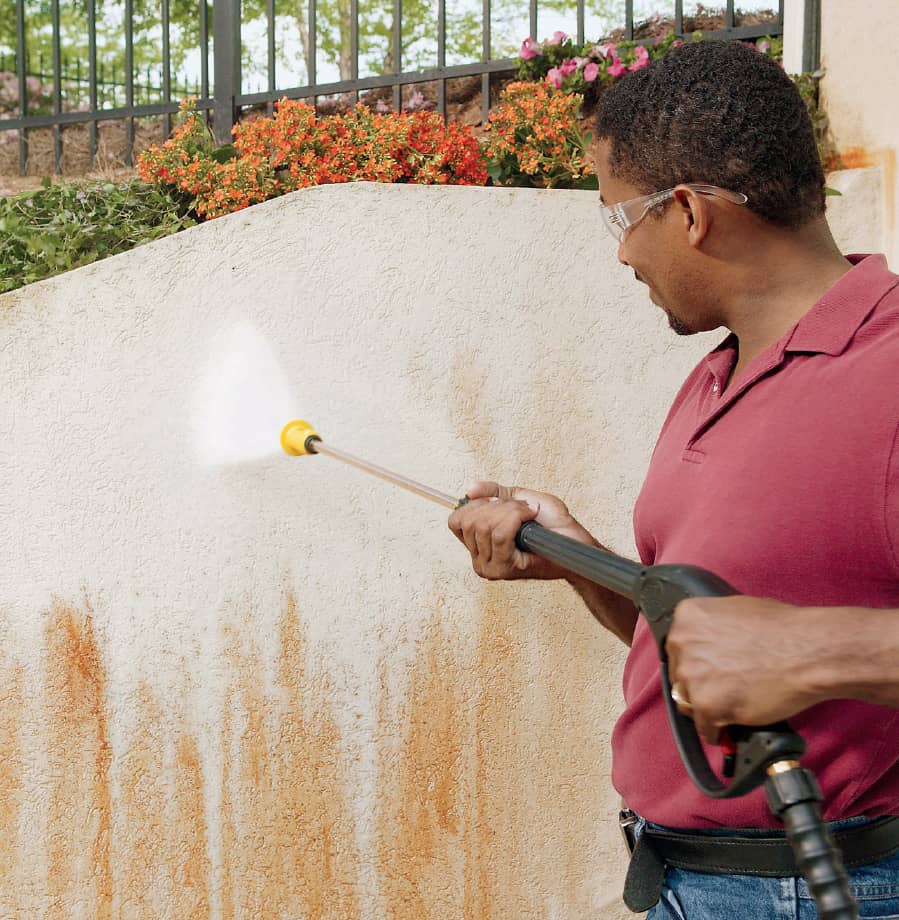
Clean the surface and remove loose paint by pressure washing the house. As you work, direct the water stream downward, and don’t get too close to the surface with the sprayer head. Allow all surfaces to dry thoroughly before continuing.
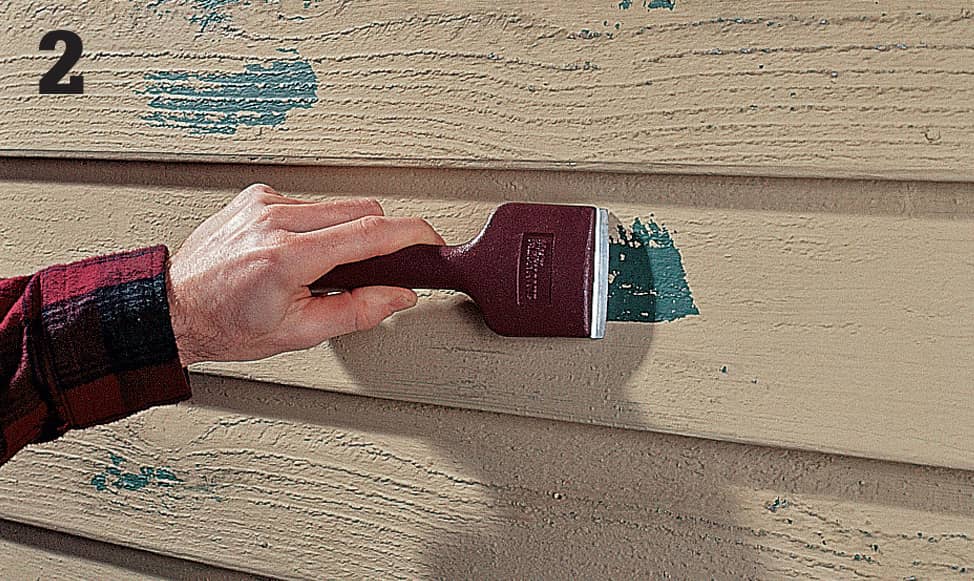
Scrape off loose paint, using a paint scraper. Be careful not to damage the surface by scraping too hard.
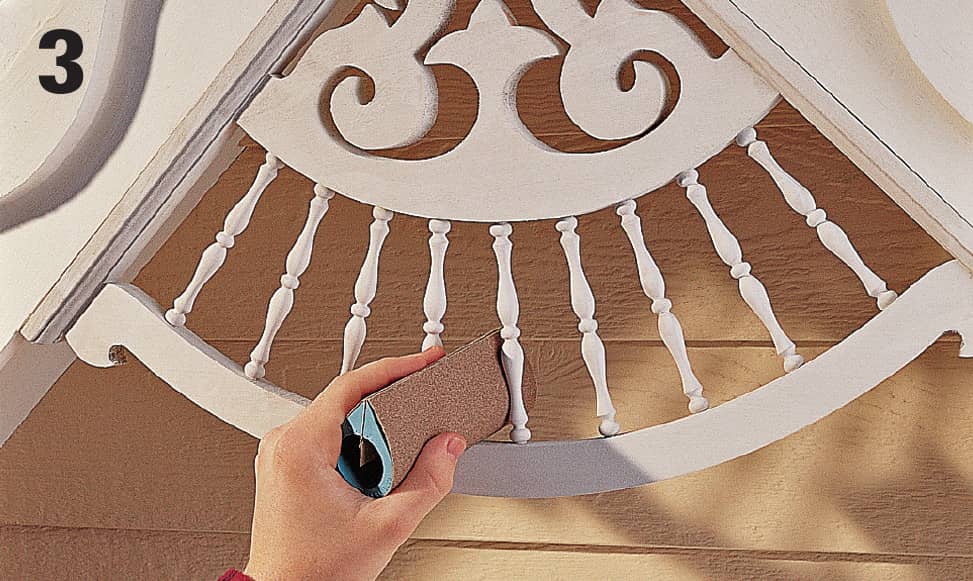
Smooth out rough paint with a finishing sander and 80-grit sandpaper. Use sanding blocks and 80- to 120-grit sandpaper to sand hard-to-reach areas of trim. Tip: You can make sanding blocks from dowels, wood scraps, or garden hoses.
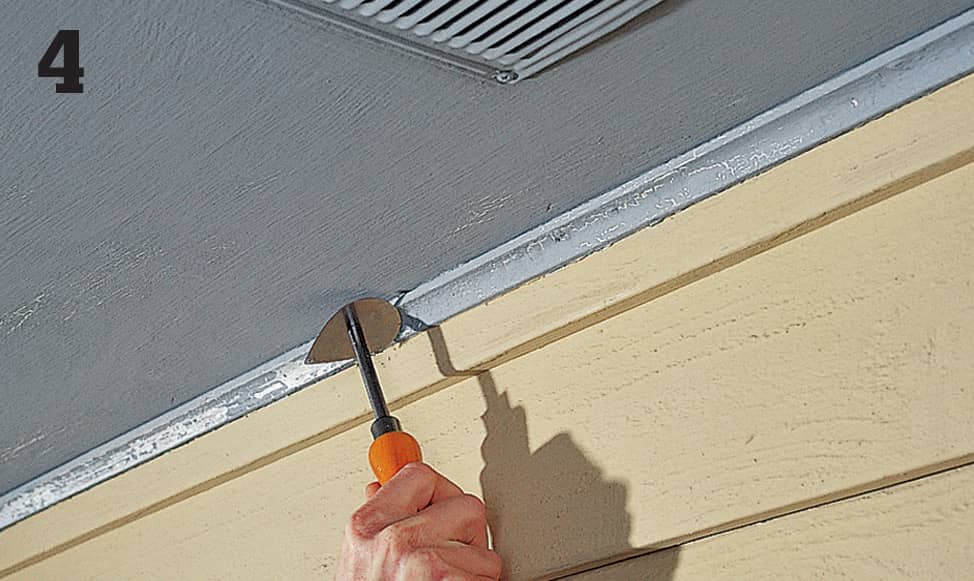
Use detail scrapers to remove loose paint in hard-to-reach areas. Some of these scrapers have interchangeable heads that match common trim profiles.
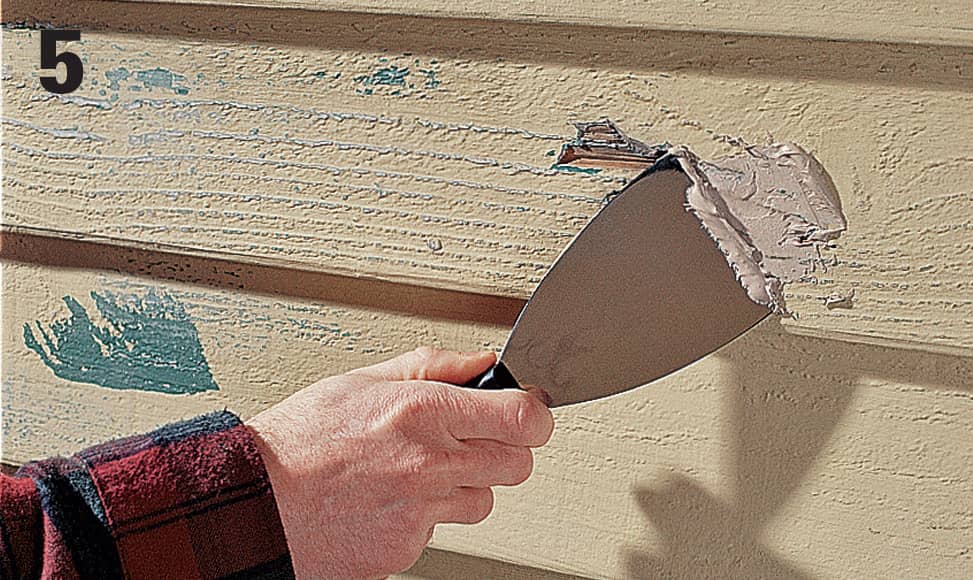
Inspect all surfaces for cracks, rot, and other damage. Mark affected areas with colored push pins or tape. Fill the holes and cracks with epoxy wood filler.
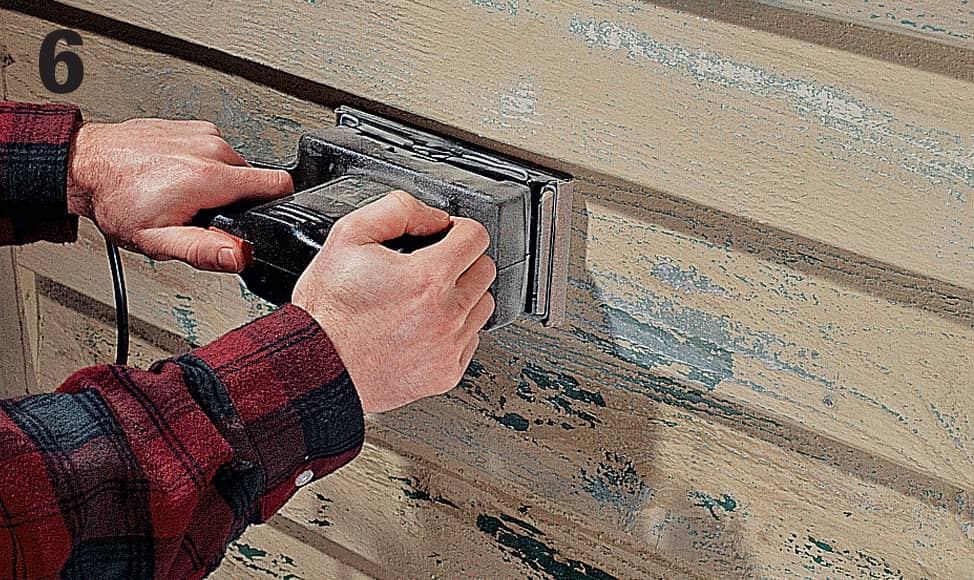
Use a finishing sander with 120-grit sandpaper to sand down repaired areas, ridges, and hard edges left from the scraping process, creating a smooth surface.
How to Prepare Trim Surfaces for Paint
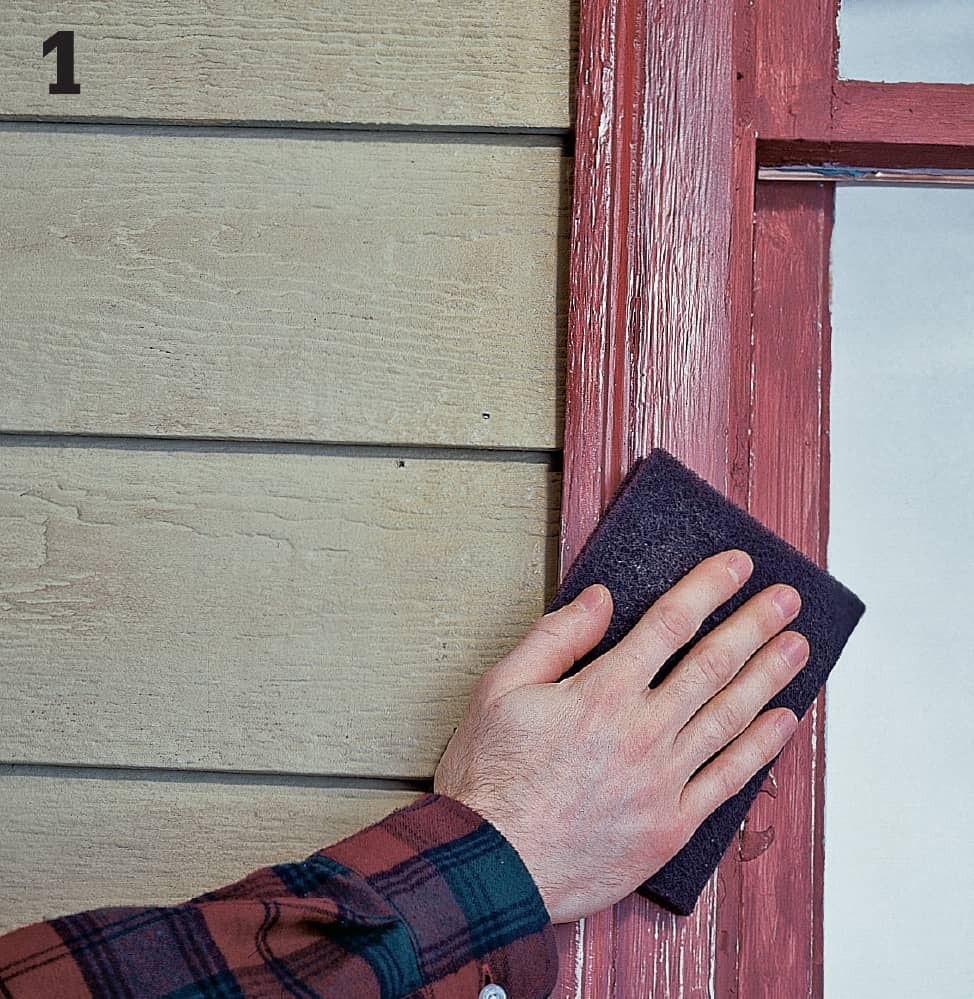
Scuff-sand glossy surfaces on doors, window casings, and all surfaces painted with enamel paint. Use a coarse abrasive pad or 150-grit sandpaper.
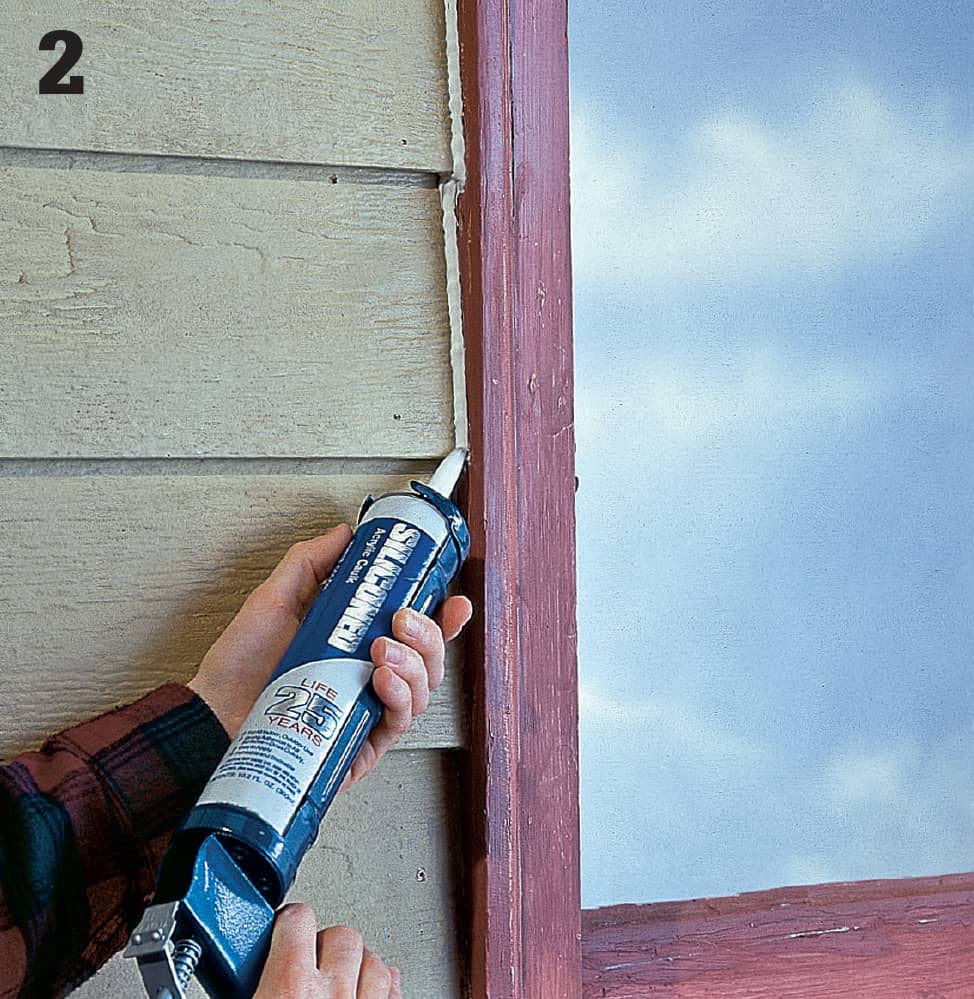
Fill cracks in siding and gaps around window and door trim with paintable siliconized acrylic caulk.
How to Remove Clear Finishes
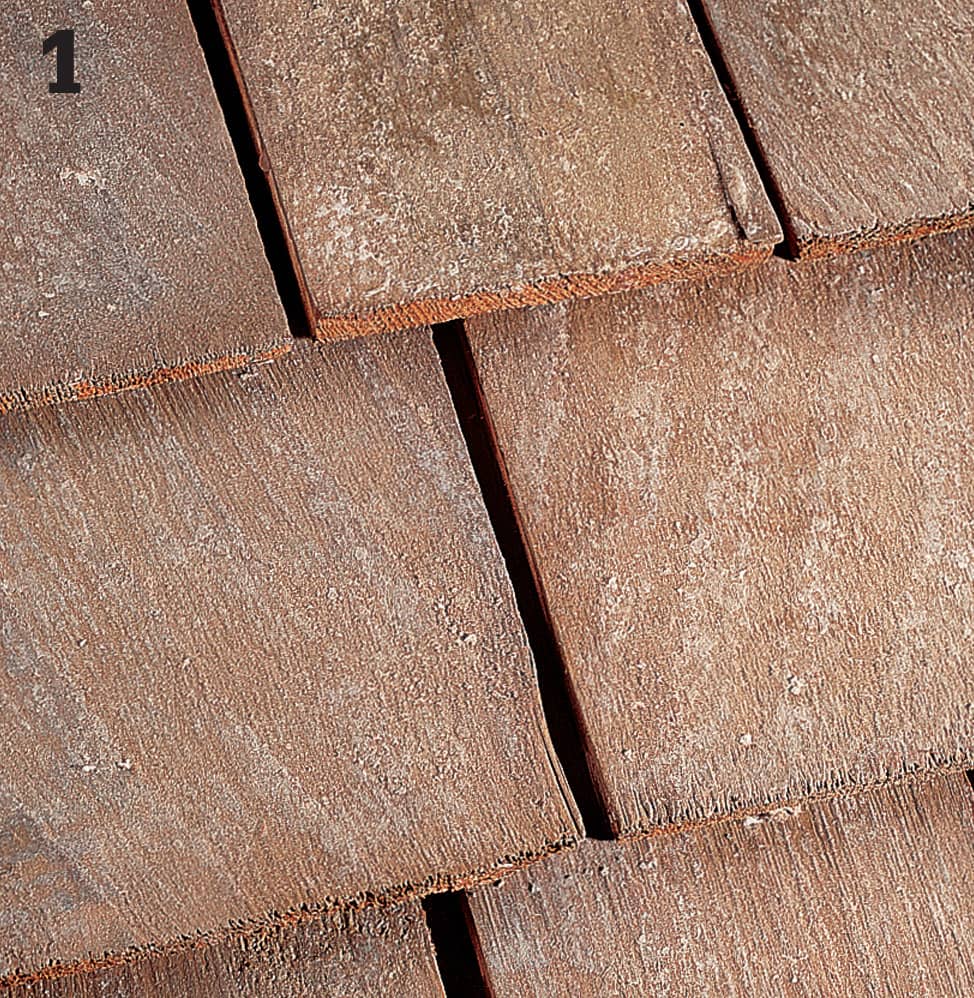
Pressure-wash stained or unpainted surfaces that have been treated with a wood preservative or protectant before recoating them with fresh sealant.
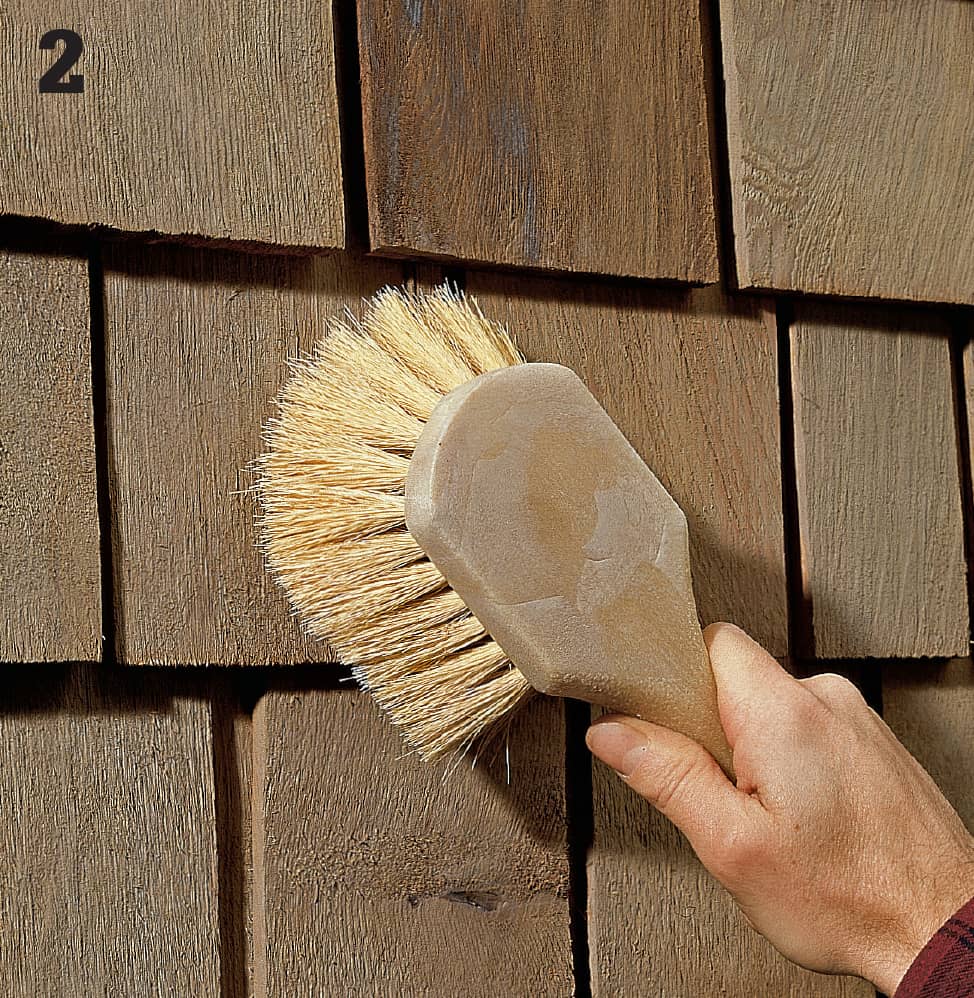
Use a stiff-bristled brush to dislodge any flakes of loosened surface coating that weren’t removed by pressure washing. Don’t use a wire brush on wood surfaces.
How to Prepare Metal & Masonry for Paint
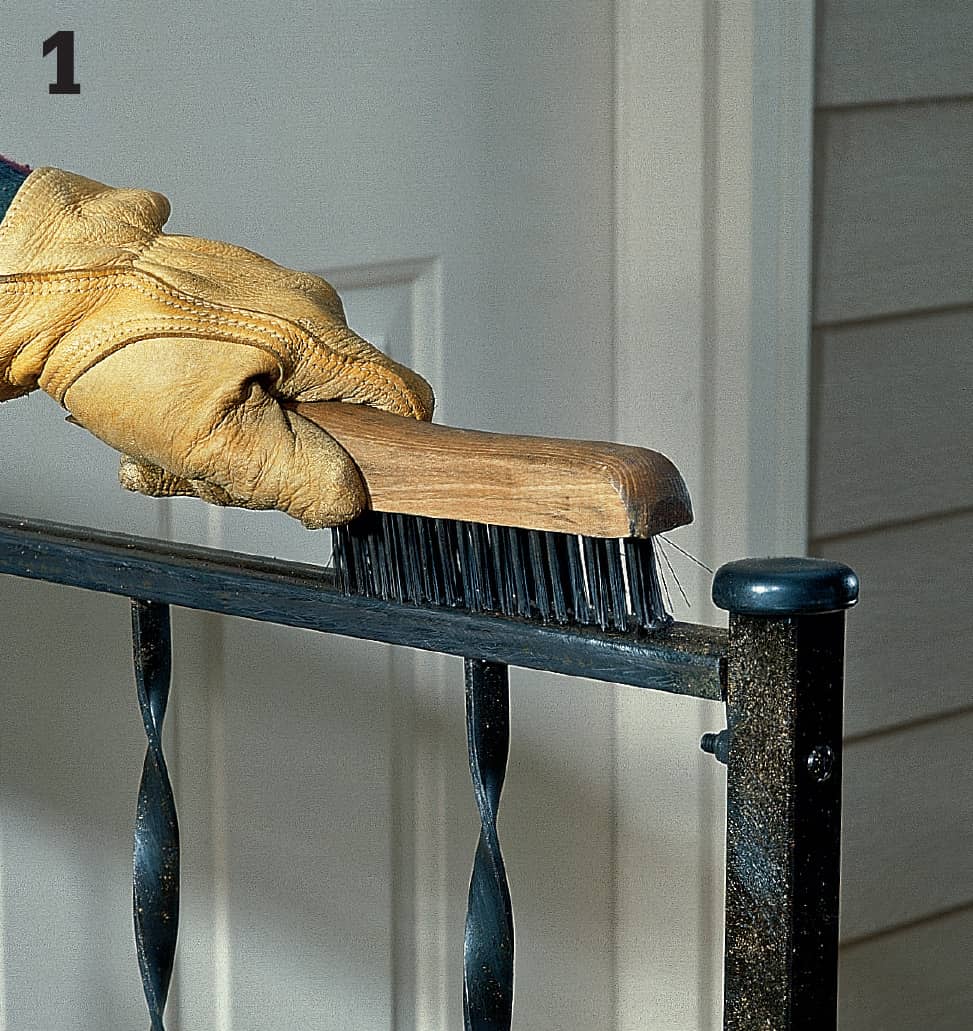
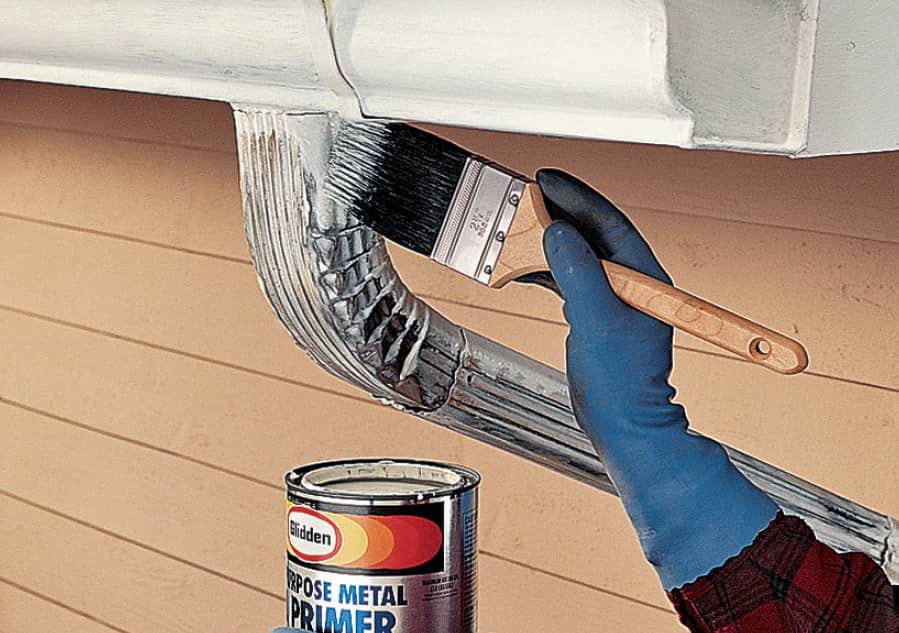
Remove rust and loose paint from metal hardware, such as railings and ornate trim, using a wire brush. Cover the surface with metal primer immediately after brushing to prevent the formation of new rust.
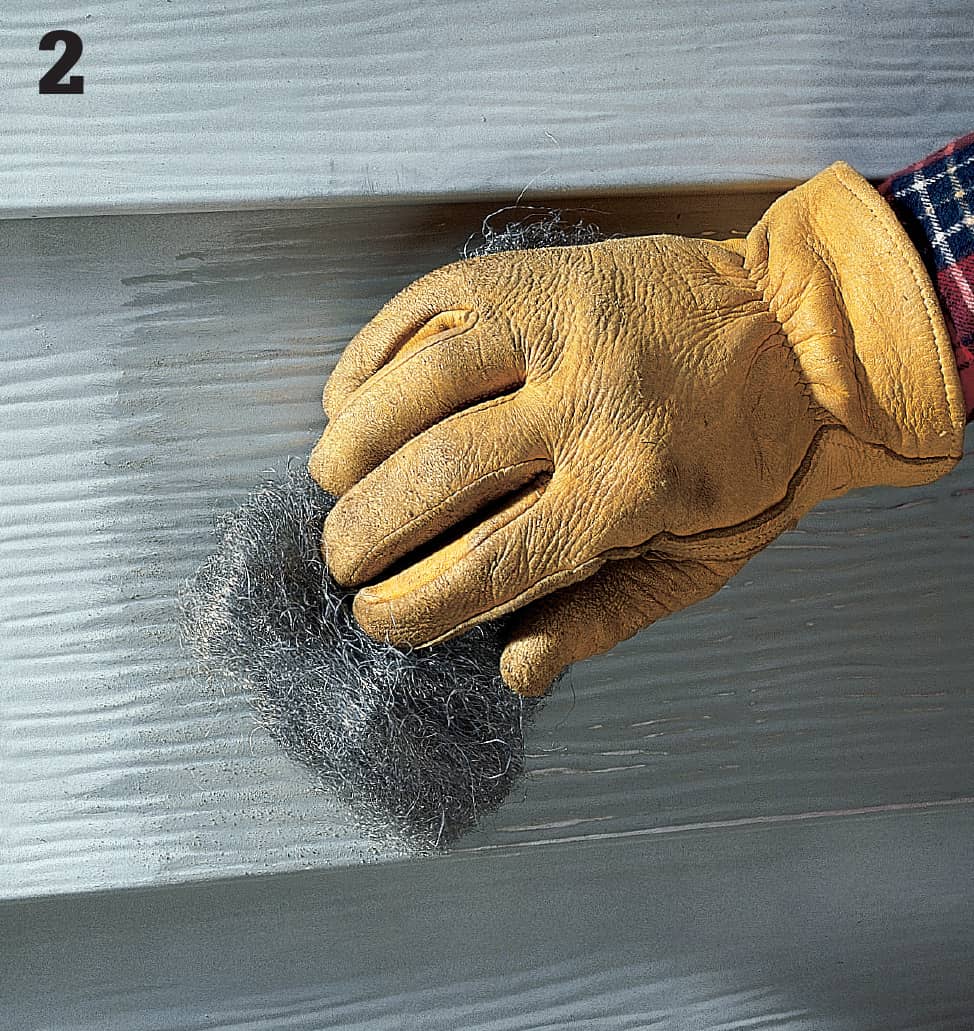
Scuff-sand metal siding and trim with medium-coarse steel wool or a coarse abrasive pad. Wash the surface and let dry before priming and painting.
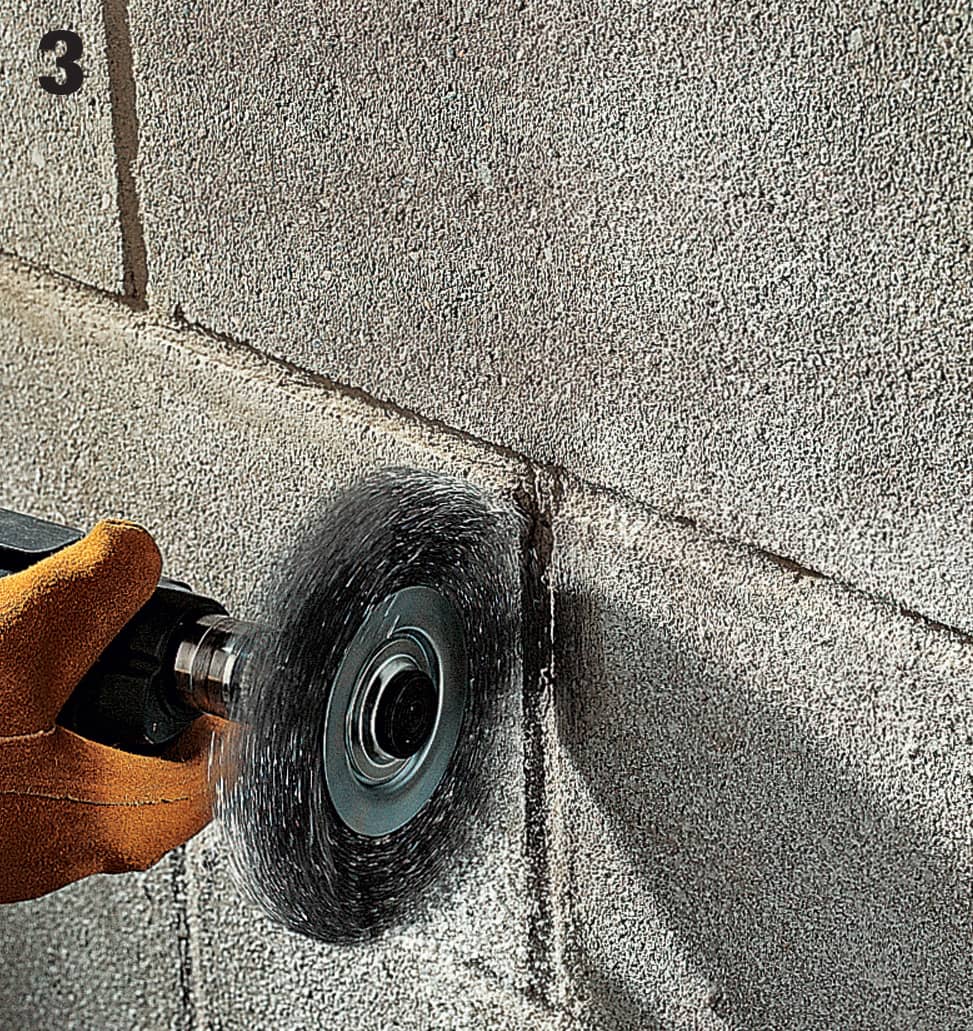
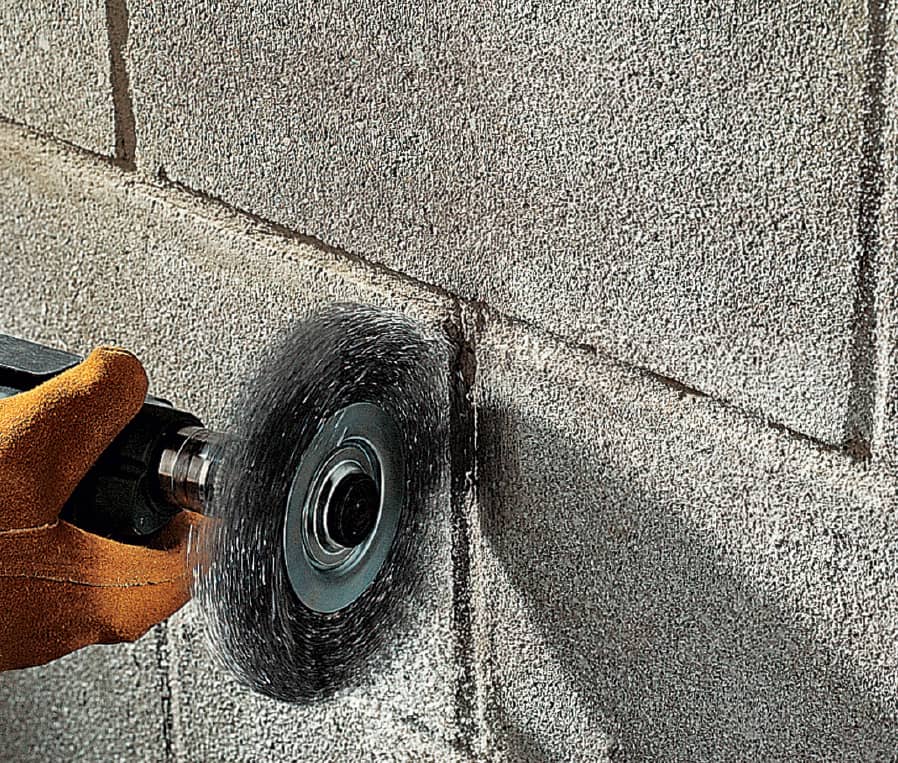
Remove loose mortar, mineral deposits, or paint from mortar lines in masonry surfaces with a drill and wire-wheel attachment. Clean broad, flat masonry surfaces with a wire brush. Correct any minor damage before repainting.
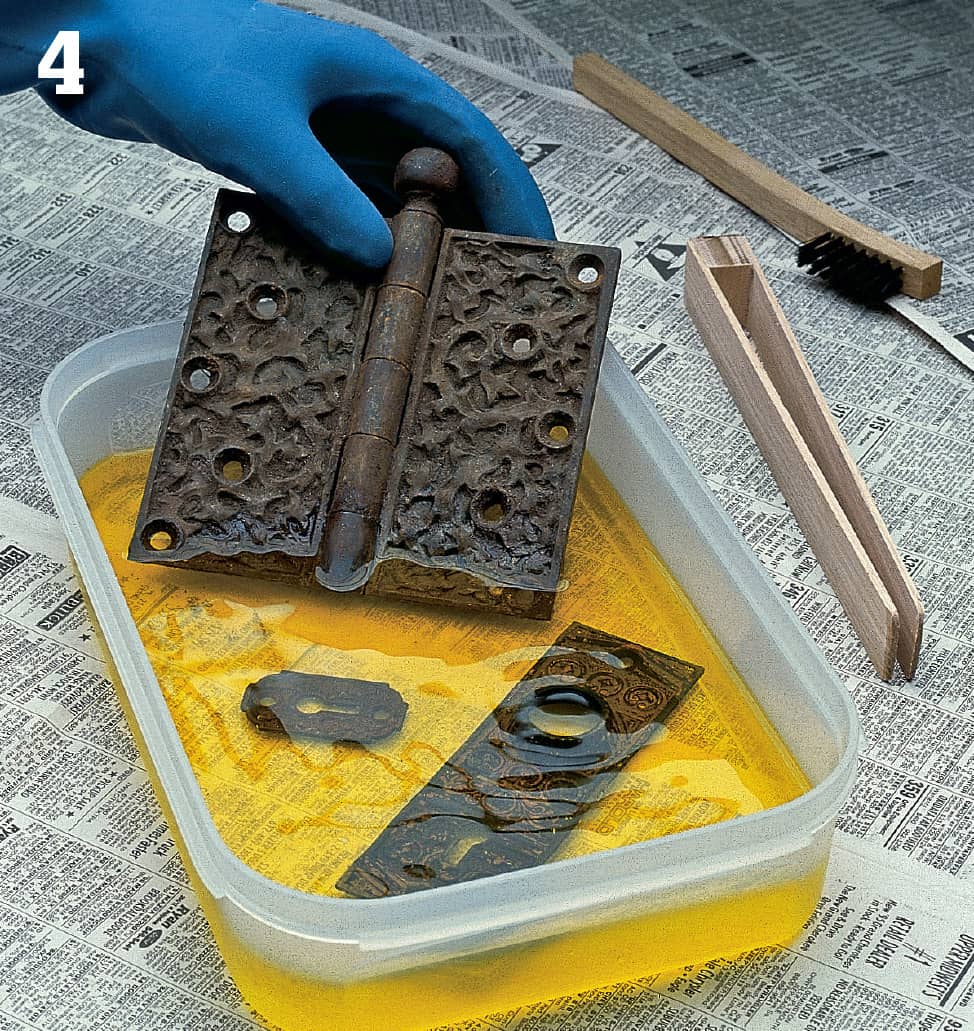
Dissolve rust on metal hardware with diluted muriatic acid solution. When working with muriatic acid, it’s important to wear safety equipment, work in a well-ventilated area, and follow all manufacturer’s directions and precautions.
 Painting Your House
Schedule priming and painting tasks so that you can paint within two weeks of priming surfaces. If more than two weeks pass, wash the surface with soap and water before applying the next coat.
Check the weather forecast and keep an eye on the sky while you work. Damp weather or rain within two hours of application will ruin a paint job. Don’t paint when the temperature is below 50° or above 90°F. Avoid painting on windy days—it’s dangerous to be on a ladder in high winds, and wind blows dirt onto the fresh paint.
Plan each day’s work so you can follow the shade. Prepare, prime, and paint one face of the house at a time, and follow a logical painting order. Work from the top of the house down to the foundation, covering an entire section before you move the ladder or scaffolding.
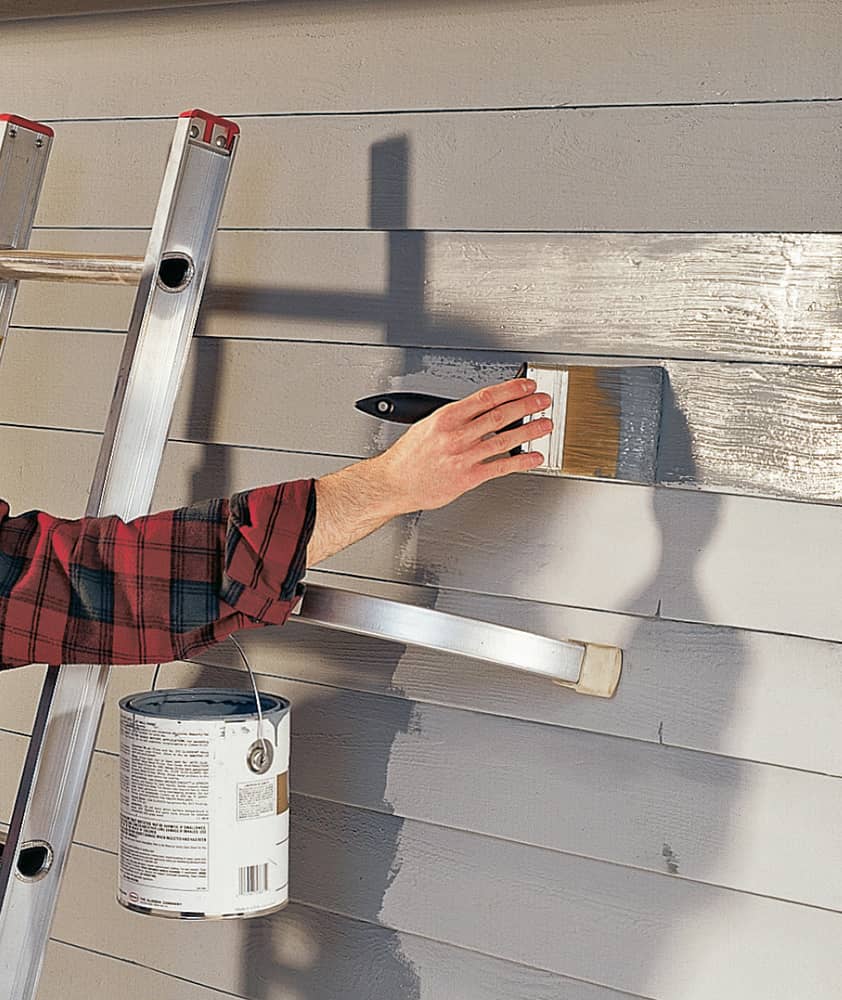
Paint in a logical order, starting from the top and working your way down. Cover as much surface as you can reach comfortably without moving your ladder or scaffolding. After the paint or primer dries, touch up any unpainted areas that were covered by the ladder or ladder stabilizer.
How to Use a Paintbrush
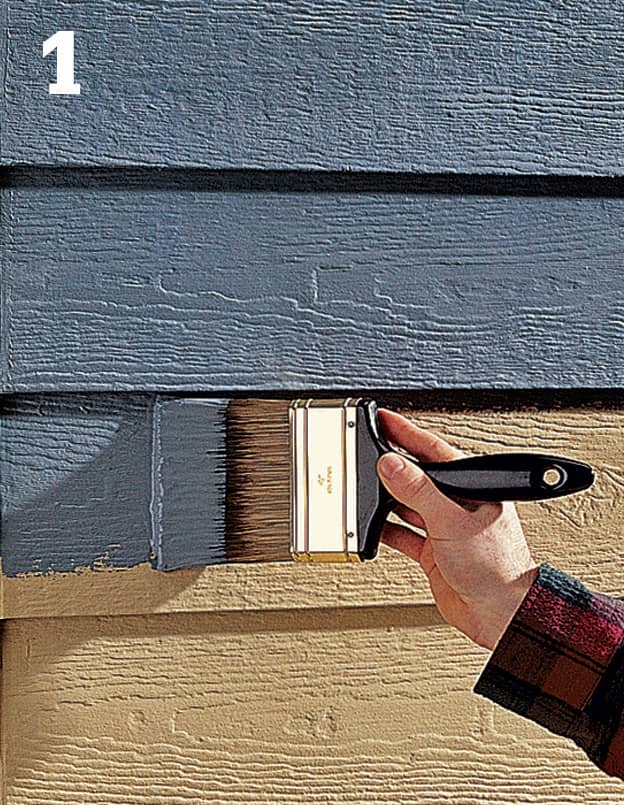
Load the brush with a full load of paint. Starting at one end of the surface, make a long, smooth stroke until the paint begins to feather out. Tip: Paint color can vary from one can to the next. To avoid problems, pour all of your paint into one large container and mix it thoroughly. Pour the mixed paint back into the individual cans and seal them carefully. Stir each can before use.
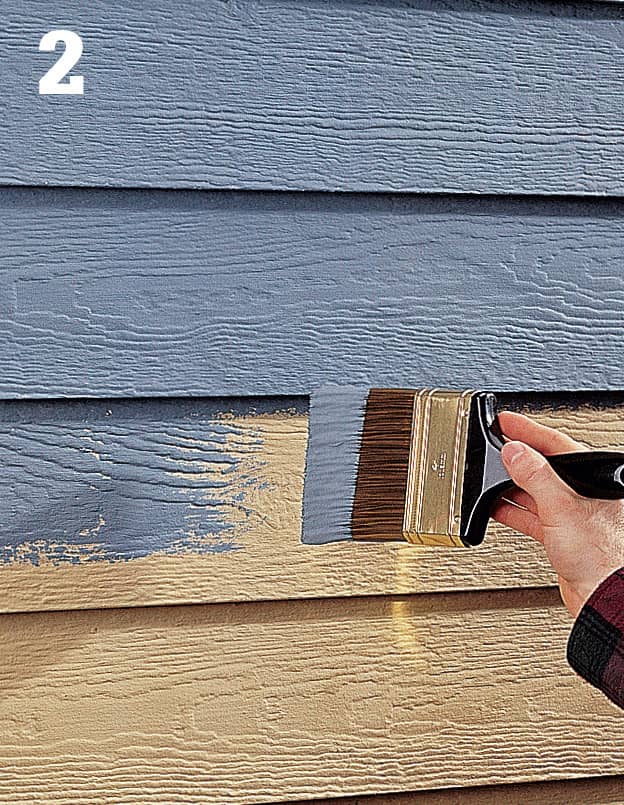
At the end of the stroke, lift the brush without leaving a definite ending point. If the paint appears uneven or contains heavy brush marks, smooth it out without overbrushing.
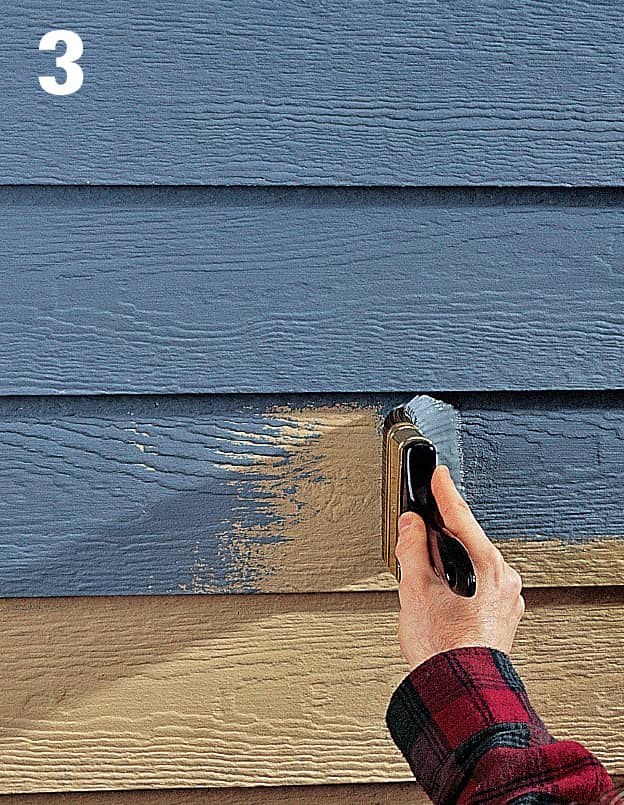
Reload the brush and make a stroke from the opposite direction, painting over the feathered end of the first stroke to create a smooth, even surface. If the junction of the two strokes is visible, rebrush with a light coat of paint. Feather out the starting point of the second stroke.
How to Paint Fascia, Soffits & Trim
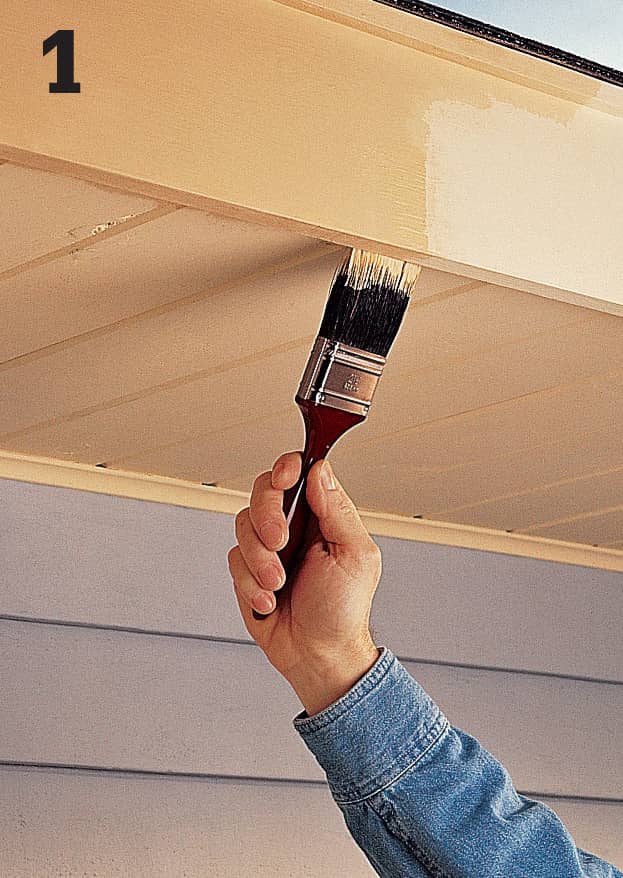
Prime all surfaces to be painted, and allow ample drying time. Paint the face of the fascia first, then cut in paint at the bottom edges of the soffit panels. Tip: Fascia and soffits are usually painted the same color as the trim.
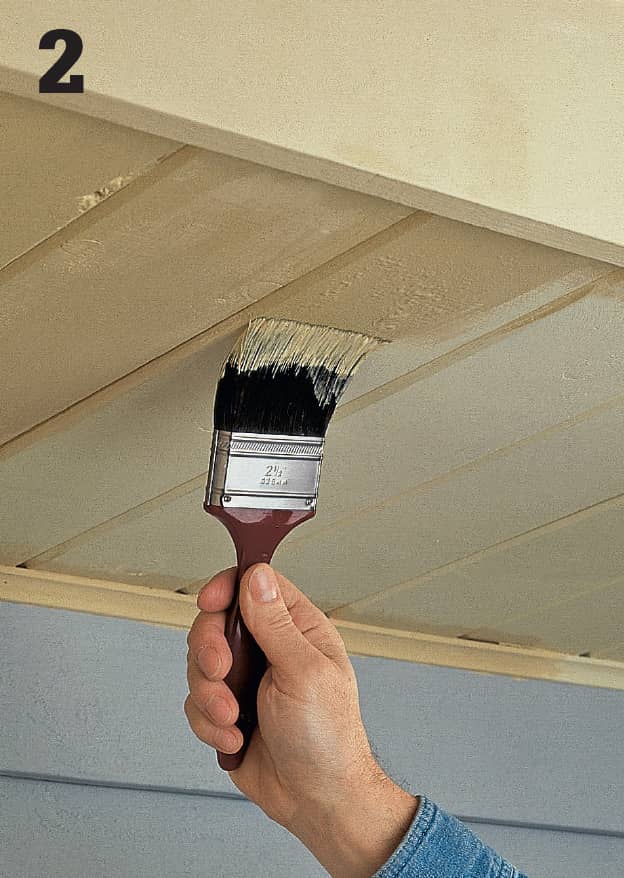
Paint the soffit panels and trim with a 4" brush. Start by cutting in around the edges of the panels, using the narrow edge of the brush, then feather in the broad surfaces of the soffit panels with full loads of paint. Be sure to get good coverage in the grooves.
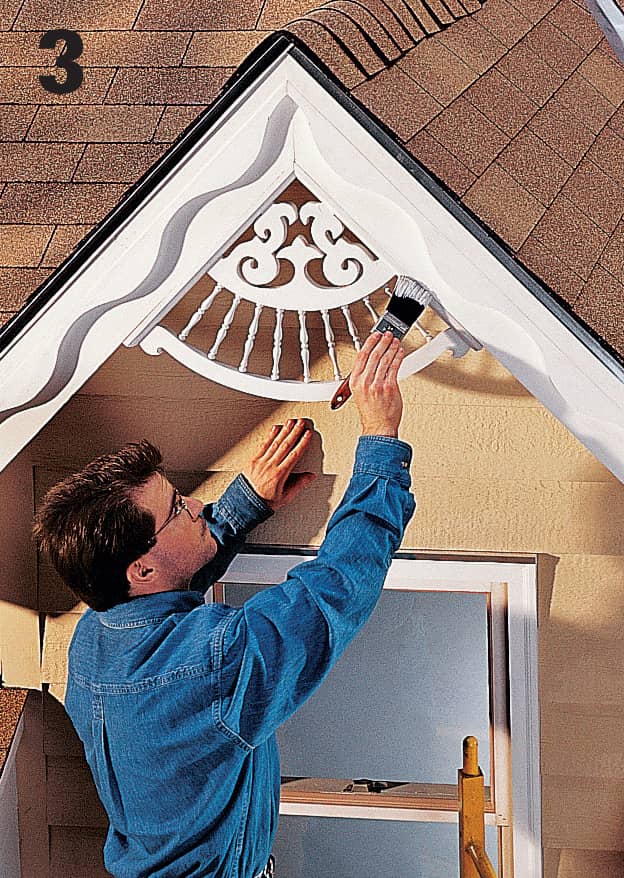
Paint any decorative trim near the top of the house at the same time you paint the soffits and fascia. Use a 2 1/2" or 3" paintbrush for broader surfaces, and a sash brush for more intricate trim areas.
How to Paint Siding
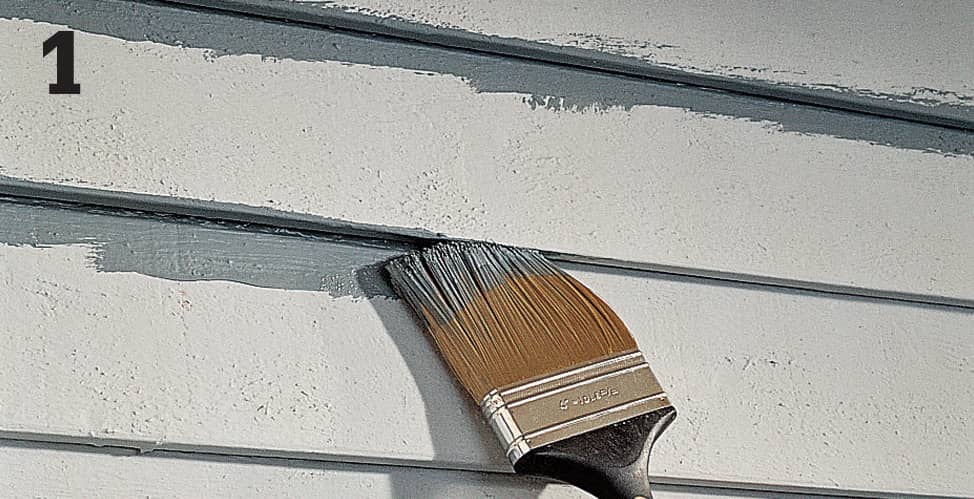
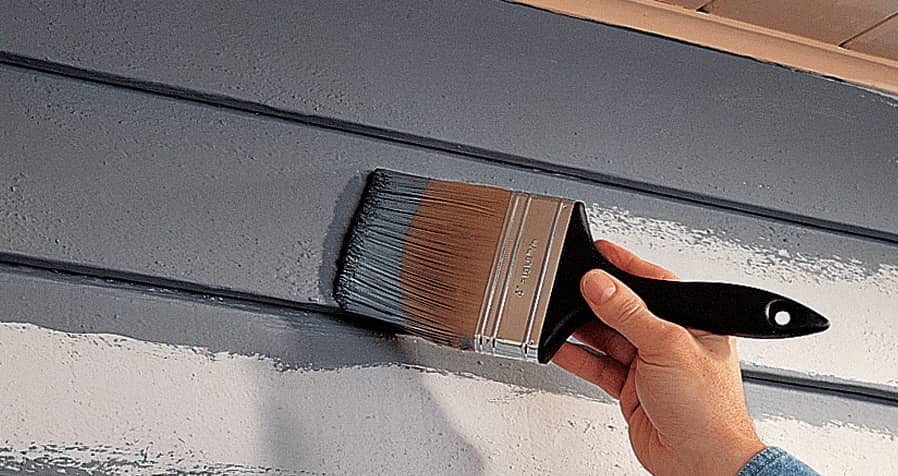
Paint the bottom edges of lap siding by holding the paintbrush flat against the wall. Paint the bottom edges of several siding pieces before returning to paint the faces of the same boards.
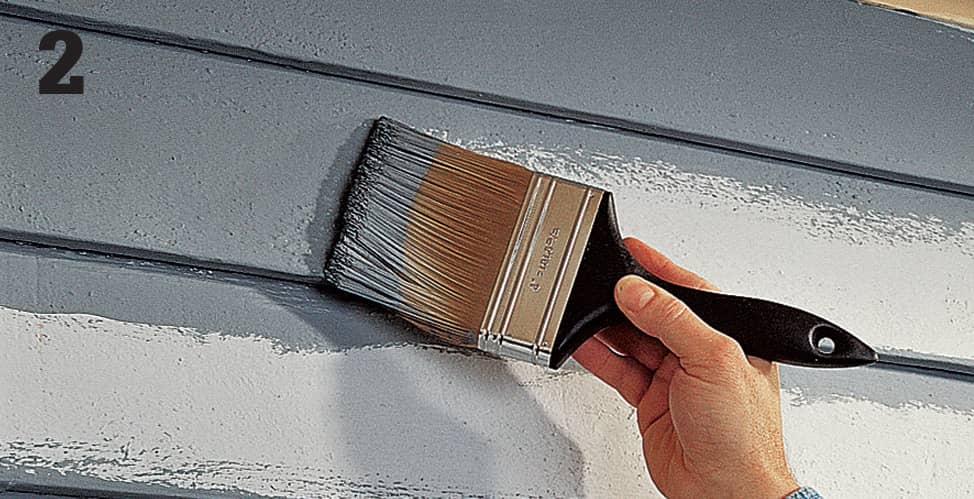
Paint the broad faces of the siding boards with a 4" brush, using the painting technique shown on page 204. Working down from the top of the house, paint as much surface as you can reach without leaning beyond the sides of the ladder.
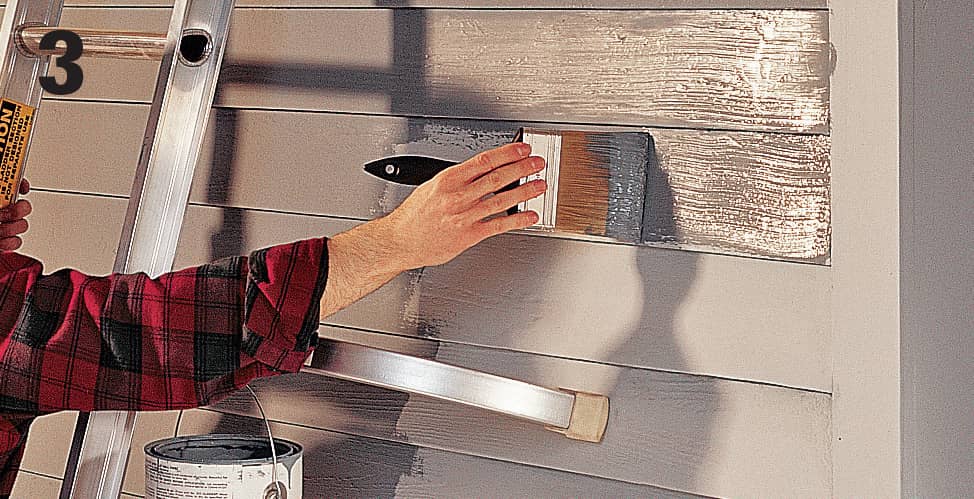
Paint the siding all the way down to the foundation, working from top to bottom. Shift the ladder or scaffolding, then paint the next section. Tip: Paint up to the edges of end caps and window or door trim that will be painted later. If you’re not planning to paint the trim, mask it off or use a paint shield.
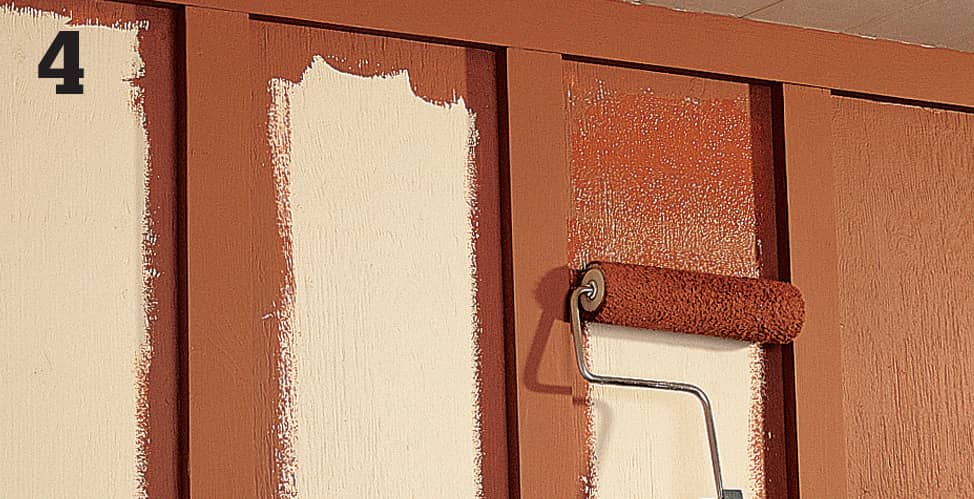
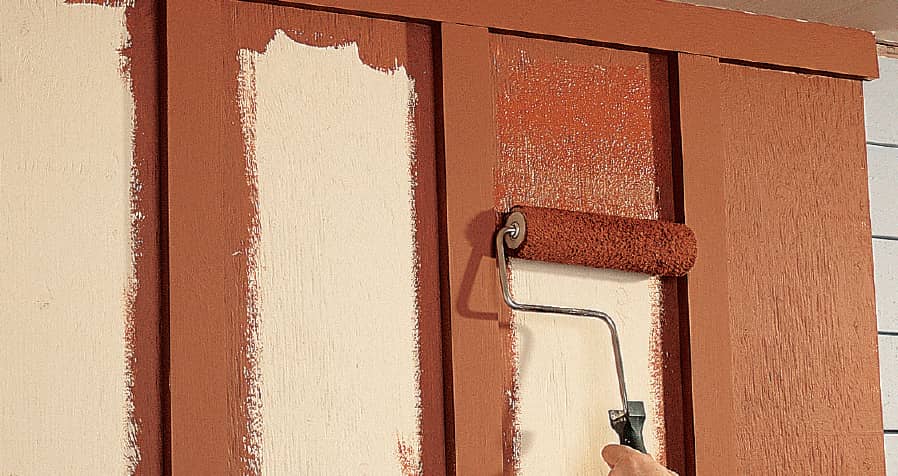
On board and batten or vertical panel siding, paint the edges of the battens, or top boards, first. Paint the faces of the battens before the sides dry, then use a roller with a 5/8"-nap sleeve to paint the large, broad surfaces between the battens.
How to Paint Stucco Walls
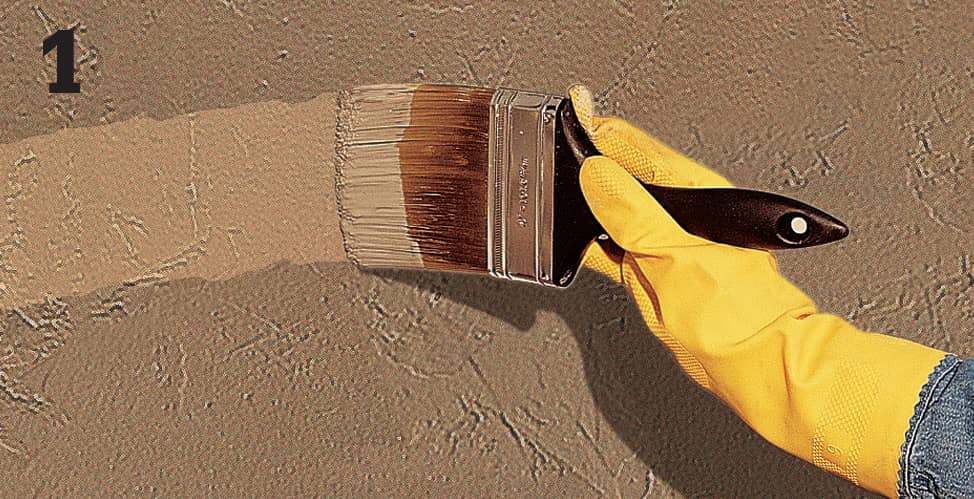
Using a large paintbrush, paint the foundation with anti-chalking masonry primer, and let it dry. Using concrete paint and a 4" brush, cut in the areas around basement windows and doors.
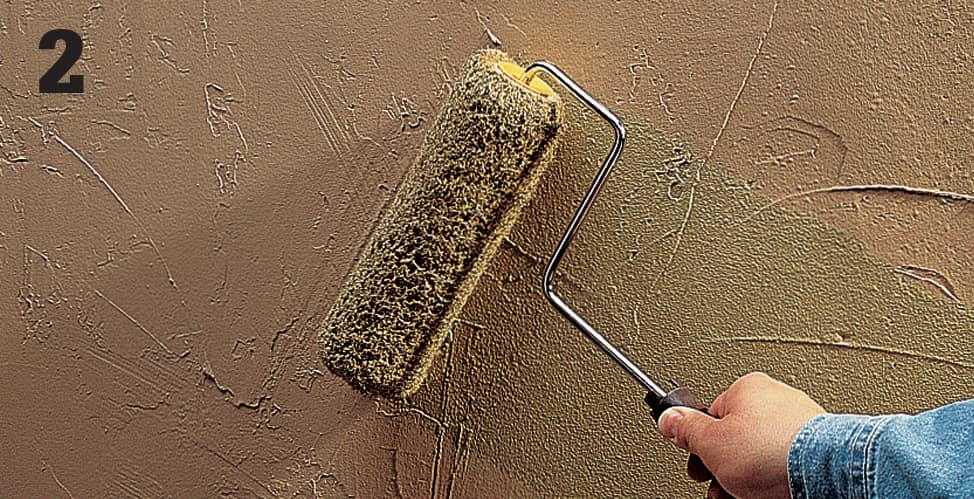
Apply concrete paint to board surfaces with a paint roller and a 5/8"-nap sleeve. Use a 3" trim roller or a 3" paintbrush for trim.
How to Paint Doors, Windows & Trim
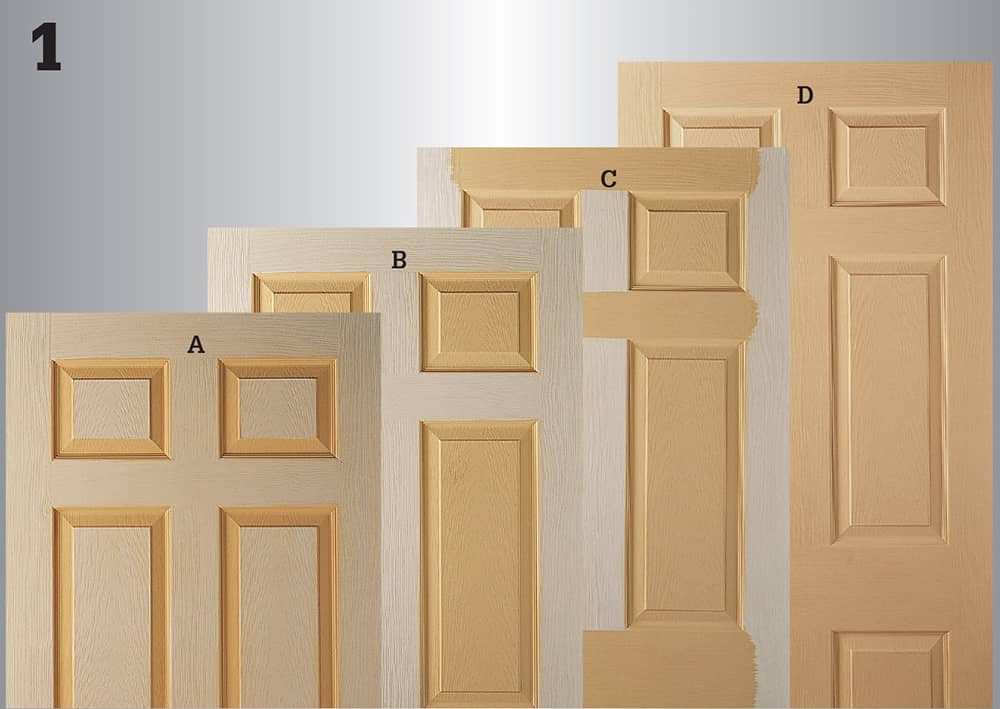
Using a sash brush, paint doors in this sequence: beveled edges of raised door panels (A), panel faces (B), horizontal rails (C), and vertical stiles (D).
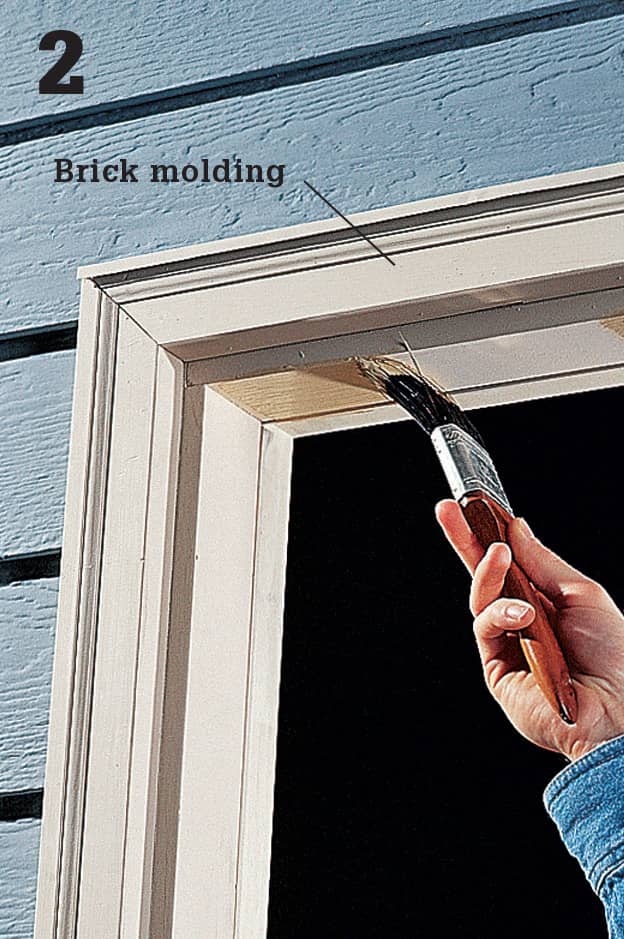
For trim, use a trim brush or sash brush and a moderate load of paint to paint the inside edges of door and window jambs, casings, and brick molding. Tip: Paint surfaces on the interior side of the door-stop to match the interior trim.
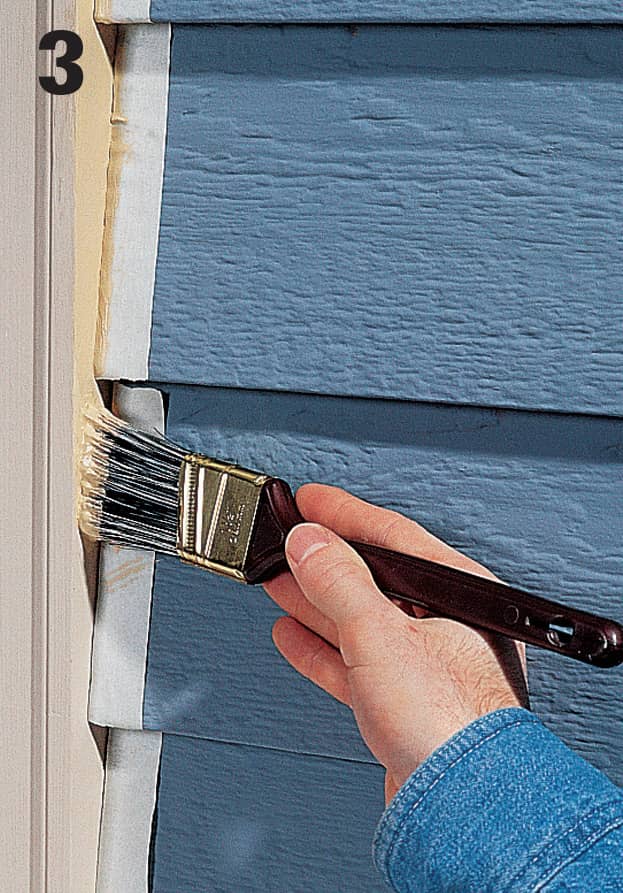
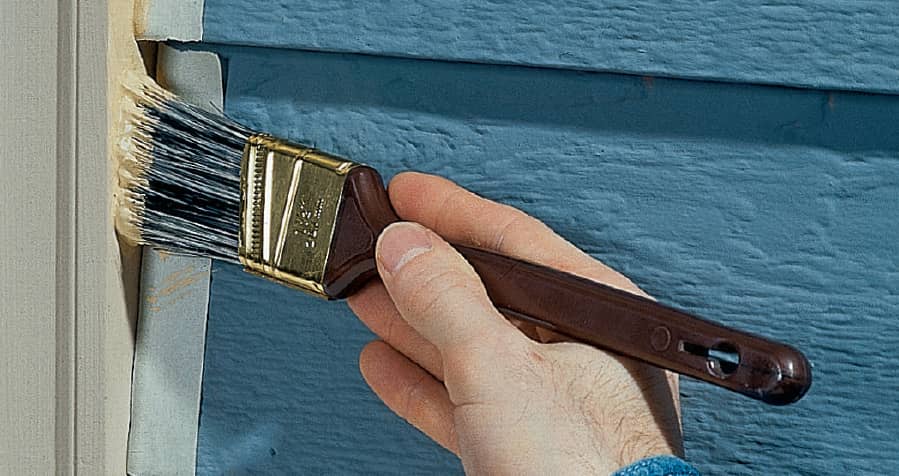
Mask off the siding—if freshly painted, make sure it’s completely dry first. Paint the outside edges of casings and brick molding. Work paint all the way into the corners created by the siding’s profile.
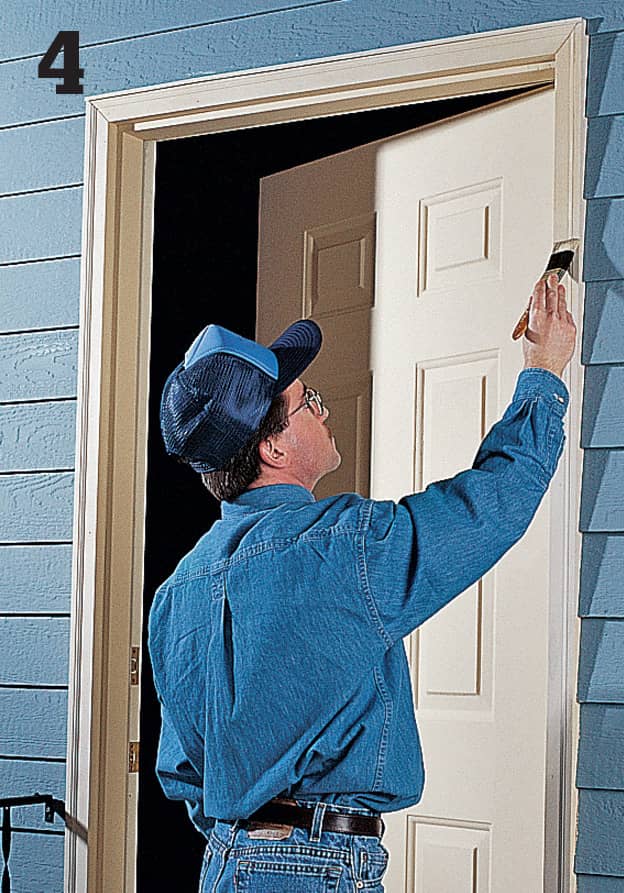
Paint the faces of door jambs, casings, and brick molding, feathering fresh paint around the previously painted edges.
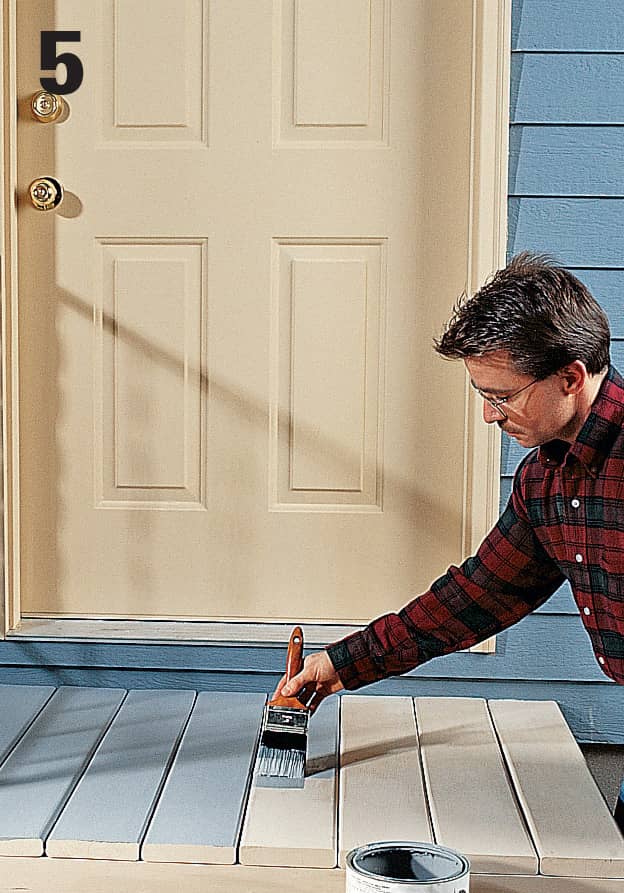
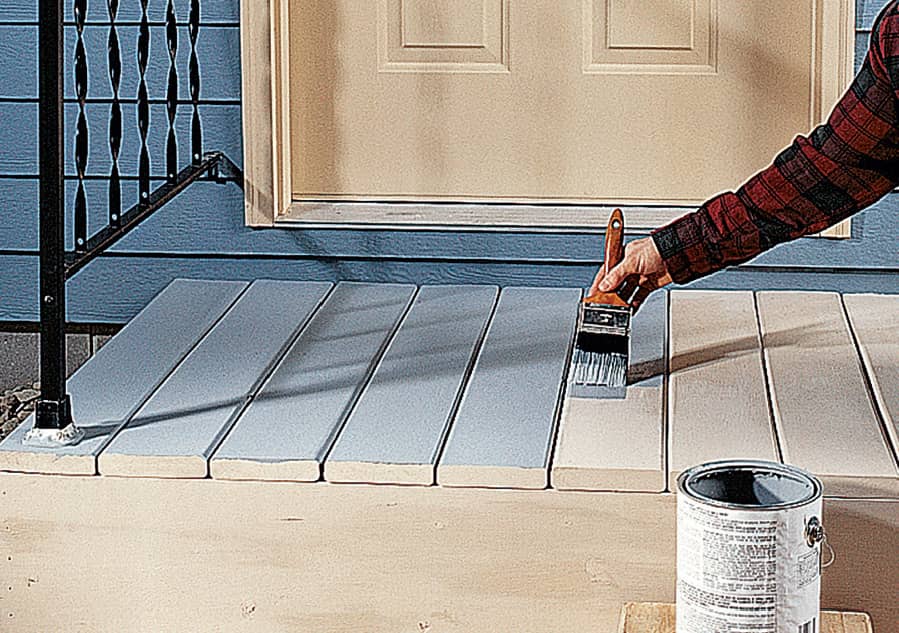
Paint wood door thresholds and porch floors with specially formulated enamel floor paint.
 Using Paint-spraying Equipment
Spray equipment can make quick work of painting, but it still requires the same careful preparation work as traditional brush and roller methods. Part of that prep work involves using plastic to completely cover doors, windows, and other areas that you don’t want painted, rather than just taping them off.
Spray equipment can be purchased or rented at hardware and home improvement stores. There are several types and sizes of spray equipment, including high-volume low-pressure (HVLP), airless, air-assisted airless, and electrostatic enhanced. They all work the same way—by atomizing paint and directing it to a work surface in a spray or fan pattern. For our project, we used an HVLP sprayer, which we recommend because it produces less overspray and more efficient paint application than other sprayers.
Be sure to read and follow all safety precautions for the spray equipment. Since the paint is under a lot of pressure, it can not only tear the skin, but it can inject toxins into the blood stream if used incorrectly. Wear the proper safety protection, such as safety glasses and a respirator, when spray painting the house.
As with other paint applications, pay close attention to the weather. Don’t spray if rain is likely, and don’t spray on windy days, since the wind can carry the paint particles away from the siding.
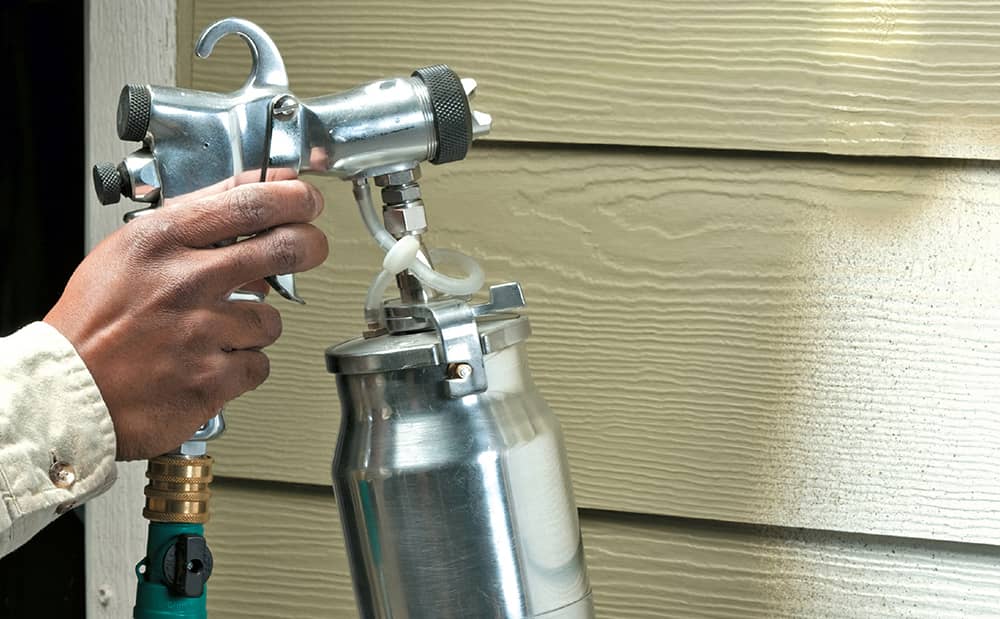
Paint sprayers allow you to cover large areas of siding and trim in a short amount of time. They also make it easier to paint areas that are hard to reach with a brush or roller.
How to Paint Using a Paint Sprayer
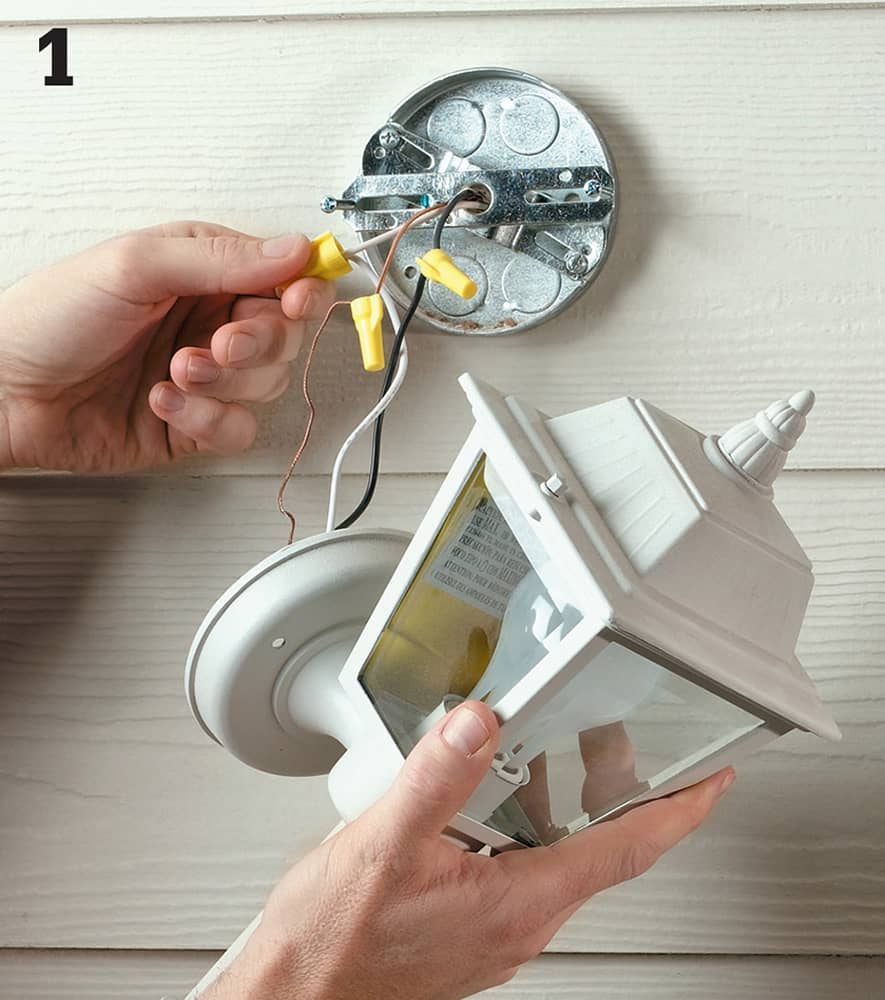
Remove outside light fixtures, window and door screens, and other detachable items that you don’t want painted.
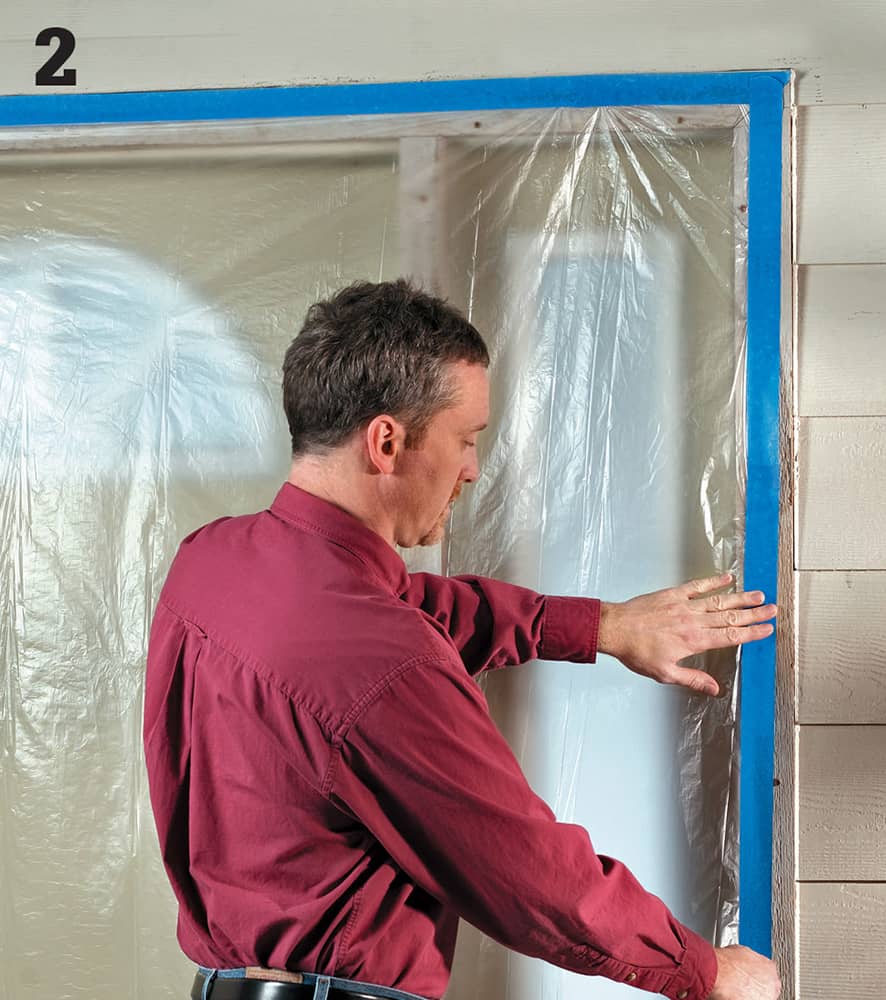
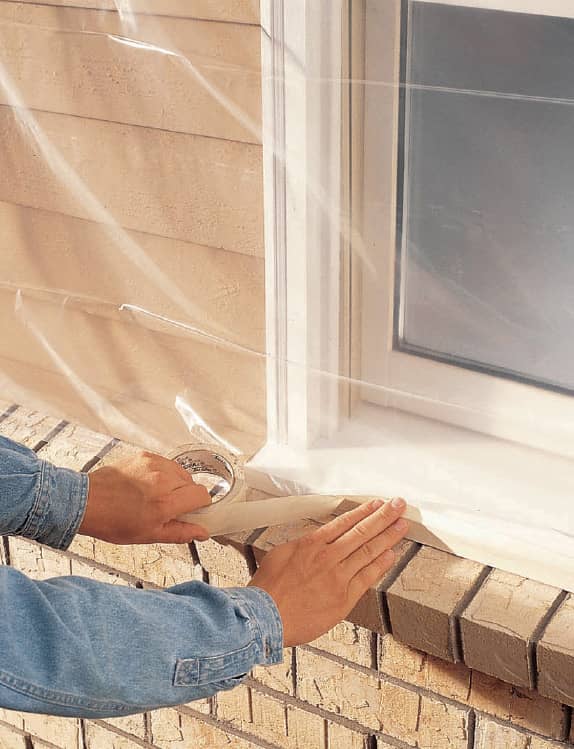
Cover doors, windows, and any other areas you don’t want painted, using plastic and masking tape.
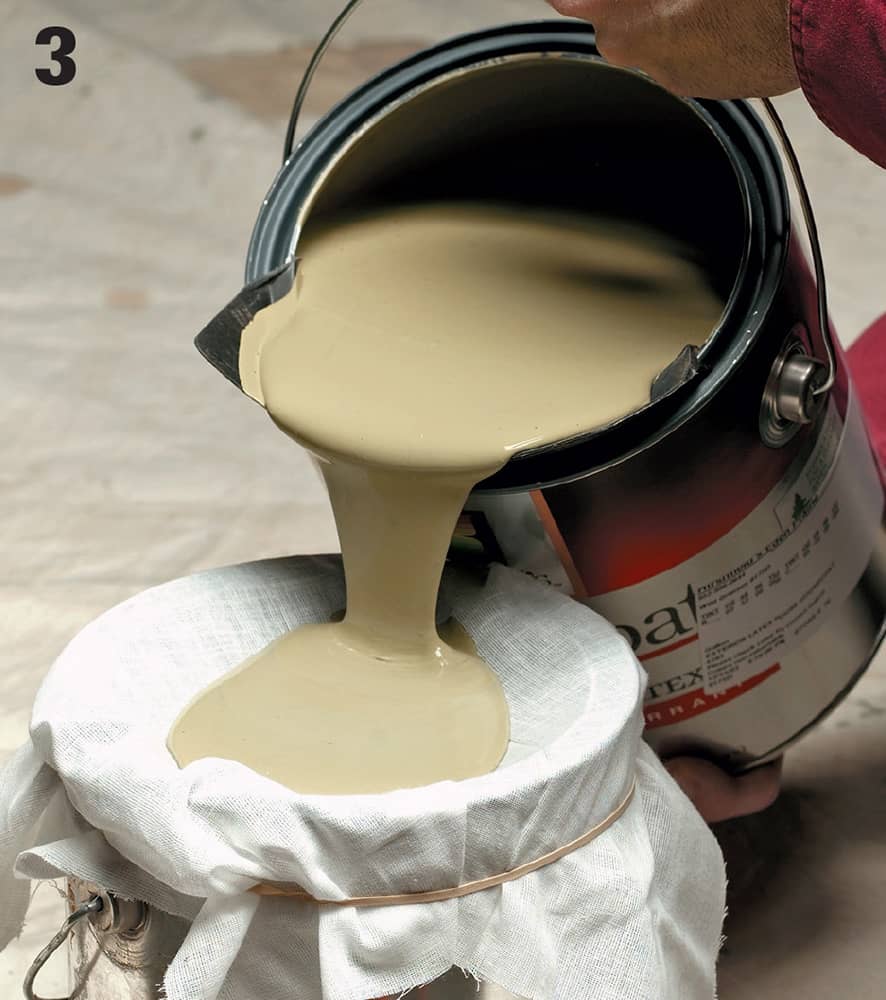
Strain the paint through cheesecloth to remove particles and debris. Mix the paint together in a 5-gallon bucket. Fill the sprayer container.
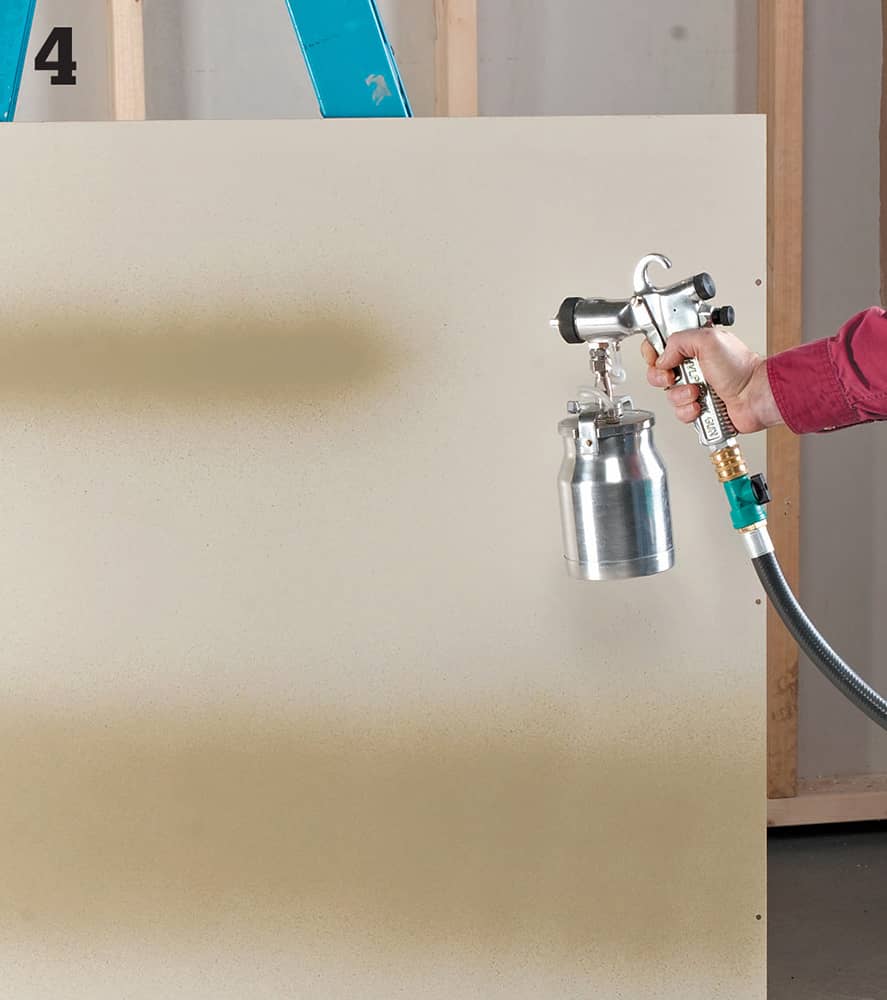
Spray a test pattern of paint on a scrap piece of cardboard. Adjust the pressure until you reach an even “fan” without any thick lines along the edge of the spray pattern.
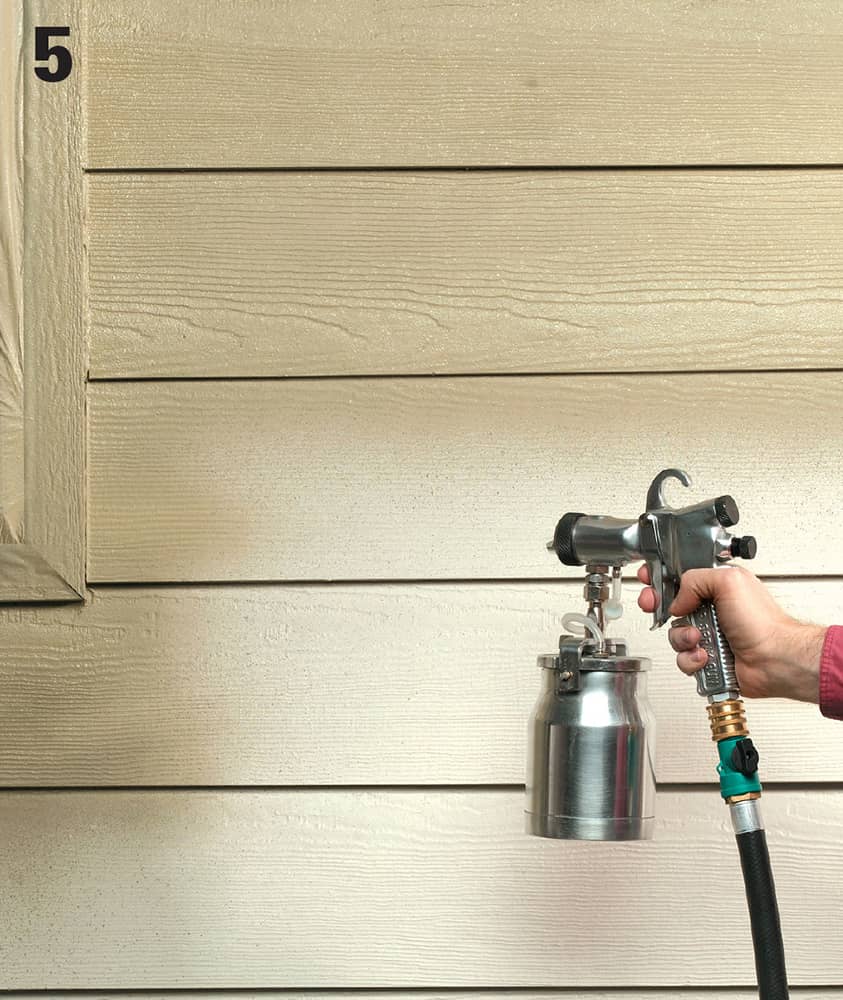
Cut-in around doors and windows with the paint. Spray the paint along each side of the doors and windows, applying the paint evenly.
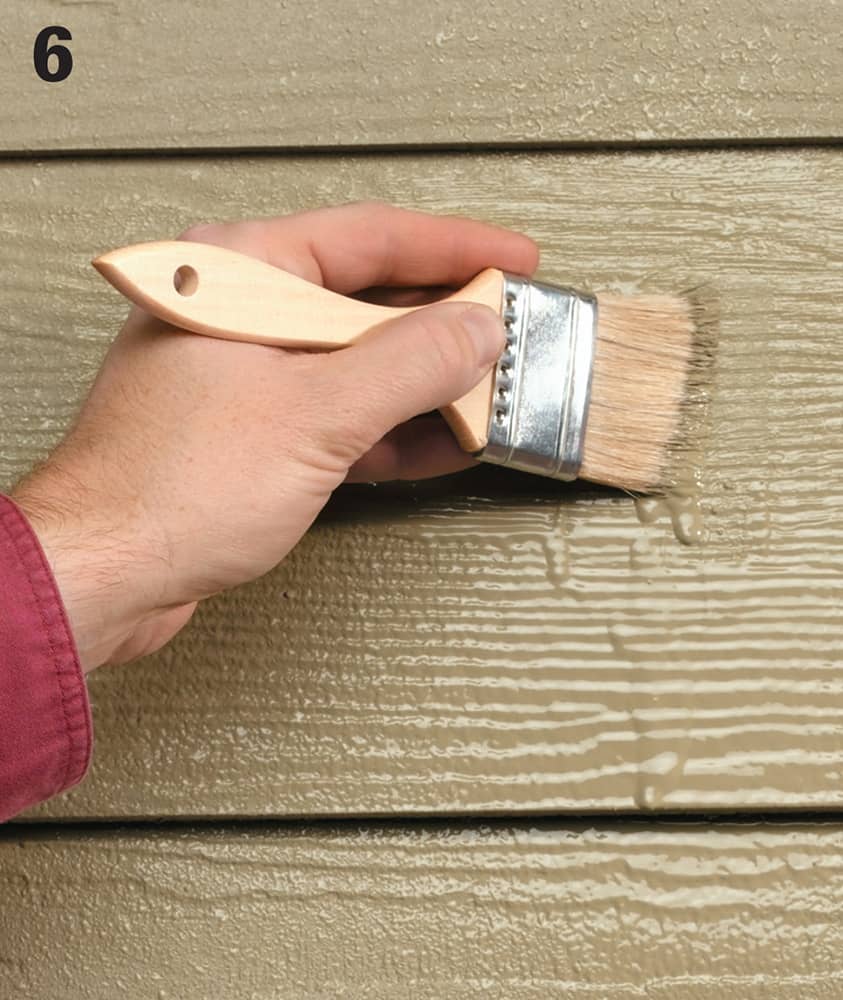
If you happen to spray an excessive amount of paint in an area and it starts to run, stop the sprayer. Use a paintbrush to spread out the paint and eliminate the runs.
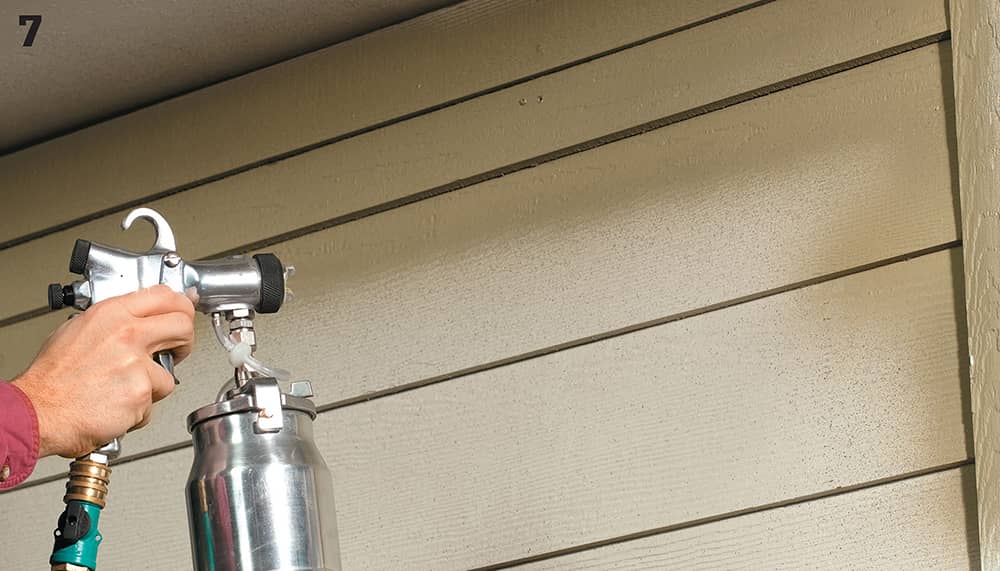
Hold the spray gun perpendicular to the house, approximately 12" from the wall. Start painting near the top of the wall, close to a corner. Move your entire arm, rather than just the wrist, in a steady, side-to-side motion. Do not wave your arm in an arc. Start your arm movement, then start the gun.
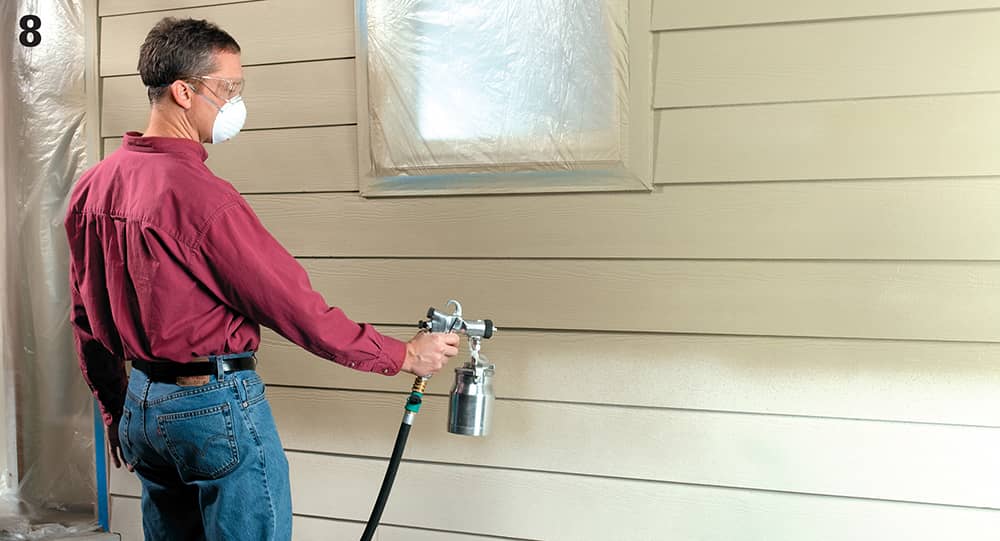
Spray the paint in an even motion, being careful not to tilt the gun. As you sweep your arm back and forth, overlap each coat of paint by 20 to 30 percent, working your way down the wall. When stopping, release the trigger before discontinuing your motion.
How to Paint Doors Using a Paint Sprayer
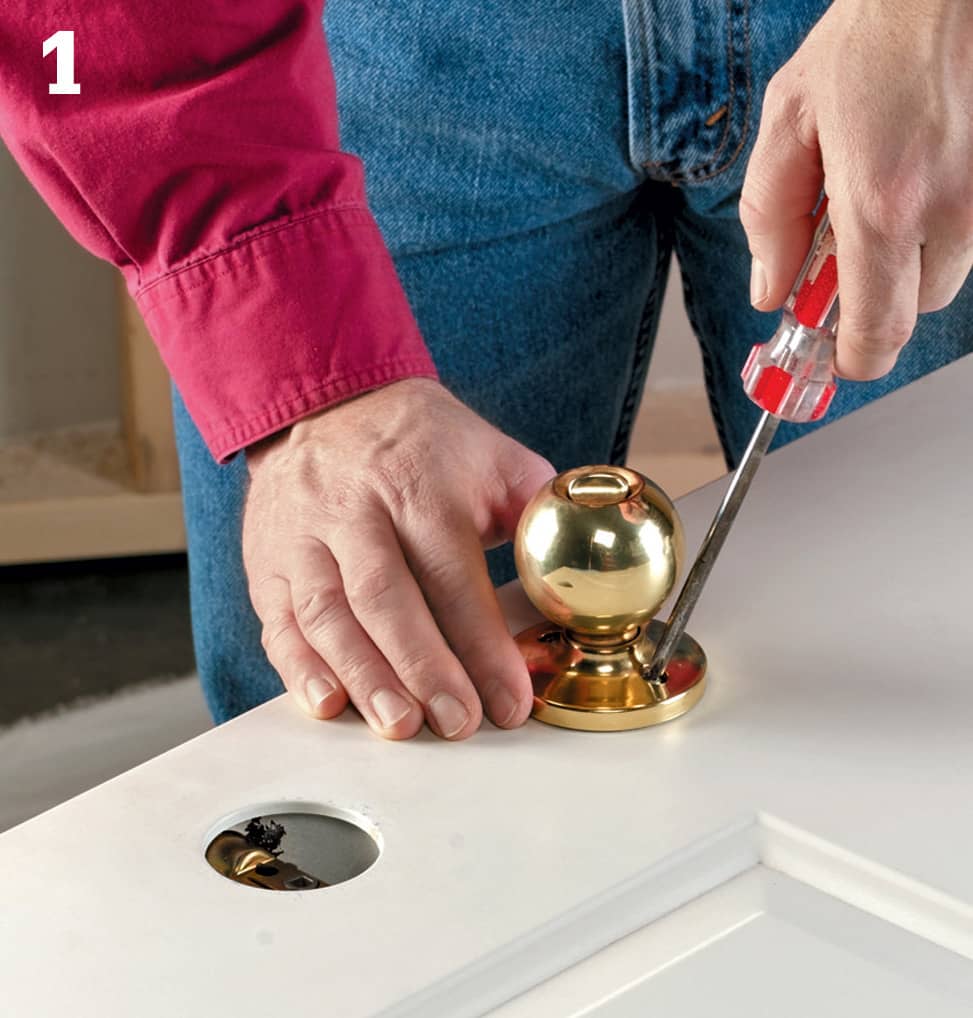
Remove the door by taking off the hinges. Remove all hardware from the door, such as handles and locks. If the door contains glass, you can either tape it off, or allow paint to get on the glass and then scrape it off with a razor after it’s dry.
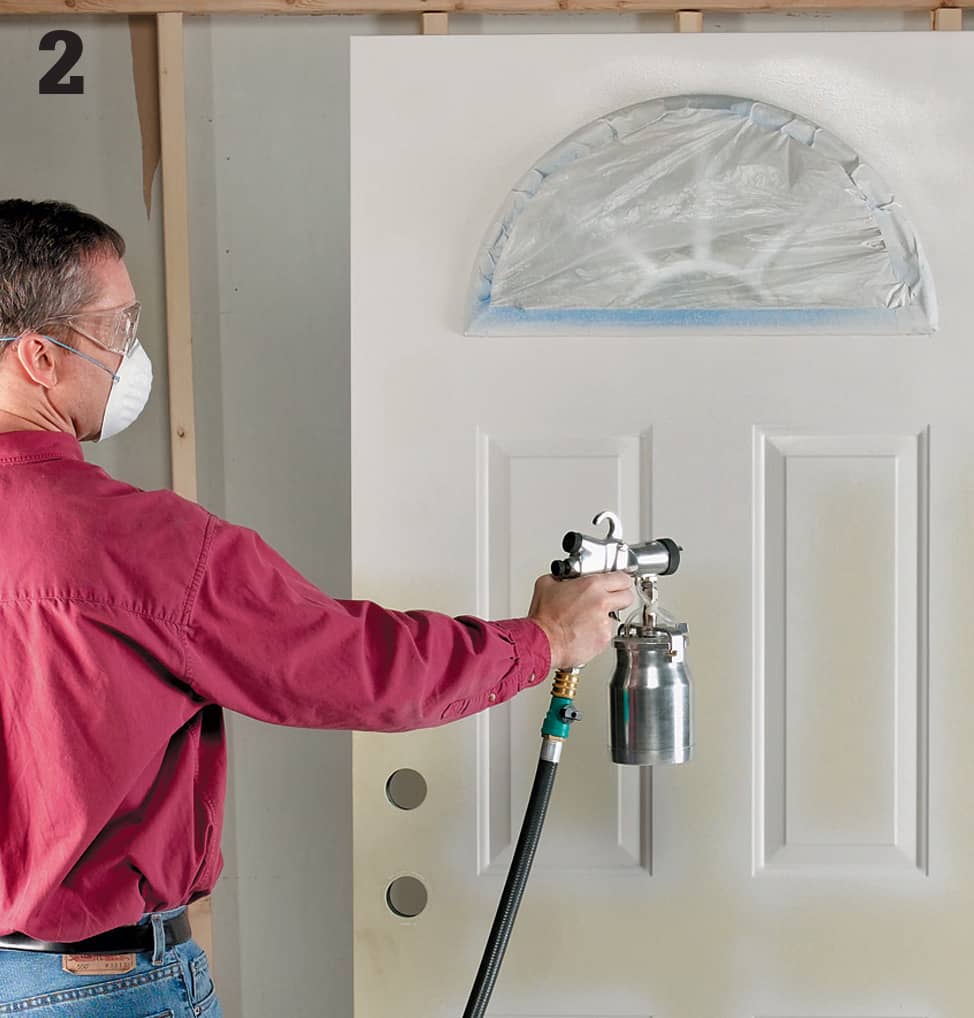
Prop up the door so it stands vertically. Starting at the top of the door, spray on the paint. As you make passes across the door, slightly go past the edges before sweeping back in the opposite direction. Wait until the paint is completely dry, then turn the door around and paint the other side.
 Staining Siding
Stain lends color to wood siding, but because it is partially transparent, it also allows the natural beauty of the wood grain to show through. Water-based stains are applied with an acrylic or synthetic brush. Oil-based stains are usually applied with a natural-bristle brush.
Work in small sections at a time. Complete an entire length of board without stopping in the middle. Unlike paint, stain can darken or leave streaks if you go back over an area after it dries. Save the trim until the end, then stain it separately to get an even coverage.
Staining requires the same careful preparation work as painting. The surface must be clean and dry. Avoid working in direct sunlight so the stain doesn’t dry too quickly. Check manufacturer’s recommendations before staining. Some stains cannot be applied in temperatures below 50°F.
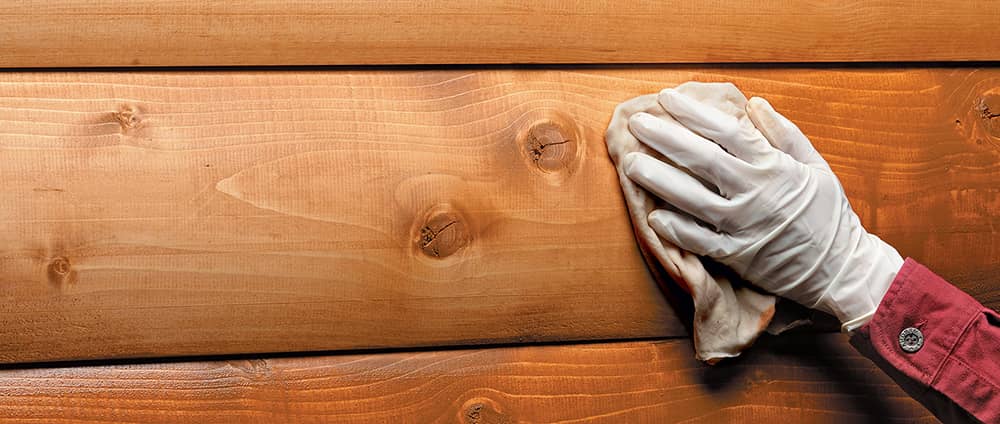
How to Stain Log Cabin Siding
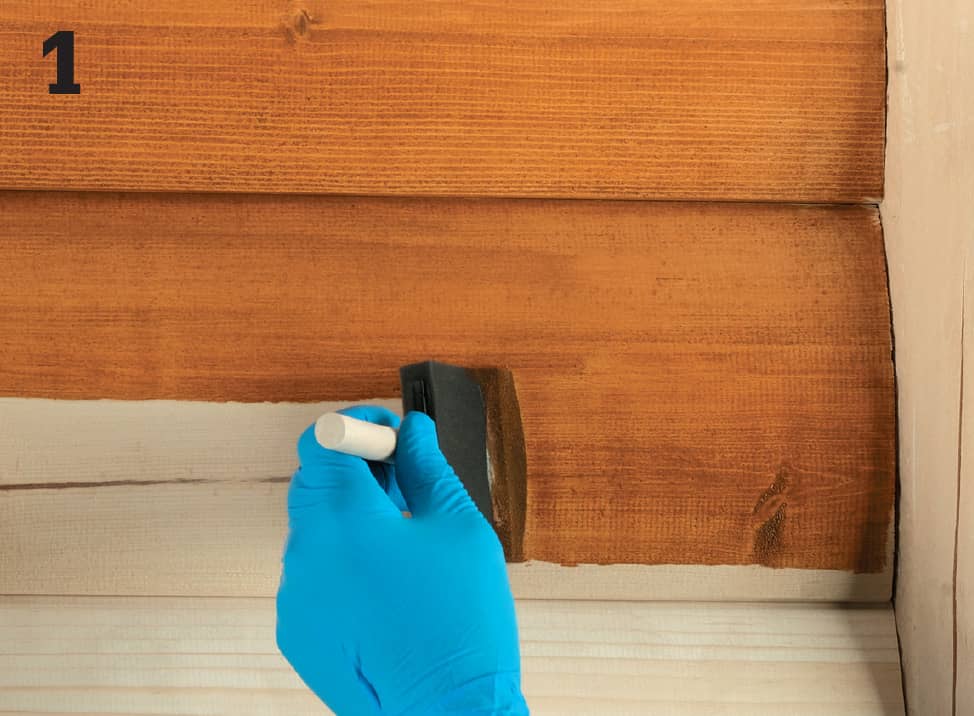
Load the brush with stain. Starting at a corner, move the brush across the siding with a long, smooth stroke. Cover the entire width of the log with stain, reloading the brush as needed, applying stain in the same direction. Tip: Mix the stain thoroughly and often as it’s being applied.
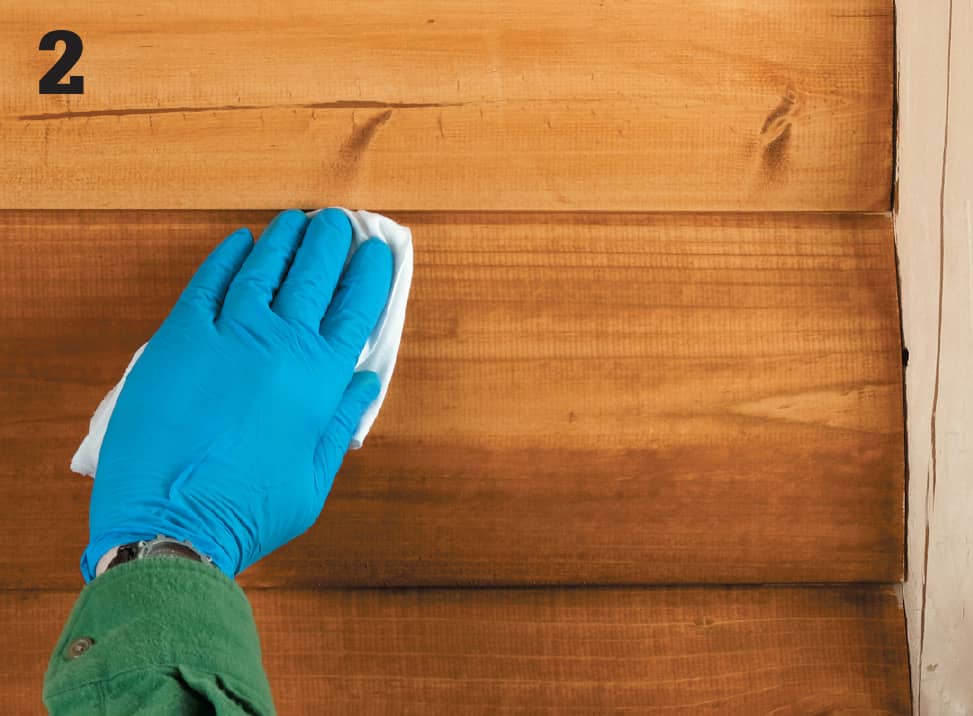
Wipe away excess stain with a clean cloth. Keep applying stain until you reach the opposite corner or an edge. Once the top course is stained, go back to the corner and start on the next row of siding, using the same technique. If the run of siding is short, such as between windows, apply stain to two rows at a time. Stain remaining courses the same way.
How to Stain Shingle Siding
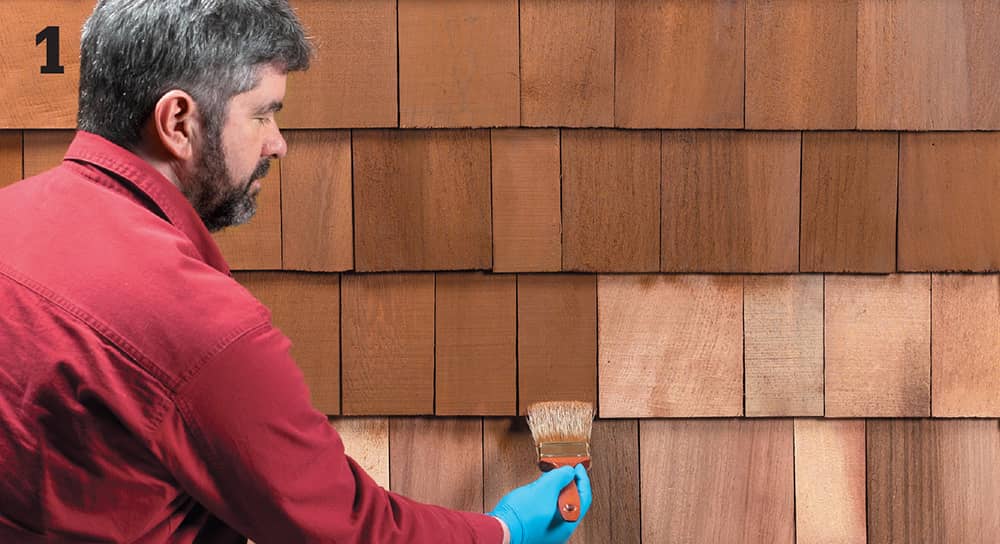
Load the brush with stain. Starting at the top of a wall by a corner, apply stain to the shingles, using smooth, downward strokes. Wipe off excess stain with a cloth. Cover the face of the shingle and stain the bottom edge before moving on to the next one. Apply stain to one or two courses at a time, moving across the wall as you go. Never stop in the middle of a shingle. When you reach the opposite corner, start over on the next set of shingles. Stain remaining rows the same way.
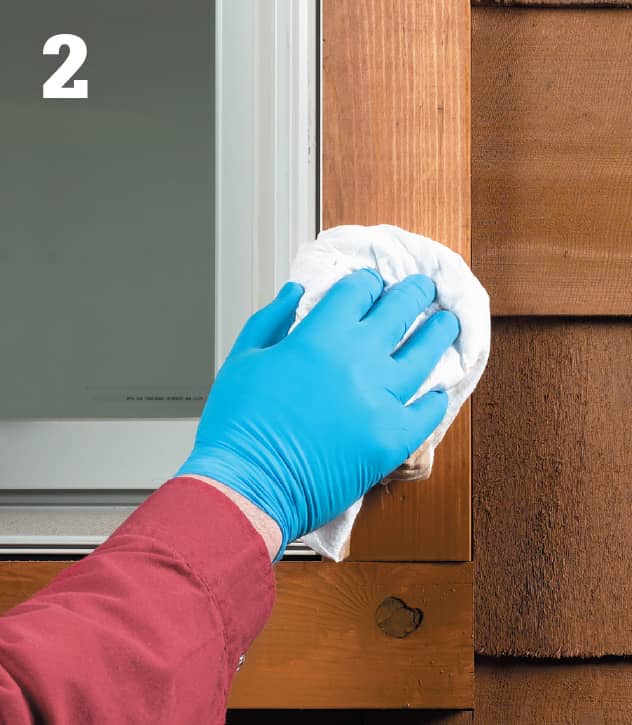
Once all of the shingles are stained, apply stain to the trim. Move the brush in the same direction as the wood grain, then wipe away excess with a cloth.
 Repairing Stucco
Although stucco siding is very durable, it can be damaged, and over time it can crumble or crack. The directions given below work well for patching small areas less than 2 sq. ft. For more extensive damage, the repair is done in layers, as shown on the opposite page.
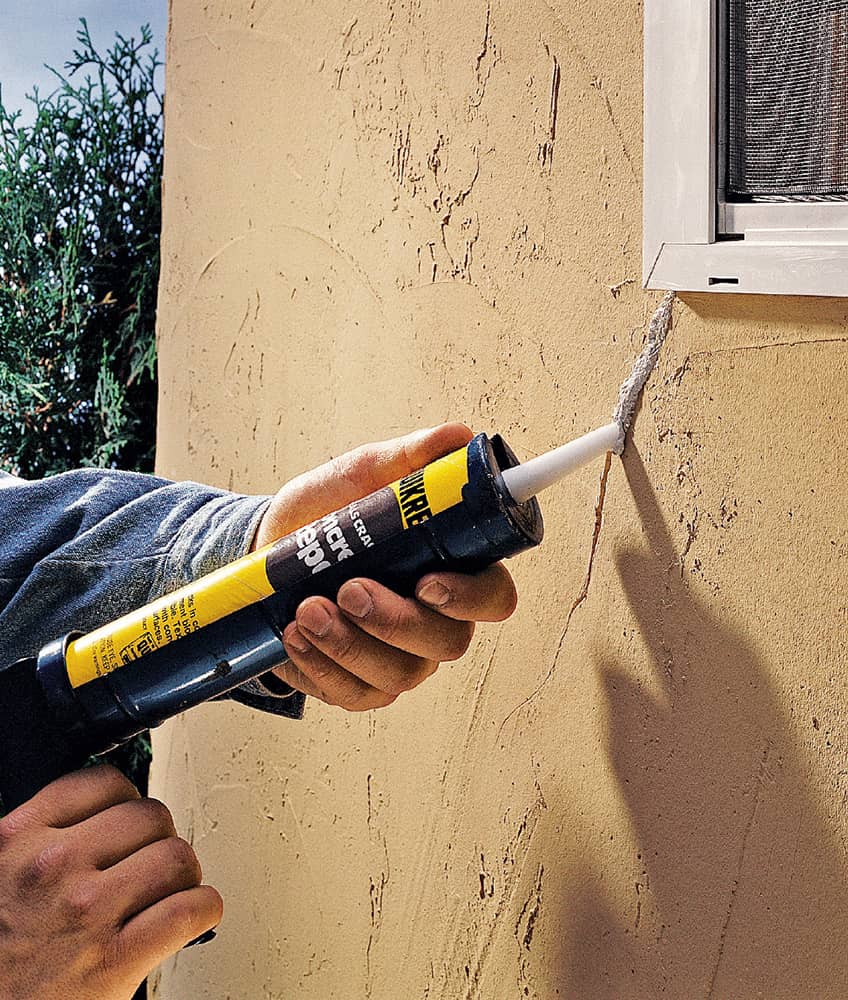
Fill thin cracks in stucco walls with masonry caulk. Overfill the crack with caulk, and feather until it’s flush with the stucco. Allow the caulk to set, then paint it to match the stucco. Masonry caulk stays semiflexible, preventing further cracking.
How to Patch Small Areas
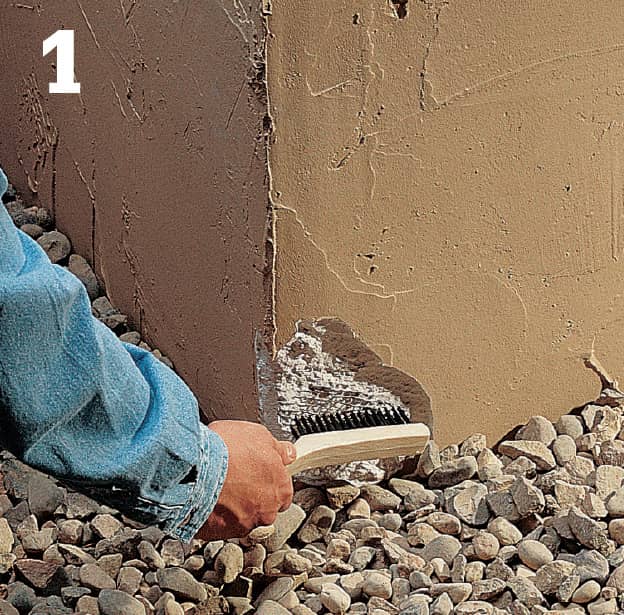
Remove loose material from the repair area, using a wire brush. Use the brush to clean away rust from any exposed metal lath, then apply a coat of metal primer to the lath.
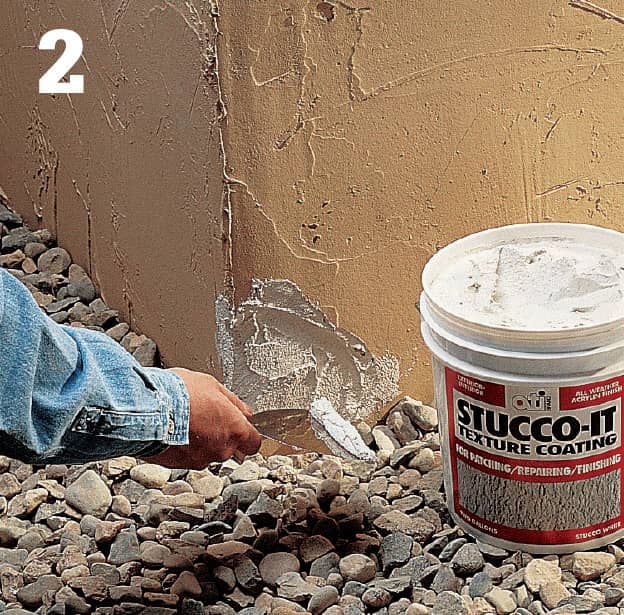
Apply premixed stucco repair compound to the repair area, slightly overfilling the hole, using a putty knife or trowel. Read manufacturer’s directions, as drying times vary.
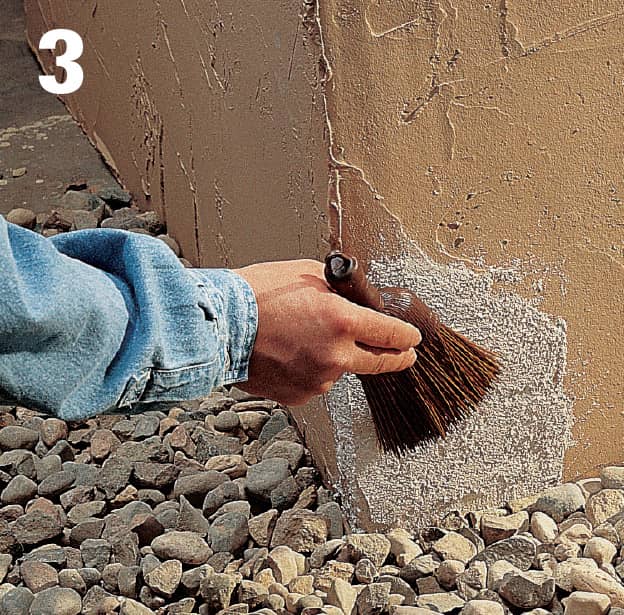
Smooth the repair with a putty knife or trowel, feathering the edges to blend into the surrounding surface. Use a whisk broom or trowel to duplicate the original texture. Let the patch dry for several days, then touch it up with masonry paint.
How to Repair Large Areas
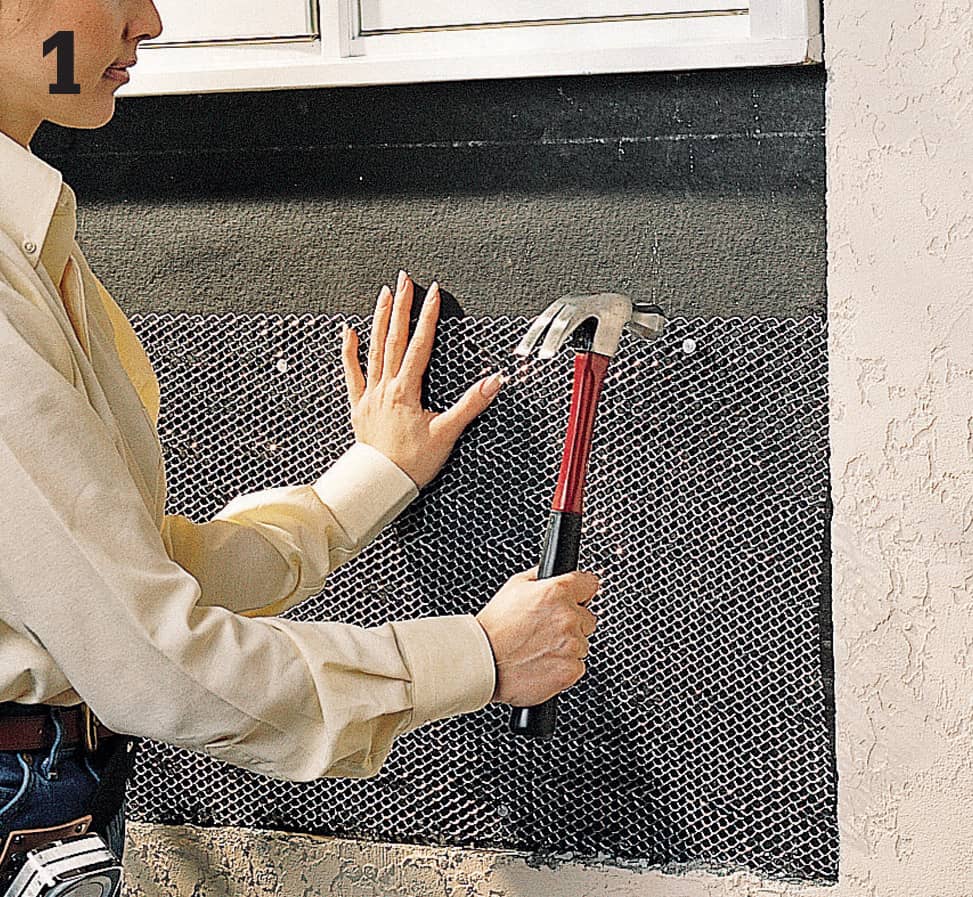
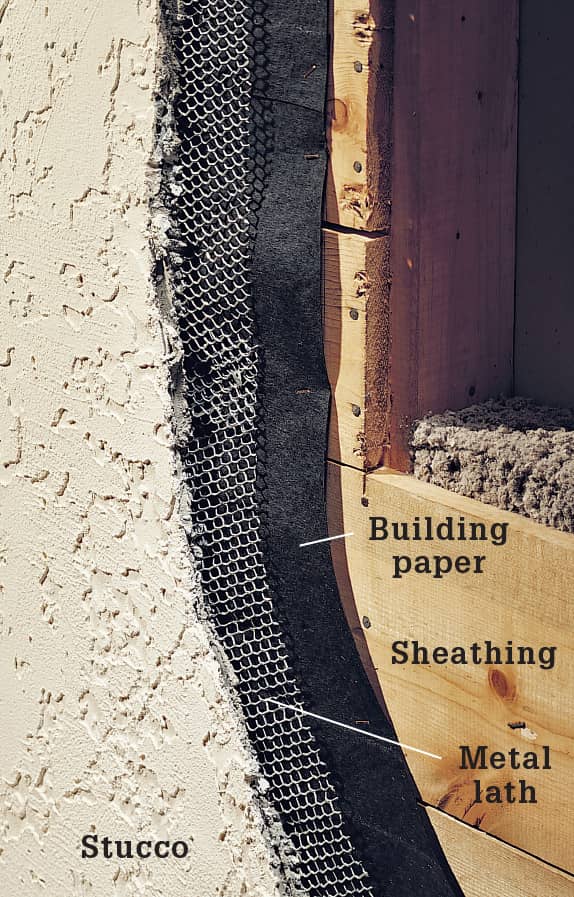
Make a starter hole with a drill and masonry bit, then use a masonry chisel and hammer to chip away stucco in the repair area. Note: Wear safety glasses and a particle mask or respirator when cutting stucco. Cut self-furring metal lath to size with aviation snips and attach it to the sheathing, using roofing nails. Overlap pieces by 2". If the patch extends to the base of the wall, attach a metal stop bead at the bottom.
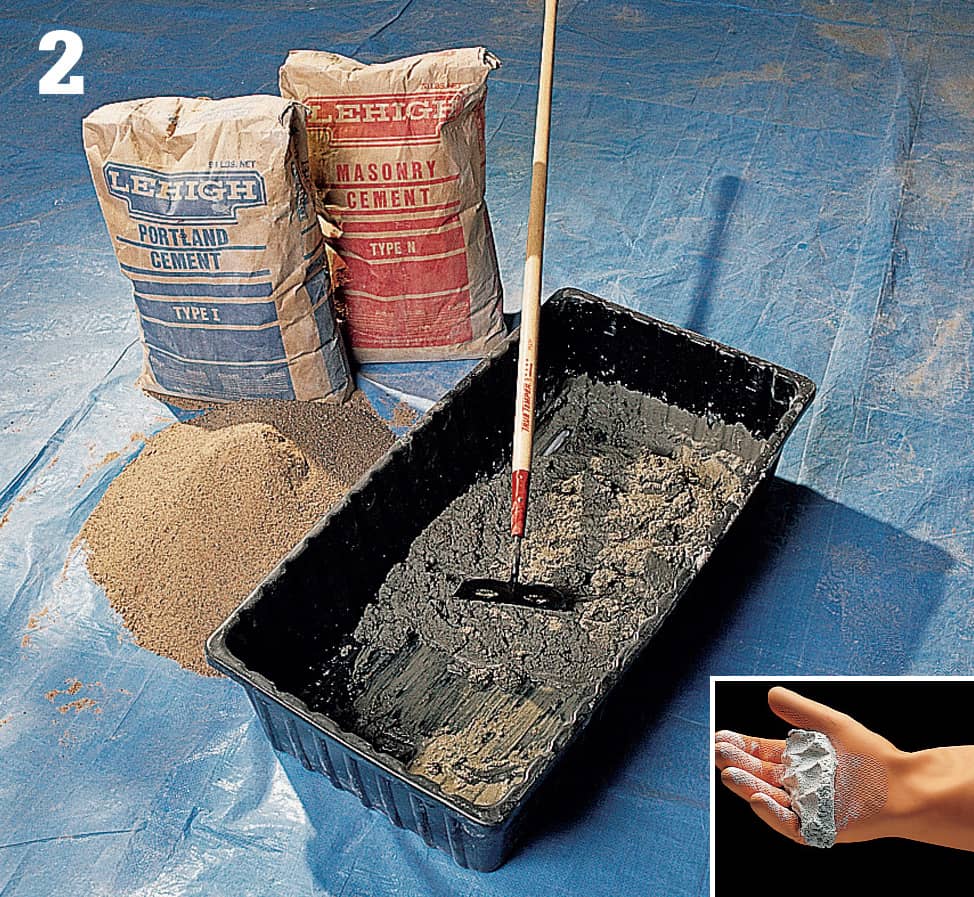
To mix your own stucco, combine three parts sand, two parts portland cement, and one part masonry cement. Add just enough water so the mixture holds its shape when squeezed (inset). Mix only as much as you can use in one hour. Tip: Premixed stucco works well for small jobs, but for large ones, it’s more economical to mix your own.
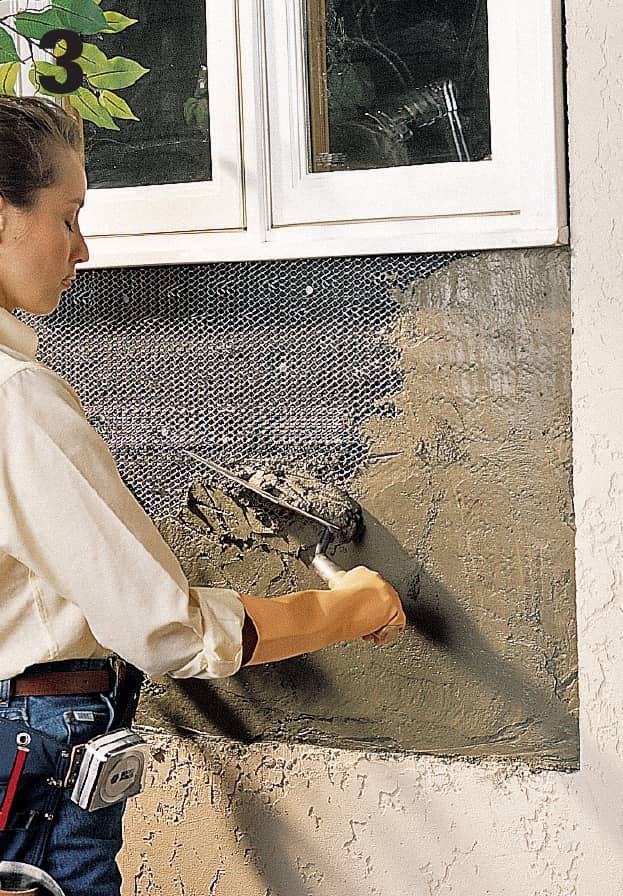
Apply a 3/8"-thick layer of stucco directly to the metal lath. Push the stucco into the mesh until it fills the gap between the mesh and the sheathing. Score horizontal grooves into the wet surface, using a scratching tool. Let the stucco dry for two days, misting it with water every two to four hours.
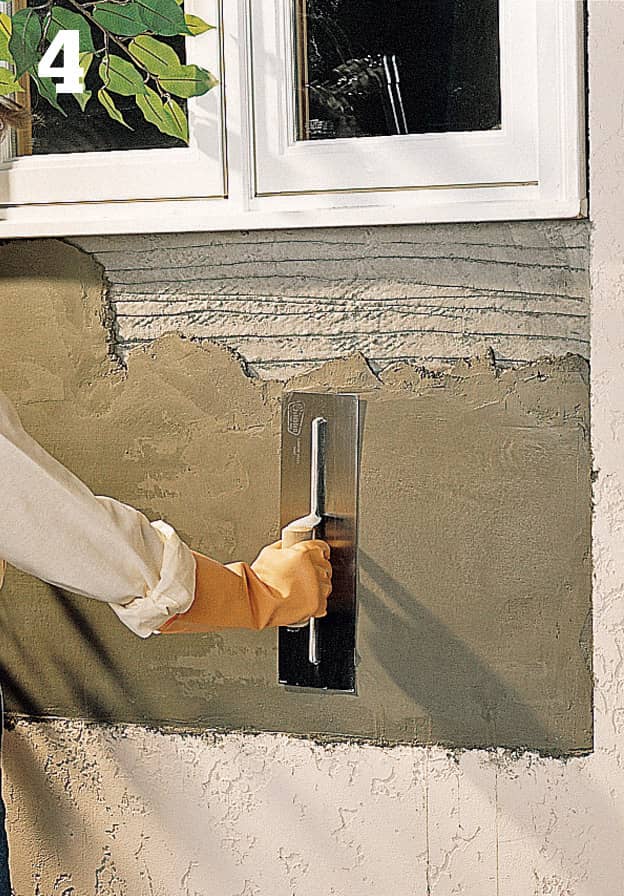
Apply a second, smooth layer of stucco. Build up the stucco to within 1/4" of the original surface. Let the patch dry for two days, misting every two to four hours.
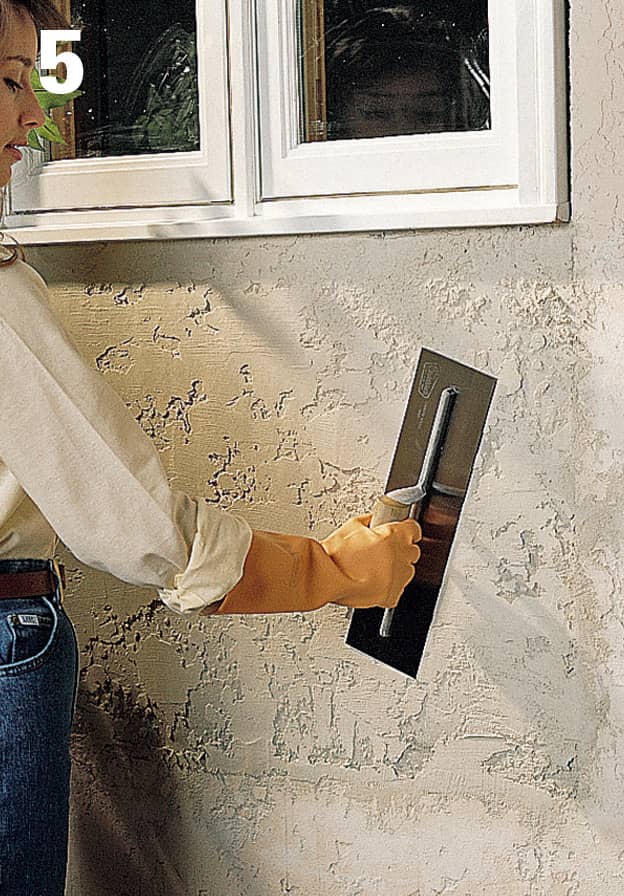
Combine finish-coat stucco mix with just enough water for the mixture to hold its shape. Dampen the patch area, then apply the finish coat to match the original surface. Dampen the patch periodically for a week. Let it dry for several more days before painting.
 Repairing Concrete
Concrete is one of the most durable building materials, but it still requires occasional repair and maintenance. Freezing and thawing, improper finishing techniques, a poor subbase, or lack of reinforcement all can cause problems with concrete. By addressing problems as soon as you discover them, you can prevent further damage that may be difficult or impossible to fix.
Concrete repairs fall into a wide range, from simple cleaning and sealing, to removing and replacing whole sections. Filling cracks and repairing surface damage are the most common concrete repairs.
Another effective repair is resurfacing—covering an old concrete surface with a layer of fresh concrete. It’s a good solution to spalling, crazing, or popouts—minor problems that affect the appearance more than the structure. These problems often result from inadequate preparation or incorrect finishing techniques.
As with any kind of repair, the success of the project depends largely on good preparation and the use of the best repair products for the job. Specially formulated repair products are manufactured for just about every type of concrete repair. Be sure to read the product-use information before purchasing any products; some products need to be used in combination with others.
A good repair can outlast the rest of the structure in some cases, but if structural damage has occurred, repairing the concrete is only a temporary solution. By using the right products and techniques, however, you can make cosmetic repairs that improve the appearance of the surface and keep damage from becoming worse.
Probably the most important point to remember when repairing concrete is that curing makes repairs last longer. That means covering repaired surfaces with plastic sheeting and keeping them damp for at least a week. In dry, hot weather, lift the plastic occasionally, and mist with water.
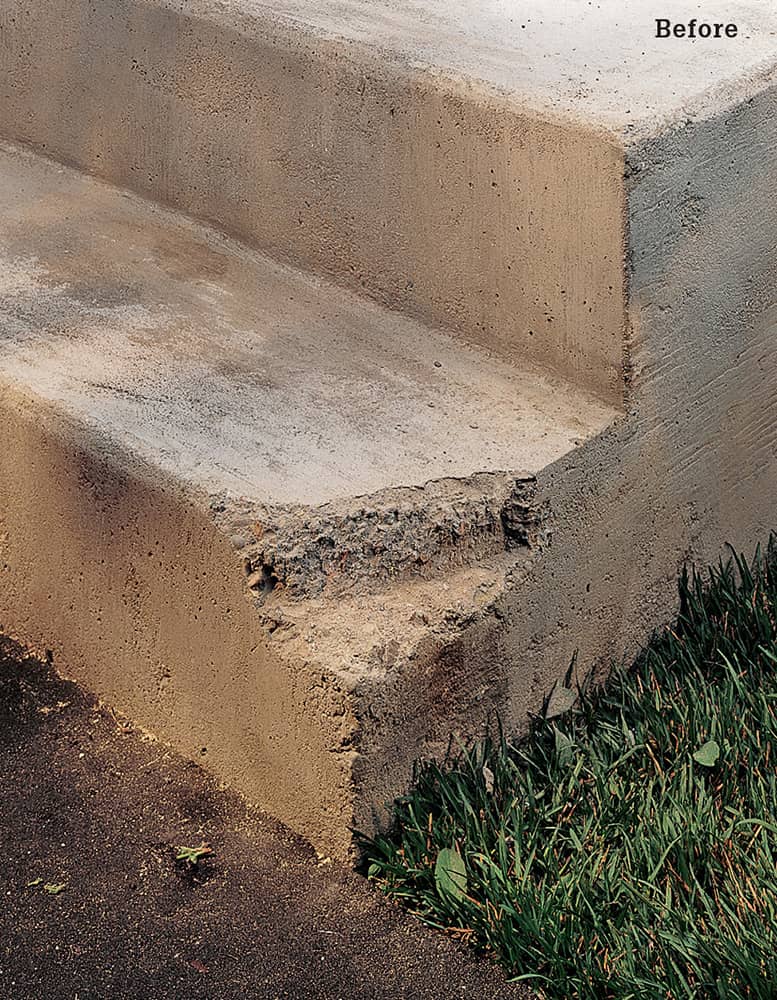
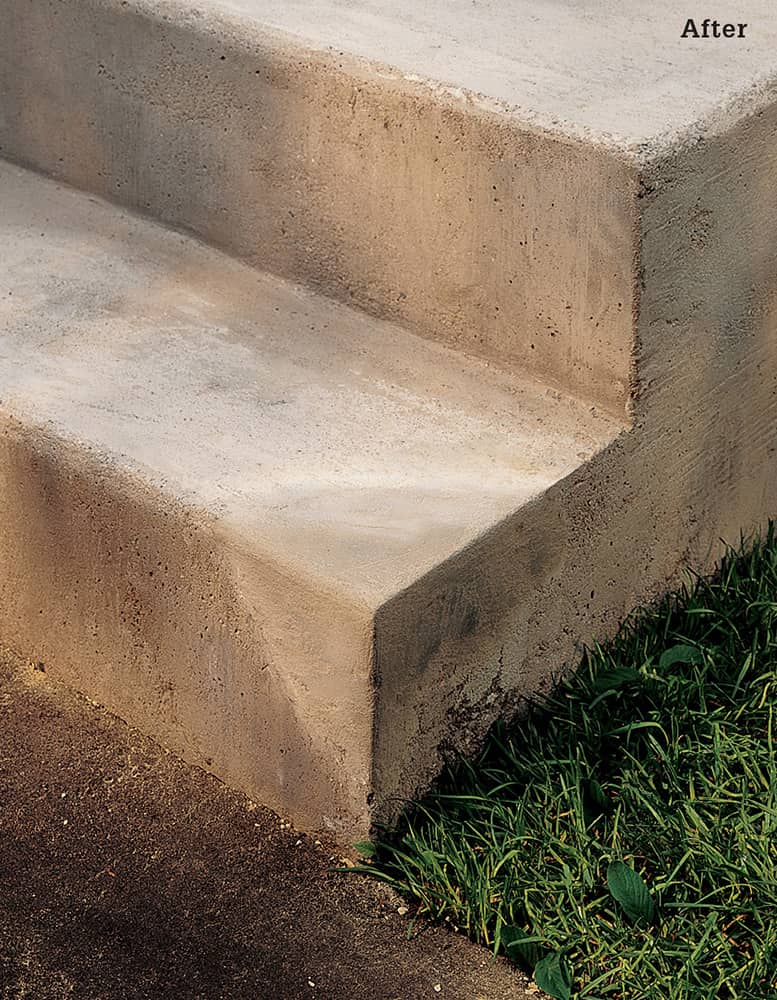
Good repairs restore both the appearance and the function to failing concrete structures and surfaces. Careful work can produce a well-blended, successful repair like the one shown above.
Concrete Repair Products
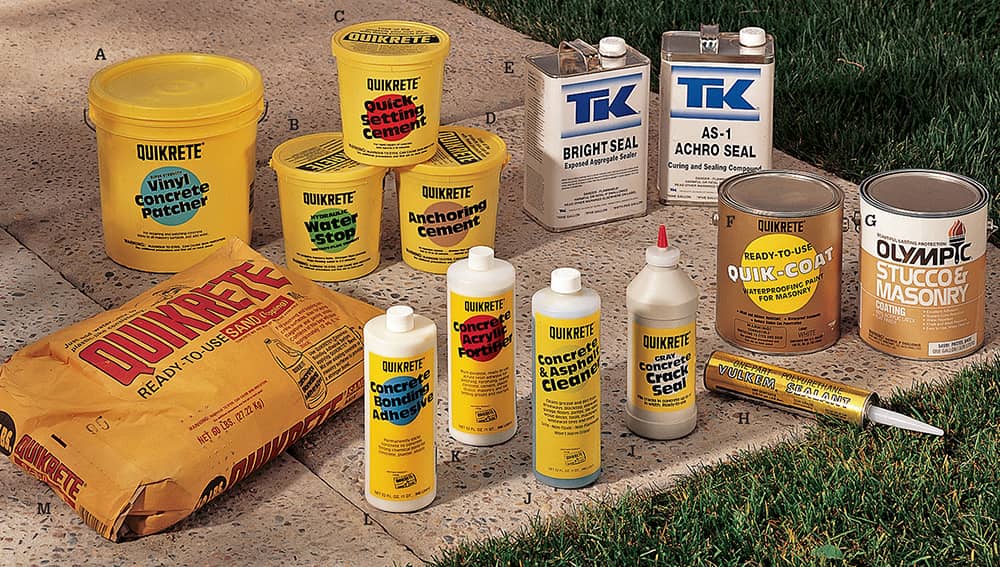
Concrete repair products include: vinyl-reinforced concrete patch (A) for filling holes, popouts, and larger cracks; hydraulic cement (B) for repairing foundations, retaining walls, and other damp areas; quick-setting cement (C) for repairing vertical surfaces and unusual shapes; anchoring cement (D) for setting hardware in concrete; concrete sealing products (E); masonry paint (F); concrete recoating product (G) for creating a fresh surface on old concrete; joint-filler caulk (H); pour-in crack sealer (I); concrete cleaner (J); concrete fortifier (K) to strengthen concrete; bonding adhesive (L) to prepare the repair area; and concrete sand mix (M) for general repairs and resurfacing.
 Identifying Problems with Concrete
There are two general types of concrete failure: structural failure, usually resulting from outside forces like freezing water; and surface damage, most often caused by improper finishing techniques or concrete mixtures that do not have the right ratio of water to cement. Surface problems sometimes can be permanently repaired if the correct products and techniques are used. More significant damage can be patched for cosmetic purposes and to resist further damage, but the structure will eventually need to be replaced.
Common Concrete Problems
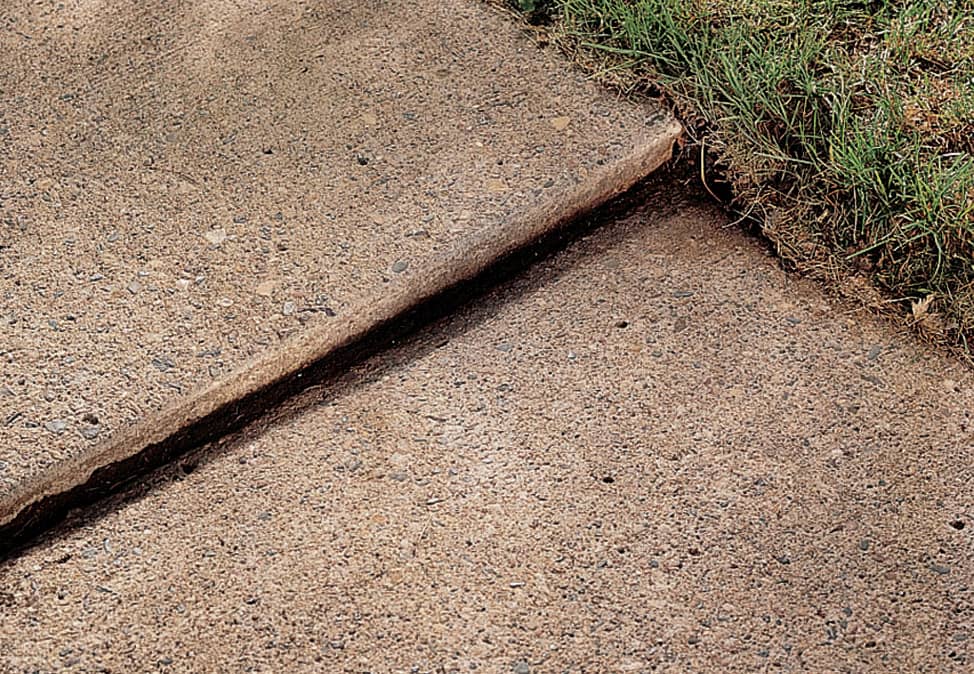
Sunken concrete is usually caused by erosion of the subbase. Some structures, like sidewalks, can be raised to repair the subbase, then relaid. A more common (and more reliable) solution is to hire a mudjacking contractor to raise the surface by injecting fresh concrete below the surface.
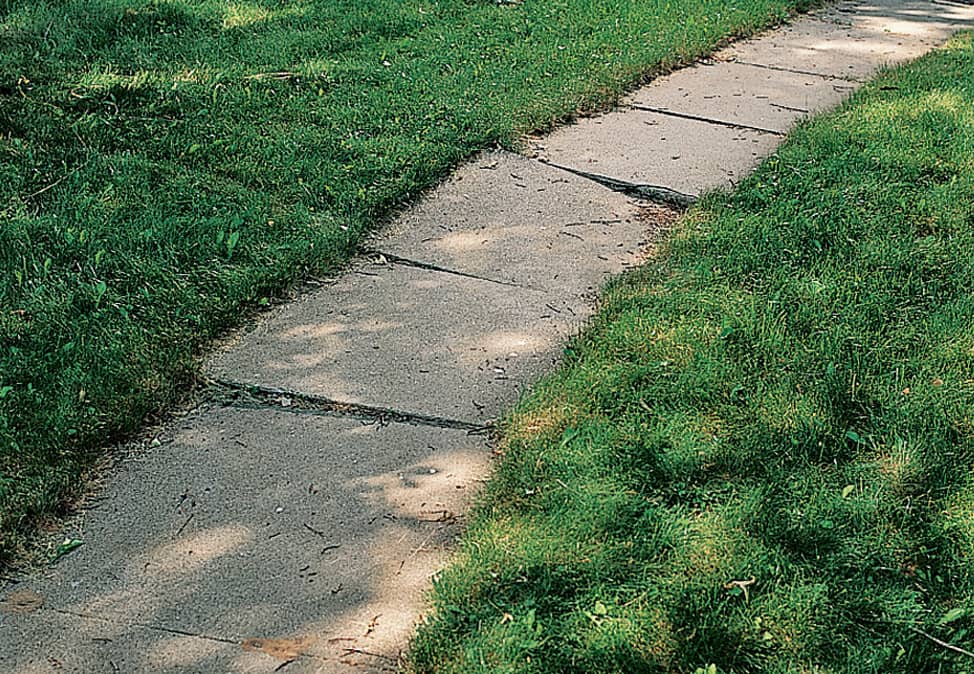
Frost heave is common in colder climates. Frozen ground forces concrete slabs upward, and sections of the slab can pop up. The best solution is to break off and remove the affected section or sections, repair the subbase, and pour new sections that are set off by isolation joints.
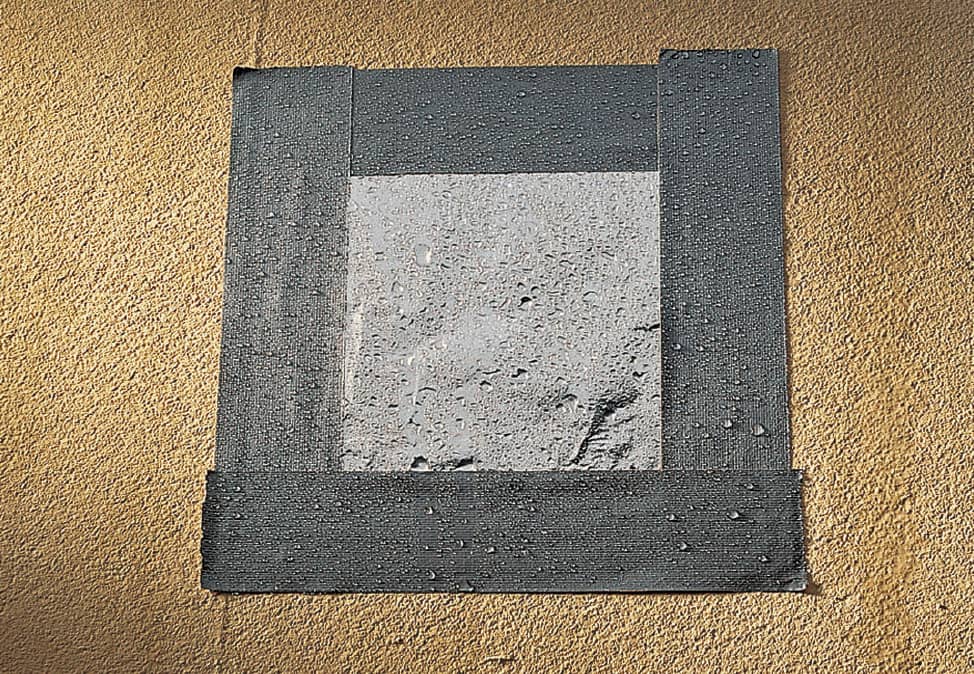
Moisture buildup occurs in concrete structures, like foundations and retaining walls, that are in constant ground contact. To identify the moisture source, tape a piece of foil to the wall. If moisture collects on the outer surface of the foil, the source likely is condensation, which can be corrected by installing a dehumidifier. If moisture is not visible on the foil, it is likely seeping through the wall. Consult a professional mason.
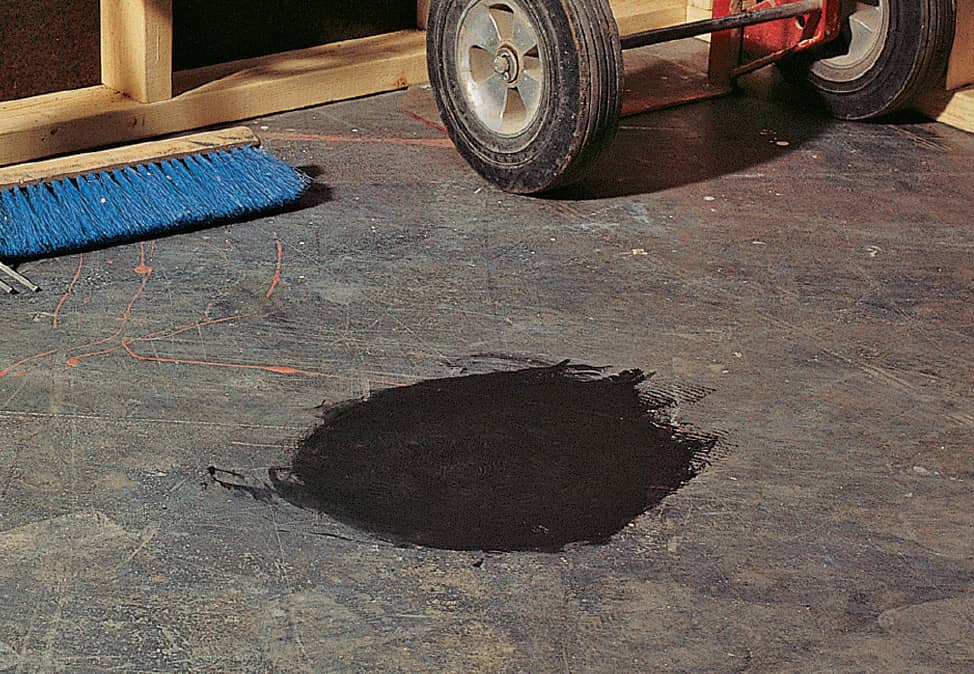
Staining can ruin the appearance of a concrete surface or structure. Stains can be removed with commercial-grade concrete cleaner or a variety of other chemicals. For protection against staining, seal masonry surfaces with clear sealant.
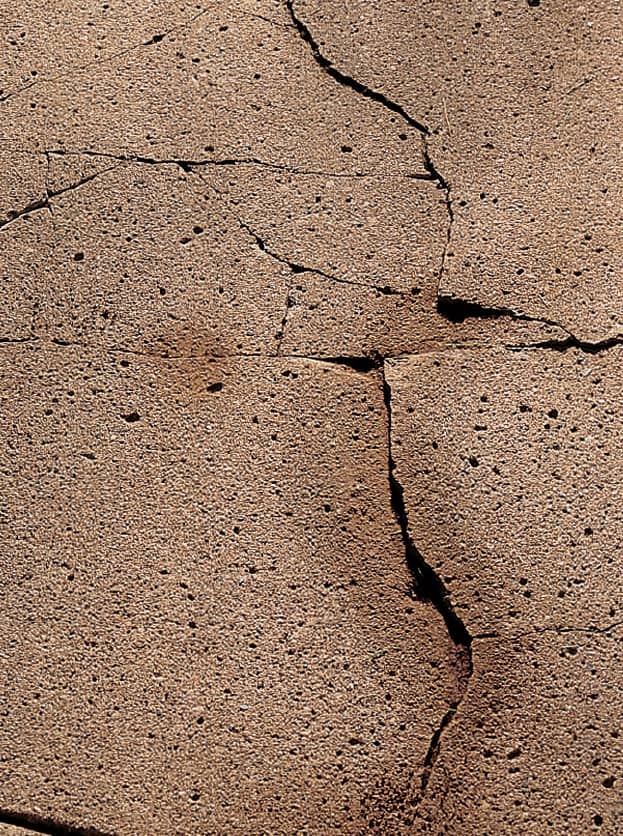
Widespread cracks all the way through the surface, and other forms of substantial damage, are very difficult to repair effectively. If the damage to the concrete is extensive, remove and replace the structure.
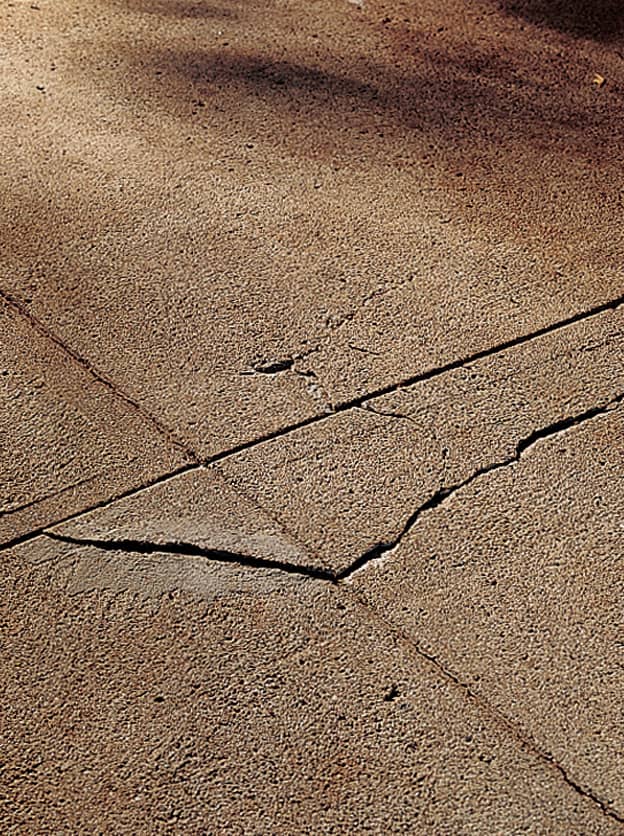
Isolated cracks occur on many concrete building projects. Fill small cracks with concrete caulk or crack-filler, and patch large cracks with vinyl-reinforced patching material.
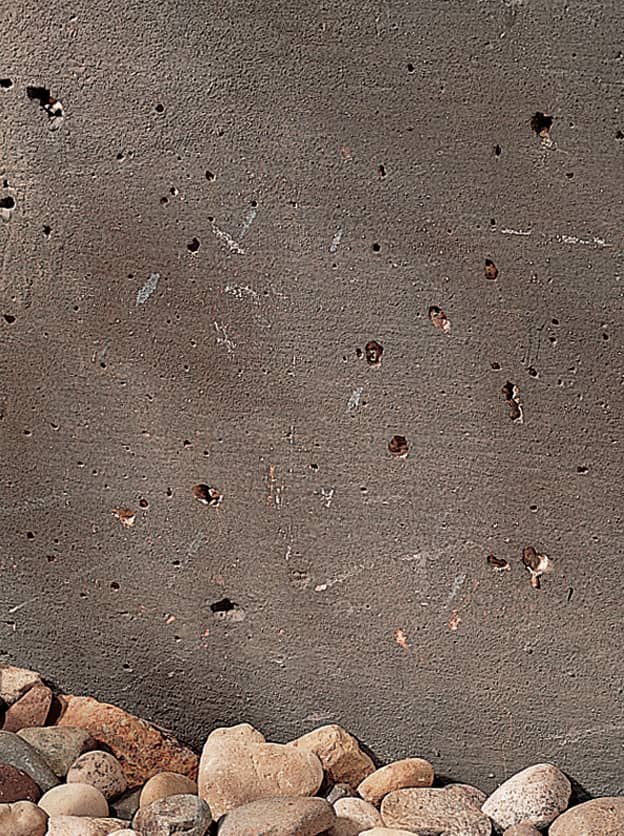
Popouts can be caused by freezing moisture or stress, but very often they occur because the concrete surface was improperly floated or cured, causing the aggregate near the surface of the concrete to loosen. A few scattered popouts do not require attention, but if they are very large or widespread, you can repair them as you would repair holes.

Spalling is surface deterioration of concrete. Spalling is caused by overfloating, which draws too much water to the surface, causing it to weaken and peel off over time. When spalling occurs, it is usually widespread, and the structure may need resurfacing.
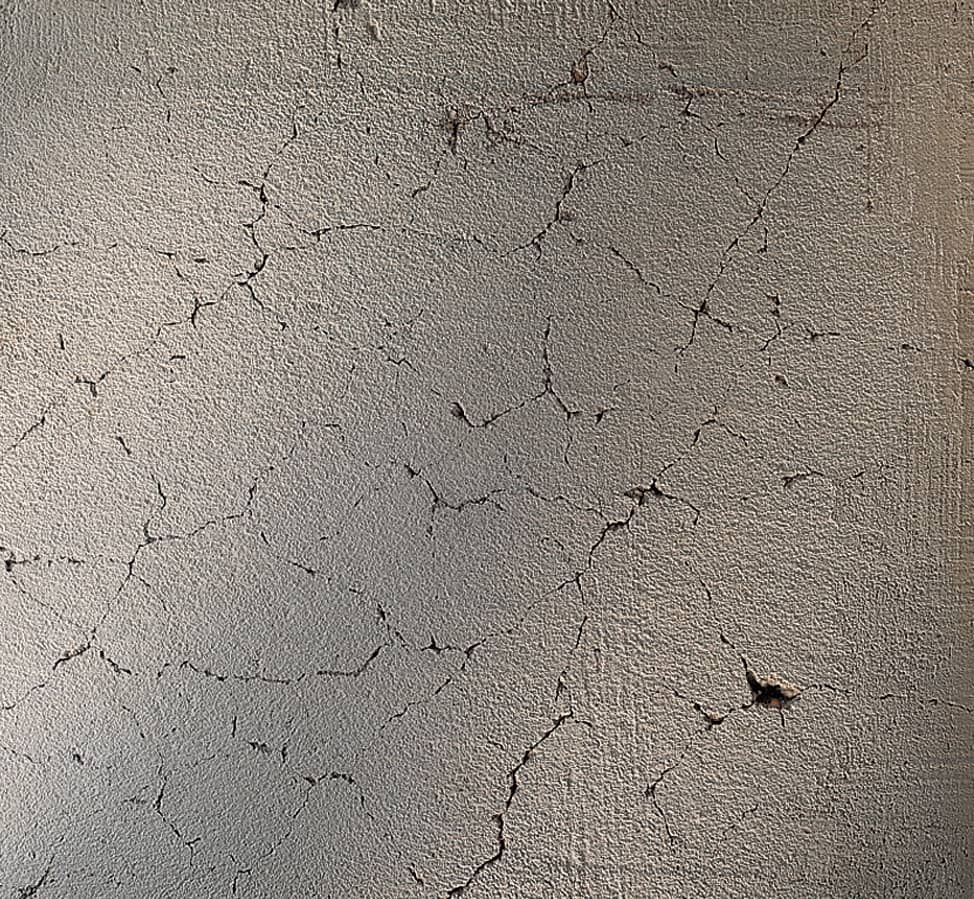
Crazing is widespread hairline cracks, usually caused by overfloating or too much portland cement in the concrete. Clean and seal the surface to help prevent further crazing. For a long-term solution, resurface.
 Patching Holes in Concrete
Large and small holes are treated differently when repairing concrete. The best product for filling in smaller holes (less than 1/2" deep) is vinyl-reinforced concrete patcher, which is often sold in convenient quart of gallon containers of dry powder. Reinforced repair products should be applied only in layers that are 1/2" thick or less.
For deeper holes, use sand-mix concrete with an acrylic or latex fortifier, which can be applied in layers up to 2" thick. This material is sold in 60- or 80-pound bags of dry mix.
Patches in concrete will be more effective if you create clean, backward-angled cuts (page 240) around the damaged area, to create a stronger bond. For extensive cutting of damaged concrete, it’s best to score the concrete first with a circular saw equipped with a masonry blade. Use a chisel and maul to complete the job.
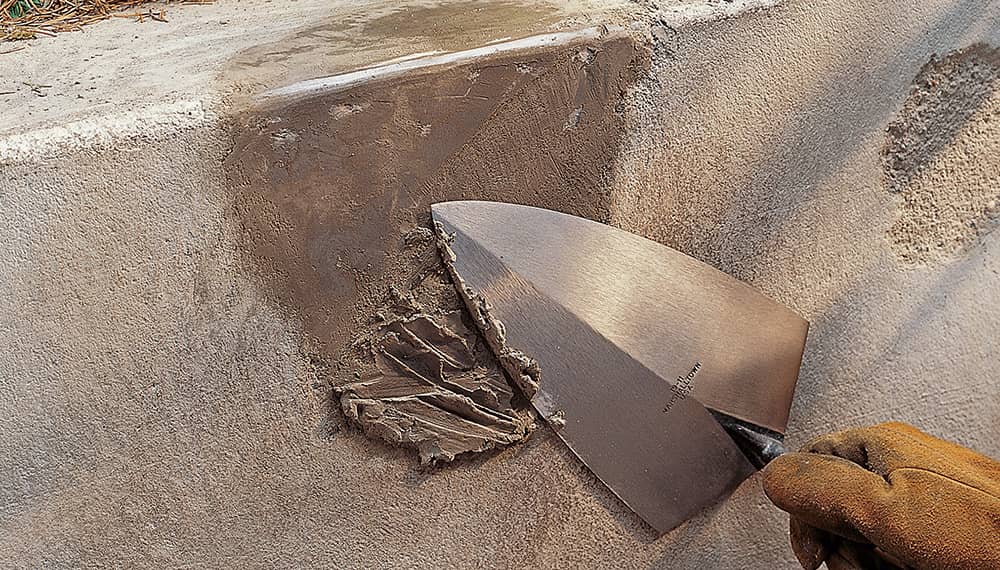
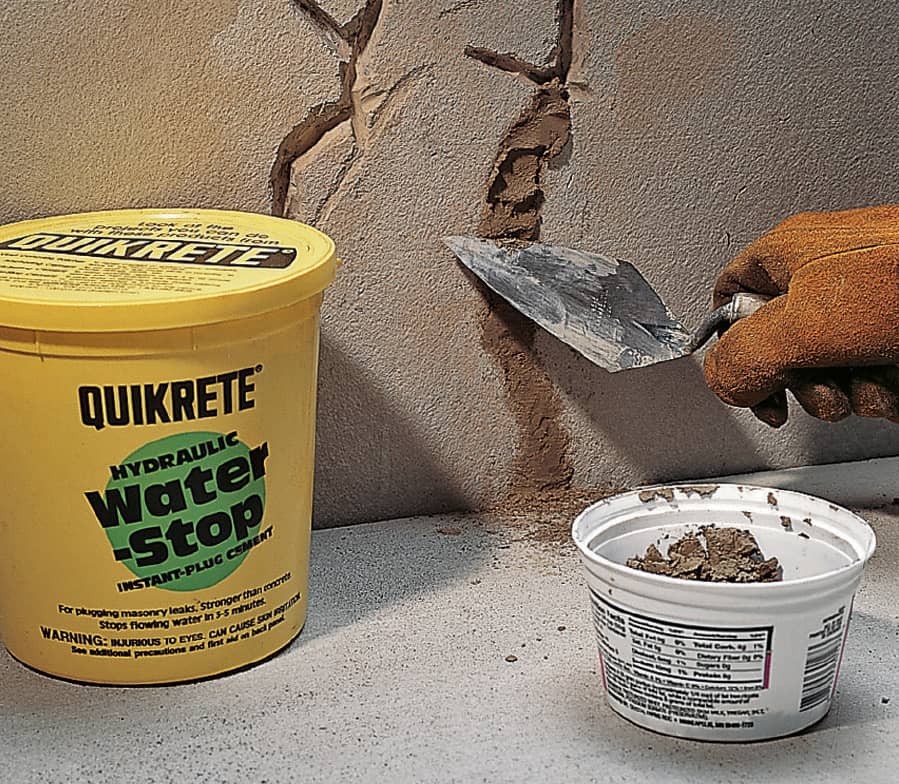
Use hydraulic cement or quick-setting cement for repairing holes and chip-outs in vertical surfaces. Because they set up in just a few minutes, these products can be shaped to fill holes without the need for forms. If the structure is exposed constantly to moisture, use hydraulic cement.
How to Patch Large Areas
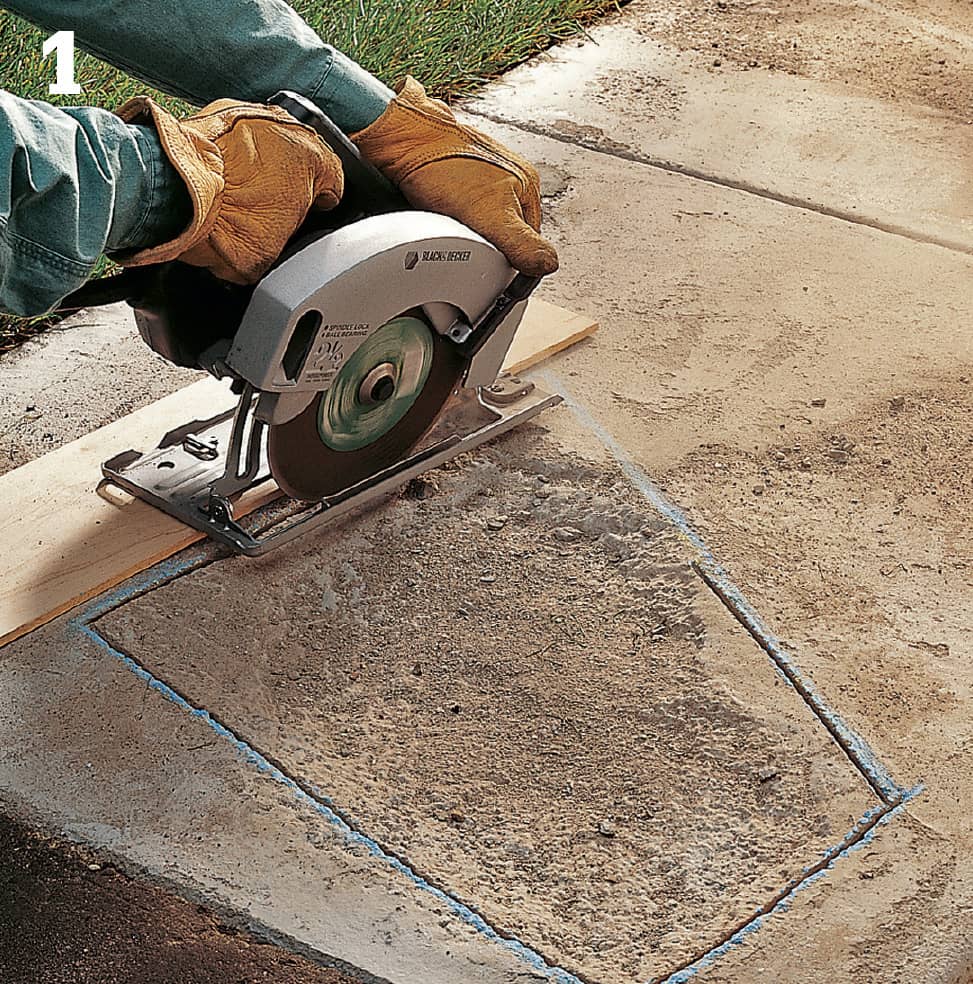
Mark straight cutting lines around the damaged area, then cut with a circular saw equipped with a masonry-cutting blade. Set the foot of the saw so the cut bevels away from the damage at a 15° angle. Chisel out any remaining concrete within the repair area. Tip: Set the foot of the saw on a thin board to protect it from the concrete.
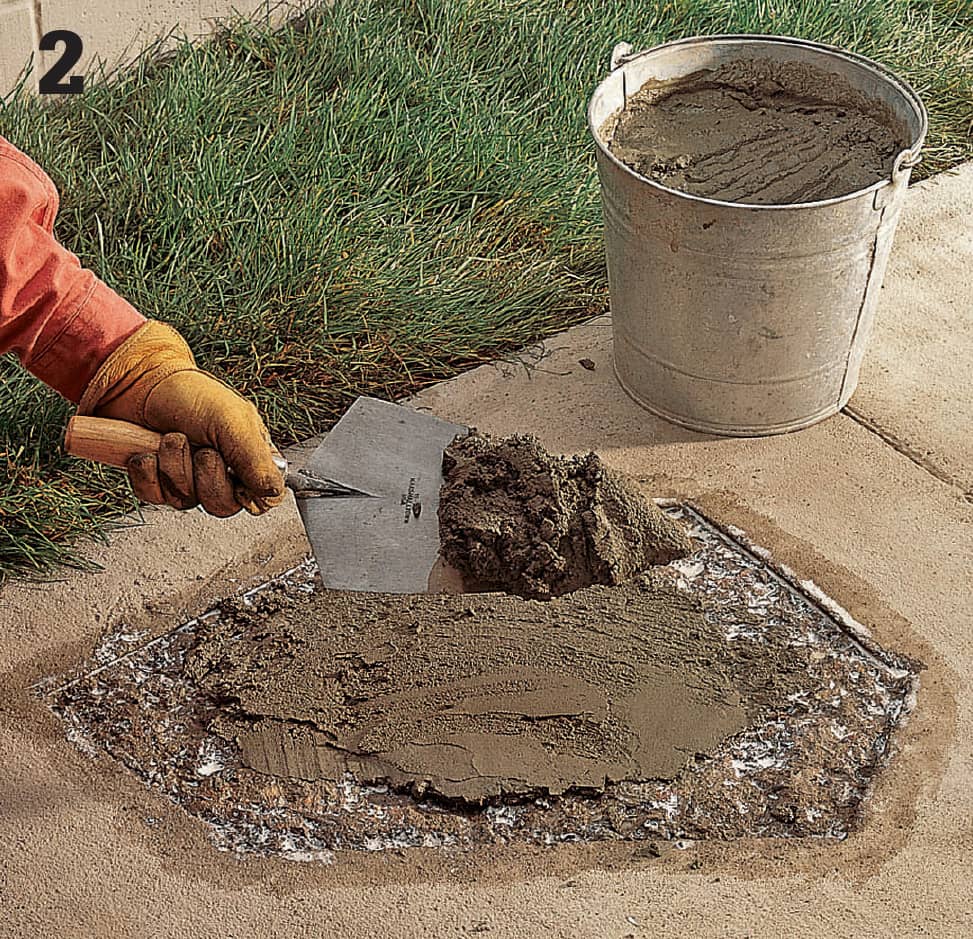
Mix sand-mix concrete with concrete acrylic fortifier, and fill the damaged area slightly above the surrounding surface.
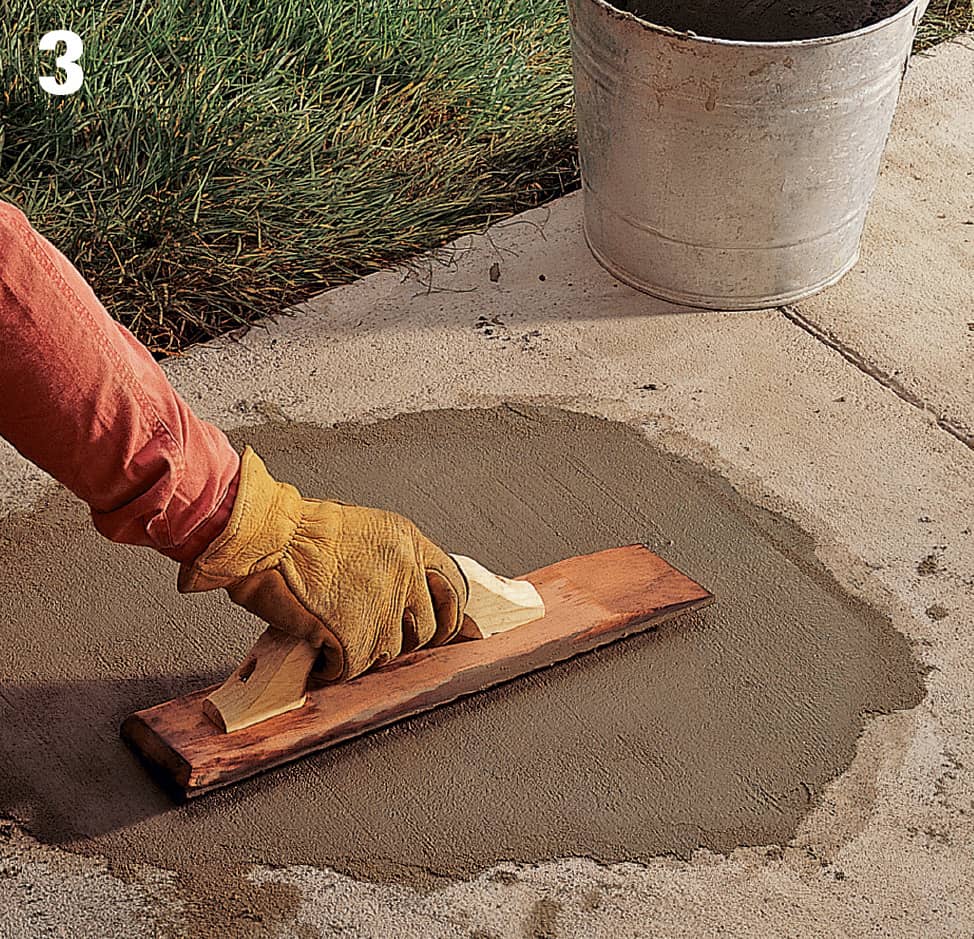
Smooth and feather the repair with a float until the repair is even with the surrounding surface. Re-create any surface finish, like brooming, used on the original surface. Cover the repair with plastic and protect from traffic for at least one week.
How to Caulk Gaps around Masonry
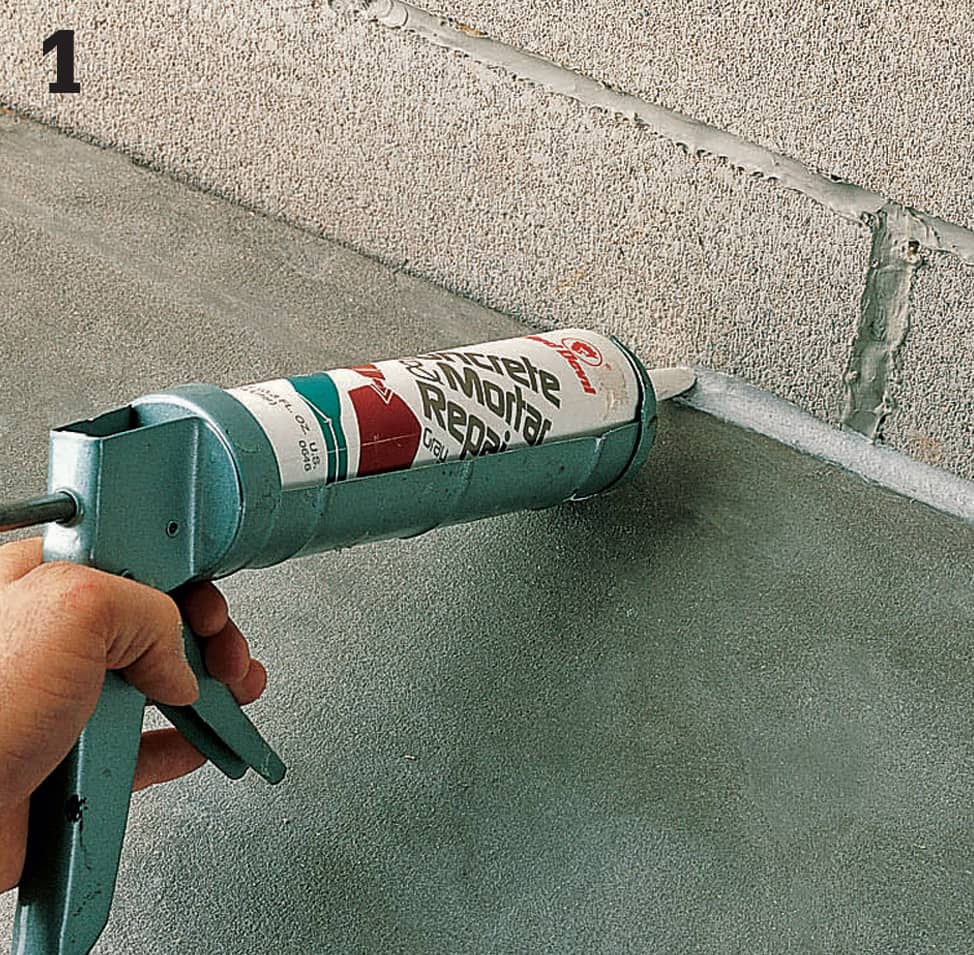
Cracks between a concrete walk and foundation may result in seepage, leading to a wet basement. Repair cracks with caulk-type concrete patcher.
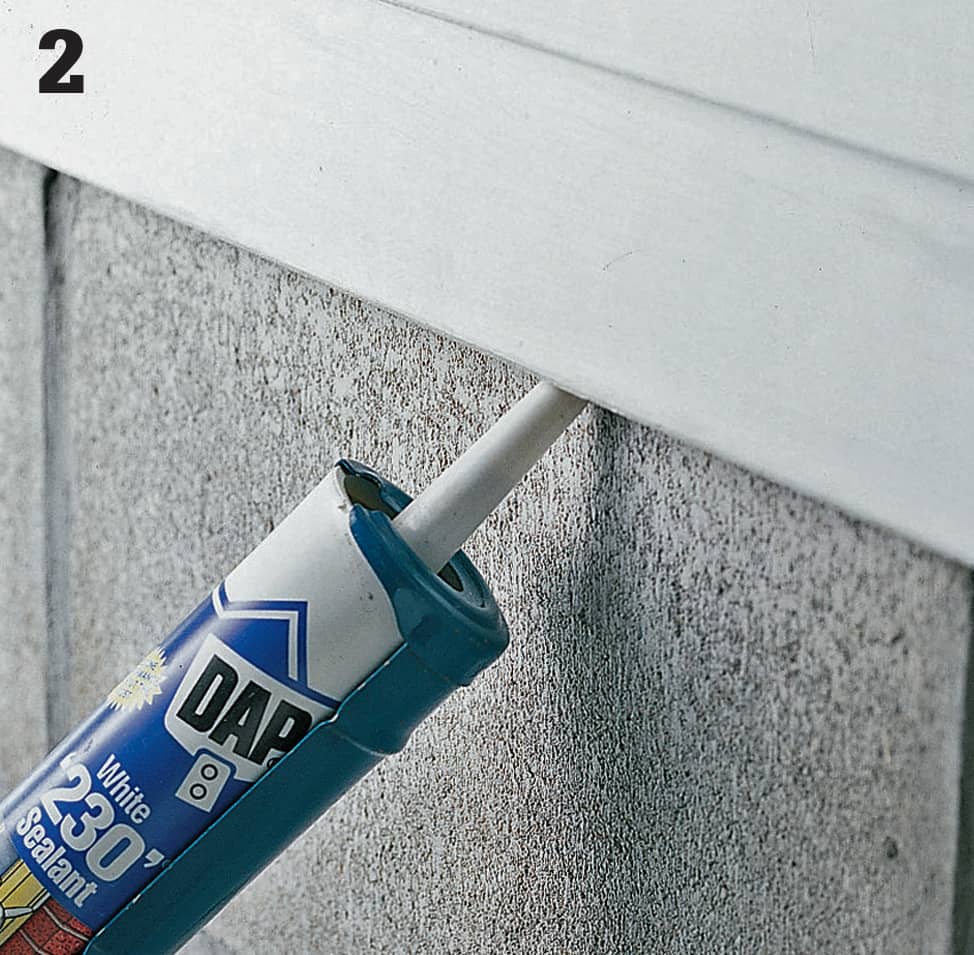
Caulk around the mud sill, the horizontal wooden plate where the house rests on the foundation. This area should be recaulked periodically to prevent heat loss.
How to Patch Small Holes
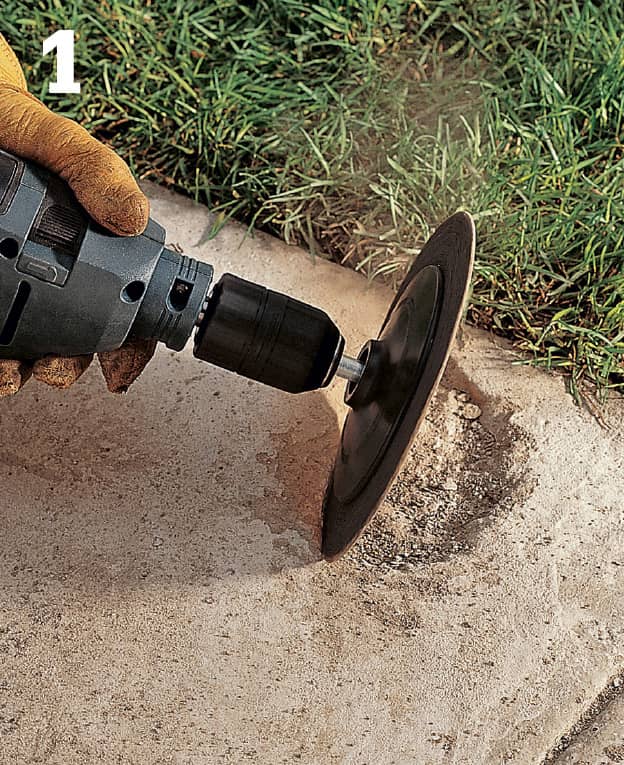
Cut out around the damaged area with a masonry-grinding disc mounted on a portable drill (or use a hammer and stone chisel). The cuts should bevel about 15° away from the center of the damaged area. Chisel out any loose concrete within the repair area. Always wear gloves and eye protection.
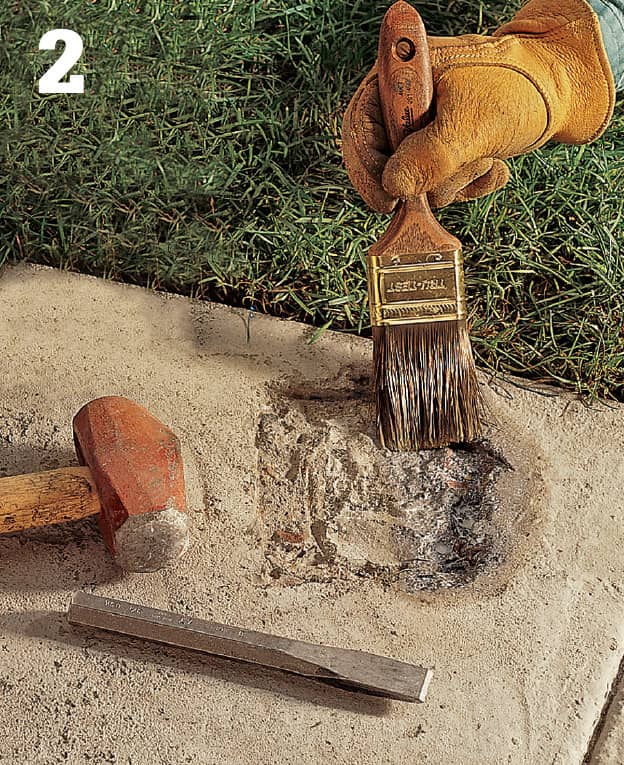
Apply a thin layer of latex bonding agent. The adhesive will bond with the damaged surface and create a strong bonding surface for the patching compound. Wait until the latex bonding agent is tacky (no more than 30 minutes) before proceeding to the next step.
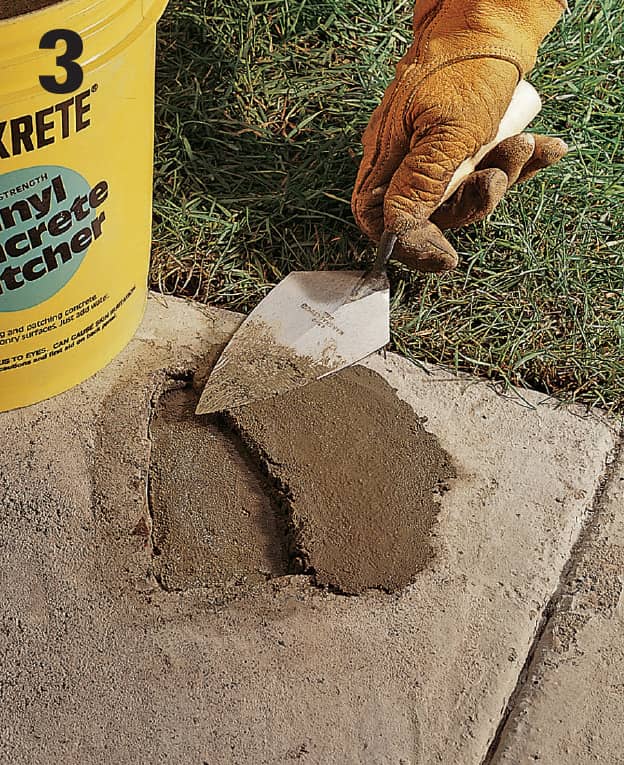
Fill the damaged area with vinyl-reinforced patching compound, applied in 1/4 to 1/2" layers. Wait about 30 minutes between applications. Add layers of the mixture until the compound is packed to just above surface level. Feather the edges smooth, cover the repair with plastic, and protect from traffic for at least one week.
How to Patch Concrete Floors
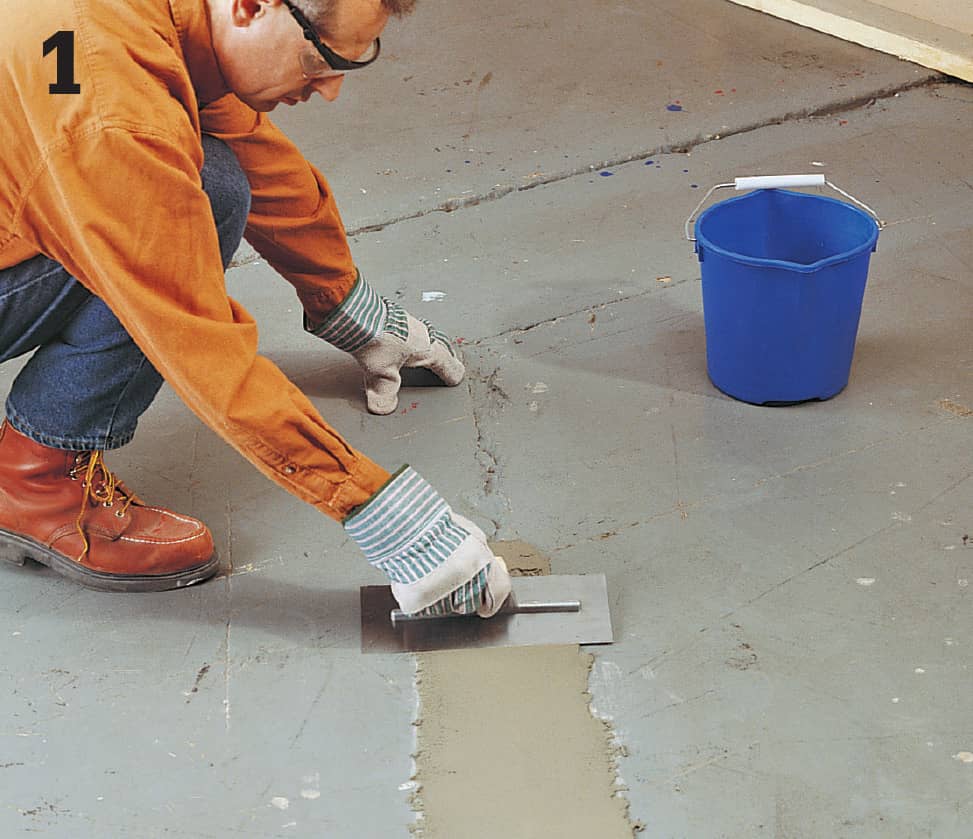
Clean the floor with a vacuum, and remove any loose or flaking concrete with a masonry chisel and hammer. Mix a batch of vinyl floor patching compound following manufacturer’s directions. Apply the compound using a smooth trowel, slightly overfilling the cavity. Smooth the patch flush with the surface.
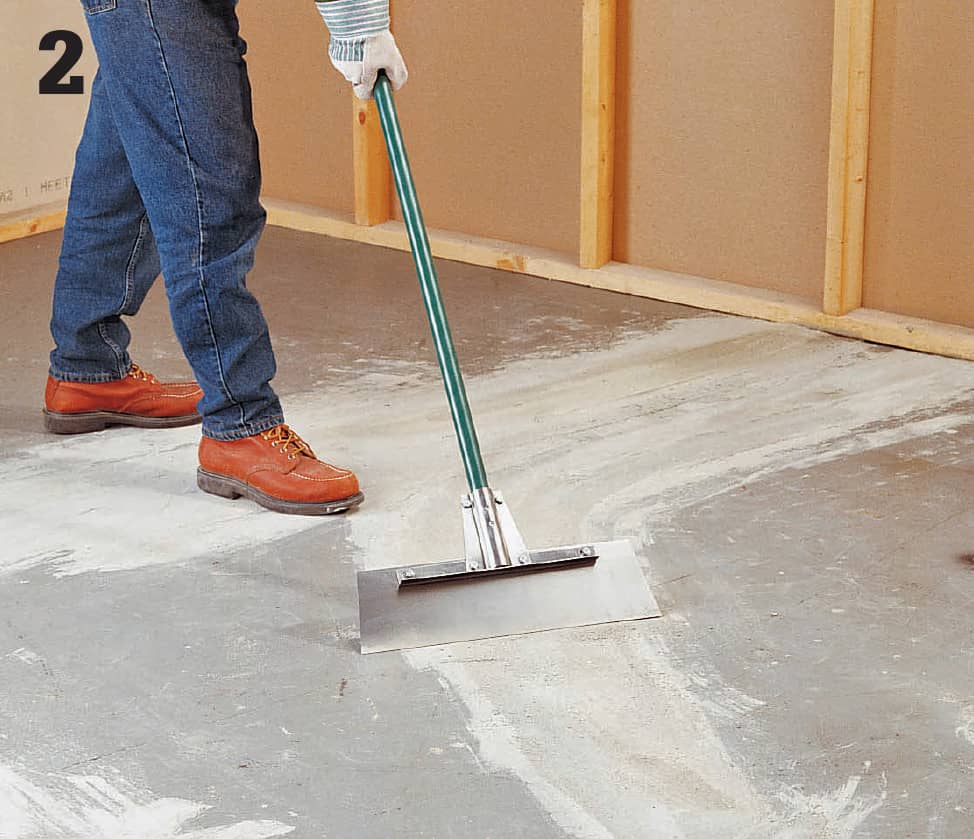
After the compound has cured fully, use a floor scraper to scrape the patched areas smooth.
How to Apply Floor Leveler
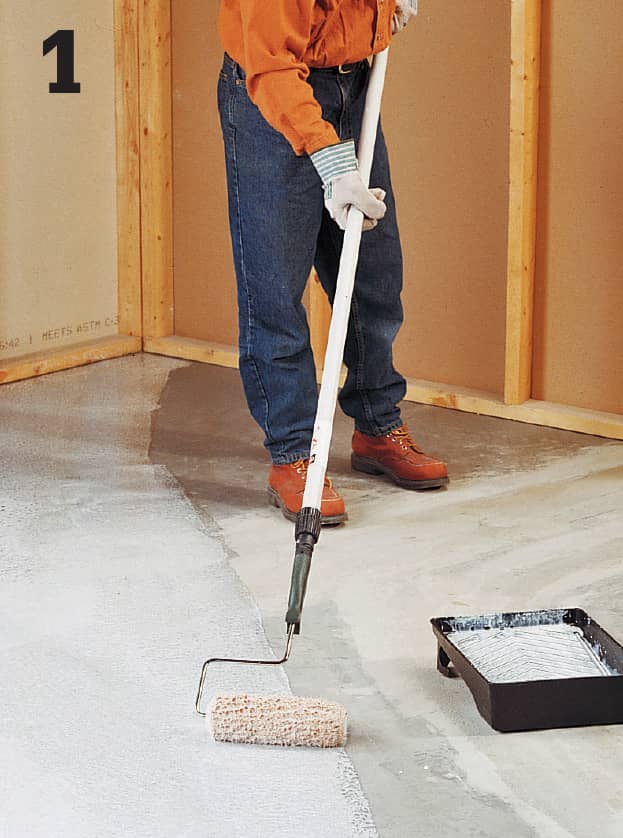
Remove any loose material and clean the concrete thoroughly; the surface must be free of dust, dirt, oils, and paint. Apply an even layer of concrete primer to the entire surface, using a long-nap paint roller. Let the primer dry completely.
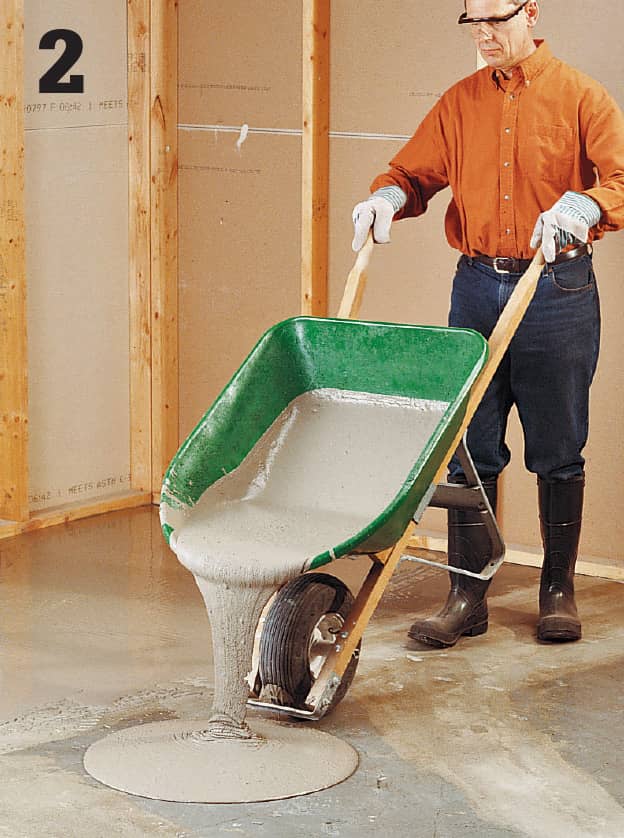
Following the manufacturer’s instructions, mix the floor leveler with water. The batch should be large enough to cover the entire floor area to the desired thickness (up to 1"). Pour the leveler over the floor.
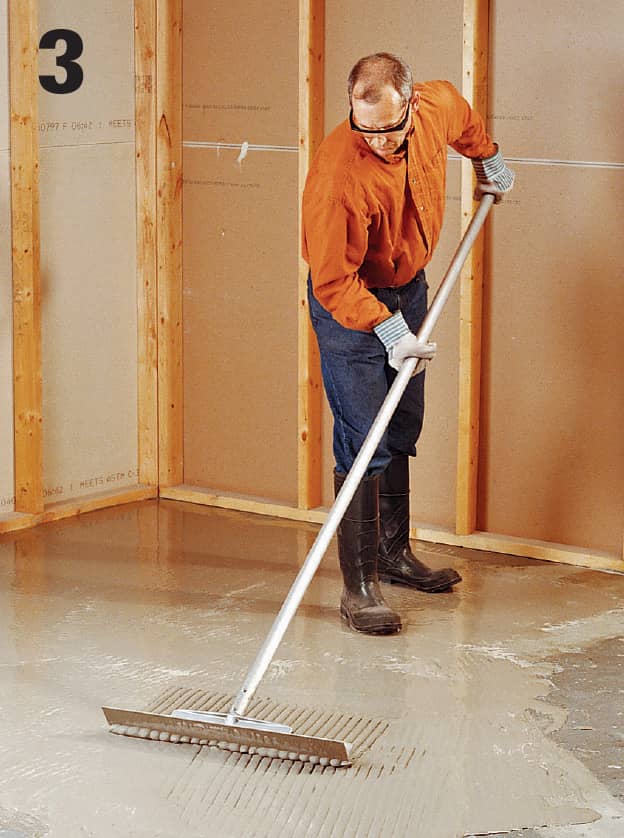
Distribute the leveler evenly using a gauge rake or spreader. Work quickly: the leveler begins to harden in 15 minutes. You can use a trowel to feather the edges and create a smooth transition with an uncovered area. Let the leveler dry for 24 hours.
 Filling Cracks in Concrete
The materials and methods for repairing cracks in concrete depend on the location and size of the crack. For small cracks (less than 1/4" wide), you can use gray-tinted concrete caulk for a quick fix. For more permanent solutions, use pourable crack filler or fortified patching cements. The patching cements are polymer compounds that increase the bonding properties and allow some flexibility. For larger cracks on horizontal surfaces, use fortified sand-mix concrete; for cracks on vertical surfaces, use hydraulic or quick-setting cement. Thorough preparation is essential for creating a good bonding surface.
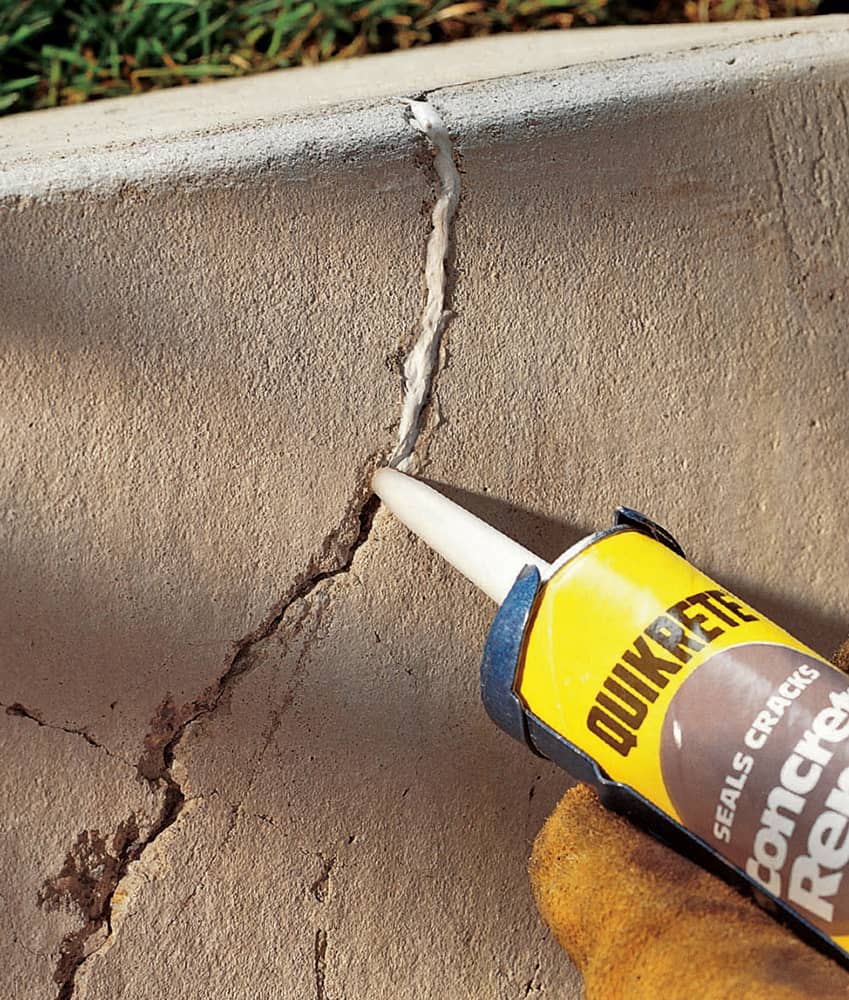
Use concrete repair caulk for quick-fix repairs to minor cracks. Although convenient, repair caulk should be viewed only as a short-term solution to improve appearance and help prevent further damage from water penetration.
How to Repair Small Cracks
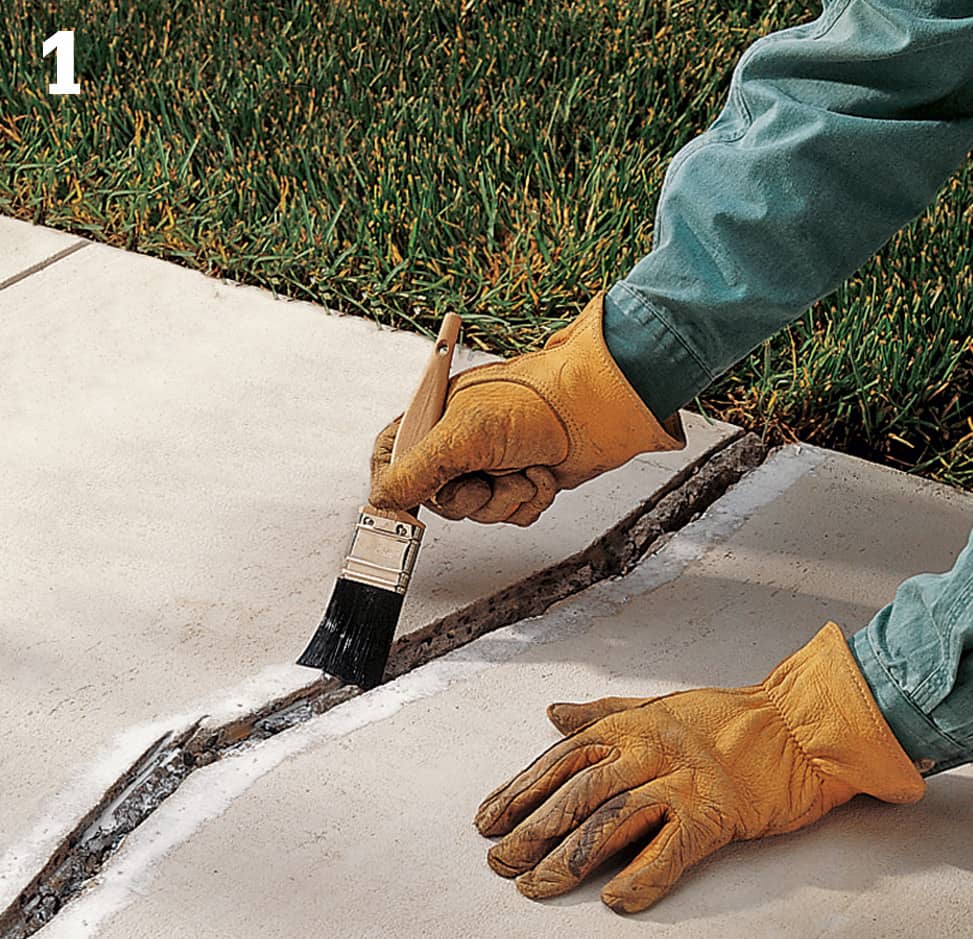
Prepare the crack for the repair (page 240), then apply a thin layer of latex bonding agent to the entire repair area, using a paint brush. The latex bonding agent helps keep the repair material from loosening or popping out of the crack.
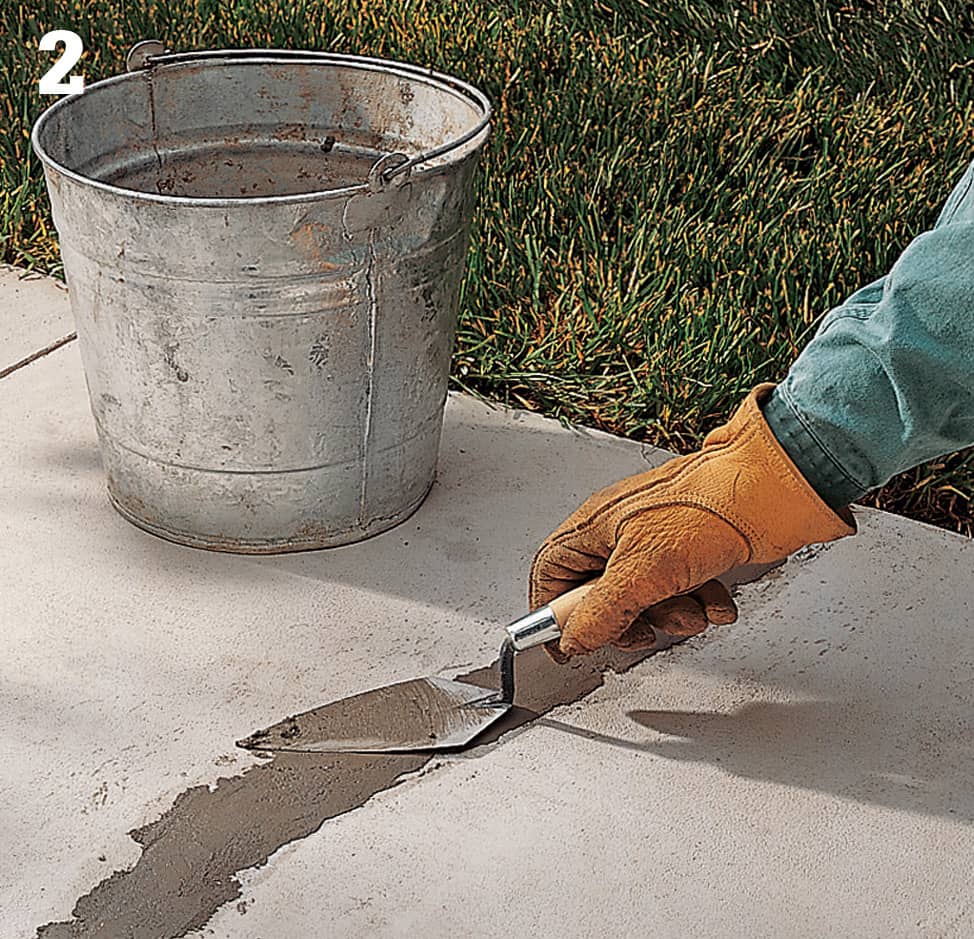
Mix vinyl-reinforced patching compound, and trowel it into the crack. Feather the repair with a trowel, so it is even with the surrounding surface. Cover the surface with plastic and protect it from traffic for at least a week.
How to Seal Cracks in Concrete Foundation Walls

To determine if a foundation crack is stable, you need to monitor it over the course of several months, particularly over the fall and spring seasons. Draw marks across the crack at various points, noting the length as well as its width at the widest gaps. If the crack moves more than 1/16", consult a building engineer or foundation specialist.
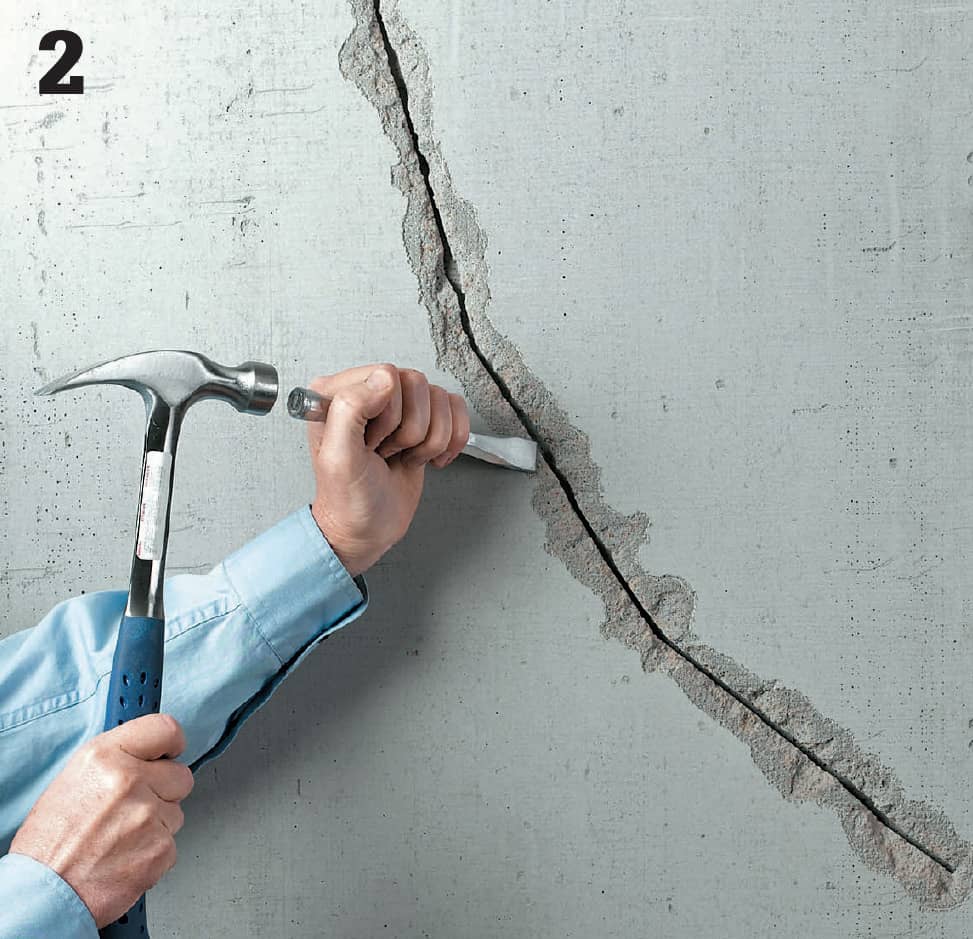
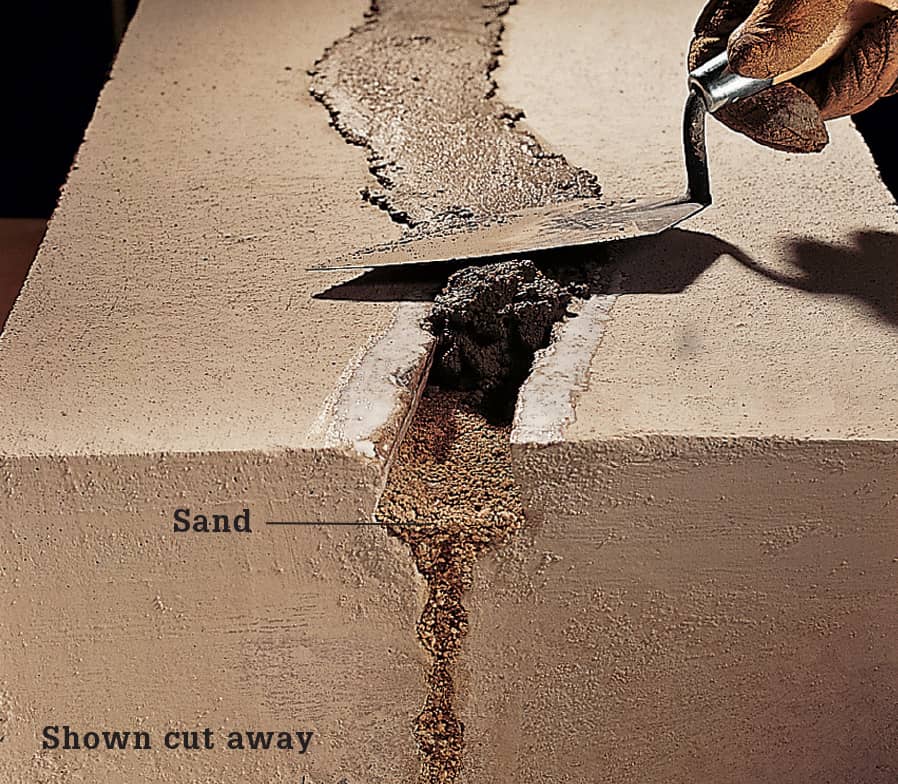
To repair a stable crack, use a chisel to cut a keyhole cut that’s wider at the base then at the surface, and no more than 1/2" deep. Clean out the crack with a wire brush.
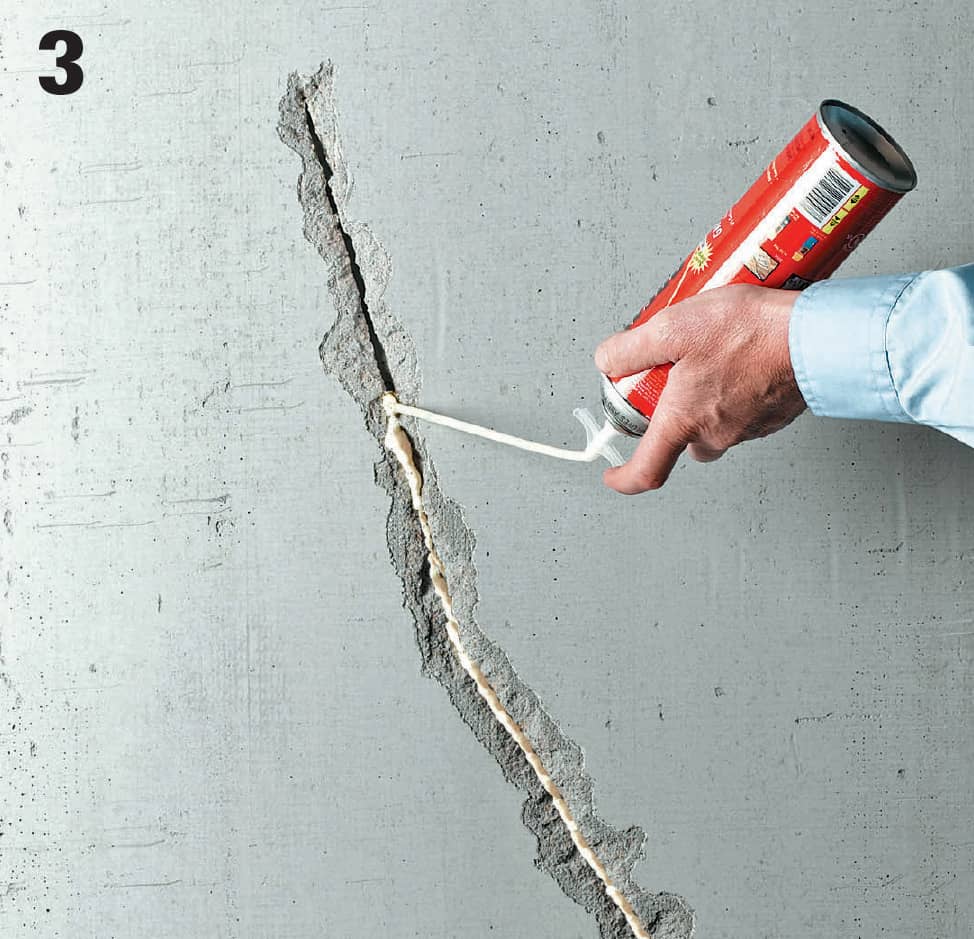
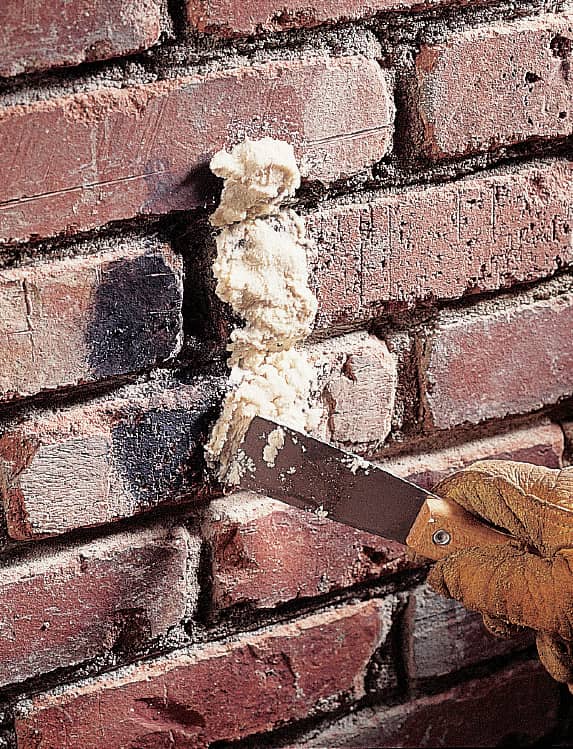
To help seal against moisture, fill the crack with expanding insulating foam, working from bottom to top.
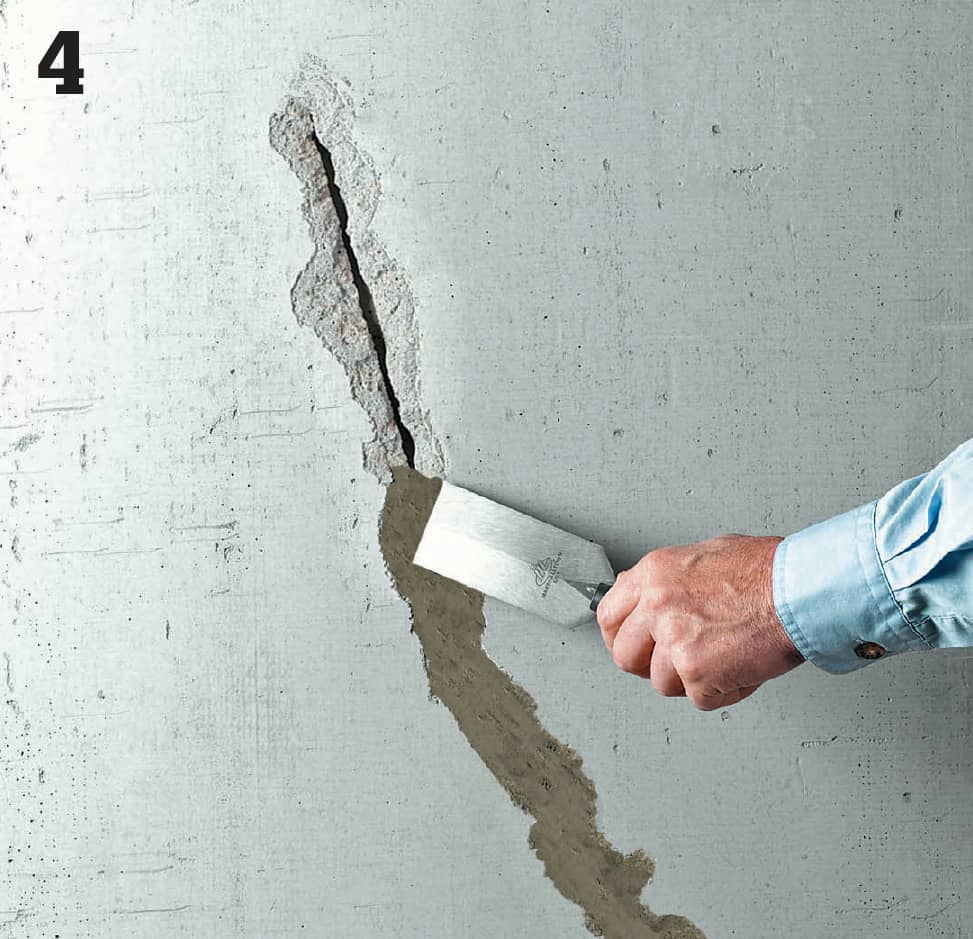
Mix hydraulic cement according to the manufacturer’s instructions, then trowel it into the crack, working from the bottom to top. Apply cement in layers no more than 1/2" thick, until the patch is slightly higher than the surrounding area. Feather cement with the trowel until it’s even with the surface and allow to dry thoroughly.
 Repairing Concrete Steps
Steps require more maintenance and repair than other concrete structures around the house because heavy use makes them more susceptible to damage. Horizontal surfaces on steps can be treated using the same products and techniques used on other masonry surfaces. For vertical surfaces, use quick-setting cement, and shape it to fit.
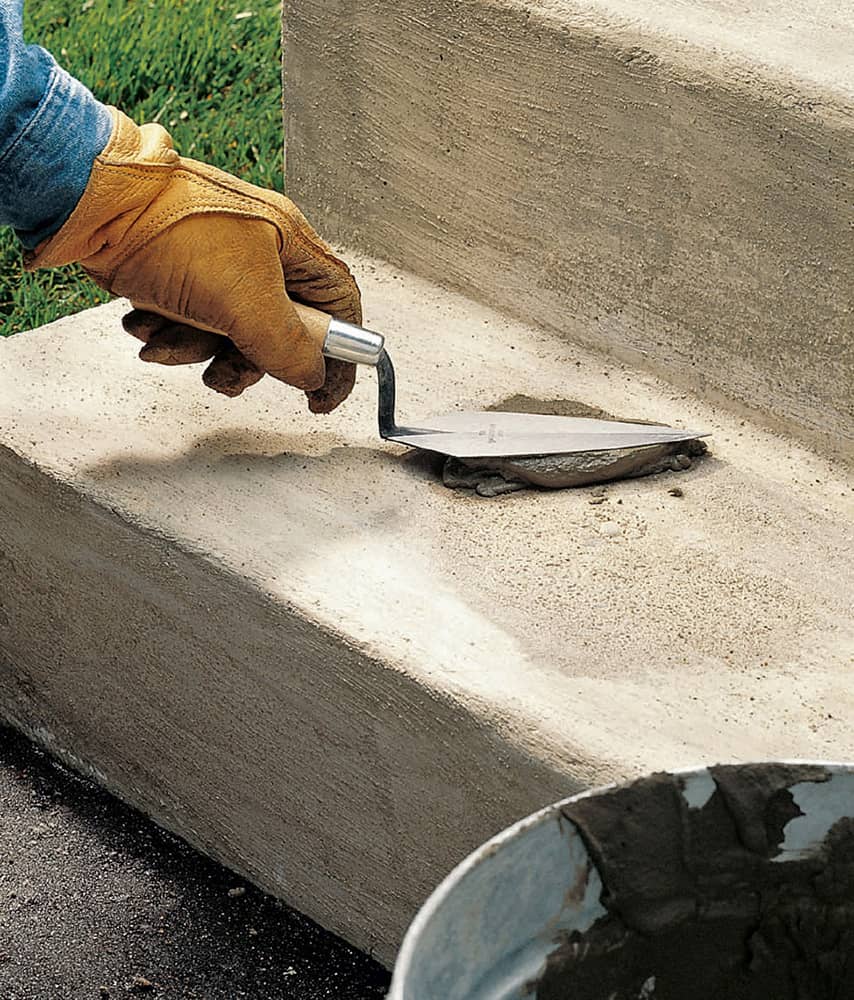
Isolated damage to step surfaces, like the deep popout being repaired above, can be fixed to renew your steps. If damage is extensive, you may need to replace the steps.
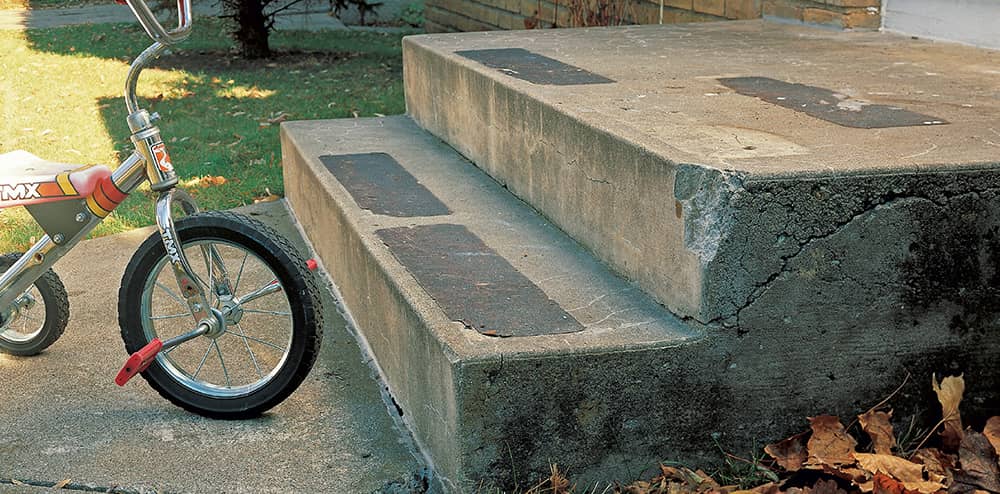
Damaged concrete steps are an unsightly and unsafe way to welcome visitors to your home. Repairing cracks as they develop not only keeps the steps in a safer and better looking condition, it prolongs their life.
How to Replace a Step Corner
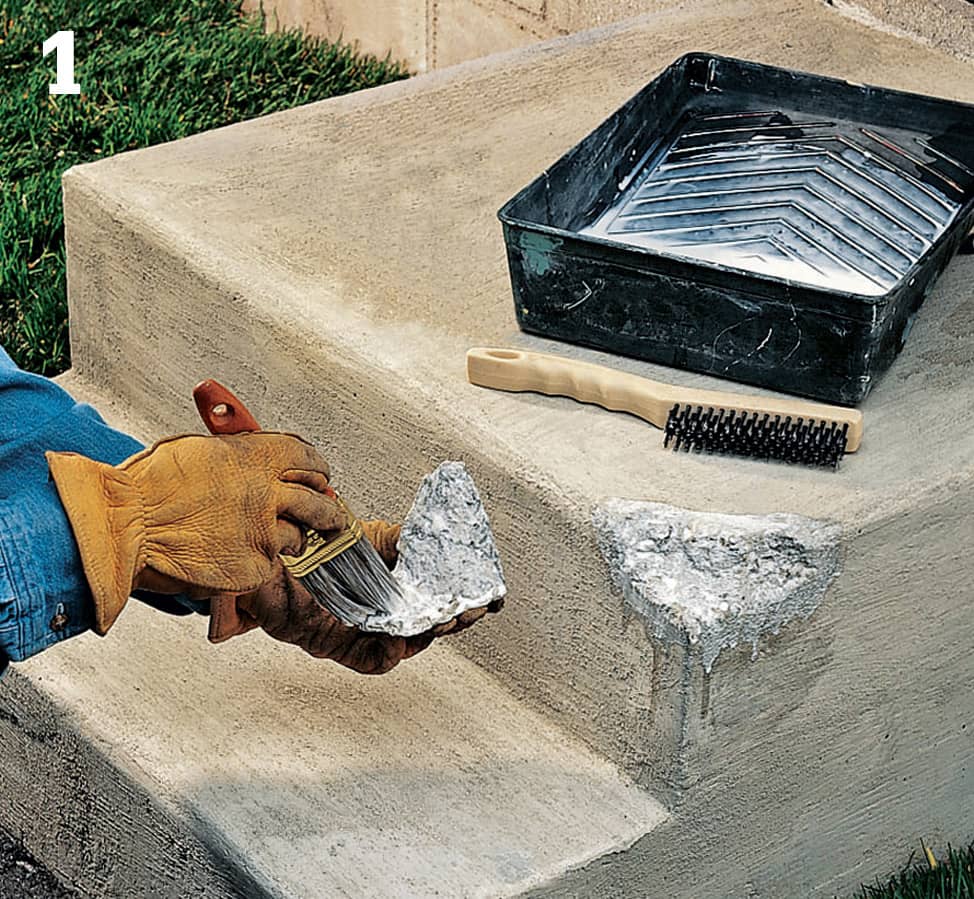
Retrieve the broken corner, then clean it and the mating surface with a wire brush. Apply latex bonding agent to both surfaces. If you do not have the broken piece, you can rebuild the corner with patching compound (below).
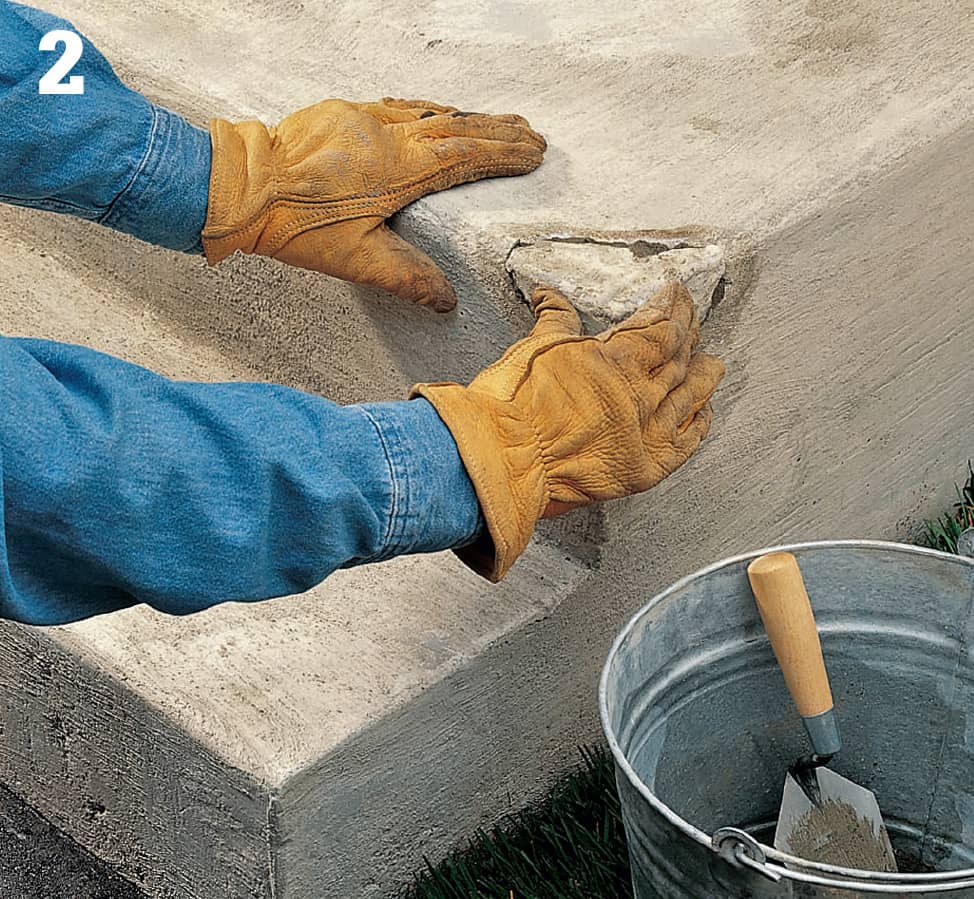
Spread a heavy layer of fortified patching compound on the surfaces to be joined, then press the broken piece into position. Lean a heavy brick or block against the repair until the patching compound sets (about 30 minutes). Cover the repair with plastic and protect it from traffic for at least one week.
How to Patch a Step Corner
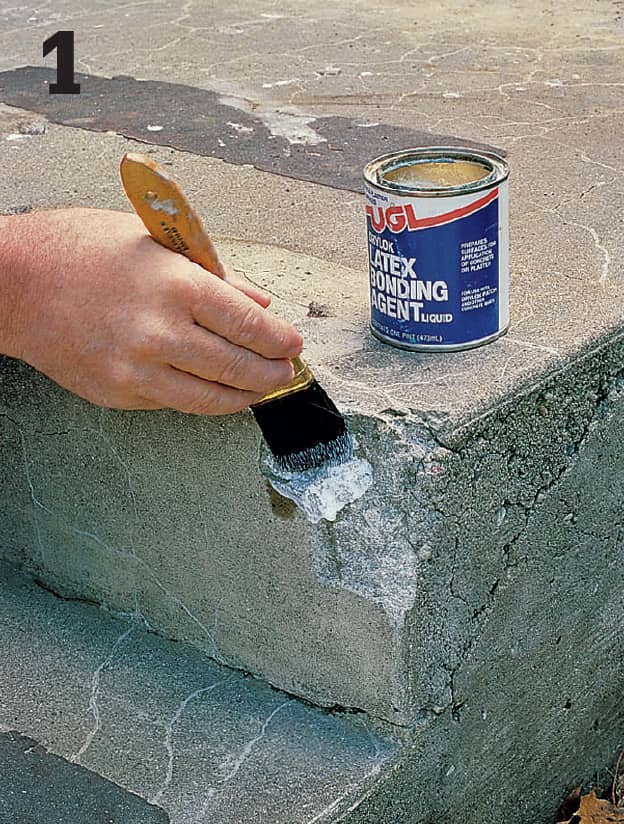
Clean chipped concrete with a wire brush. Brush the patch area with latex bonding agent.
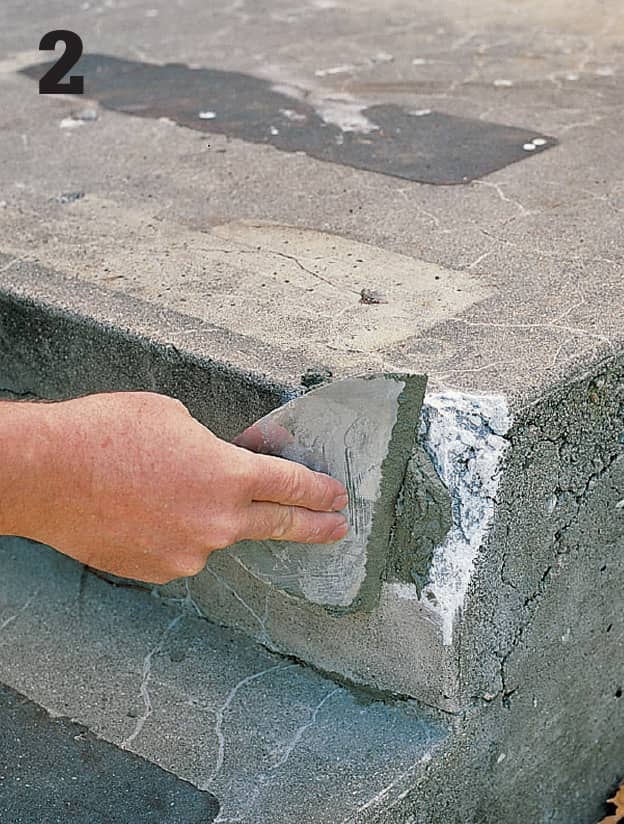
Mix patching compound with latex bonding agent, as directed by the manufacturer. Apply the mixture to the patch area, then smooth the surfaces and round the edges, as necessary, using a flexible knife or trowel.
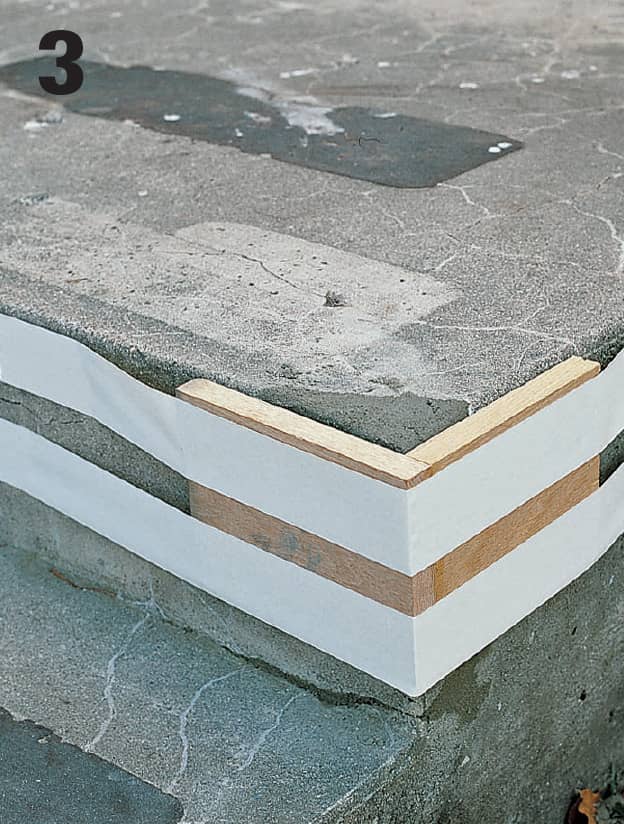
Tape scrap lumber pieces around the patch as a form. Coat the insides with vegetable oil or commercial release agent so the patch won’t adhere to the wood. Remove the wood when the patch is firm. Cover with plastic and protect from traffic for at least one week.
How to Patch Step Treads
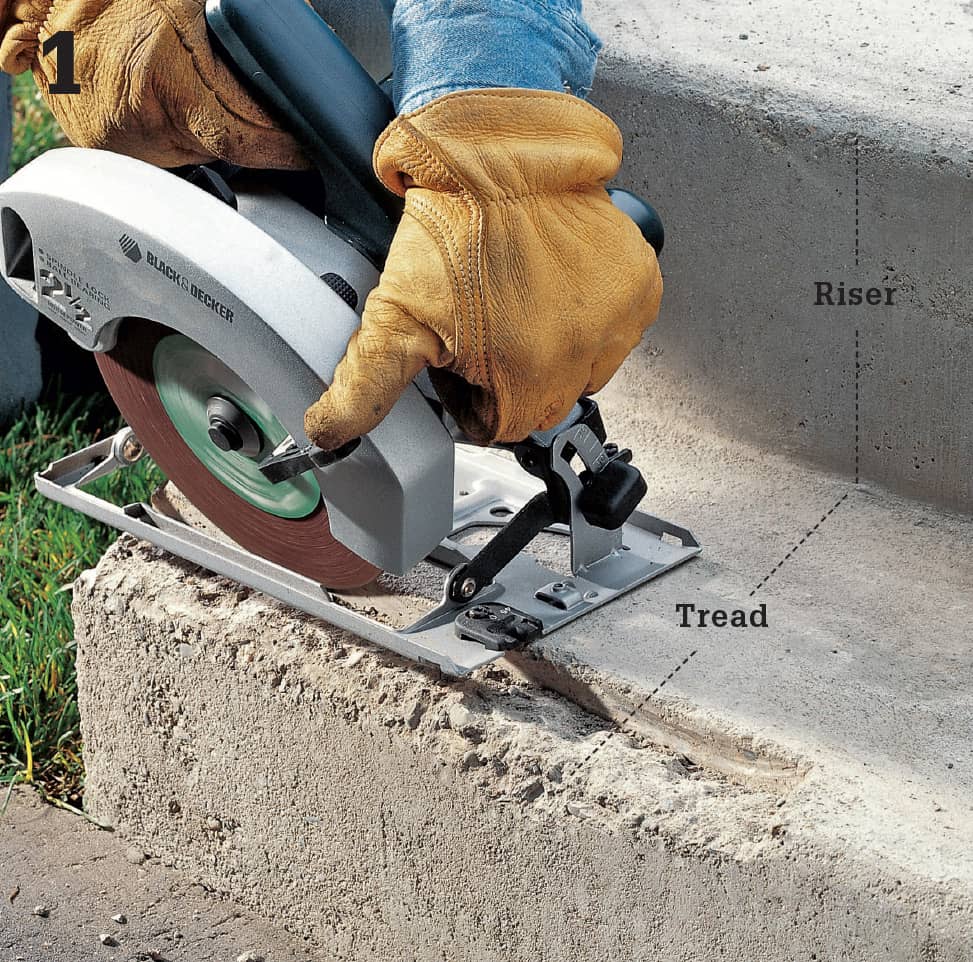
Make a cut in the stair tread just outside the damaged area, using a circular saw with a masonry-cutting blade. Make the cut so it angles toward the back of the step. Make a horizontal cut on the riser below the damaged area, then chisel out the area in between the two cuts.
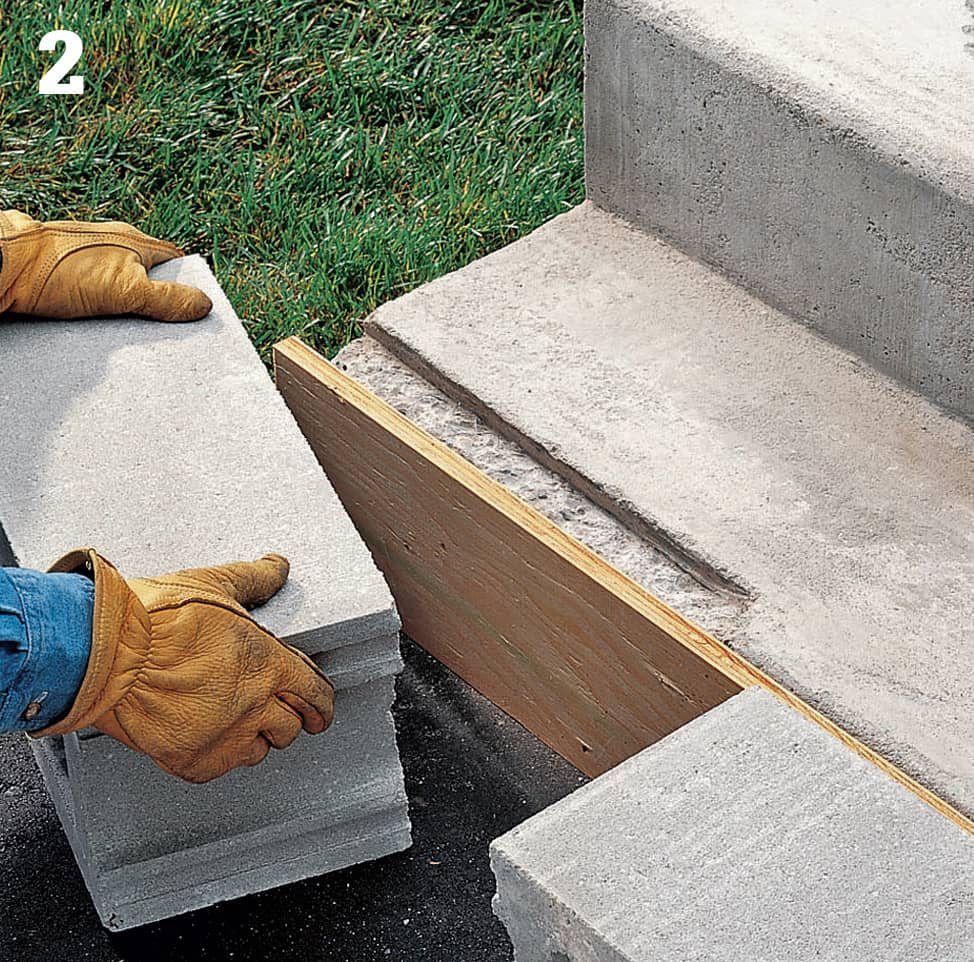
Cut a form board the same height as the step riser. Coat one side of the board with vegetable oil or commercial release agent to prevent it from bonding with the repair, then press it against the riser of the damaged step, and brace it in position with heavy blocks. Make sure the top of the form is flush with the top of the step tread.
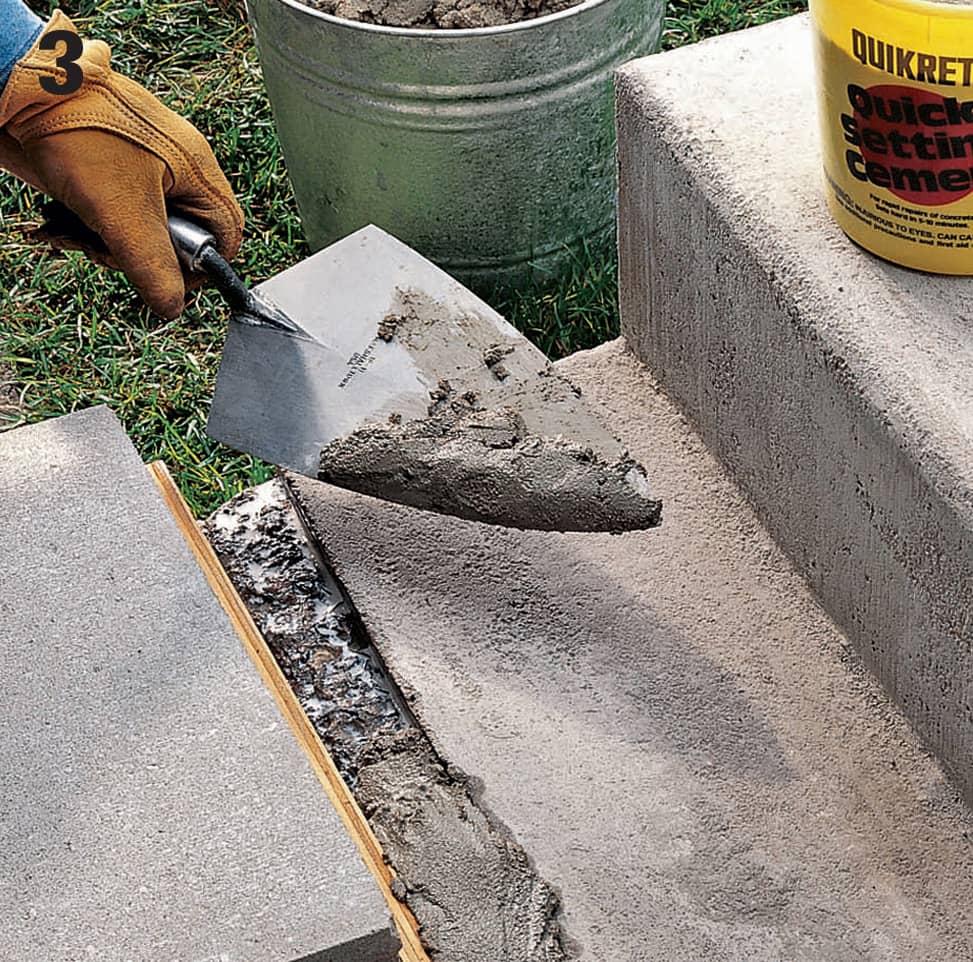
Apply latex bonding agent to the repair area with a clean paint brush, wait until the bonding agent is tacky (no more than 30 minutes), then press a stiff mixture of quick-setting cement into the damaged area with a trowel.
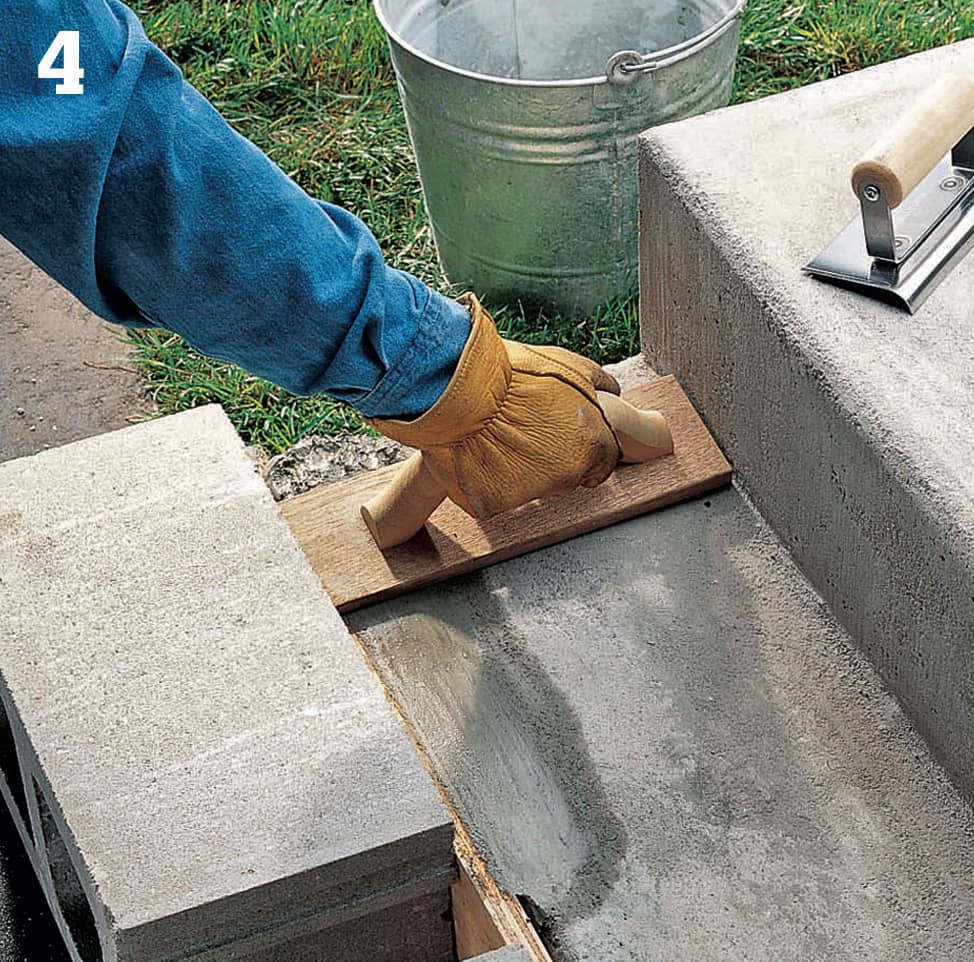
Smooth the concrete with a float, and let it set for a few minutes. Round over the front edge of the nose with an edger. Use a trowel to slice off the sides of the patch, so it is flush with the side of the steps. Cover the repair with plastic and wait a week before allowing traffic on the repaired section.
 Miscellaneous Concrete Repairs
There are plenty of concrete problems you may encounter around your house that are not specifically addressed in many repair manuals. These miscellaneous repairs include such tasks as patching contoured objects that have been damaged and repairing masonry veneer around the foundation of your house. You can adapt basic techniques to make just about any type of concrete repair. Remember to dampen concrete surfaces before patching so that the moisture from concrete and other patching compounds is not absorbed into the existing surface. Be sure to follow the manufacturer’s directions for the repair products you use.
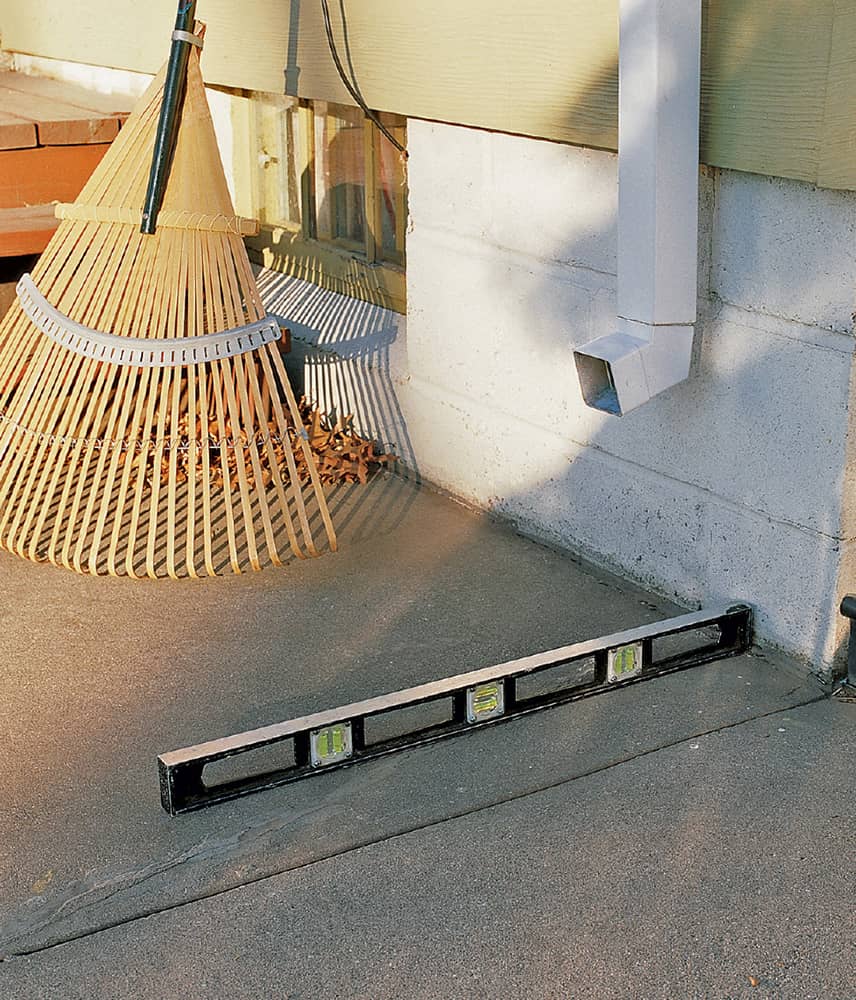
Concrete slabs that slant toward the house can lead to foundation damage and a wet basement. Even a level slab near the foundation can cause problems. Consider asking a concrete contractor to fix it by mud-jacking, forcing wet concrete underneath the slab to lift the edge near the foundation.
How to Repair Shaped Concrete
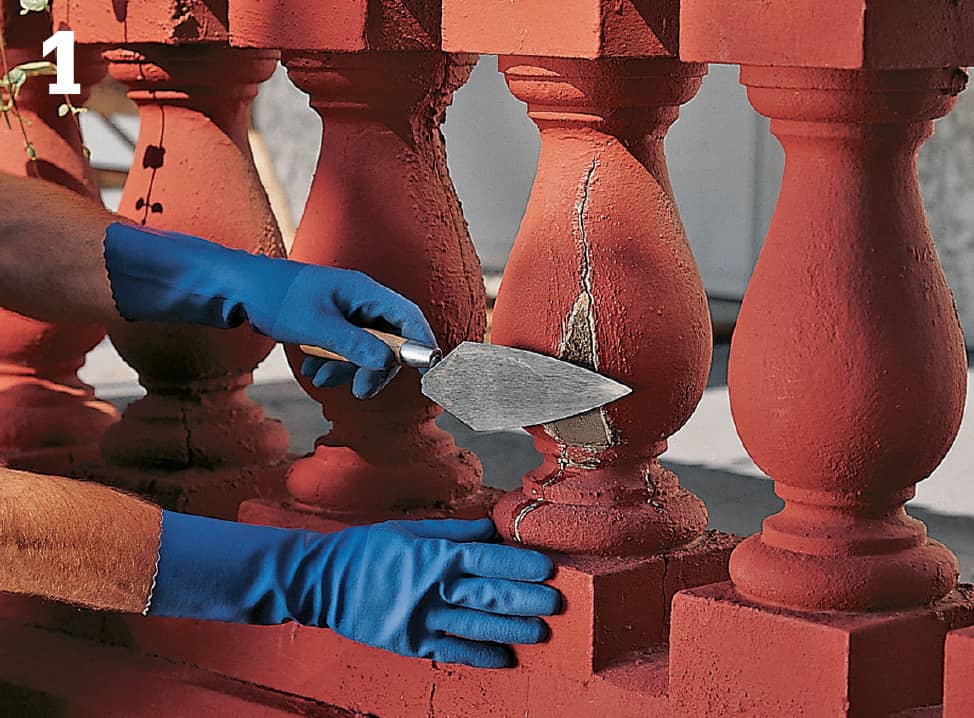
Scrape all loose material and debris from the damaged area, then wipe down with water. Mix quick-setting cement and trowel it into the area. Work quickly—you only have a few minutes before concrete sets up.
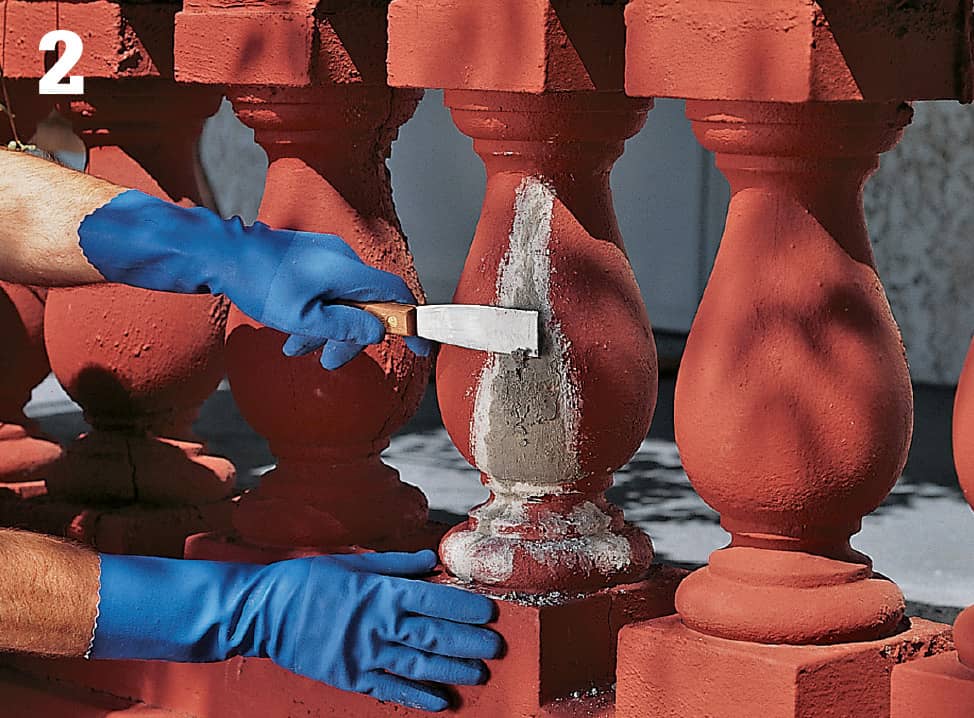
Use the trowel or a putty knife to mold the concrete to follow the form of the object being repaired. Smooth the concrete as soon as it sets up. Buff with emery paper to smooth out any ridges after the repair dries.
How to Repair Masonry Veneer
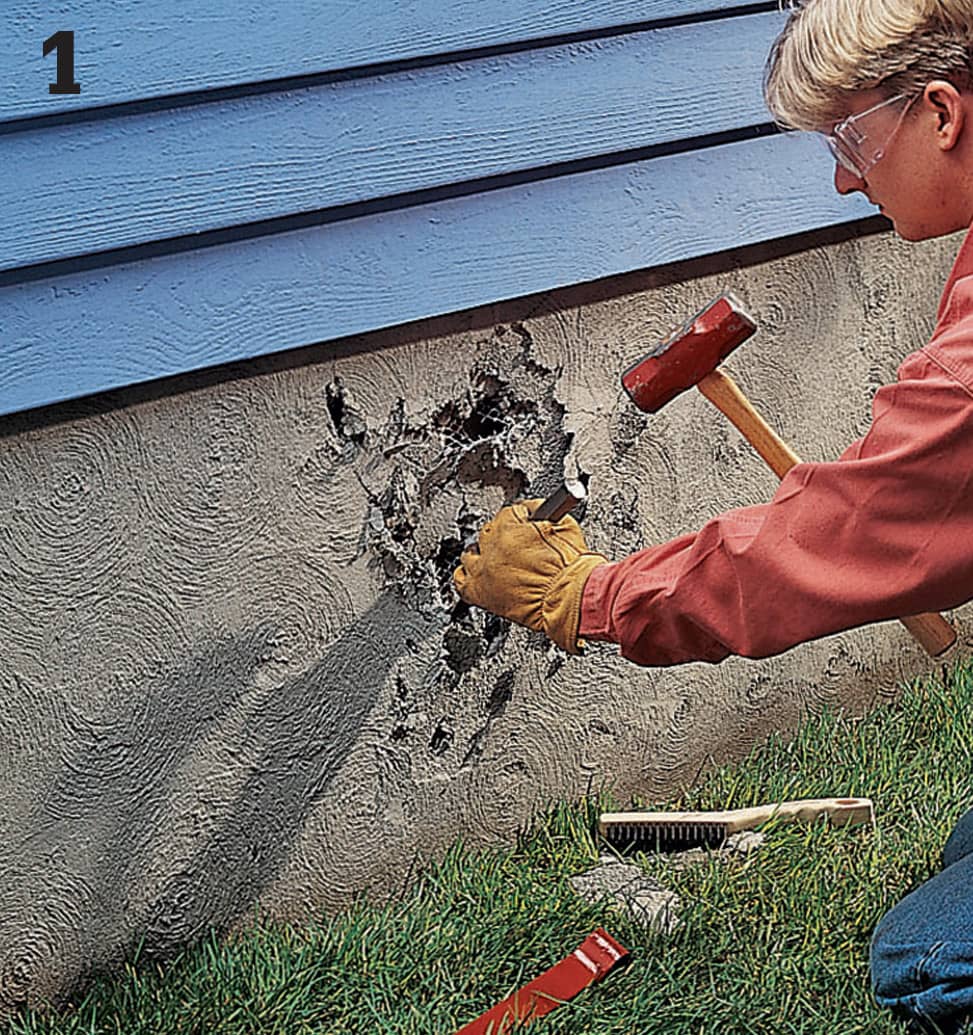
Chip off the crumbled, loose, or deteriorated veneer from the wall, using a cold chisel and maul. Chisel away damaged veneer until you have only good, solid surface remaining. Use care to avoid damaging the wall behind the veneer. Clean the repair area with a wire brush.
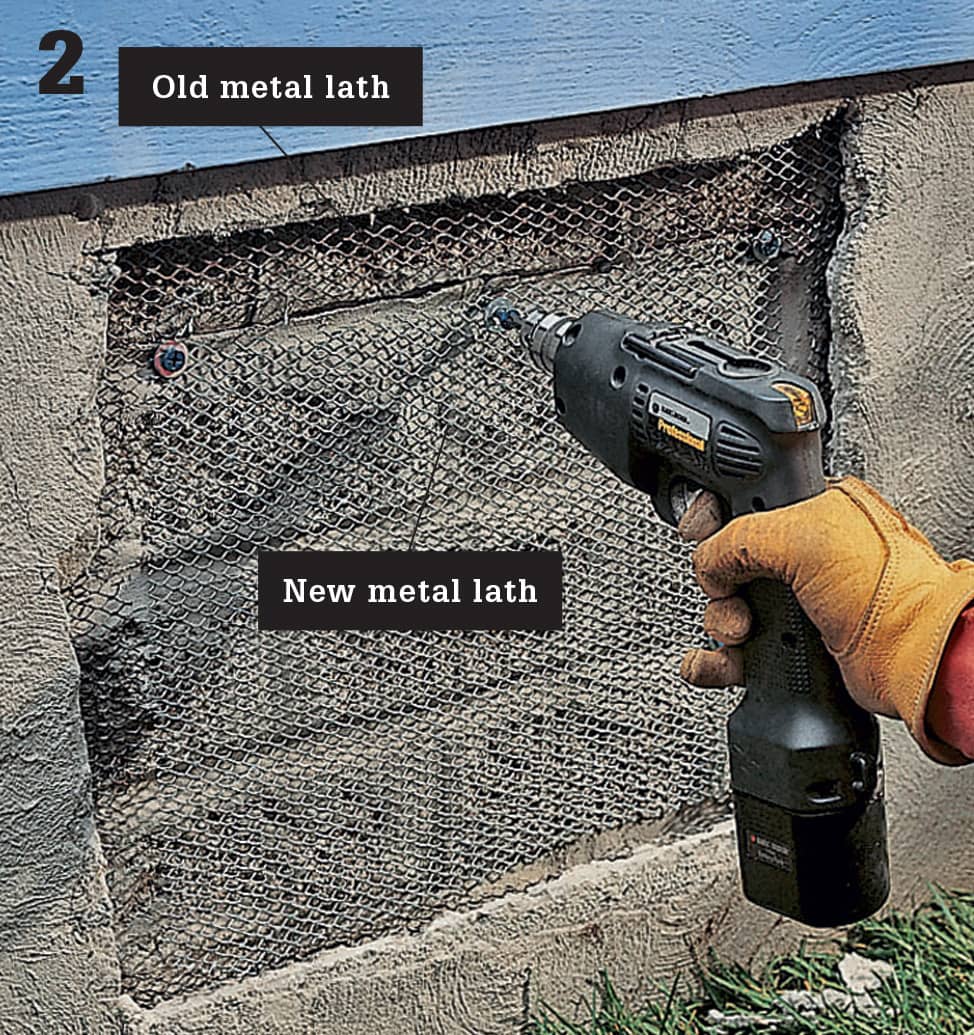
Clean up any metal lath in the repair area if it is in good condition. If not, cut it out with aviation snips. Add new lath where needed, using masonry anchors to hold it to the wall.
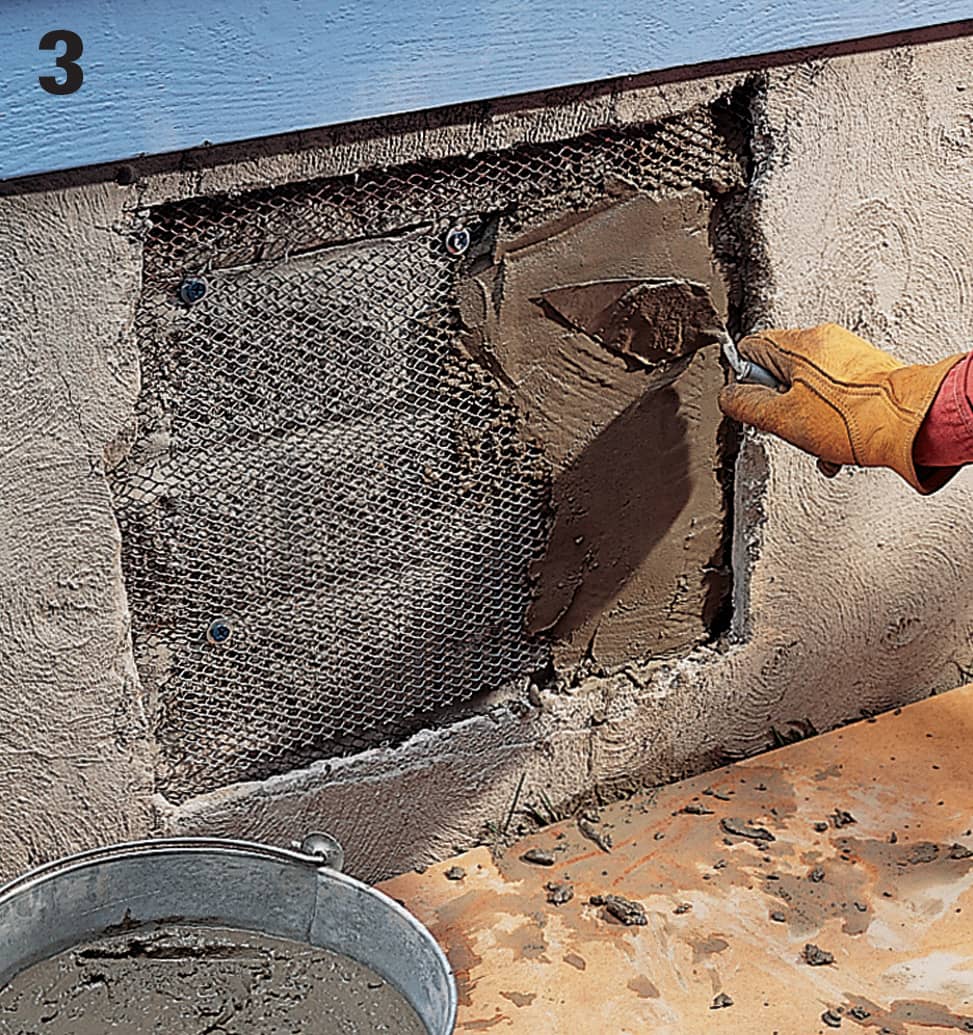
Mix fortified sand-mix concrete (or specialty concrete blends for wall repair), and trowel it over the lath until it is even with the surrounding surfaces.
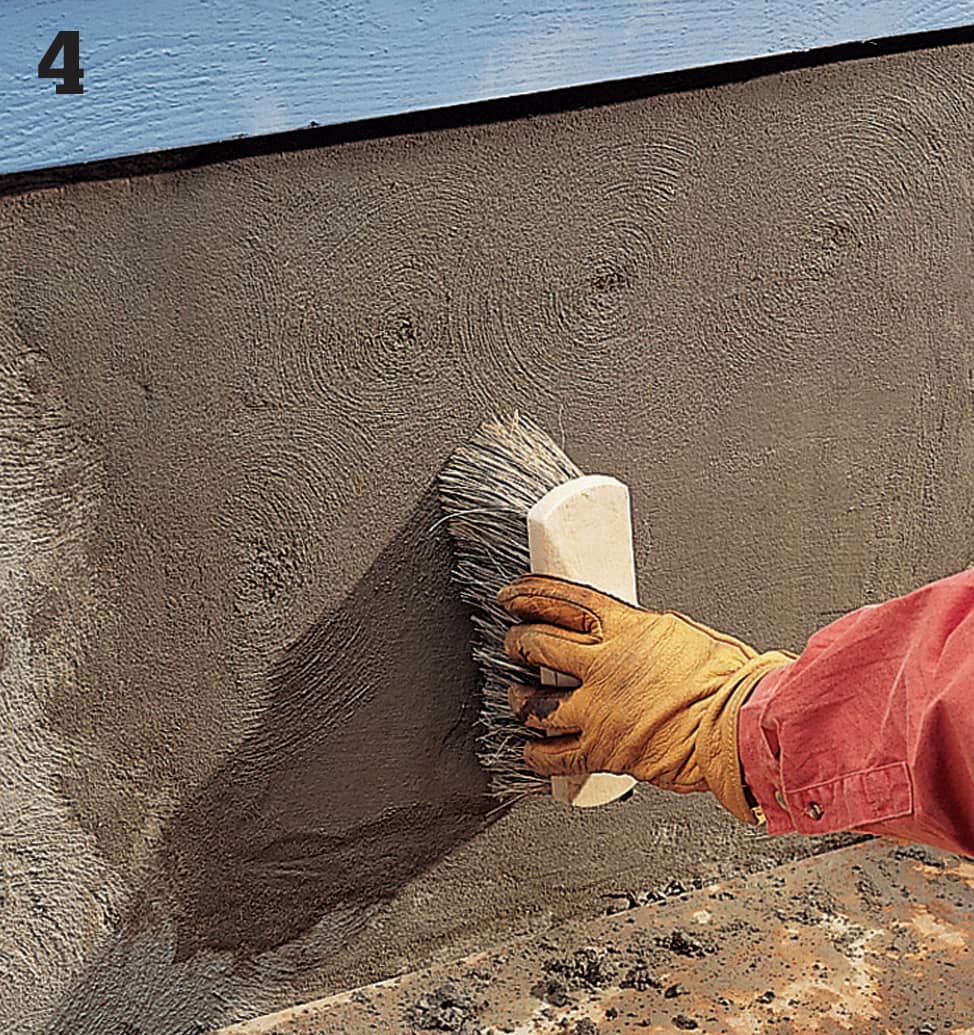
Recreate the surface texture to match the surrounding area. For our project, we used a soft-bristled brush to stipple the surface. To blend in the repair, add pigment to the sand mixture or paint the repair area after it dries.
 Resurfacing a Concrete Walkway
Concrete that has surface damage but is still structurally sound can be preserved by resurfacing—applying a thin layer of new concrete over the old surface. If the old surface has deep cracks or extensive damage, resurfacing will only solve the problem temporarily. Because new concrete will bond better if it is packed down, use a dry, stiff concrete mixture that can be compacted with a shovel.
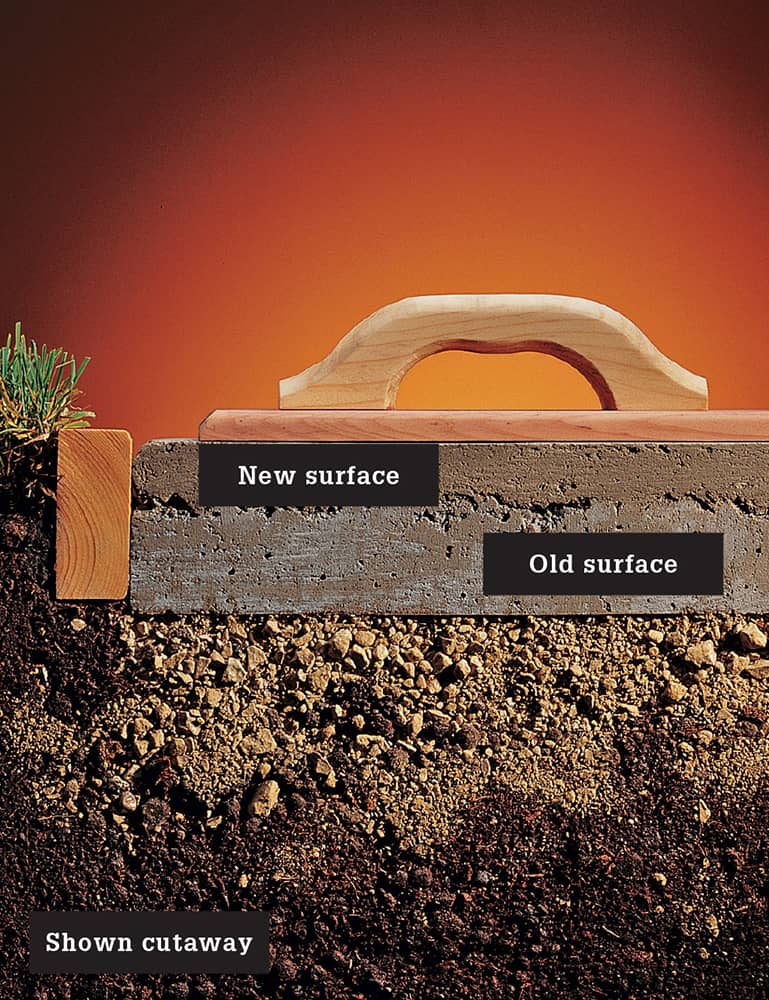
Resurface concrete that has surface damage, such as spalling or popouts. Because the new surface will be thin (1" to 2"), use sand-mix concrete. If you are having ready-mix concrete delivered by a concrete contractor, make sure they do not use aggregate larger than 1/2" in the mixture.
How to Resurface Using Fresh Concrete
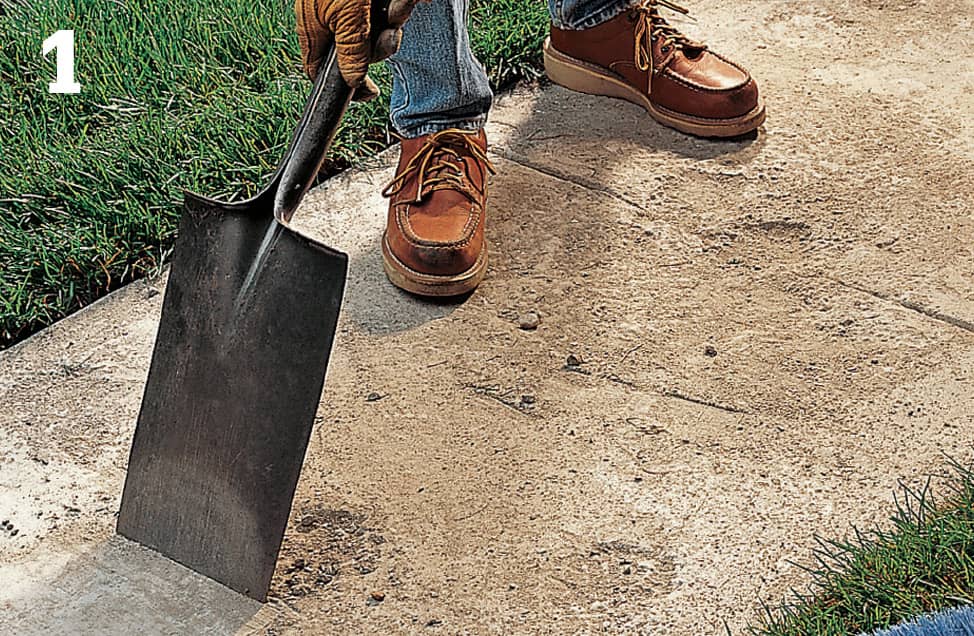
Clean the surface thoroughly. If the surface is flaking or spalled, scrape it with a spade to dislodge as much loose concrete as you can, then sweep the surface clean.
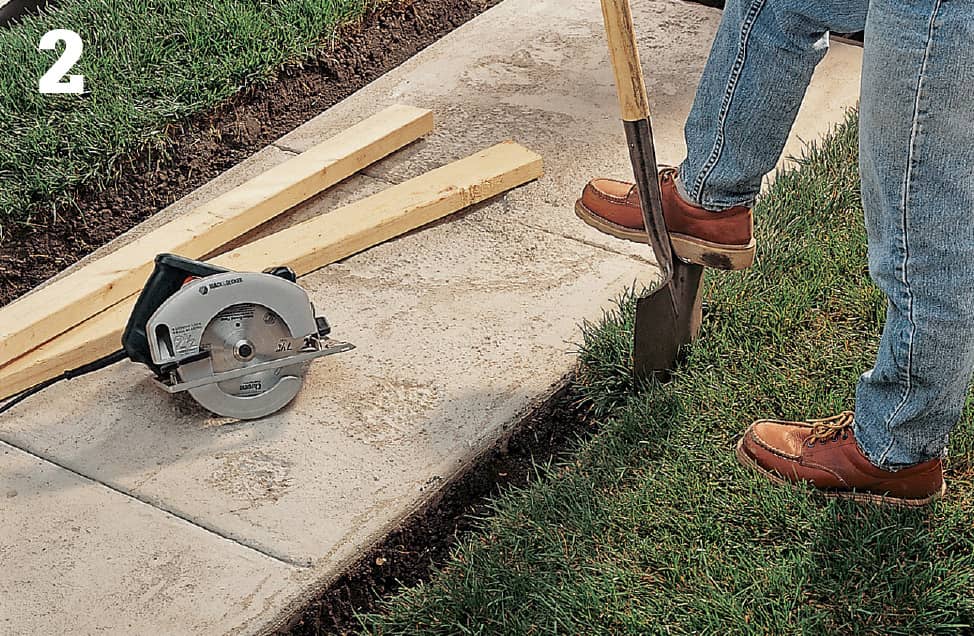
Dig a 6"-wide trench around the surface on all sides to create room for 2 × 4 forms.
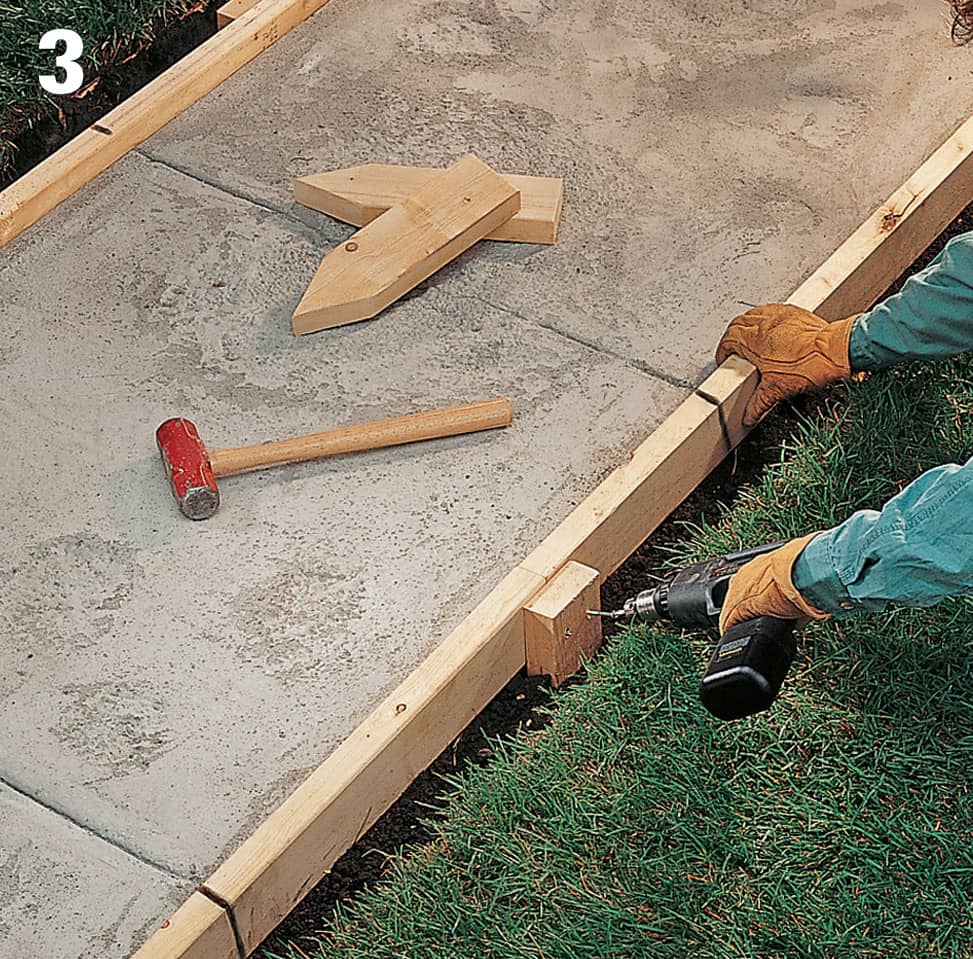
Stake 2 × 4 forms flush against the sides of the concrete slabs, 1" to 2" above the surface (make sure height is even). Drive stakes every 3 ft. and at every joint in forms. Mark control joint locations onto the outside of the forms directly above existing control joints. Coat the inside edges of the forms with vegetable oil or commercial release agent.
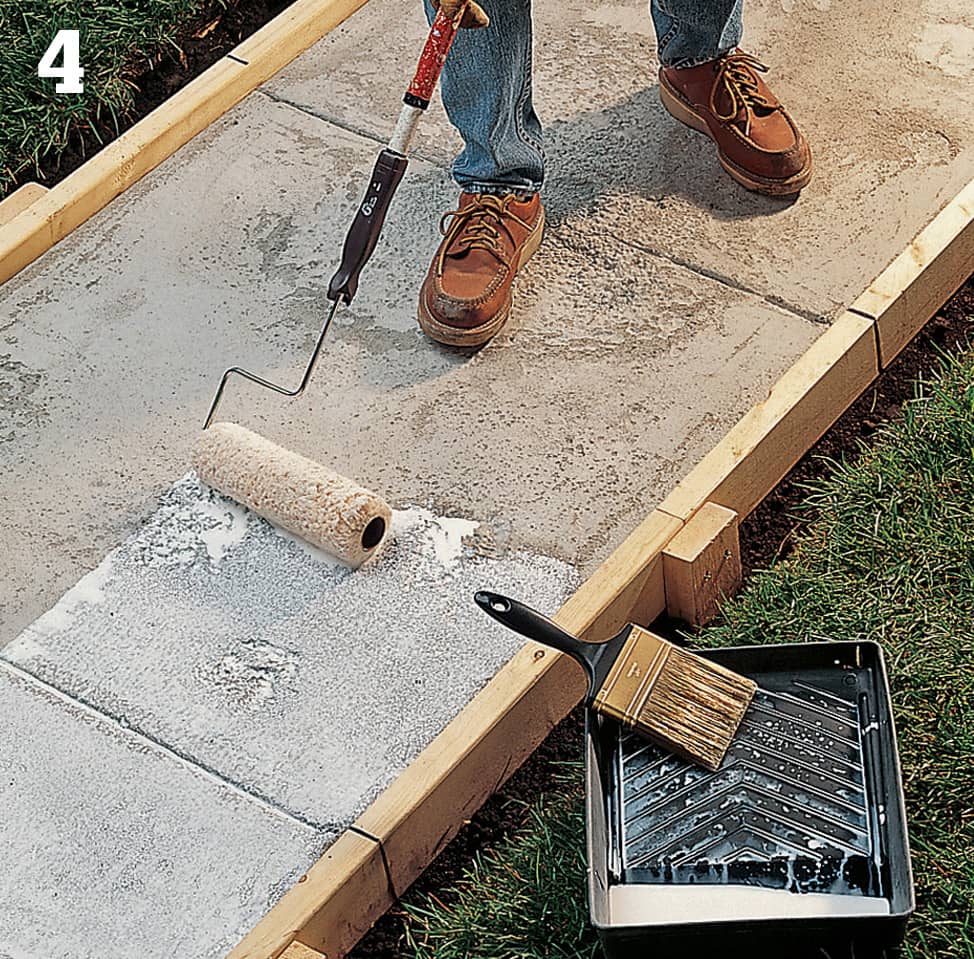
Apply a thin layer of bonding adhesive over the entire surface. Follow the directions on the bonding adhesive product carefully. Instructions for similar products may differ slightly.
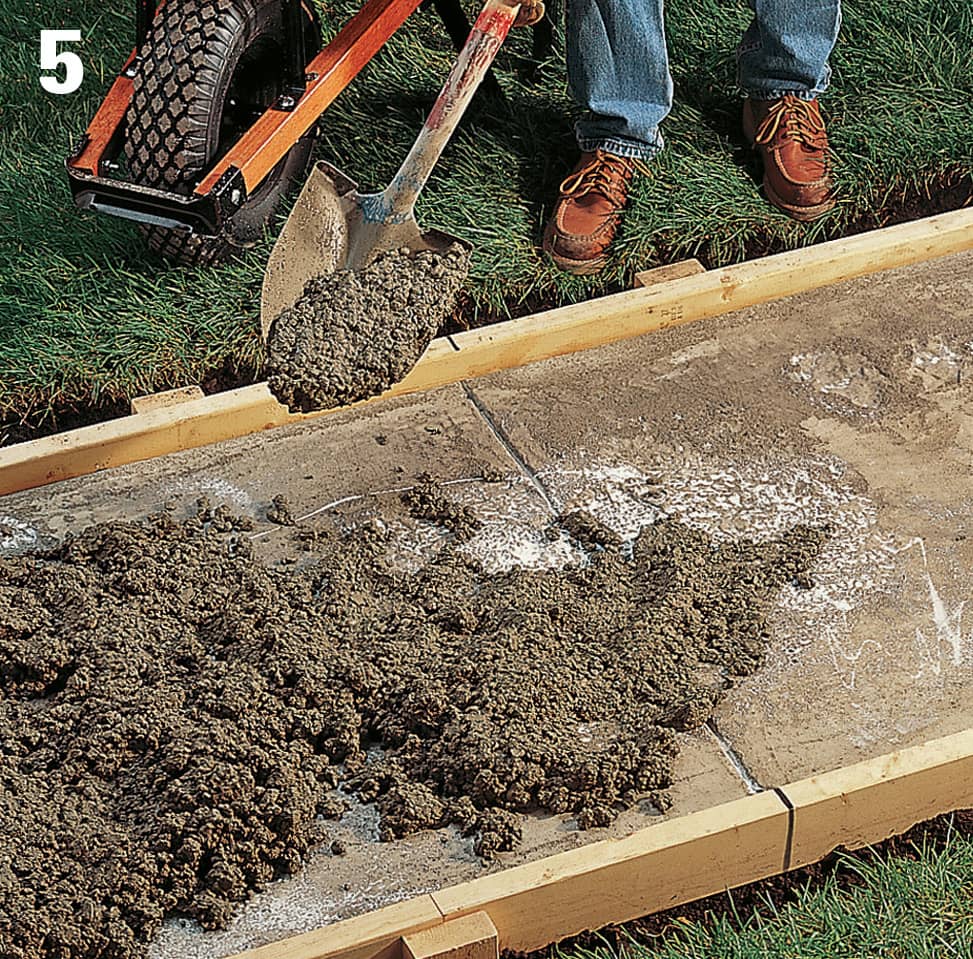
Mix concrete, using sand-mix concrete. Make the mixture slightly stiffer (drier) than normal concrete. Spread the concrete, then press down on the concrete with a shovel or 2 × 4 to pack the mixture into the forms. Smooth the surface with a screed board.
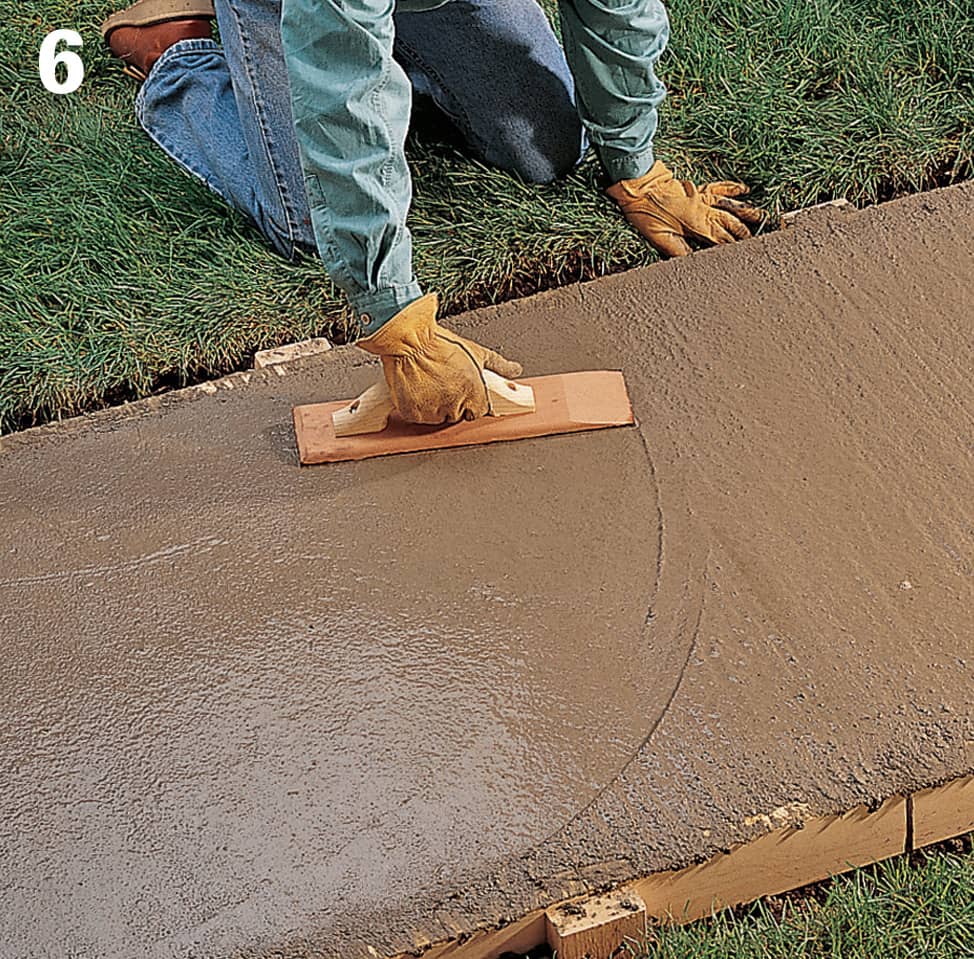
Float the concrete with a wood float, then tool with an edger, and cut control joints in the original locations. Recreate any surface treatment, such as brooming, used on the original surface. Let the surface cure for one week, covered with plastic. Seal the concrete.
 Building Concrete Steps
Designing steps requires some calculations and some trial and error. As long as the design meets safety guidelines, you can adjust elements such as the landing depth and the dimensions of the steps. Sketching your plan on paper will make the job easier.
Before demolishing your old steps, measure them to see if they meet safety guidelines. If so, you can use them as a reference for your new steps. If not, start from scratch so your new steps do not repeat any design errors.
For steps with more than two risers, you’ll need to install a handrail. Ask a building inspector about other requirements.
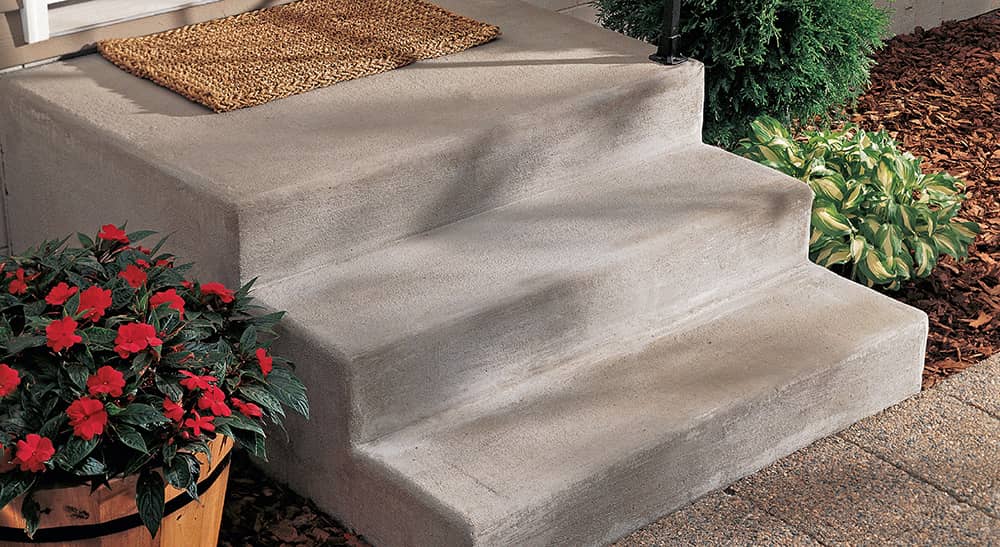
New concrete steps give a fresh, clean appearance to your house. And if your old steps are unstable, replacing them with concrete steps that have a non-skid surface will create a safer living environment.
How to Design Steps
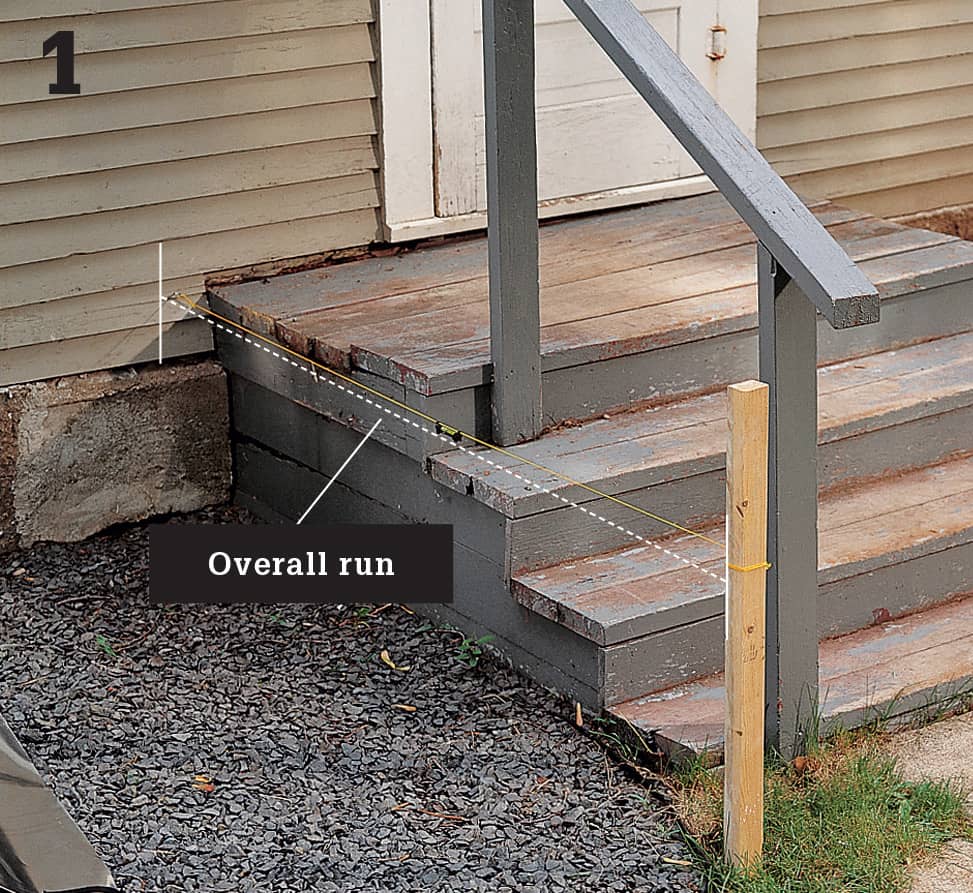
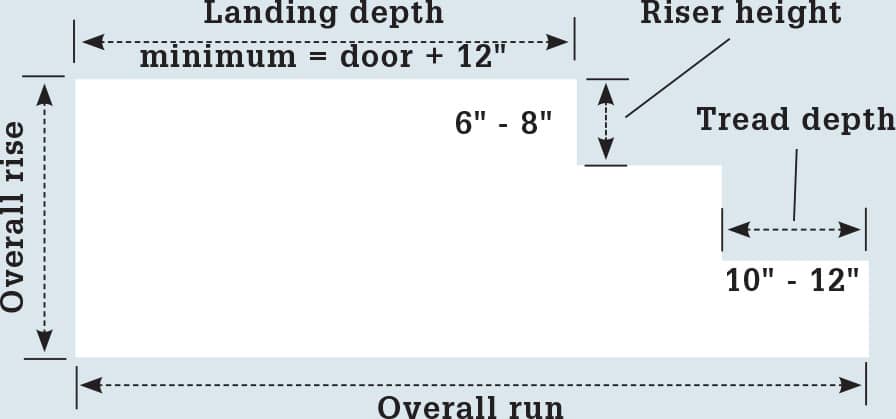
Attach a mason’s string to the house foundation, 1" below the bottom of the door threshold. Drive a stake where you want the base of the bottom step to fall. Attach the other end of the string to the stake and use a line level to level it. Measure the length of the string—this distance is the overall depth, or run, of the steps.
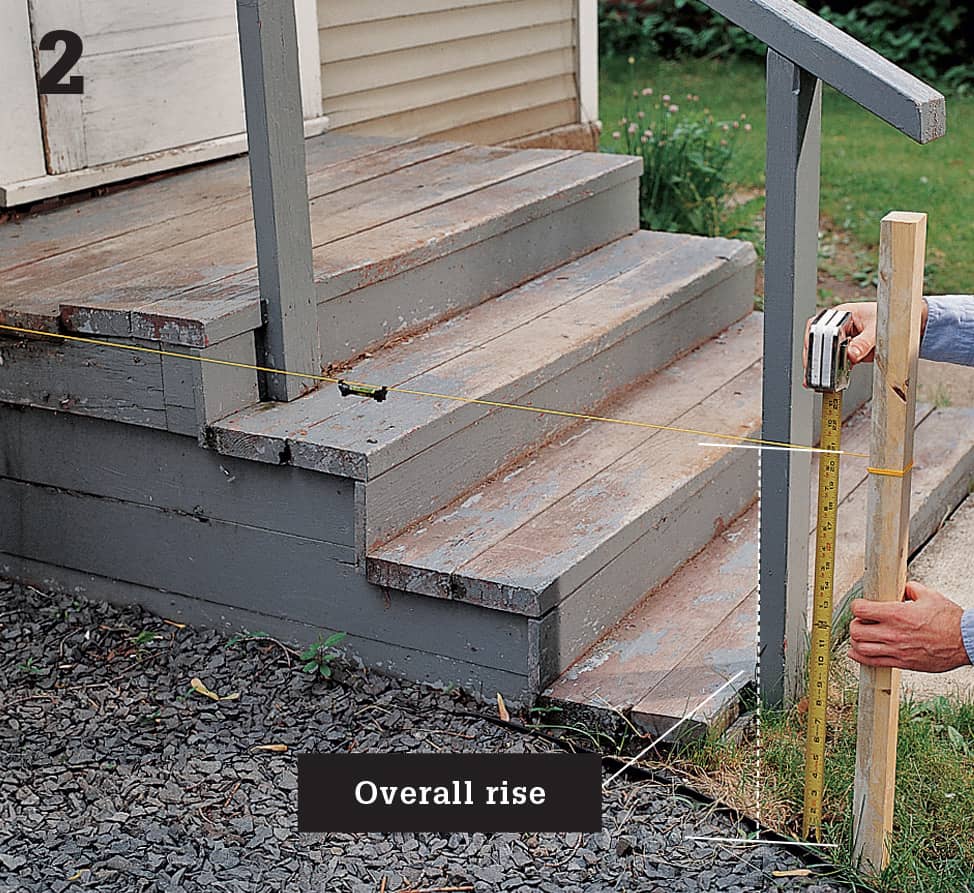
Measure down from the string to the bottom of the stake to determine the overall height, or rise, of the steps. Divide the overall rise by the estimated number of steps. The rise of each step should be between 6" and 8". For example, if the overall rise is 21" and you plan to build three steps, the rise of each step would be 7" (21 divided by 3), which falls within the recommended safety range for riser height.
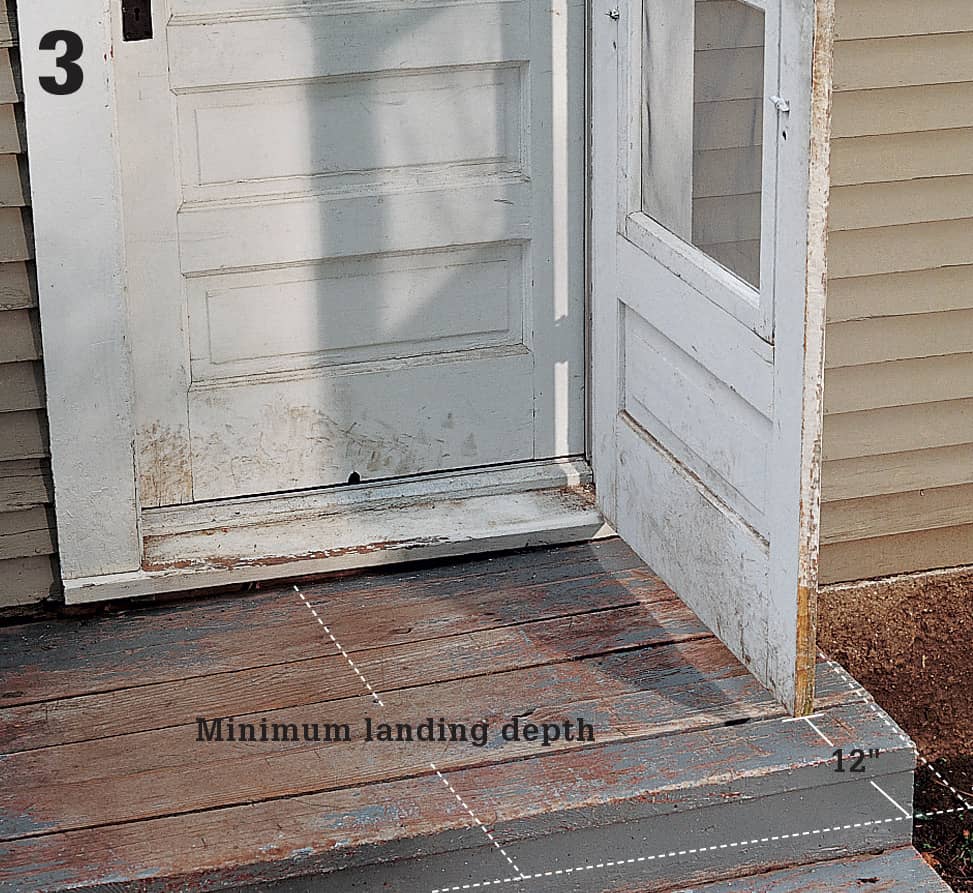
Measure the width of your door and add at least 12"; this number is the minimum depth you should plan for the landing area of the steps. The landing depth plus the depth of each step should fit within the overall run of the steps. If necessary, you can increase the overall run by moving the stake at the planned base of the steps away from the house, or by increasing the depth of the landing.
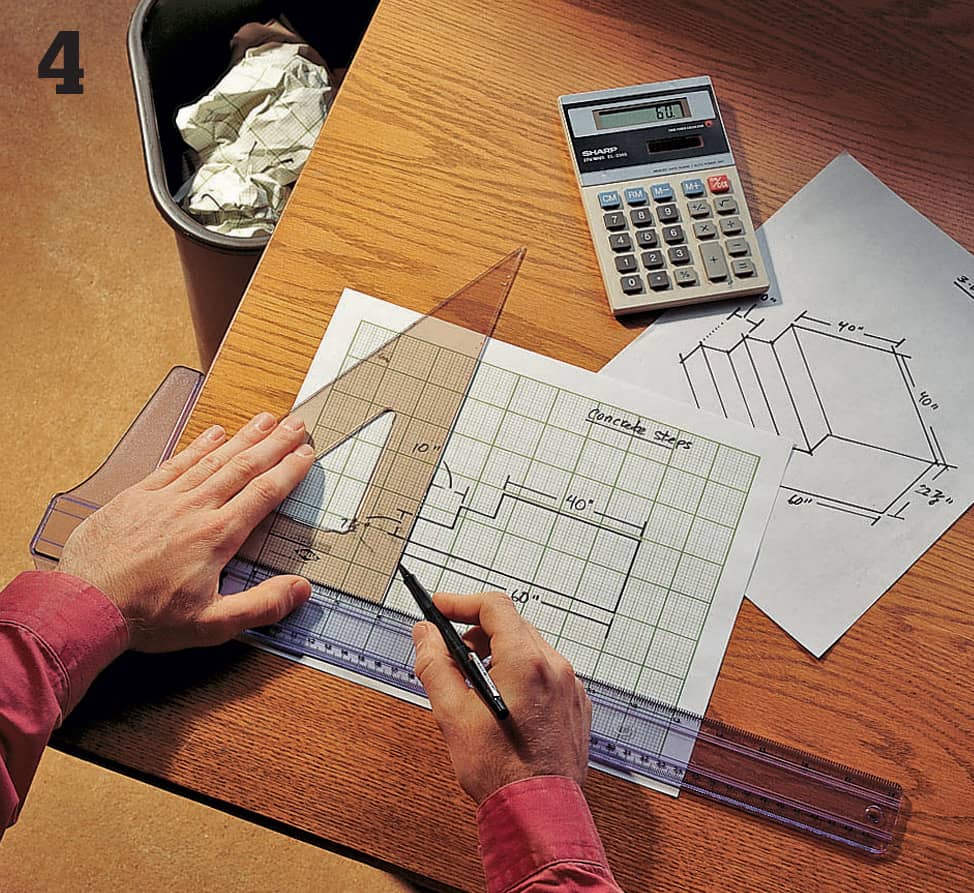
Sketch a detailed plan for the steps, keeping these guidelines in mind: each step should be 10" to 12" deep, with a riser height between 6" and 8", and the landing should be at least 12" deeper than the swing radius (width) of your door. Adjust the parts of the steps as needed, but stay within the given ranges. Creating a final sketch will take time, but it is worth doing carefully.
How to Build Concrete Steps
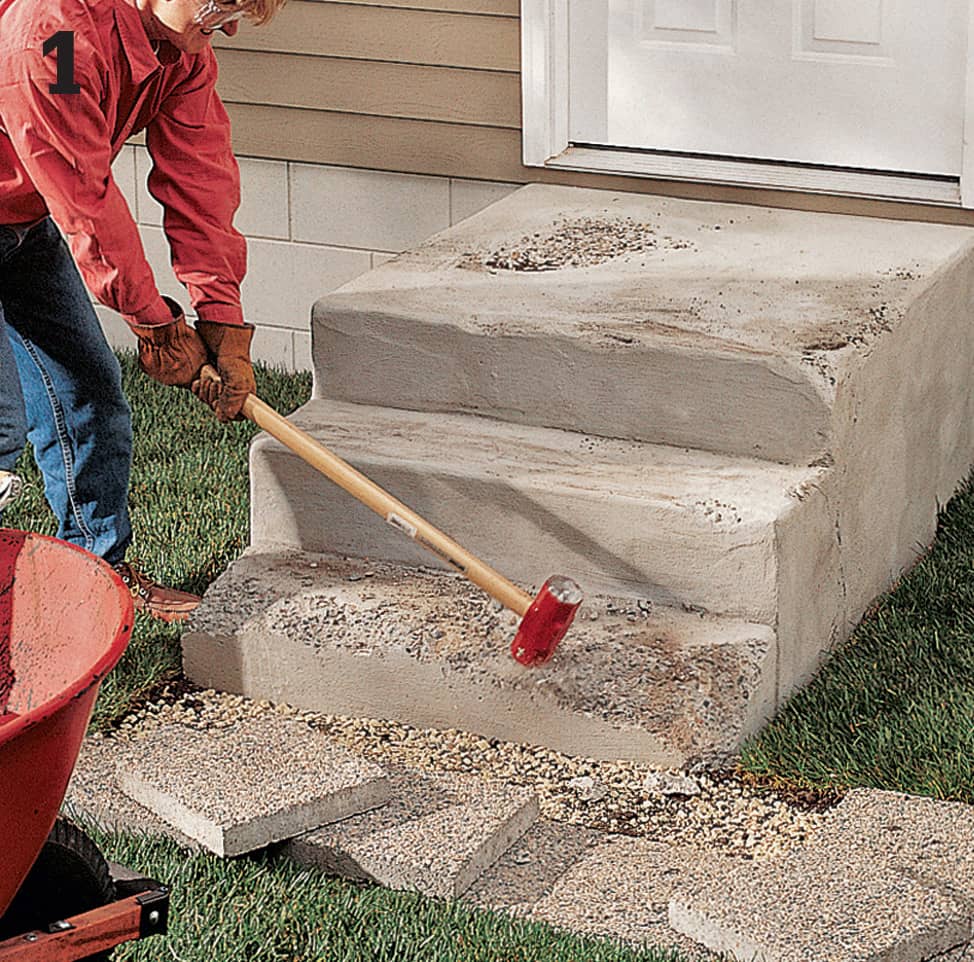
Remove or demolish existing steps; if the old steps are concrete, set aside the rubble to use as fill material for the new steps. Wear protective gear, including eye protection and gloves, when demolishing concrete.
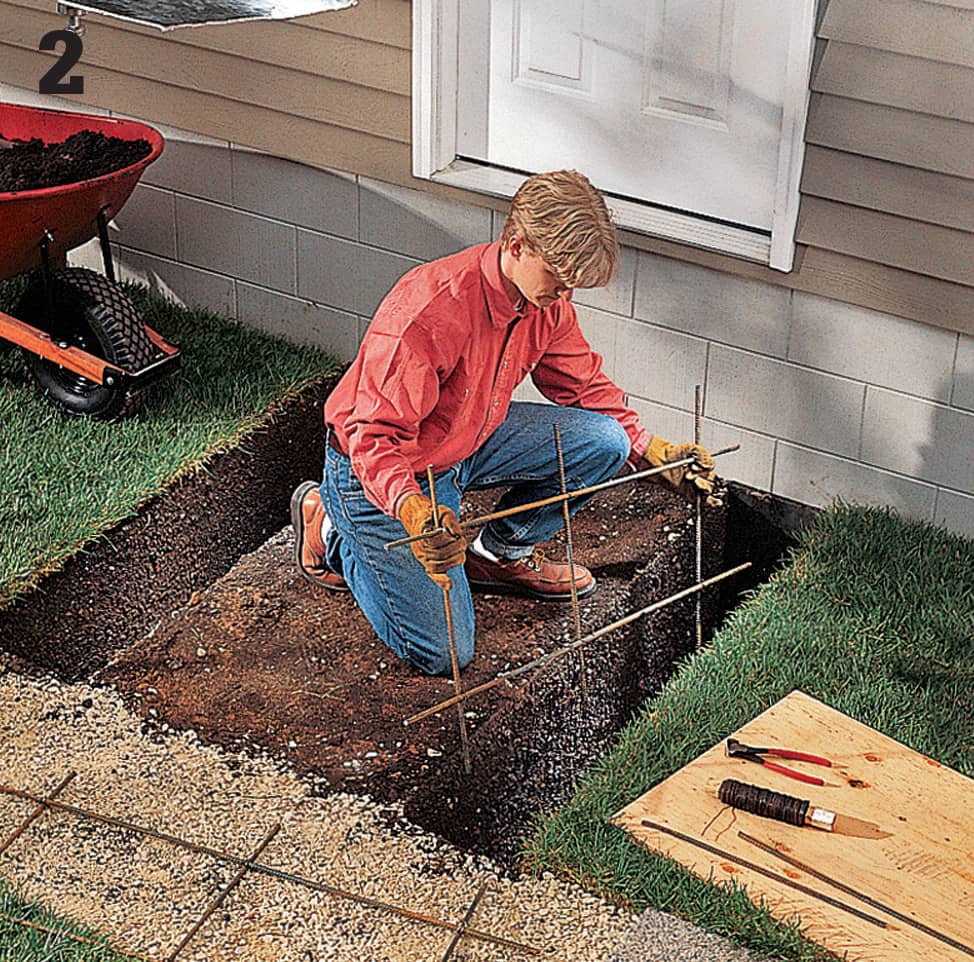
Dig 12"-wide trenches to the required depth for footings. Locate the trenches perpendicular to the foundation, spaced so the footings will extend 3" beyond the outside edges of the steps. Install steel rebar grids for reinforcement. Affix isolation boards to the foundation wall inside each trench, using a few dabs of construction adhesive.
Mix the concrete and pour the footings. Level and smooth the concrete with a screed board. You do not need to float the surface afterwards.
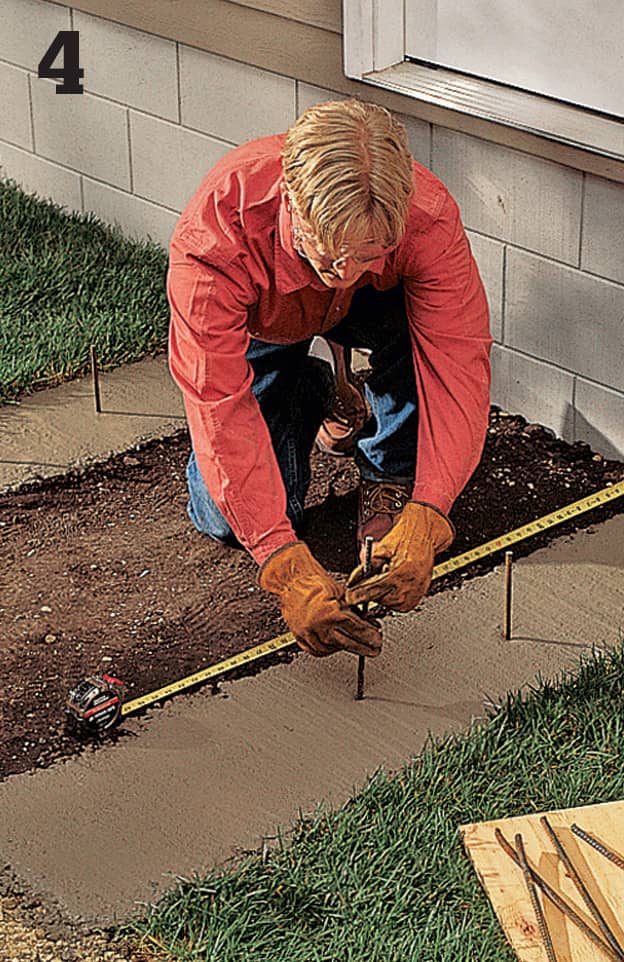
When bleed water disappears, insert 12" sections of rebar 6" into the concrete, spaced at 12" intervals and centered side to side. Leave 1 ft. of clear space at each end.
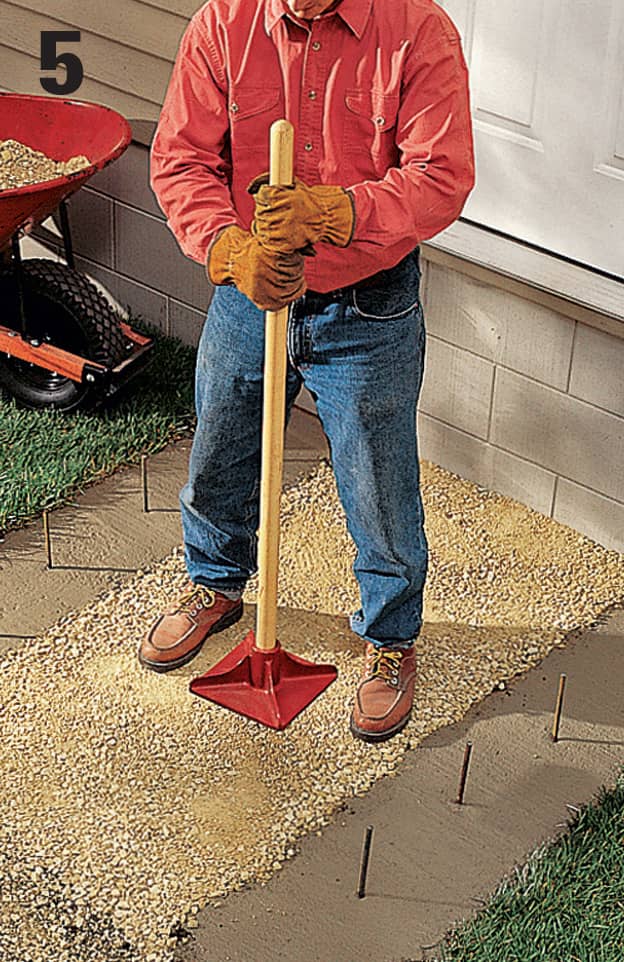
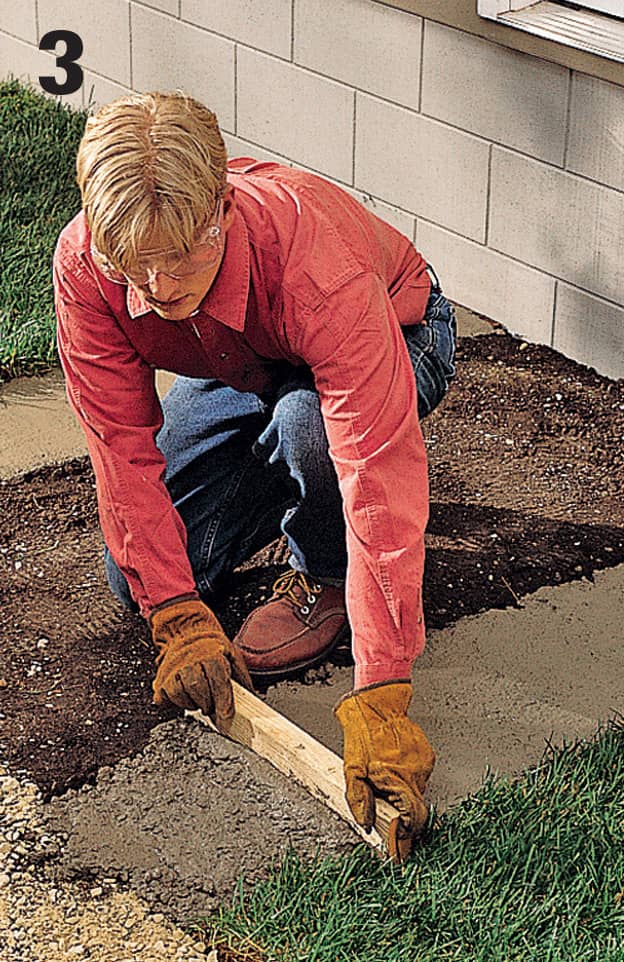
Let the footings cure for two days, then excavate the area between them to 4" deep. Pour in a 5"-thick layer of compactible gravel subbase and tamp until it is level with the footings.
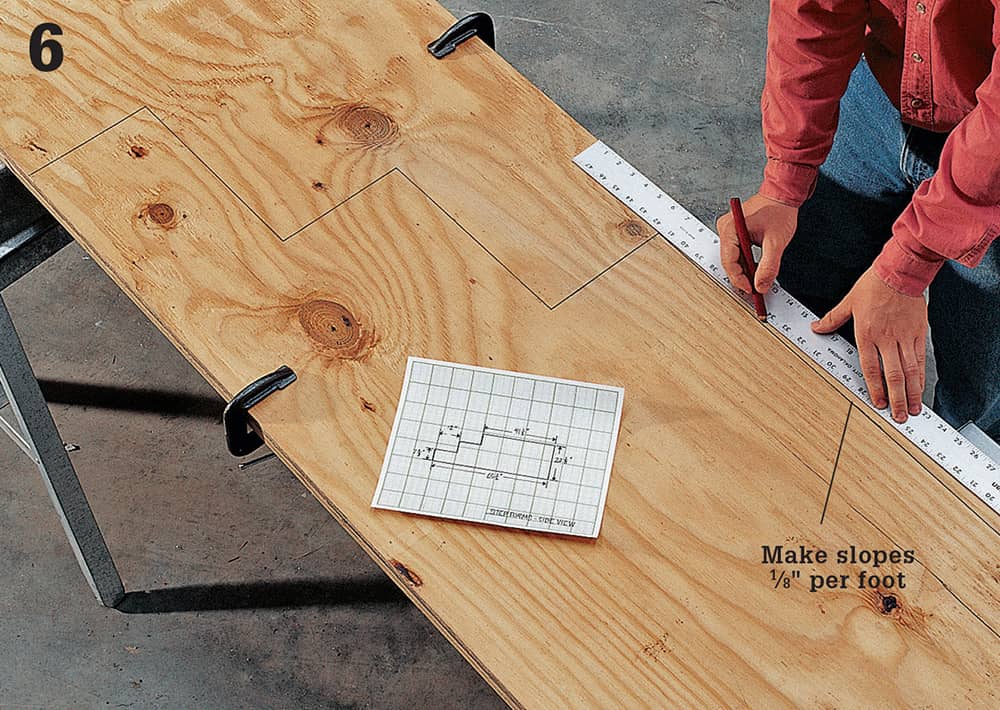
Transfer the measurements for the side forms from your working sketch onto 3/4" exterior-grade plywood. Cut out the forms along the cutting lines, using a jigsaw. Save time by clamping two pieces of plywood together and cutting both side forms at the same time. Add a 1/8" per foot back-to-front slope to the landing part of the form.
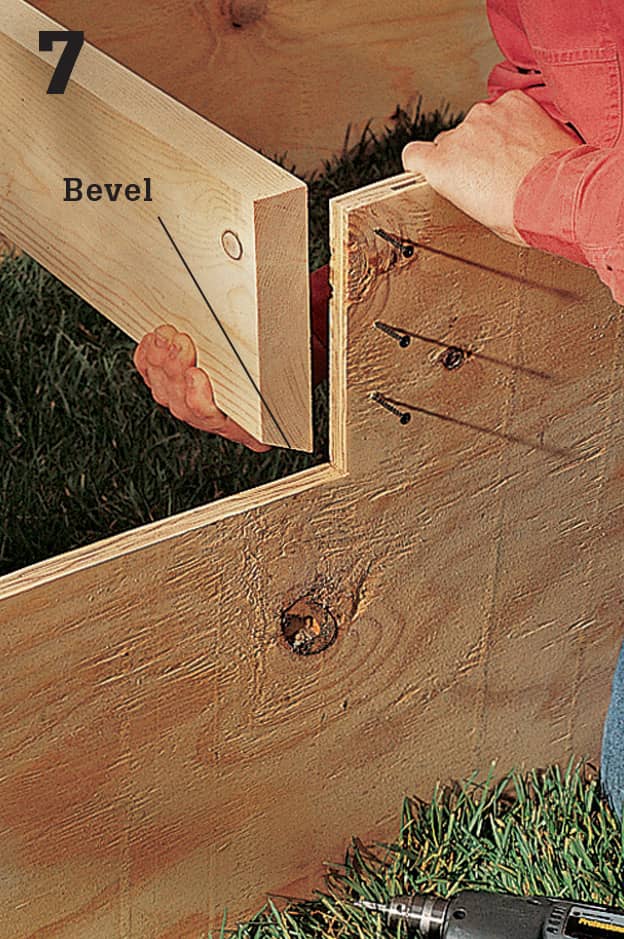
Cut form boards for the risers to fit between the side forms. Bevel the bottom edges of the boards when cutting to create clearance for the float at the back edges of the steps. Attach the riser forms to the side forms with 2" deck screws.
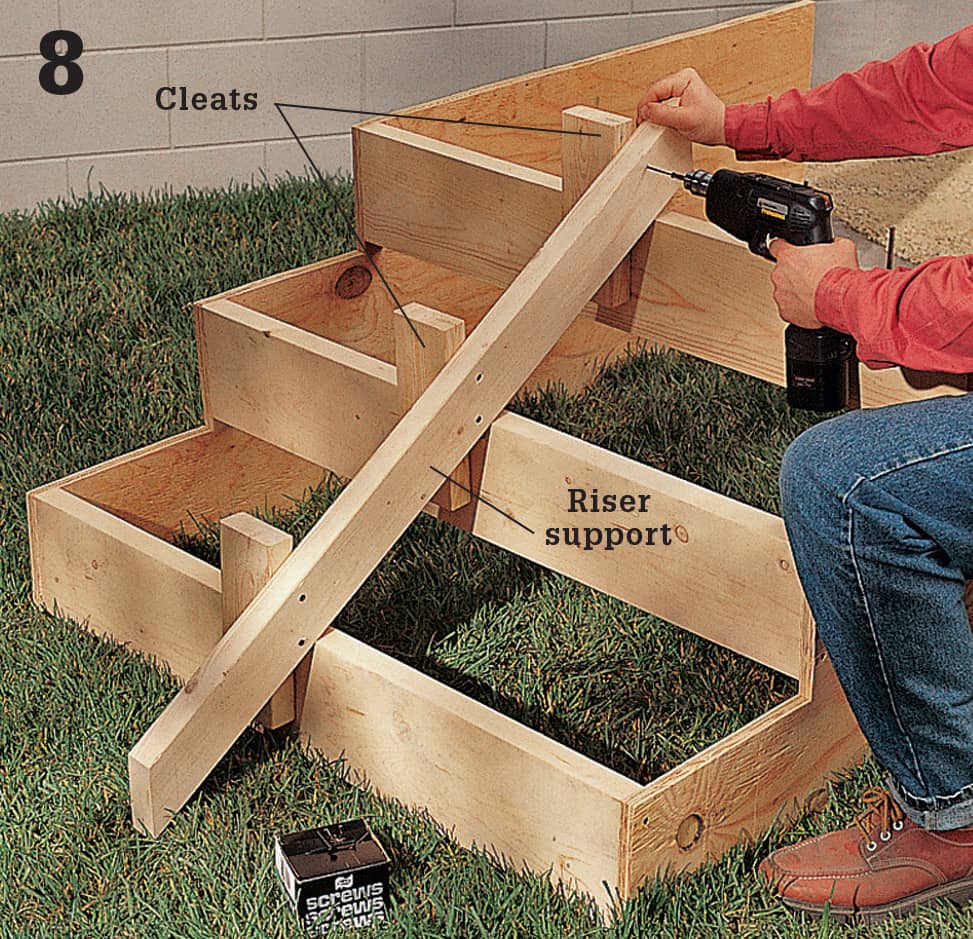
Cut a 2 × 4 to make a center support for the riser forms. Use 2” deck screws to attach 2 × 4 cleats to the riser forms, then attach the support to the cleats. Check to make sure all corners are square.
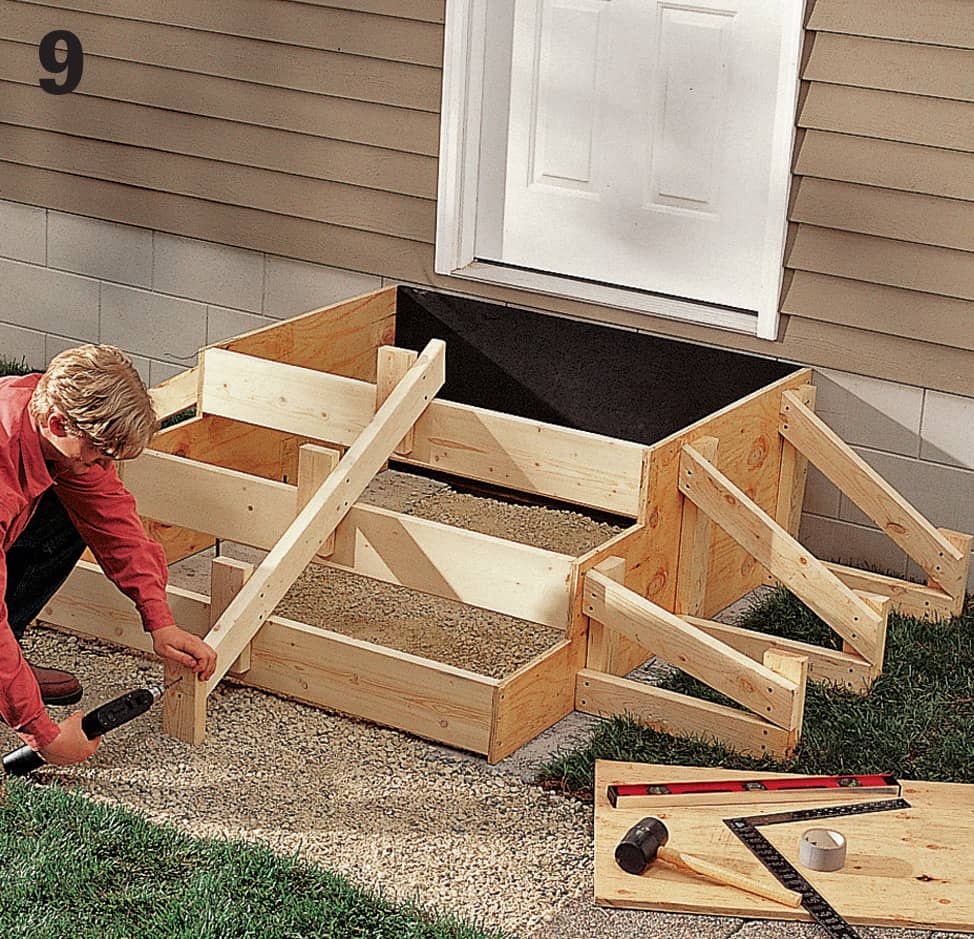
Cut an isolation board and glue it to the house foundation at the back of the project area. Set the form onto the footings, flush against the isolation board. Add 2 × 4 bracing arms to the sides of the form, attaching them to cleats on the sides and to stakes driven into the ground.
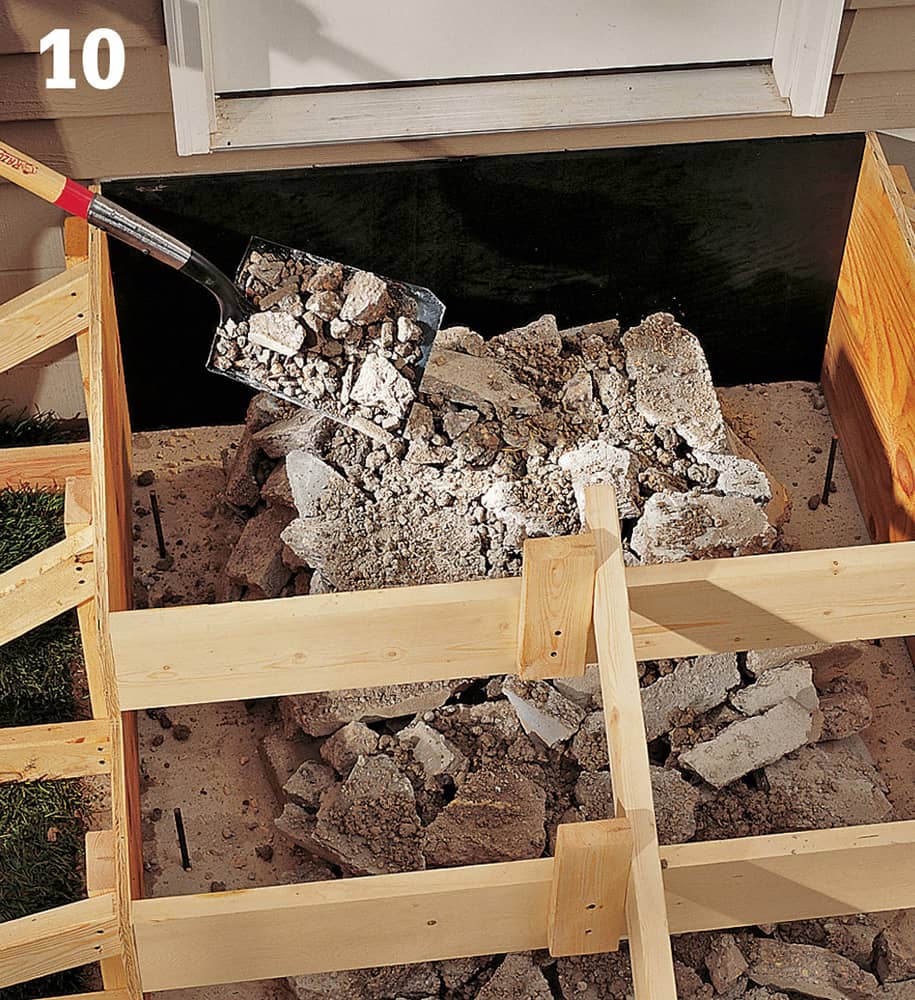
Fill the form with clean fill (broken concrete or rubble). Stack the fill carefully, keeping it 6" away from the sides, back, and top edges of the form. Shovel smaller fragments onto the pile to fill the void areas.
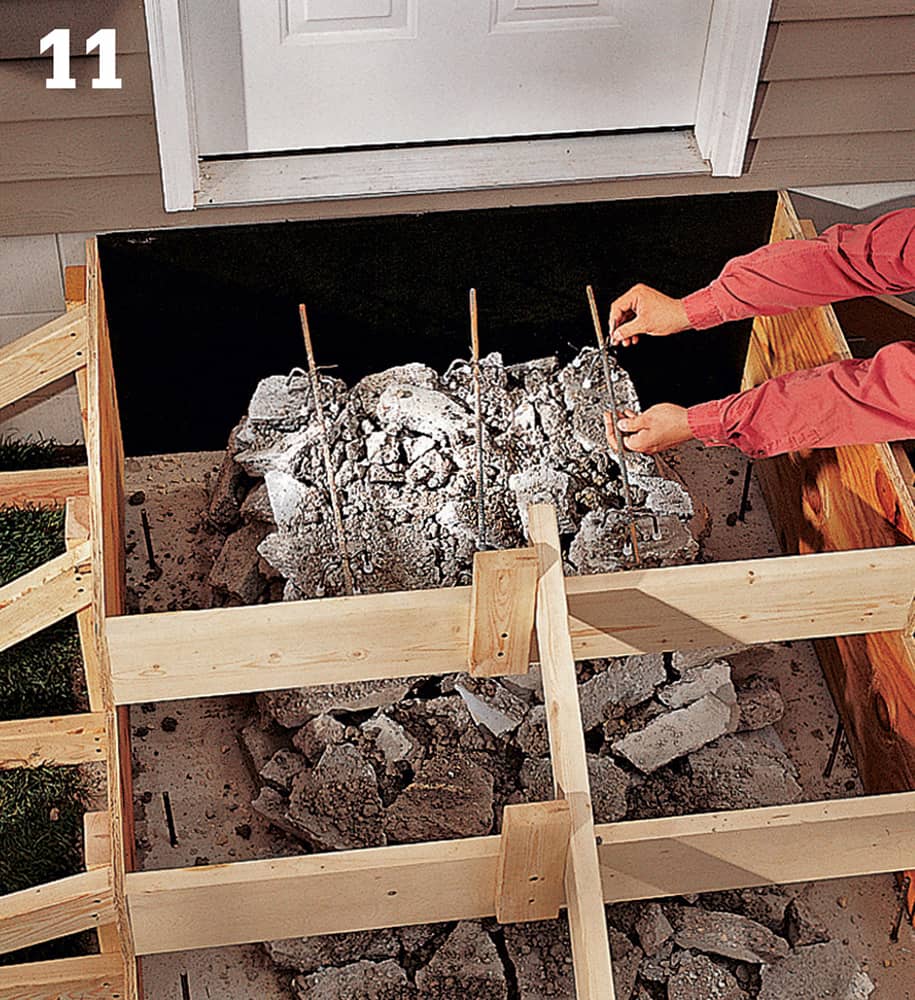
Lay pieces of #3 metal rebar on top of the fill at 12" intervals, and attach them to bolsters with wire to keep them from moving when the concrete is poured. Keep rebar at least 2" below the top of the forms. Mist the forms and the rubble with water.
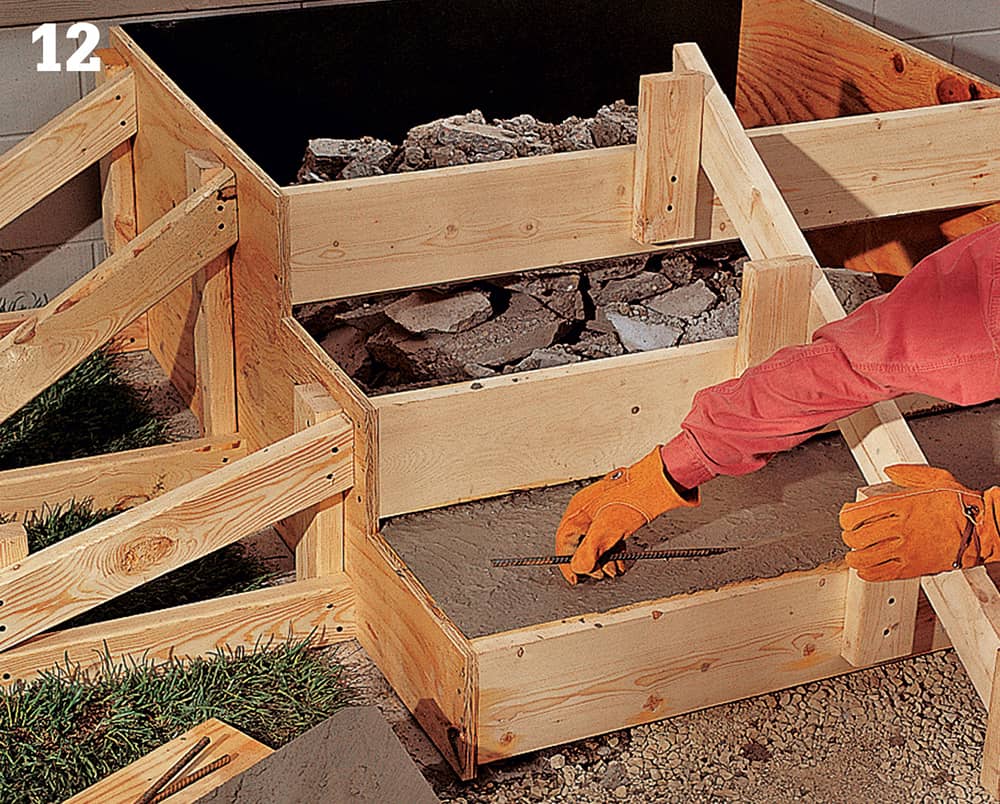
Coat the forms with vegetable oil or a commercial release agent, then mist them with water so concrete won’t stick to the forms. Mix concrete and pour steps one at a time, beginning at the bottom. Settle and smooth the concrete with a screed board. Press a piece of #3 rebar 1" down into the “nose” of each tread for reinforcement.
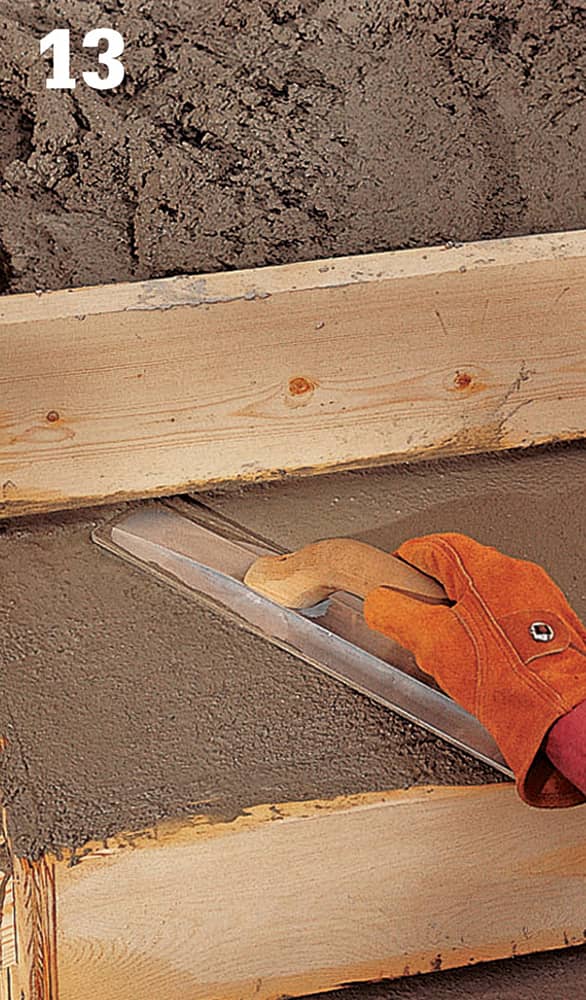
Float the steps, working the front edge of the float underneath the beveled edge at the bottom of each riser form.
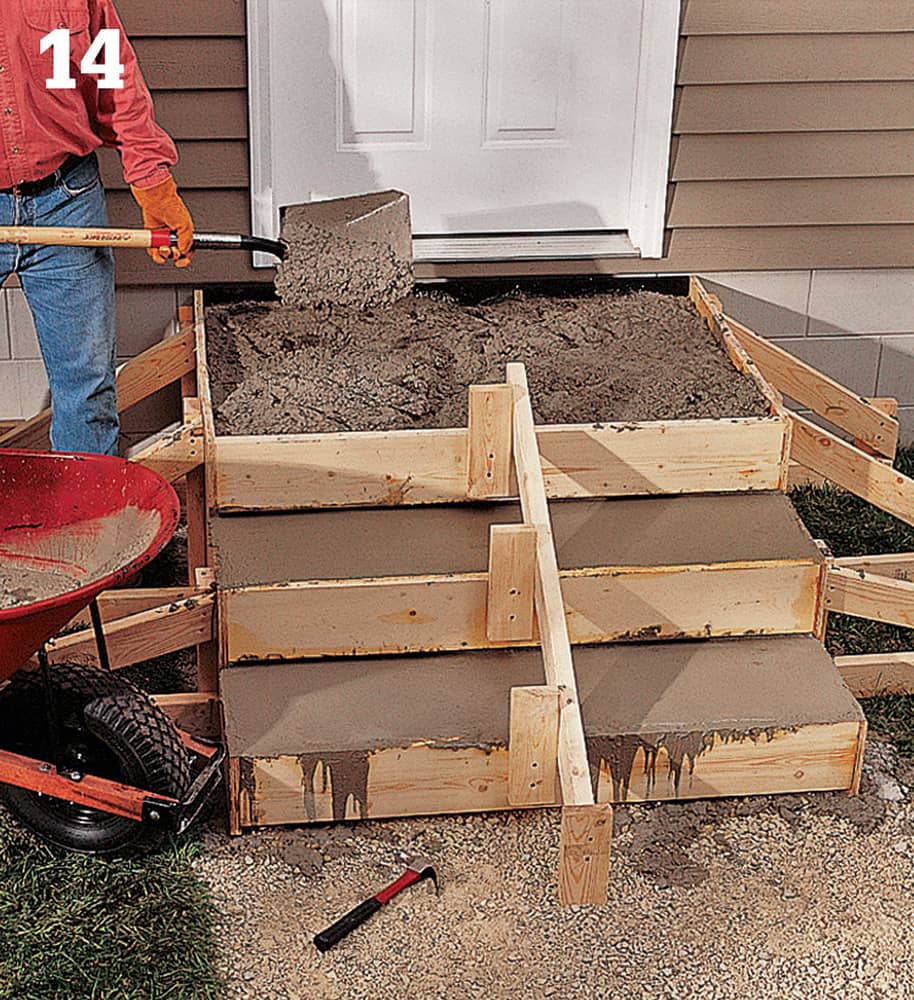
Pour concrete into the forms for the remaining steps and the landing. Press rebar into the nose of each step. Keep an eye on the poured concrete as you work, and stop to float any concrete as soon as the bleed water disappears.
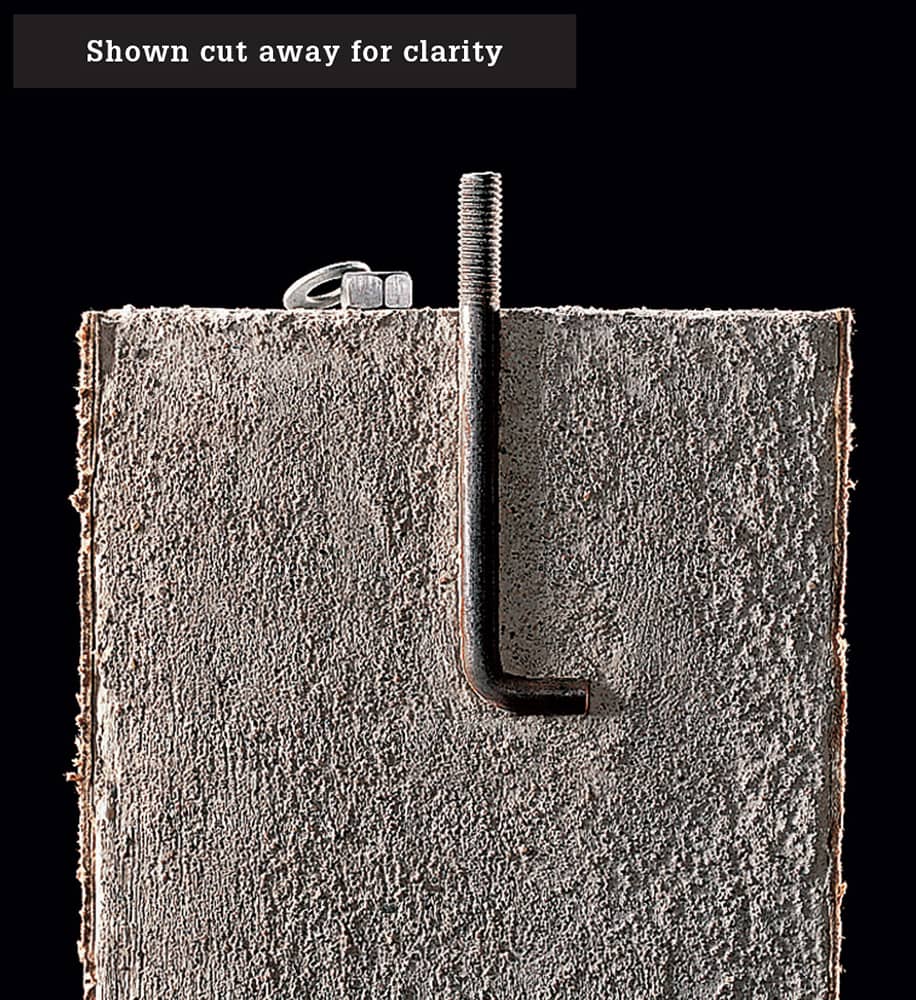
OPTION: For railings with mounting plates that attach to sunken J-bolts, install the bolts before the concrete sets. Otherwise, choose railings with surface-mounted hardware (see step 16) that can be attached after the steps are completed.
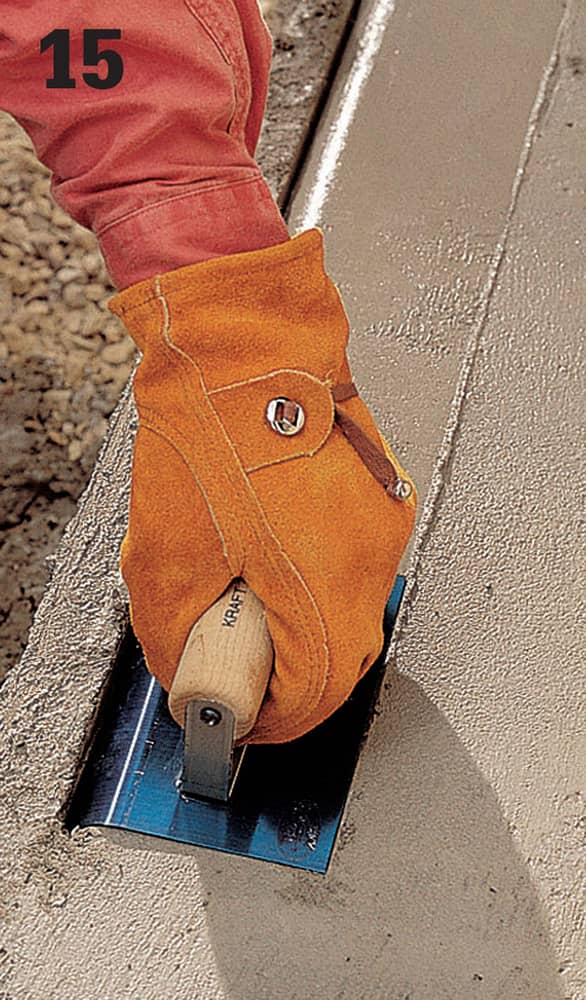
Once the concrete sets, shape the steps and landing with a step edger. Float the surface. Sweep with a stiff-bristled broom for maximum traction.
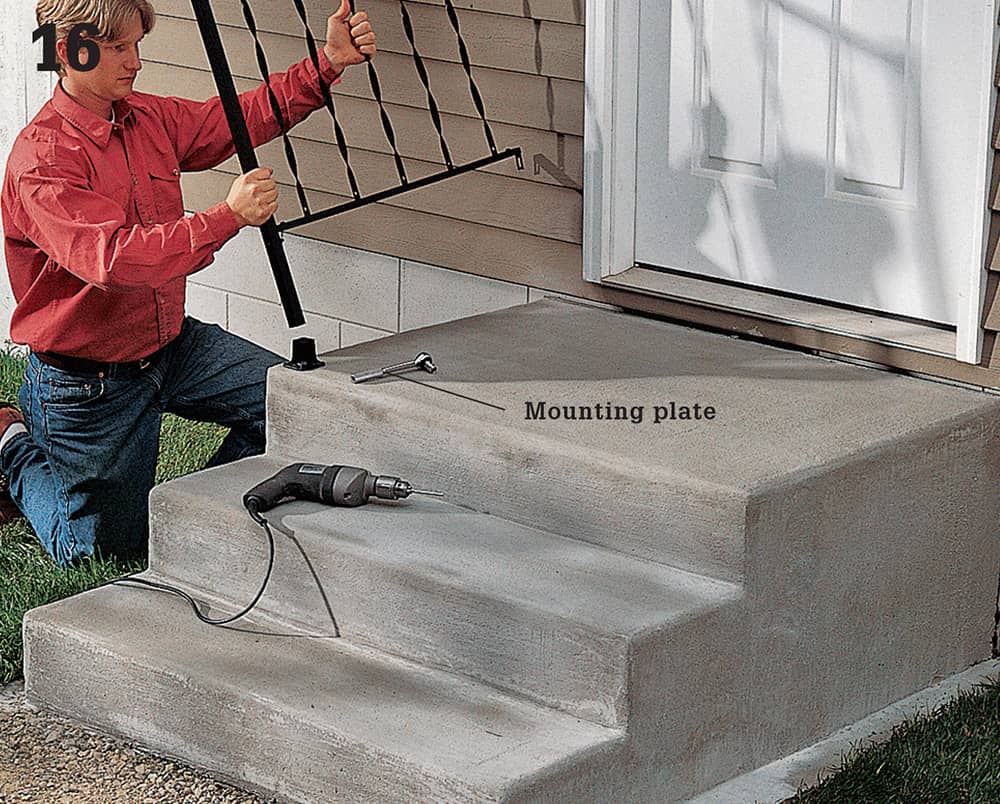
Remove the forms as soon as the surface is firm to the touch, usually within several hours. Smooth rough edges with a float. Add concrete to fill any holes. If forms are removed later, more patching may be required. Backfill the area around the base of the steps, and seal the concrete. Install a grippable hand railing that is securely anchored to the steps and the wall.
 Resurfacing a Concrete Patio
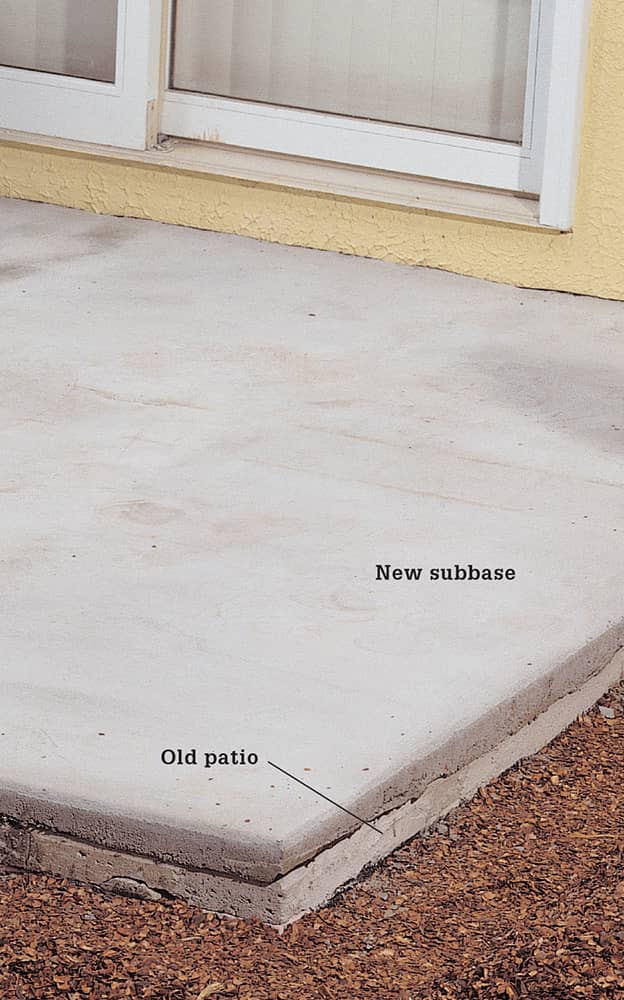
Patio tile is most frequently applied over a concrete subbase—either an existing concrete patio, or a new concrete slab. A third option, which we show you on the following pages, is to pour a new tile subbase over an existing concrete patio. This option involves far less work and expense than removing an old patio and pouring a new slab. And it ensures that your new tiled patio will not develop the same problems that may be present in the existing concrete surface.
See the following photographs to help you determine the best method for preparing your existing concrete patio slab. To resurface a concrete sidewalk, see pages 248 to 249.
How to Install a Subbase for Patio Tile
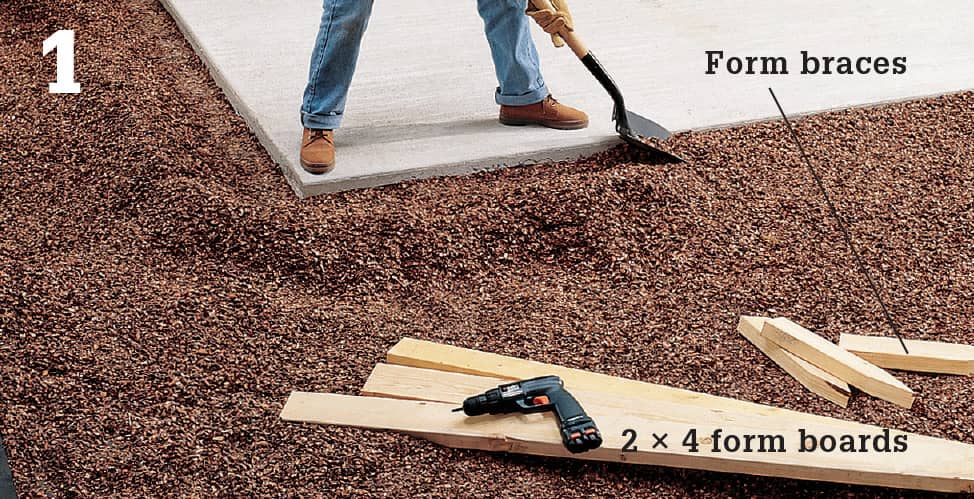
Dig a trench at least 6" wide, and no more than 4" deep, around the patio to create room for 2 × 4 forms. Clean dirt and debris from the exposed sides of the patio. Cut and fit 2 × 4 frames around the patio, joining the ends with 3" deck screws. Cut wood stakes from 2 × 4s and drive them next to the forms, at 2-ft. intervals.
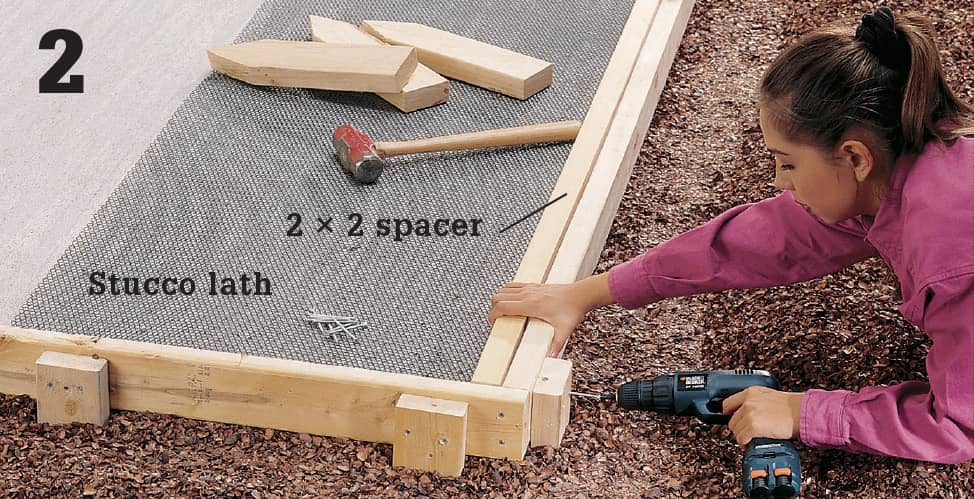
Adjust the form height: set stucco lath on the surface, then set a 2 × 2 spacer on top of the lath (their combined thickness equals the thickness of the subbase). Adjust the form boards so the tops are level with the 2 × 2, and screw the stakes to the forms with 2 1/2" deck screws.
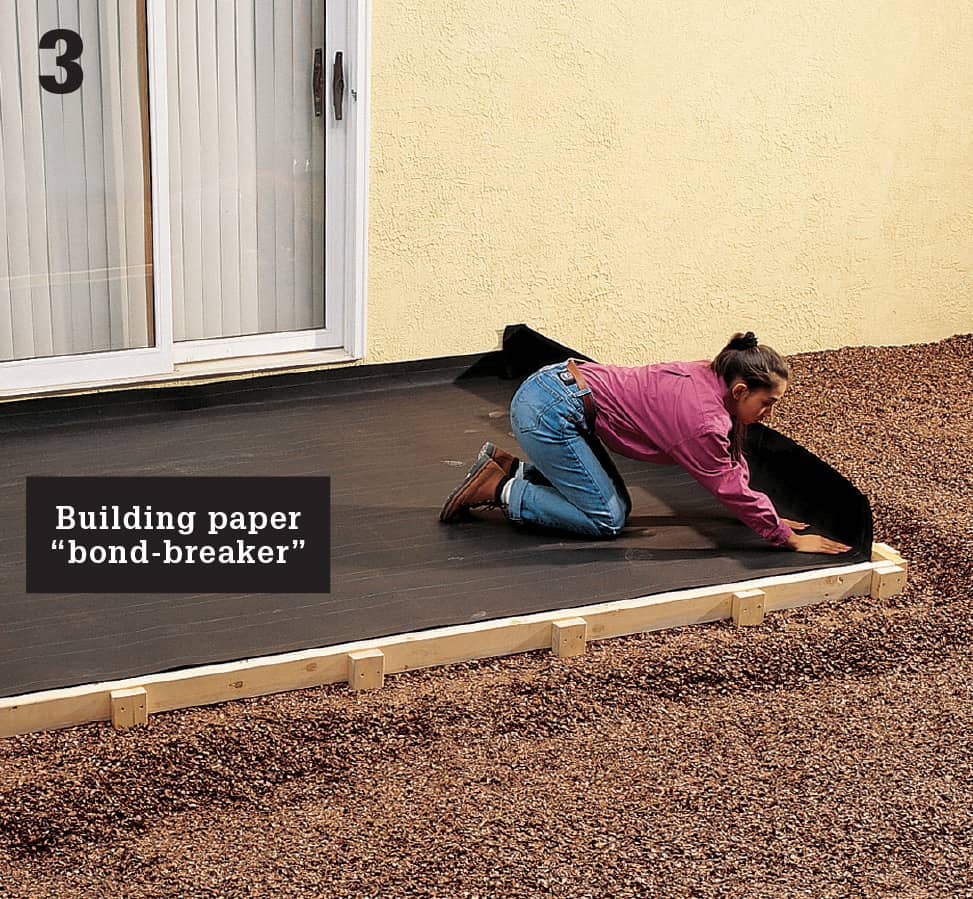
Remove the 2 × 2 spacers and stucco lath, then lay strips of 30# building paper over the patio surface, overlapping seams by 6", to create a bond-breaker for the new surface. Crease the building paper at the edges and corners, making sure the paper extends past the tops of the forms. Make a small cut in the paper at each corner for easier folding.
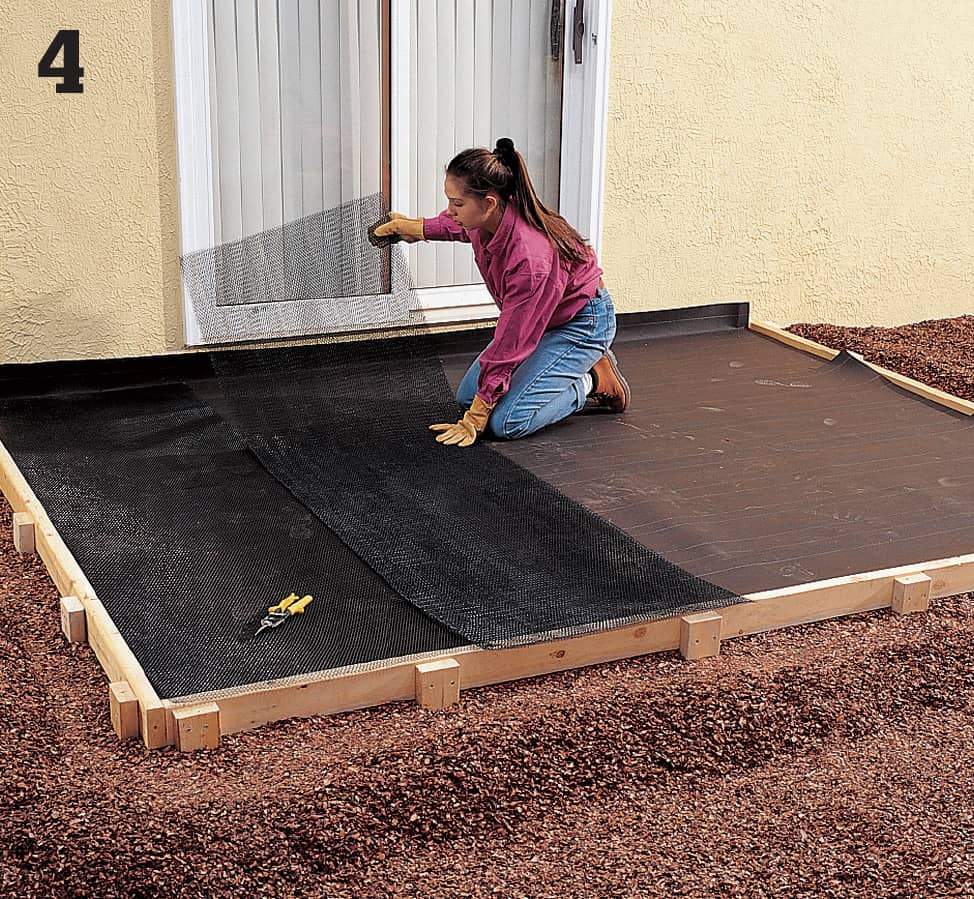
Lay strips of stucco lath over the building-paper bond-breaker, overlapping seams by 1". Keep the lath 1" away from forms and the wall. Use aviation snips to cut the stucco lath (wear heavy gloves when handling metal).
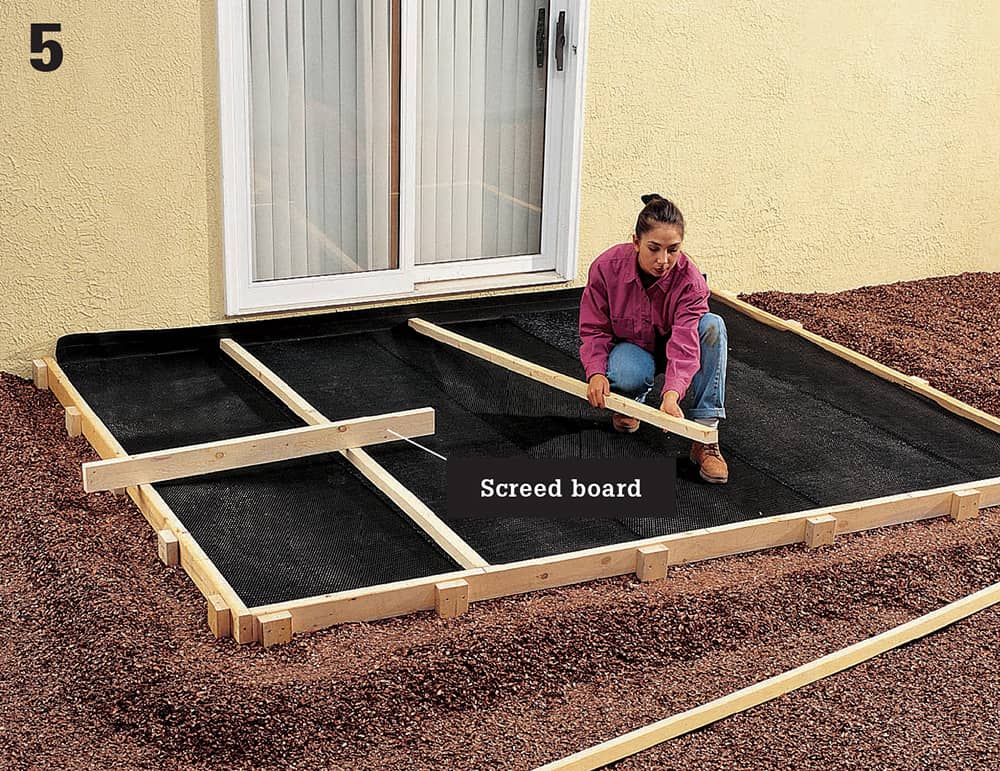
Build temporary 2 × 2 forms to divide the project into working sections and provide rests for the screed board used to level and smooth the fresh concrete. Make the sections narrow enough that you can reach across the entire section (3-ft. to 4-ft. sections are comfortable for most people). Screw the ends of the 2 × 2s to the form boards so the tops are level.
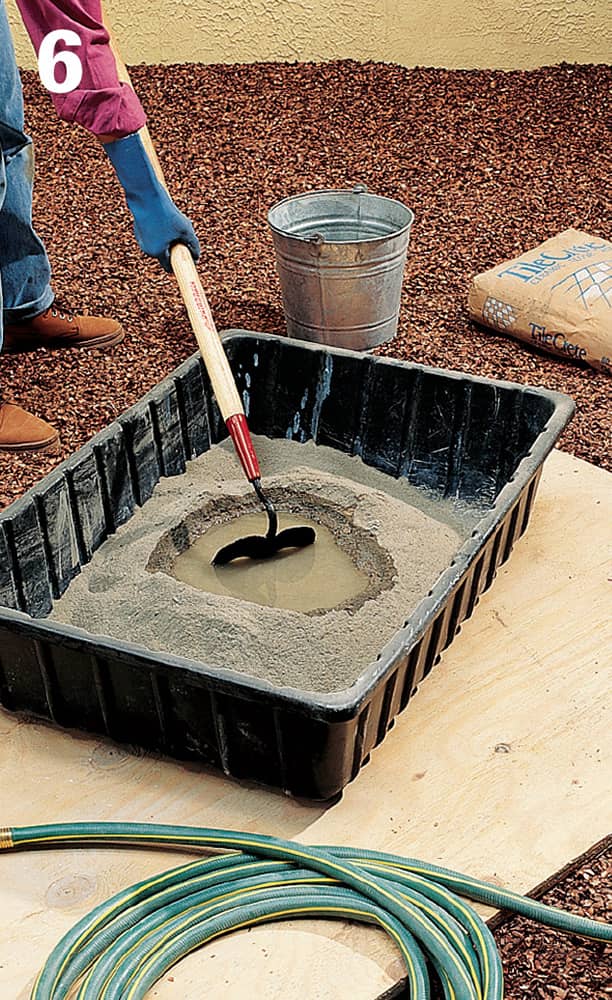
Mix dry floor-mix concrete with water in a mortar box, blending with a masonry hoe, according to the manufacturer’s directions, or use a power mixer.
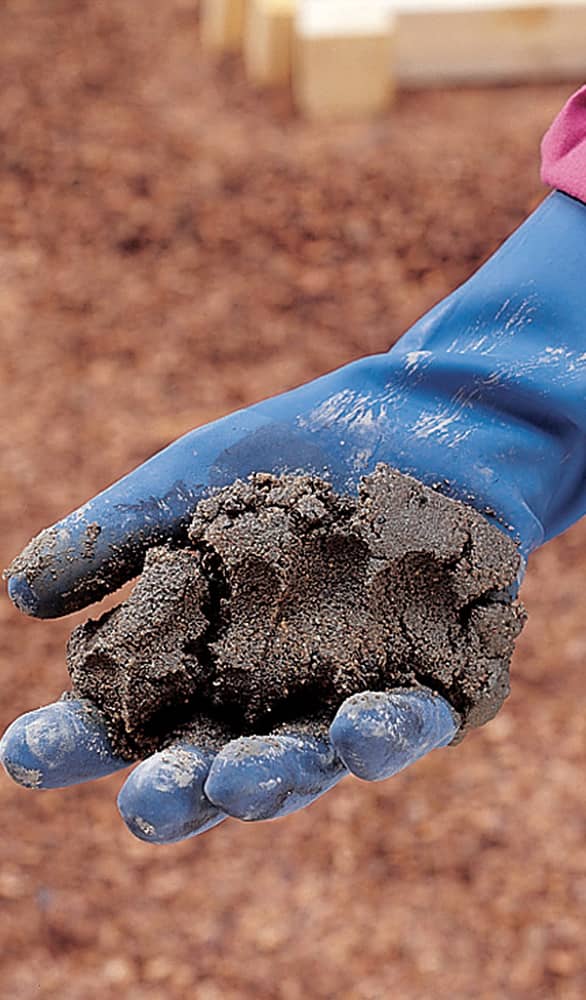
NOTE: The mixture should be very dry when prepared so it can be pressed down into the voids in the stucco lath with a tamper.
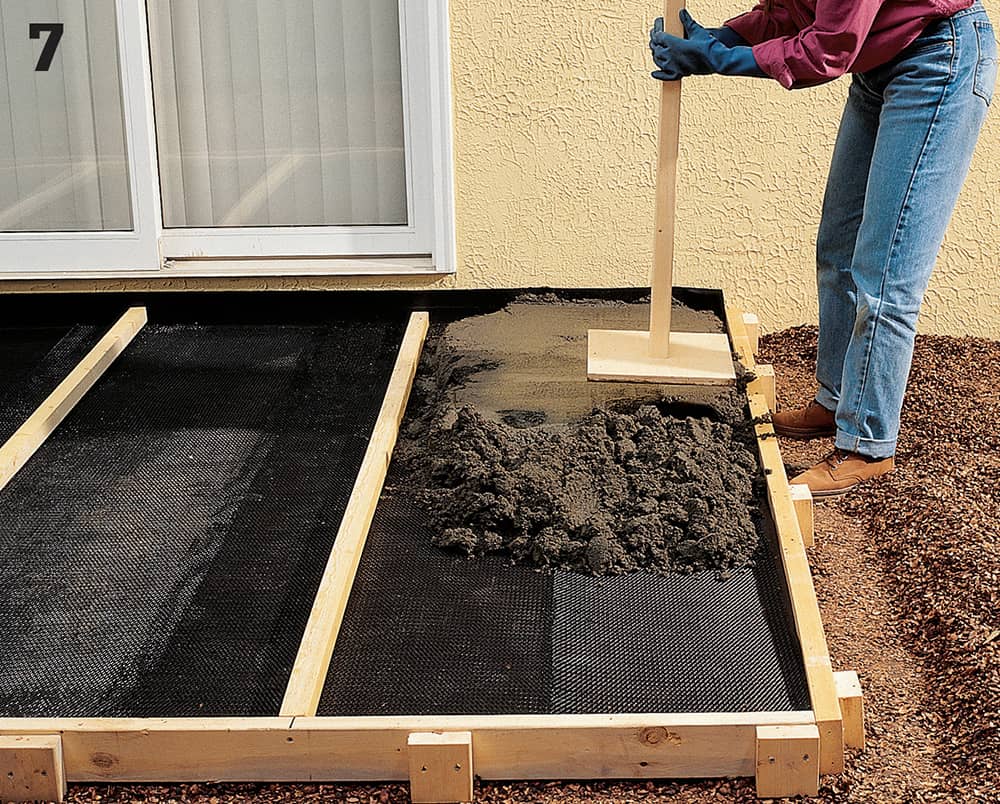
Fill one working section with floor-mix concrete, up to the tops of the forms. Tamp the concrete thoroughly with a lightweight tamper to help force it into the voids in the lath and into corners. The lightweight tamper shown above is made from a 12" × 12" piece of 3/4" plywood, with a 2 × 4 handle attached.
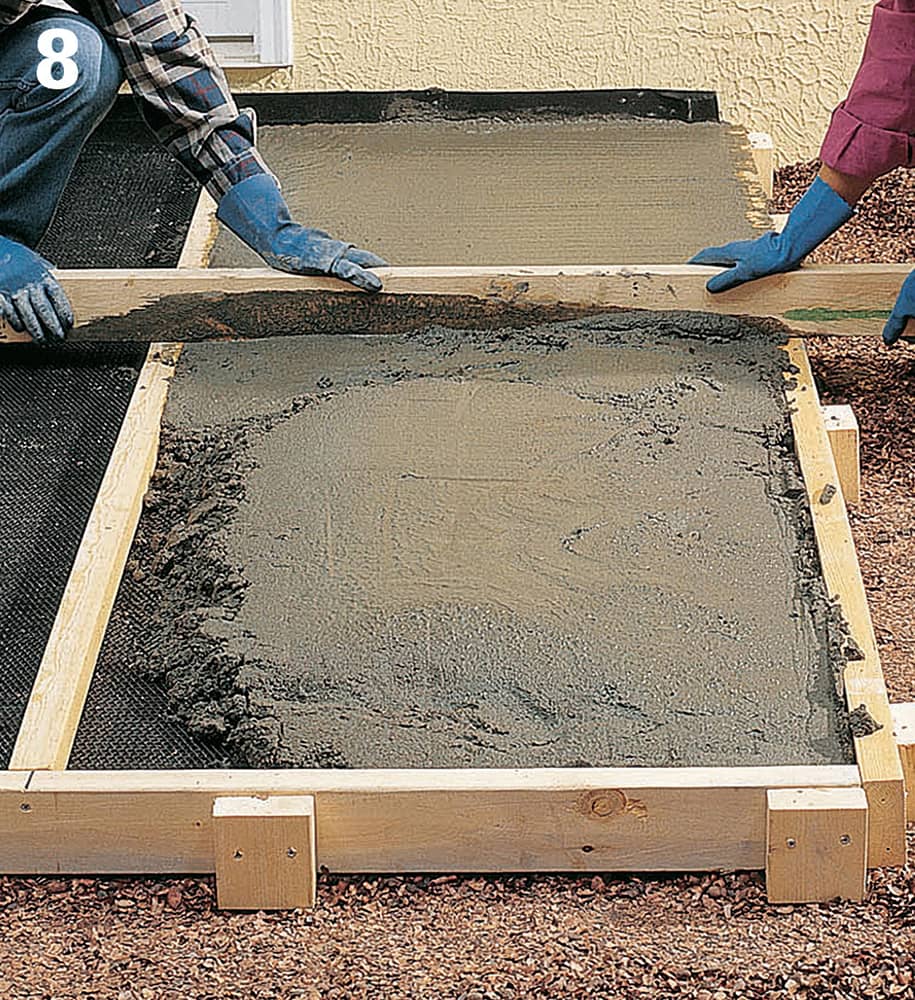
Level off the surface of the concrete by dragging a straight 2 × 4 screed board across the top, with the ends riding on the forms. Move the 2 × 4 in a sawing motion as you progress, creating a level surface and filling any voids in the concrete. If voids or hollows remain, add more concrete and smooth it off.
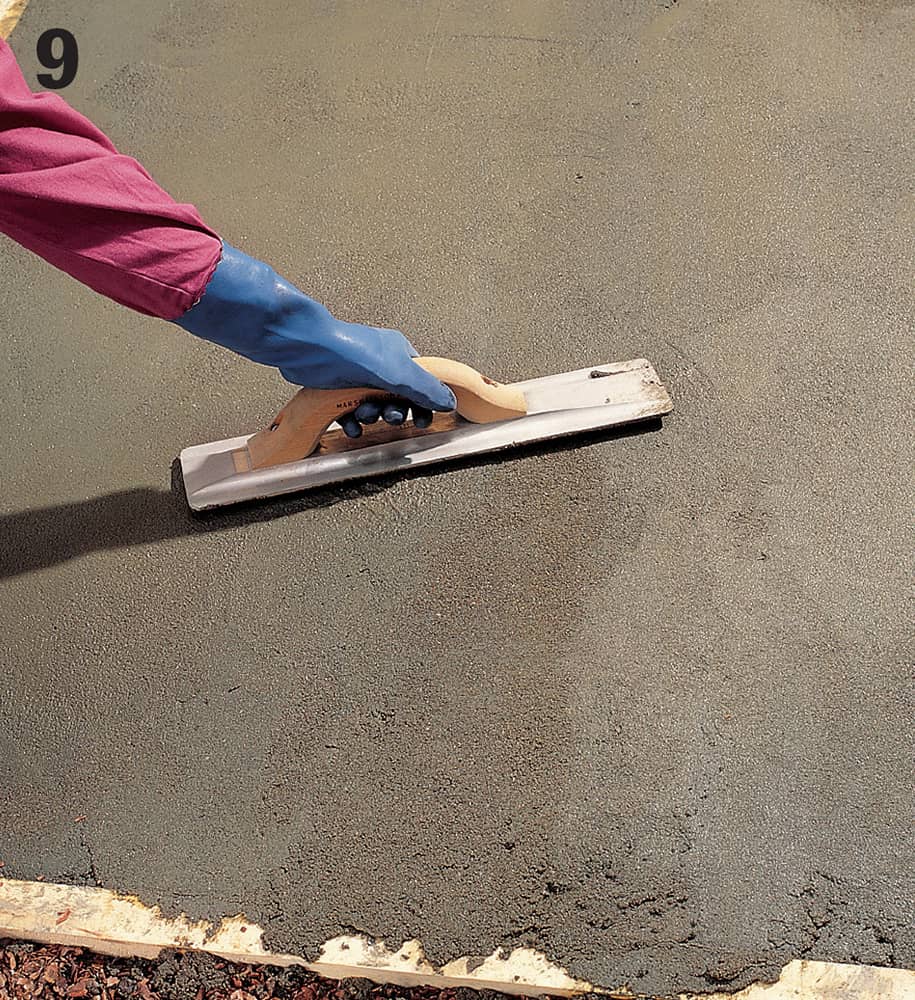
Use a magnesium float to smooth the surface of the concrete. Applying very light pressure, move the float back and forth in an arching motion, tipping the lead edge up slightly to avoid gouging the surface.
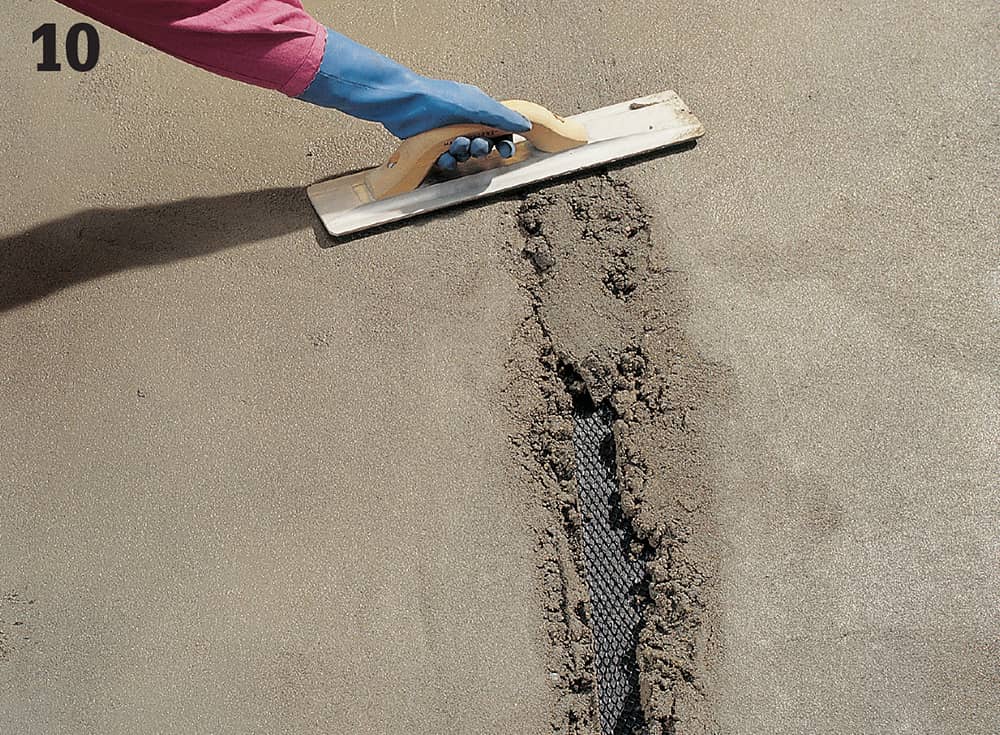
Pour and smooth out the next working section, repeating steps 7 to 9. After floating this section, remove the 2 × 2 temporary form between the two sections. Fill the void left behind with fresh concrete. Float the fresh concrete with the magnesium float until the concrete is smooth and level and blends into the working section on each side. Pour and finish the remaining working sections one at a time, using the same techniques.
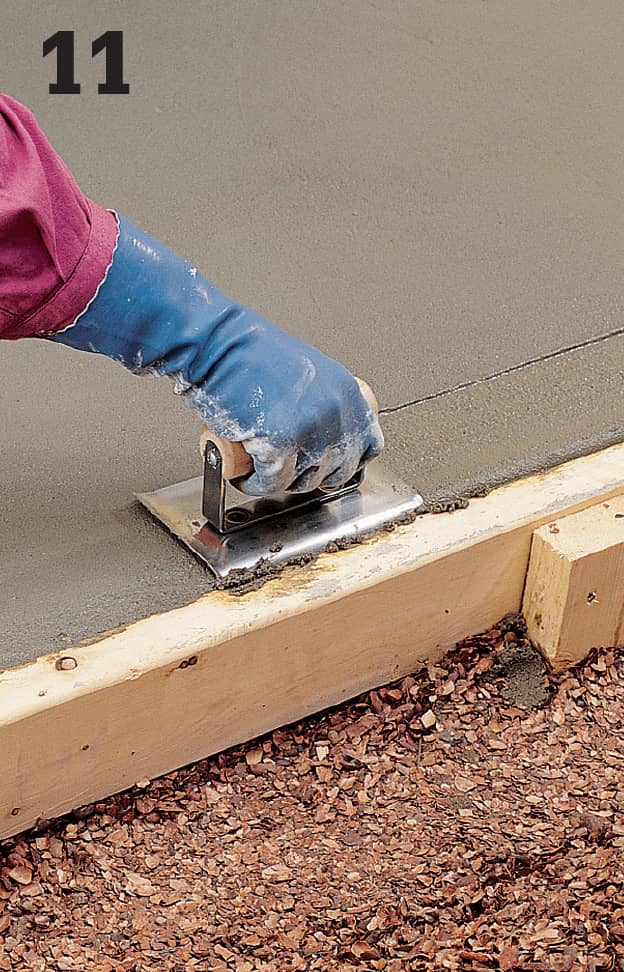
Let the concrete dry until pressing the surface with your finger does not leave a mark. Cut contours around all edges of the subbase with a concrete edger. Tip the lead edge of the edger up slightly to avoid gouging the surface. Smooth out any marks left by the edger using a float.
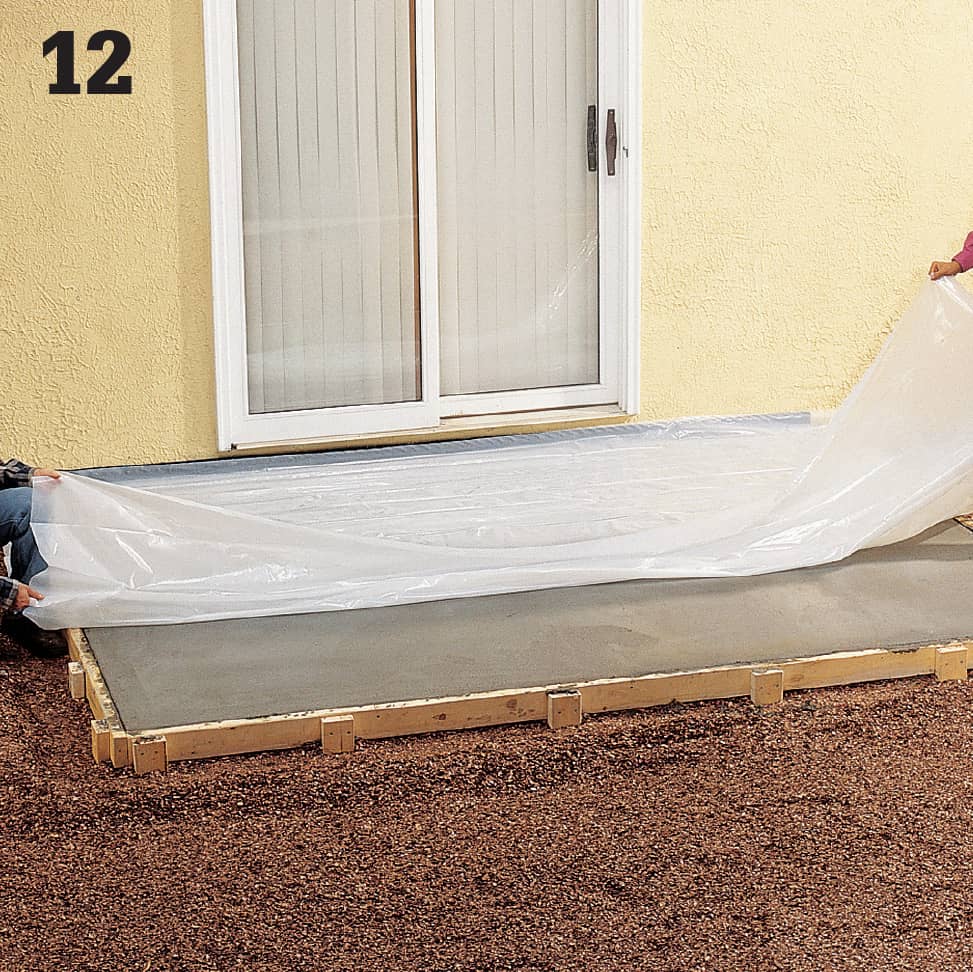
Cover the concrete with sheets of plastic, and cure for at least three days (see manufacturer’s directions for recommended curing time). Weight down the edges of the sheeting. After curing is compete, remove the plastic and disassemble and remove the forms.
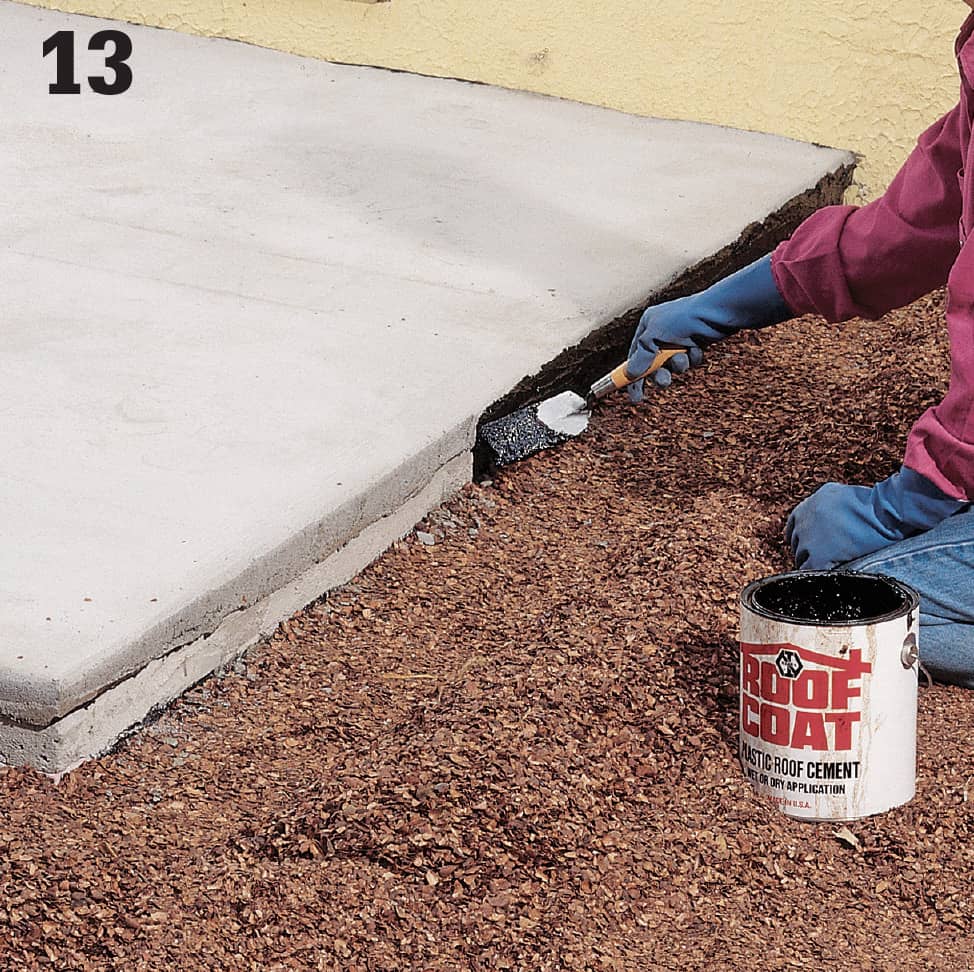
Trim off the building paper around the sides of the patio using a utility knife. Apply roofing cement to the exposed sides of the patio, using a trowel or putty knife to fill and seal the seam between the old and new surfaces. After the roofing cement dries, shovel dirt or ground cover back into the trench around the patio.
 Identifying Brick & Block Problems
Inspect damaged brick and block structures closely before you begin any repair work. Accurately identifying the nature and cause of the damage is an important step before choosing the best solution for the problem and preventing the problems from recurring in the future.
Look for obvious clues, like overgrown tree roots, or damaged gutters that let water drain onto masonry surfaces. Also check the slope of the adjacent landscape; it may need to be regraded to direct water away from a brick or block wall. Water is the most common cause of problems, but major cracks that recur can be a sign of serious structural problems that should be examined by an engineer.
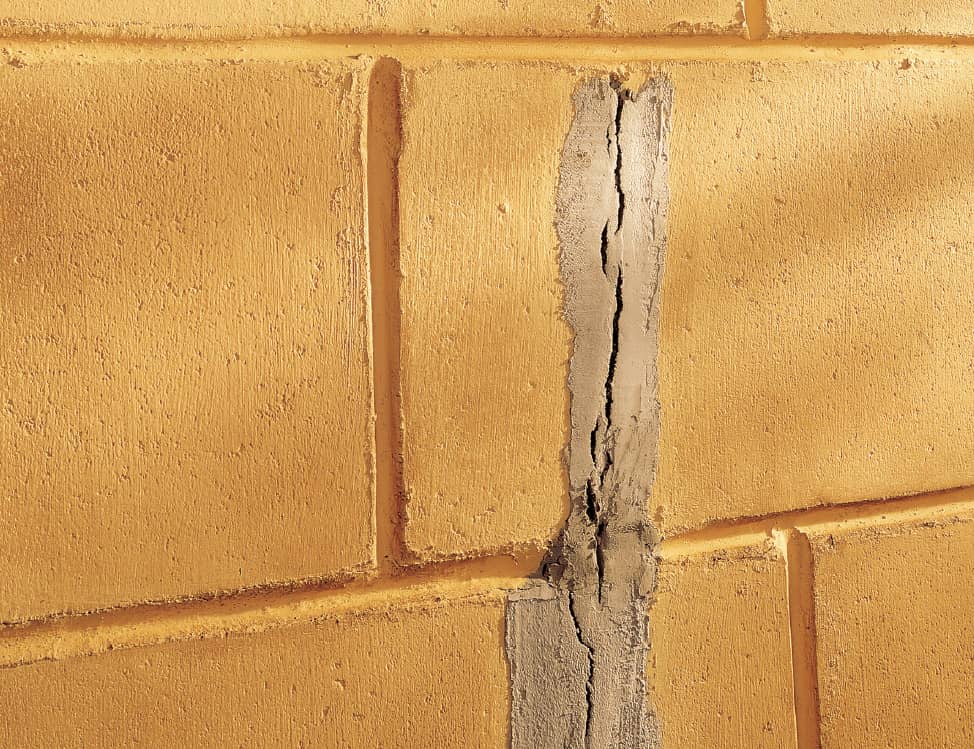
Repairs fail when the original source of the problem is not eliminated prior to making the repair. When a concrete patch separates, for example, it means that the opposing stresses causing the crack are still at work on the structure. Find and correct the cause (often a failing subbase or stress from water or freezing and thawing), then redo the repair.
Types of Brick & Block Problems
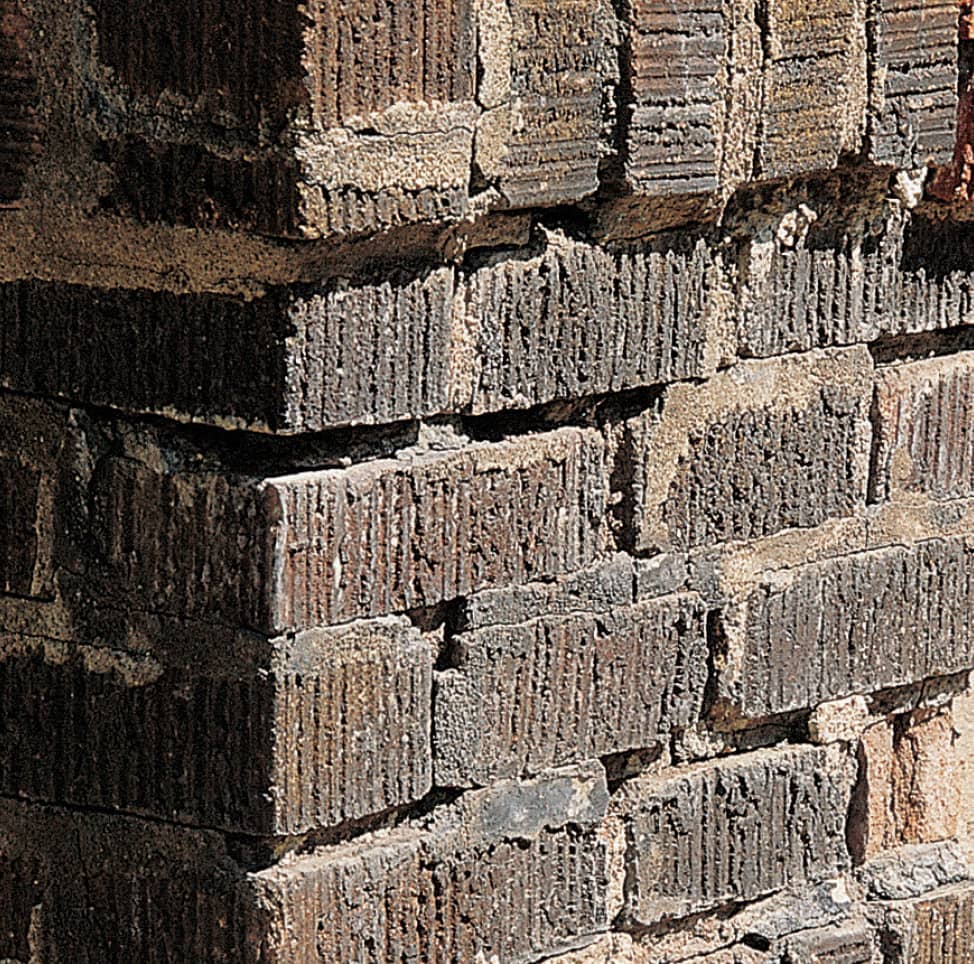
Deteriorated mortar joints are common problems in brick and block structures—mortar is softer than most bricks or blocks and is more prone to damage. Deterioration is not always visible, so probe surrounding joints with a screwdriver to see if they are sound.
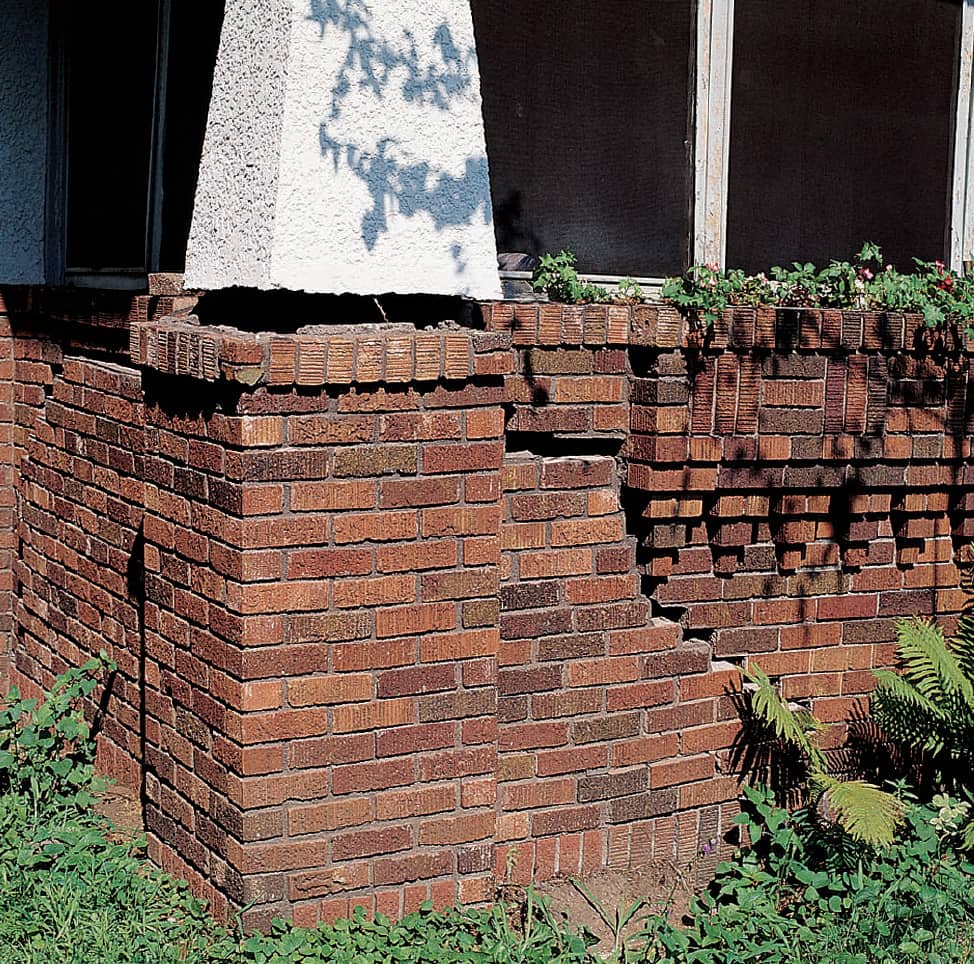
Major structural damage, like the damage to this brick porch, usually requires removal of the existing structure, improvements to the subbase, and reconstruction of the structure. Projects of this nature should only be attempted by professional masons.
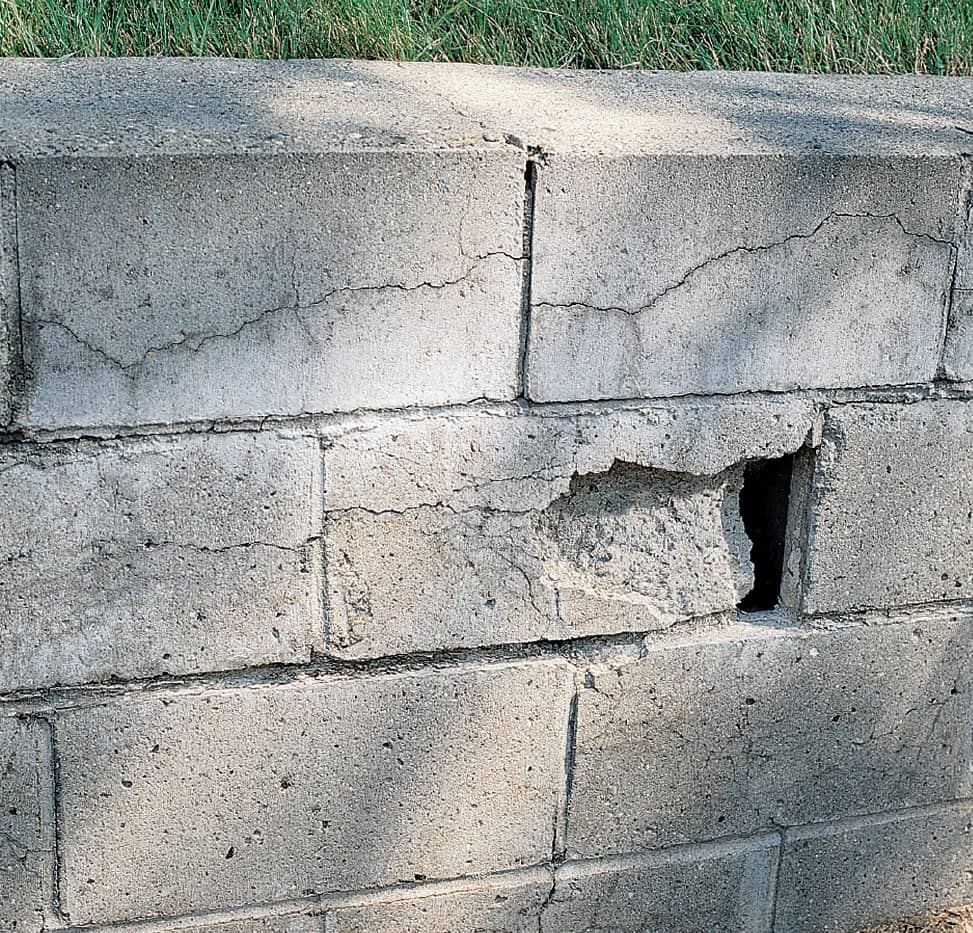
Damage to concrete blocks often results from repeated freezing and thawing of moisture trapped in the wall or in the blocks themselves. Instead of replacing the whole block, chip out the face of the block and replace it with a concrete paver with the same dimensions as the face of the block (page 266).
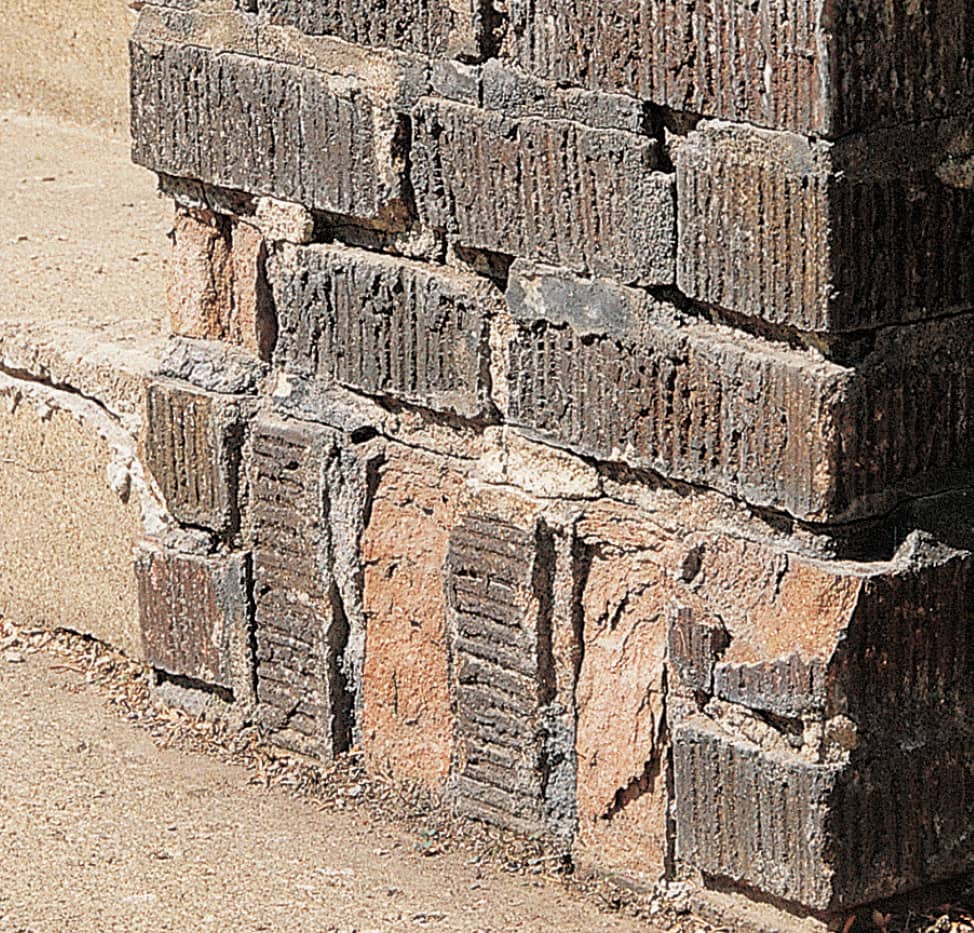
Spalling occurs when freezing water or other forces cause enough directional pressure to fracture a brick. The best solution is to replace the entire brick (pages 264 to 265) while eliminating the source of the pressure, if possible. Tip: Chip off a piece of the damaged brick to use as a color reference when looking for a replacement.
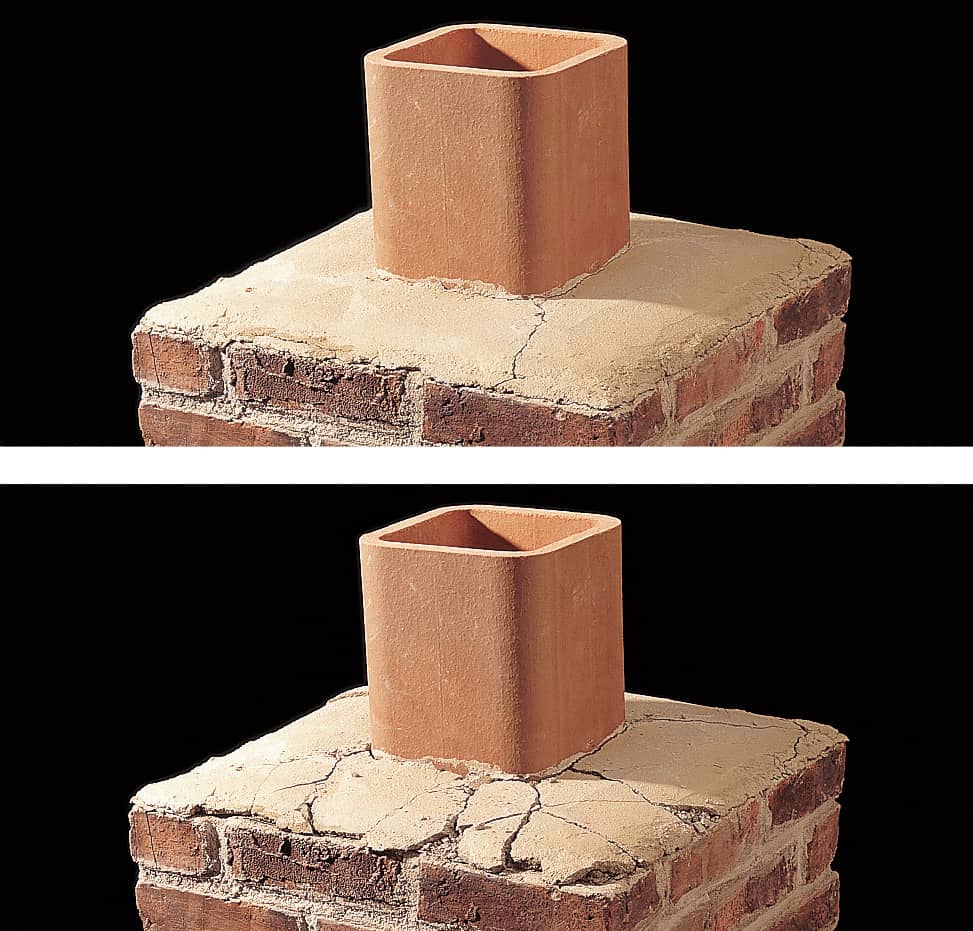
Damaged mortar caps on chimneys allow water into the flue area, where it can damage the chimney and even the roof or interior walls. Small-scale damage (top photo) can be patched with fire-rated silicone caulk. If damage is extensive (bottom photo), repair or replace the mortar cap.
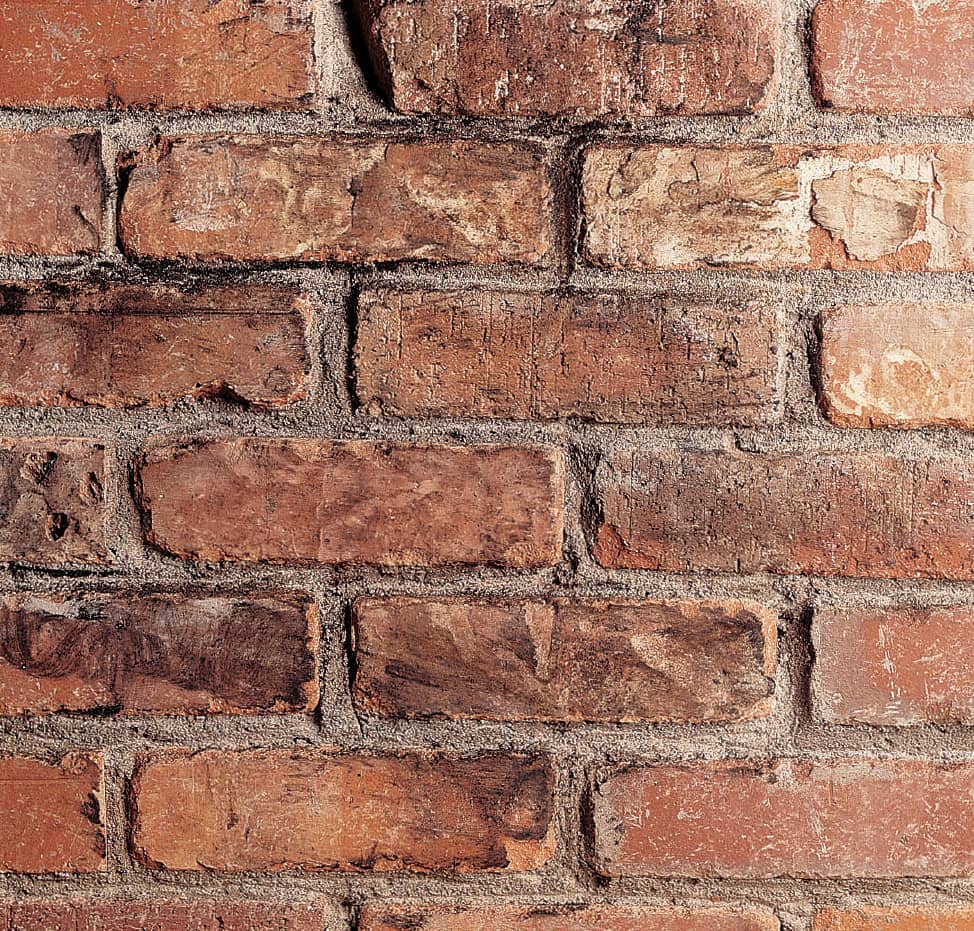
Stains and discoloration can be caused by external sources or by minerals leeching to the surface from within the brick or block (called efflorescence). If the stain does not wash away easily with water, use a cleaning solution.
 Repairing Brick & Block Walls
The most common brick and block wall repair is tuck-pointing, the process of replacing failed mortar joints with fresh mortar. Tuck-pointing is a highly useful repair technique for any homeowner. It can be used to repair walls, chimneys, brick veneer, or any other structure where the bricks or blocks are bonded with mortar.
Minor cosmetic repairs can be attempted on any type of wall, from free-standing garden walls to block foundations. Filling minor cracks with caulk or repair compound, and patching popouts or chips are good examples of minor repairs. Consult a professional before attempting any major repairs, like replacing brick or blocks, or rebuilding a structure—especially if you are dealing with a load-bearing structure.
Basement walls are a frequent trouble area for homeowners. Constant moisture and stress created by ground contact can cause leaks, bowing, and paint failure. Small leaks and cracks can be patched with hydraulic cement. Masonry-based waterproofing products can be applied to give deteriorated walls a fresh appearance. Persistent moisture problems are most often caused by improper grading of soil around the foundation or a malfunctioning downspout and gutter system.
Note: The repairs shown in this section feature brick and block walls. The same techniques may be used for other brick and block structures.
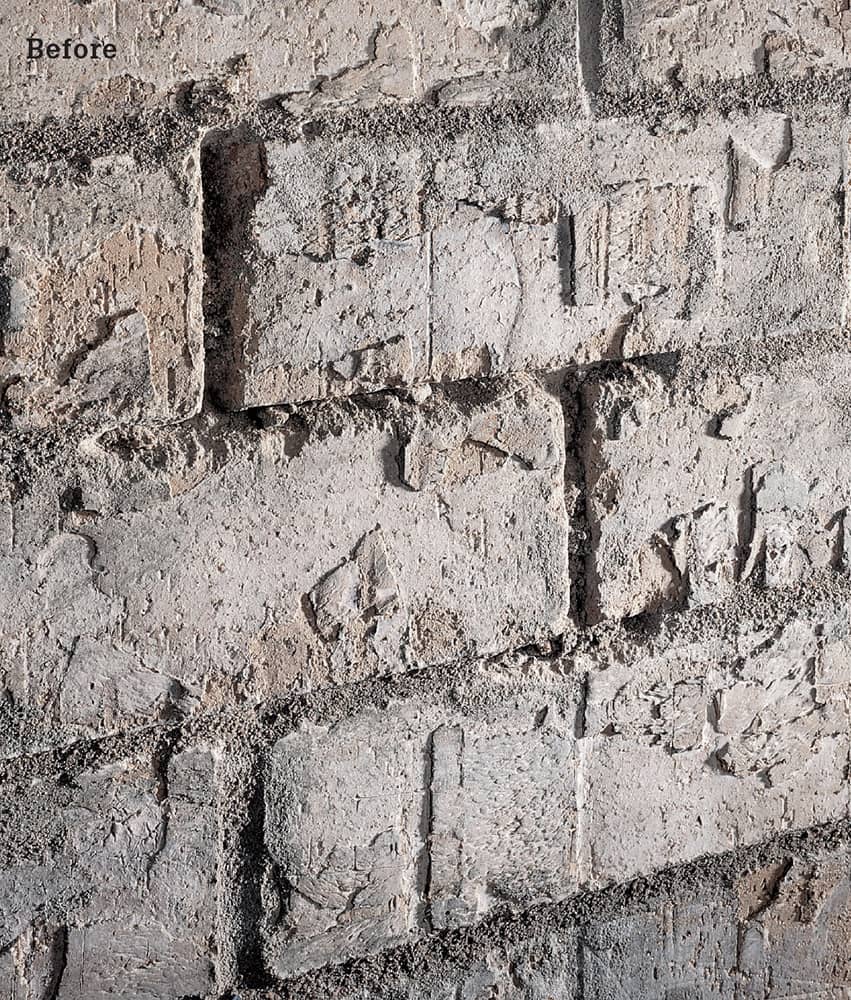
Make timely repairs to brick and block structures. Tuck-pointing deteriorated mortar joints is a common repair that, like other types of repair, improves the appearance of the structure or surface and helps prevent further damage.
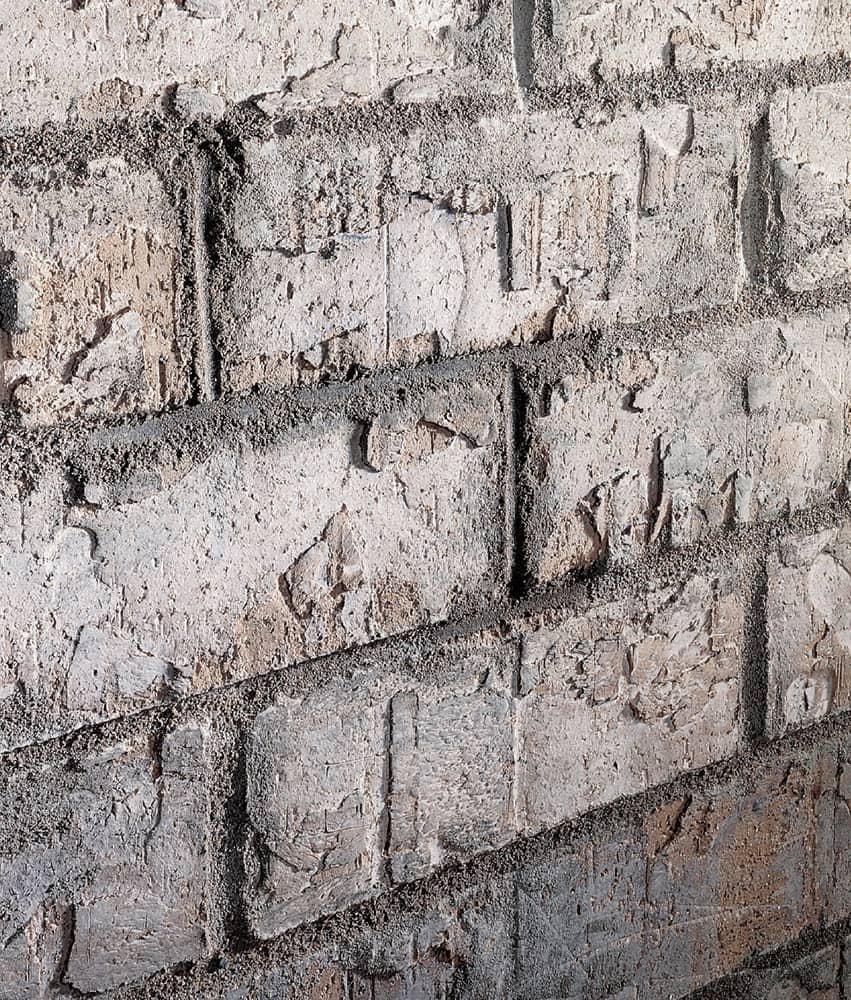
How to Tuck-point Mortar Joints
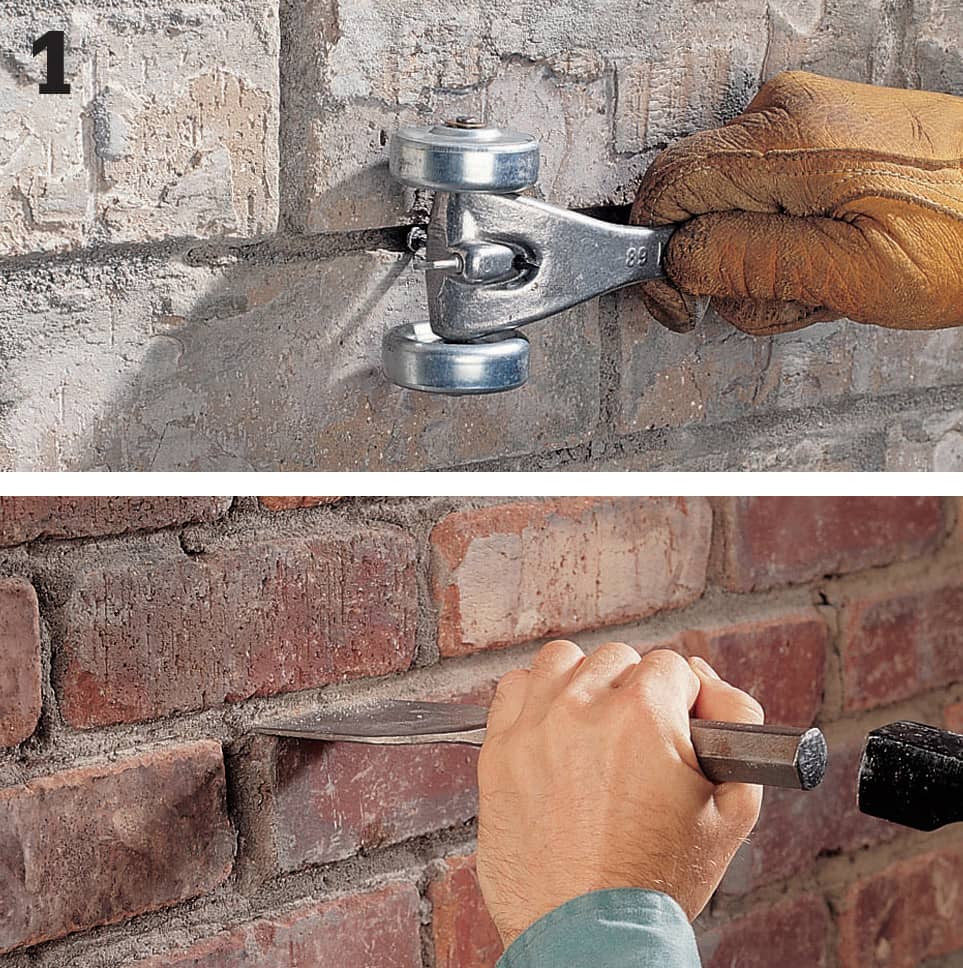
Clean out loose or deteriorated mortar to a depth of 1/4" to 3/4". Use a mortar raking tool (top) first, then switch to a masonry chisel and a hammer (bottom) if the mortar is stubborn. Clear away all loose debris, and dampen the surface with water before applying fresh mortar.
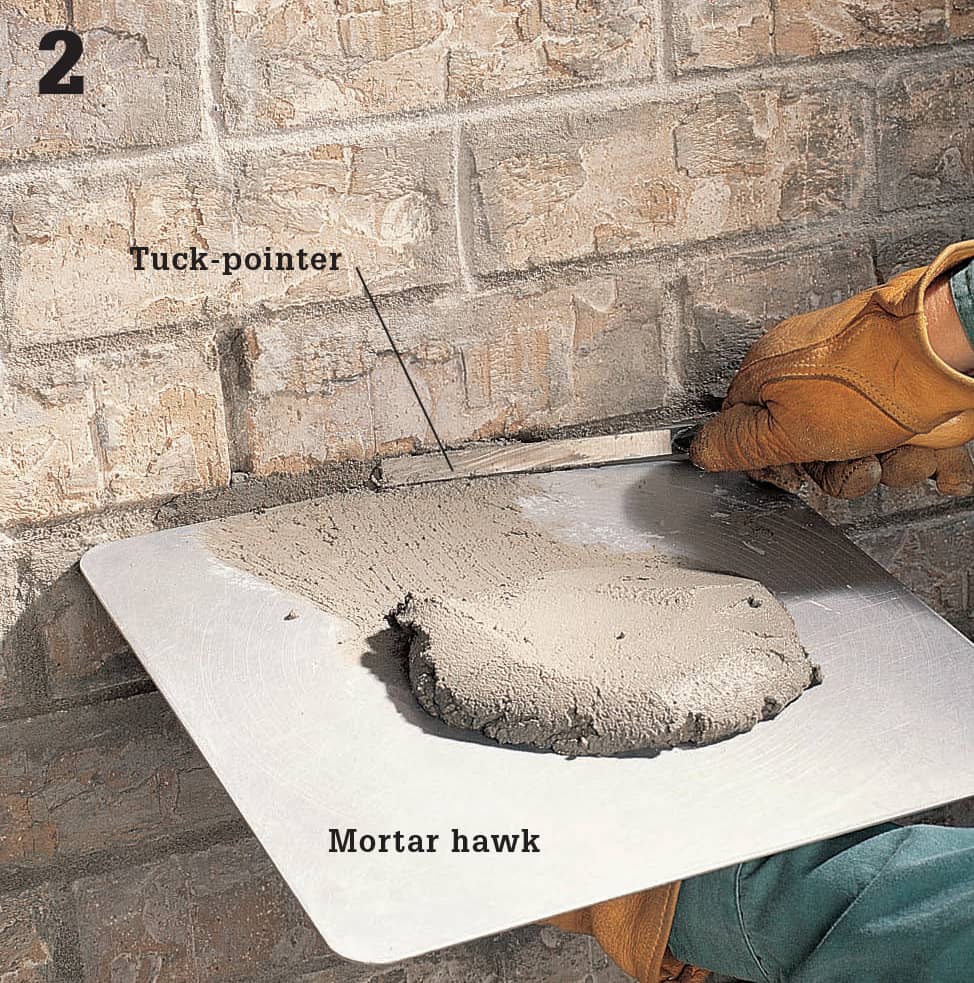
Mix the mortar, adding concrete fortifier; add tint if necessary. Load mortar onto a mortar hawk, then push it into the horizontal joints with a tuck-pointer. Apply mortar in 1/4"-thick layers, and let each layer dry for 30 minutes before applying another. Fill the joints until the mortar is flush with the face of the brick or block.
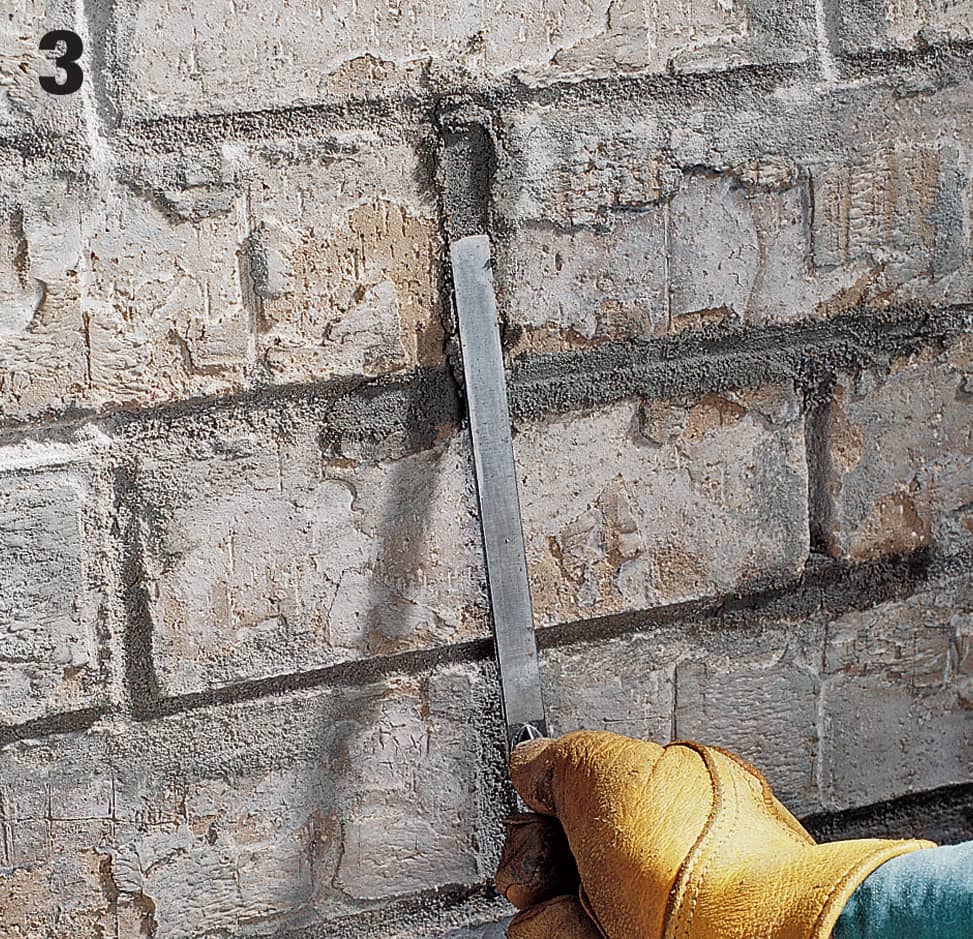
Apply the first layer of mortar into the vertical joints by scooping mortar onto the back of a tuck-pointer, and pressing it into the joint. Work from the top downward.
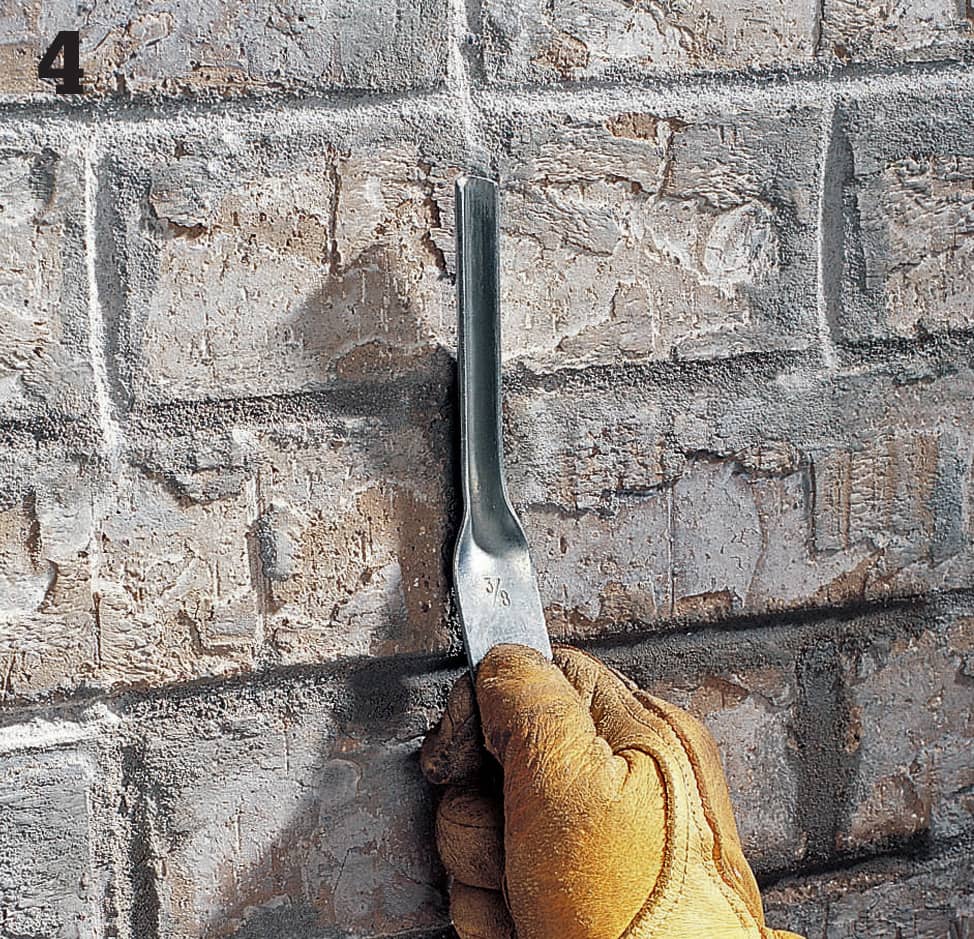
After the final layer of mortar is applied, smooth the joints with a jointing tool that matches the profile of the old mortar joints. Tool the horizontal joints first. Let the mortar dry until it is crumbly, then brush off the excess mortar with a stiff-bristle brush.
How to Replace a Damaged Brick
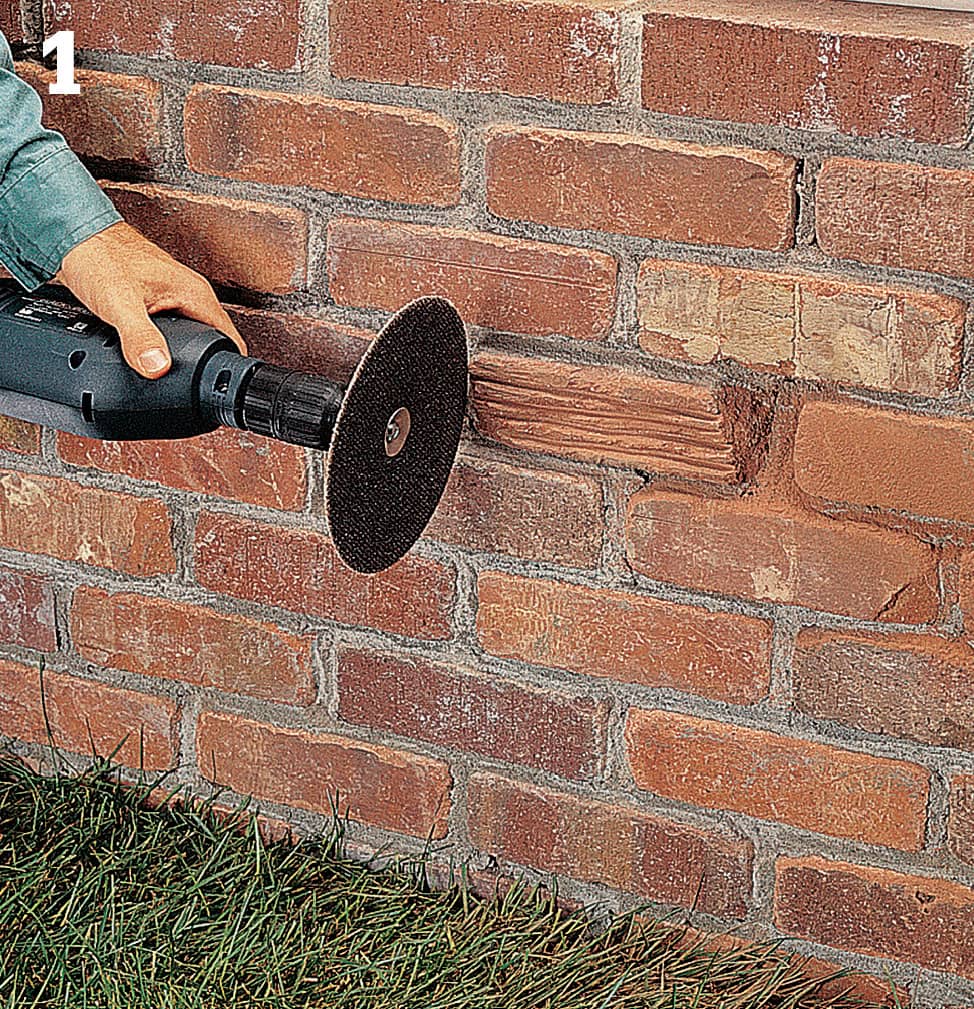
Score the damaged brick so it will break apart more easily for removal: use a drill with a masonry-cutting disc to score lines along the surface of the brick and in the mortar joints surrounding the brick.
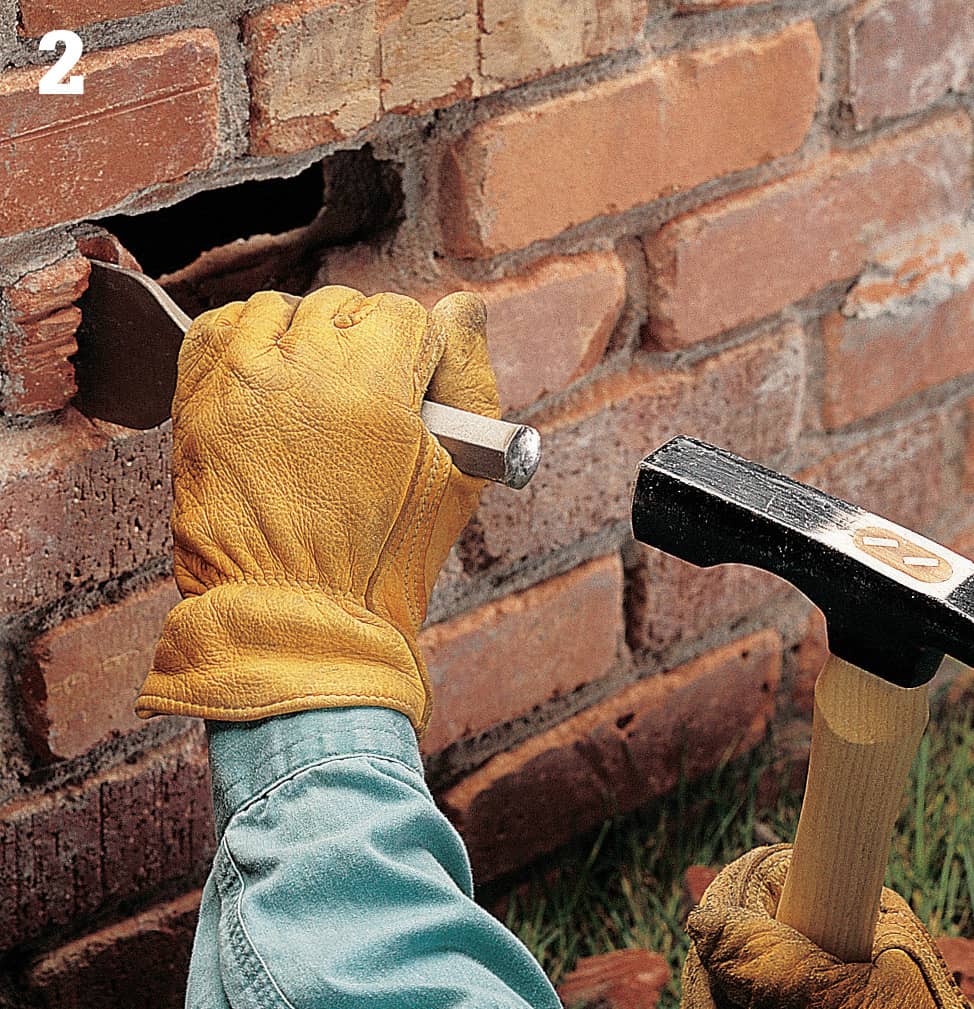
Use a mason’s chisel and hammer to break apart the damaged brick along the scored lines. Rap sharply on the chisel with the hammer, being careful not to damage surrounding bricks. Tip: Save fragments to use as a color reference when you shop for replacement bricks.
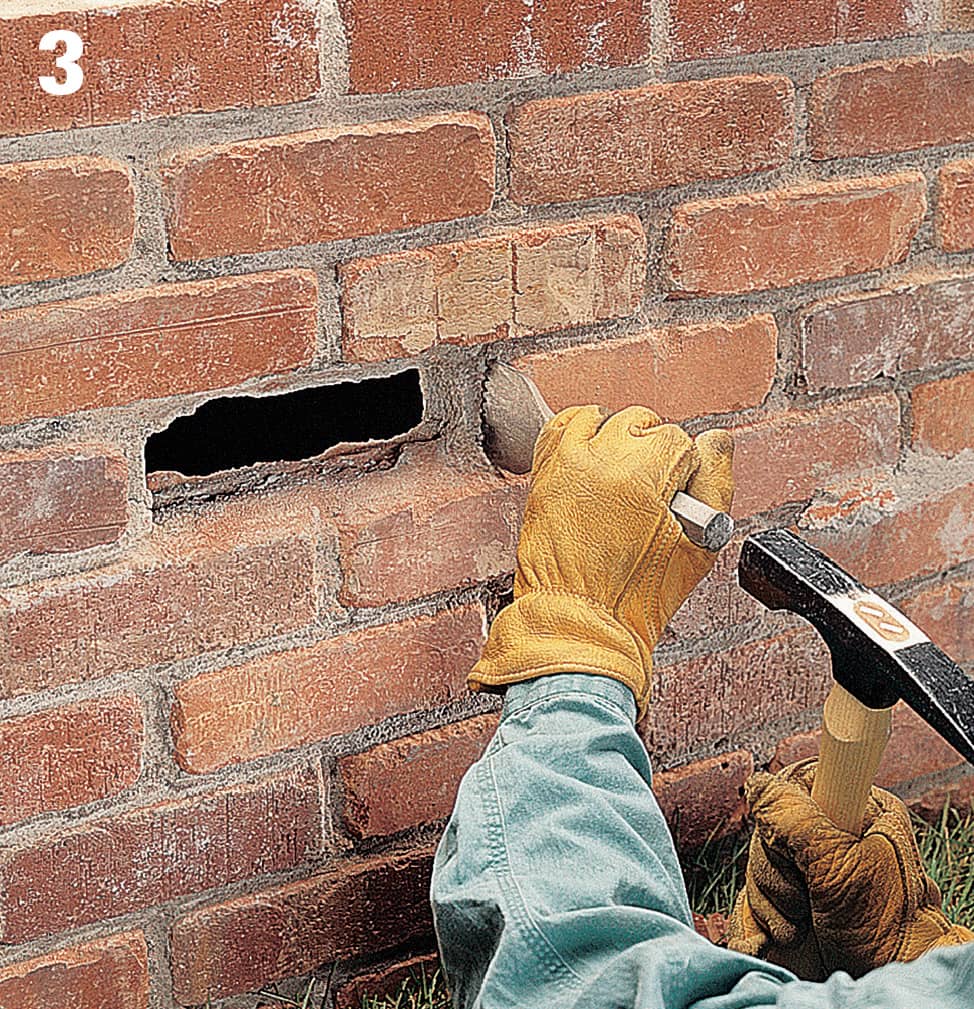
Chisel out any remaining mortar in the cavity, then brush out debris with a stiff-bristle or wire brush to create a clean surface for the new mortar. Rinse the surface of the repair area with water.
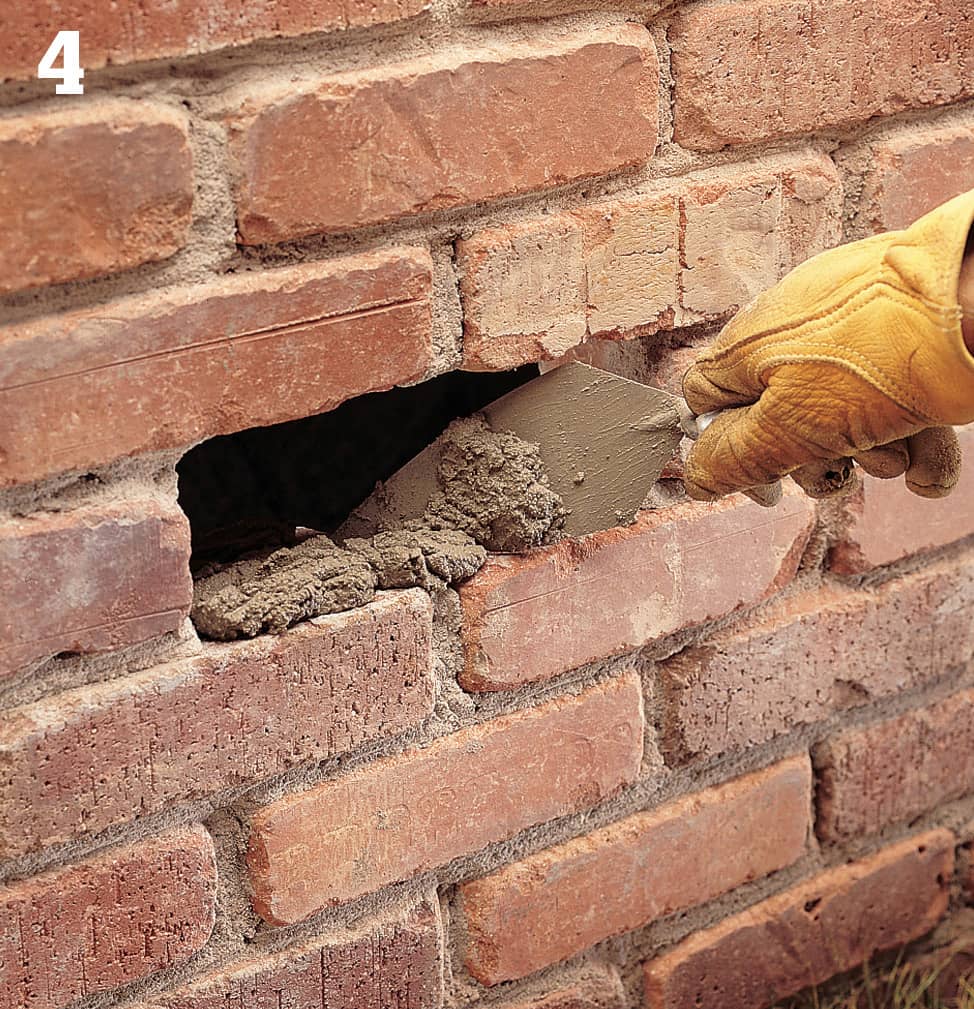
Mix the mortar for the repair, adding concrete fortifier to the mixture, and tint if needed to match old mortar. Use a pointing trowel to apply a 1"-thick layer of mortar at the bottom and sides of the cavity.
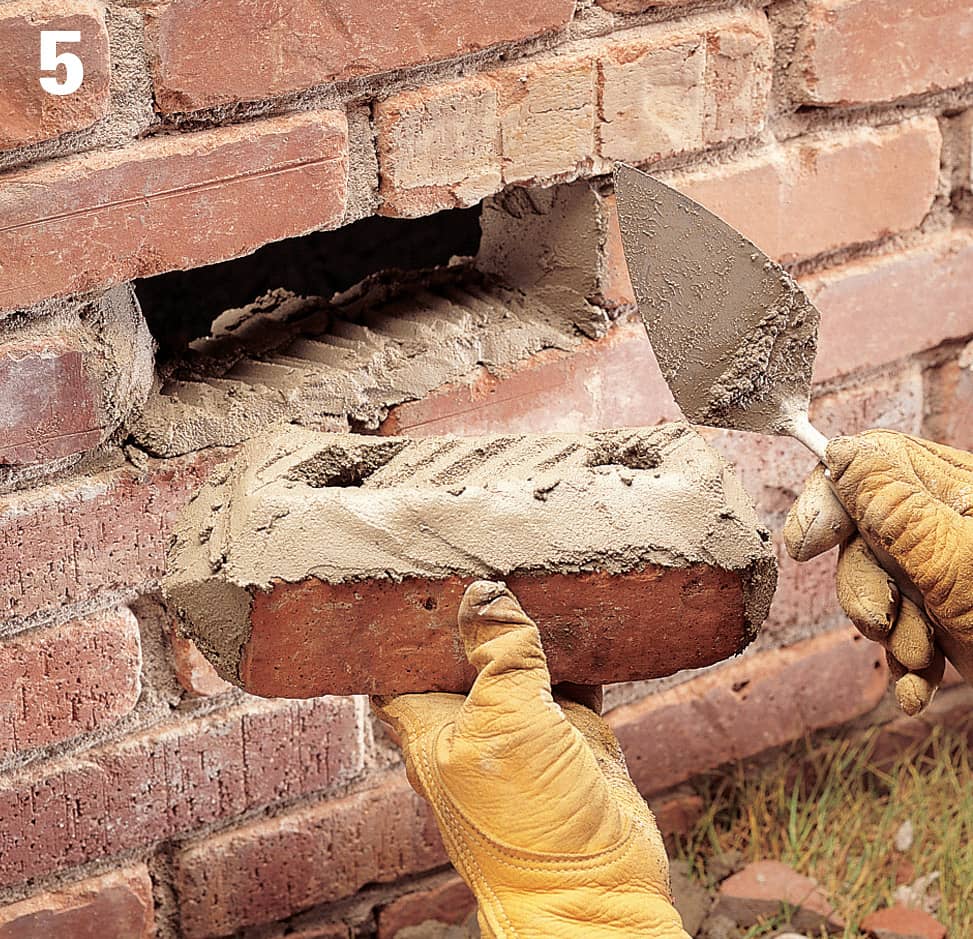
Dampen the replacement brick slightly, then apply mortar to the ends and top of the brick. Fit the brick into the cavity and rap it with the handle of the trowel until the face is flush with the surrounding bricks. If needed, press additional mortar into the joints with a pointing trowel.
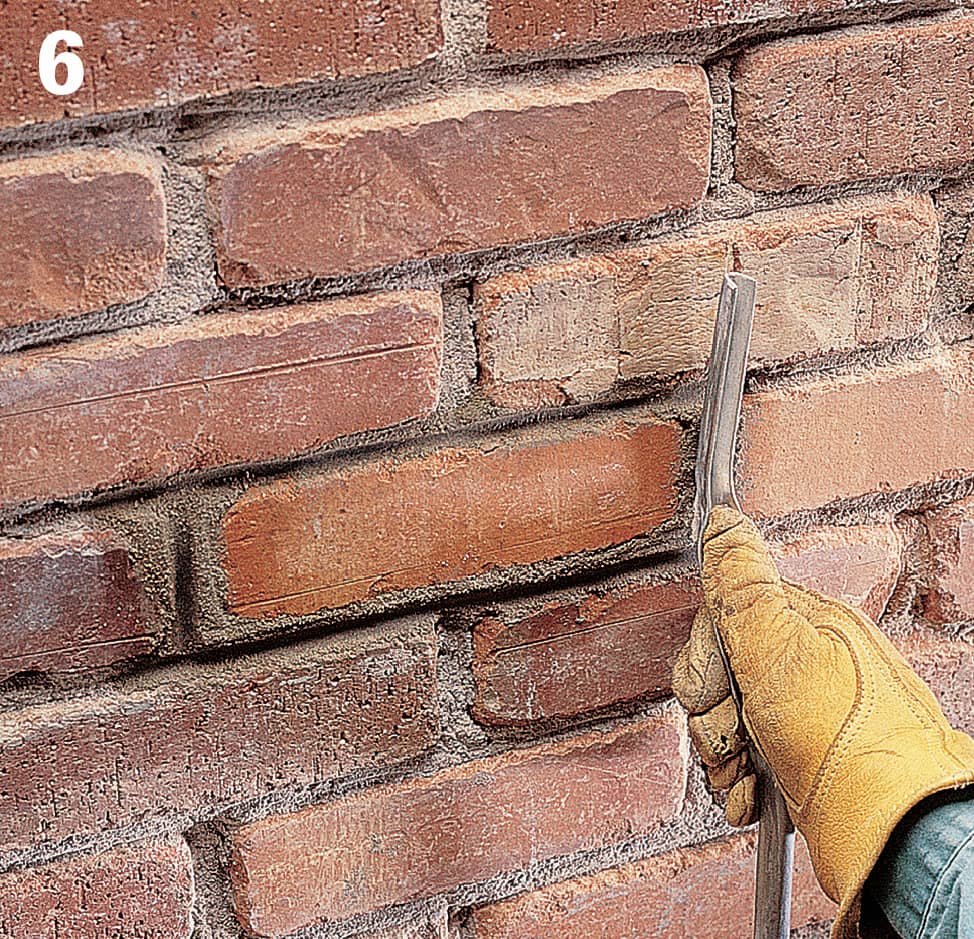
Scrape away excess mortar with a masonry trowel, then smooth the joints with a jointing tool that matches the profile of the surrounding mortar joints. Let the mortar set until crumbly, then brush the joints to remove excess mortar.
How to Reface a Damaged Concrete Block
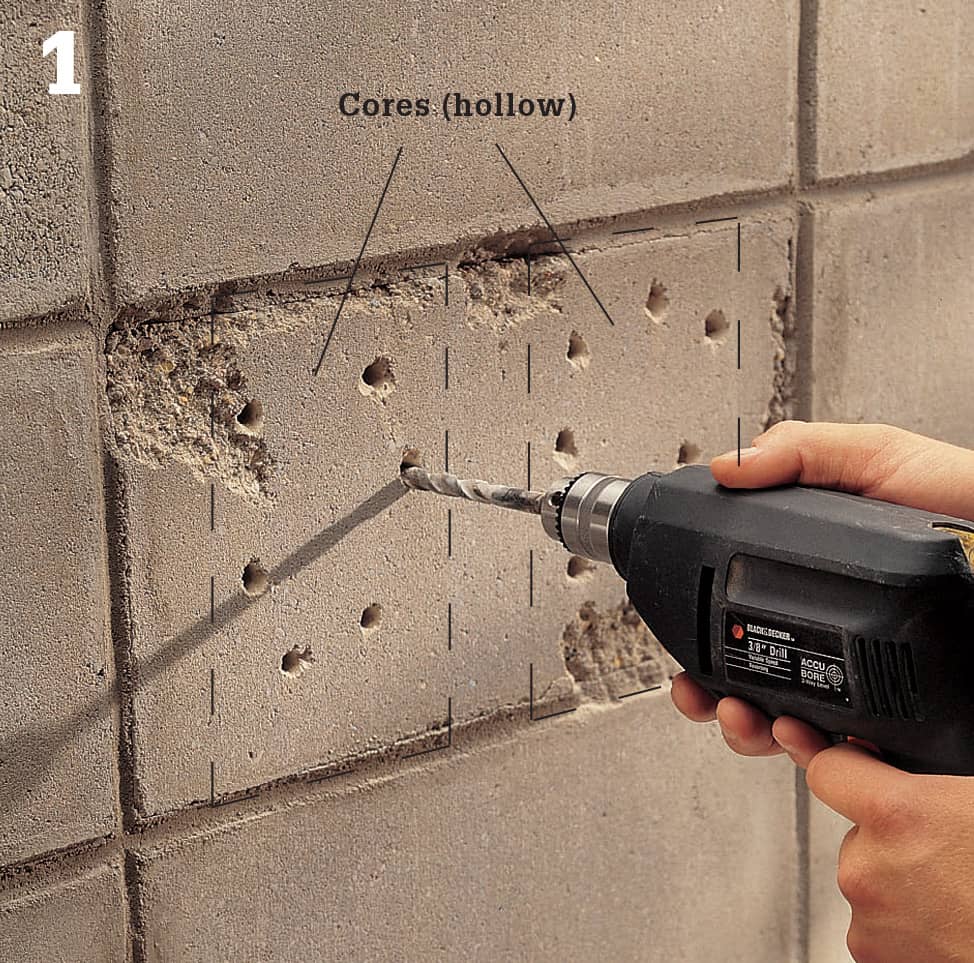
Drill several holes into the face of the deteriorated block at the cores (hollow spots) of the block using a drill and masonry bit. Wear protective eye covering when drilling or breaking apart concrete.
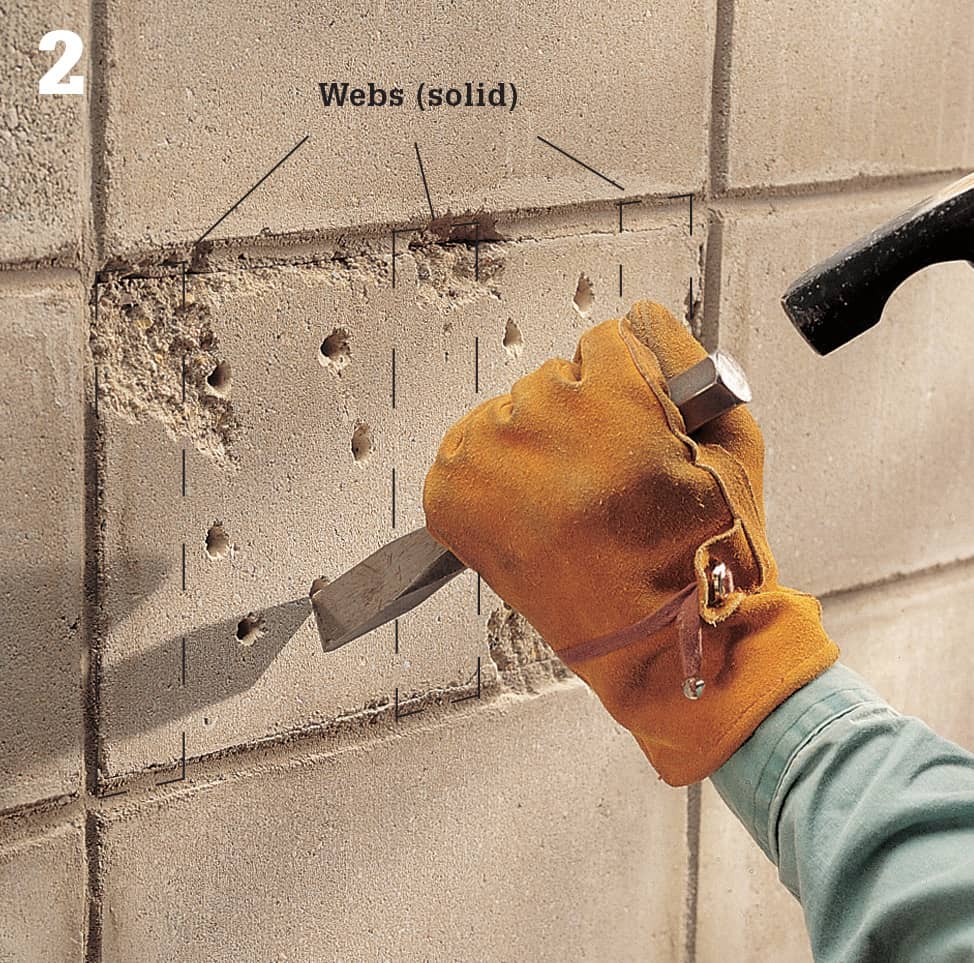
Using the holes as starting points, chip away the face of the block over the core areas, using a chisel and hammer. Be careful not to damage surrounding blocks and try to leave the block face intact in front of the solid web areas.
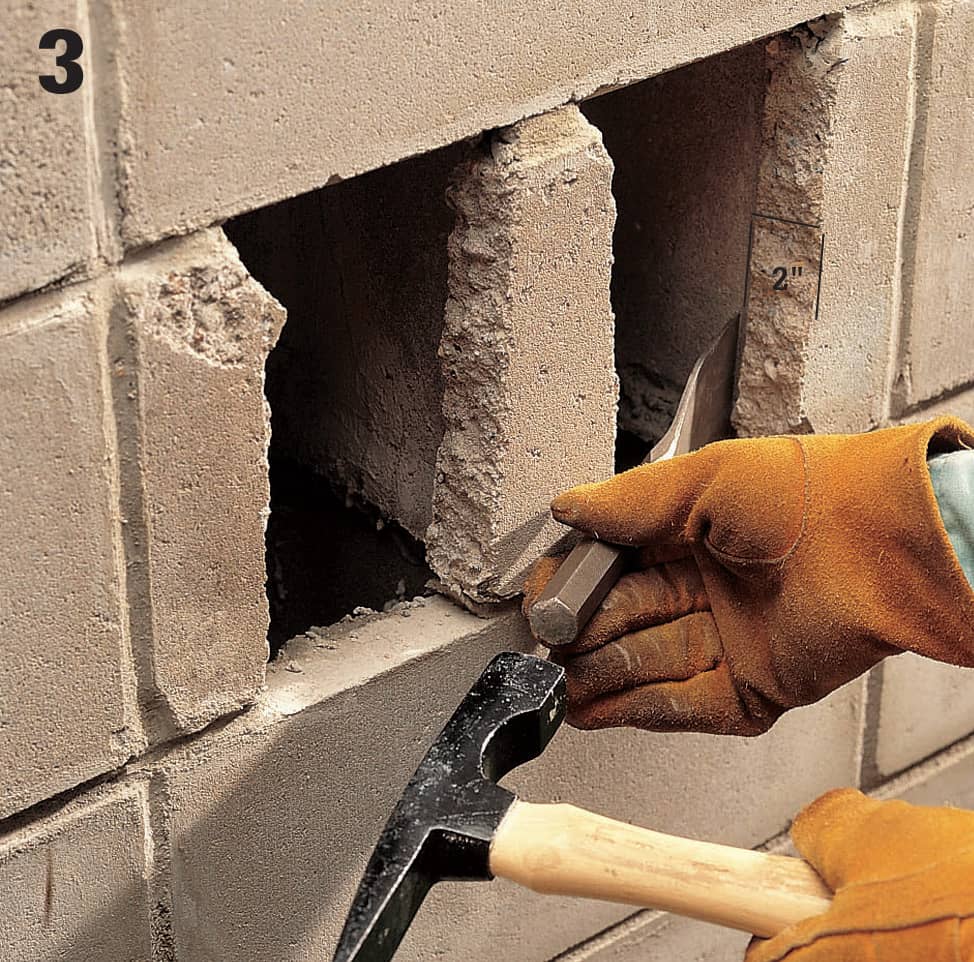
Use a stone chisel to carefully chip out a 2"-deep recess in the web areas. Mark and score cutting lines 2" back from the block face, then chisel away the block in the recess area. Avoid deepening the recess more than 2" because the remaining web sections provide a bonding surface for the concrete paver that will be installed to replace the face of the concrete block.
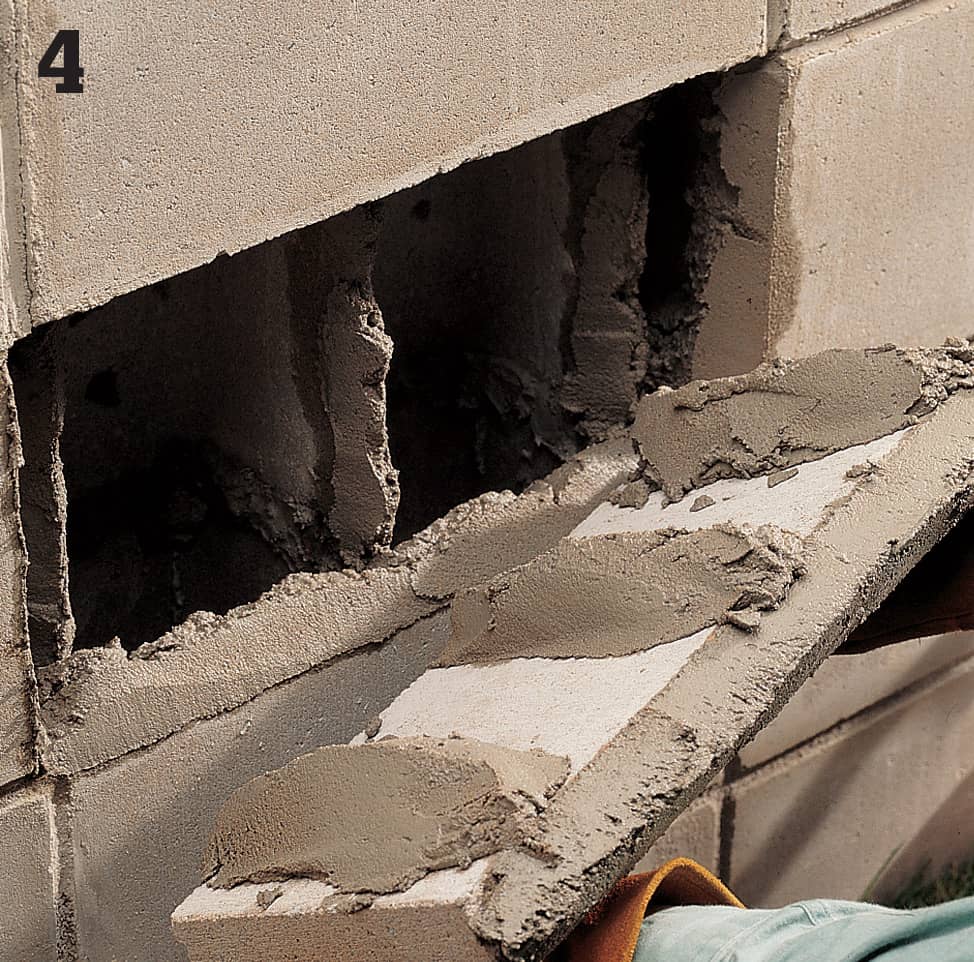
Mix mortar, then apply a 1"-thick layer to the sides and bottom of the opening, to the webs, and to the top edge and web locations on the paver (use an 8 × 16" paver to fit standard blocks). Press the paver into the cavity, flush with the surrounding blocks. Add mortar to the joints if needed, then prop a 2 × 4 against the paver until the mortar sets. Finish the joints with a jointing tool.
How to Reinforce a Section of Refaced Blocks
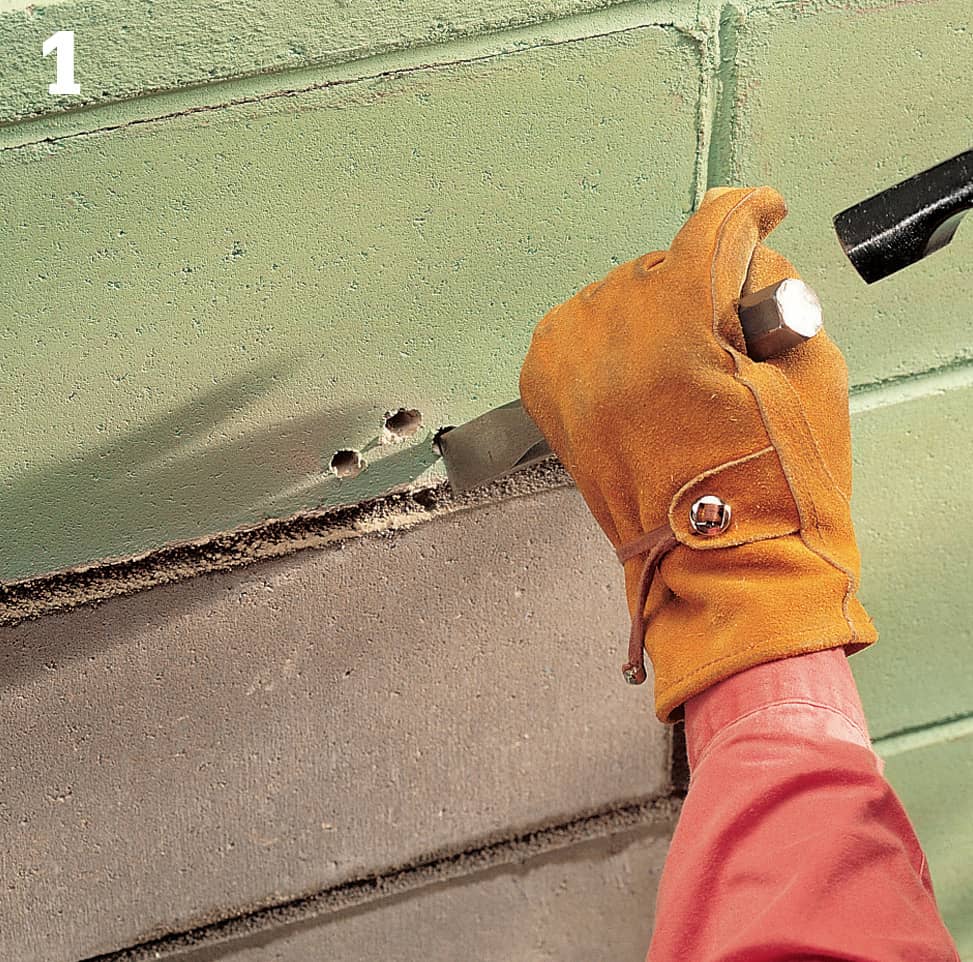
Reinforce repair areas spanning two or more adjacent block faces. Start by drilling a few holes in a small area over a core in the block located directly above the repair area. Chip out the block face between the holes with a cold chisel.
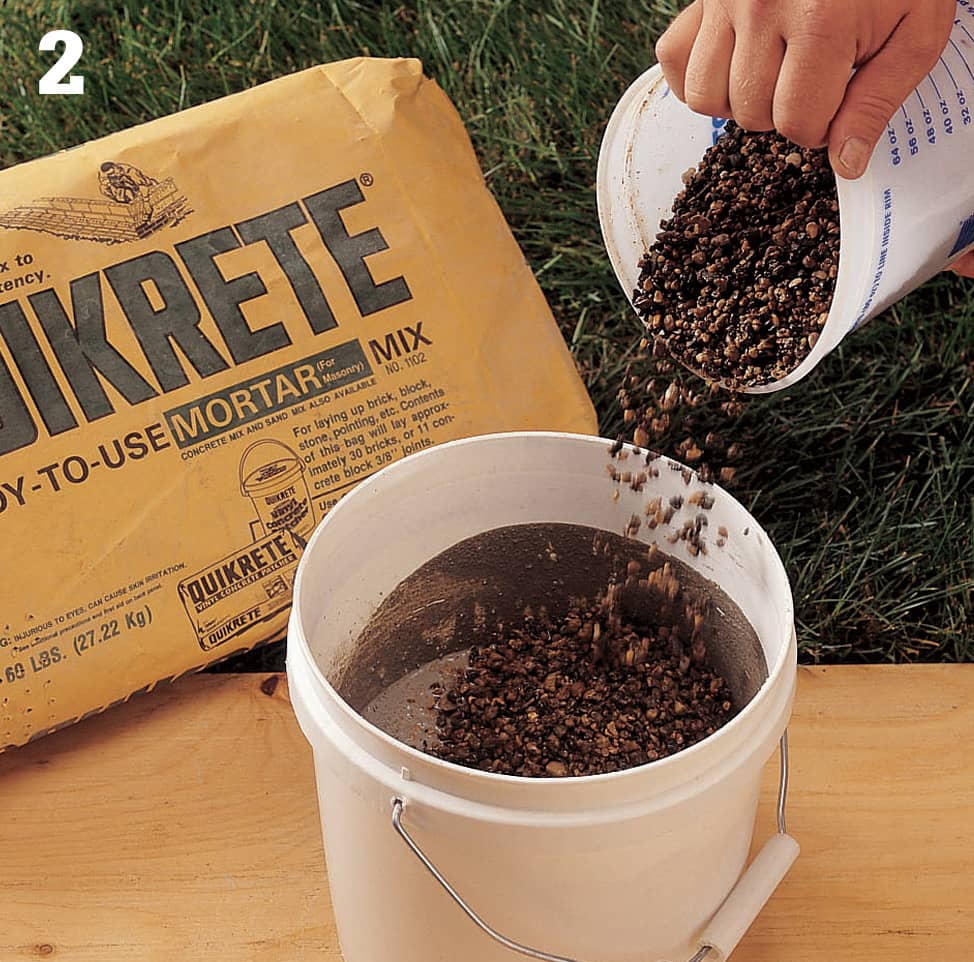
Prepare a thin mortar mix made from 1 part gravel and 2 parts dry mortar, then add water. The mixture should be thin enough to pour easily, but not soupy. Note: Adding small amounts of gravel increases the strength of the mortar and increases the yield of the batch.
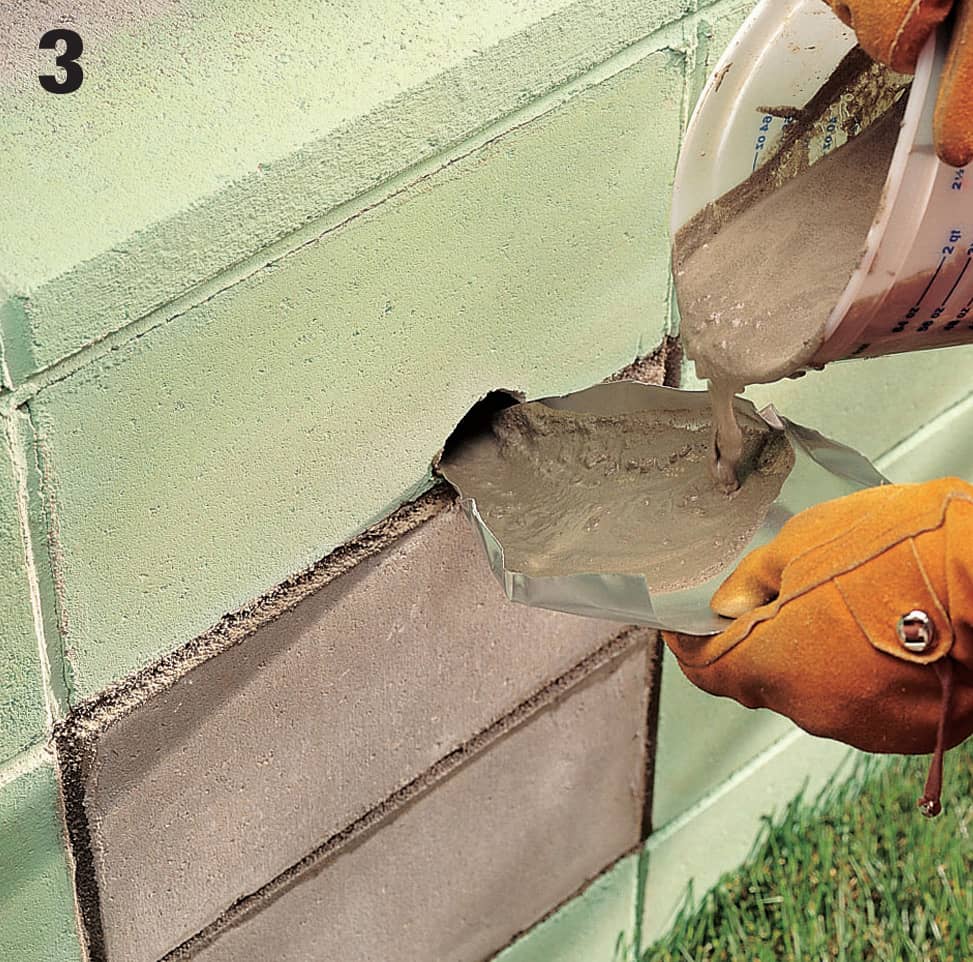
Pour the mortar/gravel mixture into the hole above the repair area, using a piece of metal flashing as a funnel. Continue mixing and filling the hole until it will not accept any more mortar. The mortar will dry to form a reinforcing column that is bonded to the backs of the pavers used to reface the blocks.
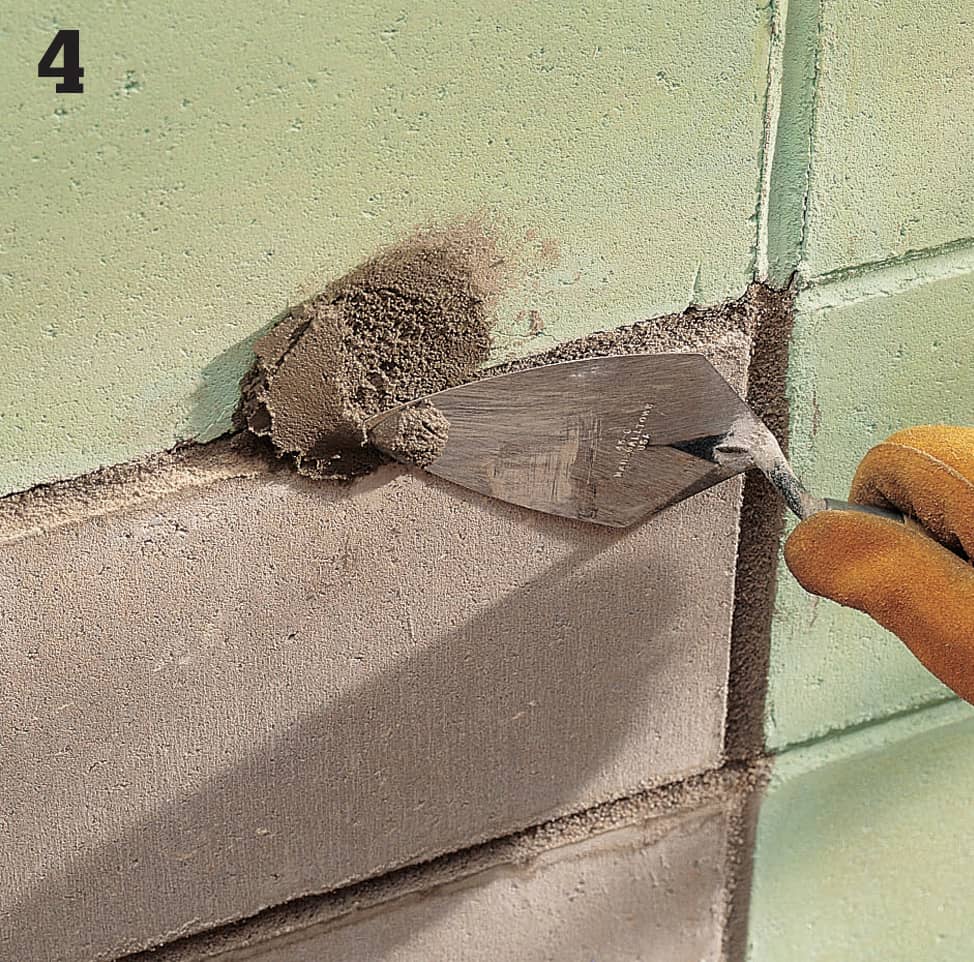
Patch the hole above the repair area by using a pointing trowel to fill the hole with plain mortar mix. Smooth the surface with the pointing trowel. When the mortar resists finger pressure, finish the joint below the patch with a jointing tool.
 Painting Brick & Block
Check brick and block surfaces annually and remove stains or discoloration. Most problems are easy to correct if they are treated in a timely fashion. Regular maintenance will help brick and block structures remain attractive and durable for a long time. Refer to the information below for cleaning tips that address specific staining problems.
Painted brick and block structures can be spruced up by applying a fresh coat of paint. As with any other painting job, thorough surface preparation and a quality primer are critical to a successful outcome.
Many stains can be removed easily, using a commercial brick and block detergent, available at home centers, but remember:
• Always test cleaning solutions on a small inconspicuous part of the surface and evaluate the results.
• Some chemicals and their fumes may be harmful. Be sure to follow manufacturer’s safety and use recommendations. Wear protective clothing.
• Soak the surface to be cleaned with water before you apply any solutions. This keeps solutions from soaking in too quickly. Rinse the surface thoroughly after cleaning to wash off any remaining cleaning solution.
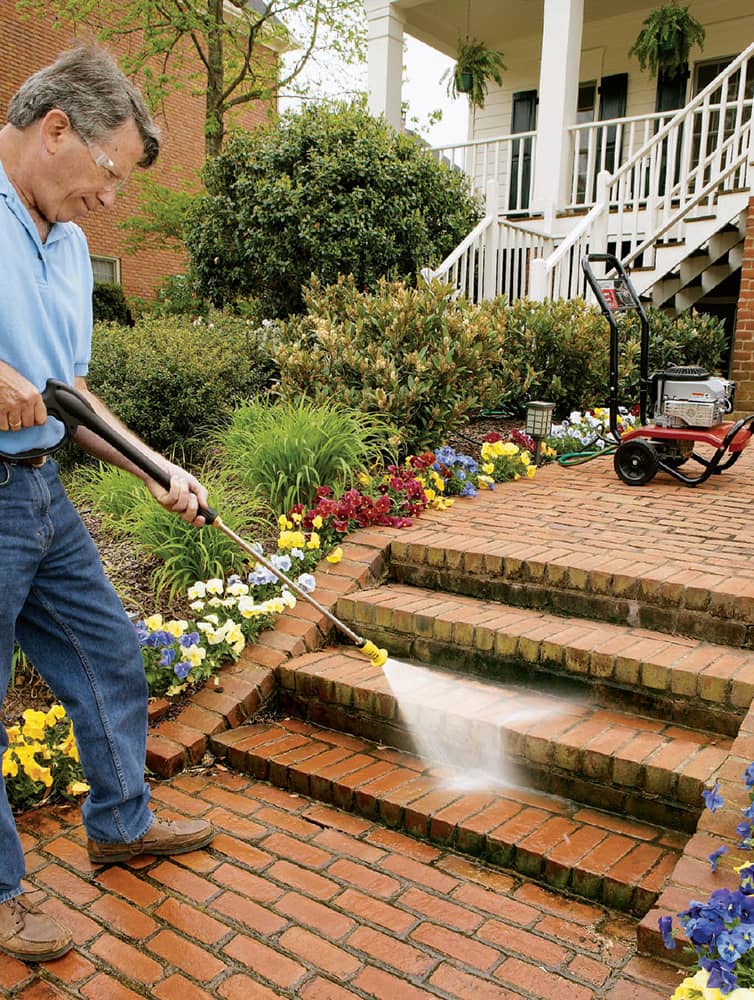
Use a pressure washer to clean large brick and block structures. Pressure washers can be rented from most rental centers. Be sure to obtain detailed operating and safety instructions from the rental agent.
 Repairing Stonework
Damage to stonework is typically caused by frost heave, erosion or deterioration of mortar, or by stones that have worked out of place. Dry-stone walls are more susceptible to erosion and popping, while mortared walls develop cracks that admit water, which can freeze and cause further damage.
Inspect stone structures once a year for signs of damage and deterioration. Replacing a stone or repointing crumbling mortar now will save you work in the long run.
A leaning stone column or wall probably suffers from erosion or foundation problems, and can be dangerous if neglected. If you have the time, you can tear down and rebuild dry-laid structures, but mortared structures with excessive lean need professional help.
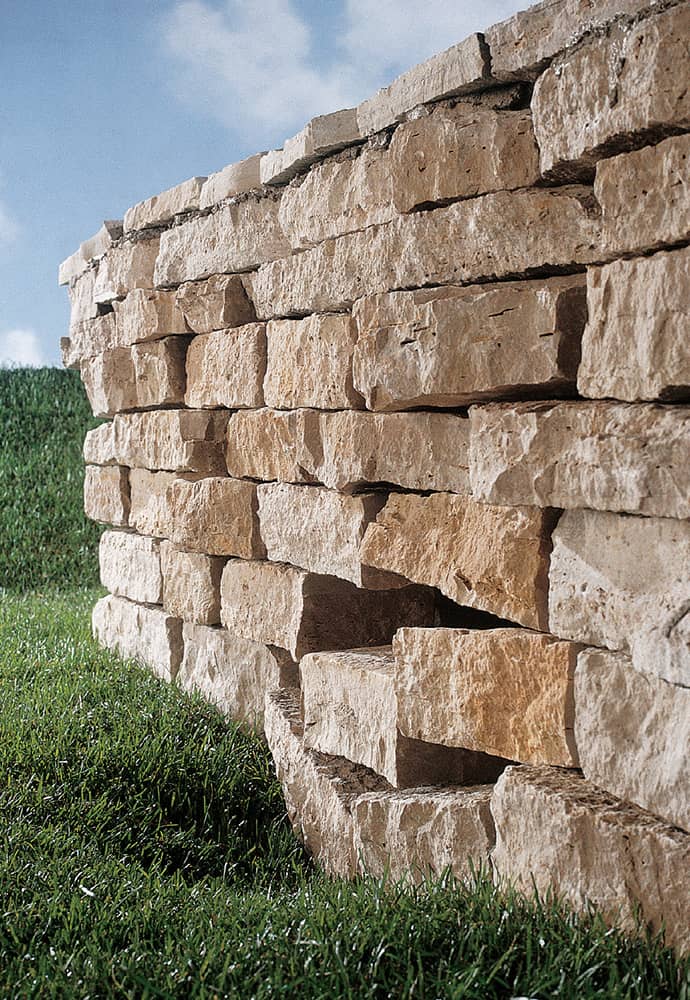
Stones in a wall can become dislodged due to soil settling, erosion, or seasonal freeze-thaw cycles. Make the necessary repairs before the problem migrates to other areas.
How to Rebuild a Dry-stone Wall Section
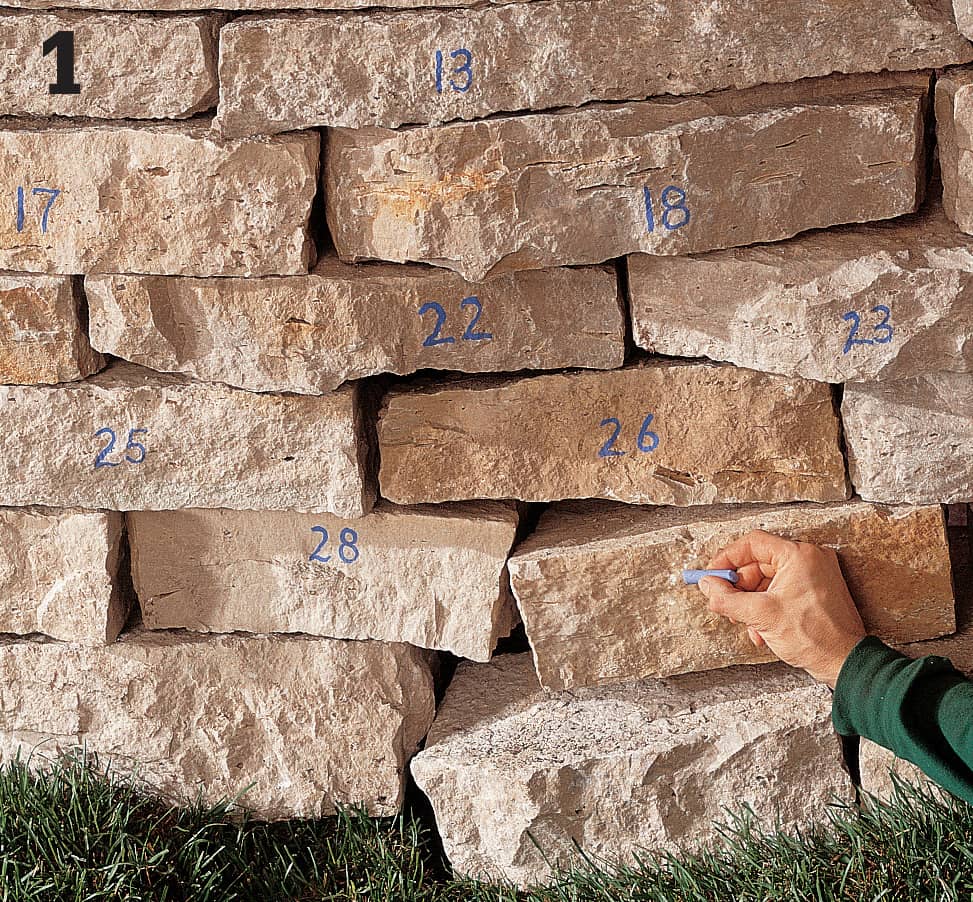
Before you start, study the wall and determine how much of it needs to be rebuilt. Plan to dismantle the wall in a “V” shape, centered on the damaged section. Number each stone and mark its orientation with chalk so you can rebuild it following the original design. Tip: Photograph the wall, making sure the markings are visible.
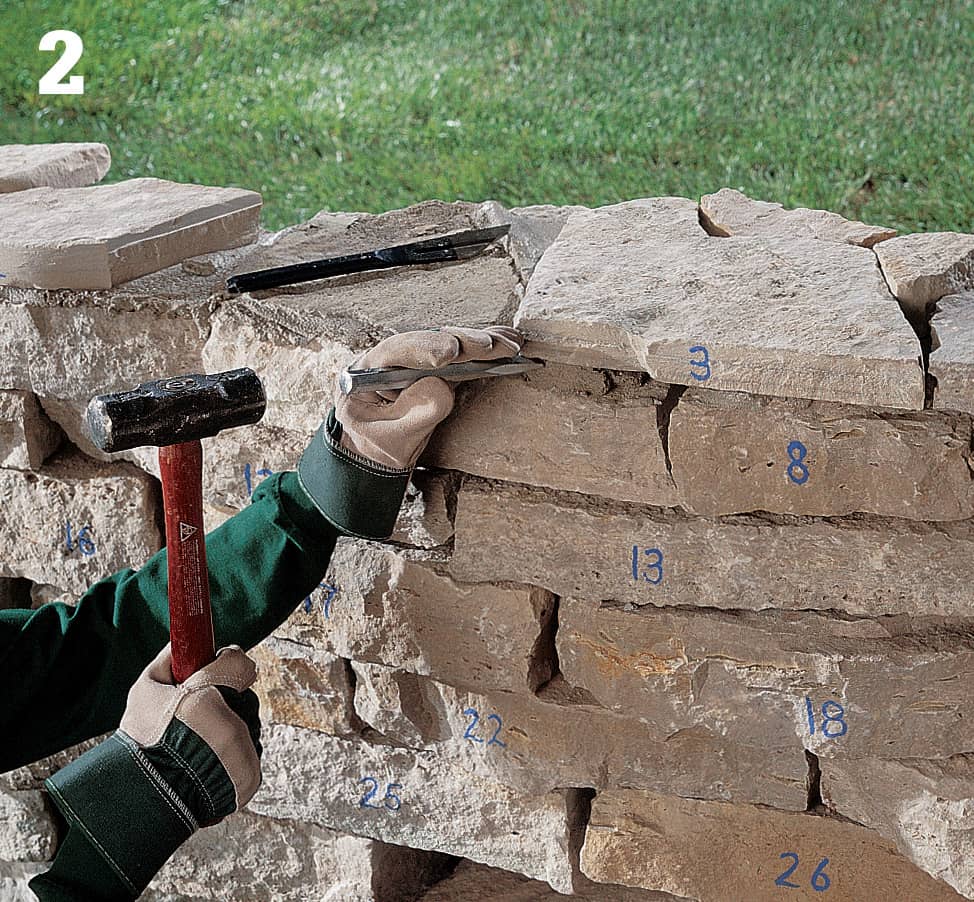
Capstones are often set in a mortar bed atop the last course of stone. You may need to chip out the mortar with a maul and chisel to remove the capstones. Remove the marked stones, taking care to check the overall stability of the wall as you work.
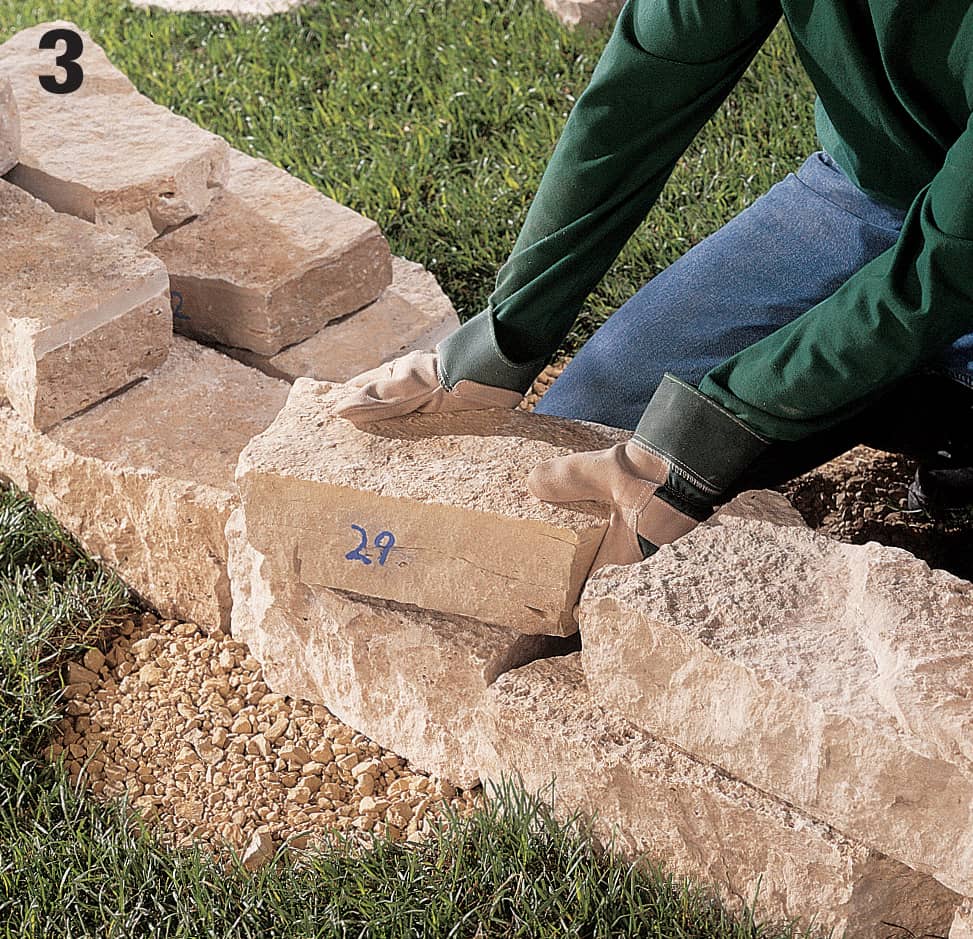
Rebuild the wall, one course at a time, using replacement stones only when necessary. Start each course at the ends and work toward the center. On thick walls, set the face stones first, then fill in the center with smaller stones. Check your work with a level, and use a batter gauge to maintain the batter of the wall. If your capstones were mortared, re-lay them in fresh mortar. Wash off the chalk with water and a stiff-bristle brush.
How to Repoint Mortar Joints
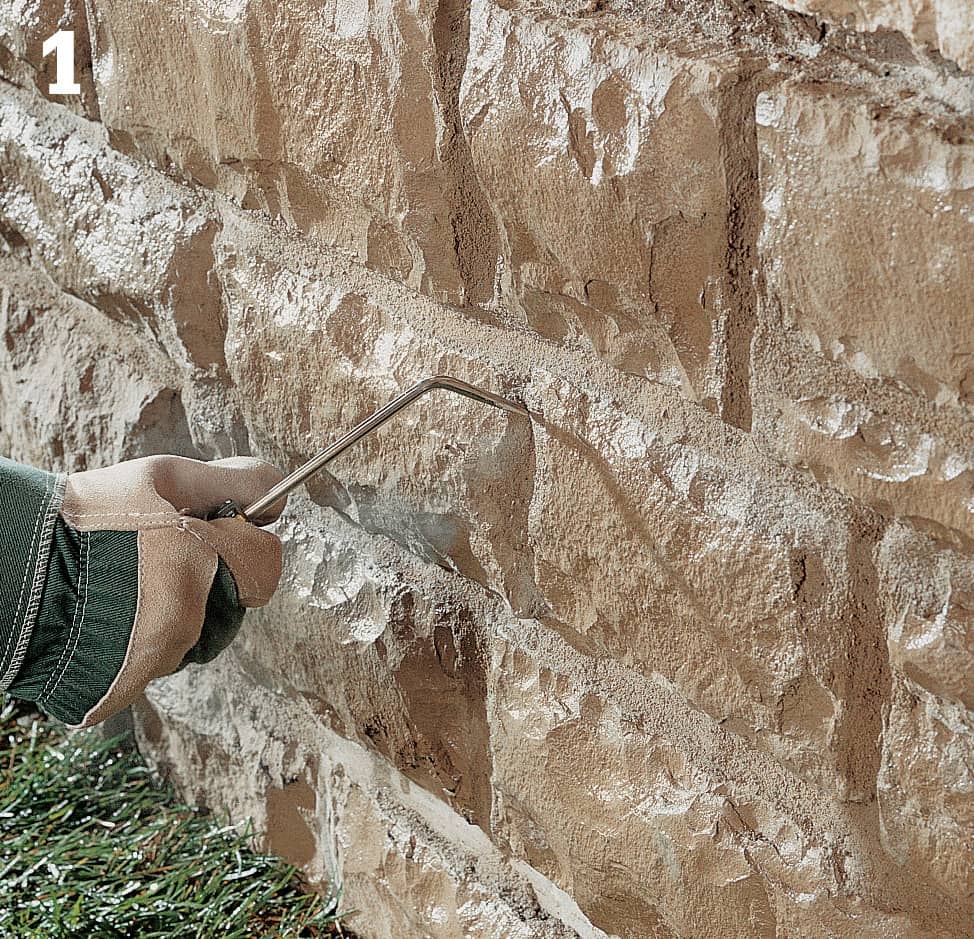
Carefully rake out cracked and crumbling mortar, stopping when you reach solid mortar. Remove loose mortar and debris with a stiff-bristle brush. Tip: Rake the joints with a chisel and maul, or make your own raking tool by placing an old screwdriver in a vice and bending the shaft about 45°.
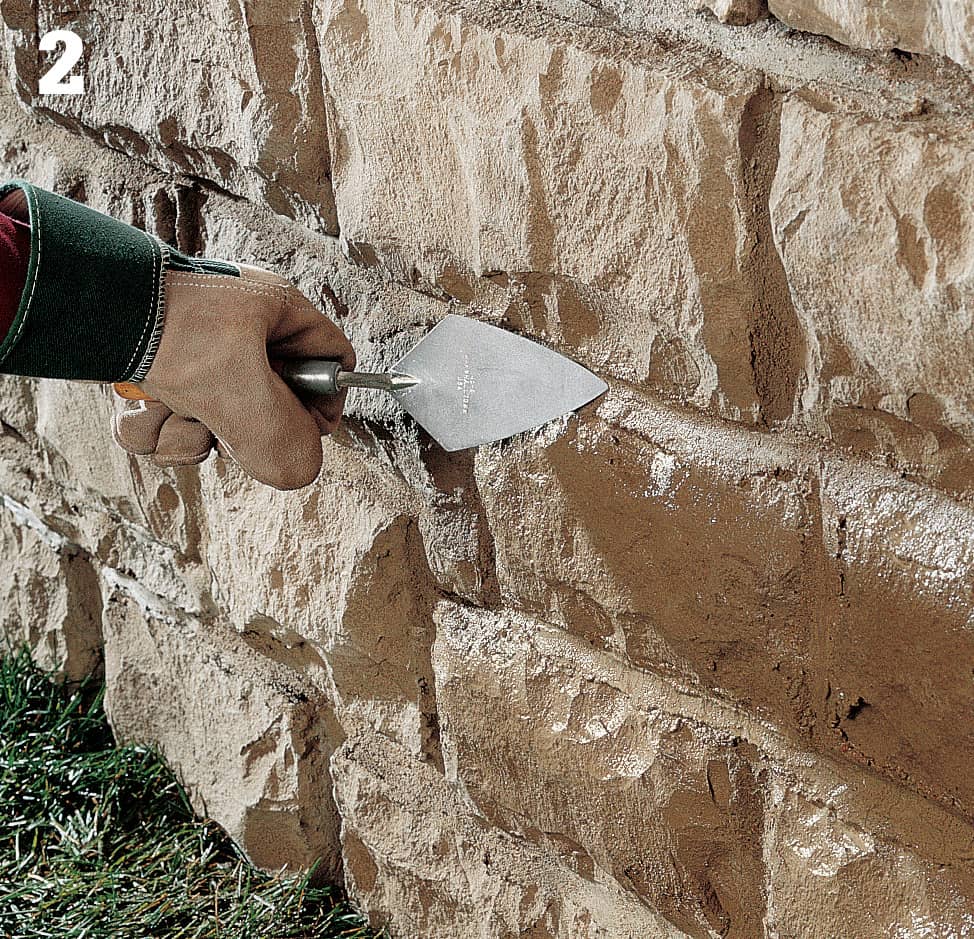
Mix type M mortar, then dampen the repair surfaces with clean water. Working from the top down, pack mortar into the crevices, using a pointing trowel. Smooth the mortar when it has set up enough to resist light finger pressure. Remove excess mortar with a stiff-bristle brush.
How to Replace a Stone in a Mortared Wall
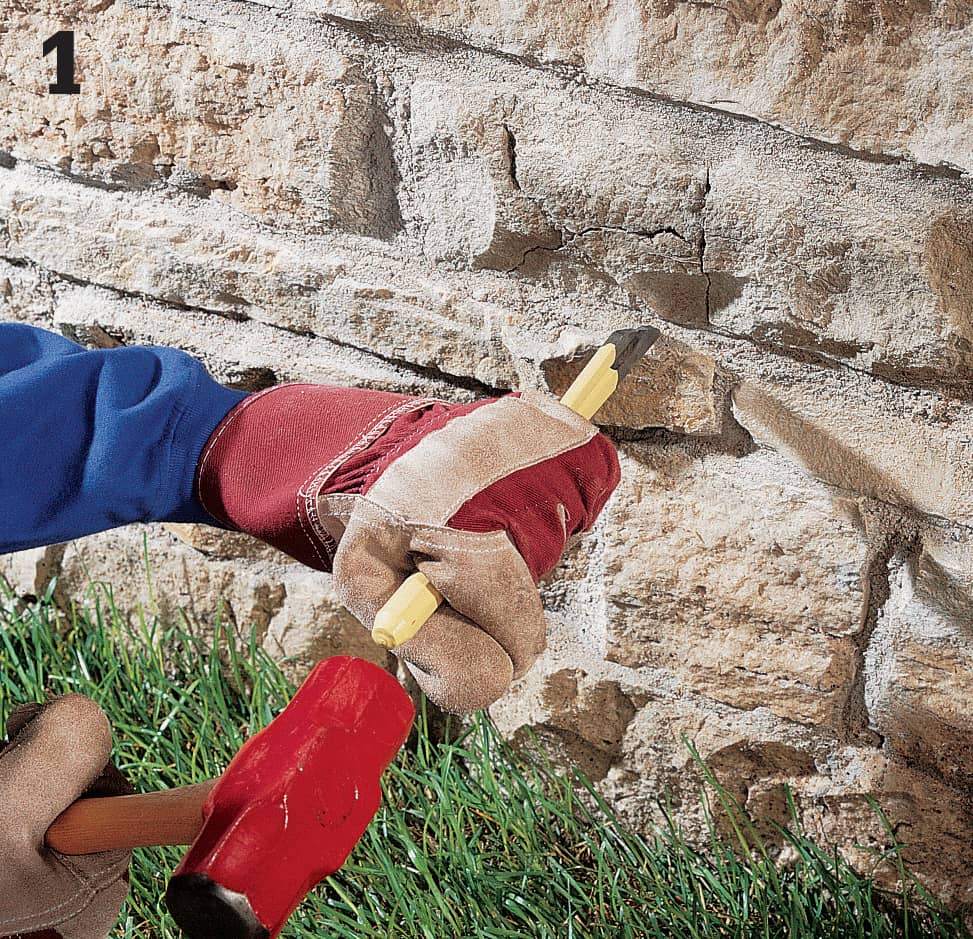
Remove the damaged stone by chiseling out the surrounding mortar, using a masonry chisel or a modified screwdriver (opposite page). Drive the chisel toward the damaged stone to avoid harming neighboring stones. Once the stone is out, chisel the surfaces inside the cavity as smooth as possible.
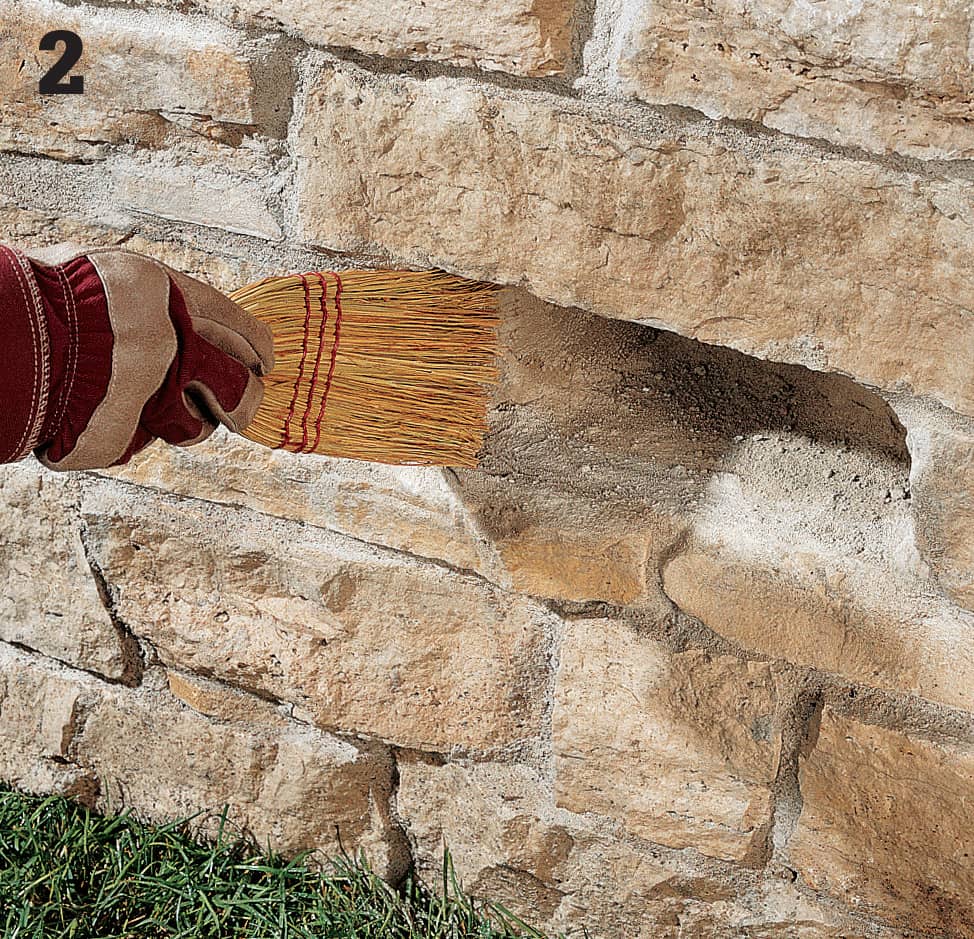
Brush out the cavity to remove loose mortar and debris. Test the surrounding mortar, and chisel or scrape out any mortar that isn’t firmly bonded.
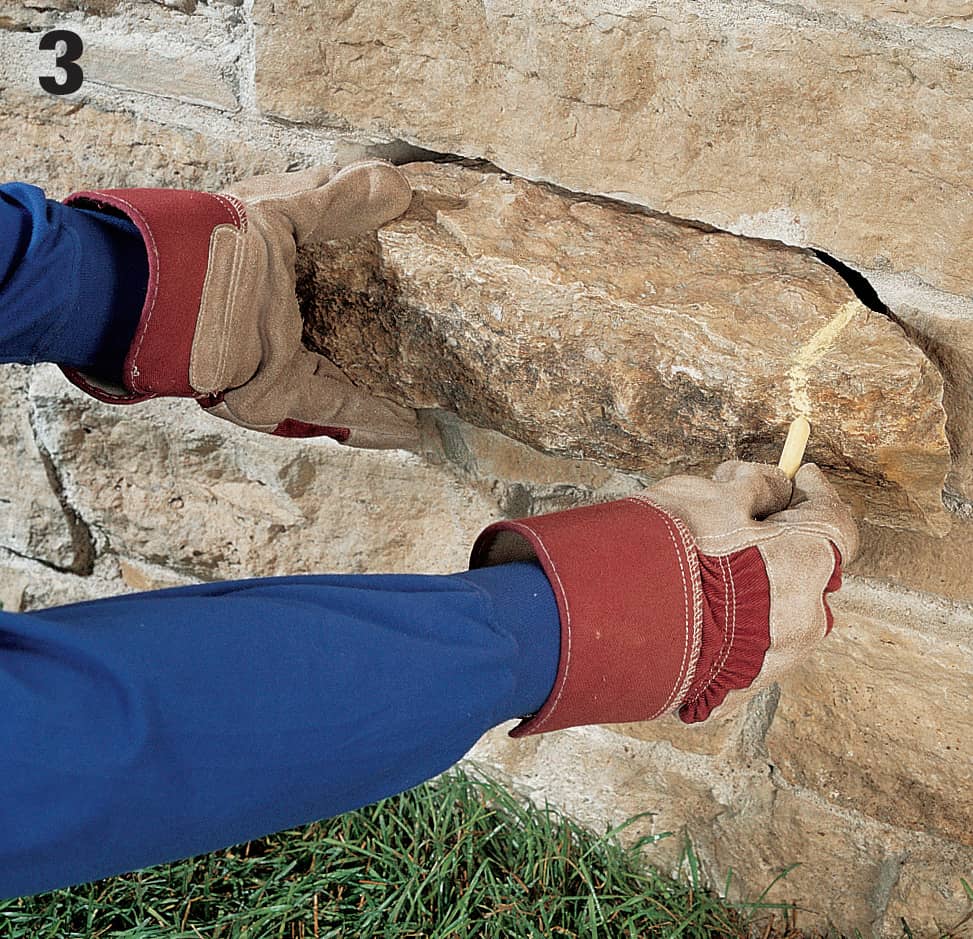
Dry-fit the replacement stone. The stone should be stable in the cavity and blend with the rest of the wall. You can mark the stone with chalk and cut it to fit, but excessive cutting will result in a conspicuous repair.
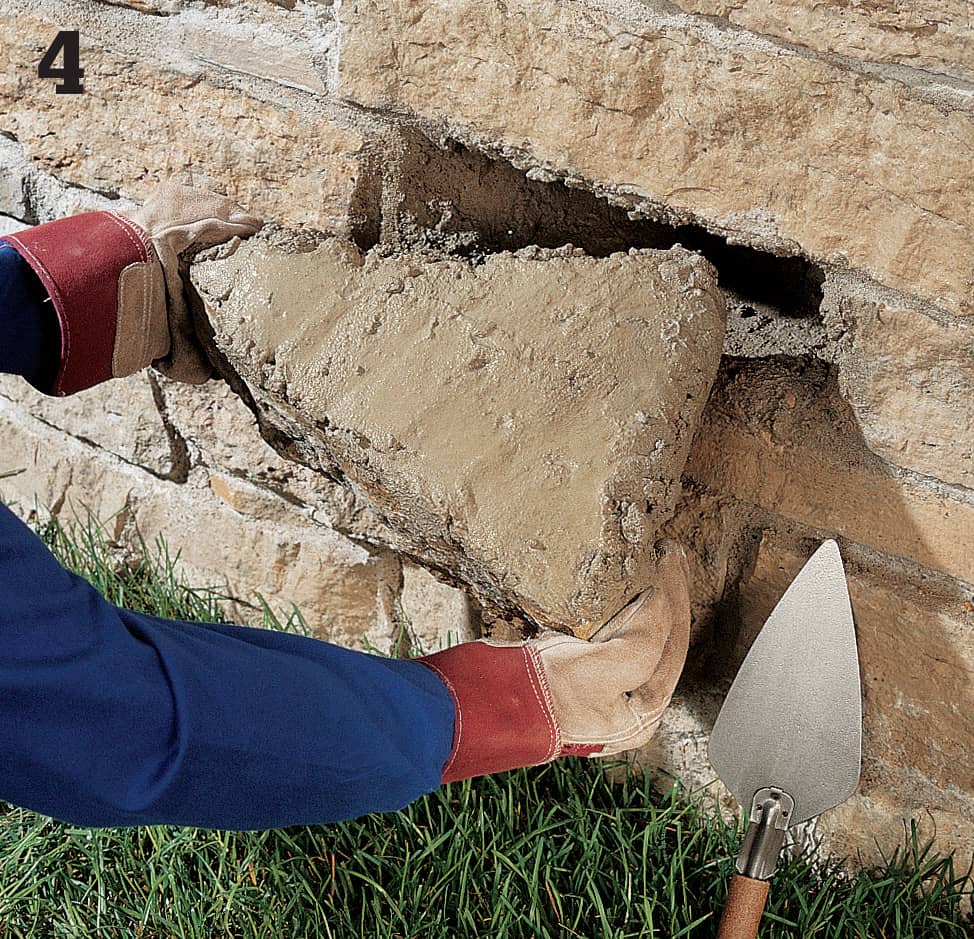
Mist the stone and cavity lightly, then apply type M mortar around the inside of the cavity, using a trowel. Butter all mating sides of the replacement stone. Insert the stone and wiggle it forcefully to remove any air pockets. Use a pointing trowel to pack the mortar solidly around the stone. Smooth the mortar when it has set up.
 Pressure Washing Masonry
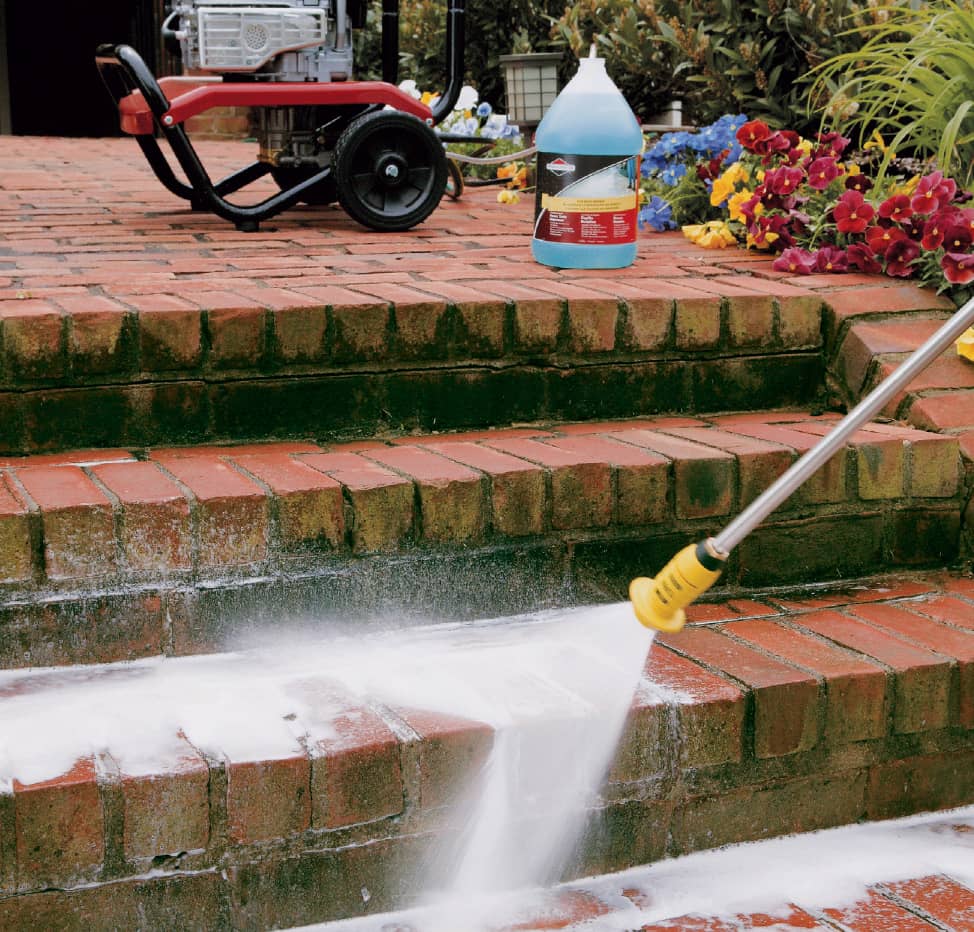
To clean the masonry and stonework surfaces around the outside of your home, there is nothing that works faster or more effectively than a pressure washer. A typical residential-grade unit can be as much as 50 times more powerful than a standard garden hose, while using up to 80% less water.
Pressure washing is quite simple: firmly grasp the spray wand with both hands, depress the trigger and move the nozzle across the surface to be cleaned. Although different surfaces require different spray patterns and pressure settings, it is not difficult to determine the appropriate cleaning approach for each project. The nozzle is adjustable—from a low-pressure, wide-fan spray for general cleaning and rinsing, to a narrow, intense stream for stubborn stains. But the easiest way to control the cleaning is to simply adjust the distance between the nozzle and the surface—move the nozzle back to reduce the pressure; move the nozzle closer to intensify it.
To successfully clean any masonry or stone surface using a pressure washer, follow these tips:
• When cleaning a new surface, start in an inconspicuous area, with a wide spray pattern and the nozzle 4- to 5-ft. from the surface. Move closer to the surface until the desired effect is achieved.
• Keep the nozzle in constant motion, spraying at a steady speed with long, even strokes to ensure consistent results.
• Maintain a consistent distance between the nozzle and the cleaning surface.
• When cleaning heavily soiled or stained surfaces, use cleaning detergents formulated for pressure washers. Always rinse the surface before applying the detergent. On vertical surfaces, apply detergent from bottom to top, and rinse from top to bottom. Always follow the detergent manufacturer’s directions.
• After pressure washing, always seal the surface with an appropriate surface sealer (e.g., concrete sealer for cement driveways), following the product manufacturer’s instructions.
 Repairing an Asphalt Driveway
The two most popular hard surface driveway materials are asphalt and concrete. Both are used, almost interchangeably, throughout the country in cold and hot climates. But there are some basic differences. Concrete generally costs more to install and asphalt generally costs more to maintain as the years go by. And, concrete doesn’t always perform well in cold areas. It’s susceptible to damage from the freeze-and-thaw cycle and it can be damaged by exposure to road salt. Asphalt, on the other hand, doesn’t always perform well in hot climates. It absorbs a lot of heat from the sun and tends to stay soft during very hot periods. And, of course, when the surface is soft, it can wear more quickly.
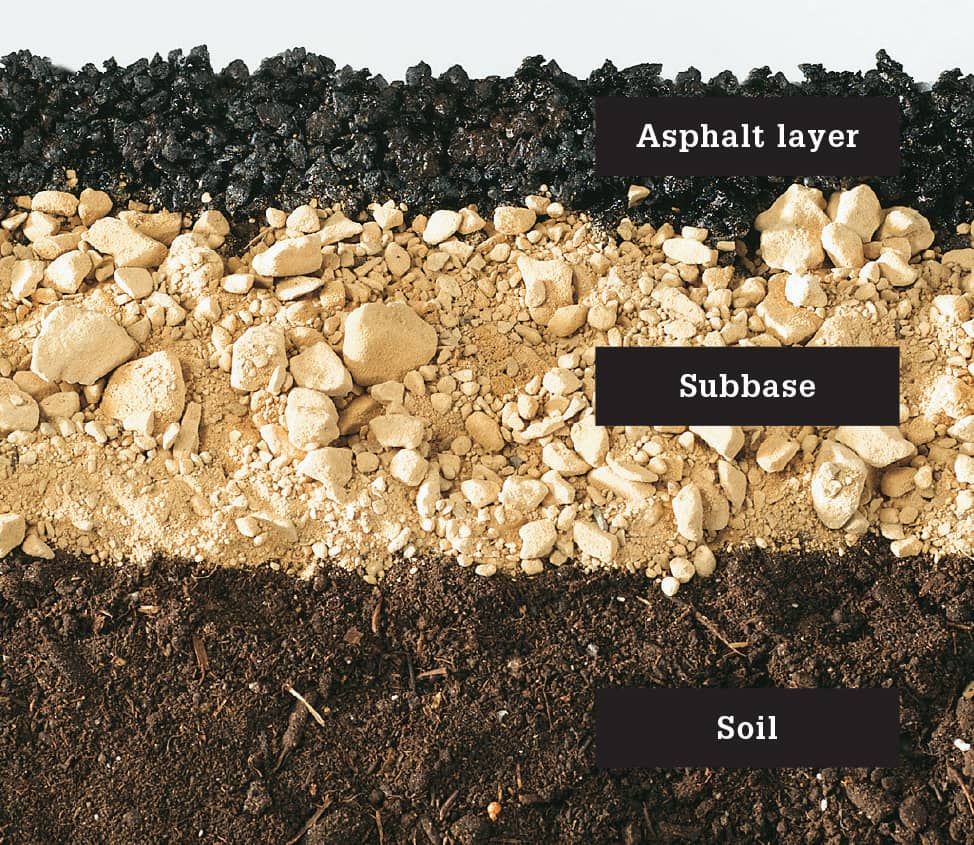
A typical asphalt driveway is formed by pouring and compressing a layer of hot asphalt over a subbase of compacted gravel.
How to Repair an Asphalt Driveway
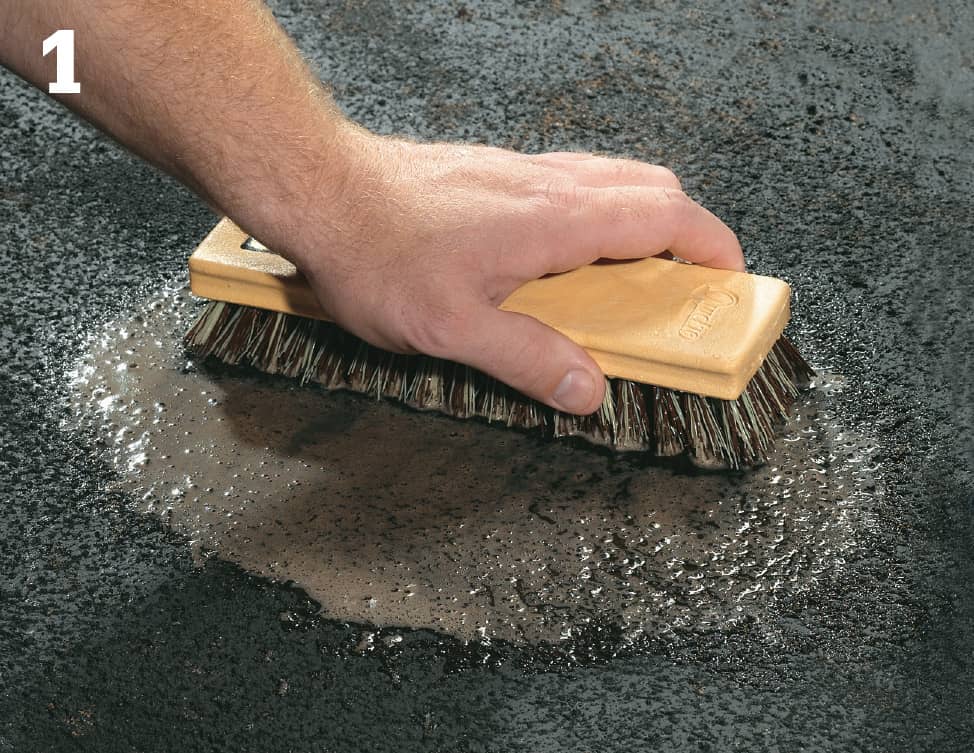
Carefully inspect the asphalt surface for any oil and grease stains. Then remove them with driveway cleaner or household detergent. Scrub the cleaner into the surface with a soft brush and rinse the area clean with a garden hose. Repeat until the stain is gone. If using driveway cleaner, wear the recommended safety equipment.
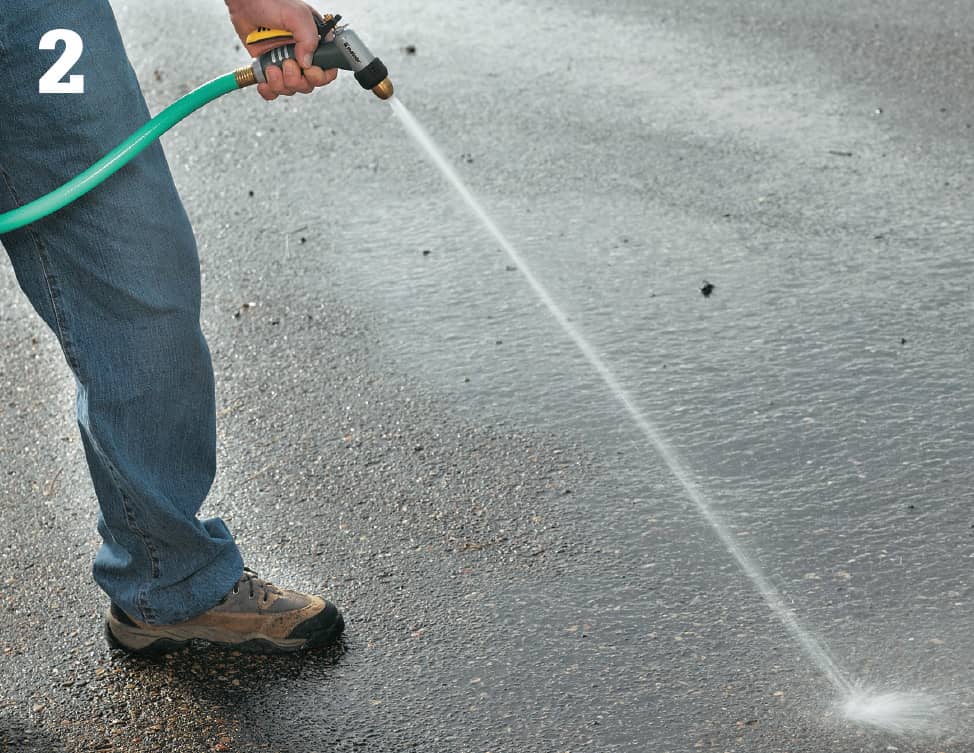
Once the stains are removed, thoroughly rinse the entire driveway with a garden hose and nozzle. The goal is to wash away any debris and to remove the dust and dirt from the surface cracks.
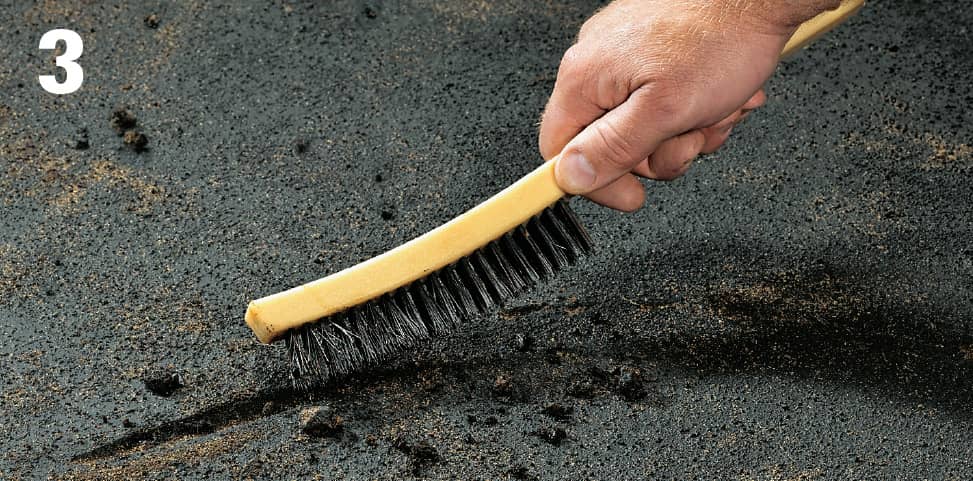
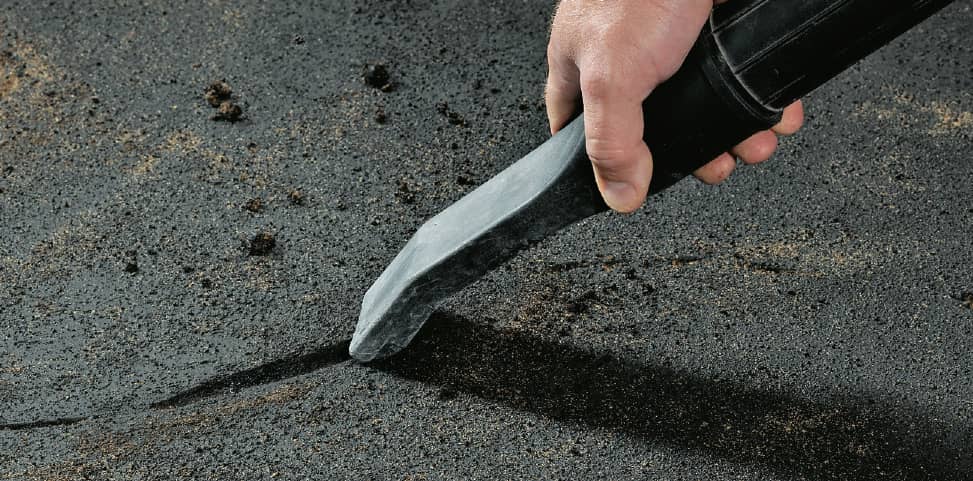
Repair the small cracks first. Chip out any loose debris with a cold chisel and hammer. Then clean out all debris with a wire brush. Remove all the dust with a shop vacuum. A crevice tool on the end of the hose will do the best job.
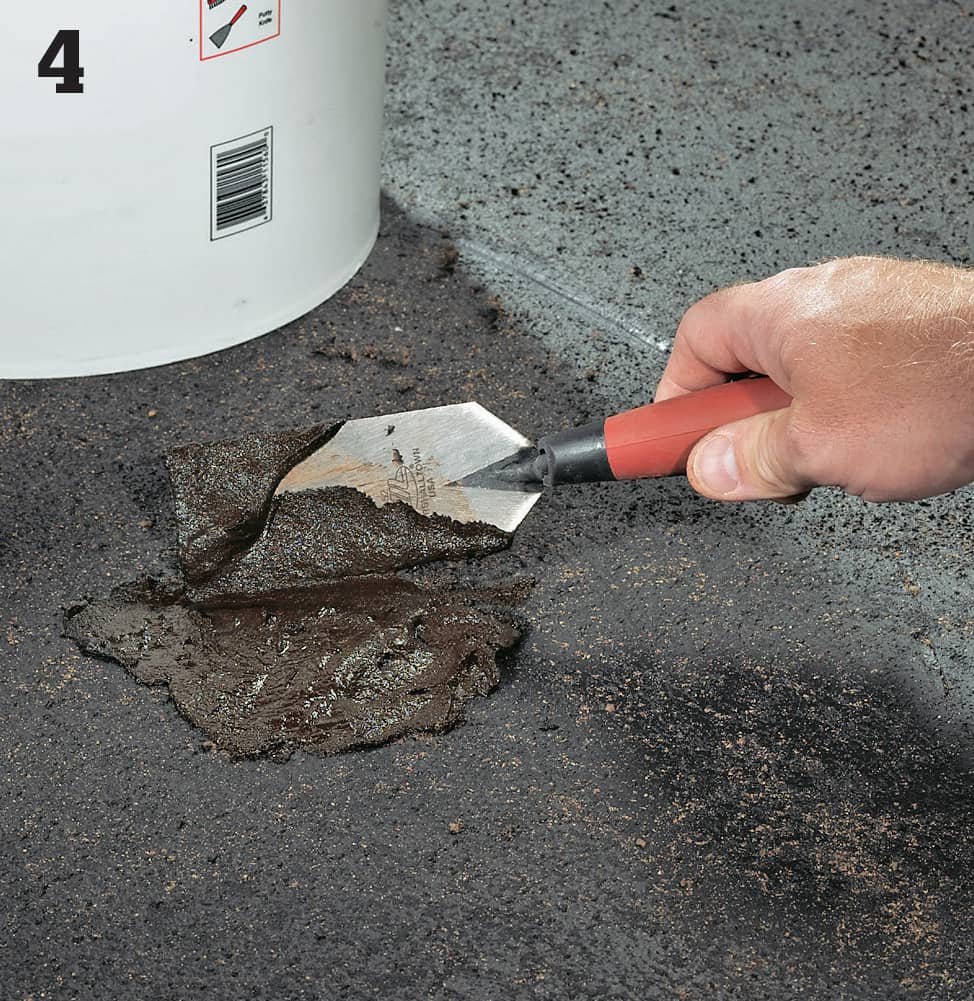
Place asphalt patching compound in the holes with a small trowel. Overfill the hole so the patch material is about 1/2" higher than the surrounding asphalt surface.
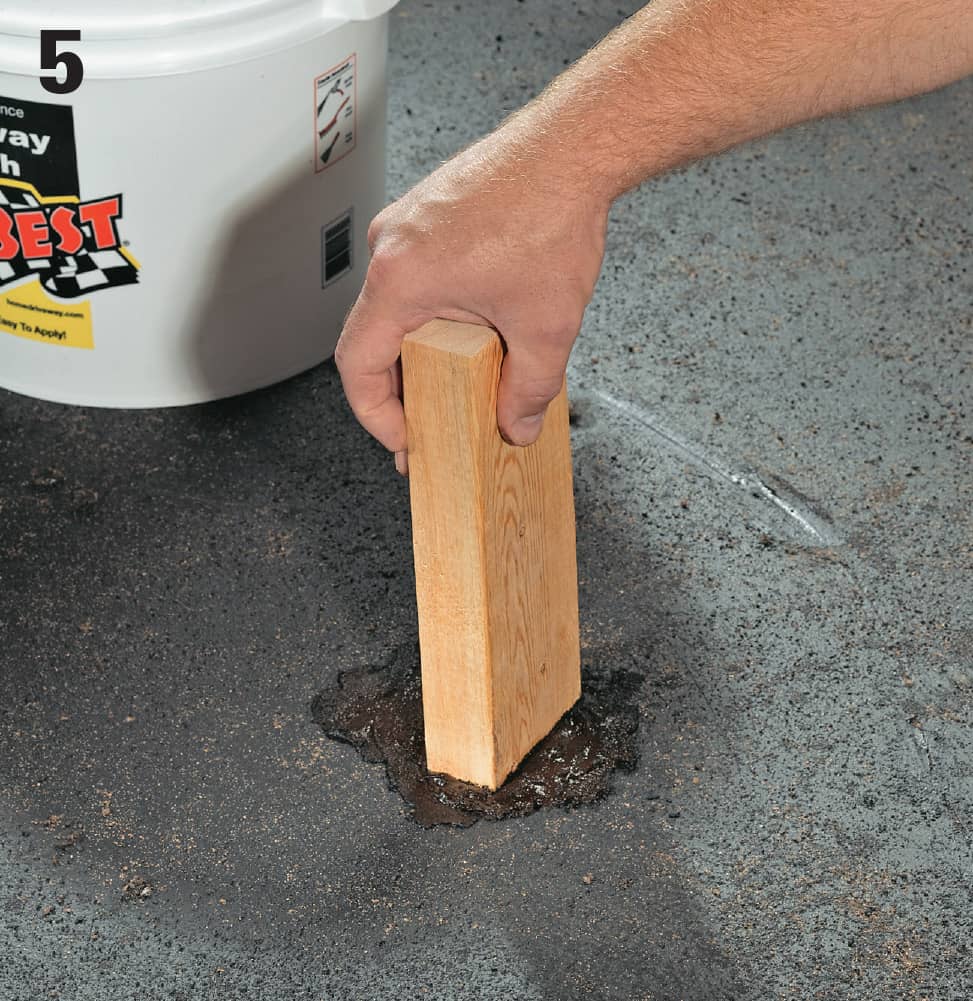
Compact the patch material with a small piece of 2 × 4. Tamp the board up and down with your hand, or strike the board with a hammer. Keep working until you can’t compress the patch any more.
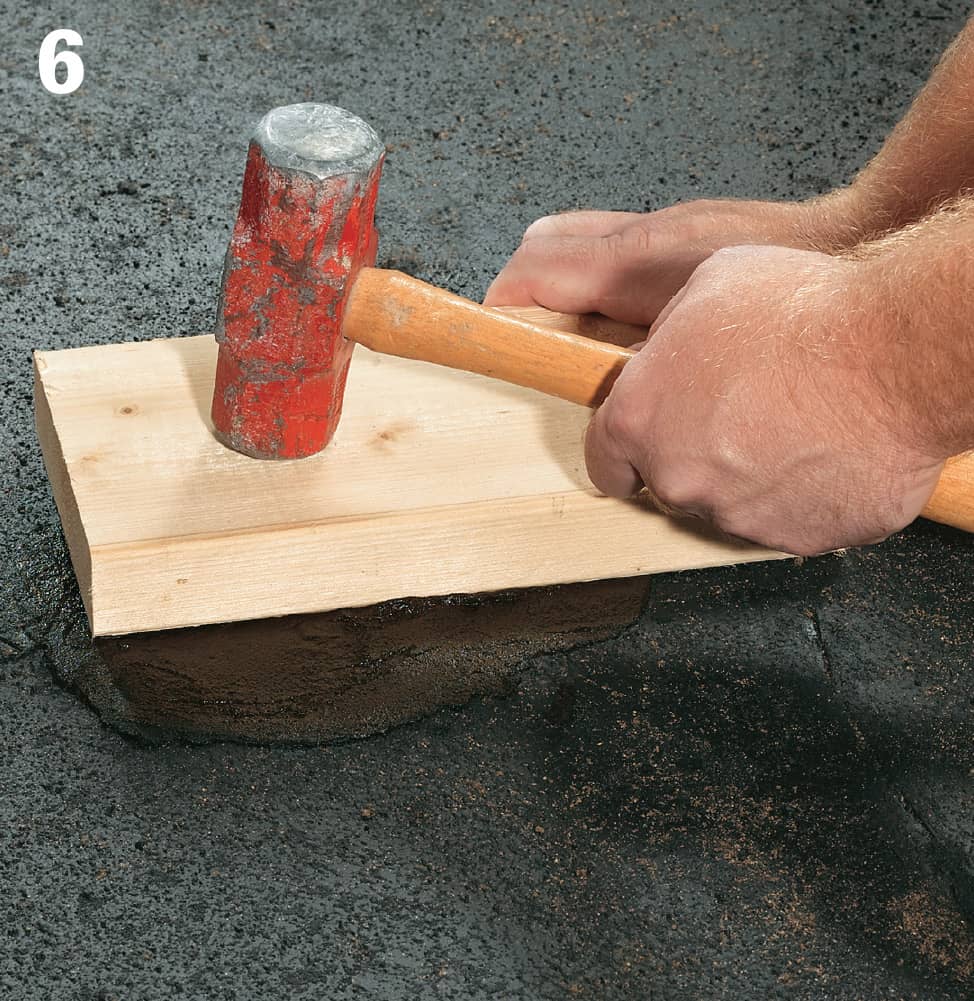
Finish the patch by covering it with a piece of 2 × 6 and striking it with a hammer or mallet. Work back and forth across the board to smooth out the entire patch and make it flush to the surrounding surface.
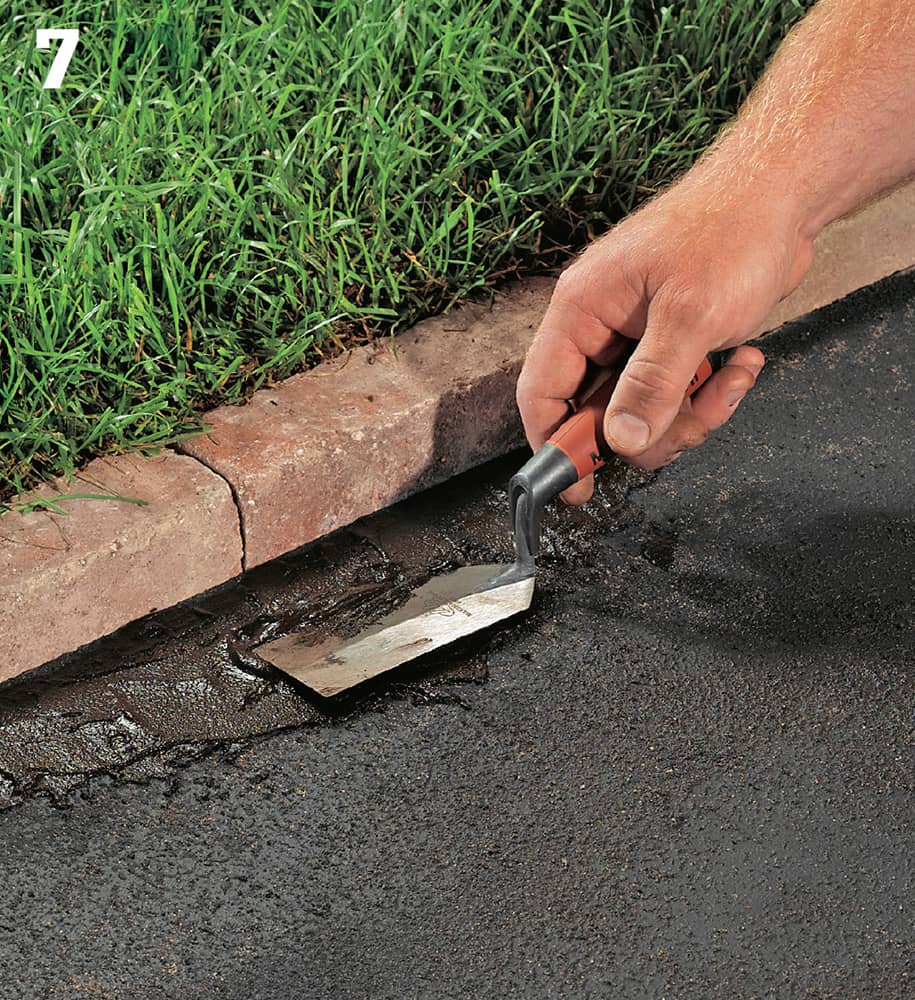
On narrower patches, the compound can be smoothed with a small trowel. Just move the tool across the surrounding surface and then over the patch. This should flatten the patch. Finish up by compressing the compound by pushing it down with the trowel.
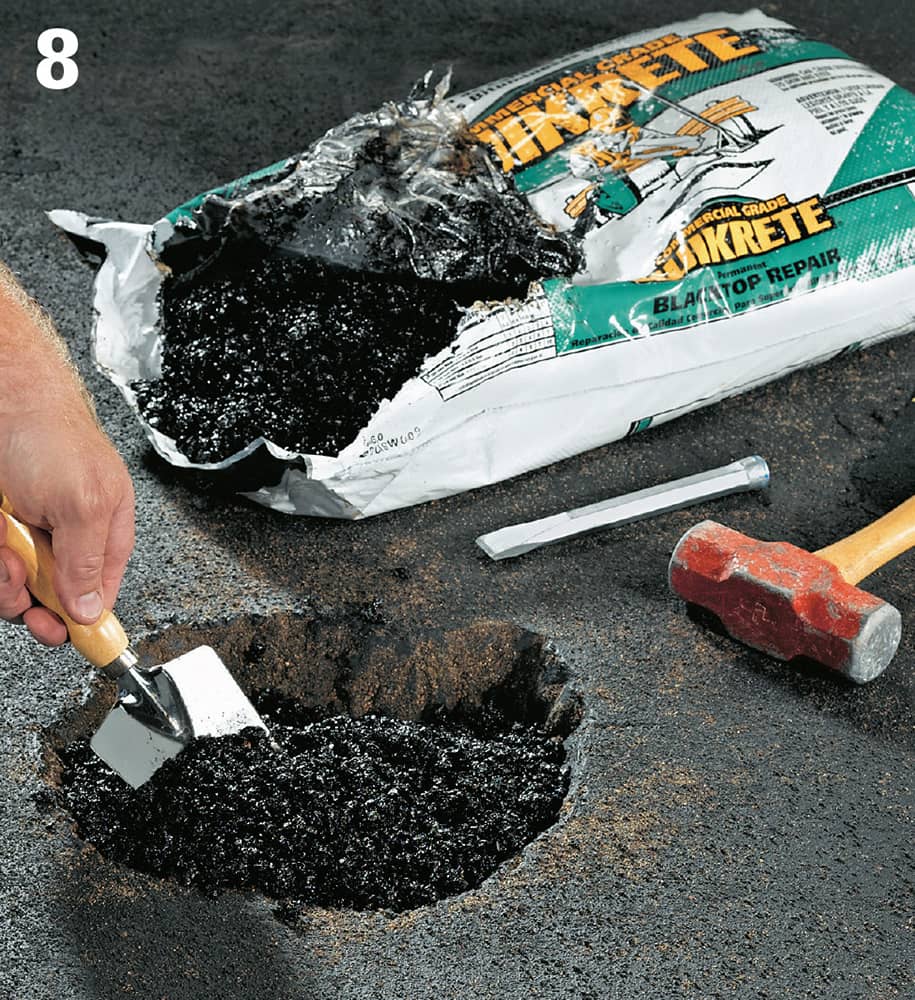
Prepare larger potholes by undercutting the edges with a cold chisel and a hammer. Then, remove all the debris and fill the hole with cold-patch asphalt mix. Working directly from the bag, fill the hole about 1 in. higher than the surrounding surface. Then compact it with a 2 × 4, as before.
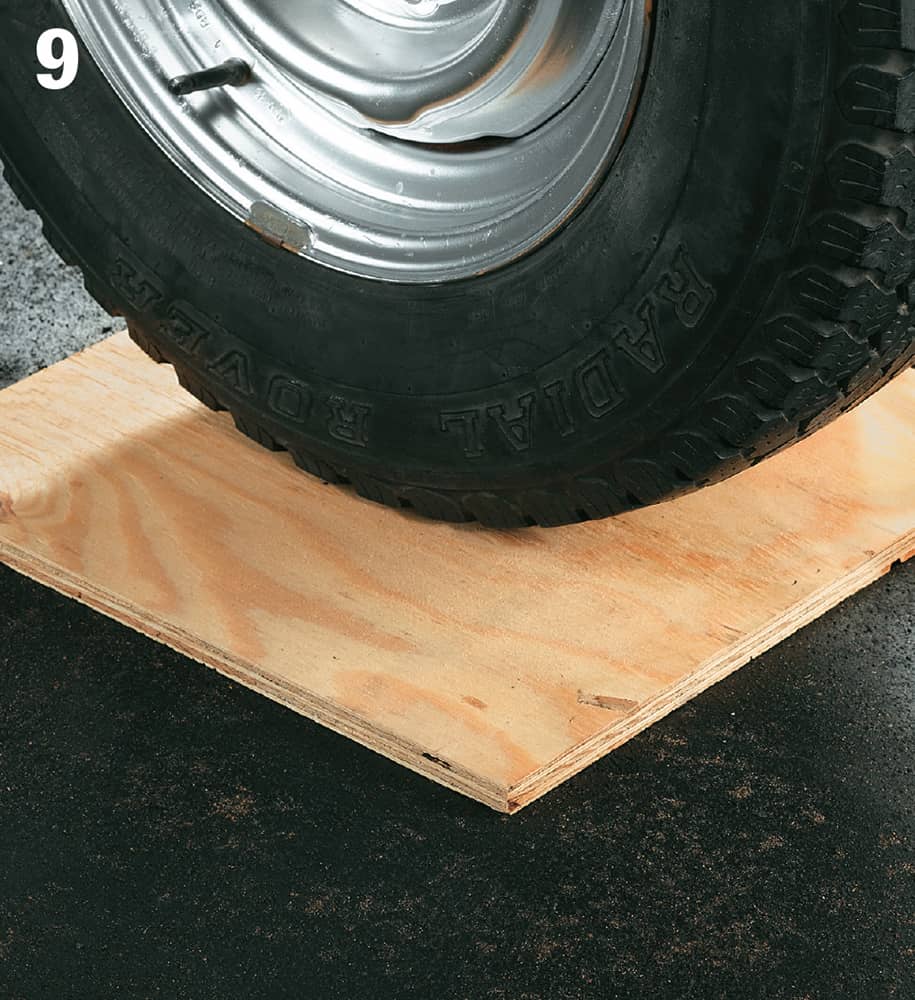
One great way to compress cold-patch asphalt is to cover the patch with a piece of plywood. Then, drive your car onto the plywood and stop when one tire is centered on the panel. Wait a few minutes, then move the car back and forth a few times.
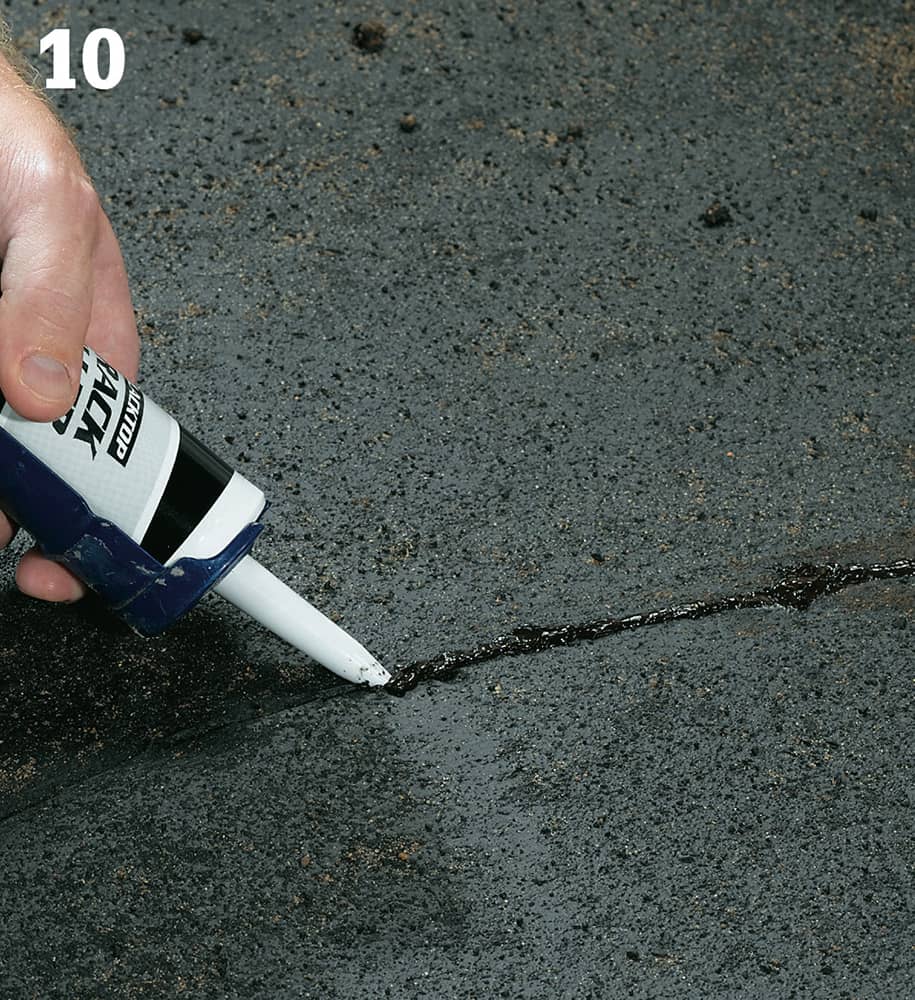
Once the hole patching is done, fill the routine cracks (less than 1/4" wide) with asphalt crack filler. This material comes in a caulk tube, which makes it very easy to apply. Just clean the crack with a wire brush and a vacuum, then squeeze the filler into the crack.
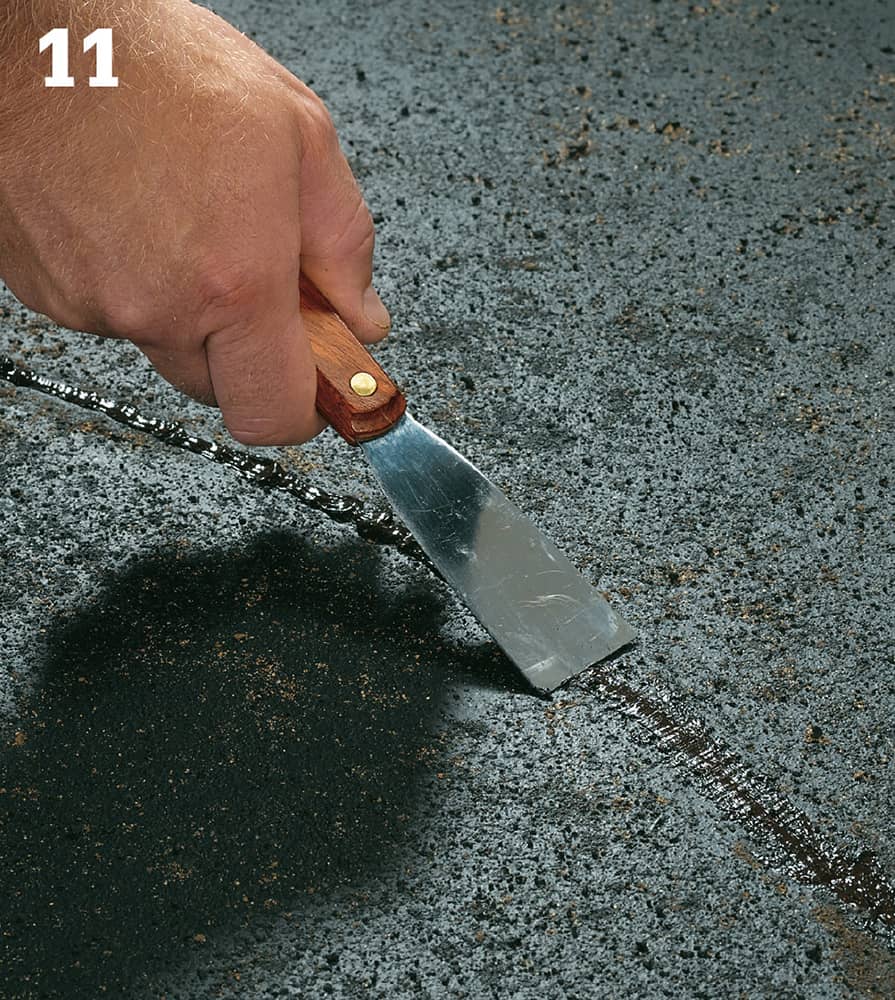
After the crack filler has cured for about 10 or 15 minutes, smooth it out with a putty knife as you force the filler down into the crack. If this creates small depressions, fill these with a second application of filler.
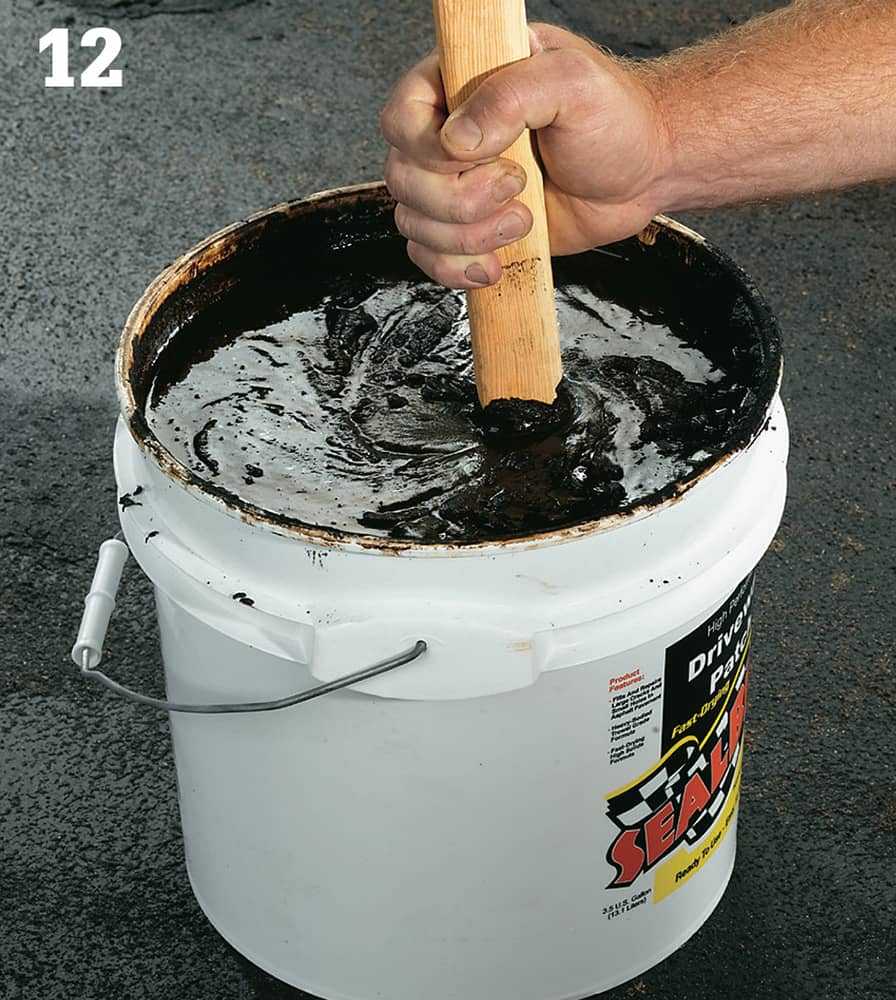
Driveway sealer should always be mixed thoroughly before use. Take a 2× stir stick that’s about 30 in. long and stir the sealer until it has a uniform consistency. Pour out enough to cover a strip across the driveway that’s about 3-ft. or 4-ft. wide.
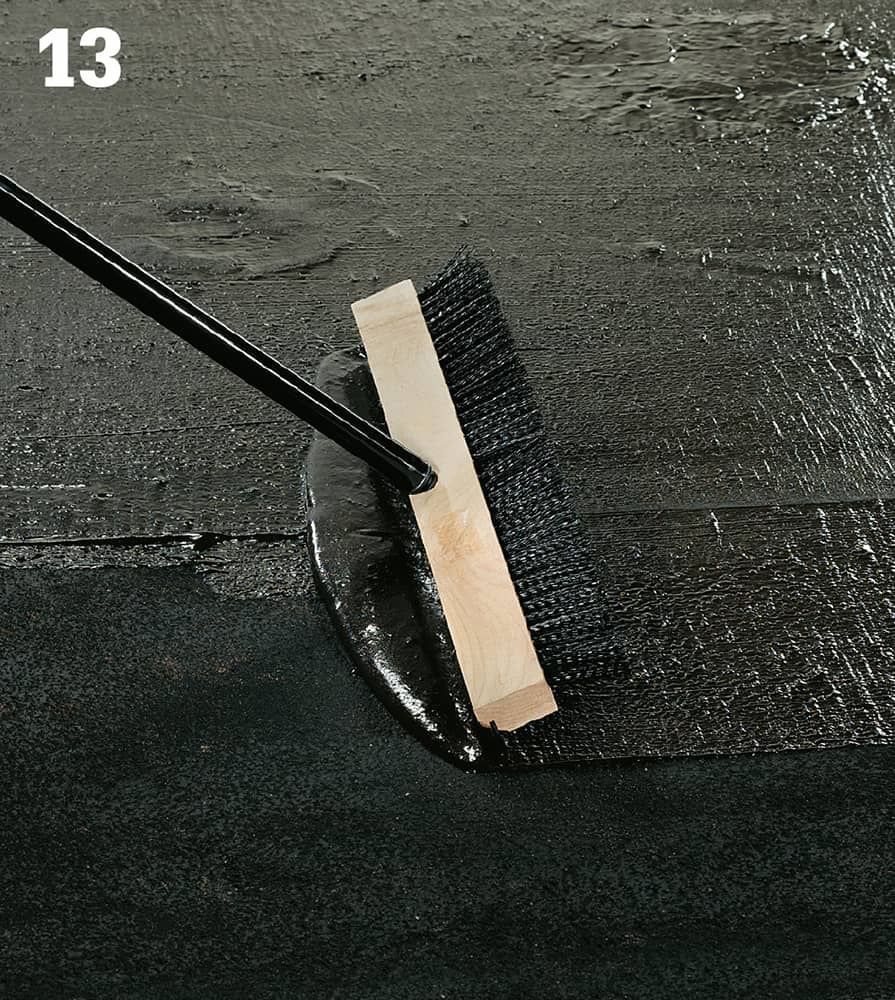
Spread the sealer with the squeegee side of the application brush. Try to keep this coat as uniform as possible. Work the sealer into the small cracks and pull it gently over the big patches.
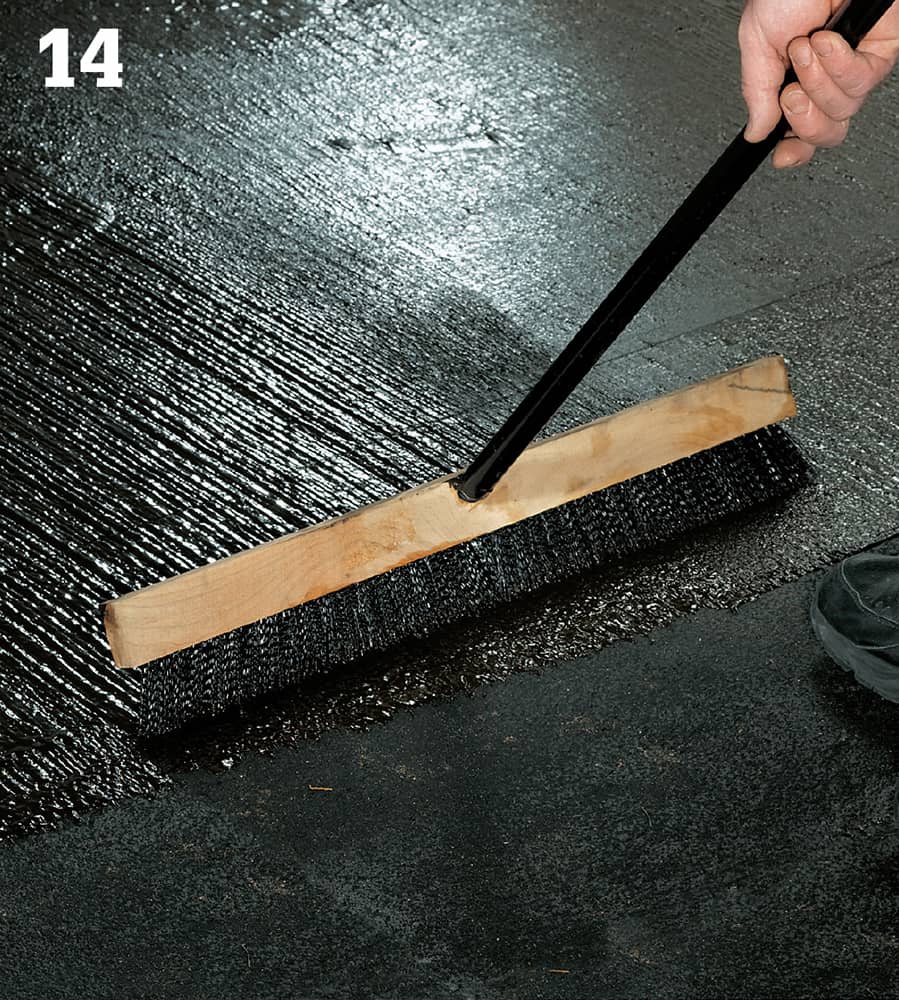
Flip the squeegee over to the brush side and smooth out the lap marks and other irregularities that were left from the application coat. Work at right angles to the first pass.
 Maintaining a Deck
Inspect your deck once each year. Replace loose or rusting hardware or fasteners, and apply fresh finish to prevent water damage.
Look carefully for areas that show signs of damage. Replace or reinforce damaged wood as soon as possible.
Restore an older, weathered deck to the original wood color with a deck-brightening solution. Brighteners are available at any home improvement store.
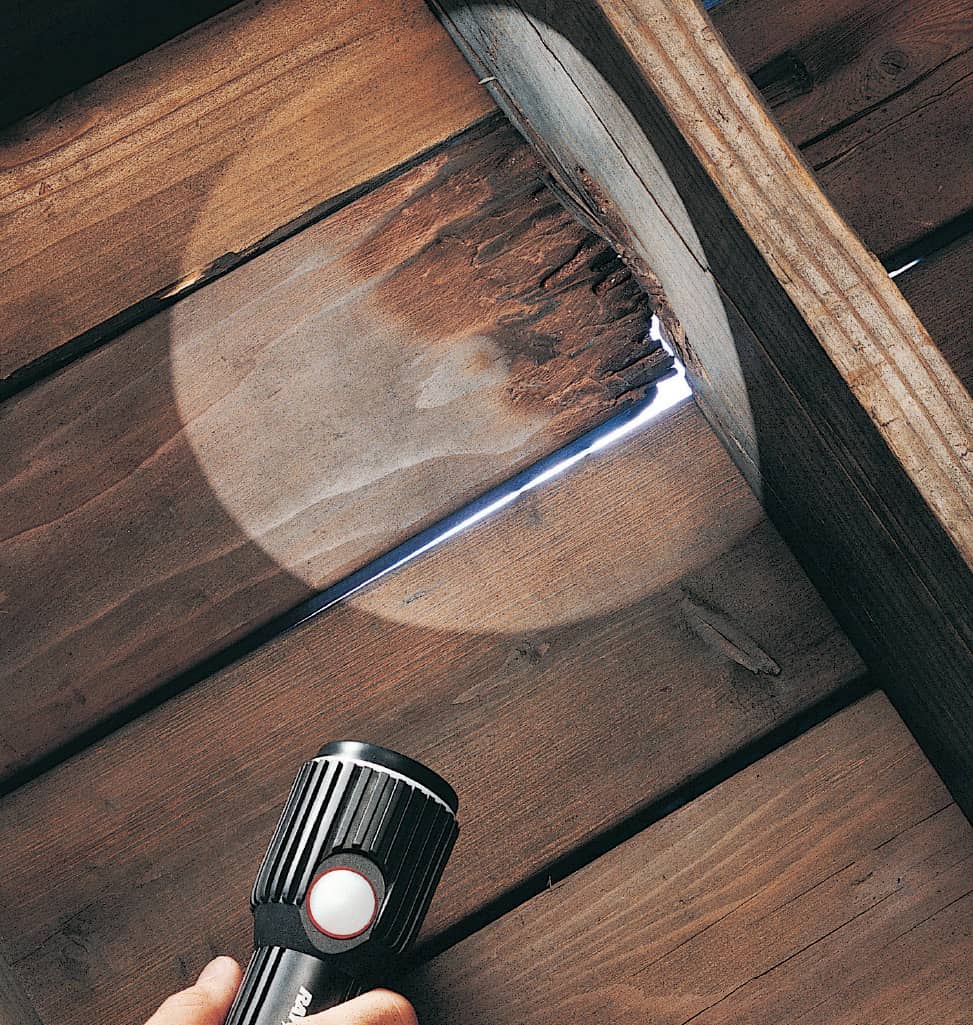
Inspect hidden areas regularly for signs of rotted or damaged wood. Apply a fresh coat of finish yearly.
How to Renew a Deck
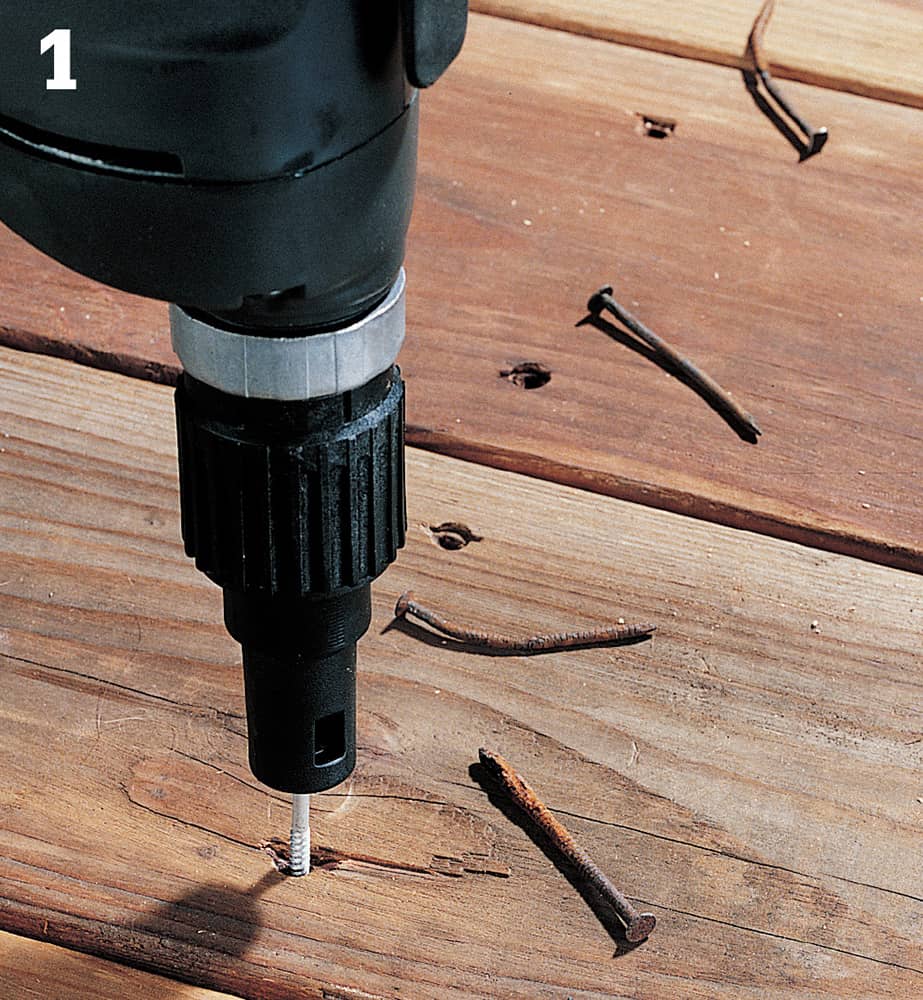
Drive new fasteners to secure loose decking to joists. If using the old nail or screw holes, new fasteners should be slightly longer than the originals.
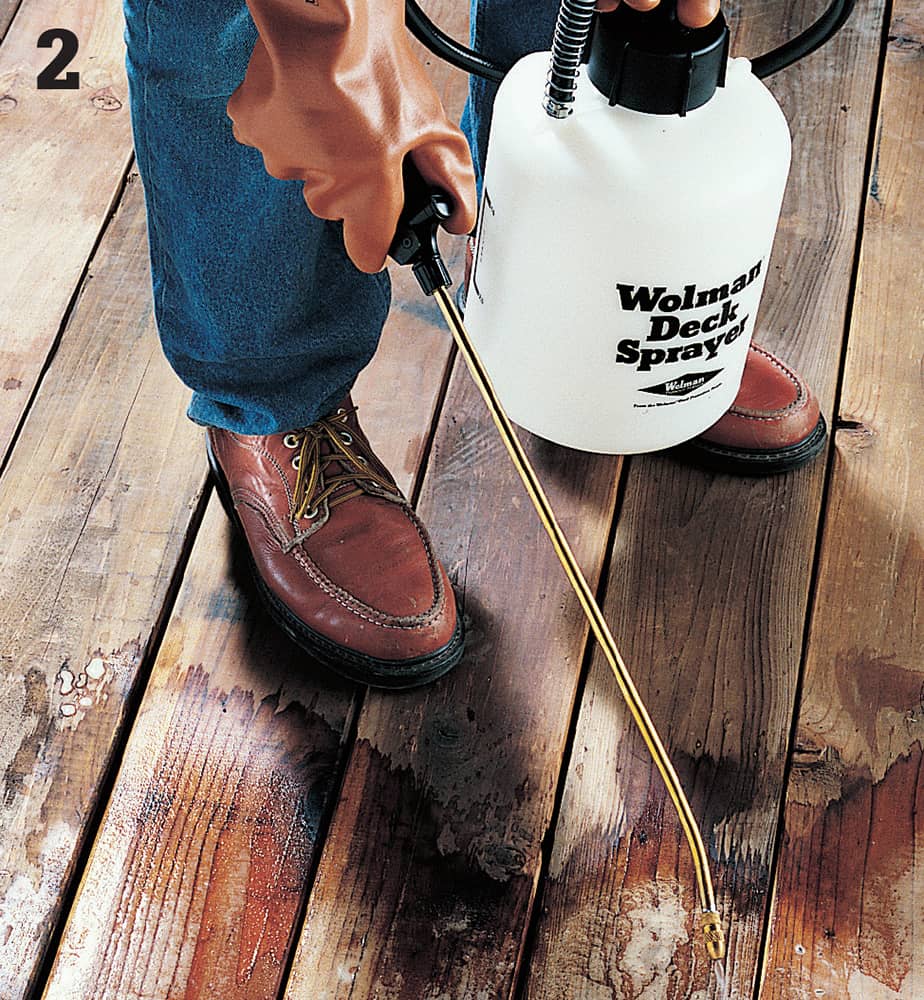
Mix deck-brightening solution as directed by manufacturer. Apply solution with pressure sprayer. Let solution set for 10 minutes.
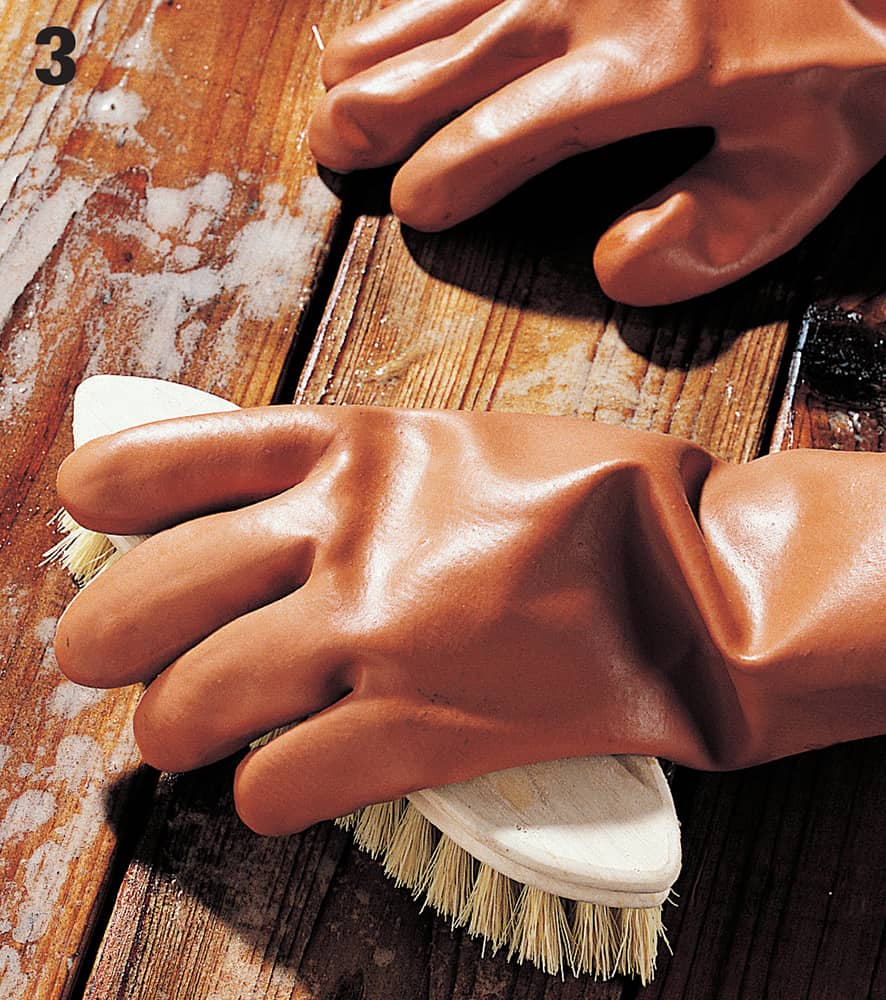
Scrub deck thoroughly with a stiff scrub brush. Wear rubber gloves and eye protection.
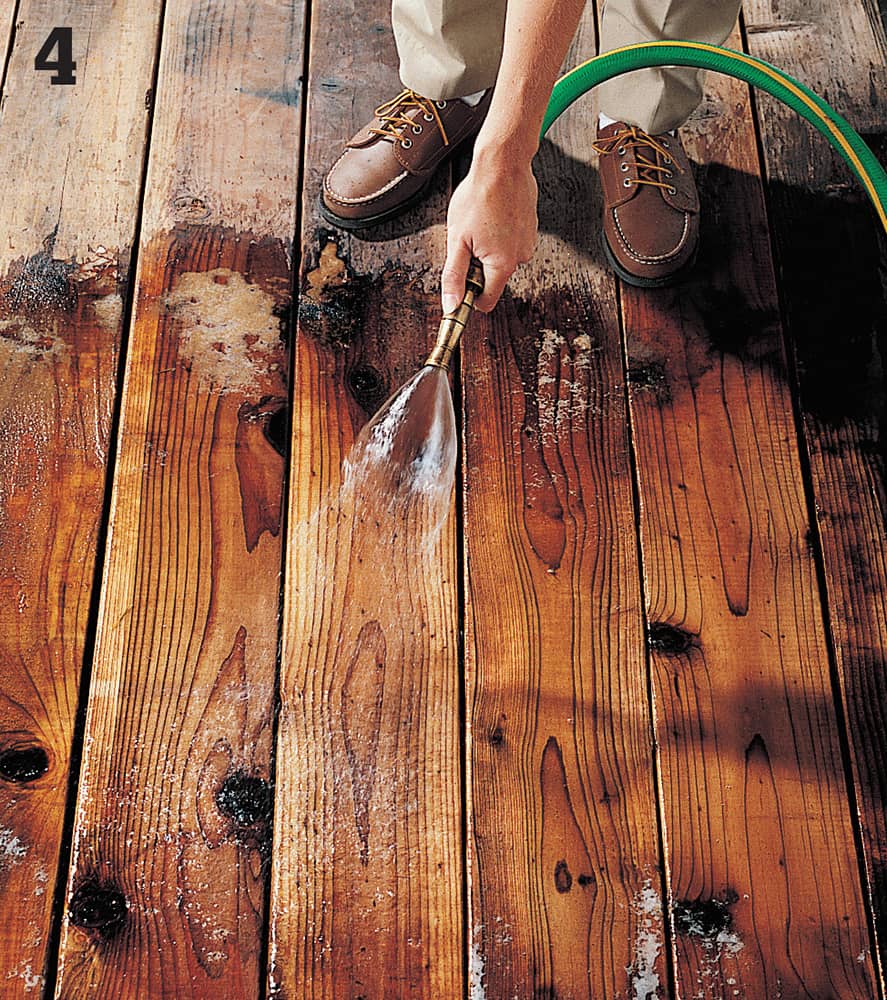
Rinse deck with clear water. If necessary, apply a second coat of brightener to extremely dirty or stained areas. Rinse and let dry. Apply a fresh coat of sealer or stain.
 Painting Metal Sheds
Metal sheds sometimes age ungracefully. Aluminum panels can become chalky and dull. Steel panels, if scratched, can begin to rust. The aluminum can be treated with an aluminum siding brightener, which can yield a nice result without painting. If the shed is rusty steel, painting is the answer. If the shed has been waxed, you will need to clean it with automotive wax remover or aluminum siding cleaner.
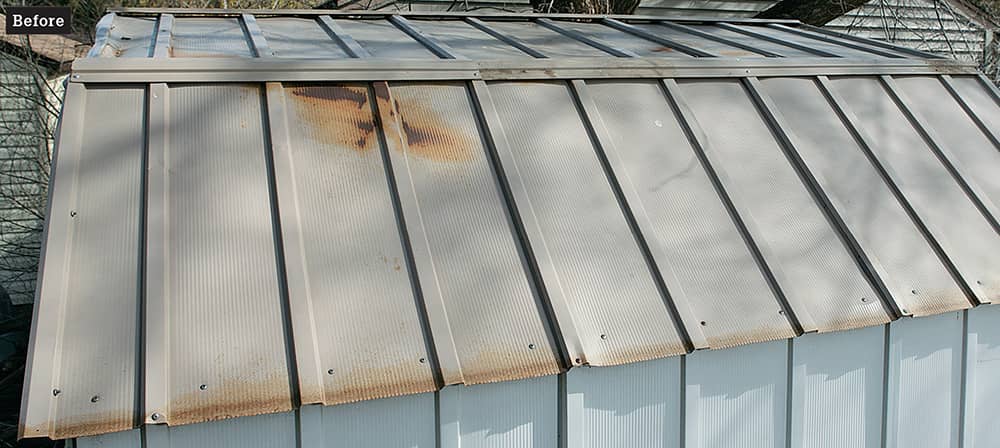
Metal sheds rust and become damaged. Proper repairs and preparation followed by a coat of fresh paint improves the appearance and extends shed life.
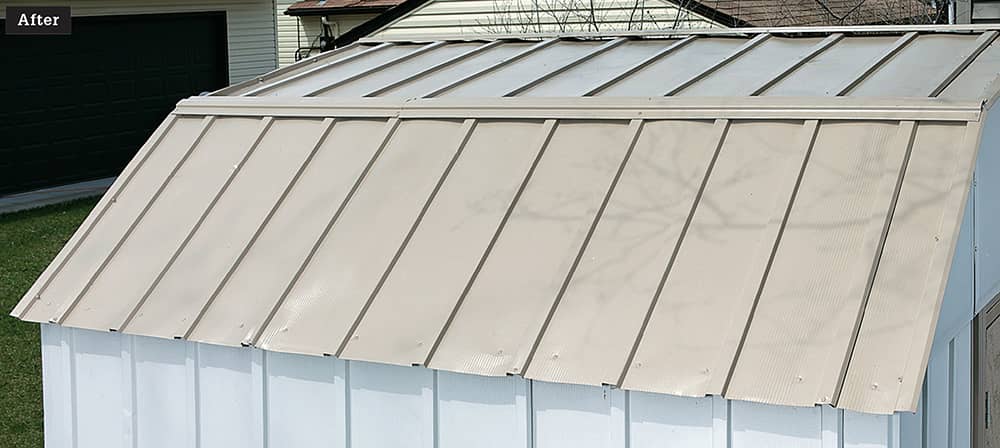
How to Paint a Metal Shed
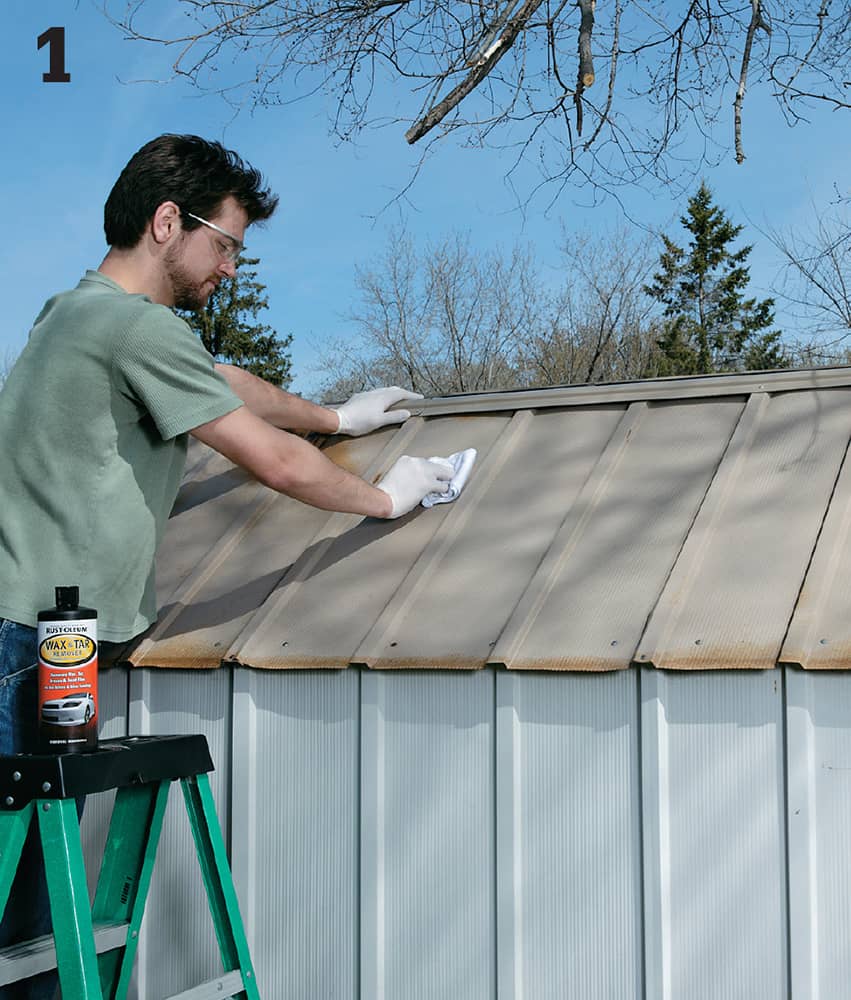
Clear all debris from the shed. If the shed has been waxed, clean thoroughly with automotive wax remover or aluminum siding cleaning solution.
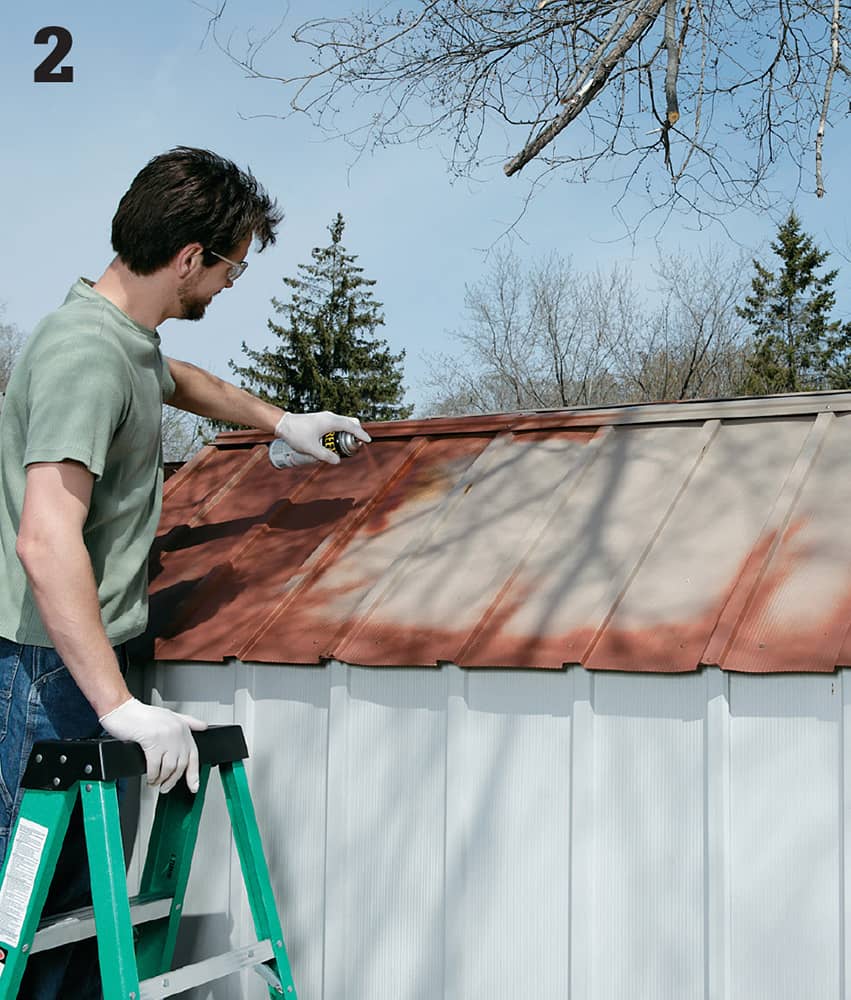
Sand, clean and prime all rusted areas with a primer rated for exterior metal.
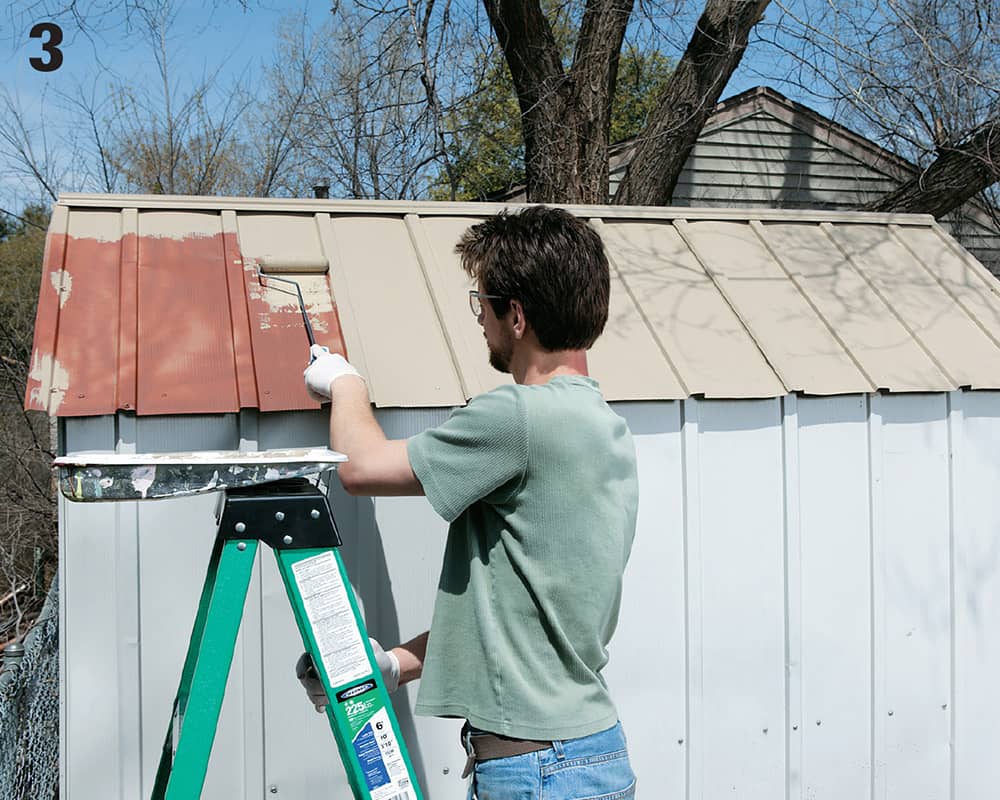
Paint the shed. The best possible surface will be obtained using a paint sprayer, which can be rented at a rental center. If you do not want to spray, use a short nap roller.
 Jacking Up a Shed
The sinking shed is a common problem. Unless a shed is built on cement piers that extend below the frost line, it is likely that sooner or later the shed will sink if the ground is subject to freeze/thaw cycles. Usually one side or one corner will sink faster. The easiest solution is to jack up that side or corner of the shed and add some shimming material to level it. Ground contact lumber or cement blocks can be used as shims. You may decide to add another set of support blocks or skids. Remove heavy items from the shed before beginning; no need to jack up the riding mower!
If the skids or joists have rotted, they should be replaced. This is an involved process and not covered here.
Leveling a sunken shed is a surprisingly simple fix.
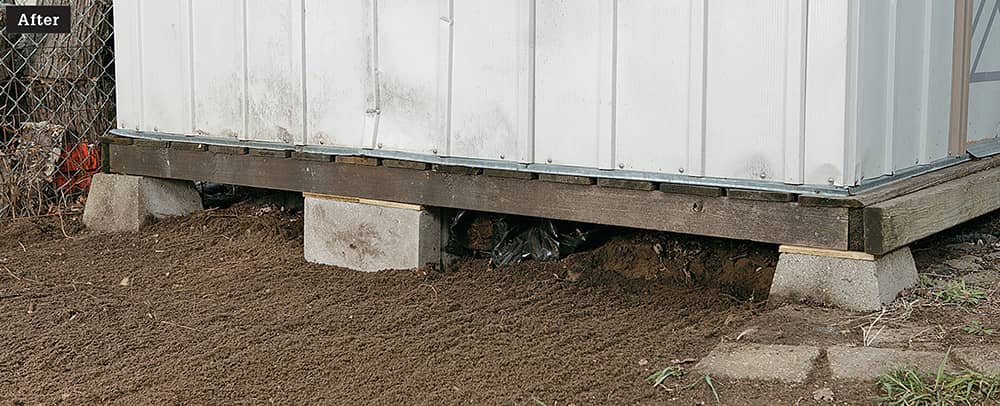
How to Jack Up a Shed
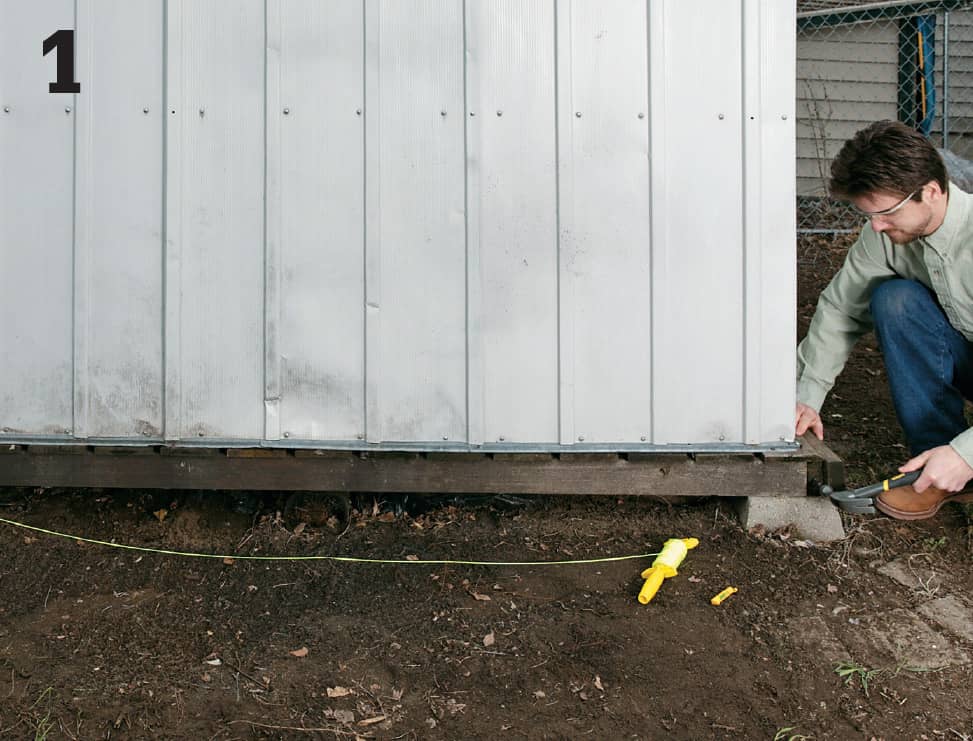
Using nails and hammer, install a masonry string level across the base of the shed. Nails should be equidistant from the top and bottom of the baseboards.
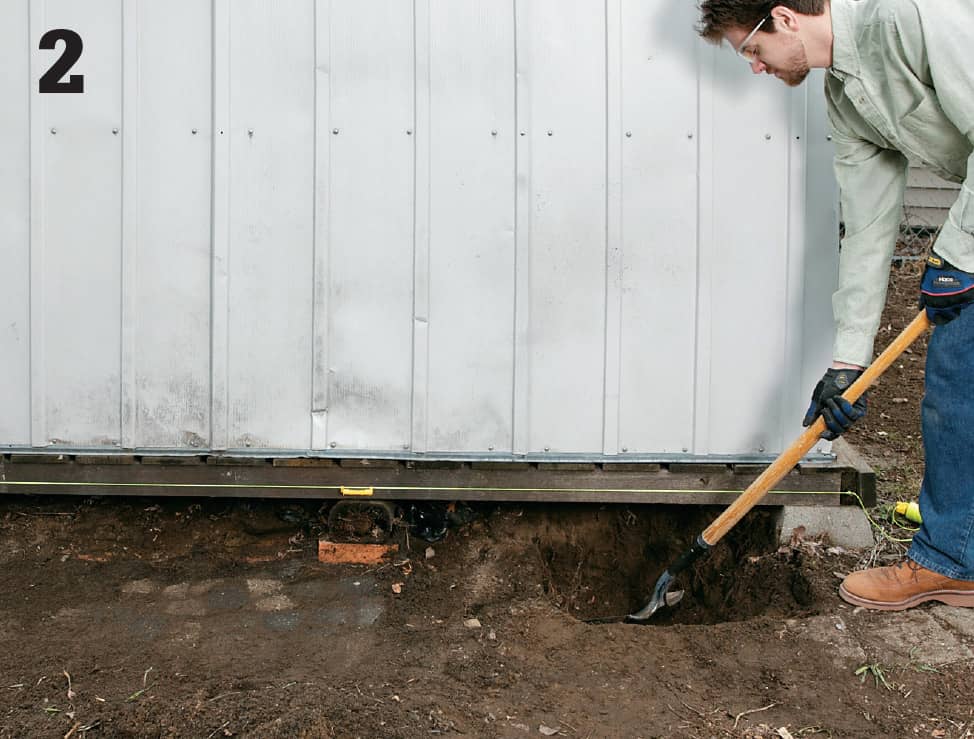
Excavate the area around the shed base to expose the foundation, and clear the area to determine the problem; sometimes a sinking shed is due to rotting skids, not settling soil. Remove debris or dirt so you have a clear view of the foundation materials. Depending on the landscape, you may have to dig out an additional area to install the jack.
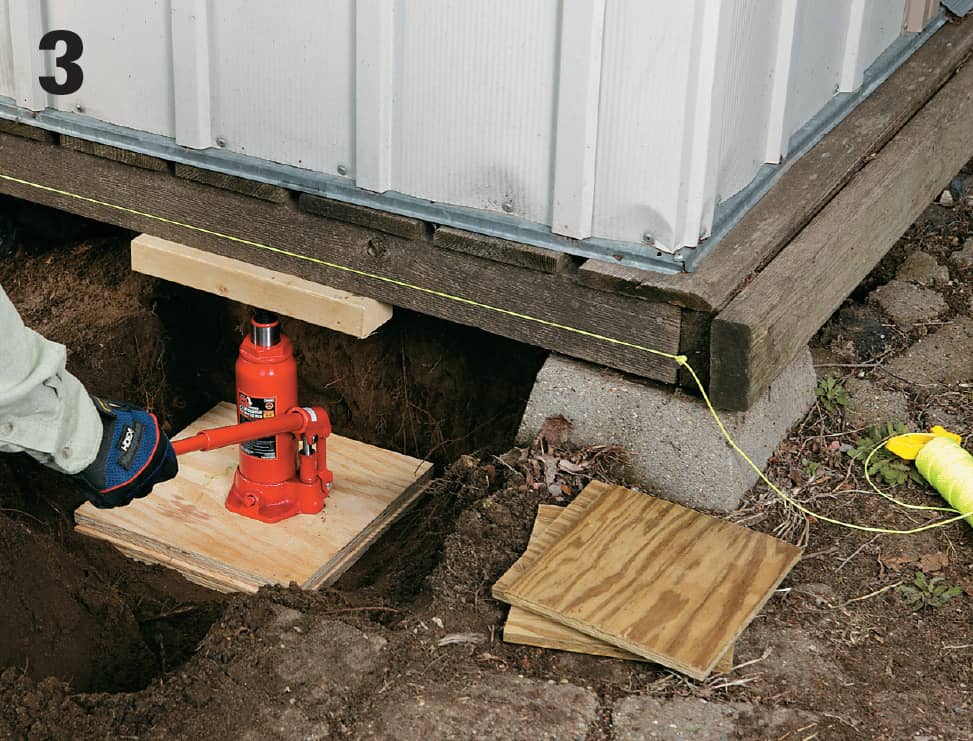
Dig a trench if you will need room to maneuver a jack handle. The jack needs a firm surface beneath it to dissipate the pressure. Stack two 12 × 12" squares of plywood under the jack. Make sure the wood above the jack is solid. Place a chunk of 2 × 4 or 2 × 6 lumber on top of the jack. Slowly pump up the jack. It is best not to move structures more than 1/4" at a time. Allow the structure to rest for a day after each raising.
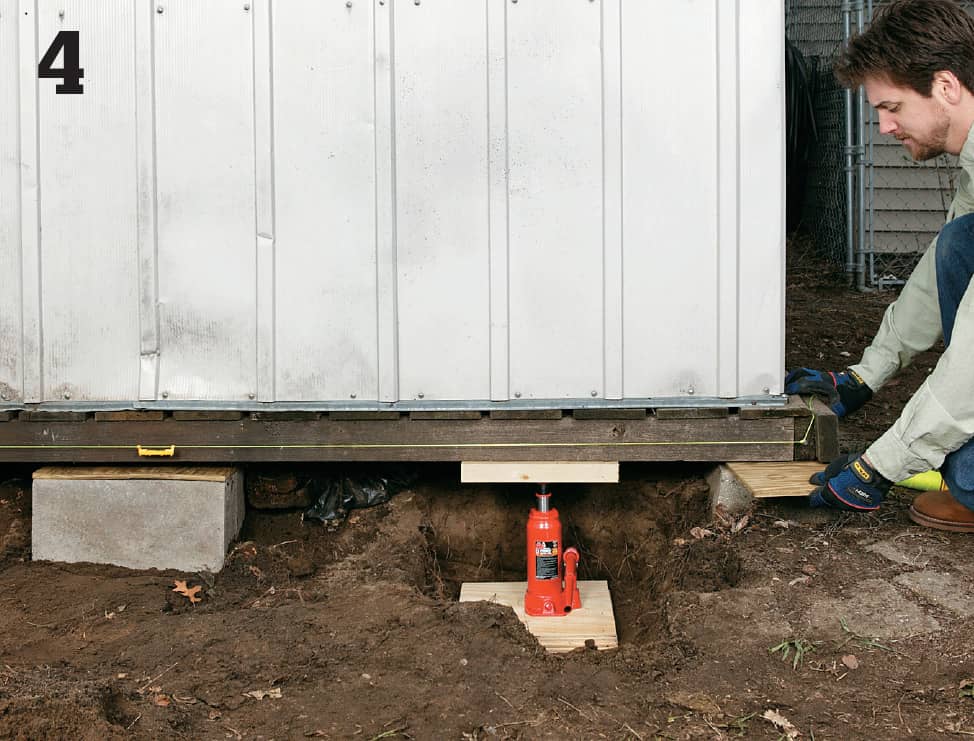
When the string reads level, insert the appropriate shimming material between the skid or joists and the gravel or concrete base. Ground-contact treated lumber or solid cement bricks or blocks are good alternatives.
 Install New Shed Doors
One of the frustrations of metal shed ownership is that the doors seem to expire long before the shed. Most inexpensive metal sheds have doors that slide on plastic slides—not even wheels! It seems like the doors quickly become catawampus, and no longer slide well in their tracks or cheap slides.
One answer is to create a set of new wood doors for the shed.
Steel shed doors often expire long before the shed itself. A new set of wood doors is an opportunity for a stylish upgrade.
How to Install Wooden Barn Doors on a Steel Shed
Sliding doors are typically removed by unfastening the screws attaching the door to the top slides then tilting back and lifting the door out of the bottom track.
Use 2 × 4s to frame a door opening. Measure and cut two boards to the height of the opening. Align them in the shed door opening, and use blocking to attach these at the top to the roof beams. Attach a 2 × 4 between the two sides as a header. Attach the base of the side 2 × 4s to the bottom door track, using angle brackets and sheet metal screws.
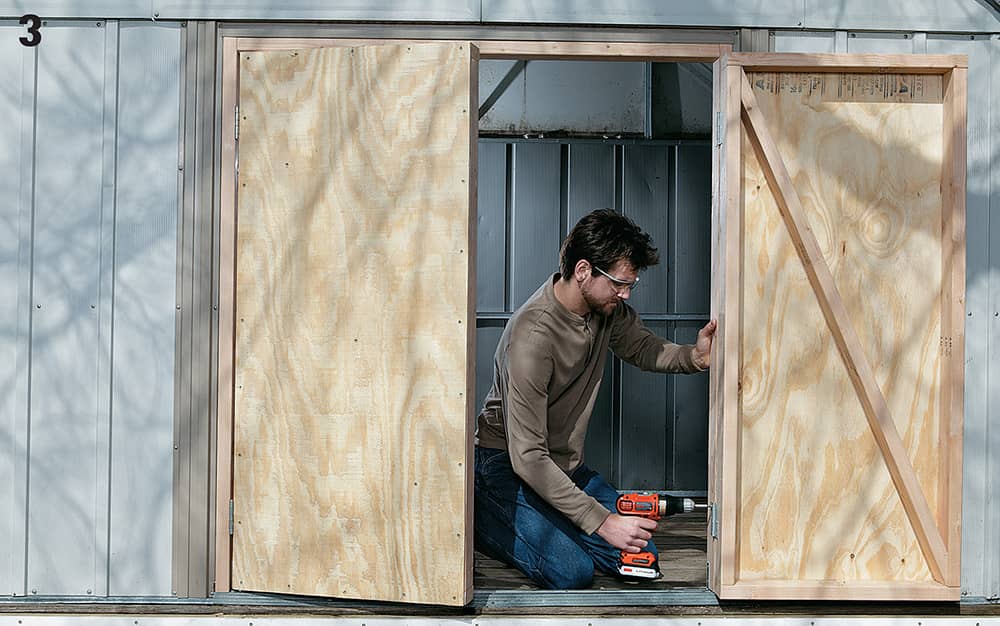
Measure the opening, and create two doors of equal size to fit into it. Use 2 × 4s for framing, with a diagonal brace, and cover with plywood siding. Attach the doors to the frame using galvanized butt hinges. The old metal doors may be used, but you will need to cut them down to size. They may also be mounted on galvanized butt hinges. Attach hardware.
 Replacing Shed Siding
Sometimes even the best maintenance doesn’t stop shed siding from rotting or deteriorating. Powerful sun rays on southern exposures can wreak havoc on even the best maintained shed. Woodpiles, shrubs, or snow piles can lead to contact rot that might not be noticed until too late. A poorly designed shed that includes horizontal members that are not protected by flashing will collect leaves and water, leading to rot. The best approach is to totally replace the siding. The amount of work for partial replacement is equivalent to full replacement, so the only savings might be in material costs.
Remember that siding is typically not rated for ground contact, so make sure siding is not in contact with the ground. If it is, dig out the dirt and perhaps create a drainage feature around the shed to direct water away from the shed. Splashing water from the roof can also age the shed more quickly.
Here, a 1 × 6 base trim board was attached over the oriented strand board siding, creating a ledge on the top of the trim board that ultimately led to rot in the panel. Battens made from 1 × 2 were run vertically to cover vertical seams and at each stud location to create a board-and-batten effect.
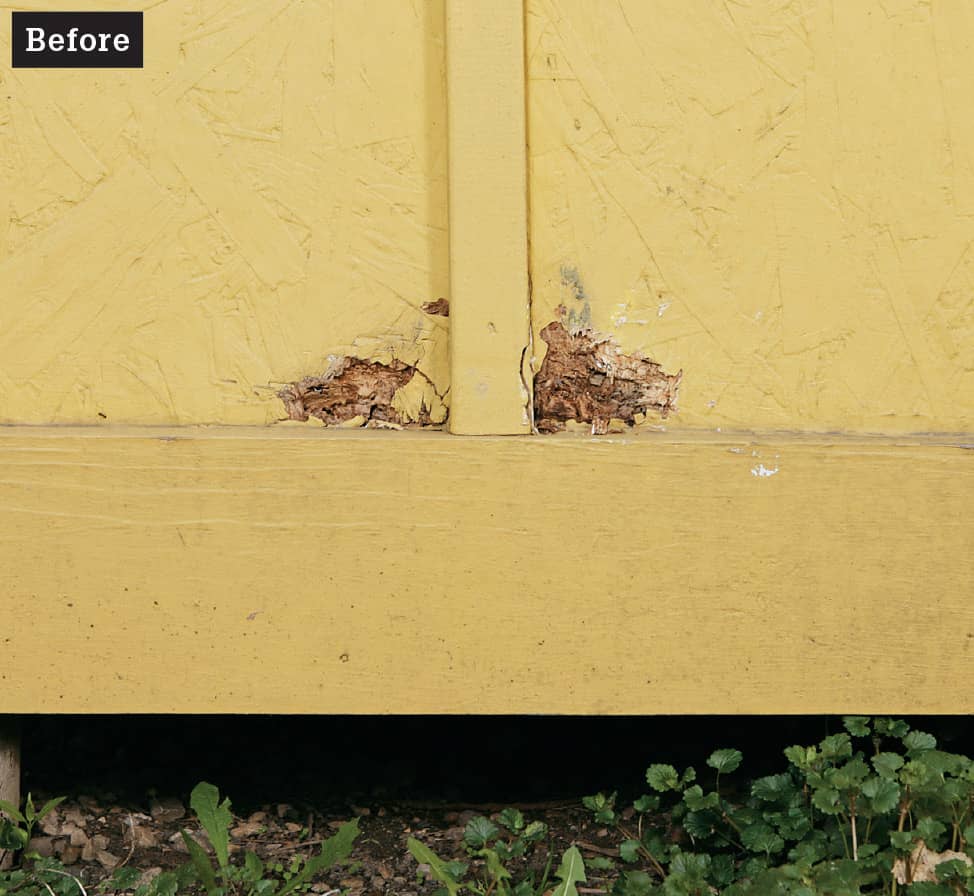
Accumulating rot defaces and devalues your shed; fortunately there’s a quick fix.
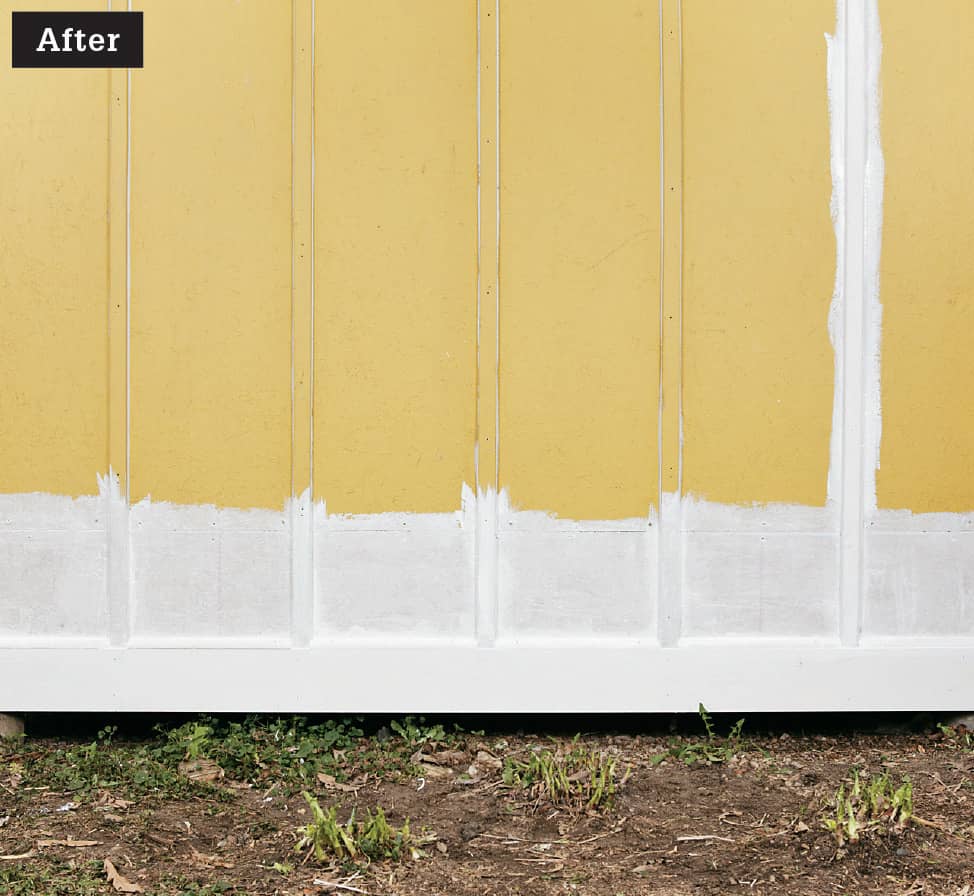
Replacing rotting siding is a common fix for wooden sheds. After painting it will look as good as new.
How to Replace Shed Siding
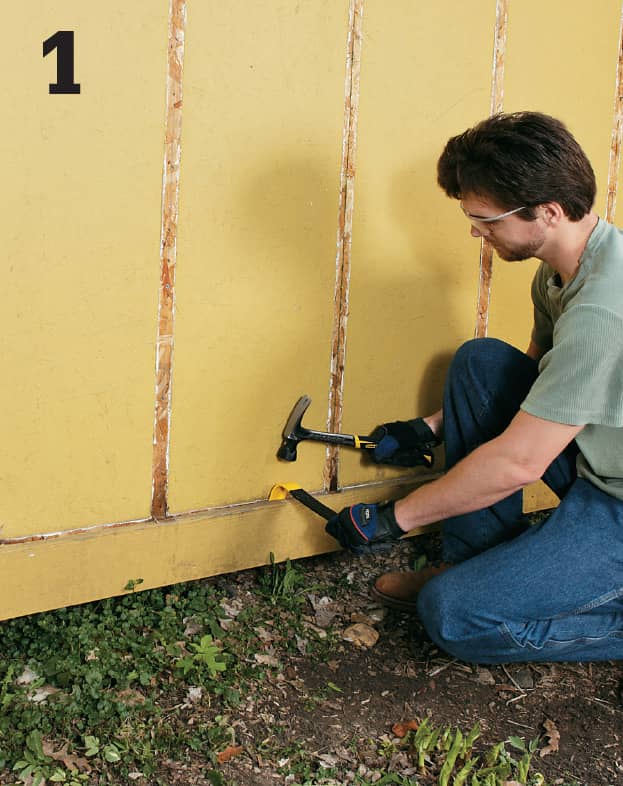
Remove the trim boards and/or batten with a pry bar and hammer to gain access to the rotting portion. The corner boards may also have to be removed.
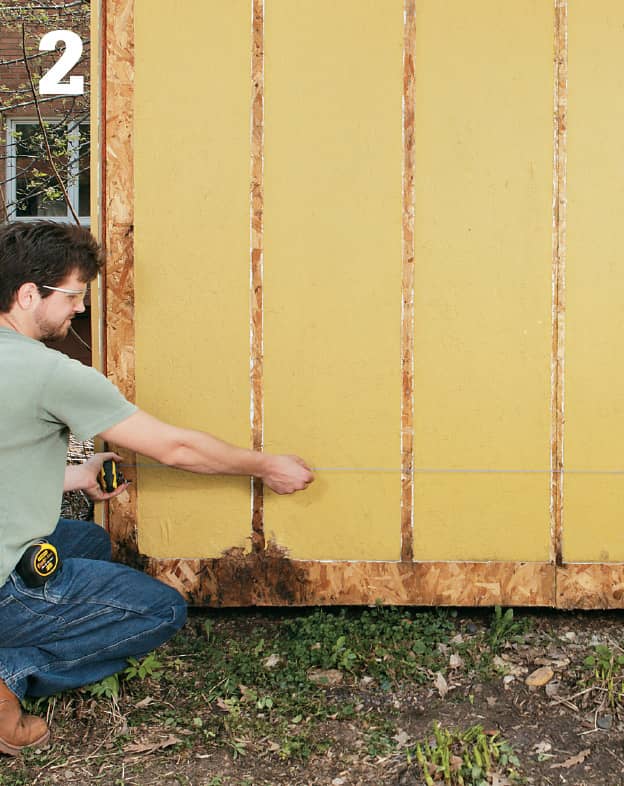
Determine where the damaged or rotted material ends and snap a chalk line at least 6" past that point to serve as your cutting line. Where possible, snap chalk lines that fall midway across a framing member.
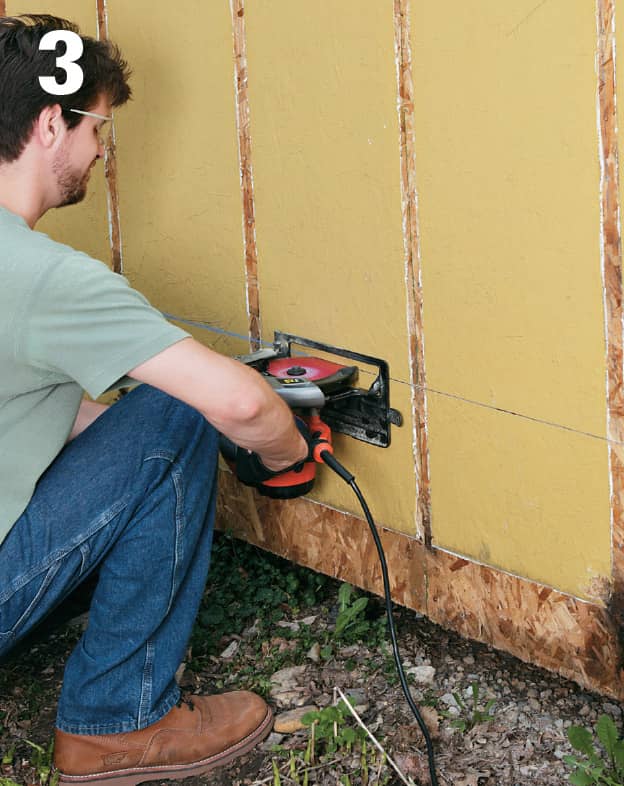
Use a circular saw to make a straight cut along the chalk line. The saw setting should be just slightly deeper than the width of the panel (usually about a 1/2"). It is easiest and safest to make the cuts before removing the fasteners which hold the panels in place. Finish the cut with a jigsaw or handsaw where the circular saw cannot reach. Remove any screws if present and pry off the damaged material.
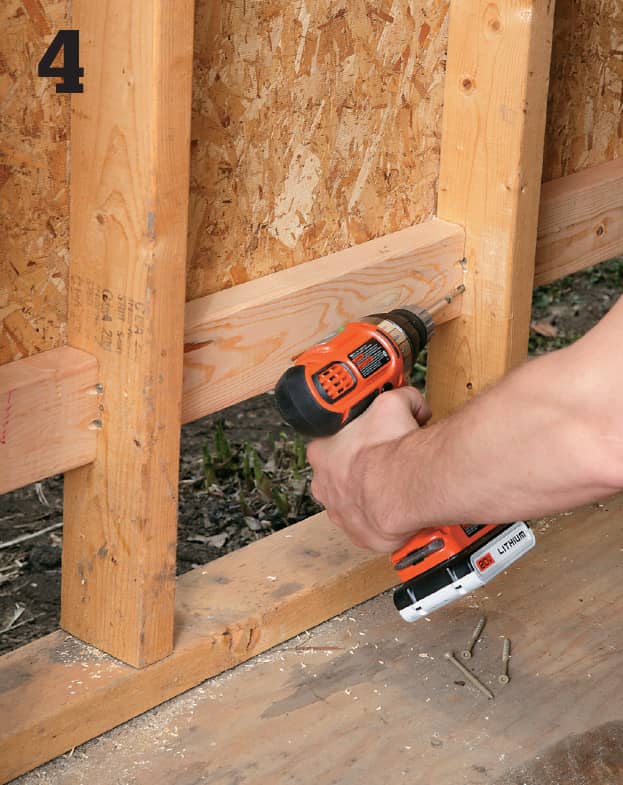
Cut 2 × 4 blocking to support the wall studs along the cutout lines. To secure the blocking, use a handheld drill and drive deck screws toe-nail style into the studs. The backers will be used to secure the replacement patch.
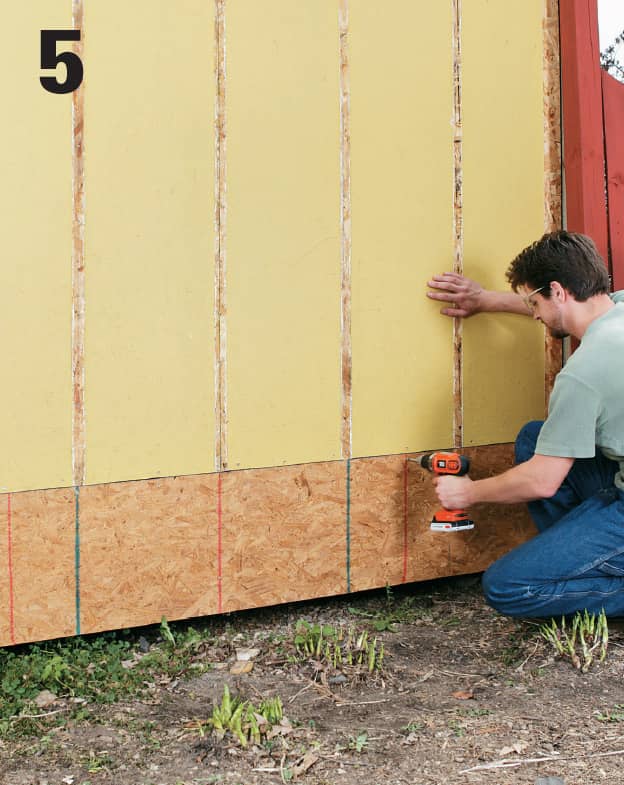
Measure and cut replacement panels using the same size and type material. To allow for expansion and contraction, leave no more than 1/8" gap between the patch board and the original siding. Use screws or nails to fasten the patch. Screws provide better holding power but are more difficult to conceal. Reattach trim and then prime and paint all exposed wood surfaces.
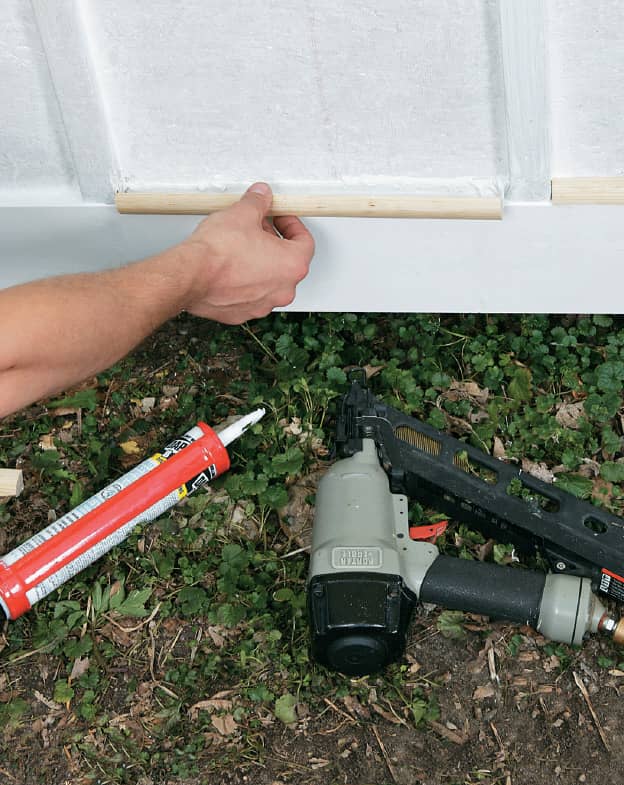
TIP: Make corrective repairs to fix problems so they don’t recur. Use a pneumatic nailer to secure appropriate molding to the ledge of the base trim. Here, pieces of 3/4 × 3/4" quarter-round molding are set into thick beds of caulk on the top edges of the base trim and then secured with finish nails. This creates a surface that sheds water instead of allowing it to accumulate.


