CHAPTER THREE
Hide-and-Seek
Looking at collage and mixed-media art can sometimes be overwhelming. Images seem to “hide” within the layers of the collage. Trying to isolate the various techniques layers and translate them into can be a daunting task. It may seem impossible for you to figure out, let alone to know where to get started.
The projects in this chapter present the collage process in its simplest form. You will learn to develop collage pieces through basic steps. I use a methodical process foundation of five steps to create a collage. In these projects, you will build up the stash of Collage Elements you created in Chapter Two.
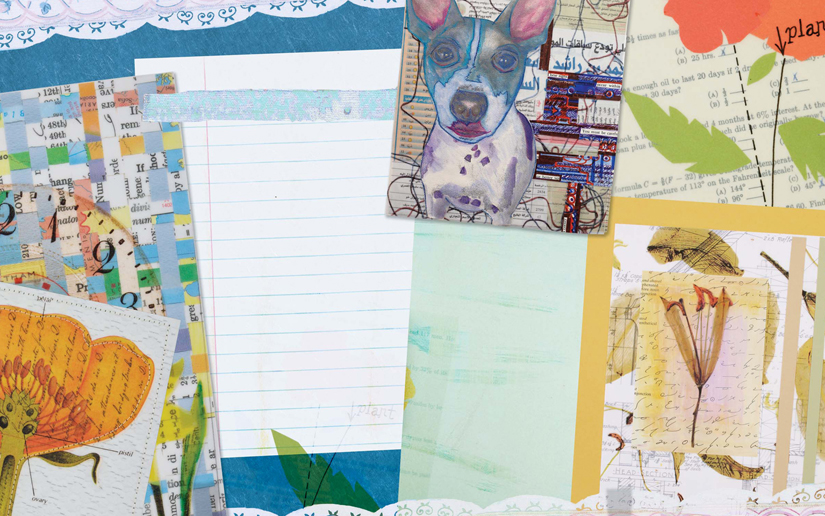
Take a look at Garden Peace #1. The basis of this collage is relatively simple. The background and foreground are from Organic, Pressed Flower Collage Sheets, the middle ground is an Altered Book Page and the finishing touches are a few paper strips and colored-pencil embellishments. This collage project is a prime example of how to break down the process to its simplest form.
Other projects, like Flip Flop #1, demonstrate the visual difference of using different backgrounds with the same foreground image. Clock #1 also shows you how the background can influence the feel and look of the collage.
This chapter features vellum, one of my all-time favorite papers. Using vellum in your collage art adds textural qualities along with mystery, making the viewer search through the layers to find the hidden meaning, much like playing “hide-and-seek.” I hope you will experiment with vellum and use it in your collage art — seek out its uses in the following pages and enjoy!
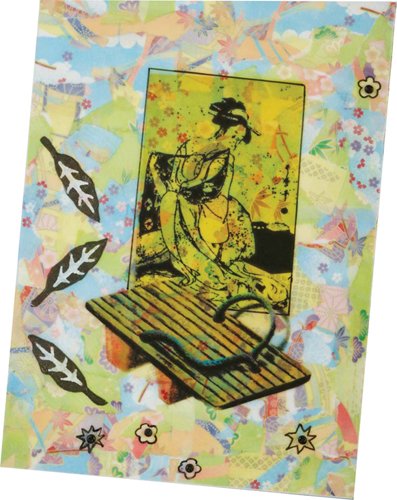
Flip Flop #1
The concept illustrated in this piece shows you how one image can be used with different backgrounds. Because this technique is about layering paper, you will learn how to use different paper for backgrounds with the same image in the foreground. Flip through a vintage magazine or book, find something that catches your eye and use it for the first background selection. If the size is not right, make an enlargement or reduction on a copier. If you want to zoom in on a certain detail, crop it on the copier and make an enlargement. Piece two images together if needed.
MATERIALS
vintage magazine page
5″ × 7″ (13cm × 18cm) self-adhesive mounting board
colored pencils
shoe image
vellum
color copier
scissors
Double Tack Mounting Film
craft knife
cutting mat
symbol image
matte medium
tweezers
assortment of beads
1. Adhere vintage magazine page to background
Adhere the vintage magazine page to the self-adhesive mounting board. Smooth it down with your hand.
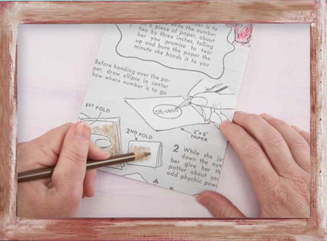
2. Color image
Using the colored pencils, embellish selected areas as desired.
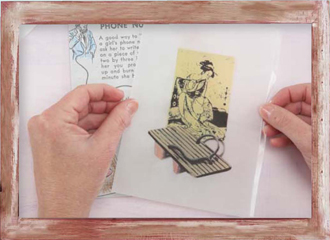
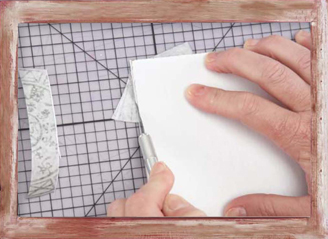
3. Create vellum foreground
Copy the shoe image onto a piece of vellum. Cut the appropriate size of Double Tack Mounting Film and place it on the back of the vellum. Remove the paper backing from the Double Tack Mounting Film and adhere the vellum to the background, smoothing it with the heel of your hand.
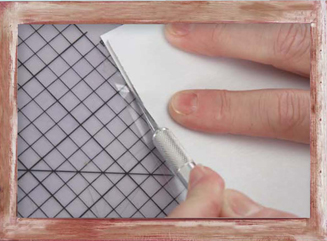
4. Trim excess vellum
Turn the artwork facedown. Using the craft knife, trim the excess paper from the edges.
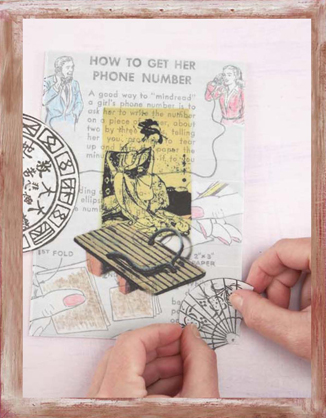
5. Embellish with symbol imagery
Apply Double Tack Mounting Film to the back of the symbol imagery. Cut out the symbols you desire and adhere them onto the vellum.
Tip
You may choose to select cutouts or stickers from your Collage Elements stash. You can use the elements that speak to you to replace images or add further embellishment.
6. Trim embellishments
Turn the artwork face down. Using the craft knife, trim the excess paper from the edges.
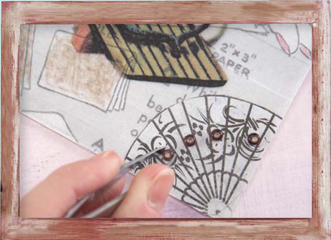
7. Add beads
Apply small dots of matte medium where you want to place the beads. Use the tweezers to pick up and position the beads. Allow the matte medium to dry.
Flip Flop #2
You will immediately notice the difference in these two projects. Isn't it amazing how changing a background can influence the feel of art?
This variation features torn pieces of origami paper in the background. I created this piece by tearing the paper into small pieces, adhering them to the self-adhesive mounting board and skipping to step 3.
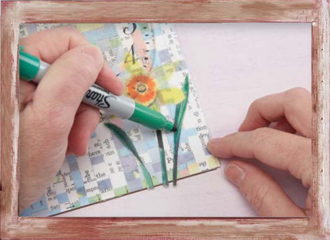
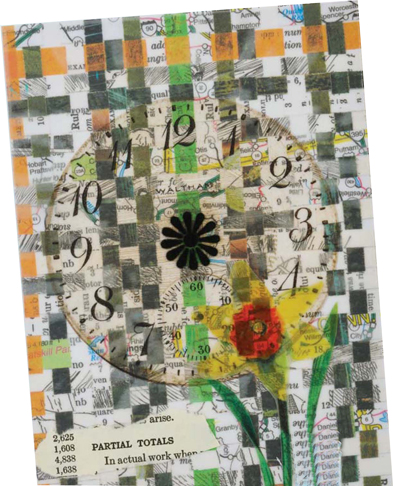
Clock #1
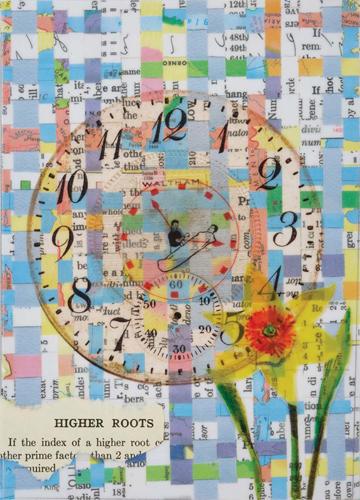
My friend Becky H. returned from a trip out west with lots of different ephemera, especially watch faces. I made copies of them and stashed them away. When I was working on this project and searching for my foreground image, the watch faces came to mind.
This project is your open door to developing a series of collage art. Continue making this project several times, using different backgrounds, and develop your own collection. By making a copy of the ephemera, it becomes a two-dimensional plane, easily workable in the collage process. If this appeals to you, dig around, find some ephemera, make copies and make art!
MATERIALS
5″ × 7″ (13cm × 18cm) self-adhesive mounting board
clock image
vellum
color copier
scissors
Double Tack Mounting Film
craft knife
cutting mat
colored markers
vintage book page
COLLAGE ELEMENTS
Weaving page
Vellum Element of a flower

1. Prepare background
Apply the weaving page to the self-adhesive mounting board.
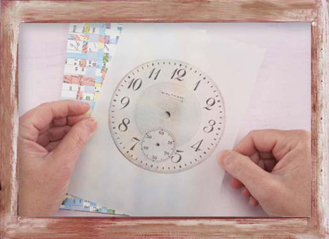
2. Create vellum clock
Copy the clock image onto a piece of vellum. Cut the appropriate size of Double Tack Mounting Film and place it on the back of the vellum. Place the vellum on the background, smoothing it down with the heel of your hand.
Tip
If your weaving paper is bulky and not flat, consider using a color copy of the weaving instead of the original weaving.
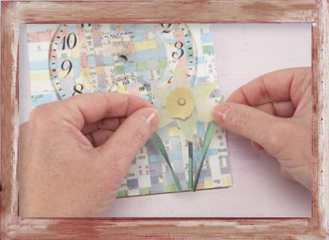
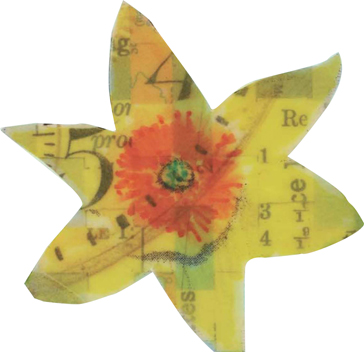
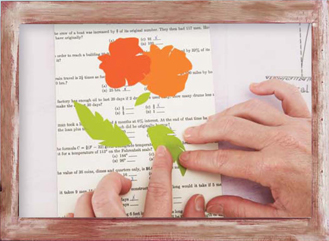
3. Add flower cutout
Apply Double Tack Mounting Film to the back of the flower image. Cut out the flower. Position the flower image on top of the vellum.
Tip
At this point you may need to flip the art over and trim any excess edges with your craft knife.
4. Color flower
Use colored markers to embellish the flower.
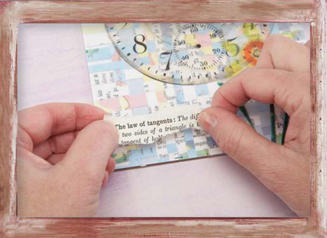
5. Add vintage book type
Tear part of a page from a vintage book. Apply Double Tack Mounting Film to the back of the page and adhere it to the bottom left side of the art.
If desired, add imagery to the center of the clock.
Clock #2
Like Flip Flop #1 and Flip Flop #2, the visual appearance shifts based solely on background and middle ground choices. See how many different versions of one image you can create. Like making friends on the playground, variety is good!
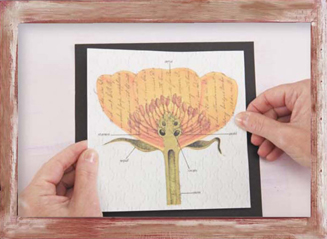
Anatomy of a Flower
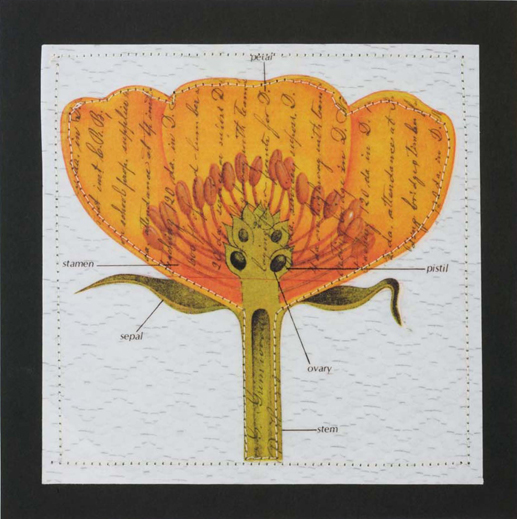
I wanted to use a combination of textures to emphasize the beauty of flowers. Looking around, I had a piece of lace, handwritten script and a graphic illustration of a flower. Bingo! Combining these textural elements brought the perfect juxta-position into a piece of art.
After you have completed this project, continue with other approaches. What different materials can you merge together? Think about opposites: sandpaper and silk, vellum and cardboard. Now think about the subject of the art: Look at images that interest you and colors that excite your senses.
MATERIALS
flower image
vellum
color copier
copy paper
scissors
Double Tack Mounting Film
vintage paper, ledger sheet with handwriting
pencil
lace fabric
sticker paper
metal ruler
craft knife
cutting mat
7″ × 7″ (18cm × 18cm) black paper
sewing machine
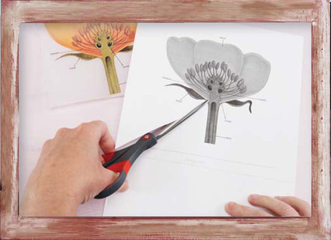
1. Prepare flower template
Make a color copy of the flower image on a vellum sheet. Make a black-and-white copy of the flower image on white copy paper. Using the scissors, cut out the black-and-white flower.

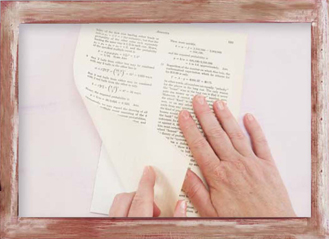
2. Trace flower on handwriting paper
Apply Double Tack Mounting Film to the front of the vintage paper, leaving the backing on the double tack. Lay the cut out flower over the piece of Double Tack Mounting Film. Using the pencil, trace around the flower.
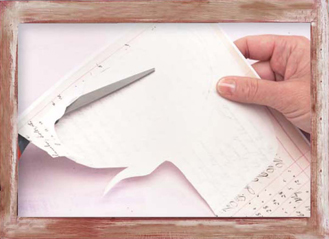
3. Cut out the flower shape
Using the scissors, cut out the flower shape following the pencil outline.
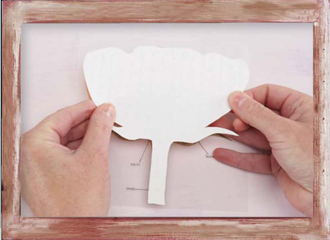
4. Merge vellum
Flip the vellum paper facedown (you should be reading the image backward). Peel the backing off the vintage paper flower shape and adhere to the back of the vellum flower, allowing the words to show through on the front of the flower.
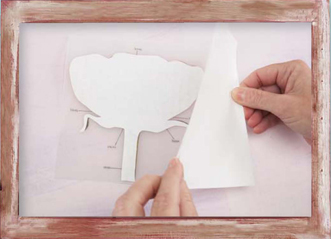
5. Apply Double Tack Mounting Film
Keeping the flower facedown, apply a 6″ × 6″ (15cm × 15cm) piece of Double Tack Mounting Film to the back.

6. Adhere flower to lace
Make a black-and-white copy of the lace on a sheet of sticker paper. Peel the backing from the flower-vellum piece and adhere to the front side of the lace sticker paper. Using the ruler and craft knife, cut the lace paper to the size of the vellum paper.
7. Attach image to black background
Peel the backing from the sticker paper. Center the image over the black-paper support and adhere it.

8. Stitch edges
Using the sewing machine, stitch a basic stitch around the outer edges.
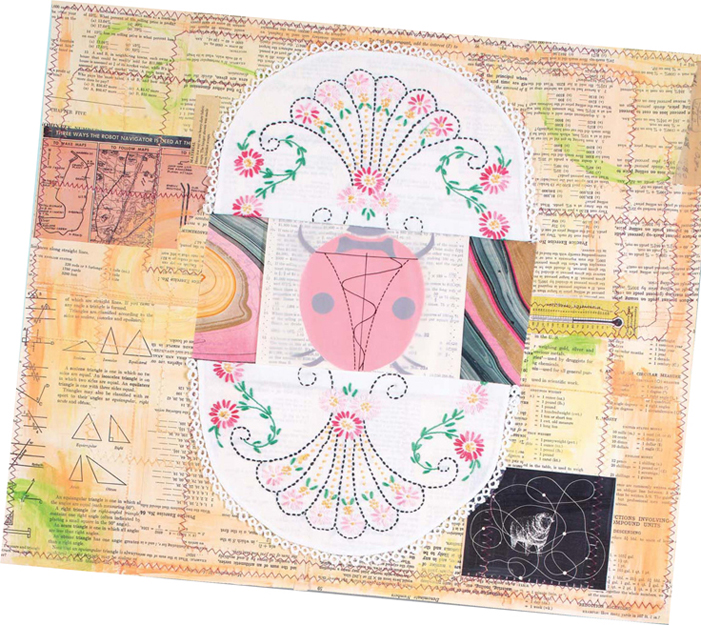
Ladybugs Will Rule the World
Never say never. A fellow artist once told me I should “never” use ladybug imagery within my art. Why not? His reply was, “Because the art will ‘never’ be taken seriously.” Well, as you can see, I took this under advisement and decided to create a piece that reflected the strength of this tiny innocent creation. The ladybug is made of Color-aid paper, layered beneath a math line drawing on vellum. The background is composed of math-book pages, sewn together with collage imagery. The doily in the center of the piece adds texture and emphasizes the lines used in the mathematical formulas. So, here's to ladybugs — may they one day rule the world!
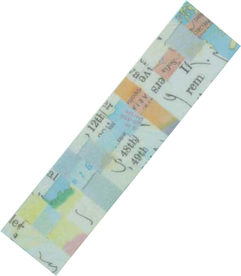
Vertical Strut
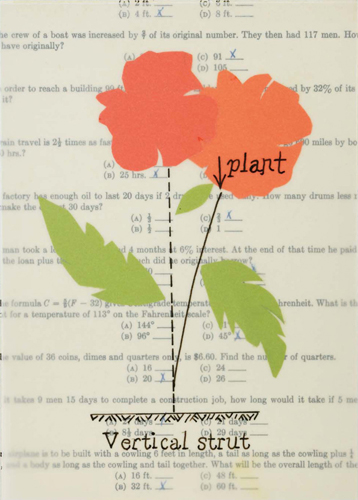
One day I sat down with a math book and began flipping through the pages. The formulas and geometrical shapes jumped out at me. Not as math, but as the foundation for flowers, fish, birds and bugs. I traced the linear shapes and adapted them to organic images. Try this project and you will see triangles in a whole new light.
MATERIALS
math formula or geometry shape
color copier
copy paper
proportion wheel
vellum
fine-tip black marker
pencil
vintage book page
5″ × 7″ (13cm × 18cm) self-adhesive mounting board
craft knife
cutting mat
scissors
Color-aid papers (up to three colors)
embroidery scissors
rubber cement
rubber-cement pick-up eraser
two-sided tape
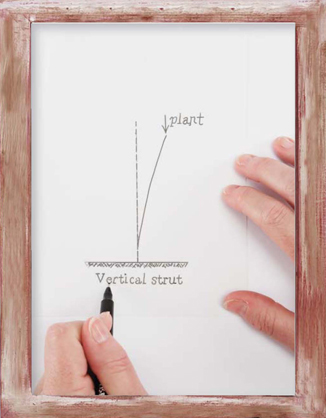
1. Trace image
Start with a geometrical shape from a math book. If needed,
copy this image onto a piece of copy paper, reducing or enlarging the image.
Lay the piece of vellum paper over the image. Using the fine-tip black marker, trace the image onto the vellum.
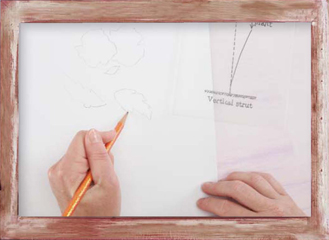
2. Sketch flower
Using the vellum drawing as a guide, sketch flowers onto a piece of copy paper.
3. Adhere book page to background
Decide which side of the book page you want to show and adhere it to the self-adhesive mounting board. Trim any excess around the support by flipping over the board and using the craft knife around the edges.
4. Build flower
Using the scissors, cut the flower shapes out of the copy paper (created in step 2). Trace on the back of the Color-aid paper. Remember this will be a mirror image of the sketch. Using the craft knife or embroidery scissors, cut out the Color-aid paper shapes. Handle the Color-aid paper carefully and try not to bend it.
Using the vellum overlay as a guide, position the flower pieces on the background. Use the rubber cement to adhere the flower pieces to the background. Use a clean piece of copy paper over the flower and press down. Any rubber cement that “leaks” out and around the flower may be removed with a rubber-cement pick-up eraser. Allow the rubber cement to dry.

5. Overlay vellum
Place a piece of two-sided tape at the very top edge of the background. Line up the vellum page with the flower and press down.

Figure 312
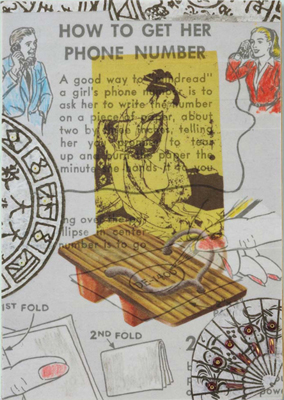
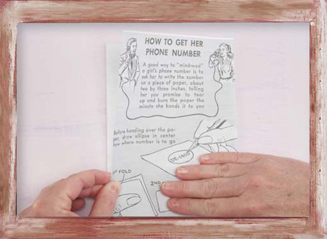
This piece evolved because I wanted to utilize magazine scraps backed with Double Tack Mounting Film. I have a box where I toss all the little scraps and pieces from other projects. Take a look at your scrap box and make some art!
Oscar, the next day
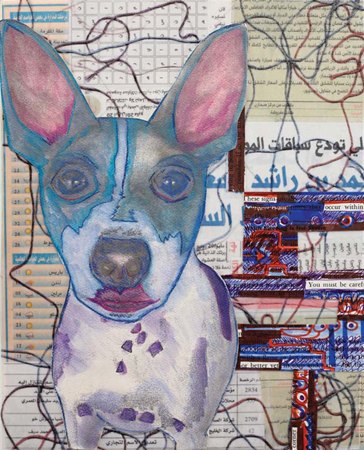
Pets, whether we are pampering them or dressing them in funny costumes, become part of our family. Oscar, the next day, is my “granddog.” My youngest daughter adopted him from a shelter a few years ago. He became affectionately known as “Oscar, the next day,” when my granddaughter, Aidan, overheard me call him Oscar de la Renta and thought I said, “Oscar, the next day.” It's funny how nicknames originate and stay with us.
Do you have a pet? Then I'm sure you have a photograph. That is all you need to get started on this next project.
MATERIALS
scissors
foreign newspaper pages
8″ × 10″ (20cm × 25cm) self-adhesive mounting board
Double Tack Mounting Film
craft knife
cutting mat
metal ruler
photograph of dog
color copier
copy paper
8½″ × 11″ (22cm × 28cm) sheet of colored pastel paper
watercolor set
oil pastels
paintbrushes
colored pencils
COLLAGE ELEMENTS
Vellum Element featuring string or thread
Altered Book Page with block out technique
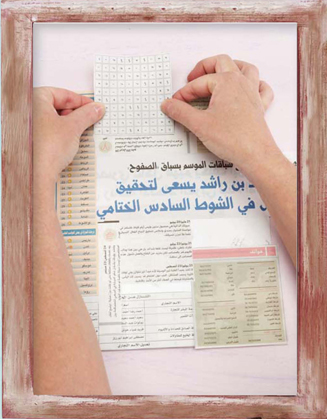
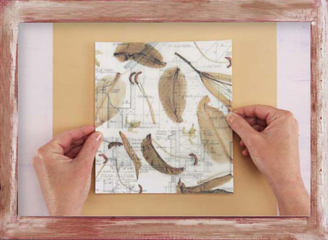
1. Prepare background
Using the scissors, cut blocks of type from the foreign newspaper and adhere them to the self-adhesive mounting board until it is completely covered.
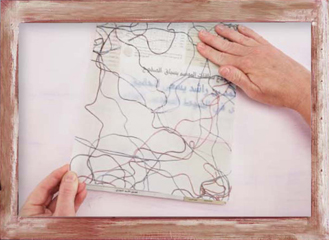
2. Layer vellum on background
Apply Double Tack Mounting Film on top of the background. Peel the backing paper from the Double Tack Mounting Film and adhere the Vellum Element.
Turn the board facedown. Using the craft knife, trim the excess paper edges.
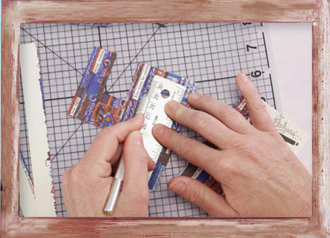
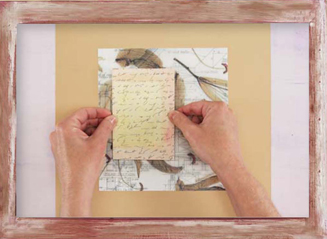
3. Prepare Altered Book Page
Apply Double Tack Mounting Film to the back of the Altered Book Page.
Using the ruler and craft knife, cut small squares and rectangles into the page, sectioning off the words and phrases you want to keep.
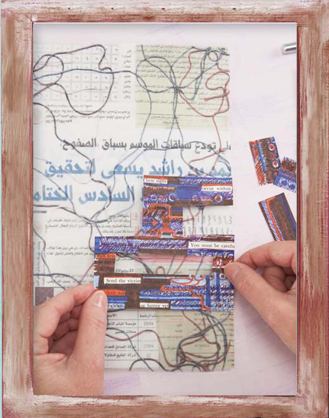
4. Adhere Altered Book Page to vellum
Peel the backing of the Double Tack Mounting Film and adhere the book page to the vellum.
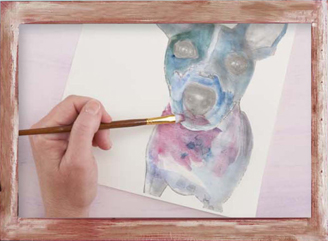
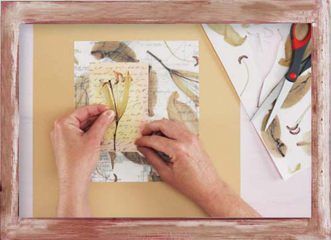
5. Embellish dog image
Make a black-and-white copy of the dog photo, enlarging the image as needed to fill the composition. Using the scissors, cut out the dog image.
On a copier, make a copy of the dog image on a sheet of colored pastel paper. Using the watercolors and oil pastels, embellish the image. Allow the paint to dry.
6. Adhere dog image
Apply Double Tack Mounting Film to the back of the pastel paper image. Using scissors, cut out the dog image.
Peel the backing from the Double Tack Mounting Film and adhere to the background. If desired, use colored pencils to embellish the artwork further.
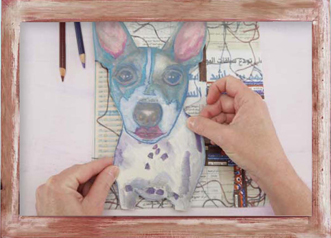
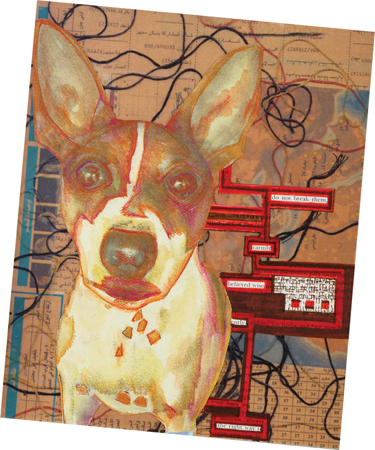
Oscar, The Day Before
This variation and the original project started with a photo of Oscar, the next day. The background materials include pieces from a newspaper my son-in-law brought to me from Dubai. It was completed using components from my Collage Elements. Of course, I could not resist embellishing Oscar's ears and mouth. I love how changing the colors makes Oscar a little more brooding than the calming effect of the purple and blue tones of the original.
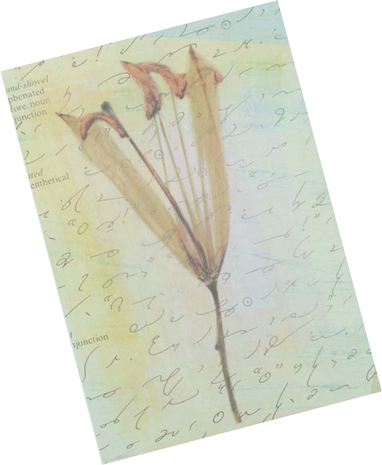
Garden Peace #1
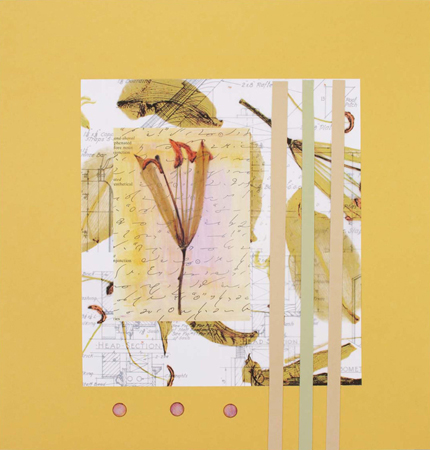
This six-step collage is the quintessential example of how to effectively use your Collage Element resources. The Collage Elements used in this project can vary, resulting in different artwork. I created an entire series, using a variety of pressed flowers and other Collage Elements. Step out of bounds and try a combination of different Collage Elements to create, create, create!
MATERIALS
Double Tack Mounting Film
scissors
12″ × 12″ (30cm × 30cm) piece of solid color card stock
craft knife
cutting mat
3 strips of colored paper, ¼″ × 10¼″ (6mm × 26cm) each
circle template
fine-tip black marker
colored pencils in blue and purple
COLLAGE ELEMENTS
Collage Sheet
Organic, Pressed Flowers on vellum sheet
Altered Book Page
Tip
The Collage Sheet featured in step 1 is one sheet with two layers. The Collage Sheet was made by first copying the architectural drawings onto a sheet of copy paper and then the images of the flowers and leaves. Collage Sheets can feature as many visual layers as you like, without having to add separate physical layers to the final piece.
1. Adhere background to support
Apply Double Tack Mounting Film to the back of the collage sheet.
Using the scissors, trim the collage sheet to 8″ × 7¼″ (20cm × 18cm). Remove the backing from the Collage Sheet and center it over the card stock. Adhere the Collage Sheet to the card stock.
2. Adhere Altered Book Page
Apply Double Tack Mounting Film to the back of the Altered Book Page. Trim the book page to 5″ × 3½″ (13cm × 9cm). Adhere the book page to the collage sheet as shown in the photo.
3. Add flower
Select a flower from the Organic, Pressed Flower vellum sheet and apply Double Tack Mounting Film to the selected area. Use the scissors or a craft knife to cut out the flower. Adhere the flower shape to the Altered Book Page as shown.
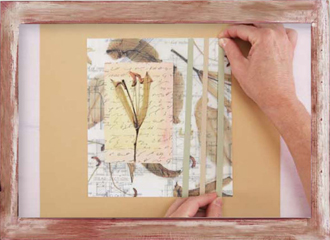
4. Add paper strips
Apply Double Tack Mounting Film to the backs of the three strips of colored paper. Adhere the strips of colored paper down the right side of the collage as shown.
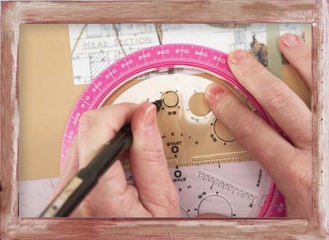
5. Draw circles
Using the 3/8″ (1cm) circle template, draw three circles with the fine-tip black marker along the bottom of the cover stock.
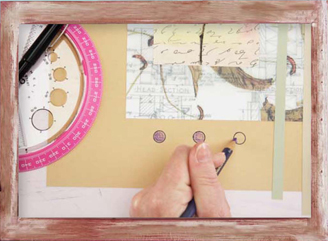
6. Embellish circles
Using the purple colored pencil, fill in the circles. Use the blue colored pencil to add highlights.
Garden Peace #10, from the “Garden Series”
All the formats in the “Garden Series” are on 12″ × 12″ (30cm × 30cm) supports. In addition to using Collage Elements to create the piece, I used a retro flash card and cut a window opening. Collage Elements make completing a series easy because you always know where you will be starting. The fundamental questions are already answered: What size is the support? What is my concept? What are my material sources?