CHAPTER FIVE
Add and Subtract
So much of collage work depends on what you add or take away while you're creating. Highlighting something in the background, tearing a piece of paper just so, using an image again and again — all these choices can make or break a piece or, at the very least, dictate how you feel about it.
In this chapter, we'll work on adding and taking away to bring out the playful art inside you! I'll introduce you to “found poetry,” the art of combining fragments of text to create a poem. The combination of this writing technique and collage is a marriage made in heaven, like doughnuts and coffee, peanut butter and jelly. Found poetry is enjoyable; try it and see what you come up with!
Repeating images is another fun concept. This isn't an exercise in memorization; it's a chance to create with a favored image or images. Will the individuality of the image get lost within the repetition, or does the repetition claim a new identity? You decide — and while you're at it, have fun and make some art!
Interactive illustrations are commonly found in “pop-up” books, enticing readers to pull the tab, turn a wheel or open a door. I love the fact that art can also be interactive. Challenge yourself to come up with other interactive forms in your art: how about a zipper, pocket sleeve, buckle or spinning wheel?
While collage can offer an almost limitless range of ingredients to provide the formal elements of design fundamentals, decollage does the same in reverse. Instead of building up layers to create art, decollage works back to front. Have you ever noticed a lacerated billboard where the advertisement is long gone, with the beautiful paper remnants showing? You will be intrigued by this technique of layering, building and deconstructing.
We'll use the techniques you've already learned to make specialized Collage Elements for your works of art. You'll see you can create Collage Elements when the mood strikes. Join me in these fun games — you can count on some great art!
Original Cast
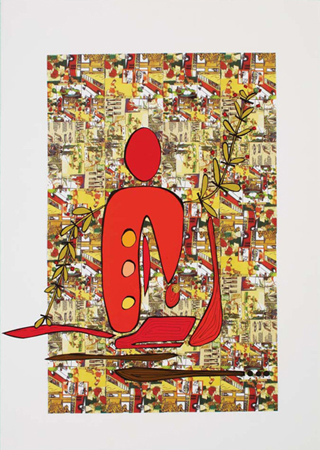
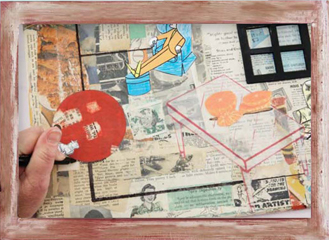
The abstract form in the foreground is a perfect balance to the multiple details of this repetitive-design background. Take a close look at the background and notice how each square is its own illustration. What if you use only one repeated image: Does it lose its identity and gain a new one? Play around with different images and ideas and see what you come up with for your repetitive design!
MATERIALS

Double Tack Mounting Film
14½″ × 20″ (37cm × 51cm) foamcore
pencil
sketch of abstracted figure
color copier
copy paper
scissors
Color-aid papers (up to three colors)
embroidery scissors
craft knife
cutting mat
two-sided tape
rubber cement
rubber-cement pick-up eraser
fine-tip black marker
COLLAGE ELEMENTS
2 Pattern Collage Sheets, 8½″ × 11″ (22cm × 28cm) each
1. Apply background sheets to support
Apply Double Tack Mounting Film to the back of both pattern collage sheets. Peel away the backing paper from the Double Tack Mounting Film and adhere the sheets to the foamcore.

2. Create color insets
Sketch an abstract figure or shape. Make several copies of the sketch to be used as templates. Cut out the templates, labeling the parts. Trace each template to the front of a piece of Color-aid paper. Using embroidery scissors or a craft knife, cut out the pieces.
To make the color inset, use the craft knife to cut window openings (in this example, it is the circles). Cut square pieces of Color-aid paper in a variety of colors large enough to fill in the openings. Adhere the pieces with two-sided tape, placing the front side of the squares to the back side of the circles.
3. Add figure
Gently brush the back side of the Color-aid paper with rubber cement and press it lightly onto the background. Continue to assemble the figure and composition on the background. Remember to use the rubber-cement pick-up eraser to eliminate any leakage around the image. It is best to wait for the rubber cement to dry (about ten to fifteen minutes) before erasing.
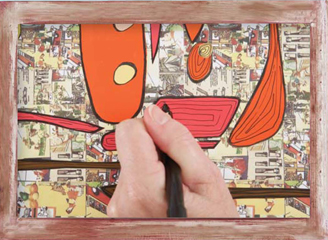
4. Outline and embellish
After the rubber cement is dry and the images are secure, use a black fine-tip marker to outline the figure and add line embellishments throughout the composition as desired.
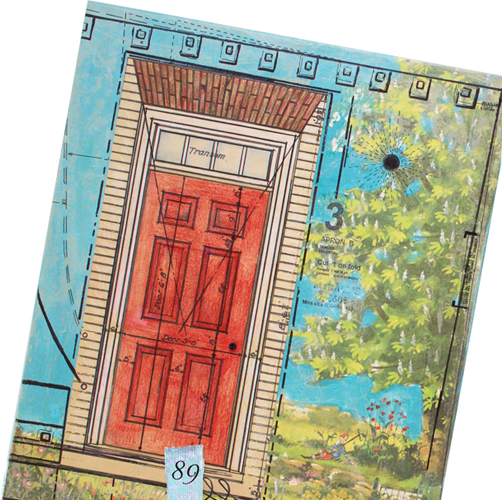
Open Door Policy
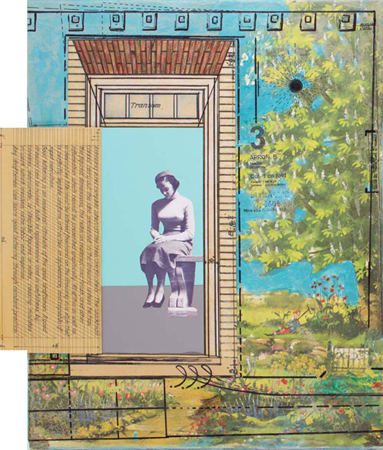
This beautiful image of a young woman sitting peacefully in a meditative state prompted the collage. I found that it defined women, provoked calmness and relayed our inner beauty. This is a sweet piece of art that invites the viewer to look beyond the expected. Find an image that speaks to you, and see what doors (or windows) it can open.
MATERIALS
acrylic paint in blue, green, yellow and white
palette
paintbrushes
16″ × 20″ (41cm × 51cm) gallery wrapped canvas
landscaping and tree images
color copier
copy paper
embroidery scissors
matte medium
putty knife
tissue paper from sewing pattern
craft knife
cutting mat
door image
3–4 sheets of manila drawing paper
proportion wheel
Double Tack Mounting Film
metal ruler
page of text (for inside door)
colored pencils
2 sheets of Color-aid paper
printer
Kodak Premium Photo paper, compatible with your printer
scissors
image of woman
two-sided tape
fine-tip black
marker small black button
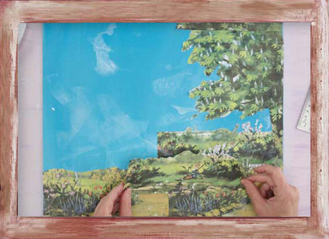
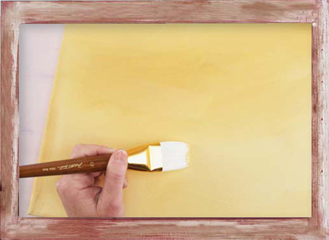
1. Prepare background
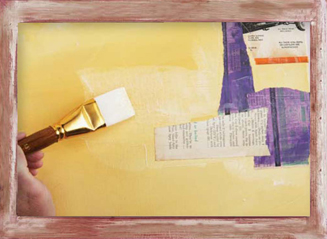
Pour the acrylic paint onto the palette. Paint the canvas using a mixture of brilliant blue and white. Allow the paint to dry.
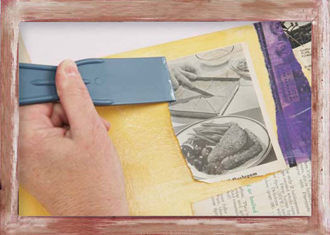
Make color copies of the trees and landscape on white copy paper. Using the embroidery scissors, trim the images carefully to get the sections you want. Apply matte medium with a clean paintbrush to the background and adhere the paper to the canvas. Smooth down the paper with a putty knife.
2. Blend background with paint
Look at the composition and add paint to the leaves and grass to help blend the paper at the seams of the separate images. Allow the paint to dry thoroughly.
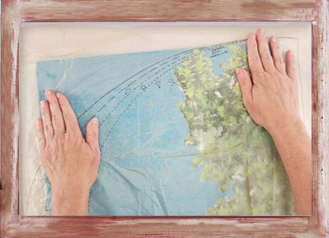
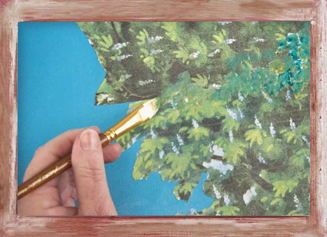
3. Apply pattern tissue paper to background
Brush the entire canvas and edges with a light coat of matte medium and cover the background with the tissue paper. Smooth it down with the heel of your hand, allowing wrinkles and folds for texture.

4. Trim excess paper
After the matte medium dries, turn the canvas over. Using the craft knife, trim any excess paper.
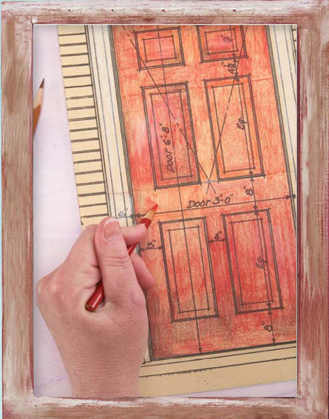
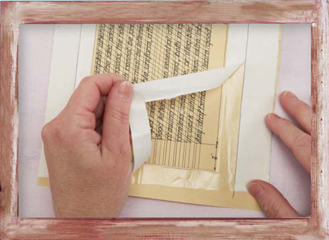
5. Assemble door
Make a black-and-white copy of the door on the manila drawing paper. Reduce or enlarge the image as needed; if you want a large door, you can print the image in two halves, but you will need to piece together the top and bottom copy of the door. The door shown is 15″ × 7½″ (38cm × 19cm).
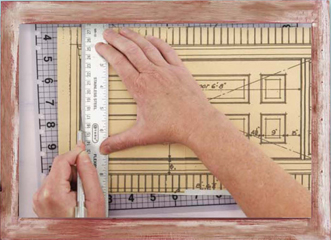
Apply Double Tack Mounting Film to the back of the door. Using a ruler and craft knife, trim around three sides of the actual door. Score the side of the door where the hinges would be so you can open and close the door (do not cut through the backing).
6. Trim backing paper from inside of door
Turn the door ensemble over, facedown. Using the ruler and craft knife, cut the backing paper from the Double Tack Mounting Film. Apply just enough pressure to cut through the backing paper; be careful not to cut the paper of the door.
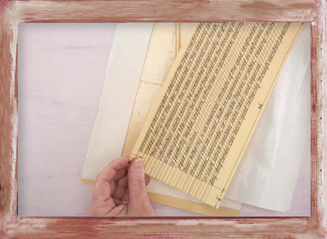
7. Add text sheet to inside of door
Measure the size of the door. Make a black-and-white copy of the text (for the inside of the door) on the manila drawing paper. If the image needs to be larger, enlarge it on a copier. Cut the text copy to fit the measurement of the door.
Peel the Double Tack Mounting Film from the back of the door. Adhere the text to the back of the door.
8. Embellish door
Using colored pencils, color the front door as desired.
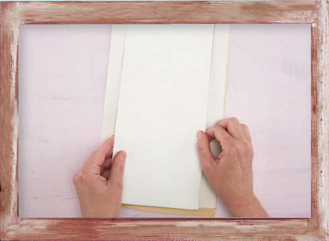
9. Assemble woman and Color-aid paper
Decide which of the Color-aid paper colors will go at the top and bottom of the image. Cut the Color-aid papers as desired, as long as they fit the dimension of the inside of the door with an extra ½″ (1.25cm) on all sides. Lap the edges of the Color-aid over each other, securing them with a piece of two-sided tape. Back the two pieces of Color-aid paper with Double Tack Mounting Film.
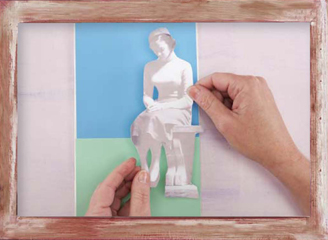
Print a black-and-white copy of the woman onto the photo paper. Apply Double Tack Mounting Film on the back of the woman. Using the embroidery scissors, cut out the image. Peel the backing from the Double Tack Mounting Film and adhere the woman to the front side of the Color-aid paper.
10. Position image under door frame
Turn the door ensemble over. Pick up the Color-aid paper ensemble and place it facedown on the back of the door ensemble. Trace the outer edges of the Color-aid ensemble using a black marker.
11. Trim backing paper
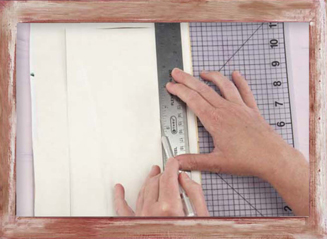
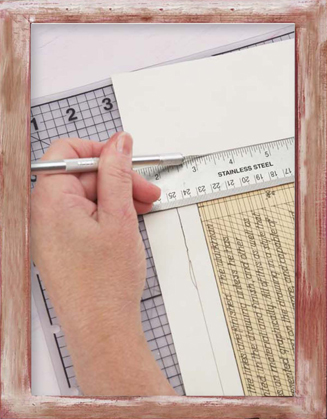
Using the ruler and craft knife, trim the backing paper of the Double Tack Mounting Film on the lines you drew in step 10. Apply only enough pressure to cut through the paper backing, being careful not to cut the door.
12. Remove backing paper
Gently peel the backing paper from the cut lines.
13. Adhere Color-aid inset
Position the Color-aid paper ensemble facedown over the exposed Double Tack Mounting Film and adhere it.
14. Embellish with black marker
Turn the door ensemble over. It should open to reveal the Color-aid paper and the woman. Now that the door and door inset are complete, peel the backing of the Double Tack Mounting Film from the door and adhere to the canvas. Press it down with the heel of your hand.
Use a dot of matte medium on the door and adhere the black button for the door knob. Allow the matte medium to dry.
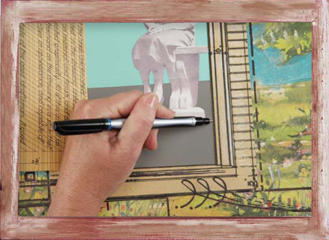
Using the black fine-tip marker, draw lines and circles to unify the composition and enhance lines.
Open Door Policy with the door closed
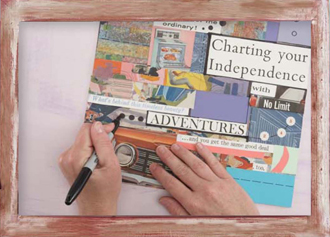
The Future You Want
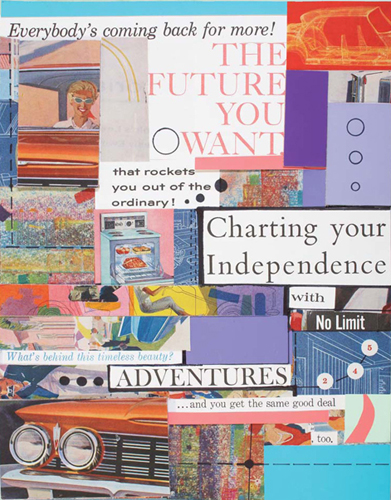
When working on art, I sometimes listen to audible books. The words become images in my head, and the images progress to works of art. After reading Mornings Like This: Found Poetry by Annie Dillard, I decided to combine the art technique of “cut-up” with the idea of found poetry. This project was so enjoyable because it could move in any direction with a serious voice or a lighthearted one.
MATERIALS
vintage magazine pages
scissors
11″ × 14″ (28cm × 36cm) self-adhesive mounting board
your choice of imagery and illustrations
Color-aid paper
craft knife
cutting mat
fine-tip black marker
Tip
The cut-up technique has long been one of my favorites. The basic idea is to take a page of text, cut it in pieces with words on each piece and then rearrange the page pieces into a new text.
For The Future You Want, I cut out headlines, subtitles and phrases from different magazines and then rearranged them into a poem. Explore your resources: cut-up and combine e-mails, song lyrics or movie titles.
Another method to make found poetry is to cut the page into quarters, rearrange them and then rewrite the prose, adding words to compensate for the word breaks.
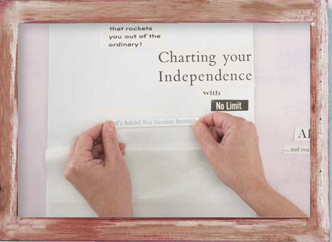
1. Select text
Flip through vintage magazines and look for headlines, phrases and images that appeal to you. Cut them out.
Peel off the backing paper on the mounting board and adhere the collage pieces, starting with the text. Stagger them unconventionally to add interest to your art.
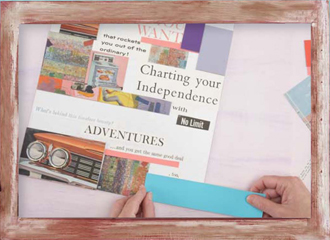
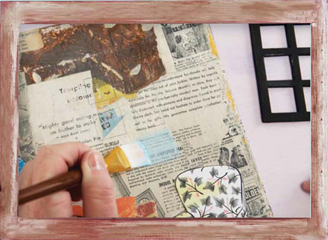
2. Add images and color
Begin to add color and images throughout your poem. It may be necessary to cut some of the images into different shapes or sizes. Play around with the composition and balance. I recommend using the Color-aid paper last to complete areas that demand specific sizes; trim the paper as needed to fill in the empty spaces.
Tip
Self-adhesive mounting board is wonderful, but do remember that images cannot be removed or repositioned after you stick them on — plan carefully!
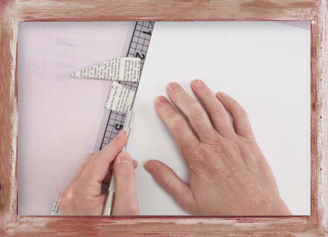
3. Trim edges
Flip the board over. Using the craft knife, trim the excess paper from all the edges.
4. Embellish artwork
Use the fine-tip black marker to draw lines, unify the piece and add embellishments.
Window Conditioning
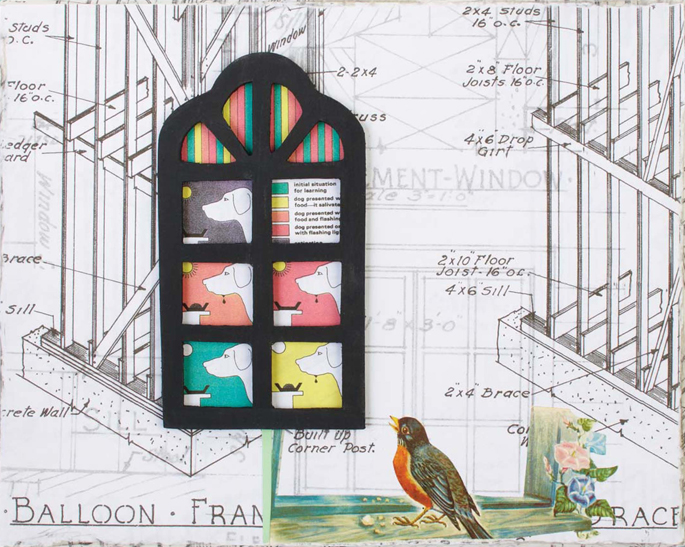
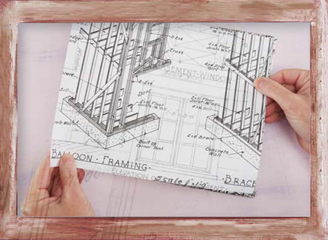
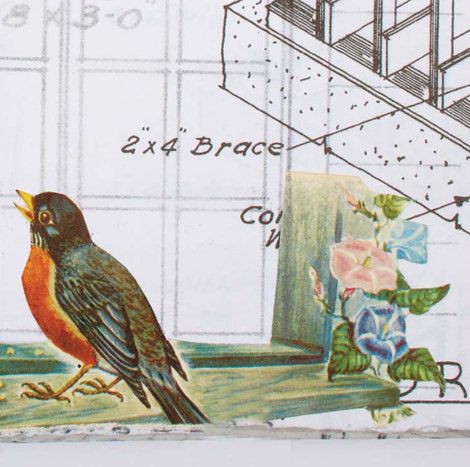
The complex background of this project is deceiving — it is actually one image copied onto itself. This is an example of how to repeat one image to create a new look. By copying the image on tracing paper, layering it over the original image and making a new copy, the images fade into one another. You can try this method using different types of papers to achieve different looks. Consider using transparent sheets or colored vellum; try manipulating the size of the image on one copy. There are lots of possibilities for your collages.
This project offers an excellent opportunity to create new items for your Collage Elements stash. For example, in step 1, you will be making collage sheets for the background; go ahead and produce several different images to stash away for future projects. In step 4, you are asked to copy a bird image onto sticker paper — take this opportunity to complete a variety of images (along with the bird) on a full sheet of sticker paper. You'll come away from this project with a piece of art and a handful of new Collage Elements!
MATERIALS
2 architectural drawings
color copier
3–4 sheets of 8½″ × 11″ (22cm × 28cm) 25-lb. tracing paper
3 sheets of 8½″ × 11″ (22cm × 28cm) sticker paper
metal ruler
8″ × 10″ (20cm × 25cm) gallery wrapped canvas
matte medium
burnisher
sandpaper
craft wood window
acrylic paint in black
paintbrushes
pencil
copy paper
6 different dog images
scissors
stripe design for arch of window
glue stick
bird image
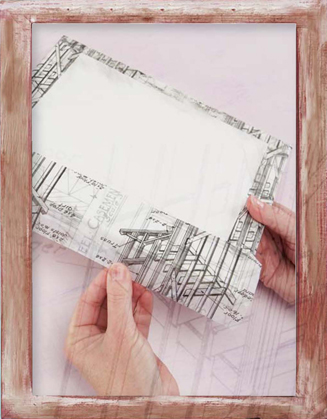
1. Prepare background
Copy one page of the architectural drawing onto the tracing paper. Use the tracing-paper copy to overlay onto the other architectural drawing and make two more copies on tracing paper and one copy on the sticker paper.
Measure and cut the tracing-paper copies to fit around the four edges of the canvas. Adhere to the canvas using matte medium. Your canvas should be blank in the center and have tracing paper along the perimeter and sides. Allow the canvas to dry thoroughly.
2. Add sticker paper
Cut the sticker paper to 8″ × 10″ (20cm × 25cm). Position and adhere the sticker paper to the front of the canvas. Burnish the edges of the sticker paper to blend them into the tracing paper on the canvas. If needed, use sandpaper to help bend all the paper's edges.
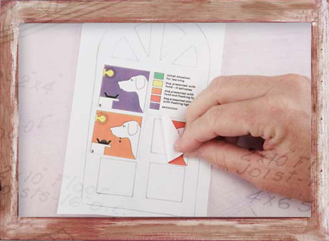
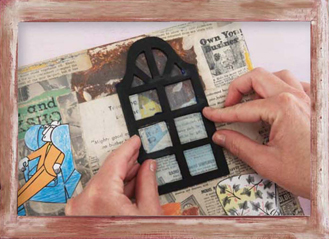
3. Create window template
Sand the wood window frame. Using the black paint, paint the window frame. Allow the paint to dry thoroughly.
Using the window as a guide, draw a template onto a piece of plain copy paper. Cut the dog images to fit into the window insets of the template. Do the same for the striped design paper in the arch of the window. Glue the images and paper down with the glue stick. Make a color copy on a sheet of sticker paper.
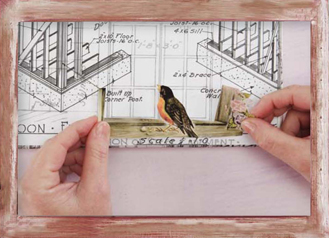
4. Add bird
Make a color copy of the bird image on sticker paper. Using the scissors, cut out the image. Play around with the placement of the window and bird. The bird image must be adhered to the background before the window. When you are satisfied with the position of the bird, remove the sticker-paper backing and affix it to the canvas.
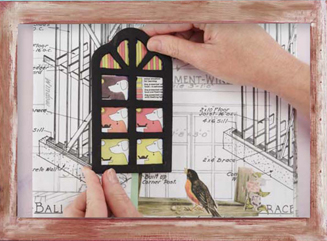
5. Adhere window
Using the scissors, cut out the window-inset image and adhere it to the back of the window, faceup, using the glue stick. Peel off the sticker-paper backing and position the window onto the canvas.
Detail of Window Conditioning
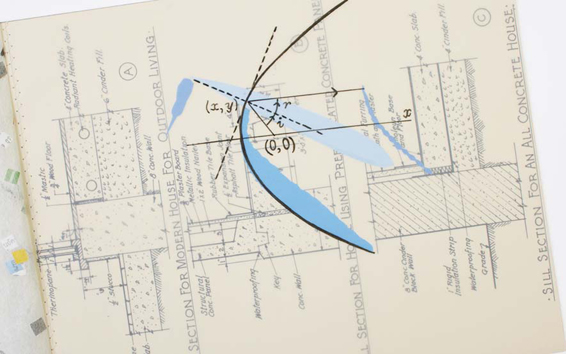
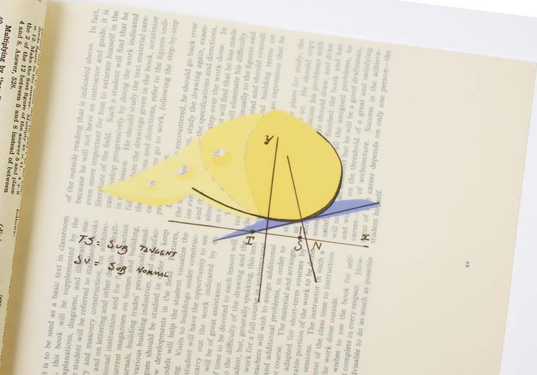
Math Made Simple, Infinite Fish
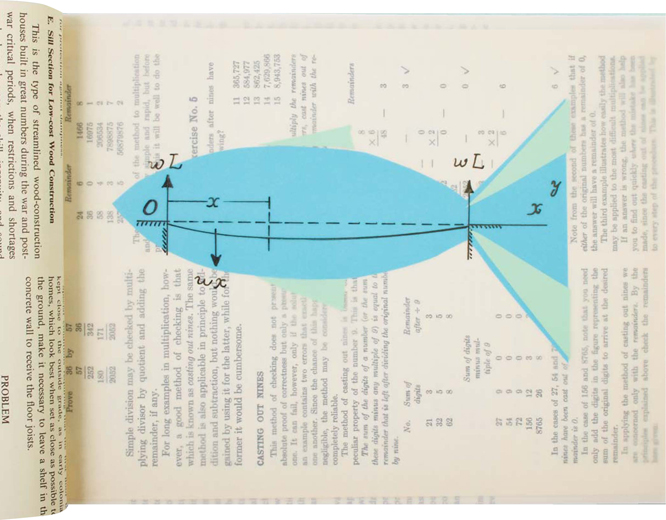
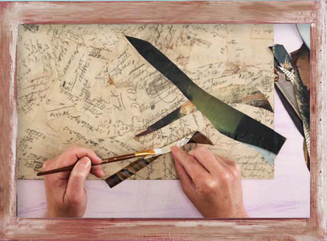
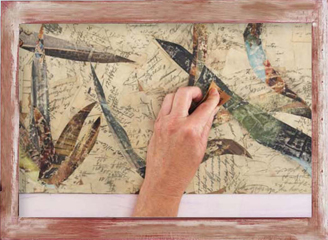
Mathematicians use graphic diagrams to illustrate their formulas, and, in doing so, they also create art. The meticulous line drawings, sweeping curves and symbols are all quite lovely, waiting for you to add your own creative touch. That is exactly what I have done in this piece. I started with a math formula and used it as the jumping-off point to complete a drawing. Create a whole series — even add a cover — and stitch it all together for your own special book. Go grab your math book, and let's do some homework!
MATERIALS
geometry diagram
color copier
copy paper
pencil
fine-tip black marker
60-lb. vellum 8″ × 10″ (20cm × 25cm)
scissors
Color-aid paper, 2 colors
rubber cement
page from math book
rubber-cement pick-up eraser
two-sided tape
decorative rice paper (optional)
sewing machine

1. Create sketch from math equation
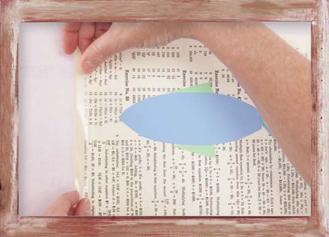
Using a copy machine, enlarge a geometry diagram on regular copy paper. From this diagram, sketch something that follows the shape of the equation. This particular equation reminded me of a fish.
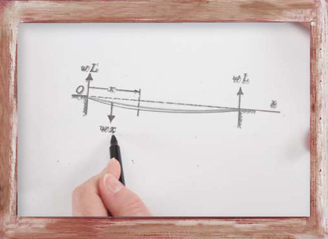
2. Trace geometry diagram on vellum
Using a fine-tip black marker, trace the copy of the geometry diagram onto the vellum paper.
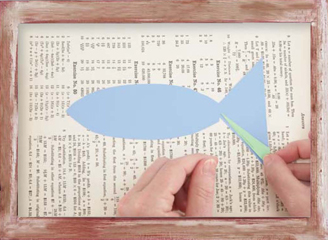
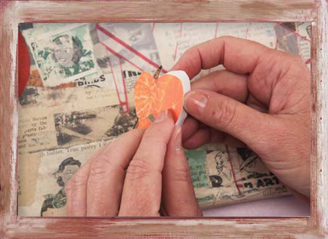
3. Create fish shape from Color-aid paper
Using the scissors, cut out the fish created in step one. Using this image as a template, create a Shape Cut Out on the Color-aid paper.
Brush a light coat of rubber cement on the back of the fish and adhere it to the math book page. Allow the rubber cement to dry. Clean up any rubber-cement residue with the rubber-cement pick-up eraser.
4. Add tape
Adhere a piece of two-sided tape down the left side of the book page.
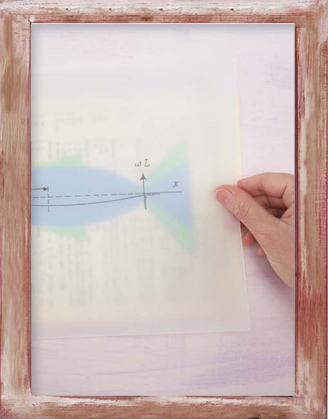
5. Add vellum overlay and create remaining pages
Carefully layer the vellum sheet with the equation over the fish; line it up to match the design of the fish.
To make a booklet, create several more pages by repeating steps 1–5 using different equations for each page of the booklet. If desired, make a cover. In the example, I printed on a sheet of decorative rice paper.
After you have the desired number of pages, continue to step 6.
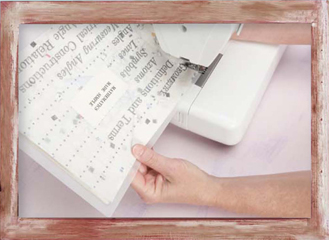
6. Sew booklet
Assemble the pages and book cover so all the pages line up. Using the sewing machine, secure the book pages with a zigzag stitch.
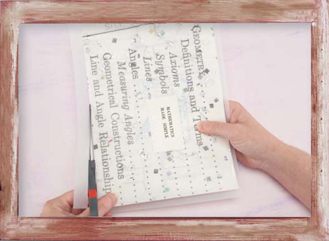
7. Trim pages to size
Using the scissors, trim the pages to size.
Math Made Simple
Cover of Math Made Simple
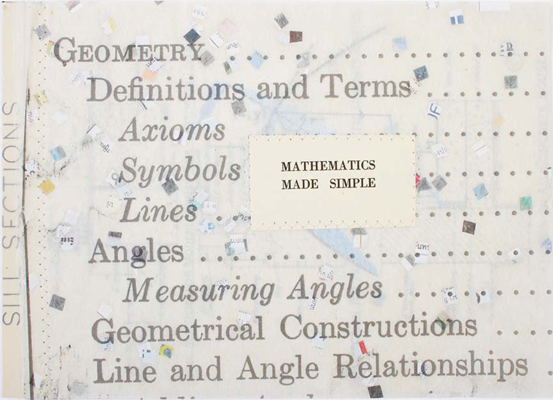
Math Made Simple
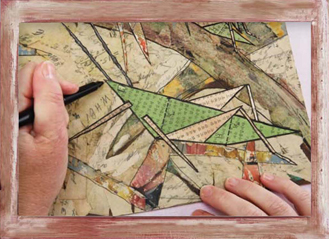
Grasshoppers
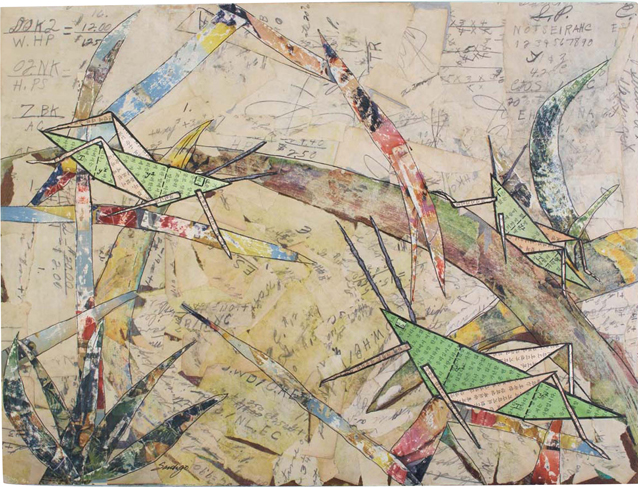
Once again, math is the main element for developing this project. The grass-hoppers you see in the foreground are drawn using a math formula as the starting point. Can you see the shapes in the grasshoppers' bodies?
The background is developed using the decollage technique: applying layers of paper and then removing layers from selected areas. Decollage can create unexpected results with each layer.
MATERIALS
matte medium
putty knife
16″ × 16″ (41cm × 41cm) chipboard support
vintage handwritten papers
scissors
vintage magazine pages
paintbrushes
sandpaper
geometry formulas
pencil
sketch paper
fine-tip black marker
1. Prepare background
Using the matte medium and putty knife, cover the chipboard with the vintage handwritten pages, overlapping them. Allow the matte medium to dry.
2. Add magazine branches
Using the scissors, cut the magazine pages into various branch shapes and sizes. Use a paintbrush and matte medium to adhere them to the background. If needed, use the putty knife to smooth the papers as you apply them. Allow the matte medium to dry.
3. Decollage artwork
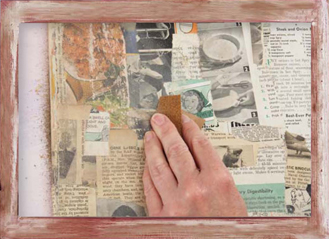
Using the sandpaper, gently sand the branches and background. As you sand the branches, you'll notice the background may show through; this is decollage. Continue to sand until you have the desired textured look.
With a clean, dry brush, sweep over the piece to remove any dust or grit residue.
4. Add grasshoppers
Using geometry formulas, sketch a grasshopper. Make the shape of your grasshopper linear. Use these sketches as a template to make Shape Cut Outs on the Altered Book Pages. Use separate pages for the body, legs and antennae.
Using matte medium, add and assemble the grasshoppers on the background as desired. Allow the matte medium to dry completely. Outline with the black fine-tip marker to give the grasshoppers definition.
Fresh Oranges
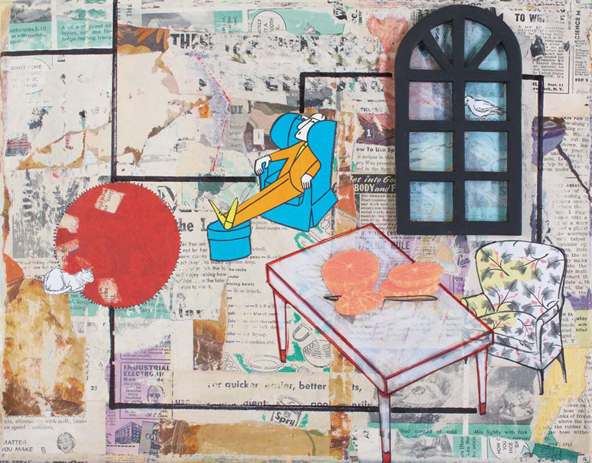
Yummy — there's nothing better than a slice of a ripe, juicy orange. My mouth waters just thinking about it. In Fresh Oranges, you will have the opportunity to create a scene. Project more interest by using images that are off scale, like the large oranges on the small table. Let the decollage technique work its magic as a textural background. Add dimensional objects within the composition to help balance it. Are you ready for some vitamin C?
MATERIALS
palette
acrylic paint in yellow, blue, black-and-white
paintbrushes
11″ × 14″ (28cm × 36cm) gallery wrapped canvas
vintage magazine pages
vintage book pages
matte medium
putty knife
sandpaper
wood window
pencil
glue stick
fine-tip markers in red and black
metal ruler
colored pencils
COLLAGE ELEMENTS
Sticker Paper with images of an orange, table, cat on a rug, figure in a chair, freestanding chair and bird
1. Paint background
Pour the acrylic paints onto the palette. Using the paint-brush, paint the canvas yellow and white, blending the colors as desired. Allow the paint to dry.
2. Adhere paper to background
Tear and cut the vintage magazine and book pages into pieces of varying shapes and sizes. Using the matte medium, adhere the torn paper pieces, overlapping the papers in some places.
3. Smooth paper pieces
When you use a variety of papers, the texture and thickness can vary. Smooth the paper using the putty knife as you collage the paper onto the canvas.
When you are satisfied with the coverage of the background, allow the matte medium to dry.
4. Decollage background
Using the sandpaper, sand away the background pages to allow images to “peep” through. When you are satisfied with the texture, use a clean, dry brush to remove any dust or grit from the canvas.
5. Apply collage images
Look at the canvas and determine how you want your composition, or scene, to look. Try to achieve balance and unity by carefully placing the images that complement one another. Remember to work back to front; for example, put the table down before adding the oranges.
Apply the Collage Element pieces as desired.
6. Add window detail
Place the craft wood window on the canvas in its designated spot (do not adhere it at this time). Using the pencil, trace an outline of the window and its openings.
Remove the window. Using the paintbrush, paint inside the window the outline with a mixture of light blue paint and matte medium. Allow the paint to dry.
7. Adhere window to art
Using the sandpaper, smooth the craft wood window. Paint the window black and allow it to dry.
Using the glue stick, adhere the window to the background over the painted area.
8. Embellish artwork
With the black marker, draw fringe around the rug; with the red marker, trace the lines on the table. Create unity within the composition by connecting imagery using a black marker to draw lines; use the ruler to create a clean, graphic look. Highlight areas using a white pencil; deepen colors using the colored pencils.
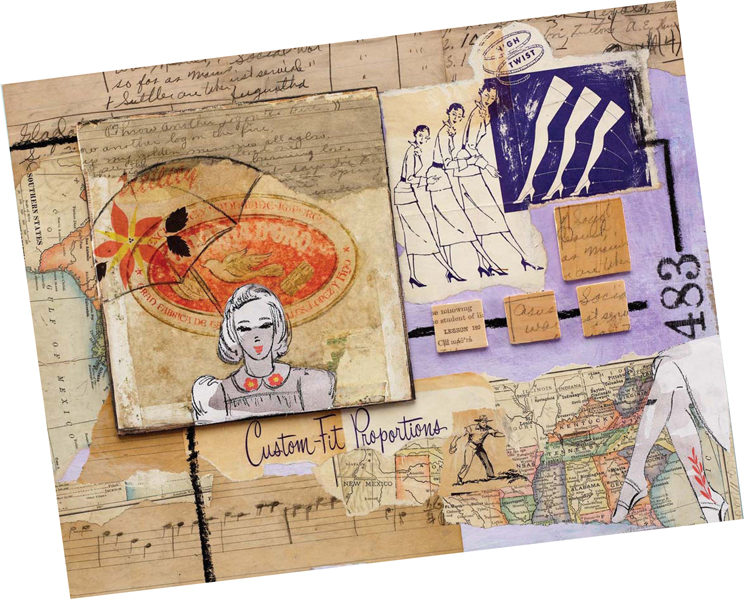
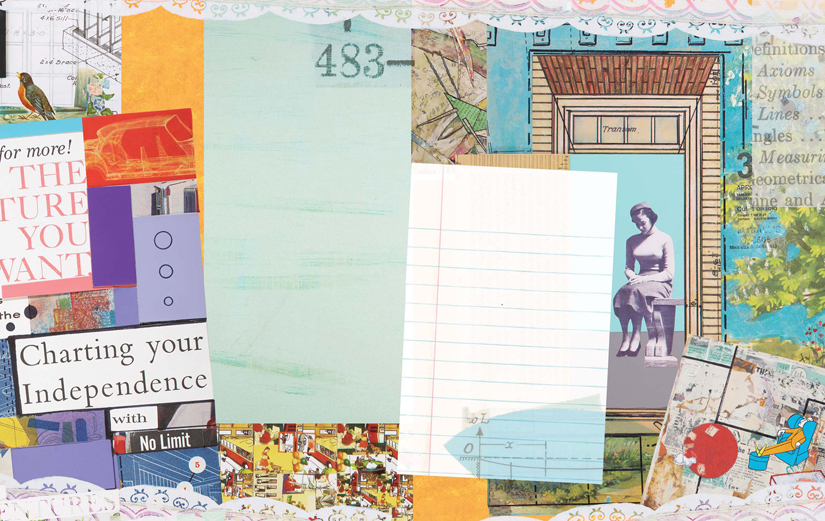
483
Notice the decollage technique in the background? This art uses a combination of collage techniques and Collage Elements previously seen. The four small squares on the right side repeat the same idea that was used in Scales and Graphs. The large square on the left side is actually the lid of a cigar box. I pulled many items from my Collage Elements stash to create this piece; now let's see what you can create!