CHAPTER TWO
Collage Elements
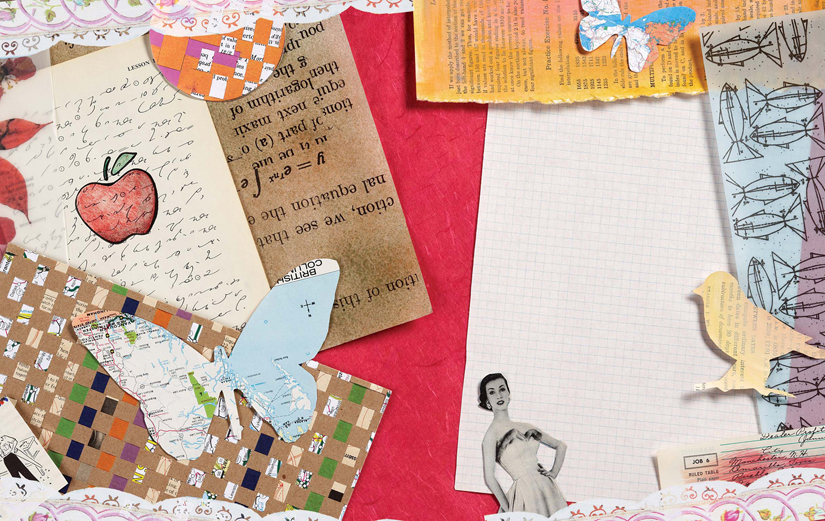
Whether you are dabbling in collage for the first time or are an experienced collage artist, this chapter will open new doors. One of the thrills of making collage art is that your sources are unlimited. This chapter will help you create your own original collage materials, which are then readily available for your collage art. By creating your own stash of original Collage Elements, you will no longer struggle with time-consuming searches for just the right background or embellishment. Making decisions on material selection for your collage art will become a simple task.
Mixed-media artists are collectors. Our ideas and concepts are equally as valuable as our materials. We hunt and gather, looking for “just” the right image to collage. Over the years of making collage art, I found I began to take raw materials and alter them. I would weave scraps of paper into shapes, paint book pages, make rub-on transfers from my art and so on. The more Collage Elements I developed, the more I realized I had created my own resource. How refreshing to have materials easily available for your art.
Tip
Organizing your Collage Elements will enable you to create more efficiently. I file my Collage Elements in three-ring binders, using plastic page protectors to sort them. I then label each binder on the spine: Collage Sheets, Flower-Pressed Sheets, Stickers, Rub-On Transfers and so on. This method works well for me; try it or create your own organization system!
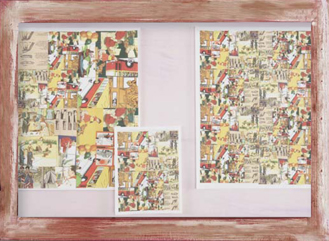
Collage Sheets
The uses for these collage sheets are limitless. Use a single sheet or pattern; make a combine several for backgrounds; manipulate sizes and cut out designs; stencil; or stamp. Combine vellum paper with other printed images on the copier to produce a layered look on Garden Peace #1. This process is a single sheet, like in variation: in Window Conditioning with a slight used again the final images are copied on sticker paper. You can indulge your creativity and produce a variety of Collage Sheets ready to use in future projects. See how many variations you can create.
MATERIALS

COLLAGE TOY BOX
scissors
glue stick
COLLAGE RESOURCES
variety of images and papers
OTHER MATERIALS
8½″ × 11″ (22cm × 28cm) copy paper
color copier
1. Gather images
The fun part of this project is to just randomly pull something from your collage source. Using scissors, trim or cut the image to the desired size.
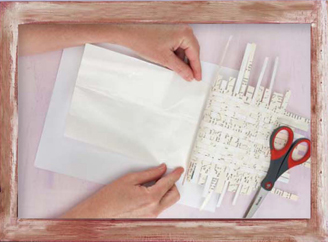
2. Adhere collage sheet
Use a glue stick to adhere your images to copy paper. Overlap pieces until the entire page is covered. If necessary, trim any overhanging edges to fit the copy paper.
Make ten to fifteen copies of each collage sheet using a color copier. You will want to keep the original intact, making copies on various types of paper, including cover stock, vellum, textured paper and more.
Pattern Collage Sheets
Take advantage of this relatively simple technique to come up with your own unique patterns.
MATERIALS
COLLAGE TOY BOX
scissors
glue stick
COLLAGE RESOURCES
vintage illustrations from children's books
OTHER MATERIALS & SUPPLIES
8½″ × 11″ (22cm × 28cm) copy paper
color copier
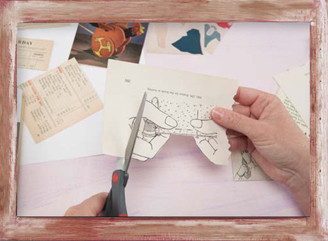
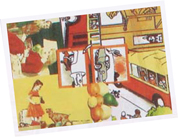
1. Begin repetitive design
Start with a vintage illustration and keep adding more illustrations until you have filled a piece of copy paper. The illustrations may be placed in different directions to help add interest to the composition. Use the glue stick to adhere the images to the paper. As you begin making color copies, set the copier settings to reduce the size of the copy by one-fourth.
Repeat this step with different illustrations until you have made four color copies. Use these copies and continue to repeat the process. Each time you reduce a group of illustrations and make new pages, they start to become a repetitive design or pattern.
2. Make several background sheets
Continue to reduce each full page until you have a page with images so small they make a pattern. When you are satisfied with a completed page, just stop.
Altered Book Pages
The pages of vintage books offer an endless supply of collage sources. By adding a little paint, adding matte medium, cutting out shapes or tracing stencils, you can manipulate each page to be unique. Because this is such a fast process, I suggest creating multiple pages within one sitting. Remember to seek books that are copyright free.
Painted
Use acrylic paint as your surface-enriching medium to create backgrounds for collage work. The transparency of the paint — mixed with matte medium — allows the words from the page to show through.
MATERIALS
COLLAGE TOY BOX
acrylic paint set
matte medium
paintbrushes
COLLAGE RESOURCES
vintage book pages
OTHER MATERIALS
palette for paint
cup of clean water
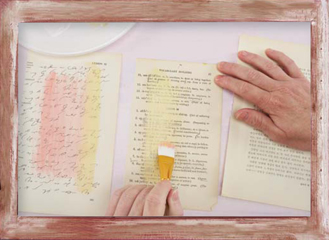
1. Paint single color
Prepare your work surface for paint. Tear out multiple book pages. Select three complementary acrylic paint colors for your palette. Add a small amount of matte medium to the palette.
Lay out three to four book pages. Begin by dipping your brush into the clean water, followed by one paint color and finally the matte medium. Brush over a large area of your book page. Repeat on other book pages.
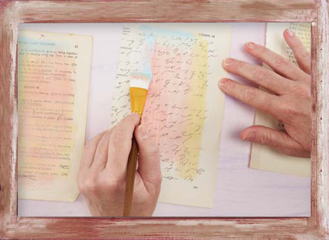
2. Layer paint
Lightly clean excess paint off the brush. Dip your brush into a second color and the matte medium. Brush over a small area of the book page, blending the paint into the first color. Repeat on other book pages.
Repeat this step, using a third paint color. Allow the pages to dry.
Tip
You do not have to allow the paint to dry to continue to step 2. In fact, by adding a second color to the wet paint, you blend to make a new color! Try different applications — remember, you have an entire book of pages.
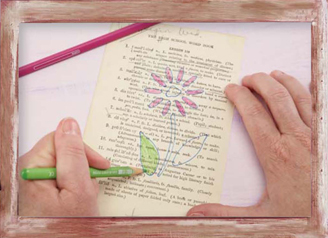
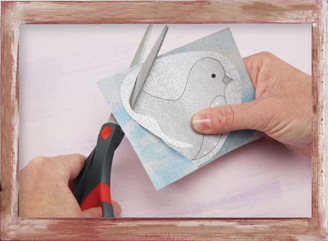
Positive Stencil
A positive stencil will take on the whole shape of the image. Cohesive images work best, but you can add interior details if desired.
MATERIALS
COLLAGE TOY BOX
colored markers
scissors
COLLAGE RESOURCES
vintage book pages
stencil templates
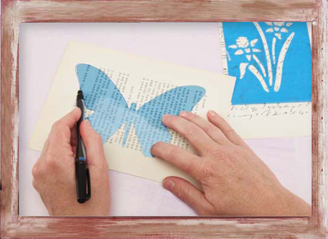
1. Trace image
Tear out multiple book pages. Lay them out on your work surface. Position the stencil template on a book page, looking closely at words or graphics you might want to capture within the shape. Using a fine-tip marker, trace in and around the template.
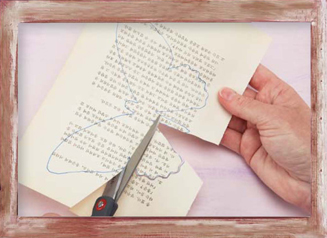
2. Cut out image
Using scissors, cut the shape out.
Negative Stencil
A negative image creates an empty space perfect for embellishing with markers, pencils and paints. I typically don't cut these images out, but you can if you want to keep track of the pieces.
MATERIALS
COLLAGE TOY BOX
colored markers
colored pencils
COLLAGE RESOURCES
vintage book pages
stencil templates
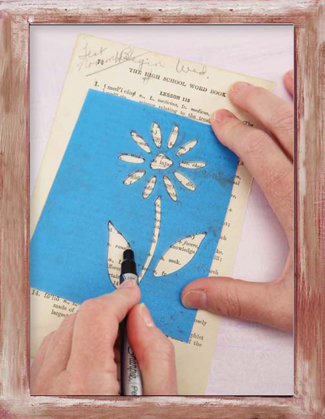
1. Trace stencil
Tear out multiple book pages. Lay them out on your work surface. Position the stencil on a book page, looking closely at words or graphics you might want to capture within the shape. Using a fine-tip marker, trace in and around the template.
2. Color in stencil
Using colored pencils, color in the stencil picture as desired.
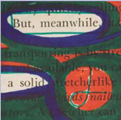
Block Out
Your ruler and a handful of colored markers can transform any book page into a Collage Sheet. This technique requires nothing but imagination. Grab your markers and let's scribble!
MATERIALS
COLLAGE TOY BOX
colored markers
metal ruler
COLLAGE RESOURCES
vintage book pages
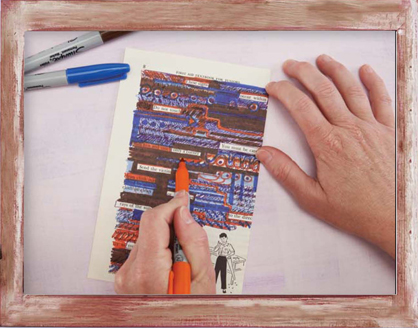
1. Choose elements to block out
Using a variety of colored markers, draw lines and shapes over the text of a book page. Create visual interest by varying designs and color. Using the ruler will help add graphic interest. Leave some words and phrases exposed to capture attention.
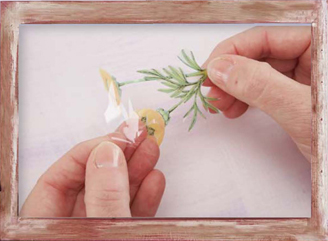
Organic, Pressed Flowers
Remember those lazy days on the playground when the girls sat in a circle making daisy chains? The sweetness of that memory comes to mind with this next project. A couple years ago, I stumbled on a flower press in an antiques store and immediately began collecting and pressing flowers. It wasn't until recently that I started incorporating them into my art. Consider making several sheets with different flowers in one sitting.
MATERIALS
COLLAGE TOY BOX
glue stick
tweezers
COLLAGE RESOURCES
pressed flowers and leaves
OTHER MATERIALS
wax paper
8½″ × 11″ (22cm × 28cm)
copy paper
color copier
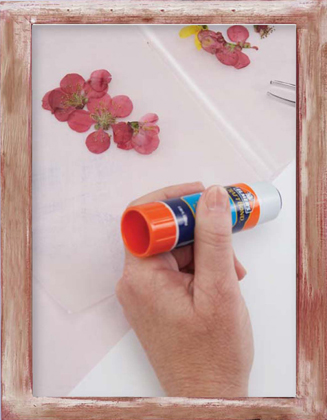
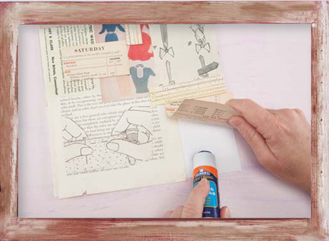
1. Apply glue to paper
Using a glue stick, smear a small dot of glue on the copy paper.
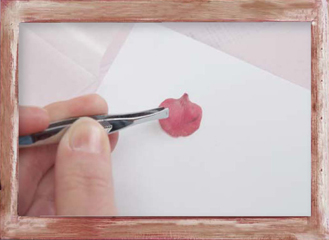
2. Select pressed flower
Pick up a pressed flower with the tweezers and place it on the glue dot.
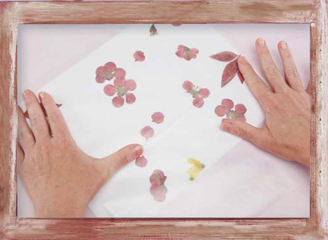
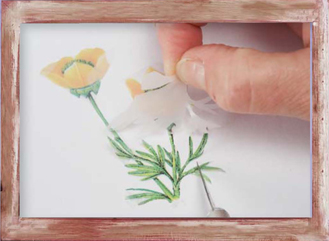
3. Fill page as desired
Repeat steps 1 and 2 until you've added all the flowers you desire. If the flowers are not adhering properly, lay a piece of wax paper or copy paper over them and gently smooth over the flowers with the heel of your hand.
Using the color copier, make copies of this sheet onto the copy paper. Use the copies in your artwork.
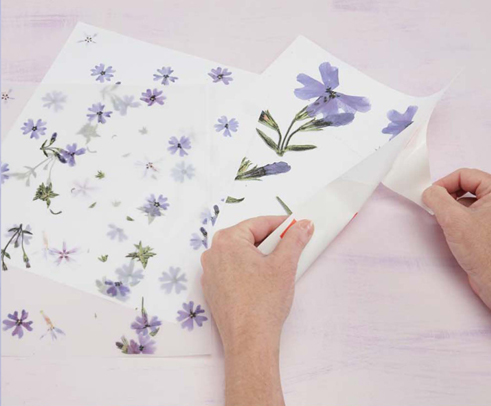
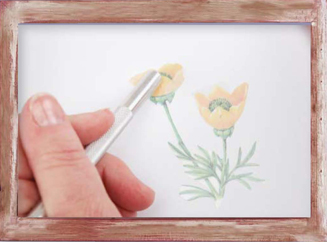
Variations
As you can see in this picture, I selected a purple flower and made a couple variations. After the pages are completed, place on a color copier and make copies from the original sheets. Experiment by copying on sheets of vellum, sticker paper, transparency and rub-on transfer sheets. Protect the original page by placing it into a plastic page protector.
Transparency Art
Printing images on a transparency sheet is a way to create additional layers within your collage art. You may use the transparency as a full sheet or cut out the individual images. Transparency sheets are readily available for most printer types. I like to use the transparency sheets that have adhesive on the back. This makes it easy to adhere the images to the art.
MATERIALS
COLLAGE TOY BOX
scissors
glue stick
transparency adhesive sheets
COLLAGE RESOURCES
vintage illustrations
OTHER MATERIALS
8½″ × 11″ (22cm × 28cm) copy paper
color copier
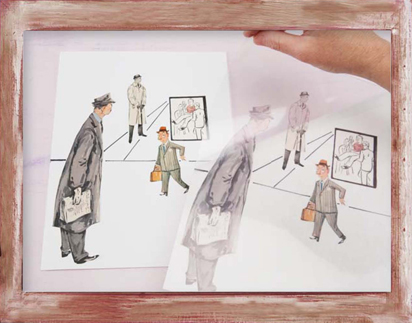
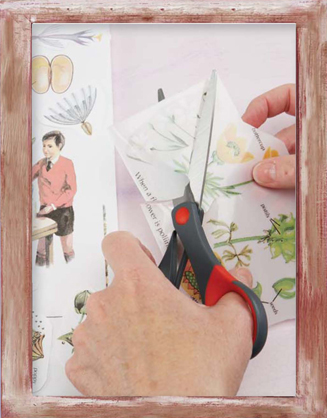
1. Select images, adhere and copy
Select images that appeal to you. Cut out the images and glue them to a piece of copy paper. Follow the manufacturer's instructions to make a copy on the transparency sheet.
Vellum Elements
One of the attractions to collage for many artists is the use of texture within the work. Vellum paper has always appealed to me because of its promise of illusion.
MATERIALS
COLLAGE TOY BOX
scissors
glue stick
COLLAGE RESOURCES
vintage illustrations
ephemera
vellum sheets
OTHER MATERIALS
color copier

1. Select images, adhere and copy
Arrange images as desired. Using the copier, copy the image onto a vellum sheet.
Weaving
The simple technique of weaving brings with it a wealth of expressive ideas. The examples in this section will help you bring weaving into your collage art. Here, I'll show you “closed” and “open” weaving, as well as two different ways of adhering the weave together. All these techniques are interchangeable. Practice the following techniques and then take it a step further by creating pieces using different sized strips, materials and patterns.
Closed Weaving
In closed weaving, the vertical strips, or warp, are cut into a single book page. Other strips of paper are woven into the warp strips, but they can't push free of the top and bottom limits of the book page.
MATERIALS
COLLAGE TOY BOX
scissors
metal ruler
craft knife
cutting mat
fusible webbing
COLLAGE RESOURCES
vintage book pages
colored paper
OTHER MATERIALS
iron
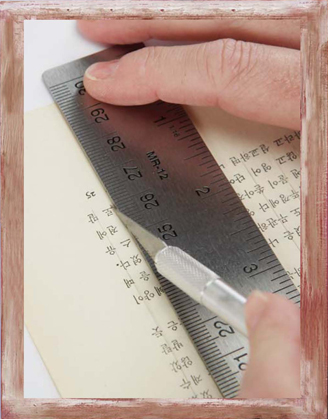
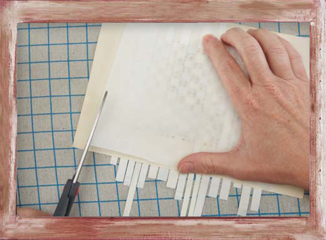
1. Prepare book page
Select a page from a vintage book. Starting where the text begins on the page, cut ¼″ (6mm) vertical strips (warp). Use the ruler and craft knife to help keep lines straight and accurate.
2. Cut strips
To make strips, select papers and cut with a craft knife and ruler on the cutting-mat surface. Repeat this step until you have an adequate amount of paper strips.
Tip
Tissue paper and other lightweight papers make a beautiful contribution to weaving. I have found it is easier to apply the fusible webbing prior to cutting the strips (as described in step 2); this gives the paper stability and enables you to handle the paper without tearing it.
The weight of the fabric or ribbon will dictate whether or not you should apply the fusible webbing before or after cutting and weaving. See how the material handles and weaves. One advantage of using the webbing first is that it stops the fabric from fraying. However, you may choose to have a frayed look. Try a few test strips.
3. Begin weaving weft
Using the basic “under and over” pattern, begin weaving the strips (weft) into the page (warp).
4. Push strips
Periodically push the strips to close gaps so the weave will remain tight.
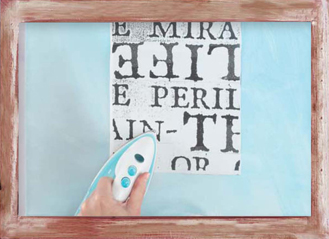
5. Add fusible webbing
Cut a piece of fusible webbing slightly smaller than the weaving.
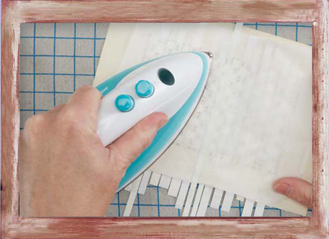
6. Iron Following the manufacturer's directions, iron the fusible webbing to the back of the weave. Allow the piece to cool before touching it. Trim the weaving to the desired shape or size.
Open Weaving
The open method of weaving uses loose strips for the warp and the weft, allowing you to select a variety of papers, textiles and other materials.
MATERIALS
COLLAGE TOY BOX
two-sided tape
cutting mat
metal ruler
craft knife
scissors
Double Tack Mounting Film
COLLAGE RESOURCES
vintage book pages
colored paper
OTHER MATERIALS
8½″ × 11″ (22cm × 28cm) copy paper

1. Place tape
In open weaving, you will use all strips to weave. Begin by placing a piece of the two-sided tape at the top of the copy paper.
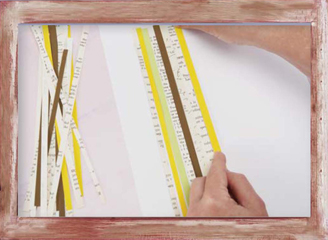
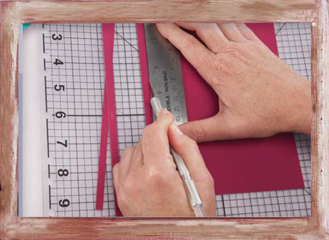
2. Position strips
Use a cutting mat, ruler and craft knife to cut a variety of paper strips ¼″ (6mm) wide and at least 6″ (15cm) long. Adhere the top of the strips to the two-sided tape. This is your warp.
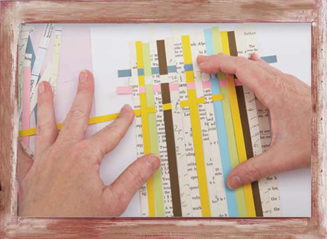
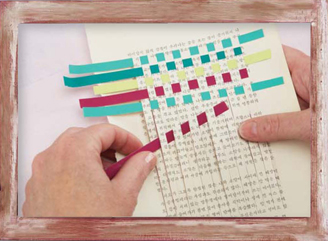
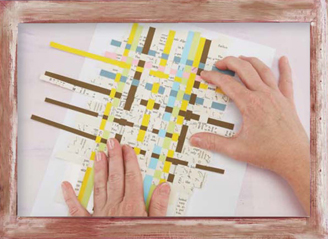
3. Begin weaving
With the remaining strips, begin to weave the weft. To keep the weave tight, periodically push the strips together to close gaps.
4. Add Double Tack Mounting Film
After the weaving is completed, gently fold the weaving back and secure it with a weight, such as a pair of scissors. Cut a piece of Double Tack Mounting Film the size of the weaving. Adhere it to the back of the weaving by peeling off one side of the film and sliding it under the weaving.
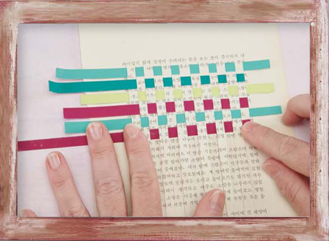
5. Secure weaving strips
Secure the weaving to the Double Tack Mounting Film by removing the weight and gently smoothing the weaving down with your hands.
Tip
Live on the edge and try any of these options to achieve your personal look! Cut different sized strips; tear the paper instead of cutting it; integrate fabric strips; or try different patterns of weaving. Try different papers as well and express yourself!
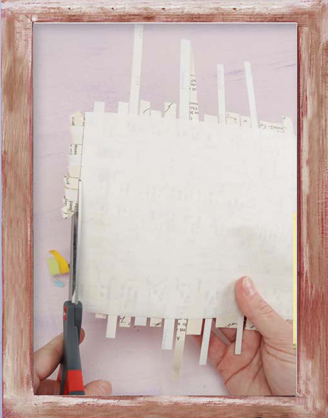
6. Trim edges of weave
Pull the copy paper away from the weaving and trim the edges as shown.
This weave is now ready to be used in a collage.
Tip
I recommend making color copies of your original weaving to have available for different projects. This allows you to create numerous elements from one weaving. It is fun to alter the size of the weaving by enlarging or reducing it on the copier.
Rub-On Transfers
Cruising through the craft store, I discovered a display of different types of paper. The paper products were geared toward scrapbook crafters. But, hey, I like to cross the line, so why not use these products for collage art? Do you have pencil sketches, paintings or photographs? Copy any of these on rub-on transfer sheets and stash them away for future projects.
MATERIALS
COLLAGE TOY BOX
scissors
glue stick
Rub-onz transfer film
craft knife or burnisher
COLLAGE RESOURCES
vintage illustrations
ephemera
OTHER MATERIALS
color copier
8½″ × 11″ (22cm × 28cm) copy paper
1. Select images, adhere and copy
Select images, cut them out and glue them down onto a piece of copy paper. Following the manufacturer's directions, print the images onto the Rub-onz transfer film. Using scissors, trim closely around an image.
2. Remove transfer backing
As directed by the manufacturer, remove the backing from the rub-on transfer.
Tip
Use the blade of the craft knife to help separate the layers of the transfer film.
3. Burnish
Position the image on your collage. Using a burnisher or the blunt end of the craft knife, gently rub the entire top surface of the transfer image.
4. Remove top paper layer
Using the craft knife, separate the top layer of the Rub-onz transfer film and remove it, revealing the image.
Sticker Paper
Do you have a favorite image? Do you repeat it within your art? Maybe butterflies, flowers or other symbols? Whatever your imagery, sticker elements deliver the goods!
MATERIALS
COLLAGE TOY BOX
scissors or craft knife
two-sided tape or glue stick
sticker paper
COLLAGE RESOURCES
vintage illustrations
ephemera
OTHER MATERIALS
8½″ × 11″ (22cm × 28cm) copy paper
color copier

Select images, adhere and copy
Select desired images, and then cut and adhere them with two-sided tape or a glue stick onto a piece of copy paper. Follow the manufacturer's directions to copy onto the sticker paper. Trim closely around each image, peel the backing and adhere to your collage art.
Textiles
I love the look and feel of vintage textiles, the time and effort that was handstitching doilies, handkerchiefs and more. Adding involved solution in cumbersome. A these textiles to your collage can sometimes be make color copies of the textiles. Another that works well is to method of adding textiles to collage is to actually print on the fabric. Please note that this is experimental, and you should take special care. If you are unsure of your copier's ability, contact the manufacturer to determine its potential.
MATERIALS
COLLAGE TOY BOX
fusible webbing
COLLAGE RESOURCES
vintage textiles, handkerchiefs or doilies
vellum fabric
OTHER MATERIALS
color copier
8½″ × 11″ (22cm × 28cm) copy paper, color paper, printable fabric or fabric
iron

1. Copy on different types of paper
Place a doily on the copier bed and make color copies, experimenting with plain paper, vellum and colored paper.
2. Print onto fabric
Try printing on fabric for a refreshing change. Printable fabrics are available through art and craft stores. Follow the manufacturer's instructions to print onto the fabric.
Use an iron to adhere fusible webbing to the fabric for support. You can then use the iron to adhere the fabric to the background. You might be able to print directly onto a piece of fabric you have, but you must check your copier's capabilities before copying onto any unusual materials.
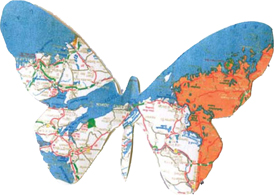
Shape Cut Outs
Many times, I am intrigued by a certain shape or image. I like to see how that particular image or shape would look on different types of paper. For instance, I like to use quilt patterns in my collage art. Along with the variety of papers within one image, I also like to play around with placing it on different backgrounds. You will be amazed at how many different looks you can make with one image. Go out of bounds and give this a try!
MATERIALS
COLLAGE TOY BOX
scissors
your choice of adhesive
COLLAGE RESOURCES
vintage illustration
OTHER MATERIALS
8½″ × 11″ (22cm × 28cm) copy paper
color copier
Tip
If you chose to use Double Tack Mounting Film as your adhesive, place the film on the back of the patterned paper before you cut out your image.
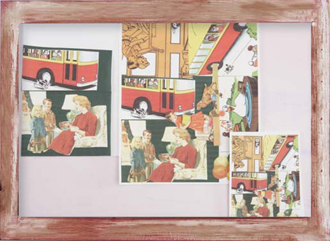
1. Cut out shape
Find your image and cut it out (If you want to preserve the original image, make a copy and use the copy to make the cut out). Look at how the image is composed. Does it require more than one pattern of paper? Do you want to inset a different pattern or paper for detail in the image? After you have made your decisions, lay the main part of the image onto the paper and cut it out.

2. Cut details
Cut the inset of the image. For example, I have cut out the chest of the bird. Lay the image on the other chosen paper and cut out the inset.
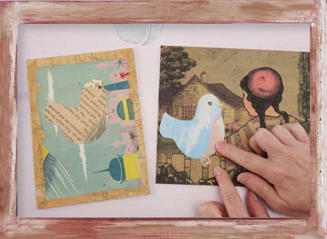
3. Affix to background
Adhere the image to your art using your favorite adhesive. (See the difference in the examples because of the different papers and backgrounds used.)