David Morris
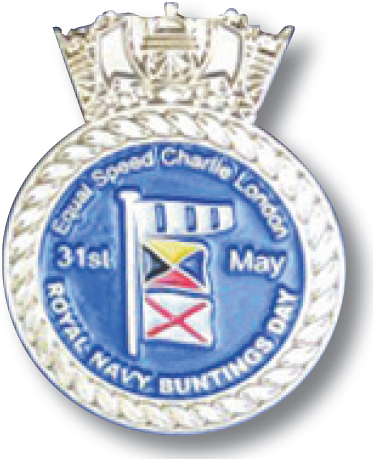
Lapel badge celebrating Buntings Day.
On 31st May every year at precisely 1815 former Royal Navy ‘buntings’, as signalmen were known, raise a glass to the famous flag hoist made by Admiral John Jellicoe when he deployed his battle fleet in line ahead at the Battle of Jutland. The day is designated Buntings Day.
David Morris
Lapel badge celebrating Buntings Day.
The hoist, comprising the signal flags C and L preceded by the Equal Speed pennant, was a precise instruction that read as follows: ‘The column nearest SE x E is to alter course in succession to that point of the compass, remaining columns altering course leading ships together the rest in succession so as to form astern of that column, maintaining the speed of the fleet.’ In the phonetic alphabet of the time the signal, also sent by W/T, was known as ‘Equal Speed Charlie London’ and signalled the moment at which Jellicoe decided to form his battle line on his port column so as to ‘cross the T’ of the German High Seas fleet approaching from the SSW. It was to be the last time a manoeuvre on such a scale was executed in battle and, with the signal’s adoption as a motif by the Royal Navy Signals School, a lasting testament to the effectiveness of flag signalling in the manoeuvring of large fleets.

Painting of Iron Duke by Rex Phillips, Britannia Royal Naval College, Dartmouth
Admiral Jellicoe’s flagship HMS Iron Duke in the van of the 3rd Division ‘Crossing the T’ of the High Seas Fleet. Although apparently depicted after executing the deployment manoeuvre, he is still flying the equal speed signal repeated by HMS Royal Oak immediately astern. This may be artistic licence celebrating the signal.
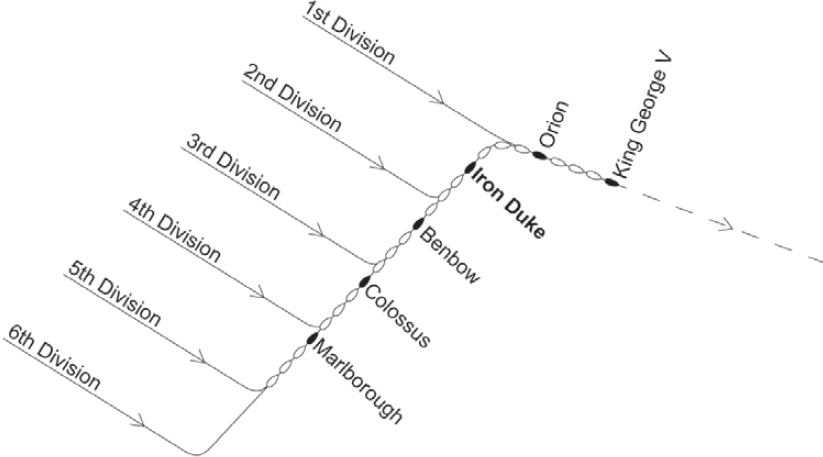
The six divisions of battle fleet form in line ahead.
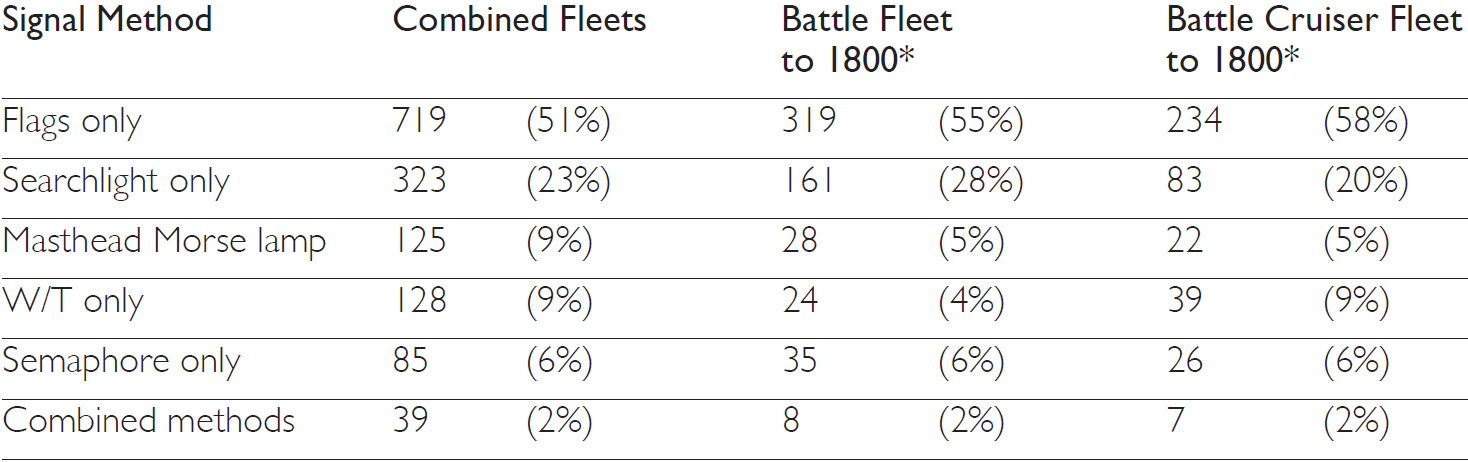
It is no surprise that out of more than 1,400 signal exchanges among ships of the Grand Fleet and Vice Admiral David Beatty’s Battle Cruiser Fleet between midnight on 30th and midnight on 31st May, more than half were made by flag only, with daylight Morse signalling by searchlight accounting for just under a quarter of the total. The breakdown by method of the 1,419 signals made in that 24-hour period is tabulated above.
*Time by which both fleets were effectively operating together
Tabulation of signals from Appendix 2 of The Official Despatches (HMSO) broken down by method and between the main Battle Fleet and the Battle Cruiser Fleet up to 1800. Despite his disdain for the Signal Book, Beatty’s BCF made a higher proportion of flag signals than his Commander-in-Chief.
Signalling by light and semaphore played their part at Jutland and with these methods, covered later in the book, the record reveals a more spontaneous and human response to unfolding events. Our focus here is on the role of flag signalling, more than half of which in both fleets controlled speed and antisubmarine zig-zag routines in the long approach passage across the North Sea. To ensure the timely dissemination and execution of instructions, fast light cruisers, HMS Boadicea, HMS Active, HMS Blanche and HMS Bellona, were deployed with the main battle fleet as visual signal repeaters. HMS Tiger, at the rear of the Beatty’s 1st Battle Cruiser Squadron, carried out the same repeating task to the two ships of the 2nd BCS and the four Queen Elizabeth class battleships of the 5th Battle Squadron. Grand Fleet Battle Orders also stipulated ‘…in the presence of the enemy all signals are to be made by flag, searchlight and wireless’.1 However, once battle was joined, procedural failures led to lasting controversies, discussed on the following pages and which historians still debate.

Comparative visibility of Size 1 signal flags (9ft x 11ft) under optimum conditions at half a mile (1,000yds) up to five miles. For comfortable legibility to the naked eye, the visual angle should be at least 20 minutes of arc. Add in funnel smoke, gunfire and mist and the challenges are obvious.
My purpose here is not to rehearse the arguments, apportion blame or to pose counter factual scenarios in a set of circumstances that tested visual signalling to the limit. Nevertheless, despite the successful outcome of Jellicoe’s deployment signal, it is important to understand what those limits were and the cultural context of what Andrew Gordon has called the ‘Long Calm Lee of Trafalgar’ in which this real-world test of signalling practices and reliance on the Signal Book took place.2 As we have seen, long-gone were the confident initiatives of Nelson’s ‘Band of Brothers’, subsumed by decades of rational improvement as sail gave way to the precision of ‘steam tactics’ in a Navy increasingly bound by order and unquestioning obedience.
At 0122 on the morning of 31st May Admiral Jellicoe signalled the Admiralty with his proposed 1400 rendezvous positions for the Grand Fleet and Vice Admiral Beatty’s Battle Cruiser Fleet with the 5th Battle Squadron. Not quite 13 hours later and 10 miles NW of his designated position at 1415  , Beatty made the first of a series of course alterations that broke the mould of the routine zig-zag passage, turning his fleet sharply North in the hope of making contact with the advance cruisers of Jellicoe’s fleet. He had just received a signal by searchlight from HMS Galatea, at a range of 13 miles, reporting what would turn out to be a light cruiser of Admiral Hipper’s 2nd Scouting Group. What happened over the next 80 minutes has been forensically examined many times, but anomalies still emerge which bear further examination.
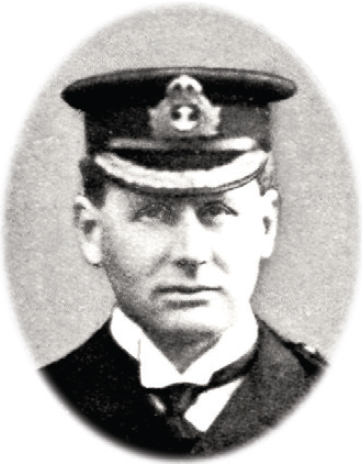
[PD-UKGov]
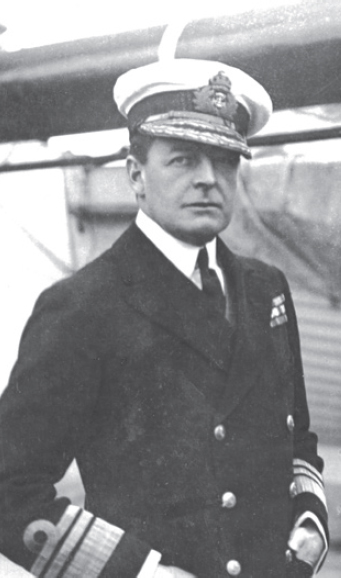
Vice Admiral Sir David Beatty.
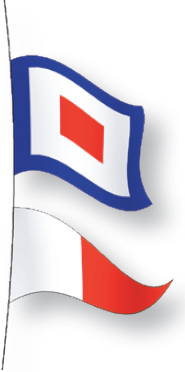
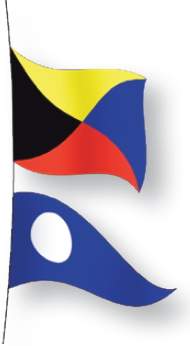
Flag hoist Pennant 9 DH: Alter course lead ships together, rest in succession, SSE.
Starting at 0230 in the long pre-dawn twilight of the northern summer, the routine signals controlling zigzag patterns had been made by flag signal from Beatty’s flagship HMS Lion, repeated by searchlight by HMS Tiger at the rear of his column. The signal record shows that these were mirrored almost exactly by flag signals from HMS Barham, Rear Admiral Hugh Evan-Thomas’s flagship, to the ships of his 5th Battle Squadron, stationed some five miles on Beatty’s port quarter. The routine was working well until Beatty’s 1415 signal to alter course to N x E which his Flag Lieutenant, Lt. Commander Ralph Seymour, made by searchlight even though they were well within flag signalling distance. Two minutes later the 5th BS made their turn, the signal repeated to his column by flag. But the next critical alteration of course, some 145° to starboard to SSE, signalled at 1432  with the flag hoist 9DH was missed. By that time Barham was only 4.2 miles on Lion’s port bow but the signal from the flagship was not repeated by HMS Tiger, an omission that has been hotly debated. As the two columns of the BCF began their turn to starboard, Evan-Thomas made a two-point turn to port as if continuing with the zig-zag pattern; they were thus on a near-reciprocal course diverging at a combined speed of 42 knots. It is worth noting that in the official record the 5th BS flag signal to alter two points to port is recorded before Beatty’s signal. This may be of no significance, with the inevitable variation in time keeping between ships and times rounded to the nearest minute, but could suggest that, though both signals are timed at 1432, Evan-Thomas had already decided to resume his zig-zag pattern
  . Whatever the case, a further eight minutes passed before he took the decision to turn in pursuit of the BCF and made the signal to his squadron to alter course in succession to the SSE, increasing speed to 22kts
  . By then he was nine miles astern of Beatty’s column and during that interval, there is no record of any attempt by the flagship or any of the battle cruisers to communicate with the 5th Battle Squadron by light signal.
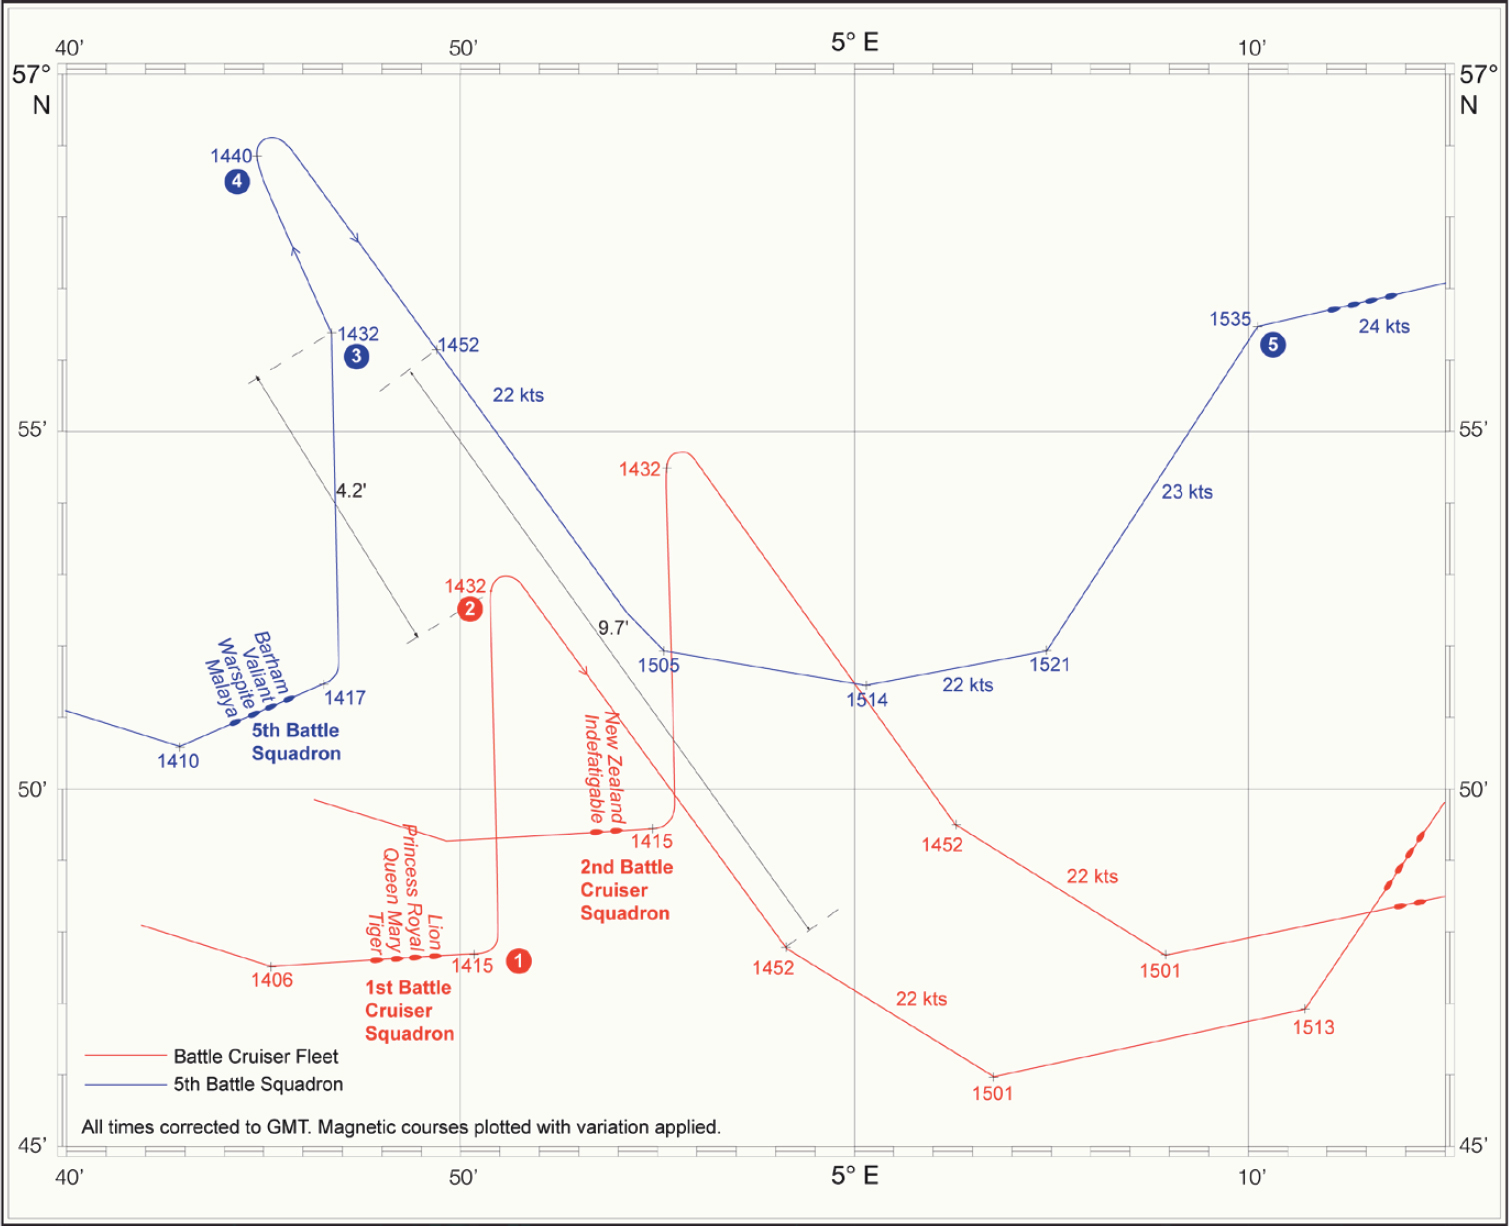
Plot of the 5th Battle Squadron and Battle Cruiser Fleet based on combination of British Admiralty post-action plots prepared under the supervision of Captain J E T Harper RN and those for the German High Seas Fleet prepared by Captain Otto Groos (Der Kriege in der Nordsee, 1920).
Had Evan-Thomas been given access to Beatty’s Battle Cruiser Fleet Orders, he would have known that the sharp alteration of course at 1415 was a likely indicator of imminent action (see Gordon, p. 88).
As the 5th BS was making its turn to the SSE, Beatty had received a further sighting report from Galatea by W/T of ‘large amounts of smoke as though from a fleet’ to the ENE but continued SSE for a further 12 minutes before altering to SE by which time Evan-Thomas was 9.8 miles astern. Subsequent alterations to E and NE allowed the 5th BS to close the distance so that their alteration of course to NE at 1521 brought the BCF onto their starboard beam at a distance of 5.9 miles. At 1527 Beatty made a general signal by flag ‘Assume complete readiness for action in every respect’; the exact same signal was repeated by Evan- Thomas, also by flag, to his own column three minutes later, suggesting that the two fleets were again within flag signalling range. The next five minutes saw a further flurry of signals by flag, searchlight and W/T clearly establishing the position of the Battle Cruisers of Hipper’s 1st Scouting Group, including the first ever such spotting report from HMS Engadine’s seaplane. Then at 1535 a dramatic but ambiguously worded signal by searchlight from Beatty to 5th BS: ‘Speed 25 kts. Assume complete readiness for action. Alter course lead ships together, rest in succession to E. Enemy in sight.’ Ships already in line ahead, as the 5th BS were, can either alter course together or in succession, there being only one lead ship. Evan-Thomas simultaneously signalled to his squadron by flag: ‘Alter course in succession E, speed 24 kts’  . He had half a knot in hand before reaching the maximum designed speed for his Queen Elizabeth class battleships.
Ten minutes later, now racing east at 25 kts, Beatty deployed his six Batttle Cruisers, now in line ahead, on a line of bearing NW to allow all to clear their smoke and bring their forward turrets to bear on Hipper’s 1st Scouting Group. At 1547 he made the single flag hoist No 5 ‘Open fire and engage the enemy’, at a range of 18,500 yards. A further 19 minutes would pass before Evan-Thomas was able to bring his heavier-calibre guns to bear on the rear of the German battle cruisers in support of the BCF. These were critical moments, that despite Beatty’s warm words in his official Report of Proceedings: ‘Led by Rear Admiral Evan-Thomas MVO, in Barham [the Fifth Battle Squadron] supported us brilliantly and effectively’,3 were to lead to deep and lasting recriminations.
Flag hoist BJ: Assume complete readiness for action in every respect.

Numeral 5: Open fire and engage the enemy, a signal to be executed as soon as it was seen. Eight minutes later Beatty signals with hoist 65 repeated by W/T: Increase rate of fire (below).
Two documents, or rather the lack of one of them, among many issued after the battle testify to the divisions that characterised the debate over the conduct of the fleets at Jutland. The first is an amendment made by Vice Admiral David Beatty to his Battle Cruiser Orders that includes the following sentence:
‘It therefore becomes the duty of subordinate leaders to anticipate the executive orders and to act in the spirit of the Commander-in-Chief’s requirements.’
Flag hoist CT: Alter course in succession 16 pts to starboard.
This is a clear reiteration of Beatty’s standing Fleet Orders, to which Rear Admiral Hugh Evan-Thomas had never been given access and which urged each captain ‘…to use his discretion in handling his ship as he considers that the Admiral would wish.’ The other document – the fair copy signal log from Beatty’s flagship, is mysteriously missing half a page that should have recorded the outgoing signals following the flag hoist ordering the 5th BS to turn the north. The significance of both will become clear by following the sequence of events as the Battle Cruiser Fleet closed the main battle squadrons of the High Seas Fleet fast approaching from the south.
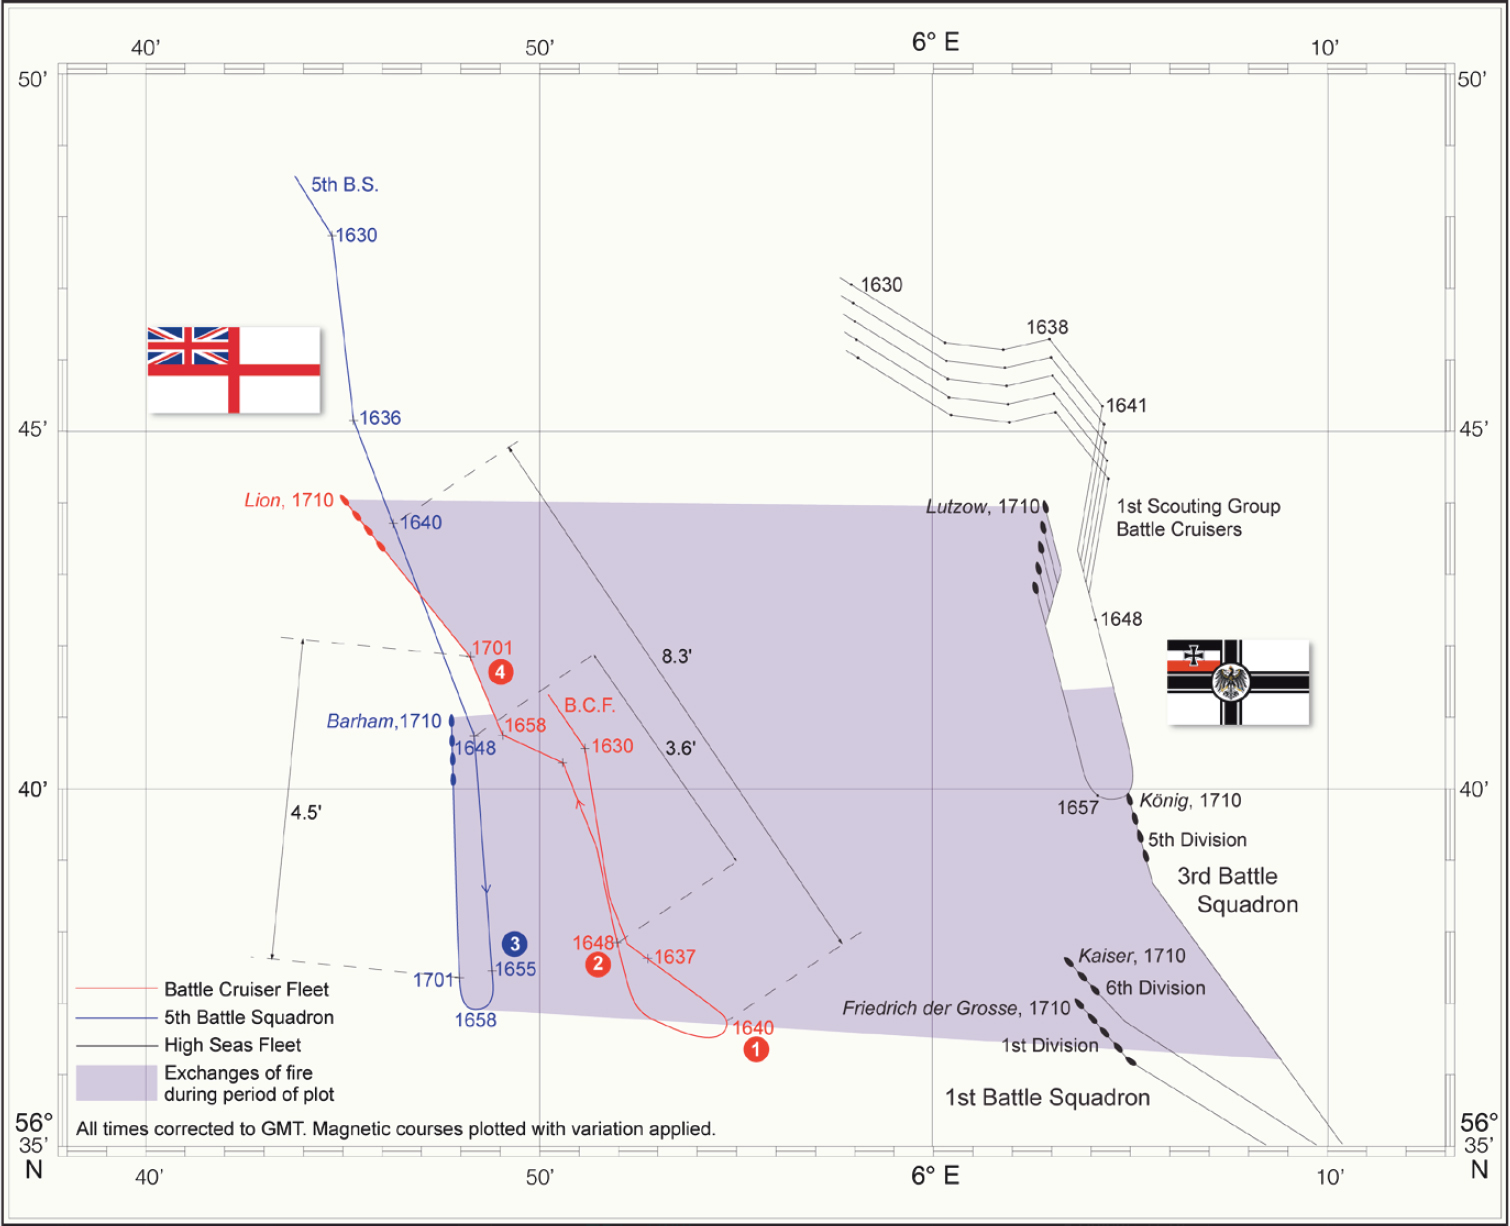
Plot of the 5th Battle Squadron and Battle Cruiser Fleet with Scheer’s 1st Scouting Group and elements of Hipper’s High Seas Fleet during the ‘Turn to the North’ (Sources as plot on page 48).
Note that light cruisers scouting ahead and destroyer flotillas who were heavily engaged between the opposing Battle Cruiser fleets are omitted for clarity.
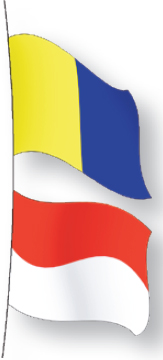
When HMS Southampton, scouting with the 2nd Light Cruiser Squadron, signalled by searchlight the first sighting report of the High Seas Fleet at 1633, Beatty’s BCF, with the 5th BS some 8 miles astern, had been heavily engaged with the battle cruisers of Hipper’s 1st Scouting Group for 46 minutes, suffering the loss of two of his six ships: HMS Indefatigable and HMS Queen Mary. At 1638 Beatty received a more detailed sighting report from Southampton by W/T and two minutes later ordered a general signal ‘Alter course in succession 16pts to starboard’ made by flag only. Given the difficulty in correctly reading the SSE turn signal at 1432 at a distance of less than five miles, it seems unlikely that the ‘general’ address was intended to include the 5th BS, then 8.3 miles to the NW.
Having made his turn, Beatty now had the 5th BS, still heading SSE, 2 pts on his starboard bow. He could have continued to the NW to allow the two squadrons to approach each other safely starboard to starboard before ordering Evan-Thomas to execute a turn to starboard to fall in astern of him; instead he altered course a further 4 pts to the north to pass to the east, on the engaged side of the 5th BS. At 1648, with the two squadrons separated by only 3.6 miles and closing at a combined speed of 48 kts, Beatty signalled by flag specifically to 5th BS a repeat of his signal at 1640 . But with Lion steaming at 25 kts and the light westerly breeze, the flags, among many signals for which Seymour was responsible at that critical time, would have been flying at such an angle as to be impossible to read from Barham’s flag bridge until the ships were almost abreast at approximately 1651. Only then would Evan-Thomas’s signalmen have been able to acknowledge with the answering pennant at the dip before hauling it close-up to indicate that the signal had been understood. Standard procedure required that they would then wait for the order to be made ‘executive’ on being hauled down on the flagship, before making their turn. But, for whatever reason, and it must here be acknowledged that Seymour was under intense pressure, the signal was not made executive for at least three minutes, by which time Evan-Thomas’s battleships were already three miles astern of Beatty’s combined squadron and had come within range of the 12in guns of Admiral Scheer’s 3rd Battle Squadron.
As Evan-Thomas began his turn at 1655 he made the flag hoist TA ‘Observe attentively the Admiral’s motions’ . The irony of that choice, the rallying cry of Vice Admiral Sir George Tryon, of whose tireless campaign to liberate the Navy from what he regarded as the tyranny of the Signal Book we have already heard, would not have been lost on his flag captain and staff. But under the concentrated fire of Scheer’s König class dreadnoughts as his four ships were turning in succession silhouetted against the sunlit horizon to the west, it was not meant ironically. The signal meant what it said: to closely follow his lead without further signals as they reversed course and re-trained their main armament to the starboard quarter while adjusting course to stay in touch with the BCF now 4.5 miles ahead. At 1701 Beatty somewhat unnecessarily signalled ‘Prolong the line by taking station astern’  – a task made no easier by the faster battle cruisers pulling further ahead.
And the two documents? Beatty’s amendment to his Fleet Orders, Gordon argues, could only be seen as a critique of what he perceived as Evan-Thomas’s failure to act on his own initiative on two occasions during the afternoon. This polarisation of individual initiative versus a doctrine of central control lies at the heart of the Beatty/Jellicoe debate that has divided opinion for more than a century. As for the missing signal record, Andrew Gordon leaves hanging the question as to whether or not its omission could have been at Beatty’s request to protect the questionable competence of his chosen flag lieutenant who later followed him to the Admiralty.4 Sadly for Evan-Thomas the post-war struggle to vindicate his decisions took its inevitable toll on his health. Nobody came out of it well.
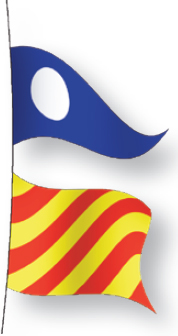
Flag hoist TA: Observe attentively the Admiral’s motions.
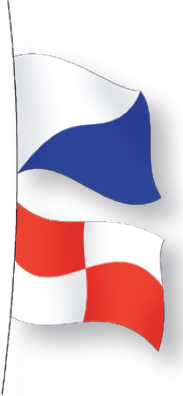
Flag hoist 71: Prolong the line by taking station astern.
[PD-UKGov]
Rear Admiral Hugh Evan-Thomas who led the 5th Battle Squadron aboard his flagship HMS Barham.