![]() MASTER THIS: Basic Cream Biscuits
MASTER THIS: Basic Cream Biscuits
Sweet Potato Biscuits with Marshmallow-Honey Butter
![]() MASTERCHEF LESSON: Making the Flakiest Pastries and Doughs
MASTERCHEF LESSON: Making the Flakiest Pastries and Doughs
Currant Scones with Jam and Clotted Cream
Roasted Strawberry-Rhubarb Shortcakes with Orange Chantilly Cream
![]() MASTERCHEF LESSON: Mastering Muffins
MASTERCHEF LESSON: Mastering Muffins
Lemon–Poppy Seed Muffins with Citrus Drizzle
Blueberry Muffins with Brown Sugar Streusel
Yogurt Breakfast Muffins with Chia Seeds and Raspberries
Cornmeal-and-Bacon Waffles with Black Pepper–Maple Butter
Skillet Corn Bread with Fresh Corn
Spiced Apple Dutch Baby with Brown Butter
Brown Sugar–Roasted Banana Bread with Toasted Coconut
CLASSIC

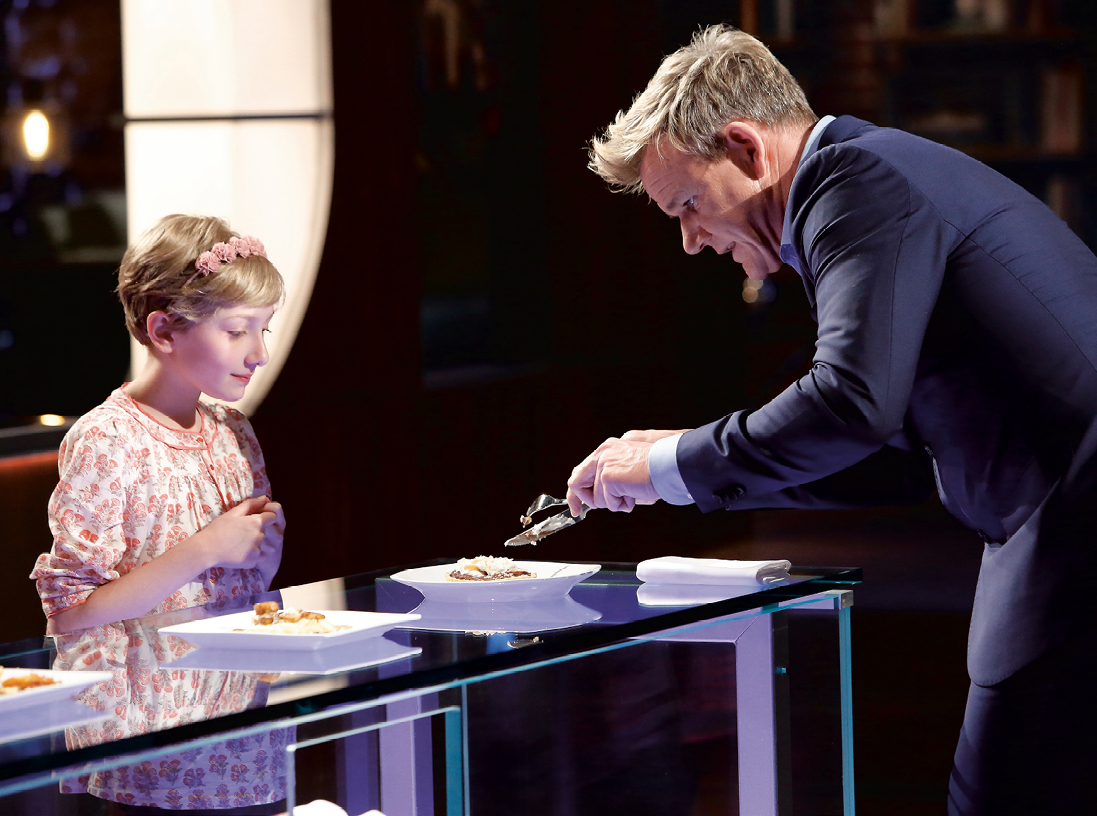
In Season 6, Cade showed off his Southern heritage—and some serious baking skills—by preparing a batch of golden, flaky buttermilk biscuits to serve alongside okra and blackened shrimp. One way to get extra flakes in your biscuits is by folding the dough in a stack before cutting it. This helps to create lots of flaky layers in the biscuit that let you split the biscuit open easily—and are perfect for slathering with extra butter and jam! These biscuits are big enough for breakfast sandwiches, but you can cut them into smaller squares before baking if you want to serve them as a side.
MAKES 6 LARGE BISCUITS

3 cups all-purpose flour, plus more for shaping
2 teaspoons baking powder
½ teaspoon baking soda
1 teaspoon sugar
1 teaspoon kosher salt
1½ sticks (6 ounces) ice-cold unsalted butter, cubed
¾ cup plus 2 tablespoons buttermilk
1 large egg, beaten
-
Preheat the oven to 400°F. Line a baking sheet with parchment paper.
-
In a large bowl, whisk together the flour, baking powder, baking soda, sugar, and salt. Add the butter to the bowl. Use your fingertips to cut the butter into the flour until the mixture is the texture of coarse crumbs and a few pea-size pieces of butter are still visible. (To learn more about this technique, see the MasterChef Lesson, this page.) Add the buttermilk to the bowl and stir gently with a fork just until a shaggy dough forms.
-
Transfer the dough to a lightly floured work surface and use your hands to press it into an 8-inch square. Fold the square in half and then in half again in the other direction. Gently press the folded dough with your hands, then use a rolling pin to roll it into a 9-inch square. Use a sharp knife or a bench scraper to slice the dough horizontally in half, then slice each square into 3 equal strips to create 6 large rectangles. Transfer the rectangles to the prepared baking sheet, leaving 2 inches of space between them. Chill in the freezer for 15 minutes. (Or refrigerate for at least 1 hour or up to overnight.)
-
Brush the tops of the biscuits with beaten egg. Bake until they are tall, golden, and crisp around the edges, 20 to 22 minutes. Serve warm. Leftover biscuits will keep for 2 days and can be wrapped in foil and reheated in a 350°F oven.
TIP To test the freshness of baking powder, sprinkle a half spoonful into a small cup of hot water: If it fizzes and bubbles, you’re good to go. For baking soda, sprinkle half a spoonful into a small cup of something acidic, like lemon water: Again, if it starts bubbling, you’re all set.
— MASTER THIS —

Cream biscuits are a simple style of biscuit that has just four ingredients: flour, baking powder, salt, and heavy cream. You might be wondering how you can make rich, tender biscuits without butter. The key is the heavy cream, which works in the recipe as both a fat and a liquid! Here’s one more thing to love about cream biscuits: Not only are they super quick and easy to make, they’re also endlessly adaptable. Stir in some cheese for a savory suppertime side; add some sugar to the dough and you have a shortcake (this page). In fact, if you are going to memorize only one recipe in this book, this should be it. It’s only four ingredients…that’s easy!
MAKES 6 LARGE BISCUITS
2 cups all-purpose flour, plus more for shaping
1 tablespoon baking powder
¾ teaspoon kosher salt
1¼ cups plus 2 tablespoons heavy cream
-
Preheat the oven to 425°F. Line a baking sheet with parchment paper.
-
In a large bowl, whisk together the flour, baking powder, and salt. Add 1¼ cups of the cream and stir the mixture with a fork just until the dough looks shaggy and holds together when squeezed.
-
Use an ice cream scoop or large spoon to drop 2½- to 3-inch knobs of dough onto the baking sheet, leaving 1½ to 2 inches between them. Chill in the freezer for 15 minutes. (Or refrigerate for at least 1 hour or up to overnight.)
-
Brush the tops of the biscuits with the remaining 2 tablespoons cream. Bake until the biscuits are pale golden and slightly puffed, 20 to 22 minutes. Wait until they are just cool enough to handle, then serve warm. Leftover biscuits will keep for 2 days and can be wrapped in foil and reheated in a 350°F oven.
VARIATION
Herb and Cheese Biscuits: Add ½ cup shredded hard cheese (such as sharp cheddar, Manchego, or provolone) and 2 tablespoons minced fresh herbs (such as rosemary, thyme, or basil) to the flour mixture before stirring in the cream, then proceed with the rest of the recipe as instructed.

WITH MARSHMALLOW-HONEY BUTTER

These biscuits are gently sweet and moist, thanks to the addition of cooked sweet potato. They get served with a smear of salty-sweet marshmallow-honey butter—kind of like the brûléed marshmallow-topped sweet potato biscuit that Kade made in Season 4. It’s the ultimate finishing touch, and the flavor combo should be familiar to anyone who looks forward to digging into an ooey-gooey marshmallow-topped sweet potato casserole during the holidays!
MAKES 10 SMALL BISCUITS
SWEET POTATO BISCUITS
10 ounces sweet potatoes (about 2 small) or 1 cup canned unsweetened pumpkin puree
¾ cup plus 1 tablespoon buttermilk
2½ cups all-purpose flour, plus more for shaping
3 tablespoons light brown sugar
2½ teaspoons baking powder
½ teaspoon baking soda
1 teaspoon kosher salt
1 stick (4 ounces) ice-cold unsalted butter, cubed
1 large egg, beaten
MARSHMALLOW-HONEY BUTTER
1 stick (4 ounces) unsalted butter, at room temperature
1 cup marshmallow crème (such as Fluff)
2 tablespoons honey
⅛ teaspoon kosher salt
-
Make the sweet potato biscuits: Pierce the sweet potatoes all over with a fork and place them on a microwave-safe plate. Microwave the potatoes until they are soft and starting to leak some juices from the holes from the fork, 10 to 12 minutes. Set aside to cool. Once the potatoes are cool, make a lengthwise slit from end to end, squeeze them open, scoop the flesh into a small bowl, and mash until smooth. (Discard the skins…or eat them!)
-
Measure out 1 cup of the sweet potato mash (save the leftovers for a snack) and add it to a bowl along with the buttermilk. Whisk the mixture until smooth and set aside.
-
In a large bowl, whisk together the flour, brown sugar, baking powder, baking soda, and salt. Add the butter to the bowl. Use your fingertips to cut the butter into the flour until the mixture is the texture of coarse crumbs and a few pea-size pieces of butter are still visible. (To learn more about this technique, see MasterChef Lesson, this page.) Add the sweet potato mixture to the bowl and stir gently with a fork just until a sticky, shaggy dough forms.
-
Preheat the oven to 400°F. Line a baking sheet with parchment paper and set aside.
-
Transfer the dough to a generously floured work surface and use your hands to press it into an 8-inch square. (The dough will be quite sticky: Don’t be afraid to generously flour the top of the dough and your hands, too.) Fold the square in half, gently pat it out a bit, then fold it in half again crosswise. Gently press the dough into an approximately 5 × 10-inch rectangle with your hands. Use a sharp knife or a bench scraper to slice the dough horizontally in half, then slice each rectangle crosswise into 5 even strips to create 10 small rectangles. Transfer the biscuits to the baking sheet, leaving 2 inches of space between them. Chill in the freezer for 15 minutes. (Or refrigerate for at least 1 hour or up to overnight.)
-
Brush the tops of the biscuits with beaten egg. Bake until they are tall, golden, and crisp at the edges, about 17 minutes. Remove biscuits from the oven and set aside to cool slightly (they are best served warm).
-
While the biscuits bake, make the marshmallow-honey butter: In a large bowl, using an electric mixer, beat the butter until smooth, about 1 minute. Add the marshmallow crème and continue beating. Add the honey and salt and beat until smooth, about 20 seconds more. Spoon the butter into a small bowl. The butter will keep, covered, in refrigerator for 1 week.
-
Serve the warm biscuits with the marshmallow-honey butter. Leftover biscuits will keep for 2 days and can be wrapped in foil and reheated in a 350°F oven.

— MASTERCHEF LESSON —

How do pastry chefs turn out perfectly flaky biscuits, scones, and pie crusts every time? The secret isn’t a magic spell—it’s how they handle the flour and butter when they’re preparing the dough.
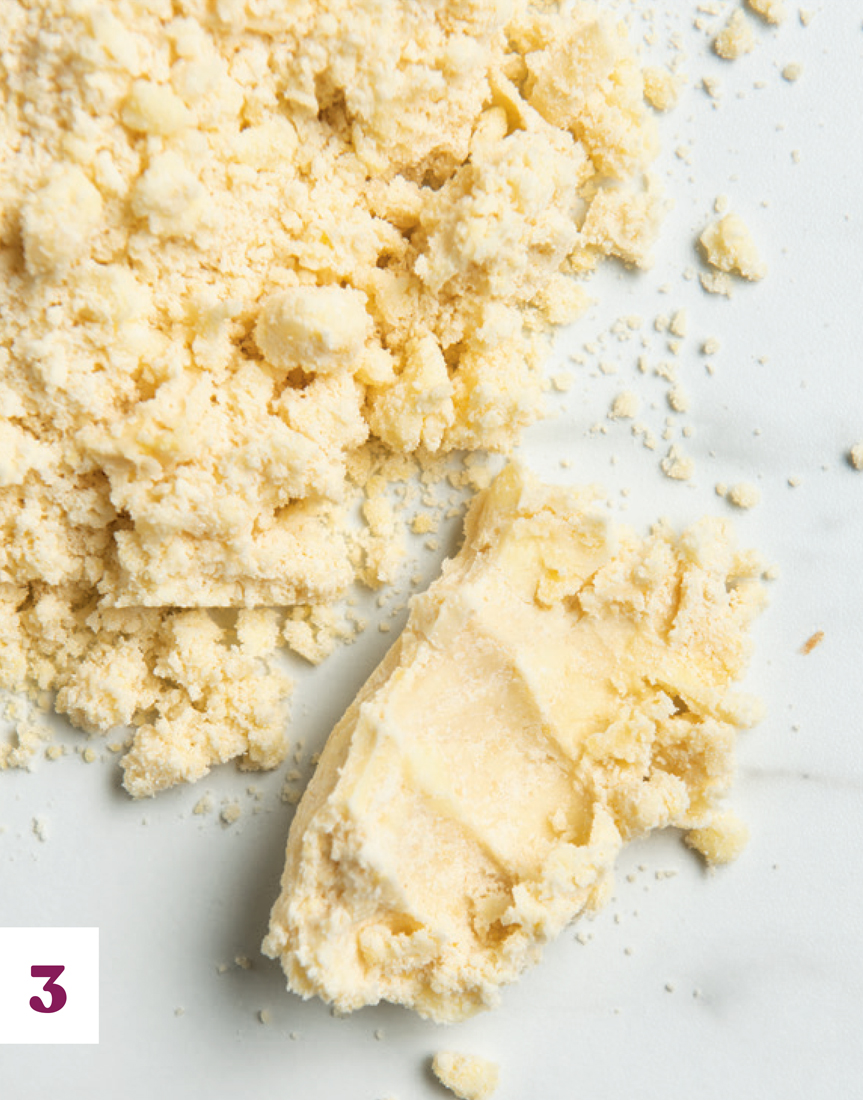
Unlike recipes for cookies and cakes, which usually involve “creaming” butter and sugar (see MasterChef Lesson, this page) to produce a light, fine-textured interior, recipes for so-called “short” flaky pastries tell the baker to “cut in” the butter. No, this doesn’t involve scissors! It just means adding the butter to the flour so that the mixture is crumbly, like coarse sand with a few large pebbles of butter left in. Some chefs like to get their hands dirty by simply rubbing the flour and chilled butter between their fingertips. Another option is to use a pastry blender, which is a tool with curved metal blades that helps press the butter into the flour without it absorbing the heat from your hands. Other bakers like to use a food processor because it keeps their fingers clean and the ingredients cold—plus, it’s fast! There’s a reason you want to leave some of the butter in big bits—but more on that in a minute!
First, let’s talk temperature. Did you know that whether you use butter that’s warm or cold makes a huge difference in the texture of your baked treats? The reason is simple: When chilly butter inside dough hits the heat of an oven, it lets off a burst of steam. The bigger the chunk of butter is, the more powerful the burst will be. Those steam bursts create pockets of air that push up inside the dough and create light, flaky layers within.
So, if it’s flakes you’re after, before you start making biscuits or scones, both your flour and your butter should be icy cold. One simple way to make sure that everything is at the right temperature is to pop your butter into the freezer for a few minutes before you begin. (This is especially useful if it’s summer and your kitchen is really hot.) Some bakers even freeze their flour—think of it as extra insurance for a super-flaky finish. Once you’ve finished shaping your dough, pop the pan in the refrigerator or freezer: This gives the butter one more chance to cool down and ensures that the dough will spring up nicely once it hits the oven’s heat.
Finally, there’s just one more rule: Like all the other ingredients, any liquid you add to dough should always be very cold. Drizzle it in just a teaspoon at a time, mixing (or pulsing) while the liquid is added. If, while adding the water, the dough clumps together when you squeeze it in your palm but doesn’t feel sticky, you’ll know you’ve hit the right spot. If the dough still seems powdery, it might need an extra spoonful of water.
Indeed, like so much of baking, getting a feel for the proper texture of dough is just a matter of practice, practice, practice. That’s why, especially if you’re just starting out, doing things the simplest way—by hand—can be a great place to begin. Sure, it’s a little messy, but isn’t that part of the fun?

Step 1: Combine the dry ingredients and ice-cold butter.

Step 2: Process until the mixture is sandy with a few pea-size chunks of butter still visible.
Step 3: Stir in cold water just until a shaggy dough forms; it should hold together when squeezed.
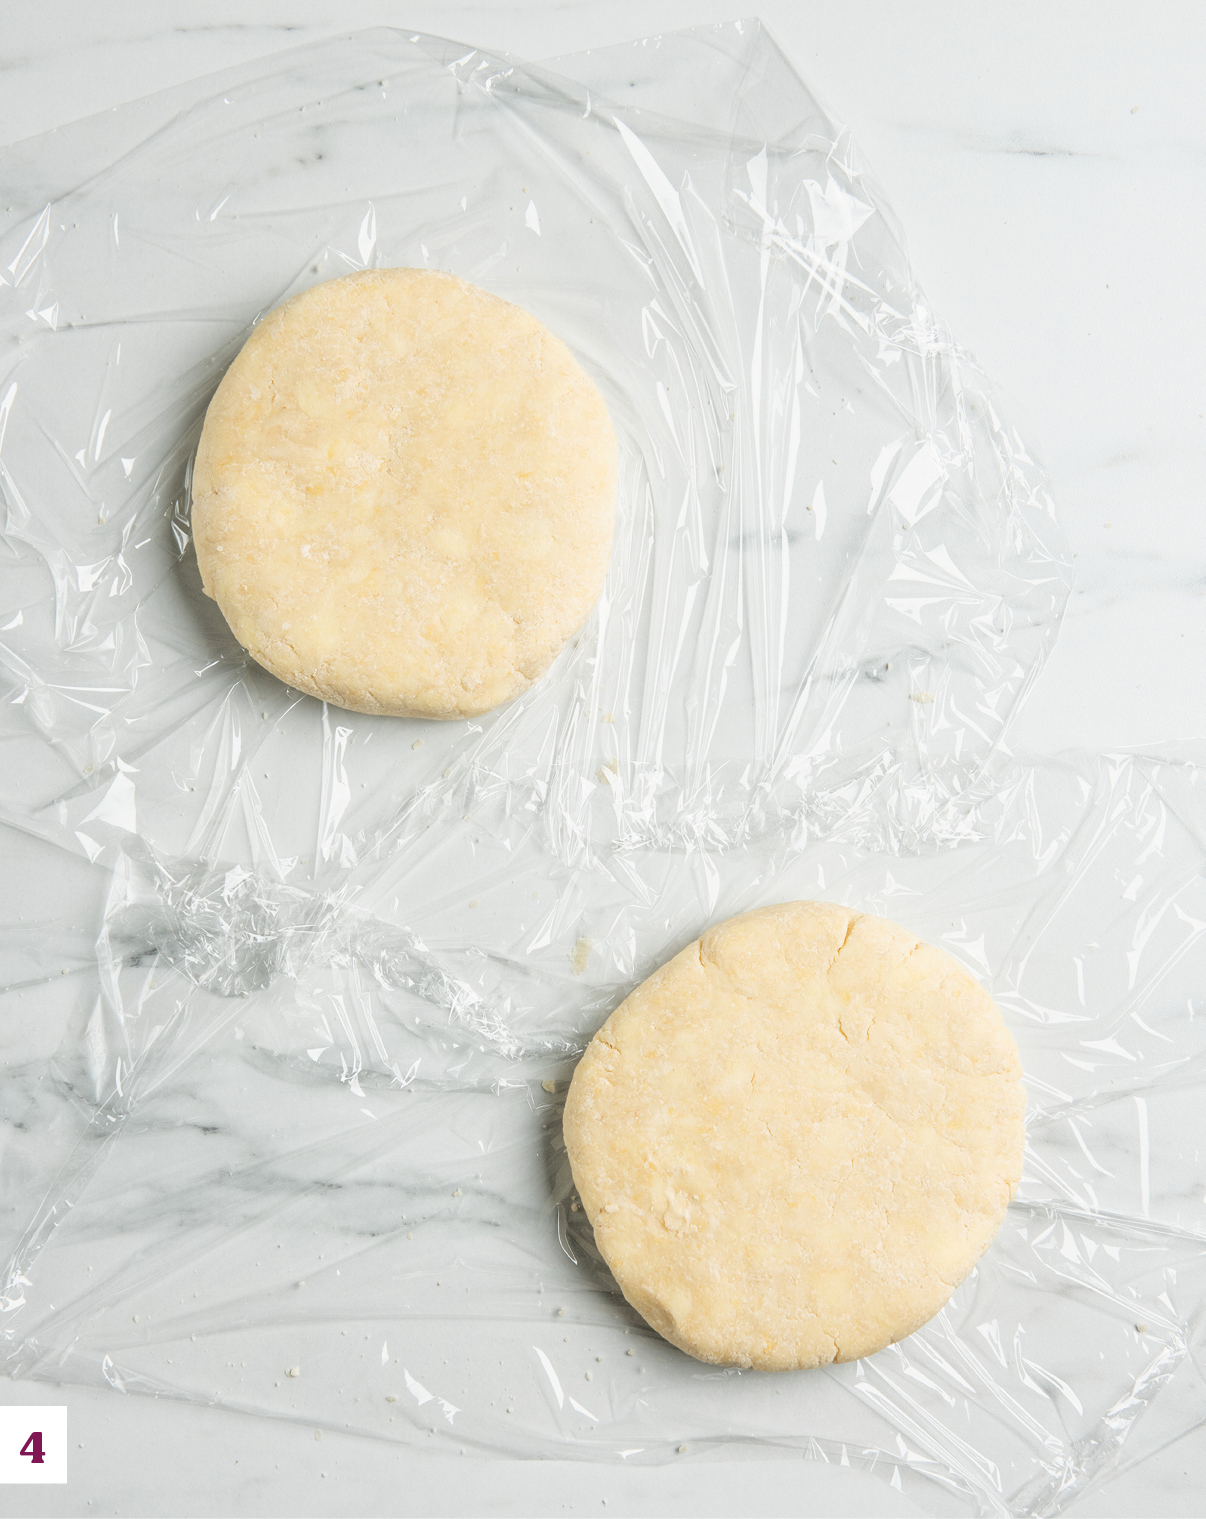
Step 4: Divide the dough into 2 equal halves and press and shape each into a disc, then chill until ready to use.
CURRANT

WITH JAM AND CLOTTED CREAM


Avani from Season 5 fell in love with flaky scones on a family trip to England, where they’re served with tea. She soon discovered that they’re delicious any time of day—especially when you slather them with strawberry jam and clotted cream, a thick spread that’s kind of like a soft, slightly sweet cream cheese! Dried currants are essentially little raisins—they give the scones small pops of texture and sweetness. You can leave them out if you prefer, or make one of the variations on this page.
MAKES 8 SCONES
3 cups all-purpose flour, plus more for shaping
⅓ cup granulated sugar
1 tablespoon baking powder
½ teaspoon kosher salt
6 tablespoons (¾ stick) ice-cold unsalted butter, cubed
1¼ cups heavy cream
½ cup dried currants
1 large egg, beaten
2 tablespoons turbinado sugar (such as Sugar In the Raw)
Strawberry jam, for serving
Clotted cream or crème fraîche, for serving
-
Preheat the oven to 375°F. Line a baking sheet with parchment paper and set aside.
-
In a large bowl, whisk together the flour, granulated sugar, baking powder, and salt. Add the butter and, using your fingers, cut the butter into the flour mixture until it is crumbly and a few pea-size pieces of butter are still visible. (For more on this technique, see MasterChef Lesson, this page.)
-
Make a well in the middle of the flour mixture and pour in the heavy cream. Stir the flour gently into the cream with a fork until a shaggy dough begins to form and pulls away from the sides of the bowl. Stir in the currants. Use your hands to lightly knead the dough once or twice to bring it together.
-
Transfer the dough to a lightly floured work surface. Use your fingers to pat it out into a 10-inch round that is about 1¼ inches thick. Using a sharp knife, slice the round into 8 wedges (like a pizza). Transfer the wedges to the prepared baking sheet, leaving about 1 inch of space between them. Chill for 15 minutes. (Or refrigerate for at least 1 hour or up to overnight.)
-
Lightly brush the tops of the scones with the beaten egg and sprinkle each with a pinch of turbinado sugar. Bake the scones until they are golden and beginning to brown at the edges, about 30 minutes. Serve warm, with strawberry jam and clotted cream.
TIP Because it is coarse, turbinado sugar is a great “finishing” sugar that’s often used to add sparkle, sweetness, and crunch to baked goods. If you can’t find it or don’t have any on hand, it’s also fine to leave it off.
VARIATIONS
Lemon-Ginger Scones: Rub 1 tablespoon grated lemon zest and ½ teaspoon ground ginger into the sugar until fragrant, then mix with the other dry ingredients. Omit the currants and add ¼ cup minced candied ginger.
Mixed Berry Scones: Omit the currants and add ¾ cup mixed fresh or frozen blueberries, raspberries, or cranberries.
Maple-Pecan Scones: Replace ²⁄₃ cup of the all-purpose flour with oat flour. (To make your own oat flour, pulse rolled oats in a high-speed blender, food processor, or spice grinder until they are finely ground and powdery.) Omit the currants and add ¼ cup chopped toasted pecans. Brush the tops of the scones with maple syrup and sprinkle with turbinado sugar.
ROASTED STRAWBERRY-RHUBARB

WITH ORANGE CHANTILLY CREAM

These roasted strawberry and rhubarb filled shortcakes are just like Avery’s in the Season 4 finale that judge Christina Tosi called “light, buttery, and flaky in all the right ways.” Roasting the fruit amps up its sweetness (even when strawberries are out of season) and makes the mixture extra juicy. For the brightest, most fuchsia-toned filling, pick the reddest rhubarb you can find. Chantilly cream is just another name for whipped cream that has been generously sweetened; here a splash of orange blossom water (which is a flavor extract that comes from the blossoms of the bitter orange tree) adds a subtle, floral flavor that complements the jammy fruit.
MAKES 6
SHORTCAKES
2 cups all-purpose flour, plus more for shaping
1 tablespoon baking powder
2 teaspoons granulated sugar
¾ teaspoon kosher salt
1¼ cups plus 2 tablespoons heavy cream
1 tablespoon turbinado sugar (such as Sugar In the Raw), for sprinkling
ROASTED STRAWBERRY–RHUBARB FILLING
1 quart strawberries, hulled and halved (quartered if large; about 4 cups)
4 stalks very pink or red rhubarb, cut into 1-inch pieces (about 4 cups)
3 tablespoons granulated sugar
2 tablespoons fresh lemon juice
ORANGE CHANTILLY CREAM
1 cup heavy cream
3 tablespoons confectioners’ sugar
1 teaspoon pure vanilla extract
½ teaspoon orange blossom water or ¼ teaspoon orange extract
-
Make the shortcakes: In a large bowl, whisk together the flour, baking powder, granulated sugar, and salt. Slowly add 1¼ cups of the cream and stir the mixture with a fork just until a shaggy dough forms. Use your hands to press the dough into a ball in the bowl, then transfer it to a lightly floured work surface.
-
Line a baking sheet with parchment paper and set aside. Using a rolling pin, gently roll the dough into an 8 × 10-inch rectangle. Slice the dough in half horizontally and then cut each rectangle into thirds vertically so you are left with 6 rectangles. Transfer the biscuits to the prepared baking sheet, leaving 1½ to 2 inches between them. Chill for 15 minutes. (Or refrigerate for at least 1 hour or up to overnight.)
-
Preheat the oven to 425°F.
-
Brush the tops of the shortcakes with the remaining 2 tablespoons cream and sprinkle with the turbinado sugar. Bake until golden and puffed, 20 to 22 minutes. Remove from the oven and reduce the temperature to 375°F. Transfer the shortcakes to a wire rack to cool.
-
Make the roasted strawberry–rhubarb filling: In a large baking dish, toss together the strawberries, rhubarb, granulated sugar, and lemon juice and spread them into an even layer. Bake until the fruit is soft and juicy, about 25 minutes, stirring once halfway through. Set aside to cool for at least 30 minutes. (The filling can be made up to 3 days ahead of time and refrigerated, covered, until ready to use.)
-
Make the orange Chantilly cream: In a medium bowl, using an electric mixer fitted with the whisk, beat the cream, confectioners’ sugar, vanilla, and orange blossom water until it forms soft peaks, 2 to 3 minutes. (If you do not have an electric mixer, you can also beat the cream by hand using a balloon whisk.)
-
To serve, split the cooled shortcakes in half. Top each bottom half with a spoonful of the cooled fruit filling, top with a dollop of chantilly cream, and cover with the top half of the shortcake.

TENDER TREATS: BISCUITS, SCONES, AND SHORTCAKES
They’re called by different names and their ingredients vary slightly, but recipes for biscuits, scones, and shortcakes have a lot of elements in common. Each one is just a mixture of a flour, a fat (usually butter), a leavener that helps give the dough lift (like baking powder and/or baking soda), and a liquid (often buttermilk or heavy cream). It’s how those ingredients are combined and handled that makes all the difference.
For instance, traditional buttermilk biscuits (like the ones on this page) get their signature layers from a process called lamination, which is a technique of rolling and folding the butter-flecked dough so that it bakes in flaky, peel-apart pieces. Cream biscuits (this page) get their tenderness from heavy cream and don’t contain any butter at all! These are sometimes called “drop biscuits” since you can stir the dough together with a wooden spoon and then drop them right onto a baking sheet before baking—no rolling required.
Scones contain many of the same ingredients as biscuits, but have an egg and some sugar added to the mix, which make them sweeter and denser. They are also usually patted instead of rolled and folded. And shortcakes are basically a sweetened type of biscuit, usually split and served topped with fresh fruit and whipped cream.
— MASTERCHEF LESSON —

A fresh-baked muffin is always a thing of beauty, but paying attention to the details can take your next batch from good to great. Here are a few of our favorite tips.
Preparing the batter: If you want light, tender muffins with textbook-perfect domes on top, it’s best to take a “less is more” approach when mixing the batter. That’s because overmixing activates the gluten in the dough, which produces muffins that are dense and heavy and more bready than cakey. How much mixing is enough? When combining wet and dry ingredients, use a rubber spatula to gently fold the two together, just until the floury streaks have disappeared. Yes, there will still be lumps (like pancake batter)—but trust us, that’s a good thing!
Adding mix-ins: Heavier muffin mix-ins like blueberries or chocolate chips have a habit of falling toward the bottom of the muffin batter during baking. Here’s a neat way to stop the sink: Before you fold any mix-ins into your batter, scoop out a small bowlful of plain batter and set it aside. Later, when you’re filling the muffin tin, put a small spoonful of the plain batter into each cup first, before filling them the rest of the way with the flavored batter. The plain batter acts as a buffer during baking and—voilà!—the mix-ins stay evenly distributed.
DIY muffin liners: Paper liners help shape the muffins during baking, make it easy to remove them from the pan once they’re done, and, of course, are just plain pretty. But if you don’t have any in your cupboard, take heart! It’s easy to make café-style muffin liners using just a sheet of parchment paper. Here’s how: Cut the parchment into 5-inch squares until you have one square for every cup in your muffin tin. Find a jar or can that sits snugly in the muffin tin—a small juice glass or a can of tomato paste is usually a good fit. One by one, wrap the parchment squares around the bottom of the glass so that they form a cup shape, then place the squares into the cupcake pan with their frilly edges sticking up. Fill each cup three-quarters full with batter, as you would a regular paper liner, and bake!
Storage: Most muffins are best the day they are made, but they also freeze very well. Just wrap cooled, unglazed muffins securely in plastic wrap and stash them in a zip-top freezer bag; they will keep well for up to 1 month. When you want to eat them, the muffins can be thawed at room temperature or wrapped in foil and reheated in a 350°F oven for 10 minutes.
LEMON–

WITH CITRUS DRIZZLE


Evan from Season 6 loves the sunny taste and subtle crunch of lemon–poppy seed muffins. Rubbing the sugar and lemon zest together in a bowl before mixing it into the batter is a neat way to activate the citrus oils in the zest and bring out big lemon fragrance and flavor. Sour cream adds tang and tenderness, and a lemon glaze adds a bright citrus essence. One storage note: Because they’re high in fat, poppy seeds lose their freshness fast. To make sure they taste their best, store them in the freezer. After six months, toss them and buy a fresh batch.
MAKES 12 MUFFINS
MUFFINS
¾ cup granulated sugar
2 tablespoons grated lemon zest (from 2 lemons)
2 cups all-purpose flour
1 teaspoon baking powder
1 teaspoon baking soda
¼ teaspoon kosher salt
¼ cup fresh lemon juice (from 2 lemons)
¾ cup sour cream
2 large eggs
1½ teaspoons pure vanilla extract
1 stick (4 ounces) unsalted butter, melted and cooled
¼ cup poppy seeds
GLAZE
1 cup confectioners’ sugar
2 tablespoons fresh lemon juice
-
Preheat the oven to 400°F. Line a 12-cup muffin tin with paper liners.
-
Make the muffins: In a large bowl, combine the granulated sugar and lemon zest. Use your fingertips to rub the sugar and bits of zest together until the sugar looks pale yellow and smells lemony. Stir in the flour, baking powder, baking soda, and salt.
-
In another bowl, whisk together the lemon juice, sour cream, eggs, vanilla, and melted butter. Pour the wet ingredients into the dry ingredients and stir gently until just combined. Stir in the poppy seeds. Divide the batter evenly among the muffin cups, filling each one three-quarters full.
-
Bake until the muffins are puffed and golden and a toothpick inserted into the center of the largest one comes out clean, about 18 minutes. Let the muffins rest in the muffin tin for 5 minutes, then transfer them to a wire rack to cool completely.
-
Make the glaze: In a small bowl, combine the confectioners’ sugar and lemon juice and whisk until smooth.
-
Use a spoon to drizzle the glaze over the cooled muffins. Let rest for 20 minutes to allow the glaze to set, then serve. (See Mastering Muffins, this page, for storage tips.)

WITH BROWN SUGAR STREUSEL
Blueberry muffins are an American breakfast classic and a favorite of many MasterChef Junior contestants. Avani from Season 5 especially likes fresh-from-the-oven blueberry muffins that deliver a pop of warm, jammy blueberry with every bite. In this version, acidic buttermilk lends a pleasant tangy flavor and keeps the muffins tender. Ground ginger adds some gentle spice, and a crumbly topping of brown sugar streusel is a simple but dramatic way to give the muffins a bakery-quality finish.
MAKES 12 MUFFINS
MUFFINS
2 cups all-purpose flour
1½ teaspoons baking powder
1 teaspoon baking soda
½ teaspoon ground ginger
¼ teaspoon kosher salt
1¼ cups buttermilk
1 large egg
½ cup granulated sugar
2 teaspoons pure vanilla extract
¼ cup canola oil
1¼ cups fresh or frozen blueberries
STREUSEL
½ cup packed dark brown sugar
⅓ cup all-purpose flour
½ teaspoon ground cinnamon
⅛ teaspoon kosher salt
4 tablespoons (½ stick) unsalted butter, melted
2 tablespoons chopped toasted pecans (optional)
-
Preheat the oven to 350°F. Line a 12-cup muffin tin with paper liners.
-
Make the muffins: In a large bowl, whisk together the flour, baking powder, baking soda, ginger, and salt.
-
In another bowl, whisk together the buttermilk, egg, granulated sugar, vanilla, and oil. Pour the wet ingredients into the dry ingredients and use a rubber spatula to gently fold them together until just combined. Fold in the blueberries. Divide the batter evenly among the muffin cups, filling each three-quarters full.
-
Make the streusel: In a medium bowl, whisk together the brown sugar, flour, cinnamon, and salt. Stir in the melted butter and pecans (if using). Use your fingers to pinch the mixture into large crumbs. Sprinkle the streusel mixture over the muffins.
-
Bake until the muffins are tall and golden and a toothpick inserted into the center of the largest one comes out clean, 25 to 30 minutes. Let the muffins rest in the muffin tin for 5 minutes, then transfer them to a wire rack to cool completely. (See Mastering Muffins, this page, for storage tips.)
YOGURT

WITH CHIA SEEDS AND RASPBERRIES
Competing on MasterChef Junior takes a lot of stamina and focus. These fruit-studded treats are like a cross between energy bars and morning muffins, and are a great way to fuel up when you’re on the go. The keys to their chewy texture and bright flavor are a sneaky scoopful of omega-3 fatty acid– and protein-packed chia seeds and a splash of orange juice. Raspberries add nice tartness to the mix, but you could substitute an equal amount of any berry (or dried fruit) in their place.
MAKES 12 MUFFINS
2½ cups rolled oats
1 cup whole wheat flour
⅓ cup chia seeds
¾ cup packed light brown sugar
2 teaspoons baking powder
½ teaspoon baking soda
2 teaspoons ground cinnamon
½ teaspoon kosher salt
1 large egg, beaten
1 cup plain whole-milk yogurt
½ cup canola oil
½ cup orange juice, preferably fresh
1 teaspoon pure vanilla extract
1½ cups fresh or frozen raspberries
-
Preheat the oven to 350°F. Line a 12-cup muffin tin with paper liners
-
In a large bowl, whisk together the oats, flour, chia seeds, brown sugar, baking powder, baking soda, cinnamon, and salt. Stir in the egg, yogurt, oil, orange juice, and vanilla. Use a rubber spatula to gently fold the ingredients together until just combined. Fold in the raspberries.
-
Divide the batter evenly among the muffin cups, filling each cup nearly to the top. Bake until the muffins are golden and springy and a toothpick inserted into the center of the largest muffin comes out clean, about 25 minutes. Let the muffins rest in the muffin tin for 5 minutes, then transfer them to a wire rack to cool completely. (See Mastering Muffins, this page, for storage tips.)
FUDGE-SWIRL

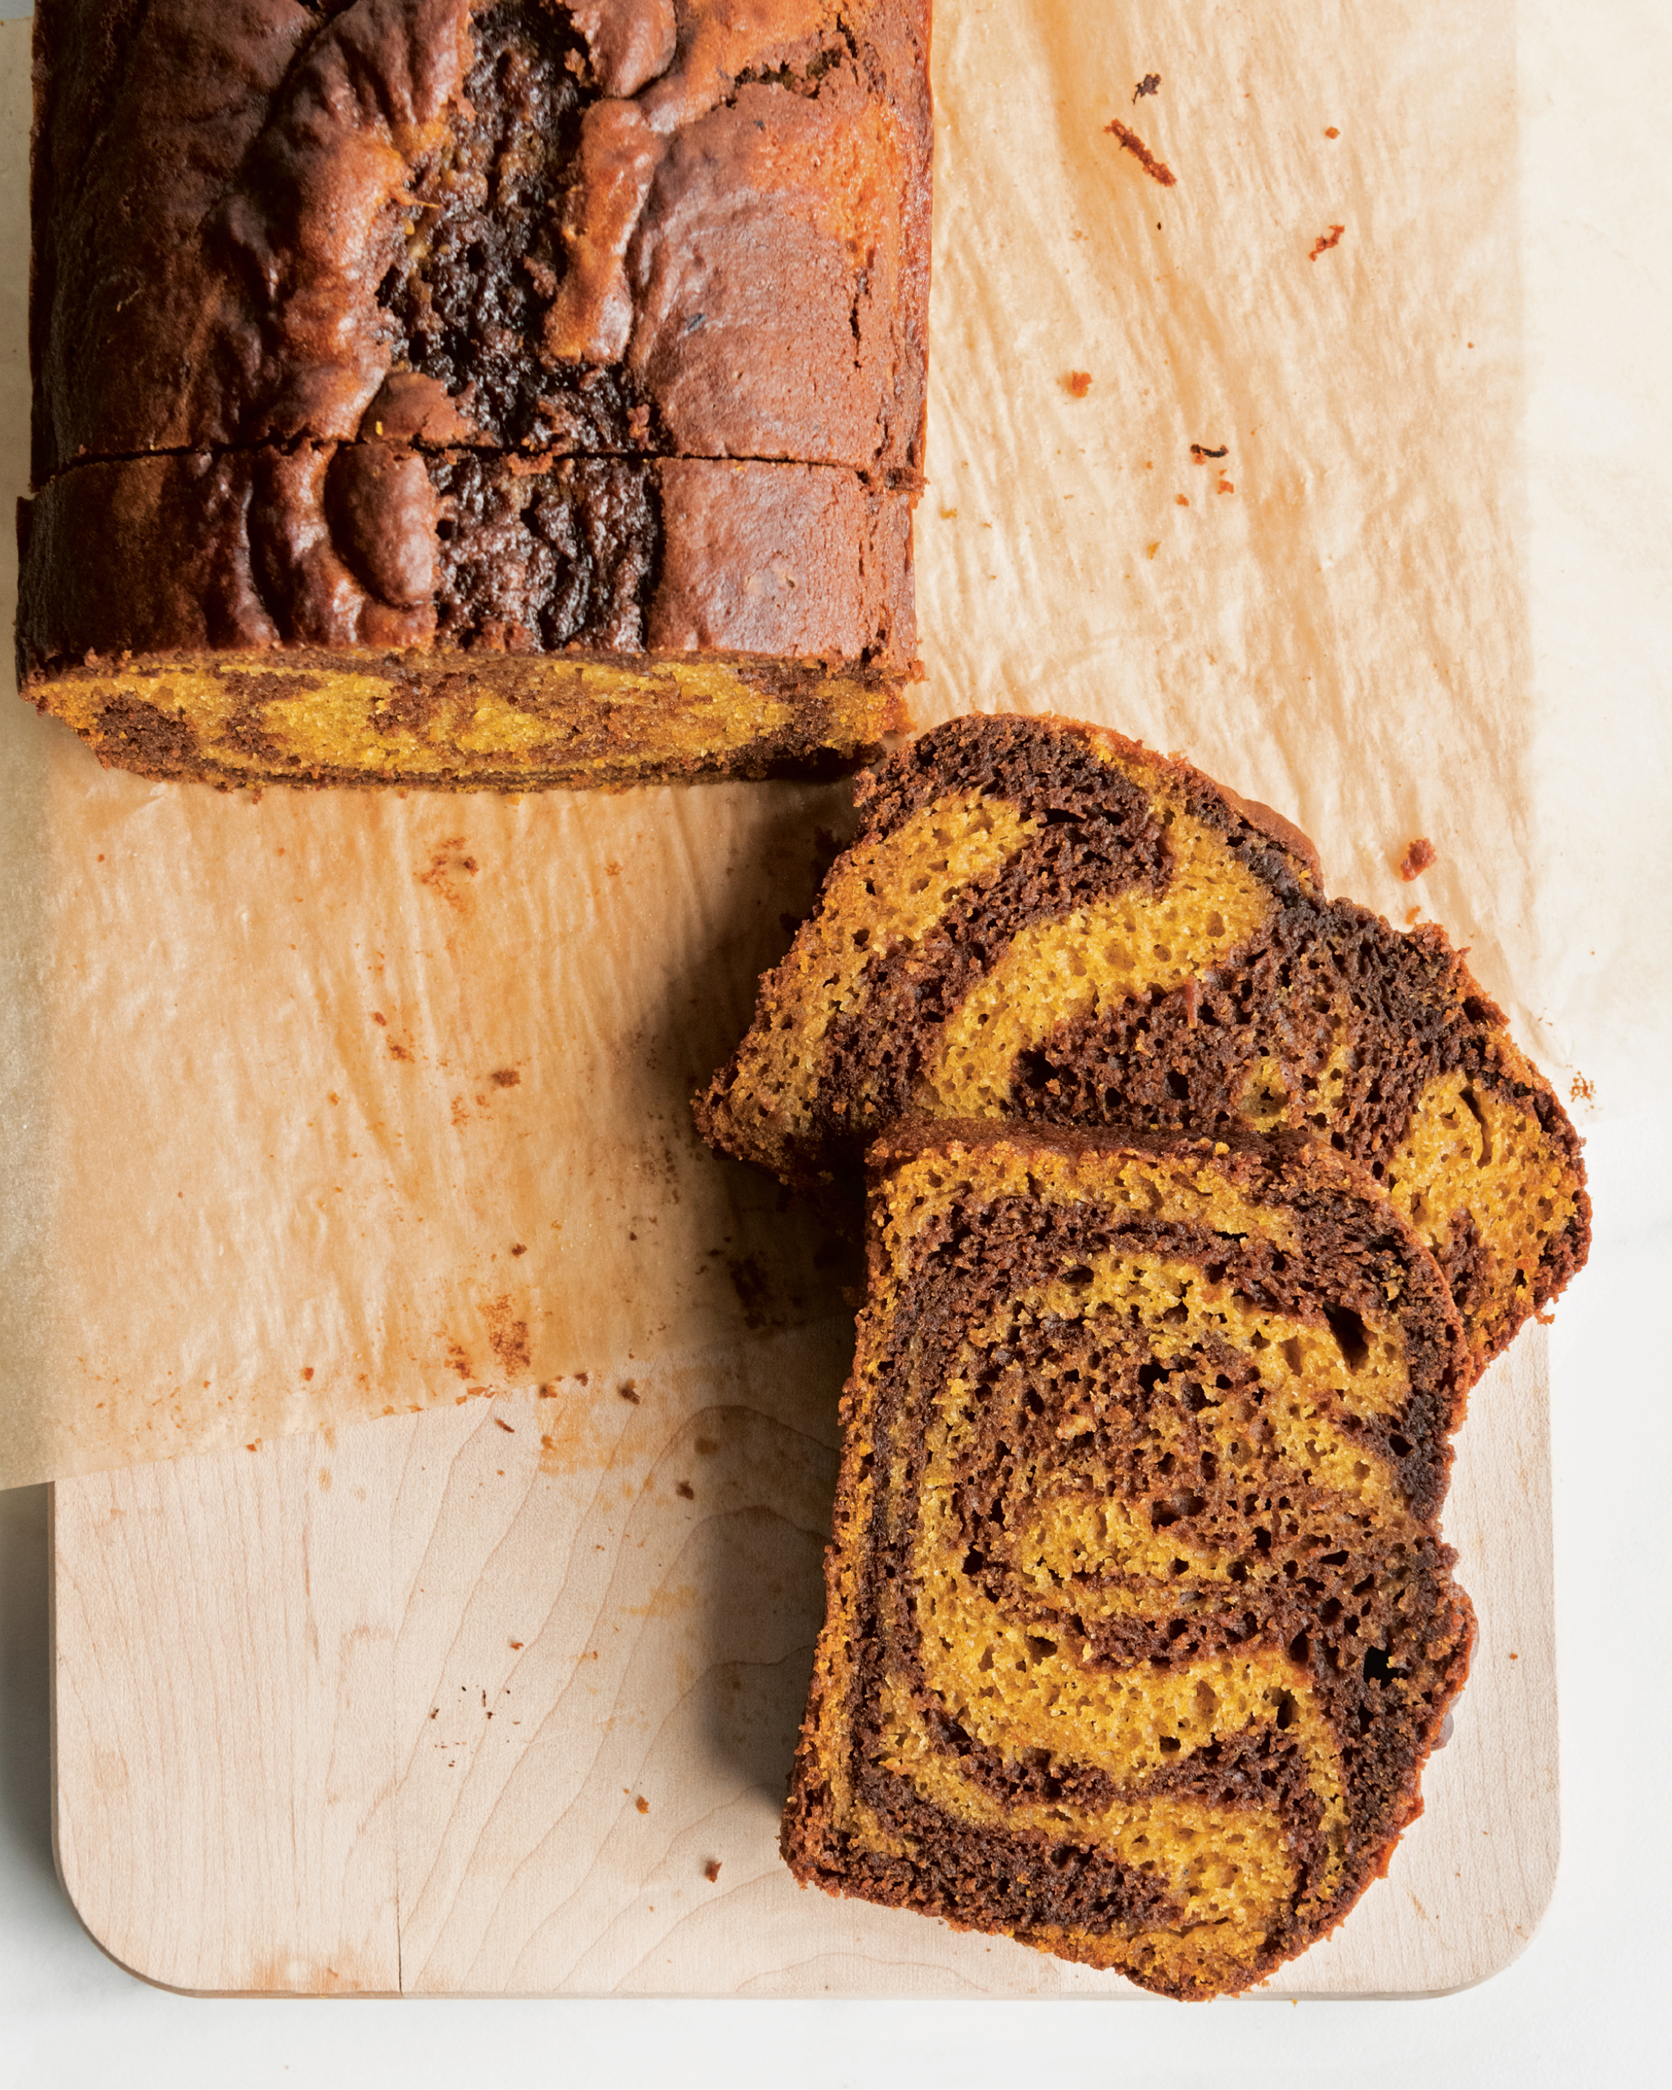
Shayne from Season 5 remembers learning how to bake pumpkin bread with his grandma, and he still looks forward to making it each autumn. A blend of warm spices gives this tempting version a wonderful scent and a decadent ribbon of melted chocolate marbled into the batter helps keep the cake moist for days.
SERVES 10
Nonstick pan spray
1½ cups all-purpose flour
1⅓ cups sugar
1½ teaspoons baking powder
1 teaspoon baking soda
1 teaspoon ground cinnamon
½ teaspoon ground cardamom
½ teaspoon ground ginger
½ teaspoon nutmeg, preferably freshly grated
½ teaspoon kosher salt
⅓ cup canola oil
½ cup buttermilk
2 large eggs
1 cup canned unsweetened pumpkin puree (see Tip)
1 teaspoon pure vanilla extract
½ cup bittersweet chocolate chips
3 tablespoons unsweetened Dutch process cocoa powder
-
Preheat the oven to 350°F. Coat an 8½ × 4½-inch loaf pan with pan spray and line with parchment paper, leaving a few inches of overhang on both of the long sides. (This will help you lift the loaf out of the pan after baking.)
-
In a large bowl, whisk together the flour, sugar, baking powder, baking soda, cinnamon, cardamom, ginger, nutmeg, and salt. In a medium bowl, whisk together the oil, buttermilk, eggs, pumpkin puree, and vanilla. Pour the wet ingredients into the dry ingredients and stir with a rubber spatula until just combined. Set aside.
-
Put the chocolate chips in a microwave-safe bowl and microwave on medium for 40 seconds. Stir, then microwave for another 15 to 20 seconds, until completely smooth. Set aside.
-
Pour half of the batter into a separate bowl. Add the cocoa powder and melted chocolate to one of the bowls. Stir just until smooth.
-
Spoon large scoops of each batter into the pan, alternating between pumpkin and chocolate. Once the pan is filled, insert a butter knife and gently swirl the batters together, moving from one end of the pan to the other. (Be careful not to overswirl, or the cake will become all chocolate!)
-
Bake until the cake is springy to the touch and a toothpick inserted into the center comes out clean, about 1 hour. If the cake begins to look a little dark on top, tent the top with foil. Transfer pan to a wire rack to cool completely. Store, wrapped in plastic wrap at room temperature, for 3 to 4 days.
TIP Pumpkin puree usually comes in 15-ounce cans, which means you’ll have some left over after making this recipe. Add the extra to a banana and almond milk smoothie or to a basic pancake or waffle batter for a breakfast treat that really tastes like fall.
CORNMEAL-AND-BACON

WITH BLACK PEPPER–MAPLE BUTTER

Cade came out on top of the Season 6 “chicken and waffles” challenge thanks to a killer recipe for cornmeal waffles that he paired with Cajun fried chicken and bacon salsa. Inspired by those flavors, these bacon-studded cornmeal waffles strike a perfect balance between sweet and savory. Homemade black pepper–maple butter is an ideal complement—but these waffles would also be equally delicious topped with poached eggs or a drizzle of maple syrup.
MAKES 6 TO 8 WAFFLES (USING A STANDARD WAFFLE IRON)

BLACK PEPPER–MAPLE BUTTER
4 tablespoons (½ stick) unsalted butter, at room temperature
2 tablespoons maple syrup
¼ teaspoon freshly ground black pepper
1 teaspoon kosher salt
CORNMEAL-AND-BACON WAFFLES
5 thick-cut slices bacon (about 6 ounces), diced
2 large eggs
1¾ cups buttermilk
1 tablespoon molasses
1 cup coarse yellow cornmeal
1 cup all-purpose flour
2 teaspoons baking powder
½ teaspoon baking soda
½ teaspoon kosher salt
4 tablespoons (½ stick) unsalted butter, melted
Maple syrup (optional)
-
Make the black pepper–maple butter: In a medium bowl, combine the butter, maple syrup, pepper, and salt. Place a sheet of plastic wrap on a clean work surface and the spoon the butter onto it in a strip. Use the plastic wrap to roll the butter into a cylinder. Chill until firm and ready to use.
-
Make the waffles: In a medium skillet, cook the bacon over medium heat until crispy, about 6 minutes. Transfer to paper towels to drain.
-
Preheat a standard waffle iron (a Belgian waffle iron makes thicker waffles and will yield fewer servings) according to the manufacturer’s instructions.
-
In a large bowl, whisk together the eggs, buttermilk, and molasses. In another large bowl, stir together the cornmeal, flour, baking powder, baking soda, and salt. Pour the wet ingredients into the dry ingredients and fold gently to combine. Fold in the bacon. Add the melted butter and stir until just incorporated.
-
Spoon about ½ cup of the batter onto the hot waffle iron. Cook until the iron stops steaming and the waffle is golden and crisp all over, about 6 minutes. Serve the waffle immediately or transfer it to a wire rack while you make the rest. Repeat with the remaining batter (don’t stack them on top of each other or the steam will make them lose their crunch.) Top the waffles with a pad of the black pepper–maple butter and more maple syrup, if desired.

WITH FRESH CORN
Baking this recipe in a cast-iron skillet not only looks cool, it helps give the corn bread a wonderfully golden, crispy crust. (If you don’t have a cast-iron skillet, don’t sweat it: A 9-inch square baking pan is a fine substitute.) Typically Southern-style corn bread is unsweetened, while northern-style ones include sugar. Mikey from Season 6 likes to split the difference, spiking the batter with just a little bit of maple syrup and stirring in a cupful of whole corn kernels for texture. Pair it with butter and jam at breakfast—or with a big pot of chili at dinner!
SERVES 8
Nonstick pan spray
2 cups yellow cornmeal
1 teaspoon baking powder
1 teaspoon baking soda
1 teaspoon kosher salt
2 large eggs
1 cup buttermilk
¼ cup maple syrup, plus more for serving
4 tablespoons (½ stick) unsalted butter, melted, plus more for serving
1 cup fresh or frozen corn kernels
-
Preheat the oven to 425°F. Coat a 10-inch cast-iron skillet with pan spray.
-
In a large bowl, whisk together the cornmeal, baking powder, baking soda, and salt. In another bowl, whisk together the eggs, buttermilk, and maple syrup. Add the wet ingredients to the dry ingredients and mix until just combined. Stir in the melted butter and fold in the corn kernels.
-
Scrape the batter into the skillet and bake until golden brown around the edges and a toothpick inserted into the center comes out clean, about 20 minutes. Let cool for 10 minutes before slicing. Serve warm, with additional butter on the side and maple syrup for drizzling. Leftover slices will keep, wrapped tightly in plastic wrap for 2 days, and can be wrapped in foil and reheated in a 350°F oven for 10 minutes.
SPICED

WITH BROWN BUTTER

Whether you call this a skillet pancake, a Dutch baby, or a Bismarck, there is one thing everyone agrees on—it’s delicious! Using room-temperature ingredients and working quickly while the pan is hot are the keys to making sure the pancake puffs up tall and golden. Adding spiced sliced apples to the pan before baking gives the Dutch baby a lovely fall flavor.
SERVES 4
1 large tart apple (such as Granny Smith), peeled, halved, cored, and thinly sliced
1 tablespoon fresh lemon juice
2 tablespoons light brown sugar
½ teaspoon kosher salt
¾ teaspoon ground cinnamon
½ teaspoon ground cardamom
4 tablespoons (½ stick) unsalted butter
4 large eggs, at room temperature
1 cup whole milk, at room temperature
1 teaspoon pure vanilla extract
1 tablespoon granulated sugar
1 cup all-purpose flour
Confectioners’ sugar, for serving
-
Place a 10-inch ovenproof skillet (preferably cast-iron) on the center rack of the oven and preheat the oven to 450°F.
-
In a medium bowl, toss together the apple, lemon juice, brown sugar, salt, ½ teaspoon of the cinnamon, and ¼ teaspoon of the cardamom.
-
In a large skillet, melt the butter over medium heat. Cook, stirring often, until the butter foams and smells nutty, about 5 minutes. Pour into a small bowl and set aside to cool.
-
In a blender or food processor, combine the eggs, milk, vanilla, granulated sugar, flour, and remaining ¼ teaspoon cinnamon and ¼ teaspoon cardamom. Process on medium-high until the batter is frothy and smooth, about 1½ minutes. (It will look thinner than a typical pancake batter.)
-
Using an oven mitt, carefully remove the skillet from the oven. (The pan will be hot: You may want to ask an adult for help!) Pour the butter into the skillet and evenly scatter half the spiced apple slices over the bottom of the skillet. Pour in the batter and top with the remaining apple slices. Immediately return the skillet to the oven. Bake until the pancake is puffed, golden around the edges, and set at the center, 20 to 22 minutes. (Resist the temptation to open the oven during cooking—this will cause the pancake to deflate!)
-
Remove the skillet from the oven, sprinkle the hot pancake with confectioners’ sugar, and serve immediately.
BROWN SUGAR–ROASTED

WITH TOASTED COCONUT
Love banana bread but hate having to wait until your bananas turn brown before you can make it? Problem solved! This tropical-accented toasted coconut and brown sugar banana bread is inspired by a technique Cydney from Season 5 shared for roasting firm bananas before mashing them into the batter. It might sound odd, but the high heat brings out the amazing caramel and nutty flavors in the fruit. And there’s no waiting required!
SERVES 10
Nonstick pan spray
4 large barely ripe bananas (mostly yellow—a couple of brown flecks are okay), whole and unpeeled
½ cup plus 1 tablespoon unsweetened coconut flakes
2 cups all-purpose flour
2 teaspoons baking powder
½ teaspoon kosher salt
1 stick (4 ounces) butter, at room temperature
1 cup packed dark brown sugar
2 large eggs, beaten
2 tablespoons robust molasses
1½ teaspoons pure vanilla extract
1 teaspoon turbinado sugar (such as Sugar In the Raw)
-
Preheat the oven to 350°F. Coat an 8½ × 4½-inch loaf pan with pan spray and line with parchment paper, leaving a few inches of overhang on both of the long sides. (This will help you lift the loaf out of the pan after baking.)
-
Line a baking sheet with parchment paper and place the bananas on top. Bake, flipping the bananas once, until their skin is deeply blackened on both sides but not split, about 25 minutes. Set the bananas aside to cool. Once the bananas are cool, remove the soft flesh from the skins (discard the skins) and spoon it into a bowl. Mash the flesh roughly with a fork, leaving some lumps. Set aside.
-
Meanwhile, in a large, dry skillet, spread ½ cup of the coconut out into single layer. Cook over medium-low heat, stirring frequently, until the flakes smell toasty and are golden brown, about 5 minutes. Remove the skillet from the heat, spoon the toasted coconut into a bowl, and set it aside to cool.
-
In a large bowl, whisk together the flour, baking powder, and salt and set aside.
-
In a large bowl, using an electric mixer, beat the butter and brown sugar on medium-high speed until light, fluffy, and pale, about 5 minutes. Reduce the speed to medium-low and add the eggs, one at a time, beating well after each addition and scraping down the sides of the bowl as needed. Beat in the molasses and vanilla. Add the mashed bananas and beat until just combined.
-
Using a rubber spatula, fold in the flour mixture and ½ cup of the toasted coconut flakes until just combined.
-
Scrape the batter into the prepared pan. Sprinkle the top with the remaining 1 tablespoon coconut flakes and the turbinado sugar. Bake until the loaf is domed and deeply golden and a toothpick inserted into the tallest part of the center comes out clean, about 1 hour 10 minutes. Let the loaf rest in the pan for 15 minutes, then use the parchment sling to lift the loaf out of the pan and transfer it to a wire rack to cool completely. Once cool, the banana bread will keep at room temperature, wrapped in plastic wrap, for 3 to 4 days.
TIP “Robust” molasses is darker and has a deeper, more concentrated flavor than mild molasses; depending on the brand, it may also be called “full flavor” molasses, so make sure to check the label.
VARIATION
Chocolate Chip Banana Bread: Replace the toasted coconut with ½ cup bittersweet chocolate chips stirred into the batter.