
Puff Pastry Plum Tart with Allspice and Honey
![]() MASTER THIS: All-Butter Pie Dough (Pâte Brisée)
MASTER THIS: All-Butter Pie Dough (Pâte Brisée)
![]() MASTERCHEF LESSON: Preparing Pie Crust
MASTERCHEF LESSON: Preparing Pie Crust
Blood Orange and Lemon Cream Pie with Fresh Raspberries and Cream
Lemon Meringue Pie with Vanilla Cookie Crust
Apple-Persimmon Crostatas with Walnut Crumble and Crème Anglaise
Mini Salted Chocolate Caramel Tarts
Pumpkin Tart with Cranberry Compote
Citrus-Mascarpone Tart with Summer Berries
ROSEMARY AND

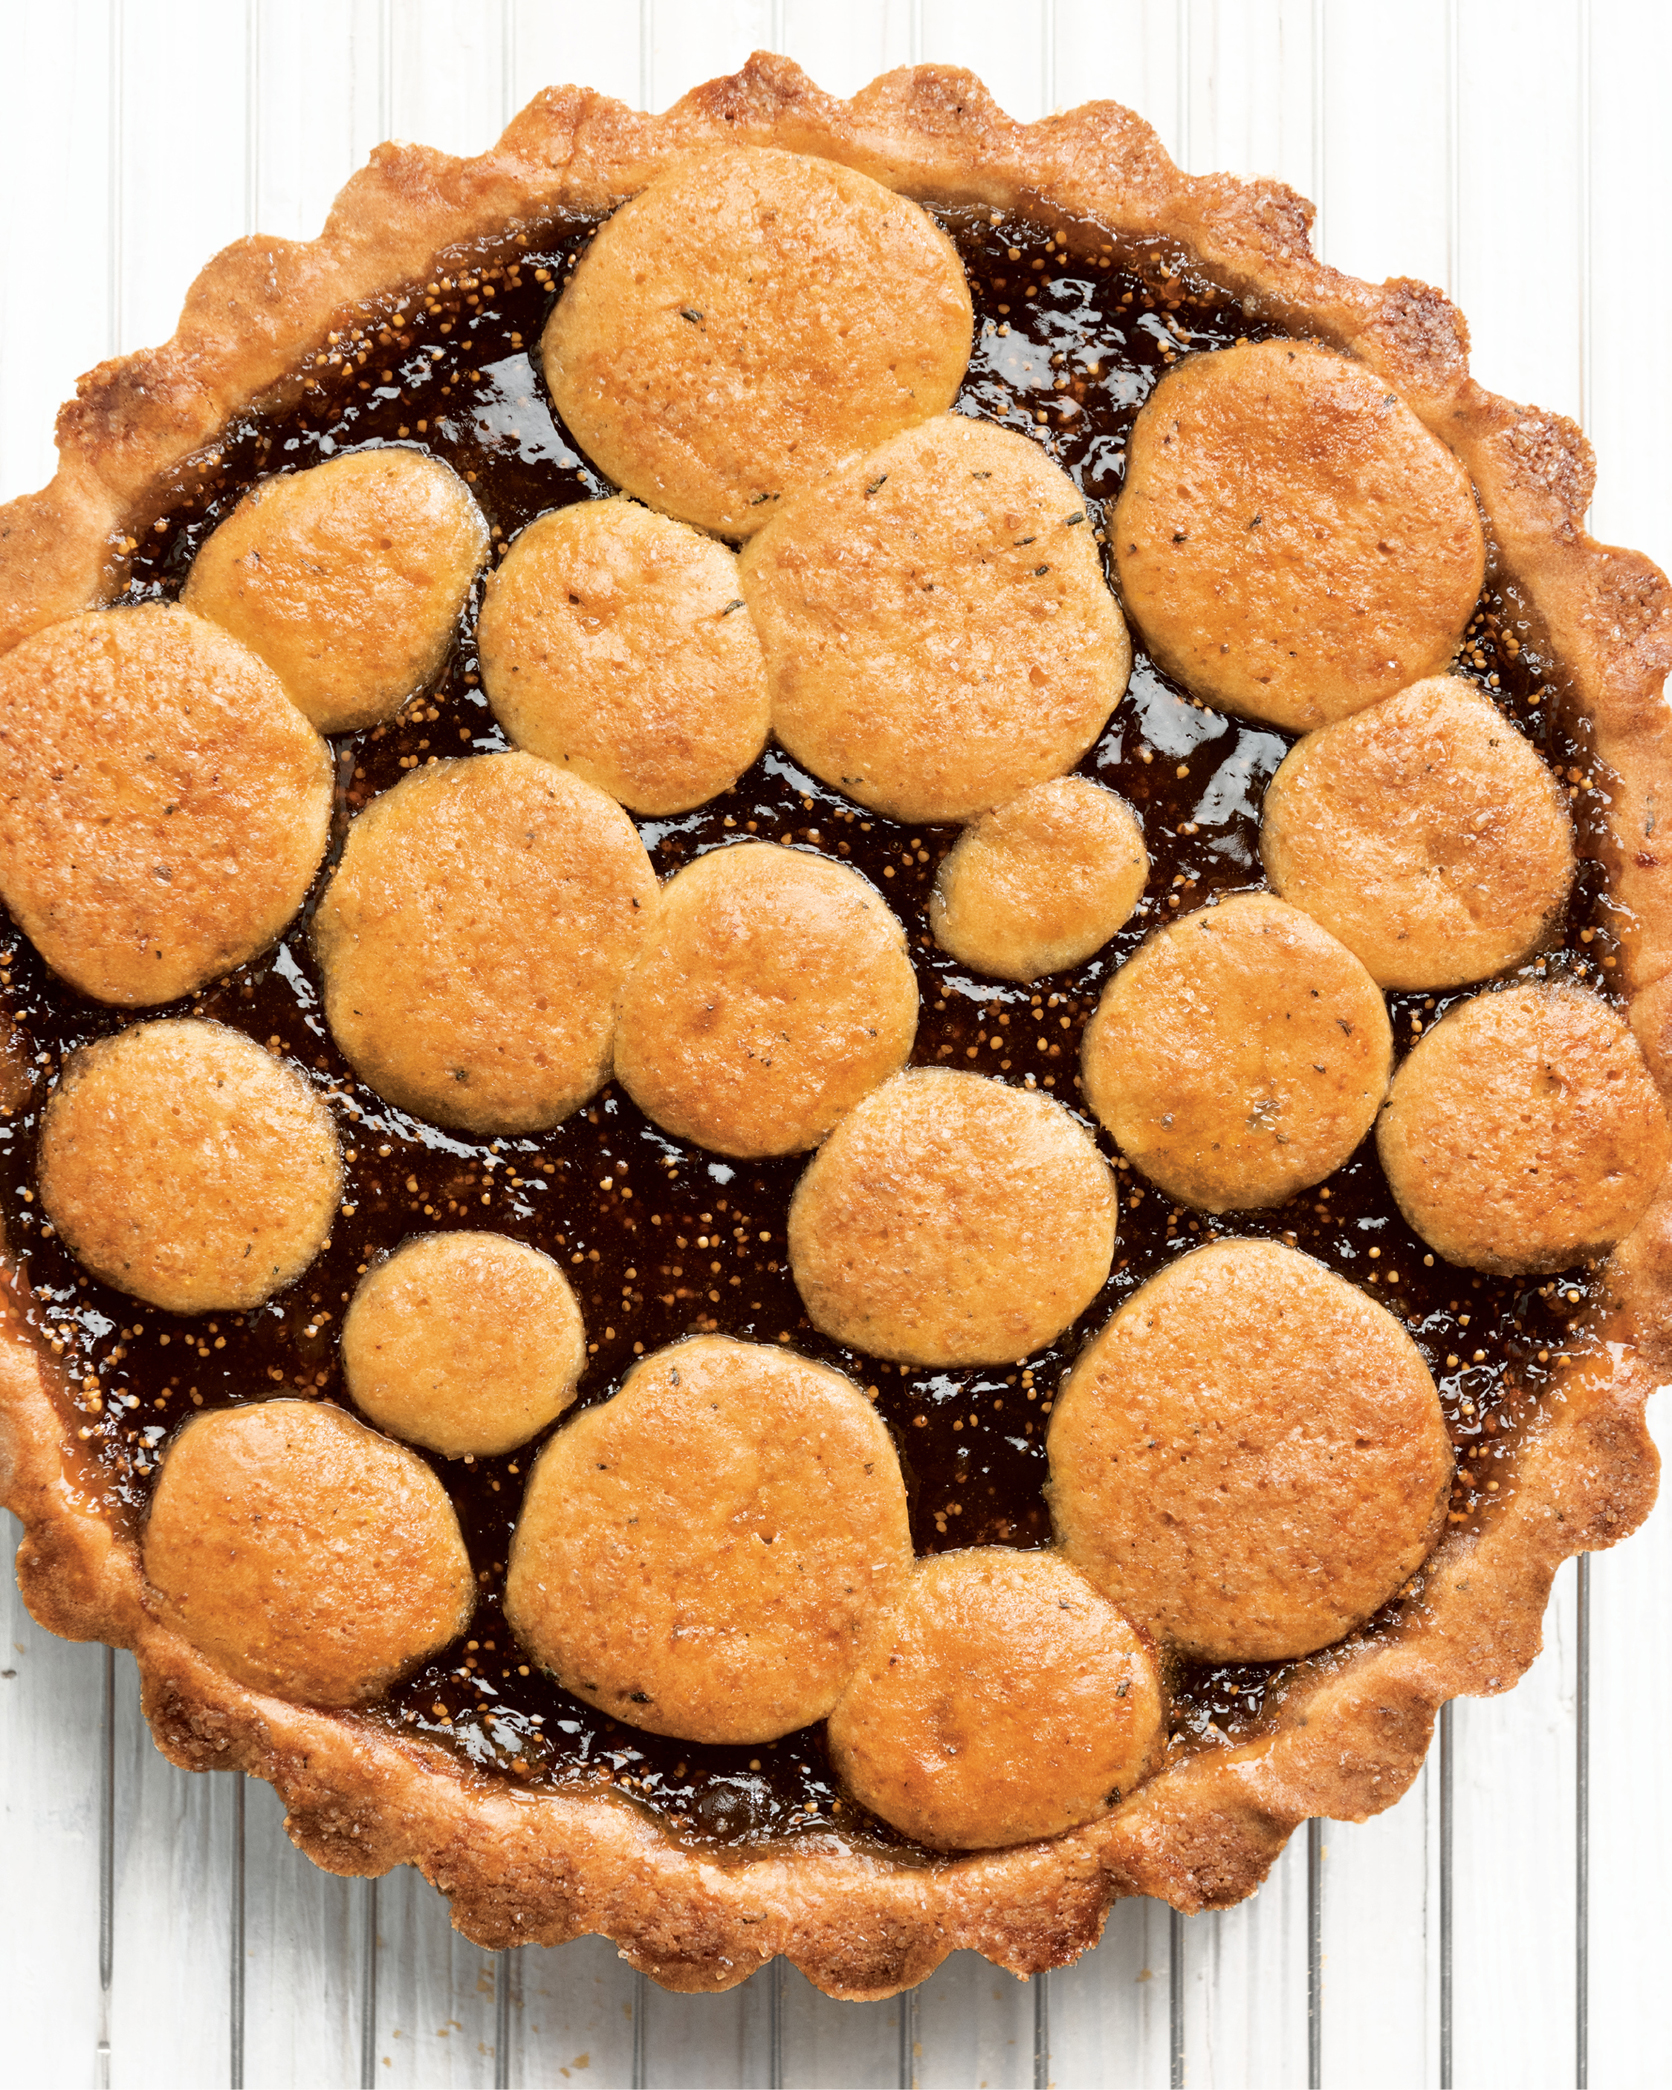

Herbs may not be an ingredient you associate with baking, but professional pastry chefs often play with ways to meld sweet and savory flavors—and herbs are a great way to do it! Here a spoonful of rosemary adds a gentle piney edge to the crumbly shortbread crust that’s the perfect contrast to the sweet fig jam filling. Think of it as a super-sophisticated Fig Newton!
SERVES 8

1 stick (4 ounces) unsalted butter, at room temperature, plus more for greasing
½ cup granulated sugar
1 large egg
1 large egg yolk
1¼ cups all-purpose flour
½ cup finely ground cornmeal
2 teaspoons finely chopped fresh rosemary
1½ teaspoons baking powder
½ teaspoon kosher salt
Nonstick pan spray
1½ cups fig preserves (about one 13-ounce jar)
1 tablespoon turbinado sugar (such as Sugar In the Raw)
-
In a large bowl, using an electric mixer with the whisk attachment, beat the butter and granulated sugar on medium-high speed until light and fluffy, about 3 minutes. Beat in the whole egg and egg yolk one at a time, beating well after each addition and scraping the bowl as needed.
-
In a medium bowl, whisk together the flour, cornmeal, rosemary, baking powder, and salt. Gradually add the flour mixture to the butter mixture and beat on low until just combined.
-
Spray a 9-inch tart pan with a removeable bottom with pan spray. Transfer the dough to a work surface. Pull off one-third of the dough, roll it into an 8-inch log, and wrap it tightly with plastic wrap. With greased fingertips, gently press the remaining dough over the bottom and up the sides of the prepared pan in an even layer. Lightly cover the tart pan with plastic wrap and transfer both the log of dough and the pan to the refrigerator to chill for at least 1 hour.
-
Preheat the oven to 375°F. Spoon the fig jam into the chilled tart shell, spreading it evenly over the pastry. Remove the log of dough from the refrigerator and slice it into thin rounds. Arrange the rounds on top of the jam with their edges touching (they will not cover the whole surface of the tart; feel free to experiment with your own designs). Sprinkle with the turbinado sugar.
-
Bake until the crust is golden, 30 to 35 minutes. Transfer the tart to a wire rack to cool completely, then remove from the pan, slice into wedges, and serve.
TIP This tart can be made in a snap with whatever jam you have in your fridge or pantry. For a basic recipe that works with just about any store-bought preserves, omit the rosemary and cornmeal, and increase the all-purpose flour to 1¾ cups.

WITH ALLSPICE AND HONEY
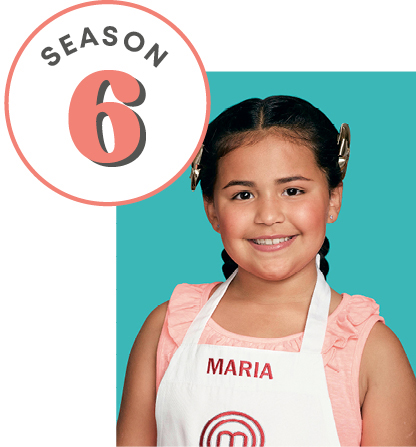
Using ripe, seasonal fruit is a simple way to bring sweetness to your baked treats without adding a ton of sugar. That’s why Maria chose to make a plum tart just like this one in Season 6 when judge Christina Tosi challenged the cooks to make a dessert without relying on refined sugar. Frozen puff pastry is a great tool to always keep in your baking arsenal. With a package in your freezer and some fresh fruit on hand, an impressive (and easy!) dessert is never more than an hour away.
SERVES 8
½ teaspoon ground allspice
¼ teaspoon freshly ground black pepper
⅛ teaspoon kosher salt
All-purpose flour, for rolling
1¼ pounds black plums (6 or 7 medium), halved, pitted, and cut into ½-inch-thick slices
1 10-inch sheet frozen all-butter puff pastry (from a 14-ounce package), thawed
2 tablespoons honey, for serving
-
Preheat the oven to 425°F. Line a baking sheet with parchment paper.
-
In a small bowl, combine the allspice, pepper, and salt. Set aside.
-
On a lightly floured surface, use a rolling pin to lightly roll the puff pastry into a 10 × 12-inch rectangle. Transfer the pastry to the prepared baking sheet. Leaving a ¾-inch border untouched around the edges, prick the pastry here and there with the tines of a fork (this is called “docking,” which prevents the pastry from puffing up too much during baking). Arrange the plum slices in overlapping rows inside the border until the surface is filled. Sprinkle the fruit evenly with the allspice mixture.
-
Bake the tart until the pastry is puffed and golden brown and the plums are juicy and tender, about 25 minutes. Let the tart cool on the pan for at least 15 minutes before transferring it to a cutting board and slicing into 8 rectangles. Drizzle with honey before serving.
— MASTER THIS —

(PÂTE BRISÉE)
Whether you’re prepping a pumpkin pie for Thanksgiving, a cheesy quiche for Sunday brunch, or just about any other sweet or savory recipe that involves a flaky pastry crust, you’re going to want to begin with a batch of pâte brisée, also known as pie dough! Despite its fancy French name, pâte brisée is basically just a combination of flour, salt, and butter with a little water drizzled in to bind it all together. We like to add a whole egg because it makes the dough richer and a little easier to roll out. If you want to take the dough in a sweeter direction, a spoonful of sugar will do the trick.
Just like when you’re making biscuits or scones, the keys to getting perfectly flaky pâte brisée are the temperature of the butter (ice cold!) and the way you combine it with the flour in large, pebbly pieces. (This technique is called “cutting in” butter; for more on the method, see MasterChef Lesson, this page.)
Using a food processor makes the task unbelievably fast and easy, but you do have to be careful not to overprocess the dough, because that will make it tough; you’ll know the texture is right if the dough just comes together but is still quite chunky and shaggy. If you don’t have a food processor, it’s no big deal—the recipe is easy to make by hand.
Once you’ve made the dough, shape it into a 1-inch-thick disc and wrap it tightly in plastic wrap. It then needs to be chilled to relax the gluten in the flour so the dough is easy to roll and stays nice and tender. Pâte brisée is so handy to have around that once you get the hang of it, you might want to make a habit of always having a batch or two stashed away! It keeps beautifully in the refrigerator for up to 4 days, or you can freeze the discs of dough for up to 2 months.
MAKES ENOUGH DOUGH FOR 1 DOUBLE-CRUST PIE, 2 SINGLE-CRUST PIES, 2 GALETTES, OR 6 MINI GALETTES

3 cups all-purpose flour
1 tablespoon sugar (optional)
½ teaspoon kosher salt
2 sticks (8 ounces) unsalted butter, cubed and frozen
1 large egg
¼ cup ice water
-
In a food processor, pulse together the flour, sugar (if using), and salt to combine. Add the butter and pulse until the mixture looks sandy, with a few pea-size pieces of butter still visible, about 1 minute.
-
In a small glass, whisk together the egg and ice water. Add the egg mixture to the food processor and pulse in 5-second increments until the dough is moistened and starting to pull away from the sides of the bowl, about 30 seconds. (If the dough still seems dry, add ice water 1 teaspoon at a time; do not overprocess, or your dough will be tough.)
-
Transfer the shaggy dough to a clean work surface and divide it in half. Shape each half into a 1-inch-thick disc and wrap each tightly in plastic wrap. Refrigerate for at least 30 minutes or up to 3 days before using.

OLD-FASHIONED

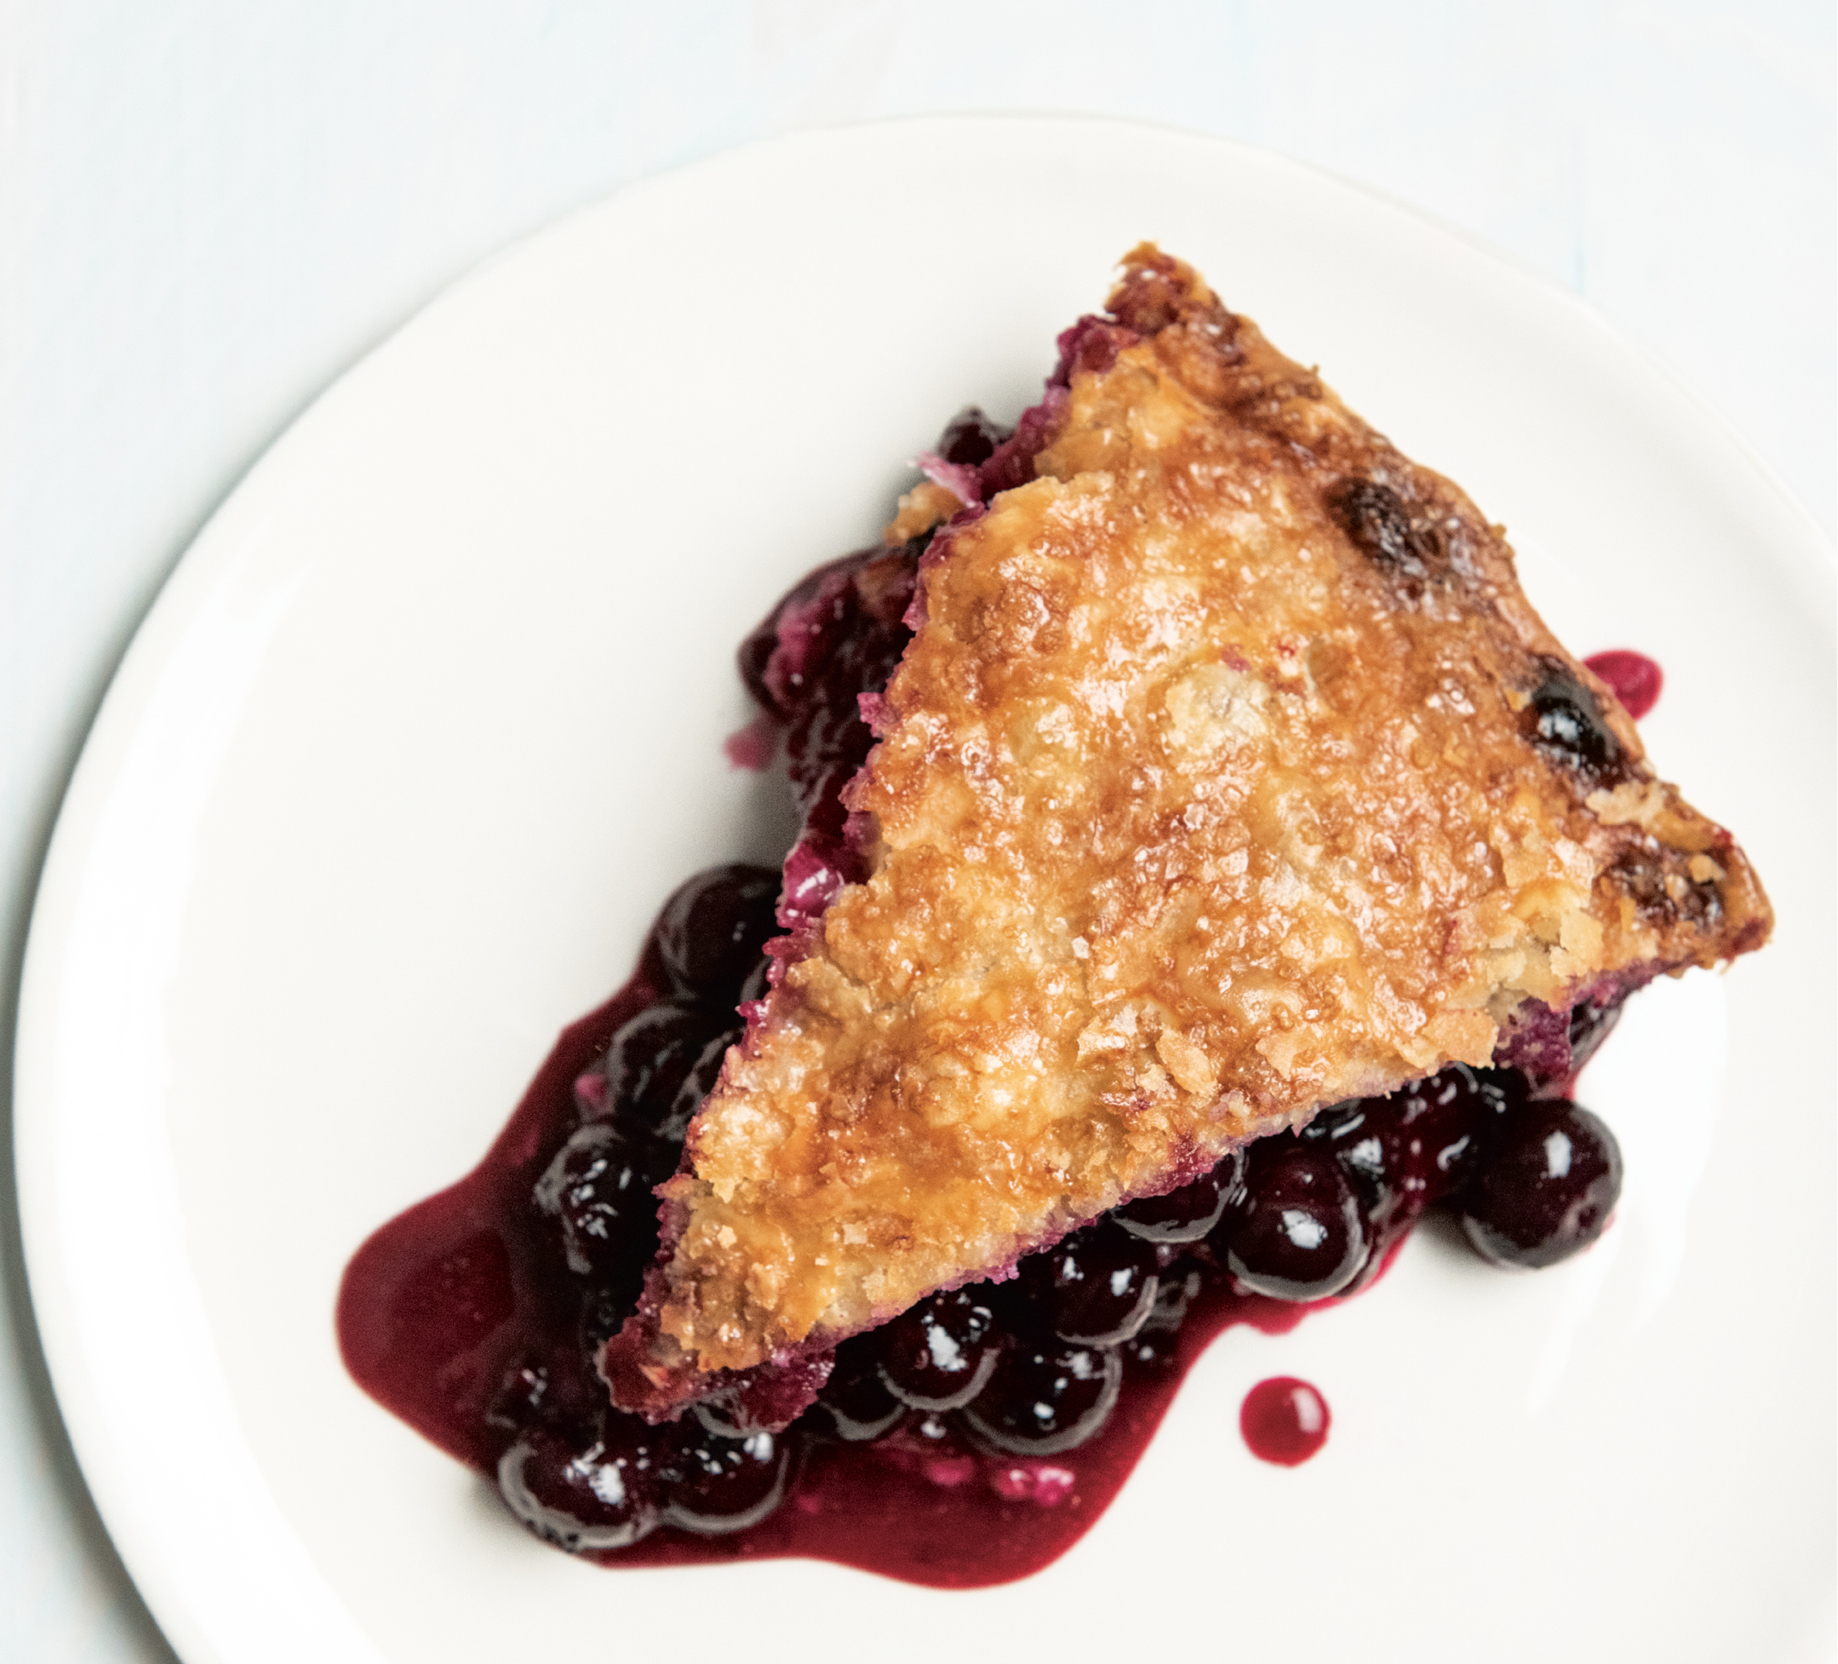

It may look simple, but mastering the perfect summer pie is no easy feat. That’s why budding chefs should always have a few tricks up their sleeves. To make sure you’ll get thick, jammy slices, use a deep-dish pie pan and don’t skimp on the berries, and if you want to keep practicing your fruit pie skills, you can try swapping out the blueberries for an equal amount of sliced peaches or plums. The flavors are so bright and tasty you don’t need anything to dress it up—though if you serve it à la mode with Easy Vanilla Ice Cream (this page), it’s doubtful anyone will object!
SERVES 8
All-Butter Pie Dough (this page)
7 cups blueberries
1 cup granulated sugar
3 tablespoons small tapioca pearls (such as Kraft Minute brand)
Grated zest and juice of 1 lemon
¼ teaspoon nutmeg, preferably freshly grated
¼ teaspoon kosher salt
All-purpose flour, for rolling
1 large egg
1 tablespoon turbinado sugar (such as Sugar In the Raw)
-
Prepare and chill the pie dough as directed on this page.
-
In a large bowl, combine the blueberries, granulated sugar, tapioca, lemon zest, lemon juice, nutmeg, and salt. Stir the mixture gently until the fruit is coated with the sugar and the tapioca is evenly distributed. Set aside at room temperature for 15 minutes to let the fruit macerate and the tapioca soften.
-
Remove one disc of dough from the refrigerator. Unwrap the dough and, on a lightly floured surface, roll it into a 12-inch round about ⅛ inch thick, dusting the top and underside with more flour as needed to keep the dough from sticking. Drape the dough into a 9½-inch deep-dish pan so that it lies across the bottom and over the edges of the pan without needing to be pulled or stretched. Return the pan to the refrigerator to keep the pastry cool while you roll out the remaining dough.
-
Preheat the oven to 425°F.
-
Remove the second disc of dough from the refrigerator. On a lightly floured surface, roll it into a 12-inch round about ⅛ inch thick.
-
Remove the pie shell from the refrigerator. Fill it with the blueberry mixture, piling the berries in the center of the pie shell in a small mound. Place the second round of dough over the fruit to cover it. Trim away any dough that is hanging over the edges of the pie pan (for pie tips and techniques, see MasterChef Lesson, this page). Using your fingers, press the edges of the dough together to seal and create a fluted edge. With a sharp knife, slice three small vents in the middle of the top crust (this allows steam to escape during baking and helps prevent the crust from splitting).
-
In a small bowl, whisk together the egg and 1 tablespoon water. Brush the mixture onto the top and edges of the pie in a thin layer so the egg wash doesn’t pool around the edges. Sprinkle the surface of the pie with the turbinado sugar.
-
Place the pie pan on a rimmed baking sheet and bake until the crust looks pale and dry, about 25 minutes. Reduce the oven temperature to 375°F and bake until the crust is a deep golden brown and the fruit is bubbling, about 35 minutes more. Transfer the pie to a wire rack. Because the tapioca and the fruit need to cool in order to set, let the pie rest for at least 3 hours before slicing and serving.
— MASTERCHEF LESSON —

Making pies from scratch can intimidate even experienced bakers, but one of the nicest things about pies is that they look pretty even when they’re not perfect. Filling leaking a little? Crust a bit cracked? Don’t fret—just call it “rustic!” And once you’ve learned a reliable dough recipe (like the recipe on this page) and a couple of simple techniques, the task of rolling and shaping the crust really does get a whole lot easier. For painless pie making, just remember these rules of thumb:
-
Always chill your dough for at least 30 minutes before rolling it out. Not only does this make it easier to handle, it gives the gluten proteins inside the dough a chance to relax, which helps keep the crust tender.
-
When you’re ready to roll the dough, work quickly and confidently. To get nice flakes, it’s important that the flecks of butter in the dough stay firm and cold, not melty. If the dough starts to seem warm or saggy while you’re working, pause and pop it back in the fridge (you can transfer it to a parchment-lined baking sheet so it chills in a flat layer) for a few minutes.
-
Dust your work surface generously with flour. And if your dough still starts to stick during rolling, work it up with a spatula or a bench scraper and sprinkle a bit more flour underneath and on top of the dough. You can always use a pastry brush to wipe the excess flour off before baking.
-
All pies look lovelier when they’re finished with an egg wash and a sprinkling of sugar. To make the egg wash, just beat a large egg with a couple of spoonfuls of water and use a pastry brush to paint it on the dough just before you put the pie in the oven. Just make sure to use a light touch: If you put the egg wash on too thick, it will drip and collect in dark pools at the edges of the pie. Then sprinkle it all over with a few pinches of coarse turbinado sugar. After baking, the crust will emerge beautifully golden, shiny, and sparkling. Granulated sugar on top can be pretty, too, for more of a glistening sparkle.
ROLLING OUT DOUGH: A STEP-BY-STEP
-
Set a chilled disc of dough on a well-floured work surface. Sprinkle a little flour on top of the dough. Place your rolling pin crosswise on the disc of dough, with the end of the pin at the nine o’clock and three o’clock positions. Place your hands in the middle of the rolling pin and, applying steady downward pressure, make two or three strokes with the rolling pin, pushing it out and away from your body.
-
Lightly lift the dough with your fingertips or a spatula, sprinkle a little more flour underneath the dough if needed, and rotate it 90 degrees. Place the rolling pin over the dough again at the nine o’clock and three o’clock positions and repeat making two or three strokes, pushing the rolling pin out and away from your body.
-
Continue lifting the dough, sprinkling flour, rotating, and rolling until the dough forms a thin, even round. As your rolled piece of dough gets larger, continue to move your hands out to the ends of the rolling pin so you have an even thickness. For a 9- or 9½-inch deep-dish pie pan, you’ll want a round that is about 12 inches in diameter.
-
To transfer the dough to your pie pan, lightly roll it around the rolling pin, then slowly unroll it over the dish, make sure the dough is centered. Use your fingertips to lightly settle the dough into the pan, taking care not to stretch it to make it fit. (Stretching the dough can cause it to shrink during baking.)
-
Use a sharp knife or a pair of scissors to trim the dough, leaving about 1 inch hanging over the edge of the pan on all sides. Patch any cracks or holes in the dough with the scraps. Fill the pie. If making a double-crust pie, roll out and trim the remaining dough in the same fashion and use it to cover the filling.
FINISHING TOUCHES
Once your dough is snuggled into the pan, filled, and topped, it’s time to seal (or “crimp”) the edges of the dough and add any decorative finishing touches. One eye-catching option is to roll your dough scraps, cut them into shapes with cookie cutters, and arrange them on top of the pie (use egg wash to glue the shapes to the crust). Or, instead of slicing simple vents in the top of your pie, use small star- or heart-shaped cookie cutters (or any design you like!) to cut small decorative shapes out of the top crust. There are also all kinds of ways you can dress up your crust using little more than your fingertips, a knife, and a fork. Here are a few you might want to try:
Scalloped edge: This wavy edge is one of the most traditional finishes. To make it, hold the thumb and index of your left hand about 1 inch apart on the rim of the pie shell, resting on the outside edge of the pie pan. With the index finger of your other hand, press the dough outward toward them. Repeat to form an undulating scalloped design.
Herringbone edge: Trim the dough to the outside edge of the pan. Dip a fork in flour and press the tines down onto the rim of dough (but take care not to slice through it). Turn the fork 45 degrees and press next to the first set of marks, creating a herringbone pattern. Continue around the rim.
Checkerboard edge: Trim the dough even with the outside edge of the pan. Using scissors, make slices at ½- to 1-inch intervals all around the edge to create a series of tabs. (Make sure that you have an even number of tabs when you finish.) Fill the pie, then fold every other tab up over the filling, until the whole edge is finished. This design works best for single-crust fruit pies or custard pies, like pumpkin.

Step 1: On a well-floured surface, use steady downward strokes with a rolling pin to roll the dough out and away from your body.

Step 2: To transfer rolled dough to the pie pan, roll it around the pin, move it, and then gently unroll it over the dish.

Step 3: Use a sharp knife or a pair of scissors to trim the edges of the dough, leaving about 1-inch of overhang on all sides.
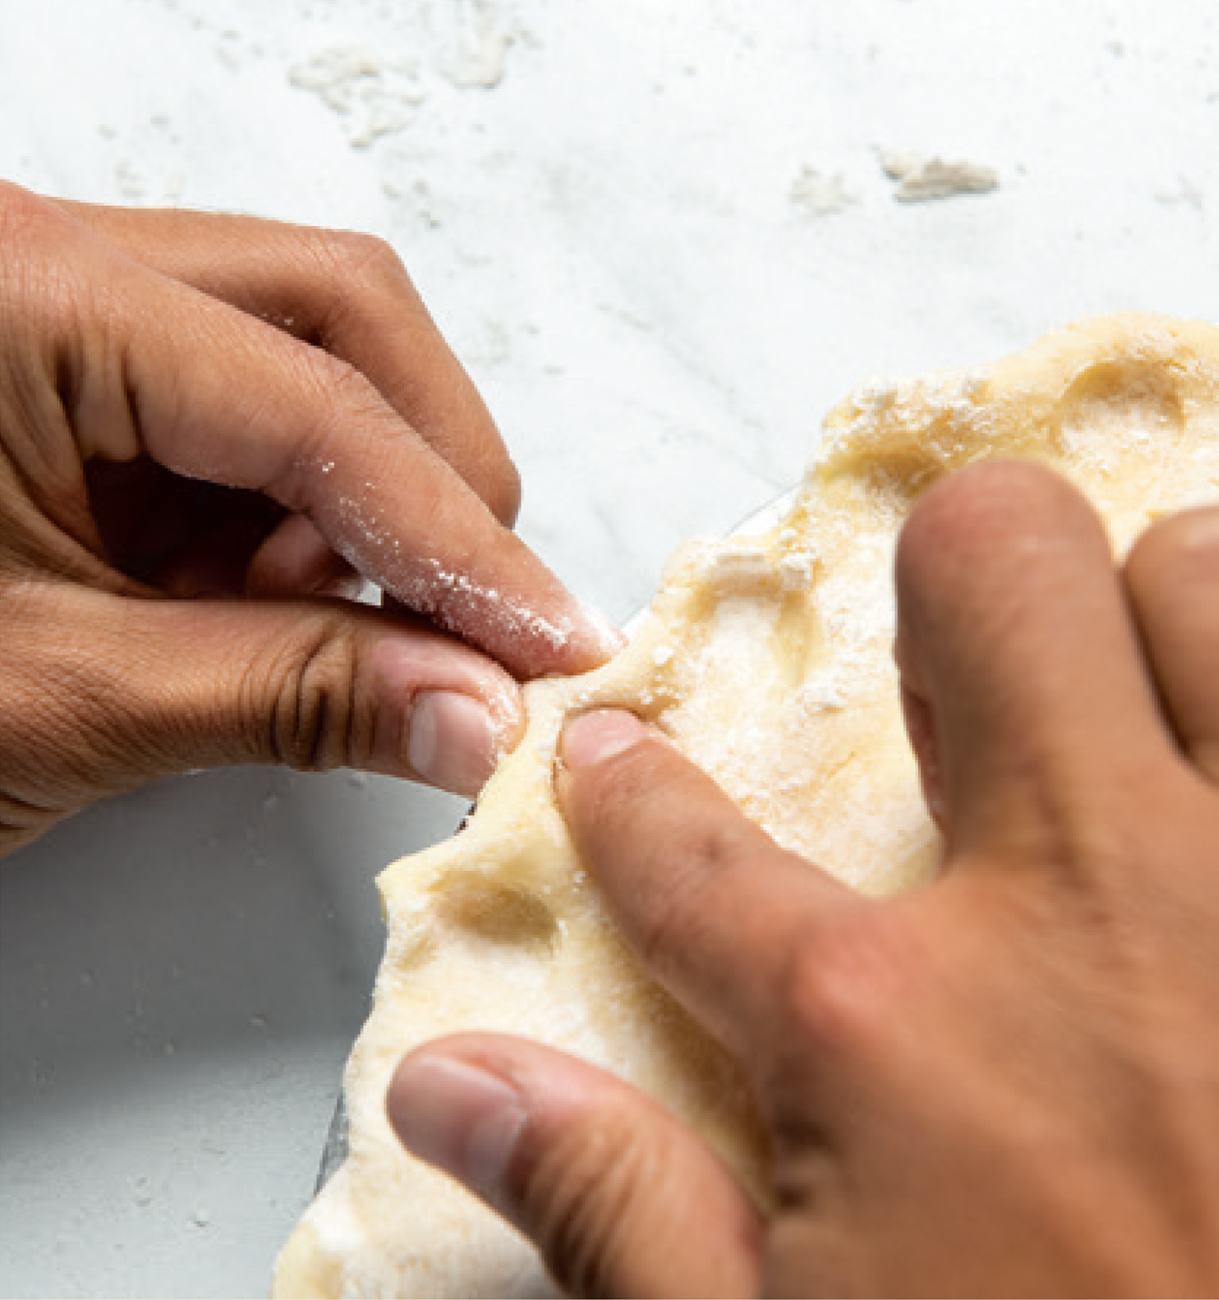
Step 4: Use your thumb and index fingers to seal the edges of the pie with a decorative scalloped edge.
BLOOD ORANGE AND

WITH FRESH RASPBERRIES AND CREAM
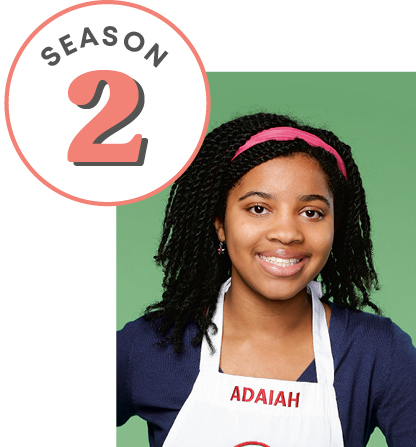
Because she comes from a long line of Southern bakers, Adaiah felt confident going into the Season 2 cream pie challenge—and that confidence paid off when she presented this gorgeous citrus and raspberry pie to the judges. Judge Gordon Ramsay told the kids that the most important qualities to look for in a cream pie are a crispy, cracking crust and a custardy filling that’s perfectly balanced between sweet and tart. Luckily for Adaiah, this one nails it on both counts!
SERVES 8

All-Butter Pie Dough (this page)
All-purpose flour, for rolling
BLOOD ORANGE AND LEMON CREAM FILLING
1 teaspoon unflavored powdered gelatin
3 cups plus 2 tablespoons whole milk
4 large egg yolks
½ cup plus 2 tablespoons granulated sugar
⅓ cup cornstarch
1 tablespoon pure vanilla extract
2 tablespoons unsalted butter
2 tablespoons finely grated blood orange zest, plus more for garnish
2 tablespoons blood orange juice
2 tablespoons finely grated lemon zest
2 tablespoons fresh lemon juice
WHIPPED CREAM
2 cups heavy cream
2 tablespoons confectioners’ sugar
1 teaspoon pure vanilla extract
ASSEMBLY
1 pint fresh raspberries
Grated blood orange zest
-
Prepare and chill the pie dough as directed on this page. You will only use one of the dough discs—save the other for another time.
-
Dust a work surface lightly with flour. Remove the chilled dough from the refrigerator and, using a rolling pin, roll it into a 12-inch round about ⅛ inch thick. (For pie dough rolling and trimming tips, see this page.) Drape the dough into a 9½-inch deep-dish pie pan so that it lies across the bottom and up the sides without stretching. When the dough is in place, trim away the excess, leaving a 1-inch overhang of dough around the edges. Fold the overhang under and use a fork to crimp the edge. Pierce the bottom of the dough all over with the tines of a fork (this is called “docking”) and place the pan in the freezer to chill for 15 minutes.
-
Preheat the oven to 400°F.
-
Remove the pie shell from the freezer. Line the pie shell with parchment paper and fill with enough dried beans or pie weights to cover the surface. Bake until the crust is pale golden around the edges, about 20 minutes. Carefully remove the parchment and the pie weights and return the pie crust to the oven. Bake until the bottom of the crust is dry and the edges are beginning to brown, about 8 minutes more. Transfer to a wire rack to cool completely.
-
Meanwhile, make the blood orange and lemon cream filling: In a small bowl, whisk the gelatin with 2 tablespoons of the milk until smooth. Set aside for 5 minutes. In a medium bowl, whisk the egg yolks, ½ cup of the milk, the graulated sugar, cornstarch, and vanilla until smooth.
-
In a large saucepan, bring the remaining 2½ cups milk to a low simmer over medium heat. Slowly drizzle ¼ cup of the hot milk into the egg yolk mixture, stirring constantly. (This is called “tempering” and helps prevent the eggs from curdling. See the MasterChef Lesson on this page.) Beat the warm milk mixture into the eggs, ¼ cup at a time, until fully combined. Return the mixture to the saucepan and cook, whisking constantly, until thickened, 2 to 3 minutes. Add the butter, gelatin mixture, blood orange zest, blood orange juice, lemon zest, and lemon juice and whisk until smooth. Transfer the custard to a bowl, press a piece of plastic wrap against the surface to prevent a skin from forming, and refrigerate until cold, about 2 hours.
-
Make the whipped cream: In a large bowl, using an electric mixer fitted with the whisk attachment, beat the cream, confectioners’ sugar, and vanilla on medium-high speed until the cream holds stiff peaks, 2 to 2½ minutes.
-
Assemble the pie: Spoon half the chilled custard into the cooled pie shell in an even layer. Scatter a single layer of raspberries over the top. Top with the remaining custard. Spoon whipped cream on top of the pie to cover. Garnish with the remaining raspberries and a flurry of blood orange zest. Serve chilled.
SWEET CHERRY


What’s better than a cherry pie? How about one that fits in your lunchbox? These adorable hand pies are golden, flaky, and filled with a fresh cherry filling that’s jazzed up with brown sugar, lime zest, cinnamon, and allspice. Evan from Season 6 says the hardest part about making cherry pie is getting the pits out—without a cherry pitter, it can literally be the pits! Happily, you can order the tool online for just a couple of dollars. It’s definitely a worthwhile investment! Make sure you buy the kind with a cherry juice guard—so you don’t end up getting splattered!
MAKES 8
All-Butter Pie Dough (this page)
1 pound sweet cherries, pitted and halved (see Tip)
1 teaspoon finely grated lime zest
1 tablespoon fresh lime juice
¼ cup packed light brown sugar
1 tablespoon cornstarch
½ teaspoon ground allspice
½ teaspoon ground cinnamon
¼ teaspoon kosher salt
1 teaspoon cider vinegar
1 large egg, lightly beaten
1 tablespoon turbinado sugar (such as Sugar In the Raw)
-
Prepare and chill the pie dough as directed on this page. You will only use one of the dough discs—save the other for another time.
-
Meanwhile, in a medium saucepan, combine the cherries, lime zest, and lime juice and cook, stirring frequently, until the cherries begin to release their juices, about 3 minutes. In a small bowl, whisk together the brown sugar, cornstarch, allspice, cinnamon, and salt. Whisk the sugar mixture into the warm cherry mixture. Reduce the heat to low and simmer, stirring frequently, until the mixture is smooth, jammy, and thickened, about 3 minutes. Remove from the heat and whisk in the vinegar. Transfer to a bowl, cover with plastic wrap, and refrigerate until cool.
-
Remove the dough from the refrigerator and let it rest at room temperature until slightly pliable, 3 to 5 minutes. Divide the dough into 8 equal pieces and gently press each piece into a small disc. On a lightly floured work surface, use a rolling pin to roll each disc into a 6-inch round about ⅛ inch thick.
-
Line a baking sheet with parchment paper. Dip your finger in cold water and lightly moisten the edges of the rounds. Place one heaping spoonful (about 2 tablespoons) of the cherry filling in the center of each round, then fold the dough over to make a half-moon. Use your fingers to press the edges together, then use a fork to crimp the edges to seal. Arrange the pies on the prepared baking sheet, spacing them at least 1 inch apart. Transfer to the refrigerator to chill for 1 hour or up to 2 days.
-
Preheat the oven to 400°F.
-
Before baking, brush the pies lightly with the beaten egg thinned with 1 tablespoon water. Using a sharp knife, cut two small slits in the top of each pie and sprinkle with the turbinado sugar. Bake until deeply golden, about 30 minutes (don’t worry if they leak a little—they’ll still be delicious!). Let the pies rest on the baking sheet for 10 minutes, then transfer to a wire rack to cool. Serve slightly warm or at room temperature. Store leftover pies in an airtight container in the refrigerator for up to 4 days.
TIP If you don’t have a cherry pitter, you can use a chopstick to remove the pits. Just place the point of the chopstick at the stem end of the cherry, give it a push, and pop the pit out the other side.

WITH VANILLA COOKIE CRUST
This lovely lemon meringue pie has a buttery vanilla cookie crust that comes together in a snap, making it a surprisingly quick project. Because it’s easiest to separate eggs when they are cold (and even the tiniest trace of yolk in the whites will make the meringue hard to whip), separate the eggs for this recipe as soon as you take them out of the refrigerator. Then put the egg whites in a bowl on the counter and let them come to room temperature while you’re preparing the filling. When your pie comes out perfectly, you may not get to throw it in Gordon Ramsay’s face like the Season 3 contestants did after their lemon meringue pie challenge—but you will get the pleasure of eating it!
SERVES 8
VANILLA COOKIE CRUST
40 vanilla wafer cookies (such as Nilla wafers)
6 tablespoons (¾ stick) unsalted butter, melted
¼ cup sugar
½ teaspoon kosher salt
LEMON FILLING
⅓ cup cornstarch
1 cup sugar
6 large egg yolks
½ cup plus 2 tablespoons fresh lemon juice (from 3 or 4 lemons)
¼ teaspoon kosher salt
2 tablespoons finely grated lemon zest
2 tablespoons cold unsalted butter, thinly sliced
MERINGUE
6 large egg whites, at room temperature
½ teaspoon cream of tartar
⅛ teaspoon kosher salt
½ cup sugar
-
Make the vanilla cookie crust: Preheat the oven to 375°F. In a food processor, process the vanilla wafer cookies until finely crushed, about 1 minute. In a medium bowl, combine 2 cups of the crushed cookies, the melted butter, sugar, and salt. Mix well until the crumbs are saturated. Using the back of a spoon or the bottom of a measuring cup, press the mixture evenly over the bottom of a 9-inch pie pan.
-
Bake until lightly golden, about 10 minutes. Transfer the pie pan to a wire rack to cool completely. Keep the oven on.
-
Make the lemon filling: In a medium saucepan, whisk together the cornstarch, sugar, egg yolks, and lemon juice. Add 1¼ cups water and whisk until smooth. Bring to a boil over medium heat, whisking constantly, until the mixture is thick and bubbling, about 6 minutes. Cook, whisking and scraping the sides of the pan, for 1 minute more, then remove from the heat and stir in the lemon zest and butter until completely combined. Immediately spread the warm filling evenly into the prepared crust.
-
Make the meringue: In a large, clean, dry bowl, using an electric mixer fitted with the whisk attachment, beat the egg whites and cream of tartar on medium-high speed until soft peaks form, about 4 minutes. With the mixer running, add the salt and then sprinkle in the sugar, a tablespoon at a time, until the meringue forms stiff, glossy peaks, 2 to 3 minutes more.
-
Spoon the meringue over the warm lemon filling, spreading and piling it in peaks so that it covers the surface and touches the crust all the way around. (Making sure that the meringue touches and covers the edges of the crust helps prevent the meringue from shrinking and exposing the filling.) Bake until the meringue is golden, about 15 minutes. Transfer to a wire rack to cool to room temperature before slicing and serving.

APPLE-PERSIMMON

WITH WALNUT CRUMBLE AND CRÈME ANGLAISE

The terms crostata and galette are just alternate names for a rustic freeform pie. To make a crostata, instead of shaping the pastry inside a pie pan, roll the dough flat and lay the filling inside before folding the edges of the dough up and over it. When Beni presented her fragrant and nutty apple crostatas to the judges in Season 6, Christina Tosi said there “wasn’t one element done with anything less than perfection.” And Gordon Ramsay liked them so much, he actually licked his plate clean! If you can’t find persimmons, replace them with three more apples.
SERVES 6
All-Butter Pie Dough (this page)
WALNUT CRUMBLE
¼ cup all-purpose flour
¼ cup packed dark brown sugar
¼ cup finely chopped walnuts
2 tablespoons rolled oats
¼ teaspoon kosher salt
3 tablespoons unsalted butter, cubed
APPLE-PERSIMMON FILLING
2 tablespoons all-purpose flour
¼ cup granulated sugar
1 teaspoon pure vanilla extract
1 teaspoon ground cinnamon
1 teaspoon nutmeg, preferably freshly grated
½ teaspoon ground cardamom
3 Granny Smith apples, peeled, quartered, cored, and thinly sliced
3 Fuyu persimmons, seeded and thinly sliced (see Tips)
CRÈME ANGLAISE
1 cup whole milk
1 tablespoon pure vanilla extract
⅓ cup granulated sugar
¼ teaspoon kosher salt
3 large egg yolks
CROSTATAS
⅓ cup walnut pieces
All-purpose flour, for rolling
1 large egg, beaten
2 tablespoons turbinado sugar (such as Sugar In the Raw)
-
Prepare and chill the pie dough as directed on this page.
-
Make the walnut crumble: Preheat the oven to 400°F. Line a baking sheet with parchment paper.
-
In a small bowl, whisk together the flour, brown sugar, walnuts, oats, and salt. Add the butter and rub the mixture between your fingers until crumbly, with a few pea-size pieces of butter still visible. Spread the crumble evenly over the prepared pan and bake until crisp and golden, about 10 minutes. Set aside to cool, then use your fingers to break the crumble into small pieces. Leave the oven on for the crostatas.
-
Meanwhile, make the apple-persimmon filling: In a large bowl, whisk together the flour, granulated sugar, vanilla, cinnamon, nutmeg, and cardamom. Add the apples and persimmons and gently toss to combine. Set aside.
-
Make the crème anglaise: Set up an ice bath by filling a medium bowl with ice cubes and placing another small bowl inside it; set aside. In a medium saucepan, whisk together ²⁄₃ cup of the milk, the vanilla, granulated sugar, and salt. Bring to a simmer over medium heat, stirring to dissolve the sugar. In a small heatproof bowl, whisk together the remaining ⅓ cup milk and the egg yolks. Ladle ⅓ cup of the hot milk into the yolk mixture, while whisking constantly, then return the yolk mixture to the pan. Bring the sauce almost to a simmer over medium heat, stirring often, but do not let it boil (boiling will curdle the eggs and make the sauce lumpy). Test for doneness by dipping a spoon into the sauce and running your finger over the back of the spoon: If it leaves a clean trail in the sauce, it is done. Remove the pan from the heat and immediately pour the custard through a fine-mesh sieve held over the bowl sitting in the ice bath. Stir until smooth, then cover with plastic wrap and refrigerate until ready to serve.
-
Make the crostatas: Line two baking sheets with parchment paper. Remove the chilled dough from the refrigerator and let it rest at room temperature for 10 minutes.
-
Using a food processor and the small bowl insert, pulse the walnuts until finely ground, about 30 to 45 seconds.
-
Dust a work surface lightly with flour. Divide each disc of dough evenly into 3 pieces and gently press each piece into a 1-inch-thick disc. One at a time, roll the discs into rounds ⅛ inch thick. Transfer the rounds to the prepared baking sheets. Sprinkle the ground walnuts into the center of each round. Top each with the apple-persimmon mixture, arranging the slices of fruit in tightly packed swirls and leaving 1 inch of dough bare around the edges. Fold the edges of the dough up and over the fruit to form a packet, with some fruit still peeking out in the center. Brush the tops and edges of the crostatas with the beaten egg and sprinkle with the turbinado sugar.
-
Bake until the fruit is soft and the pastry is deeply golden, about 30 minutes. Let the crostatas rest on the baking sheets for 5 minutes, then transfer them to a wire rack to cool. Serve warm or at room temperature, garnished with the walnut crumble and drizzled with the crème anglaise.
TIPS Most persimmons that you find in markets in fall are one of two varieties: Hachiya or Fuyu. Though both are orange-skinned, Fuyus are squatter and Hachiyas have more of an acorn shape. They also ripen differently. Hachiyas are ready to eat when they feel soft to the touch and the interior is soft and custardy; Fuyus, on the other hand, are eaten firm, like an apple.
To get the flavor of crème anglaise without all the work, buy a pint of high-quality all-natural vanilla ice cream (which is essentially frozen crème anglaise) and let it melt in your refrigerator. Before serving, transfer the melted ice cream to a bowl and whip it briefly with a whisk or an electric mixer. No one will know your secret!
MINI SALTED CHOCOLATE CARAMEL


Like ganache and pâte brisée, homemade caramel is one of the basic elements in the pastry chef’s toolbox and a staple in the MasterChef Junior kitchen. Because it involves melting sugar until it is extremely hot, learning to make caramel can seem scary at first, but if you work carefully (and have an adult on hand to help you out), you might be surprised at how quickly you get comfortable with the process. Once you do, these miniature salted caramel tartlets are a delicious way to get in some practice! Using confectioners’ sugar in the chocolate pastry shell gives it a tender, cookie-like crumb, and adding a pinch of flaky sea salt on top of the ganache is a sparkling finishing touch.
MAKES 8

CHOCOLATE TART SHELLS
1 large egg, at room temperature
2 tablespoons ice water
½ teaspoon pure vanilla extract
1 cup all-purpose flour
½ cup plus 2 tablespoons almond flour
¼ cup unsweetened Dutch-process cocoa powder, plus more for rolling
½ cup confectioners’ sugar
¼ teaspoon kosher salt
10 tablespoons (5 ounces) cold unsalted butter, cubed
Nonstick pan spray
CARAMEL
1½ cups granulated sugar
3 tablespoons light corn syrup
½ teaspoon kosher salt
6 tablespoons (¾ stick) unsalted butter
7 tablespoons heavy cream
GANACHE
1 cup bittersweet chocolate chips or chopped bittersweet chocolate (about 6 ounces)
½ cup heavy cream
1½ teaspoons flaky sea salt (such as Maldon), for garnish
-
Make the chocolate tart shells: In a small bowl, whisk together the egg, ice water, and vanilla. Set aside.
-
In a food processor, pulse together the all-purpose flour, almond flour, cocoa powder, confectioners’ sugar, and kosher salt to combine. Add the butter and pulse until the mixture is sandy, with a few pea-size pieces of butter still visible, about 45 seconds to 1 minute. Add the egg mixture and pulse until the dough is moistened and starting to pull away from the sides of the bowl, about 30 seconds. (If the dough is still dry, add ice water 1 teaspoon at a time; do not overprocess.) Transfer the dough to a clean work surface and shape it into a 2-inch-wide log. Slice the log crosswise into 8 equal pieces and gently flatten each one into a small disc. Wrap the discs in plastic wrap and refrigerate for at least 2 hours or up to 3 days.
-
Lightly coat eight 4-inch tart pans with removable bottoms with pan spray. Dust a clean work surface with a sprinkling of cocoa powder. Working with one piece at a time, roll each chilled disc of dough into a 6-inch round. Gently transfer the rounds to the prepared tart pans, pressing the pastry over the bottom and up the sides of the fluted pans. Once the dough is in place, roll a rolling pin over the top of the pans to trim any excess dough hanging over the sides. If there are tears or holes in the crusts, use the scraps to patch them. Pierce the bottom of the dough all over with the tines of a fork (this is called “docking”). Place the pans on a baking sheet and transfer to the freezer to chill for 10 minutes.
-
Preheat the oven to 350°F.
-
Remove the baking sheet from the freezer, line each tart pan with a small square of parchment paper, and fill with pie weights or dried beans. Bake until the shells are firm and dry, about 20 minutes. Transfer the tart pans to a wire rack to cool.
-
Meanwhile, make the caramel: In a medium saucepan, whisk together the granulated sugar, corn syrup, kosher salt, and 6 tablespoons water. Cook over medium heat, stirring, until the sugar has dissolved. Bring to a boil and cook, without stirring but swirling the pan occasionally, until the syrup turns a deep golden amber and a candy thermometer inserted into the mixture reads 350°F, 6 to 8 minutes. Remove the pan from the heat and whisk in the butter and cream (be very careful—the mixture will be very hot and bubble up a lot). Whisk until smooth, about 1 minute. Set the mixture aside to cool for 2 minutes, then divide the caramel among the cooled tart shells. Return the tart pans to the baking sheet and chill in the refrigerator until the caramel has set up, about 1 hour or for up to 3 days.
-
Make the ganache: Place the chocolate chips in a heatproof medium bowl. In a small saucepan, bring the cream to a simmer over medium heat. Pour the hot cream over the chocolate chips and let stand for 1 minute, then stir until smooth. Divide the ganache evenly among the cooled tarts and use a teaspoon or a small offset spatula to spread it over the caramel in an even layer.
-
Sprinkle each tart with a pinch of flaky sea salt. Return the tart pans to the baking sheet and place in the refrigerator until the ganache is set and the caramel is cool, at least 1 hour or for up to 3 days. Serve chilled.

WITH CRANBERRY COMPOTE
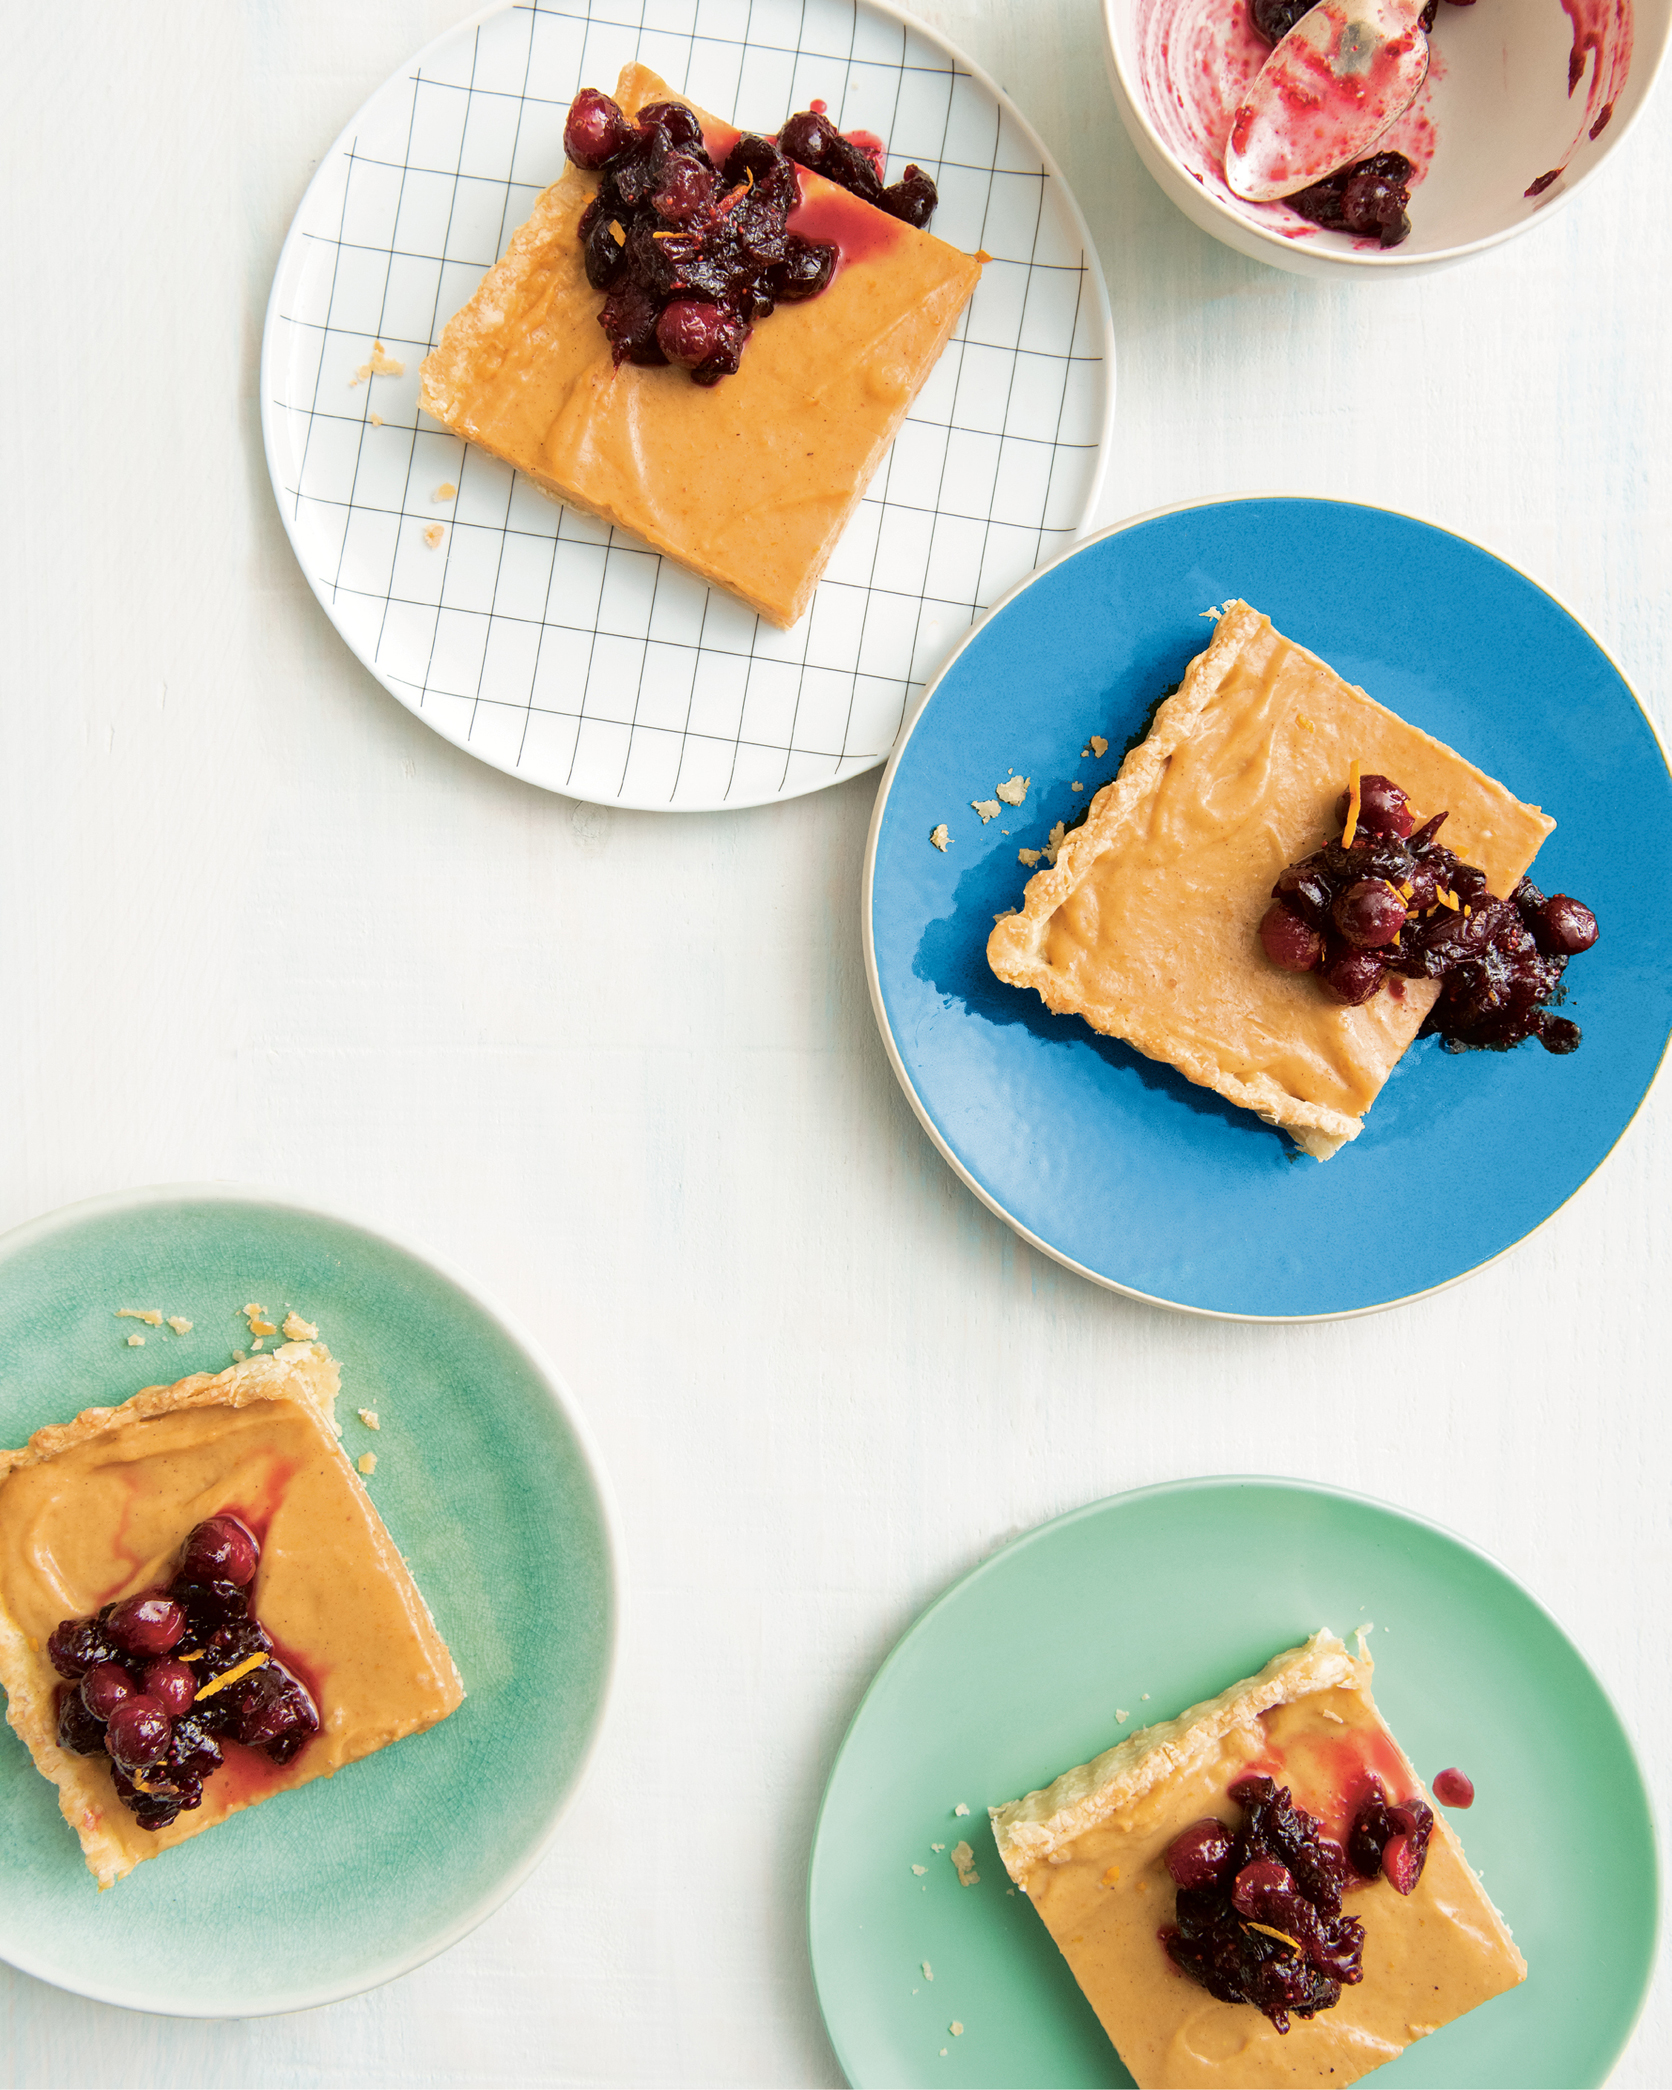

Beni’s dish from the Season 6 canned food challenge was an elegant update on a traditional holiday favorite: pumpkin pie. She combined two of Thanksgiving’s most iconic flavors—creamy pumpkin and bright, tart cranberries—and adds a blend of cinnamon, nutmeg, and coriander (for a citrusy kick) that dresses up the creamy pumpkin filling. Here the cranberry compote is really just a sweet-and-spicy cranberry sauce—so if your family already has a favorite recipe, feel free to use that one instead.
SERVES 8
TART SHELL
1¼ cups all-purpose flour, plus more for rolling
½ cup confectioners’ sugar
1 stick (4 ounces) unsalted butter, cubed and frozen
¼ teaspoon kosher salt
1 large egg
Nonstick pan spray
1 large egg white, beaten
PUMPKIN FILLING
½ cup granulated sugar
¼ cup cornstarch
½ teaspoon ground cinnamon
¼ teaspoon ground coriander
¼ teaspoon nutmeg, preferably freshly grated
⅛ teaspoon kosher salt
2 cups whole milk
2 large egg yolks
1 tablespoon pure vanilla extract
1 cup canned unsweetened pumpkin puree
CRANBERRY COMPOTE
1¼ cups fresh or frozen cranberries
⅓ cup packed dark brown sugar
¼ cup apple cider
1 tablespoon grated orange zest
¼ teaspoon ground cinnamon
⅛ teaspoon ground allspice
½ teaspoon grated orange zest, for garnish
-
Make the tart shell: In a food processor, pulse together the flour, confectioners’ sugar, butter, and salt until the mixture is sandy, with a few pea-size pieces of butter still visible, about 1 minute. Add the egg and pulse until the dough is moistened and starting to pull away from the sides of the bowl, about 30 seconds. (If the dough is still dry, add ice water 1 teaspoon at a time; do not overprocess.) Shape the dough into a 1-inch-thick disc and wrap it tightly with plastic wrap. Transfer to the refrigerator to chill for at least 30 minutes or up to 3 days.
-
Coat an 11 × 7-inch tart pan with a removable bottom with pan spray. (You may also use a standard round tart pan if you prefer.) Dust a work surface lightly with flour. Remove the chilled dough from the refrigerator and, using a rolling pin, roll it into a 13 × 9-inch rectangle about ⅛ inch thick. Gently transfer the dough to the tart pan and press it over the bottom and up the sides. Once the dough is in place, roll the rolling pin over the top of the pan to trim off any excess dough that is hanging over the sides. (If there are any tears or holes in the crust, you can use the scraps to patch them.) Pierce the bottom of the pastry all over with the tines of a fork (this is called “docking”). Place the tart pan on a baking sheet and transfer to the freezer to chill for 15 minutes.
-
Preheat the oven to 375°F.
-
Remove the pan from the freezer and line the pastry with parchment paper, then fill with dried beans or pie weights. Bake until pale golden around the edges, 20 to 25 minutes. Remove the parchment and the pie weights and return the pan to the oven. Bake until the pastry is dry and the edges are just beginning to brown, 4 to 5 minutes more. Brush the inside of the crust with the beaten egg white (see Tip) and bake until dry, about 1 minute. Transfer the pan to a wire rack to cool completely.
-
Meanwhile, make the pumpkin filling: Set up an ice bath by filling a large bowl with ice cubes and 1 cup water. In a medium saucepan, whisk together the granulated sugar, cornstarch, cinnamon, coriander, nutmeg, and salt. Whisk in the milk, then the egg yolks, whisking until smooth. Bring the mixture to a simmer over medium heat, stirring constantly, and cook until thick, 6 to 7 minutes. Whisk in the vanilla and the pumpkin puree and cook, stirring, until smooth, about 1 minute more. Submerge the bottom of the saucepan in the prepared ice bath (be careful not to get water in the pan) and whisk occasionally until the filling is cool, about 15 minutes. Transfer the filling to a bowl and press a piece of plastic wrap against the surface to prevent a skin from forming. Chill for at least 3 hours or up to 3 days.
-
Make the cranberry compote: In a medium saucepan, combine the cranberries, brown sugar, cider, orange zest, cinnamon, and allspice. Bring to a boil over medium heat, then reduce the heat and simmer, stirring occasionally, until the cranberries are soft and the sauce is thick, about 15 minutes. Remove from the heat, transfer to a bowl, and refrigerate until cool, at least 1 hour or for up to 3 days.
-
To assemble the tart: Spoon the pumpkin filling into the cooled tart shell and spread it in an even layer. Spoon the cooled cranberry compote onto the center of the tart in a pretty mound and garnish with the orange zest.
TIP Brushing egg white over the inside of the tart shell during baking forms a moisture barrier over the crust and provides protection against sogginess.
CITRUS-MASCARPONE

WITH SUMMER BERRIES

When judge Christina Tosi introduced the fruit tart challenge in Season 6, she reminded the young bakers that the way a fruit tart looks is just as important as the flavor. The secret to nailing that straight-from-the-pâtisserie look? A thin, firm, flaky shell and a balanced ratio of creamy filling to fruit topping. Olivia learned how to make tarts like this one with her great-grandmother and was excited to show the judges her skills. Her tangy, no-cook lemon curd filling is a great and easy alternative to pastry cream. When it’s time to arrange the fresh fruit topping, choose a combination of whatever berries look best at the market, and remember judge Tosi’s advice: “This shouldn’t just be a work of art—it should be a masterpiece!”
MAKES ONE 9-INCH TART (SERVES 6 TO 8)
TART SHELL
1¼ cups all-purpose flour, plus more for rolling
½ cup confectioners’ sugar
1 stick (4 ounces) unsalted butter, cubed and frozen
¼ teaspoon kosher salt
1 large egg
Nonstick pan spray
1 large egg white, lightly beaten
CITRUS-MASCARPONE FILLING
1 cup mascarpone cheese
½ cup cream cheese, at room temperature
½ cup store-bought lemon curd (see Tips)
2 tablespoons finely grated lemon zest
⅓ cup confectioners’ sugar
ASSEMBLY
2 pints mixed fresh berries, such as blueberries, blackberries, raspberries, golden raspberries, or red currants
-
Make the tart shell: In a food processor, pulse together the flour, confectioners’ sugar, butter, and salt until the mixture is sandy, with a few pea-size pieces of butter still visible, about 1 minute. Add the egg and pulse until the dough is moistened and starting to pull away from the sides of the bowl, about 30 seconds. (If the dough is still dry, add ice water 1 teaspoon at a time; do not overprocess.) Shape the dough into a 1-inch-thick disc and wrap it tightly with plastic wrap. Transfer to the refrigerator to chill for at least 30 minutes or up to 3 days.
-
Coat a 9-inch tart pan with a removable bottom with pan spray. Dust a work surface lightly with flour. Remove the chilled dough from the refrigerator and, using a rolling pin, roll it into a 12-inch round about ⅛ inch thick. Gently transfer the dough to the tart pan and press it over the bottom and up the sides of the pan. Once the dough is in place, roll the rolling pin over the top of the pan to trim off any excess dough that is hanging over the sides. (If there are any tears or holes in the crust, you can use the scraps to patch them.) Pierce the bottom of the dough all over with the tines of a fork (this is called “docking”). Place the tart pan in the freezer to chill for 15 minutes.
-
Preheat the oven to 375°F.
-
Remove the tart shell from the freezer. Line the crust with parchment paper, then fill it with dried beans or pie weights. Bake until the crust is pale golden around the edges, 20 to 25 minutes. Carefully remove the parchment and the pie weights and return the tart shell to the oven. Bake until the crust is dry and the edges are just beginning to brown, 4 to 5 minutes more. Brush the inside of the crust with the beaten egg white and bake until dry, about 1 minute more. Transfer the pan to a wire rack to cool completely.
-
Make the citrus-mascarpone filling: In a large bowl, using an electric mixer with the paddle attachment, beat the mascarpone, cream cheese, lemon curd, lemon zest, and confectioners’ sugar on medium-high speed until light and smooth, 1 to 2 minutes.
-
Assemble the tart: Spoon the filling into the cooled tart shell and spread it into an even layer. Arrange the berries on top. Chill until ready to serve.
TIPS For a glossy, bakery-perfect look, after you’ve finished the berry topping, brush the fruit lightly with a little warmed strawberry jelly thinned with a teaspoon of warm water.
Lemon curd is widely available in grocery stores: Look for a jar alongside the jams and jellies or in the British section of the international food aisle.
