Although it is quite possible to create web pages by starting with an empty file and writing your own HTML, there are numerous products which make it much easier to create and maintain web pages by generating HTML. You can then customize the HTML, to refine the design or adhere to your own corporate style. Such products include NetObjects Fusion, Microsoft FrontPage, Macromedia’s DreamWeaver, or Borland’s JBuilder.
The web designers at the KanDoIT company decide to use the NetObjects Fusion product to generate their new web interface. NetObjects Fusion enables you to create web sites quickly and efficiently in a WYSIWYG environment. There are page layout systems that allow you to draw the various components you want for your site and arrange them on a page. The tool then generates all the HTML.
Their first objective is to create a view account request form that reflects the design described in Designing the Web Interface in Chapter 8. We have called the HTML file that is generated by NetObjects Fusion for the view account form, view-acct.html. We are not only designing the look of the form but also we are setting the properties of the form (see Figure 9-5), so that when the user clicks the Request button, the KanDoIt servlet is invoked. The form settings properties dialog box allows you to set these.
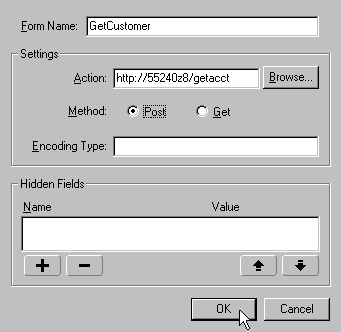
In the HTML of view-acct.html, the definition of the form begins as follows:
<FORM METHOD=POST ACTION="/getacct">
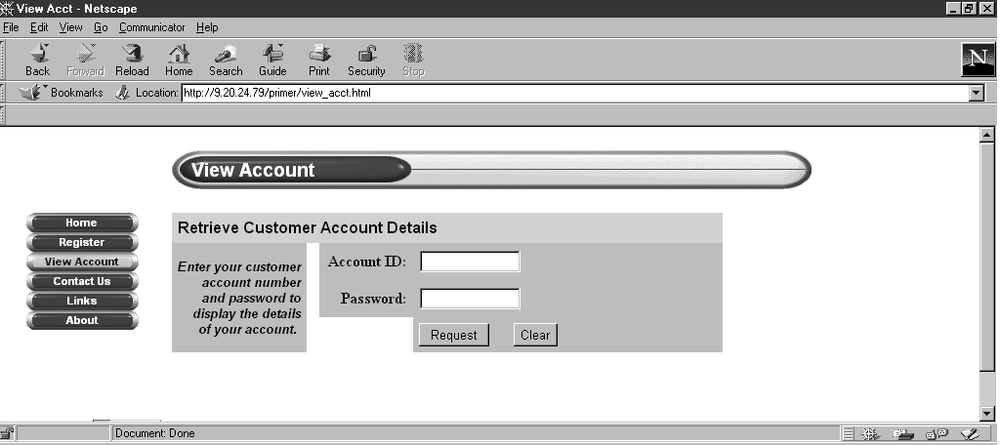
In this line the action is /getacct. That is the alias we defined through the WebSphere Application Server administration tool earlier in this chapter. In our example, /getacct is mapped to the KanDoIt.KanDoItServlet. The POST method is used to ensure that we don’t reveal the parameters we used to call the servlet (which would happen if we used a get). Figure 9-6 shows the finished form.
The Account Details output screen that is returned to the customer after they have entered a valid account number and password is also generated using NetObjects Fusion. Figure 9-7 shows the Account Details page. When you are creating this form it is important to remember that what you are creating is the basis of the Java Server Page (JSP) file that we want to call from the servlet. We have designed the details.html file so that it satisfied corporate standards but then we hardcoded the data fields, so that we know what to replace with dynamically generated data, that is, the hardcoded items are used as placeholders. After we have edited the file to replace the placeholders with the bean reference field, we will rename this file from details.html to details.jsp:
<INSERT BEAN="KanDoITServlet" PROPERTY="acctStatus"></INSERT>
The remainder of this chapter describes the creation of the programs that are involved in the process, from the moment a customer enters their account ID and password, until the moment the account details appear on the screen.