
TV and film have their own way of describing the types of shots you can create. You will need to know some of these – not least because it’s a way of describing what you are trying to do to other people. This chapter will run through some of the basics.
There are various different sizes of shot. This is not an exact science; there are no actual measurements but the following should give you an idea.
There are a number of examples here but if you log onto the website you will find a wide selection of examples.

Wide shot (WS)/establishing shot: This is a shot which should be big enough to show you all the action in a scene. It should help the viewer with the geography of where everything is. You will usually need to get wide shots for every location you visit. Generally, people tend to try to get the wide shot first. If you are using lighting, wide shots tend to be the most time-consuming shots to light. The wide shot also establishes the ‘line of action’ or the ‘180-degree rule’, which will be discussed later.
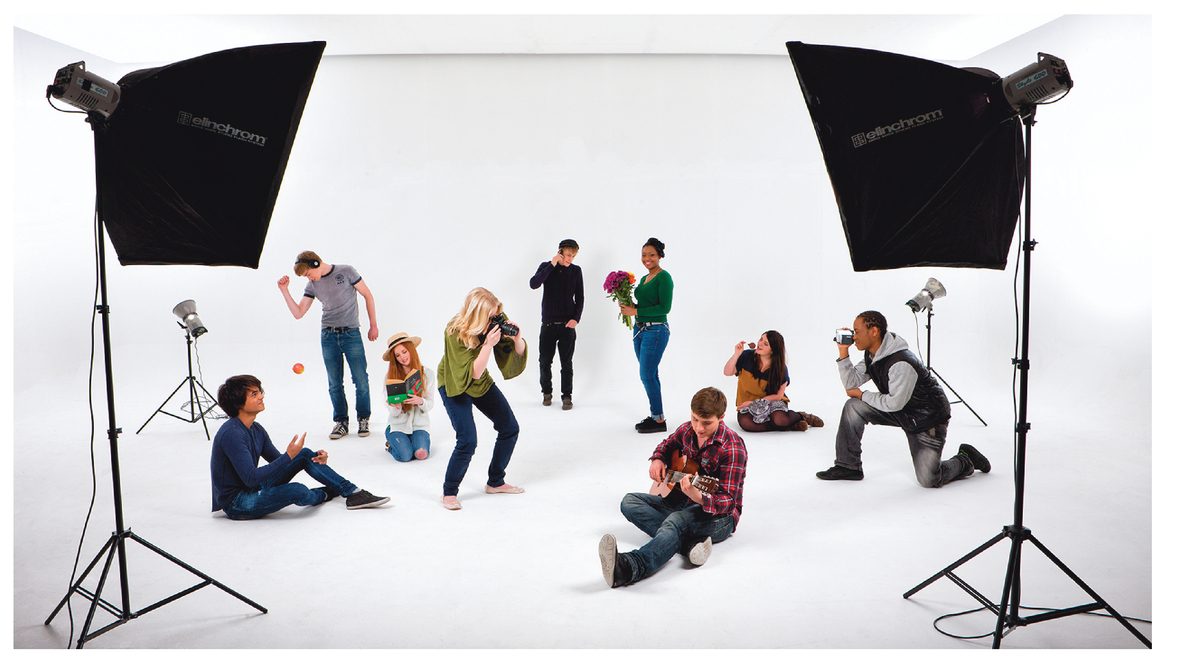
Figure 10.1a Example of a wide shotn
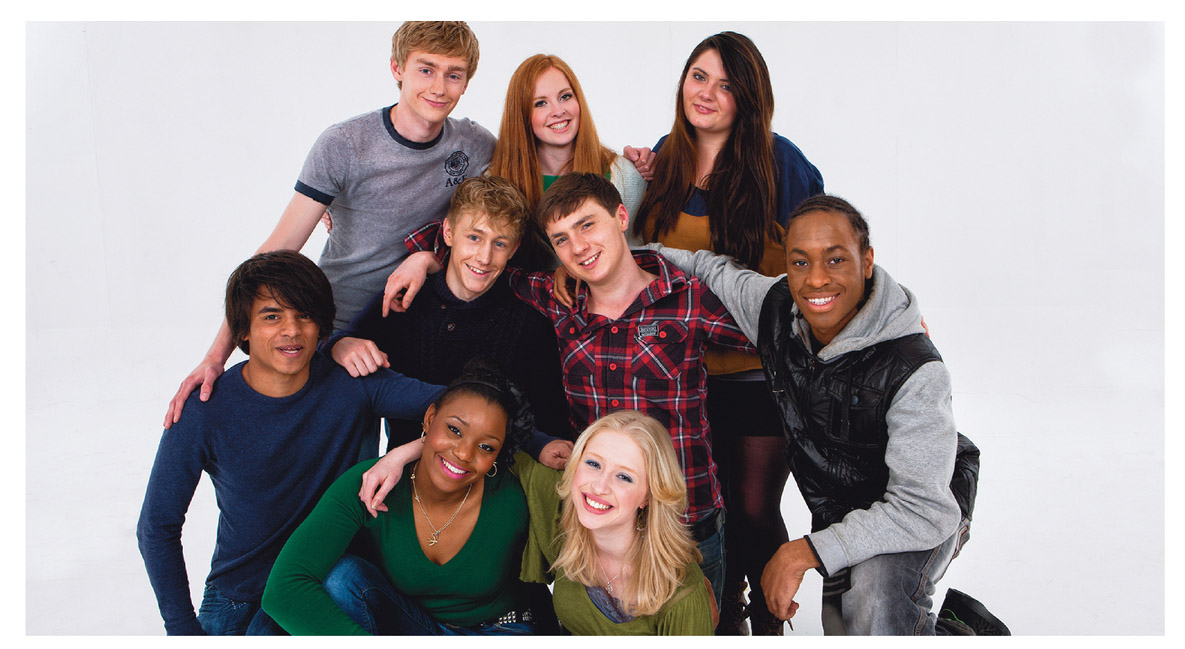
Figure 10.1b Example of a wide shot
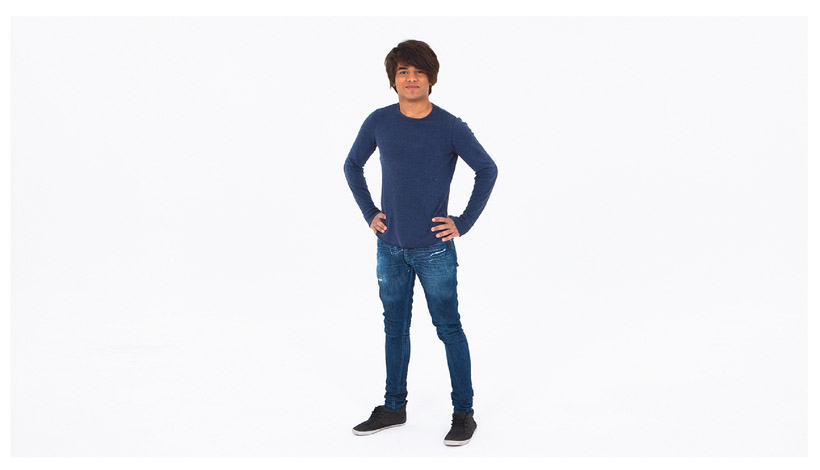
Long shot (LS): This tends to be used when talking about people and means you would have the whole body in the frame.
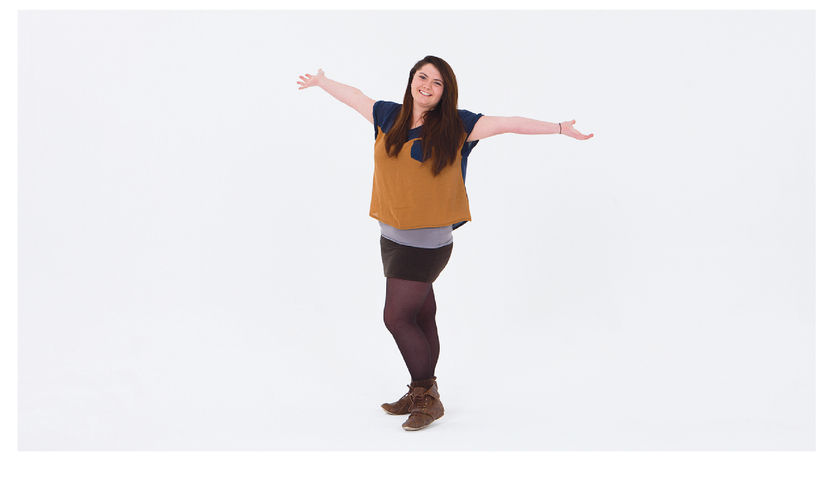
Figure 10.2 Two examples of a long shot
Mid-shot (MS): This shows a smaller area than the long shot but still contains quite a lot of information. If there are people in the scene then you would tend to have their head and torso, perhaps down to the waist.
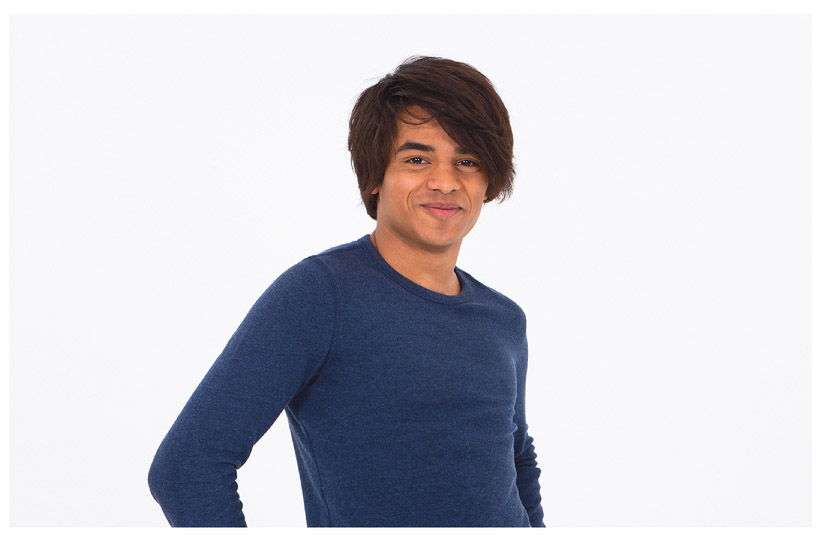
Figure 10.3 Two examples of a mid-shot

Medium close-up (MCU): Somewhere between a MS and a CU; if you are looking at a person then it would tend to be a head-and-shoulder shot.
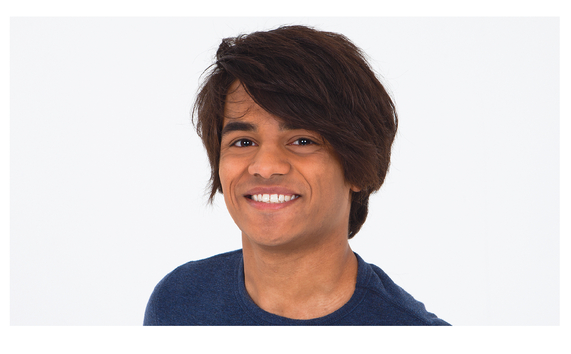
Figure 10.4 Two examples of a medium close-up shot
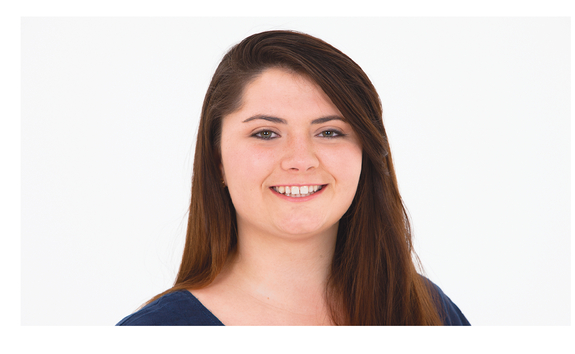
Close-up: You are looking in detail at something in the scene. If it is a person then it would be just the head or hand, or some other specific part of the body. If it’s an object, it’s likely to be some kind of detail.
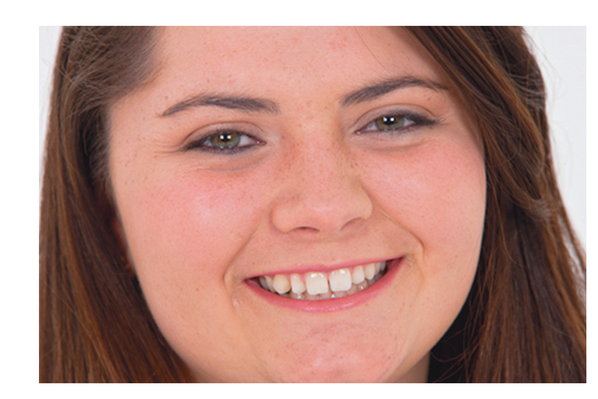
Figure 10.5 Two examples of a close-up shot
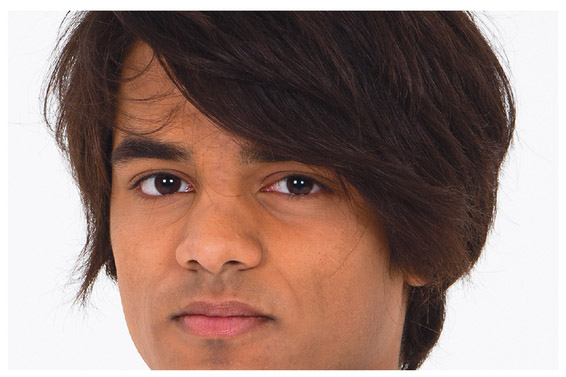
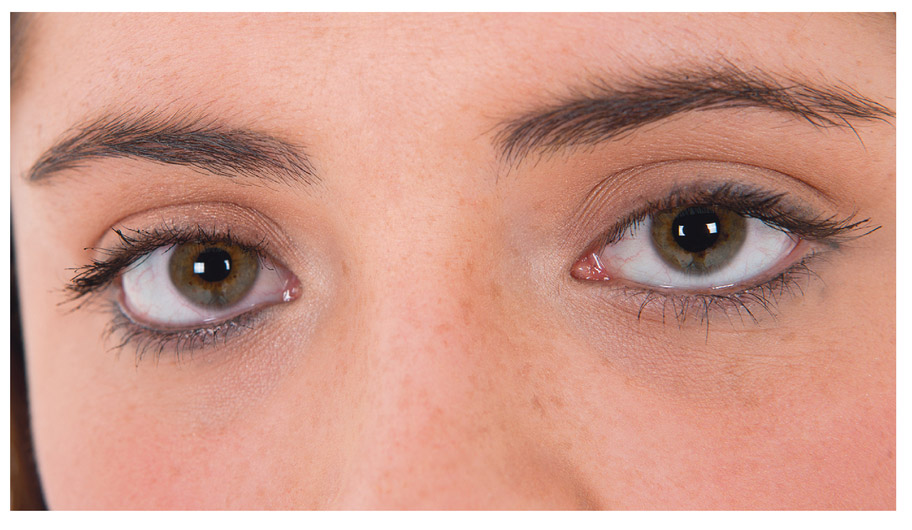
Big close-up (BCU), sometimes called extreme close-up: This would show some very small detail you want to feature.
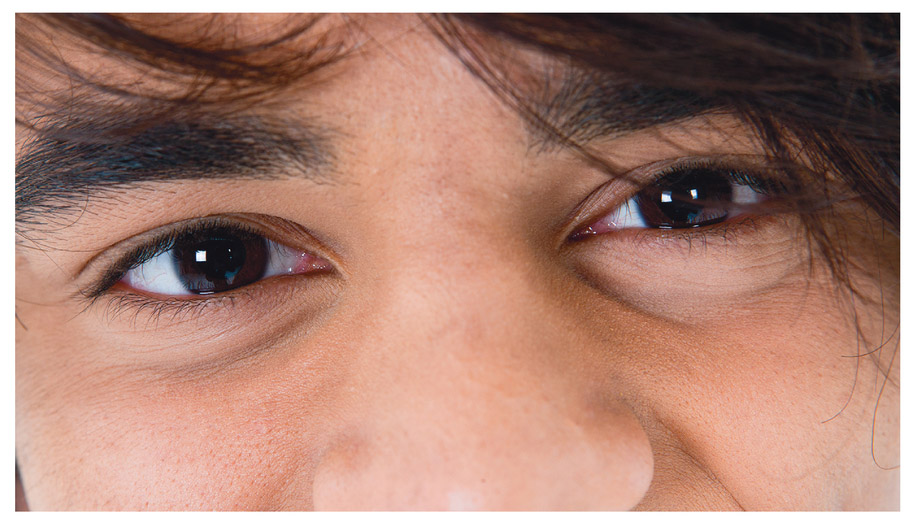
Figure 10.6 Two examples of a big close-up shot
Sometimes directors will refer to the shots by the number of people in it. This is usually when they are shooting a scene with a number of people and then want to have closer shots on just one or two. Normally this is just confined to shots with either one or two people in it. A shot with just one person is referred to as a single. A shot with two people is referred to as a two shot.
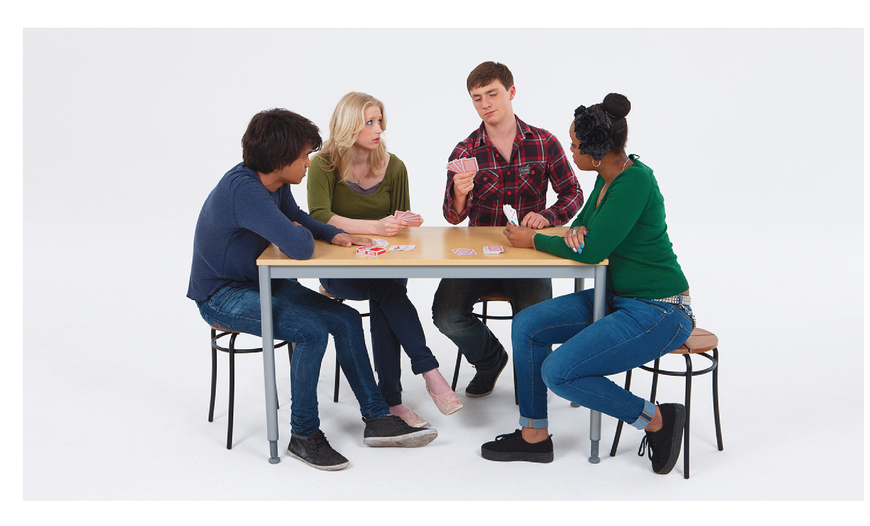
Figure 10.7 An example of a wide shot
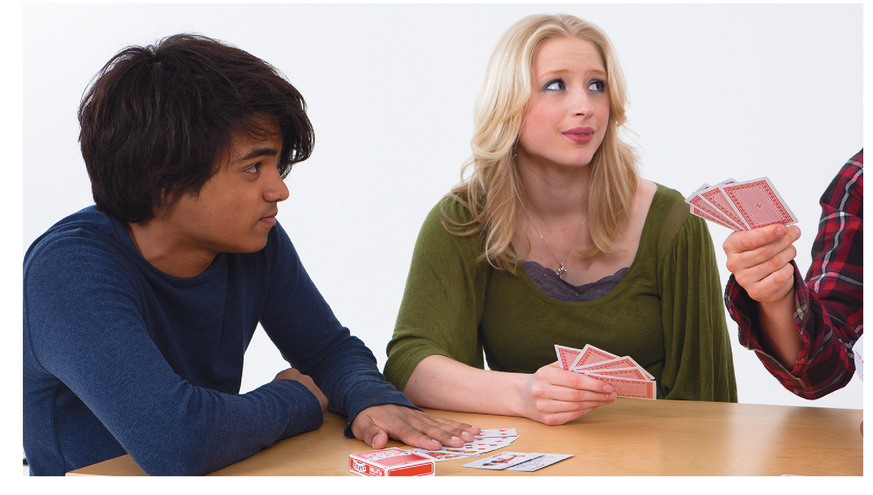
Figure 10.8 An example of a two shot
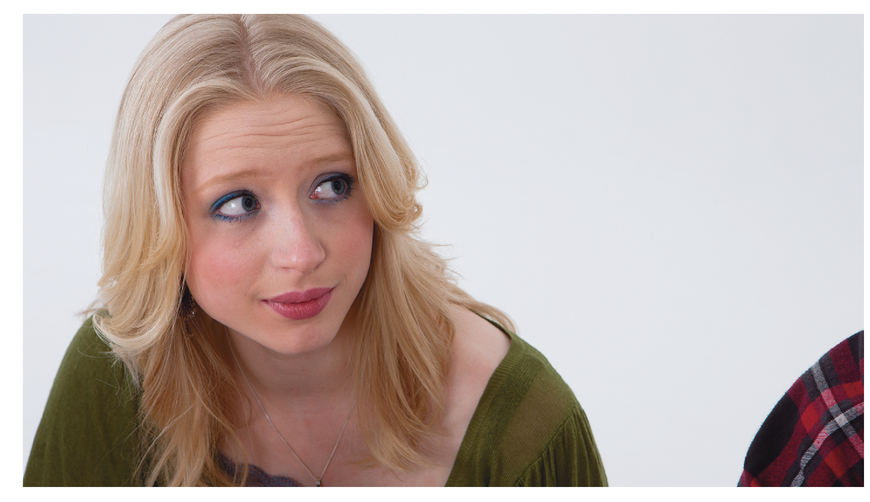
Figure 10.9 An example of a single shot
When you come to take a sequence of shots on the same subject, it will be very important to change the camera angle each time you change shot size. If you don’t do this your shots won’t cut very well. The general rule is that you should change the camera angle by at least 30 degrees between two shots on the same subject if you want them to cut together.
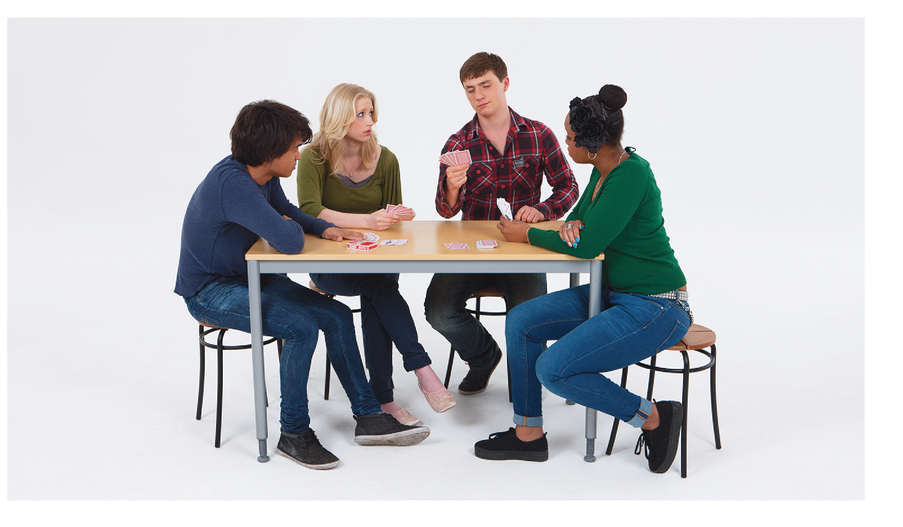
Figure 10.10 Changing shot sizes, wide shot
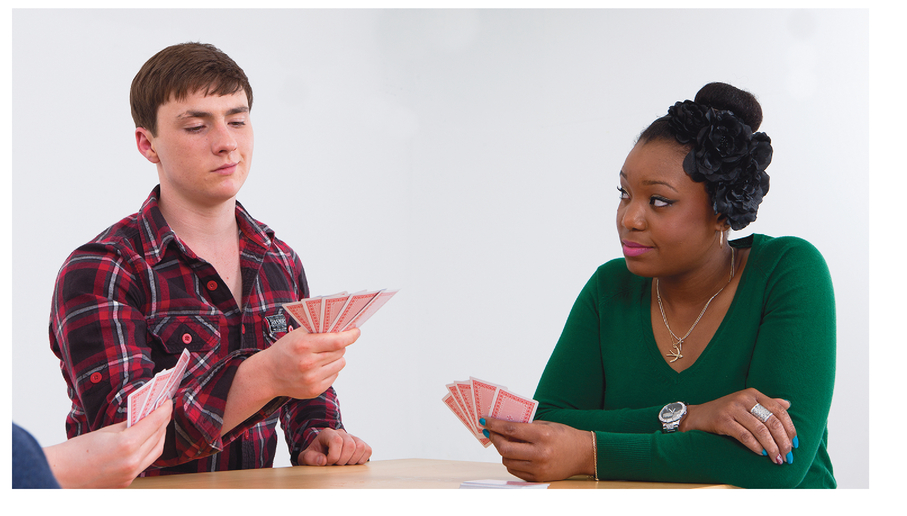
Figure 10.11 Changing shot sizes, mid-shot
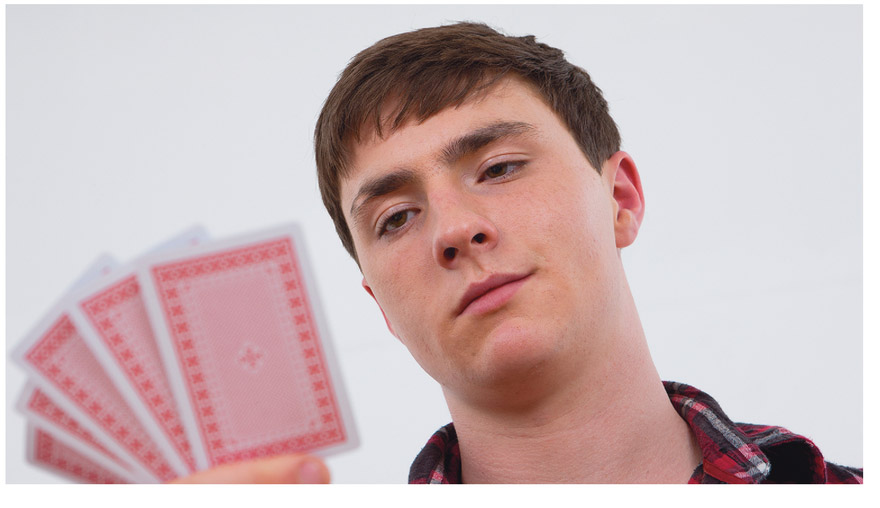
Figure 10.12 Changing shot sizes, single
Understanding the names of shot sizes is very important; however, that said, there is no fixed rule for what should be in any size shot. They tend to be relative to one another. If, for example, your wide shot is taken to show a busy high street and shows the whole length of the high street, a CU of the same scene could actually be one person picked out from the crowd. You might be showing the whole person but relative to the size of the WS it’s quite a close shot.
Point of view (POV): This type of shot makes the viewer think that they are seeing what the character or presenter is seeing. You are taking a shot from the point of view of a person or object. You may have seen whole films made as a point-of-view shot. For example, Cloverfield Director Matt Reeves (2008) was seen from the point of view of one of the characters supposedly shooting home footage.
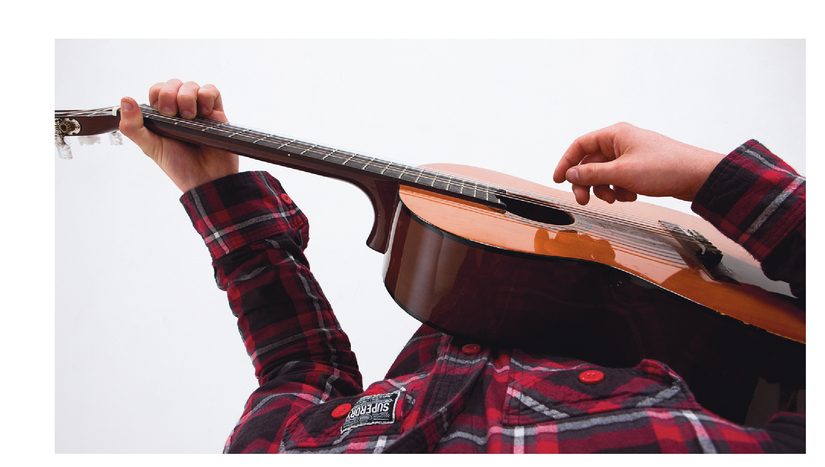
Figure 10.13 Three examples of a point-of-view shot
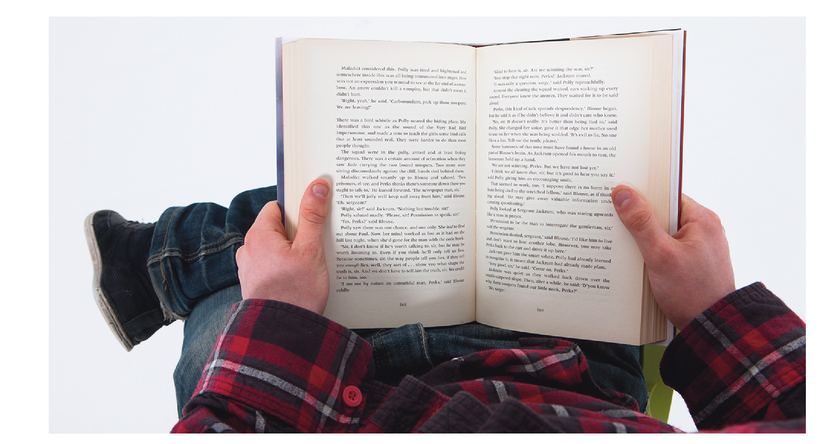
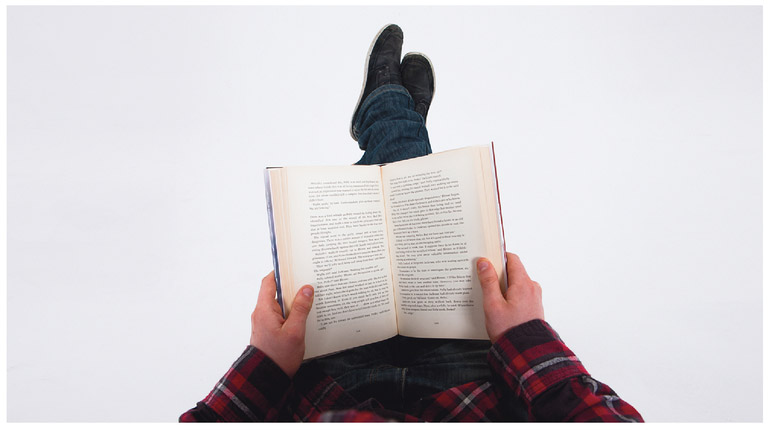
Over-the-shoulder shot: Similar to a point-of-view shot but in this type of shot you will also see a small part of the person: for example, a bit of the shoulder or head. This is to orientate the viewer as to whose point of view they are looking from.
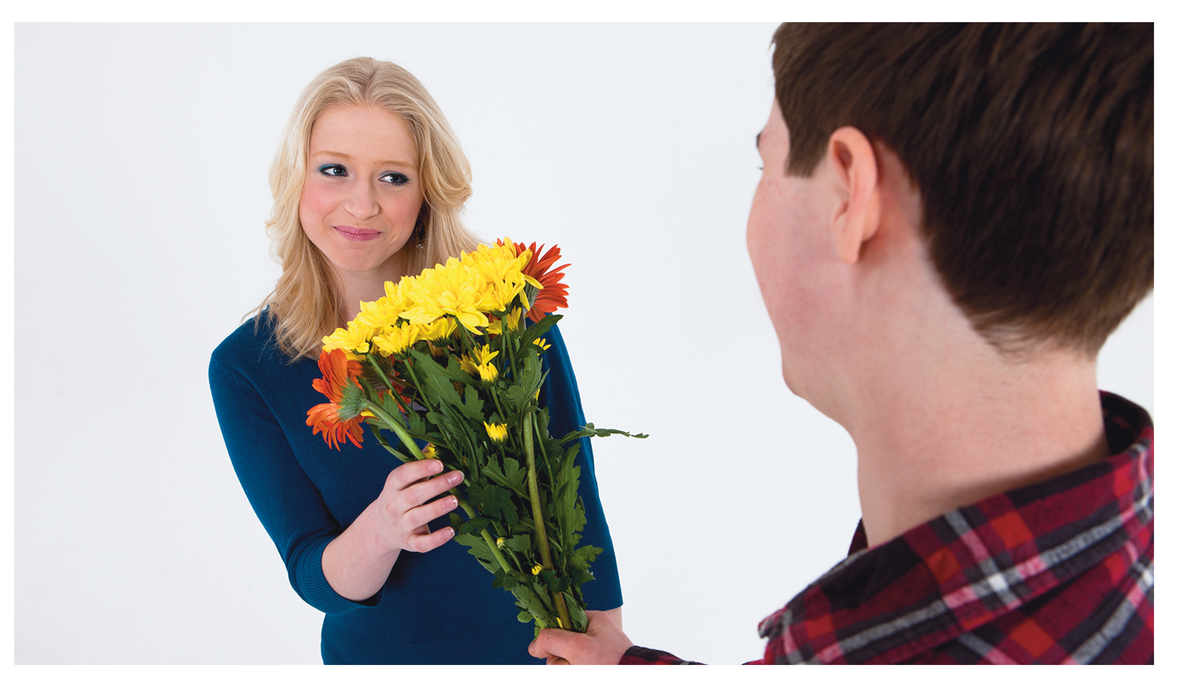
Figure 10.14 An example of an over-the-shoulder shot
Shots can also be taken from different heights; any of the above shots can be taken from a number of different angles. The effect can be fairly extreme or it can be quite subtle. Using different heights creates variety.
Low angle: This type of shot gives the viewer the impression they are looking up at something (Figure 10.15).
Eye level: In this type of shot the viewer is on the same level as the person or object in the shot (Figure 10.16).
High angle: In this type of shot it’s as if the viewer were sitting above the scene and looking down on it (Figure 10.17).
Bird’s eye: This gives the impression that the viewer is right on top of the action looking down on it, like a bird hovering overhead (Figure 10.18).
Oblique angles: This is also known as a Dutch tilt or canted angle. In this type of shot the camera itself is tilted to one side. This gives the viewer a sense of instability; it is sometimes used to create a sense of fun and anarchy in a piece (Figure 10.19).
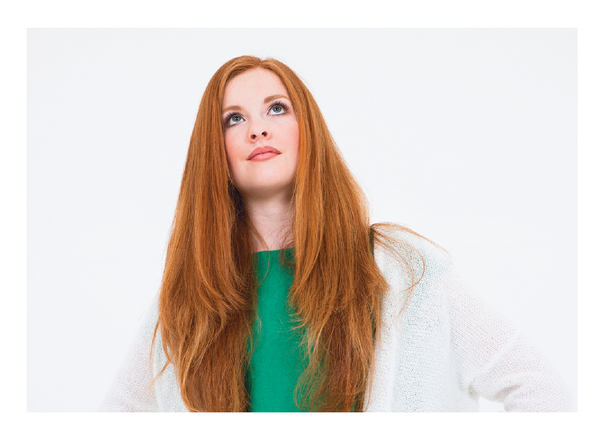
Figure 10.15 Three examples of a low-angle shot
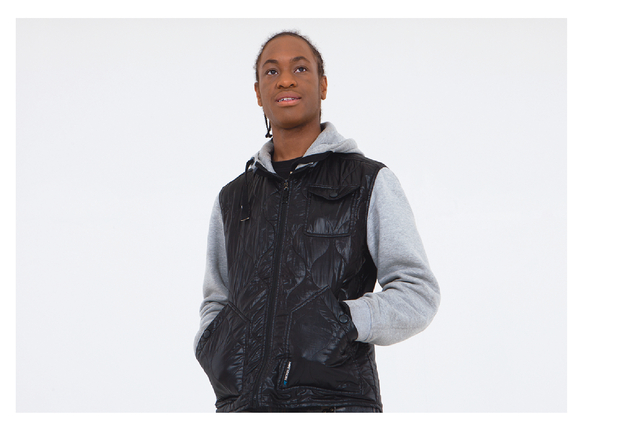
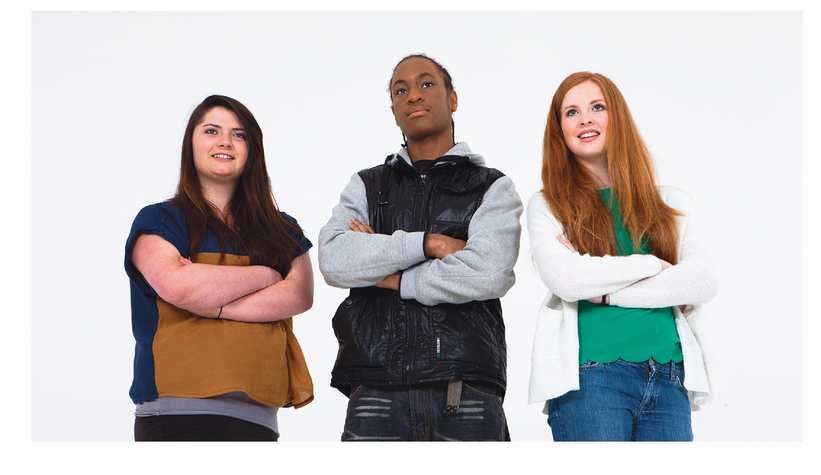
Figure 10.16 Three examples of an eye-level shot
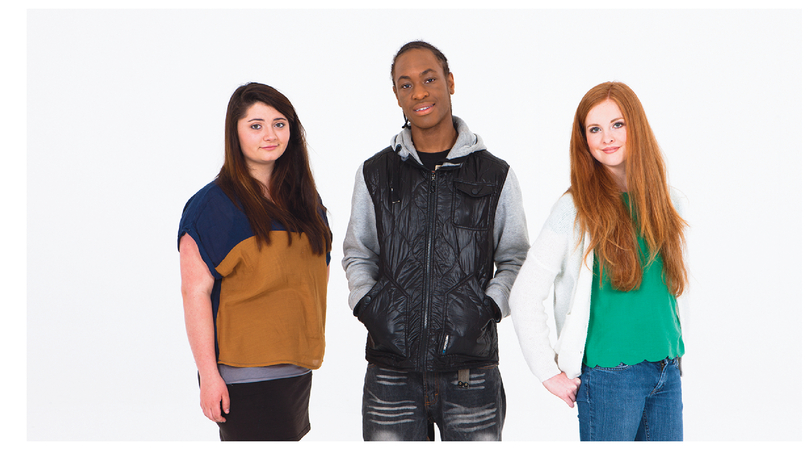


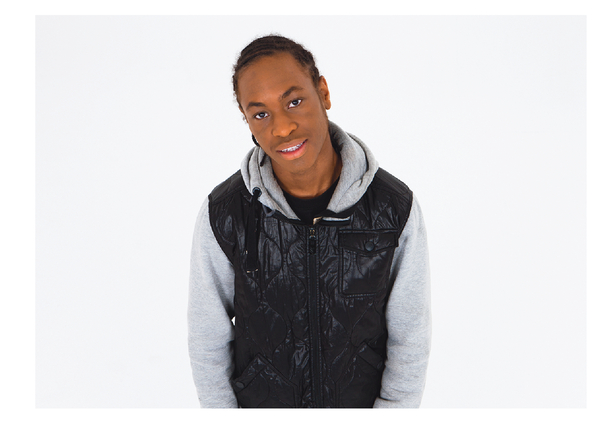
Figure 10.17 Three examples of a high-angle shot
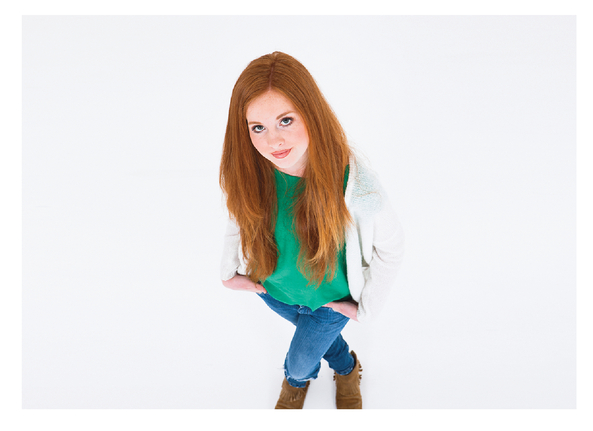

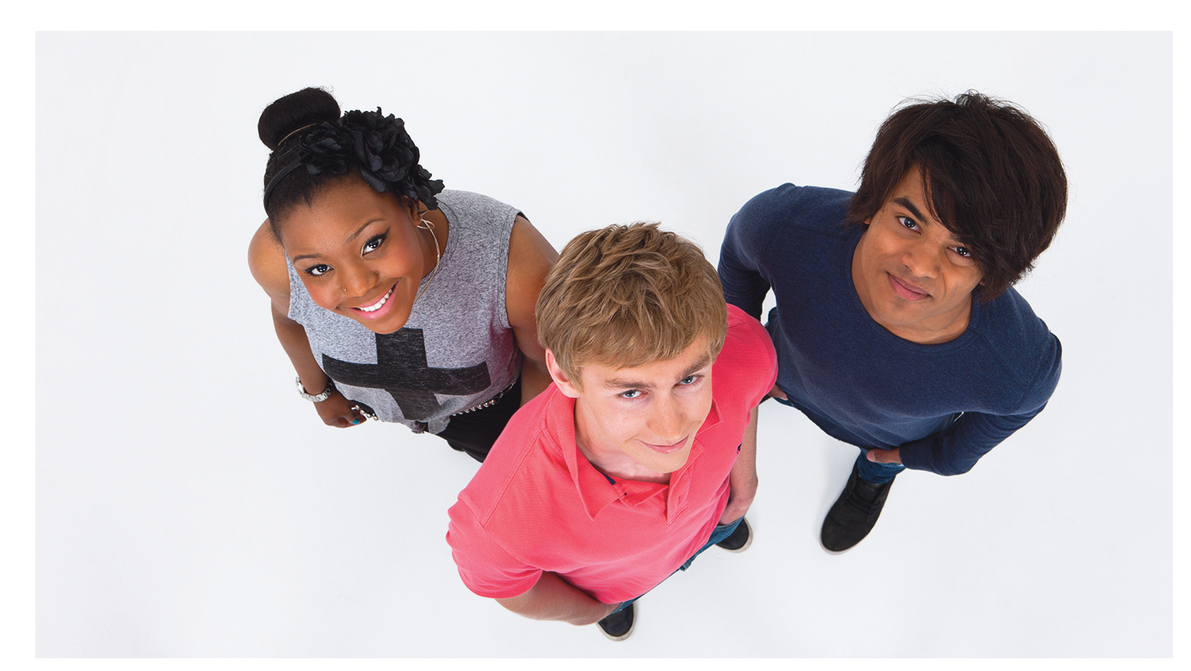
Figure 10.18 An example of a bird’s eye shot
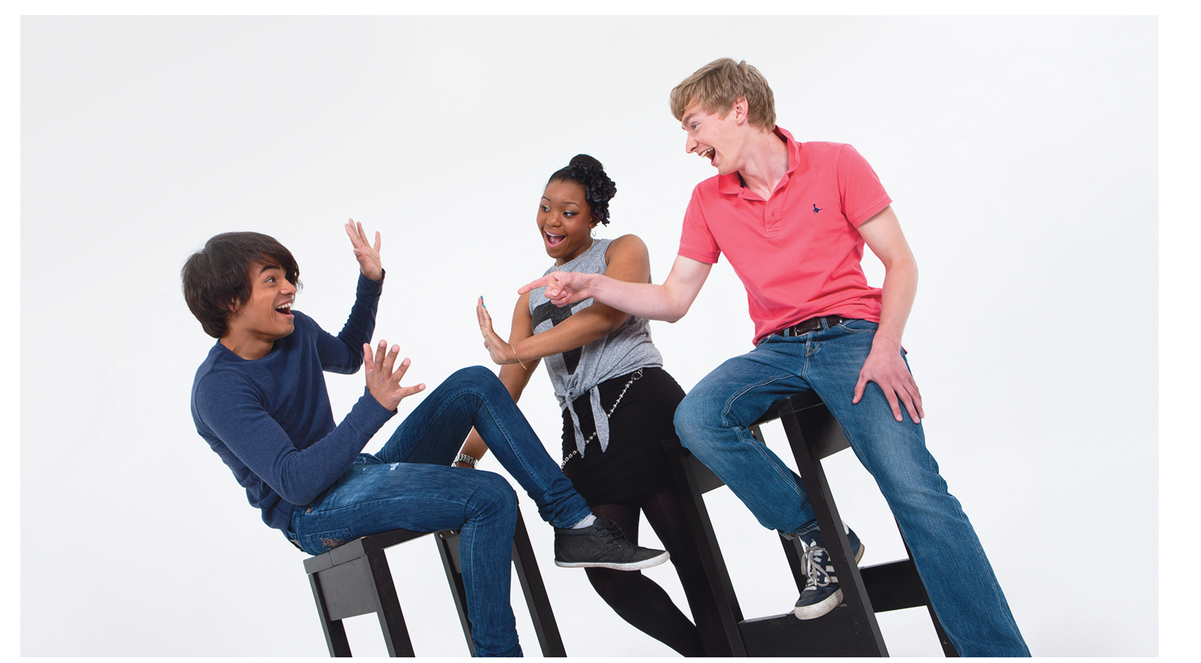
Figure 10.19 An example of an oblique (canted or Dutch) angle
There are no hard-and-fast rules as to when you should use which shot. If you watch different programmes you will see a huge variety of different shots. However, there are some conventions which you may start to notice, although these are by no means ‘rules’.
There are also a number of camera moves you can make. Some of these involve swivelling the camera on the tripod, or using the zoom; in other types of shot the camera itself moves; in some the camera needs to be handheld and in others you have to have special equipment such as tracks, jibs and cranes. This chapter assumes that you are not going to be able to access this type of equipment so will touch only briefly on them.
In a tracking shot the direction of the movement could be at right angles to the direction of the camera lens (see Figure 10.20) or it could be travelling in the same direction. Alternatively, or it can move towards the object or away from it (see Figure 10.21).
Without this equipment to hand you can try to reproduce this move by holding the camera in your hand and walking beside the character. However, you need a fairly steady walk to pull this off. You will also need someone to walk beside you to make sure
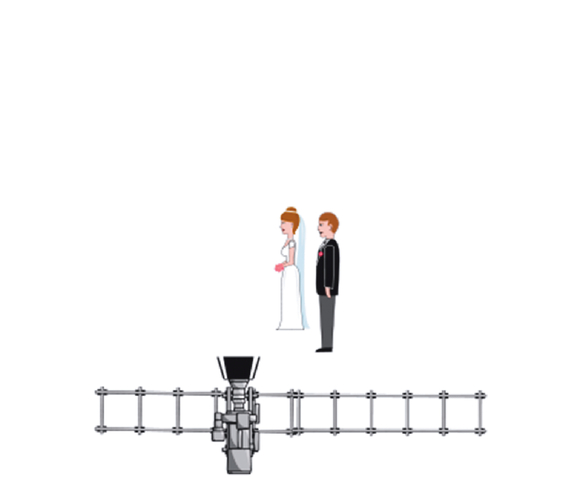
Figure 10.20 Tracking at 45-degree angle
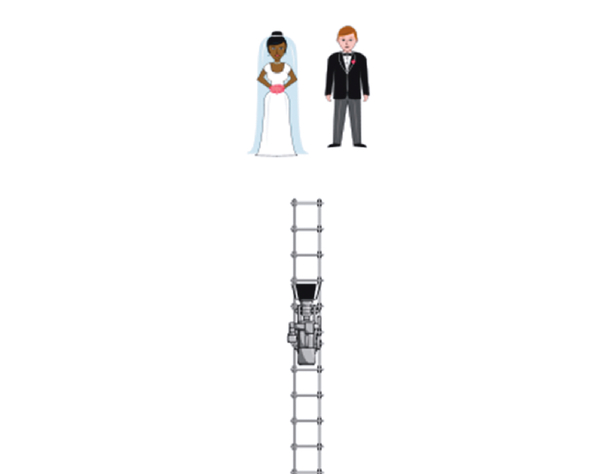
Figure 10.21 Tracking in front of subject
Just as with shot sizes, there is no hard-and-fast rule as to when you should be using moves.
Moves should be handled carefully. There is a temptation to move the camera all the time – up and down, side to side, to try to cover everything. This is often called ‘hose-piping’ and is generally regarded as a poor filming technique. It is next to impossible to edit and the viewer will start to feel rather sick. If you are going to use a move it should have a definite start and a definite end, and you should know why you are doing it. You should also leave a handle on both ends of the move. A handle is about five seconds at the beginning and end of a shot where the camera does not move. You will find this useful when you come to the edit. Some types of programmes of course do have this technique of moving the camera all the time. However, it’s a very particular approach and, unless you have deliberately chosen to use this style, stay clear of hose-piping.
You will also need to think about whether you want your camera to be mounted on a tripod or handheld. Again, there is no right or wrong answer to this; it’s a creative decision you have to make.
If you are taking a handheld shot it is best to use two hands. The first hand will go through the strap and hold the camera. The second hand will cradle the bottom of the camera. You should use the first hand to operate all the switches; the second hand is just there to keep the camera level and steady (Figure 10.22). Handheld shots are not an excuse for hose-piping. You need to know what your shot is before you record it.
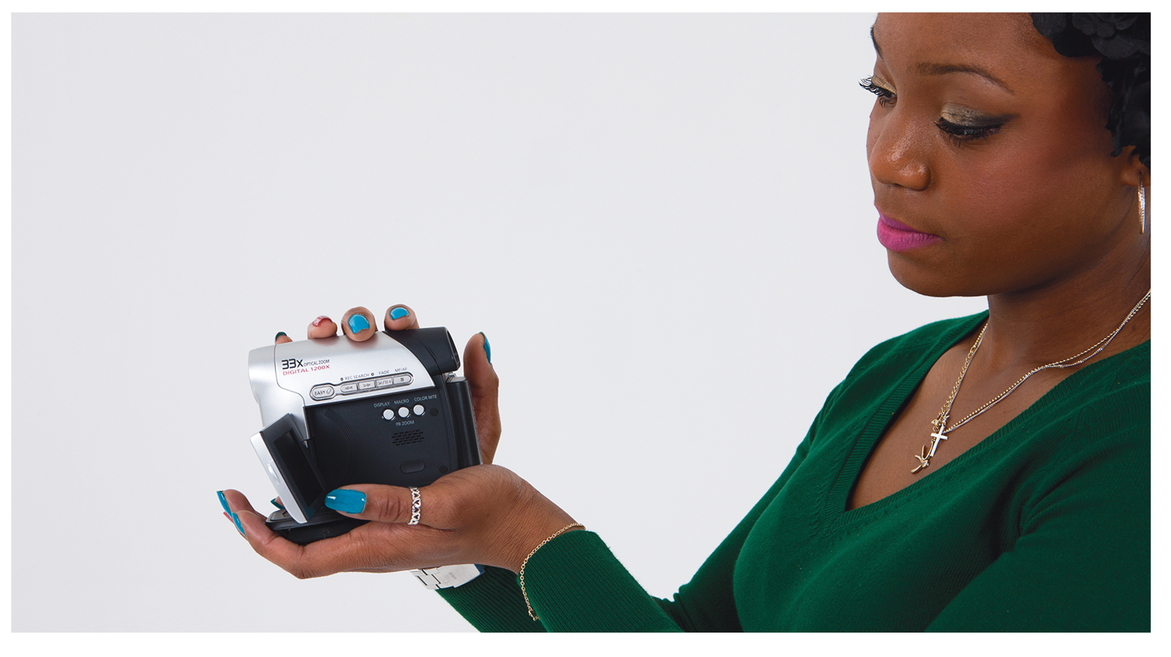
Figure 10.22 Holding the camera for handheld shots
Framing a shot well is quite an art form; it is complex and ultimately subjective. However, framing a shot on video is not unlike framing a shot in photography; there are some basic rules which will help you to take a better shot.
If you have a person in shot, whether a presenter, interviewee or character, you need to frame the shot so as to give the person enough ‘looking room’ (Figures 10.23 and 10.24). If they are looking to the right then you need to leave some space between the end of the character’s nose and the edge of the right-hand frame. If you don’t do this it looks as if the character is bumped up against a wall.

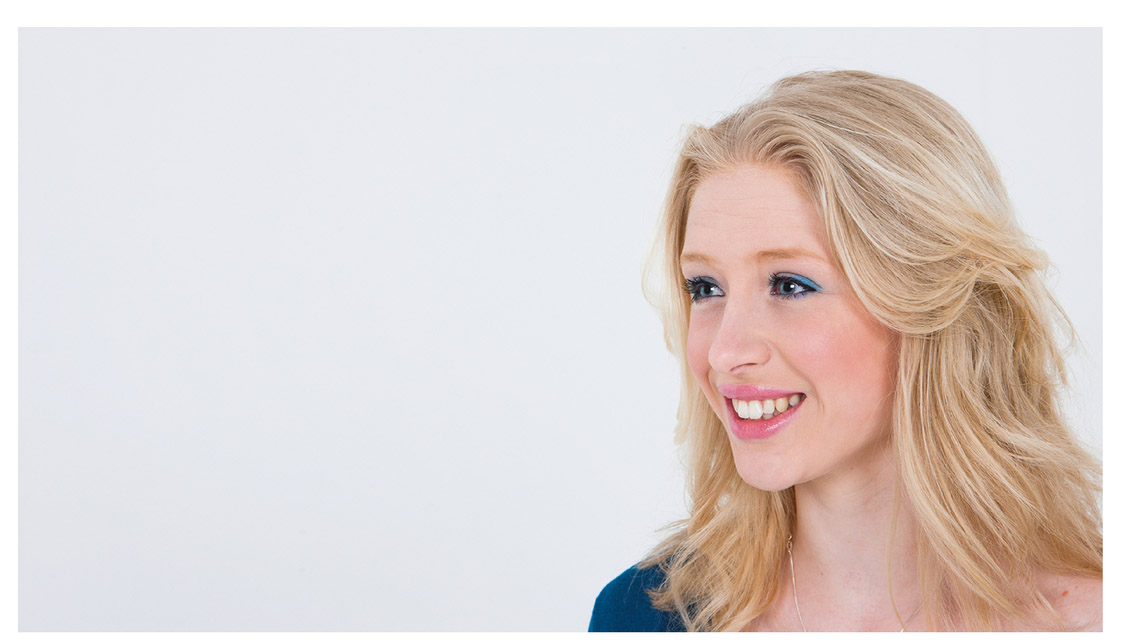
Figure 10.23 Two examples of a correct looking room shot
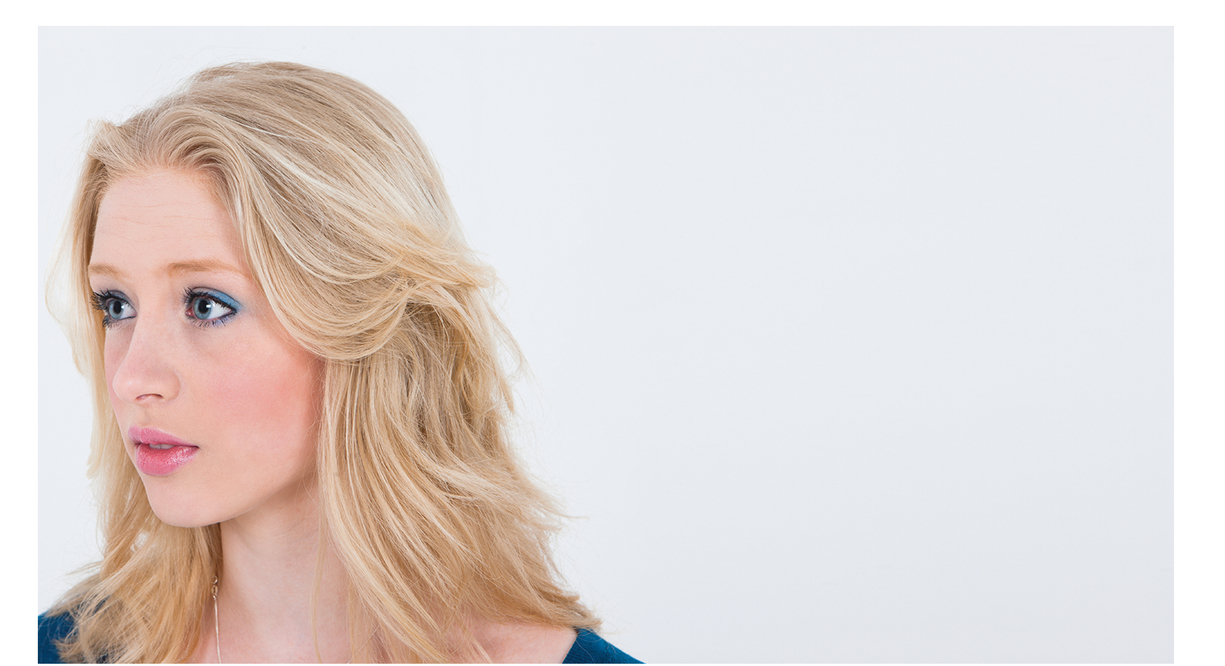
Figure 10.24 Two examples of a poor looking room shot
In Figure 10.23 both the girl and boy have quite a lot of looking room. There is quite a lot of space between the end of the nose and the edge of the frame. Figure 10.24 shows what they look like if the shot is framed without looking room. It’s a slightly odd effect and makes you think they are about to bump into something. Stills photographers tend to play around with this a great deal, but in filming when a character or contributor is talking it looks quite odd not to give them some looking room.
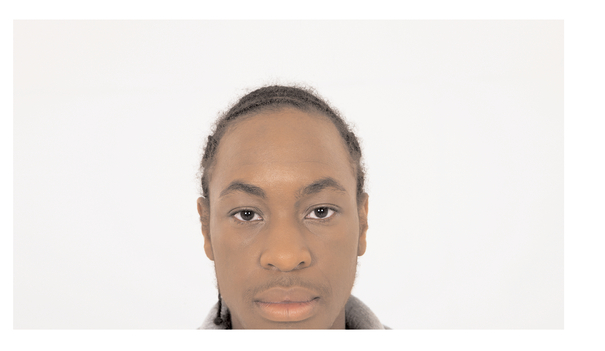
Similarly, you will want to position your characters and contributors to give them enough headroom. You want to avoid cutting off too much of their head or make it look as if their chin is resting on the bottom of the frame. Generally speaking, if you have to choose between one of the two it’s better to cut off a bit of the top of the head than to have the chin resting on the bottom of the frame, but it should be possible to frame so that neither happens.
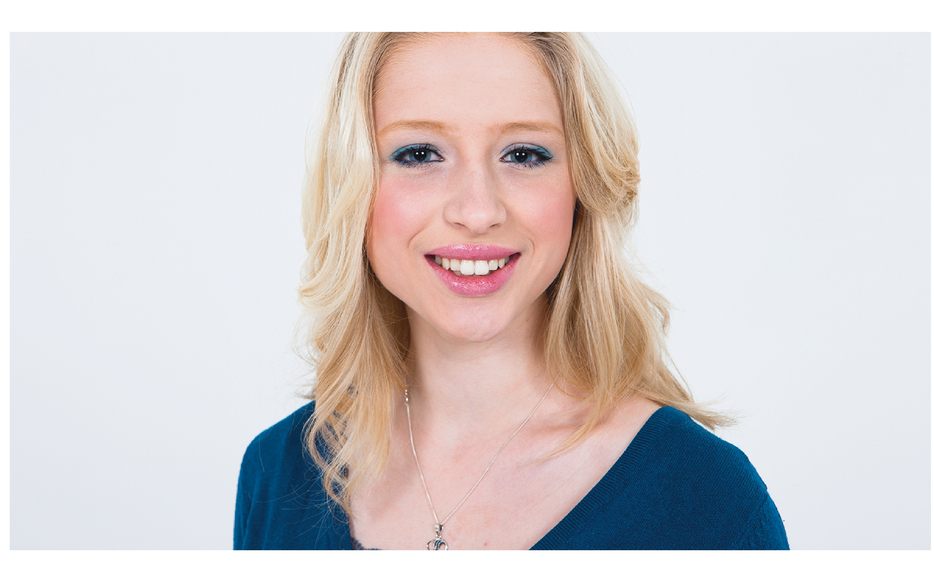
Figure 10.25 Two examples of a poor headroom shot

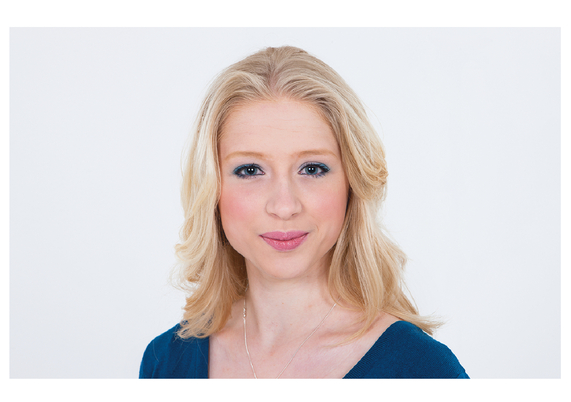
Figure 10.26 Two examples of a correct headroom shot

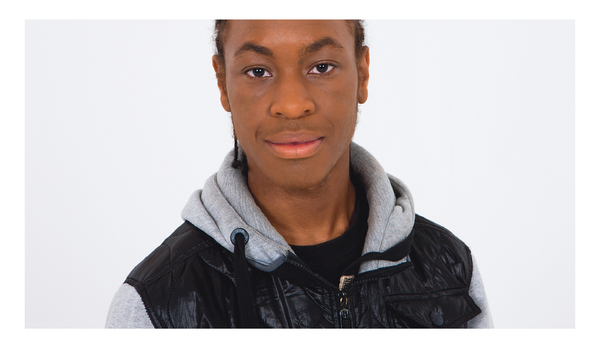
Figure 10.27 Two examples of a poor headroom shot
If you have studied photography you will be familiar with the term ‘Rule of thirds’. It’s an easy way of helping you frame your shots. It applies both to stills photography and video filming.
Imagine your frame, then draw three imaginary horizontal lines dividing the frame into three, and then imagine and draw three vertical lines also dividing the frame into three. The four spots where the lines intersect are the best spots where you want the viewer to focus on. The reason for this is that it’s thought that when you look at a picture the intersection of those four lines is the place your eye most naturally looks at. If you put the things of most interest in these spots your brain will feel comfortable with that position.
Nobody is arguing that you have to frame every shot in this way; your programme would start to look very odd and boring if you did. But it’s a tip well worth knowing.
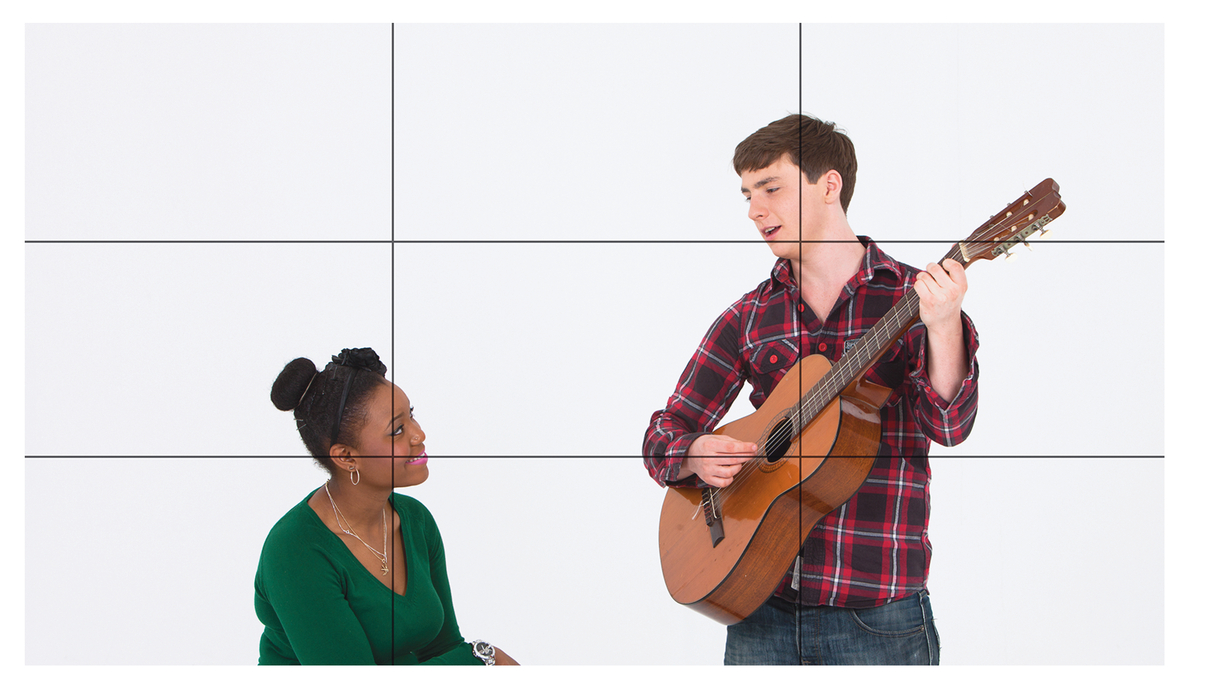
Figure 10.28 Rules of thirds
Depending on what camera you are using you may or may not want to think about depth of field. In order to play with the depth of field you will have to be able to perform two things with the camera. You will need to be able to control the amount of light coming into the camera, so you will need to control the aperture. You will need to change the focal length; that is to say, you will need to be able to zoom in and out. If you can do either or both of these things on the camera you will be able to play with the depth of field.
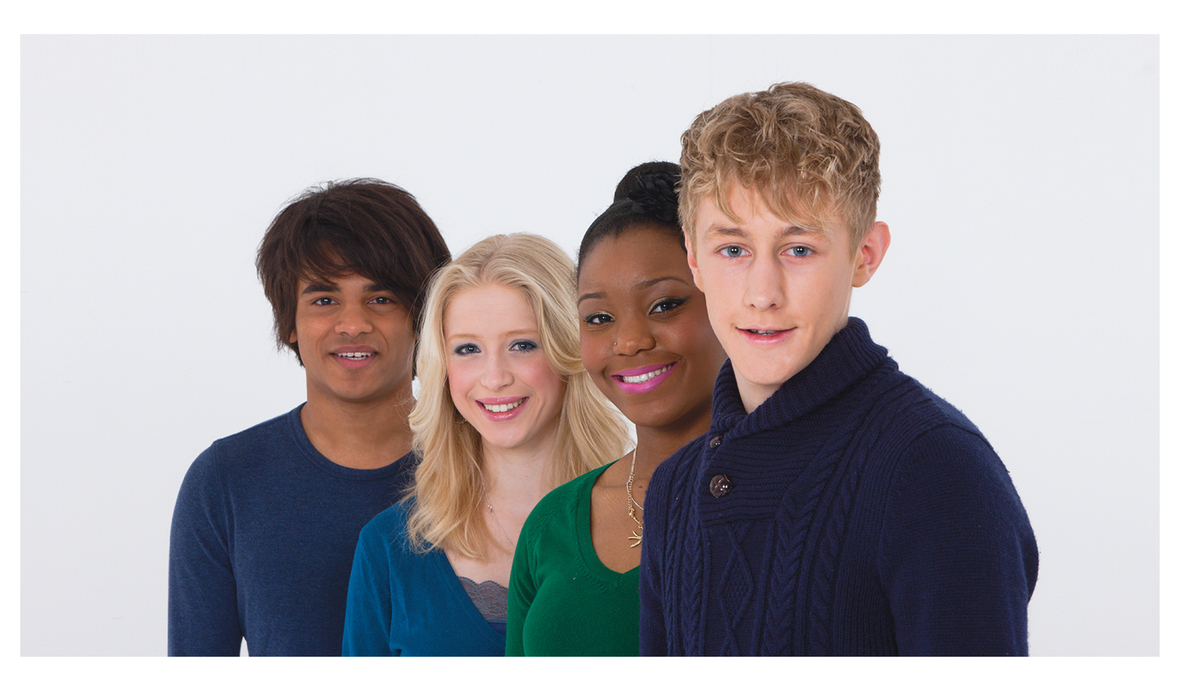
Figure 10.29 An example of a long depth of field shot
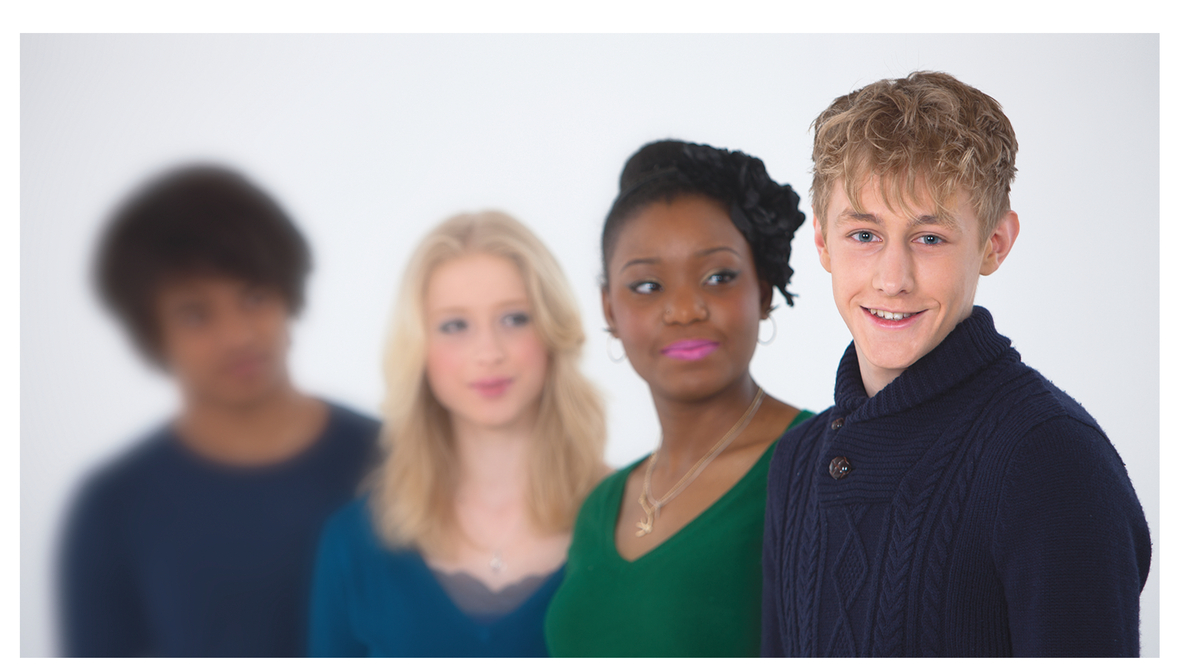
Figure 10.30 An example of a short depth of field shot
What is depth of field? When you take a shot with any camera you focus on a particular subject within the frame. Depth of field is the distance behind and in front of the main subject which is also in focus. If there is a shallow depth of field it means that the area in the foreground and behind the object on which you have focused will be blurry or soft. If you have a long depth of field it means that much more of the foreground and background will be in sharp focus.
Look at Figures 10.29 and 10.30 on the previous page. In the first image everyone in the shot is in focus and it has a long depth of field, but in the second image the person in front is in focus but the peoples behind have gone soft, even though the image is a similar size: it has a shorter depth of field.
There are two ways to alter the depth of field. The first way is to alter the aperture or iris. If you want to get a shallow depth of field and have more of the picture looking blurry, then you need to open the aperture. The more you open it, the shorter the depth of field and more of the picture will look blurry. If you want everything to stay in sharp focus then you need to close the aperture. The smaller the aperture, the more of the picture will stay in sharp focus.
However, opening and closing the aperture to this extent may not always be possible. If you are outside on a very sunny day and you open the aperture right up, there will be too much light coming into the camera and it will burn out; that is to say, it will just look all white. If there isn’t very much light naturally and you have no artificial lights then you won’t have enough light coming into the camera and it will look too dark.
The second way to alter the appearance of the depth of field is to move the camera and use the zoom lens. If you physically move the camera further away from the object on which you want to focus and use the zoom to create the same size of shot, then you will get a short depth of field. You will need to use a tripod if you are going to zoom in a long way. Any camera movement is exaggerated when you are on a long lens and a handheld shot will look very shaky. If you want more of the picture to stay sharp (longer depth of field) then you need to physically move the camera closer to the object you want to focus on and zoom out.
With a combination of changing the focal length (the amount you zoom in or out) and altering the aperture you will be able to change the depth of field on most video cameras.
Why alter the depth of field? There are no set rules; it is down to your own creative sense. However, the effect of having a shallow depth of field is to give more contrasts in the shot; it also makes the viewer concentrate on the object you want them to focus on. It makes the subject of the frame stand out more. It creates a softer, slightly more dreamy image. However, this may not be appropriate to what you want. A journalist reporting on a situation going on around them might want everything to stay in focus. That kind of dreamy look may not be something you feel is right for the piece.
EXERCISE 10.1 Depth of field
Line up seven books on a table, one behind the other but slightly staggered so that you can see them all. Make the middle book the focus of your shot. Frame up the shot so that you have all the books in the shot filling most of the frame, but make the middle book the focus of the framing.
Take the shot twice. The first time put the camera as close to the books as possible and zoom out so you get all the books in the shot on wide angle. The second time keep the camera at the same level but stand further back and use the zoom to create the same size shot. Stand as far back as you can and still have the same framing.
If you have easy access to an edit suite then record these two bits of commentary below and lay the pictures on top of them. If you don’t have easy access to an edit suite you can just play back each of the two versions of the shot and read the commentary over it. It should be fairly easy to see which shot best matches which piece of commentary.
There are no hard-and-fast rules for film grammar and for what shot to use when and where. This is up to you and your own creativity. However, it is worth knowing what’s available to you. The more you know about the effect which different shots have then the more creative you can be about how you use them. The more you play and practise with material before you do your shoot the more confident you will be about trying different things when it comes to the shoot.