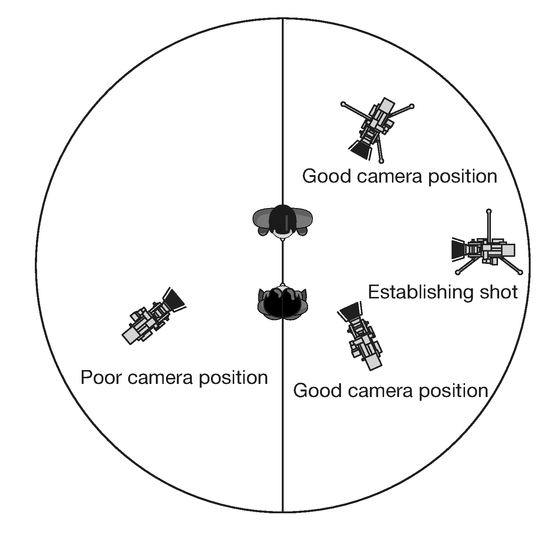
Figure 11.1 Crossing the line
You hear the phrase ‘crossing the line’ talked about a lot and you’ll hear a lot of people seeming to be quite anxious about it. This is largely because it’s quite difficult to explain. However, the good news is that it’s very easy to know when you’ve done it; the bad news is you may discover it too late. That’s why you have to get your head around it.
Crossing the line is more important in some situations than in others. It is important to understand the term if you are shooting dramas or action sequences. It is also important in factual programmes if you have two people talking to one another or if you have some kind of action sequence with people moving in and out of frame.
So what is it and why do we need to know about it? Well, it’s important to keep the geography of a sequence making sense in the mind of the viewer. If you have established a scene in a wide shot, you will probably want to use some closer shots as well. A viewer will form a map in their mind of where people are in the frame, even if they can’t see them. If they appear in an unexpected place then it will confuse the viewer and they will stop watching the piece and start wondering why everyone is jumping around.
The easiest way to think about it is to imagine that there are two people in the scene. Then draw an imaginary line between the two objects. That line is called the ‘180-degree line’ or sometimes the ‘line of action’. Then draw a circle using the line as the diameter of the circle. Look at Figure 11.1: if you start by taking a wide shot from the right half of the circle, all the other shots should be taken from the same side of this line. They can be taken from any position or angle within the 180 degrees of the semicircle, but once you cross that line into the left half of the circle the shots will start to become confusing to the viewer.

Figure 11.1 Crossing the line
Look at the image in Figure 11.2. The camera is in front of the table at which the couple are sitting. The vertical line on the floor represents the line of action. If the camera stays in front of the table and then cuts to a close-up of each of them individually the girl will be looking towards the right and the boy towards the left (Figure 11.3). This is consistent with what the viewer has seen in the wide shot and they will not get confused.
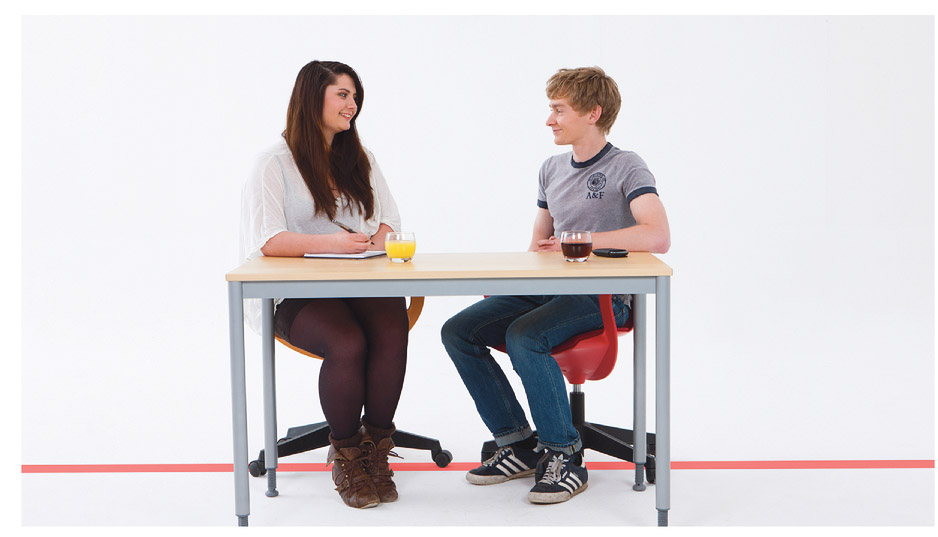
Figure 11.2 Establishing the line of action

Figure 11.3 Two examples of a single from correct side

However, if you take the wide shot from one side of the table and then move the camera around to the other side of the vertical line and take the close-ups from the opposite side, it would have the disorientating effect of making it look to the viewer as if they had swapped positions (Figures 11.4 and 11.5). This will confuse your viewer and they will stop watching the film and start trying to make sense of the geography. You can easily try this yourself; even a sequence of shots from a stills camera will demonstrate the effect.
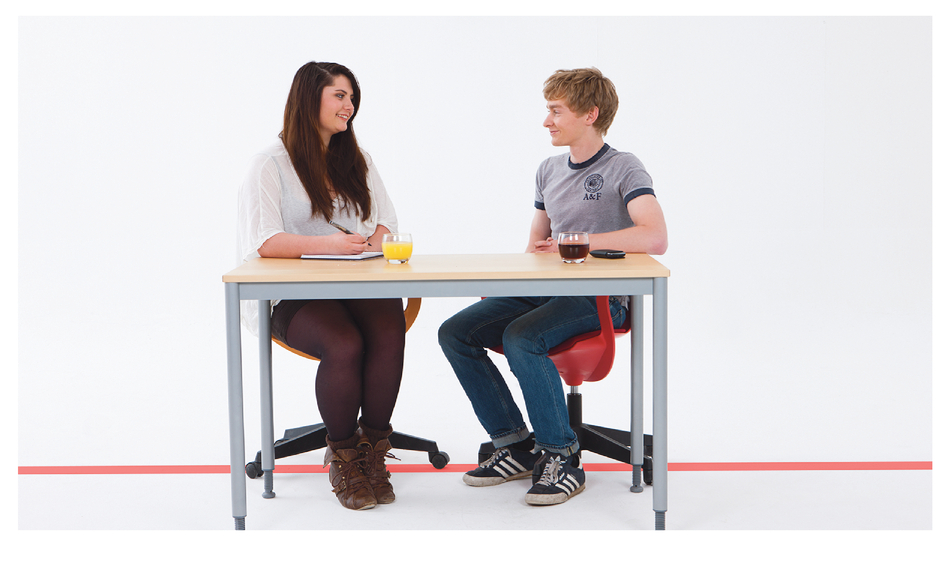
Figure 11.4 Re-establishing the line of action
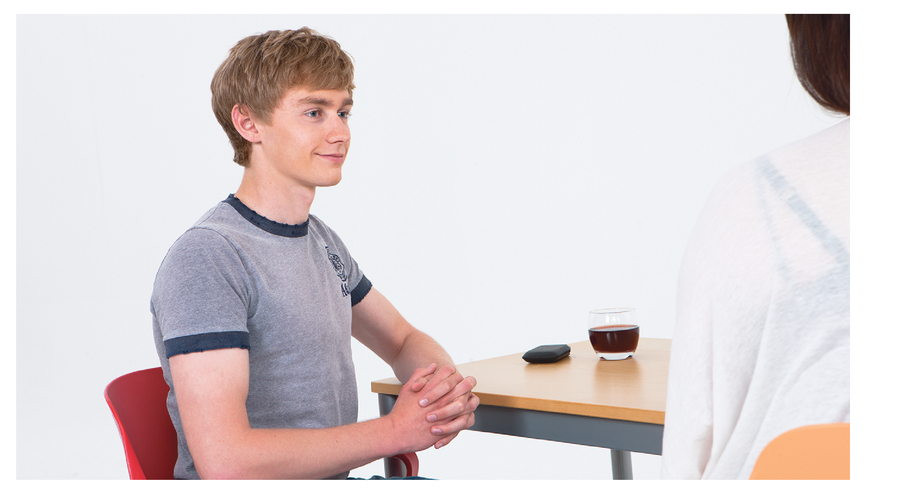
Figure 11.5 Two examples of a single from wrong side

EXERCISE 11.1 Crossing the line
You can have a go at this yourself if you wish. You will need to have a camera and access to edit facilities if you want to try this out. Below is a short script. There’s also a list of shots and a diagram of where to take the shots from. If you take these shots and try to edit them together as a piece then you will immediately understand the 180-degree rule.
You can download the script from the website.

Scene interior: A teenage girl and boy are relaxing in the social area of the college. They are sitting on opposite sides of a coffee table.
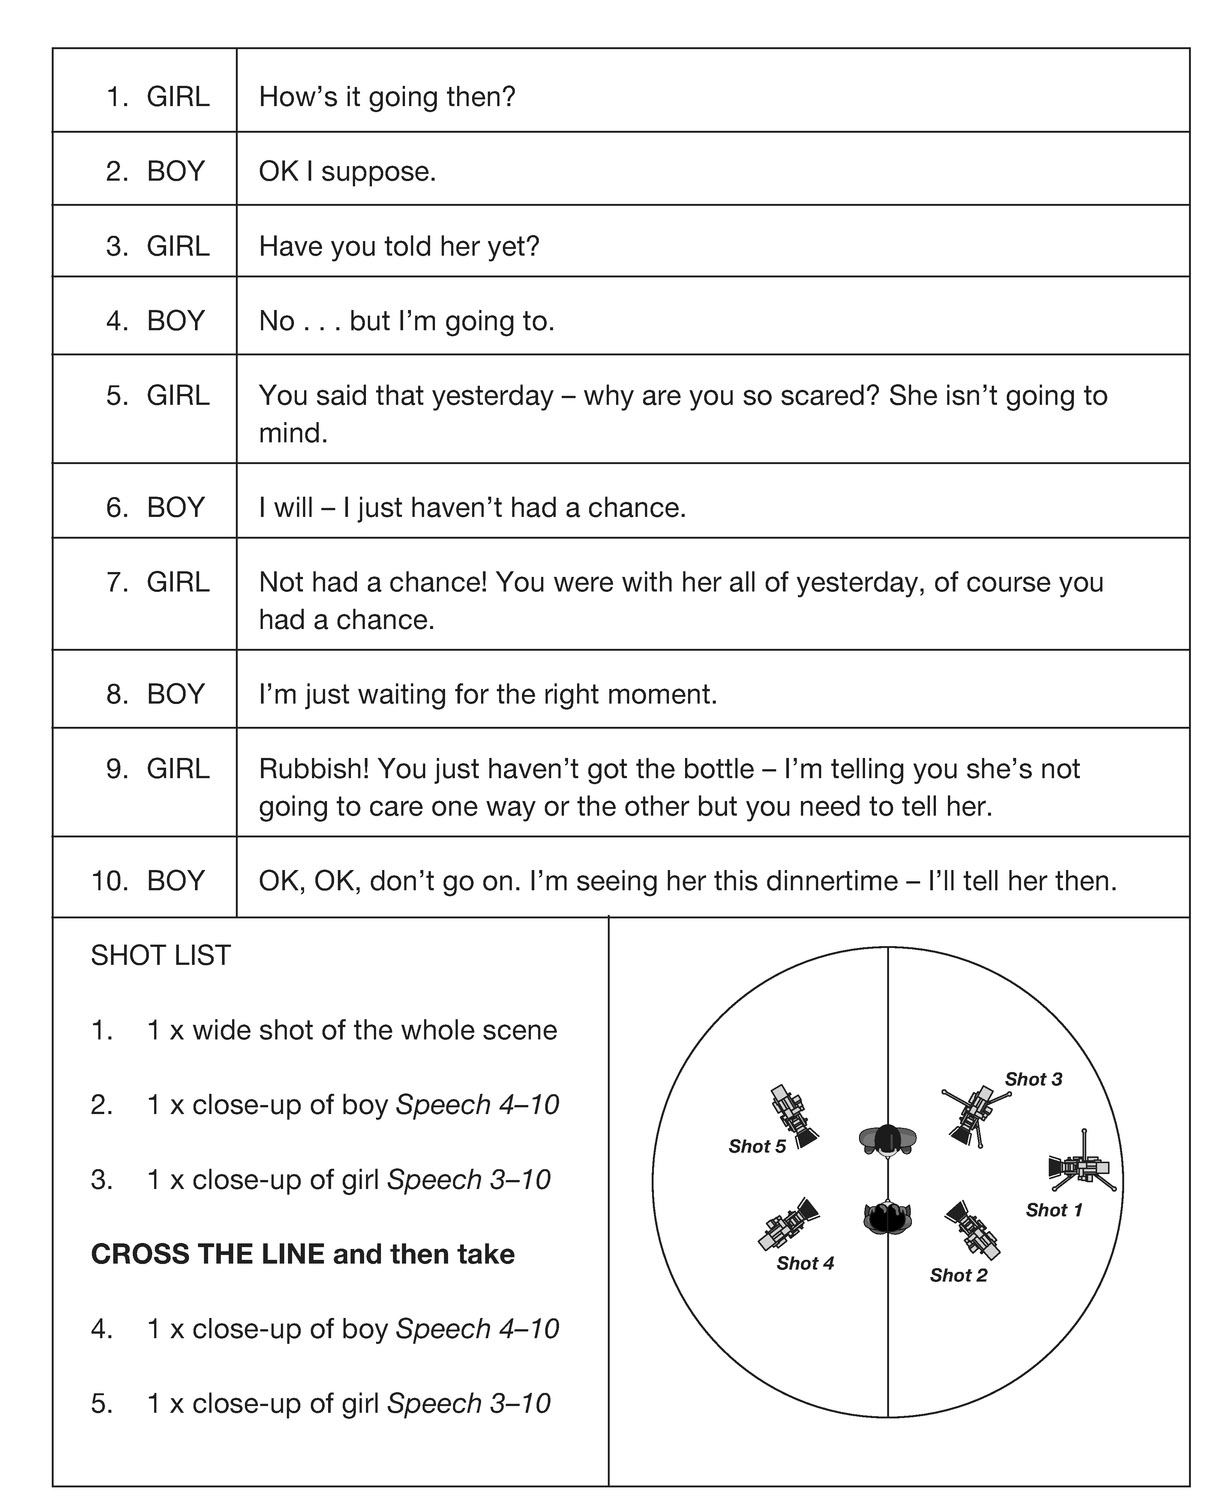
Figure 11.6 Crossing the line
Once you have shot the piece, start to edit it together: you can use any combination of shots you want. However, it should become immediately obvious that only certain combinations of shots will make sense.
So far so good. However, people rarely stay still for long, and in dramas they tend to get up and move around. In this case the 180-degree line will move with them. Look at the two pictures in Figures 11.7 and 11.8. As the boy gets up and moves, the red line representing the line of action moves with him. So long as you stay on the right side of the line, you won’t have a problem with the geography of the scene and you will find your edit much easier.
If you go onto the website you will see a number of examples of how the 180-degree line moves with the action in a shot.


Figure 11.7 Moving the line, establishing shot
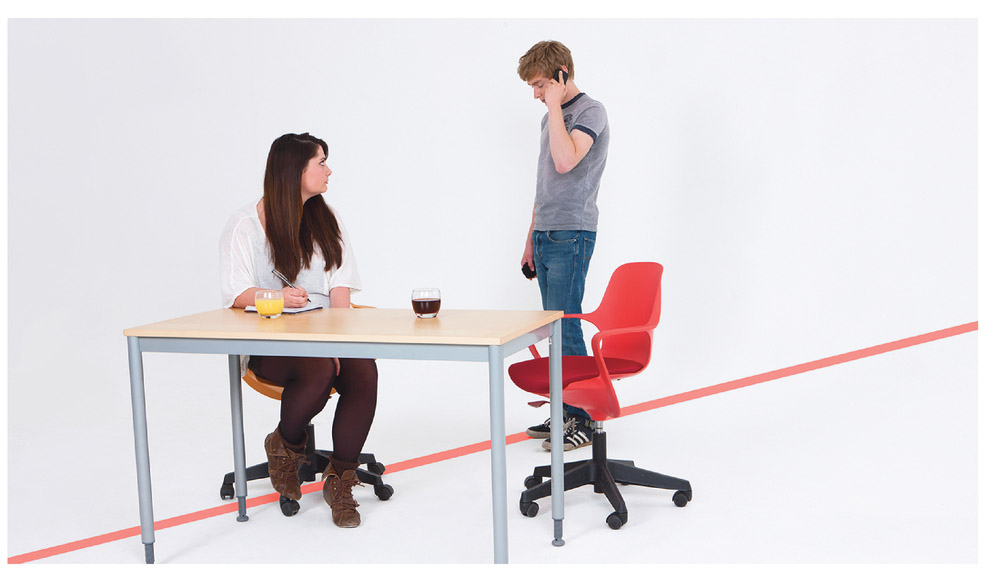
Figure 11.8 Line of action moved
Directors can and do cross the line all the time. You can, for example, create a second wide shot from a different angle. This will reorientate the viewer and they will now accept the change. However, once you have established this new line of action you will need to stay with it.
However, if you want to do this, you will need to know what you are doing and you should approach it with caution.
If you log onto the website you can see some examples of how directors play with crossing the line.

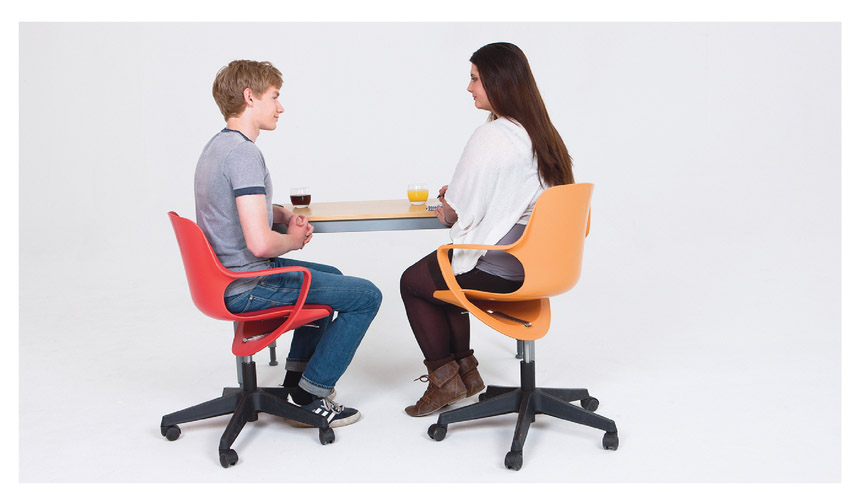
Figure 11.9 An example of a re-establishing shot
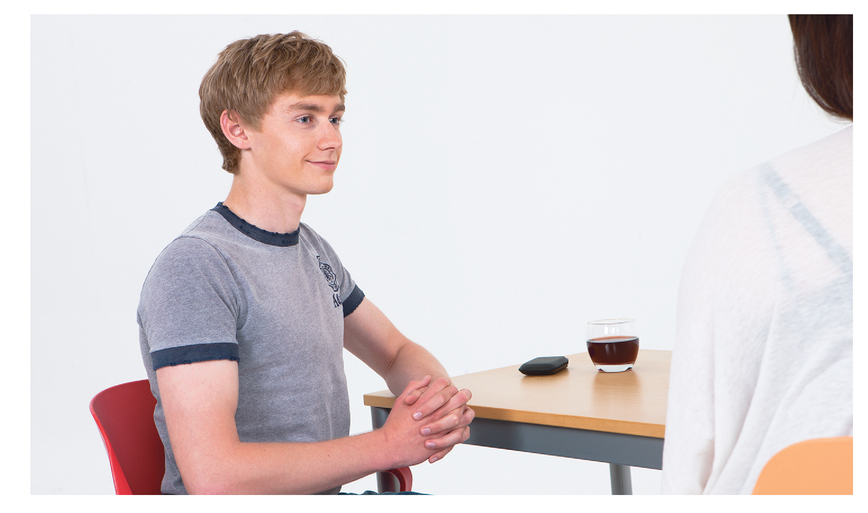
Figure 11.10 Two examples of a single shot

Crossing the line or the 180-degree rule is a helpful guideline. Directors do ignore it on certain occasions; however, unless you are trying to deliberately confuse the viewer you should try to keep the geography of a scene clear and it’s probably best to stick to the 180-degree rule and stay on the right side of the line.