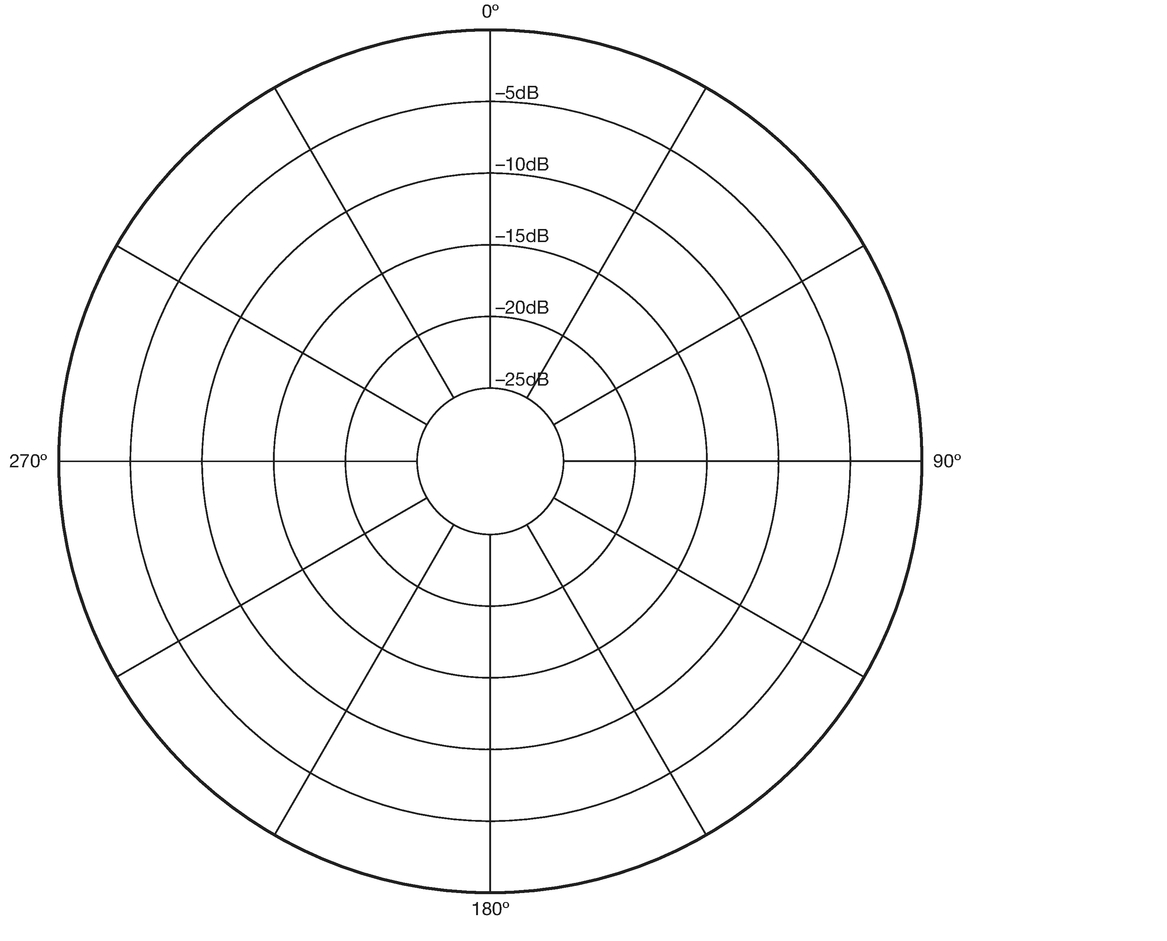
Figure 13.1 Omnidirectional microphone
When you are working in radio obviously sound is the medium, and you need to be able to understand how to get the best sound from the equipment you have available.
When you are on a shoot it is just as important to think about the sound as it is to think about the pictures. More footage is wasted in the edit because of bad sound than because of bad framing. The best interview, best piece to camera or most interesting shots can be rendered useless because not enough attention has been paid to the sound.
If you are recording on location you will need to be aware of what sounds are going on around you. Sound is slightly odd; the ear can tolerate and accept some sounds much more easily than others. A continuous sound in the background, even if it’s quite loud, may not be that detrimental but a single noise – a crash or something similar – can be much more annoying.
The real issue with sound comes when you start to edit. If, for example, you are interviewing someone and a car passes in the distance, this in itself is not going to be particularly disturbing, particularly if you have already established that the interviewee is close to a road. However, when you come to do your edit you may want to stop the interview or make a cut while the noise of the car is in the distance. If you do this you will get a sudden drop or jump in the sound, and it can be disrupting and annoying for the listener. Bizarrely in this situation you often end up adding some traffic noise over the edit, just to smooth out the jump. For some reason are eyes are perfectly happy to accept shots which jump around all over the place; however, our ears don’t like it much when the sound does the same thing, particularly on radio, if you don’t know the source of the sound. The ear likes those transitions to be fairly smooth.
If you are recording in any location it won’t be possible to cut out all the noise. You will have to deal with some of the noise around you. Therefore, because the ear seems to be fussier than the eye, it’s very important to get some wild track when you are on location. Wild track is simply a minute or so in which you just record the ambient sound – that is to say just the sounds around you. It should have no talking on it at all. You should do this even if you are recording in a quiet room. You will be surprised that a quiet room isn’t that quiet and even if it is you should still record the silence. The reason for this is that when you come to the edit you can use your wild track to smooth over any sharp sound edits. You will need to do this for every different location you use. Wild track is something that can get overlooked while you are recording or shooting, but it’s very important that you get into the habit of taking wild tracks. If there is a particular person in the group with responsibility for sound then they should be the person nagging the others not to forget the wild track.
You may not have that much choice in the type of microphone you are going to be using; however, it’s worth knowing about them so that you can make the best of the ones you have. The following is a list of microphones that are commonly used. Even if you don’t have much choice over the type of microphone you use, if you know something about them, then at least you can understand the issues a particular microphone might pose.
The first thing to understand about microphones is the direction from which they will pick up sound. They are not all the same. Imagine that the microphone is in the middle of a circle. Some microphones will pick up sound from all the directions around the circle; others will only pick up sound from a small portion of the circle. Different microphones tend to be used in different circumstances.
This type of microphone picks up sound all around it (Figure 13.1). Think of a microphone positioned in the middle of a circle: an omnidirectional microphone will pick up sound from every direction. This may be useful if certain situations, for example, if you are trying to achieve a lot of ambient sound. However, it’s less useful for dialogue, interviews or for presenters, as it is harder to distinguish one sound from another.

Figure 13.1 Omnidirectional microphone
Directional microphones allow you to prioritise a sound source. A directional microphone will record sound coming from one direction. It won’t completely cut out all the other sounds but it will make one sound source much stronger. These types of microphones are much more useful on location when you have dialogue or are interviewing someone. It means that if you direct the microphone towards the person talking it will pick up much more of what they are saying than anything else and the words will stand out from the background noise. There are several different types of directional microphones; they differ according to the pattern in which they pick up sound.
A figure-of-eight microphone will pick up sound from two opposite directions but not from the side. The area defined by the hard black line in the diagram below is the area from which the microphone will pick up the sound. It’s a useful microphone in a handheld situation where you might have a presenter in vision talking to an interviewee and you want to record both people.
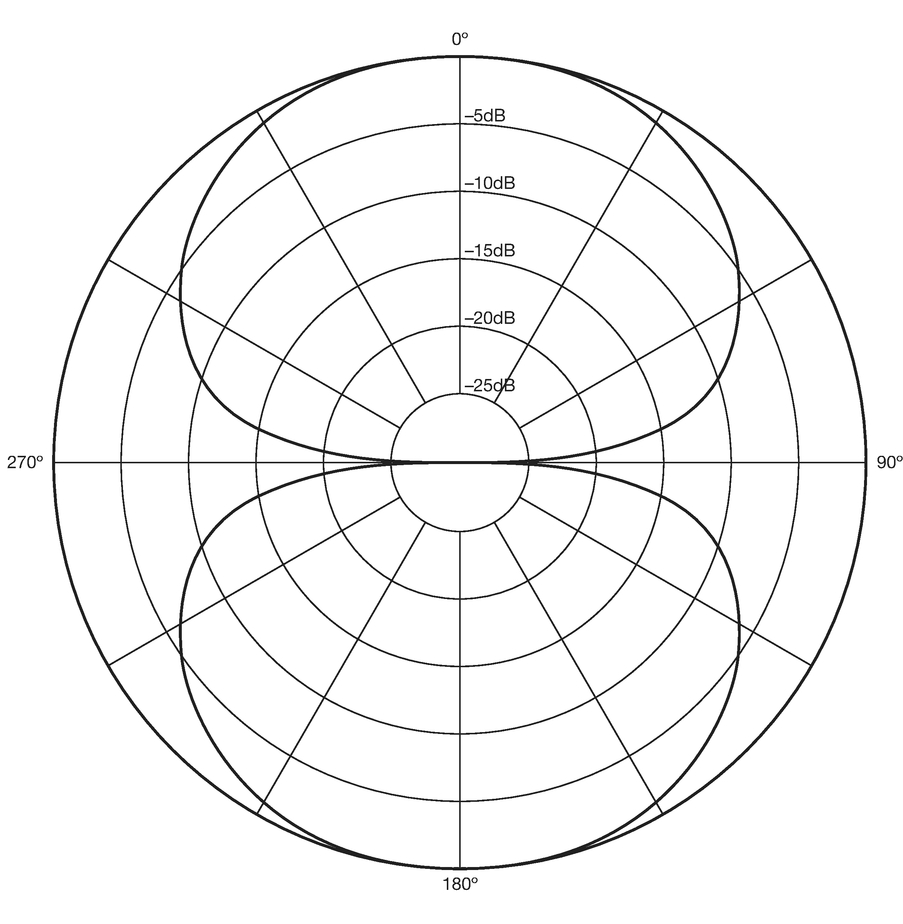
Figure 13.2 Figure-of-eight microphone
A cardioid microphone will pick up sound from in front of the microphone and to the side, but it won’t pick up any sound to the rear (Figure 13.3, opposite). These microphones are useful if you are recording dialogue or an interview. However, you will need to be careful,
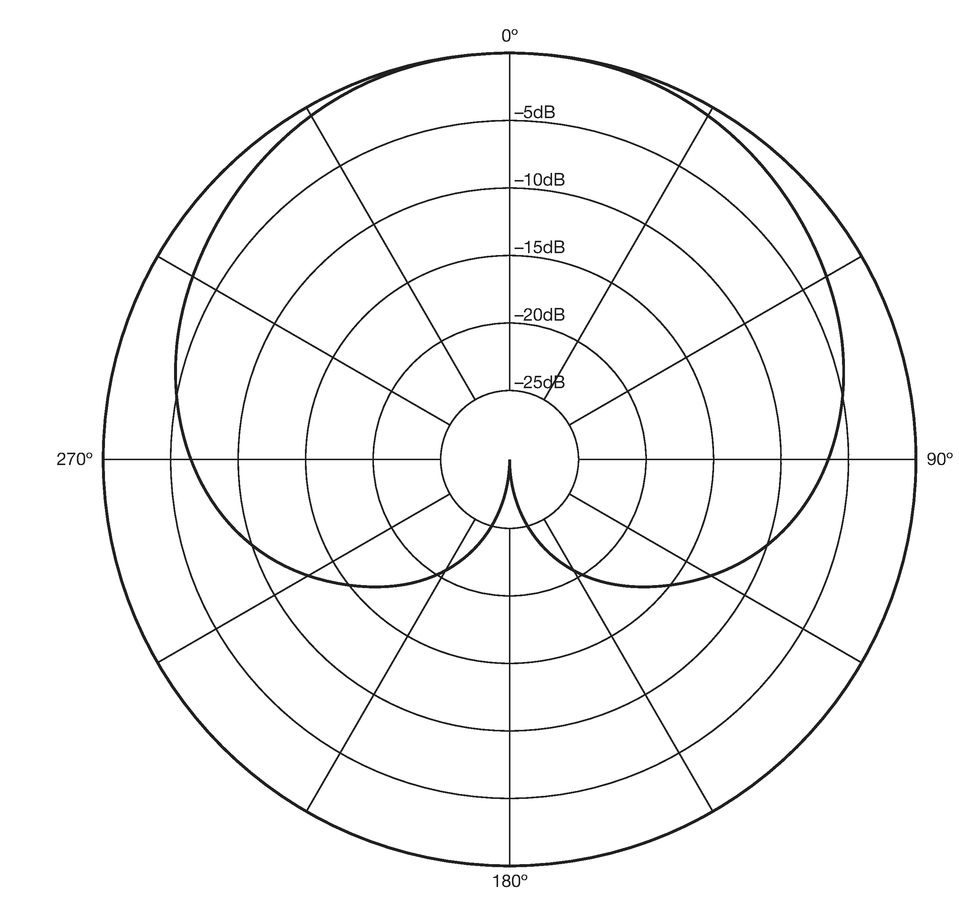
Figure 13.3 A cardioid microphone
as they are more prone to being distorted by wind noise and popping. Popping is a distortion which happens when someone is speaking into the microphone, often when you use words beginning with P or B – where you exhale breath. It causes a nasty distortion. You also tend to get more handling noise, the sort of rustling noise which comes from the microphone itself moving.
A hyper-cardioid microphone will pick up sound to the front and some sound to the side, but not quite as much as a cardioid microphone, it will pick up some sound from the rear but not a lot (Figure 13.4, overleaf). It will have the same issues around wind noise and popping as the cardioid.
A shotgun microphone is an even more directional microphone (Figure 13.5, overleaf). The areas which will pick up sound are much smaller. It would be a good microphone to use if you were in a very noisy situation and wanting to pick up one person talking. However, it’s quite easy to get it horribly wrong and end up picking up completely the wrong bit of sound unless you are monitoring it quite closely. The other disadvantage of using a very directional microphone is that it can start to sound a little unnatural. It’s as if the voice has become disembodied from its surroundings. It is largely a matter of balance. You want a little bit of the sound of the room so that you get the atmosphere, but not so much that it becomes difficult to listen to.
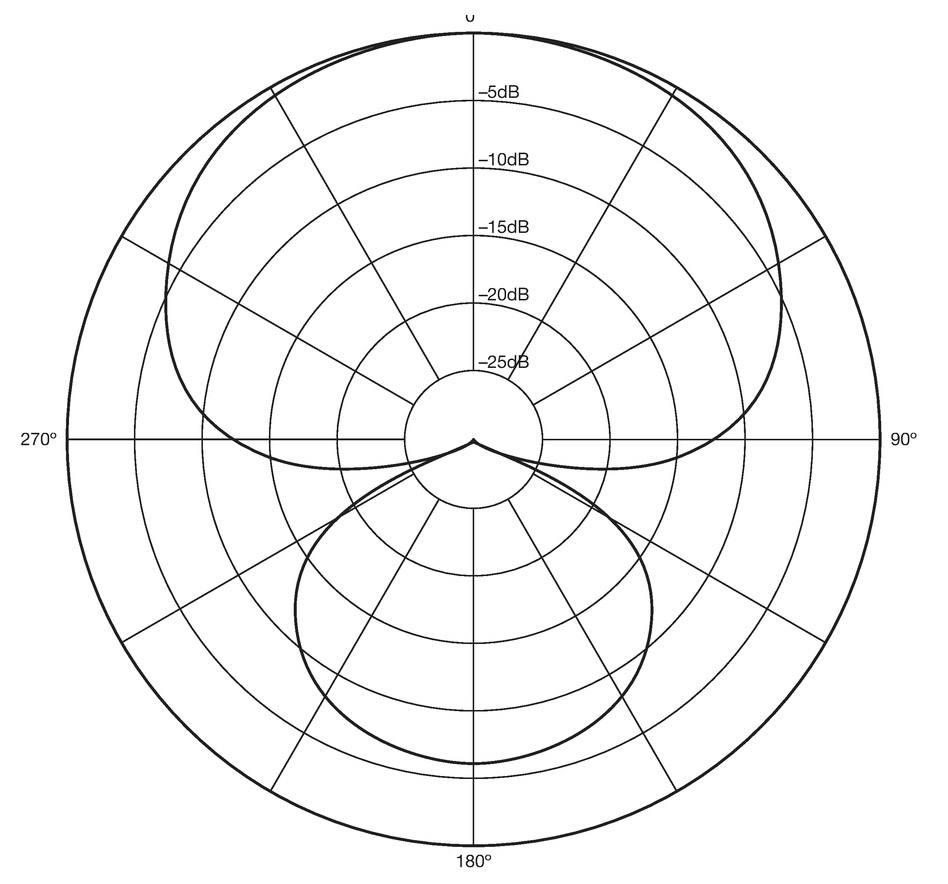
Figure 13.4 A hyper-cardioid microphone
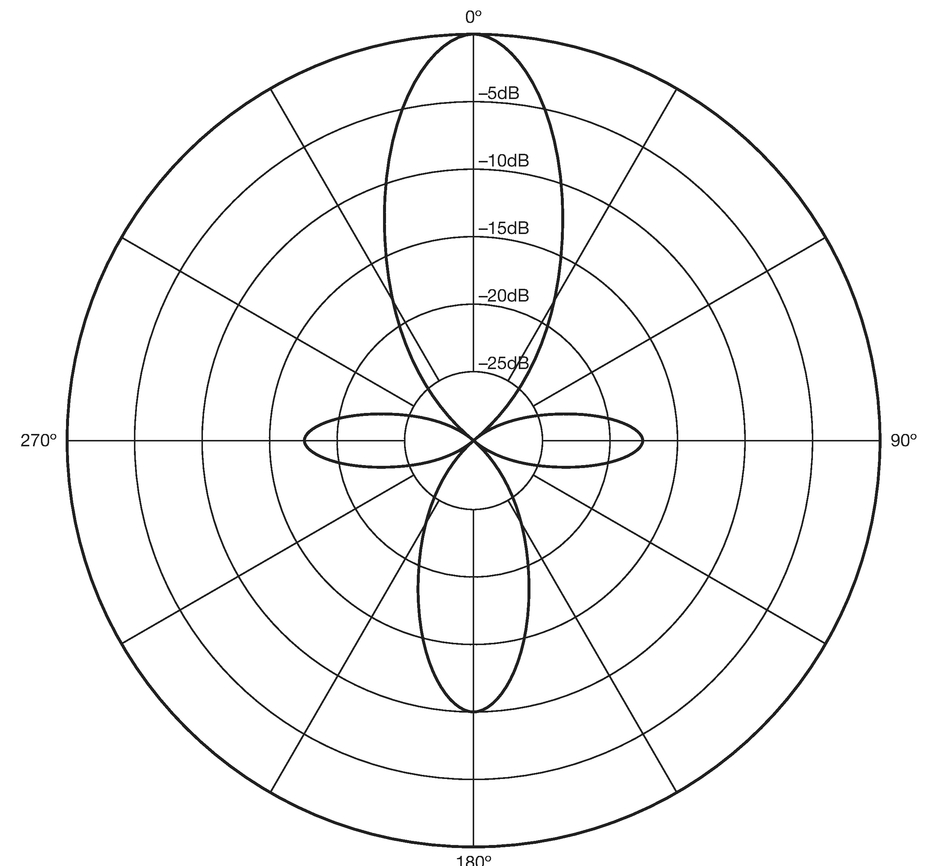
Figure 13.5 A shotgun microphone
Even if you don’t have any choice over what kind of microphone you have, you should check what sort of microphone you are using. This is fairly easy to do if there is no indication on the microphone itself. Start recording and clap or click your fingers in different positions around the microphone. If you have sound-level meters you can watch what happens; if you don’t, then just use headphones and your ears to check when the sound is loudest.
As well as differing in range and direction, microphones also differ in terms of size and how they are mounted. The following are some of the most common types of microphone you are likely to come across.
These are the microphones that are built into the camera: sometimes it’s just a small microphone that you cannot see, while some cameras have a microphone mounted on the top of the camera. While these are suitable for home movies, they are really the least effective type of microphone, and if at all possible you should try to avoid using them in most circumstances. The problem is that while they may be fine for recording ambient sound (the sounds around you) they won’t be much good for recording interviews or dialogue. The reason is that the microphone can’t get close enough to the person to record sound in such a way that it becomes distinct from the ambient sound. Some microphones are directional and some are not; however, what you will get is dialogue/interview and ambient sound all mixed together at the same level, and it will sound very indistinct. Most cameras have an input for some kind of microphone, and if at all possible you should try to use an additional microphone if you want to record dialogue/interviews.
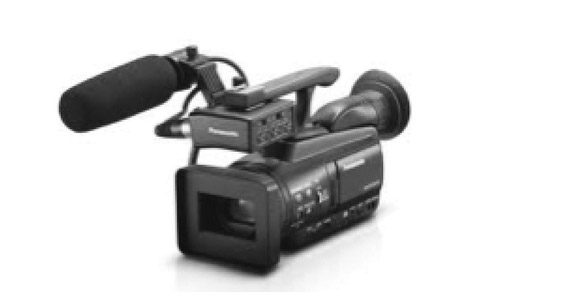
Figure 13.6 An example of a camera mounted microphone
You often see reporters or presenters using this kind of microphone. The reporter holds the microphone and speaks into it. It will be connected by a cable either directly to the recording device or camera or via a mixer. These tend to be directional microphones. If you use a handheld microphone you will need to learn how to hold it properly to avoid getting noise from the cable and connections. Figure 13.7 (overleaf) shows the best way to hold the microphone. Usually the best position to hold the microphone is below chin height. You should try to talk across the top of the microphone rather than directly into it; this will cut out distortion and popping. When you move the microphone to the interviewee try not to shove it in their face; just hold it below the chin so they can talk over it. You should also try to hold it in such a way as to stop any cable movement at the connection. Loop the cable and grasp it in the hand holding the microphone. This means that most of the cable can move, but the point where the cable is connected to the microphone is not moving (Figures 13.7 and 13.8).

Figure 13.7 An example of the correct way to hold a microphone

Figure 13.8 An example of a poor way to hold a microphone
These are also called lavaliers or neck microphones. They are clipped onto a person’s clothing, and sometimes they are on view and at other times they are hidden. They are also attached to the mixer or camera with wires. They can achieve a good sound but a problem will arise if they aren’t attached very carefully so that every time the person moves the microphone will pick up the sound of their clothes rustling and sometimes even the heart beating! Unless you are recording a drama it’s best to attach the microphone to the outside of their clothing; this will cause less rustling. Sometimes you can position the microphones facing downwards; this gets rid of the popping sound on words beginning with P or D. Remind the person that they are connected to the camera so that they don’t suddenly get up and walk away. If you want to hide the microphone you will need to be able to tape the wires firmly so that you get as little movement as possible.
These are similar to lapel microphones but they are wireless. They are good if the person has to do a lot of walking around. The disadvantage is that they are quite expensive and you are unlikely to have access to them; also they can get some distortion if the wireless isn’t working properly. They will have the same issues as lapel microphones with regard to noise from clothes.
There are a number of different ways of holding a microphone. The lapel microphones and radio microphones just clip on to clothing; the other types of microphone can be held in different ways.
This is in the form of a mini-tripod that can sit on a table. It is best used on radio when your interviewee is sitting down. It’s not normally used on TV these days.
These are similar to the table mounts but much bigger. You can adjust the height and angle of the microphone – they are very versatile but not easy to use outside as they are easily knocked over.

Figure 13.9 An example of a lapel microphone
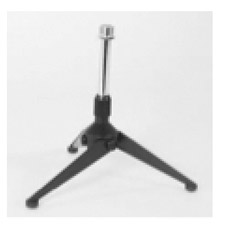
Figure 13.10 An example of a table stand
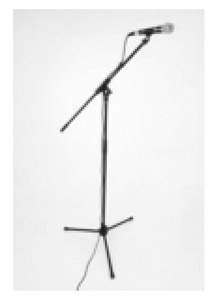
Figure 13.11 An example of a large stand
This is a type of stand or pole which is held by the sound operator. Usually it will be a directional microphone. This type of microphone avoids the problem of hearing clothes rustling. It also means that the interviewee isn’t connected to the camera or mixer with wires. It is quite a useful way of recording several people talking, as you can easily move the microphone slightly to favour the person speaking. However, if it’s mounted on a pole it really needs a separate person to hold it. It’s quite difficult to hold a boom and operate the camera or mixing desk at the same time. It can also be quite tiring if it is used for a long period. If you are filming, because it’s not usually shown in the shot, you have to be careful of shadows cast by the microphone, which can look a little odd. You also have to be careful when you change shot size that the microphone isn’t suddenly in the frame. If you are filming you should try to get the microphone as close to the person as possible without getting into the shot.
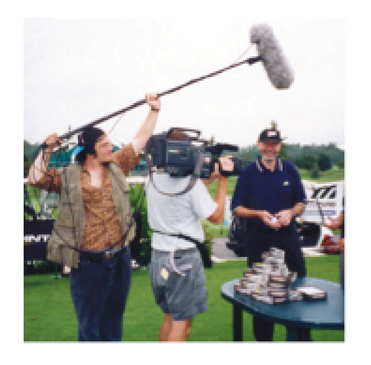
Figure 13.12 A boom
There is no exact science to this; it’s more of an art. There are things that you definitely want to avoid, such as distortion or wind noise, or clothes rustling. However, the balance of the sound is more subjective.
If you are recording a voice or perhaps an instrument or some other specific sound, you are trying to balance what you are recording with the acoustic or ambient sound. If you are recording on a location then there will always be some kind of ambient sound. The aim really is to balance the sound so that you can clearly hear what is being recorded but haven’t completely lost the ambient sound, as this contributes to the listener’s sense of place.
The critical thing is to get the distance between the microphone and the item you are recording right. There is no set formula for this: you will just have to try it and then listen. However, as a general rule you will want to get the microphone as close to the object as possible without getting any distortion and at the same time keeping a balance between the item you are recording and the background sounds.
You will need to check the sound in the same way as you check camera shots. Before you record any sound you will need to check the levels. If you are recording a voice you will need to ask the contributor to say a few words for level. You should ask them to speak in their normal voice and to sit or stand in the position they feel comfortable in. You should then move the microphone around them; don’t ask them to move for the microphone. If you move them out of the position they feel comfortable in then, as the interview progresses, they will start to move back to their most comfortable position without really noticing what they are doing, and then your sound levels will start to change.
Once you have the person in position and speaking in their normal voice you will need to check your sound levels. If you are using a mixer it will have a sound level gauge on it. Some recording device and some cameras also have meters for sound levels. You should be watching the gauge. The sound levels should be peaking just below the red line. As people speak, their voices will get louder and softer, and the beginnings of words will tend to be louder than the ends. You will notice that the gauge usually lights up or a needle goes up and down. The highest level the needle hits is called the peak. If the highest level is in the red zone you are in danger of getting distortion and you will need to either move the microphone or reduce the volume. If the highest level is peaking significantly below the red zone it may be too low and you will lose some of the words, so you should move the microphone closer or increase the volume.
If you are recording outside then wind can be an issue. The wind can blow across the microphone and cause a nasty sound. This is particularly a problem with handheld and boom microphones but can also be an issue with lapel microphones. One option is to find a more sheltered spot to do the filming, but this may not be possible from the point of view of the pictures. If this is the case you will need a wind sock. These range from fairly inexpensive pieces of foam that go over the end of the microphone, right up to the much more expensive big, hairy-looking things you may have seen. However, that said, even with the most expensive windsock it can be difficult to get good sound in very windy conditions, so if you are out in a howling gale it’s best to find a sheltered spot.
It’s vital to listen to the recording wearing headphones, often referred to as ‘cans’. What you hear naturally is not what the microphone is picking up. It could be more or less but it will be different. If you want to monitor sound you will need to be wearing headphones; it’s much more difficult to monitor sound without them.
Before you start recording, listen again to all the background noise. Is there anything you can eliminate? Sometimes there may be music or the radio playing in the background; you should ask for them to be turned off. Sometimes there is machinery which is making a noise; it may be possible to get this turned off. You should also unplug any phones if possible and obviously ask for all mobile phones to be switched off.
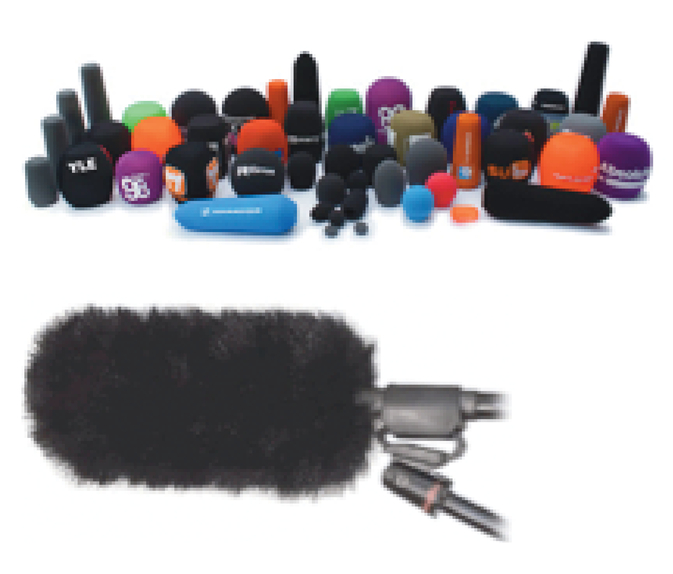
Figure 13.13 Two examples of a windshield
Depending on how many people you have in your group you may have allocated someone exclusively to do the sound, or you may be combining it with another role. However, it’s very important that when you are recording, someone is monitoring the sound. If you are shooting it’s very difficult to operate the camera and monitor the sound at the same time. If there is a camera and director, then it’s better for the director to monitor the sound rather than the camera.
What are you listening for?
The first thing you should check is that the level of the recording is correct. If for some reason the person has moved, the recording levels will have changed. You may either be getting distortion from a higher level or losing sound because the level is too low. If this happens you need to alert the rest of the team. If you are doing an interview, wait until the end of the answer the person is giving and then alert the camera, or director. If it’s a piece of dialogue, wait for a pause, or if it’s a short piece wait until the end of the piece. You will then need to adjust the microphone to the new position. Again, it’s better to change the microphone than to ask the person to move. They will probably move back to their former position unconsciously. Check your levels again and then restart the recording.
The main thing to listen for is changes in background levels. If you are on location there will always be some level of background noise. The way you set the microphones will have helped to balance the person talking with the background noise. However, the levels of background noise can change. For example, you may be in an office where there is the hum of a computer. It will have been impractical to turn off all the computers and you have decided that the level of the computer hum is fairly low and consistent, and so is not a problem. If, however, during the interview for some reason the computers all turn off and the humming stops, then the background noise level will change. The problem is that when the programme is edited the change from computer hum to no computer hum will sound a little odd to the ear. In this case the thing to do is to redo the section where the computer went from hum to no hum. However, it’s worth remembering that during the edit it will be difficult to cut between the sections with the hum and sections without the hum, so it may mean redoing some more to cover yourself. This will be a particular problem if you are recording a drama, as you will not be recording in sequence.
The other thing you need to listen for is intermittent noise. This could be a door banging, a plane going overhead, or a particularly loud car horn. Is it something that drowns out the person speaking or something which is likely to distract the person listening? Again this is something of a judgement call. If, for example, you are interviewing someone in a park and there is a dog barking in the background, so long as the bark isn’t too loud it may not be a problem. If the listener or viewer knows the person is in a park and expects there to be children and dogs there, then they probably won’t be disturbed by the noise. However, if you were in the office environment and you heard the sound of a dog, perhaps coming through an open window, the listener or viewer is likely to be much more distracted by this as they are unlikely to associate dogs with offices or other quiet environments, and will start to wonder where the noise is coming from. While they are wondering they will stop listening to your speaker. If the piece is a drama then the intermittent noises are likely to be quite problematic unless they can be accommodated within the scene.
Don’t be afraid to speak up. If you are monitoring the sound then it’s your responsibility to speak up if you think there is a problem. Under pressure there is a natural urgency to keep going and sometimes it’s difficult to stop the flow of events. However, if the sound is poor there won’t be very much you can do about it during the edit, particularly if you are using basic editing packages. It is much better to get the sound right there and then. There may be times when you need to make compromises but at least you should be aware that you are making them.
Lastly, wild track: Don’t forget it – you’ll need it in the end!
The technical aspects of recording sound need planning and thought. The choice of microphone, the choice of mounting and where you record will dramatically affect the piece. You may not have the luxury of choice, but at least if you understand what the issues are you will be able to make allowances. Do not be fooled into thinking that sound is easier than pictures; it isn’t. Remember: more things tend to go wrong with the sound than with the pictures, so plan your sound.