I love making my own staples, and I think you will, too. When you make them at home instead of buying them, you know exactly what ingredients are used. There are no added preservatives or hidden ingredients that you have to check for.
Homemade bouillon and beans cooked from scratch can save you lots of money in the long run. The trick is to freeze some of the extra each time you make them, so that even on the busiest of nights you have some already on hand.
I have many other practical recipes for you like Almond Ricotta, delicious Maple Walnut Breakfast Sausage Patties and Mushroom Red Pepper Pasta Sauce. You can double some of these and freeze them so you have enough for the whole month.
• gluten-free • soy-free • no oil added
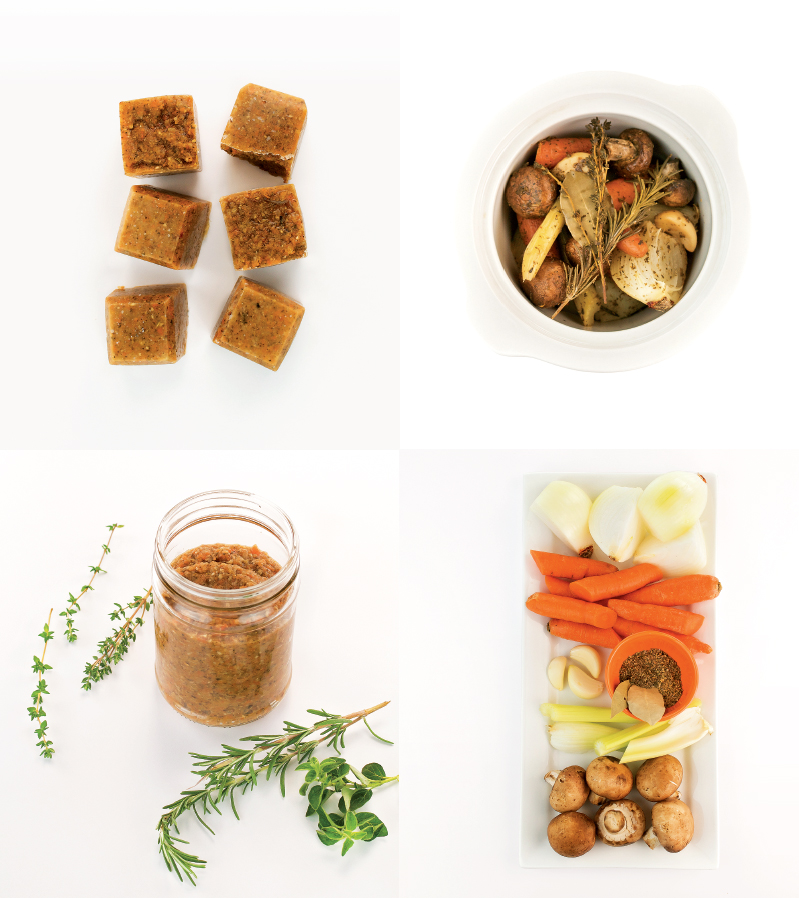
Store-bought veggie bouillon can be expensive, and it’s hard to find exactly what I want. You’ll be surprised at just how easy it is to make, and you can vary it with the veggies and herbs you have on hand. Making this is much easier than even reading all the ingredients on all the packages at the store.
BASE INGREDIENTS
1 large onion, cut into quarters
3 large carrots
2 stalks celery
1 cup (87 g) mushrooms, optional (will create a beefy-flavored bouillon)
3 whole garlic cloves
2 teaspoons (10 g) dried thyme (or about ¼ cup [10 g] packed fresh)
1 teaspoon dried rosemary (or about 1 tablespoon [2.5 g] fresh)
ADDITIONS TO THE BASE INGREDIENTS (OPTIONAL)
1 to 2 teaspoons dried oregano
1 to 2 teaspoons dried marjoram
1 to 2 teaspoons dried basil
1 to 2 teaspoons dried thyme
1 to 2 teaspoons dried rosemary
1 to 2 teaspoons celery seed
1 to 2 teaspoons tarragon
2 bay leaves
A handful of fresh herbs
TO ADD AFTER COOKING (OPTIONAL)
½ cup (48 g) nutritional yeast (will create a chickeny-flavored bouillon)
Salt
Pepper
More fresh herbs
OVEN-COOKING METHOD
Preheat your oven to 350°F (177°C). Layer the base ingredients on the bottom of a Dutch oven and bake for about 1 hour, or until the veggies are soft. I do not roast them with water or oil, but you may certainly drizzle them with olive oil or use ¼ to ½ cup (59-118 ml) water. You could even top them with salt and pepper.
SLOW COOKER METHOD
Add the base ingredients to a 2- to 4-quart (2-4-L) slow cooker. (If you use a 4-quart [4-L] slow cooker or larger, add an additional ½ cup [118 ml] water). Cook on low while you are asleep or at work, about 8 to 9 hours. If you think you will cook the bouillon longer, or if your slow cooker runs hot, add ½ cup (118 ml) water. You can cook it on high for 3 to 4 hours if you prefer.
FINISHING THE BOUILLON, BOTH METHODS
Once the veggies are cooked, remove any tough herb stems that will not purée. Add the veggies to your food processor or a strong blender. This is the time to add salt, pepper, fresh herbs or nutritional yeast. The nutritional yeast adds another layer of depth and is my favorite addition.
Store in the refrigerator in a covered jar however much you think you will use in a week. Freeze the rest in ice-cube trays. Once the cubes are solid, remove them from the trays and store in a freezer bag. When measuring for a recipe, use twice as much of this bouillon as you would store-bought bouillon.
Per 1 cup (237 ml) serving: Calories 78.5, protein 2.2 g, total fat 0.0 g, carbohydrates 9.7 g, sodium 65.0 mg, fiber 3.0 g
• gluten-free option* • soy-free • no oil added
There was a time when I always made my gravy from a prepackaged vegan mix. It takes about the same amount of time to make your own, and it’s dirt cheap. You can make a plain gravy to spoon over your garlic rosemary mashed potatoes or a jazzier one with herbs to pour over food that’s simple.
¼ cup (30g) flour (whole wheat or *brown rice flour)
2 cups (470 g) vegetable broth (or 2 cups [475 ml] water plus 1 vegetable bouillon cube)
2 cups (473 ml) unsweetened nondairy milk
2 tablespoons (10 g) nutritional yeast
Salt and pepper, to taste
EXTRAS, TO TASTE (OPTIONAL)
Thyme
Sage
Rosemary
Garlic powder
Onion powder
Heat a large sauté pan (enough to hold 4 cups [0.95 L] of liquid and still have a little room) over medium heat. Add the flour and sauté until it gets just a shade darker, about 3 to 4 minutes.
Slowly whisk in the broth about ½ cup (118 ml) at a time. Once it is incorporated, add ½ cup (118 ml) nondairy milk at a time, whisking constantly.
Turn the heat up to medium-high and let the sauce reduce and get thick. Whisk often. It will take about 20 to 30 minutes to thicken up. Once it’s almost as thick as you’d like, take it off the heat and whisk in the nutritional yeast, salt and pepper plus any extra herbs you’d like to add in. It will continue to thicken until it cools.
Per 1 cup (237 ml) serving: Calories 83.8, protein 4.0 g, total fat 2.5 g, carbohydrates 12.0 g, sodium 500.0 mg, fiber 2.6 g
TIP: You can hurry this gravy along by turning the heat to high after all the milk is added. Keep on high until the mixture almost begins to boil, then lower the heat to medium-high. Be sure to watch it like a hawk and whisk often.
• gluten-free • soy-free • no oil added
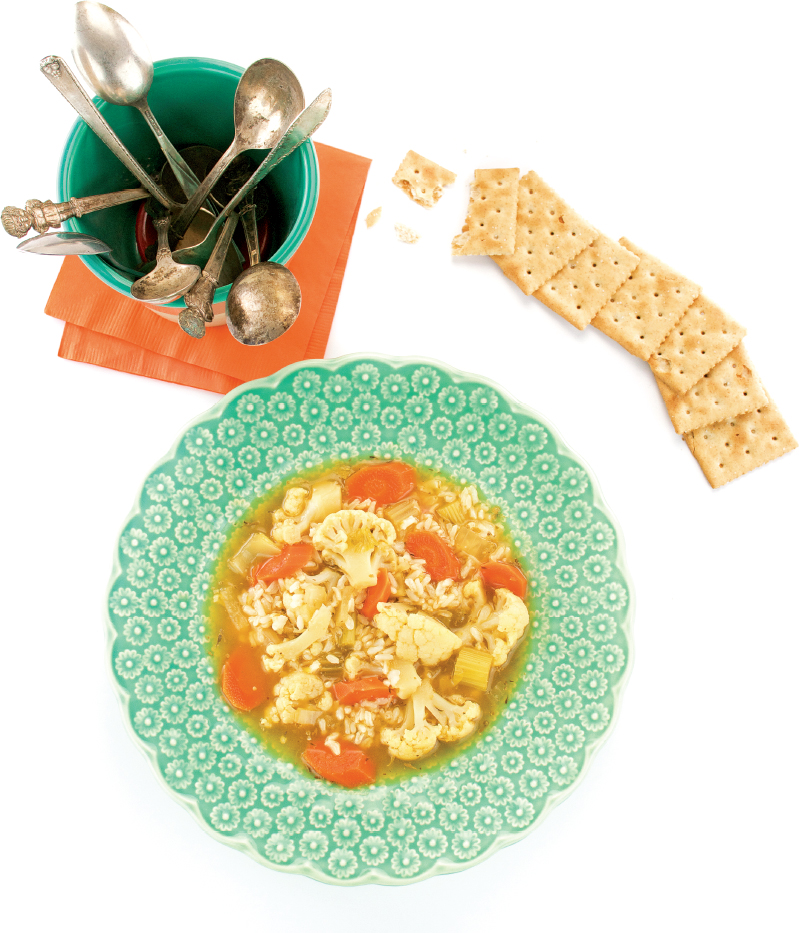
Cheryl likes to eat a few hearty meals a week. She is not a vegan, but she agrees to eat vegan at home as long as I make some meat-like substitutions. Honestly, she would eat vegan mac and chez or store-bought vegan crispy fingers with ketchup every day. I like to make gluten- and soy-free versions of things like this mince so she gets what she wants and I get some extra veggies in her. Use this mince in burritos, tacos, pasta or anywhere else you’d like to try it out.
½ medium head of cauliflower, minced (about 4 cups [918 g])
2 teaspoons (10 g) cumin
2 teaspoons (10 g) oregano
1½ teaspoons (7 g) garlic powder (or 1 clove fresh, minced)
1 teaspoon coriander powder
1 teaspoon paprika
1 teaspoon salt
1 teaspoon of your favorite chili powder (I use ½ teaspoon ancho and ½ teaspoon jalapeño)
Preheat your oven to 350°F (177°C). Line two baking sheets with parchment paper.
Add all the ingredients to a mixing bowl and mix well. All of the spices should easily stick to the cauliflower bits.
Spread thinly on the baking sheets and bake for 10 minutes. Then stir and bake 10 more minutes.
Per ¼ cup (57 g) serving: Calories 8.7, protein 0.7 g, total fat 0.1 g, carbohydrates 1.7 g, sodium 10.0 mg, fiber 0.8 g
TIPS: Use a food processor to mince the cauliflower.
Try this with different spice combinations such as Italian to top a pizza, or even use the Maple Walnut Sausage Patties spices from the recipe here for an all-veggie homemade sausage.
• gluten-free option* • soy-free • no oil added
This recipe is from OATrageous Oatmeals. I’m including it in case you can’t find unsweetened nondairy milk where you live. It’s also nice to be able to make a batch on the fly instead of trekking out to the grocery store. Since you probably have oats on hand, you can make this on the spot. Oat milk is so easy to make; it’s rich and creamy and much cheaper than store-bought.
4 cups (946 ml) water
1 cup (80 g) steel-cut oats or rolled oats (*make sure they are labeled “gluten-free”)
Sweetener of choice to taste, optional
Add the water and oats to your blender and soak. If you are using steel-cut oats, soak for at least 30 minutes; if you are using rolled oats, soak for 10 minutes. Then blend for 1 to 2 minutes until smooth. Pour the oat mixture through a fine mesh strainer into a pitcher or a bowl with a spout. You will need to scrape the bottom of the strainer with a spoon when it gets clogged.
Remove the sediment from the strainer, rinse the blender and then strain one more time. You can strain back into the blender.
Now you have plain unsweetened oat milk!
This milk will keep for 3 to 4 days in the refrigerator. It will separate, but you can mix it in the blender to get it to come back together.
Per 1 cup (237 ml) serving with no pulp removed: Calories 140, protein 6.0 g, total fat 2.5 g, carbohydrates 27.0 g, sodium 0 mg, fiber 4.0 g
TIP: You can make other nondairy milks as well. Try soaked almonds, cashews, rice or coconut in place of the oats.
You will need to soak all of these longer to get the creamiest milk if your blender is not very powerful. I also recommend using a nut milk bag instead of a fine mesh strainer to get the best results. Otherwise, the milks will be slightly grainy.
Here are two vegan sour cream substitutes. Both are gluten-free and one is soy-free. I hope one of these will fit your dietary needs. Both of these recipes make about 1 cup (118 ml) and can be used to thicken soups or stews, as a base for dips or as a topping for potatoes and burritos.
You may already have your own recipe for sour cream. Feel free to use it; it should work fine for this book.
• gluten-free • soy-free • no oil added
1 cup (140 g) cashews
2 tablespoons (29 ml) lemon juice
¼ to ½ cup (60-120 ml) water, as needed
Soak the cashews for a few hours to overnight, or cook in enough water to cover for about 15 minutes over medium heat.
Drain water. Add cashews to a blender with the lemon juice and just enough water to keep the blades working. You will need to scrape down the sides several times and blend. Do this until it’s smooth. Store in the refrigerator for about 7 days.
Per ⅛ cup (15 ml) serving: Calories 90, protein 2.5 g, total fat 7.0 g, carbohydrates 4.0 g, sodium 0 mg, fiber 1.0 g
• gluten-free • no oil added
1 (13.5 oz [350 g]) box silken tofu
2 tablespoons (29 ml) lemon juice
1 to 3 tablespoons (15-44 ml) water, as needed
Add the tofu, lemon juice and 1 tablespoon (15 ml) of water to a blender and blend till smooth. Add more water if needed. You will need to scrape down the sides several times and blend. Do this until it’s smooth. Store in the refrigerator for about 7 days.
Per ⅛ cup (15 ml) serving: Calories 24.1, protein 2.1 g, total fat 1.2 g, carbohydrates 1.3 g, sodium 2.2 mg, fiber 0.0 g
TIP: I like to mix this with refried beans in my burritos. Take 1 (15-ounce [439 g]) can of black beans, drained and rinsed, and mix in 1 cup (241 g) cooked, puréed sweet potato with ½ cup (118 ml) salsa, ¼ cup (60 ml) water and ½ teaspoon smoked salt. Mash well, heat and enjoy!
• gluten-free • soy-free • no oil added
This ricotta is much richer than Cauliflower Ricotta (recipe here) and is great to serve to non-vegans because it looks so much like the real thing. My friends are always surprised that it’s made of almonds. You do have to soak the almonds ahead of time, but if you’re in a real pinch you could simmer the almonds and water on the stove for 15 to 20 minutes to soften them a bit on the fly.
1½ cups (162 g) skinless slivered almonds (or use whole and remove skins after soaking)
1½ cups (355 ml) water
3 tablespoons (45 ml) lemon juice
1 teaspoon salt (optional)
¼ to ½ cup (59-118 ml) water, enough to pull the mixture together
EXTRAS
2 to 3 tablespoons (10-15 g) nutritional yeast
½ cup (10 g) minced fresh basil (or about 1 tablespoon [1.6 g] dried)
1 tablespoon (6 g) minced fresh lemon balm (or 1 teaspoon lemon zest)
Soak the almonds in 1½ cups (355 ml) water for 8 to 24 hours. Drain and add to blender with lemon juice and salt.
Break up the almonds as much as you can, then add water 2 tablespoons (30 ml) at a time until the mixture blends easily. The end product will not be smooth like nut butter, but will look like ricotta.
Per ⅛ cup (31 g) serving: Calories 70.0, protein 0.4 g, total fat 0.0 g, carbohydrates 0.3 g, sodium 145.3 mg, fiber 0.1 g
TIP: This is great with about ½ cup (10 g) fresh oregano blended in. Use anywhere you’d use ricotta.
• gluten-free • soy-free • no oil added
Ever wish there were a creamy cheese substitute that didn’t cost a fortune, and you could freeze the leftovers for later? I did, and that’s why I made up this easy recipe from staples you probably always have—carrots and cashews. Spread the mixture on crackers for a lazy wine-and-cheese dinner or cook with it. It’s a must-have ingredient in the Creamy Mexi Mac. I promise you won’t be disappointed.
1½ cups (194 g) cashews
1½ cups (192 g) chopped carrots
1½ cups (355 ml) water
¼ cup (59 ml) unsweetened nondairy milk
2 tablespoons (10 g) nutritional yeast
½ teaspoon garlic powder
½ teaspoon onion powder
½ teaspoon salt
Add the cashews, carrots and water to a saucepan. Bring to a boil, then turn heat to medium and simmer for 15 to 20 minutes, until the carrots are soft.
Add the cooked mixture and the rest of the ingredients to a blender and blend until smooth. You will need to stop a few times and scrape the mixture from the sides. If you’re having trouble getting it smooth, add more nondairy milk, a tablespoon (15 ml) at a time.
Per ¼ cup (60 g) serving: Calories 120.3, protein 4.3 g, total fat 8.4 g, carbohydrates 8.5 g, sodium 18.5 mg, fiber 1.4 g
• gluten-free • soy-free • no oil added
When fall comes around, it brings pumpkin mania with it. I get a little jealous of all the new non-vegan pumpkin goodies, so I get creative and make a few copycats. This recipe is my answer to those pumpkin spice cream cheeses that pop up at every bagel place. It’s amazing on a vegan whole grain or cranberry bagel and would work well as a whoopie pie filling, too!
1 cup (137 g) cashews
1 cup (237 ml) water
¾ cup (184 g) pumpkin purée (can substitute sweet potato or butternut squash purée)
2 tablespoons (30 ml) maple syrup
1 tablespoon (15 ml) lemon juice
1 teaspoon cinnamon
½ teaspoon dried ginger
½ teaspoon salt
⅛ teaspoon ground cloves
Soak the cashews in the water for 4 to 24 hours in the refrigerator. Note: If you have a high-speed blender you can soak them more briefly; but if you have a normal blender, soak overnight for best results.
Drain the soaked cashews into a measuring cup and combine them in the blender with the pumpkin, maple syrup, lemon juice, cinnamon, ginger, salt and cloves.
Blend until smooth. You will have to stop and scrape down the sides. It helps if you use a slow speed first to begin to break up the cashews before moving up to the more intense speeds.
If you have a blender that’s not very powerful and you need more liquid, add a tablespoon or two (15-30 ml) of the soaking water.
Store in the refrigerator however much you will use in a week.
Per ¼ cup (60 g) serving: Calories 114.8, protein 3.4 g, total fat 7.4 g, carbohydrates 10.6 g, sodium 148.4 mg, fiber 1.5 g
TIP: Make a savory variation by trading mashed avocado for the pumpkin purée and using your favorite savory herbs. You will want to increase the lemon juice to 1½ tablespoons (22 ml) to keep it from browning.
• gluten-free • soy-free • no oil added
If you’re looking for a salt-free version or you just can’t easily find Cajun seasoning in your area, this little recipe will keep you in spicy goodness for a while. The best part is you can make it as spicy or as mild as you like!
2 teaspoons (10 g) paprika
2 teaspoons (10 g) thyme
2 teaspoons (10 g) oregano or marjoram
1 teaspoon garlic powder
½ teaspoon onion powder
½ to 2 teaspoons cayenne pepper (depending on heat preference)
¼ teaspoon black pepper
¼ teaspoon allspice
⅛ teaspoon cloves
Mix all the ingredients well and store in a lidded container. You can also use a spice grinder or coffee grinder to make it more like store-bought and to distribute the spices more evenly.
It always surprises me how nervous people get about cooking dry beans. Dried beans are so much cheaper than canned beans! A can of organic dried beans costs about four times what it would cost for you to cook them yourself. Unlike canned beans, home-cooked beans contain no BPA and only the salt you put into them. Plus, you can cook heirloom beans that you can’t buy in cans.
1 pound (0.45 kg) dried beans (such as pintos, navy, chickpeas, black or small red beans)
Water, to cover
TIP: Kidney beans contain the toxin phytohaemagglutinin, which can make you sick. These beans need to get up to a high temperature for at least 10 minutes so it can break down. If you would like to slow cook kidney beans, boil them first for 10 minutes on the stove, and then do the slow cooker method. I usually cook them on the stove since they are already in a pan that I’ll have to clean up anyway.
SLOW COOKER METHOD (NOT TO BE USED AS IS WITH KIDNEY BEANS)
Be aware that all beans except chickpeas will come out creamier and softer when cooked in the slow cooker. If this is the wrong texture for the dish you’re making, try the stove-top method below. Also, I do not soak my dried beans for the slow cooker, though you certainly can. It will speed up the cooking time.
Sort through the beans for small rocks and other things you don’t want in them, then rinse them well. Add them to your 4-quart (4-L) slow cooker and cover with water to about 3 inches (7.6 cm) above the beans. Cook on low 6 to 9 hours. (My tester Julie’s favorite way to slow cook beans is on high, which has them ready in 3 to 4 hours.)
STOVE-TOP OPTION
Sort through the beans for small rocks and other things you don’t want in your beans, then rinse them well.
If you’d like to soak them, leave them covered in water overnight or all day while you are at work. Drain and then cook as below.
Add the cleaned beans to a large pot with a lid and cover with water to about 2 inches (5 cm) above the beans. Bring to a boil, then lower the heat, cover and simmer until they are tender, about 1½ to 2 hours. Soaking will lessen the cooking time, so check soaked beans after about 45 minutes.
TIP 1: Freeze cooked beans measured out to 1½ cups (380 g) to have the equivalent of 1 can of beans for a recipe.
TIP 2: You can cook a smaller amount of beans. I do this in my 1½- to 2-quart (1½-2 L) slow cookers. Add 1 cup (194 g) dried beans to 3 cups (710 ml) water and cook on low for 6 to 9 hours. (Do not use kidney beans without boiling them first—see tip box on kidney beans at left.)
• gluten-free • soy-free • no oil added
It’s tricky to find a vegan enchilada sauce and even harder to find one that has no added oil. This recipe is ridiculously easy because you use a can of crushed tomatoes as your base, add some spices and mix or blend until it’s smooth. It doesn’t get any easier than this!
1 (28 oz [794 g]) can crushed tomatoes
1 to 2 tablespoons (8-16 g) chili powder, to taste
2 teaspoons (10 g) oregano
1 tablespoon (15 ml) agave nectar, optional
1½ teaspoons (7 g) cumin
1 teaspoon ground garlic
Salt, to taste
Mix all the ingredients; use a blender if you want it to be smoother. Use as is wherever enchilada sauce is called for. You can freeze the leftovers.
Per ½ cup (118 ml) serving: Calories 44.9, protein 1.9 g, total fat 0.3 g, carbohydrates 10.6 g, sodium 149.7 mg, fiber 2.2 g
TIP: Of course you’ll use this on enchiladas, but don’t forget that it’s great on beans and grains, too. It can elevate a plain old dinner into something Instagram worthy!
• gluten-free • soy-free • no oil added
If you’ve been looking for a nut- and soy-free ricotta, here it is! It does lend a hint of cauliflower flavor to your dish, but that gets covered up in the Almost Effortless Lasagna here or by any pasta dish that has a red sauce. You may want to use a bit less of this than your normal ricotta substitution the first time you try it. Make sure to use it on pizza, too!
1 large head cauliflower
3 tablespoons (45 ml) lemon juice
2 tablespoons (30 ml) unsweetened nondairy milk
1 tablespoon (5 g) nutritional yeast
1½ teaspoons (7 g) oregano or basil
1 teaspoon salt (or to taste)
⅛ teaspoon black pepper
Remove the outer leaves of the cauliflower and cut off any blemished areas. Cut into large florets, place in a soup pot and cover with water. Cook for 8 to 10 minutes, until the stems are turning translucent or at least look less bright white than when you started. Drain.
Carefully add the cooked cauliflower to a food processor and pulse until it starts to look like couscous. Add the rest of the ingredients and pulse until mixed well. Do not turn the food processor on and leave it, or you may end up with puréed cauliflower instead of the slightly chunkier mixture that is closer to the appearance of regular ricotta.
Per ¼ cup (57 g) serving: Calories 19.6, protein 1.7 g, total fat 0.1 g, carbohydrates 3.9 g, sodium 2.0 mg, fiber 1.8 g
TIP: Make a double or triple batch when you find cauliflower on sale or happen to have a ton of it. You can freeze the extra for a time when cauliflower is out of season.
• gluten-free • soy-free • oil-free option*
Weekend breakfasts at my house are often vegan sausage biscuit or biscuits topped with a creamy gravy and vegan sausage crumbles on top. This sausage comes together in a flash. Don’t be put off by the long ingredient list—it’s 70% spices, and you will have it measured out in no time. If you already have a special sausage blend, you can use that. I like the blends from Savory Spice Shop. Serve this in one of the biscuits in Chapter 8, Straight-Forward Sides.
1 cup (92 g) rolled oats (make sure they are labeled gluten-free to make this dish gluten-free!)
1 cup (100 g) walnuts
2 teaspoons (10 g) rubbed sage
1 teaspoon marjoram
½ teaspoon thyme
½ teaspoon coriander
½ teaspoon ginger powder
½ teaspoon granulated garlic
½ teaspoon onion powder
½ teaspoon rosemary
½ teaspoon salt
¼ teaspoon red pepper flakes or cayenne, optional
⅛ teaspoon pepper
2 tablespoons (14 g) ground flaxseed mixed with 4 tablespoons (60 ml) warm water
2 tablespoons (30 ml) maple syrup
2 tablespoons (30 ml) olive oil (*use applesauce)
Add the oats, walnuts and all the spices (all ingredients above the ground flax seed) to a food processor. Pulse them until you’ve broken up the oats and walnuts into tiny pieces but they’re not yet powdery.
Add the flaxseed mixture, maple syrup and olive oil to the mixture and process until it forms a ball.
Form the patties using a scoop or tablespoon measure, then pat flat to make them into patties.
Heat a nonstick skillet over medium heat. Cook the sausage for about 5 minutes on one side, flip and cook until the other side starts to brown.
If you want to freeze some for later, do not cook them now because they will be too dry when you reheat them. Stack with waxed or parchment paper between patties and freeze them in a container that will protect them from getting smashed.
Per patty with oil: Calories 98.0, protein 2.2 g, total fat 7.5 g, carbohydrates 7.0 g, sodium 73.1 mg, fiber 1.4 g
TIP: Save time by making up a big batch of the sausage spices in an old spice container or other tight-lidded container. Then just add about 1½ tablespoons (20 g) of the mixture to the sausage mix.
• gluten-free option* • soy-free • oil-free option**
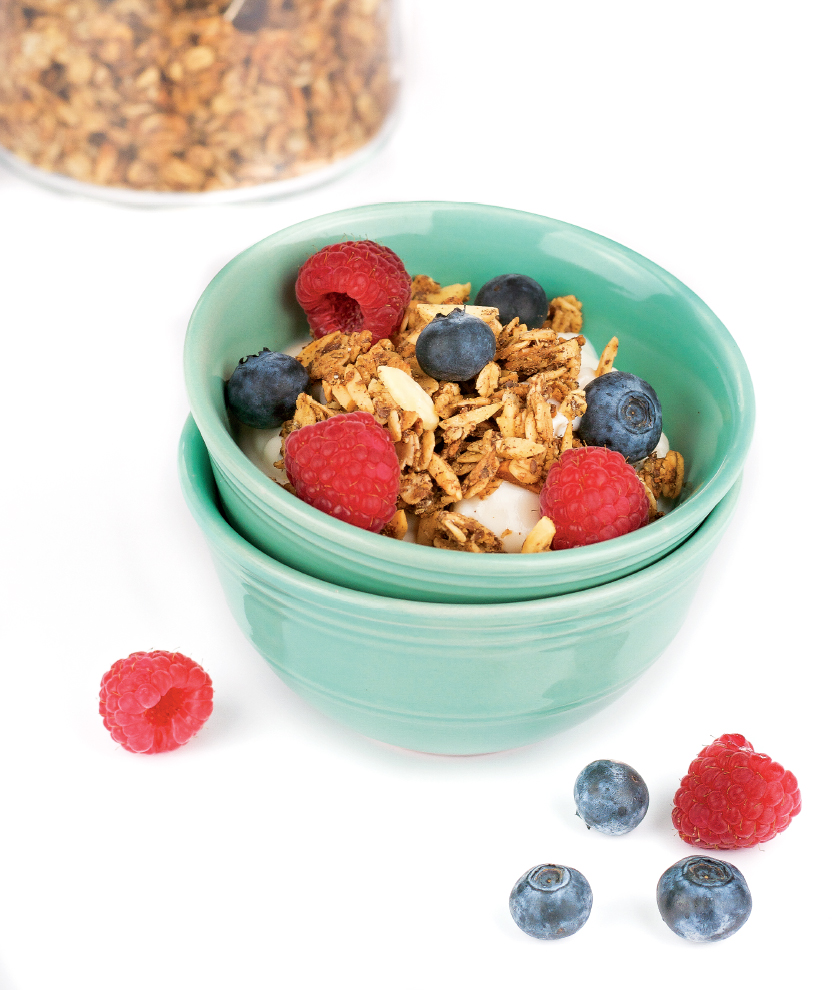
Homemade granola is so easy to make that I always wonder why it’s so expensive to buy in the store. I like to cook this around the holidays because it makes the house smell wonderful. It’s a great vegan yogurt topping.
2 tablespoons (14 g) ground flaxseed mixed with 4 tablespoons (60 ml) warm water
2 cups (184 g) rolled oats (*make sure oats are marked “gluten-free”)
¼ cup (60 ml) maple syrup
¼ cup (54.5 g) coconut oil, melted (**replace oil with 1 tablespoon [7 g] ground flaxseed mixed with 2 tablespoons [30 ml] warm water in addition to the amount above)
½ cup (54 g) slivered almonds
2 teaspoons (10 g) cinnamon
1 teaspoon cardamom
½ teaspoon ground ginger
¼ teaspoon allspice
⅛ teaspoon cloves
¼ teaspoon salt
Preheat oven to 350°F (177°C) and either oil a cookie sheet or cut a piece of parchment paper to fit it.
Add all ingredients but the salt to a medium-sized mixing bowl. Mix well, then add salt to taste.
Pour the mixture on the prepared cookie sheet and press thin so that it’s in one large flat piece about ⅛ to ¼ inch (3 to 6 mm) thin. Bake for 20 to 25 minutes, until the edges are browned and the middle is no longer wet.
After it’s completely cool, store in an airtight container for up to 2 weeks.
Per ½ cup (45 g) serving: Calories 294.8, protein 6.9 g, total fat 16.5 g, carbohydrates 31.9 g, sodium 97.7 mg, fiber 5.0 g
TIP: Use this granola for a quick and easy crumble. Use berries or cut up enough stone fruit, apples and/or pears to fill up your dish. Toss with a little agave nectar or coconut sugar and a pinch of salt. Cover with the granola. Bake at 350°F (177°C) until the fruit is soft.