Appendix A. Setting Up the Pi
You’ve probably noticed that after you get the Pi up and running, working with it
is pretty straightforward. You have root access (using sudo) to any files you
need to change, such as /etc/network/interfaces, or the /etc/rc.local file. You
can plug in your keyboard, mouse, and monitor, and work with it as a
standard desktop machine, or (as I prefer) you can just hook it to your network
and remotely log into it via SSH (or VNC, if you need a graphic desktop
environment). With the wireless working, you can put the Pi in your rover and do
all of your programming work without taking it out of the robot.
But what about setting it up in the first place? Even if you bought your Pi with the now-available NOOBS-preloaded SD card, you still need to install Raspbian and set it up to be easily accessed remotely. If you just bought yourself a bare-bones setup and need to get NOOBS, you may be a little confused. Sure, there are instructions on the raspberrypi.org website, but who reads instructions? And if you’re new to this whole Raspberry Pi thing, you may need some help.
That is what this appendix is for. (The word appendix comes from the Latin
word appendere, meaning “to hang upon,” or “to explain OS installation.”)
Let’s quickly go through the process of downloading NOOBS, formatting your SD
card, installing Raspbian, and working through the raspi-config tool. If you
bought a preformatted card (always a good idea, as it’s only about $7, and all
proceeds go to the nonprofit Raspberry Pi Foundation), you can skip ahead to the
installation section.
And why download NOOBS, you ask? NOOBS is handy because it contains all the files you need in one easy download. In fact, it contains the installation files for several operating systems, including Raspbian and Kodi Entertainment Center, so should you want to experiment with other OSs on your Pi, by downloading NOOBS you have access to a virtual cornucopia of operating system goodness.
Download NOOBS
NOOBS, which stands for New Out Of Box Software, is available for free from http://www.raspberrypi.org/downloads. The version as of this writing is 1.3.5. On that page, click the ZIP file to begin the download and get a cup of coffee (or go to bed—it’s a hefty 1.3GB download).
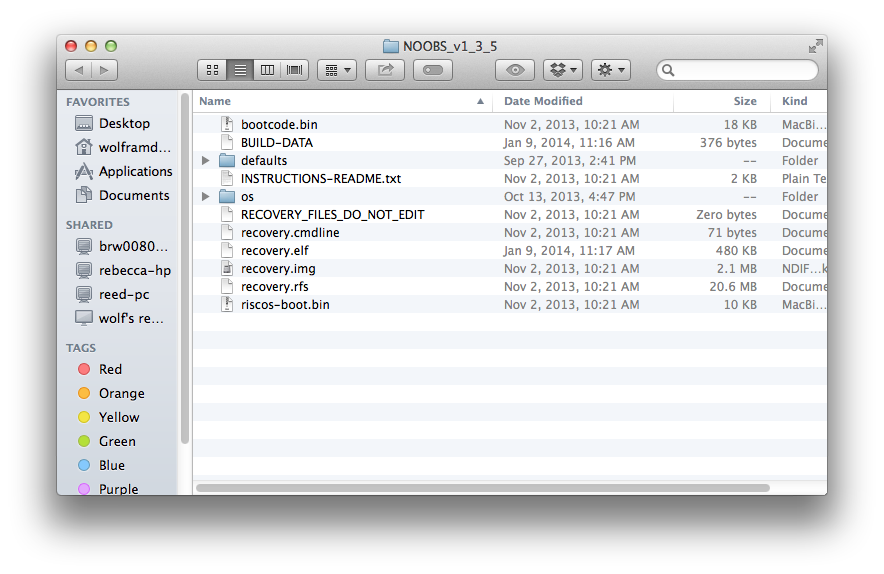
After the ZIP file is downloaded, extract the files. You should end up with a folder containing files similar to what you see in Figure A-1.
Set that folder aside for a moment. Before we do anything with it, we need to get the SD card ready.
Download the SD Card Formatting Tool
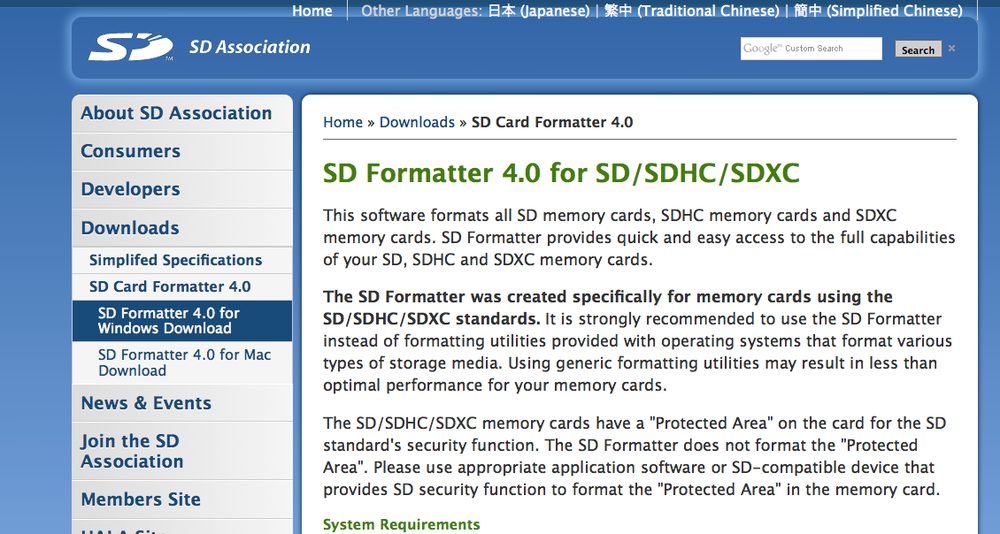
Although you can probably just drag and drop the NOOBS files onto a blank SD card and expect it to work, you may not want to take that chance. Depending on your computer’s operating system and the format currently on the card (which often depends on the card’s manufacturer), the dragged-and-dropped files may or may not install correctly onto the card. I have had luck with a Mac and a PNY card, but the same card did not accept the files when I attempted to drag and drop them from a Windows installation. To avoid any guesswork, I highly recommend getting the card-formatting tool from the SD Association’s website.
Point your browser to http://www.sdcard.org/downloads/formatter_4/. On the left side of the page, you’ll see your download choices (Figure A-2). Select your operating system, agree to the terms, and download the tool. Unlike the NOOBS file, it’s quite small.
When it is downloaded, open up the file and follow the instructions to install the SD card formatting tool on your machine.
Format and Fill Your Card
While we’re on the subject of cards, which one are you using? You’ll need at least 8GB for your install. (The raspberrypi.org site says 4GB, but my experience is that 4GB isn’t big enough.) Go larger if you like; there’s no upper limit, as far as I know. I tend to go with 16GB.
Put the card in your computer’s card slot. Open the formatting tool you installed earlier and follow the instructions to format the card.
Make sure you choose the correct drive to format. The tool will erase whatever disk you point it at! That includes your hard drive. Be careful!
When the tool is done and the card is ready, just copy the files from the NOOBS_v1_3_5 folder onto the card. That’s it!
The raspi-config Tool
When the Pi starts up for the first time, you’ll see a splash screen, giving you the option of which OS to install. Choose Raspbian (the first option) and click Install. The NOOBS tool will expand the file system to fill your SD card and then do a clean install of Raspbian. Feel free to watch for a while, as the Raspberry Pi Foundation has included some helpful reading material to watch while you wait. And you will wait: especially if you have a high-capacity SD card, the installation may take up to an hour.
When the install is done, you’ll reboot the Pi, and then will be greeted with
the raspi-config tool (Figure A-3).
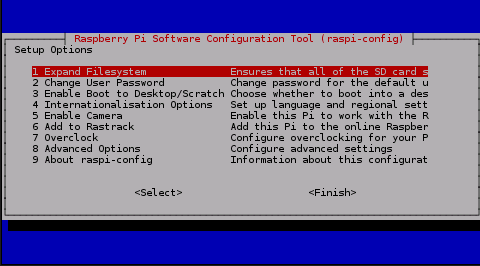
Getting around the tool is easy: use the up and down arrows to choose your line item, and then the right arrow and Enter key to select.
You used the NOOBS tool, so you can disregard the first item, Expand
Filesystem, because NOOBS automatically expands the installation to fill the
SD card. The second menu item lets you change the default username and password
from pi and raspberry, respectively, to something more appropriate, should
you so desire. It’s probably unnecessary, unless you plan on exposing your Pi
to the outside world via an unprotected network.
The third option allows you to choose whether you want to boot to a desktop
environment, a command line, or the Scratch programming language IDE. If you
choose to boot to a command line, you can always start a desktop by typing
startx at the prompt.
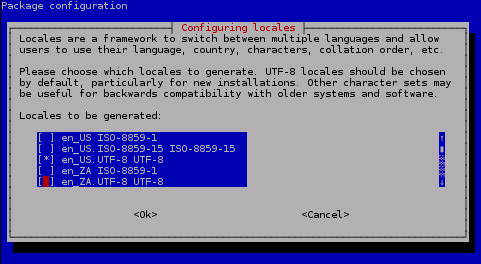
The fourth option, Internationalisation Options, is important if you’re not using the Pi in the United Kingdom. Work your way through the menus, choosing your locale, time zone, and the sort of keyboard you have. The locale menu is a little different to get around in, and can be a bit confusing. First of all, it’s comprehensive, meaning that a lot of regions are listed, from Antigua to Zimbabwe. To choose your locale, move up and down with the arrow keys. The locale(s) currently selected will have an asterisk in the brackets (Figure A-4). To clear or add an asterisk, press the space bar while you have that line selected. According to the configuration instructions on the screen, when faced with a choice, choose the UTF-8 locale for your country.
When you’re finished, press the Tab key to get to the <Ok> option, and press Enter. Follow that up by choosing your time zone (your system clock will be updated via a network time server if you have your Pi connected to the Internet while you run the tool) and your keyboard layout. In general, unless you have a super-duper high-tech keyboard, you can probably just agree with the defaults presented to you in the keyboard selection screens and press <Ok>. You’ll know you got it right if, after you’re finished, pressing Shift+2 gives you the result you expect—either an at sign (@) or a double quote (“).
Enable Camera, the fifth option, does just what it says—configuring the Pi to work with the camera board. If you don’t enable it, your Pi won’t be able to work with the camera, and if you’re planning on putting the IR camera in the robotic arm as per the rover design, you’ll need camera support. Even if you’re not going to use the Pi camera, I recommend enabling it. It doesn’t cost you anything.
Option six, Add to Rastrack, simply adds your Pi to the global database/map of Raspberry Pis. Feel free to enable it if you’re not feeling particularly paranoid today.
The seventh option, Overclock, gives you the ability to upgrade your 700MHz chip all the way to a screaming-fast 1GHz. This is totally up to you; I find it’s not really necessary unless you’re planning on doing a lot of intensive computing or working with video. It can make your Pi run a little hot, and can cause system instability. Experiment if you feel you must.
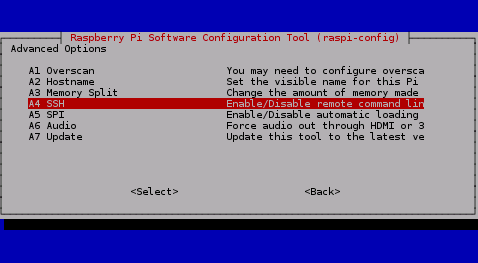
Option eight, Advanced Options, is important if only because of its fourth submenu item, SSH (Figure A-5). It’s important that you enable the SSH server on your Pi, so you can log in remotely and work on it while it’s installed in your rover or other project. Experiment with the others as you like.
When you’re finished playing with the options in the tool, select Finish and reboot your Pi if necessary.
The final part of the setup process is to update your Pi. Updates are
continually being released, and it’s quite likely that one or more of the
packages on your Pi have been updated since the NOOBS tool was released. Open a terminal, and at the prompt type sudo apt-get update and sudo apt-get upgrade. That will make sure all of your installed software is cutting-edge. Depending on the number of updates to the software you have installed, this update and upgrade process can take quite a while—not quite as long as the initial installation, but still long enough to go enjoy a nice cup of tea.
That is a short-and-sweet guide to getting your Pi ready to program and build. As you progress through the build, you may find yourself downloading other software packages as well; it’s not uncommon to end up with an SD card that’s completely tailored to one project in terms of installed software and written programs and scripts. This is another advantage to the Pi’s hard drive system: you can set that SD card aside, buy another one for under $30, and start fresh on the next project. It’s not like buying another 1TB hard drive for your laptop every time you start a new build.
Now that you’re up and running, you may want to peek at Appendix B if you need a refresher on (or an introduction to) the Python scripting language.