

DIFFICULTY: EASY TO INTERMEDIATE
RECOMMENDED HAIR LENGTH: SHOULDER-LENGTH OR LONGER WITH BANGS OR FACE-FRAMING LAYERS
To help you put your best Madame de Pompadour foot forward, we present this very French take on a mid-eighteenth-century hairstyle. This hairstyle, while not a tête de mouton, [8] was worn from the 1750s up through the very early 1770s. This is an easy hairstyle to achieve whether your hair is long or short. If your hair is long, use your natural hair for the chignon and your false toupee for the front; if your hair is short, this style may be done with your own hair while your false chignon will easily fill in the back; and if your hair is a pixie cut, the use of both the false toupee and the chignon will create the style with your own short hair blended in at the front, a perfectly period-accurate method [9] with excellent results. Abby has type 1A hair that is shoulder-length with blunt-cut bangs, but bangs are not required to successfully pull off this look. Try crape-ing your small wispy hair or some short layers around your face, or skip the crape-ing steps altogether and just work your hair into the sculpted curls.
• Large powder brush
• Rattail comb
• Alligator hair clips
• Flat iron
• Teasing comb
• ½-inch (1.2-cm) curling iron
• Size 15 (10-mm) knitting needle
• Hairpins large and small
1. Start with the model’s hair already pomaded, powdered and combed through (here).

2. Part the hair from ear to ear, separating the front from the back. Hold the back portion out of the way with clips.
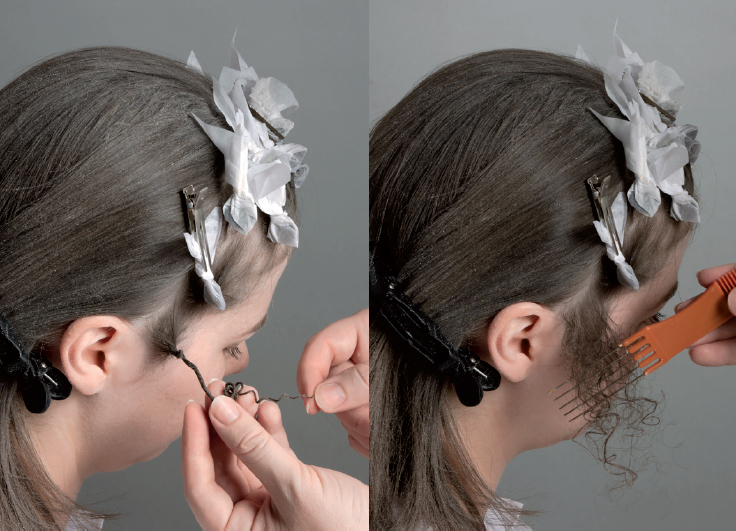

3. Using the flat iron, crape the front of the hair following the instructions here. Comb through, powder, fluff and back comb the curls to create the frizz. The frizz will be worked into the rolls behind it.
ROLLING THE TOUPEE
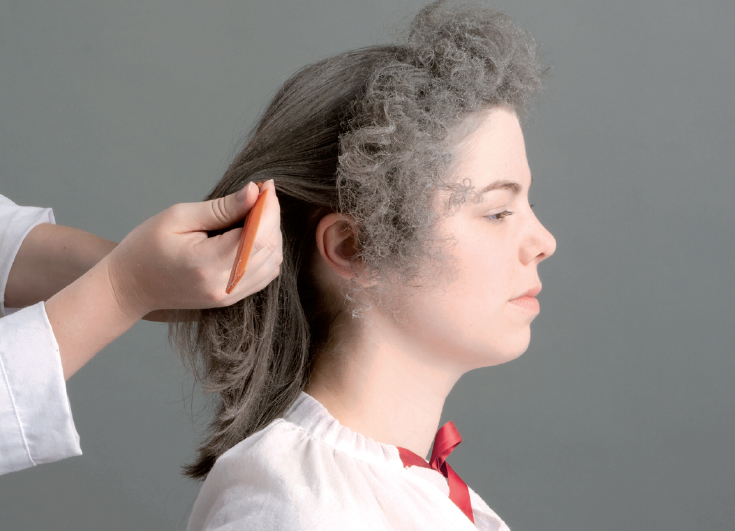
4. Next, part the hair across the upper back of the head for the middle section with the sculptured curls.
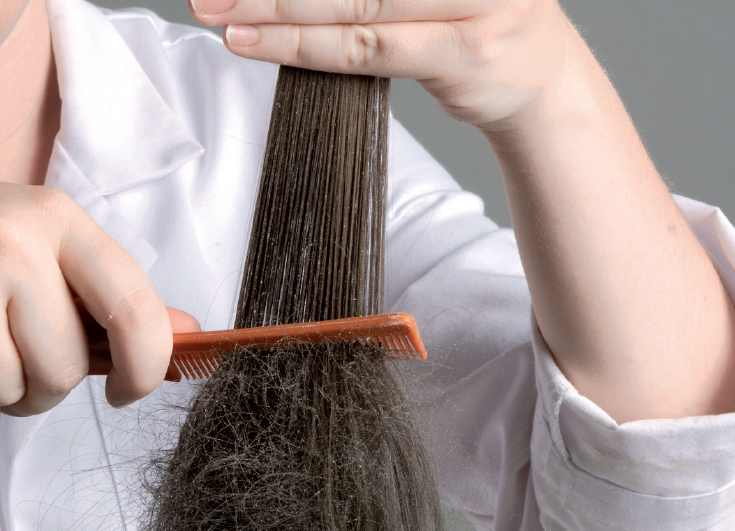
5. Working in rows running from the front to the back of this section, divide out a 1-inch (2.5-cm)-wide hank of hair. Backcomb the base of this hair thoroughly, then curl the ends downward with the ½-inch (1.2-cm) curling iron. Remove the curling iron, then starting at the ends again, roll the hair around that huge knitting needle we made you buy all the way down to the scalp.
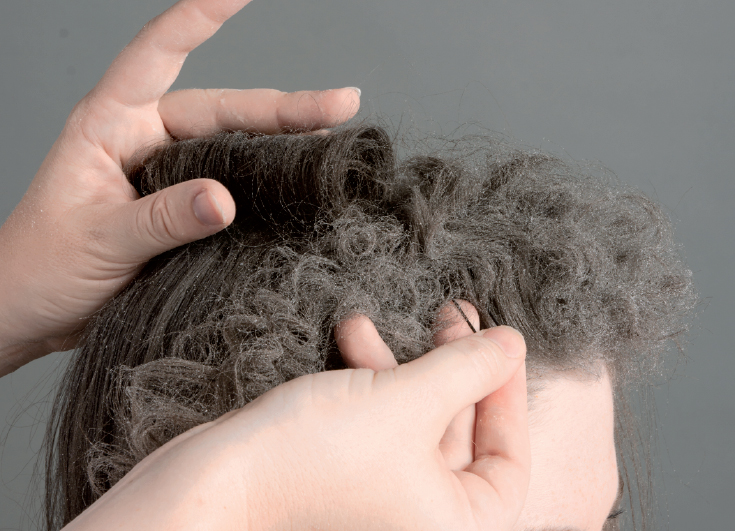
6. Slide the knitting needle out of the curl, holding the curl in place with your fingers. Pin inside the curl from the front, catching some of the crape’d hair in the pin as you work it into the curl. Also pin inside the curl from the back, wiggling the pin up and down through the hair at the scalp to secure it.

7. Repeat steps 4 and 5 from ear to ear. The hair should curl upwards from the ears. At the center-top of the head, the two curls will curl toward each other. Remember to pull the crape-ing back and work it into the rolls to blend these two sections together.

8. To treat the hair at the back of the head, comb the chignon smoothly upwards, bobby pinning securely at the top. If you don’t have quite enough hair of your own to accomplish this look, experiment with your false chignon from here.

9. At the top of the chignon, divide the ends into three sections and curl under with the curling iron. Pin each curl in place.
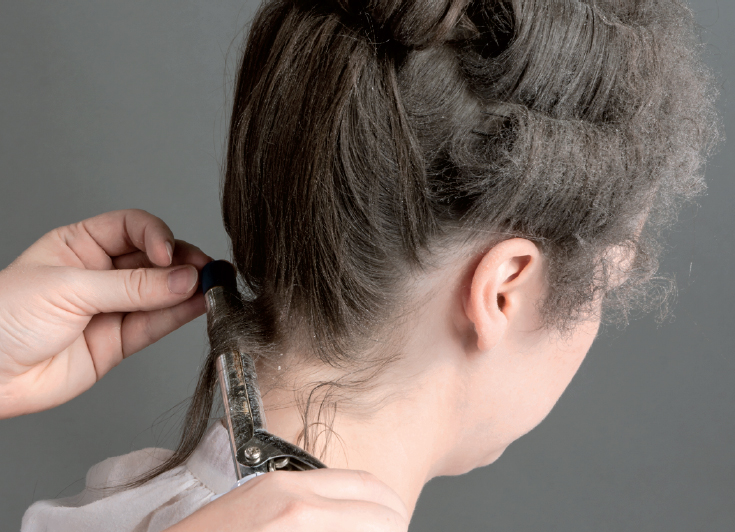
10. If you have baby hairs floating out at the base of your neck, curl these with a ¼-inch (6-mm) small barrel curling iron, or be very eighteenth-century and just cut them off! [10]

11. For an extra-French look, add more powder! Really lay it on there, friends!

12. Ta-da! Your impressive mid-century French hairstyle is complete. Add the 1750s cap and lappets to top it all off, or try a few flowers tucked into the top of the chignon.