

With the popularity of pastoral dress [9] in the 1780s, very large straw hats came into fashion. These hats, now known as “Gainsborough Hats” after the prolific artist who depicted many a fine chapeau in his work, came in all shapes and sizes, some with huge brims and shallow crowns and others with tall crowns and turned-up brims. The hats could be simply decorated or elaborately fluffed and often featured black trim with a profusion of black or white ostrich feathers. [10] In this tutorial, we will re-block a standard straw hat to achieve a different crown shape, wire, mull and bind the edge of the brim and add a few more elements to create a fashionable country hat. You can use this tutorial as a reference point for re-shaping and refashioning just about any hat that will take steam, even lightweight felt hats.
• 15-inch (38-cm) diameter real straw hat
• 6–7-inch (15–18-cm) diameter flower pot
• 1 yard (1 m) narrow twill tape
• Spray bottle
• Steam iron
• 1½ yards (1.5 m) 18-gauge millinery wire
• #30 silk thread, straw color
• ¼ yard (25 cm) thin cotton muslin
• 1½ yards (1.5 m) 1-inch (2.5-cm)-wide silk ribbon
• #50 silk thread, matching ribbon color
• ¼ yard (25 cm) lightweight cotton fabric for lining
• 20 inches (51 cm) ⅛-inch (3-mm)-wide twill tape
• 20 inches (51 cm) 2–3-inch (5–8-cm)-wide silk ribbon or ¼ yard (25 cm) silk taffeta fabric to make your own ribbon
• 2–3 white ostrich feathers


1. For this tutorial we are re-blocking an existing straw hat. It’s very important to have a real straw hat for this project so that it responds to the steaming and shaping. Start by removing any decorations, interior hat bands, tags, wires and glue from your hat base.
2. Once your hat is naked, soak it in the sink or a bucket of water to “revert” the shape to a hood or capeline. [11] Remove the hat from the water and towel it off. The straw should be damp, not dripping wet, but moist all the way through.

3. For our fashionable crown shape we are using a 7-inch (18-cm) flower pot as a hat block. Because this hat sits atop the hair rather than down on the head, the inner circumference of the crown need not be the same as your head. Pull the damp, reverted straw hood down over the flowerpot, tugging downwards with some force until the straw starts to take the shape.

4. Tie the crown at the base very securely with tape or use a strong rubber band. Allow the straw to dry on the form overnight.

5. Once dry, remove the hat from the flower pot. You may need to iron the brim flat with a good application of steam to shrink and shape it if there are bubbles or uneven bits.
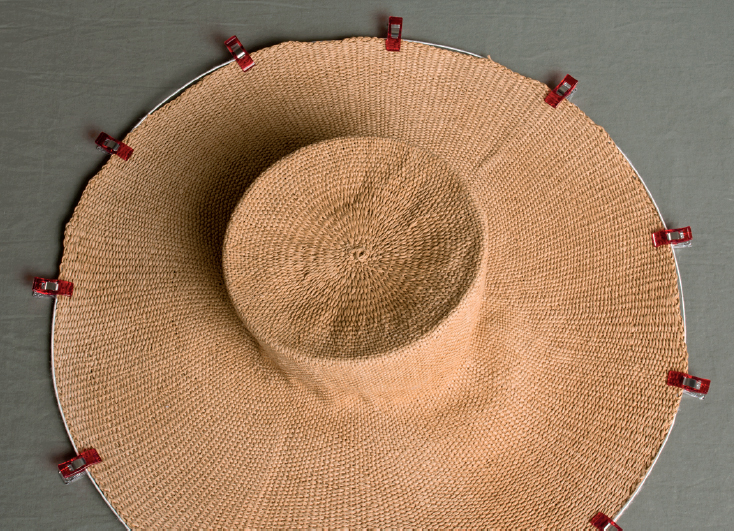
6. Wiring the brim helps a floppy hat hold its shape while also allowing for curving the brim later on. Place the millinery wire around the brim and clip into place. Cut and overlap the ends by 2 inches (5 cm).
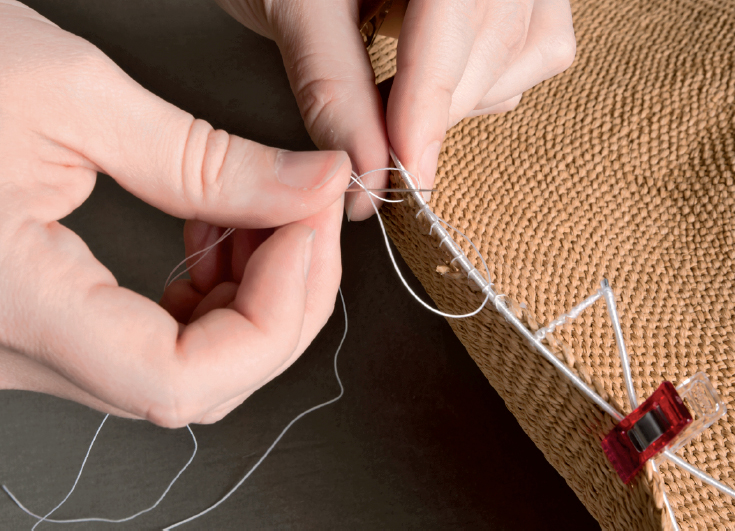
7. Using #30 silk thread, well-waxed, blanket stitch (see here) the wire to the hat brim 4 to 5 stitches per inch (2.5 cm). Make sure the wire is right on the edge.

8. Mulling is used to smooth, stabilize and pad edges while also providing something to sew coverings and decorative elements to. To create your mulling material, cut ¾-inch (2-cm) bias strips from cotton muslin and join together for about 1½ yards (1.5 m) in length.

9. Fold the cotton bias over the edge of the hat brim, stretching and clipping as you go. There is no need to turn in the raw edges at any point, including the overlap.

10. Stitch the mulling to the hat brim using a milliner’s figure 8 stitch (here).
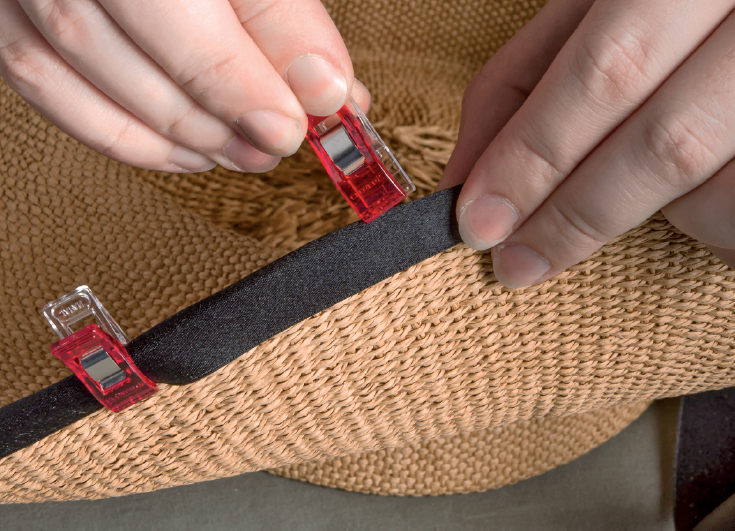
11. Fold the 1-inch (2.5-cm)-wide satin ribbon over the edge of the brim, covering the mulling completely, and clip into place.
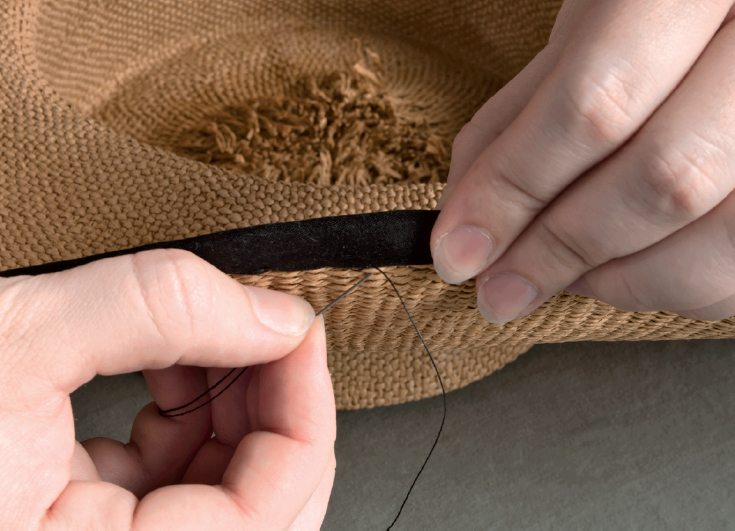
12. Stitch the brim binding into place using a milliner’s figure 8 stitch (here). Turn under the raw edge at the end where the ribbon overlaps, and neatly hem stitch to finish.

13. Crown linings serve multiple purposes in eighteenth-century hats. They act as a stabilizing interior band, adjust the fit of the hat and also hide the sometimes messy interior of the crown. Measure the interior circumference and depth of your crown. This may differ from ours depending on your hat base and the block you use to re-shape it, so double check! Our hat lining is 19½ inches (49.5 cm) by 3 inches (8 cm), including the seam allowance.

14. Turn up ½ inch (1.2 cm) on one long edge and baste.

15. Turn in ¼ inch (6 mm) on the short edges and baste. Turn up another ¼ inch (6 mm) on the short edges and hem stitch.
16. Turn up ¼ inch (6 mm) on the remaining long edge, baste, then turn up another ¼ inch (6 mm) and hem stitch, leaving the ends open. Using a large, dull upholstery needle, thread the ⅛-inch (3-mm) twill tape through the channel.

17. Place the lining inside the crown of the hat, aligning the basted long edge with the base of the crown. Carefully sew the lining to the hat with applique stitches through all layers. It is OK for the stitches to show on the outside of the hat—these will be covered in the next steps.
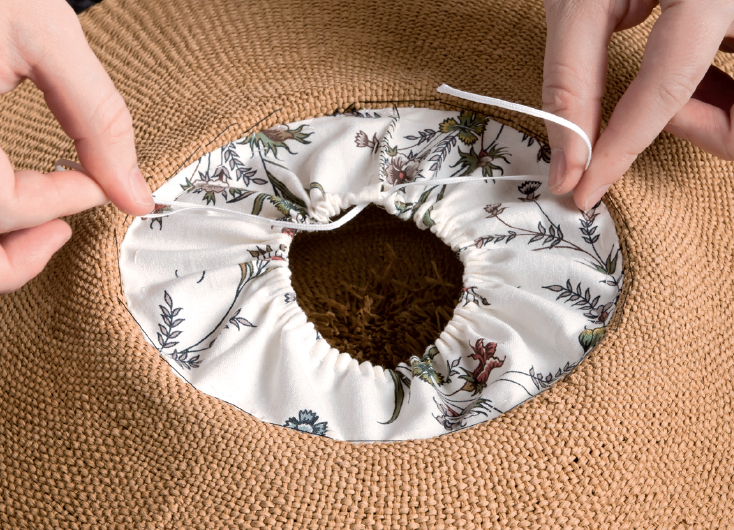
18. Once you reach the short ends, abutt the edges and whipstitch together, leaving the drawstrings open and free.

19. To create the exterior hat band you may use wide satin or grosgrain ribbon ready-made or make your own band. Ours is silk taffeta fabric cut and sewn into a band 20 inches (51 cm) long and 2 inches (5 cm) wide, but yours may differ depending on crown circumference and depth. We made ours sewn right sides together and turned right side out. One raw short end was turned and basted.
20. Apply your hat band to the outside of the crown, covering the lining stitches. Overlap the short end you turned under over the raw edge of the other short end and pin through the hat to hold in place.
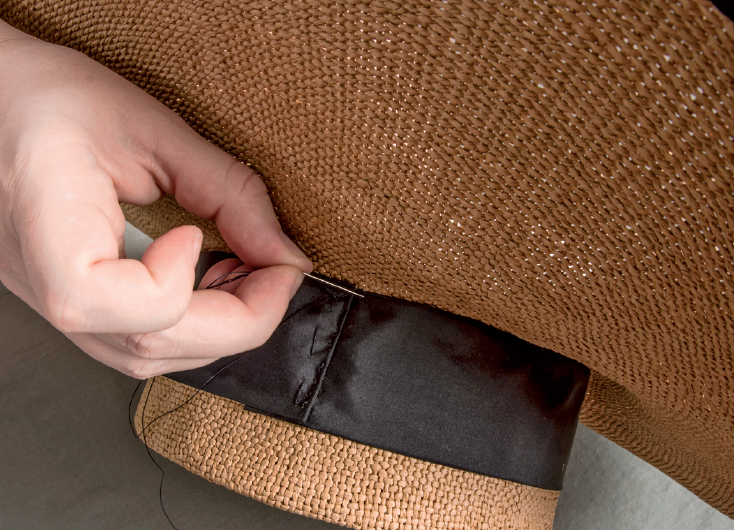
21. Stitch the band to the hat through the straw layer, but avoiding the lining inside, using applique stitches at the base of the band. These stitches can be placed quite far apart and are there only to secure the band to the hat. This whole process is a little tedious, so be careful!
22. Take a few prick stitches across the short end to secure the band further. There is no need to stitch around the top of the hat band.
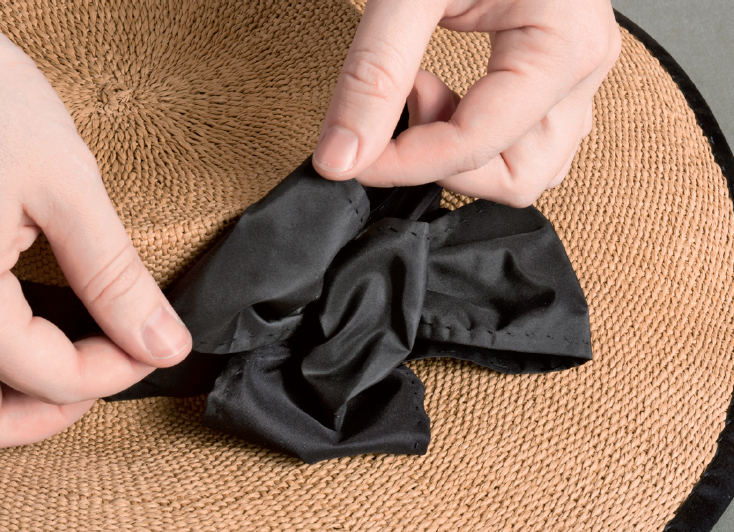

23. We decorated our hat with a 5-loop bow in black taffeta and a large white ostrich feather. To learn how to make 5-loop bows, see here. To see our tips on working with ostrich feathers, see here.
Hooray! Your lovely new Gainsborough Hat is complete! Pull up the drawstrings of the hat lining to adjust the crown depth and wear your new hat at a jaunty angle, secured through your hair cushion with a hat pin.