1. Equipment for Lighting in the Studio
A s we begin to tackle the topic of studio lighting, we have to start with the single most elementary aspect of this kind of work: the equipment. Working in the studio requires very specific tools designed to perform the necessary functions needed in portrait photography. As with anything else, there are choices—choices in quality, features, and brands. Before you begin working in the studio you’ll have to make some decisions about what kind of equipment you will likely use. This may be influenced by your photographic training, your mentors, or perhaps other photographers in your area. At the same time, you must also factor in the type of work you plan to produce, which may have special requirements.
Figure 1-1. Most photographers choose to use strobes in their daily work.
Figure 1-2. Shooting with strobe helps to eliminate any subject movement and keep your images looking sharp.
Advantages. Most studio portrait photographers choose to use studio strobes ( figure 1-1 ) in their daily work; there are a number of reasons for this. First, working with strobes makes it much easier to freeze your subjects. The near-instantaneous burst of light from a flash helps to eliminate any movement that could make the image appear a bit soft or slightly out of focus ( figure 1-2 ). For example, if you are taking a family portrait and there is a small child in the photo, he might be a little anxious about being in the studio and could be swaying left or right or possibly wiggling a foot as he sits on his parent’s lap. That subtle movement would appear as blurred motion—if you were not using strobe lights. Studio strobes will also allow you to work at a wider variety of apertures for increasing or decreasing the depth of field, depending upon your specific need for the image and subject.
Power Output.
Most brands of studio strobe lighting are available in different power output levels, measured in watt/seconds or joules. This refers to the amount of flash output from the unit; a rating of 400–500ws per individual lighting head seems about average for most portrait studio applications. Certainly, lights are available with more or less power, and each unit is adjustable from full power down to ½, ¼, ⅛, and even ![]()
![]() power. Some photographers who work in smaller, more confined studio spaces can work with less power—say 200ws. Even speedlights work in some studio situations, but there are trade-offs: the maximum output can be less than needed and, without a modeling lamp, it can be harder to focus and to predict the results you will get when using light shaping tools.
power. Some photographers who work in smaller, more confined studio spaces can work with less power—say 200ws. Even speedlights work in some studio situations, but there are trade-offs: the maximum output can be less than needed and, without a modeling lamp, it can be harder to focus and to predict the results you will get when using light shaping tools.
Price and Value. I have always found that the price you pay for a specific piece of photographic lighting equipment is a good predictor of the value of the equipment. In other words, if you spend a little less you will probably receive fewer features and a bit of a lesser product in terms of durability. If you spend a bit more, you will usually find more features, a more durable light, and a more consistent color temperature. It is all about a fair exchange of value—and only you know what types of features you need, how the equipment might be used (whether daily or weekly), and the travel conditions your work might entail. Also, you are the only one who knows your budget to spend on lighting. If you are working in a small home studio you can spend less than if you need equipment that might be used for heavy travel, large output, and more professional needs.
![]()
The price you pay for a specific piece of photographic lighting equipment is a good predictor of the value.
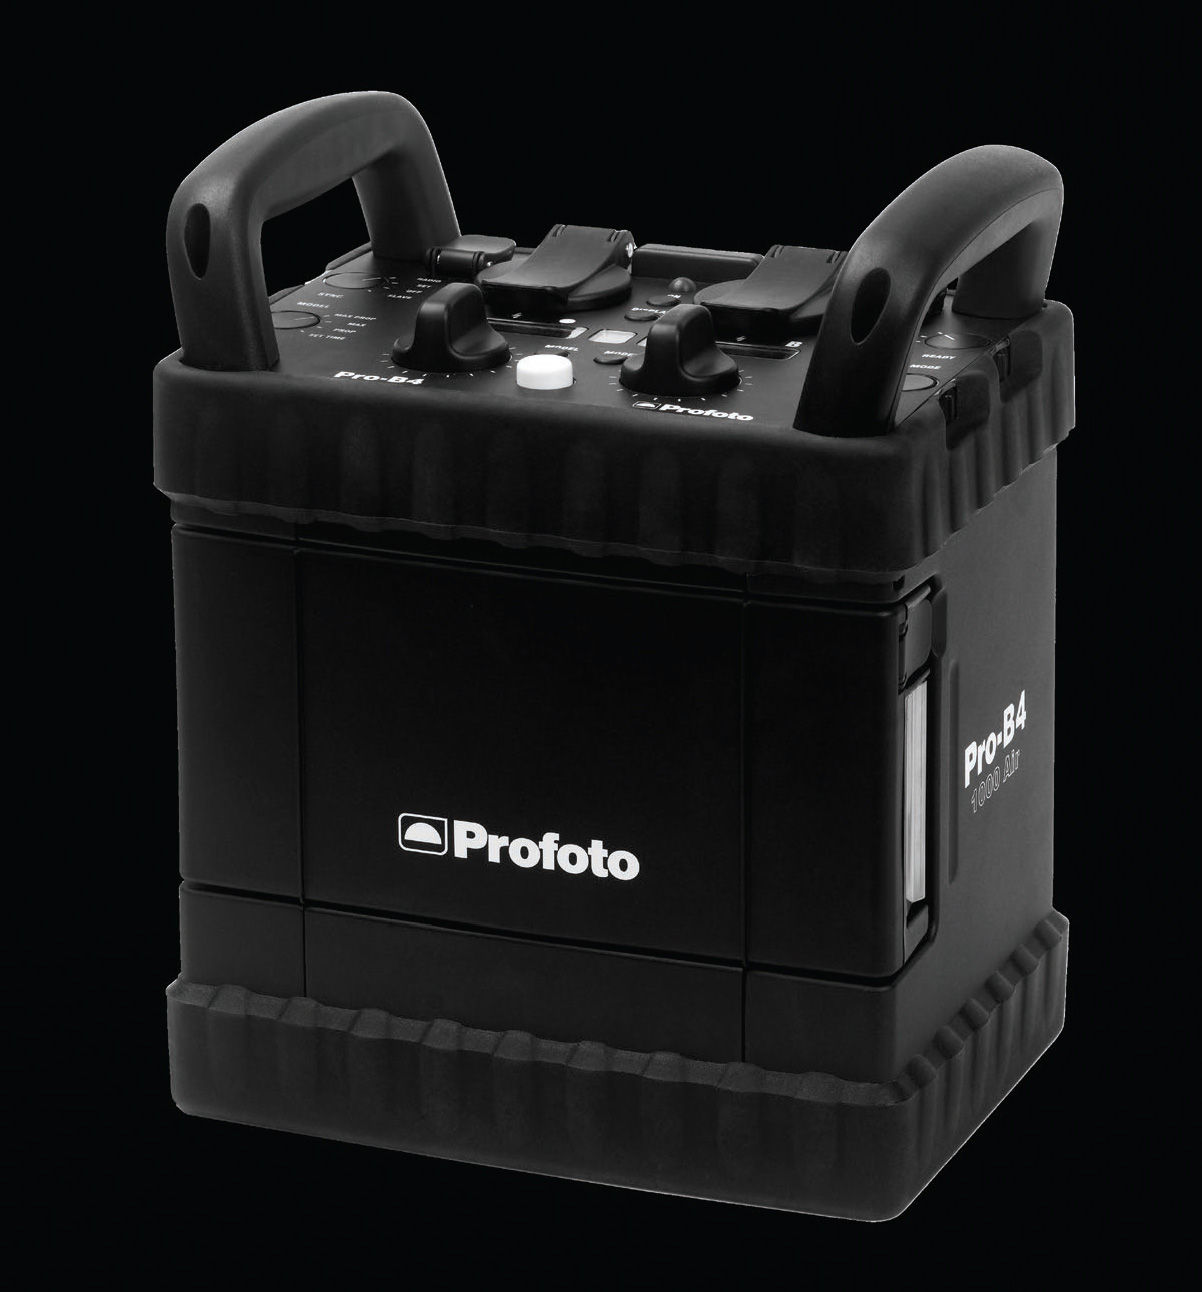
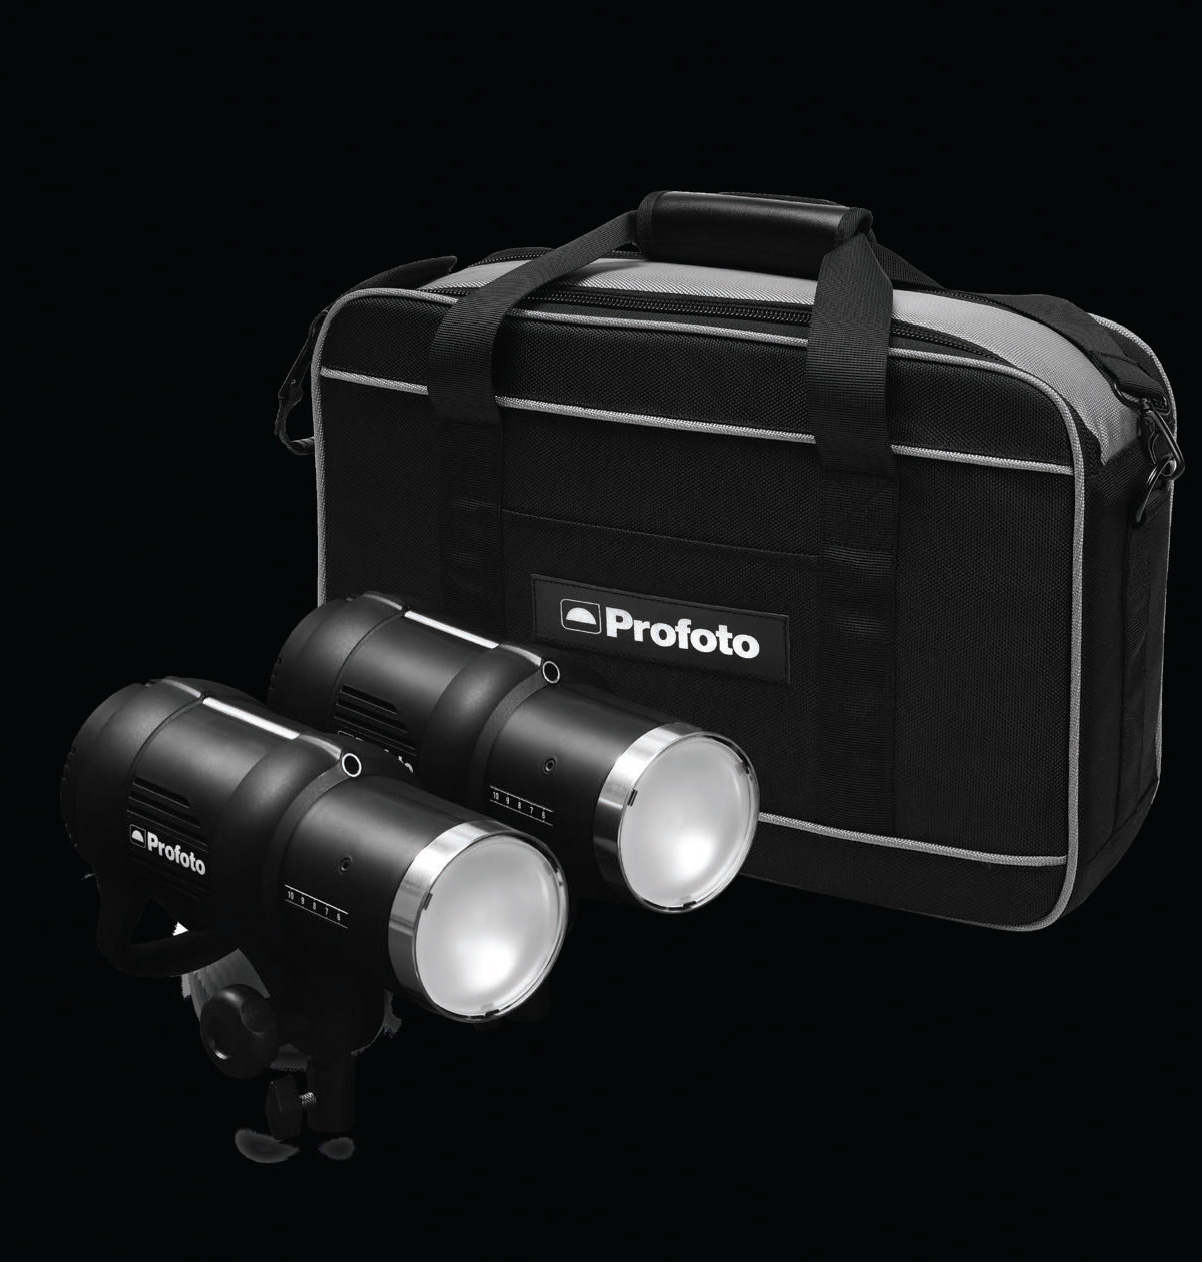
The brand that I have had the most consistent and long-term relationship with is Profoto ( figure 1-3 ). They continually create well-made, professional products. While some might consider them a bit expensive, I have always found that they hold up extremely well to the rigors of daily use in professional applications. They are durable, made of the highest quality materials, and employ cutting-edge technology in their electronics. I have also used—and, at different times of my career, been connected to—Bowens (UK) as well as Elinchrom and Broncolor (Switzerland). These are all quality brands with a great series of accessories and long-term respect throughout the world. Also, they each began as a family business.
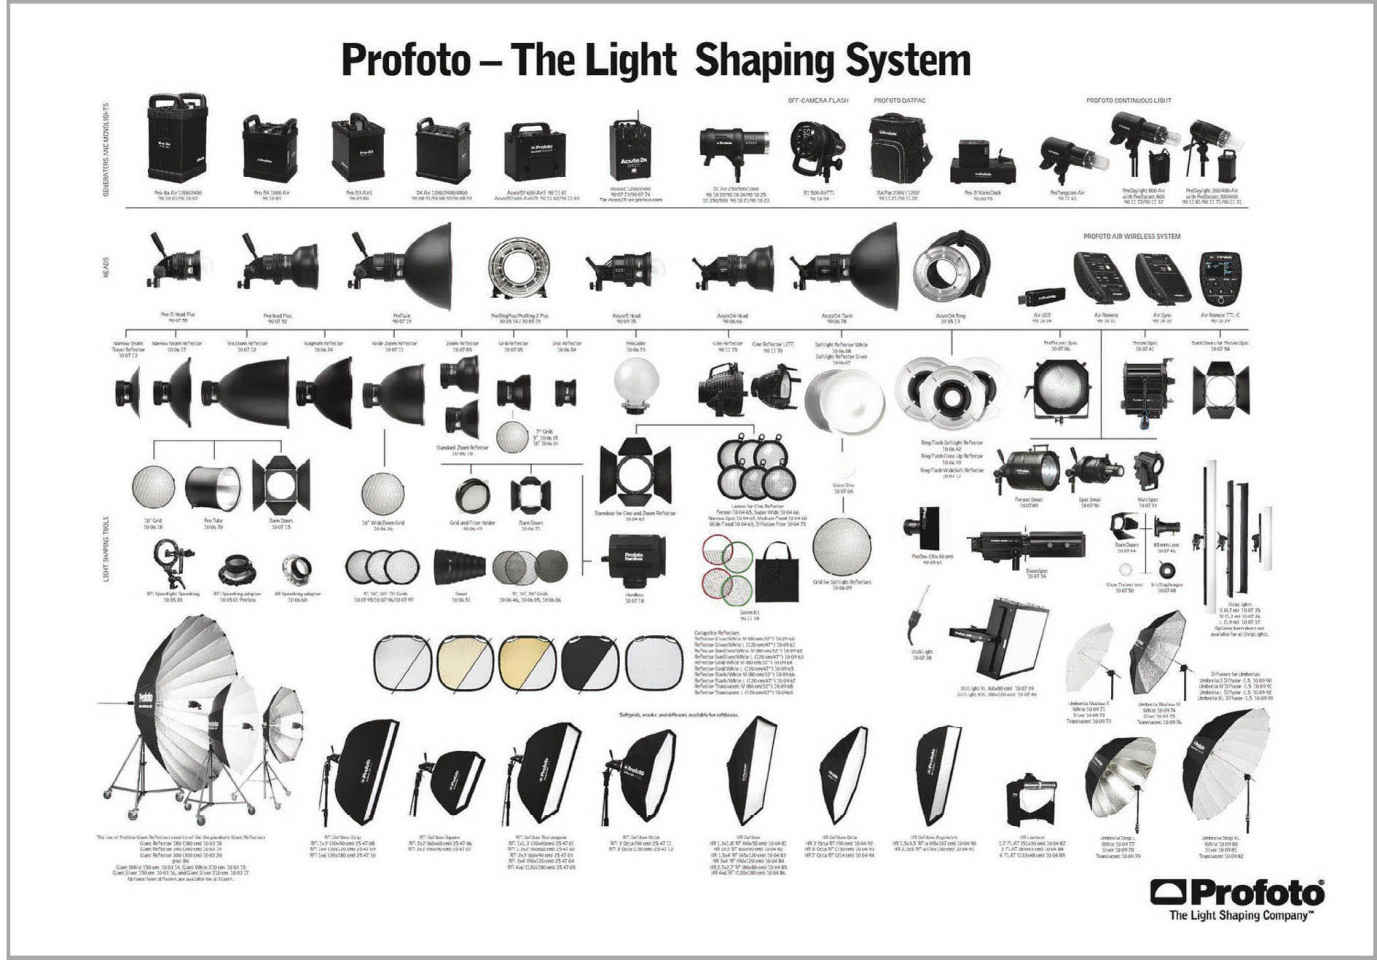
Figure 1-3. Quality lighting equipment can be a significant investment but it offers great long-term value. Image courtesy of Profoto .
A Quick Burst of Light
. Most studio strobes are designed to produce a daylight-balanced burst of light at a high-speed flash duration that is hard to beat for general portrait work. The amount of time that it takes the flash to peak at full strength then dip down to dark again is quite fast. This can range from ![]()
![]() second flash duration all the way up to
second flash duration all the way up to ![]()
![]() second. This comes in handy for taking photos of dancers in motion or when you need to freeze the motion of a falling drop of milk for a commercial advertisement image.
second. This comes in handy for taking photos of dancers in motion or when you need to freeze the motion of a falling drop of milk for a commercial advertisement image.
The Flash Tube . Studio strobes are equipped with two separate lights within each individual lighting fixture or light head. First is the flash tube, which is designed to create the exposure. This is a glass tube filled with xenon gas in a vacuum and includes a small wire filament ( figure 1-4 ). When a sync cord or remote sync completes or closes the circuit, the wire filament receives an electrical charge and the gas is fired. This triggers a quick, controlled mini-combustion. The control of brightness or output is achieved by dialing the power up or down on the flash head, depending upon the type of picture you are taking and at what lens aperture you need to work.
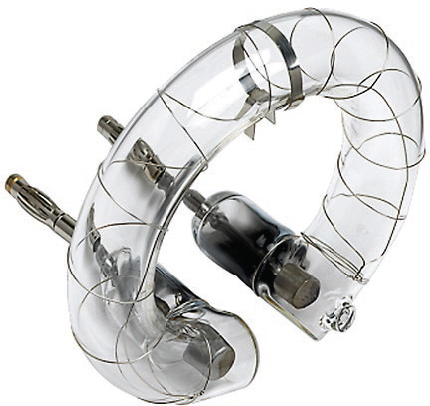
Figure 1-4. Studio strobes contain two light source. The first is the flash tube.
The Modeling Lamp . A second lamp within the lighting fixture is the modeling light ( figure 1-5 ). This is designed simply to aid in focusing and approximating what the image will look like when the actual exposure is made. Modeling lamps can be tungsten, halogen, or quartz bulbs. While modeling lamps are not often bright enough to aid in making the actual exposure, the image cannot be made effectively without one—at least in a darkened studio. Focus is a critically important step in studio portrait work and the modeling lamp makes it possible. In chapter 2 we’ll take a look at light-shaping devices, but for now it’s important to note that what they do with the light and shadow can only be previewed on our subjects thanks to the modeling lamp. I have had students ask what the color balance (or Kelvin temperature) of the modeling lamp is. That really does not come into play unless you are using it as the light source for your actual exposure—or in instances when you’re using a very slow shutter speed that could cause it to affect the exposure. Keep in mind that the exposure settings when shooting with flash are based on the strobe or flash tube, not the modeling light.
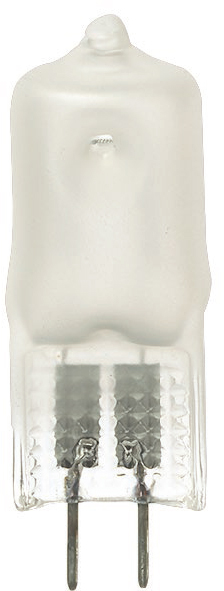
Figure 1-5. The second light source in a studio strobe is the modeling lamp.
Power Pack Lights (or Generator Lights)
This type of strobe system consists of a power pack (generator) and multiple heads (lamps) that are connected to it via cables. The electronics, capacitors, and controls are all located in the generator ( figures 1-6 and 1-7 ). This means that the heads only need to house the modeling lamp and a flash tube, so they can be quite small and lightweight. (Usually, these heads have an on/off switch for the modeling lamp, but not much else in terms of functionality.) Once the heads are plugged into the power pack, the power is distributed to each light based on power-pack setting that allows for control of the output level and symmetrical vs. asymmetrical output.

Figures 1-6 and 1-7. The power pack contains the electronics, capacitors, and controls for this type of light.
This generator-style strobe is capable of great power output, which makes it a good choice for many photographers. Commercial photographers and many portrait photographers also like that the lightweight heads are easy to position. Another benefit to shooting with this kind of light is that it needs only one A/C power cord to plug into the wall outlet. Each head ( figure 1-8 ) is connected to the power pack, which is then plugged into the wall.
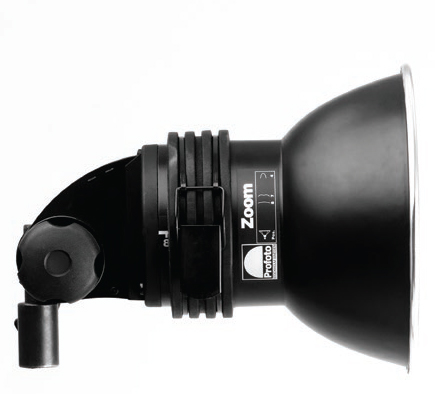
Figure 1-8. The heads are connected to the power pack, which is plugged into the wall.
Some of the higher quality power pack lighting equipment is designed to offer the photographer variable color temperature settings. This feature may have been more important in the days of film (especially with transparency/slide film) than it is in today’s world of digital editing capabilities. But it is a feature, nonetheless, that some photographers find useful. Also, some models feature extremely short flash durations designed to freeze moving subjects—even with high-output settings. Again, this can be extremely helpful (and versatile) for advertising work, when photographing pours and splashes, freezing dancers in motion, and in some forensic photography as well.
Monolights (or Self-Contained Lights)
Just as the name implies, monolights can stand on their own. They are designed to include all of the electronics and controls within each individual strobe head. This gives the photographer tremendous control over the output of each head since they are not dependent upon the power pack to distribute power. This has made them very popular—and, in fact, the number-one choice in studio lighting for portrait and people photography. However, there is a trade-off for this kind of control: the heads are heavy. These heads have to perform all of the same functions found in the entire power pack lighting system—but in each individual head. Also, each individual head requires its own A/C power cord. This means that if you have four monolights on a photo shoot, there will be four power cords that will each need to plug into wall outlets or power strips. The upside? You gain the precise control, down to ![]()
![]() stop, on each separate head.
stop, on each separate head.
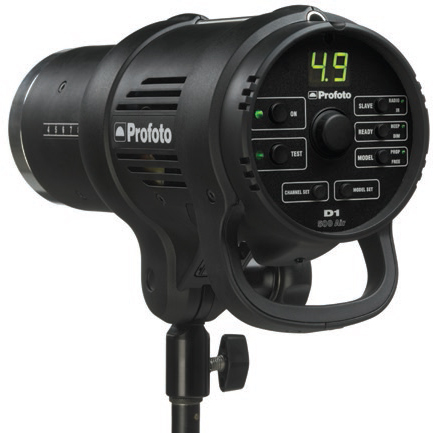
Figures 1-9 and 1-10. In a monolight system, each head has its own electronics, capacitors, and controls.
Figure 1-11. Each monolight has its own controls and power cord, making it easy to position and control.
I have been using monolights exclusively for almost twenty-five years (
figure 1-11
). For me, they are the most effective means of controlling light quickly and efficiently in the studio and I have learned to work around the heavier weight issue. And having ![]()
![]() stop control on each individual head on the set means having total control over my picture.
stop control on each individual head on the set means having total control over my picture.
Each time the strobes fire, there is an inherent delay in getting the capacitors built back up to the preset output power level. This delay is called the recycle time and it will vary based on the power level. Obviously, the higher the output, the longer the recycle time will be. In today’s world of higher quality camera sensors and fast ISOs (with little to no degradation of quality), it is entirely possible to set your strobe to a lower output than in the past and increase the ISO setting. This yields two positive results: much faster recycle times and (when using battery powered lighting units) much longer battery life.
Flash duration is the actual amount of time it takes the flash to fire—from the time the flash pops and reaches its maximum output until it goes off. In most cases, in portrait work, this is insignificant. Again, there are times when a very fast flash duration can be quite helpful. For example, it can be very useful when you need to freeze the action of a jumping dancer. In ambient light photography, this is something you would control for by using your camera’s shutter speed. When shooting with flash in the studio, however, the shutter speed cannot exceed the camera’s flash sync speed, which is typically in the ![]()
![]() to
to ![]()
![]() second range. That will not properly freeze a fast moving subject (
figure 1-12
). In these cases, the flash duration takes over and can help tremendously. Some flash units have flash durations as short as
second range. That will not properly freeze a fast moving subject (
figure 1-12
). In these cases, the flash duration takes over and can help tremendously. Some flash units have flash durations as short as ![]()
![]() second. If this is something you are in need of or interested in exploring, get online and read all of the lighting manufacturers’ specs on their products. You’ll find many that offer very fast flash durations.
second. If this is something you are in need of or interested in exploring, get online and read all of the lighting manufacturers’ specs on their products. You’ll find many that offer very fast flash durations.
In digital photography, we are responsible for making sure that the color balance in our work is true and accurate. In most portrait circumstances, our job is to present a “complimentary likeness”—and part of that is great skin tones and true clothing colors. In the previous film generation, our color outcome rested firmly in the hands of the professional color labs that both processed and printed our negatives. But that area of responsibility now rests with us.
![]()
We are responsible for making sure that the color balance in our work is true and accurate.
Happily, one of the great things about studio strobes is that (for the most part) they all have the same color balance. They have all been manufactured to give a daylight color balance when the flash tube is fired. While some brands might be a little biased towards warmer or cooler tones, they are very close to the same color from brand to brand. Using the small “sun” icon as your camera’s white balance setting will render true color in most cases.
One important aspect to color that has to be discussed here, however, is the quality of your lighting equipment. The color output of some brands might drift as the output setting shifts from full power to ½, ¼, or even ⅛ power. The stability, consistency, and accuracy of the color balance can be a major selling feature for products in the more expensive range—and it can also be a determining factor in your choice of lighting equipment.
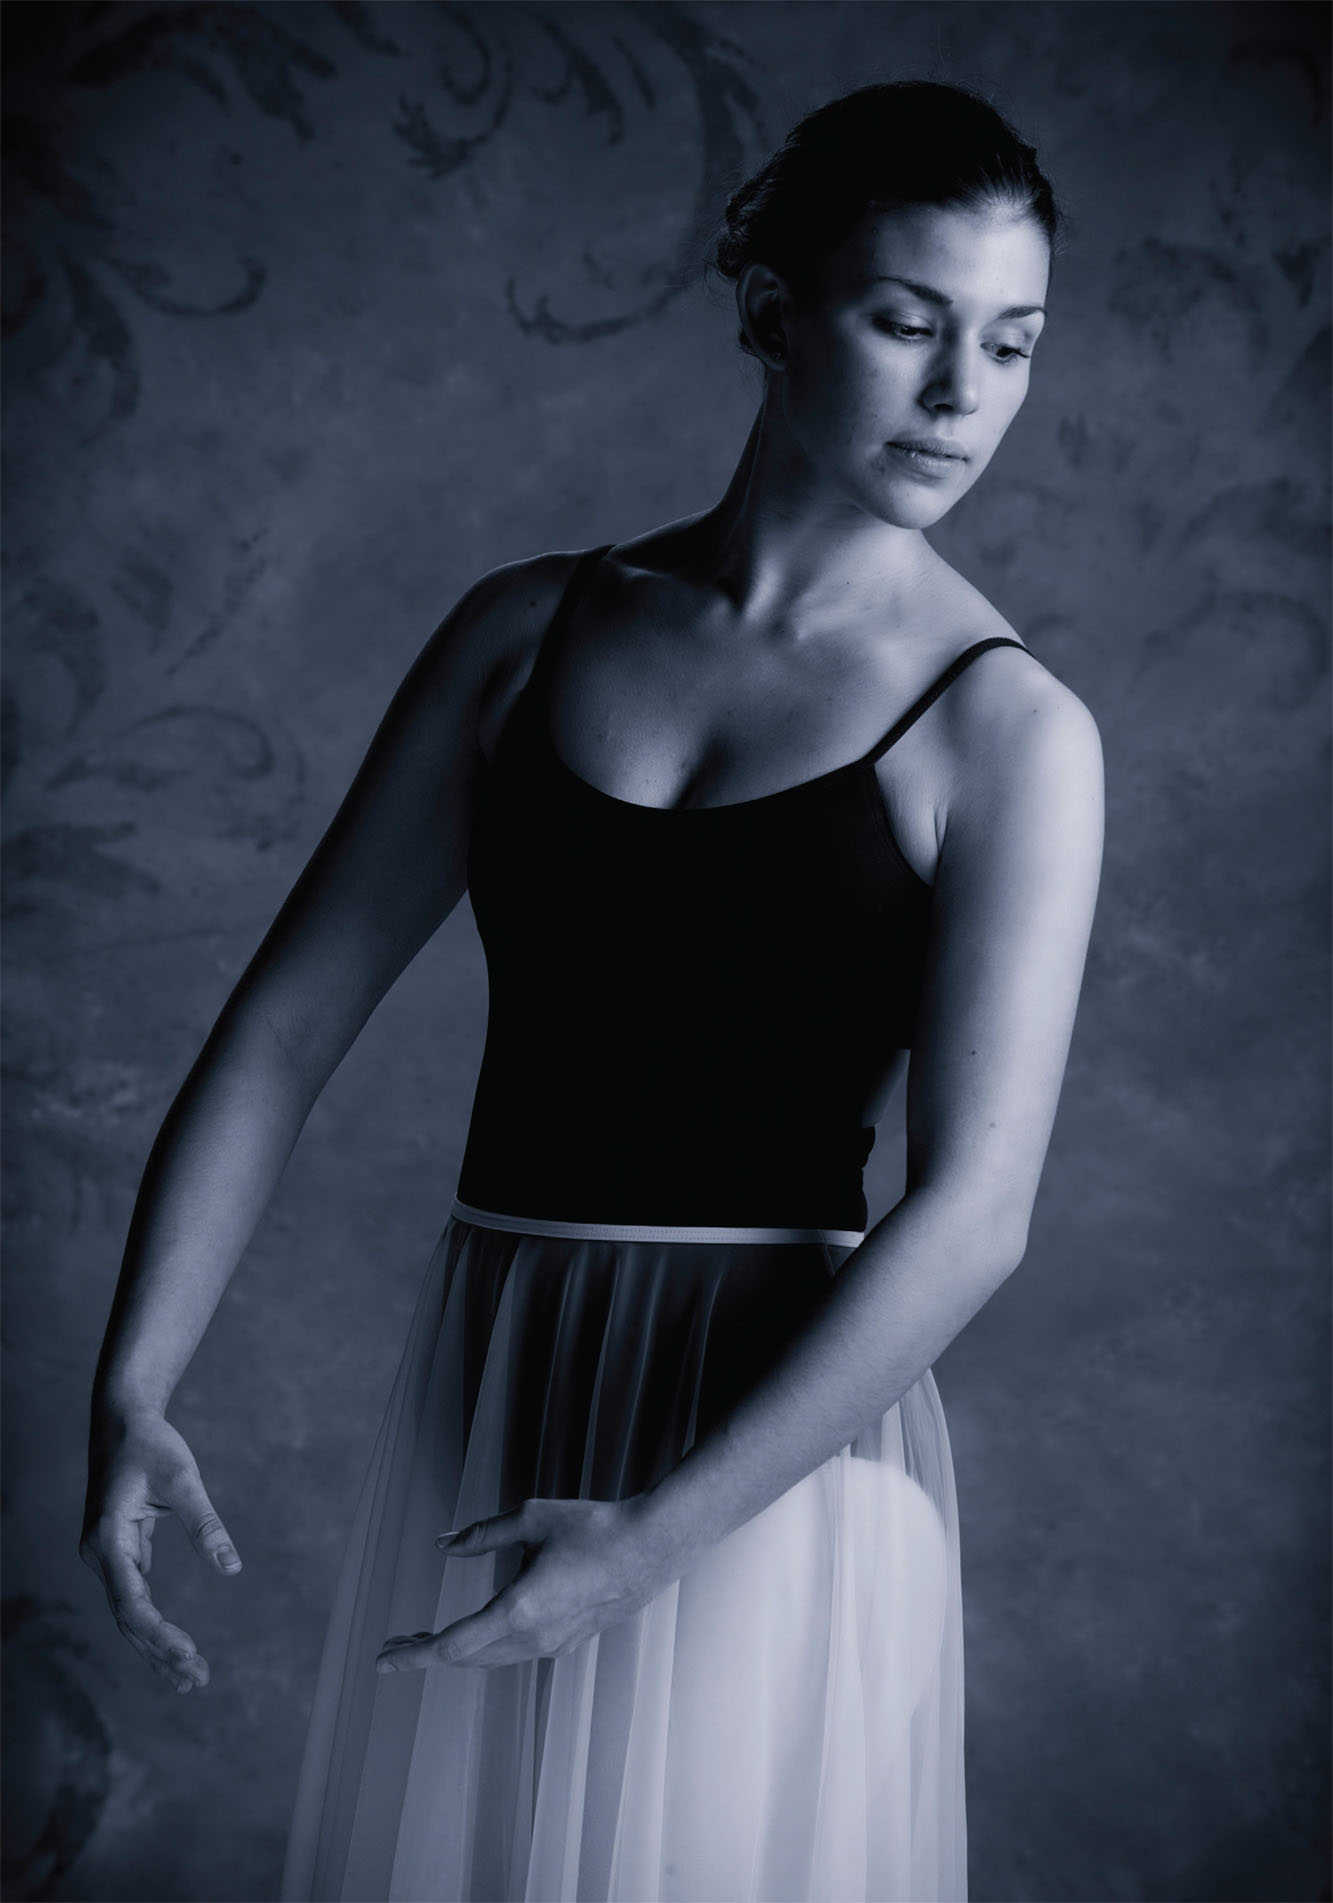
Figure 1-12. The short duration of flash makes it ideal for working with moving subjects like dancers.
For absolute color fidelity and instances where the garments or props must meet rigid standards of color accuracy, it is common practice for professional photographers to create a custom white balance. This can be accomplished by shooting a color checker chart in the scene. In post-processing, the color can be precisely balanced to match the color picker. That same set of adjustments can then be applied to all of the other images taken with the identical lighting setup.
There are many ways to create perfect color. In fact, there are entire books on the topic, so I won’t dig much deeper here. Suffice to say that creating color that simply makes people look like they look is really important and yet not as difficult as you may have been led to believe.
Methods of Firing Studio Strobes
In order for your lights to actually flash when you take a picture there has to be communication between the camera and the lights. There are several different methods for generating the electrical charge to close the loop on the circuit and make the flash units fire.
Flash-Sync Cords. The sync cord supplied by virtually all lighting manufacturers is the simplest and least expensive way to synchronize the firing of your flash. This cord plugs into the camera on one end and into one of the lighting units (or, in the case of power pack lights, directly into the power pack) at the other end.
The financial benefits are terrific, especially if you are first starting out and will just be working a few sessions a year (maybe even out of your home). The one major drawback is that the camera is now physically connected to the lights by a long cord, and this can limit your camera movement. At times, it can also create a bit of a danger—especially if there are small children on your set or in your studio. They can easily trip over the cord in a dark room, hurting themselves and/or damaging your equipment. This is a big issue that has caused trouble for numerous photographers (including myself, early on).
![]()
The one major drawback is that the camera is now physically connected to the lights by a long cord . . .
Flash-Activated Trigger. Many strobes and flashes have a built-in cell that is used to detect another flash firing and trigger the light. This is terrific if you have a small light on or near the camera that can be fired by the camera and be “seen” by the other lights without adversely affecting the exposure or the integrity of the image you are creating at the time.
Radio Remote Trigger. Finally, the most popular among professional photographers is the radio remote trigger. Radio remote controls are highly accurate and, since they operate on radio signals, they can “see” through walls, around corners, and accurately fire with reliability. This allows the photographer to place lights in areas that are more distant than a cord would allow or out of the direct line of sight required when using a flash-activated trigger.
There are numerous popular brands such as PocketWizard, RadioPopper, and the newest entry into the arena, Phottix. They each have their own sets of different features, but suffice to say these are terrific tools that just about all pros use every day in their work.
For many years, I used PocketWizard triggers and have many of them on hand, but I recently began using the more dedicated remotes designed to work with my specific brand of lighting ( figure 1-13 ). There are great features offered by staying “within” the brand. I personally like the Profoto Air-Remote for all of the remote features as well as accurate TTL control for my Canon cameras.
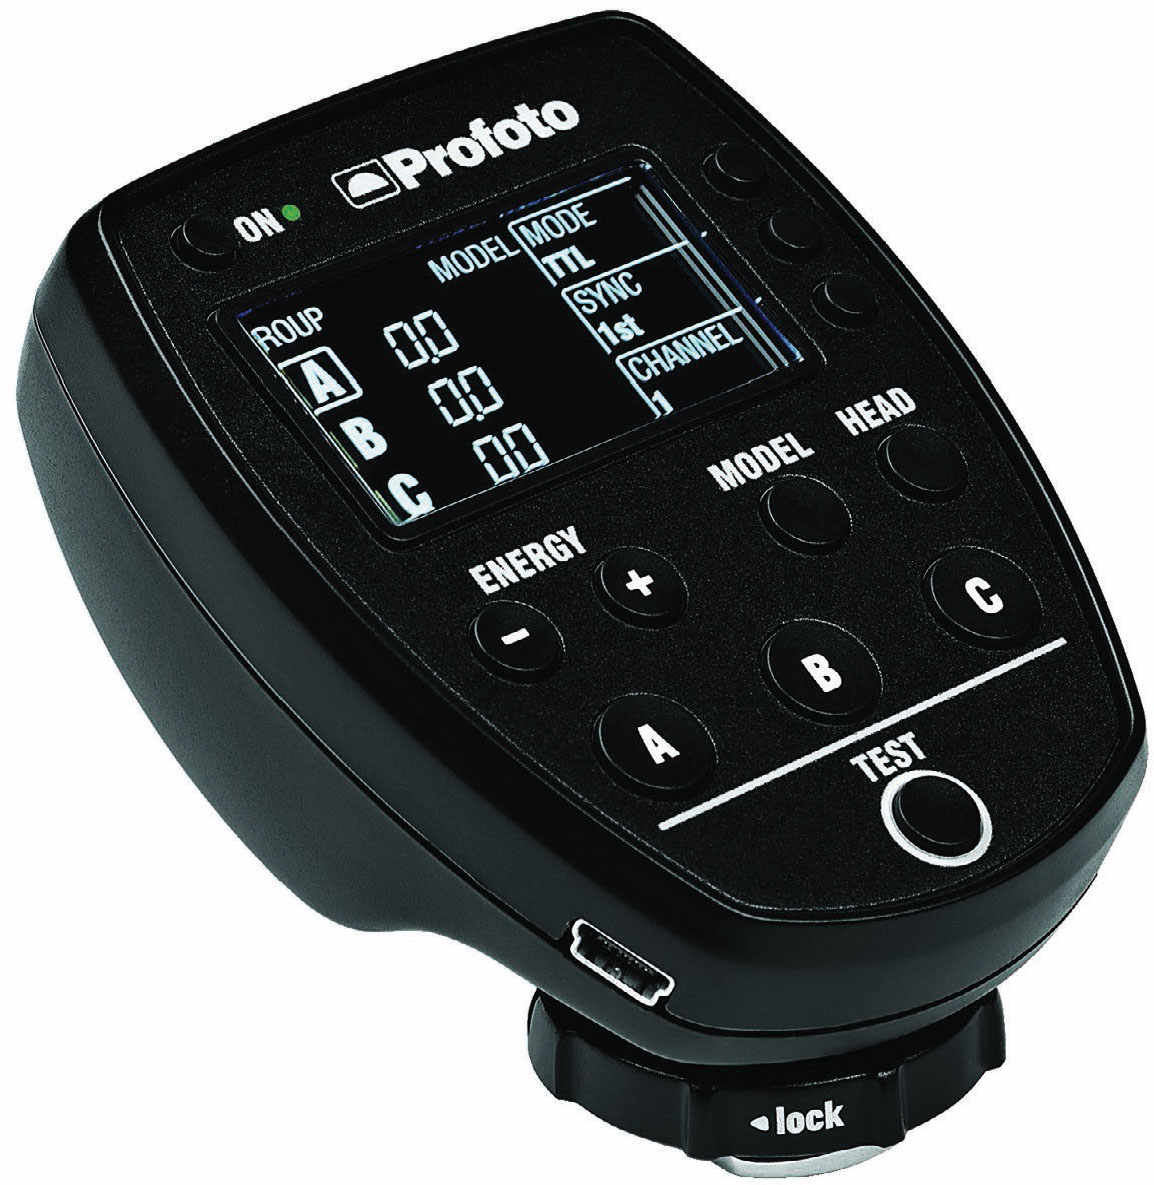
Figure 1-13. The Profoto Air Remote TTL.
For many years, long before we had electronic studio strobes and portable flash/speedlight units, photographers worked with the light from continuous sources. Window light is obviously a great choice for available or continuous light images, but it can be quite limiting in terms of portability and output.
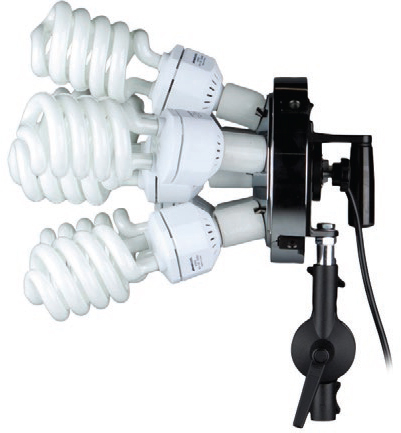
Figure 1-14. Fluorescent light fixtures for photography have become popular in recent years.
However, many photographers working today find there is a distinct advantage to using a continuous light source for some specific needs. This might include photography that needs to provide visual motion (as opposed to freezing it with strobe), to help with subjects who blink (often the case with animals and children, plus many adults), and more. Also, new photographers who don’t want to invest in strobes may find these units offer an affordable entry point into studio lighting.
Is there a right choice? Not really. In portrait photography, the issue of strobes vs. continuous light sources is something you’ll hear discussed at all the photo events these days. Some people swear by their continuous lights sources; others will never work without their studio strobes.
There is one major advantage to using continuous light. With strobe lighting, the modeling lamp will approximate what you see when the strobes fire and the image is captured. But when using continuous light sources, what you see is exactly what you get; there’s no guesswork and no wondering.
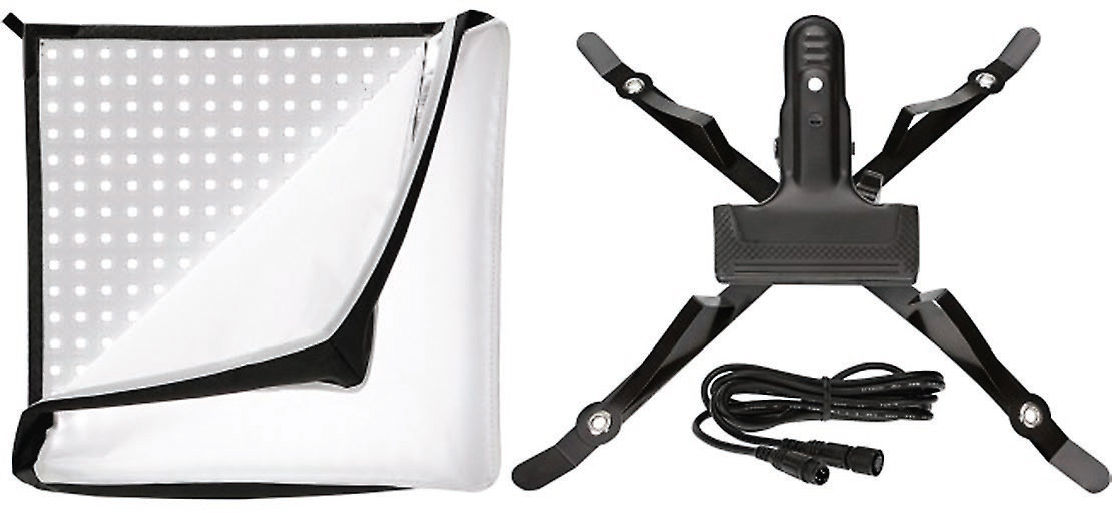
Figure 1-15. LED light panels are a popular choice for today’s studio photographers.
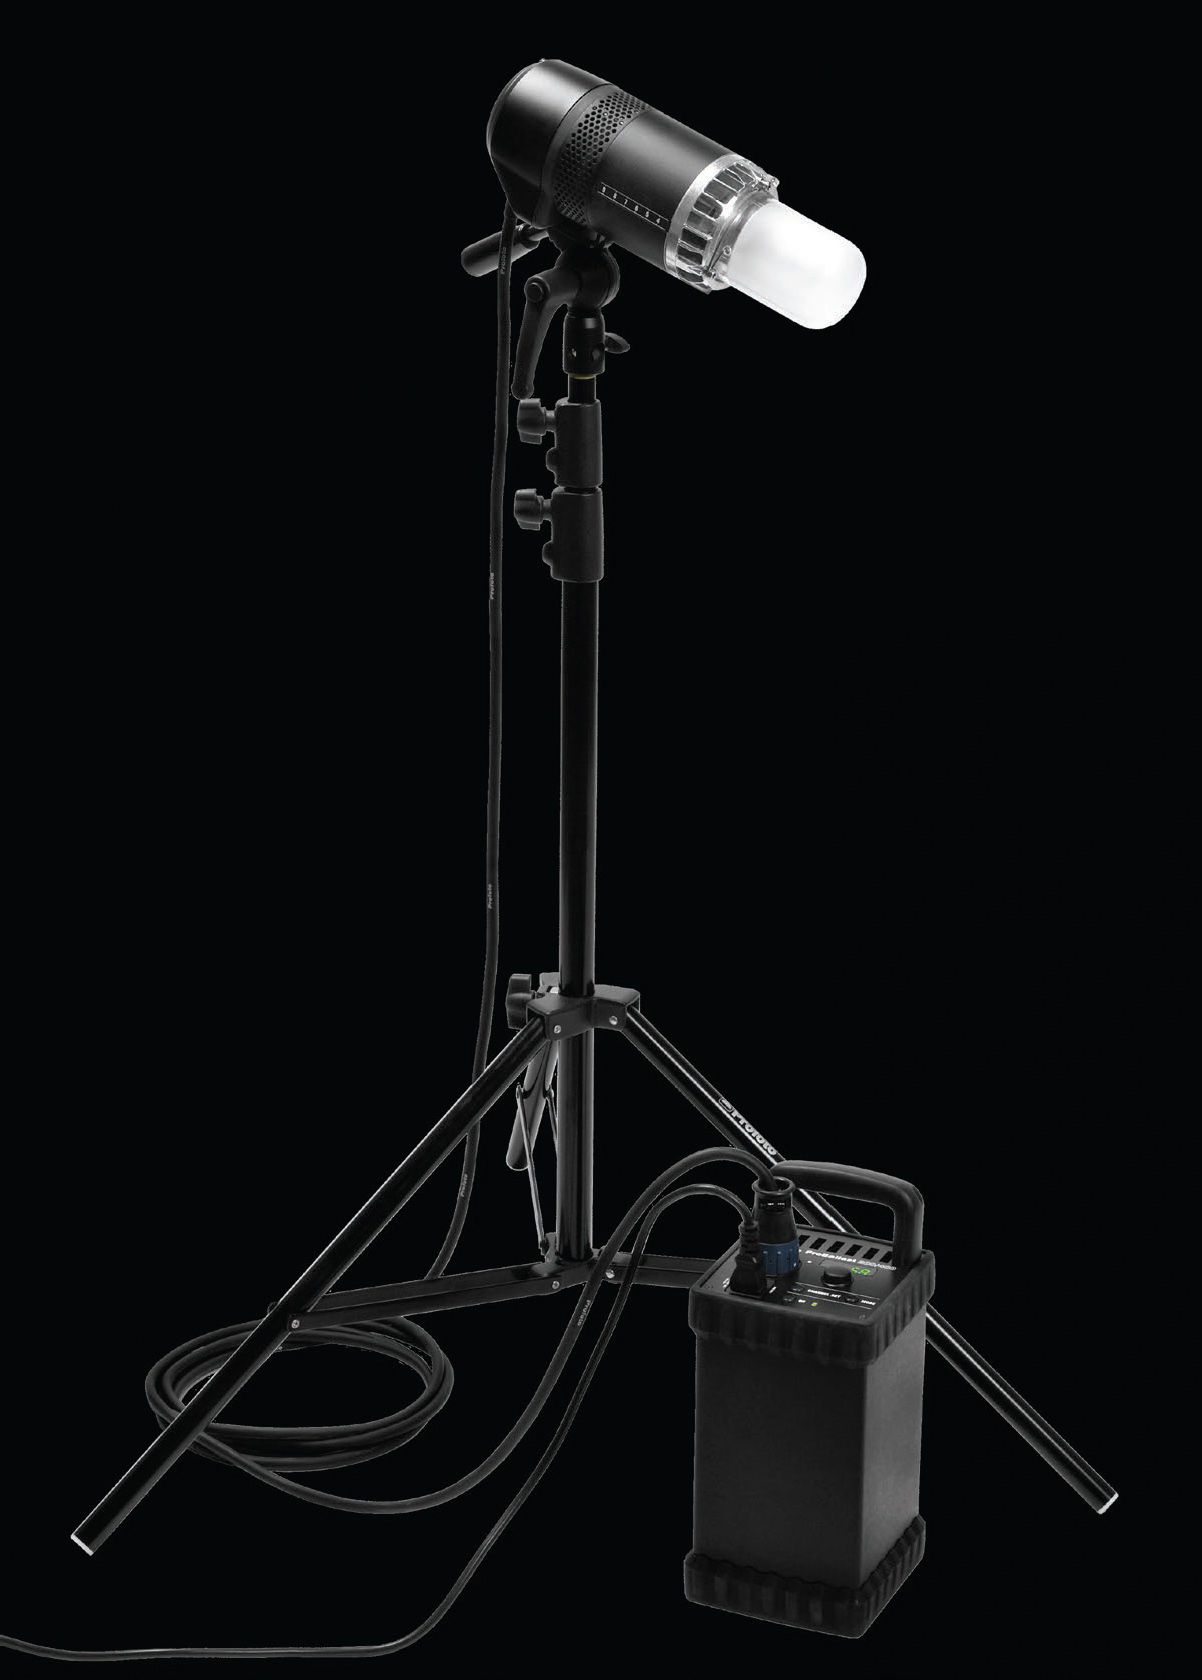
Figure 1-16. Tungsten light is a classic choice for photography and continues to be popular.
![]()
When using continuous light sources, what you see is what you get; there’s no guesswork and no wondering.
Fluorescent ( figure 1-14 ) and LED ( figure 1-15 ) light sources have really taken off as the most popular continuous light sources in recent years. There are numerous brands, of course, and many different sizes and shapes. They are all really helpful and easy to use. The ease of use is the big benefit, coupled with the small size and light weight.
Tungsten lighting ( figure 1-16 ) was used for many years as a choice in continuous lighting—mostly because it is bright, easy to use, and fairly common to find. The color temperature (or Kelvin temperature) is an almost consistent 3200 degrees.