2. Light Shaping Tools in the Studio
P hotographers often project their own personal style into a portrait session. The more successful ones will also ensure that the images reflect the style and personality of their clients/subjects. I recommend spending quite a bit of time with your client discussing what the portrait should be about, determining what it will be used for, and—more importantly—who they are as individuals. It is only with this in mind that you can effectively begin the task of deciding how you will approach lighting the subject. This discussion should guide how you use the equipment we just discussed in chapter 1 and how you might best create the image that both you and your client want.
![]()
Only with this in mind can you effectively begin deciding how you will approach lighting the subject.
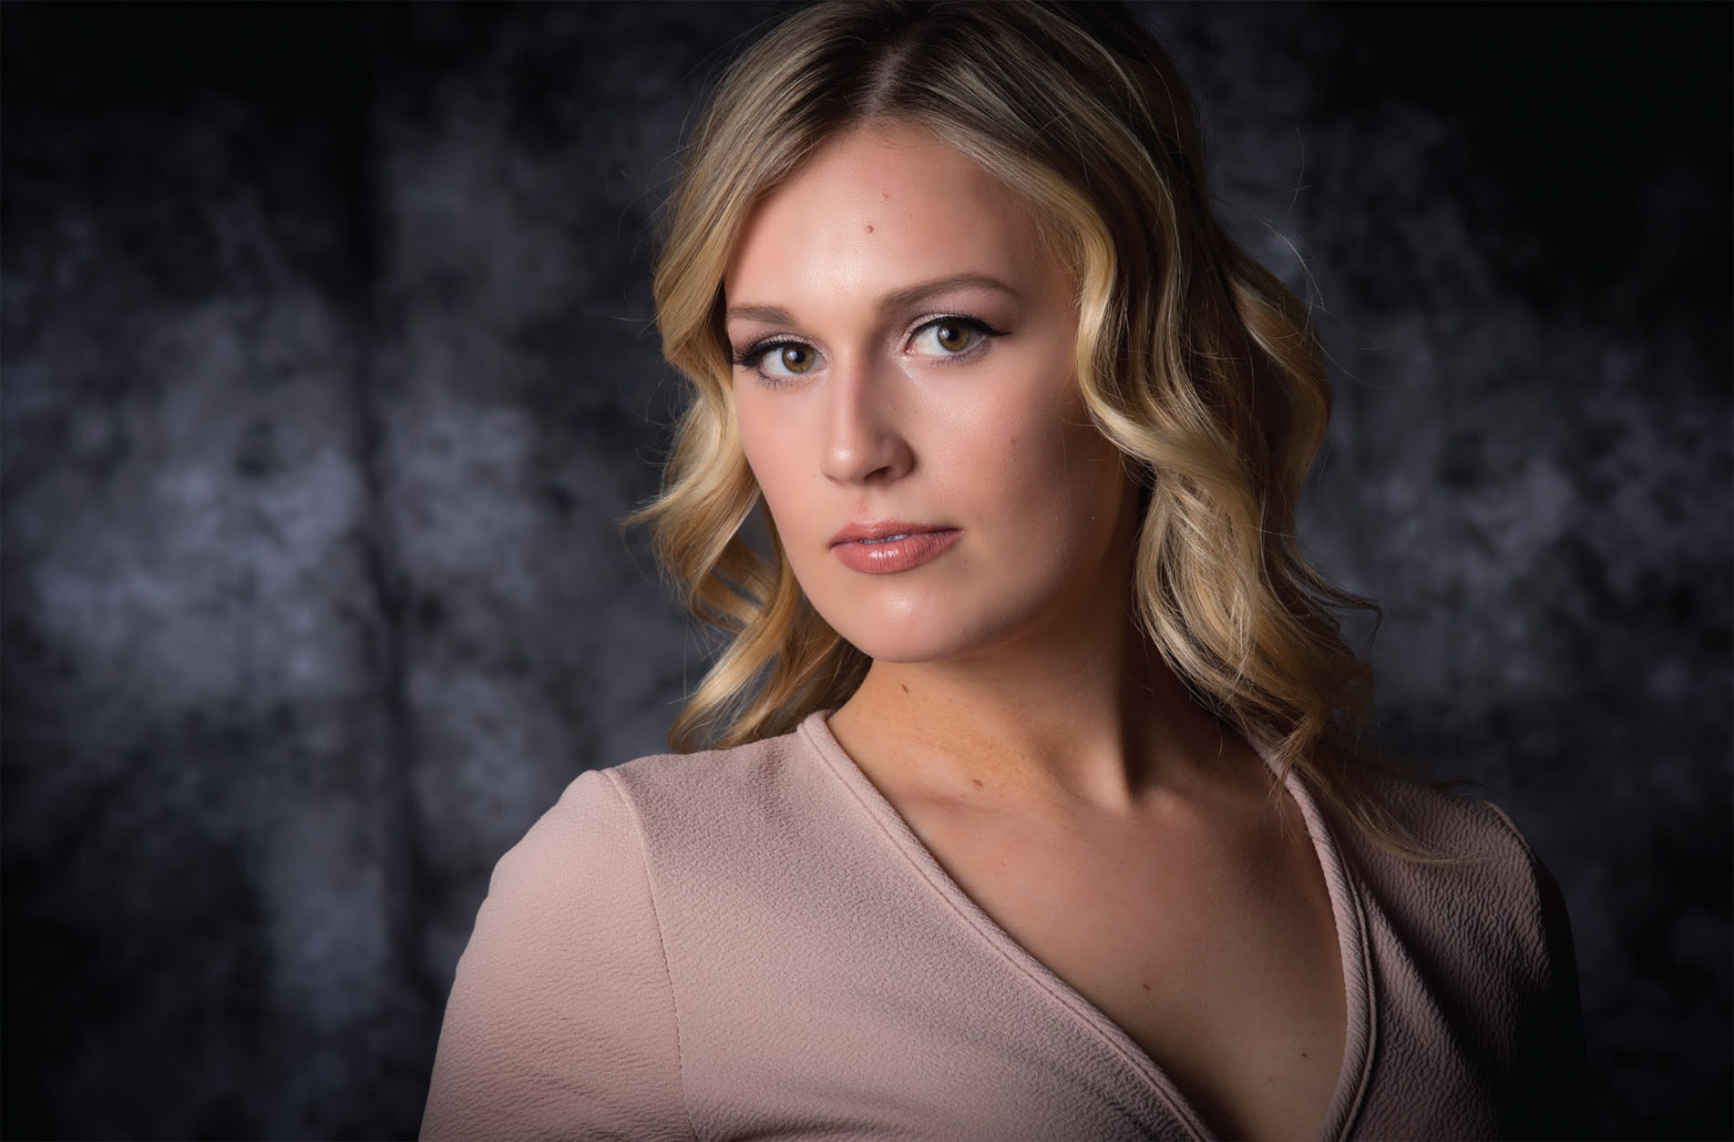
Light shaping tools are aptly named as their function is simply to change the size and shape of the light source. This, in turn, changes the light quality (how hard or soft the light is) and can help determine the mood and feel of a portrait. For example, a large light modifier produces soft light and a more gentle feel. A small light produces harder light with sharp shadows that might offer an edgier, more focused style.
Every lighting product has a right to exist. However, not every photographer needs every tool. For example, a commercial food photographer might need a specific spotlight that would have no real role in the work of a portrait photographer. Likewise, wedding photographers need portable equipment but may not have as much use for a 4×6-foot softbox.
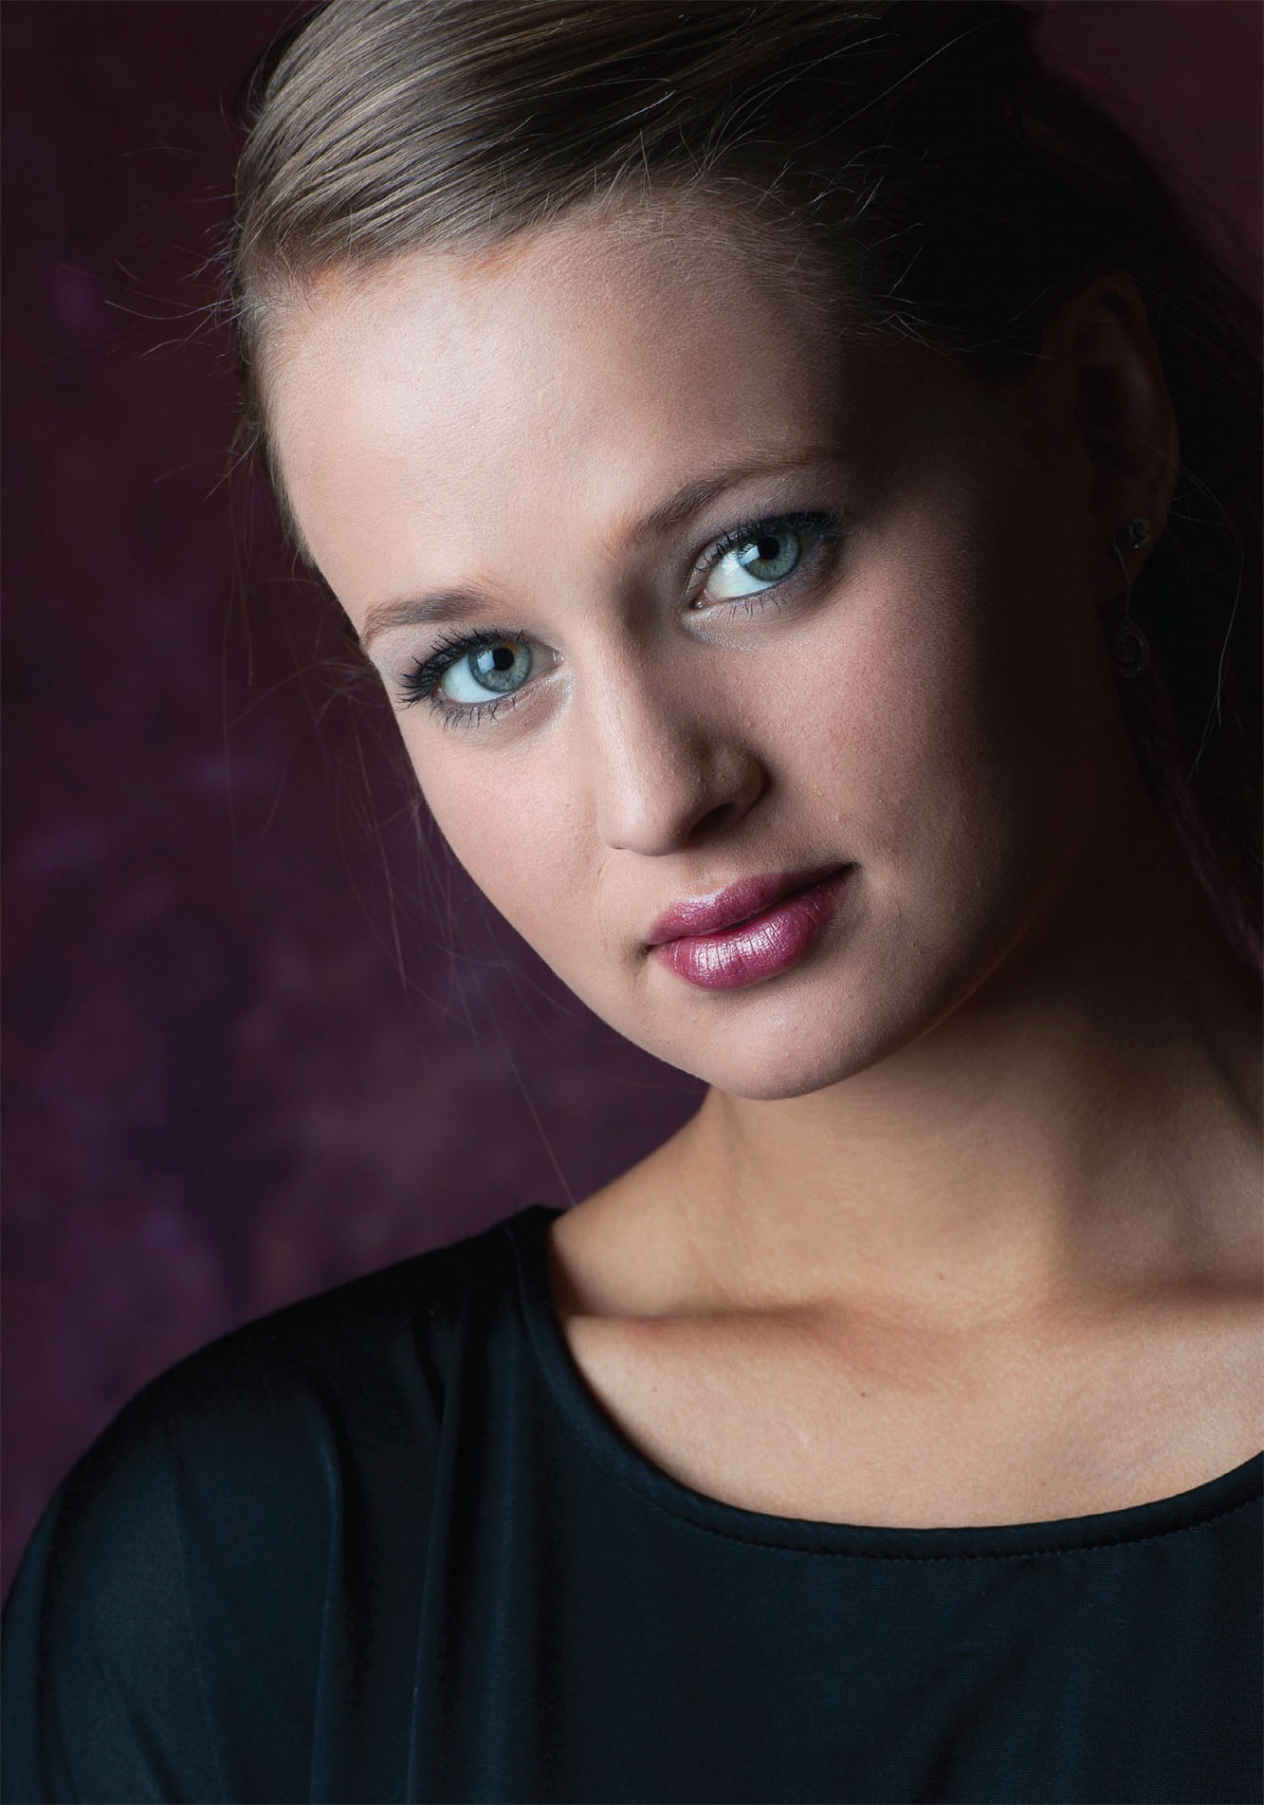
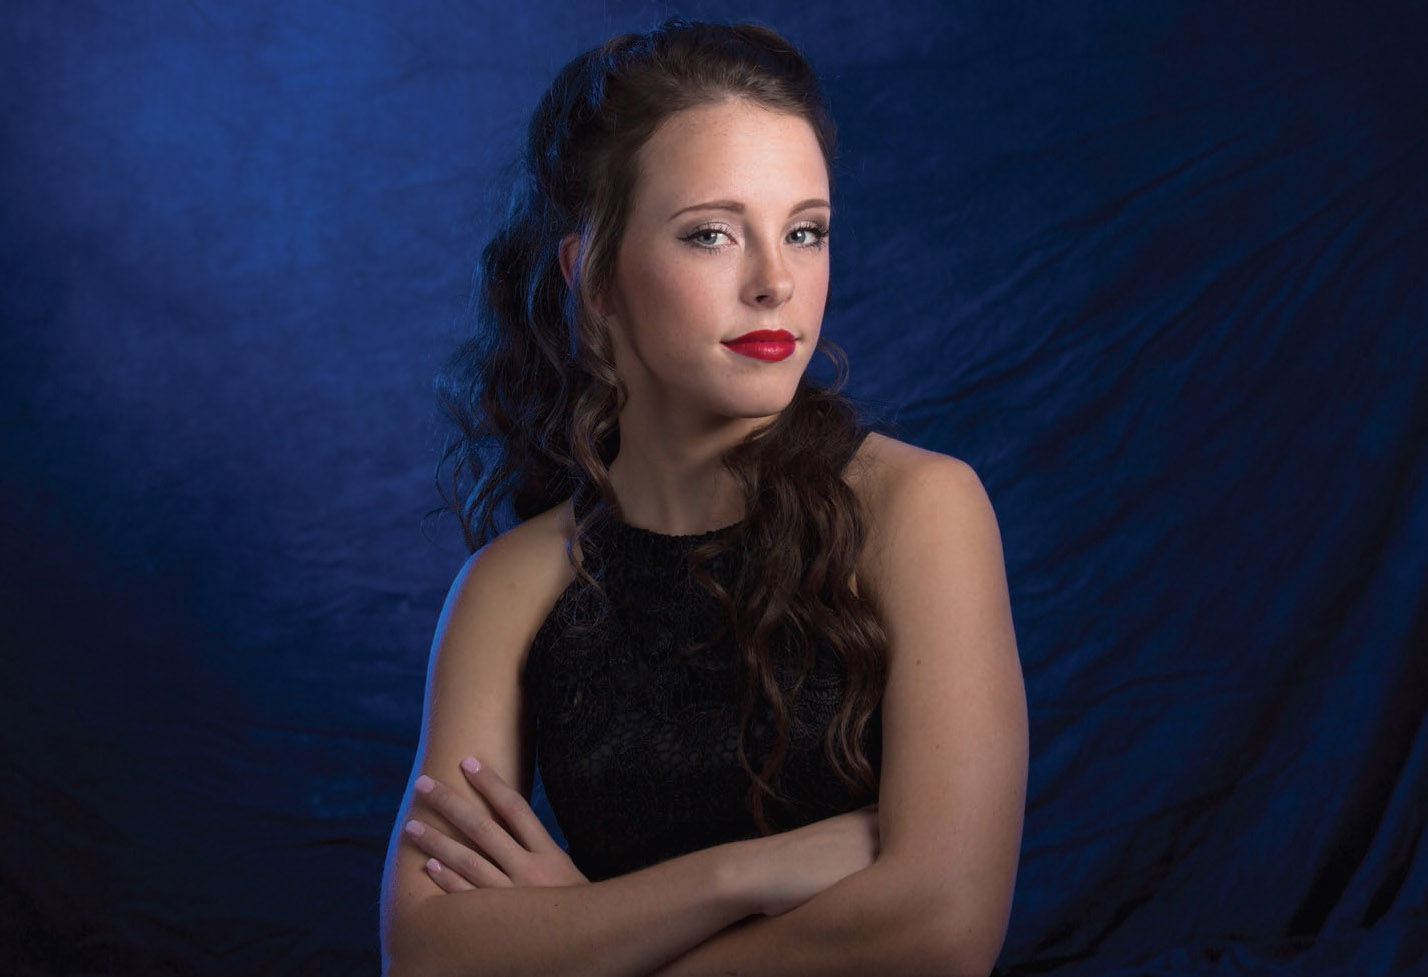
Figure 2-1. Large light shaping tools produce soft lighting and can help establish a gentle mood.
Let’s take a look at a number of different lighting tools and identify some of their best attributes.
Standard and Parabolic Reflectors
A small reflector head ( figure 2-2 ) is supplied with nearly all lights, regardless of brand. They usually are from 6 to 8 inches in size and are often used as a general tool to light up a large area. However, in a portrait situation they might be a little harsh.
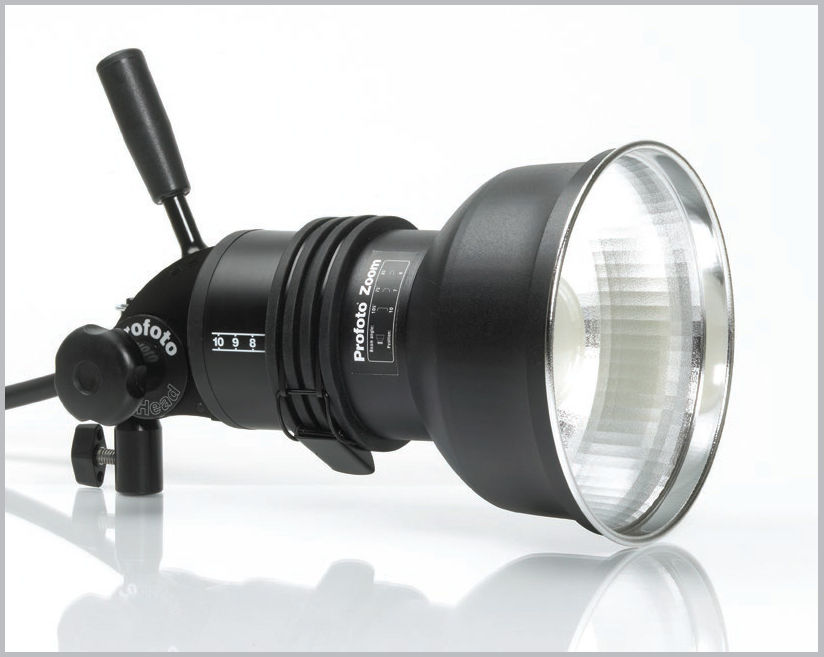
Figure 2-2. Standard reflector.
They also create a very broad swath of light when they are not controlled in some way; they tend to light up the floor, walls, background, and even the ceiling. This makes them good for some things (like large areas that need to be lit). A rigid grid ( figure 2-3 ) is often available as an accessory and is helpful for constraining how much spill there is from the light (also known as the area of light coverage). However, the controlled light needed for quality portraits is still not their strength—at least as a main light source.
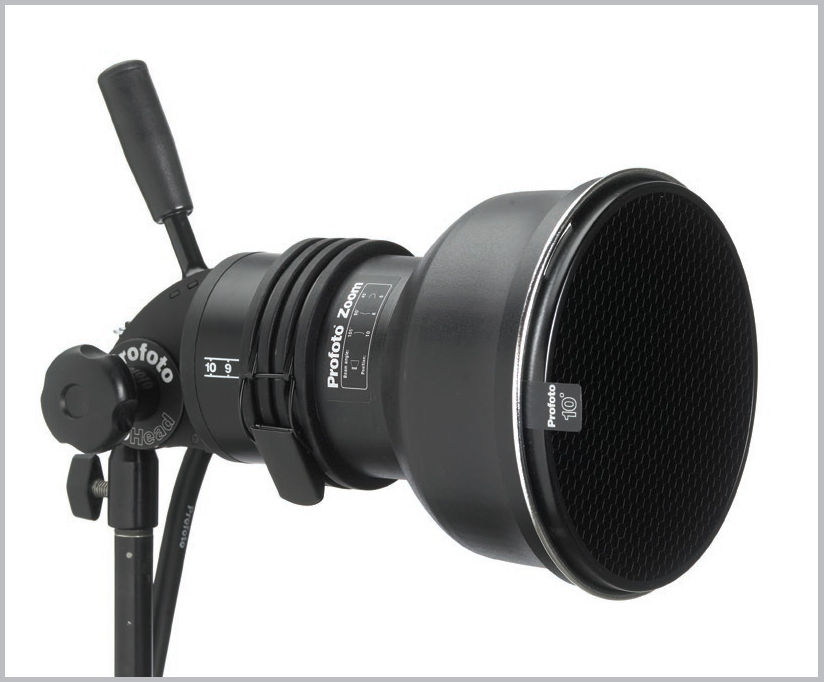
Figure 2-3. Rigid grid.
For some brands of lights, the standard reflector is used for another purpose: to harness the light enough to bounce it into an umbrella. This will eliminate any problems with light spilling outside of the edge of the umbrella.
The parabolic reflector ( figure 2-3 ) was used for many years as a traditional portrait lighting tool of choice. The most popular was a 16-inch unit from Photogenic. When placed in the hands of a master, this became a great tool to craft beautiful lighting for faces. It allows nice space for highlights and depth for shadows to help tell the story. The parabolic was so popular that literally everyone in my friend/peer group used this at one time or another on their portrait lighting journey. The idea was to use this great product with a pair of barn doors, which were used to limit where the light could spill. Basically, you could use the barn doors to “gobo” the light off of the background or create a nice falloff effect in the lower area of the portrait, helping draw the viewer’s attention to the face of your primary subject.
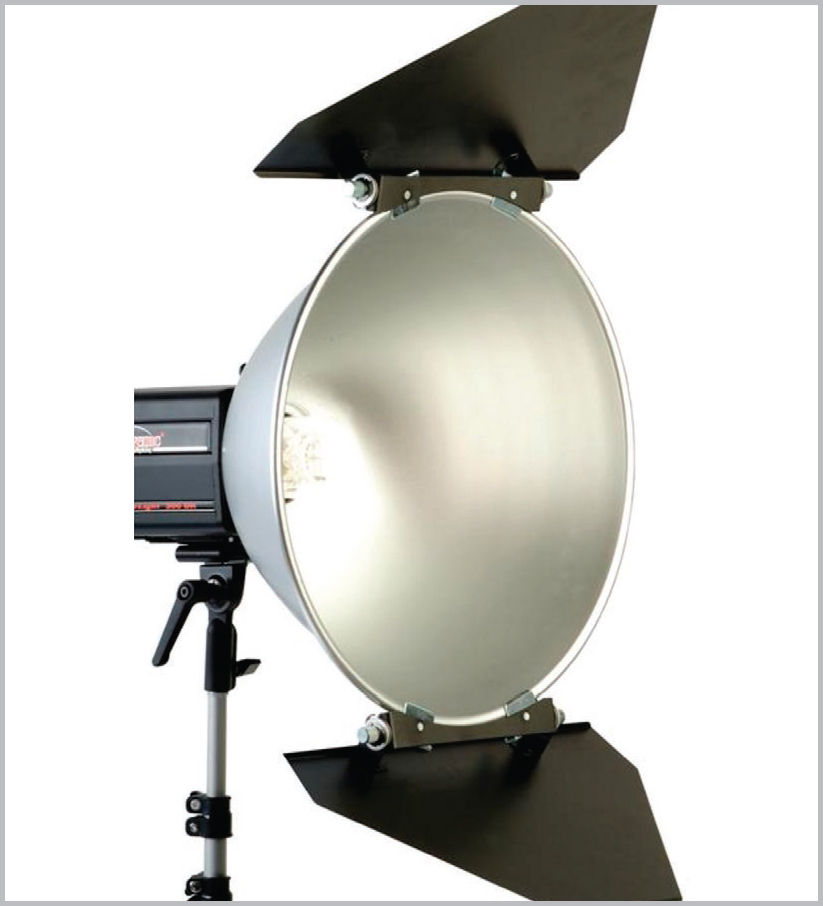
Figure 2-4. Parabolic reflector.
Many photographers have a misconception that the “great master” painters/artists they pattern themselves after used large, soft window light all of the time in their work. The fact is, they used more directional, harder-edged light to achieve more of a “sculpted” effect in their work. You can see this in many artists’ paintings from the Italian Renaissance—as well as from the well-respected Dutch painters. The parabolic reflector is a terrific tool to replicate this kind of look.
One of the most misunderstood lighting tools is the umbrella figure 2-5 . I think the reputation they have for not being very important might be because they are generally inexpensive and often come free as part of a lighting set or kit. However, umbrellas serve a few really wonderful purposes that other lighting tools simply can’t.
Admittedly, umbrellas are a challenge at times in the studio because they have a tendency to send light everywhere. They are not easy to control if you are working to confine the light to a specific area of your photograph, such as the background. This is especially true if you are in a small studio. If the angle to the camera from an umbrella is too extreme it can also cause lens flare that can be a big problem. The very clever Profoto SpillKill ( figure 2-6 ) is one accessory that can help to eliminate any issues of flare when using their D1 strobe head.
Nothing compares to an umbrella for lighting a large group of people or a large area. When shooting studio portraits of a large family, using umbrellas produces an even lighting and exposure level that simply cannot be accomplished as efficiently with another modifier. There are a lot of location photographers, certainly interior and architectural folks, who cannot work without a few umbrellas in their arsenal of equipment. Recently, I have been working with the entire family of really large umbrellas ( figure 2-7 ) because they offer the great benefit of a large light source but with the added feature of very large areas of coverage—something I cannot get from a large softbox, for example.
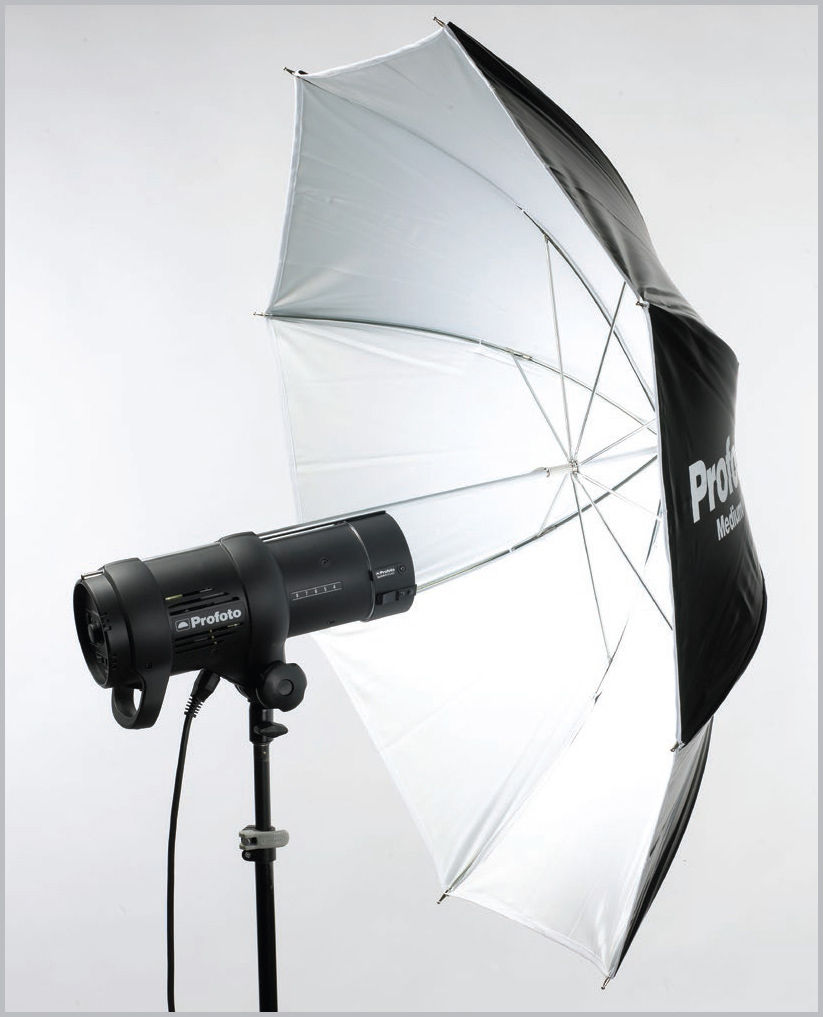
Figure 2-5 . Umbrella.
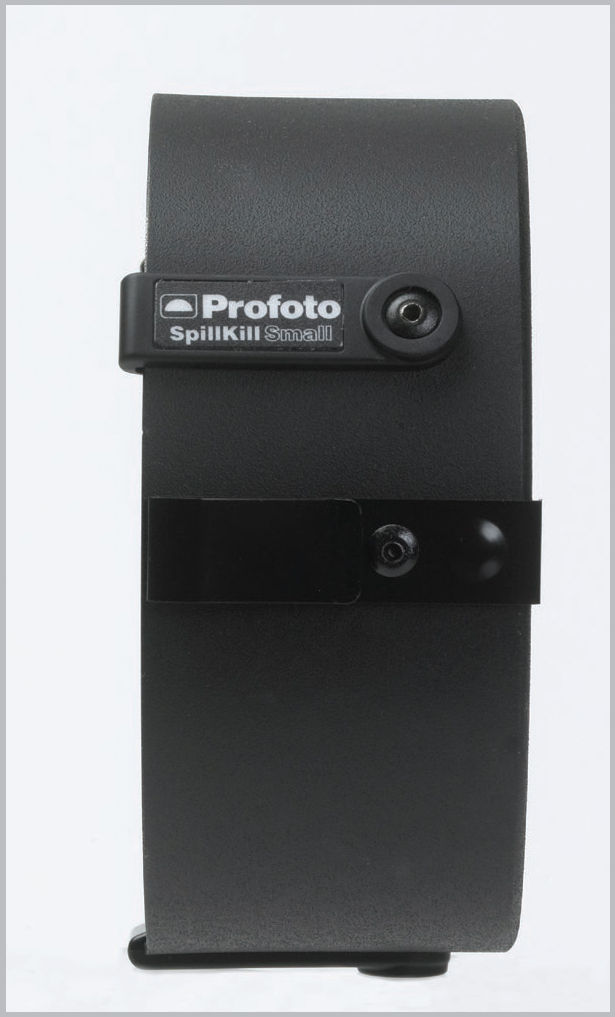
Figure 2-6. Profoto SpillKill.
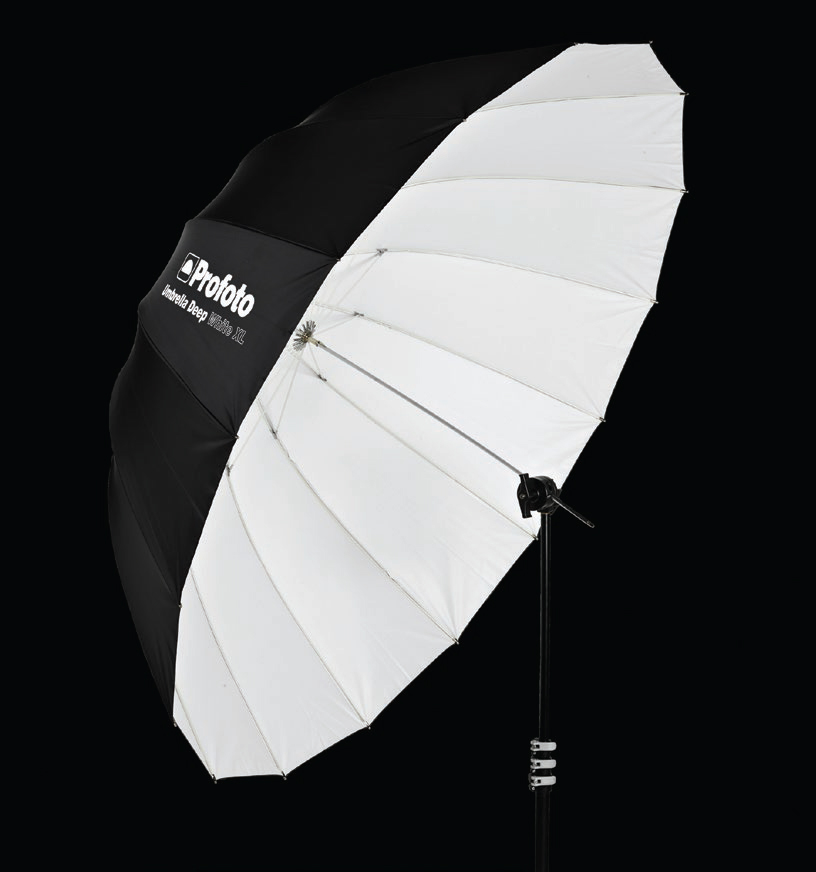
Figure 2-7. Really large umbrellas are powerful lighting tools.
Figures 2-8 through 2-11 are several examples of umbrellas doing what they do best.
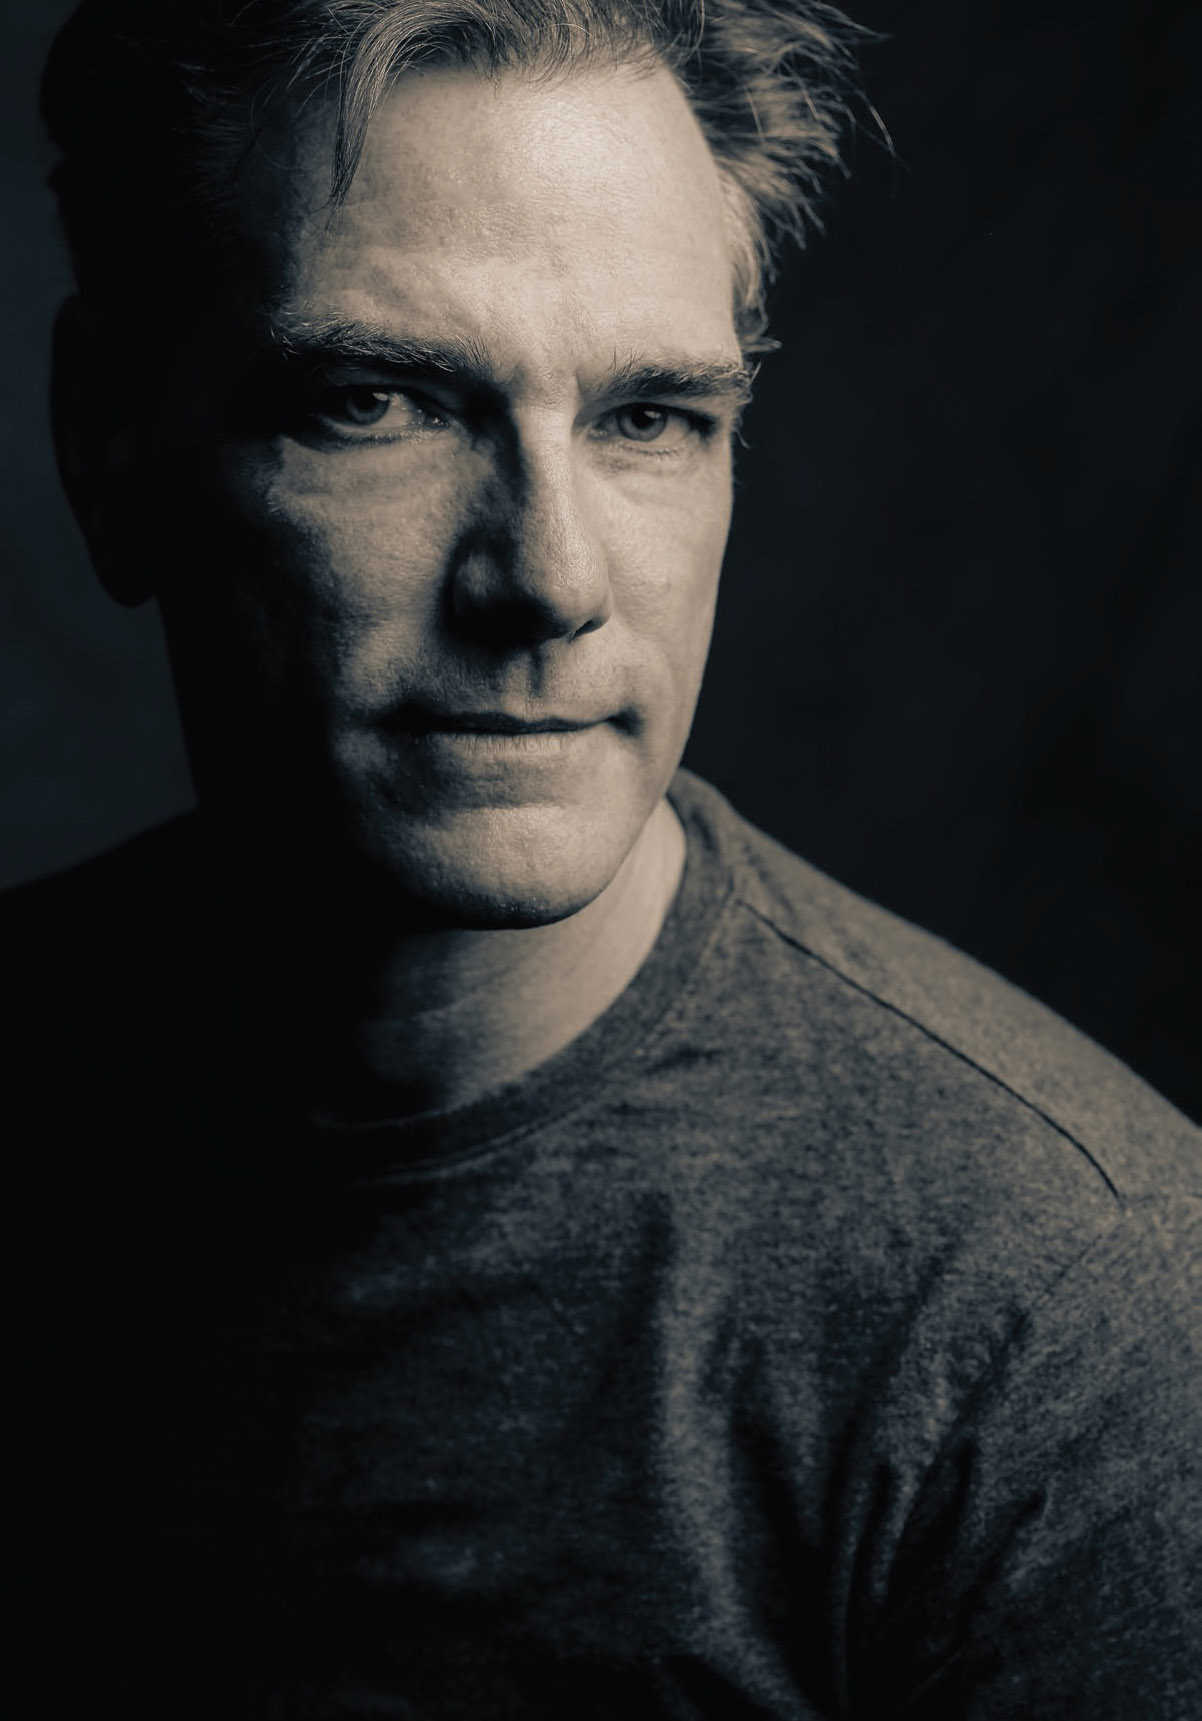
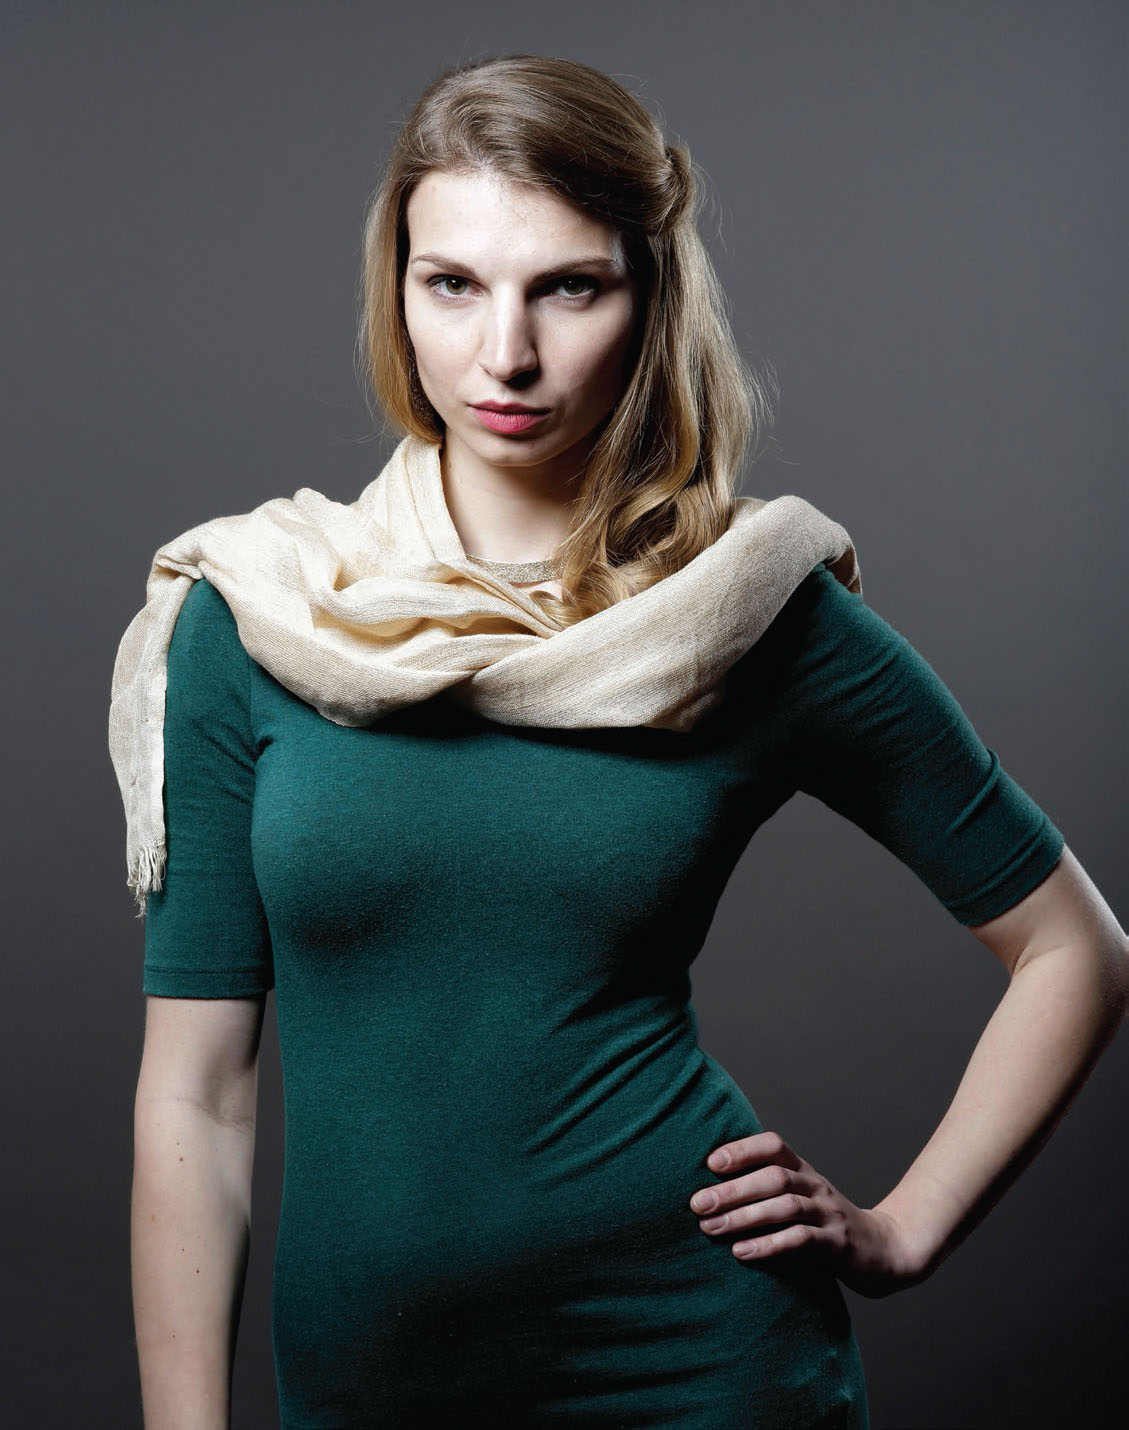
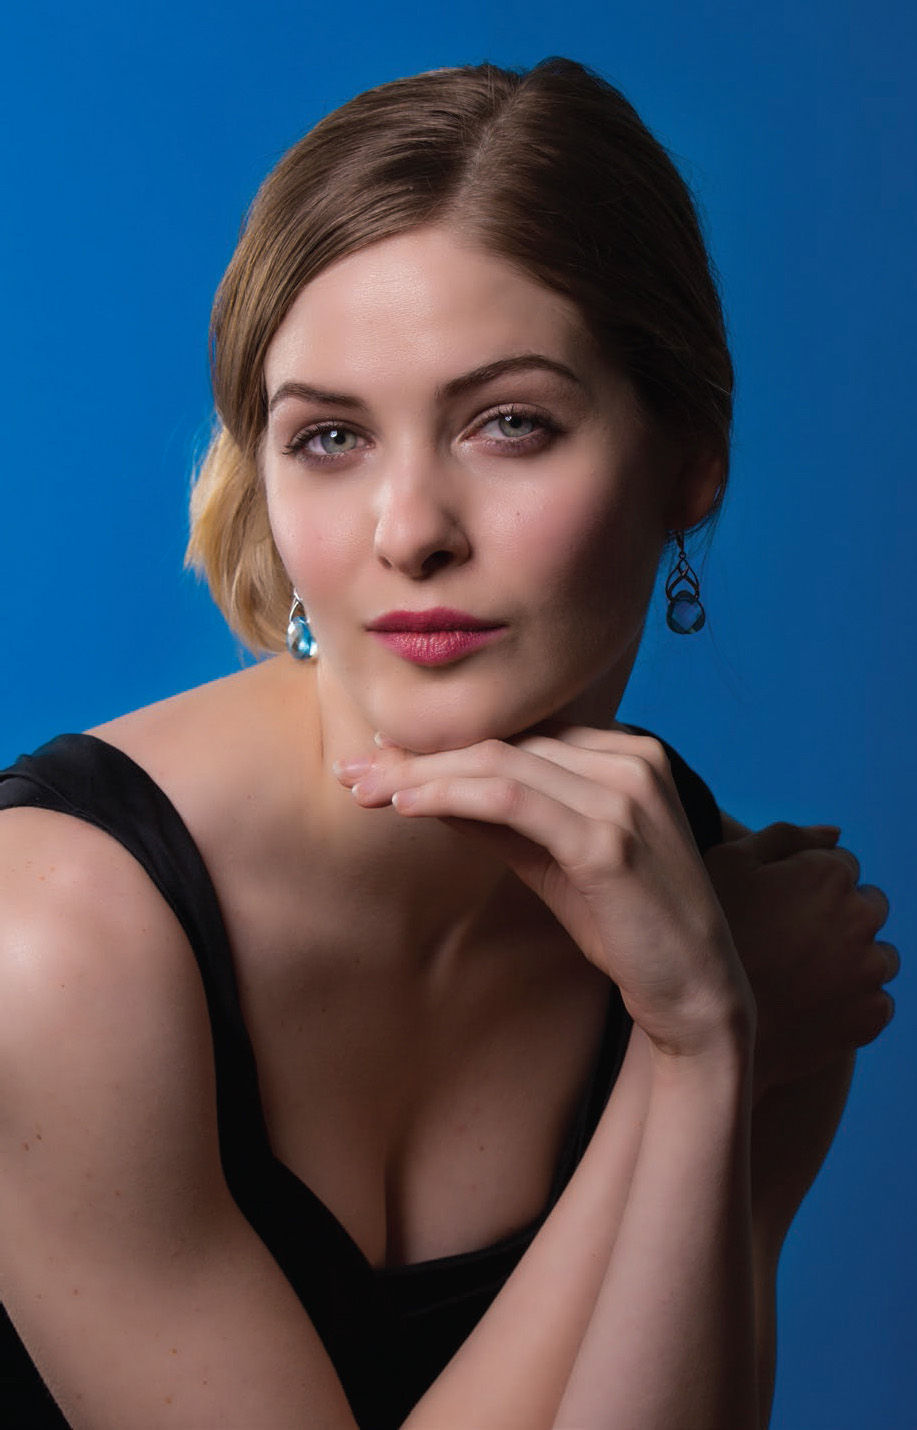
Figures 2-8, 2-9, 2-10, and 2-11 . Portraits created in the studio using umbrellas.
Figures 2-12 and 2-13. There are different sizes and shapes of softboxes (above) to suit different portrait lighting styles (left).
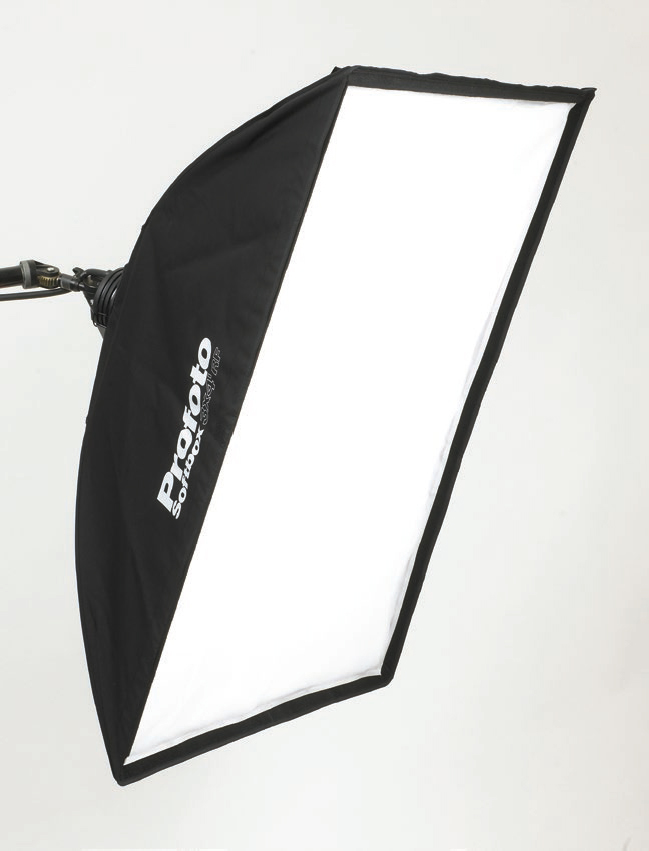
There aren’t any lighting tools that have become more important to working portrait photographers than the softbox. This versatile and almost standard piece of equipment is ideally suited to work with portrait subjects because a softbox can almost always make a face look great. Softboxes are available in a variety of sizes and shapes for all kinds of different tasks ( figures 2-12 and 2-13 ). The 3×4-foot softbox (often called “medium”) is one of the most widely used for many portraits as it provides light that is both soft and directional, based on its position.
There are many successful studios that only use softboxes. They are reliable, easy to control, and consistent—all things that combine to make it a great choice in lighting the portrait. However, while softbox lighting can be quite forgiving, understanding the role of adjusting its distance and angle relative to the subject remains important for producing quality results.

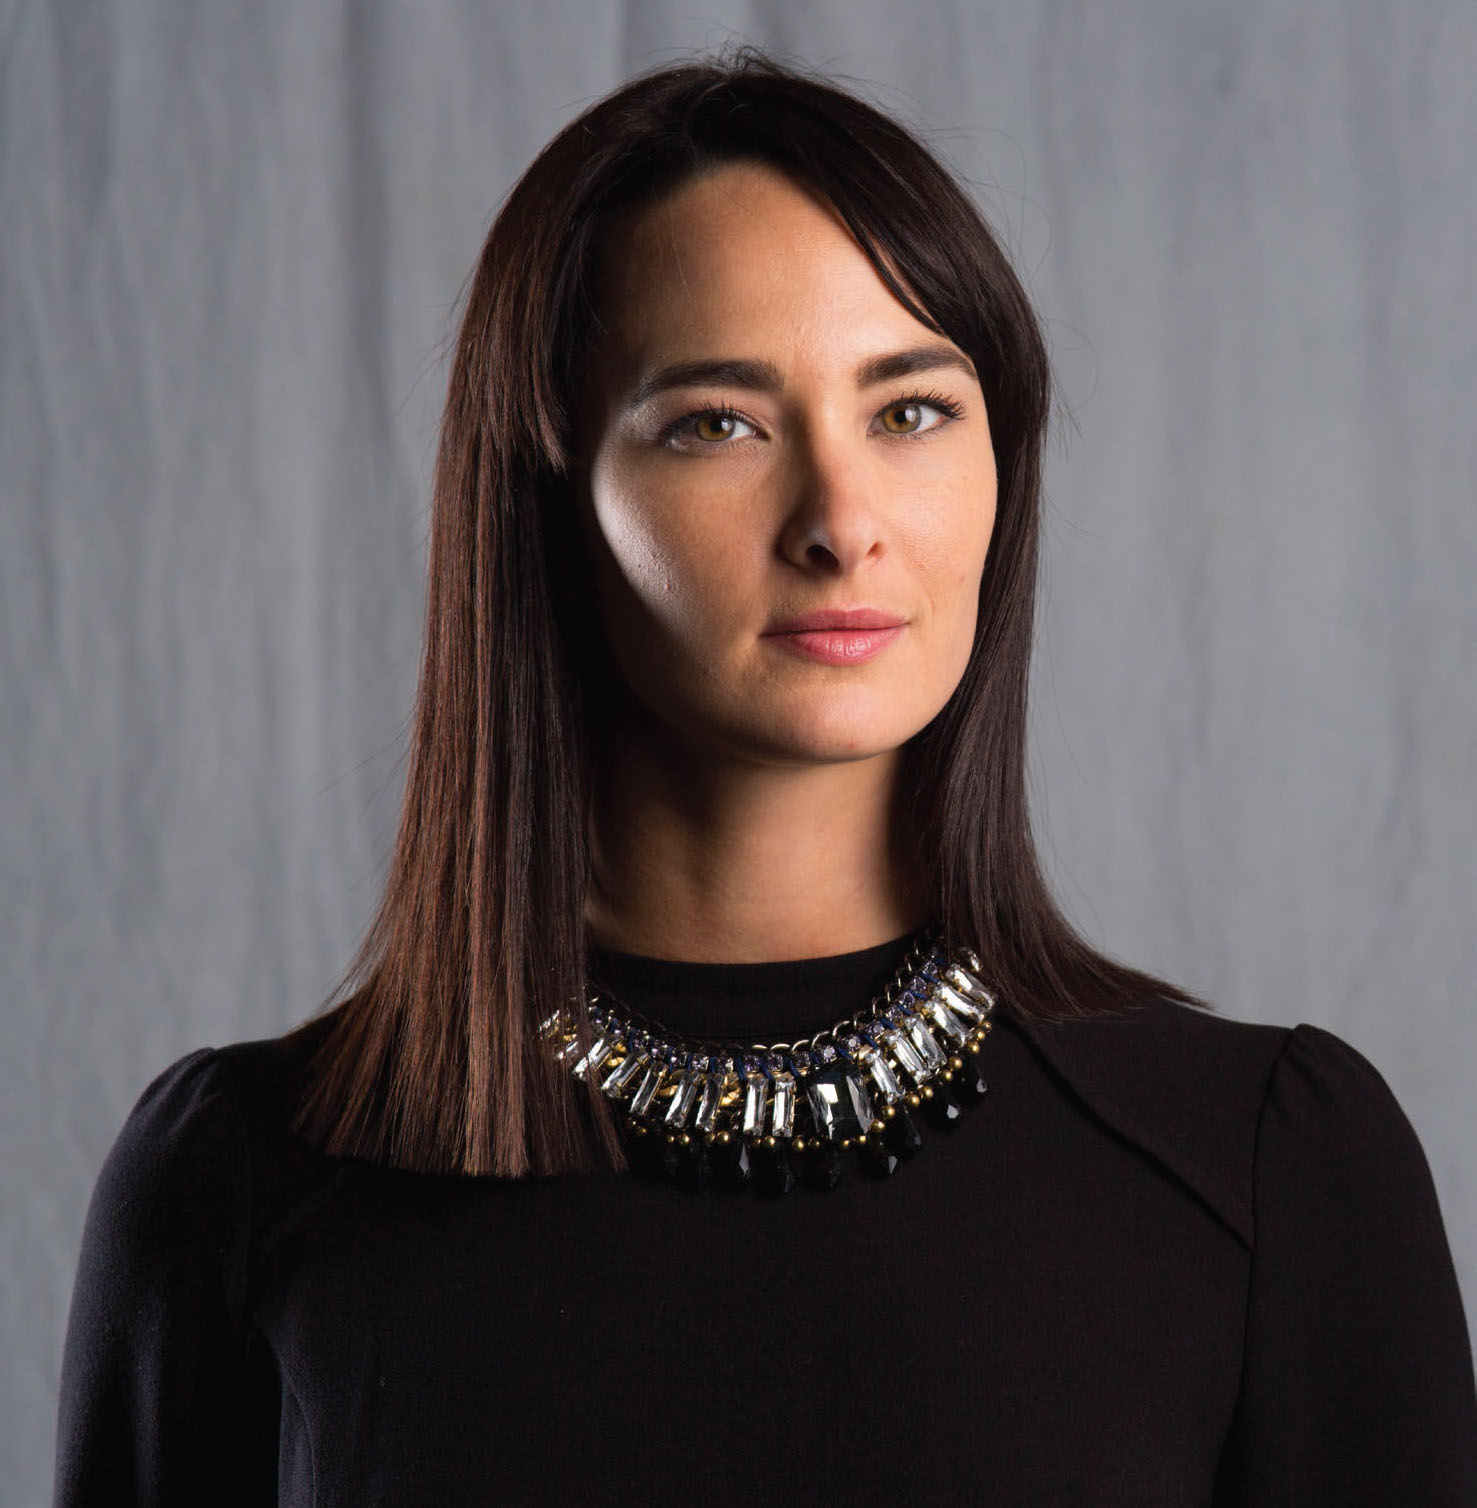
Figures 2-14 and 2-15. Softboxes are extremely versatile light modifiers for studio portraiture.
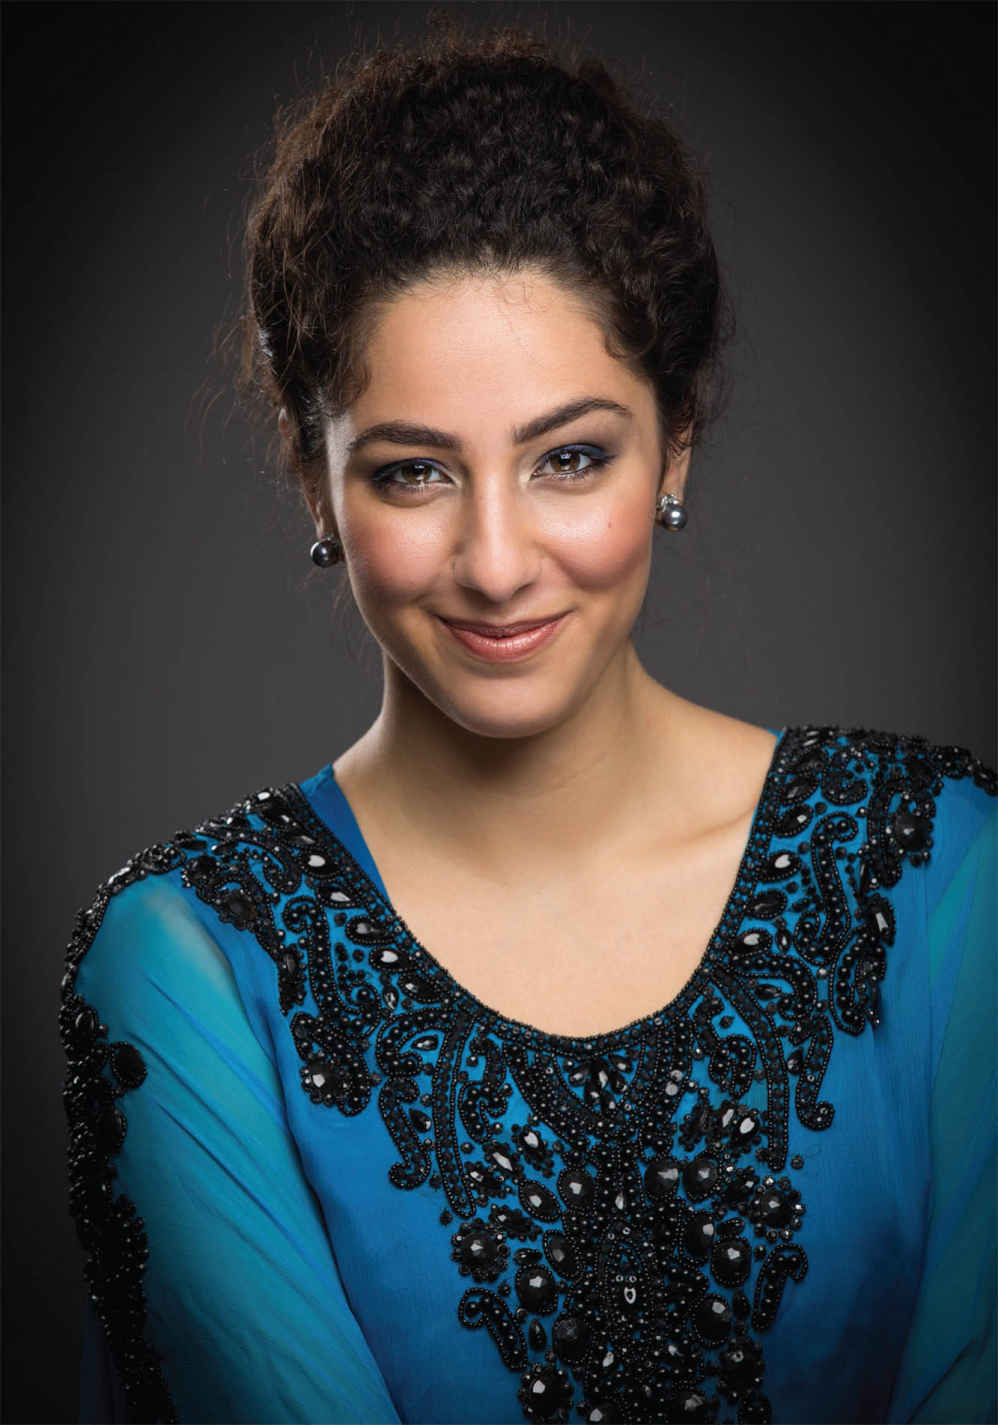
Figure 2-16. The gentle light from a softbox can make skin look so nice that little or no postproduction is required.
When used at a 45 degree angle to the camera, a softbox yields really pretty results on the face. It can be aimed directly at your subject or “feathered” slightly toward the background, which can add a subtle brightness to the background. Or it can be slightly turned away from the background to minimize any light on the background.
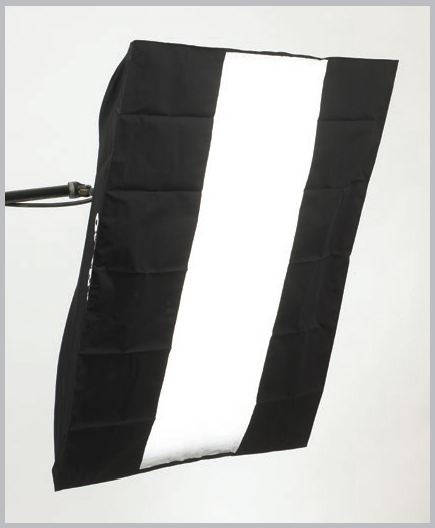
Figures 2-17 and 18. A softbox can be masked to function as a strip light.
Most of the images used in this section, as examples of portraits that were taken with a softbox, were not retouched to correct any lighting or skin issues. Most were directly out of the camera—just as you see them here. With proper exposure, color balance, and quality lighting control, a large majority of your work can be shown and often delivered to the client with no further postproduction needed, other than a little basic cleanup. Can you even imagine how much time that could save you in a single session—never mind over the course of a year?
Standard shapes of rectangular and square softboxes are the most often used in portrait work. There are also strip boxes, which (as you can imagine) are ideal for long, slender accents and for lighting narrow beams of all kinds. Square boxes can also be masked to produce the same effect ( figures 2-17 and 2-18 ). Adding an accessory soft egg-crate grid helps to offer the ultimate control over portrait lighting ( figure 2-19 ).

Figure 2-19. Egg crate on a softbox.
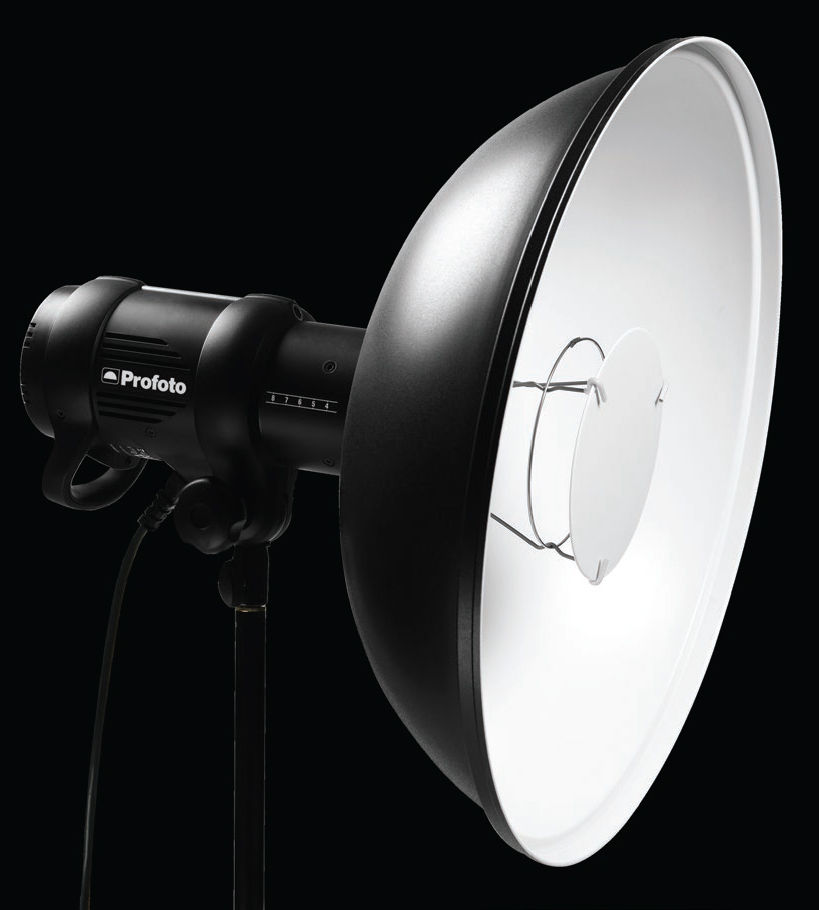
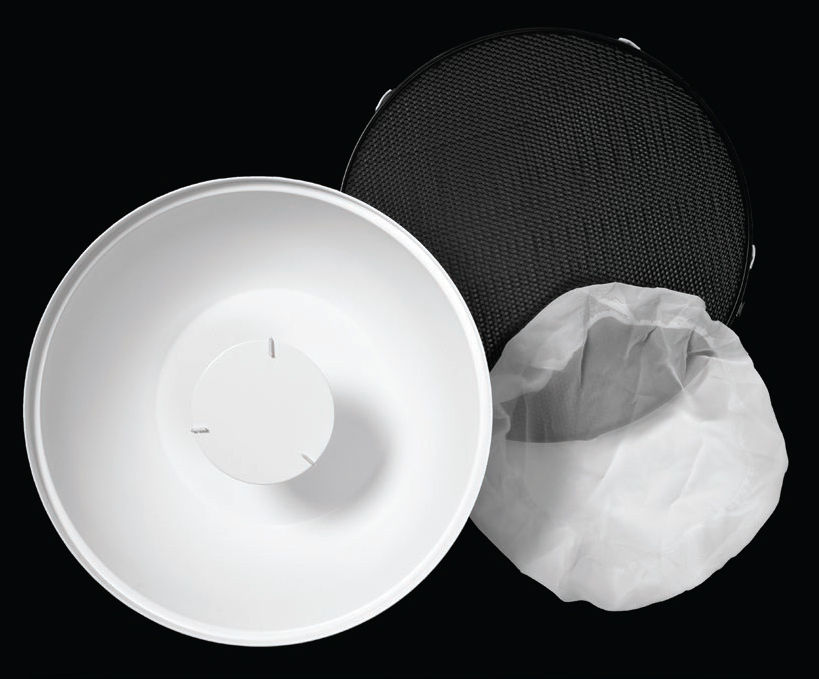
Figures 2-20 and 2-21. Beauty dishes.
Of all the different types of light shapers available to photographers, the beauty dish is by far the most unique. What I mean by that is that it is a wonderful light source when used properly. When not used properly? Not so great.
![]()
Of all the different types of light shapers available to photographers, the beauty dish is by far the most unique.
The beauty dish ( figures 2-20 and 2-21 ) looks as if it is a large parabolic reflector that has been flattened out to a more shallow depth. Often, these modifiers come equipped with a small reflective cover in the center. This deflector covers the flash tube and bounces the light back into the “bowl” of the dish. This creates a light that is still concentrated but not quite as hard and sharp as a smaller or more direct light source.
While the placement of most light shapers in a portrait situation doesn’t have to be extremely precise, the beauty dish is different. It is the only light source that I use by watching the face of my subject very closely while moving the beauty dish up and down and in and out until the exact “mask” of the face seems to almost glow. If you watch the face while you place the beauty dish you will see there is some light position where the face really does seem to come to life and look its very best ( figure 2-22 ). Stick with positions that are approximately 3 to 4 feet from the face. If you place the beauty dish any farther away from the subject, it becomes another just light source.
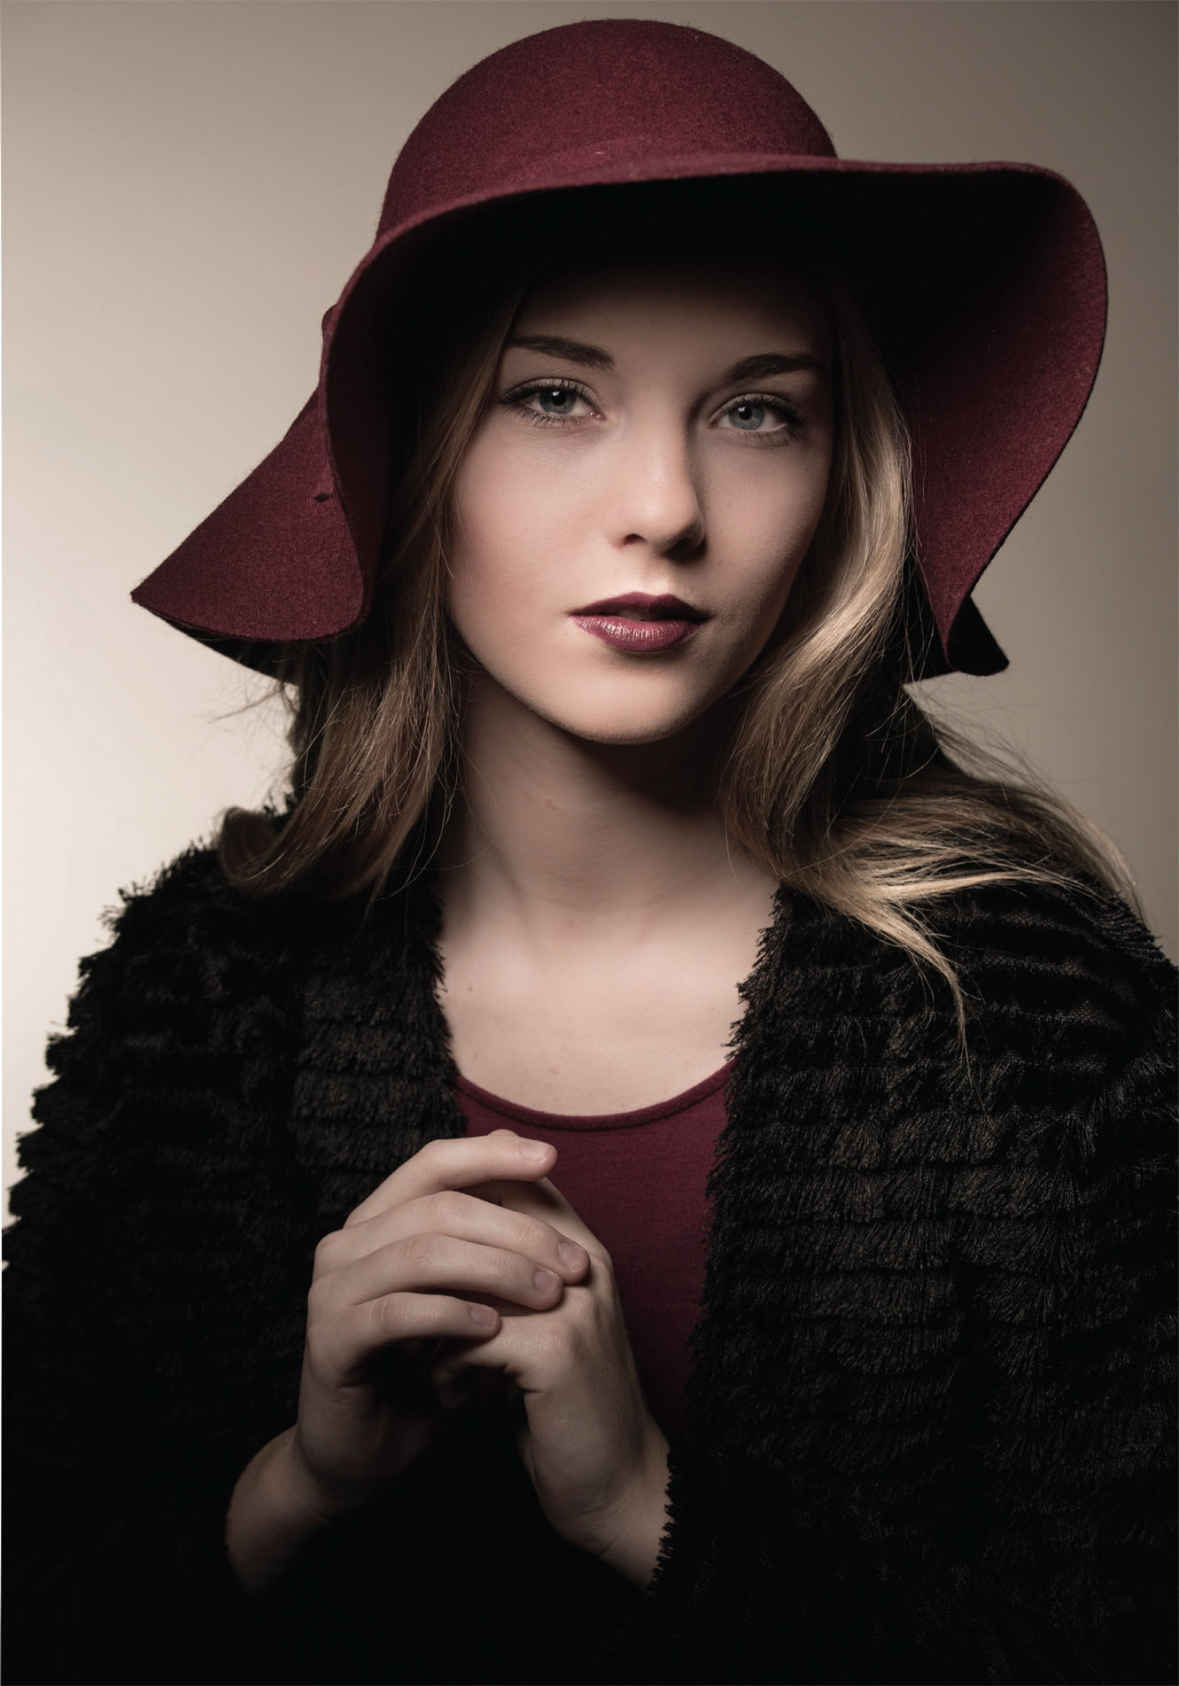
Figure 2-22. A portrait shot with a beauty dish.
However, I must give a brief word of caution here. A beauty dish is designed to make a really great face look even greater. If your subject’s face has wrinkles or imperfections they’d prefer to see minimized, they won’t likely benefit from the beauty dish. I once heard a photography speaker say the beauty dish is truly great for a beautiful face. I think he was right.
I am now in my thirty-fifth year as a photographer, and I can say without hesitation that this has easily become my favorite light source. I avoided the octabank for almost twenty years before finally deciding that my problem with an octagonal shaped catchlight in the eyes was really not a big deal or detrimental to the image at all. For me, the quality of the light far outweighs anything that could be thought of as a shortcoming. This light source does a great job on the face and, in fact, lighting more than one person and more than just a face. Full-length portraits are beautiful with an octabank, which provides soft yet directional lighting ( figure 2-23 ).
![]()
This has easily become my favorite light source.
The octabank can be used as a contemporary portrait light for one person and does a beautiful job. But it is also quite a nice light source for four, five, or even six people. Due to the nature of its size, there is an inherent softness as long as it is used close to the subject. As with any source, if you move it back a long distance from the subject, the quality of the highlights and shadows start to diminish.
![]()
There is an inherent softness as long as it is used close to the subject.

Figure 2-23. Portrait created with an octabox.

Figure 2-24. Octabox.
Octaboxes ( figure 2-24 ) generally come in three sizes, regardless of the brand: small, medium, and large. There is also a very large version of the octabank specific to some brands, such as Elinchrom, Broncolor, and Profoto. These ultra-sized giant light sources are often used in sophisticated fashion shoots and editorial location work. While they are easy to use, they require a lot of ceiling height and a larger studio or shooting area.
Honeycomb Grids and Egg Crate Grids
Designed as tools to restrict the spread of light, honeycomb grids are hard, metallic accessories that fit onto the head of smaller reflectors and beauty dishes. They come in different degrees of restriction, rated in degrees; 20, 30, 40, and even 50 degrees of coverage angle are the standard types. These tools are in almost every photographer’s bag of tricks because they are very helpful in maintaining control over the areas that are being illuminated by a light source.
A related light modifier accessory is the larger, soft, egg crate grid that is often used with large softboxes for the same purpose as the smaller grids. Typically, these devices attach to the front of a softbox with Velcro fasteners. They are the best tools possible to help channel the light from a large source, giving it direction and controlling it without diminishing its size. These tools are essential for minimizing light spill onto backgrounds and are chiefly used when lighting with accent lights from behind the subject. Lights in this position are usually aimed forward to light the hair and shoulders, separating the subject from the background. Adding an egg crate grid to these lights helps minimize the risk of lens flare, but it also requires that you use more exact light placement. When placed properly, gridded lights like this can add a great degree of dimension to your portraits.
![]()
When placed properly, gridded lights like this can add a great degree of dimension to your portraits.
These widely used reflectors are often sold in a package with white, silver, black, and gold fabric. They also are occasionally sold with a translucent or diffusion material as well. Portability is the name of the game here, as you can easily use these collapsible reflectors on location and they pack down into small bags or cases. Every photographer I know uses these little beauties. They save time, offer subtle or more dramatic change, and can really make a difference in an image.
I am one of the few still photographers who utilizes the black fabric reflector a lot in my work ( figure 2-25 ). I tend to feel strongly about what some call “negative fill” (or “subtractive lighting”) which means eliminating light on the shadow side of the subject to offer a more dramatically lit image. The black fabric is also great for minimizing overhead light.
The standard white reflector ( figure 2-26 ) is probably the single most used lighting tool in photography of all kinds—from portraits and weddings, to fashion and commercial work, all the way to macro and still life imaging. This is one very useful product and one that most photographers can’t do without.
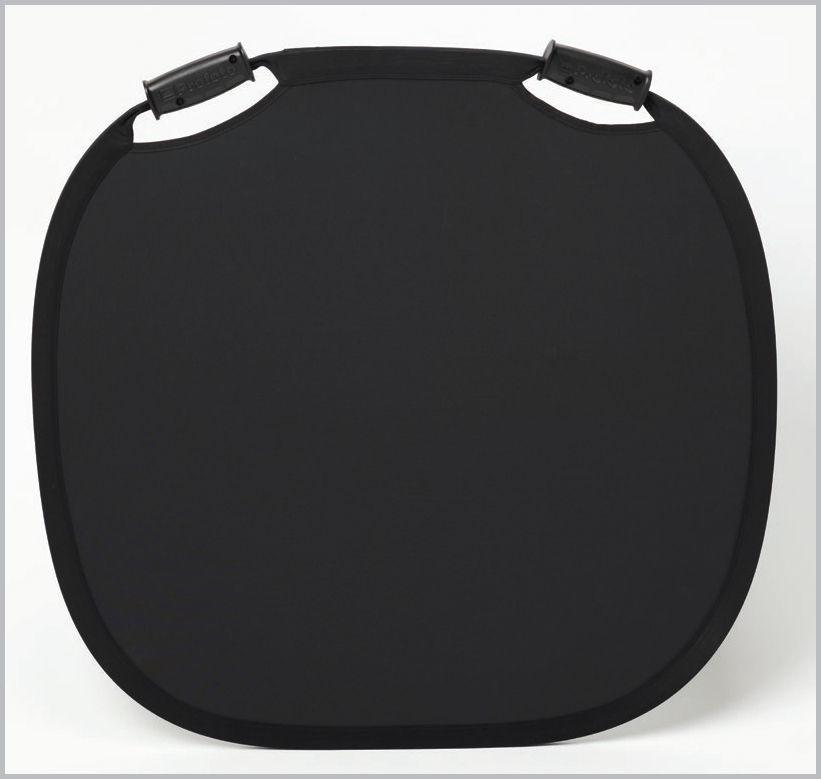
Figure 2-25. Collapsible reflector used for subtractive lighting.
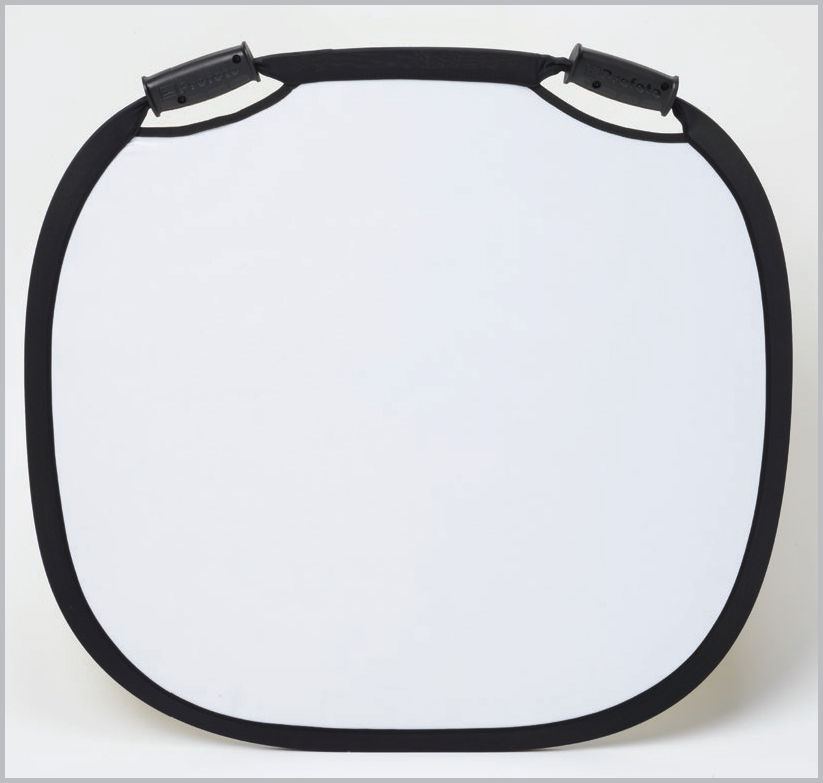
Figure 2-26. Collapsible reflector used for additive lighting.
![]()
When placed properly, gridded lights like this can add a great degree of dimension to your portraits.
Its cousin, lined with highly reflective silver, is very similar and is also used for many of the same things as the white reflector. Silver does tend to produce a little more shine on the skin than white fabric, but it is also much easier to redirect or reflect lower light levels. Gold fabric is also very popular and adds a nice bit of warmth—but it comes at the risk of adding a lot of shine. The gold is never flat or dull but always metallic and shiny, just like the silver fabric. Again there are many instances where this can be highly useful if used correctly and at the right time. For example, I love to add a touch of warmth to my subject’s hair when working outdoors. A gold reflector is ideally suited for this and is quite helpful when used to eliminate the cool blue look in an outdoor portrait lit by the open, blue sky.
Finally, the translucent or diffused fabric is tremendously helpful for softening any small, bright source like the sun, a small strobe head in the studio, or a speedlight. They usually have a density in the 1- to 1.5-stop range. This is really a helpful product and one that has many different uses.
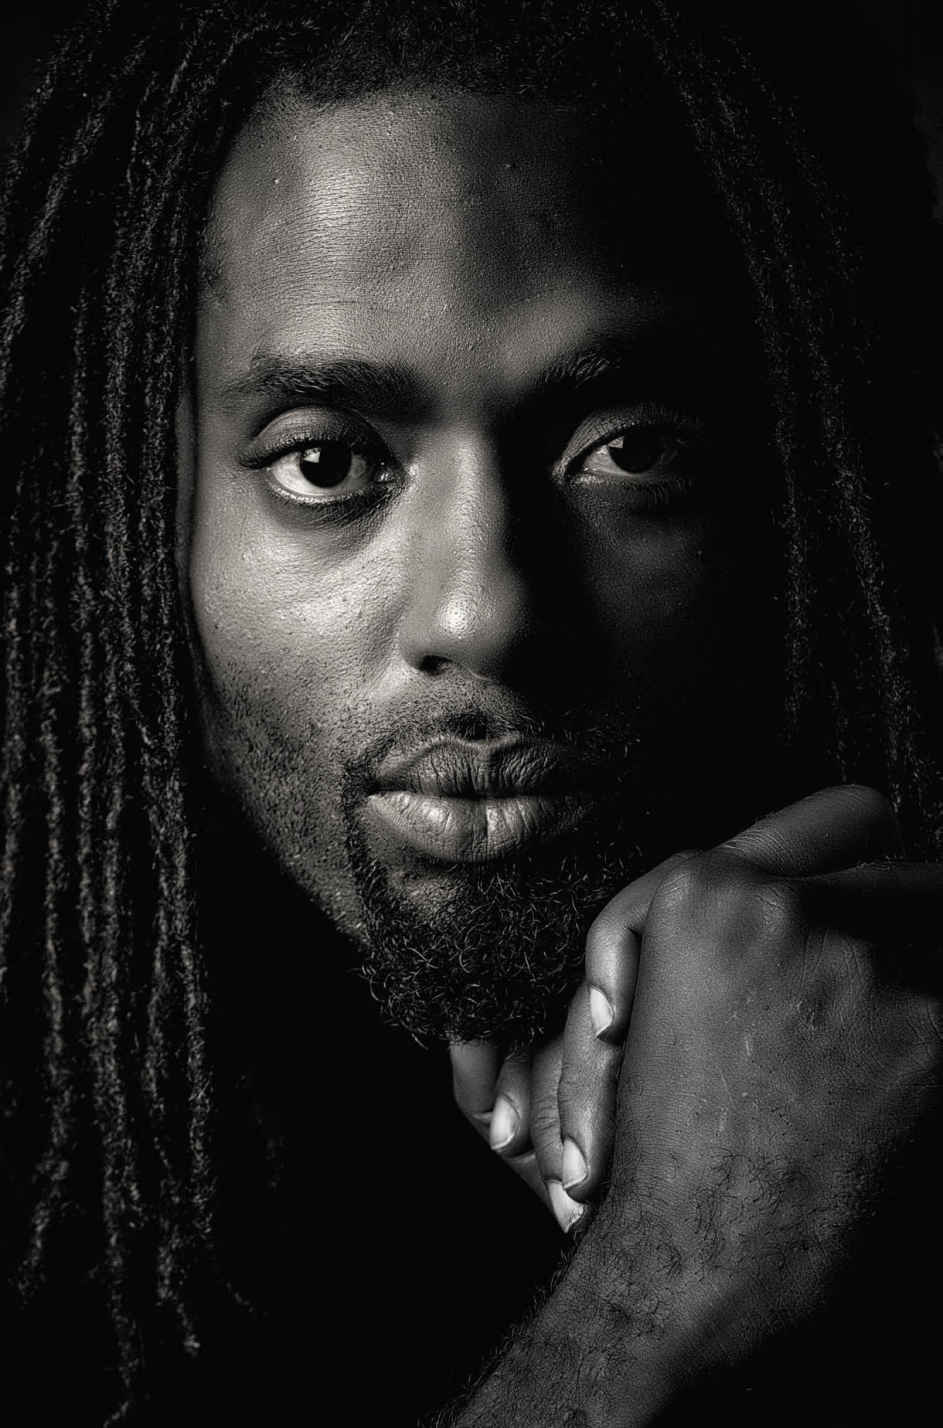
As the name implies, a ring flash is a circular flash accessory. The photographer places the camera’s lens through the ring when shooting. The effect is highly contemporary, giving very bright, clear, and circular catchlights in the eyes. Since it is in direct line with the lens, it also eliminates any shadows on the face. This modifier has gained tremendously in popularity over the past ten years or so.
When using a ring flash, the portrait subject’s skin takes on an almost luminous look as each pore is filled with light—since there is no defined light direction ( figure 2-27 ). Another very fun result of the ring flash is that, if you are within a few feet of a background, you will see a small, well-defined shadow outlining the subject. Fashion and glamour photographers often use this light-shaping tool to draw attention to the eyes of the subject.
![]()
Fashion photographers often use this light-shaping tool to draw attention to the eyes of the subject.
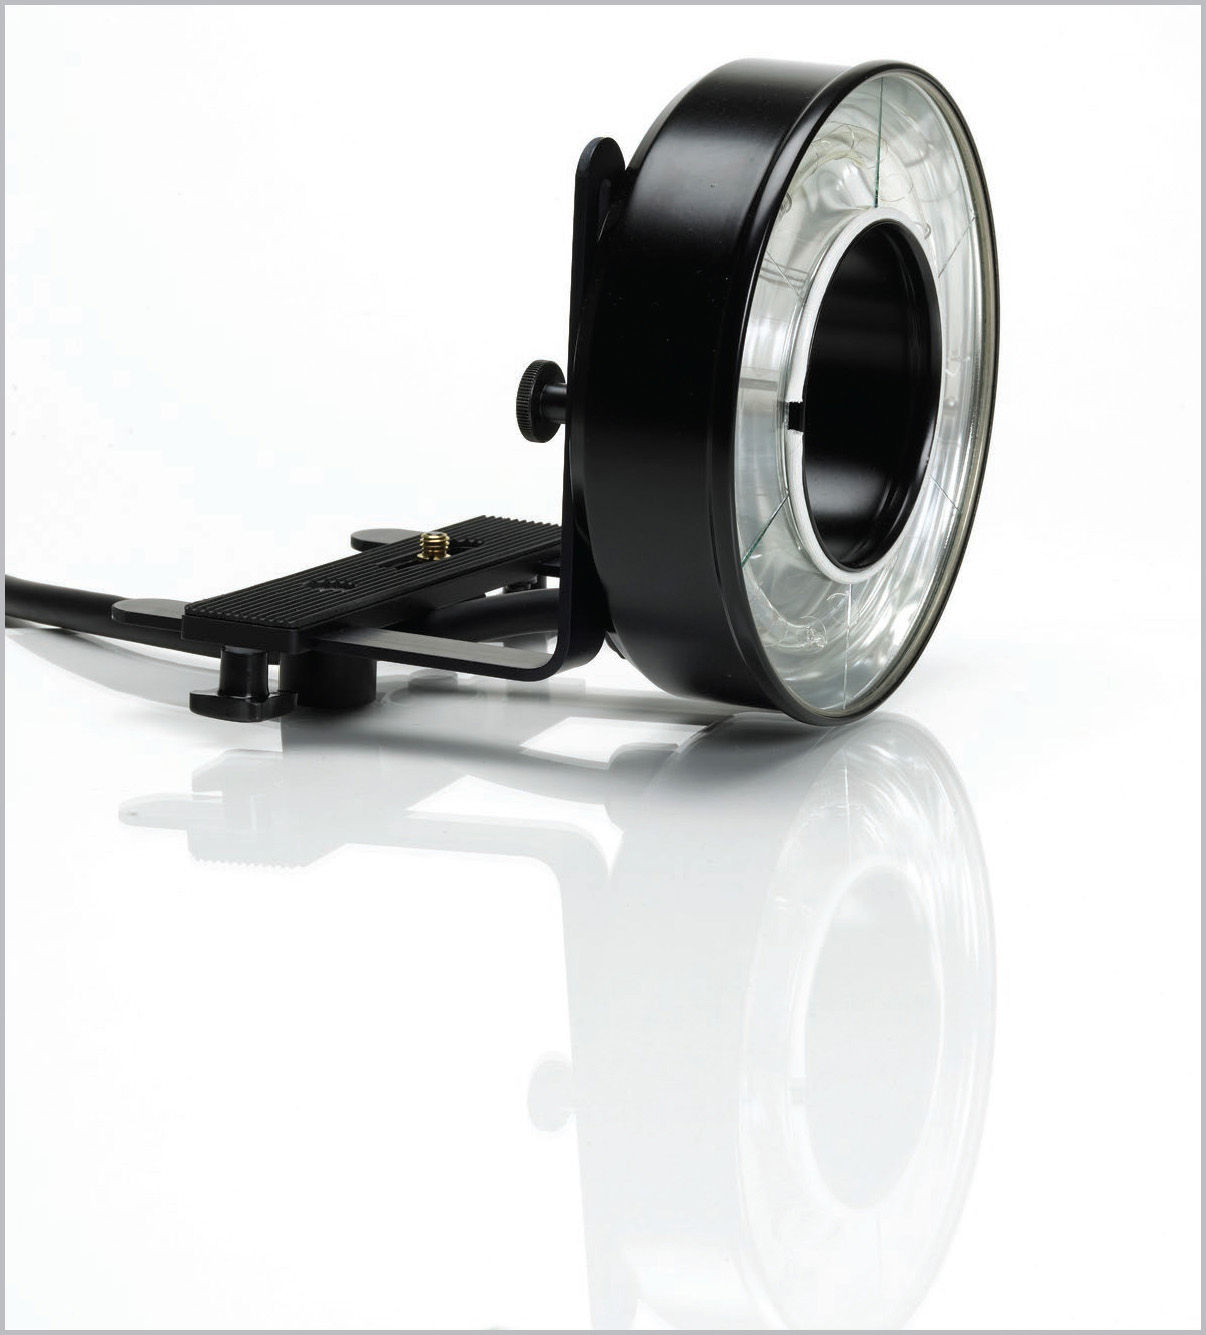
Figure 2-27. Ring light.