3. Backgrounds and Props in the Studio
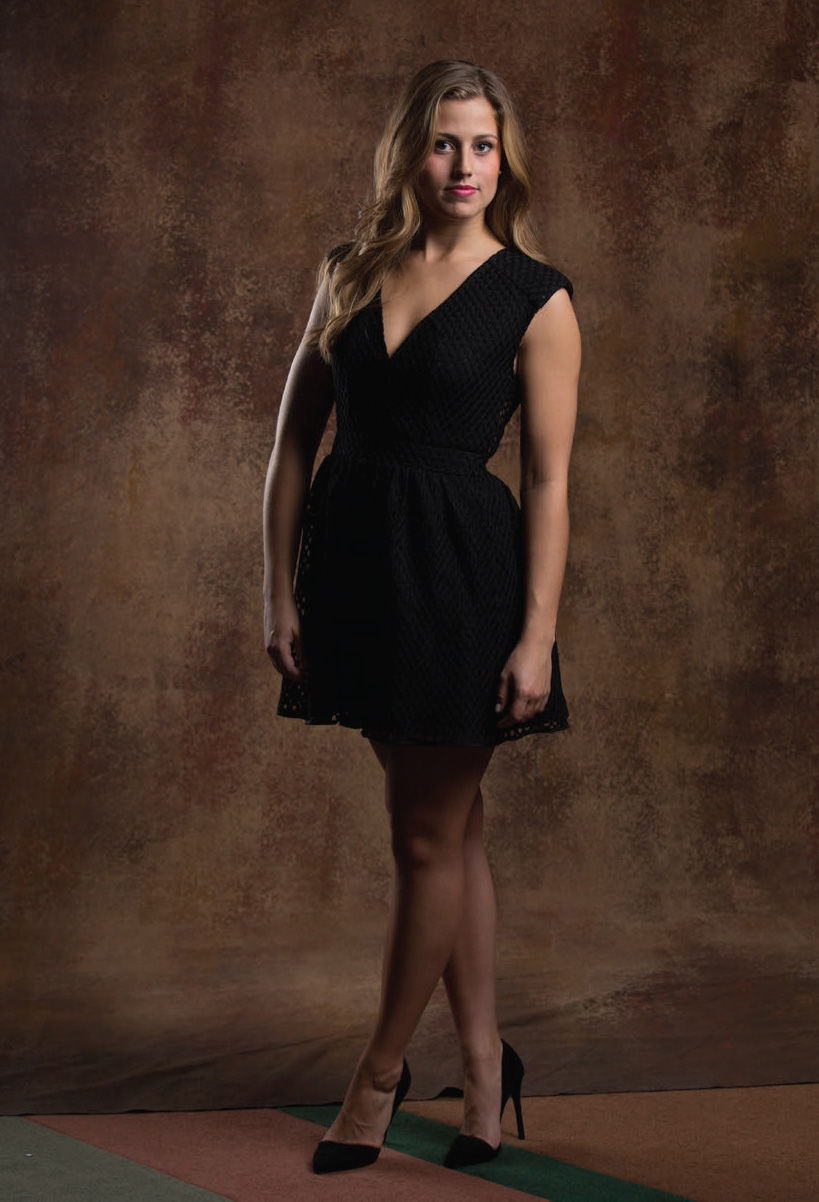
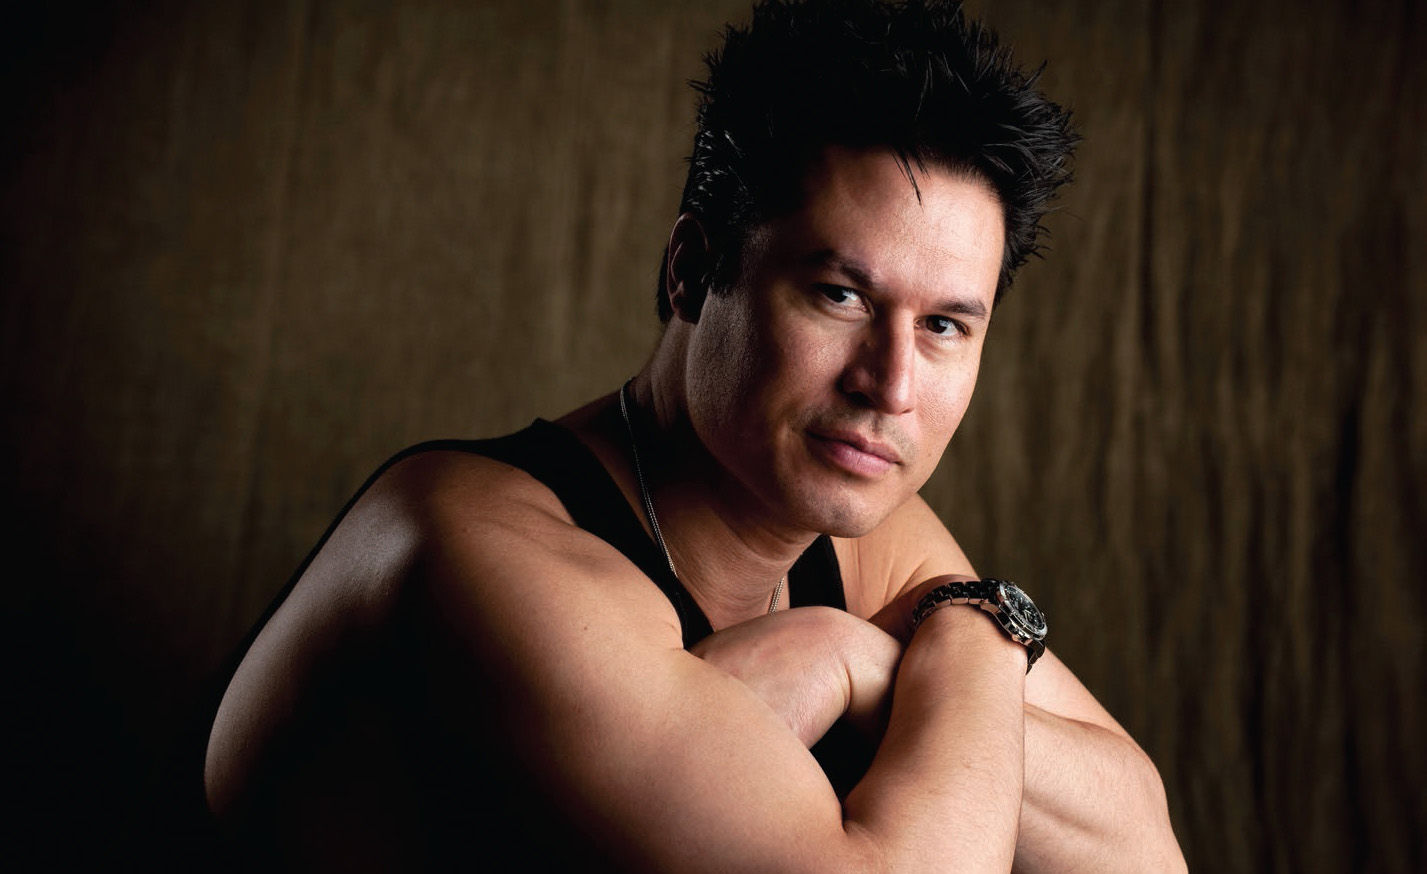
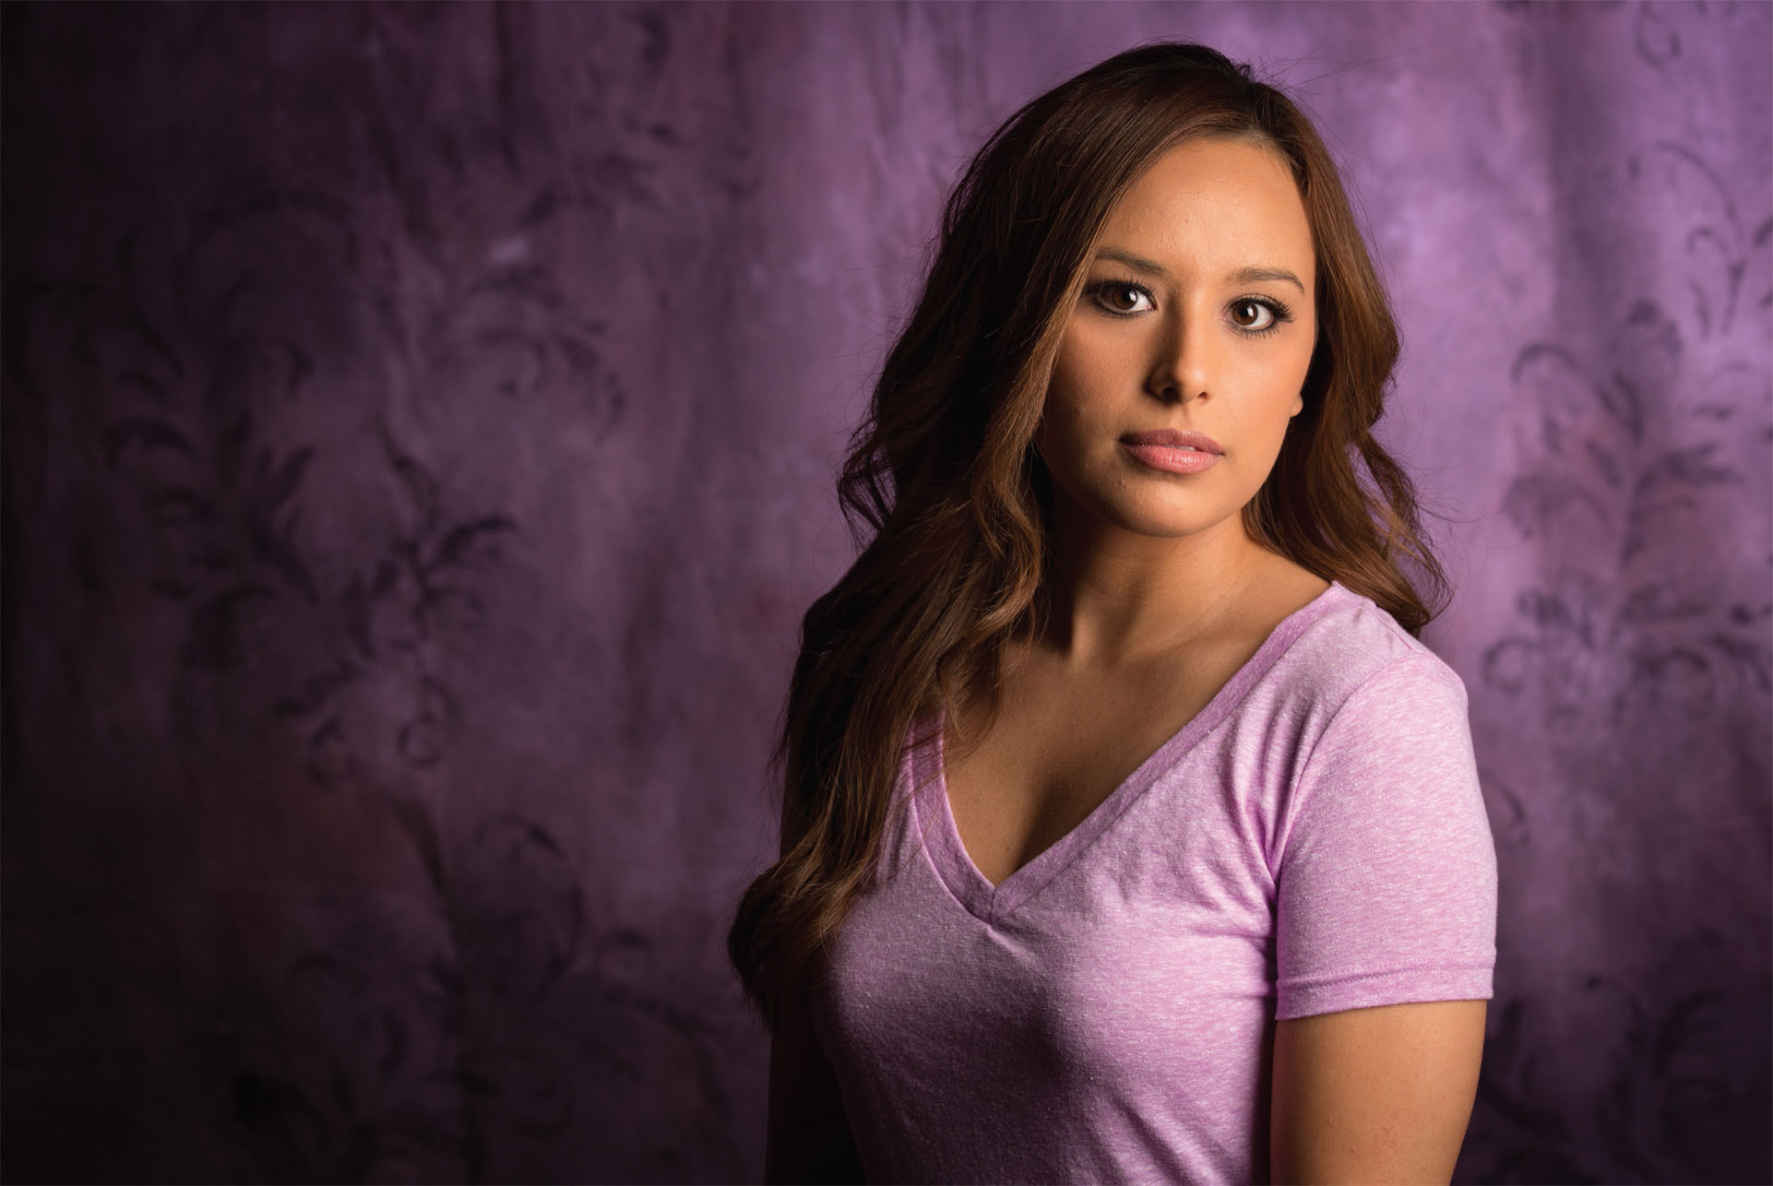
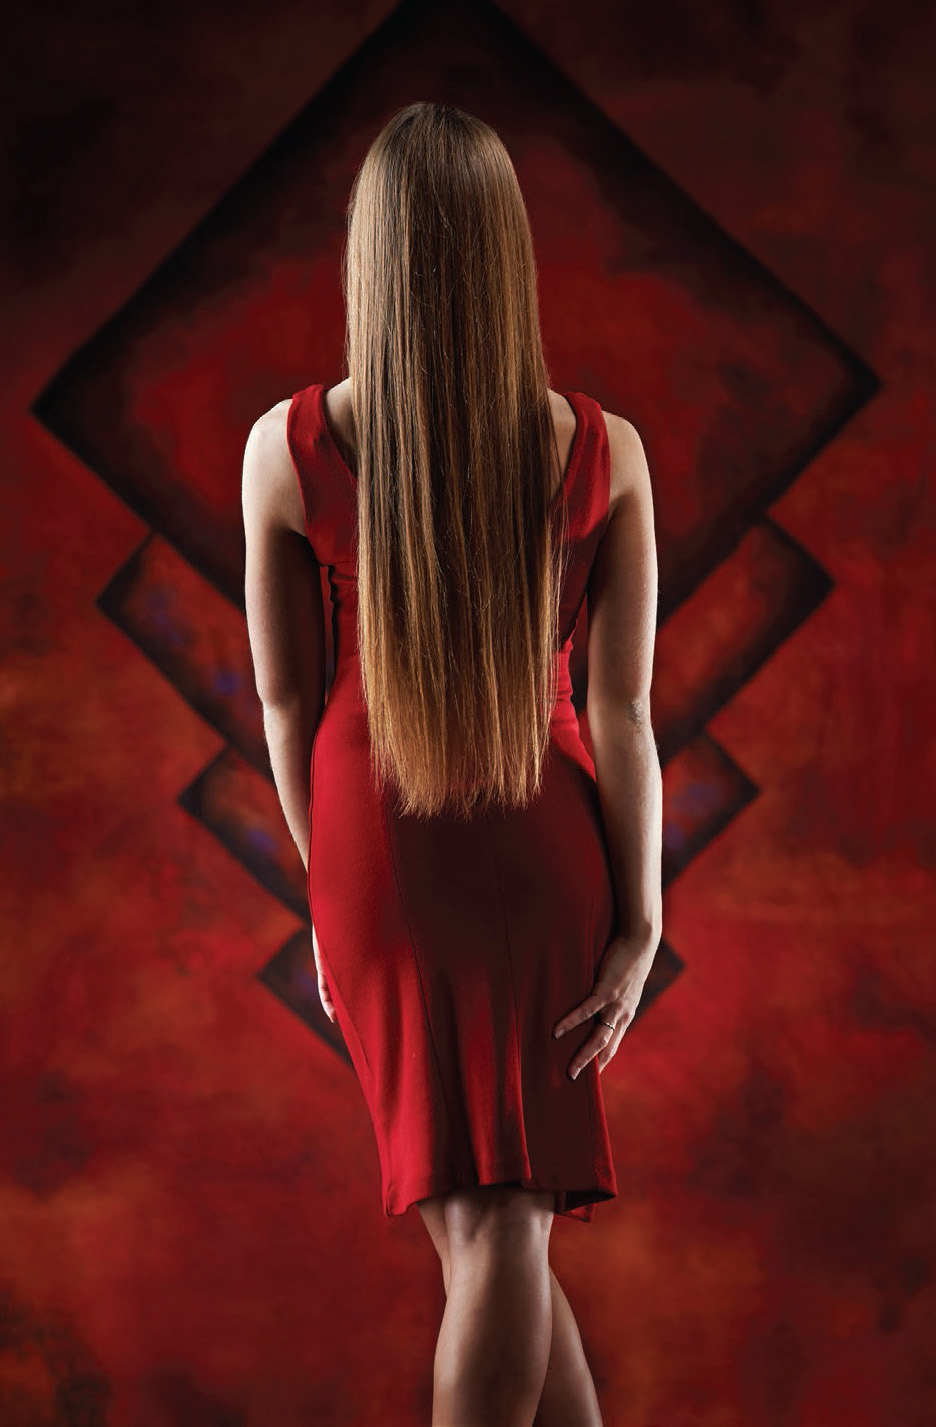
T here are so many different choices of styles and techniques portrait photographers can use when creating portraits in the studio ( figure 3-1 ). Some photographers love to create traditional portraits that reflect the style and grace of artists of the past—artists like the great Dutch painters or the masters of the Italian Renaissance, like Michelangelo, DaVinci, and Raphael. Other photographers prefer styles that are more contemporary to their own time. They tend to look to today’s magazines and movies for inspiration on style, clothing, and lighting. Still others are photographers working in middle America who simply want to capture whatever look is requested by their clients ( figures 3-2 and 3-3 ). While clothing and posing will often help to establish the “look,” it is often the backgrounds and props that represent the primary difference. A dramatic background or a specific prop will do more to help set the tone for the portrait being presented by the photographer than just about any other portrait elements.
![]()
There are so many different choices of styles and techniques portrait photographers can use.

Figure 3-1. Any style you can imagine can be created in the studio.
Figures 3-2 and 3-3. For many photographers, the determining factor is the style that their client desires.
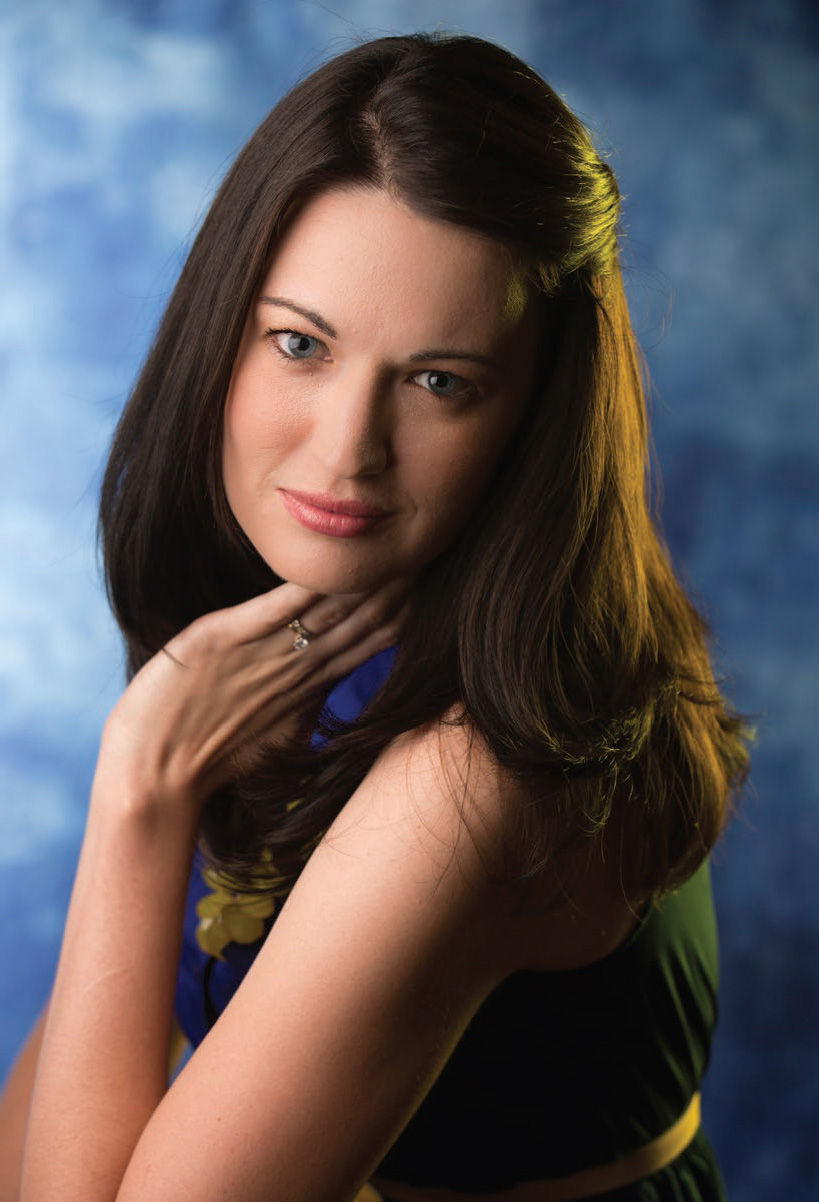
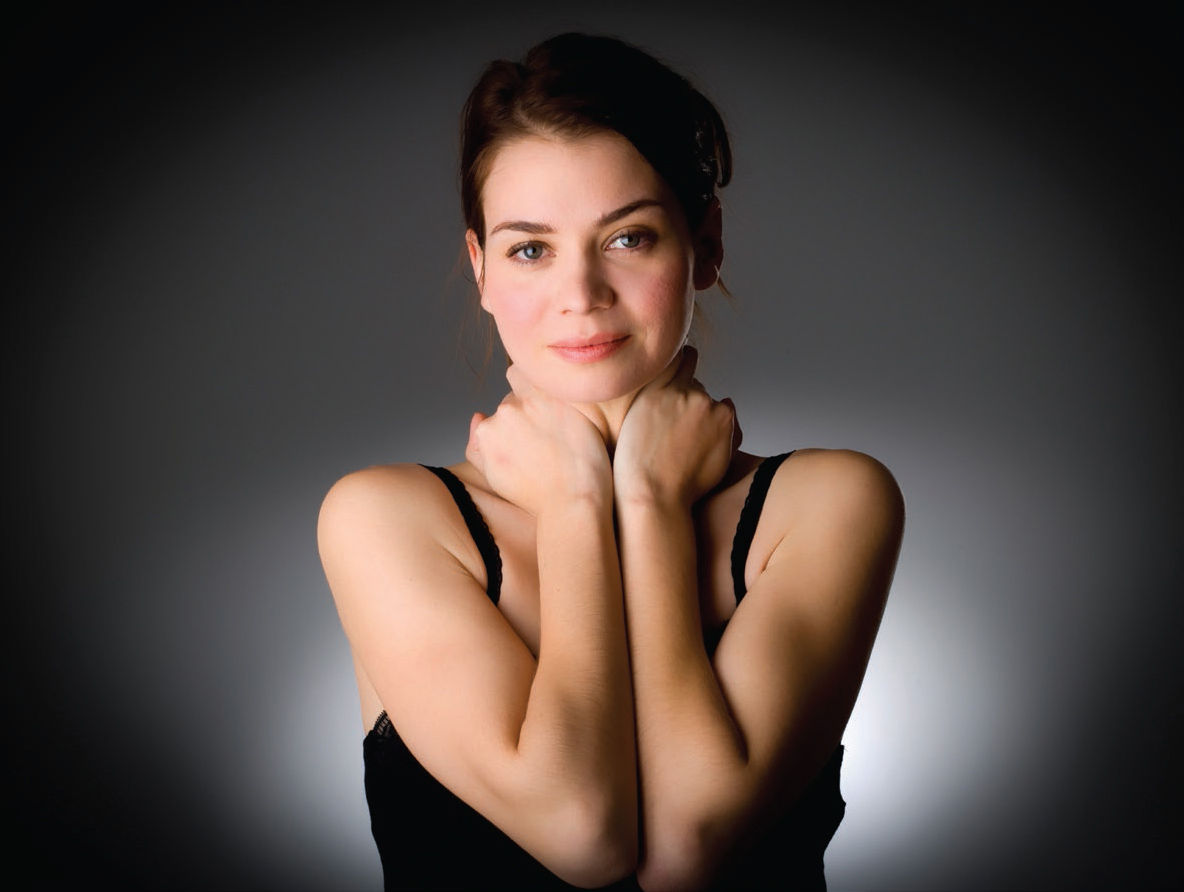
There are many comparisons made between photography and music. Many of my photography friends have music in their personal history and so, for me, it seems natural to think of the background of a portrait like the foundation or score of a piece of music ( figure 3-4 ). The tone is instantly set, even though it may be secondary to the primary focal point. The background should serve to support the subject in your portrait; it should not compete for the viewer’s attention.
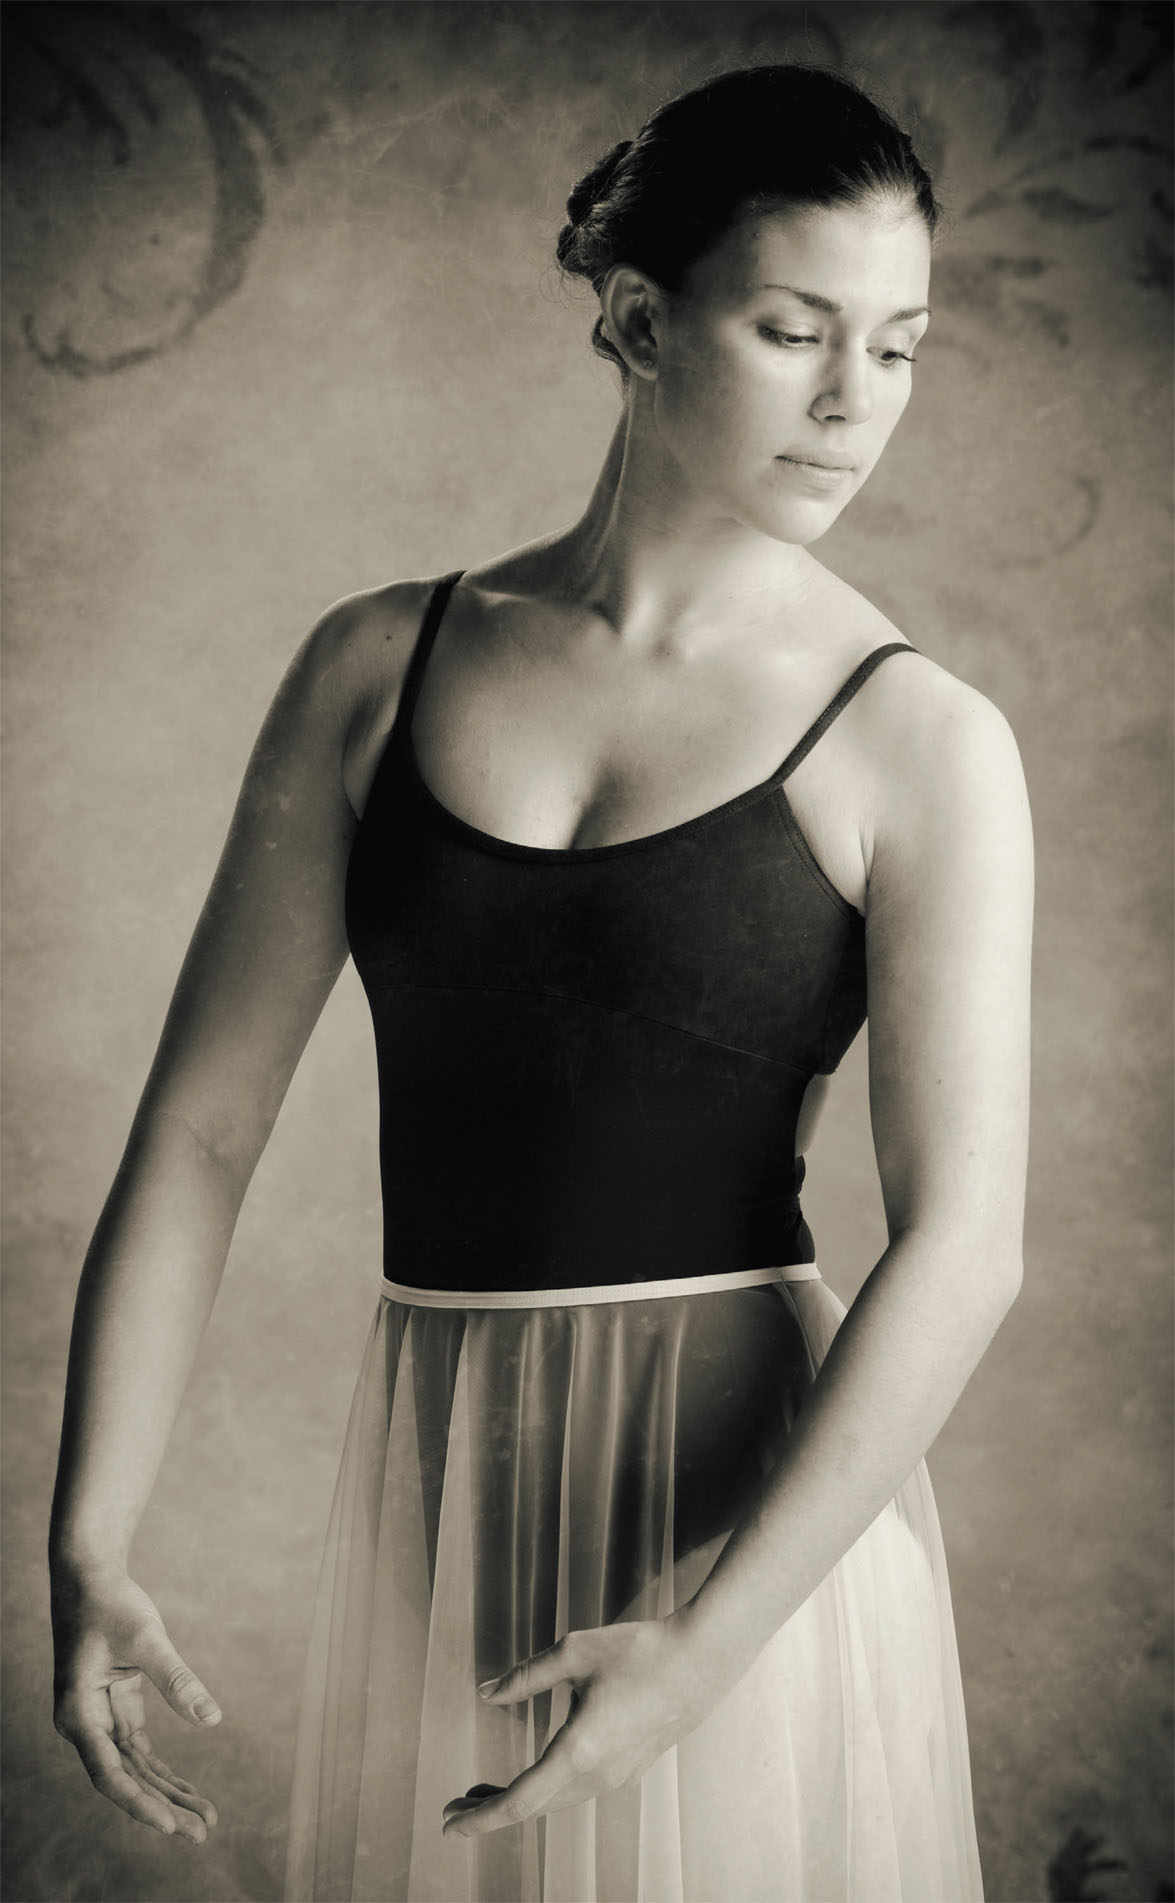
Figure 3-4. A painterly background helped set the mood for this graceful dancer.
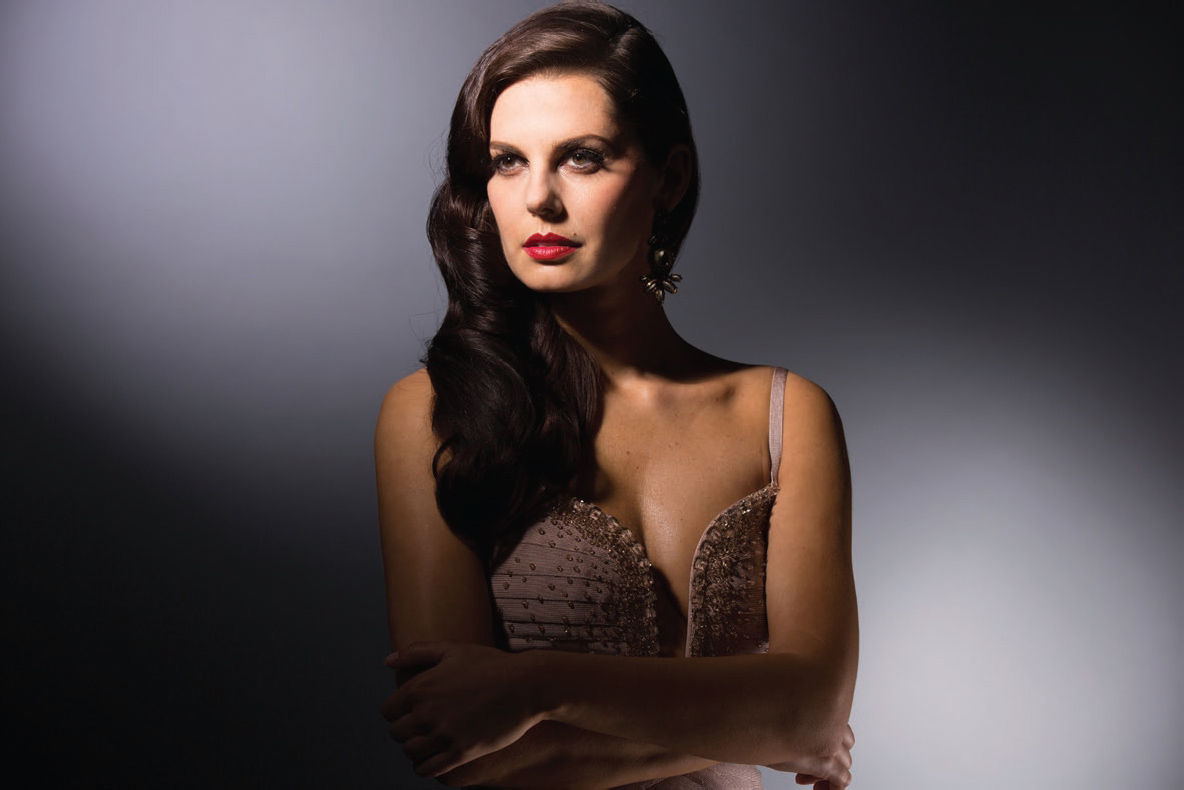
Figures 3-5, 3-6, and 3-7. Even backgrounds that make a fairly impactful visual statement will fall into a secondary role when all of the other elements of the portrait are well conceived and executed.
Relying on a powerful background to “make” your image would be too easy and would, in fact, only serve to take away from the primary objective of the portrait: the person whose image you are creating. Clearly, the background is an element of your portrait that should be discussed with the client. As the photographer, however, you should try to be persuasive about how the portrait look they want can be most effectively designed. Strive to make good choices for the subject and create a truly complimentary likeness.
When lighting backgrounds, the first and possibly most important thing to keep in mind is the brightness or exposure. If you select a background out of a catalog, it will be presented as it truly appears under normal daylight conditions. However, by adding more or less light to a specific background, based on how you expose for the primary subject, you can entirely change the way the background will record in your image. I have a few backgrounds that I prefer when they are underexposed by 1 or 2 stops; there’s another one that I especially like when overexposed by 2 stops. It does require some experimentation on your part and some practice time to figure out how best to work with your backgrounds.
For variety, I will sometimes move a background light very close to the background to create a more focused or spotlight appearance. One great rule of thumb to keep in mind is that the closer the light source to the background, the more rapid the falloff of light will be. I often like to create a gradient splash of light on my backgrounds. This can easily be accomplished by lighting from one side only; adjust the size of source and its distance until the desired look is achieved. You can also create a couple of bursts of light on a smooth surface. That yields a nice look.
Draping the background fabric can also add an element of depth and help to direct the viewer’s attention. Simply roll up the background on one side next to the background stand and clamp it to the stand. The resulting folds in the fabric can be lit with a small source for harder shadows or a larger source to reveal softer shadows. This is a quick and easy way to add interest.
Figures 3-8 and 3-9. A graduated splash of light can spice up a simple background.
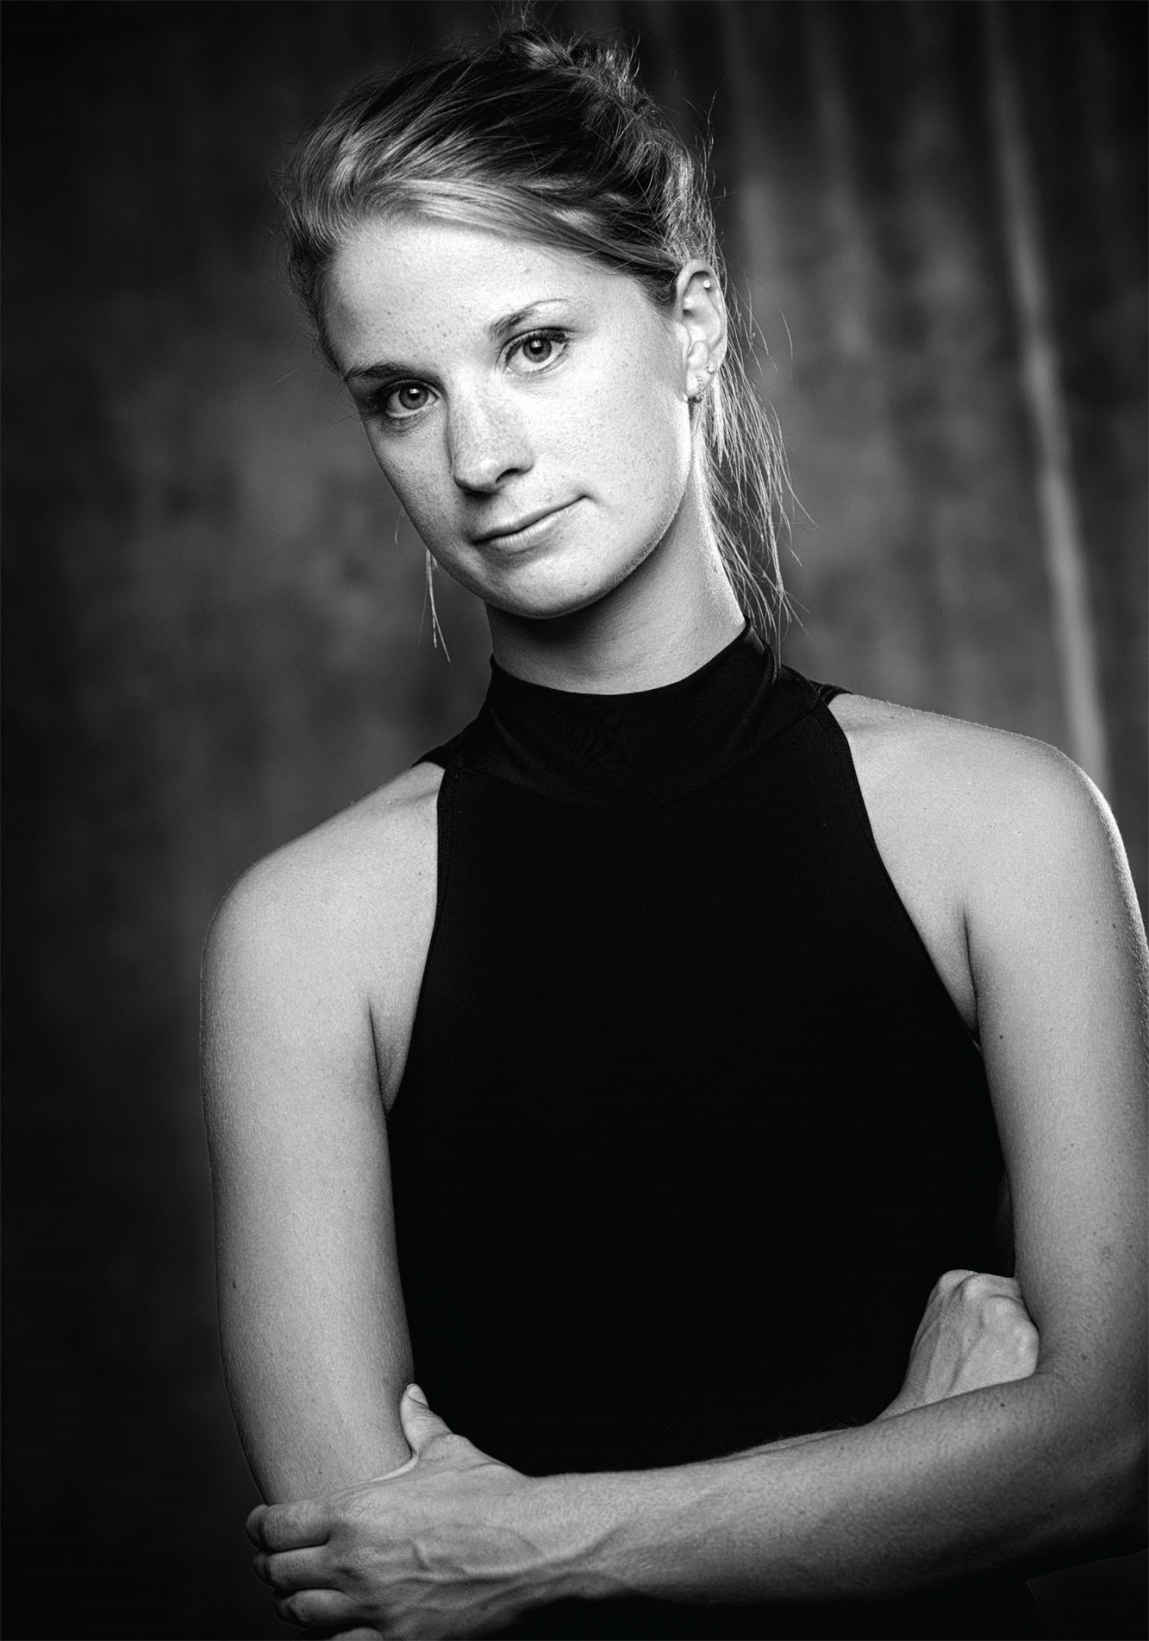
Figure 3-10. Draping the background creates texture and added interest.
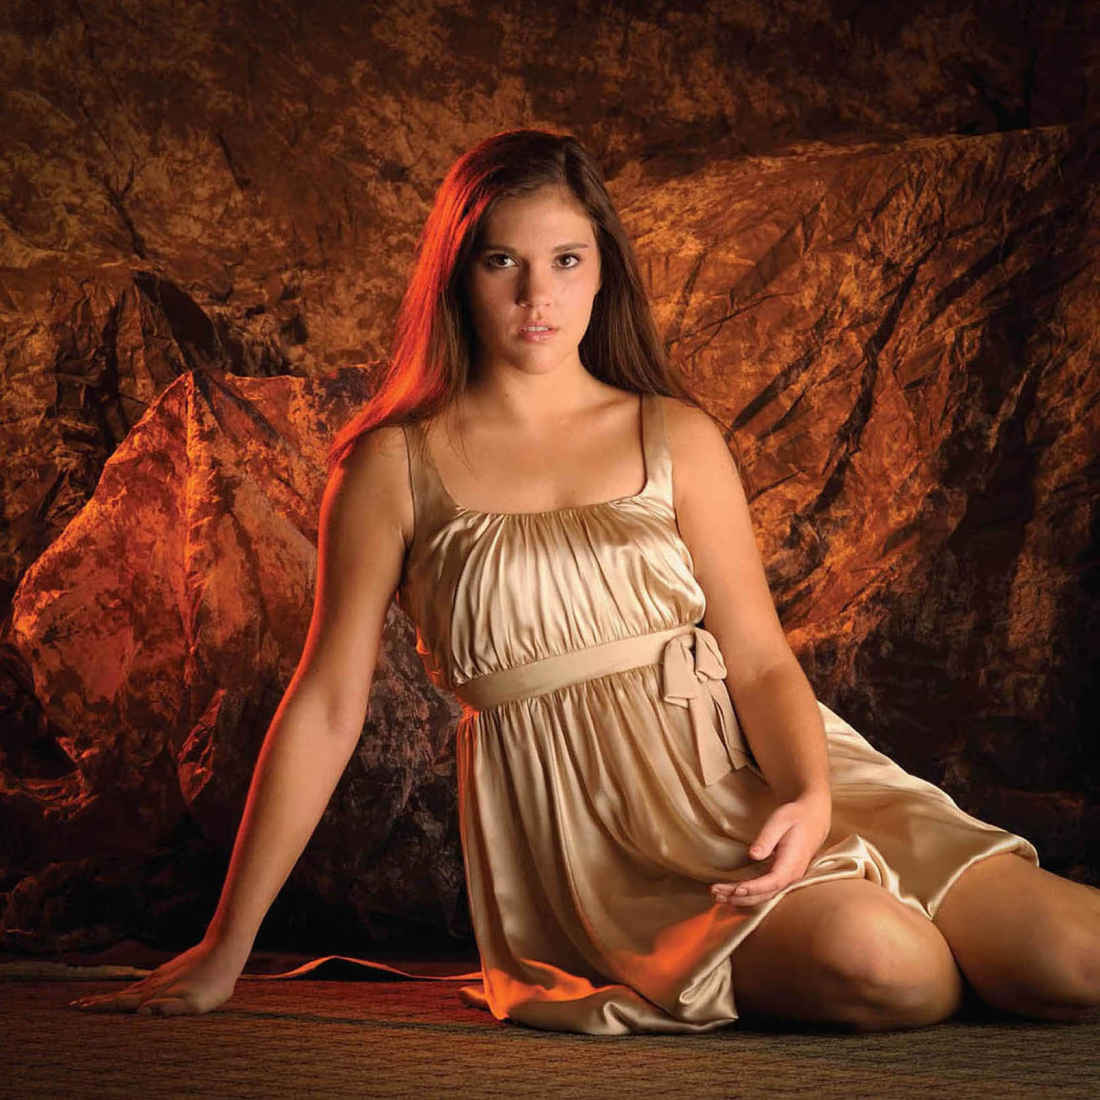
Figure 3-11. Backgrounds can be made of muslin, canvas, or other fabrics.
Backgrounds can be made from muslin fabrics, canvas material, or even a blended wrinkle-free fabric. I have several from White House Custom Colour that I use because they always look fresh and crisp without wrinkles. You can paint your own backgrounds, splatter a piece of plywood with wild colors of paint, or use a set of mini-blinds. There are so many opportunities out there! One of my photo buddies likes to follow a painter’s truck until they stop for lunch (or to work) and will offer to buy their old drop cloths used to cover floors and furniture during house painting. This is a great idea, since the colors are fantastic and they can be picked up for very little money ( figure 3-11 ).
![]()
The colors are fantastic and they can be picked up for very little money.
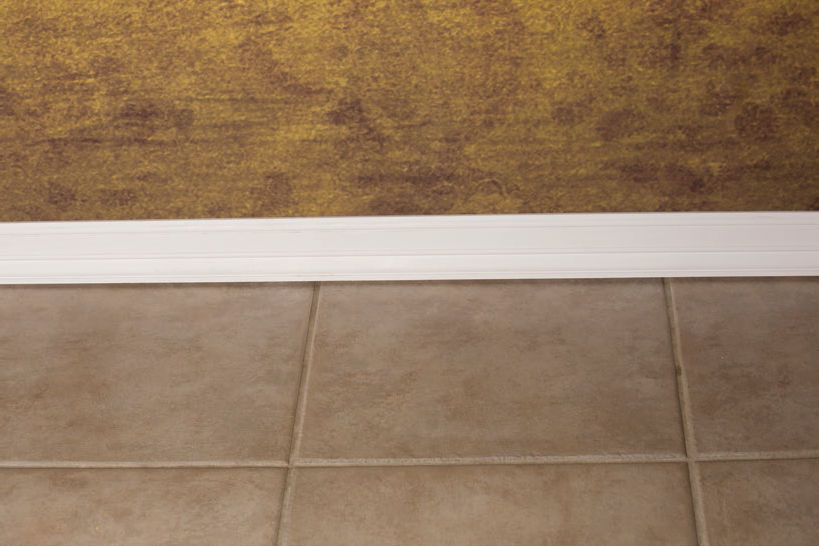
Several of my favorite backgrounds are 8×10-foot wrinkle-free polyester fabrics from White House Custom Colour. If the backdrop is suspended on a cross bar then raised to be just off the floor, you can create the look and feel of a living room or bedroom by using a piece of painted trim from the hardware store to create a trim at the bottom of what can look like a wall ( figure 3-12 ). To set this trim in place, I use a couple of clamps and a small L-bracket. Then, I add a small weight of some type to hold the L-bracket in place and keep it from tipping over. One fast and easy solution for the weight is to cover a small bag of rice with gaffer’s tape; the gaffer’s tape makes it look much more professional. A great tip to keep in mind is that this illusion will be even more effective if there is a great looking floor meeting the edge of the trim. The flooring should look like it belongs in the same “room” you are creating.
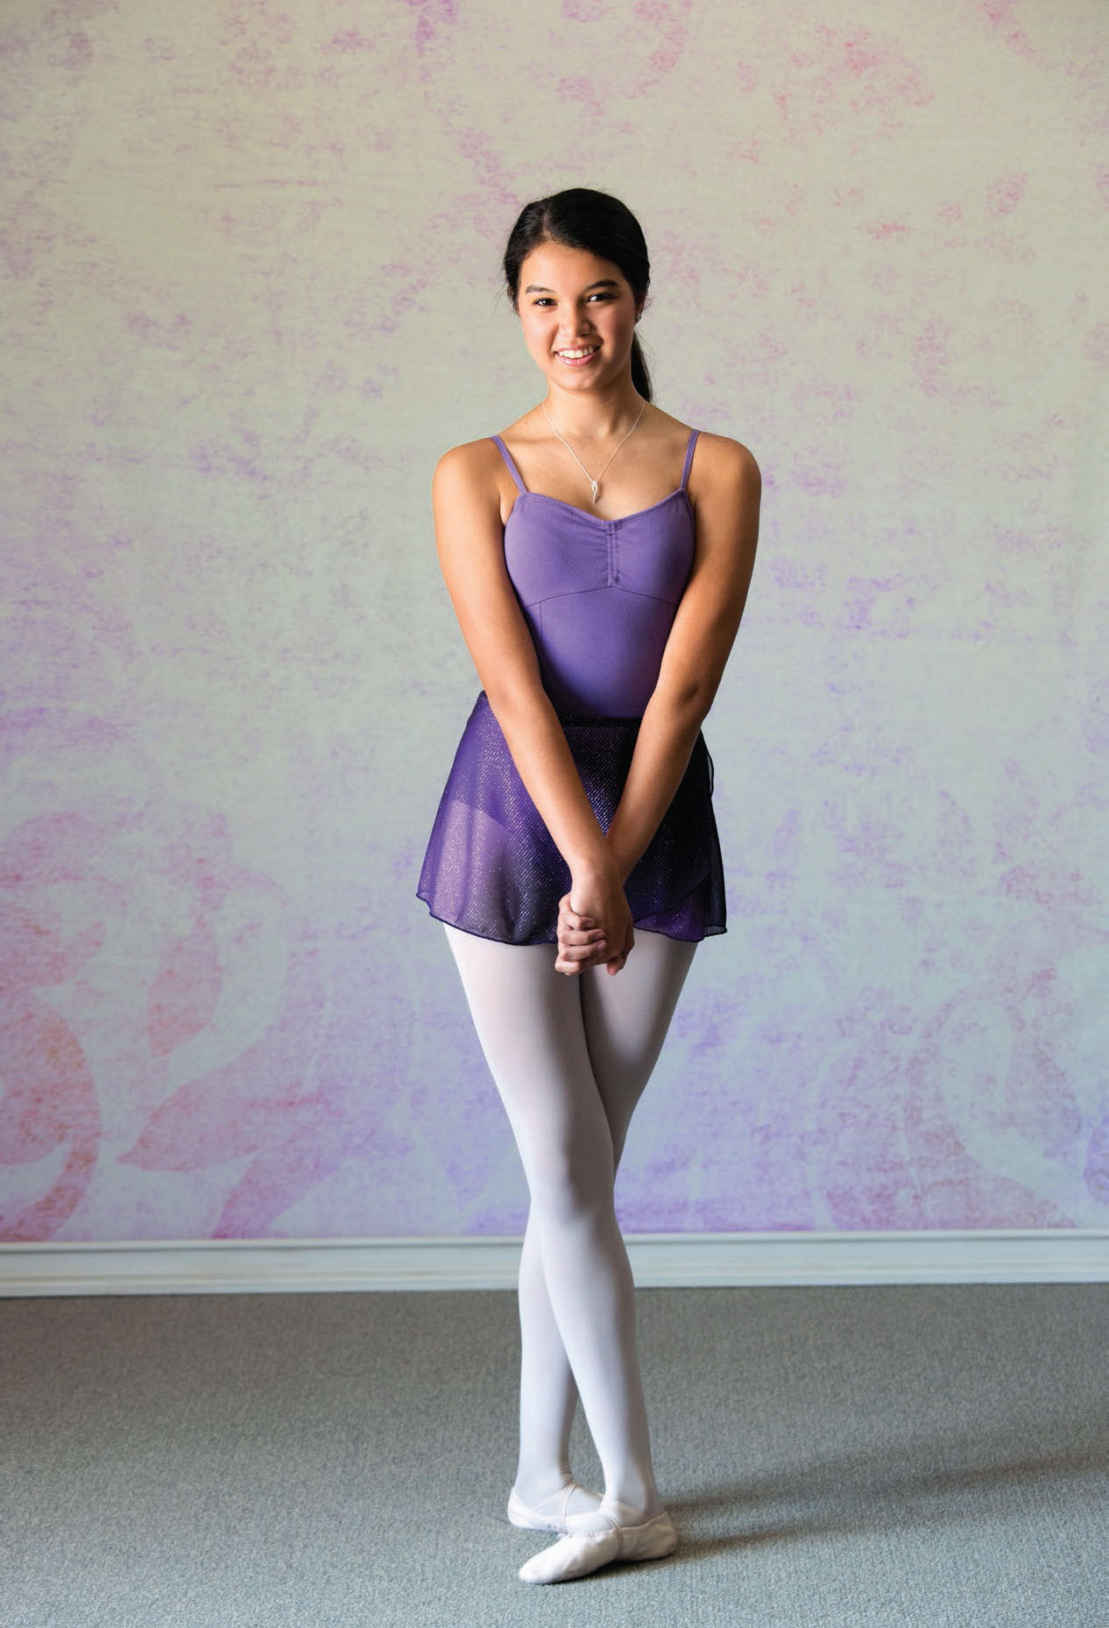
Figure 3-12. A cleanly hung polyester background was paired with a baseboard to create the look of being in a home, rather than a studio.
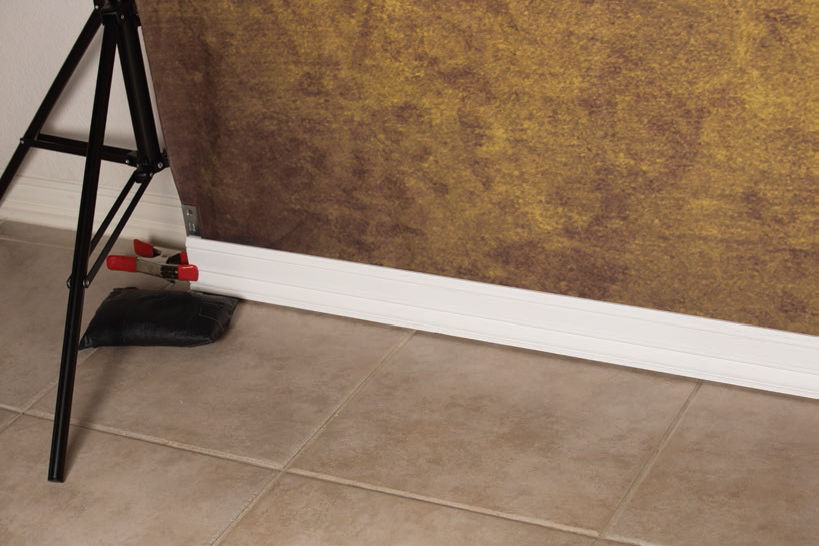
Figures 3-13 and 3-14. Positioning a baseboard at the bottom of a backdrop.
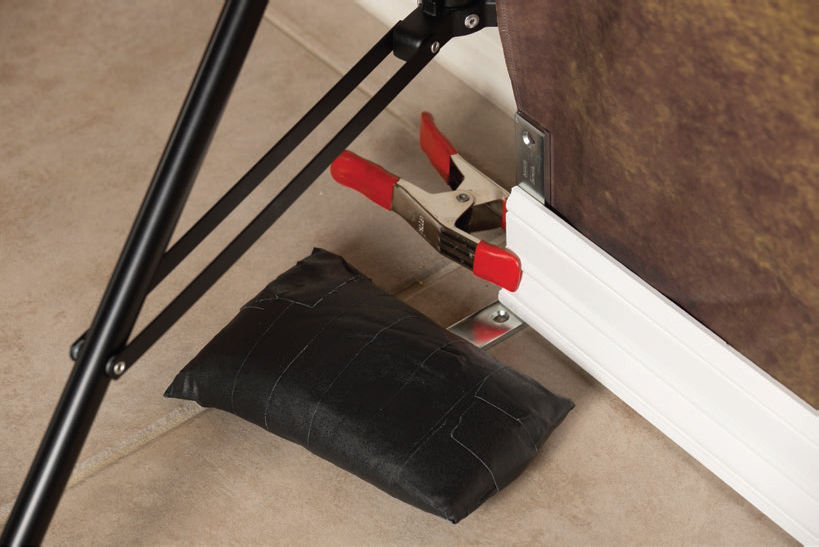
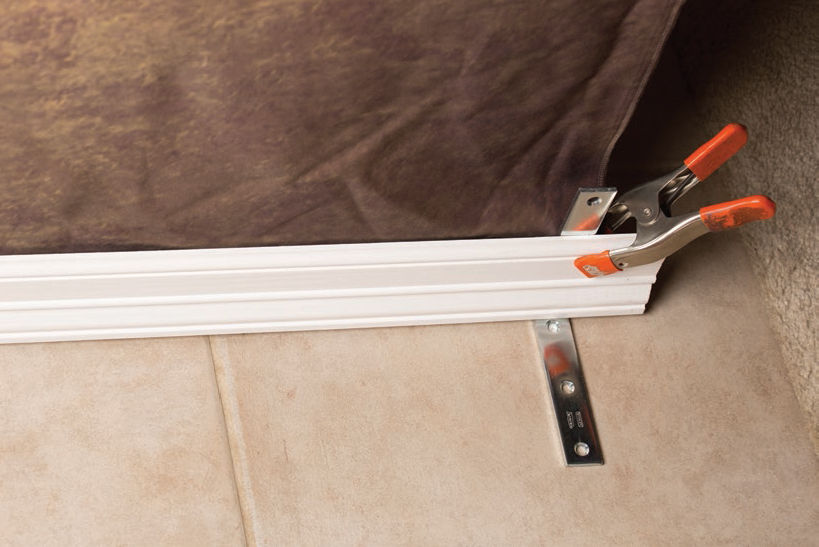
Figures 3-15 and 3-16. The A-clamp secures the backdrop, baseboard, and an L-bracket. A weight on the L-bracket helps keep the baseboard in place.

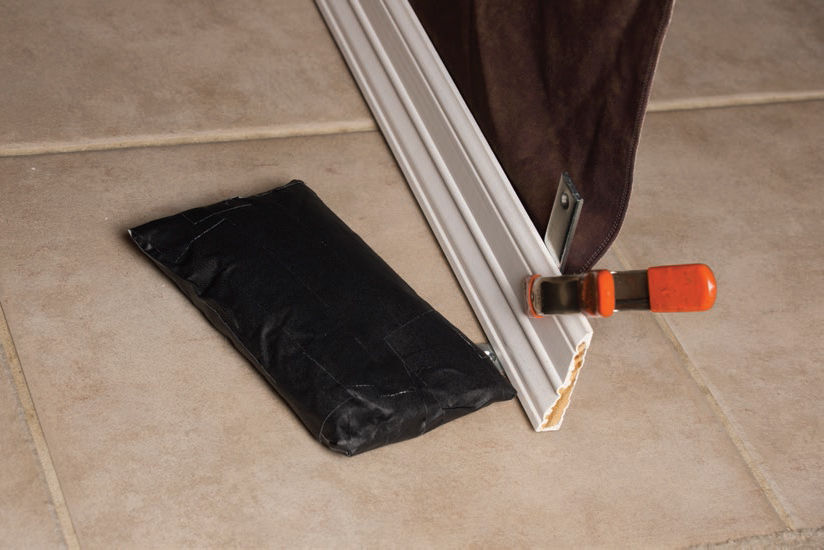
Figures 3-17 and 3-18. Covering a bag of rice with gaffer’s tape to make a quick weight.
Another fun way to create a fast and variable background, based on the subject and their clothing, is with poster boards. I have multiple colored poster boards that can easily be arranged behind my subjects. Bright or subtle colors and geometric shapes can be added—as long as you are careful with your framing or cropping. This is has the added advantage of not requiring too much planning; you can set it up and refine it quite quickly.
![]()
Bright or subtle colors and geometric shapes can be added . . .
Color gels also add a lot in terms of giving you a variety you might otherwise not have available. Back in chapter 2 , we already saw a photo from one of my favorite recent commercial shoots—with Nicholas, the coolest model of the year. I used Hollywood glamour lighting on the subject, then added green-gelled light to create bold color and interesting shadows on the seamless background. As you can see, this normal warm-tone background was totally transformed when a bright green gel was used ( figures 3-19 and 3-20 ).

Figures 3-19 and 3-20. A golden-brown background was gelled bright green for an eye-popping effect.
Figures 3-21 through 3-24 show some different background styles. First, this fun background from White House Custom Colour is made to look like a steel door and bricks ( figure 3-21 ). The next ones ( figures 3-22 through 3-24 ) show some more unusual options from Backgrounds by Maheu.

Figure 3-21. This backdrop from White House Custom Colour presents a realistic-looking steel door and bricks for an “urban grunge” look.

Figures 3-22 and 3-23. These images by Dave Junion for Backgrounds by Maheu show some really interesting background options.
Support props and materials have always been used as far back as portraits and portrait art have been recorded. Chairs, tables, the edge of a stairway handrail, window ledges, and more have graced the background and foreground areas in countless works of art. These props are intended to help set the stage for the portrait and support everything it stands for. If you decide to integrate props, ensure that they remain exactly what they should be: support material. Use great care not to “over prop” any portrait, whether traditional or contemporary.
Using subtle and well-controlled lighting can help to add interest with props without drawing too much attention. In low key photography (meaning darker tones in the background and subject’s clothing choice), darker more moody props add a tremendous amount of interest. Portrait photographers who enjoy higher key work (white backgrounds and lighter toned clothing) often use white or light-colored props.
Again, the props should be selected simply to support the primary subject. They will be best received by the viewer when the attention on them is secondary.
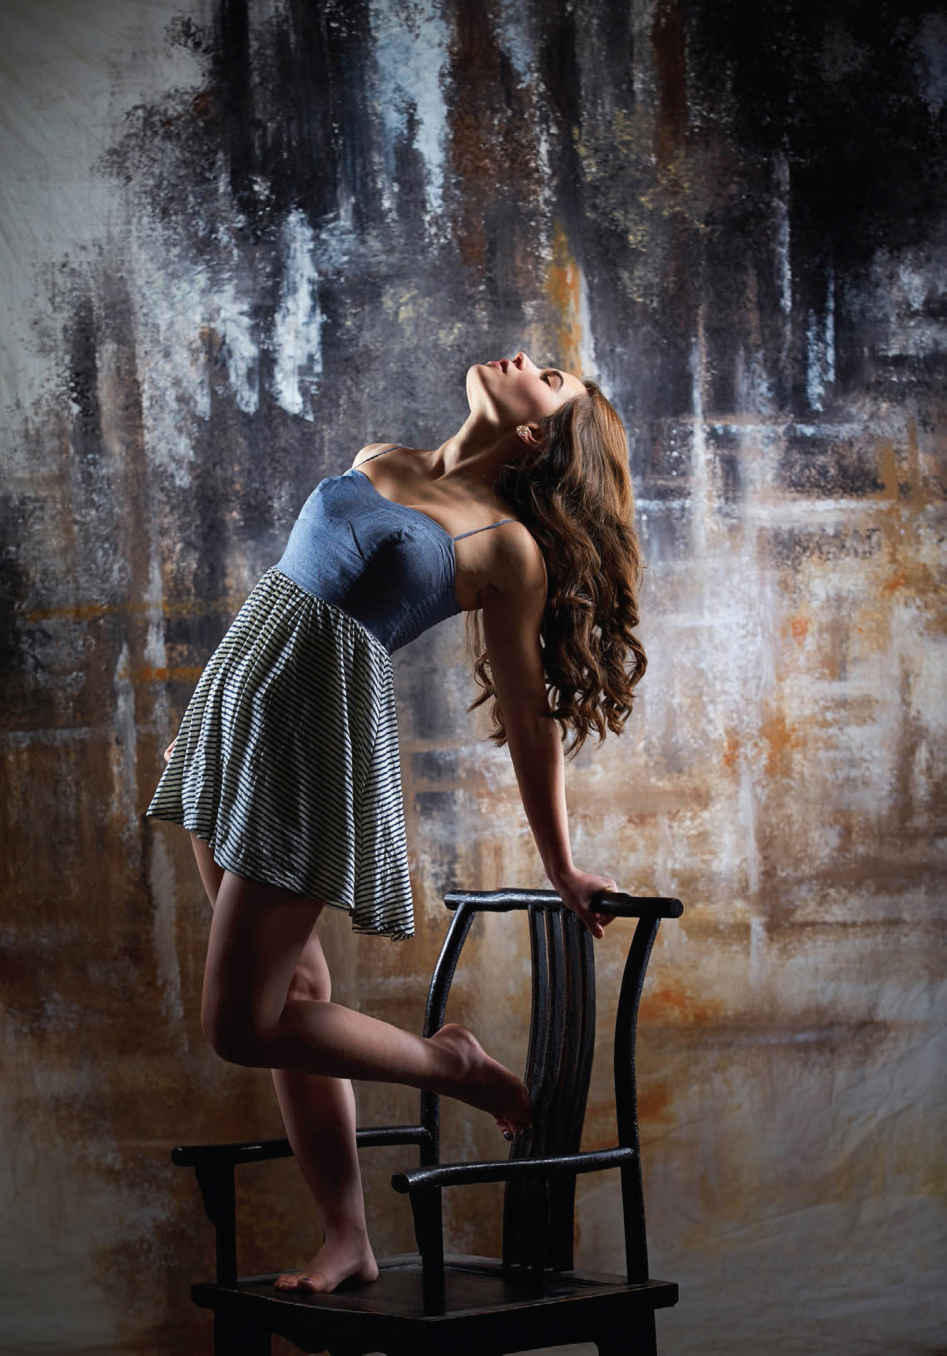
Figure 3-24. This image by Dave Junion for Backgrounds by Maheu shows another interesting background option. Notice, too, the nice use of the chair as a prop to help create this engaging pose. It adds interest without distracting from the subject.