Chapter 6
Eggs, Birds, and Rabbits
Chickens are the gateway animal to food self-sufficiency. So more likely than not, if you are reading this book, you have chickens or you’ve thought about having them, probably for their eggs. But why stop there?
Poultry suited to backyard homesteaders includes broiler chickens, guinea fowl, turkeys, ducks, and geese. Guinea fowl, by the way, are known for their prodigious appetite for feasting on ticks and other insect pests — and their prodigious ability to make noise. They are also good to eat, although better braised than roasted because the meat is tougher. Ducks are cute and are wonderfully rich eating; geese are fierce guard animals . . . oh, there’s more, but these are the most likely candidates for a backyard homesteader.
Along those same lines, rabbits are an excellent source of protein and are easy to raise. Also, as it turns out, skinless chicken and rabbit recipes are fairly interchangeable.
Although with larger animals you are likely to use a local slaughterhouse for slaughtering and butchering, with poultry and rabbits that job will likely fall to you. If you’re accustomed to purchasing your meat in shrink-wrapped packages of nice, neat cuts, you might think that working with a whole animal will be a challenge. With the right tools and know-how, it doesn’t have to be.
Chicken Eggs
The average chicken lays 5 or 6 eggs a week. Multiply that by a flock of a dozen hens, and you are looking at 6 dozen eggs a week during the peak warm spring weather. Production does slow when the chickens are getting less than 15 hours of light, or when temperatures fall below 45°F (7°C) or rise above 80°F (27°C). Still, if you raise chickens for their eggs, you will inevitably have an overabundance. How are you going to deal with this incredible bounty?
Storing Chicken Eggs
If your chicken yard isn’t muddy, and if the nests are kept clean and lined with fresh litter, and if the eggs are collected regularly, the eggs that come into the kitchen should be pretty clean. Eggs that are slightly dirty can be brushed or rubbed with a dry nylon scrub brush.
Why not just wash the eggs? When freshly laid, an egg is coated with a gelatinous outer layer that quickly dries, sealing pores on the shell to help block bacterial infections. This protective “bloom” extends the shelf life of the egg; you don’t want to lose that coating if you can help it. If an egg is really dirty, you can wash it with water that is at least 20°F (11°C) warmer than the egg itself. The water temperature is important because cooler water can allow bacteria to be drawn into the shell. Use a washed egg as soon as possible.
You can leave fresh eggs in a wire basket on the counter, lending your house a “country kitchen” charm. But charm only goes so far. According to an experiment conducted by the editors of Mother Earth News in 1977, unrefrigerated, fertilized eggs will keep for upward of 8 weeks, and unfertilized eggs a little less long. But those kept in the refrigerator will last for 7 to 8 months, a huge difference. (Those Mother Earth News editors also tested out packing eggs in sand, submerging them in a sodium silicate solution, and submerging them in a lime solution. You can find a description of the whole experiment by searching for “How to Store Fresh Eggs” on the Mother Earth News website.) The best way to extend the life of whole fresh eggs is to place unwashed eggs in a carton, pointed side down (to keep the yolks centered and the air pocket up, thus keeping bacteria away from the yolk), then place the carton in the refrigerator.
Separated egg whites and yolks can be stored in the refrigerator in airtight containers for a few days.
If your hens are laying eggs beyond your capacity to store them in the refrigerator, you may want to consider freezing them out of the shell — as whole eggs or with the yolks and whites separated. It would be great if you could freeze them in the shell, but the contents of the egg will expand when frozen and crack the shell. See Freezing Eggs for tips.
Accidently Frozen Eggs
In the winter, it is not unusual to find eggs already frozen in the chicken coop. What then? According to the USDA, if the eggshell breaks or cracks during freezing, the egg should be discarded. If not, let it thaw in the refrigerator; it is fine to use. Do be aware, though, that your cakes may not have the same rise with previously frozen eggs as they would with fresh eggs.
Fresh versus Older Eggs
Fresh eggs generally taste better than older eggs, but there are two instances where older eggs are more desirable than fresh eggs:
- When you are beating egg whites separately — to make meringues and mousses, for example, or to lighten a batter — the whites will achieve a greater volume if they are slightly older.
- When you are hard-boiling eggs, older eggs will release their shells and peel more readily than fresher eggs. However, given that the fresher eggs taste better, it is a bit of a trade-off. Losing hunks of hard-boiled white doesn’t matter so much with eggs destined for egg salad, but it does matter when you’re making deviled eggs. (If sticking shells are a problem for your hard-boiled eggs, check out the easy-peel method.)
When is an egg too old? The classic trick of seeing whether an egg floats is still a good way to check for freshness: Fill a bowl with cold salted water. Add an egg. If it sinks, it is fresh; if it floats, throw it out.
Fertilized versus Unfertilized Eggs
If your flock includes roosters, some of the eggs will come into the kitchen fertilized. I was raised to believe that a blood spot on the yolk indicates fertilization, but I have since learned that that’s not true. Instead, a fertile egg has a small white bull’s-eye on the yolk, which can easily go unnoticed. A fertile egg must be kept at a temperature of at least 85°F (29°C) for several hours in order for that spot to begin developing into an embryo. When that happens, you may be able to see some spidery red lines developing on the yolk. But use the egg anyway because it will taste the same and cook the same as an unfertilized egg. Some people think that fertilized eggs are more nutritious than unfertilized eggs, but there is no science I know of to back that claim.
Egg Sizes
I have several hundred cookbooks in my house, and every single one assumes I will be cooking and baking with large eggs. Good thing chickens can’t read, because the young ones, which tend to lay smaller eggs, not to mention certain breeds of hens, would be most offended. The eggs you collect from your flock may not be uniform in size: some may be pullet size, and others small, medium, or large.
It turns out that 1 large egg measures about 1⁄4 cup (4 tablespoons), which makes the math pretty simple. Crack the eggs into a measuring cup until you have the equivalent of whatever the recipe calls for. If a recipe calls for 1 large egg, the equivalent is 1⁄4 cup eggs. If a recipe calls for 2 eggs, the equivalent is 1⁄2 cup, and so on. Don’t sweat it if the eggs measure out to a little more or a little less. Exact measures are not necessary in home baking and cooking.
Cooking with Eggs
Somehow, Americans have pigeonholed eggs as breakfast food. This is an unfortunate turn of events, since an egg, that perfect protein source, transforms a meal of vegetables into a completely satisfying, stick-to-your-ribs feast. And if those veggies are topped with a sunny-side-up or poached egg, the liquid yolk turns into a luxurious sauce. Additionally, there are egg-based sauces that are transformative for all manner of vegetables (mayonnaise; aioli; hollandaise) and fruit (custard sauce).
The following methods are for the simple egg dishes that every self-sufficient human being should be able to prepare (look for more recipes in part 3). Figure one to three eggs per serving; timings are based on large eggs.
Hard-Boiled Eggs: The Easy-Peel Method
This is not the standard method found in most cookbooks because the standard method (put the eggs in a pot of cold water, bring to a boil, turn off the heat, leave for 10 minutes, then cool down quickly) doesn’t work as well with very fresh eggs, which are notoriously hard to peel.
- 1. Bring a few inches of water to boil in a large pot. Put the eggs in a steamer basket.
- 2. Set the eggs in the basket over the boiling water, cover, and steam for 15 minutes.
- 3. Transfer the eggs to a bowl of ice water and let cool, then crack and peel.
Soft-Boiled Eggs
There are some who say that a soft-boiled egg must be served in an eggcup, a ceramic or china cup that is specially designed to hold just one egg. When you serve a soft-boiled egg in an eggcup, you can neatly tap the top of the shell with a butter knife, lift off the top shell, then scoop out the egg and eat daintily with a small spoon. Since my homestead is nothing like Downton Abbey, I feel fine putting torn toast bits in a bowl, topping with a scooped-out soft-boiled egg, and having at it.
- 1. Bring a saucepan of water to a gentle boil.
- 2. With a pin, poke a hole in the broad end of the egg. Lower the egg into the water on a spoon or ladle and carefully release it to the water.
- 3. For large eggs, cook for 3 minutes for runny yolks and the white not quite set, 4 minutes for the whites to be completely set, and 5 minutes for set whites and set but moist yolks. (Adjust the time for smaller or larger eggs.)
- 4. Lift each egg out of the water and place in an eggcup to serve. Alternatively, run the egg briefly under cold water so you can hold it, then crack the shell and scoop out the egg into a bowl.
Poached Eggs
Temperature, temperature, temperature! There are dozens of tips on the Internet for egg poaching, but it is really all about the water temperature. The water must be barely simmering, about 180°F (82°C). Anything much higher and the rising bubbles in the water will shred the egg white. Oh, and no matter what, there will be wisps and tails of eggs. The show-offs and restaurant chefs trim and waste them; the rest of us live with them.
- 1. Start heating a couple of inches of salted water to a boil in a skillet or wide saucepan. Add 1 teaspoon of vinegar for firm whites, if you want (I don’t). The water is ready when it reaches 180°F (82°C). If you are reaching for perfection, figure out how to maintain the water at that temperature.
- 2. Working with no more than two eggs at a time, crack each egg into a separate shallow dish or ramekin. Slide each egg into the water (i.e., don’t dump them), and use a silicone spatula to coax the egg white over the yolk. Slide the spatula under the egg to make sure it isn’t sticking to the bottom, and keep gently pushing hot water over the yolk and encouraging the white to stick close to the yolk. The egg will take 3 to 4 minutes to poach, depending on the size of the eggs and whether you’re using them straight from the fridge. The goal is firm, fully cooked whites but still-runny yolks.
- 3. Lift the eggs out of the water with a slotted spoon and set them on a paper towel to drain; trim away the white feathers and tails, if you must. Then set the eggs on your toast, asparagus, hash, or whatever you are serving them on. If you aren’t serving immediately, you can hold the eggs for up to an hour and reheat in hot water for 1 minute before serving.
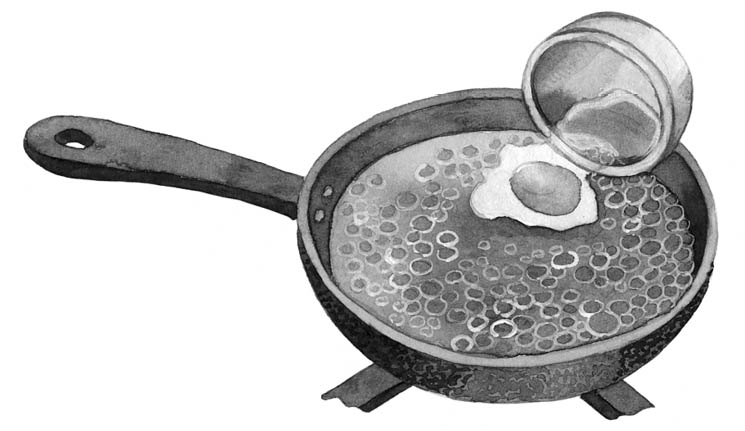
Fried Eggs
Any animal fat can be used to fry an egg. Butter and bacon grease are the classics here, but chicken, duck, or goose fat adds a luxurious flavor.
- 1. Heat a nonstick skillet over medium heat. Add 1 to 3 teaspoons butter or fat to the pan and let it melt.
- 2. Crack the eggs into the skillet. As soon as the whites begin to set, turn the heat to low, season with salt and pepper, and cover.
- 3. Cook for 1 to 2 minutes longer, until the whites are completely set. At this point, the eggs are sunny-side up and ready to serve.
- 4. If you prefer your eggs over easy, flip them over, count to 10, and then serve. If you want them over hard, turn them over and cook for 1 more minute.
Scrambled Eggs
If you like your eggs soft and creamy, add 1 tablespoon milk, cream, or water for every two eggs. If you want them more flavorful, add about a tablespoon of chopped scallions, chopped fresh herbs, chopped cooked meat, sautéed and squeezed spinach, salsa, or anything else that you want. Whatever you do, don’t forget salt and pepper. You can make scrambled eggs in as big a batch as your skillet will hold; increase the butter or fat proportionately, and expect a longer cook time.
- 1. Crack the eggs into a bowl and beat well, adding in milk, cream, or water for softer eggs. Season with salt and pepper and any other flavorings you may desire.
- 2. Place a skillet over medium heat and add 2 to 3 teaspoons of butter or other animal fat for every 2 eggs.
- 3. Add the eggs and wait until they begin to set. Then stir and cook until the eggs are as soft or firm and wet or dry as you like.
Baked Eggs
Baking eggs is a great way to prepare eggs for a crowd, if you have enough ramekins. You can add all sorts of flourishes to the basic baked eggs: sprinkle grated cheese, chopped herbs, chopped cooked bacon, and/or chopped fresh tomatoes over the cream, or replace the cream with creamed spinach or other creamed veggies.
- 1. Preheat the oven to 375°F (190°C). Butter as many small ramekins or custard cups as you have eggs to cook and place them on a baking sheet.
- 2. Spoon a couple of tablespoons of cream into each cup. If you’re cooking the eggs with any other ingredients, such as chopped vegetables, distribute them among the cups. Break an egg on top of each cup. Season with salt and pepper, and cover with a sprinkling of fresh or dried bread crumbs.
- 3. Bake for 10 to 15 minutes, just until the whites have solidified. (They will continue to cook in the ramekins if you hold them for any period of time.) Serve.
Omelets
Nonstick skillets are helpful here, but a well-seasoned cast-iron pan works just as well. Don’t skimp on the butter and don’t use too much filling; the egg is the star here. An omelet should make no more than two servings. If you are serving a crowd, make multiple omelets, one at a time.
- 1. Prepare the filling; see the box at right for suggestions.
- 2. Beat together 4 or 5 eggs with 2 tablespoons milk, cream, or water until light and fluffy.
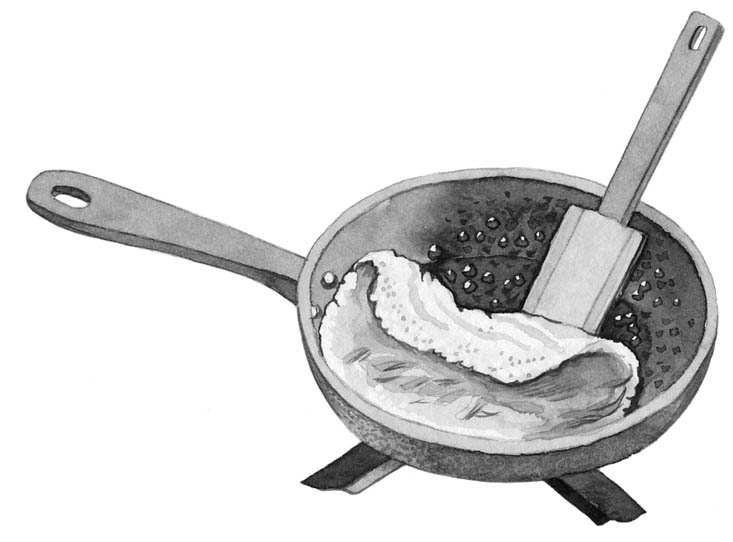
- 3. Melt 2 tablespoons butter in a medium to large skillet over medium-high heat. Pour in the eggs and let set on the bottom, about 30 seconds. With a silicone spatula, push the edges of the eggs toward the center, tipping the pan to allow the still-liquid egg to flow to the edges. Continue the pushing and tipping until the top of the eggs appears wet but not runny, 2 to 3 minutes more.
- 4. Sprinkle the filling on half the omelet.
- 5. Fold the unfilled half over. Slide out of the pan and serve.
Omelet Fillings
Here are a few suggestions. There are really no limits and no rules.
- Herbs: Sprinkle a handful of mixed chopped fresh herbs over the egg mixture just before folding.
- Cheese: Sprinkle a handful of grated cheese over the egg mixture just before folding.
- Veggies: Use any vegetables or any combination of vegetables you like; leftovers are great here. The individual pieces should be pretty small. Briefly sauté in butter and/or oil, about 5 minutes for raw vegetables, 1 to 2 minutes for already cooked vegetables.
- Mushrooms: Sauté a handful of chopped mushrooms in butter, any animal fat, or oil over medium-high heat until the mushrooms give up their liquid, about 5 minutes.
Yolks and Whites
Some recipes call for only egg whites, others only yolks. Some tips:
- Eggs separate easiest when cold (but for highest volume, beat egg whites at room temperature).
- When separating whites and yolks, use three bowls: one to catch the white as you separate each egg, one to collect all the yolks, and one to collect all the separated whites. Crack an egg over the first bowl and let the white drop into it. Dump the yolk into the second bowl, and empty the white from the first bowl into the third bowl. This way, if you should break the yolk as you separate an egg, it will affect only the egg you are working with and not the whole batch of whites. (The egg isn’t ruined; put it aside and use it for another recipe that calls for whole eggs.)
- Egg whites are most often used separately to lighten a batter or to make a meringue.
- Beat egg whites in a perfectly clean, grease-free ceramic or metal bowl.
- Egg whites beat best at room temperature and in the presence of a little acid. Acid will leach naturally from a copper bowl or can be provided by the addition of 1⁄8 teaspoon cream of tartar or lemon juice for every 2 egg whites as they begin to be frothy.
- When folding in beaten egg whites, stir in about one-third of the whites first to lighten the batter. Then fold in the remaining whites. Use a large silicone spatula and bring the batter up from the bottom of the bowl over the whites, rotating the bowl with each folding motion.
- Egg yolks are used alone to add richness to a batter or to bind a mixture such as a custard or mayonnaise.
- When adding egg yolks to a hot mixture, always temper the yolks by adding a small amount of the hot mixture into the yolks to warm them. Then add the heated yolk mixture to the hot mixture.
- Egg yolks blended with oil make mayonnaise, plus garlic makes aioli. Egg yolks blended with butter and lemon juice make hollandaise sauce. Egg yolks blended with hot milk and sugar make a soft custard sauce to use as a dessert sauce or the basis of ice cream or rice pudding.
Cleaning Up a Dropped Egg
Cooking with kids is fun, and they particularly enjoy breaking eggs. But, inevitably, one gets dropped. Just sprinkle it with a generous layer of salt, wait a couple of minutes (during which time the salt will absorb the egg), then scoop the whole mess up with paper towels.
Duck, Geese, and Turkey Eggs
When it comes to eggs, Americans tend to be chicken-centric. But if you are raising poultry for meat (or coaxing wild birds to migrate via your pond by leaving out grain), you may be able to collect fresh eggs from other birds, particularly in the spring. You may also be able to find these eggs in a farmers’ market, but not with any consistency.
Whereas chickens have been bred to be egg-laying machines, geese and turkeys lay most of their eggs in the spring, when they are most likely to be able to hatch and raise them. Turkey farmers rarely have extra eggs to sell because the eggs are their breeding stock. Duck eggs are more readily available, and there are some breeds that really excel at year-round egg production (such as Khaki Campbells and Runners).
The shells of waterfowl eggs (duck and goose) are more porous than those of chicken eggs, so bacteria can more easily enter the eggs. If the eggs are at all dirty, they should be rinsed off, again in water that is at least 20°F (11°C) warmer than the eggs. Then store in the refrigerator, not on your kitchen counter, and use promptly.
Egg Comparisons
The eggs of turkeys, geese, and ducks are larger, have larger yolks, and have a larger percentage of yolk than chicken eggs. Their shells are much stronger than chicken eggs; it is most noticeable with goose eggs, which require a good knock to break. Size aside, you can use other poultry eggs just like chicken eggs in most stovetop recipes. Scrambled eggs, omelets, and the like will be noticeably richer in flavor and darker in color when made with nonchicken eggs. Goose eggs are particularly prized for making pasta. And, obviously, a scrambled goose egg yields more than a scrambled chicken egg.
When it comes to baking, the greater proportion of yolk to white in nonchicken eggs makes a big difference. I made two pound cakes, one with duck eggs and one with chicken eggs. To compensate for the size difference I used two duck eggs to the three chicken eggs. The duck egg cake, while edible, was noticeably denser and greasier (which isn’t quite the same as richer); it clearly needed less butter and probably other adjustments as well.
Our desserts have been developed over hundreds of years with millions of bakers working with chicken eggs. In modern cookbooks, recipes are standardized to use large chicken eggs. It takes experimentation to standardize a cake recipe to another size egg, and experimenting with other types of eggs is harder still. On the Internet I’ve found swapping formulas (one goose egg for every two large chicken eggs, and other such formulas). But if you raise chickens, you know that the size of the egg varies by the age of the chicken and the breed. The same is true for other fowl, so don’t count on these formulas. At right are some weights of different eggs by type, based on eggs I have bought (or was given) and USDA standards. Unfortunately, I wasn’t always able to learn the breed of the egg-laying bird or its age.
Chicken Egg Sizes (per USDA)
Notice that there is a 1-ounce difference between pullet eggs (peewee eggs) and jumbo eggs. Bantam chicken eggs weigh about 1.5 ounces.
Other Poultry Eggs (in My Own Experience)
Notice the huge range in sizes. If you are adjusting a recipe to accommodate other poultry eggs, you can try to adjust the egg amount by weight; this will yield slightly more accurate results than just replacing the egg by volume (remembering that 1 large chicken egg equals 1⁄4 cup). You may also want to reduce the amount of butter or fat you use.
Meat Birds
Although poultry stock catalogs distinguish between layers and meat birds, on a homestead any bird that you cook, including layers you have culled and mean ol’ roosters, are meat birds.
Different types of poultry have striking similarities and striking differences. They all have relatively tender meat under an edible skin. They are all readily adaptable to most cooking methods: poaching, stewing, roasting, grilling, broiling. How to handle the differences depends, at least in part, on whether your bird is a land fowl (chicken, turkey, guinea fowl) or a waterfowl (geese and ducks). And keep in mind that a “meat” bird offers much more than just the flesh under its skin; the fat is a valuable cooking medium, the livers make delicious pâtés, and the giblets make good eating.
Land Fowl
Among land fowl, chickens are the most common in the backyard, and Cornish Cross is the most common breed because the birds gain weight so quickly and efficiently. They are designed to be slaughtered at no later than 8 weeks of age because they get so fat they have difficulty moving around. The meat is exceptionally tender and will dress out at 4 to 5 pounds. You can cook these birds any way you like, with excellent results, and they make the best roasts.
Slower-growing breeds, such as the European rouge or red types, will take 12 weeks to fully mature and dress out at about 31⁄2 to 4 pounds. It seems to me that their meat is leaner, they have proportionately less breast meat, and the carcass is noticeably longer and narrower. Many people say this meat is more flavorful, but I’m guessing they wouldn’t be able to tell the difference if both types of birds were poached and they tasted them blind. I think these leaner birds are best for poaching, braising, stewing, and red cooking).
Guinea fowl, which dress out at 21⁄4 to 3 pounds, are also leaner, with less breast meat and a longer and narrower carcass. Guinea hen meat is darker and richer tasting than chicken (some say it tastes like pheasant), and it contains less fat and fewer calories. Guinea fowl are also smaller-boned than chickens, and some breeds have heavier breasts. The average guinea fowl dresses out to 75 percent of its live weight, compared to the average broiler chicken’s 70 percent.
Young guinea fowl is much more tender than older birds. The giant guinea is a breed of guinea fowl that was developed for the meat market. It reaches about 4 pounds in 12 weeks, while other guinea fowl can be expected to weigh about 2 pounds in 12 weeks.
Butcher and dress a guinea fowl as you would a chicken. Succulent young guinea fowl can be broiled, roasted, or fried. The traditional way to roast an older guinea fowl is to wrap it in bacon and roast it uncovered at 350°F (180°C) for about 45 minutes, until the meat is tender. Then remove the bacon and run the bird under the broiler to crisp the skin. I think older guinea fowl are best braised, stewed, or red-cooked.
Turkeys are big. Commercial varieties have been bred to have large breasts, while the heritage varieties generally yield 50 percent white meat and 50 percent dark meat. Pastured turkeys tend to be juicier than commercial turkeys (lots of gravy!). They tend to cook faster than commercial turkeys.
Waterfowl
Waterfowl are fatty, and that’s what makes them so wonderful, if prepared properly. A goose will weigh 9 to 14 pounds and will provide about 1 pound of fat, which will render into close to 2 quarts of cooking fat. The goose’s liver will weigh 3 to 4 ounces, which is considerably larger than a chicken liver, which generally weighs in at 3⁄4 ounce (though the goose liver can get even larger if the bird is fed a high-calorie diet with the goal of creating a 11⁄4-pound liver). The goose doesn’t pack much meat on its bones, and an 11-pound goose will just serve five to six people. Ducks weigh in at 5 to 6 pounds, with 21⁄2-ounce livers, and will feed 3 to 4 people.
Bringing the Bird into the Kitchen
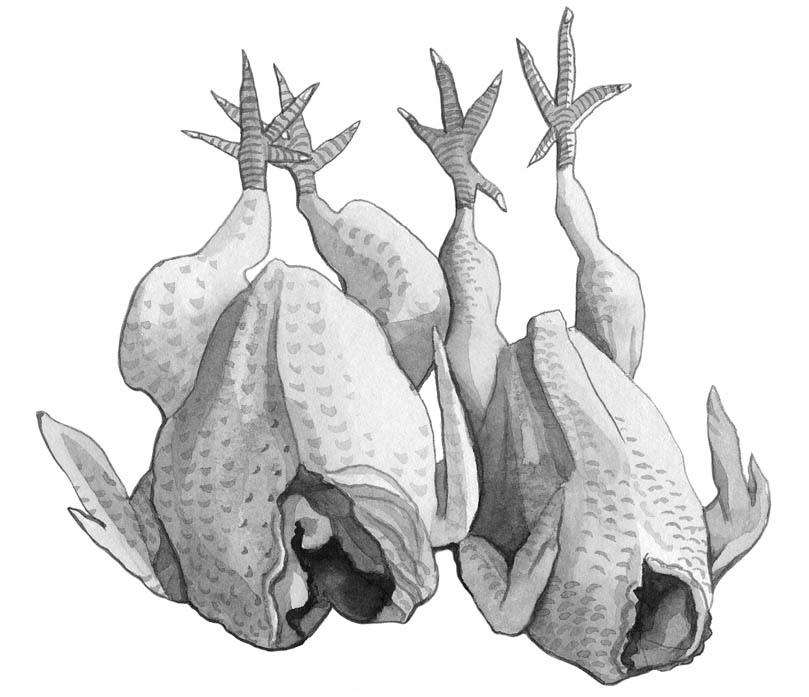
If you are raising your own birds for meat, chances are you do the butchering all at once, and most likely the birds are brought into the kitchen once they have been bled out, eviscerated, and plucked. A word about plucking: it is worth doing it right. Dry plucking is likely to tear the skin. Scalding the bird makes it easier to pluck, but the water can’t be too hot or the skin will cook. Use a 5-gallon stockpot so that you can immerse the entire bird at once. Heat the water to 145°F to 150°F (63°C to 66°C), and immerse the bird for 1 minute. You can add a drop of dish soap to help the scalding water penetrate the feathers better. You want the skin in good shape to keep the flesh from drying out as it cooks, even if you don’t eat the skin. And, hopefully, you can do this outside because it is a messy job.
The birds that come through the door should be accompanied by a container of fat and a container of edible organs (gizzards, hearts, and livers); the necks, fat, and feet may or may not be attached to the carcass. In the step-by-step sequences that follow, you’ll find instructions for processing the birds from head (well, neck) to feet, including how to cut them up, what to do with the innards, and how to render the fat. You don’t have to do everything all at once. The feet, for example, can be frozen without cleaning and then cleaned before cooking. But do make sure that everything is chilled promptly.
Whenever you’re handling raw birds, it’s a good idea to sanitize your work area first. You don’t have to steam-clean everything, but empty out the sink and clear away anything that might get splashed. Wash everything that will come in contact with the birds with hot, soapy water, then sanitize. Finally, be sure to thoroughly wash your hands both before and after handling the raw meat.
For all of the processing described below, you’ll want to have ready a lot of paper towels, freezer bags (and a vacuum sealer, if you have one) or special poultry shrink bags for the freezer, and freezer paper and tape. You’ll also need a large cutting board, a sharp knife, and, especially if you’re going to remove the backbone (spatchcock), sturdy poultry shears. A cleaver will come in handy, especially if the bird is older (not a spring chicken, so to speak), with bigger bones.
Step-by-Step
How to Handle Freshly Slaughtered Birds
Before you start butchering, you should be clear about how the job ends. You may be thinking of roast chicken for dinner tonight, but I have to tell you that an aged bird will be much more tender than a freshly processed bird. The meat should go through rigor mortis and then relax. Broilers that are 6 to 8 weeks old should age in the fridge for 24 to 36 hours. Age older birds for a full 48 hours. (That said, if you are processing young broilers, they will probably be tender enough to eat, though not as tender as they could be.)
Some people think their job is done when the bird is completely cleaned and left whole. I highly recommend spatchcocking (or butterflying) the bird for a number of reasons: it will cool faster, it will freeze faster, it will take up less space in the freezer, and it will roast faster and more evenly. Some people will want to cut their chickens into parts (see cutting a bird into parts in the section on cooking poultry, as well as spatchcocking).
Instructions
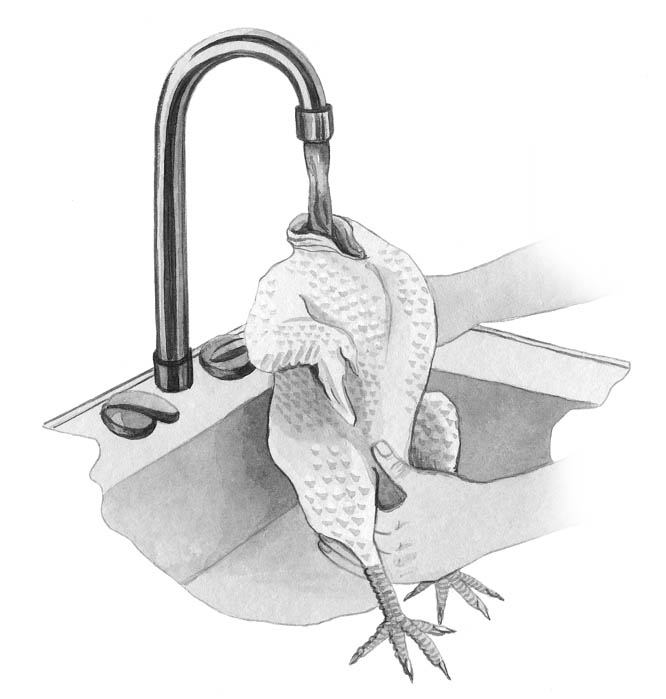
- 1. Examine and rinse the birds. Rinse each bird under cool running water with the neck end up (to flush out any remaining gunk). Blood left on the carcass will make the bird taste gamy. As you rinse, pull off any fat that you can grab. Just pull it out of the bird and collect it in a container. You’ll want to render the fat and use it for cooking.
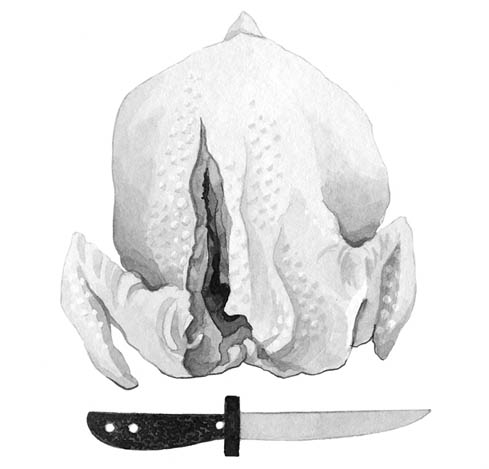
- 2. Remove the oil gland (if needed). If the oil gland, located on the tail end (pygostyle) of the bird, hasn’t already been removed, you will need to do it now. It’s the bump that is found at the top of the tail end and looks a bit like a pimple. Cut around and under it to remove it without getting the oil onto the carcass. As you cut around it, you will see the gland is yellow, unlike the surrounding pink flesh.
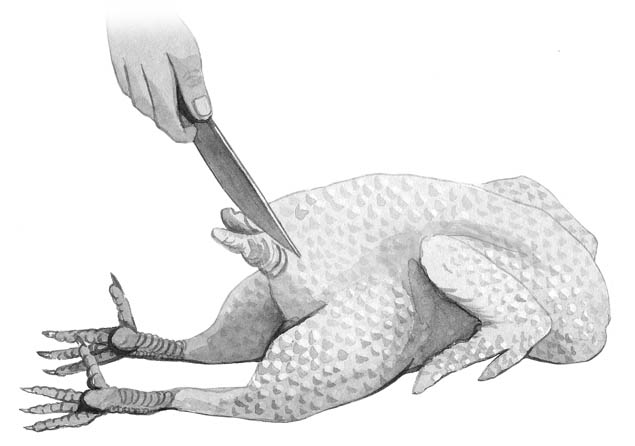
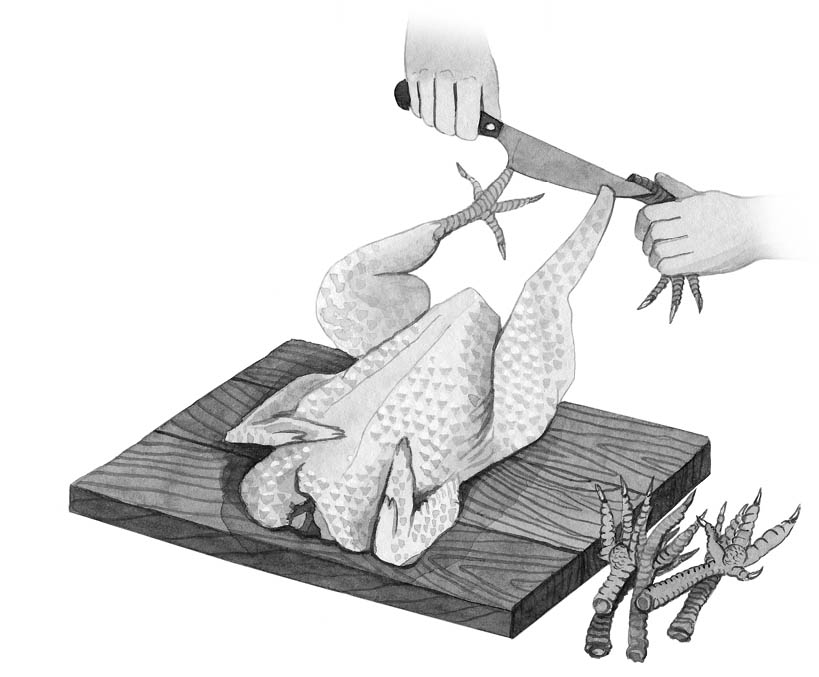
- 3. Remove the feet. The feet of land fowl make excellent stock and are well worth saving, so please don’t throw them out. (I have eaten duck feet at a Chinese restaurant, so I know that they are edible, but I’ve never cooked any or had any desire to really explore the subject. The texture of the duck webbing is exactly what you’d expect.)
Place the bird on a large cutting board. Locate the joint where the lower leg and drumstick meet. Cut through the skin and the stringy ligaments holding the joint together. You should not have to cut through bone or cartilage. It helps to bend the joint. The feet take some prep work, so set them aside until later. (See Step-by-Step How to Clean Chicken Feet for tips on working with the feet.)
- 4. Remove the neck if it is still attached. Begin by grasping the neck with one hand and use your other hand to pull the skin around the neck down. If you are very, very good with a cleaver, you can whack the neck off. If you don’t trust your aim, push the sharp point of a boning knife into the base of the neck where it joins the back until you meet the resistance of bone. Make the same cut two or three more times until the neck is loosened from the body. Now twist the neck off and set it aside for soup stock. Cut off the extra skin around the neck area and add it to the fat you’ve collected.
- 5. Final rinse and chill. Give the bird a final rinse and remove any remaining feathers. At this point, it is necessary to chill the bird. Most people chill their freshly slaughtered birds in a bath of ice water. The goal is to chill the bird to 40°F (4°C) (as measured in the breast with a temperature probe) within 4 hours for a 4-pound bird, 6 hours for a 4- to 8-pound bird, and 8 hours for a larger bird. Make sure ice and water fill the body cavity and that the chicken is completely submerged. After all that work, take a minute to do whatever cleanup is necessary. Get the gizzards, livers, and feet in the fridge. You can deal with them later — even a day or so later. After chilling, the birds are ready for the refrigerator. Pat dry with towels and seal in airtight plastic bags. Even if you plan to spatchcock your bird, give it a rest in the refrigerator until rigor mortis has passed.
Step-by-Step
How to Spatchcock a Bird
To spatchcock a bird (chicken, turkeys, guinea fowl, ducks, geese, and so on) means to remove the backbone and flatten the bird. You can use the word butterfly instead. The reason for doing this is to enable the bird to be cooked more evenly. In fact, a spatchcocked bird cooks faster and with crisper skin that is always on top and not sticking to the pan. It takes up less space in an oven and less space in the freezer because the bird ends up in a flatter package. If you package the spatchcocked bird in a ziplock freezer bag, the bird can be quickly defrosted with a soak in cold water (see Safe Thawing of Meat), whereas a whole bird frozen in a poultry shrink bag must be thawed in the refrigerator because the poultry shrink bag is not waterproof. Before and after cooking, a spatchcocked bird is much easier to cut into parts or carve. And finally, it gives you a lovely backbone for making stock.
You can spatchcock a bird at any point before it goes into the oven. Chickens are easy to spatchcock, as are ducks. Geese take a bit of muscle, and turkeys take a lot of muscle.
Instructions
- 1. Cut along one side of the backbone. Start with the bird breast-side down. Use a sharp knife to cut along the spine, beginning at the neck end. If you hit a tough spot, try cutting with just the tip of the knife. Sometimes you need a cleaver; with a goose or turkey, you will also need a soft mallet to push the cleaver through the bone.
- 2. Cut out the backbone. Use poultry shears or a cleaver to cut through all of the small bones and along the other side of the backbone. Remove the backbone and set aside.
- 3. Flatten the breastbone. Take hold of both newly cut edges and open the bird. With a turkey, you will literally be breaking bones. With a young chicken, this really isn’t necessary. Remove any large pieces of fat. Turn the bird breast-side up. Place your hand on one side of the breast, close to the breastbone, and push down firmly until you hear a crack. Repeat on the other side. (For better leverage as you work on a turkey, you may want to stand on a stepstool.)
- 4. Chill, refrigerate. If you don’t intend to eat the bird right away, wrap or bag it, seal, and freeze. The flattened birds will be easier to stack in the freezer.
You can use the backbones for making stock. If you don’t intend to do so right away, package up the backbones together and throw them in the freezer.
Step-by-Step
How to Handle the Edible Innards
Why save the giblets, livers, necks, and hearts? Because they are edible, even delicious, and you already paid for them.
Instructions
- 1. Clean the gizzards. If the gizzards have not yet been cleaned, you need to slice them open and clean them. Slice each one from hole to hole, and open it up. Inside will be grit and possibly some food. Dump this out, peel off the skin, and rinse the gizzards under cold running water. Drain on paper towels. (The gizzards can be used in soup stock as they are. But if you are planning on cooking them in a dish, you will want to remove the silverskin that connects the two lobes. This is fussy work and should be reserved until you are ready to cook.)
- 2. Clean the hearts. If necessary, place the hearts in a bowl and run cold water over them until the water runs clear. Cut away any veins or membranes. Poke the tip of the knife into the holes where the veins were and remove any blood clots. Drain on paper towels with the gizzards.
- 3. Clean the livers. The gall bladder should have been removed already, but if not, remove it carefully so that the bile does not leak out. (It is an unmistakable-looking green sac.) Rinse the livers. If necessary, place in a bowl and run cold water over them until the water runs clear. Cut away any membranes, fat, or stringy bits. Remove any black or greenish spots. Drain on paper towels.
- 4. Package and freeze. Pack up in 1-pound packages. Package the gizzards and hearts together because they are usually cooked together. Package the liver separately. If you’re not going to use the innards right away, freeze them.
Step-by-Step
How to Clean Chicken Feet
Those chicken feet (and the feet of other land fowl) that you removed from your birds are dirty! The chickens have been walking around outside, without shoes on, so who knows what’s on them? And let’s face it: those talons pretty much define unappetizing. But the stock the feet will make is worth the trouble. Here’s how to clean those dirty, scaly feet.
Instructions
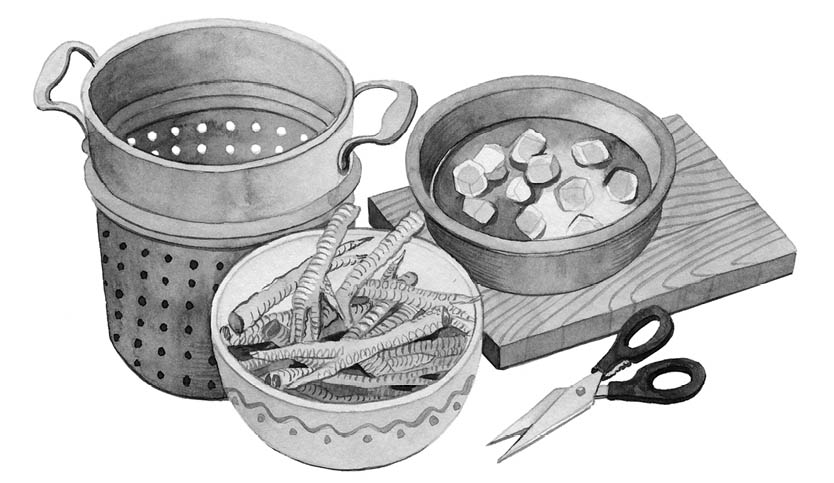
- 1. Set up for blanching and prep the feet. Bring a large pot of water to a very low boil. Set out a large metal steaming basket that will allow you to immerse the feet and then lift them all out at once. While you’re waiting for the water to heat, set a bowl of ice water near the pot. Set up a cutting board, poultry shears or chef’s knife, and a bowl to hold the cleaned feet. Put the feet in a big bowl and rub with a generous sprinkling of kosher or coarse salt. (This is optional, but I think it makes the skin easier to peel.)
- 2. Blanch the feet. You will blanch the feet for only 3 to 5 seconds. Too little time, and the skin won’t peel; too long, and the feet start cooking and the skin won’t peel. It is a good idea to blanch the feet one at a time, until you decide on the perfect blanching time for the feet you are working with and the water temperature. Then you can work in bigger batches, as big as your steaming basket will allow. Put the feet in the steamer basket, dip into the water for the allotted time, and then pull them out and immediately plunge them into the ice water. Let them sit for 5 minutes (or more) to fully cool off.
- 3. Peel. Peel the skin off the feet; it should come off easily. The only tricky part is the pad of the feet. You can use a scrub brush under running water to get any bits that are hard to peel off.
- 4. Remove the talons. Sometimes you can pull off the talons when you are peeling the feet. Those that don’t come off easily can be clipped off with poultry shears or chopped off with a sharp knife.
- 5. Bag for the freezer or cook. Figure that 1 pound of feet equals about 10 feet, and that 1 pound will make about 2 quarts of stock. If you’re not going to use the cleaned feet to make stock right away, bag them up, seal, and freeze.
Step-by-Step
How to Render Poultry Fat
You can easily render the fat from chickens, geese, and ducks for use in cooking. (Turkeys, on the other hand, are rather lean and won’t produce much fat.) Poultry fat, and especially goose and duck fat, has fabulous flavor, especially when used for roasting potatoes and root vegetables. It is also more challenging — but not impossible — to use it in baking. In the Jewish cooking traditions of northern Europe, chicken fat was often rendered with onions for flavor. In the French cooking tradition, goose fat and duck fat are more common and are generally not flavored. Either way, savory foods are delicious cooked in poultry fat.
Poultry fat is higher in polyunsaturated fatty acids than either lard or beef suet, which is why it is softer at room temperature. It is stable at high heat, and the rendered fat will keep for at least 2 months in the refrigerator or for 1 year in the freezer. After about 2 months in the fridge, though, the fat becomes rancid and has an off-odor that will be transmitted as an off-flavor to any dish it is cooked in.
Even if you are buying your birds from a farmers’ market or a supermarket, you should be able to collect enough fat to make it practical to render it. I recommend collecting chicken fat in the freezer until you have a few cups. You can do the same with ducks and geese, though chances are that you roast them more infrequently. One commercial duck will still yield 1⁄3 to 1⁄2 cup rendered fat, while one commercial goose will yield about 2 quarts.
Instructions
- 1. Cut the fat into small pieces. Some of the fat, especially from geese, is in large pieces. Cut the fat into small pieces to reduce the time it takes to render and to reduce the chance of the fat scorching.
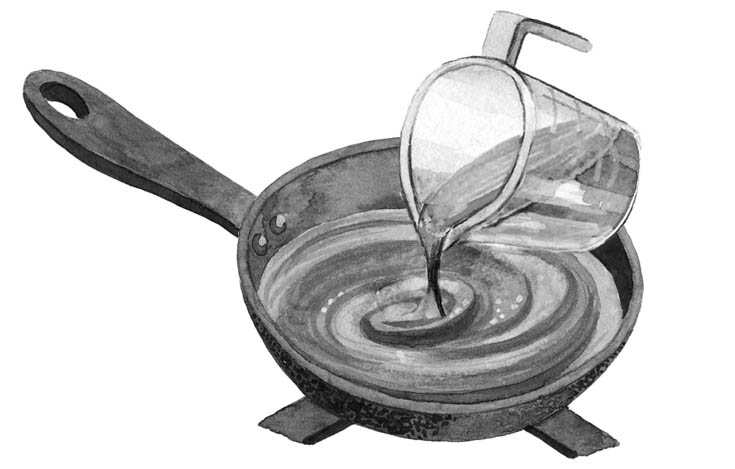
- 2. Combine the fat with water and apply heat. Place the fat and any skin scraps or the ends of backbones in a heavy, nonreactive pot, along with a diced onion, if you like. Add enough water to just cover the fat. Cook over very low heat, stirring occasionally, until the scraps render most of their fat, about 2 hours. Watch carefully during the last 30 minutes or so because the water will boil off, which could allow the fat to burn, which you do not want.
- 3. Strain and store. When the fat has liquefied, turn off the heat and let cool for a few minutes. Strain through several layers of cheesecloth, a single layer of butter muslin, or a double layer of paper coffee filters into a clean canning jar or freezer container. Cover tightly and store in the refrigerator for up to 2 months or in the freezer for up to 1 year.
- 4. Fry the cracklings. There will be bits of skin (and onion, if you used it) remaining after the fat is drained off. This is called gribenes in Yiddish; there is no real English equivalent. Like pork cracklings, gribenes are unbelievably tasty, especially if there is onion in the mix. Fry them over medium heat until crisp, then drain on paper towels. Try not to eat all of the gribenes; you can sprinkle them over salads and other dishes as you would sprinkle bacon. Store in the fridge and refry as needed to make crisp again.
Schmaltz and Other Poultry Fats
My ancestors came from Poland and Russia and kept kosher. Chicken fat was used for cooking all meat dishes; butter was used for cooking all dairy dishes. Cooking oils weren’t readily available in eastern Europe in the late nineteenth and twentieth centuries. Outside of the Jewish enclaves, people cooked with lard. Only in southern Europe and the Middle East was olive oil a popular cooking medium.
Today chicken fat, goose fat, and duck fat are enjoying a minor revival — as well they should. It is easy to render the fat to make it possible to use it for cooking. It will keep for 2 months in the refrigerator and even longer in the freezer. As for its reputation as being very unhealthy for you, see The Homestead Diet, Animal Fats, and Health; goose fat and duck fat, in particular, are possibly better for you than butter, in terms of amount of saturated fat.
Chicken fat is sometimes referred to as schmaltz, which is Yiddish for chicken fat; it has also come to mean “excessively sentimental or corny.” Jewish schmaltz is often flavored with onions, but the onion is not at all necessary.
Because poultry fat has a medium-high smoke point (higher than butter but lower than peanut oil), it can be used for browning meats and sautéing vegetables. It can be used instead of other fats in most pâtés. Goose fat and duck fat make the best roasted potatoes and roasted root vegetables, and chicken fat is used in both traditional matzo balls and chopped liver. I have done only limited baking with chicken fat, enough to learn that it does not create flaky pastries as lard does, and cakes made with chicken fat tend to be dense and greasy.
Cooking Poultry
Birds that spend most of their time walking around and scratching in the dirt — chickens and turkeys — have well-developed leg muscles, which become dark meat. Wings and breasts, which don’t get much use by these landed birds, tend to be primarily white meat, which is softer and less dense.
In some breeds the breasts are quite large, something nature wouldn’t bother to develop. Today’s commercial turkey varieties, inevitably the intensively bred Broad Breasted White, both male and female, usually have about 70 percent white meat and 30 percent dark meat. Selective breeding has eliminated white meat/dark meat gender differences, though toms still grow larger than hens. Heritage breeds of turkey and chicken and birds that haven’t been as intensely bred for commercial characteristics, like guinea fowl, tend to have a 50:50 split between dark meat and white meat.
White meat typically has a milder flavor than dark meat and is lower in fat. That makes it easy to overcook, which results in dry meat. Darker cuts have more fat and take longer to cook, so they tend to be juicier, but they also have a more pronounced taste that some people find “gamy.” Ducks and geese are all dark meat, as are quail, guinea fowl, pheasants, and pigeon (squab).
There are almost infinite ways to cook poultry. To begin, there’s roasting. Roasting is simple, but it is important to distinguish between roasting relatively lean birds (chickens, guinea fowl, turkeys), a process that includes making gravy, and roasting fatty birds (ducks and geese), whose juices you will not want to turn into gravy. Lean or fatty, I think birds roast most successfully when spatchcocked. Roasting does little to tenderize older hens and roosters, though; with them you might try making stock or braising. Poultry can also be fried, sautéed, stir-fried, poached, broiled, and barbecued.
Judging Doneness
The USDA says to cook all types of poultry to 165°F (74°C). In fact, breast meat is fully cooked at 150°F (66°C), when it is still juicy. Cooking beyond that point causes the muscle fibers to contract and allow the juices to run out. Leg meat, on the other hand, should be cooked to 165°F (74°C), or the juices will still be pink or red, and the meat won’t be as tender as it should be. When you spatchcock a bird, you’ll see that the breast meat sits taller and has more mass. The legs are splayed out with better air circulation around them, allowing them to cook more than the breasts. In this way, spatchcocking encourages the bird to cook more evenly, with breasts and legs more likely to reach doneness at the same time.
USDA cautions aside, duck breast is usually served medium-rare (150°F/66°C) in restaurants.
Test for doneness with an instant-read thermometer, taking care that the probe is not touching a bone. Test a few spots to be sure the entire breast or leg has reached the desired temperature. Also, when you withdraw the probe, the juices should run clear, not pink or red. Although duck breast meat will be tender served medium-rare, the leg meat should be cooked to the full 165°F (74°C); otherwise it will be stringy, tough, and bloody.
Step-by-Step
How to Cut a Bird into Parts
There are plenty of reasons to cut birds into parts, not the least of which is that a turkey is too big for most family meals. Although ducks and geese are all dark meat, the breasts cook in less time than the legs, so if you are harvesting these birds in batches, you may want to package breasts and legs separately. The process of cutting a bird into parts is the same for all poultry. The instructions below assume you are starting from a spatchcocked bird. If not, do that first (see Step-by-Step How to Spatchcock a Bird).
Instructions
- 1. Cut off the leg quarters. Place the bird on a cutting board, breast up. Grasp the chicken’s left leg. Pull it away from the body so you can see where the leg and hip bones connect. With a sharp knife cut through the skin to expose where the leg and breast meet. Pull the leg out as far as you can to allow the joint where the thigh bone connects to the carcass to pop out and cut through. Repeat these steps on the other leg.
- 2. Divide the thighs and drumsticks. Place the leg quarter skin-side down on the cutting board. The drumstick is the smaller part of the leg; the thigh is the larger, meatier part. Grab the thigh in one hand, the drumstick in the other, and bend the drumstick backward to expose the joint between the drumstick and thigh, which is the easiest place to cut, and cut through to separate the drumstick and thigh. Repeat these steps on the other leg.
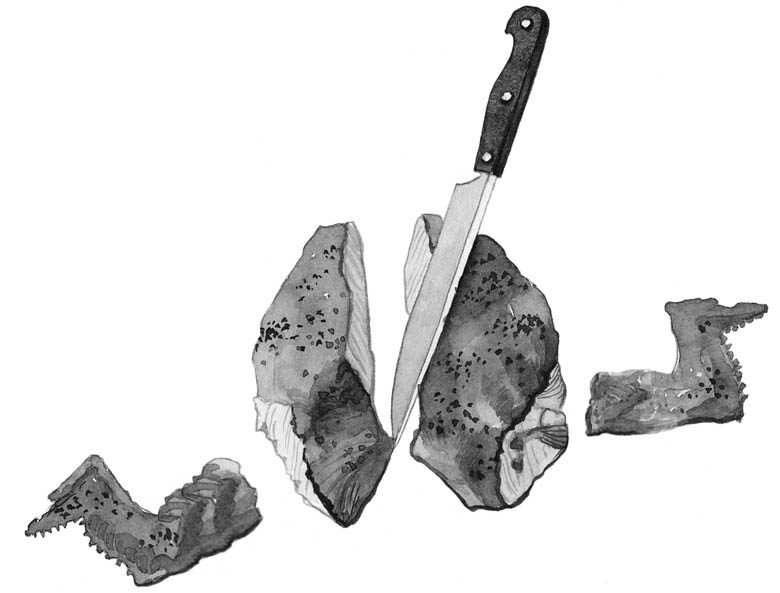
- 3. Remove the wings. Start with one wing and bend it away from the body, opposite to how it would naturally move, extending the wing. This will help you find the shoulder joint. Cut through the joint. Cut off the wing tips and save for stock. Repeat with the other wing.
- 4. Divide the breast. Turning the breast bone-side up, find the center of the breastbone (called the keel or sternum) and slice down firmly. This should slice the breast fairly evenly in half. The bone in a young chicken will give little resistance, but a turkey may require a cleaver and some muscle (or a mallet). Continue cutting until you have two distinct halves. If you like, cut each breast half in half again to equalize the size of the pieces. Repeat with the other breast half. The bird is now ready for cooking.
Step-by-Step
How to Roast a Chicken or Guinea Fowl
You can find lots of information in cookbooks about roasting birds, whether or not to stuff, whether or not you need a rack in the roasting pan, whether or not to truss. I’m going to keep it simple: try roasting spatchcocked birds to save time, to keep the skin crisp, to ensure the breast meat doesn’t overcook, and to make the carving easy.
Instructions
- 1. Preheat the oven and prepare the bird. Preheat the oven to 450°F (230°C). If you haven’t done so already, spatchcock the bird. Rub the bird on all surfaces with 1 tablespoon oil or butter. Season generously with salt and freshly ground black pepper. If you like, sprinkle with 2 teaspoons chopped fresh or 1 teaspoon dried thyme, sage, oregano, and/or rosemary. If you plan to make gravy, you can also add chopped aromatic vegetables (onions, celery, carrots, garlic) to the pan to enhance the flavor of the gravy.
- 2. Roast. Position the bird on a rimmed baking sheet or in a shallow roasting pan so that the breasts are aligned with the center of the pan and the legs are close to the edge. A roasting rack is not necessary. Roast until the thickest part of the breast close to the bone registers 150°F (66°C) on an instant-read thermometer and the joint between the thighs and body registers at least 165°F (74°C), 45 to 60 minutes for an average-size (3- to 5-pound) bird, but start checking with an instant-read thermometer after 30 minutes. (If you’re using a probe thermometer, remember to test a few different spots to be sure the desired temperatures have been reached throughout.)
- 3. Rest, then carve. Transfer the bird from the roasting pan to a cutting board, tent loosely with foil, and allow to rest for at least 10 minutes before carving. Resting is critical to allow the meat to reabsorb the juices.
Variation: Roasting a Turkey
The same method outlined for spatchcocked chickens (above) can be adapted for a whole turkey. Plan to cook the turkey at 425°F (220°C) for 20 minutes, then reduce the heat to 350°F (180°C) and roast for a total of 11⁄2 to 2 hours. Roast until the breast meat reaches 150°F (66°C) and the thighs read 165°F (74°C). If the breast reaches that temperature before the thighs, remove the bird from the oven, remove the breast, and return the thighs to the oven. The thermometer is a more important gauge than the timing.
Step-by-Step
How to Carve a Spatchcocked Roasted Turkey
A spatchcocked turkey requires a slightly different carving technique than a bird cooked the traditional way, but the basic approach remains the same: remove the legs and wings, and then slice the breast meat. The same method applies to other birds, but generally speaking, you will just cut smaller birds into individual parts.
Instructions
- 1. Cut the legs from the breast. With a sharp chef’s knife, remove each leg by cutting through the turkey where the thigh connects to the breast.
- 2. Separate the drumsticks and thighs. At the joint of each leg, cut the drumstick from the thigh. Transfer the thighs and drumsticks to a warm platter. Tent with foil.
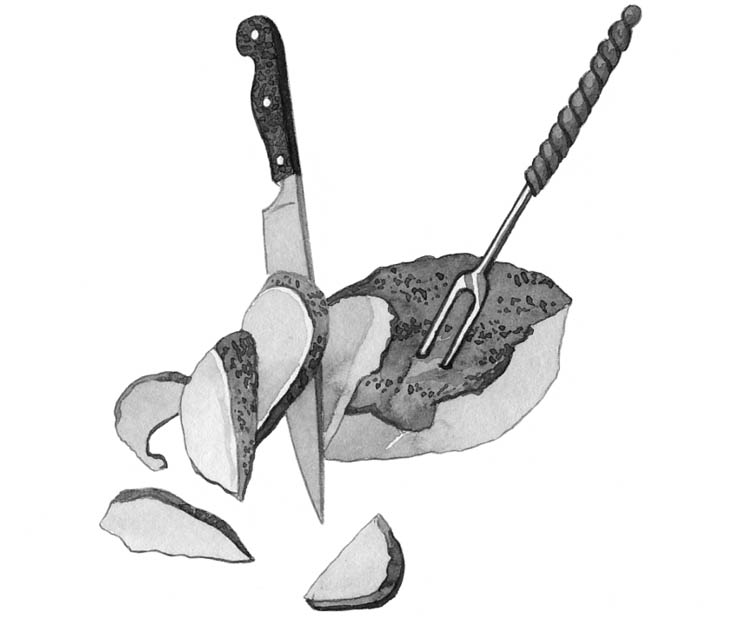
- 3. Cut off the wings and breast meat. On one side, find the joint connecting the wing and breast, and cut through it. Repeat to cut off the other wing. Cut the breast meat into two pieces, slicing with your knife along either side of the breastbone.
- 4. Slice the breast meat. Slice the breast meat across the grain. Arrange on the platter with the dark meat, and add the wings.
Step-by-Step
How to Make Gravy
A free-range bird makes fabulous, flavorful gravy, and it isn’t difficult to prepare. If you don’t have poultry stock on hand, be sure to prepare some as the bird roasts. If the bird arrived with the neck and giblets, put them in a saucepan with a chopped onion, a couple of ribs of celery, and a bay leaf or garlic clove. Cover with water and simmer for about 1 hour, then strain. Although chicken stock does not taste exactly like turkey stock or guinea fowl or duck stock, they can all be used interchangeably.
Instructions
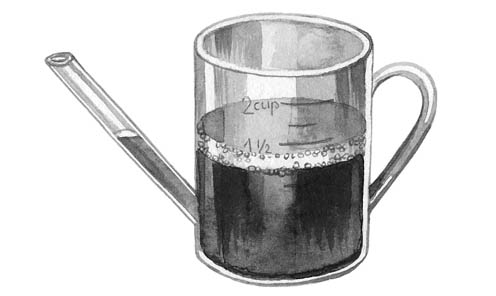
- 1. Pour out the pan drippings. Transfer the bird from the roasting pan to a rimmed baking sheet, cover loosely with aluminum foil, and set aside to rest. Pour the pan drippings (through a strainer if necessary) into a tall measuring cup or 1-quart fat separator. The fat will rise to the top and the drippings will settle. How many cups of drippings you have will depend on the type and size of the bird. Some free-range turkeys are incredibly juicy, others less so.
- 2. Remove the fat. If you have a fat separator, you can pour off the drippings to a large measuring cup, leaving the fat in the separator. Otherwise, you can let the fat rise to the top of your tall measuring cup and then skim it off. Do not discard this fat; you will need it in step 5!
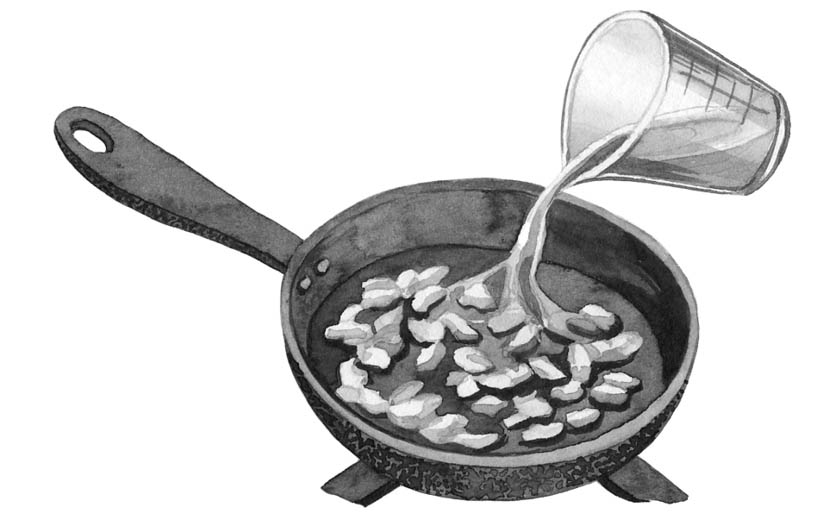
- 3. Deglaze the pan. Set the roasting pan over medium-high heat on the stovetop, spanning two burners, if necessary. Pour in 1 cup stock or water, and then scrape up all the bits from the bottom of the pan with a silicone spatula. Add to the drippings.
- 4. Do the math. Sorry, but a little math now is unavoidable. To calculate how many cups of gravy you need, figure 1⁄2 cup per serving. (Some people would say that 1⁄4 cup or 1⁄3 cup gravy per person is sufficient, but I like to be generous.) Dilute the pan drippings as needed with stock to equal the total amount of gravy you need. Leftover gravy can be frozen and served with any roasted bird, or used to enrich a soup or pot pie.
- 5. Make a roux. For every 1 cup of drippings and stock, you will need 2 tablespoons flour and 2 tablespoons fat. The flavor of the gravy is really enhanced by using the fat you separated from the drippings in step 1; you can also use butter or a combination of the two.
Add the fat to a saucepan and heat over medium-high heat. When the fat is hot, whisk in the flour to form a thin paste. Cook for a few minutes, whisking constantly, until bubbly and deeply golden brown.
- 6. Add the diluted pan drippings. Pour the pan drippings into the roux, whisking to combine. Bring to a boil.
- 7. Finish the gravy. If the gravy is too thin, cook to reduce, stirring occasionally. If it is too thick, whisk in some stock until you have the desired thickness. Taste, and add salt and pepper as needed. Serve warm.
Step-by-Step
How to Make Poultry Stock
The first time I made soup stock from an older stewing hen, it was a complete revelation. I threw the bird in a pot with a couple of onions and a bunch of parsley. I forgot my usual celery and carrots. That stock was so flavorful, it was tasty even without salt. It was probably about ten times tastier than both my normal all-dark-meat soup stock, in which I had taken such pride over the years, and my backbone-and-spare-parts stock.
The bird was an 18-month-old egg layer that had been culled from a flock. It astounds me that stewing hens don’t show up in supermarkets. Why isn’t there a huge demand for this outstanding product? It is worth raising chickens just to have a supply of old birds for soup stock.
For those of you who have never made soup stock, the process is easy and you don’t need to fuss over it while it simmers on the back of the stove for 4 to 6 hours. For the best-tasting chicken stock, use an old bird — a laying hen or rooster. Or save the parts you don’t normally eat, such as wings, backs, necks, and feet, for making stock. The greater the proportion of bones to meat (as when using all backs or feet), the more gelatin will be released to thicken the stock. When chilled, a stock rich in gelatin will be semisolid, like Jell-O. Writers in the Nourishing Traditions school of thought and followers of the Paleo diet suggest that a “bone broth” is richer in minerals and will even add vinegar to a stockpot to make the minerals more likely to leach from the bones. I don’t know about that; all I know is that a gelatinized stock is a rich and good-tasting stock — whether you call it bone broth or chicken stock (or any other type of stock). Gizzards can also be thrown in (or see The Edible Tidbits for alternative ideas for the gizzards). When buying chicken specifically to make stock, choose dark meat if you don’t have access to feet or backs. It is less expensive than white meat and more flavorful. The quantities for making stock are easily doubled. You can also save the bones of a roasted bird and use those for a somewhat less robust stock. Ducks, geese, guinea fowl, and turkeys all make good stock.
Instructions
- 1. Combine the ingredients. In a 2-gallon stockpot, combine 3 to 4 pounds of a stewing bird or bird parts or chicken feet, or a roasted bird carcass, with 1 large onion (quartered), 4 ribs celery, 4 garlic cloves, and 1 bunch parsley. Add enough water to cover (about 4 quarts).
- 2. Cook. Cover and bring just to a boil. Immediately reduce the heat and simmer gently for 4 to 6 hours, with the lid partially on. Do not allow the stock to boil (to keep the stock clear), if possible.
- 3. Strain. Strain and discard the vegetables. Remove the meat from the bones if you started with fresh bones and meat (not roasted), and save it for another use, such as chicken salad or pot pie. (Some people think the meat is too dry and stringy at this point; they may discard it or use it for pet food.)
- 4. Chill and skim off the fat. Chill the stock for several hours. Skim off the fat that rises to the top and hardens. You can use the fat for cooking or discard.
- 5. Use or store. To finish the stock, season to taste with salt. Or leave unsalted and use as a base for soups and grain dishes. Use immediately or pressure-can (see chapter 11); process pints for 20 minutes and quarts for 25 minutes. Or cool, then refrigerate. It will keep for about 3 days in the refrigerator or 4 to 6 months in the freezer.
Canning Poultry Stock
Stock, with or without meat, can be canned in a pressure canner (see chapter 11). Do not consider using a boiling-water-bath canner. I have read bloggers on the Internet who don’t like to fuss with the pressure canner, so they just increase the boiling-water-bath canning time. This is not a safe practice! No matter how long the contents of the jar are processed, the internal temperature will never rise above 212°F (100°C) unless pressure is applied, and botulism spores can survive that temperature. You need to bring the contents above 240°F (116°C), which can only be done under pressure. That’s science.
Stock vs. Broth
Is there a difference between stock and broth? It depends on whom you ask. In this cookbook, stock is the strained liquid that results from cooking meat, fish, or their bones and/or vegetables in water. A brown stock is made by roasting the bones and vegetables first. Depending on the cook, stock may or may not be seasoned with salt. I don’t salt stock because I want to be able to use it with salty ingredients and not worry about adding too much salt to a dish. Broth is seasoned stock, ready for serving. You can use the words broth and stock interchangeably. Whatever you call it, just be aware of whether the liquid has been salted or not.
Tips for Cooking Roosters and Older Birds
Roosters and older birds, such as unproductive laying hens, don’t take well to roasting. Dry heat makes the meat almost too tough to chew. But take your time with them, and they will make exceptional fare. Roosters differ from older hens in that they have sturdier bones (harder to cut), more cartilage, and denser muscles. Also the breasts are much smaller, and there is a greater proportion of dark meat. But the cooking rules remain the same.
- Let the bird age in the refrigerator for 2 to 4 days. You can keep it in a container of water or just wrapped in plastic (after washing and drying well).
- Marinate for at least 12 and up to 48 hours, if you are planning to eat the meat. This isn’t necessary if you are simply making stock. Any marinade will do; coq au vin is traditionally made with an old rooster (the coq) and marinated in red wine (the vin).
- Cook long and slow. In a Dutch oven with a lid, cook at 200°F/95°C for at least 6 hours, or until the meat is falling off the bone. The manual for my slow cooker says high equals 212°F/100°C, low equals 200°F/95°C, simmer equals 185°F/85°C, and keep warm equals 165°F/74°C. If you are going to use a slow cooker, it is worth checking to make sure that low is the proper temperature; many run higher than that.
- Old birds vary! This is not a standardized piece of meat. Do not plan to serve the day you are cooking the bird, unless you plan to start very, very early in the morning. Far safer is to cook the bird a day in advance and give it as much time as it requires to become tender. Then skim off the fat, reheat, and serve.
The Edible Tidbits
The edible tidbits of poultry include the neck, liver, gizzard, and heart. There are numerous ways to cook each.
Neck. Necks are mostly bone with meat clinging to it. They can be thrown into any stew or braise if you don’t mind eating with your hands and putting a lot of effort into getting a little bit of meat. I think they are best suited for stock. Save them up in a bag in the freezer until you have a few pounds, and then make stock.
Liver. Either you love it or you hate it. If you don’t know where you stand on liver in general, start by sampling poultry liver. To prepare poultry liver for cooking, remove any greenish or black spots and any fat or membrane. Rinse well under running water to remove all traces of blood. If necessary, put the livers in a bowl and run cold water over them until the water runs clear. Then pat dry. Pan-fry livers in butter over medium heat until they are seared on the outside but still pink inside. That’s it. Or dress it up with a little onion, garlic, and/or fresh thyme. This is the basis of some incredible pâtés and, of course, Jewish chopped liver, which is a rustic pâté by another name. You can also turn the liver into a pasta sauce, sautéed with onions or bacon or both.
Gizzard and heart. No matter how you prepare these mild-tasting morsels, they are going to be chewy. Those who don’t like gizzard or heart generally have an issue with the texture, not the flavor. If you are among the texture protesters, use them in soup stock and then discard. However, they can be cut into small pieces and stewed or braised; I like them red-cooked. They can be poached in water or stock until cooked through; then thinly sliced, battered, and deep-fried, or they can be thinly sliced, marinated in buttermilk, then coated with crumbs and deep-fried. Or after poaching, you can chop finely and add to poultry stuffings or gravy. Before cooking, remove any membranes, fat, or darkened spots and rinse well.
Step-by-Step
How to Roast a Duck or Goose
When it comes to cooking them, ducks and geese provide unique challenges because they are so fatty. Of course, this is a good thing. An 11-pound goose may yield as much as 3 cups of delicious fat. The trick when roasting a duck or goose is to render out all the fat so that the meat is tender but not greasy and the skin is crispy.
Another challenge is that the breast meat is tender when it reaches 150°F (66°C), but the legs are tender at 165°F (74°C) or higher. You’d think the breast meat would therefore be white, as with chickens and turkeys. But no, all the meat from these birds is dark and quite rich. You can get around this problem by removing the breasts from the oven before the legs.
Low-temperature roasting works best with these fatty birds. Roasting at a high temperature causes the fat to smoke and set off smoke alarms. Be aware, however, that roasted ducks and geese are never as tender as chicken and turkey.
Fruity sauces (including cranberry sauce) make the best accompaniments because they help cut the richness.
Instructions
- 1. Prep the bird. Preheat the oven to 325°F (165°C). If you haven’t done so already, spatchcock the bird. Remove the wing tips and save for stock. Remove and save excess fat from the body cavity and neck. Remove and save any excess skin around the neck area. Score the skin (do not slice into the meat) and prick the skin all over with a needle or the tip of a sharp knife.
Place the bird skin-side up on a rack in a roasting pan and pour boiling water over the bird to tighten the skin. Leave the water in the pan (to prevent the fat from smoking), but pat the bird dry. Rub all over with salt and pepper.
- 2. Roast. Roast the bird for about 45 minutes (small ducks) to 60 to 75 minutes (larger ducks and geese). Test the temperature of the breast meat with an instant-read thermometer. When the breast temperature reads 150°F (66°C), remove the breasts. Place the breasts under a tent of foil and return the legs to the oven to continue to roast for about 15 minutes more, until the meat in the thickest part of the thigh reads 165°F to 170°F (74°C to 77°C). The temperature is more important than the timing, so put your trust in the thermometer and allow yourself extra time. (If you’re using a probe thermometer, remember to test a few different spots to be sure the desired temperatures have been reached throughout.)
- 3. Rest. Rest the thighs under a tent of foil for at least 15 minutes. The fat in the roasting pan can be strained and saved in the refrigerator; it is already rendered.
- 4. Crisp the skin. Meanwhile, if needed, run the breasts under the broiler for a few minutes to make the skin crisp.
- 5. Carve. Slice the breast meat and separate the legs and thighs. Most of the meat will be in the breasts.
Rabbits
I wanted to call this chapter “Eggs, Birds, and Bunnies.” But we don’t like to think about eating bunnies, do we? In fact, if the bunny connection is very strong, rabbit will be a tough sell at the dinner table.
Rabbit is easily compared to chicken, more because of size than flavor. It is also like chicken in that you probably will have to slaughter and butcher the rabbit yourself, in which case it won’t arrive in your kitchen all neatly vacuum-bagged and ready for the freezer.
You can compare the flavor of rabbit to that of dark-meat chicken, but it is actually closer in flavor to squirrel. Unless you happen to have a hunter in your house, this comparison will be meaningless, so let’s stick with the chicken metaphor. Because rabbit is leaner and less meaty than the chicken, the meat is more likely to be tougher, bonier, and drier. Some pieces are meatier than others and will cook more slowly. All the meat is dark.
If you are raising rabbits yourself, you might want to harvest the animals in batches and freeze all the hind legs together (the meatiest parts), and everything else together (a lot of bony parts). This gives you the opportunity to cook a batch of rabbit parts to the same degree of tenderness and doneness. Even if you are freezing single animals, you may still want to cut them into pieces before you cook them. Some people save only the hind legs and discard the rest. You also want to be sure to harvest your rabbits young, certainly before they are 6 months old. The older the rabbit, the tougher the meat.
Cooking Rabbit
As with all other animals, make sure the rabbit rests in the refrigerator for at least 24 hours after slaughter. Cook rabbit like skinless chicken. It does best in stews and braises. It can also be soaked in buttermilk, coated with crumbs, and deep-fried. If you want to roast it, wrap it in bacon first.
Step-by-Step
How to Cut Up a Rabbit
Anytime you are handling raw meat, it is a good idea to sanitize your work area and equipment with a sanitizing solution. Rinse the animal under running water in the sink and pat dry. Remove the head, if it is still attached, and any membranes, silverskin, and clotted blood. Then gather your tools and you are good to go (if your cutting tools are sharp; if not see Step-by-Step How to Sharpen a Knife).
Instructions
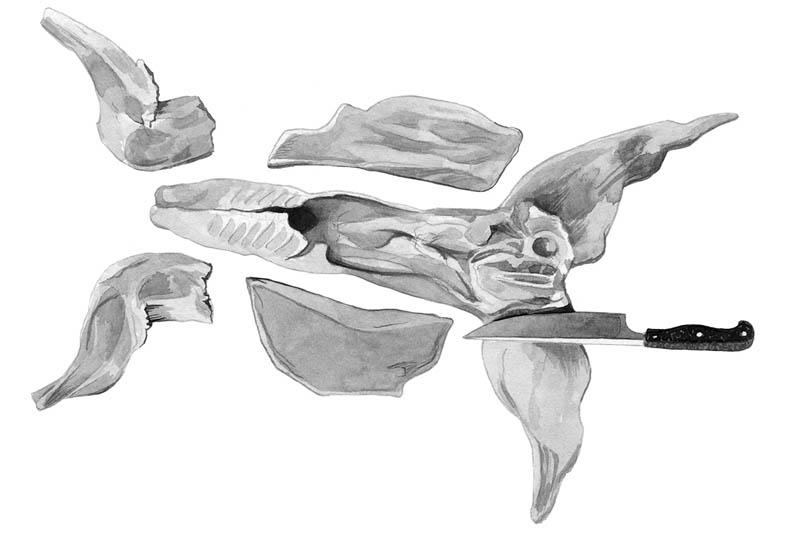
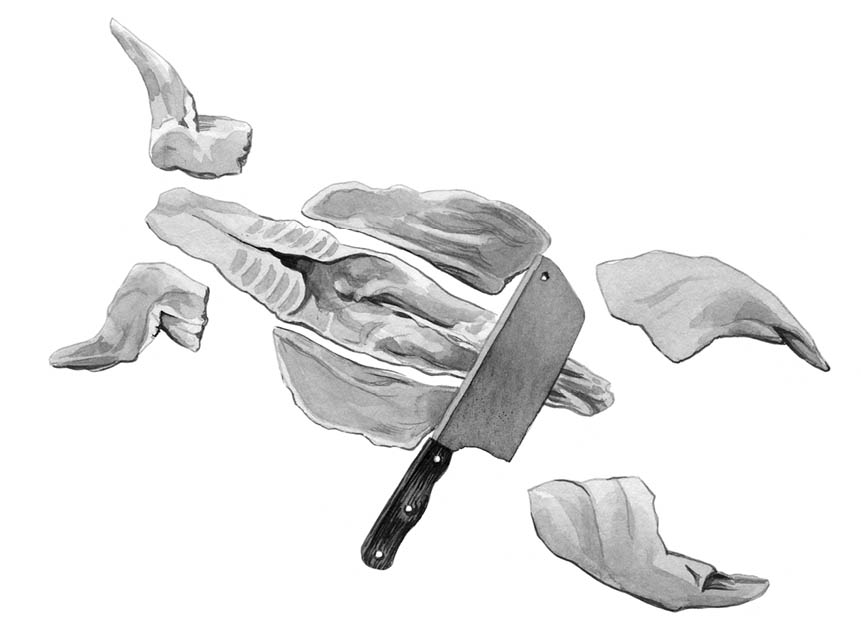
- 1. Remove the forelegs. Place the rabbit on its side so that one foreleg is up. Pull the front leg away from the body to identify the natural seam where the leg is attached (by flesh, not by bone). Cut through the seam, keeping the blade of your knife against the ribs and pulling the foreleg away from the body. Repeat on the other side.
- 2. Remove the flank. Turn the rabbit over onto its back. Identify the flank, or belly meat, which is a thin muscle that is attached to the hind legs and runs up along the sides. With a boning knife, cut the flank away from the body and slice along the line where the saddle (or loin) starts; then run the knife along that edge to the ribs. When you get to the rib cage, you can cut the meat off the ribs, as far as you can go, which is usually where the front leg used to be.
- 3. Slice off the hind legs. With the rabbit still on its back, cut into the flesh along the pelvic bones until you get to the ball-and-socket joint. When you do, grasp either end firmly and bend it back to pop the joint. Then slice around the back leg with your knife to free it from the carcass.
- 4. Divide the loin. The loin is left. Remove as much silverskin as you can. Chop the loin into serving pieces with a cleaver, smashing through the spine.
Woodchuck: Tastes Like Rabbit
If you garden anywhere from eastern Alaska, through much of Canada, into the eastern United States and south to northern Georgia, you have probably had a problem with woodchucks. One solution is to shoot and eat them. Every gardener in the area will thank you. (You could just kill the woodchucks, but most hunters feel pretty strongly that whatever you kill, you must eat.) I would rather eat a woodchuck than share my garden with one, so if my son is willing to shoot a woodchuck that trespasses on my garden, I will cook it.
Woodchucks, for all their mass, don’t yield much meat. They average around 2 pounds after the fur and organs are discarded. A 2-foot critter is mostly just voracious appetite and fur. It should be noted that woodchucks, as well as most other small food animals such as squirrels, have scent glands that should be cut out as soon as possible to avoid tainting the meat. When dressing woodchucks, look for and carefully remove without damaging any small gray or reddish-brown kernels of fat located under the forelegs, on top of the shoulder blades, along the spine in the small of the back, and around the anus.
Woodchuck can be cooked like rabbit, which is why I mention it here. Any way you would cook a rabbit, you can cook a woodchuck. You can also adapt your favorite beef stew or chicken gumbo recipe. I understand Southern-fried woodchuck is perfectly fine, but I prefer my woodchuck cooked until it is no longer recognizable. But that’s just me.
