

Undergarments are a pretty ridiculous concept, if you really think about it. Why are we meant to wear a special set of clothes underneath our regular clothes? (I guess for, like, sanitary reasons and stuff?) I’m not saying that I think you should go without undergarments, but I do happen to think that everything you thought you knew about bras, slips, and underwear is actually wrong, wrong, wrong (but especially about bras).
I am pretty staunchly anti-shapewear, at least when it’s used to make one look “skinnier.” Because it really doesn’t! Sausage still looks like sausage, even when it’s in a casing. The whole idea of these horrifically constricting undergarments being necessary is a giant, cruel joke that we’ve all been happily seduced into spending millions upon millions of dollars on. The actors I dress regularly show up to fittings with their own personal undergarment “rig”—a frighteningly restrictive amount of spandex and Lycra meant to squeeze, tuck, mold, and reshape their natural assets into whatever Hollywood is currently deeming “acceptable.”

I put actors (both male and female!) in a modified version of shapewear for only two reasons—smoothing and coverage. Smoothing as in not having any bulky, lumpy seams visible under clothes, and coverage as in having their lovely cheeks remain covered, should they find themselves with skirts suddenly up over their heads. When I really do need to put someone in a sleek, long-legged control garment, I always buy a size up from what the size chart suggests in order to avoid death by slow lower-body asphyxiation.
You may be surprised to learn that I hit up the lingerie departments of discount and department stores for old-school girdles and cute granny panties instead of blowing my cash on name-brand “slimming” shapewear. Because despite what you may have heard, the idea that granny panties are some horrible, shapeless, floral cotton things that only unsexy women wear is totally false. The classic 1950s style high-waist panty is easily one of the sexiest lingerie looks going! Its lines echo the natural shape and folds of the body and provide a long, smooth, uninterrupted line underneath clothes. The full bottom coverage is extremely coquettish and comes in quite handy if you encounter a giant gust of wind or just happen to be a bit unladylike when you sit or bend over.
My other secret shapewear substitute is a plain old pair of cotton or microfiber bike shorts. They cover all the bases—protecting thighs from rubbing themselves raw due to chafing (sometimes known as “chub rub”), protecting cheeks from possible prying eyes, and stopping panty lines in their tracks. They are at least twenty times more comfortable than traditional control garments, and a pair of lace-trimmed bike shorts can also look ridiculously cute peeking out from the hem of a skirt or dress. But beware the waistband and front seam on most bike shorts, which will show like crazy underneath a sheer or tight skirt.
Both granny panties and bike shorts manage the job of covering your lady-bits for less money than traditional shapewear—and without stopping the flow of blood to your lower extremities or rolling down around your waist like a cartoon window shade that’s about to cut you in half. And best of all, you aren’t forced to pee out of a small hole as with most shaper garments—which is a shameful experience, no matter how you try to spin it. I was once part of a costume crew tasked with taking care of a big-name actor who loved to wear a full-body shaper suit at all times. Every single time she had to use the bathroom, it was a huge, dramatic production that I had to help with. Fourteen hours into an eighteen-hour day, said actor nonchalantly announced to me from the other side of the bathroom door that she had accidentally wet herself—and could I please have someone bring her backup bodysuit from the wardrobe trailer?
The trailer was an incredibly inconvenient, fifteen-minute van ride away. I dutifully sounded the alarm and got word within minutes that a costumer was already on the road, burning rubber toward the set with the spare bodysuit. In the meantime, I had the entire production hysterically freaking out on me over the walkie-talkie headset I had jammed into my ear, wondering where in the hell their star was. I put them off and made excuses until I could no longer stand it—at which point I politely excused myself from the bathroom, stepped outside, and calmly announced to the entire production over a wide-open walkie channel: “She pissed herself, okay? I’m doing the best I can.” The line was silent for almost a full minute until finally our assistant director came on and said, “Copy that! Let me know when you’re all cleaned up.”
The moral of this story is not to find yourself in this situation in the first place—because when peeing through a hole goes south in the real world, you’re not going to have a fancy Hollywood costume designer at your side to help. You’ll be stuck cramming your urine-soaked shapewear garment into your handbag and slinking home.
Panty lines are the number one undergarment problem I’m asked to solve, by actors and readers alike. If you don’t actually care about this problem, you’re in pretty great company! I once asked an actor if she wanted a thong, and she told me that, in fact, she loves a visible panty line. As she said to me: “I want people to know I’m wearing underwear! Can you imagine if they thought I wasn’t?”
Panty lines are almost always caused by the intersection of too-tight elastic and your backside—so choosing underwear with nonbinding edges that don’t cut into your flesh is obviously the best, easiest way to eradicate them. This immediately lessens the pressure of the elastic, giving you a little more breathing room and resulting in less visible skin indentations where the underwear’s seams are. But the best panty line defense is really a good offense—and that means getting your underwear seams to cleverly hide themselves in the neat little shelf your butt cheeks naturally create. This is where a full-coverage garment (like the much-maligned granny panty) saves the day. When the seams and elastic follow the natural curves of your body, they disappear—and never expose themselves in the harsh light of day.

A thong is also an obvious fix for visible panty lines, but who really wants a piece of razor wire stuck up their bum all day long? If you simply must wear a thong with that one particular pair of pants, I say maybe don’t wear that pair of pants! I’m kidding, obviously—if something really requires a thong, save yourself a ton of heartache and reach for a pair of Commando brand thongs, invisible under absolutely everything and ultrasoft on your backside. I also recommend seamless boy shorts or bikini-style underwear for actors who don’t want to hop on the granny-panty train. They have raw, unfinished edges that create zero bulk under clothes—making them really, truly invisible.
Mind you, these are only suggestions. The actual right pair of underwear for you is the one that always stays firmly in place with no creep up factor. So when you finally find it, stock up! All your underwear should make you feel great, because life is hard enough already. Did you know that the average woman spends about sixteen minutes per day pulling her underwear out of her backside? Just imagine what you could get accomplished if you had those sixteen minutes back! (I actually just made that figure up, but I’d be willing to bet I’m pretty darn close to correct.)
If you suddenly find your panty line is ruining an outfit (and you don’t have any other options), you can try very carefully snipping the seams of your underwear at the sides (on your lower hip) to release the pressure of ultrarestrictive elastic digging into your flesh. This trick cuts visible panty lines in half instantly, but it’s a true “emergency-only” fix, as said underwear are now rather unsightly. However, it will last as long as you want it to; nylon (like most synthetic fibers) doesn’t tend to unravel.
In the last twenty years or so, slips somehow fell almost totally out of fashion. It’s a travesty, because a wardrobe of inexpensive slips is one of the most useful things you can have in your lingerie closet. If you’ve ever stepped out of your house and only later realized that your dress was (whoops!) sort of see-through, well, you should’ve worn a slip. I’ve dressed reams of teenaged actors (they are actually my specialty), and every time I have a slip on the rack for one of them, she will laugh and say: “Ew, I’m not a grandma!” Then she gets into the habit of wearing one, and her life is changed for the better, forever.
In addition to keeping your dresses from being too sheer, a good slip can also help your clothes lie properly so they don’t cling unflatteringly or ride up on your body. I wear a slip under almost every skirt or dress I own simply because it eliminates the dreaded “skirt stuck in butt” problem I see on the street far too often. A lot of inexpensive dresses are either unlined or have a cheap lining that bunches up and doesn’t do you any favors, so the slinky anticling layer a slip provides is a godsend. If your favorite skirt or dress has a useless lining that twists and bunches uncomfortably, just cut it out with a pair of scissors and pop on a half-slip! And if you have an issue with always seeing shirt hemlines right across your bum when you tuck a shirt into a skirt, a good compression slip (think shapewear material, but in slip form) will solve the problem immediately; it gives you a firm underlayer to tuck your shirt into, hiding the seam handily. (But honestly, the only real solution to shirt hemlines that are visible through your pants or skirt is to have the shirt hemmed so the tail hits you right in the curve of your lower back, where it becomes practically invisible—head over to chapter 3 for more on brillant alterations like this.)
I personally own and wear a ton of twelve-inch, low-rise, superstretchy microslips that are invisible underneath even the shortest of skirts. If you can’t find a microslip in a pinch, just whip out a pair of scissors and convert any ancient slip you already have in your closet into a one. Nylon doesn’t unravel, so you really don’t even need to hem the dumb thing. A slip also helps when your overloaded handbag hikes your dress up on one side and exposes your underpants to the world. (Women in New York City who are forced to carry tote bags containing their good “going out” shoes while wearing their comfy walking shoes, I’m looking at you.) Slips keep your assets covered and cut down on wolf whistles from creepy passersby. A slip with an interesting, decorative hem can also help to lengthen a skirt that is a wee bit too short—or add some flair to a boring one. Plus—and this is the very best part of wearing a slip—when you get home at night and take off your clothes, you’re already wearing part of your pajamas!
Why do you think those groovy babes of the 1960s originally wanted to burn their bras? Yes, for equality and all, but mostly because bras are terrible torture devices! Take a seat and get comfortable, because you are about to read a bra manifesto. The whole world is obsessed with breasts—so how could any bra discussion be short, sweet, and to the point?
I once worked with a very large-busted teenage actor who told me horror story after horror story of costume designers strapping down her breasts with a compression bandage in order to hide them on camera. (She was meant to look thirteen, but Hollywood also just loves to punish beautiful, well-endowed young women who don’t fit the “perfect” body mold.) I was stunned when I heard this, because her “problem” could easily have been fixed simply by putting her in the right bra.
But those three little words—“the right bra”—carry a ton of baggage with them. What is the “right” bra, anyway? The answer is as varied as the number of bodies there are in the world—because no one bra fits every person the same way. That doesn’t mean that your particular body is somehow wrong; it just means you haven’t found something that suits you yet. Bra shopping is the ultimate challenge for some of you, but trust me: taking the time to find a bra that fits you properly is a worthwhile endeavor. It will make every garment you have in your closet look, fit, and feel better than you could ever dream possible.
All that poor, large-busted teen actor really needed was to wear a volume-minimizing bra. They are a great way to play down what nature gave you, and also work wonders for those tops in your closet that could use a little extra help to close. A volume-minimizing bra really just shapes what was once a mountain of boob into a smoother, more manageable breast hill—using the exact same amount of dirt. No cruelty needed!
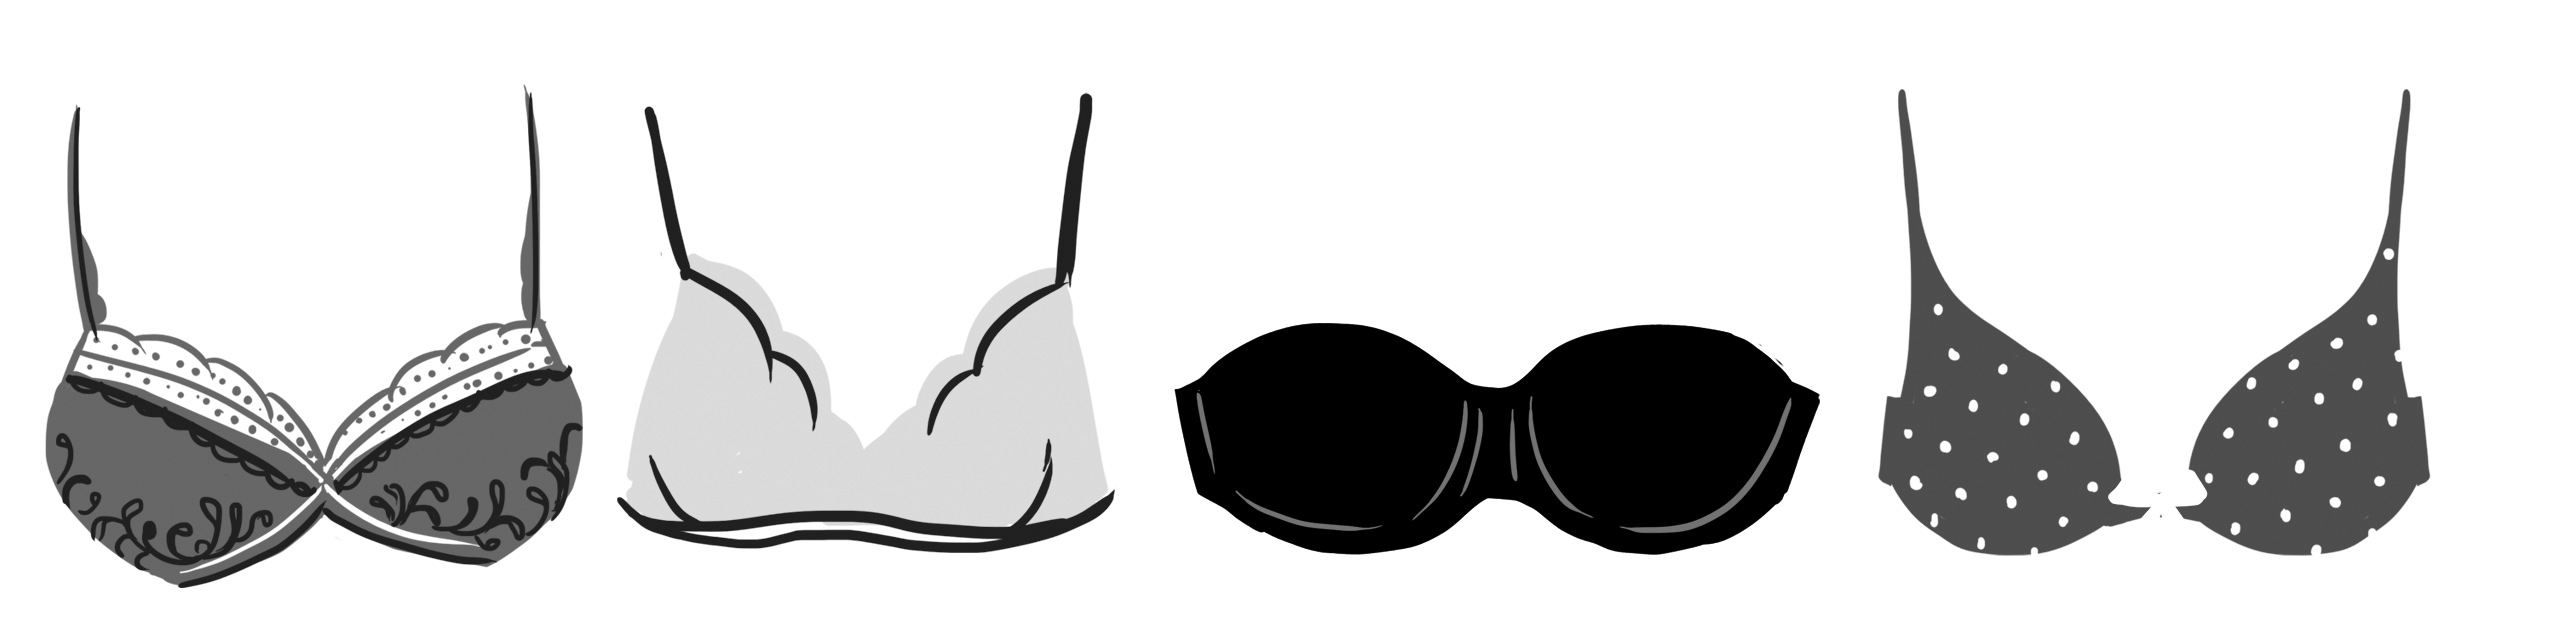
If you are confused by all the styles of bra available, I’m not surprised—because there is really no standardized system of categorizing bras in the first place. Coverage, fit, and functionality vary greatly from manufacturer to manufacturer, resulting in more styles than you can shake a stick at—but I’m going to take a crack at listing all the ones you’re most likely to come across.
ADHESIVE OR BACKLESS: A bra without straps that attaches to the underside of each breast and stays in place with medical-grade adhesive. Some adhesive bras incorporate silicone cups that pad and lift the breasts.
BALCONETTE: Also known as a shelf bra, this is a more revealing version of a demi-cup bra. While they offer little to no coverage, balconette bras are good for sweetheart necklines and tend to create dramatic uplift and cleavage. Balconette bras are so named because the shape of the cups is in fact a “little balcony” for each breast.
BANDEAU: A strapless band of fabric that covers the breasts. A bandeau is ultrastretchy and usually does not have built-in cups, making it a light, comfortable option for small-busted women who don’t have aggressive nipples. (Larger-busted women will find a bandeau doesn’t even begin to offer enough support.)
BRALETTE: An unlined, soft-cup, pullover style bra. Sometimes resembling a crop top, a bralette gives only very light support and is a comfortable alternative to traditional bras for smaller cup sizes.
BUSTIER/LONG-LINE: A highly structured undergarment that extends from bustline to high hip, distributing breast support over the entire lower torso instead of at the shoulders. This style of bra commonly closes at the back with a column of hooks and eyes and usually has flexible boning to help maintain its shape and stay wrinkle-free under clothes. Bustiers and long-line bras are perfect under special-occasion garments because they provide shaping, support, and lift without visible straps.
CONTOUR: A bra with shaped cups that mimics the natural shape of a woman’s body. They often have an underwire and are usually padded or foam lined. The contour bra is the perfect choice for any woman seeking a highly sculpted silhouette, because they offer a significant amount of coverage and control.
CONVERTIBLE: A bra with detachable straps that can be reattached in a myriad of ways, depending on the needs of a particular garment. It’s basically five bras in one; a convertible bra’s straps can be arranged in a one shoulder, criss-cross, strapless, halter, or low-back formation.
CORSET (OVERBUST): A form-fitted support undergarment meant to slim and shape the torso, waist, and upper body to emphasize a curvy figure. A proper corset is made by a professional corsetmaker and is often fitted specifically to an individual’s body. Corsets are tightened or loosened via laces at the back of the garment and often use a hook closure system at the front of the garment called a busk.
DEMI-CUP: A bra that covers half to three-quarters of the breast and extends about one inch above the nipple. This partial-cup style is designed with a slight tilt, which pushes the breasts together, creating a cleavage-enhancing shape. These bras offer less coverage than a contour bra but more than a balconette and are best for women in the A to C cup range.
FULL-CUP/FULL-FIGURE/FULL-SUPPORT: Full-cup bras completely cover the entire breast, while full-figure bras range in size from a thirty-eight-inch to a fifty-six-inch band size. Full-support bras offer maximum support, incorporating structural features designed specifically for DD+ cup sizes.
MASTECTOMY: A bra designed to hold one or two prosthetic breast inserts, which simulate the shape of an actual breast. These bras are meant for women who have had mastectomies and elected not to undergo reconstructive surgery.
NURSING: A practical bra designed to provide support for breasts that have increased in size for lactation. A nursing bra utilizes fuller cups in stretchy, nonirritating fabrics with wider shoulder straps for comfort. It aids breastfeeding via panels that can be folded down or to the side, exposing the nipple for easy access. Nursing bras do not feature underwire construction, which can restrict the flow of milk.
PADDED: A bra with shape-enhancing pads or lining designed to increase bust size. Padded bras support and “amp up” breast size, but are not intended to greatly increase cleavage.
PLUNGE: Sometimes known as a U-plunge, this is a bra designed with angled cups and a wide-open, significantly lowered center gore, allowing for increased cleavage. A plunge bra is suitable for special-occasion dresses or outfits with low necklines and is not as heavily padded as a push-up bra.
PUSH-UP: Like the original Wonderbra and Victoria’s Secret Miracle Bra, this is a bra that creates the appearance of increased cleavage by using angled underwire cups and padding to push the breasts inward and upward toward the center of the chest.
RACERBACK: A bra designed with shoulder straps that form an “X” pattern at the center back for a no-show fit under tank tops or other garments that would expose traditional bra straps. A racerback bra can also provide extra support and reduce bounce for larger-busted women. (If you don’t want to shell out for a proper racerback bra, flip to this page for my secret Hollywood-approved tips for making any bra you own a racerback for less than $5!)
SEAMLESS: A bra constructed without seamed cups. Seamless bras are a great choice for pairing with clingy knits. They are designed to be completely invisible and create a clean, uninterrupted line under clothes.
SPORTS: A bra specifically designed to offer firm support and minimize breast movement during physical activity. Usually made of stretchable, Lycra-blend fabrics, sports bras wick perspiration away from the body and reduce skin irritation due to trapped sweat.
STRAPLESS: A bra that relies on an extra-wide band and rubberized or silicone beading along the cups to support the breasts without the help of shoulder straps. Many large-busted women find that strapless bras simply will not stay up due to lack of support, so a bustier or long-line bra is a better choice for these women when faced with wearing a garment that exposes the shoulders.
T-SHIRT: A contoured-style bra designed without any front seams, hooks, or construction elements that could be seen under a T-shirt. A close cousin of the seemless bra, the T-shirt bra is almost always lined lightly with foam to help conceal the nipples.
U-BACK: Also known as a leotard-back. This is a bra that, exactly as it sounds, dips into a low “U” shape at the back closure. This type of bra features closer-set straps, which provides more support and helps prevent straps from sliding off the shoulders. A U-back bra is particularly good for full-busted or sloped-shouldered women, as straps that constantly fall down don’t provide enough support.
UNDERWIRE: A bra designed with a thin, semicircular strip of rigid material (sometimes made of actual coated wire) at the bottom of each cup that helps support the breasts. Underwires are sewn directly into the bra fabric, from center gore to under the armpit.
VOLUME-MINIMIZING: A bra meant to deemphasize breasts by compressing and reshaping them. They are an intensely practical design for large-busted women because the simple readjustment of breast shape can help reduce cup spillover and alleviate pressure on the shoulders and back.
While there is obviously no one “right” bra out there that magically suits every single body, there are definitely many bad and poorly fitted ones. The number one sign of a poorly fitted bra is its tendency to leave red marks and welts on your shoulders and ribcage. Most women are wearing their band one size too small, which is what usually causes this phenomenon. There is an entire contingent of maniacal bra fitters out there telling women that the band is supposed to be horrifyingly tight. Run, don’t walk away from anyone who deems this to be okay. It’s not acceptable, and a bra that digs into your flesh like a pair of satanic hawk talons is definitely not the right bra for you. For the record, only 10 percent of breast support should come from the straps—the other 90 percent should come from a properly fitted band. You should be able to easily slide two fingers under both your bra straps and your bra band. Don’t just rely on too-tight straps to provide the bulk of your support! If you can fit more than two fingers under your bra band, a smaller band (that’s the number in a bra size; the letter represents the size of the cup) will give the support you are currently missing out on and should also help to alleviate pain in your shoulders.
If your bra band is too large, it’s likely to ride up mercilessly in the back. This concept might seem confusing until you consider the actual physics involved in how a bra provides support. It’s really rather simple: to keep your breasts supported, the band of your bra must sit level (or low) on your back. When the band begins to ride up, your breasts will then drop down in front. A smaller band will sit more firmly on your rib cage and remain in place—keeping your breasts front and center where you want ’em!
A cup that is too large will sit unnaturally low on the front of the body, possibly causing your breasts to sag. If you find there is always space between the cup of your bra and your breast, try going one size down in the cup.
If you are an E cup or above, I’ve got some great/terrible news for you: No department or chain store bra is probably ever going to fit you. If the store in question doesn’t carry your size, they are going to cram you into the closest thing they happen to have in stock and be done with it. You, my dear, are going to need to visit a real, proper, old-fashioned bra store, the kind of joint run by custom fitters who have held literally thousands of pairs of breasts in their hands. The fitter will sternly ogle your bare breasts with the detached interest of a battlefield surgeon, while her husband does crossword puzzles and mans the cash register just on the other side of the curtain. It will be a totally awkward, yet really awesome experience. (If you can’t find a proper fitter in your own neighborhood, you’ll need to plan ahead. This could include keeping an eye out for one in a city you may be visiting in the future, or planning a road trip with friends to a spot you found online.)
The bra your fitter recommends will most likely include a combination of letters and numbers you never dreamed possible—and will shock you with its price. You will knuckle down, buy two and treat them better than your eventual human offspring. (For all my tips on proper bra care, check out this page). This is simply the cost of having a spectacular rack. Consider this permission to feel amazing about your boobs, because they’re fabulous.
But being fitted is not the same thing as being measured. Measurements rely on a standardized method—and humans are anything but standardized. A measurement can accurately tell your band size, but your cup size really depends on your body type and shape. This is where a proper fitter can’t be beat. You can measure your underbust and overbust to get an idea of bra size, but it’s still just a guideline. Every brand differs, and the “size” that works so well in one brand may not fit the same in another. However, knowing how to properly measure yourself for a bra is still useful! To do it accurately, peel off your bra and start by taking a measuring tape (a soft, flexible one, that is—not one meant for measuring cabinetry!) and run it around the trunk of your body, underneath the breasts. This is your underbreast measurement—also known as your band size. Write it down; you’re going to need it in a minute. (A caveat: If your underbreast measurement is an odd number, it means you should try on bras in both the size below and the size above your measurement. If your measurement is an even number, it almost always is your exact band size, but you may still need a larger or smaller size depending on body type.)
Next, lean forward at the waist so that your chest is parallel to the ground. This ensures that you’ll be measuring all of your breast tissue—not just what protrudes outward while standing up. Run the tape around your torso, taking care to center it over the fullest part of your breasts. (Don’t pull the tape too tightly—you want to make sure your breast tissue isn’t being squished down. Also, make sure your tape measure is straight—you don’t want it sliding down your back, as this will cause an inaccurate measurement. Measuring yourself in front of a mirror will help make sure the tape is staying right where you want it.) The resulting number is known as your overbust measurement, and, together with your underbust measurement, will help you figure out your likely cup size—using good old-fashioned math. To properly calculate your cup size, simply subtract your underbust measurement (also known as your band measurement, remember?) from the overbust measurement you just took. The difference between these two numbers determines your cup size. If the difference between your two measurements is less than one inch, your cup size is AA. If it’s exactly one inch, you are a legit A cup. And on and on, like so:
+ Difference of two inches = B
+ Difference of three inches = C
+ Difference of four inches = D
+ Difference of five inches = DD
+ Difference of six inches = DDD (E in UK sizing)
+ Difference of seven inches = DDDD/F (F in UK sizing)
+ Difference of eight inches = G/H (FF in UK sizing)
+ Difference of nine inches = I/J (G in UK sizing)
+ Difference of ten inches = J (GG in UK sizing)
Don’t be confused by the alternate UK lettering for cup sizing. I’ve included it here because most leading lingerie brands for sale in the United States actually use UK cup sizing above a DD. So if you see cup sizes such as a DDD or DDDD in your local lingerie shop, these are equivalent to an E and an F.
I actually consider the self-measurement method to be a far better starting point for a bra try-on session than a pushy department store salesperson. The idea that you need a clerk (who likely works on commission!) to tell you what fits and what doesn’t is rather old and antiquated. I find that you’re always better off to measure yourself at home and then try on a dozen bras in peace and quiet, taking your time until you land on the one that feels right to you. It’s a far less awkward experience, and you aren’t likely to be rushed or pressured into buying something that doesn’t actually work correctly for your body just because you feel guilty that you’re taking up too much of the salesperson’s time.
Now that you’re armed with the magic number, hop into a dressing room with a handful of bras to determine which one is best for you. While we’re pretty darn sure we’ve arrived at the correct bra size with our clever at-home measuring, you still shouldn’t take it as gospel until you’ve tried on bras by five different manufacturers—in five different styles. Only then will you know that your measurements told you the truth.
But let’s back up for a second here. Before you can determine if a bra fits properly, you’ll want to make sure you are putting it on correctly in the first place. This is not achieved by standing up straight—you actually want to lean forward the whole time to ensure that all of your breast tissue is in the bra. After removing the bra from its hanger, put your arms through the straps and lean forward slightly so that your bust falls easily into the cups. Next, fasten the bra on the largest set of hooks and eyes. While still leaning forward, grab the underwires or bottoms of each cup and give ’em a wiggle from side to side, making sure your breasts are settled comfortably and correctly into the cups. Then, slip your hand inside each cup and lift your breasts up and toward each other. At this point, you’ll likely have to adjust the length of the shoulder straps. Do so by slipping each strap off your shoulders and adjusting the sliders so that the straps are short enough to stay in place without cutting into your flesh.
Next, check the band size. The correct band size is the smallest one you can comfortably wear. (This might actually be smaller than your underbust measurement, as different brands of bras have bands that stretch quite differently.) A properly fitting band should be providing the bulk of the bra’s support without relying too heavily on the shoulder straps to do the work. The right-fitting bra will fit well when fastened on the loosest hook, but will be too tight if fastened on the smallest one. This is so you can comfortably tighten the band as the elastic starts to stretch and wear out. If you buy a bra that only fits on the smallest hook to start with, you won’t be able to wear it once it gets to be even a little bit old!
You’ll likely need to adjust your cup size when you move to a different band size. For every band size you go down, try going up by one cup size so the cups continue to have the same capacity. (And remember, a too-small cup can most definitely make the right band size seem too tight!)
I know you’re getting tired of still trying on this one single bra, but there are still two steps left. Don’t give up on the process now! After getting settled on the correct band size, you’ll want to double-check your cup size. The correct cup size should be completely filled—with no wrinkled fabric or extra space. Any spillage means the cup size is too small—even when you’re talking about low-cut or pushup bras. Check all around the cups for bulging—either at the front or at the sides under your arms. Bulging is no good and means the cups are too small.
Make sure any underwire encircles your entire breast and lies flat against your rib cage. You want the wires to sit on your ribs, not on the breast tissue. If an underwire is cutting into the sides of your breasts, you need a larger cup size. And an underwire that presses into your breastbone means you’ll need to try a style with a lower center front due to the shape of your ribcage.
Finally (and most importantly!), take the time to see how the bra looks with a shirt on. You’ll want to make sure that what looks great on its own also works well under your clothes. Most women find that their clothes feel and fit far better once they finally wear a bra that actually works as it should. In a properly-fitting bra, your bustline will also suddenly be at the correct proportional level—about halfway between your elbow and shoulder. If your bustline was previously riding too low due to an inadequately supportive bra, you might even find that you can suddenly wear a smaller dress size! Like I said earlier: Poor fit really is the true enemy of great style.
If you’ve long been plagued by armpit and back rolls, you’ll be glad to know that they are often a direct result of wearing a bra that’s too big in the band and too small in the cups. While bulges are sometimes caused by wearing a too-small bra, most of the time they are actually caused by a too-large bra riding up in the back. A band that sits lower on the back will remain in place—rather than migrating upward, creating bulges.
Now you know exactly how to find a bra that fits you all on your very own. See how easy that was? Who needs a snobby, sullen salesperson pressuring them into buying the wrong thing? Not you, my dear. Certainly not you.
Even after measuring themselves, getting properly fitted by an expert, and trying on one million and ten bras, there just may not be such a thing as the perfect bra for some women. Assuming there’s a “holy grail” bra out there for all is a fairy tale. If the perfect bra doesn’t exist for you, don’t despair—because there are a million ways to tweak or “Frankenstein” your existing bras to perfectly suits your needs. You’ll just need to use a little bit of the magic dust I keep in my bra tool kit!
The slow bra strap slide is the most irritating wardrobe malfunction there is. Sliding bra straps have absolutely nothing to do with band size, unless you are wearing a bra that is many sizes too big. It’s most likely occurring because your straps are too loose. An easy way to check your straps is to drop your shoulders and run your fingers under the straps, from the front to the highest part of your shoulder. If you can fit more than two fingers under the strap, it’s too big. Your straps should never pull away from your shoulder farther than about a half inch. If they do, tighten them. Straps loosen with wear, so they need frequent adjusting.
A narrower-set strap (one that begins closer to the breast, like on a demi or balconette bra) will help address the problem somewhat, as most times, bra strap slippage is caused by wearing a style of bra that is wrong for your particular body. A woman with narrow or sloping shoulders will need to make sure a bra’s straps are not set too far apart for her frame. A bra with wide-set straps can ride too close to the shoulder, resulting in the straps falling down all day long. But a bra with closer-set straps centers the bra more securely on the shoulders and back, resulting in less slippage.
An easy no-sew option to keep bra straps from sliding all over the place is to use a set of old-school, pin-in lingerie strap keepers. They are the original solution to bra strap slippage, used by broads like Joan Crawford since the dawn of modern fashion. Essentially a thin piece of ribbon with a snap sewn on each end, you pin them into your garment at the shoulder (taking care to only allow the pin to grab the innermost layer of fabric so that it doesn’t show) and then snap them around your bra straps—and just like that, your straps stop sliding southward. They are about two bucks at any sewing or notions joint. (You can also use them to keep your straps in place with an off the shoulder or boat neck–style shirt.) Some “better” or vintage garments have these lingerie straps already sewn in, and I’ll bet a bunch of you reading this right now thought those tiny ribbons with snaps were just meant to keep the clothes on the hanger while in the store. If you’re feeling fancy, you can have a tailor stitch a set of these “bra keepers” into your favorite garments for about $7 a pair.
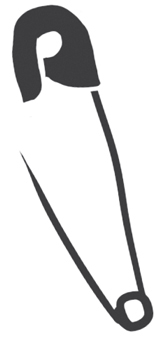
Making your bra a halter is another surefire way to keep your straps in place. I use a simple plastic racerback clip—available at almost any store that has a decent lingerie department—but you can also use a large safety pin to make any bra into a halter in a pinch. (Just make sure to let your bra straps down a little longer before you halter up.) As a bonus, if you happen to have wide-spaced breasts, making your bra a halter will pull them together, resulting in a more supportive fit.
Another cheap, easy solution to slipping bra straps is to slap a piece of Topstick tape onto your bra straps at the shoulders and then adhere them to your shirt. They will stay put all day long until you don’t want them to anymore, then peel off with ease. If you are a babe who has to wear a bra with exactly everything, this is the tip of a lifetime for you. It’s also why you never see an actor’s bra straps showing on TV! Topstick is an integral part of my costume kit, and it’s available at almost any sewing or wardrobe supply store (see this page for more).
One word: Ouch. Bra straps dig into your tender shoulder flesh for many reasons. Sometimes, it’s simply breast size—boobs are really heavy! But other times, it’s caused by the bra—or the strap itself. If you suffer from digging straps, make sure you are wearing a bra with flat-style strap, not a rounded string style. Also make sure that your straps are wide enough for your cup size. The bigger the cup, the wider the strap should be. A wider strap provides a firmer base of support, so the weight of each breast is then spread evenly across your shoulder—not focused on one thin pressure point as with a thin, rounded strap. You can also look for bras with padded straps or invest in an inexpensive pair of silicone strap cushions, available at specialty bra shops or from your old pal, the Internet.
A too-soft bra (like a flimsy silk bra) can be prone to excessive stretchiness, allowing your straps to dig fiercely into your shoulders. Make sure the bra you choose is made from a rigid enough material, such as a sturdy compression fabric—as the less give in the band and cups, the less work the straps have to do. You don’t want it to be stiff or tight—just sturdy and supportive.
People get all hung up on bra extenders, those rectangular pieces of material that latch onto both ends of your bra, giving you extra room by acting as a sort of patch. People like to claim that if you’re fitted correctly, you shouldn’t ever have to use one—and that an extender means you’re wearing the wrong bra. I’ll never understand the bellyaching about their very existence, because the truth is, some people just need them! For example, women with broader backs and smaller cups have a notoriously hard time finding bras—so if your band size is large and your cup size is small, you’re kind of out of luck. But in this case, buying a bra that fits well in the cup but is two inches too small in the band and using an extender isn’t a failure—it’s a brilliant (and necessary) life hack. So use one, have a bra that fits, and be foxy.
A properly fitting bra (one where the band sits low on your back, not way up near your shoulder blades, remember?) should help prevent your skin from pouring out over said bra. I call this phenomenon “overhang,” but you may know it as “back fat.” It’s just a sad fact of life—as I’ve seen it on skinny and plus-sized actors alike. It could mean your bra is too tight—but since a bra’s band is what needs to provide the bulk of breast support, overhang could still be a problem, even if you go up a size. Some people just have looser skin than others! If skin overhang is your cross to bear in life, look for a bra with two, not three hooks and higher sides to keep everything tucked in. This creates a larger area of coverage and support—which helps distribute pressure, resulting in less bulging.
A softer, stretchier bra can sometimes help to alleviate overhang, while a more rigid bra has the tendency to accentuate it. I realize this sounds like the exact opposite of what I just recommended for straps that dig into your shoulders, but different things work for different folks—and half of finding what works for you is trial and error.
Wearing a bra with a backless shirt and keeping it out of sight is a pointless battle—unless you use a low-back bra converter. This handy piece of elastic hooks onto both sides of your existing bra clasp and wraps around the front of your lower stomach, pulling the band down in back while still offering maximum support in front.
If you can sew on a button, you can make your own bra extender with a piece of elastic and some hooks you’ve cannibalized from an ancient, stretched out bra. Heck, you could really just safety pin those hook ends onto the elastic and be done with it.
If your garment is both backless and strapless, you should try wearing a long-line bra. Some folks consider it to be a dated style, but a long-line bra dips low in the back and derives its support from a corset-like bodice—which has the added benefit of smoothing lumps and looking sleek under clothes. Once you get used to wearing it, you’ll wonder how you ever lived without one in heavy rotation. If you are large busted, you may have thought that a strapless bra was forever outside the realm of possibility for you due to the utter lack of support and constant slippage. A long-line bra stays up due to the built-in support of the bodice—which basically stabilizes your boobs on a handy little shelf. It’s a great alternative to the classic strapless bra that heads southward with the slightest hint of any motion—such as daring to lift your arms over your head at a party.
I love going braless—but am also quite interested in keeping my nipples under wraps whenever I venture outside. Self-adhesive silicone nipple covers (available at better lingerie and department stores for about $10) are perfection for those who can go without a bra and just need a touch of modesty. But they also work just as well for women who practically have to sleep in their bras—because sometimes even the best bra can’t stop nipples that insist on perking up whenever they please. A well-made pair of nipple covers should be washable and reuseable up to thirty times with careful use.
You most likely already knew this, but you should be hand washing your better bras and underwear, period. And washing your bras in the shower while bathing (you’d be surprised at the emails I get!) isn’t going to cut it—unless you’re using laundry-grade soap, which is terrible for your skin. Take the time to hand wash your bras once every two weeks by soaking them in the bathroom sink in warm water with a capful of gentle laundry soap or baby shampoo for about ten minutes, then rinsing well. Take care not to wring, twist, or press your bras, which can cause them to lose their shape. When you think you’re done rinsing, rinse once more for good measure—excess soap attracts dirt and makes your bras wear out faster. Once you’re done, lay your clean, wet bra cups up on a dry towel until it is no longer dripping wet, then finish air-drying by hanging it from both straps on a hanger in an area where air can move through it freely. Make sure your bras are properly reshaped before you set them aside to dry—if the cups get dented while being washed, take your fingers and gently smooth them out so they look like cups again.
If you must toss your bras in the washer due to lack of time or extreme laziness, invest in a plastic bra-washing ball or structured wash bag. Hook all hooks and clasp all clasps before washing to avoid excess twisting and snagging. And never put your bras in the dryer—most bras are made of synthetic materials and can’t withstand the heat. (It’ll also damage the wire.) But even if you toss your bras in the washer and dryer like a wild woman, I still love you. And your boobs are still spectacular.