4.
BREAKFAST
The French epicure and cheese-lover Jean Anthelme Brillat-Savarin once wrote, “A dessert without cheese is like a beautiful woman with only one eye.” Well, breakfast without eggs is a woman with no eyes at all. What would you pop on top of your corned beef hash? What would you put into a little cup, carefully cut the top off of, and dip your toast soldiers into? What would you fry into the punched-out hole in your bread? How would you turn regular toast into french toast? Imagining breakfast without eggs is like imagining the sky without the sun—too dreary to even consider.
This book, among other things, should make abundantly clear that eggs need NOT be confined to breakfast. But lest we neglect to acknowledge that eggs first thing in the morning—or for a leisurely weekend brunch—are, without question, one of life’s greatest pleasures, here’s a chapter on the eggs we eat for this most important meal of the day: boiled, poached, scrambled, and fried. They’re the subject of strong preference: How do you like your eggs? The question comes preloaded. They are the thing you can order, any style. They stimulate, fortify, and sustain us. EGGS!
Why Do We Eat Eggs for BREAKFAST?
Sascha Bos
It’s difficult to answer this question without also asking, Why do we eat breakfast? The Ancient Romans ate breakfast, which they called ientaculum, and included eggs, if available. When the Romans were pushed out of Europe, breakfast left with them, and throughout the Middle Ages Europeans ate two large meals (in contrast to the Roman three). The Normans had dinner around nine a.m., making a wake-up meal superfluous. Physicians and religious leaders of the time suggested that it would be gluttonous to eat before dinner, and so breakfast was a meal reserved for children, the elderly, and manual laborers, who needed energy first thing in the morning.
In the West, it is not until 1620 that an English medical writer, Tobias Venner, actually suggests eating eggs for breakfast: poached, with salt, pepper, and vinegar, and served with bread and butter. In one of the oldest known cookbooks, The Closet of Sir Kenelm Digby Knight Opened (1669), Sir Digby, chancellor to Queen Henrietta Maria, suggests eating “two New-laid-eggs for break-fast” (he also recommends them poached). This brings us to another theory: Since chickens lay eggs in the morning, it made sense for farmers to grab them for breakfast. (This isn’t, strictly speaking, true: Chickens lay eggs on a twenty-five-hour cycle, depositing their eggs later in the day until they hit that magical three p.m. mark when they start all over again.)
The English began taking their dinners later and later (as late as four or five p.m. by the end of the eighteenth century), pushing supper even later and creating the need for a third meal: breakfast. It’s in the 1800s that breakfast really takes off. The Industrial Revolution ushers in the need for workers, who in turn need heavy breakfasts, and the Second Industrial Revolution and rise of the nouveau riche sees the creation of the Full English: an egg-laden meal that can be dressed up (three-course breakfast spreads) or down (beans, toast, and an egg).
Throughout its history, breakfast has been the domain of the worker. Those who could afford to eat more lavishly, later in the day, often did. Workers needed protein and fat—slow-metabolizing energy sources—to get them through the day, and eggs provided a cheaper alternative to meat. The need for a filling breakfast meant that eggs would serve as breakfast’s primary protein—uniting workers of the world.

Boiled Eggs
Ah, the boiled egg—austere, yet luxurious. Simple, yet complex (and perfect!). Easily adorned, yet impossible to improve upon. Whether soft-boiled or hard-boiled or somewhere in between, a boiled egg refers more to an outcome than to a cooking method, as an egg cooked in its shell to a firm white with a runny or hard yolk is often not cooked in boiling water, rather boiled water that reaches some equilibrium with a cool egg.
Soft-Boiled Egg(s)

Makes 1 to 12 eggs
1 to 12 eggs
1. Bring a large saucepan of water to a boil and gently add the egg(s). Stir the water and egg around the pot for 60 seconds. This will center the yolk inside the egg white, yielding a more evenly cooked egg. Stop stirring and simmer the egg, reducing the heat as necessary to maintain a light bubble, for 3½ minutes longer.
2. Remove the egg and plunge it into an ice bath. When the egg is cool enough to handle, peel it carefully. Alternatively, set the hot egg in an eggcup and use an egg topper to remove the pointed end of the egg. Serve with a small spoon and toast soldiers.
Hard-Boiled Egg(s)

Makes 1 to 12 eggs
1 to 12 eggs
1. Put the egg(s) in a saucepan of cold water and bring to a full boil. Once you see big bubbles, remove the pan from the heat and let stand 8 minutes for a fudgy yolk, 10 minutes if you’d like the yolks firmer. Plunge the egg(s) into an ice bath and let cool.
2. Crack the egg(s) against a flat surface. Peel the egg(s) and rinse under running water to remove any bits of shell. Eat right away, or refrigerate until ready to serve.
Half-Boiled Eggs

These are a Malaysian breakfast fixture: custardy “half-boiled” eggs with soy sauce and pepper. They’re lazier than a hard-boiled egg, less fussy than soft-boiled (you just crack them into a bowl). Suck these down with something sweet, like condensed milk–sweetened tea. Another worthy companion is kaya, coconut jam, on white toast—the fluffiest you can find—with the crusts cut off.
Makes 1 serving
1 tsp salt
2 eggs
+ soy sauce
+ white pepper
1. Bring a saucepan of water to a boil. Once boiling, turn off the heat and stir the salt into the water.
2. Lower the eggs into the pot using a spider or slotted spoon. Cover and let sit for 5 minutes. Take them out of the water.
3. Crack the eggs (which will be hot!) into a small bowl, scraping out any whites, which should be just set, that cling to the shell.
4. Season with soy sauce and white pepper to taste. I like a lot of both. You can pop the yolk and mix it all around (I like a little white and yolk in each spoonful), or do what my great-grandpa liked to do: eat the whites first, then suck the yolks down whole.

Mockingbird
The HARDBOILED Detective
Harold McGee
Peeling can be an unpredictable and frustrating job. Sometimes the shell comes away cleanly, but sometimes it clings to the white, gouging or tearing divots in it. In a given carton there’ll usually be both easy eggs and recalcitrant eggs, and you can’t tell which is going to be which.
Over the years I’ve tested many different methods for making eggs easier to peel. The latest is the oral method, much demonstrated on the Web: You partly peel a hard-boiled egg at both ends, then place your mouth on the narrow end and blow the egg through the other.
Blowing eggs is certainly quick and showy, but not especially hygienic. And recalcitrant eggs still pop your ears before they pop their shells. No more reliable is prepoking the shell, boiling with baking soda, or shocking in ice water.
After blowing failed to be the answer, I decided that it was time to solve the peeling problem for real. How tough could it be?
Well, the egg turns out to be a very sophisticated package—mysterious and not so easy to manipulate. I did finally come up with a reliable peeling method, but it takes some pretty inelegant, brute-force chemistry, and it’s kind of messy. But entertainingly so.
I started by revisiting the scientific literature on egg peeling to see what solid information we have these days. It still comes down to one not-so-new fact: Eggs become easier to peel as they age. Freshly laid eggs slowly lose moisture and carbon dioxide through their porous shells, and the loss of carbon dioxide causes their whites to become more alkaline. The pH of a freshly laid egg’s white starts out at a slightly alkaline 7.5. Food scientists have found that when the pH rises above 9, the egg becomes easy to peel.
Apparently, the change in pH makes the egg-white proteins adhere less strongly to the thin, tough membrane attached to the inner surface of the shell, but we still don’t know how or why. It might involve a well-documented stabilization of the major egg-white protein, or the recently discovered “peri-albumen layer,” a microscopically thin envelope around the egg white that disappears in a few days as a fertilized egg develops.
In any case, the fresher a farm-fresh egg, the more likely it is to peel ugly.
The pH of a fresh egg white rises from 7.5 to a peelable 9 after a few days at room temperature, but it takes much longer in the refrigerator. Cold temperatures helpfully slow general deterioration, but they also slow the egg’s loss of carbon dioxide and the rise in pH and peelability. According to a couple of recent studies, a refrigerated egg may take 2 or more weeks for its albumen pH to reach 9. So even when they’re not especially fresh, the eggs we buy may not have become alkaline enough to peel cleanly.
The challenge is to raise the pH of eggs reliably and quickly, faster than leaving them in the back of the fridge for weeks. My first thought was to hold them at room temperature or in a warm oven to speed their aging. This does work, but it still takes several days for enough carbon dioxide to pass through the membranes and shell. Then I tried immersing eggs in a very alkaline solution at pH 12, to raise the inner pH artificially. That also worked, and also took days.
I realized that the shell itself is the main obstacle to changing the chemical environment within. How could I make the inner egg more accessible to an alkaline bath? By starting with alkali’s opposite: acid. I found that I could etch away much of the shell by immersing it in acid for about an hour. This acid treatment also conveniently makes the shell weaker and easier to break during peeling. Once the shell’s been thinned out by acid, a few hours in an alkaline solution is enough to raise the pH of the egg white just beneath the shell.
The entire process takes about 4 hours—maybe 30 minutes of real attention—and a couple of odd ingredients. One is citric acid, the main acid in citrus fruits. Pure citric acid is used in Middle Eastern cooking, and is much stronger than vinegar. It’s available online and is often sold in ethnic markets or in the kosher section of supermarkets as “sour salt.” Buy plenty; you’ll need almost half a pound for a dozen eggs.
The second ingredient is baked baking soda. By spreading baking soda out on a baking sheet and heating it in a 350°F oven for a couple of hours, you transform sodium bicarbonate into sodium carbonate. Baking soda itself is a weak alkali that can’t create a pH above 9, but a carbonate solution can get up to pH 12.
To treat a dozen eggs, dissolve about a cup (200 grams) of citric acid in a quart of water in a bowl that’s large enough to keep all the eggs immersed. Add the eggs. They’ll quickly fizz over with tiny bubbles of carbon dioxide created from the acid’s reaction with the shell’s calcium carbonate. Then the eggs will rise to the surface and start doing barrel rolls as the bubbles grow and detach from the shells.
As the shells continue to dissolve and some of their protein is released, the bubbling creates a foamy scum. To speed up and even out the shell etching, gently rub the scum off each egg back into the liquid every 15 or 20 minutes. (If your hands have any recent nicks, wear gloves or expect some stinging.)
After about 45 minutes, start checking the eggs. When they’ve developed little clear spots where the acid has etched away nearly all of the shell, remove and rinse them. Don’t let the spots grow into large clear patches. All the eggs should be well etched in 45 to 90 minutes.
At this point, immerse the etched eggs in a solution of baked baking soda—4 teaspoons (10 grams) dissolved per quart of water. Let them sit for at least 2 hours—or as long as 6 hours—gently stirring every 15 or 20 minutes. After the soak, rinse them off and either proceed to the cooking or refrigerate them for later use.
I’ve handled several dozen eggs this way, all as fresh as I could find at stores and farmers’ markets, and only a couple of eggs tore when I peeled them. The acid-alkali method works pretty well. The weakened shells often peel off in long, papery spirals.
Whether you etch the shells or not, once you cook eggs it’s best to immerse them in cold or iced water and let them cool down before trying to peel them. This firms the white and further helps it resist tears and gouges. Gently tap or squeeze the shell all around to fracture it into many small pieces. The egg’s narrow end is especially vulnerable, so press the shell down on the very tip with one finger while peeling up to it.
If you’re adventurous, let the eggs sit in the soda solution overnight or longer before cooking them. When the pH of the outer white approaches 12, it develops an opalescent translucency and stronger flavor. You’re on the way to the Chinese century egg and real edginess (this page).

More Than One Way to Poach an Egg
Tienlon Ho
There’s an episode of Julia and Jacques Cooking at Home, where the two poach eggs in Julia’s sunny kitchen in Cambridge, Massachusetts. Julia Child is beginning to bend under her eighty-eight years but ever spry. Jacques Pépin, barely sixty-five, vibrates with enthusiasm.
“I’m going to use a mechanical device, and Jack is going to use his own hands and ingenuity,” Julia declares, without a tinge of apology.
Julia pokes a pinhole in the large end of her eggs, then boils them in the shell for ten seconds. Then she brings out her gizmos, four oversize perforated spoons with perpendicular handles. She doesn’t need these to get the eggs right, of course. She has by that time hosted a dozen cooking shows and printed forty editions of her first cookbook. Julia is trying to tell us to do whatever you need to make this work for you.
Jacques cracks his eggs and slides the contents into the simmering water with the efficiency that only people who have cracked a million eggs can have. A few seconds in, he waves a slotted spoon over a jumble of egg to get it to roll over, and it instantly reorders itself into a tidy pillow.
When Julia cooks, she is teaching confidence. When Jacques cooks, he is teaching sleight of hand. Both are key to mastering any technique.
In the end, Julia’s eggs are soft and expansive, while Jacques’s are plump with a round protrusion of yolk on top, and they admire each other’s handiwork.
“Oh that came out beautifully and it looks very eggy,” Julia says. After all, it doesn’t matter how you get to the finish line. As Julia was known to say, “If you’re alone in the kitchen, who is going to see?”
Jacques’s Poached Eggs
When making poached eggs, the fresher the eggs the better. The older the eggs, the more the whites will tend to spread in the water. A dash of vinegar (white vinegar preferably) is added to the water to help firm the egg white. Salt is omitted because it has the reverse effect and tends to thin down the white. Eggs can be poached several hours, even a day, ahead (as most restaurants do), eliminating any last-minute panic when you want to serve several people at once.
—Jacques Pépin
Makes 6 poached eggs
¼ cup distilled white vinegar
6 eggs
1. Place 2½ to 3 quarts of water and the vinegar in a large saucepan. Bring to a boil, then reduce to a slow simmer: You want small bubbles just at the sides of the saucepan. Break one egg at a time on the side of the saucepan. Holding it as close as you can to the water (to avoid splashing), open it with both thumbs and let it slide into the water. If you are afraid of burning your fingers, break the eggs into a saucer or bowl and slide them into the water. (Cracking directly into the saucepan can also lead to weird egg shapes; sometimes there’s a sticky tail of white that lingers on the shell.)
2. Go as fast as you can putting the eggs into the water so that the difference in cooking time is not too great between the first and the last egg. Keep the water at a bare simmer, or let it “shiver” as it is said in France.
3. As soon as all the eggs are in the water, drag the bottom of a large slotted spoon across the surface of the water to move the eggs about a bit and keep them from sticking to the bottom of the pan. Once some of the whites have hardened, the eggs will not stick anymore.
4. Large eggs take 3 to 4 minutes of cooking. If you like them more runny or more set, the timing should be changed accordingly. Check the eggs by lifting them, one at a time, with a slotted spoon and pressing them slightly with your fingers. The white should be set, but the yolks soft to the touch.
5. As soon as an egg is cooked, transfer it to a bowl of ice water. This stops the cooking and washes the vinegar off.
6. When the eggs are cold, lift each one from the water and trim off the hanging pieces with a knife or a pair of scissors. Place in a bowl of fresh cold water.
7. Drain well if you use them cold, or keep refrigerated in cold water. They will keep for at least a couple of days. To use hot, place in a strainer, lower into boiling water for about 1 minute, drain, and serve immediately.
Julia’s Poached Eggs
In Julia and Jacques Cooking at Home, Julia says: “In my method, you crack the egg into an egg poacher—a perforated-metal oval egg-shaped container—set in shimmering water. The egg takes on the oval poached-egg shape.” Those oval egg poachers turn out to be tricky to find these days, but as it turns out, the real trick is in the pinprick and parboiling, which sets the whites and helps keep the egg in shape.
Makes 4 poached eggs
4 eggs
1. If you’re using egg poachers, set them in a large saucepan with at least 3-inch sides, and measure in enough water to cover them by ½ inch. Remove the poachers and bring the water to a boil. If not using poachers, fill the water to 2 inches high, and bring it to a boil.
2. With a pin, prick the large end of each egg—going through the shell and into the body of the egg to make a small hole (no egg should come out)—then place in a strainer and lower into the boiling water.
3. Submerge the eggs for exactly 10 seconds and lift out with a slotted spoon.
4. Now reduce the heat to a gentle simmer, just so there are the tiniest bubbles at the bottom of the pan. Set the poachers in the saucepan, if using.
5. Once the water is at a simmer, rapidly crack an egg into each of the poachers, holding it as close to the water as possible. If you aren’t using poachers, crack your eggs directly into the water (again, as close to the water as possible), the first one at the pan’s twelve o’clock.
6. Rapidly continue with the rest of the eggs, going clockwise.
7. Poach for 4 minutes per egg. When the time is up, slip the eggs out of the poachers onto a plate or, if you are not planning to use them right away, into a bowl of ice water.
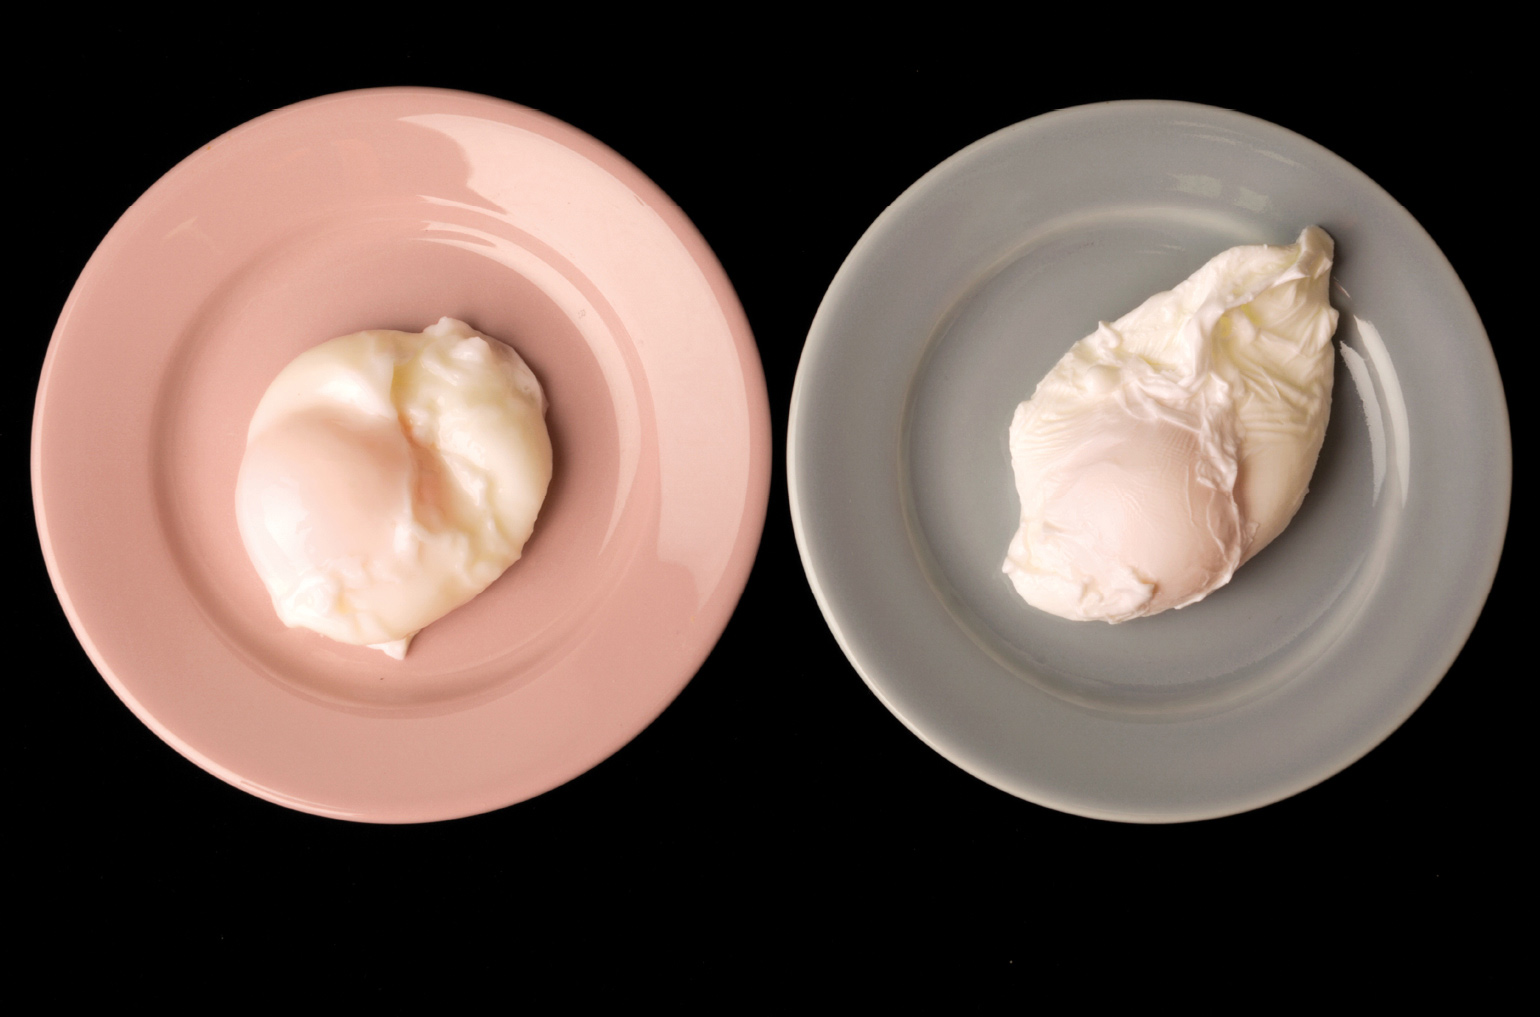
Flamingo
The POACHED Egg Murder
Rachel Levin
Across from a Jack in the Box, in downtown San Francisco, Pinecrest Diner serves just about everything, as any respectable, forty-eight-year-old, twenty-four-hour diner should. Salisbury Steak. Shrimp Louie. Pastrami on Rye. Two Eggs Any Style.
Except for one.
We regret that we cannot prepare poached eggs, states the oversize plastic menu—as it has since 1969, when a local Greek man named Bill Foundas opened shop on the bustling corner of Geary and Mason. After five decades, at ninety-nine years old, Foundas still comes in daily to watch over his family’s restaurant from his perch at the counter, sipping black coffee in his three-piece suit.
But, somehow, he wasn’t there that summer day in 1997: the day a waitress was killed by the cook who’d agreed to poach the eggs for a pretty customer.
Hashem Zayed, a fifty-nine-year-old Jordanian immigrant, father to children back in the Middle East, and husband supposedly several times over, had been flipping pancakes and burgers at Pinecrest since 1975. From behind the counter, he’d chat up customers and joke with regulars and, because of house rules—and the limitations of Pinecrest’s tiny kitchen—refuse special requests that would only further slam their only short-order cook.
Unless the request came from an attractive woman, as it did on July 23, 1997. The woman wandered in, grabbed a stool at the counter, and simply asked the cook for eggs the way she liked them, as egg eaters do.
But the server, Helen Menicou, a forty-seven-year-old mother of two, originally from Cyprus, who, like Hashem, had also worked at Pinecrest for two decades, was a stickler. If the menu said no poached eggs, then no one—no matter how pretty—got ’em poached. And that was that.
Until the next morning, which, for Helen, began like every morning: early, in a black skirt, at the diner, with coffee and Hashem. The two were apparently longtime frenemies—he, a card gambler who’d recently lost a bundle and lived in a Tenderloin SRO and often made Helen lunch; she, the suburban wife of a retiree, known and loved by everyone and who, just days before, had loaned Hashem a few hundred bucks to send home to his family.
But at seven a.m., on July 24, Hashem was still holding a grudge. And a gun.
He hadn’t slept all night and was still upset about the eggs, he’d told Helen. And then he shot her in the arm. Surrounded by screaming customers, he shot her again, in the back. Then, as she lay on the floor behind the counter where they had worked together, side by side, for twenty years—he shot her one more time, in the neck.
Mayhem ensued as Hashem just stood by the door, waiting for the police. Helen was whisked off to San Francisco General and, within the hour, pronounced dead. Hashem was convicted of first-degree murder and sentenced to twenty-five years; he died in prison from a brain tumor a few years later.
Today, little is spoken about the tragedy at Pinecrest. Obnoxious customers used to come in and flippantly order their eggs poached, but that eventually died down. Occasionally, someone sidles up to the counter asking about the veracity of the rumored murder. “Polite men have no memory,” a line cook once responded. But the murder predated him, anyway. No one who currently works at Pinecrest was present—save for owner Bill Foundas and his family. Somehow, none of them happened to be there that ill-fated day, said daughter-in-law and manager Sylvia Foundas. Bill had been in the hospital…His son-in-law had run out of gas…Sylvia was at home pregnant.…
It was a mystery. What made Hashem snap? everyone asked. Why would he kill a waitress? Why would he kill Helen? What ever happened to the pretty woman who preferred her eggs poached?
We may never know. Pinecrest’s past is the past, buried beneath pallets of fresh eggs and slabs of perfectly crisped hash browns. The diner churns on, as diners do. All day, every day, scrambling, folding, frying six thousand plus eggs a week, a time warp in the rapidly changing city around it. The only gunshots come from the ever-grittier street corner outside. Its cushioned booths and faux-leather stools are filled with decades’ worth of crumbs, and conventioneers and late-night partiers and tourists from around the world pour in for grilled pork chops and whipped-cream-topped pancakes and a taste of a true American greasy spoon—but never, ever for poached eggs, per the fine print.
Eggs Benedict
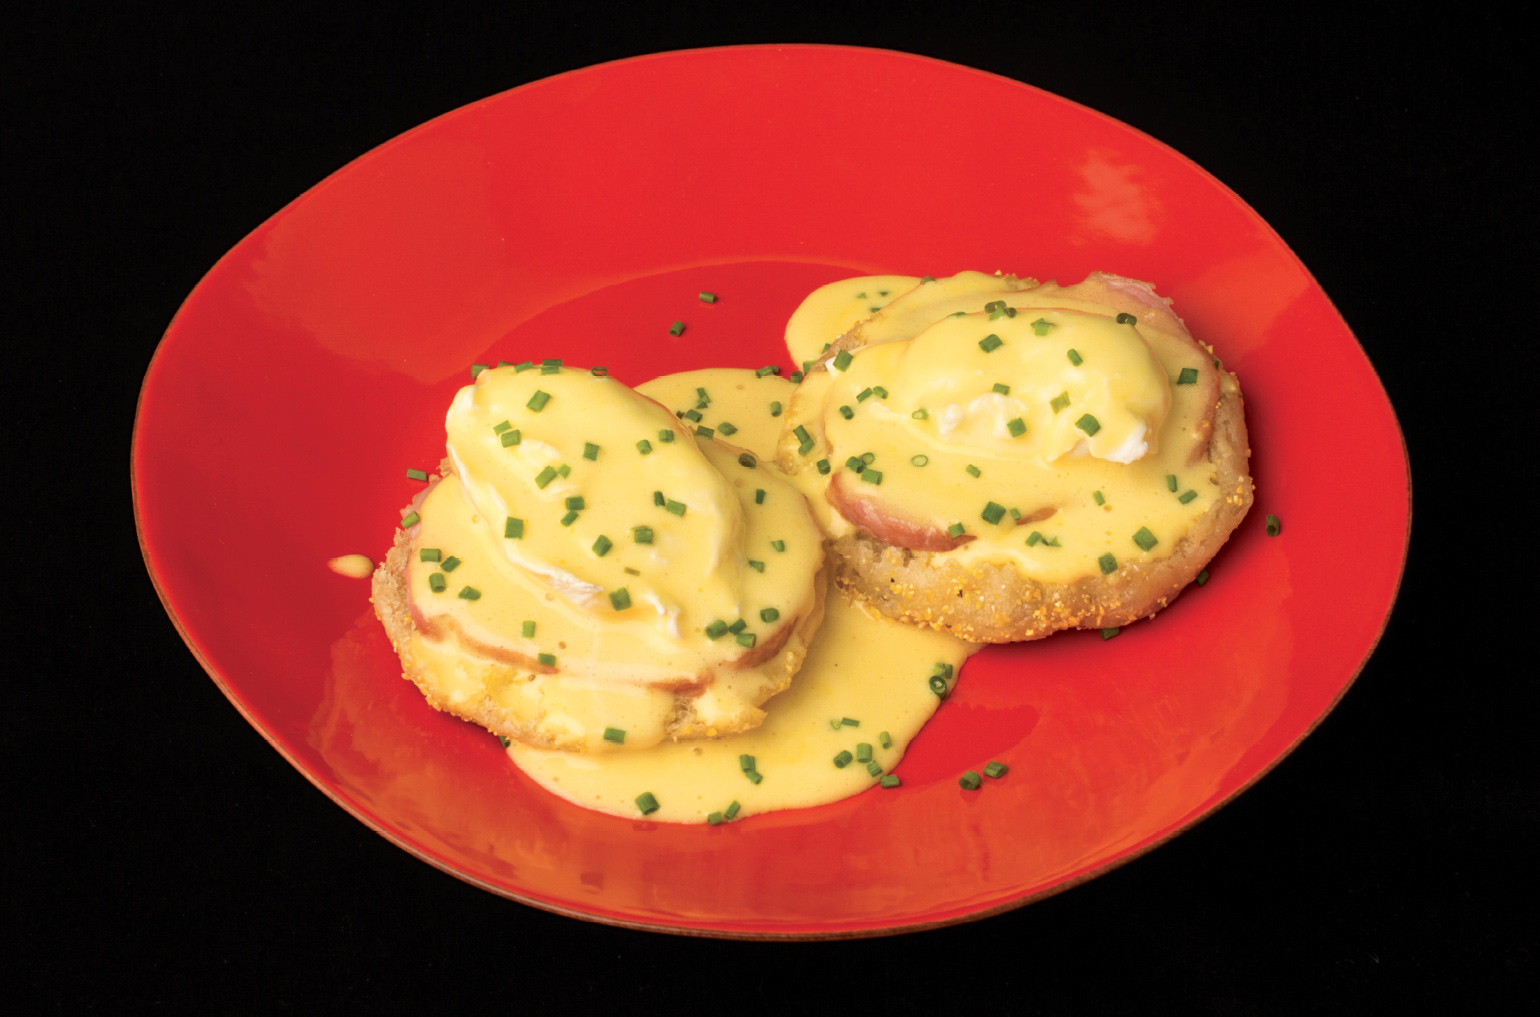
Eggs Benedict originated circa 1894, when the chef at Delmonico’s in New York committed to paper the recipe for Eggs à la Benedick, named after a favorite patron, LeGrand Benedict, which instructs readers to “Cut some muffins in halves crosswise, toast them without allowing to brown, then place a round of cooked ham an eighth of an inch thick and of the same diameter as the muffins on each half. Heat in a moderate oven and put a poached egg on each toast. Cover the whole with Hollandaise sauce.” Another slightly less believable story goes that during that same year a man named Lemuel Benedict, a well-to-do Wall Street stockbroker, walked into the restaurant at the Waldorf one morning with a spectacular hangover and demanded to be served poached eggs, toast, bacon, and a hooker of hollandaise sauce. Whatever the truth, whether Lemuel or LeGrand, this is fancied-up eggs, toast, and bacon—an ideally absorbent weekend brunch. Also, once you try these English muffins—inspired by Model Bakery’s, in Napa, California, you’ll never go back to store-bought.
Makes 4 servings
4 English Muffins (recipe follows)
8 slices Canadian bacon or ham
+ Hollandaise Sauce (recipe follows)
+ chopped chives (optional)
+ shaved truffles (optional)
1. Split the English muffins with a fork and toast until lightly browned. Arrange each on a plate, nooks and crannies up.
2. Meanwhile, warm the Canadian bacon in a skillet over low heat until steamy but not yet browned, about 1 minute.
3. Place one slice of bacon on each muffin half. Top each piece of bacon with a poached egg and cover with hollandaise. If desired, sprinkle with chives (and truffles, if you’re fancy).
English Muffins
Makes 12 muffins
BIGA
½ cup bread flour
¼ cup water
¾ tsp active dry yeast
DOUGH
1⅓ cups water
¾ tsp active dry yeast
1½ tbsp olive oil
1½ tsp fine sea salt
3½ cups all-purpose flour, plus more for dusting
¼ cup stone-ground cornmeal
6 tbsp butter, melted
1. Make the biga: The day before making the muffins, stir together the bread flour, water, and yeast in a bowl. Cover and refrigerate for 12 to 24 hours.
2. Make the dough: Combine the biga, water, yeast, olive oil, and salt in a bowl or the bowl of a stand mixer and stir with a whisk or the paddle attachment until creamy. Add 3 cups of the flour and stir to form a sticky dough. Cover the bowl with plastic wrap and let stand for 20 minutes.
3. Add the remaining ½ cup flour and stir to form a soft dough. Knead with the dough hook or by hand until the dough is smooth and elastic but still a bit moist and tacky, about 10 minutes.
4. Shape the dough into a ball and transfer to an oiled bowl. Cover and let rise until doubled in volume, about 2 hours at room temperature or 12 hours in the refrigerator. Bring to room temperature before proceeding.
5. Scatter the cornmeal on a rimmed baking sheet. Scrape the dough onto a lightly floured work surface and pat to 1 inch thick. Using a 4-inch biscuit cutter, punch out 12 rounds of dough and place them on the cornmeal-dusted baking sheet. Flip the dough rounds over so both sides are coated with cornmeal. Cover loosely with plastic wrap and let rise in a warm spot until the muffin dough is puffy, about 1 hour.
6. Pour 1 tablespoon of the melted butter into a large skillet set over medium-low heat. Add 2 to 3 muffin doughs and cook until they are golden on the bottom and domed on top, about 6 minutes. Flip and continue cooking, reducing the heat as necessary so the muffins cook through without scorching, 5 to 6 minutes longer.
7. Place the cooked muffins on a wire rack to cool, wipe out the skillet, and repeat with the remaining butter and muffins. Let the muffins cool completely before splitting and toasting.
Hollandaise Sauce
Makes 2 cups
1 small shallot, chopped
1 tsp black peppercorns, cracked
¼ cup white wine vinegar
¼ cup water
3 egg yolks
2 tsp fresh lemon juice, plus more to taste
½ tsp salt
2 sticks (8 oz) butter, melted
+ cayenne pepper
1. Make the gastrique: Combine the shallot, peppercorns, and vinegar in a small saucepan. Bring to a boil over medium-high heat and cook to sec, the moment the pan is nearly dry; immediately stir in the water and remove from the heat. Strain the gastrique into a bowl (discard the solids).
2. Bring 1 inch of water to a simmer in a saucepan. Whisk the gastrique, egg yolks, lemon juice, and salt in a large, heatproof bowl. Set the bowl over the saucepan of simmering water and whisk until the mixture is frothy and slightly thickened, about 5 minutes. Add a few drops of the melted butter, whisking vigorously to incorporate, then begin adding the butter in a thin, steady stream. Whisk the mixture constantly until you have a creamy, slightly fluffy, emulsified sauce. Season with a pinch of cayenne and thin with a drop of water or lemon juice as needed. Keep warm until ready to serve.
Çilbir
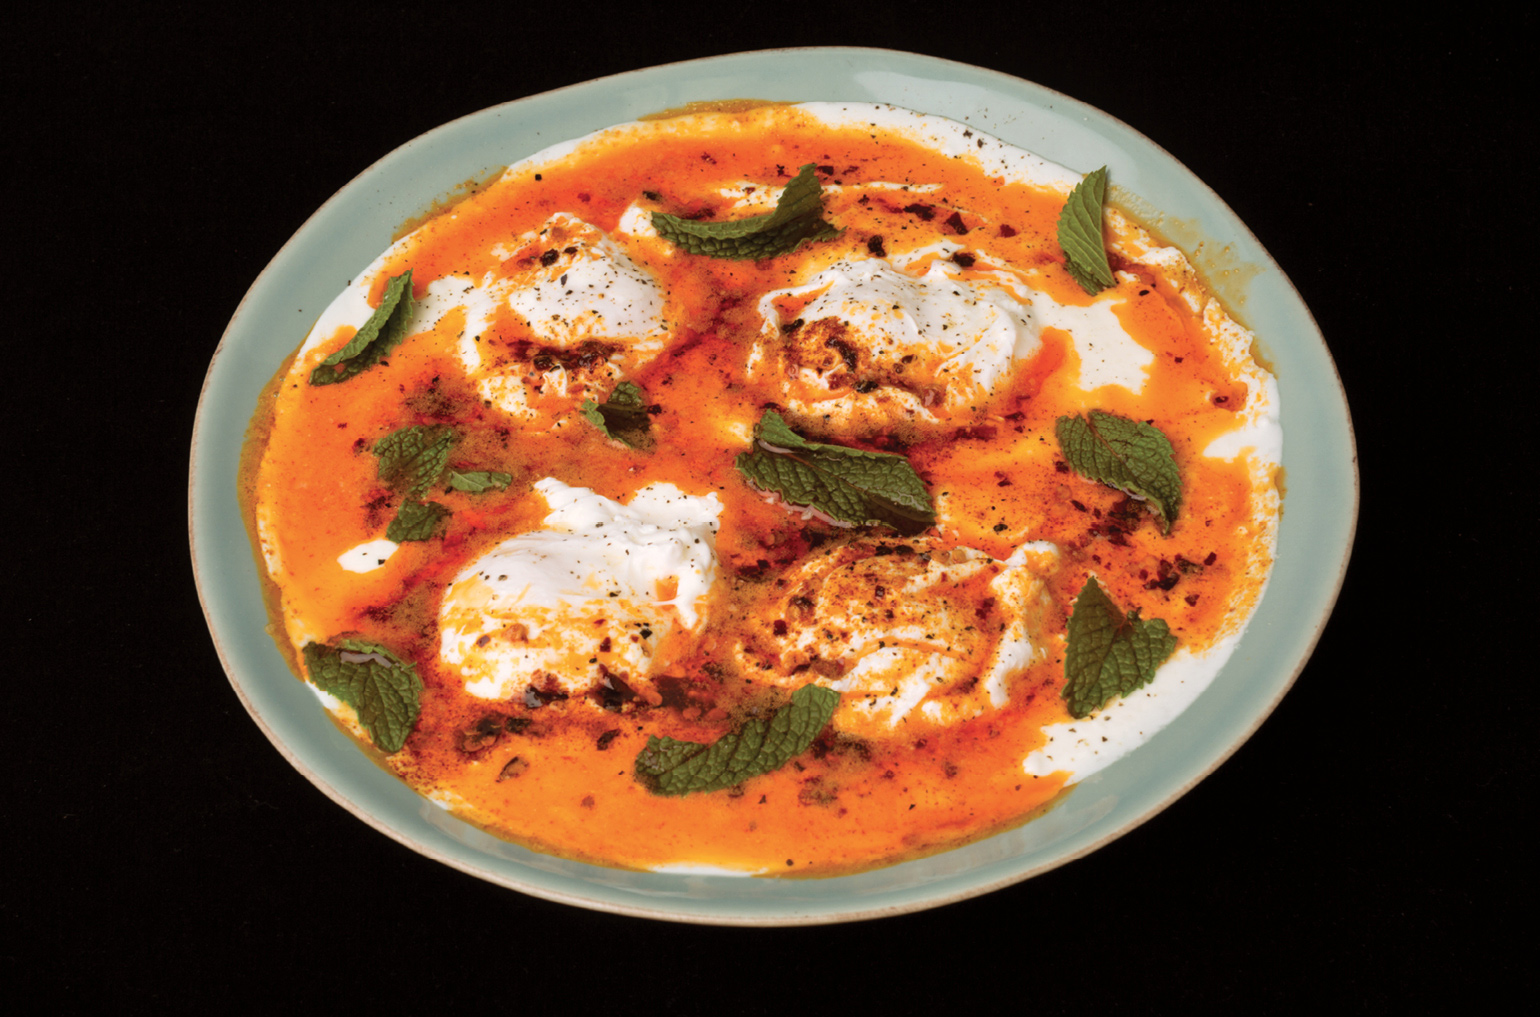
Çilbir—poached eggs on a bed of garlicky yogurt, drizzled with spiked butter—is a Turkish egg dish. This is Filiz Hosukoglu’s recipe. She is a culinary researcher from Gaziantep, Turkey, who has worked with chefs like Paula Wolfert, Claudia Roden, Anissa Helou, and Rick Stein on cookbooks and TV shows. She talks about resting the eggs on top of the yogurt (rather than hiding them beneath) to show them off, and I get her entirely—everything sits on this whipped white backdrop; the yolks are the stars. Çilbir’s uniqueness rests on the sourness of the yogurt and the softness of the whole thing—there is nothing to crunch. If you love to sop up an egg yolk with some bread at the best of times, this bowl of creamy, yolky wonder is for you.
—Laura Goodman
Makes 2 servings
1 garlic clove
1¾ cups whole-milk yogurt
4 tbsp butter
1 tsp Aleppo chili flakes
½ tsp paprika
+ salt and freshly ground black pepper
+ mint leaves (optional)
+ pide or pita bread, for serving
1. Crush and pound the garlic to a paste in a mortar and pestle; mix it in with the yogurt. They must be properly mixed. These two ingredients are good company—leave them alone.
2. Meanwhile, combine the butter, chili flakes, and paprika in a small saucepan. Set over medium-high heat to melt and froth a little, about 2 minutes.
3. To assemble, spread the garlic yogurt on a plate and place the poached eggs on top, so you can see the beauty of the eggs.
4. Drizzle with the chili butter, and season generously with salt and pepper. If you like, tear some mint leaves over the top for some extra color and texture. Serve with bread.
Fried Egg

Fried Eggs (from left): Over Easy, Over Hard, Sunny-Side Up
Fried egg, I’m in love! There are probably thirteen ways of looking at a fried egg but here are four ways to cook one. A sunny-side up egg has a purely white albumen that is fully set, including where it meets the yolk and the yolk is not opaque or coagulated but warm to the palate. An over easy egg has a purely white albumen that is flipped and fully set. The yolk is warm and the outside of it is coagulated. When cut, the yolk will run past the edge of the white. An over hard egg has a fully set, pure white albumen, flipped and cooked so the yolk will not run, though it retains a creamy and not chalky consistency. An over medium egg lands in between.
Makes 1 egg
+ oil, butter, lard, or other edible fat
1 egg
+ salt
1. Warm a teaspoon of fat in a small nonstick skillet over medium-low heat. Crack the egg into the pan and run a heat-resistant spatula through the egg white where the cohesive albumin meets the runnier albumin. This will create a uniform white.
2. Cook the egg undisturbed until the white is set. Doneness can be tested by dragging a spoon across the white near where it meets the yolk; the white should collect in the spoon in a soft curd, like a scrambled egg. It should not be rubbery. Depending on the size of your pan and burner, it will take 60 to 90 seconds to reach this stage. This is a sunny-side up egg.
3. For an over easy egg, flip the egg and cook for 15 seconds, sealing the yolk in coagulated protein. For over medium, cook for another 15 to 30 seconds, until the yolk feels like a cheek when poked. The yolk will have thickened but not be firm throughout. For over hard, continue cooking for another 30 seconds, until the yolk feels like where your thumb meets your palm. It should be firm but creamy. Slide onto a plate, season with salt, and serve.
Huevos Motuleños

This is a very straightforward breakfast dish from Motul on the Yucatán Peninsula. The contrasts really appeal to me: the sweetness of the plantains with the saltiness of the ham and the spiciness of the sauce. Some people put sour cream on it, but I don’t think it needs any because of the queso fresco. Huevos Motuleños already has all the perfect elements, if you can get a bite of everything together in your mouth at one time. It’s a classic breakfast dish.
—Karen Taylor
Makes 2 servings
+ vegetable oil
4 corn tortillas
2 tbsp butter
1 ripe plantain, cut into ¼-inch-thick coins
4 eggs
4 thin ham slices
+ Habanero Salsa (recipe follows)
½ cup green peas
½ cup crumbled queso fresco
+ black beans, for serving (optional)
1. Fill a large pan with 1 inch of oil. Heat the oil over medium heat until a tortilla crumb sizzles gently when it hits the oil. Add a tortilla and fry until halfway crisp. Remove and let drain on a cooling rack. Repeat with the remaining tortillas.
2. Heat 1 tablespoon of oil and 1 tablespoon of the butter in a pan over medium heat. Add the plantain and sauté until golden, about 6 minutes. Reserve for plating.
3. In the same pan, heat another 1 tablespoon oil and the remaining 1 tablespoon butter over medium heat. Add the eggs and fry until you have soft yolks.
4. Assemble the motuleños: Place 2 tortillas on each plate, and layer each tortilla with 1 slice of ham and 1 fried egg. Top each egg with habanero salsa, 4 or 5 slices of plantain, the peas, and queso fresco. Serve with black beans, if you like.
Habanero Salsa
Makes ½ cup
1 large tomato
1 habanero chili
+ salt
1 tbsp vegetable oil
¼ cup diced white onion
+ water or chicken broth, if needed
1. Fill a small pot with water and bring to a boil. Blanch the tomato until its skin has shriveled and it is heated through, about 2 minutes. Drain and reserve on a paper towel until cool enough to handle. Remove the skin and core.
2. Roast the habanero under a broiler or in a dry skillet until soft and charred all over, about 3 minutes. Remove the habanero stem and discard.
3. In a blender or food processor, blend the tomato and habanero until smooth. Salt to taste.
4. Heat the oil in a large saucepan over medium heat, then add the onion and sauté until it’s soft, about 5 minutes.
5. Add the tomato-habanero mixture and cook for a few minutes, until slightly thickened and fragrant. Thin with water or chicken stock if needed to make a cohesive salsa.

Albatross
Corned Beef Hash
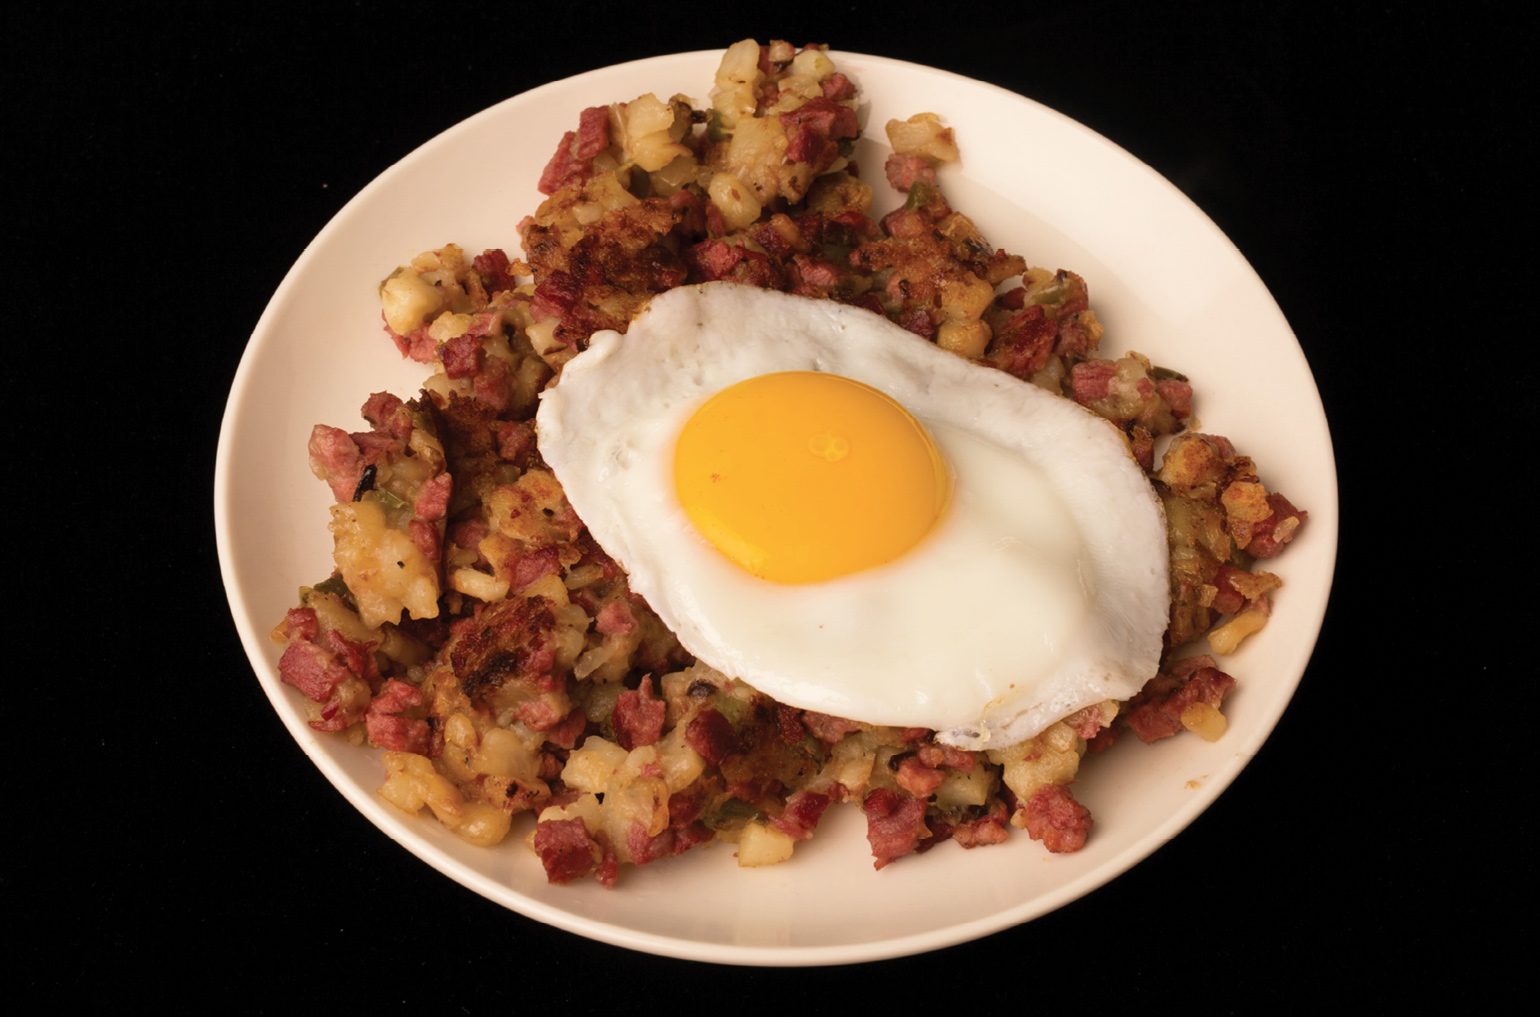
This is not an egg recipe. But corned beef hash is one of the most classic, most perfect eggcompaniments, and this is why it’s included here. There is no better medium for soaking up egg ooze: Paired with an egg or two or three, poached or fried, it is one of the world’s great breakfasts.
Makes 4 servings
1 lb cooked corned beef
4 tbsp butter
1 onion, finely chopped
1 green bell pepper, finely chopped
1 lb russet (baking) potatoes, peeled and finely diced
+ salt and freshly ground black pepper
1. Chop the corned beef: If you have a meat grinder, grind the beef through the coarse plate. If chopping by hand, cut into rough ¼-inch pieces.
2. Melt 2 tablespoons of the butter in a 12-inch skillet over medium heat. Add the onion and bell pepper and cook until the vegetables are softened, about 5 minutes. Add the potatoes and season generously with salt and black pepper. Toss to combine everything, then cover, reduce the heat to medium-low, and cook until the potatoes are tender, about 10 minutes.
3. Uncover and fold the corned beef into the vegetables. Increase the heat to medium-high and add the remaining 2 tablespoons butter around the edges of the pan. Let melt and cook undisturbed until the hash is crispy, about 6 minutes. Flip over in two or three large pieces and cook until browned, 3 to 4 minutes longer. Divide among plates and serve with eggs.
Saltie’s Soft-Scrambled Eggs
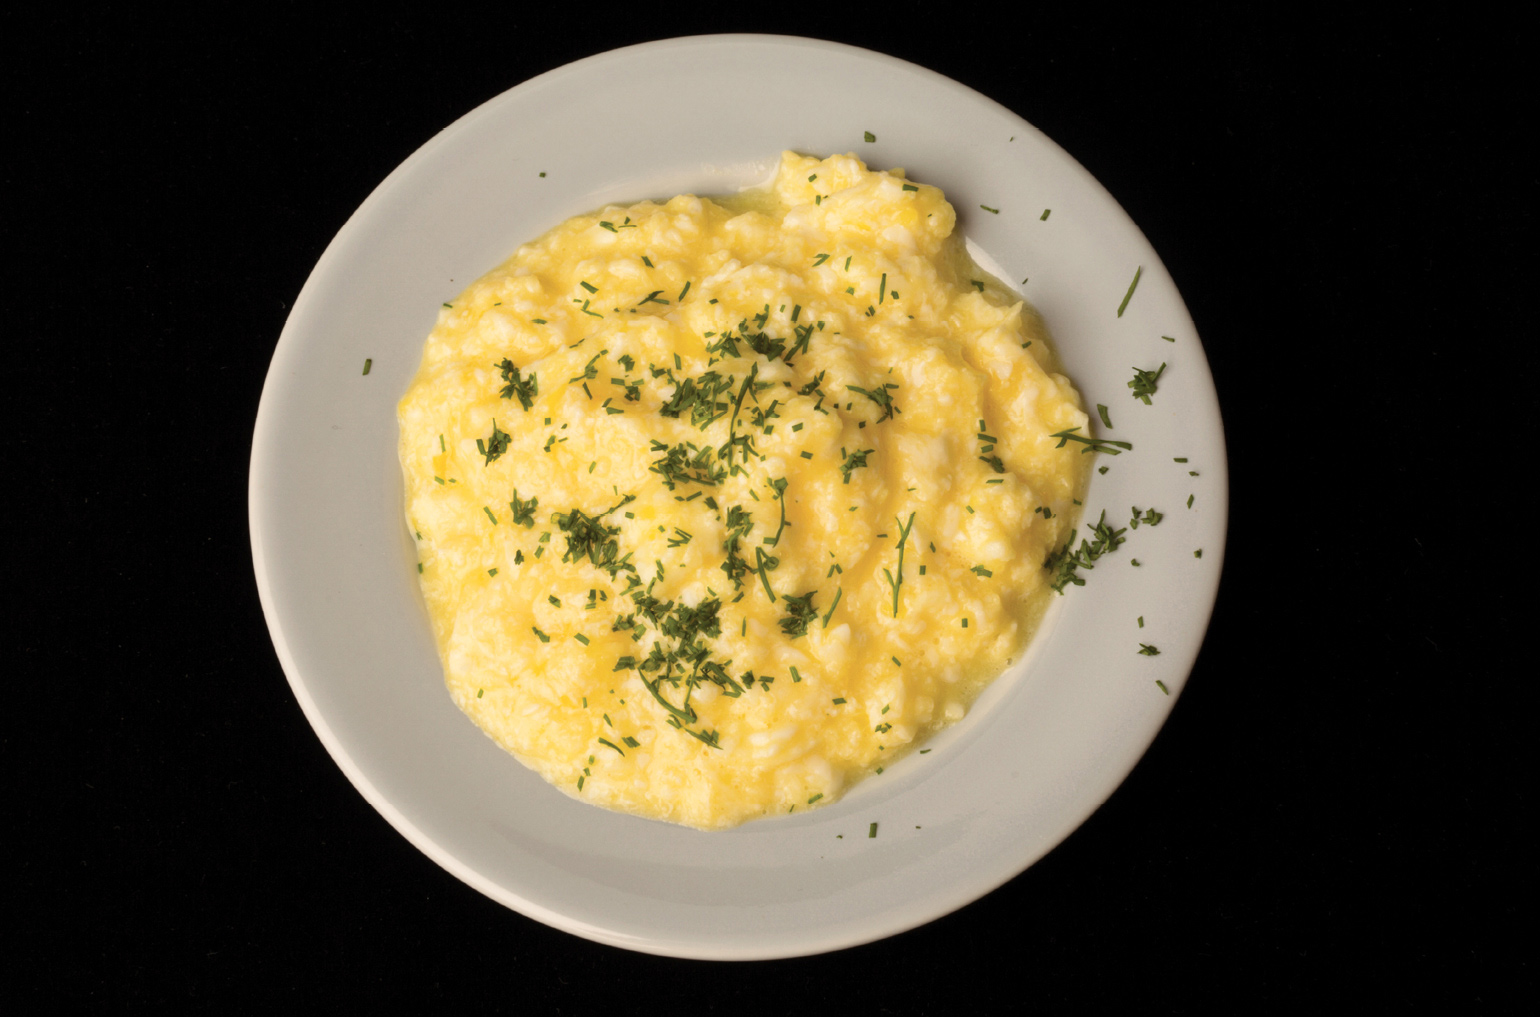
Before opening my restaurant, Saltie, I had a real phobia about cooking eggs—really, anything in regard to brunch in general. When you work in restaurants, it’s always, Ugh we have to do brunch now. The restaurant had to change personalities to do all of this short-order cooking—and for some reason, I was not good at short-order cooking. So I developed a real phobia.
When we opened Saltie, we didn’t have enough space to cook other kinds of protein in here—so it turned into a mostly vegetarian menu. The egg entered the picture in full force. There was a lot of being with the eggs: thinking about them, dreading them.
But Rebecca Collerton, one of my co-owners, had this technique for eggs that was the best of both over easy and scrambled, where you scramble the whites in the pan, leaving the yolks whole, and then you break them at the last minute, folding them into the whites. For so long, I had this idea of what a scrambled egg was, and it wasn’t exciting. This was an exciting way to cook. The technique changed me. It was so easy, and it had such a better texture than the small-curd scramble method. It was…rugged. It was easy. It was a joy.
It’s funny that for this little simple food, there are so many cooking techniques: so many styles, times, and temperatures. This took all the stress out of cooking eggs. It became the signature way for us to do it—there is no other way. I still, to this day, love it. It’s the one thing where I say, “I love cooking these eggs.” It still makes me really happy.
—Caroline Fidanza, as told to Brette Warshaw
Makes 1 serving
1 tsp unsalted butter
2 eggs
+ salt
+ finely chopped herbs, for garnish (optional)
1. Melt the butter in a nonstick skillet over medium heat. Break the eggs into the pan when it is warm but not yet hot. Sprinkle the eggs lightly with salt.
2. Let the pan heat up, and don’t move the eggs until the egg whites begin to set. Using a heat-resistant spatula, move the whites around the pan to help them cook through, while keeping the yolk unbroken, for about 30 seconds. When the whites fluff up and are almost completely set, remove from the heat and fold the yolks into the whites. The residual heat should cook the whites through and leave the yolks soft. This is kind of like scrambling an over easy egg.
3. To emphasize: Be careful not to overcook the eggs. Err on the side of runny rather than dry. Sprinkle with herbs, if desired.
Buvette’s Steamed Scrambled Eggs
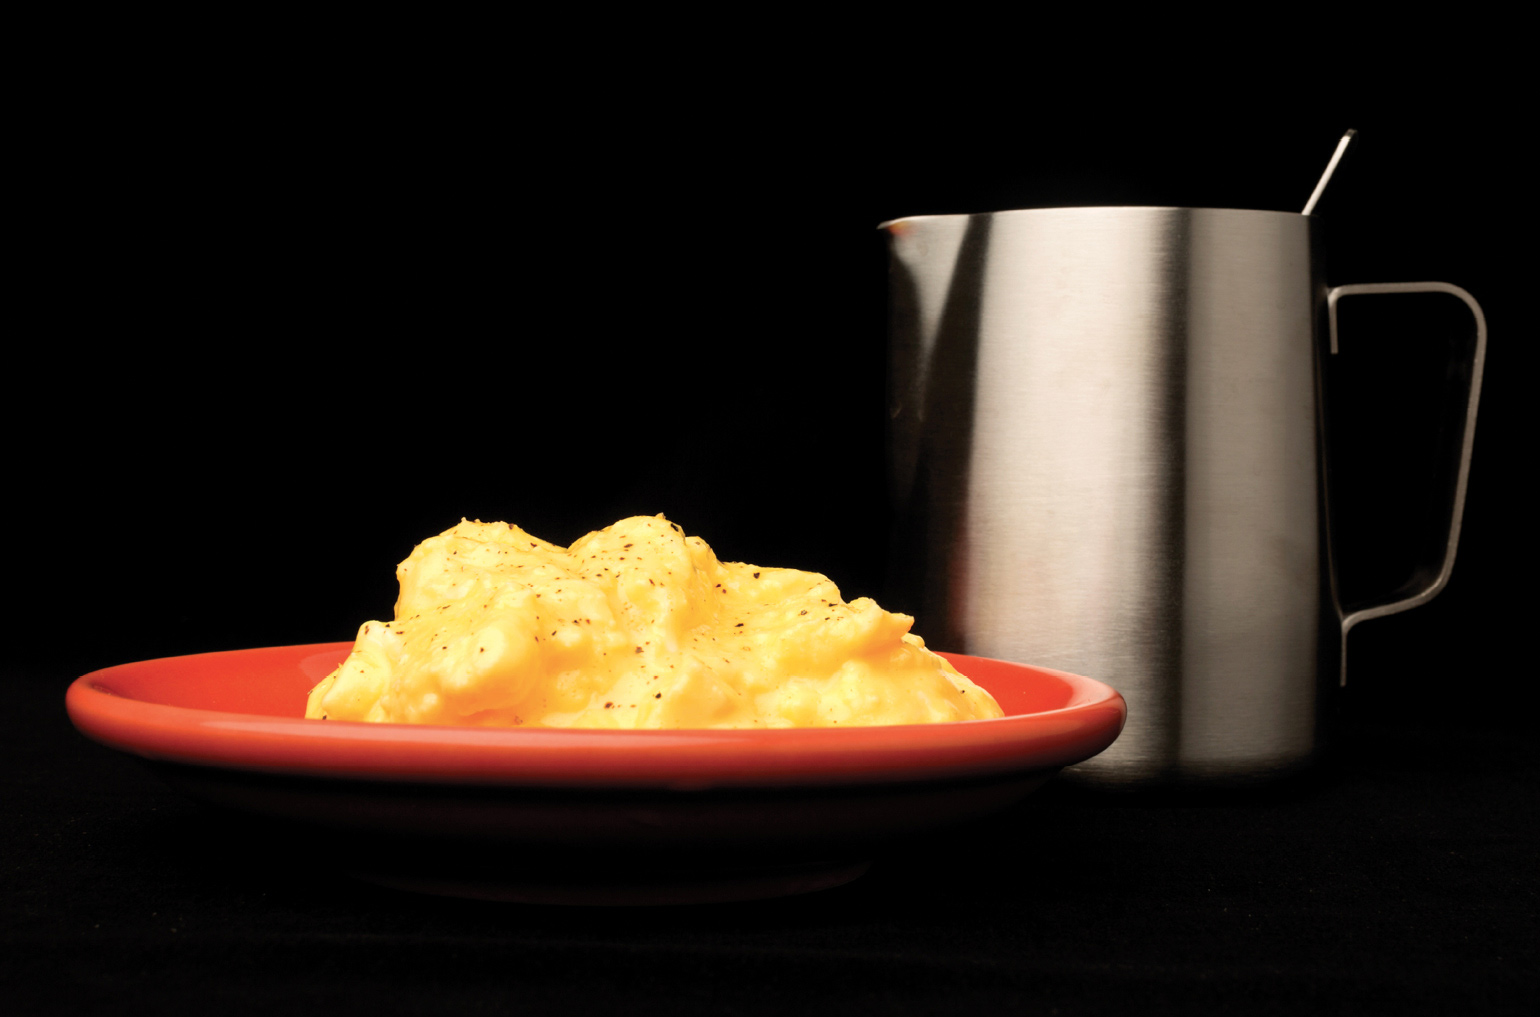
I don’t think I had ever seen this technique of cooking eggs before, but I had this piece of equipment—the espresso machine—and wondered what else I could do with it. I steamed milk, hot chocolate, wine, even soup, so why not eggs? They’re light and fluffy and are a fixture on our breakfast menu. You can make them with chives or fresh herbs, crème fraîche or butter or soft cheese, smoked salmon or prosciutto, or vegetables. But however you have them, lots of fresh black pepper is a must—I always have my eggs with lots of fresh black pepper.
—Jody Williams, as told to Joanna Sciarrino
Makes 2 servings
4 eggs
2 tbsp butter, cut in two
+ salt and freshly ground black pepper
+ soft cheese (optional)
+ chopped herbs (optional)
+ crème fraîche (optional)
+ smoked salmon (optional)
1. Crack the eggs into a porcelain or stainless steel pitcher. Using a fork, give the eggs a quick scramble, making sure to puncture all the yolks. Add the butter.
2. Using the steamer attachment of your espresso machine, submerge the wand into the egg mixture in the pitcher. Open the valve and steam the eggs, moving the pitcher in a circular motion, until curds start to form, 60 seconds or so.
3. Spoon the eggs onto two plates and season with salt and pepper. Top with cheese, herbs, crème fraîche, smoked salmon—anything you like, really!
Anda Bhurji
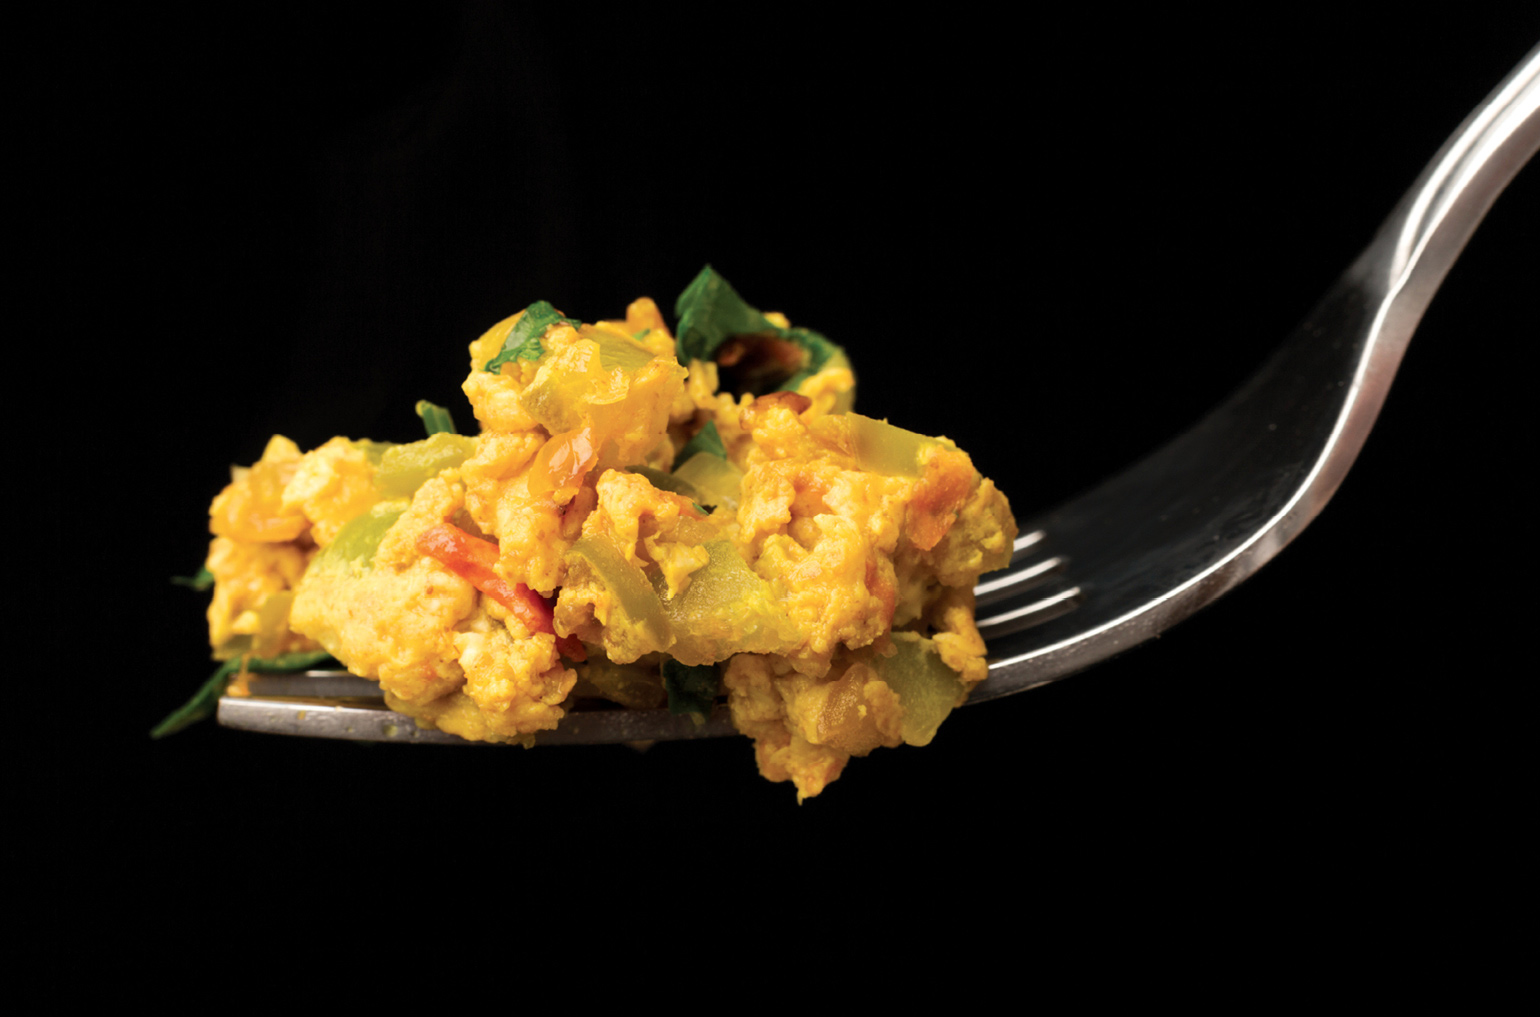
Eggs in India are nearly always prepared with onions, tomatoes, and a lot of spices. Anda bhurji, spicy scrambled eggs, is less creamy than American-style scrambled eggs, and in our house was often served for lunch, rather than breakfast, usually with roti, naan, or pav, a soft bread roll. It is savory and piquant, studded with red tomatoes and green bell peppers, and smells of fresh cilantro and cumin. When I was a child, my mother would roll a spoonful into a blazing-hot paratha, a flaky, layered flatbread. I always washed it down with a cup of milky sweet tea.
—Pooja Makhijani
Makes 2 to 4 servings
2 tbsp vegetable oil
2 tsp ginger-garlic paste (see Note)
3 green chilies, such as serrano, slit lengthwise
1 tsp cumin seeds
1 medium onion, finely chopped
2 medium tomatoes, finely chopped
1 medium green bell pepper, finely chopped
½ tsp ground turmeric
½ tsp ground coriander
½ tsp ground cumin
4 eggs, whisked lightly
+ salt and freshly ground black pepper
¼ cup chopped cilantro leaves
1. Heat the oil in a large skillet over medium heat. Add the ginger-garlic paste and sauté until aromatic, about 30 seconds. Add the chilies and sauté until softened, about 1 minute. Add the cumin seeds and sauté until browned and sputtering, about 30 seconds. Add the onion and sauté until softened, about 2 minutes. Add the tomatoes and bell pepper and stir until tender, another 5 minutes.
2. Add the turmeric, coriander, and ground cumin. Reduce the heat to low. Add the whisked eggs, season with salt and black pepper, and stir gently until the eggs begin to curdle, 2 to 3 minutes.
3. Continue to stir until the desired texture is achieved. I prefer a uniformly crumbly bhurji. Fold in the chopped cilantro, and serve immediately.
Note: While ginger-garlic paste, a South Asian staple, can be found in most ethnic grocery stores, it is easy to make at home. Combine equal parts chopped ginger and garlic and pulse in a food processor until finely chopped. Drizzle vegetable oil, a preservative, into the mixture, and continue pulsing until the paste has a smooth, consistent texture. Store in a clean, dry airtight container in the refrigerator for up to 1 month.
Matzo Brei

I was born in Queens, New York, in 1937. I learned to make matzo brei from my mother. We never in our lives measured anything. You put in enough butter so that it’s sizzly, and then you fill the pan with matzo and smush it around and cook it until it’s crispy on one side, then flip it and do the same on the other side. There are some things you don’t screw around with, and as far as I’m concerned, this matzo brei recipe is one of them.
My recipe is hardly a recipe: matzo, eggs, water, and butter. You buy Streit’s matzo. I mean, if you have to use something else, okay, but it really should be Streit’s. Matzo brei is the kind of thing you really have to try hard to screw up, but you do need to get it crispy. Frankly, nobody makes it as good as I do. I mean, there are some things I will admit that people make better than I do, but matzo brei is not one of them. The secret is making sure to get it crispy. After you soak it, you really have to get as much of the liquid out as you can; otherwise it’s just mush in the middle. It’s not a complicated thing, and if you fry it in enough butter it doesn’t matter what you do.
When I was a kid, we used to get our eggs from the milkman. Now I try to buy my eggs at the farm, and it makes a huge difference from the ones they have in the supermarket—that’s for sure. I don’t always do it because it’s a separate trip, but there is a tremendous difference. I don’t particularly like eggs sunny-side up but when I get eggs from the farm, I like them, because the eggs are so much more flavorful.
—Judie Baker, as told to Ashley Goldsmith
Makes 2 servings
2 sheets unsalted Streit’s matzo, broken into 1- to 2-inch pieces
2 eggs
+ salt
2 turns freshly cracked black pepper (optional)
2 to 4 tbsp butter
1. Soak the broken-up matzo in warm water (about 3 cups) until it gets kind of mushy, 3 to 5 minutes. Squeeze as much liquid out of it as you can in a colander without mashing up the natural flakes of the matzo. Put the squeezed-out matzo in a bowl and crack the eggs over the matzo. Add some salt. Add a couple turns of freshly cracked pepper if you like. Mix with your hands until the eggs are well blended. I don’t season it too heavily before I cook it.
2. Heat the butter in a large nonstick or cast iron skillet over medium-high heat and fry the matzo-egg mixture until it’s nice and browned and crispy on one side, about 3 minutes, then flip it over. If you’re really good, you can turn it over whole and do the other side. If not, you can do it in pieces. It depends on what kind of day I’m having: Sometimes I can flip it over whole. When it is browned and crispy on the second side, after about 2 minutes, flip onto a plate and serve. You can use maple syrup or powdered sugar, but I’m not a sweet matzo-brei person. I like salt and pepper.

Bird of Paradise
Menemen
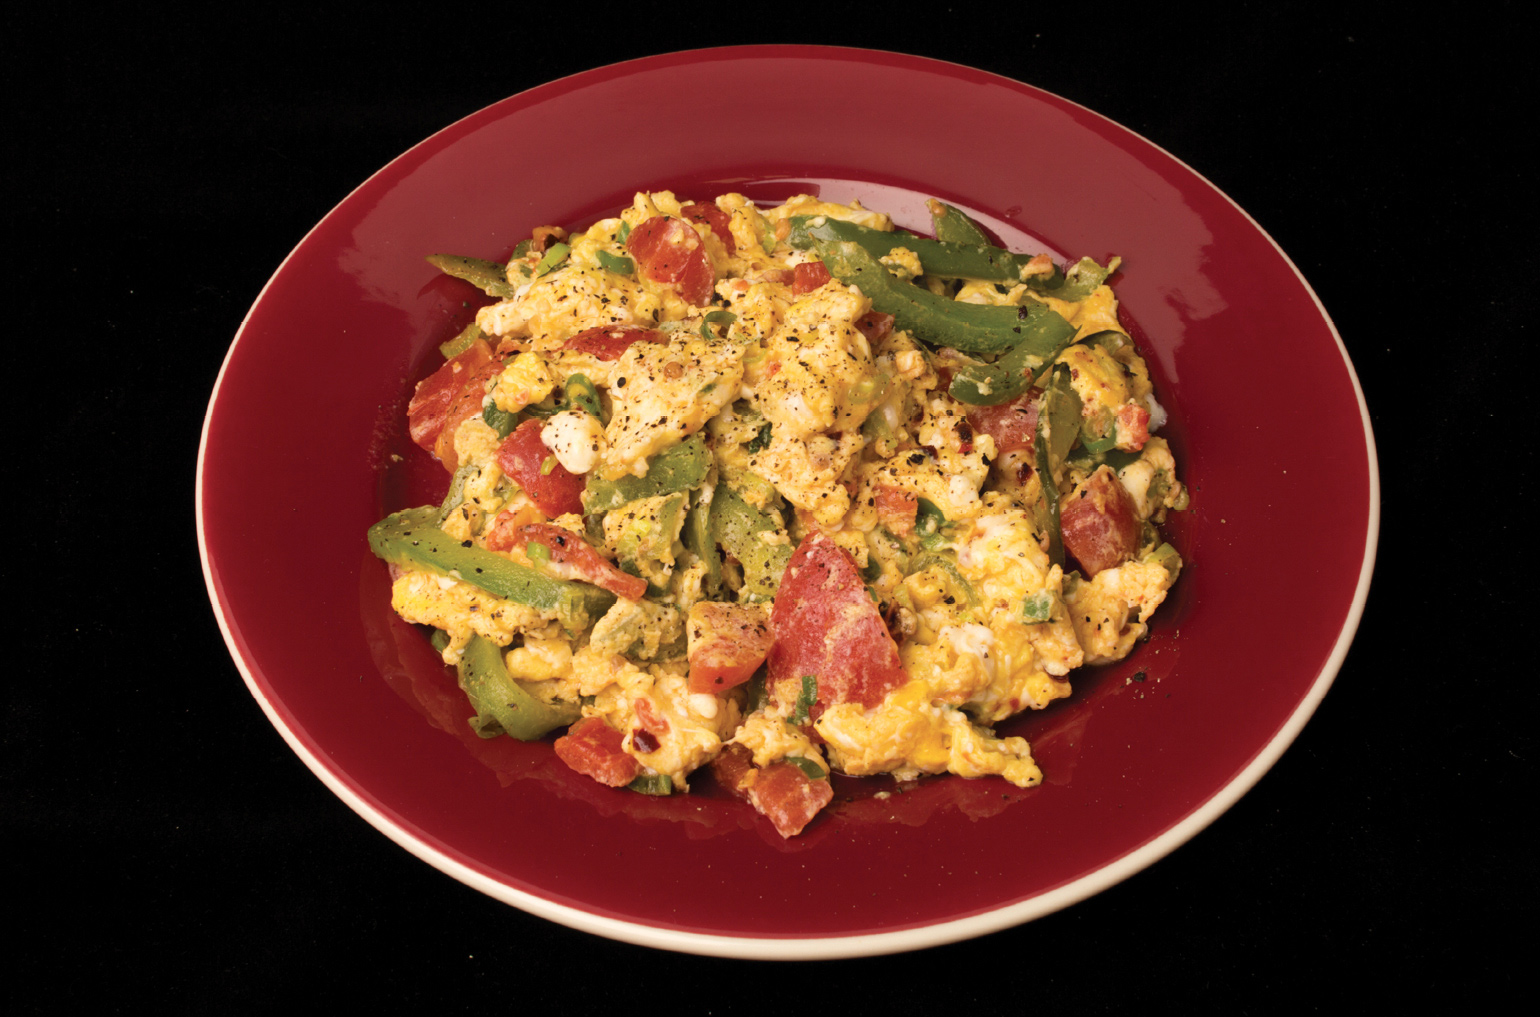
On a traditional Turkish breakfast table, there’s always a feast: cucumbers, tomatoes, olives, herby feta pastries, honey, homemade jam, kaymak (Turkish clotted cream), and simit (sesame-coated bread rings). And then, center stage, there are the eggs. Menemen is a Turkish-style scrambled egg dish made with peppers and tomatoes. There are variations of menemen that use a white cheese like feta, garlic, onions, and sucuk (sausage flavored with garlic, cumin, and chili flakes), depending on which region they’re from, and which chef is behind them. This is my version.
—Ozlem Warren, as told to Laura Goodman
Makes 4 servings
1 tbsp butter
1 tbsp olive oil
1 green bell pepper, finely sliced
3 scallions, finely sliced
4 medium tomatoes, diced
1 to 2 tsp chili flakes
8 eggs
4 oz feta cheese, crumbled (about ¾ cup)
+ salt and freshly ground black pepper
+ crusty bread, for serving
1. Heat the butter and olive oil in a skillet.
2. When the butter is melted and foaming, stir in the bell pepper and cook over low to medium heat until softened, about 5 minutes.
3. Add the scallions, tomatoes, and chili flakes and cook for 3 to 4 minutes.
4. Meanwhile, crack the eggs into a bowl and beat well. Crumble in the feta cheese and mix with a fork.
5. Pour the egg and cheese mixture into the pan and give it a good stir.
6. Scramble the eggs until they are just cooked through, retaining their juice, about 4 minutes. Season with salt and black pepper.
7. Serve warm with a little more chili flakes sprinkled on top and a chunk of crusty bread.
