Gate Frame Options

flat perimeter frame gate
Gates are the “business end” of the fence, the doorway that makes the fence a functional item. While fences are pretty simple structures, gates can be fairly complex. To endure the everyday rigors of opening and closing (not to mention the constant pull of gravity) gates must be, above all else, well built. But don’t sweat it; if you can build even a small fence, you’ll have no trouble building the gate (and you’ll probably enjoy it a lot more than the fence building).
Gates are usually made from metal or wood, but when making your own, you are pretty much restricted to the latter. With ornamental metal fences, gates can be purchased along with the fence and should be installed as directed by the manufacturer.
Wood gates can be used with just about any type of fence. The big question is what style of gate to build. With front-yard wood fences, I like gates that closely resemble the fence but have a feature or two that make them stand out. This can be done by using the same wood and finish as the fence itself while adding a subtle change or two. Perhaps the gate sits a bit higher or lower than the fence, or is placed between two visually prominent posts.
Distinctive features make a gate easy to identify and thus more welcoming to visitors. On the other hand, if a welcoming entry is what you want to avoid (say, for privacy or security reasons), then your goal should be to match the gate exactly to the fence so they appear to constitute a seamless barrier. A seamless look can also complement certain house styles.
You can build a gate about as wide or as narrow as you want. But, being of a practical mind, I suggest that you plan to make it 4 feet wide, and then determine if there is any good reason to adjust that plan.
Begin by considering what will need to get through the gate, such as garden carts and lawn tractors, in addition to people and pets. At 4 feet, a gate will most likely be wider than the exterior doors on your house, which should mean that it could accommodate anything currently in the home.
One advantage of keeping the opening at or less than 4 feet is that a single gate can handle the span between the posts. With larger sizes you might need to consider a double gate. For particularly large, heavy gates, such as those serving driveways, it’s advisable to hire a professional rather than tackle the project yourself.
An existing sidewalk, driveway, or pathway normally dictates where the gate goes. But if you’re relandscaping you might choose an alternative location. For example, if you’re redoing an entry sidewalk, you might consider offsetting the gate from the house entry, so the path between the gate and house door is curved. This design can add privacy if you plant shrubs along the sidewalk.
Another design trick is to set the gate in from the fence a few feet. This inset not only calls additional attention to the entry, even if the gate is designed to look like the rest of the fence, but it also positions the entry out of the flow of traffic, which can be a real blessing if the fence is set along a well-traveled road, path, or sidewalk.
When it comes to how the gate swings, decide whether it should swing out, in, or both ways — and whether it should be hinged on the right side or left side. Most front-yard gates swing in toward the house (rather than out into sidewalk traffic). Gates on backyard fences can swing either way but may be restricted by sloping ground or other natural obstructions, such as trees. In any case, always confirm the gate can open easily in the desired direction.
As discussed in chapter 2, gateposts are different from all other fence posts: They not only help support the fence but also the gate, which is routinely swinging back and forth and is frequently knocked around by people and objects passing through. The post that holds the gate hinges is under the greatest strain, but both gateposts need to be treated with more care than other posts. Ideally, gateposts should be heavier than the other posts and be buried deeper and backfilled more securely. They also must be perfectly plumb to ensure proper gate operation.
Regardless of what style of backfill you use on other posts or the depth at which you bury them, gateposts should be placed 6" to 12" below the frost line and be set in concrete. If frost is not an issue where you live, set the posts at least 30" deep.
In terms of size, use 4×4 posts for gates up to 3 feet wide, 6×6s for gates 3 to 5 feet wide, and 8×8s for anything larger than that. These dimensions can be a bit flexible, depending on the weight of the gate and the amount of use it will receive, but you’ll never regret using bigger posts.
There are two basic styles of wood gate frames. A full perimeter frame is usually the strongest and can be adapted to most fence styles. A Z-frame is relatively simple and has light appearance, but due to their lower strength I don’t recommend Z-frames for gates wider than 3 feet. If you’d like to have both strength and a thin profile, build a perimeter frame with the 2×4s set flat rather than on edge, using half-lap joints at the corner (see Gate Frame Options).
Gate frames are sometimes built with 1×4s or 1×6s, but I would use such thin boards only if the gate is very light and small and the thin boards are vital to the gate’s appearance. A compromise between 1× and 2× lumber is 5/4 (called five-quarter) wood, which measures about 1" thick.

Z-frame

perimeter frame
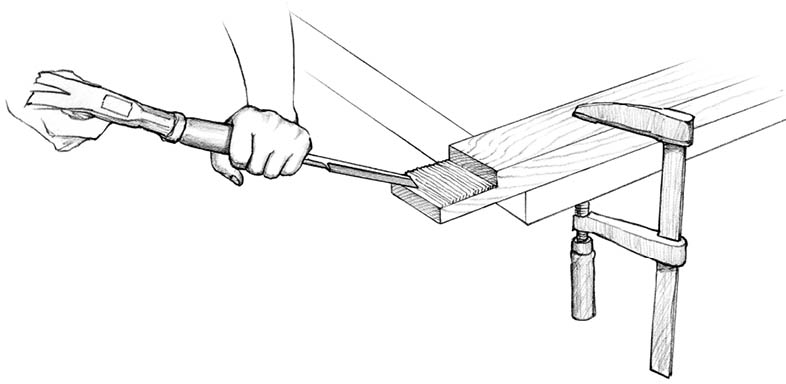
When using a circular saw, clamp the 2×4, flat side down, to a sawhorse or other sturdy work surface. This allows you to keep both hands on the saw for clean, consistent cuts. If you have a table saw but no dado blade, you can use this same approach.

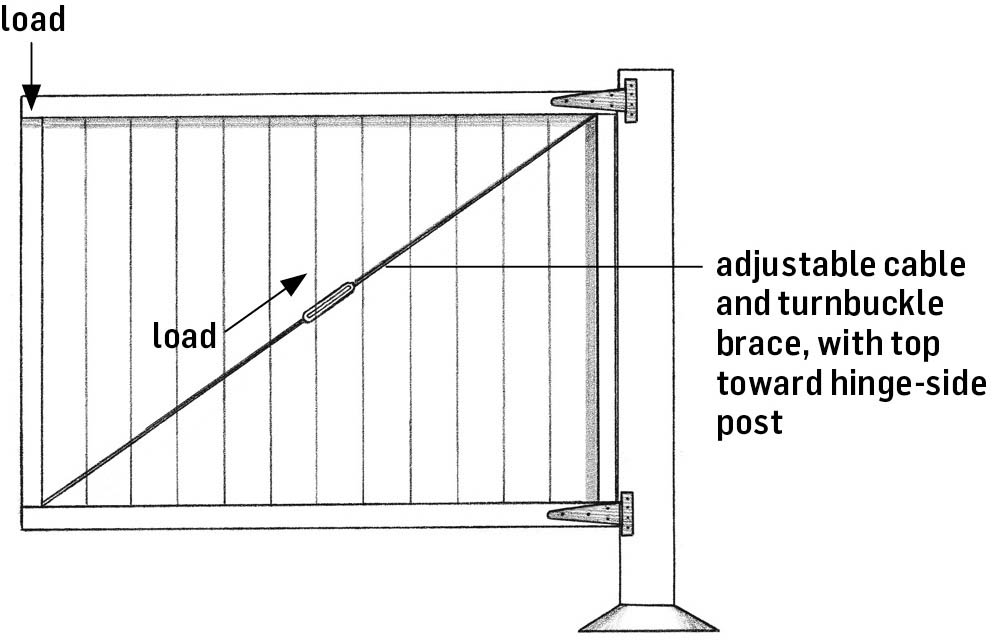
Diagonal bracing is a critical element of the frame, but it is frequently misunderstood and/or misapplied. A properly positioned wood brace transfers forces, or loads, from the top edge of the latch side of the gate down toward the bottom hinge, which is the strongest corner of the gate. If a wood brace is angled in the reverse direction, it actually encourages the gate to sag. (The hinge side is tied directly to a post and so does not sag, but the latch side is suspended and therefore is subject to gravity and other downward forces, including kids who like taking a ride on the gate.) For the load to be directed efficiently, the wood bracing must be installed tight against the horizontal boards of the gate.
By contrast, when bracing a gate with a cable (tensioned with a turnbuckle), the cable runs from the bottom corner on the latch side up toward the top corner on the hinge side.
Hence, a wood brace relies on compression, or crushing force; a cable works under tension, or pulling force.

Select your hardware before you build your fence. Learn how it installs and how much space on the side of the gate it needs to function properly, and then finalize the dimensions and style of your gate.
You can usually find a pretty good selection of hardware at one of the large home improvement stores. Smaller lumberyards and hardware stores often have a limited selection but are able to make special orders through catalogs. Two major manufacturers are Stanley Hardware and National Hardware, and both have websites that display their full product lines (see Resources).
Gate hardware tends to be either ornamental or utilitarian. Ornamental hardware is usually black and formed into attractive shapes. Utilitarian hardware has a dull galvanized or shiny zinc-plated finish and is not really intended to be admired for its looks. The price difference between these styles often is less than you might think.
Select hinges based on function, look, installation, price . . . and whatever other criteria you deem important. But always go for quality hinges that are big enough and strong enough for the job at hand. Here’s a look at the basic types:
T-hinges. The most basic style of gate hinge. They usually have a nonremovable pin with a vertically oriented “mounting leaf” (the side that attaches to the post) and a horizontally oriented “door leaf” (the side that attaches to the gate).

T-hinges
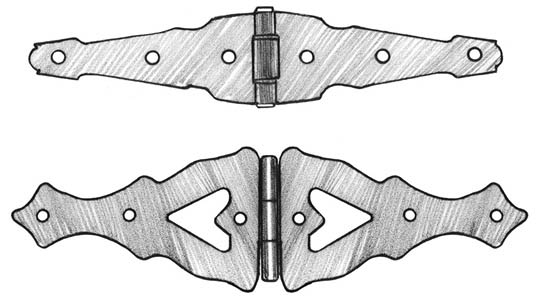
Strap hinges. Long, identical leaves on each side of the pivoting pin. They are most common on large gates and often have removable pins.

strap hinge with bolt hook
strap hinges
Spring hinges. These make the gate self-closing. Choose hinges with adjustable tension, as too much tension creates a nuisance and can be dangerous for kids and less-able adults. An alternative is a hydraulic closer (Kant-Slam is one brand), which is self-closing and highly adjustable. You need only one hydraulic closer per gate, along with one or two regular hinges.
Screw and bolt hinges. These include a strap leaf that attaches to the gate and a lag-screw-style screw hook or through-bolt hook that anchors to the gatepost. They can handle heavy gates and can be installed for either swing direction. Screw hooks are handy for round gateposts, while bolted versions are easy to tighten during periodic maintenance.
The most important criteria for choosing a gate latch are security, ease of use, and appearance. Ease of installation may also be a factor, and the size or style of your gate may limit your choices somewhat. With short gates, you can mount a latch on the inside that can be easily reached from the outside. But for taller gates, you’ll need a latch that can be operated from both sides.
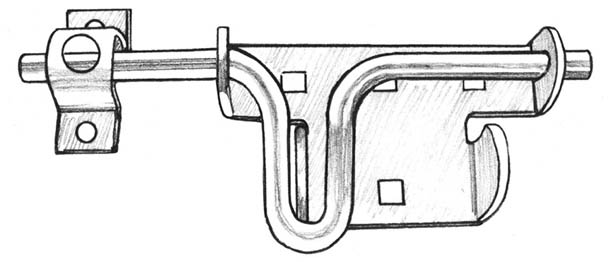
Slide-action bolt. Offers modest strength and some security; can be secured with a padlock.
slide-action bolt
Hasp latch. Can be locked with a padlock and offers security when the latch is highly visible or accessible. Those with hasps that cover the mounting screws are most secure.
Automatic gate latch. Combines both latch and stop. Some can be secured with a padlock, and most have a lever that allows the latch to be operated from the opposite side of the gate by a pullcord, which you need to install.
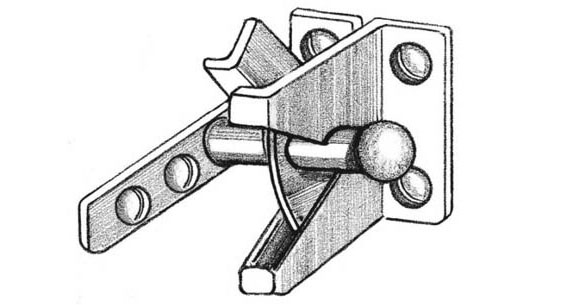
automatic latch
Thumb latch. Classic decorative gate latch that can be operated from both sides. Check the thickness of the gate before purchasing; many thumb latches don’t work on gates thicker than 25/8".
Cane bolt. This secures the gate with a steel shaft that drops down into a hole in the ground. This is commonly used to secure one or both doors of a double-door gate. Cane bolts can also hold gates open via a second hole.
Automatic latches stop the gate from swinging too far. If you use another type of latch you might need to add a custom stop to halt the gate in its closed position. A gate stop can be as simple as a strip of wood installed on the latch-side gatepost (much like stop molding on a standard door). You can also build the gate (or the fence) so that the last infill board overhangs the framing a bit to serve as a stop.
It’s a good idea to work out the details and dimensions of your gate on paper before you begin construction. You can prepare a scaled drawing, but it’s even better to draw a full-scale replica of the gate on a sheet of plywood, and then use the drawing as a working template. This is particularly helpful with a Z-frame gate, because you can set the face of the gate down on the template with the boards aligned and spaced properly before you attach the three framing boards. With a perimeter frame, it’s usually easier to construct the frame first, and then attach the infill to it.

Position the brace board beneath the gate frame to mark the cut lines.

Prop the gate in the opening so that it is level. Then slip a shim under the bottom on the latch side. Attach the hinges with the gate set in this slightly tapered position. Once the props are removed and gravity takes over, the gate will settle into proper alignment.