Growing up in the suburbs of Montreal, I was an awkward, little country boy. My backyard was my homestead (made to look a lot bigger by the extending woods of the psychiatric hospital just behind), and it is where I spent the majority of my first twenty years (the backyard, not the hospital). I have a picture of me on the day of the high-school prom, not in a suit posing with some cute classmate, but in my backyard garden holding a big head of lettuce I had grown.
I learned about gardening in the same way I’ve learned about most things in my life: part from just doing and part from the Reader’s Digest L’Art de Vivre au Temps Jadis (The Art of Living in the Old Days), a book I pulled from my parents’ shelves. My grandparents had these kinds of books, too: How to Settle in the Woods, How to Build a Homestead, How to Make Brambleberry Jelly, How to Generate Your Own Electricity. Boxes in the basement held copies of Mother Earth News magazine or books on Vermont folk medicine, all of them filled with ideas and projects.
When I was twelve, the next-door neighbors had a pile of bricks near the foundation of their home just waiting to be stolen. I grabbed some bricks, dragged them to my house, and then stuck them together with clay and began to build what became my first makeshift smoker. I didn’t get to use it for long because, much to my surprise, I got a Little Chief smoker for my birthday the next year. Pastrami, almonds, bacon, and beef jerky were my menu mainstays, and my neighbor and best friend, Matthew Roberts, was always there to sample the goods (and the bads, like smoked eggs and banana gum made from pine sap and bananas). Thus, my smoking journey was launched.
A quick disclaimer before I go on: I understand that building smokers has been cool for so long that it’s no longer cool, and we are by no means the first to embark on a how-to of smoking techniques. We’re no Apostles of Bacon, and we know that the world needs another praise of pork like it needs another celebrity TV dance show. That being said, preserving and salting meats have always been a big part of the Quebecois culture, starting with the coureurs des bois tradition, and they are a big part of Joe Beef culture, too.
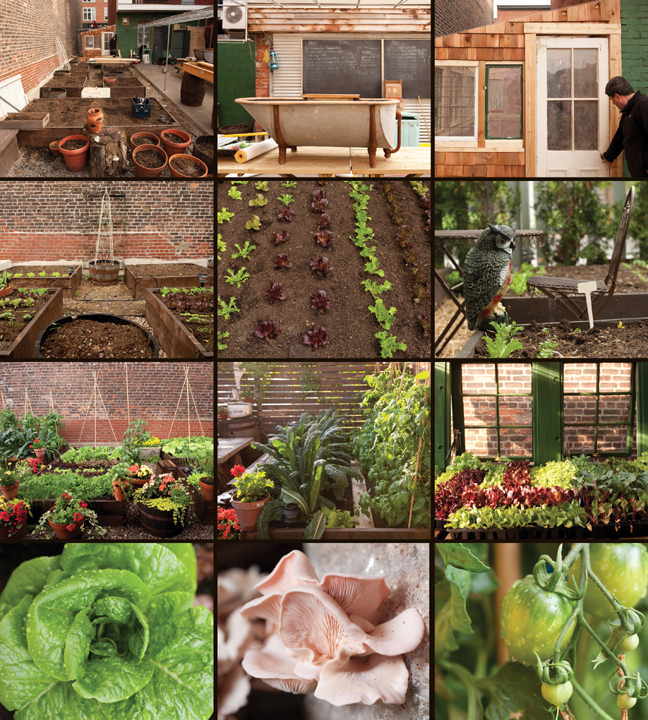
Fast forward to 2009: Liverpool House and McKiernan Luncheonette had been built and the shared back garden was starting to thrive. Dave and I had always talked about having a smoker (which is why we held onto the chimney when we first moved into the Joe Beef space) and the time just seemed right. We had seen a little smoker at Monas (the Montreal equivalent of JB Prince kitchenware in New York) that cost two thousand dollars. Allison said to wait. Because she’s usually right and because I had no choice, I waited. But in the spring of 2009, with paycheck in hand and nothing else to spend the money on, I secretly bought a MIG welding machine for a thousand dollars so we could build a smoker on our own.
It was to be neither a southern BBQ pit smoker, nor a northern cold smoker suitable for making a batch of fish boucanné. I wanted it to have a cabinet, which is unusual these days, so I didn’t have any plans to follow. I just used my imagination. In my head, I could picture a smoker that might have been used at the Montreal smoked-meat shops, like Lester’s or Schwartz’s, at the turn of the twentieth century. After I shared my plans with Dave and Allison, we all agreed that the Joe Beef smoker should look something like this.
“La Matematica non è un’opinione.” (Mathematics is not an opinion.)
—Wally Ricciardelli
My dad always draws models of planes or machines on letter-size graph paper, a practice that I inherited. (A lot of things at Joe Beef have started as sketches on those pads. It’s a good way to orient yourself with space and volume.) So I drew the plan for the smoker. When I put my ideas down on paper, I could see and understand how the smoke would progress, how the smoker would draw, where the damper should go, and so on. The process of drawing the plan forced me to read, to dig up more information. When I have an idea, or when I have a build going on, I feel like a crackhead looking for a rock. I’m completely obsessed and I’ll do anything to finish the project, including sabotaging the restaurant by hijacking the kitchen staff to help me. This totally screws the staff’s prep time and generally pisses off everyone, especially my partners.
An area was set aside in the backyard for construction. This was when the garden only took up about half the space it does today. In one of the daily pilgrimages to the hardware store, I bought a metal chop saw, a black welding helmet, metal brushes, a plethora of metal grinders, and a welder’s hammer. Quincaillerie Notre-Dame, aka Rona hardware, is one block east of the restaurants on the same street and thank god for that. It’s the oldest hardware store in Montreal, and walking inside is like stepping back in time (excluding the Slap Chops on sale near the cash register). Because Rona services an industrial neighborhood, it still sells pipe wrenches for the guys who install gas pipes and tools for railroad workers. Speaking with any of Rona’s staff, whether about plumbing or welding, is a completely humbling experience. If you need one screw, they will sell you one screw. It’s that kind of place.
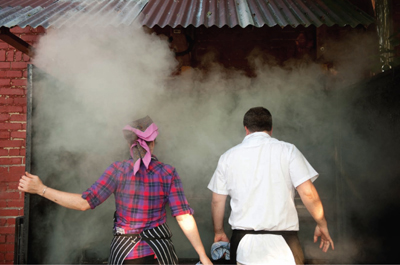
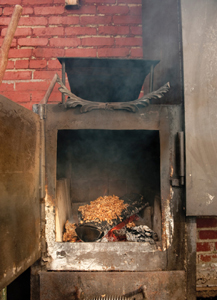
It took ten days to build the smoker. Max, an old Joe Beefer, and François Coté (another staff member) worked on the smoker every day before service. We would still be welding when the first customers of the night arrived, creating disgusting fumes of smoke and the smell of flux and ruining their apéros on the terrace. Our favorite welder (and Italian), Wally Ricciardelli was on speed dial and instrumental in giving advice on all things metal. The days passed in a blur of measurements, hard work, and Dilallo burgers (neither Dave nor I have ever lost any of our many pounds while working on a new project, although we always believe we will). Once the smoker was welded, the guys at Rona dropped by with thirty bags of concrete, which all of us mixed by hand. We dug the hole, made the foundation, tied the rods, and poured the concrete. The next day it took six of us to lift the smoker to its position and bolt it into place. The smoker sits on the back wall of Joe Beef; on the other side is the dish pit.
There are complex rules about smoke dynamics that I didn’t know then (or now, really) but had a feeling about, so I was happy when it all started to work: the firebox burning, the baffle directing heat, and the chimney smoking. It’s been easy to use and maintain since the beginning. As a river finds its bed in soil, the smoke goes where it wants to, and our cooks have mastered its little imperfections. We realized that airflow in a smoker is finicky: you want smoke, but not too much; you want heat, but in good proportion. I wanted to combine the smoker with a gas burner, but the gas burner was way too hot, so that idea was out. The perfect temperature is 225°F (110°C), and we’re able to maintain that temperature until November (at which point we start making nova-cured fish, cold-smoked hams, and the like). The smoker isn’t chrome or mechanized, but we think it’s handsome, if only because it looks like it’s always been there.
A year later, at any given time, the smoker could contain three dozen racks of ribs, two pig heads, a dozen pork butts, twelve rabbit summer sausages, and lots of duck, chicken, and rabbit legs. It is used five days a week throughout a good part of the year, making prep time more interesting for the kitchen, and creating new “classics” on the menu for the customers. The smoked duck legs are a good example. When you add the element of smoke, the dish becomes completely different.
One evening, Habs player Roman Hamrlik sat by himself at the Liverpool bar with a Czechvar and the duck legs. The next week, a bunch of other Czech and Slovak players came to try the same thing. We can’t really say it is a Liverpool House classic, but it is definitely an expectation that we’ll serve Czechvar and duck legs during hockey season now. The smoker also gave rise to the Joe Beef ribs, which are now a phenomenon because the recipe was aired on the popular Quebec television program, À la di Stasio. Because of Josée di Stasio, we sell an average of forty racks of ribs per night between Joe Beef and Liverpool House, and we get the chance to meet people from all corners of Quebec who are willing to drive three hours for dinner (because Josée said to).
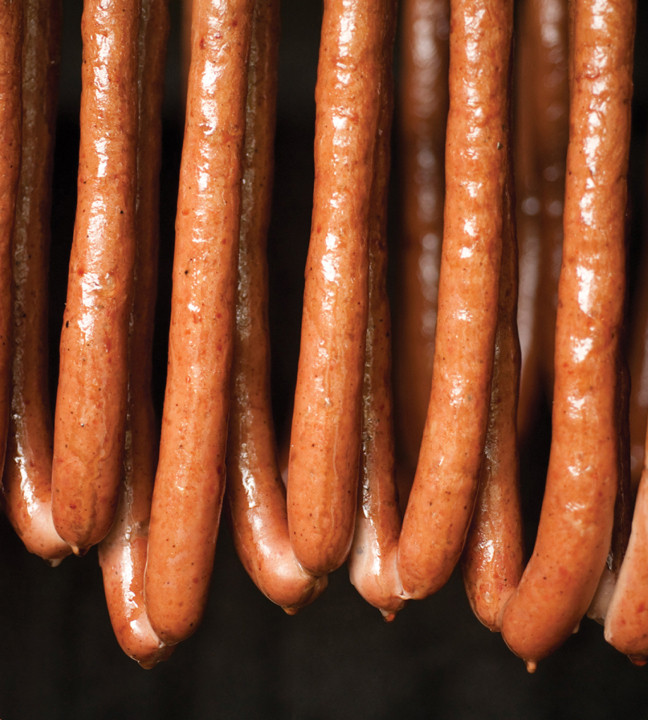
The following recipes were inspired by the Joe Beef smoker. —FM
I HAVE ALWAYS HAD A FASCINATION with utilitarian objects, whether it be a globe on wheels with a liquor cabinet inside, Felco #2 pruning shears, the perfect verre à vin d’Alsace, or a nice smoker. And apart from the eBay bills, this fascination feels healthy. When my head is populated by projects, the work feels less like a job and more like inspired fun. François, Emma, Manu, Marco, and all of the Joe Beef staff seem to feel the same way; they show up to work wanting to make summer sausage, wanting to sew cloth casings, or just wanting to talk about getting back to the roots of making good baloney.
Because we built the smoker on our own, we understand it more fully. We also understand that most people who want to start smoking won’t have the space (or the desire) to build a freestanding smoker like ours. As a result, we’re providing two options for smoking at home: (1) building your own smoker (similar to ours) or (2) building a wood-chip device for an outdoor grill (see The Hot Délicieux Sandwich). We have included the original plan for our smoker here, and have based our instructions accordingly. We understand that this plan will probably be useless for you. But we can’t fake an original, so you should see the information below as more of a “plan fantastic,” like a time-travel machine or the floor plan to Grizzly Adams’s cabin.
A WORD ON SAFE WELDING
I am in no way a professional welder. I took welding in agricultural college and practiced here and there for a few years. One thing I know, though, is how to work safely. To start, cover your eyes with safety glasses when you cut, assemble, or handle steel tubes. Weld with your full-face helmet on. I had cataract surgery at age twenty-eight, probably from being courageous. Cover your head and wear inflammable long sleeves and pant legs, even when grinding: the shower of sparks can and will ignite anything. Wear your cuffs outside of your work boots. No lighter in your pockets; that’s just stupid. Wear welding gloves (not ones that are old and transparent). If it rains or the ground is wet, wait it out. Use an approved extension cord. Warn people nearby when you’re about to weld by screaming “WELDING!”
A (VERY MINIMUM) LIST OF TOOLS
• MIG, flux core, or stick welder (220 volts operation is a must)
• 12-inch (30-cm) abrasive chop saw
• 4½-inch (11-cm) abrasive grinder with grinding wheel and wire-brush wheel
• Soapstone marking chalk
• Welder hammer
• Large welder vise grip
• 2 magnetic squares
• Arc-welding helmet
• 1 piece heavy steel scrap, to use as a weight
• Cutting pliers (in case the wire sticks)
• Proper and sufficient flux core wire
• Powerful electric drill with ½-inch (12-mm) metal bit
• Measuring tape
• Acetylene torch kit or MAPP TurboTorch
All the tubing used is square steel with walls ⅛ inch (3 mm) thick (see diagram).
For the main body frame:
• four 1½ × 1½ × 60 inches (4 × 4 × 152 cm)
• four 1 × 1 × 69 inches (2.5 × 2.5 × 175 cm)
• four 1 × 1 × 46 inches (2.5 × 2.5 × 117 cm)
• four 1 × 1 × 21 inches (2.5 × 2.5 × 53 cm)
• four 1 × 1 × 22 inches (2.5 × 2.5 × 56 cm)
• two ¼ × 2½ × 26 inches (6 mm × 6 cm × 66 cm) [strap for the base]
• fourteen angle 1 × 1 × 23 inches (2.5 × 2.5 × 58 cm) [for the racks]
For the doors:
• four 1 × 1 × 48 inches (2.5 × 2.5 × 122 cm)
• four 1 × 1 × 36 inches (2.5 × 2.5 × 91.5 cm)
For the firebox:
• four 1 × 1 × 17 inches (2.5 × 2.5 × 43 cm)
• two 1 × 1 × 24 inches (2.5 × 2.5 × 61 cm)
• two 1 × 1 × 22 inches (2.5 × 2.5 × 56 cm)
For the exterior, using sheet metal ⅛ inch (3 mm) thick:
• one 72 × 48 inches (183 × 122 cm)
• two 72 × 24 inches (183 × 61 cm)
• one 48 × 24 inches (122 × 61 cm)
• two 36 × 48 inches (91.5 × 122 cm)
• one 24 × 30 inches (61 × 76 cm)
For the firebox doors and top, using sheet metal ¼ inch (6 mm) thick:
• one 24-inch (61-cm) square
• one 6 × 21 inches (15 × 53 cm)
• one 24 × 18 inches (61 × 46 cm)
The door handles and hinges pin are ½-inch (12-mm) steel rod, bent with a torch. Cut and then position with ½-inch (12-mm) ID washers welded in place. The tube for the hinges is ⅝-inch (1.5 cm) interior diameter for ⅛-inch (3-mm) wall thickness.
1. Draw the plan, calculating the cutting lengths. It’s a lot of fun to look for other smoker references in books like The Practical Handyman’s Encyclopedia and old welding guides, but I’m sure you can also just use the dreary World Wide Web.
2. Establish a comprehensive list of materials.
3. Order and purchase the materials from your local steel supplier.
4. Measure the steel twice and mark (accurately) once before cutting with a band or chop saw.
5. Prepare your welder MIG, flux core, or stick in a safe and dry area.
6. Mock fit all of your tubes.
7. Tack weld (read: temporarily set before final weld) the front and back panel, check the square by taking two opposite cross measures; they have to be even. If all is even, finish the welds.
8. Assemble the front to the back with the connecting tubes. If it warps, straighten with a small jack or a ratchet strap.
9. Assemble and weld the door frames and the firebox.
10. Cover the frame with premeasured and cut steel sheets. Number them to avoid mistakes. Airproof the smoker by tack welding the exterior and interior.
11. Measure, cut, and bend the rods with a torch for the handles and the hinges.
12. Same for the grate for the firebox.
13. Paint the exterior with commercial stove paint.
14. Install the damper and the thermometer.

Makes 4 hefty sandwiches
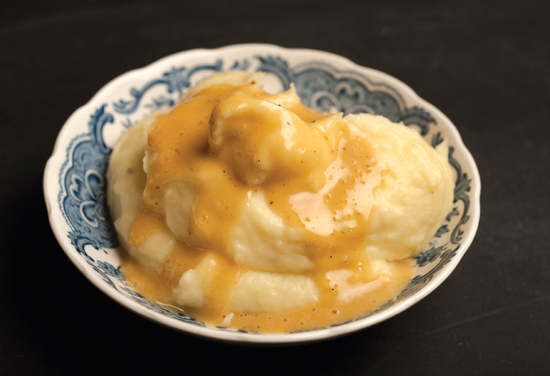
Even though places like St. Hubert Rotisserie have been serving the “hot chicken sandwich” since the 1930s, no factual proof exists that it originated in Quebec. Our only proof is that we haven’t seen it outside the province, whereas inside, it’s a weekly staple. It’s basically hot, shredded chicken, served with galvaude (peas and gravy, usually a poutine variation) and two pieces of white bread.
In this recipe, you have four meat options: pork, duck, rabbit, or chicken. They’re all hot and they’re all delicious. For pork, use the pulled pork recipe in Scallops with Pulled Pork. For the other meats, there are three steps: (1) cure it, (2) smoke it, and (3) confit it. If you don’t have a smoker can, you will need to dig up an empty 1-quart (1-liter) tin can for step 2. If you live in the States, D’Artagnan (www.dartagnan.com) will deliver the duck fat you need in step 4 to your door. If not, use bacon fat.
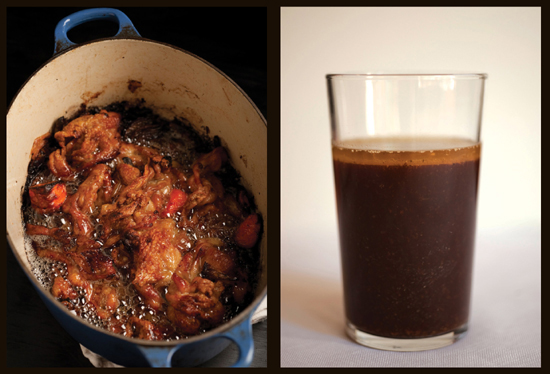
The gravy is the perfect clone of the local poulet barbecue sauce. It’s not a hot sauce, but it’s also not that thickish gravy that tastes like spinach and baking soda. It’s zingier, a cross between BBQ sauce and gravy. It is classic on these sandwiches, but it’s also good, minus the bread, on duck, pork, poutine, or yes, chicken.
SMOKED MEATS
¼ cup (55 g) kosher salt
¼ cup (50 g) packed brown sugar
1 clove garlic, chopped
1 tablespoon peppercorns
6 whole duck, rabbit, or chicken legs
About 1 quart (1 liter) all-natural wood chips
About 2 tablespoons olive oil
9 cups (about 2 kg) rendered duck fat
DELICIOUS GRAVY
1 small onion, finely chopped
1 teaspoon minced garlic
¼ cup (60 ml) roast chicken, duck, or pork drippings
¼ cup (30 g) all-purpose flour
¼ teaspoon cayenne pepper
2 teaspoons Colman’s dry mustard
1 teaspoon celery salt
½ teaspoon allspice
½ teaspoon pepper
2 tablespoons HP Sauce or Gentleman Steak Sauce
1¼ cups (300 ml) tomato juice (we use Heinz)
2 cups (500 ml) chicken stock
Salt
8 slices white bread
1 cup (140 g) frozen or very fresh shelled peas
Good Fries, crinkle cut
1. To cure the meat, in a small bowl, mix together the salt, sugar, garlic, and peppercorns. Rub the mixture into the legs thoroughly. Place the cured legs in 1 or more lock-top plastic bags and refrigerate for 4 hours. When the time is up, remove them from the bag(s), rinse off the cure, and pat dry with paper towels.
2. To smoke the meat, start the BBQ on low-medium setting. To prepare the smoker can (or a 1-quart/1-liter tin can), fill it to the top with the wood chips. Cover the entire can with aluminum foil and poke 3 or 4 holes in the top. By now the BBQ should be hot and smoking. Place the can on the fire on the opposite side of where you will put the meat.
3. In a large enough bowl, coat the legs with the oil. Put the legs on the BBQ, close the lid, and smoke for 45 minutes. There should be a good amount of smoke billowing out near the end. Now remember, you’re not cooking the meat here. You are smoking it for flavor.
4. To confit the meat, preheat the oven to 300°F (150°C). Pour the duck fat into a large (big enough for 6 legs) baking dish and let it melt. When the fat is melted and liquid, nestle the 6 smoked legs in it, side by side. If you’re using duck or rabbit legs, cook in the oven for 3½ hours; for chicken, cook for 2½ hours. You know you’re on the right track when after 45 minutes the bubbles in the fat start rising to the top like a glass of 7UP long after it’s been poured.
5. Meanwhile, make the gravy. In a saucepan, sweat the onion and garlic in the drippings over medium heat for 4 to 5 minutes, or until slightly colored. Add the flour and stir well with a wooden spoon. Add the cayenne, mustard, celery salt, allspice, and pepper and stir for another minute or two, then add the HP sauce. Stir again for a minute and then add the tomato juice and the stock. Whisk about 10 turns, reduce the heat to low, and simmer for 20 minutes. Strain the gravy; you should have about 2 cups (500 ml). Season with salt. Just before serving, reheat until piping hot.
6. When the time is up on the confit, remove the pan from the oven and let cool for 30 minutes. Take the legs out of the fat. Now you have confit legs. If you want to stop here and not make the sandwich, we don’t blame you. You can enjoy the legs on their own. (Confit legs are the best leftovers: an absolute treat and they taste better in the days after.) If you are going ahead with the sandwiches, while the legs are still warm, pull the meat off the bones and then pull the meat apart using either your fingers or 2 forks.
7. Get out 4 plates, and put 1 bread slice on each plate. Divide the meat evenly among the bread slices. Pour half of the hot gravy over the meat and bread. Top the sandwiches with the remaining bread slices. Add the peas (thawed, if using frozen) to the remaining gravy and put on the heat for 2 to 3 minutes, enough to warm a little. Pour the gravy and peas over the top of the sandwiches. Serve with the fries.

Makes 4 racks; serves 4 to 6
Our use of ribs extends beyond a plate of ribs. We use them in gnocchi and in potato soup, and we will cut them into three, remove the bones, and make a McKiernan ribs sandwich. As lard was a staple at the turn of the century, so are ribs at Joe Beef. We provide two ways of cooking: roasting and smoking. Serve with Good Fries.
2 tablespoons smoked paprika
2 tablespoons garlic powder
2 tablespoons Colman’s dry mustard
2 tablespoons pepper
½ teaspoon ground bay leaf
4 racks baby back ribs, about 1½ pounds (680 g) each
One (12-ounce/375-ml) bottle beer, if roasting the racks
About 1 quart (1 liter) all-natural wood chips
1. Preheat the oven to 325°F (165°C). In a small bowl, mix together the paprika, garlic powder, mustard, pepper, and bay. Place the rib racks in a roasting pan and coat them generously with the spice mix, then shake off the excess. Pour the beer between the ribs. Cover with aluminum foil.
2. Roast for 2½ hours. During the last 30 minutes, remove the foil and coat the racks with the BBQ sauce so the surface is well glazed.
3. To smoke the ribs, the first thing to do is to find out if your BBQ can maintain the target temperature. Get an oven thermometer and test it; if it holds a temperature between 210° and 230°F (100° and 110°C) for a good 20 minutes, you’re fine. Also, because the racks require a 4-hour smoke time, it’s clever to check for a good supply of gas. The ingredients are the same for smoking as for roasting except for the beer. In other words, you mix the spices together and coat the racks with the mixture. Next, fill the smoker can (or any 1-quart/1-liter tin can) to the top with the wood chips. Cover the entire can with aluminum foil and poke 3 or 4 holes in the top.
4. Nowadays, most BBQs have 3 burners: light only the left one, turning it to low-medium; your ribs will cook on the right. You may want to put an aluminum cake pan filled with water under the grill rack, to prevent flare-ups and to provide moisture. Place the ribs on the right side, place the can on the opposite side, and close the lid. Check now and again to make sure the temperature does not go above 240°F (115°C), adjusting the flame as needed. After 2 hours, check the ribs. Are they too soft or too hard on the edges? Listen to the force and adjust. They should be ready in 4 hours. When I smoke ribs, I like to keep the BBQ sauce on the side and dip the ribs.
Serves 4
The best fries are done with potatoes that have never seen the cold. It has something to do with starch converting to sugar at certain temperatures. If you’re interested in the specifics, check out Harold McGee’s On Food and Cooking: The Science and Lore of the Kitchen. At the restaurant, we use a russet potato from the Île d’Orléans in the Saint Lawrence River (which Cartier originally named the Isle of Bacchus because of the native vines that covered the landscape), but you can use anything similar.
This recipe really is made to work with a deep fryer. If you don’t have a small one at home, a 5-quart (5-liter) thick-bottomed, high-sided pot and a deep-frying thermometer will work. We use half canola oil and half beef fat, which always makes better fries the second day. If you can get your hands on rendered beef leaf fat (the fat from around the kidneys), definitely use that. If this is all too much, you can use peanut oil. We don’t, as we can’t piss off both the vegetarians and the allergics.
A few years back we started tossing our fries in escargot butter (its name comes from its use, not its contents; it’s basically garlic butter) and now we can’t stop. We also like to add a little grated pecorino as we toss.
4 large russet potatoes
Salt
Oil for deep-frying
Escargot butter (see Whelks with Escargot Butter), optional
¼ cup (30 g) grated pecorino cheese (optional)
1. Peel the potatoes and cut into ⅜-inch (1-cm) sticks—the size of a Crayola crayon. Place the sticks in a deep bowl, sprinkle in 1 tablespoon salt, and mix in with your hands. Pour in just enough hot tap water to cover. Let sit for 1 hour.
2. Drain the potatoes, rinse well in cold water, and dry well with a salad spinner or a kitchen towel.
3. Pour the oil to a depth of 3 inches (7.5 cm) into your deep fryer and heat to 260°F (125°C). Working in batches, fry the potatoes for 4 to 6 minutes, or until almost tender. Drain in the basket and place on a baking sheet.
4. Now heat the oil in the fryer to 360°F (185°C) in preparation for a quick double fry. Again working in batches, fry the potatoes briefly to crisp them up but not color the outside. They should still be a nice blond color. Scoop them out of the oil, allow the oil to heat up again to the 360°F, and then fry them one last time until crisp. Do the taste test to see if they are ready, then pat them dry with paper towels.
5. Serve immediately sprinkled with salt or tossed in the butter with or without the cheese.

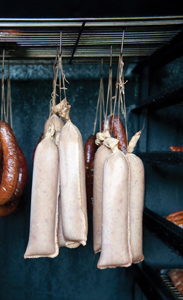
Liverpool House Rabbit Sausage
Makes 6 sausages, each about 8 inches (20 cm) long and 3 inches (7.5 cm) in diameter
When Fred travels, the first place he always goes is to a grocery store. Forget the idyllic markets and the virile butchers; he has this immense fascination with supermarkets. Nothing compares to landing in Paris at 9:00 A.M. and heading to the loaded yogurt aisle of a Monoprix. He feels the same when he’s visiting western Canada, checking out the sausage sections. Far from artisanal anything, we’re sure, but the array is crazy: midget baloney, cotton-sack summer sausage, skinless Mennonite, headcheese, jerky of all kinds, and on and on.
It’s a fun challenge to take an old commercial sausage and just make it honest again: good meats and real smoke. This one we made with Emma, who was chef de cuisine at Liverpool House at the time. We suggest the use of muslin bags for this sausage in particular. You might find them online, or, as a proper Joe Beefer, you can sew them yourself (see Note). The penetration of smoke is much better and you don’t need a stuffer. You just do it by hand.
3 pounds (1.4 kg) boneless rabbit, cut into 1-inch (2.5-cm) cubes
1 pound (455 g) boneless lean pork loin, cut into 1-inch (2.5-cm) cubes
2 pounds (900 g) fat pork cheek or fatback, cut into cubes
3 tablespoons kosher salt
1½ cups (375 ml) water
½ cup (110 g) powdered milk
¼ cup (30 g) Colman’s dry mustard
2 tablespoons sugar
2 tablespoons ground black pepper
1 teaspoon Prague powder #1
6 (2⅜by 24-inch/6 by 61-cm) sausage casings (we buy them from sausagemaker.com)
Butcher string for tying the casings
POACHING INGREDIENTS
2 onions, each studded with three cloves
4 bay leaves
Preserved Stone Fruits for serving
1. In a large bowl, combine the rabbit, pork loin, pork cheek, salt, water, powdered milk, dry mustard, sugar, pepper, and Prague powder and mix well. Cover and refrigerate for at least 2 hours or up to overnight.
2. Fit your meat grinder with a plate with medium-size holes (⅜ inch/10 mm). Slowly pass the meat mixture through the grinder. Using your hands, stuff 1 pound (455 g) of meat into each casing by inserting small balls of the meat mixture and squeezing the casing to compact the mixture. (If your casings are too long, just trim them to size.) Tie ’em up with butcher string. Place the sausages on a tray, cover with a cloth, and let sit at room temperature for 1 hour.
3. To smoke the sausages, preheat the smoker to a chamber temperature of 200°F (93°C). (To smoke your sausages on a barbecue, follow the smoking instructions for the Hot Délicieux Sandwich.) Hang the sausages in the smoker (we hang them from a grill using small stainless-steel hooks) and smoke them until they reach a core temperature of 152°F (67°C). That’s about 3 hours at 185°F/85°C (the chamber temperature will drop a bit once the sausages are inside). We figure if you have a smoker, a meat thermometer is probably not such a big deal for you. Be sure to spray the sausages with water every 30 minutes. When the sausages are finished smoking, let them cool for a day.
4. Alternatively, poach the sausages in simmering water with the onions and bay leaves for 30 to 40 minutes, or until they reach a core temperature of 152°F (67°C).
5. Serve the sausages with a pocketknife, crackers, and the stone fruit preserve, preferably while on a fishing trip. The sausages will keep for a week (if poached) to 10 days (if smoked) wrapped in aluminum foil in the refrigerator.
Note: To make your own casings, cut unbleached muslin cloth into 14 by 6½-inch (35 by 16.5-cm) rectangles. Fold in half lengthwise and sew along the long and one short side to make a 14 by 3¼-inch (35 by 8-cm) bag. Wash the casings before use.
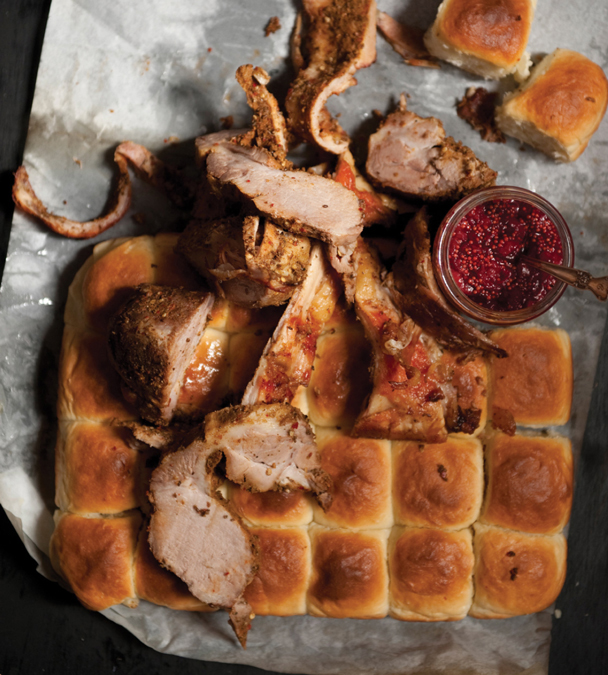
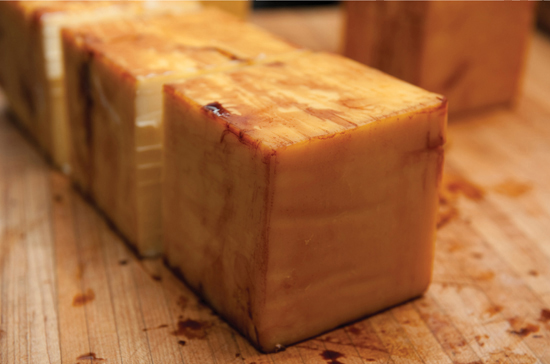
Serves 6 to 8
Porchetta is something you want to eat lukewarm: work on it in the morning, cook it in the afternoon, take it out, and eat it an hour or so later. We’re aware that a traditional porchetta is a whole stuffed pig; this is our version and has little affiliation with the Italian classic. Because you wrap the pork belly around the shoulder, you need a pretty skinny piece of Boston butt. We buy a 5-pound (2.3-kg) shoulder, slice it lengthwise, and use half (freeze the other half for another time). This recipe may look labor-intensive, but it won’t be, especially if you get your butcher to do all of the trimming for you.
4-pound (1.8-kg) piece pork belly, skin removed and reserved
2.5-pound (1.1-kg) cylinder Boston butt (pork shoulder)
8 sprigs rosemary
2 cloves garlic
½ jalapeño chile
2 tablespoons fennel seeds
¼ cup (60 ml) white vermouth
2 tablespoons salt
1 tablespoon pepper
¼ cup (60 ml) olive oil
Canola oil for coating
2 large carrots, halved crosswise
Potato Dinner Rolls (recipe follows)
Babylon Plum Jam (recipe follows)
1. You want to be sure that the belly width and the butt length are the same, and that they don’t look like a cartoon hot dog (big wiener, small bun). So if they are not identical, do some trimming. Now, preheat the oven to 350°F (180°C).
2. For the seasoning paste, in a food processor, combine the rosemary, garlic, chile, fennel seeds, vermouth, salt, pepper, and olive oil and process until a paste forms. Or, use a mortar and pestle.
3. Rub the paste on the butt and the belly, inside and out. Wrap the butt in the belly, fat side out. Then stack the wrapped pork butt on the belly skin; in a perfect world, it would be the same size. Roll tightly and tie securely with kitchen twine. Coat the outside with canola oil.
4. Line up the carrots, to make a support, on the bottom of a roasting pan. Place the tied pork on top. Roast for 2 hours. Lower the temperature to 275°F (135°C) and continue to roast for 5 hours more. You are slow roasting pig fat here, so it’s much better to slightly overcook than to undercook. The smell, just as much as the look, should clue you in to its doneness.
5. Remove from the oven and let rest for 30 minutes. Snip the twine, slice, and serve with the rolls and jam.
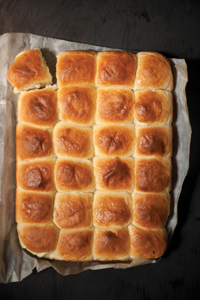
Makes 12 rolls
You know those cheap dinner rolls you eat at your grandma’s house on Sunday nights? The supersoft, semiattached kind you buy in plastic bags? These are those dinner rolls. The base of the recipe is mashed potato, so it’s important to start this recipe as soon as you’ve just finished making mashed potatoes. These are perfect to serve with a pulled pork sandwich or on porchetta.
2¼ teaspoons (1 package) active dry yeast
1 tablespoon sugar
6 tablespoons (90 ml) lukewarm water
1 egg
⅔ cup (160 ml) milk, at room temperature
½ cup (100 g) warm mashed potatoes
3½ cups (510 g) all-purpose flour, plus more for rolling
1 tablespoon salt
⅓ cup (75 ml) rendered bacon fat, melted and cooled to room temperature
1. In a small bowl, combine the yeast and sugar with the water and let sit for 15 minutes, until frothy.
2. Using a stand mixer fitted with the dough hook, knead together the egg, milk, mashed potatoes, and the yeast mixture on low speed. Add the flour and salt and knead for 4 minutes. Add the bacon fat by the spoonful and mix until the dough is homogenous. You want to have a smooth dough consistency. It should taste like raw mashed-potato bread dough—in other words, not very good.
3. Transfer the dough to an oiled bowl and set it in a warm place. Let the dough rise for an hour, or until doubled in size. Transfer the dough to a lightly floured work surface, punch it down, and knead it for a minute. Divide the dough into 12 equal pieces (2½ to 2¾ ounces/70 to 75 g each; remember to use your scale!). Roll each piece between the palm of your hand and the floured work surface, pressing down gently. Line a rimmed baking sheet with parchment paper and oil the sides. Place the dough balls, seam-side down, on the baking sheet ¼ inch (6 mm) apart, so when they rise they attach to one another. Let rise for 45 minutes in a warm place, or until doubled in size. Meanwhile, preheat the oven to 375°F (190°C).
4. Bake the rolls for 20 to 25 minutes, or until very lightly browned. They should not turn golden brown, but instead look like the cheap grocery-store doughy rolls that your grandma serves. Remove from the oven and let cool on a rack for 15 minutes before tearing apart and serving.
Makes about 1½ pints (680 ml)
The spice and heat in this jam make it more at ease with meats and cheese than toast. As for the Babylon term, it’s simply in relation to the avid devotion that the world’s kitchen has for reggae music!
1½ pounds (680 g) plums (about 10), pitted and chopped
2¼ cups (455 g) sugar
¼ cup (60 ml) distilled white vinegar
1 small fresh or dried red chile
2 tablespoons ground ginger
½ cup (105 g) mustard seeds
1. In a heavy saucepan, combine the plums, sugar, and vinegar and let stand for 1 hour.
2. Place the pan over low heat and cook, stirring occasionally, for 1 hour, or until the mixture thickens.
3. Add the chile, ginger, and mustard seeds and continue to cook, stirring, for about 15 minutes, or until you have the right jammy consistency. It should be thick, not soupy. If you’re using big plums, you may have to keep it on the heat for a bit longer to cook away the extra water. Remove and discard the chile. If you don’t want chunky jam, buzz it with a hand blender.
4. Let cool for 10 minutes before serving or jarring. The jam will keep for up to a month stored in a tightly sealed container in the refrigerator.

Makes about 2 pints (1 liter)
This is Fred’s mom, Suzanne’s, recipe. It is an old Belgian Walloon standard—a quick and tasty pickle that is good with pork roast and sausages. You can also mix the “brine” with nut oil as a dressing for beets. And use it to give a welcome buzz to a bland wine sauce: just a drop or two.
This pickling solution works well with almost any stone fruit. The amount of liquid you need will vary according to the stone fruit(s) you use. Here, the amount has been geared to 1 pound (455 g) cherries and/or Italian plums. You may need to adjust it if you use other stone fruits. Because we are deathly afraid of preserves gone wrong (from watching an old episode of Quincy, M.E., where the culprit was botulism), we suggest using superclean plastic containers and always refrigerating the preserves.
1 pound (455 g) large dark cherries or Italian plums or half cherries and half plums
1 cinnamon stick
1 bay leaf
2 cups (500 ml) white wine vinegar
1 cup (250 ml) water
1 cup (200 g) packed Demerara or brown sugar
1. Rinse the fruits and wipe dry. Burn the tip of a safety pin briefly to sterilize, then prick each plum about 8 times and each cherry about 4 times.
2. Divide the fruits into your containers of choice and pack tight; divide the cinnamon stick and the bay leaf evenly among the containers.
3. In a saucepan, combine the vinegar, water, and sugar and bring to a boil, stirring to dissolve the sugar. Remove from the heat and pour over the fruits. Let the fruits temper for about 2 minutes, then cover and promptly place in the fridge.
4. Give the fruits at least a week to pickle properly before serving. They will keep for up to 2 months.
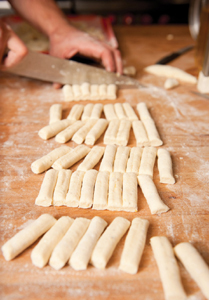
Makes 20 to 24 doughnuts, depending on size
Pier Luc Dallaire has worked for us for five years (and counting) as a cook, busboy, bartender, oyster shucker, and now, a real French waiter! His dad, Bertrand, was a kindred soul gardener, and his mom, Huguette, made these killer doughnuts. They rise with baking powder, not yeast. And you will often find them at weekend country flea markets. The Isle-aux-Grues cheese is a great Quebec product that we couldn’t resist smoking. Together they sing.
2¾ cups (350 g) all-purpose flour, plus more for dusting
1 tablespoon baking powder
½ teaspoon salt
¼ teaspoon freshly grated nutmeg
¼ teaspoon ground cinnamon
¼ cup (55 g) unsalted butter, at room temperature
½ cup (100 g) sugar
2 eggs
¼ cup (60 ml) whipping cream (35 percent butterfat)
¼ cup (60 ml) milk
1 teaspoon vanilla extract
Canola oil for deep-frying
1 cup (300 g) maple syrup
8 thin slices Smoked Cheddar (recipe follows)
1. In a bowl, stir together the flour, baking powder, salt, nutmeg, and cinnamon. Set aside.
2. In a second bowl, cream the butter with the sugar until smooth. Add the eggs, one at a time, beating after each addition until combined. Slowly add the cream and milk, mixing until combined, and then mix in the vanilla. Lastly, add the flour mixture and stir until a stiff dough forms.
3. On a floured countertop, roll out the dough about ½ inch (12 mm) thick. With a doughnut cutter, cut out the doughnuts. We prefer a smaller doughnut, but it is up to you.
4. Pour the oil to a depth of 3 inches (7.5 cm) into your deep fryer (or according to the manufacturer’s instructions) and heat to 350°F (180°C). (Or, use a thick-bottomed, high-sided pot and a deep-fat thermometer.) Working in batches, add the doughnuts and fry for 3 to 4 minutes, or until they are a nice light brown. Drain on paper towels.
5. In a small saucepan, bring the maple syrup to a boil over high heat, then lower the heat and simmer for 5 minutes. With your trusty tongs, dip and coat the doughnuts with the syrup. Serve 4 to 6 doughnuts per person with a couple of slices of the Smoked Cheddar each.
2-pound (900-g) block Cheddar cheese
1 tablespoon Canadian whisky
2 tablespoons maple syrup
1. Combine the cheese, whisky, and syrup in a large freezer bag. Seal the bag and place it in the freezer for 4 hours.
2. Start your smoker and heat it to 85° to 105°F (30° to 40°C); you want to keep the smoke “cold,” that is, at a slow smolder, using mostly wood chips.
3. Insert a remote thermometer into the cheese and place it in the smoker. Smoke the cheese until it reaches an internal temperature of 39°F (4°C). The smoked cheese will keep in the fridge for up to 1 month, wrapped tightly in plastic.
TALL TALES, TASTE, AND A FEW THEORIES
Je n’ai jamais un service qui ne finit pas. (I’ve never seen a service not end.)
—Nicolas Jongleux, to a stagiaire during a particularly hellish night
WHEN YOU’VE BEEN in the restaurant business for more than fifteen years, you begin to develop ideas about the way things work. And after years of these ideas being legitimized, they become theories: how you know when a cook is going to last, why you can’t trust people with thin lips, why catering always seems like a nice idea but never is, and so on.
A FEW THEORIES
The following section is a collection of these random theories. It is the equivalent of a thought experiment, like the Éclair Velveeta or the Joe Beef Double Down, one-off items on our menu. The customers who order these dishes are immediately endearing to us, forever noted in the “good” book.
Theory #1
Square plates: Like a man wearing a tuxedo top with shorts, square plates do not work with Joe Beef food. They look heavy in a waiter’s hands and are awkward to fit on the table. The food looks unappetizing; it’s like eating a culinary version of a Malevich painting. Even in Paris, you’ll go to the oldest of brasseries (so old they’ve been designated as World Heritage sites), where the toilets are so antiquated they can’t be outfitted for the handicapped, and you’ll see raw tuna whiz by on a square plate. French food doesn’t belong on square plates.

Theory #2
Horseradish: This heady root is the cure for all. People think we serve shaved Parmesan next to our raw oysters, when in fact it’s a snowy mound of pungent, freshly grated horseradish. While it’s a seemingly small part of the meal, horseradish is a key part of our mise en place. A pile on a steak gives your appetite a shiver. We simply peel the thick, phallic root; cut it into chunks; store it in water and a bit of vinegar in the fridge; and then grate it with a fine rasp at the very last minute. Try it in a piping hot broth when you suffer your next cold.
Theory #3
The four seasons of lardons (sliced bacon): We cut our bacon according to the season. There are times of the year when the warm, fatty piece is a big part of the flavor and texture of the dish.
Winter lardons are big, thick, and long. During the dark days of January, when your beach body is a distant memory, toss your sorrows and your potatoes with a handful of large lardons, ¼ inch (6 mm) thick and 1 inch (2.5 cm) long, for when your latitude leaves you hanging with cellared roots, far-fetched greens, and melting pork neck. In spring, you’re getting tired of bacon but still want to taste slivers in the spaghetti lobster. This is a detox from winter, not quite summer, and the lardons’ matchstick figure does justice to snow morels, fiddleheads, or dandelions. In summer, you want just a hint, the tiniest dice, like a square from a matchstick. It seems only logical when you’re serving perfect little vegetables and barely touched sea goods, and they don’t assault the flavor of great summer libations like the Francois Cotat Sancerre Rosé. And in the fall, we cut thickish (¼-inch/6-mm) cubes, a clue of what’s to come. The faint summer lardons would get lost in autumn’s mushrooms, game, and roots. Such fare requires the companionship of a more substantial heft.

Theory #4
Greasy vegetables: When you cook vegetables and they look greasy, it’s never because you’ve used too much fat. It’s because you didn’t use enough water. The “undercover” fat is somehow less repugnant than the blatant, oily fat. When you finish sauce in a pan, or you have a braised dish that seems split or greasy, scoop out a couple tablespoons of the fat and replace it with a few drops of cold water. The sauce will become more satiny, matte, and appetizing.
Theory #5
Hangovers: Whenever someone in our business comes to work saying he or she is in “top shape,” he or she is extremely hung over. To alleviate said hangover, nothing beats a glass of ginger juice, a few B vitamins, a bottle of Pedialyte, and some Spam and American processed cheese prepared with three bunches of kale, wilted.
Theory #6
Fancy knives: People have too many knives these days. The classic chef’s knife and, on the smaller side, a slicer and a butcher knife, are all you really need. We have a friend who is somehow a traveling salesman of Damascus steel knives. He drops in once in a while to tempt the kitchen staff with his newest imported beauties, promising “you can pay later.” It’s too tempting for a couple of knife passionistas like Frank and Marco. It’s an easy sale, like a herring in a seal tank. That said, our favorite knives are carbon steel from E. Dehillerin, near Les Halles in Paris. They’re black beauties: easy to sharpen and you know that Dumaine, Chapel, and Bocuse have cooked with them. Another great brand is Dexter-Russell, with carbon-steel blades and beech handles. They are cheap and dependable, and still made in America.
Customers as friends: When you are a chef, some of your customers become friends. They may ask you to cater (see box above), or you may get invited to parties with people who are different from those in your regular social circle (which is awkward). This gives us a Pretty Woman–type vibe. Not in a whorish way, but because most of us are from modest, ordinary backgrounds and suddenly we find ourselves in this blue-blooded patch of life. It’s weird and seldom enjoyable, yet we know we were invited with the nicest intentions. Perhaps this is more of an admission than a theory.
Theory #8
Perks: It’s always seemed funny to us that a restaurant will go out of its way to offer special treatment to people with millions in the bank, yet the couple who saved for months to eat at the same place on a special occasion is somehow lucky to be there. If we notice a passionate student-type or a couple on a first date eating in one of our restaurants, we will give them the world. They will have the entire menu for thirty bucks. It’s our pleasure to give them a complimentary bottle of good wine. Of course, this is not a habit, but we do it once in a while.
Theory #9
Manners: Never wear your hat in an Irish pub.
Theory #10
Not everything is meant to be seen: An animal being slaughtered is not funny or pretty, but it’s necessary, and most people who do it, do it with care. We don’t have to witness every process in the universe. Waiters run their asses off, but should show up to your table cool, calm, and collected, treating you like you’re the only customer. That’s service.
Theory #11
Le Creuset cookware: We’re not hawking kitchenware here, but if you’ve gotten this far in the book, you probably realize that having a proper enameled cast-iron pot is crucial. They’ll fit a chicken, a shank, a soup, lentils, everything. They stay hot and they stay shut, plus they work on induction plates. We suggest having a few sizes: a braiser, a baking dish, and a few individual stoneware pots (ramekins). Stay with the original brand; you can obtain spare parts and the guarantee is unreal. The other alternatives are more contemporary, not as fluid or elegant. We also like how these pots are steeped in tradition: on their honeymoons, our parents rode sleds down the cobblestone streets in the old cities of Portugal, eating pineapple with Madeira and thinking about the wedding gifts of fondue sets and Le Creuset pots back home.
CATERING REQUEST TO JOE BEEF
Bonjour: J’espère que vous allez bien. I am working in conjunction with Tourisme Montreal for a potential event for a group of high-end clients and gourmet connoisseurs. The event will take place at Montreal’s City Hall (on the terrace if the weather permits). We would like to propose a menu from your restaurant Joe Beef—the concept behind this being local, accessible food with gourmet flair! Please suggest a menu for this evening. This could be a cocktail dînatoire, or a sit-down meal. Because these clients may come back to Montreal with their own corporate events, this is a good opportunity to impress them so that they will want to use your services in the future. Merci beaucoup de me répondre aussitôt que possible si cette pièce de business vous intéresse.
RESPONSE FROM DAVID MCMILLAN
Thank you so much for thinking of us! Sadly, we are not set up in any way for catering and hate doing it. You are very kind, but I think we would only disappoint you with our bad attitudes and lethargic ways.
In college, Fred dreamed he was composing a recipe for soup on sheet music, with the chords and scales representing salt and temperature: the soup was the song, the ingredients were the notes. This isn’t just a peek into Fred’s psyche, but rather a nice way of explaining how taste can be expressed in both the way we enjoy food and the way we create it. It’s also a perfect setup for our last theory, which involves taste and the Big Mac.

The Big Mac has everything in the right amounts. The combination is so perfect that the whole becomes better than the parts. There is a great lesson to draw from the deliciousness involved here. You see, not only do you have salt, but you also have fat, then sugar and acid, and then the bite: pepper, chile, or whatever “the edge” is. At the intended serving temperature, it’s irresistible and unstoppable. The Big Mac tricks our evolutionary upbringing because your mouth thinks it’s great, yet you will not need that energy to labor in the fields, so to speak, for the day to come. Obviously, we’re not using the example of a Big Mac for its political or nutritional value. I agree that we all have to eat better, so let’s instead use the Big Mac as a model of optimal taste equilibrium. Draw from it to make your lentil soup taste right, your wine jus zingy.
Let’s start: There is sweet, salty, fat, bite, and sour. When you add them to a dish to make something taste good, you don’t add the same amount of each; instead, you add the same perceived amount, perhaps a pinch of something versus a teaspoon of another. When you season in small amounts, you barely perceive the change until you reach the threshold, at which point the effect becomes clear and the equilibrium becomes crucial. The point at which everything is in holy harmony is the optimal equilibrium. When you alter one of the five constituents, it alters the harmony and automatically triggers a need to increase the four others. So no one element can move independently. The accord remains coherent until the superior threshold, at which point harmony is no longer possible. Note that the movement is unidirectional and irreversible. For example, when I’m cooking lentils, I let them sit in the cooking juice and I start salting the broth. But salt alone will make the broth briny, so I add a couple dashes of vinegar, a pinch of sugar, then a pinchette of cayenne (if I like it hot) and maybe a bit of butter, or, if the broth is cold, a bit of oil and a bit more of everything. The result is lentils that taste like lentils on steroids.
Anyone who has ever freewheeled a béarnaise or mayonnaise recipe knows what correcting flavor is all about, and that’s the basis of the Big Mac Theory. It is an example of a precarious yet optimal equilibrium that exists between all of the taste actors. You can intervene with texture and/or temperature, but that’s a whole other game. In France, a few years back, I had oeufs en meurette: it was more buttery and salty than I expected, yet because the dish had a healthy dose of vinegar, the whole thing was perfect (and memorable, as drag queens on stilts were handing out flyers in the Marais and looking at my eggs tenaciously as I ate).
The following recipes fit the Big Mac profile in taste, or are a simple, basic element of other dishes. —FM

Serves 4
This recipe is a perfect illustration of the Big Mac Theory: It hits everywhere at the same time, it tastes perfect, and it’s so rich but you barely notice it. It’s a bit weird, a bit trashy, and very tasty. Awesome.
1 onion, thinly sliced
1 tablespoon canola oil
1 tablespoon sherry vinegar
1 tablespoon currants
½ cup (125 g) Velveeta cheese
⅔ cup (150 g) warm mashed potatoes
Salt and pepper
2 tablespoons chopped fresh chives, plus more for garnish
4 thin slices fresh foie gras, each about 3 ounces (85 g)
4 choux pastries for Éclairs, about 6 inches (15 cm) long
Flake salt
4 slices bacon, cooked crispy
1. In a sauté pan, cook the onion in the oil over low heat for about 5 minutes, or until caramelized. Mix in the vinegar and the currants, remove from the heat, and set aside.
2. In a small saucepan, combine the Velveeta and mashed potatoes and set over low heat. Cook until the cheese is melted, stirring occasionally. Season to taste with salt and pepper and then stir in the chives. Remove from the heat, cover the saucepan with foil, and keep warm on the stove top.
3. Set a sauté pan over medium-high heat and turn on your exhaust fan. Season the foie gras slices on both sides with salt and pepper. When the pan is hot, add the foie gras and sear for 1 minute on each side, until nice and brown. Remember to flip the slices away from you to avoid splashing your belly. Transfer the foie gras to a plate and let rest. Some extra fat will melt off the foie gras. It’s pure yellow, it’s good, keep it.
4. Cut the top off each pastry lengthwise, about two-thirds from the bottom (so the top is half the thickness of the bottom). Put a tablespoon and a half of the onion mixture in the bottom of each pastry. Divide the mashed potato and cheese mixture into four portions and place on top of the onion. Add a slice of foie gras, a pinch of flake salt, a sprinkle of chives, a slice of bacon, and the pastry tops. Serve warm.

Ricotta Gnocchi with Rich and Tasty Red Sauce
Serves 4
This red sauce is a steroid ingredient that we use to pump up wimpy dishes like gnocchi or in chicken gravy for a quick sauce chasseur. Most of our sauces are done this way, baked in a good French enameled cast-iron pot. We’re not too fussy about the type of tomatoes we use, just canned and whole; San Marzano will do. If you cannot obtain pig skin from your butcher, then a pig’s trotter, halved lengthwise, works, too. You could also add Smoked Baby Back Ribs to the sauce before serving it with the gnocchi.
SAUCE
1 square pork skin, about the size of a sheet of printer paper
Salt and pepper
1 sprig rosemary
1 anchovy fillet
1 bay leaf
1 small fresh or dried chile
2 cloves garlic, roughly chopped
1 tablespoon fennel seeds
2 (28-ounce/796-ml) cans plum tomatoes
2 tablespoons olive oil
1 onion, finely diced
8-inch (20-cm) square Parmesan cheese rind (optional)
GNOCCHI
1 whole egg
1 egg yolk
2 cups (455 g) fresh ricotta cheese
1 cup (130 g) all-purpose flour, plus more for rolling and dusting
¼ cup (30 g) grated Parmesan cheese
Grated zest of ½ lemon
¼ teaspoon freshly grated nutmeg
Salt and pepper
8 quarts (8 liters) water
4 big handfuls ice cubes
¼ cup (60 ml) neutral oil
1. To make the sauce, preheat the oven to 350°F (180°C). Place the pork skin fat side up on a plate, and season generously with salt and pepper. Lay the rosemary, anchovy, bay leaf, and chile across the skin. Sprinkle the garlic and fennel seeds over the top. Roll the skin up tightly and tie it around and around with butcher twine, like you would a cheap sleeping bag for a college trip to Camp Lake Crystal. Set aside.
2. Open the cans of tomatoes and crush the tomatoes between your fingers over a large bowl.
3. In a Dutch oven, heat the oil over medium heat and sauté the onion. When it is translucent, after about 5 minutes, add the tomatoes. Nestle the sleeping bag in the tomatoes. Add a tablespoon of salt and the Parmesan rind.
4. Cover the pot and bake for 2 to 2½ hours, or until the skin pierces effortlessly with a fork.
5. In the meantime, to make the gnocchi, whisk together the whole egg and egg yolk in a small bowl. On a vast and clean work surface dusted with flour, drop the ricotta and the flour and mix. Make a well in the ricotta mixture and add the eggs, Parmesan, lemon zest, nutmeg, a teaspoon of salt, and a pinch of pepper to the well. Mix in the sides of the well, first with the tips of your fingers, gathering together all the ingredients, and then with your hands. Cautiously and briefly knead to form a uniform dough. It should be firm but not hard.
6. Press the dough into a rectangle ¾ inch (2 cm) thick and cut into strips 1 inch (2.5 cm) wide. Between flat, floured hands, roll each strip into a serpent. Each serpent should be about ½ inch (12 mm) thick. Cut each serpent into pieces 3 inches (7.5 cm) long and carefully transfer to a floured tray. Refrigerate the gnocchi for 15 minutes so they will firm up and keep their shape.
7. Meanwhile, in a large pot over high heat, salt 6 quarts (6 liters) of the water and bring to a boil. Prepare an ice bath with the remaining 2 quarts (2 liters) water and the ice.
8. Working in batches of 12 gnocchi, gently slide the gnocchi into the boiling water with the help of a spatula. Once they float to the surface, they will need 2 to 3 minutes to cook through. Test one to see if it is ready. With a wire skimmer, transfer the gnocchi to the ice bath and leave for 1 minute. Then transfer them to a tray and oil them lightly.
9. Returning to the sauce, remove the rolled skin and the cheese rind from the oven. Discard the rind. You can snip the twine, unroll the skin, toss away the seasonings, and then dice the skin and serve it with the gnocchi. That’s what we do, but we agree that it doesn’t look appetizing.
10. Strain the sauce and keep it warm. (If you don’t want to use it right away, it will keep for up to 7 days in the refrigerator and even longer in the freezer. You’ll notice it becomes slightly gelatinous when you refrigerate it because the skin was cooked in it.)
11. To serve, add 2 tablespoons oil to a sauté pan set over medium-low heat. Add the gnocchi and cook for a minute or two, then carefully flip and cook for another minute or so, until warmed through. Top the gnocchi with the sauce and serve with a few thin slices of parmesan.

Makes 2, serves 4
Dear World,
We’re sorry food has come to this. Like Richard Pryor said, more or less, the double down is God’s way of telling you that you have too much money. But it’s also really delicious.
CRUST
2 cups (260 g) all-purpose flour
1 tablespoon brewer’s yeast (optional)
2 teaspoons baking powder
2 teaspoons crushed pepper
2 teaspoons powdered sage
2 teaspoons salt
2 teaspoons Old Bay seasoning
1 teaspoon garlic powder
2 cups (500 ml) buttermilk
MAYONNAISE
2 tablespoons mayonnaise
1 teaspoon Sriracha sauce
½ teaspoon Maggi sauce or marmite
4 slices fresh duck foie gras, each 3 ounces (85 g) and ¾ inch (2 cm) thick
Canola oil for deep-frying
2 slices good-quality Cheddar cheese
4 slices bacon, fried until crisp
2 tablespoons maple syrup
Sea salt and pepper
1. To ready the crust, sift together the flour, brewer’s yeast, baking powder, pepper, sage, salt, Old Bay, and garlic powder into a bowl. Keep the buttermilk in the fridge.
2. To make the mayonnaise, in a bowl, mix together the mayonnaise and the Sriracha and Maggi sauces. Put the sauce in the fridge until serving.
3. Put the foie gras in the freezer 30 minutes before you are ready to cook it.
4. Pour the oil to a depth of 3 inches (7.5 cm) into your deep fryer and heat to 350°F (180°C). To set up the crust assembly, put the bowl holding the flour mixture on your countertop. Pour the buttermilk into a second bowl and put it alongside the flour mixture.
5. To coat the foie gras slices, one at a time, dip them into the buttermilk and then into the flour mixture. Repeat the dips a couple more times. Keep the coating soggy—you don’t want it too dry—and resist the urge to pat the slices.
6. Drop 2 coated foie gras slices into the hot oil and cook for exactly 3 minutes and 20 seconds. Drain briefly on paper towels and pat them dry. Repeat with the remaining 2 slices.
7. Lay a slice of cheese on 1 “patty,” place 2 slices of bacon on top of the cheese, and spread half of the mayo on top. Top with a second patty, then plate. Repeat to a build second stack. Top each stack with a drizzle of maple syrup and a pinch each of crispy sea salt and pepper.
Makes about 2 cups (500 ml)
Our favorite sauce is made from chicken skin. It is a delicious gravy that we use for a lot of dishes at Joe Beef—more than we would like to admit. It’s like an extraction of the deliciousness of crispy chicken skin. Ask your butcher for the chicken skin. More skinless chickens are sold out there than skin-on birds, so the skins must be somewhere other than at a schmaltz factory. Serve this on its own or as a sauce on guinea hens or other poultry.
2 pounds (900 g) chicken skins
1 carrot, peeled and cut into chunks
1 celery stalk, cut into chunks
1 onion, cut into chunks
1 sprig rosemary
1 clove garlic
Pinch of salt
2 bay leaves
4¼ cups (about 1 liter) water
2 cups (500 ml) dry white wine
1. Preheat the oven to 375°F (190°C). In a large enameled cast-iron pot, combine the chicken skins, carrot, celery, onion, rosemary, garlic, salt, bay leaves, and ¼ cup (60 ml) of the water. Place in the oven and cook, uncovered, for 2 hours, stirring and flipping the chicken skins occasionally.
2. After the 2 hours, the skins should look like the skin of a roasted chicken. Drain off the fat and add the remaining water and the wine to the pot. Return the pot to the oven, lower the temperature to 300°F (150°C), and cook for 1 hour.
3. Remove from the oven, strain, and serve right away or cool and refrigerate for later use. It will keep in the fridge for up to a week, or a month in the freezer.
Makes 8 tacos
We made this dish because we like the “potato” de gallo idea. (In fact, you can make only the rub and eat it on almost anything, especially eggs.) Make certain that the potatoes are tiny and crisp, so you get that salt-and-vinegar potato chip taste.
About 1½ pounds (680 g) chicken skins
2 tablespoons canola oil
Salt and pepper
RUB
2 teaspoons salt
2 teaspoons sugar
1 teaspoon pepper
1 teaspoon red chile powder
1 teaspoon ground cumin
1 teaspoon ground coriander
1 teaspoon achiote powder (optional)
1 cup (140 g) minutely diced peeled potato
¼ cup (60 ml) canola oil
⅓ red onion, very finely diced
1 jalapeño chile, seeded and diced superfine
1 tablespoon Mayonnaise (recipe follows)
¼ cup (10 g) chopped fresh cilantro
3 tablespoons fresh lime juice
Salt
8 small corn tortillas, warmed
8 hard-boiled quail egg yolks (optional)
8 sprigs coriander
1. Preheat the oven to 425°F (220°C). Cut the skins into 4 or 5 pieces, each roughly 1 inch (2.5 cm) square. With your hands, combine the skin pieces and canola oil in a roasting pan and season with a pinch each of salt and pepper.
2. Roast the skins for 1 hour, stirring and tossing them every 15 minutes with your trusty tongs.
3. While the skins are roasting, make the rub. In a small bowl, stir together the salt, sugar, pepper, chile powder, cumin, coriander, and achiote powder.
4. When the skins are ready, they should be crispy, golden, and delicious looking. Remove from the oven, drain, and pat dry with paper towels. Chop finely while still lukewarm, and season to taste with the rub. Keep warm. (The remaining rub will keep well in a tightly capped jar in a cool, dry cupboard.)
5. Just before the skins are ready, make the potato de gallo. In a nonstick frying pan, fry the potato in the oil for about 6 minutes, or until they have a French-fry color and are crispy. Transfer to paper towels and pat dry. Just before you are going to serve the tacos, combine the potato, onion, chile, mayonnaise, coriander, and lime juice and season with salt. Don’t mix the ingredients any sooner; it is important that the “salsa” tastes fresh.
6. Now, build each taco: warm tortilla, some skin, some spud, a yolk (as dressing), and a coriander sprig.
Makes about 1 cup (250 ml)
A classic mayo.
1 egg yolk
1 tablespoon Dijon mustard
1 cup (250 ml) canola oil
Salt and pepper
Juice from ½ lemon
Purée de Fines Herbes, optional
1. In a large bowl, whisk together the egg yolk and mustard. Pour in the oil in a steady, fine, slow stream and whisk, whisk, whisk. Always have a glass of water nearby in case the mayonnaise starts splitting and you need to thicken and mend. Season with salt, pepper, and lemon juice to taste. Mix in some of the puréed herbs if you want to add a bit of flavor.
2. Use right away, or cover and refrigerate for up to 2 days.
Makes 2 cups (500 ml)
This is part of our mise en place at the restaurant. We mix it with mayonnaise, serve it straight up with potatoes or fish, or use it to punch up sauces, soups, stews, or anything raw like tartare. Do not use woodsy herbs like rosemary, thyme, or sage in this purée, and be sure to wash all of your herbs well.
1 bunch chervil
1 bunch chives
1 bunch flat-leaf parsley
1 bunch tarragon
1 bunch watercress, blanched and chilled in an ice bath
Squeeze of fresh lemon juice
2 teaspoons neutral oil
½ cup (125 ml) water
Pinch of salt
1. In a food processor, combine the herbs, watercress, lemon juice, oil, and water and process until smooth. Season with the salt.
2. Store in a tightly sealed container for up to a week.
Makes about 2½ cups (625 ml)
Most Dijon mustard that is shipped to North America from France is made with seeds from Saskatchewan, Canada. Hence, it makes sense that we make our own mustard. Feel free to experiment with the types of vinegar and flavorings (tarragon, horseradish, dill).
½ cup (90 g) mustard seeds
5 tablespoons (75 ml) water
2 tablespoons maple syrup
Scant 2 tablespoons neutral oil
1¼ cups (300 ml) white wine vinegar
1 tablespoon ground turmeric
Pinch of cayenne pepper
1 teaspoon salt
1. In a powerful food processor, combine the mustard seeds, water, maple syrup, oil, one-third of the vinegar, the turmeric, the cayenne, and the salt and process on high speed. (If it is not powerful, you will end up with more whole seeds, which is okay but not ideal.) Once you start, the seeds will bounce around like money in a money cage.
2. When the seeds stop bouncing around, slowly add the rest of the vinegar. When the blade stops spinning well and the mustard is thick, it’s ready. Transfer to a tightly capped jar and store in the fridge for up to a month.
Makes about 2 cups (500 ml)
This is our infamous rib sauce.
One 8-ounce (237-ml) bottle Coca-Cola
1 cup (250 ml) ketchup
¼ cup (60 ml) cider vinegar
2 tablespoons molasses
1 tablespoon Sriracha sauce
1 teaspoon instant coffee crystals
Salt and pepper
In a saucepan, stir together the Coca-Cola, ketchup, vinegar, molasses, Sriracha, and coffee. Season liberally with salt and pepper, place over low heat, and cook for 30 minutes. The sauce will keep for up to 2 weeks in a tightly sealed container in the fridge.
Makes ½ cup (180 g)
We use this for our Scallops with Pulled Pork recipe.
7 egg yolks, at room temperature
1 cup (225 g) unsalted butter
Pinch of cayenne pepper
Salt
1 tablespoon fresh lemon juice
1. Put the egg yolks into a 1-quart (1-liter) pitcher large enough to contain the head of your hand blender.
2. In a small saucepan, melt the butter over low heat and bring to exactly 245°F (119°C), then remove from the heat.
3. As you start blending with the hand blender, carefully but steadily pour the hot butter into the egg yolks, and keep mixing. You should obtain a smooth emulsion.
4. Season with the cayenne and salt, then mix in the lemon juice. Keep at room temperature until serving.
Makes about 3 cups (600 g)
This is a staple in pretty much every professional kitchen, and with this easy method, it could be in yours, too. We like to eat the crudités with our Zesty Italian Tartare.
½ cup (70 g) chopped celery
½ cup (55 g) matchstick-cut carrot
½ cup (55 g) chopped cauliflower florets (try to maintain tiny shape)
¼ cup (30 g) sliced red onion
¼ cup (55 g) kosher salt
½ cup (125 ml) red wine vinegar
½ cup (125 ml) water
½ clove garlic
1 Thai bird chile
1. Combine the celery, carrot, cauliflower, and onion in a colander. Add the salt and massage into the vegetables. Let stand for 5 minutes, then rinse and place in a bowl.
2. In a small saucepan, combine the vinegar, water, garlic, and chile and bring to a boil. Immediately remove from the heat and pour over the vegetables.
3. Cover the bowl and refrigerate right away for a minimum of 1 hour—or as long as you can wait.

Serves 4
It’s true, at least for Fred, that an egg cooked in meat is the best. So much so that when we make braciole, he’s known to dig like a gopher to reach the eggs inside, leaving a hollow meat box to crumble on itself. The following is a short recipe where the egg gets that viande taste that Fred loves.
6 oeufs mollets (in case you break a couple) from the recipe for Oeufs en Gelée
SAUCE
2 teaspoons chopped French shallot
1 tablespoon plus 1 teaspoon unsalted butter
1 cup (250 ml) Chicken Skin Jus
Salt and pepper
4 Everything Biscuits (recipe follows), warmed and buttered
Truffles, the amount to your liking
1 bunch fresh watercress, tough stems removed
Aged Cheddar cheese for shaving
1. To make the sauce, in a small saucepan, sweat the shallot in 1 tablespoon of the butter over medium-low heat until tender. Add the jus and the remaining 1 teaspoon butter, bring to a simmer, and season with salt and pepper.
2. Carefully put the eggs in the simmering sauce and cook for 2 to 3 minutes. Gently poke the eggs to make sure they are not hard. They are ready when they are coated in the sauce, are still soft, and are warm to the touch.
3. Put a biscuit on each plate. With a spoon or your fingers, create a little depression in the middle of each biscuit. Carefully spoon an egg into each depression. Divide the sauce evenly among the plates and then shave some truffles over the eggs.
4. Put the pan back over medium-low heat, add the watercress, and leave it for just a few seconds so it loses its cold from the fridge. The tops of the sprigs will wilt slightly.
5. Top each serving with a few shavings of the cheese and serve right away with the watercress on the side.
“There’s nothing better than un oeuf cuit dans la viande.”
—Frédéric Morin
Make 12 biscuits
½ cup (110 g) rendered bacon fat, at room temperature plus more for greasing baking sheet
2 cups (240 g) sifted all-purpose flour, plus more for dusting
1 tablespoon baking powder
1 tablespoon sugar
1 tablespoon salt
1½ cups (375 ml) buttermilk
3 tablespoons whipping cream (35 percent butterfat)
1 tablespoon sea salt
1 tablespoon dried onion flakes
1 tablespoon poppy seeds
1 tablespoon sesame seeds
1. Preheat the oven to 375°F (190°C). Grease a rimmed baking sheet.
2. In a large bowl, stir together the flour, baking powder, sugar, salt, buttermilk, and bacon fat. The mixture should come together in a thick, sandy dough.
3. On a floured work surface, flatten the dough to get an even thickness. It should be about 8 by 11 inches (25 by 28 cm) and about 1 inch (2.5 cm) thick. Dust with flour if sticky.
4. Using a wineglass or a biscuit cutter 3 inches (7.5 cm) in diameter, dip the rim in flour and cut out the biscuits. Place on the prepared baking sheet. Gather the scraps, pat flat again, and cut out more biscuits, or form them by hand.
5. Brush the tops of the biscuits with the cream, then sprinkle evenly with the sea salt, onion flakes, poppy seeds, and sesame seeds. Bake for 12 minutes, or until the tops are golden.

Serves 4
David has an Irish friend called Jerry O’Regan who always triple checks whether or not his main course is served with mashed potatoes. In fact, Jerry doesn’t understand why all food isn’t served with potatoes. Sometimes we send him a side of lentils instead of potatoes and he looks at it as if it were alien food. We don’t want to make an “Irish guy potato” stereotype here, but after cooking for Jerry for ten years, we get it. At the end of the meal, Jerry doesn’t say thank you, he says “Feels good to have some potatoes, hey Davey?”.
2 pounds (900 g) fingerling potatoes, unpeeled
Salt and pepper
½ cup (125 ml) milk
½ cup (110 g) cold unsalted butter, diced, plus more if needed
1. Place the potatoes in a saucepan. Add water to cover by 1 inch (2.5 cm) and 1 tablespoon salt, and bring to a boil over high heat. Lower the heat to medium and cook for 15 to 20 minutes, or until you can press against the potatoes with a spoon and feel them crush.
2. Just before the potatoes are ready, in a small saucepan, bring the milk to a boil and remove from the heat. Drain the potatoes and pass them through a potato ricer into a large bowl. Add the butter and half of the milk. Using a wooden spoon, incorporate gently until silky. Add the rest of the milk and more butter if you deem necessary. Rectify the seasoning.
3. Serve immediately as is, or push through the ricer again (if you’re going for that look) straight onto the serving plates.

Serves 4
A note on ricers: For a young boy, a potato ricer is akin to magic. It’s more impressive than planes or satellites; it’s up there with fire trucks, guns, and large breasts. We use ricers a lot at Joe Beef—for potatoes, Madeira jelly for foie gras, fruit preserves, and polenta.
One day, a hungover vegetable cook produced a plate of clumpy, amateur polenta. It was on the menu, so we couldn’t send out carrots and apologies. Instead, we just pressed it through the ricer. It came out freaking perfect, the clumps gone and the polenta shaped like rice, slowly falling in the butter. There we were, four grown-ups, as fascinated as ever with the potato ricer.
The general rule for polenta is four parts water to one part cornmeal.
2 cups (500 ml) water
Salt and pepper
½ cup (110 g) cornmeal
¼ cup (55 g) unsalted butter
½ cup (55 g) grated Parmesan cheese
2 bay leaves
1 clove garlic, smashed
1. Bring the water to a boil over high heat and add a pinch of salt. Take the pot off the burner and whisk in the cornmeal in an even stream. Put the pot back on the burner, reduce the heat to medium-low, and cook, stirring occasionally with a wooden spoon, for about 30 minutes, or until the mixture pulls away from the sides of the pan and no longer tastes grainy. You would rather overcook polenta than undercook it.
2. Mix in 2 tablespoons of the butter and half of the Parmesan, correct the seasoning with salt, and pass the polenta through a ricer. Then cover with plastic wrap to keep it warm, and set aside.
3. In a small pan, melt the remaining butter, a turn of pepper, the bay leaves, and the garlic over high heat. Cook for 2 to 3 minutes, or until the butter bubbles and smells delicious.
4. Remove the butter from the heat and drizzle it along with the bay leaves and garlic over the polenta. Sprinkle with the remaining Parmesan and serve right away.