UNIT 4
STRAIGHT-AHEAD ANIMATION
Straight-ahead animation is the art of animating anything with the camera pointing straight ahead at the subject rather than down at a tabletop. Thus, you are essentially animating in a three-dimensional world rather than a two-dimensional one (on a flat surface). Animating elements in the third dimension is a magical practice.
Before you begin the labs in this chapter, take a moment to consider that animating with a camera facing forward requires a secure area around your set and the tripod, and a space that’s easy for you (the animator) to move and work within.
Also included in the labs that follow are some tricks to help you navigate a few classic challenges that animators experience when working in the third dimension.
STRAIGHT-AHEAD CAMERA ANGLE
Beloved by most stop-motion animation moviemakers throughout the ages, the straight-ahead (or “three-dimensional”) angle captures our world in all of its three-dimensional glory! Please note: This isn’t “three-dimensional animation,” where you create all images and movements on the computer. This is real-life filmmaking!
The straight-ahead camera angle is used in most stop-motion animation films that you see on the big screen today. This technique looks wonderful, but it does come with its share of technical challenges. Not to worry, these can be easily fixed with a good setup. Rigging and clever behind-the-scenes tricks will ensure that your straight-ahead angles will be truly impressive.
Creating a Straight-Ahead Set
The basic requirements for the straight-ahead shoot—a film stage in the form of a table and some lighting—are the same as for a downshoot project (see here). Again, make sure your table measures at least 24 by 12 inches (61 by 30.5 cm) so you have enough room to work, and you should consider covering the top to avoid damage.
For straight-ahead projects, it’s especially important to have clean, balanced lighting that lights your set and characters consistently.
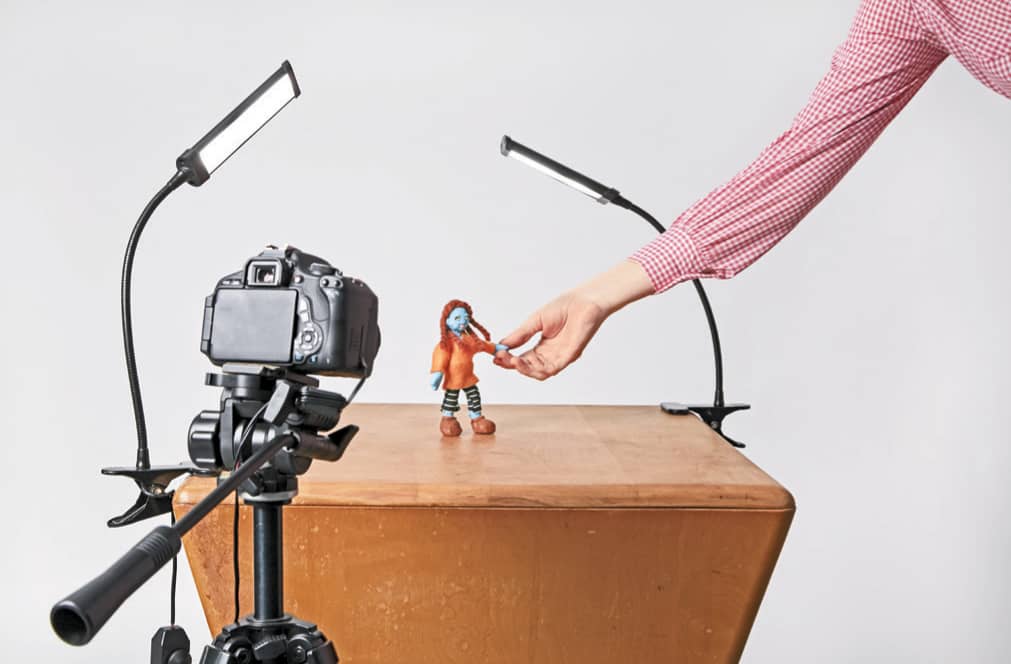
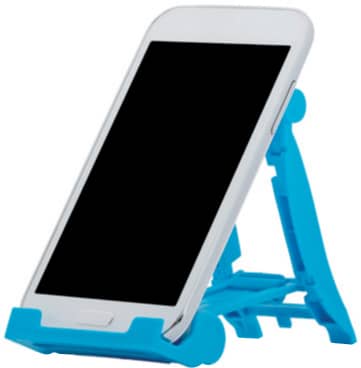 You can film a straight-ahead project with either a camera or a smartphone. Instead of a traditional tripod, you can use a frame-style tripod for your smartphone to give you a variety of shot options.
MOTION ARCS
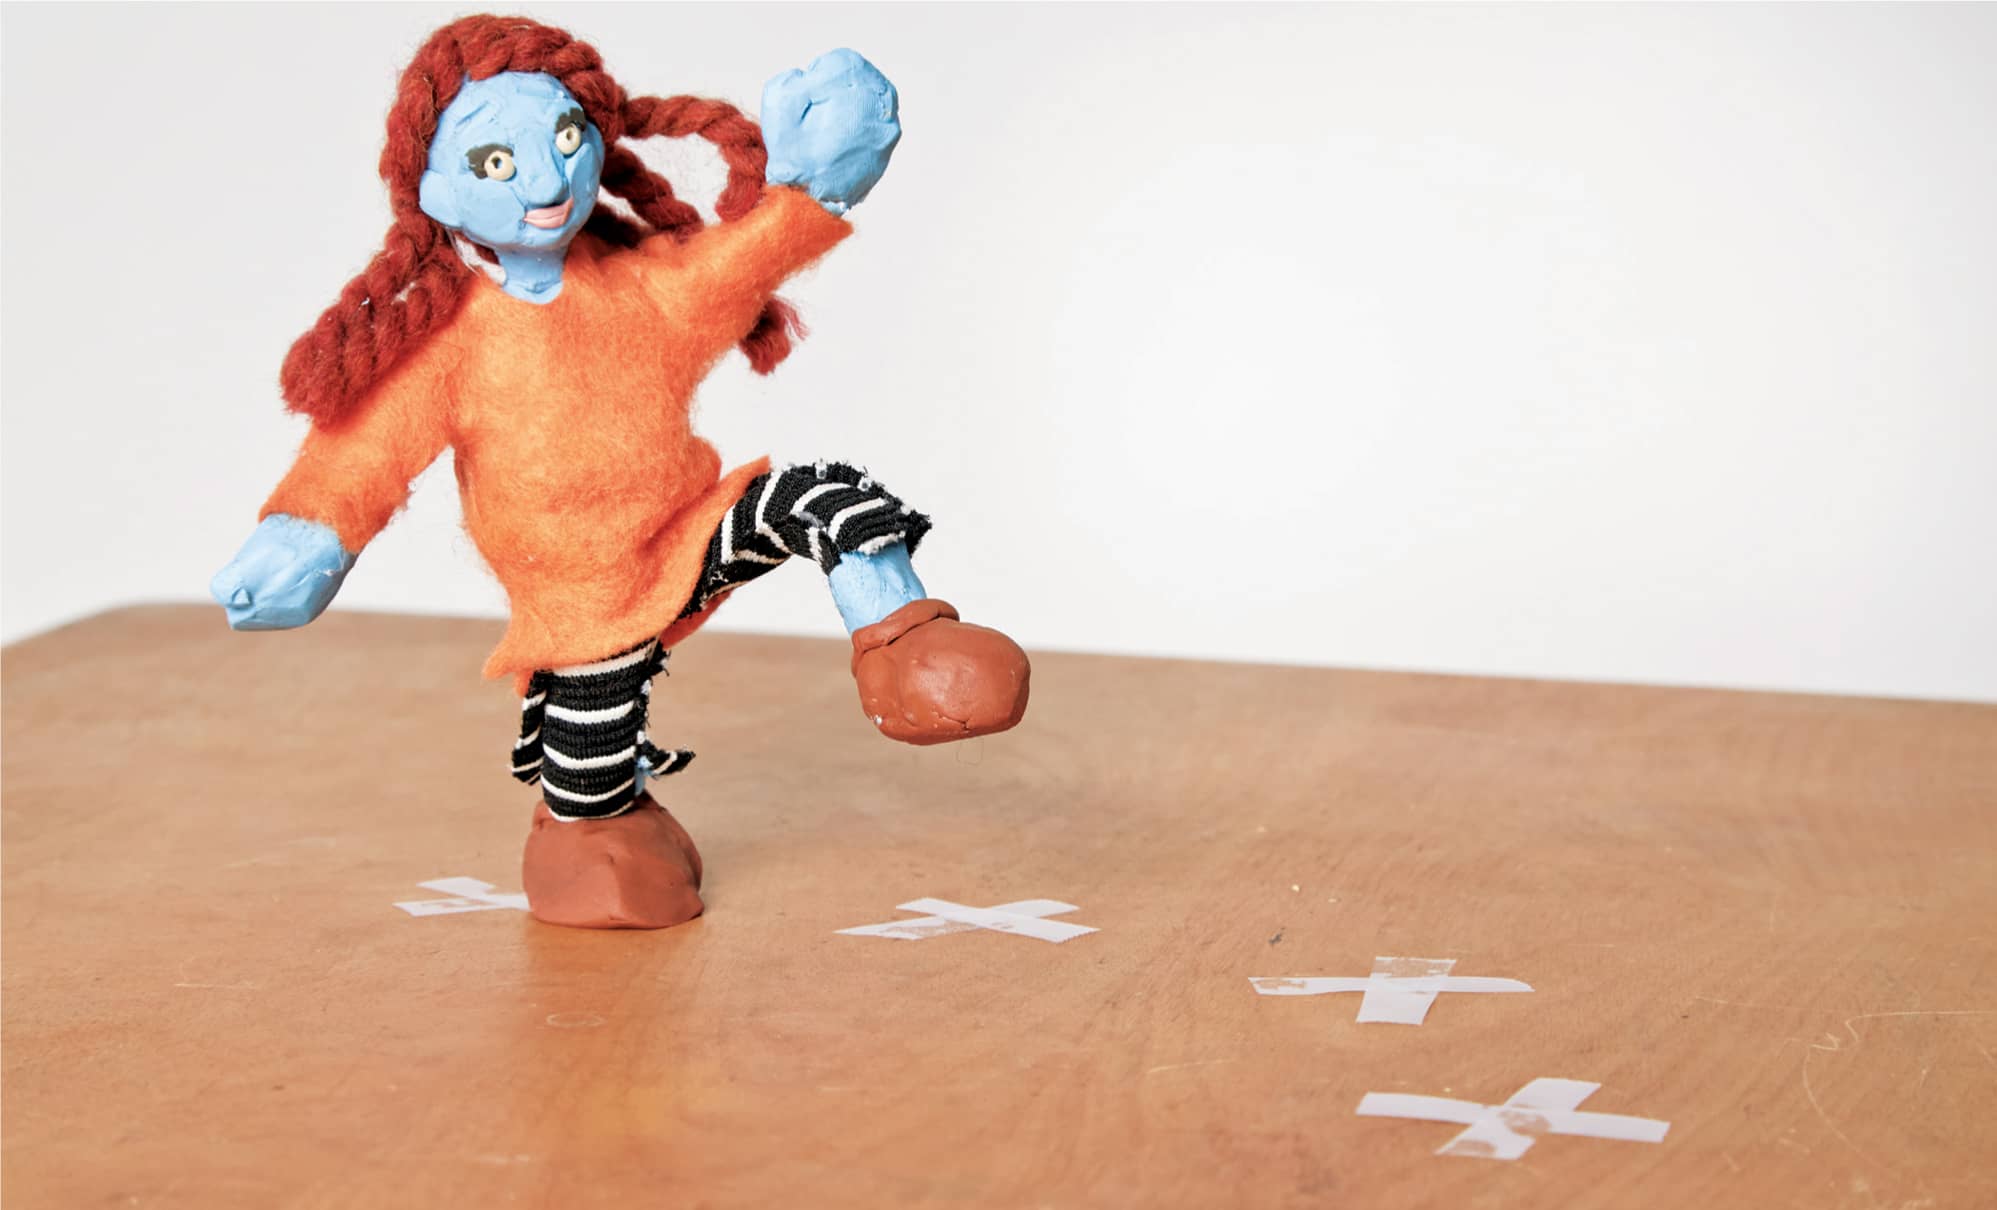
Motion arcs are simply guides that help you plan your movements in advance to make them more precise and strategic. In stop-motion animation terms, the most lifelike sequential movements tend to follow a curved path through space, or an arc. Creating “motion arcs” is a technique used by the pros to map out the course of an action. This trick is sure to make your puppets’ moves smooth, slightly organic, slow, and even.
A motion arc feature is often included in professional-grade animation software, but it can also be imitated in real life by first marking your animation stage with points mapping where your animated actions should land. Try using something that cannot be detected by your camera, such as clear or matte transparent tape.
LAB 13
PLAY WITH YOUR TOYS
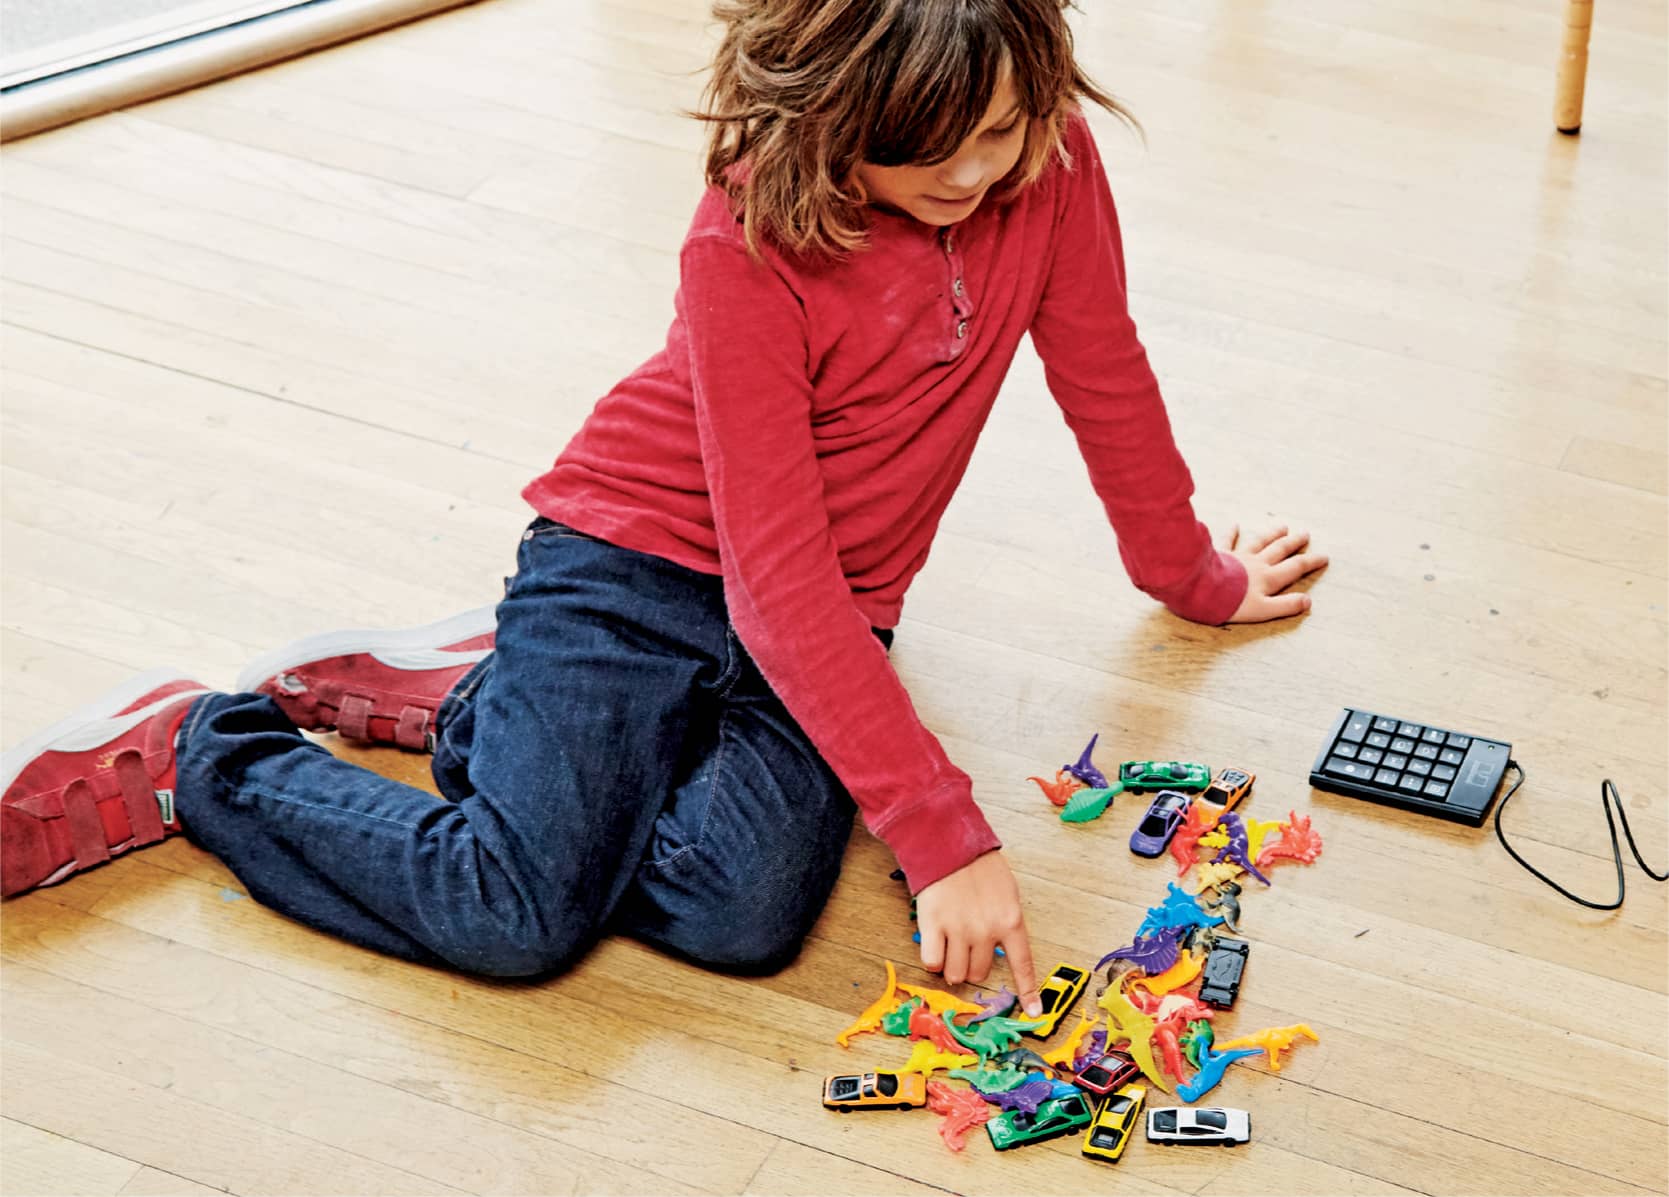
This lab helps animators try their hand at working in a straight-ahead environment. It’s also a great place to incorporate favorite toys or games right from their own world! To select materials, animators need look no further than their toy box or curio shelf.
BEFORE YOU BEGIN
Make sure that you have a great space to animate in. You should have a surface on which to animate: this can be a tabletop or even the floor. Point the camera toward that general space and secure a backdrop behind your animation surface using masking tape. Now you have created a stage in which to animate! Also, it’s a good idea to tape the feet of the tripod to the floor so that it won’t move in case it gets bumped.
MATERIALS
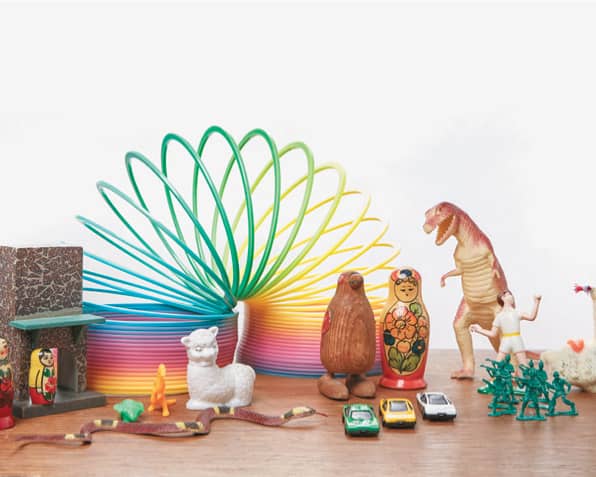
Note: For this project, you will pick a variety of objects/toys to play with in front of the lens. Look for something large and flat that can serve as a backdrop; this can be an interesting piece of fabric, a poster, or a sign. You can also use a blank wall if you want a clean look.
− Backdrop
− Camera or other capture device
− Tripod
− Lighting
− Masking tape
− Toys and objects
ACTION!
1 Set up your backdrop, camera, tripod, and lighting, securing them with masking tape.
2 Arrange your objects in front of the lens (fig. 1). Take 15 pictures of your still environment with nothing moving. This sets a foundation for your film so that your audience has a moment for their eyes to adjust before things begin to move.
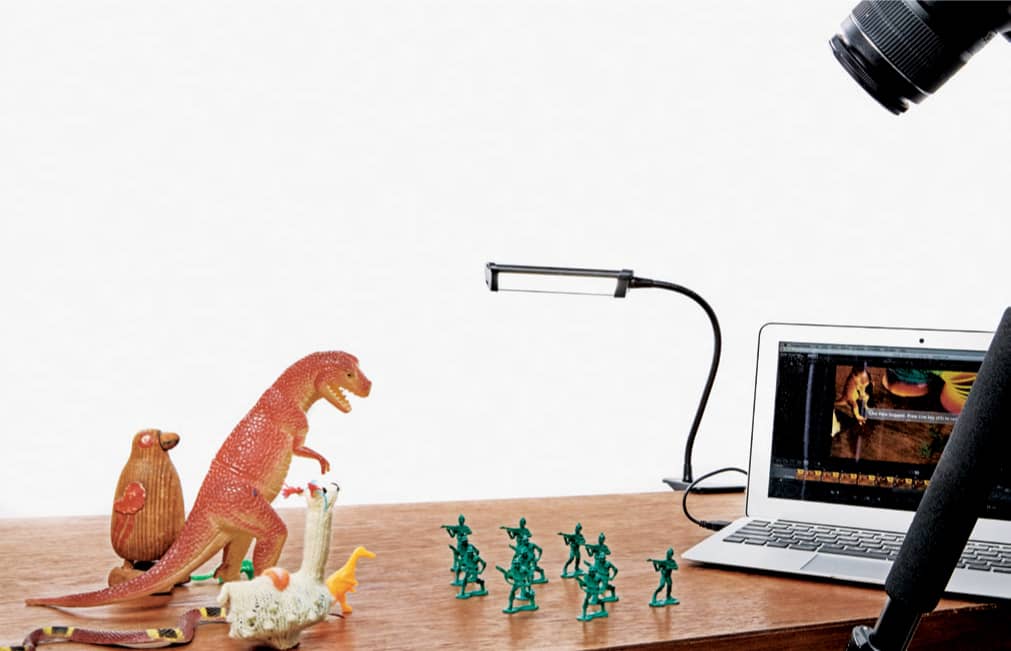
fig. 1. Arrange your objects in front of the camera.
3 Next, move your elements a tiny bit. Remember that the smaller the movement, the smoother the motion will be. You can use the onion skin function on your stop-motion animation software to make sure that you are making small movements. Capture a photo of this change.
4 Repeat! Move your subjects bit by bit, taking photos each time (fig. 2).
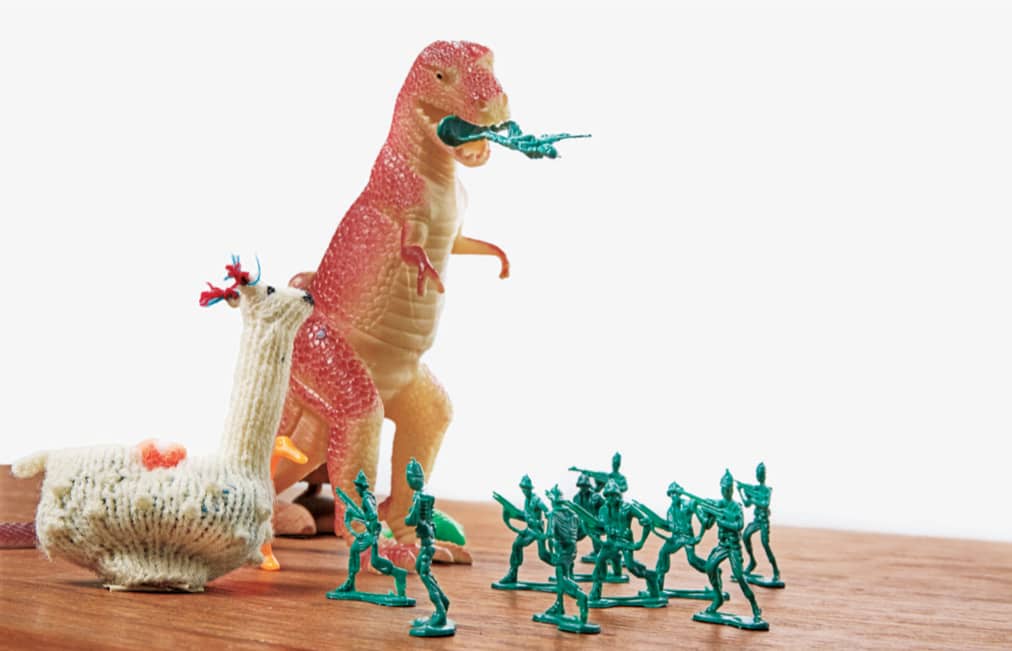
fig. 2. Keep moving your objects a little at a time, taking pictures after each change.
5 Play with different types of movements. Try using small movements and also bigger movements. You could even place a new object in the same space that an old object was positioned in, creating a transformation. Try telling a simple story (fig. 3).
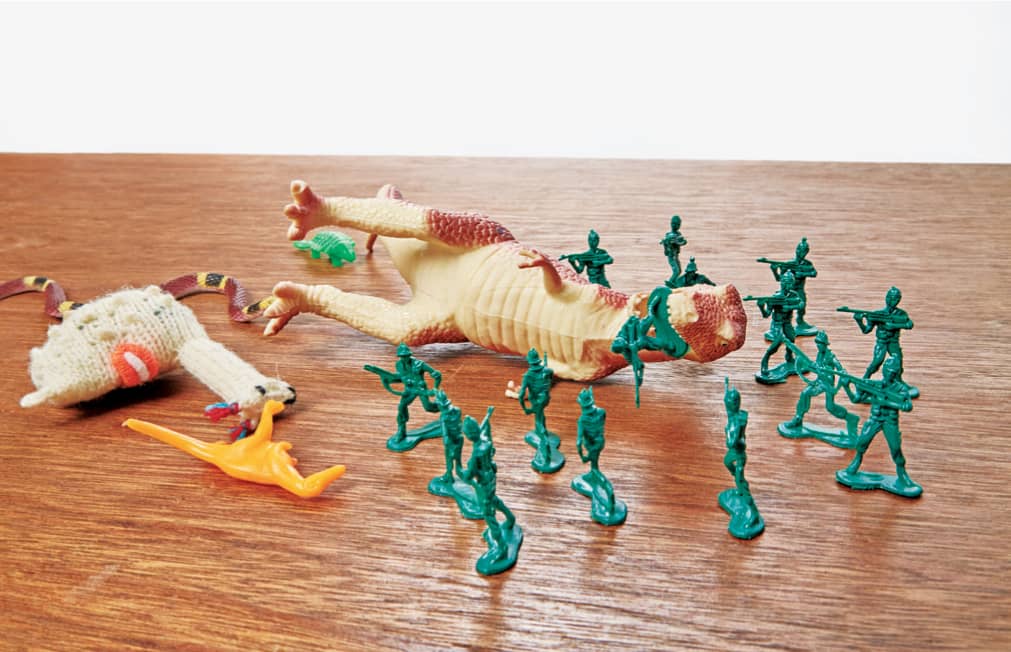
fig. 3. Have your characters tell a simple story.
LAB 14
HAND-SEWN THREE-DIMENSIONAL PUPPETS
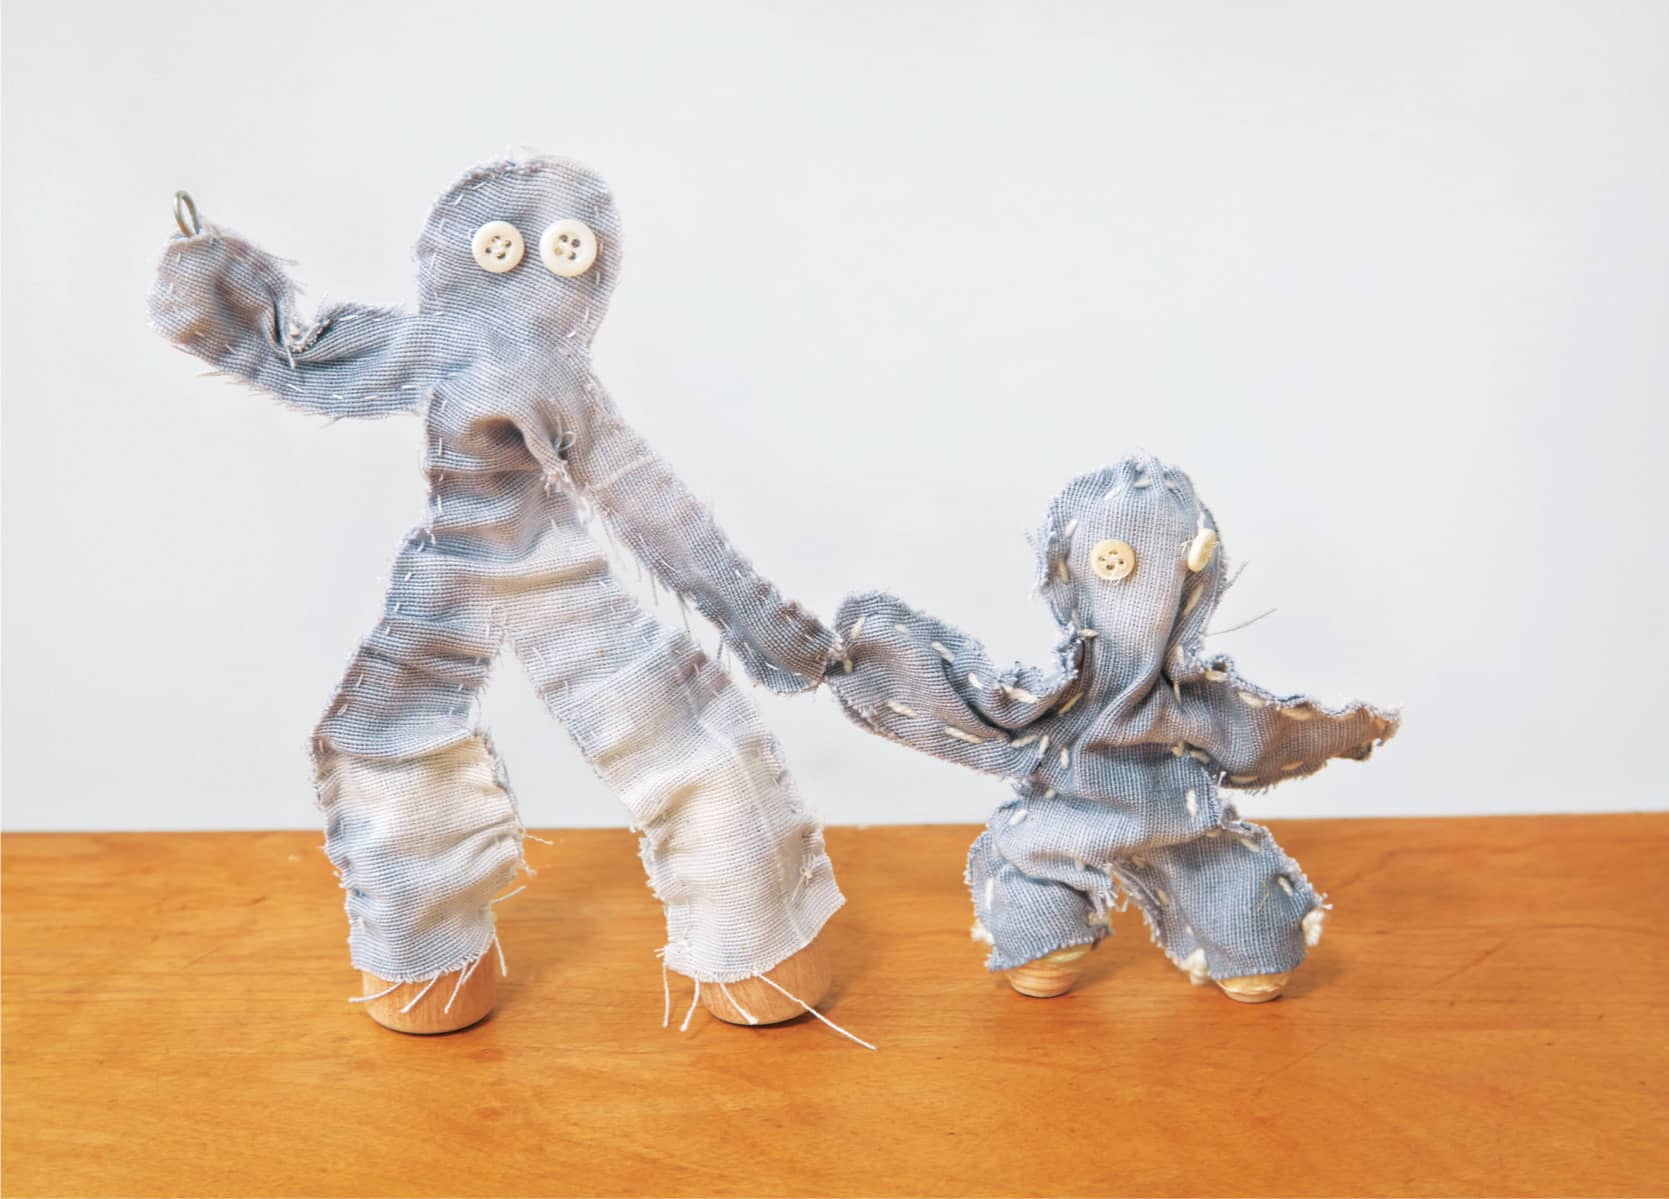
Design and make a poseable puppet from start to finish: sketch your idea, shape the movable wire armature—your puppet’s bone structure—cut and sew a fabric “skin,” and then make it come alive!
BEFORE YOU BEGIN
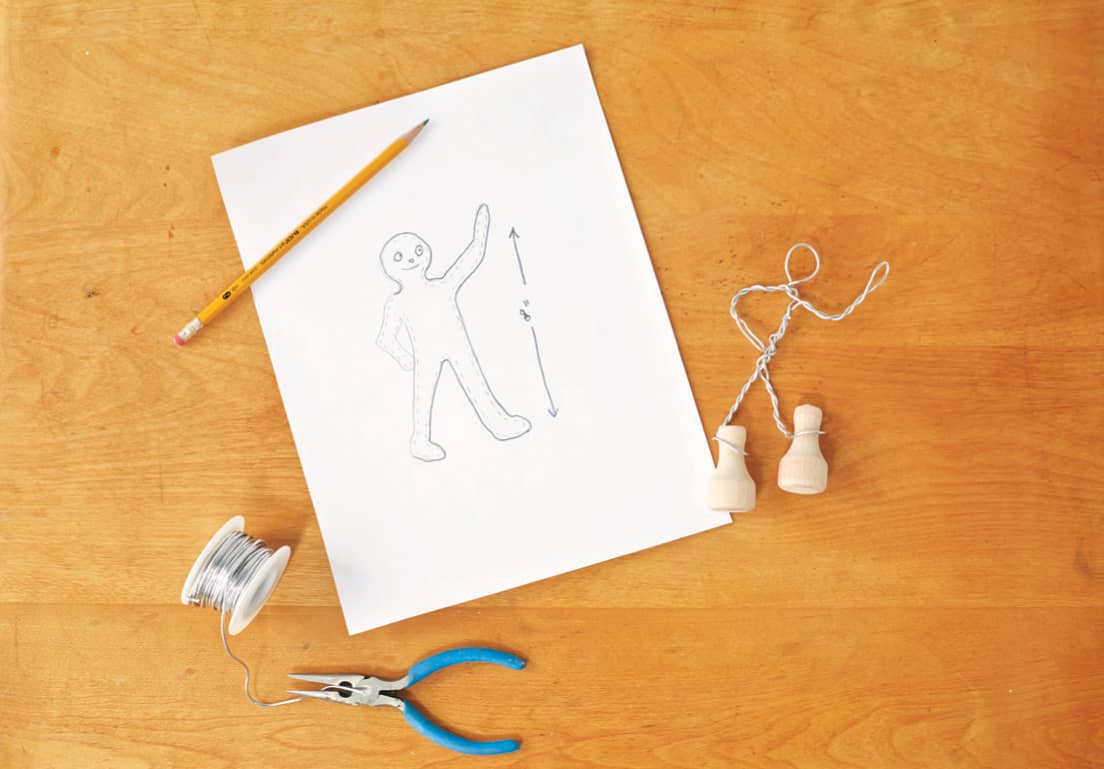
Before you can start building your puppet, you should explore and develop what it will look like, including its proportions (the size relationships among its body parts), in a few sketches using pencil on scratch paper. In addition to providing an opportunity to develop your drawing skills, this stage is for trying out and playing with different characters and looks. Your final sketch will serve as a guide to creating your puppet.
Once your sketch is complete, determine the size of your puppet so you’ll know how much wire you’ll need to cut for the armature. For a figure that stands about 8 inches (20.3 cm) tall—a recommended minimum height for animating in a small environment—you’ll need about 30 inches (76.2 cm) of wire. If your puppet has any exaggerated features—for instance, a large head, or long arms or legs (or all three)—you’ll need more wire.
MATERIALS
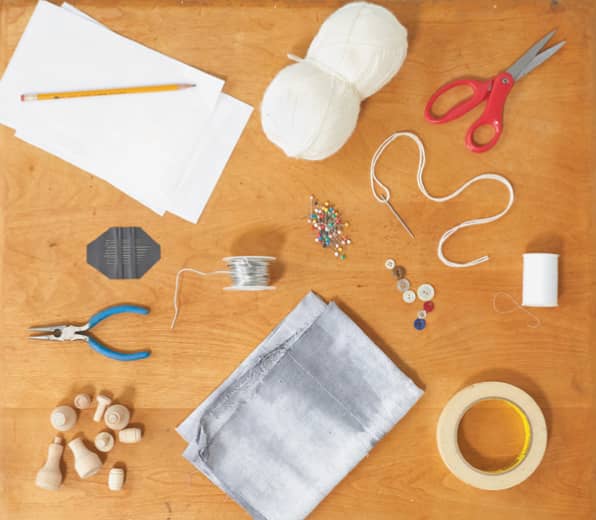
− Pencil
− Scratch paper
− Wire cutters
− 32’ (9.8 m) spool of 16-gauge aluminum armature wire
− Needle-nose pliers
− 2 small wooden knobs or drawer pulls with flat fronts per puppet
− Masking tape
− Fabric
− Marker
− Ruler
− Straight pins
− Scissors
− Lightweight yarn and tapestry needle OR sewing needle and thread
− Buttons
− Non-hardening modeling clay or Sticky Tack (optional)
− Camera or other capture device
− Tripod
ACTION!
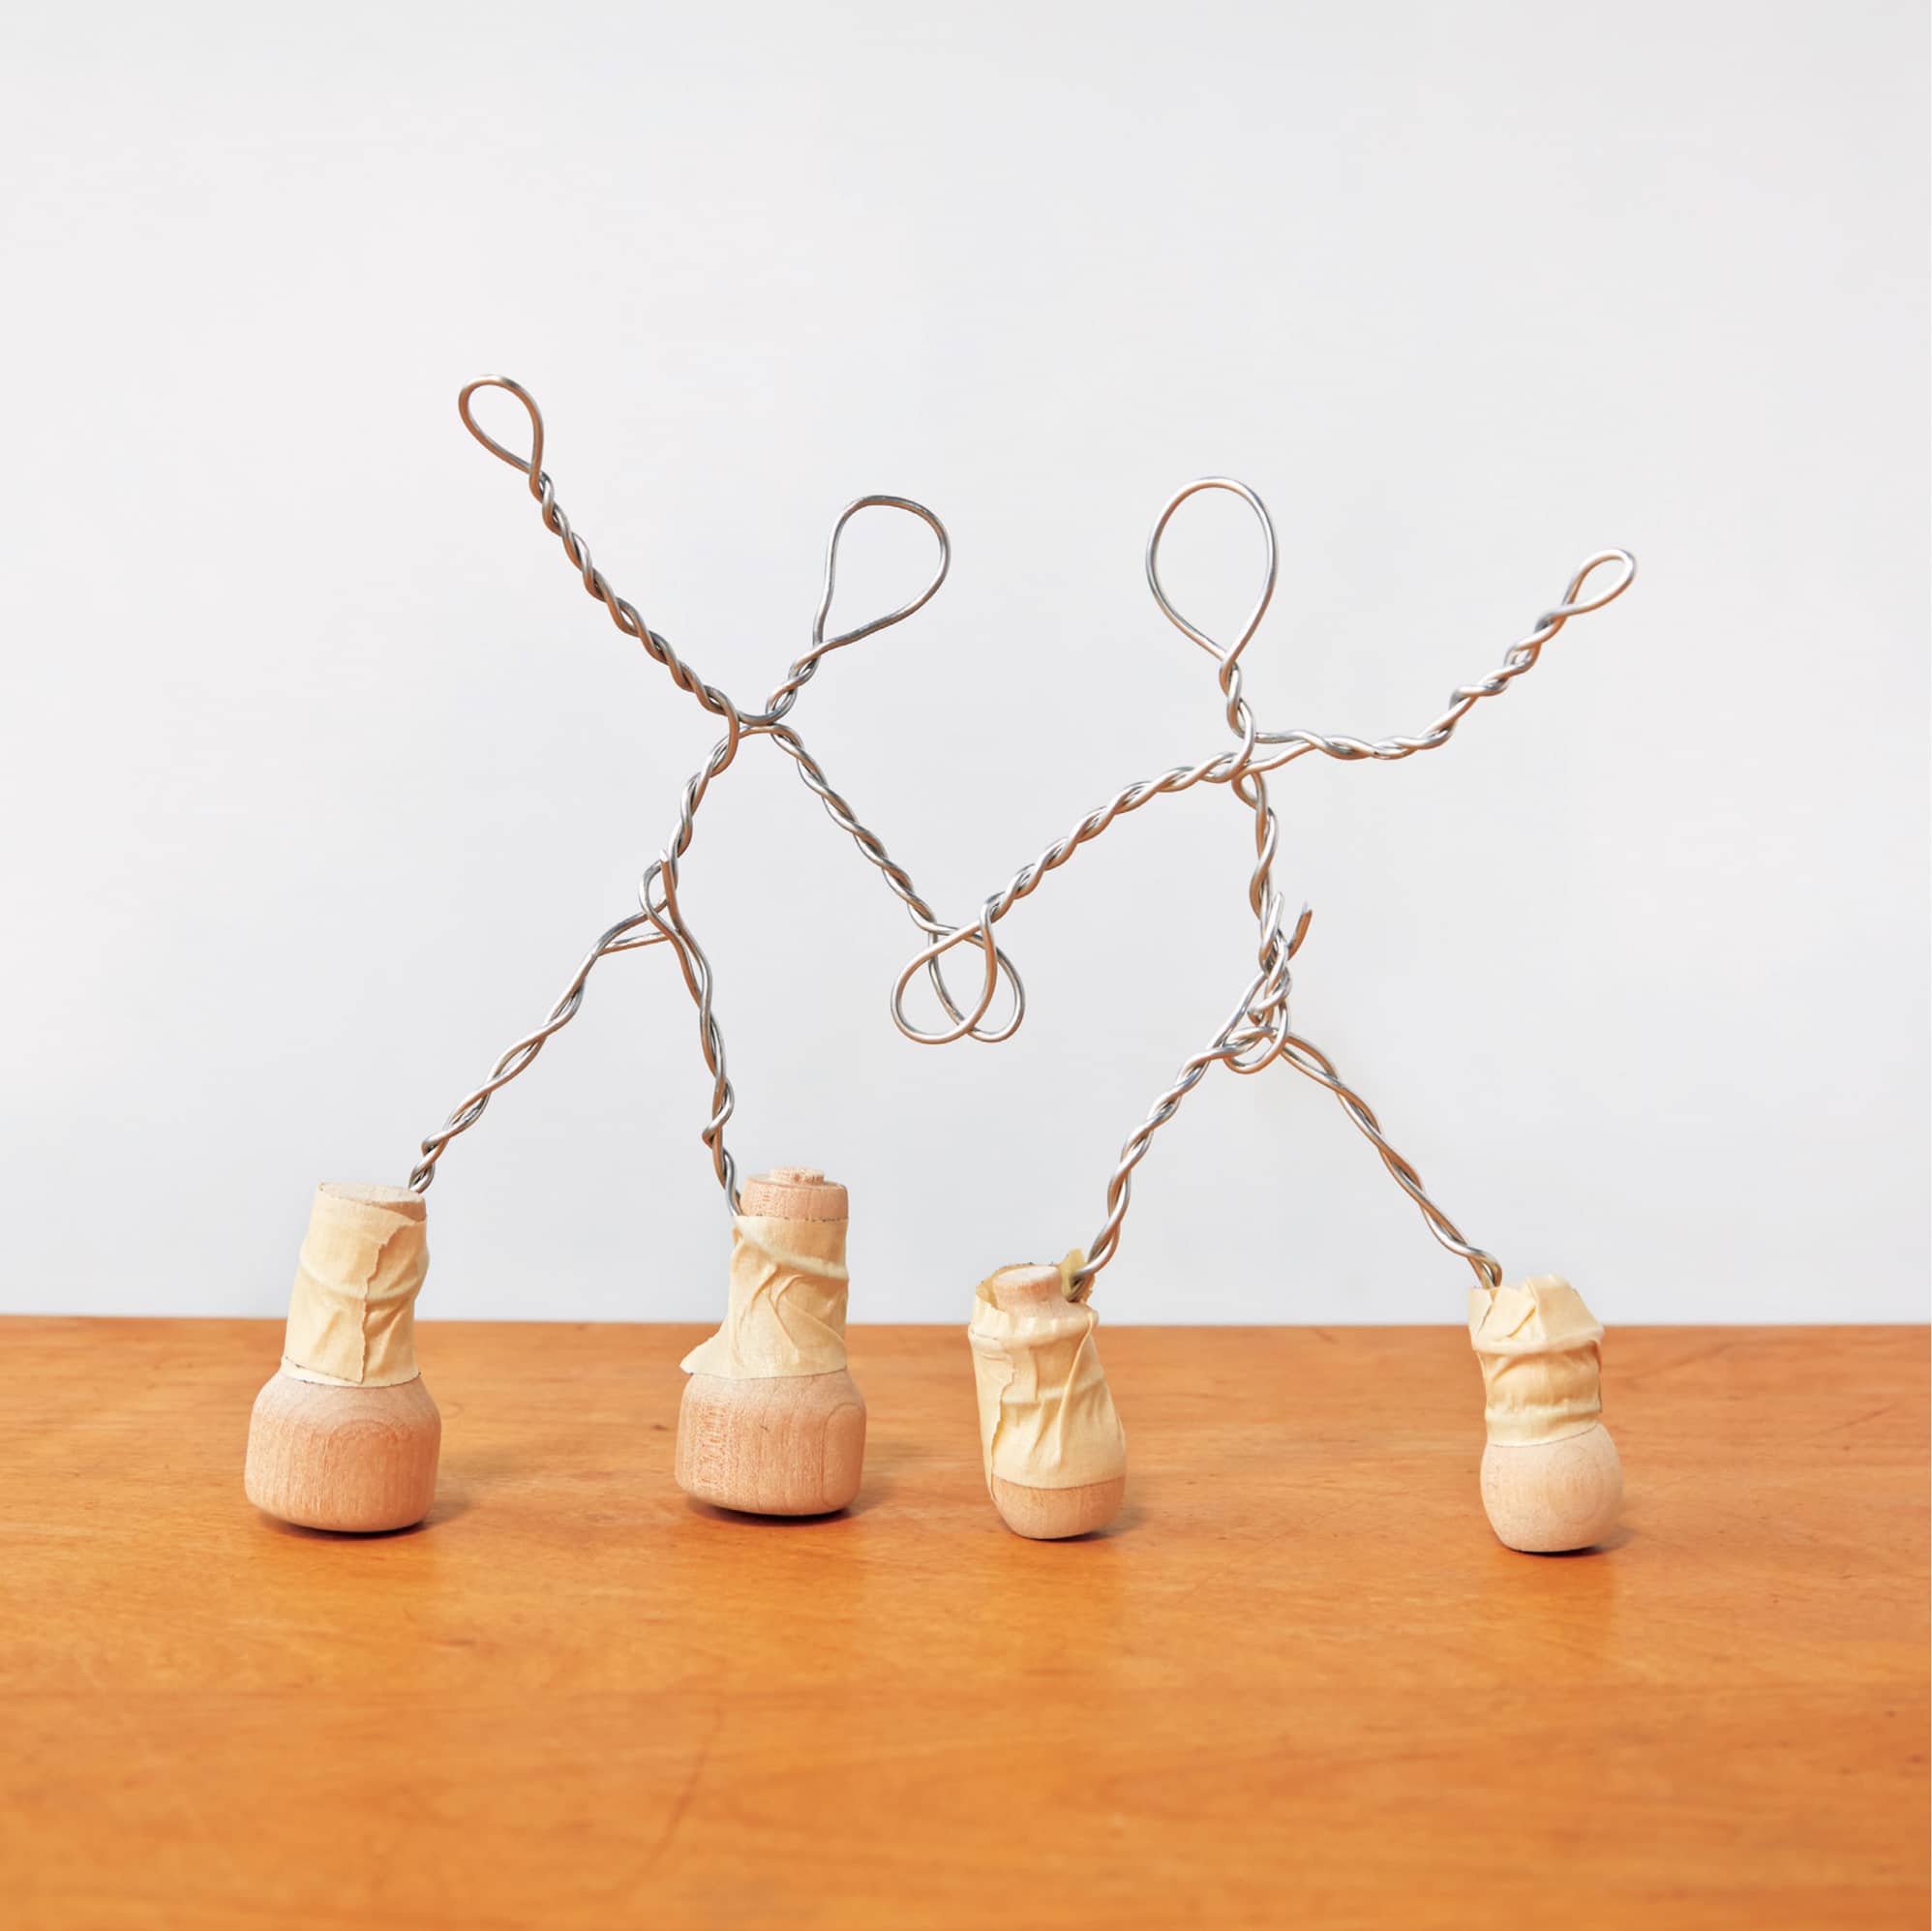
1 Cut a 30-inch (76.2 cm) length of wire from the spool. As you create the puppet’s armature, reference your sketch so you can shape the wire to reflect your design. To make the puppet’s head, fold the wire in half, then twist a loop at the top (fig. 1). Use needle-nose pliers to hold the wire while twisting.
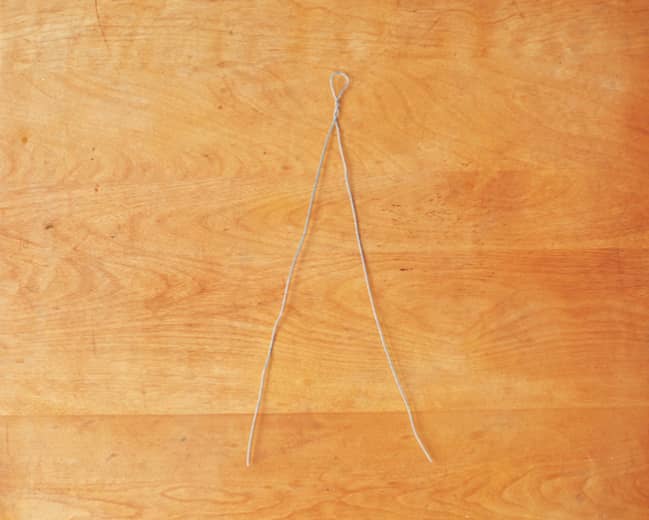
fig. 1. Fold, loop, and twist the wire to make the head.
2 To make an arm, fold over in a short loop one of the long pieces of wire descending beneath the head and then twist it (fig. 2). The end of that piece of wire will become one of the legs.
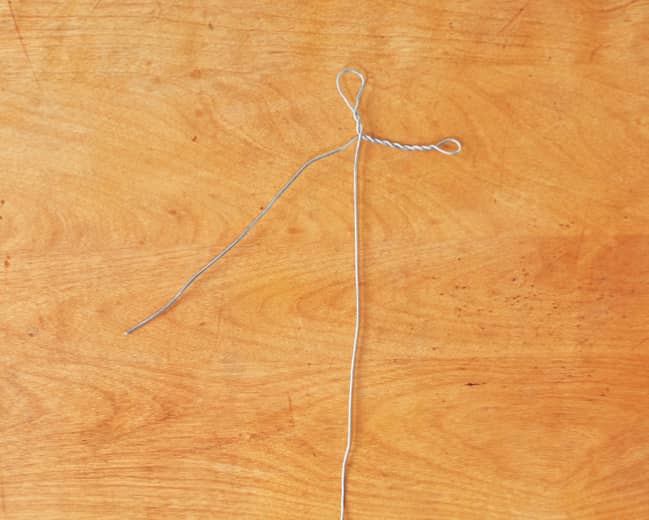
fig. 2. Fold over one piece of wire across the other and make a loop. Twist the loop of wire to form an arm.
3 Fold the longer piece of wire across the torso to form a loop on the other side. Twist the loop to form the other arm (fig. 3). You now have two arms and two legs.
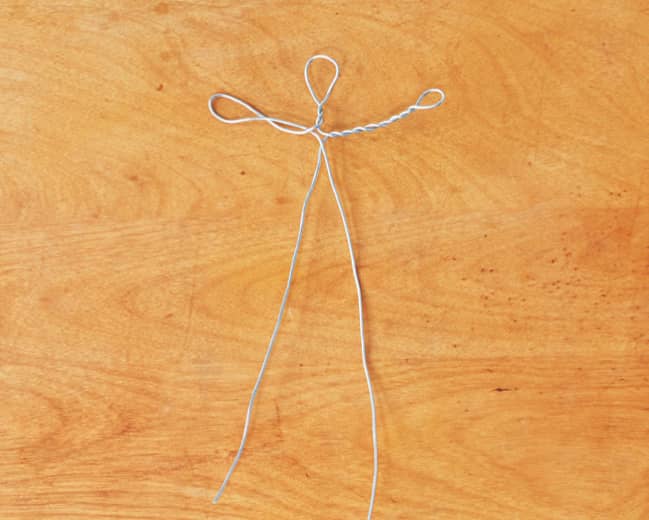
fig. 3. Using the longer piece of wire, fold it up across the torso and make a loop. Twist the loop into the second arm.
4 Wrap the wire at the base of each leg around a wooden knob to make feet and secure with masking tape (fig. 4). Make sure your puppet’s legs are still long enough to allow for a broad range of movement.
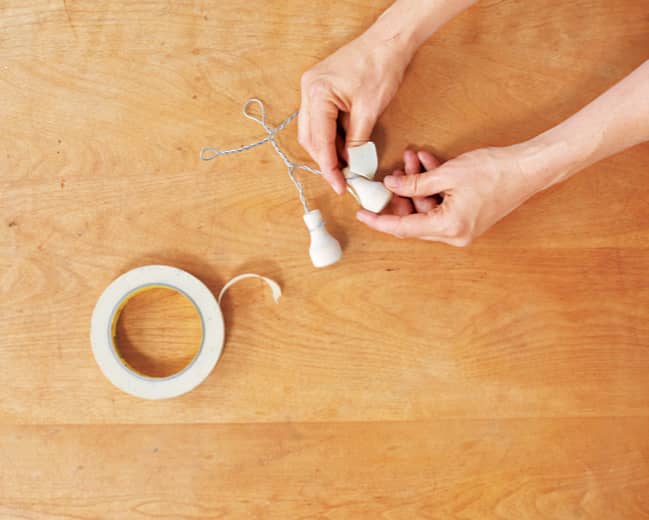
fig. 4. Twist the bottom of each leg around a wooden knob to make sturdy feet and secure with masking tape.
5 Fold the fabric in half so there are two layers, one on top of the other. Lay the armature with its arms and legs extended on top of the fabric and then trace with a marker. Leave at least 2 inches (5 cm) around it if you’re using yarn to sew the fabric; you’ll only need 1 1/2 inches (3.8 cm) if you’re using thread. Be sure to allow for extra space when tracing the wooden “feet”—think bell-bottom pants (fig. 5).
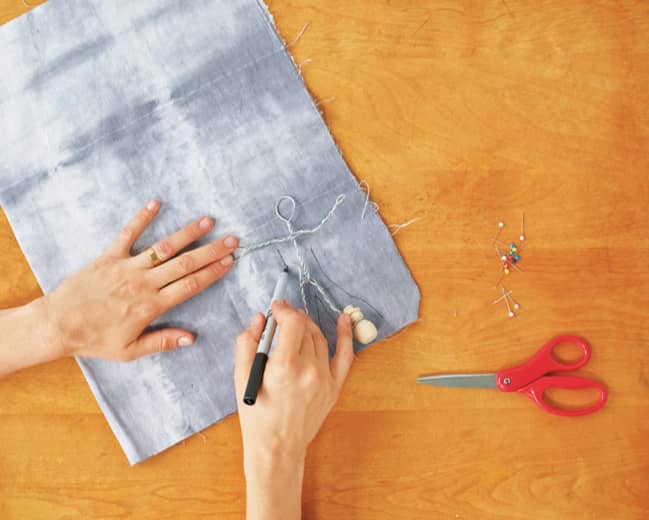
fig. 5. Trace the outline of the armature onto the fabric, leaving space around it for sewing.
6 Once you’ve finished tracing, set the armature aside. Pin the two pieces of fabric so the layers stay together, then cut along your traced guidelines (fig. 6).
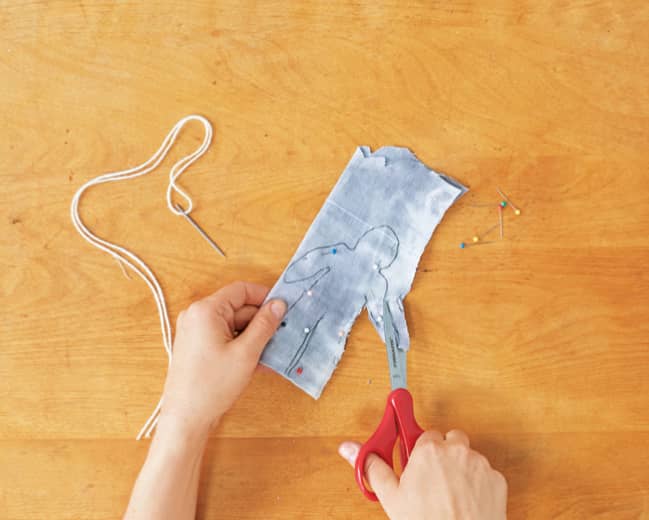
fig. 6. Pin the fabric together and then cut along the traced lines.
7 Start sewing around the right half of the skin—the right ankle is a great place to start—continuing just over the head and stopping at the left shoulder so you can slip the armature in with ease. Continue sewing around the fabric until your puppet is completely covered. Do not cover the wooden feet with fabric—they should remain exposed for easy animating (fig. 7).
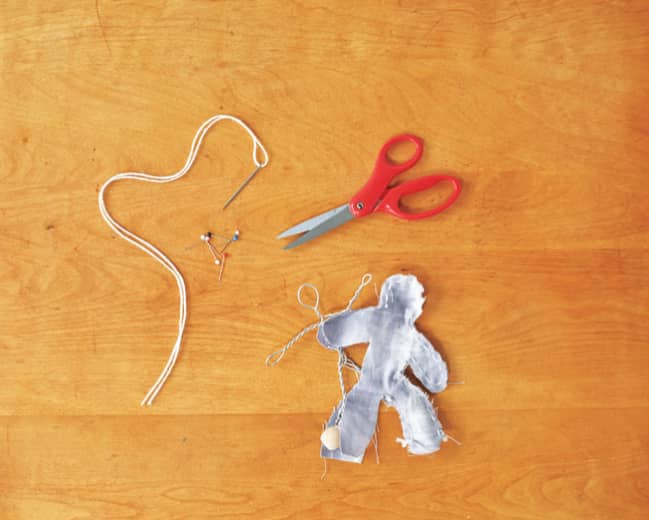
fig. 7. Sew the fabric skin around the armature, leaving the wooden feet exposed.
8 Give your puppet a face. Buttons and beads make great eyes and noses, or you can draw or paint a face.
9 For extra stability and support, use non-hardening modeling clay or Sticky Tack to stick your puppet’s feet to the tabletop. Set up your camera and tripod. Now your puppet is ready for action (fig. 8)!
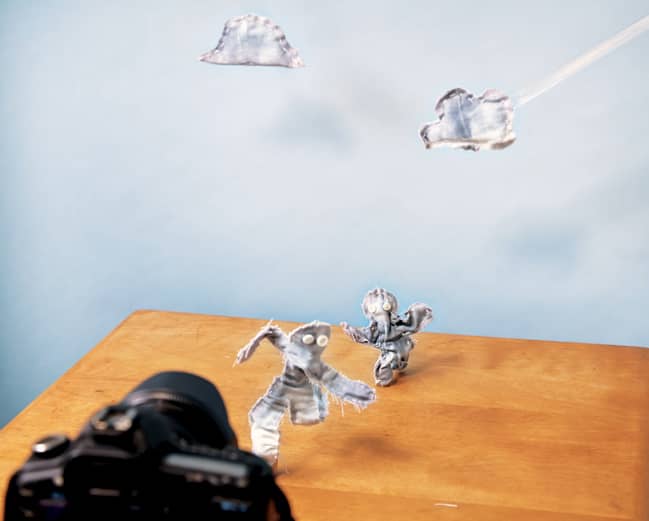
fig. 8. Add a face and then make your puppet move!
LAB 15
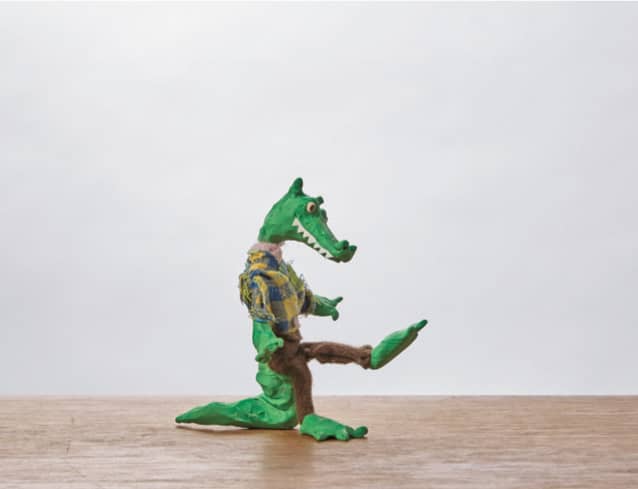
THREE-DIMENSIONAL CLAYMATION PUPPETS
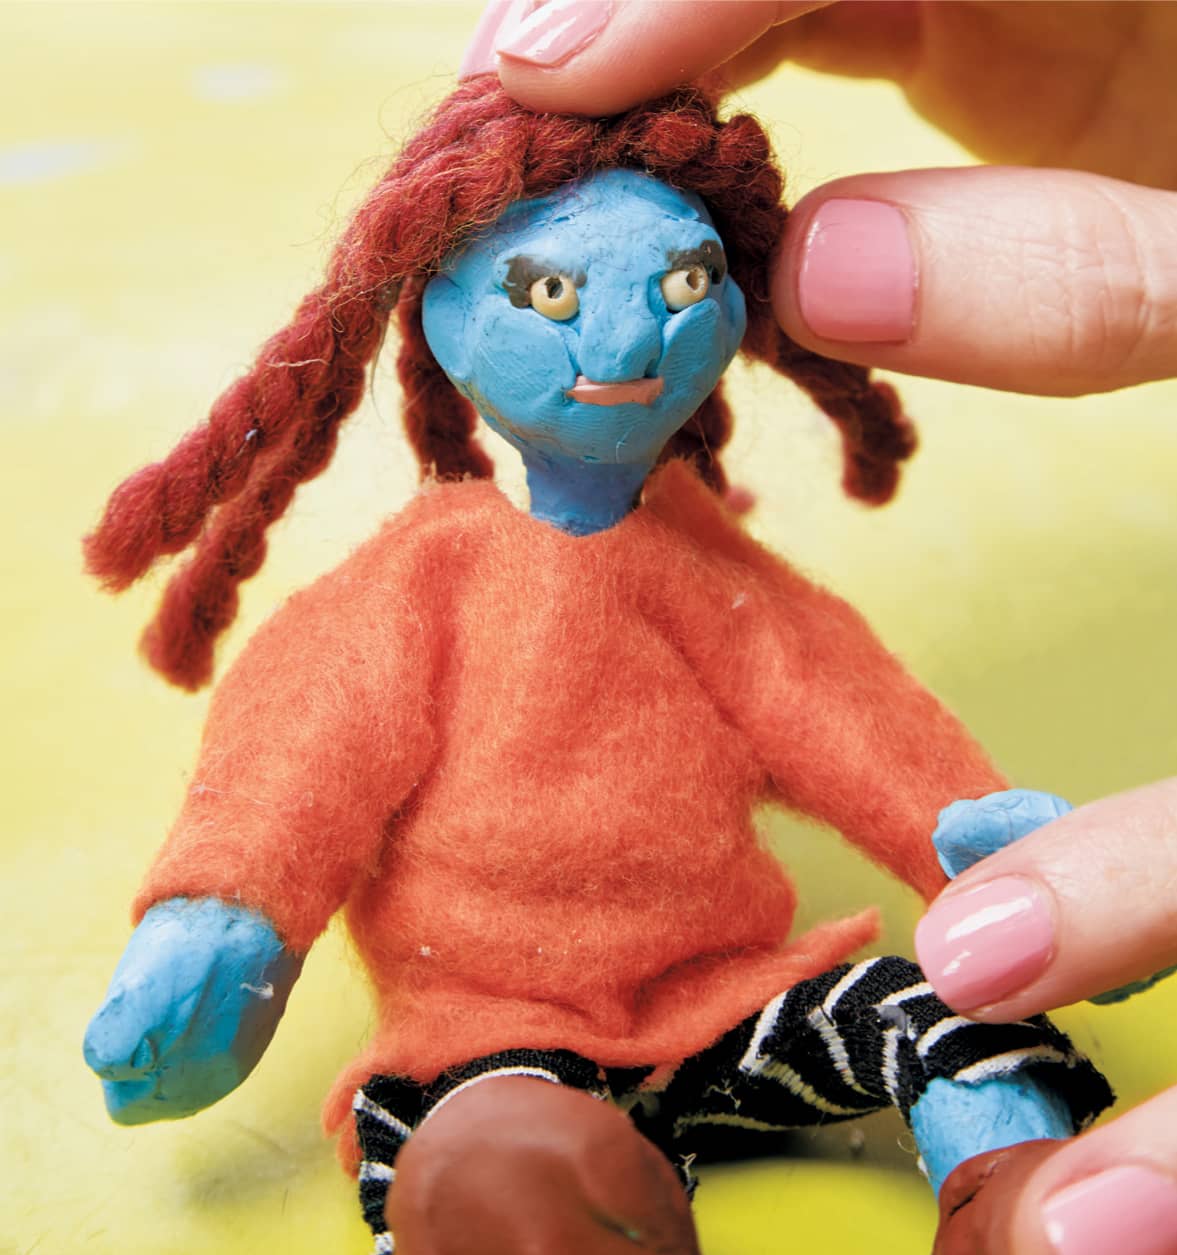
These puppets are such fun to make and animate! Animators can try their hand at sketching, sculpting, and even a little fashion design!
BEFORE YOU BEGIN
As with the fabric puppet (Lab 14), take a moment to design what you would like your puppet to look like. You will be using a greater variety of materials to create this puppet, so you can do more with facial features and details. Use some scratch paper to try out a few ideas. Think about proportions, materials you might use for clothing, hair, and how you will design those clay features. Again, your final sketch will serve as a guide to creating your puppet.
For this lab, we will be using the same measuring technique that we used for the fabric puppet. Determine the size of your puppet so you’ll know how much wire you’ll need to cut for the armature. Refer to steps 1 to 3 in Lab 14 to create the wire armature.
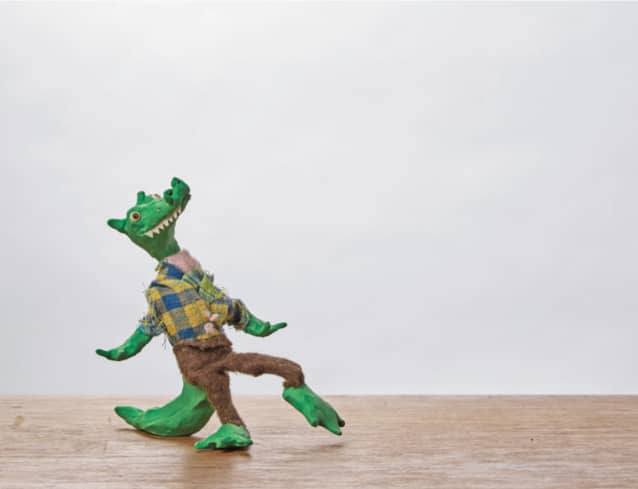
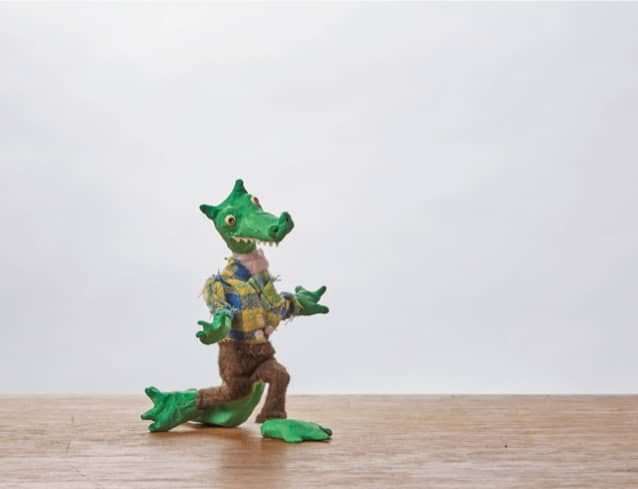
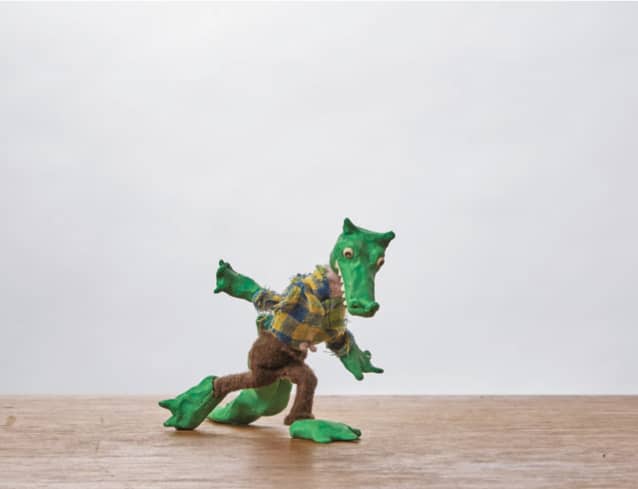
MATERIALS
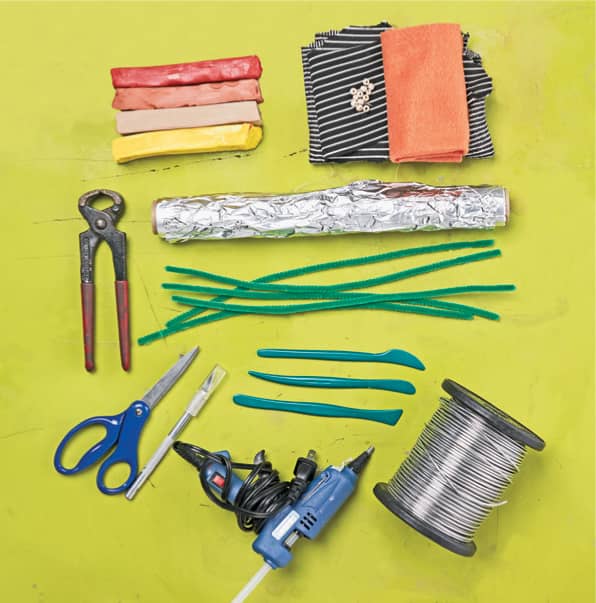
− Pencil
− Scratch paper
− Wire cutters
− 32’ (9.8 m) spool of 16-gauge aluminum armature wire
− Needle-nose pliers
− Aluminum foil
− Masking tape
− Fabric
− Marker
− Straight pins
− Scissors
− Hot glue gun
− Non-hardening modeling clay in a variety of colors
− Clay sculpting tools
− Beads for eyes
− Yarn for hair (optional)
− Camera or other capture device
− Tripod
ACTION!
1 Follow steps 1 through 3 in Lab 14 to make the puppet’s armature, leaving large loops on the ends for the hands and feet.
2 Rip off strips of aluminum foil and wrap them loosely around the armature, bunching up areas to give more mass (fig. 1).
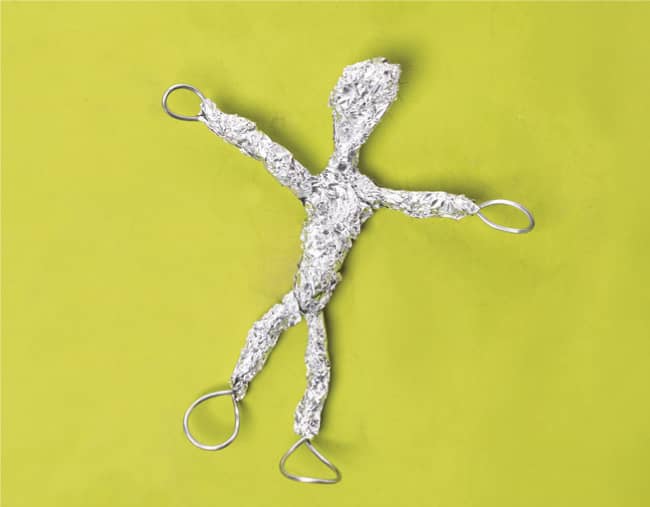
fig. 1. Wrap aluminum foil around the armature to create the body.
3 Wrap the foil with masking tape so that it is secure (fig. 2).
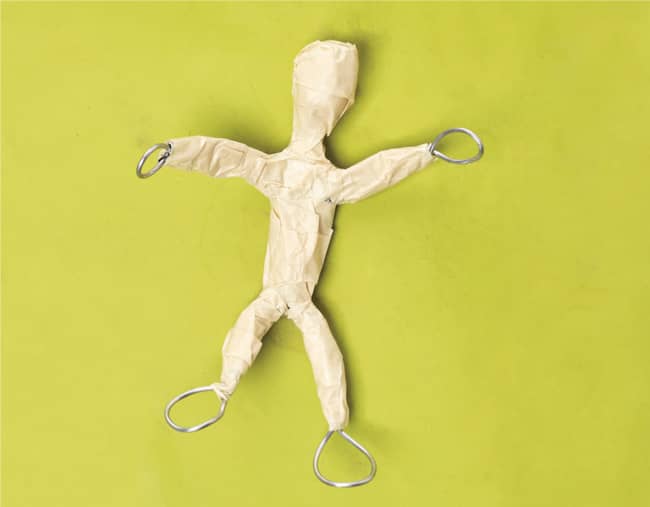
fig. 2. Wrap the foil armature with masking tape.
4 Fold the fabric in half so that there are two layers, one on top of the other. Lay the armature with its arms and legs extended on top of the fabric and trace around it with a marker to create clothing (fig. 3).
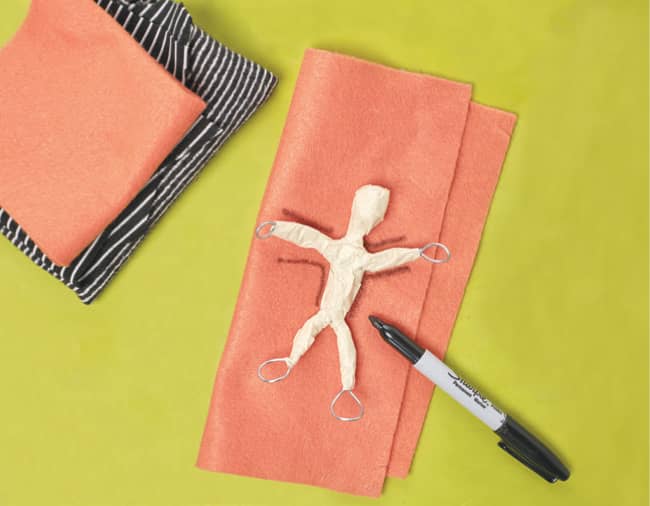
fig. 3. Trace the outline of the armature onto the fabric, leaving space around it for gluing.
5 Set aside the armature, pin the fabric together, and then cut it out.
6 Lay the covered armature on the back panel of the outfit and glue it down using the hot glue gun. Next, glue on the top panel, creating complete coverage (fig. 4). Remember to leave the feet free of fabric. Clay puppets do well with large feet that stick to surfaces and animate easily.
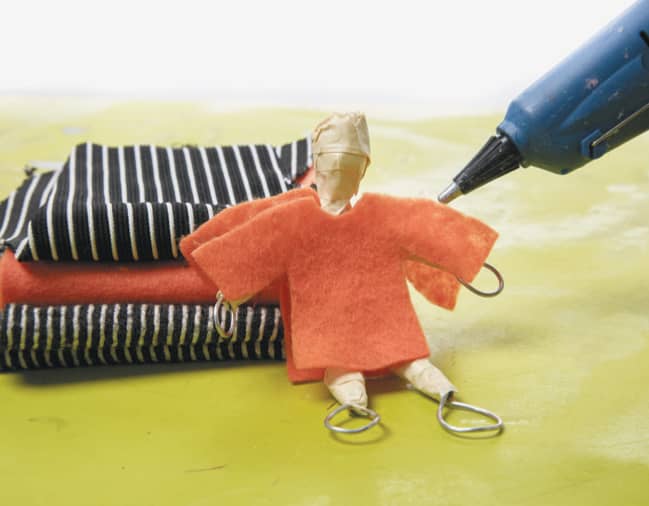
fig. 4. Adhere the clothing to the body with a hot glue gun.
7 Now let’s add clay features. We want to keep the puppet fairly light in its upper half so that it is easy to pose and won’t slump over during the course of your animation.
Use clay sculpting tools to help create features and fine lines. Beads work well as eyes. Also add the hands and feet (fig. 5).
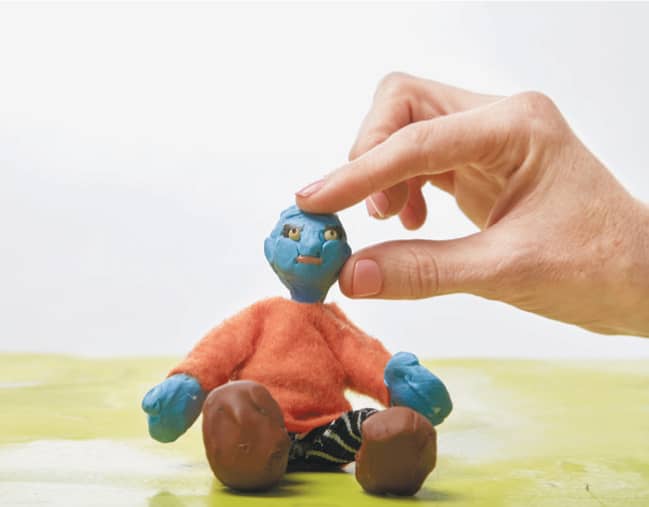
fig. 5. Create a face, hands, and feet with modeling clay.
8 Cover the head in hair. Yarn works well and can be easily attached with the hot glue gun (fig. 6). Or you can use other types of materials for hair, such as paper, clay, or wire.
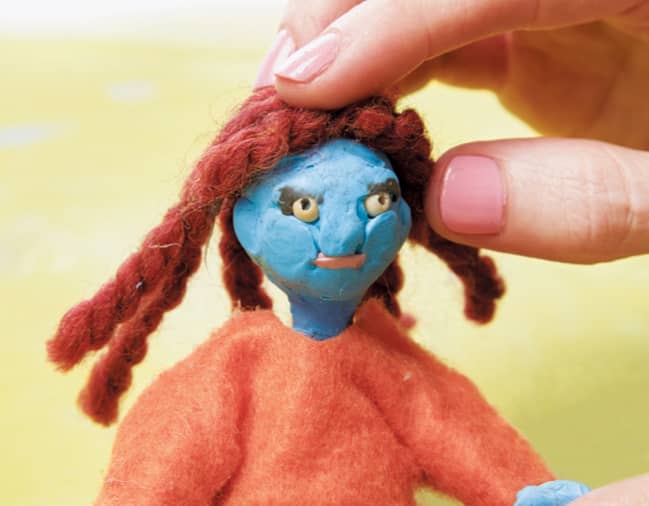
fig. 6. Attach hair to the puppet’s head.
9 Lastly, make sure the feet are stable. You may need to cover the feet with another layer of modeling clay and shape them so the puppet will stand upright (fig. 7).
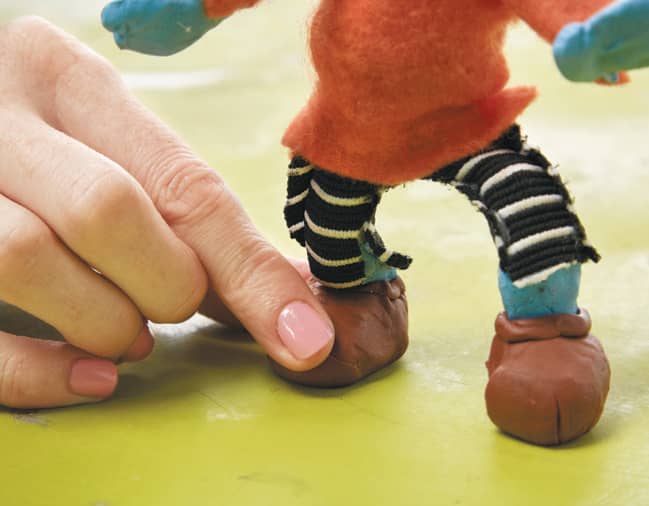
fig. 7. Shape the feet with more modeling clay so they’re stable and will hold the puppet upright.
10 Now you’re ready to set up your camera and tripod and snap away!
LAB 16
THREE-DIMENSIONAL CLAYMATION TREES
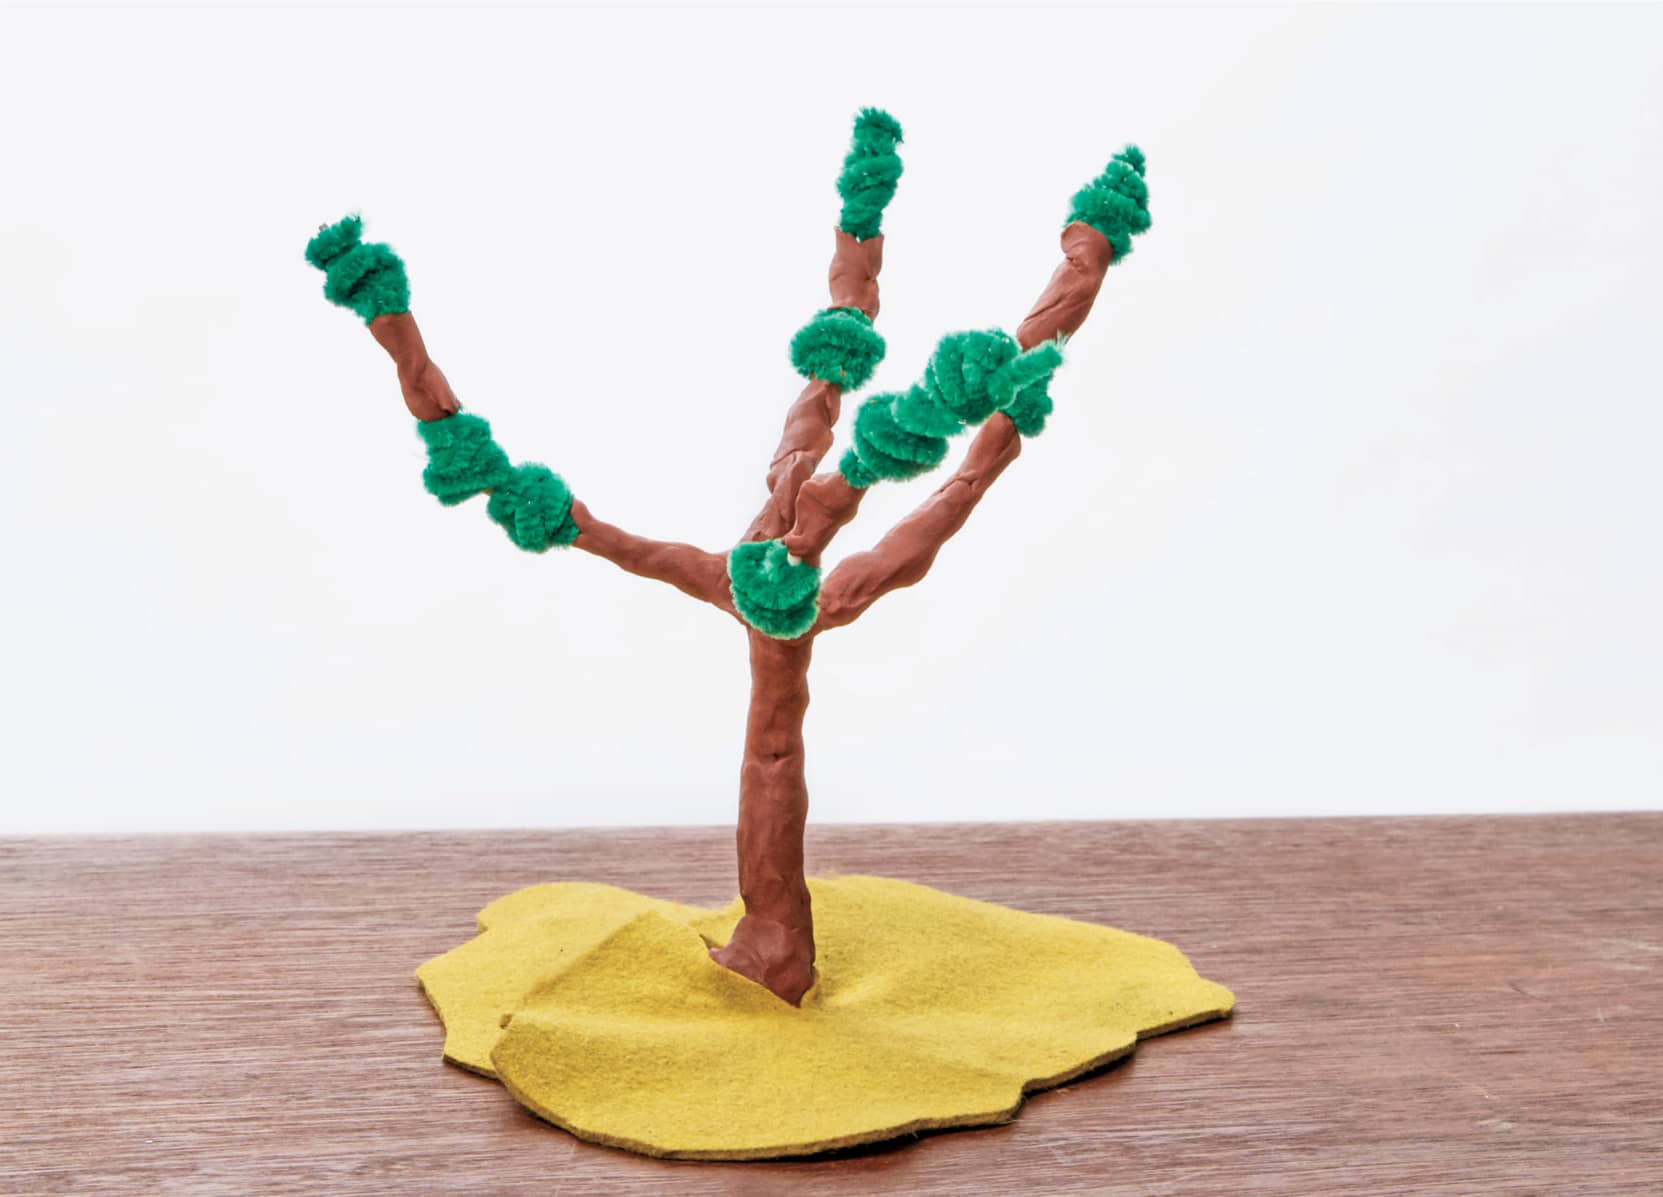
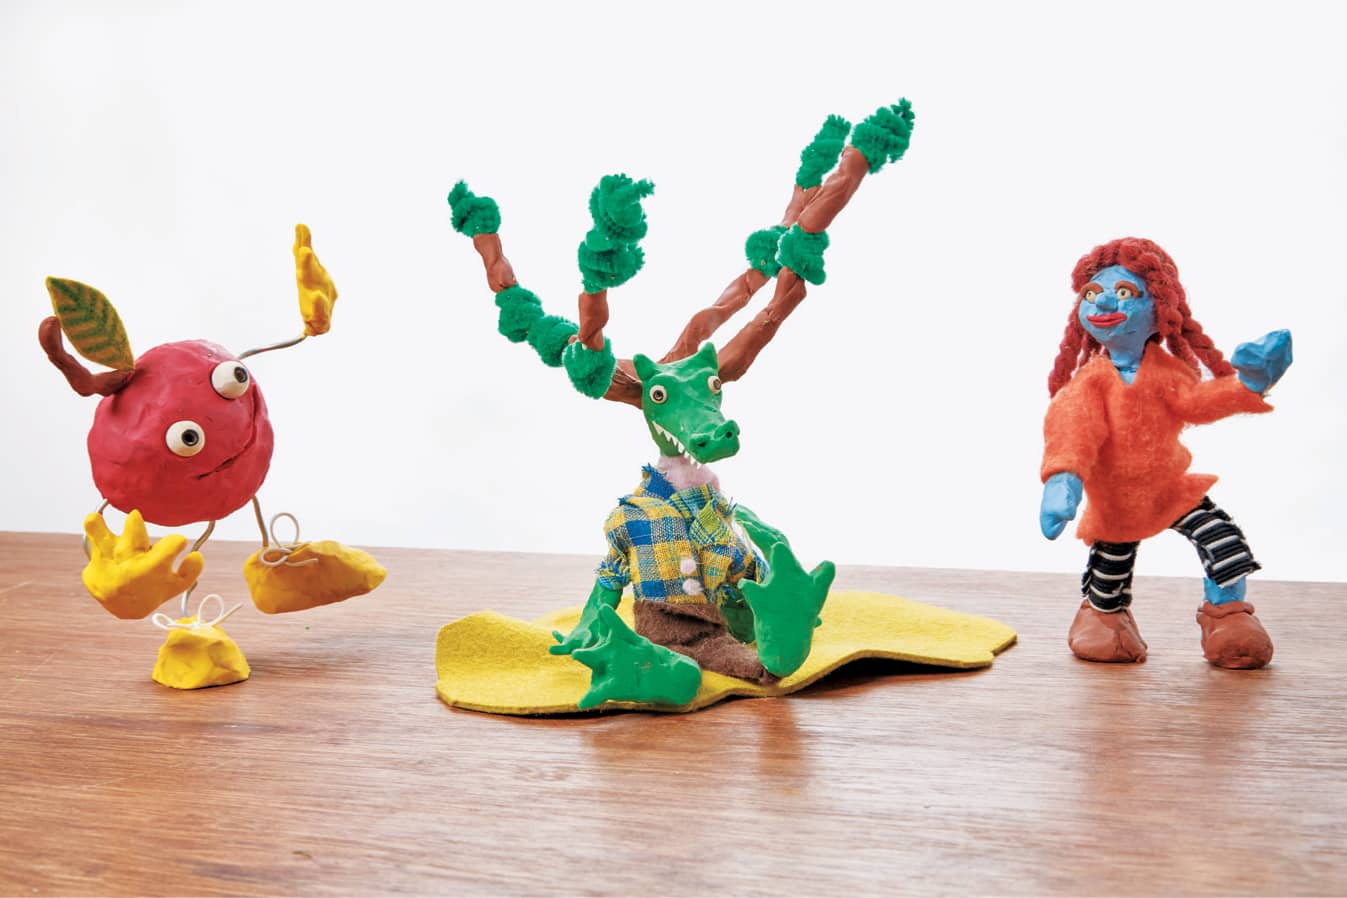
Let’s add to your animation environment. This extra set piece helps create a unique world—and it’s also movable!
MATERIALS
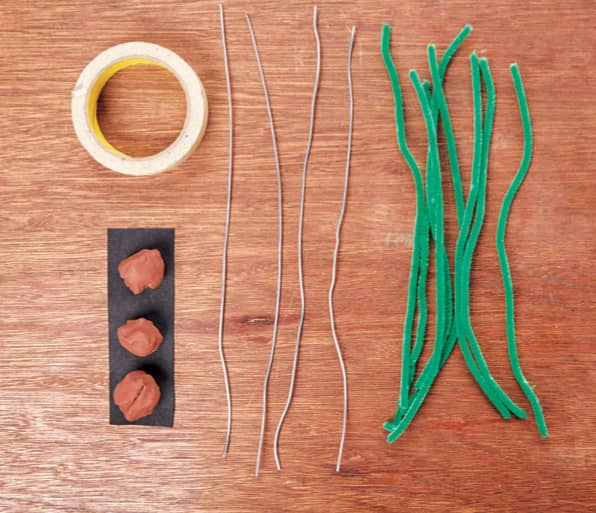
− Wire cutters
− 32’ (9.8 m) spool of 16-gauge aluminum armature wire
− Pipe cleaners
− Needle-nose pliers
− Masking tape
− Non-hardening modeling clay in brown
− Clay sculpting tools
ACTION!
1 Decide how tall you would like your tree to be, considering that the base of your tree will be made of “roots” that you will secure to a tabletop. Cut 5 to 8 lengths of armature wire that are more or less equal lengths. Cut the pipe cleaners into 4 similar lengths.
2 Twist together the lengths of wire in the center, creating a trunk with loose wire at the top and the bottom. Wrap the branches and trunk with masking tape, creating a stable armature (fig. 1). Build up certain areas to create variations in shape and texture.
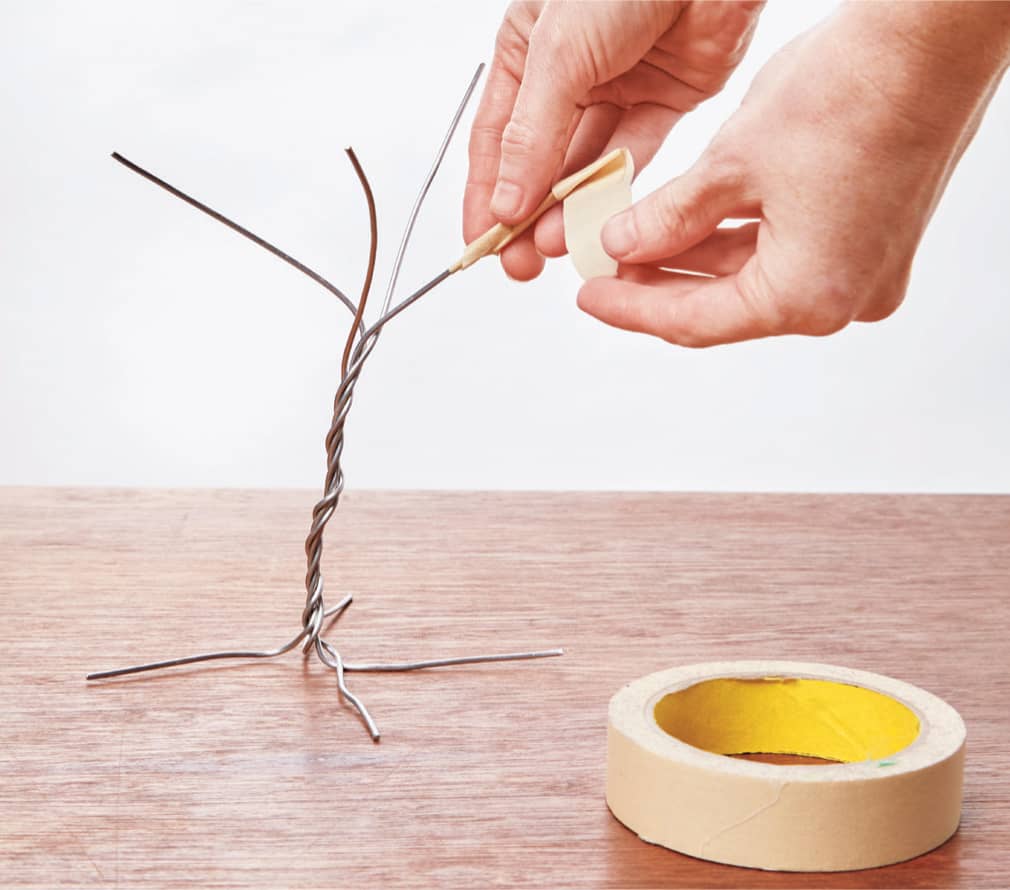
fig. 1. Cut wire lengths to the desired size and then twist the wires together to form a trunk and branches. Wrap the armature with tape.
3 To make the leaves, gather the pipe cleaners and twist them together. Cut into short lengths about 1 to 2 inches (2.5 to 5 cm) long (fig. 2). Play with the pipe cleaners to make different kinds of foliage. Does your tree have wild, curly leaves like ours, or short, spiky leaves?
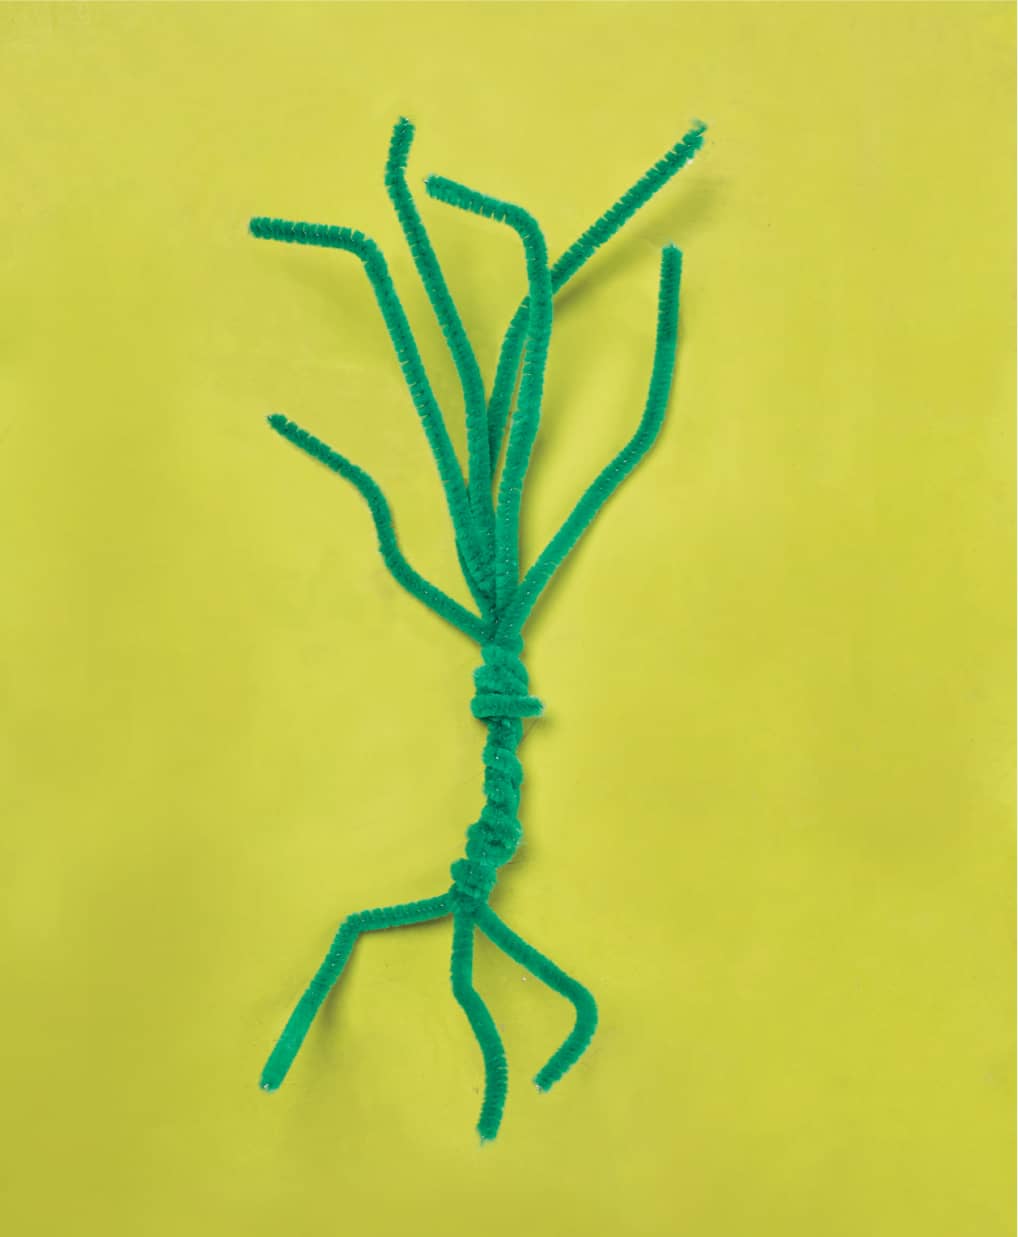
fig. 2. To make leaves, twist four pipe cleaners together and cut into short lengths.
4 Tape the wire roots to the tabletop for stability. Wrap your pipe cleaner leaves around the ends of the branches in small bunches. Add modeling clay to the armature in a thin layer (fig. 3).
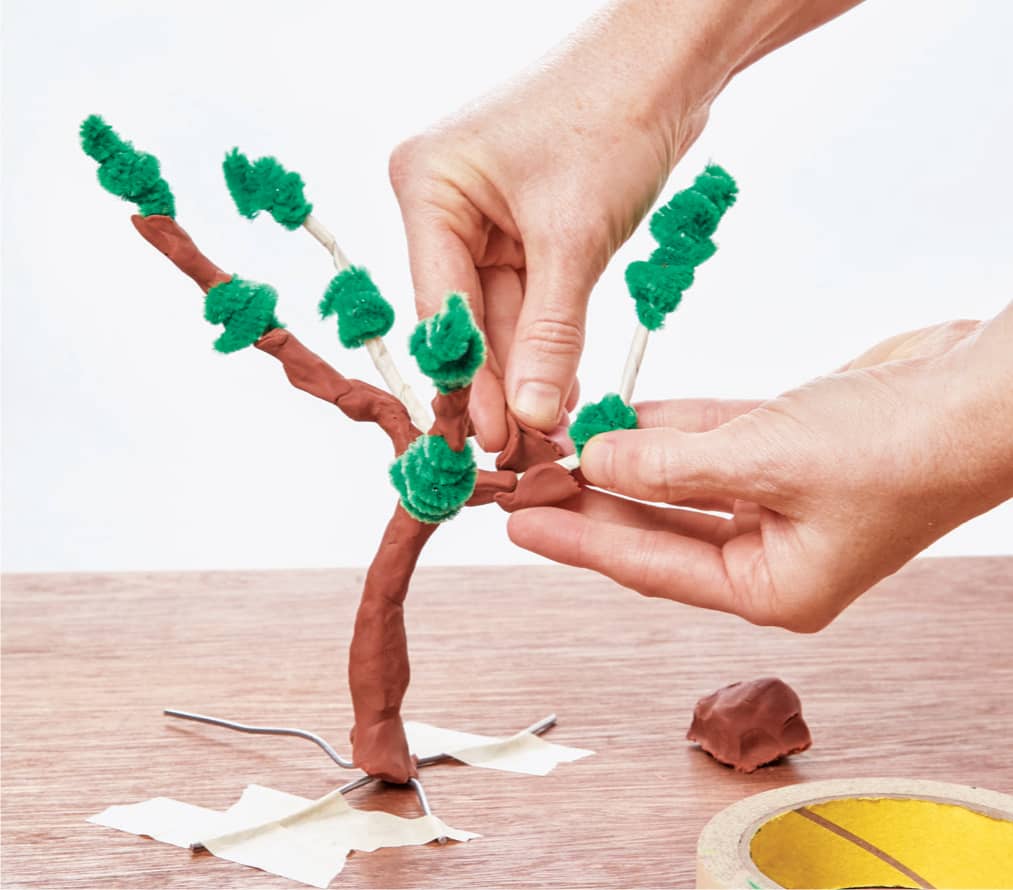
fig. 3. Attach pipe cleaners to the branches and apply modeling clay to the trunk.
LAB 17
LEARNING TO FLY: WORKING WITH RIGGING
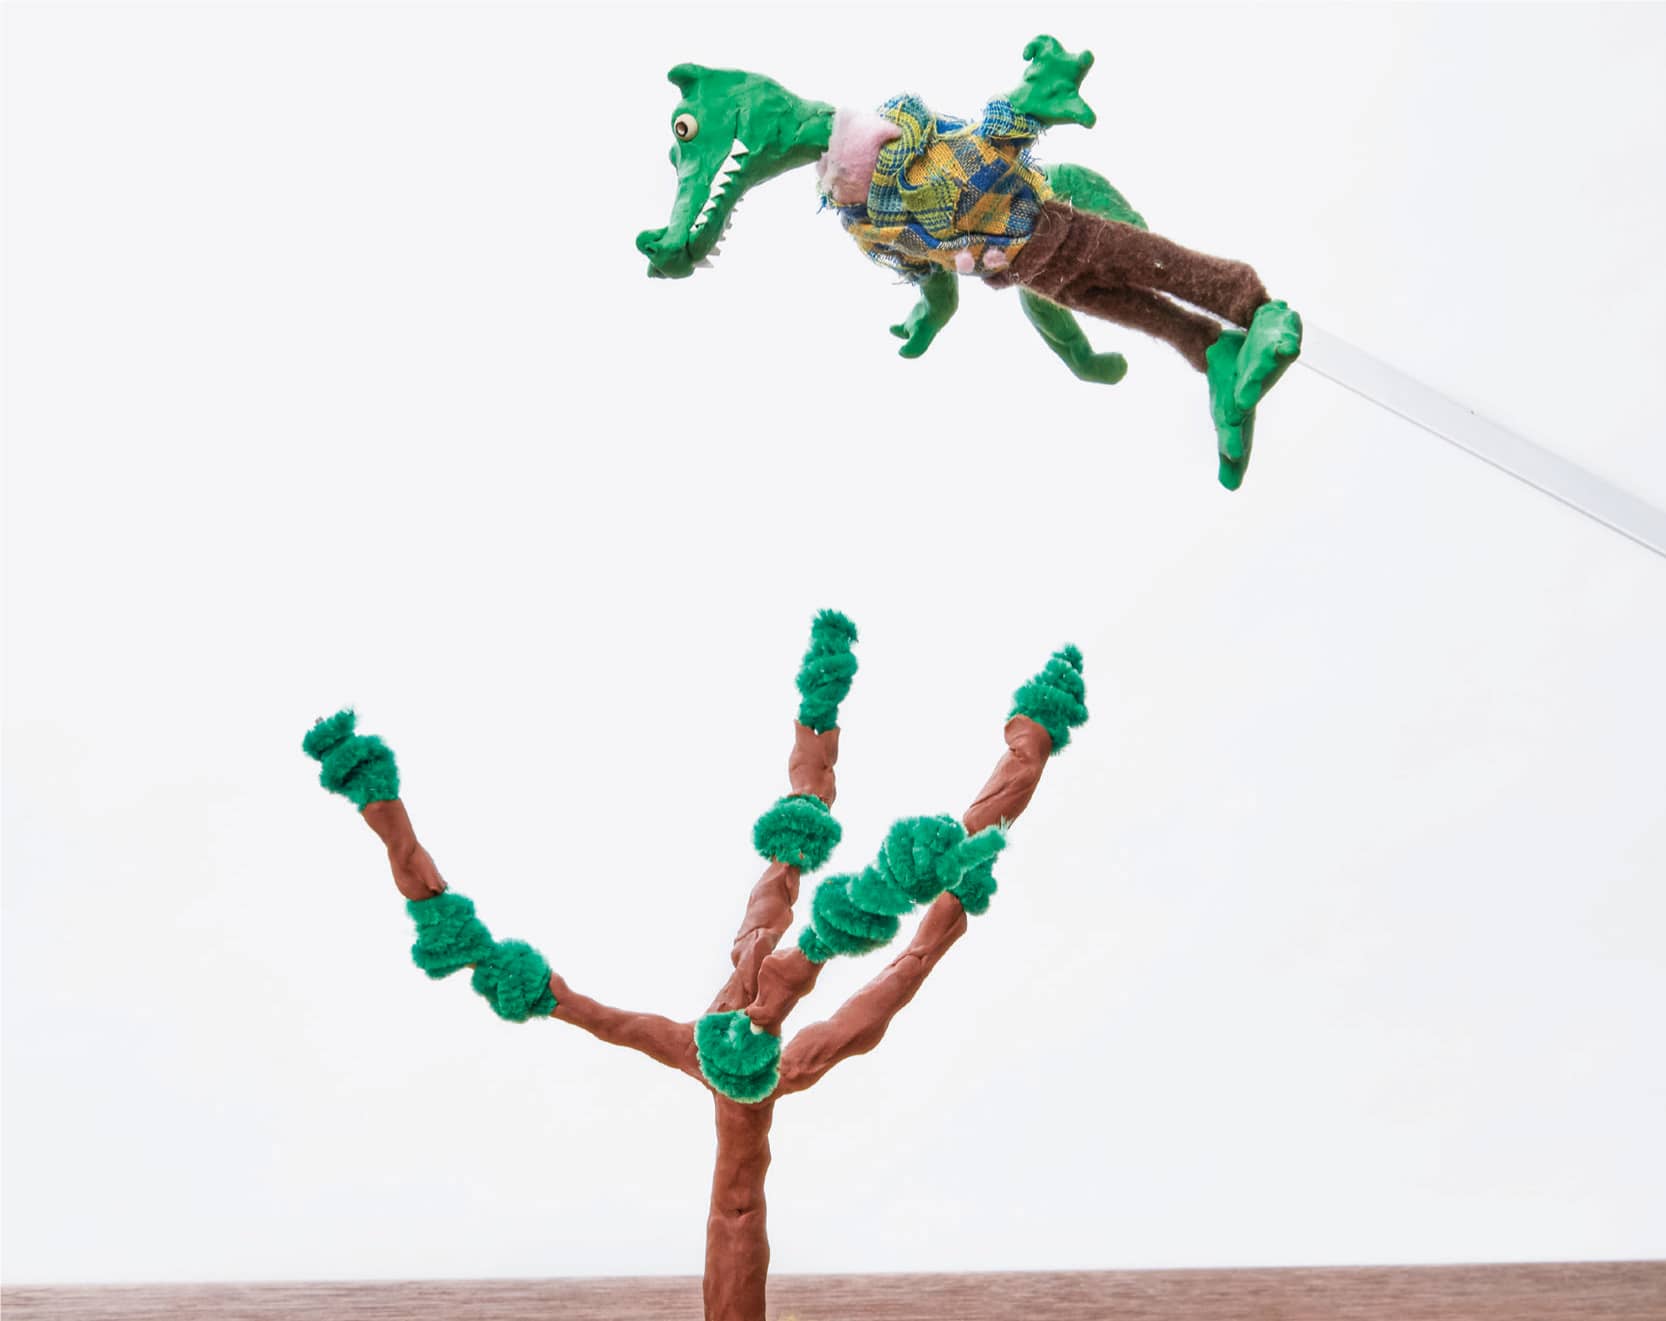
This lab leads you through a helpful method that enables puppets to fly in a straight-ahead angle or three-dimensional environment. Having some fishing line on hand is always a great place to start, but even though the support method is invisible, it can be hard to hold your puppet still in space because the fishing line tends to swing and sway slightly. Following these steps ensures a stable holding technique that is still transparent to the camera’s lens.
MATERIALS
− Puppet, toy, or found object of your choosing
− Length of clear plastic dowel, either round or square and at least 3/16” (4.8 mm) in diameter
− Large binder clips, masking tape, or thin wire
− Camera or other capture device
− Tripod
− Set to house the action
ACTION!
1 Securely attach your puppet to the end of the clear plastic dowel using a binder clip, masking tape, or thin wire.
2 Hold the clear plastic dowel at one end just out of sight of the camera and carefully move your puppet into the set through the air. Capture each incremental movement with the camera.
3 Your puppet can fly!
LAB 18
LOOKS LIKE WATER
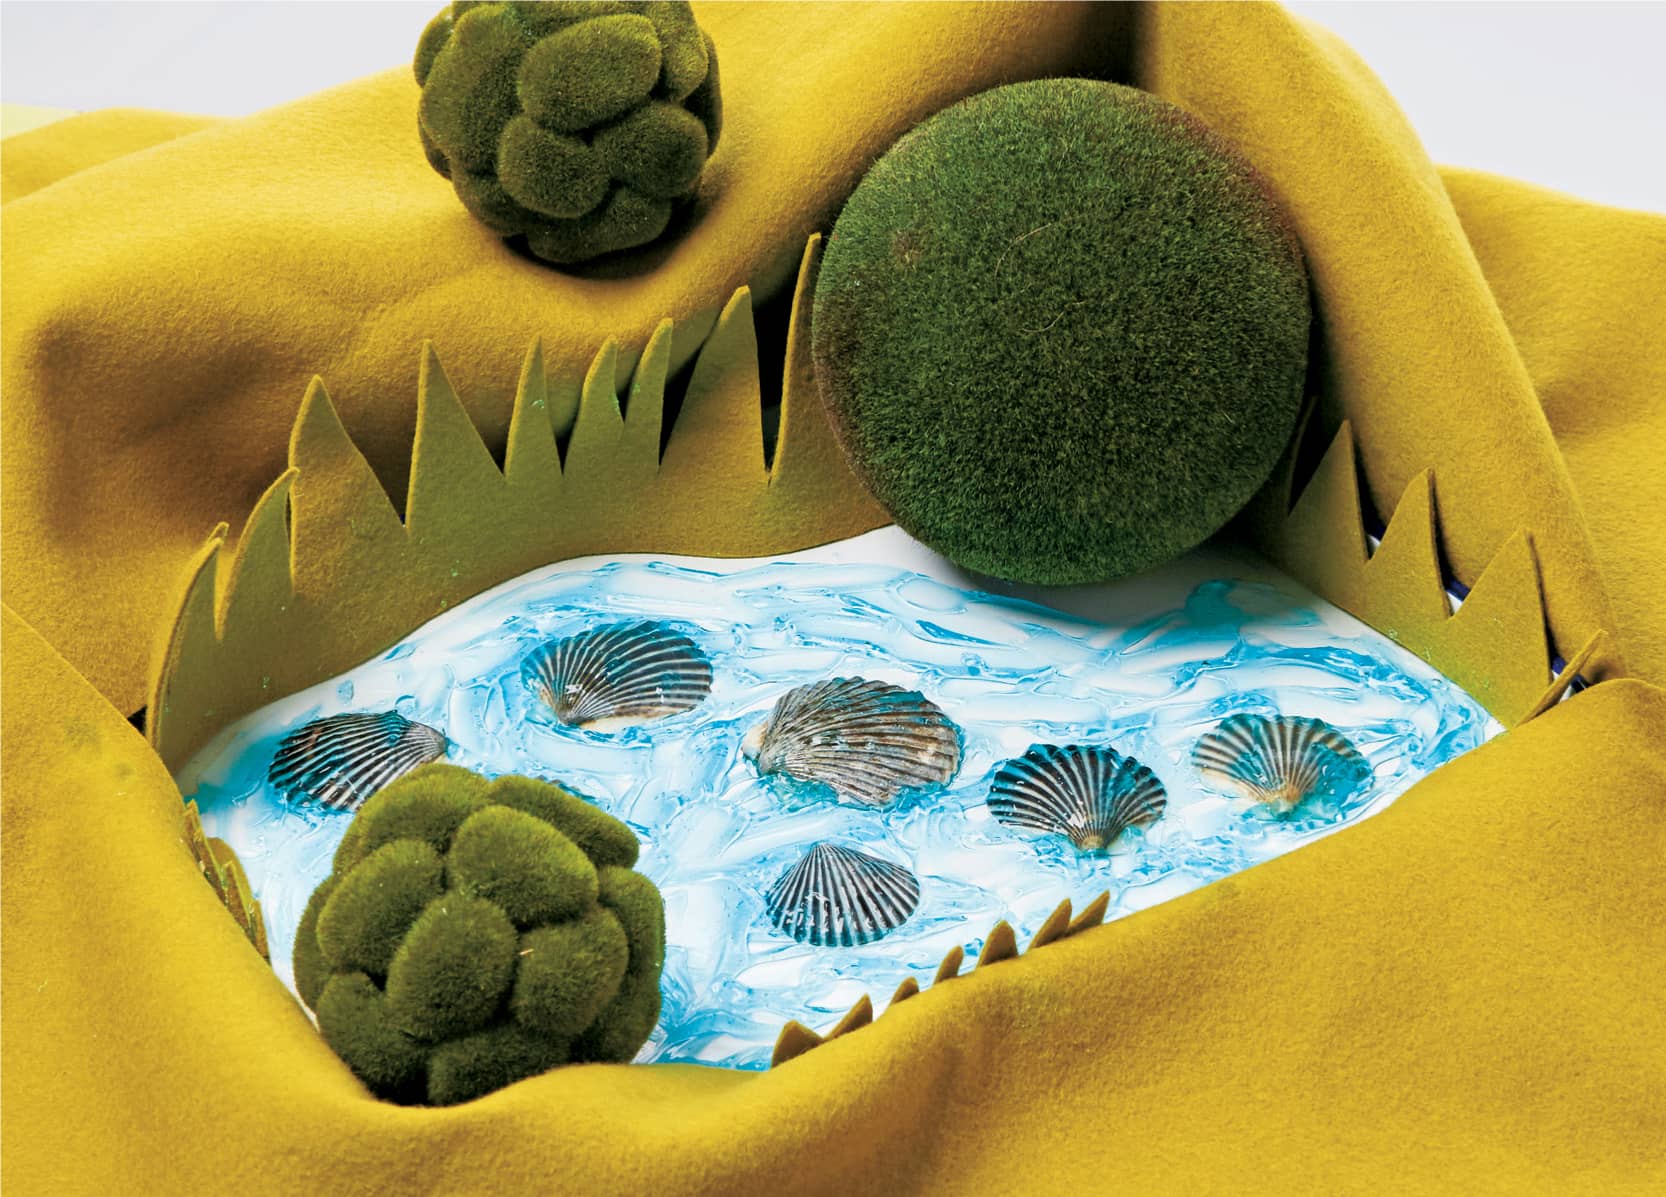
This lab tackles one of the most challenging tricks in animation: creating believable water! The tricky thing is that you need a substance that looks fluid but can hold a position until you are ready for it to move. Using some simple materials, you will be able to create a small set complete with a magic watering hole!
MATERIALS
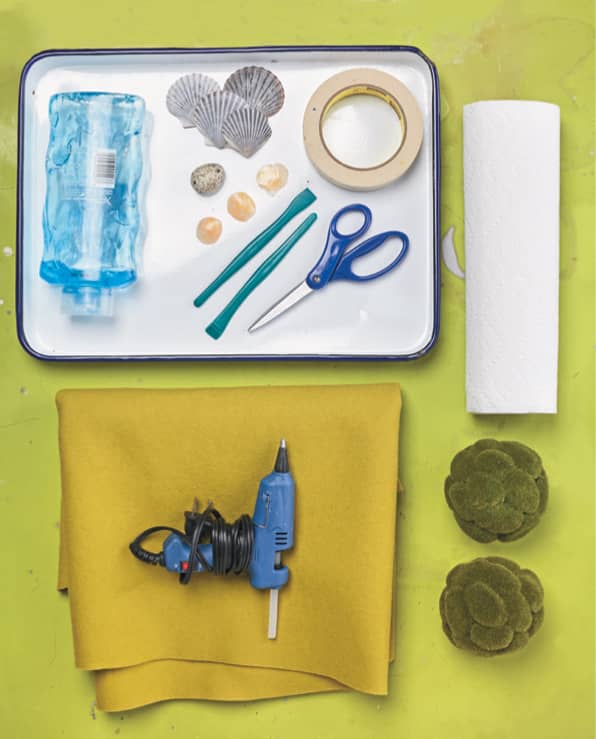
− Masking tape
− Tray for holding body of “water”
− Recycled cardboard boxes and/or plastic cups to create height in your set
− Paper towels
− Large sheets of felt or fabric
− Scissors
− Hot glue gun
− Natural or natural-looking materials, such as moss, rocks, and sticks
− Shells and/or river rocks
− Blue hair gel
− Camera or other capture device
− Tripod
ACTION!
1 Tape the tray to a tabletop, where you will be animating (fig. 1).
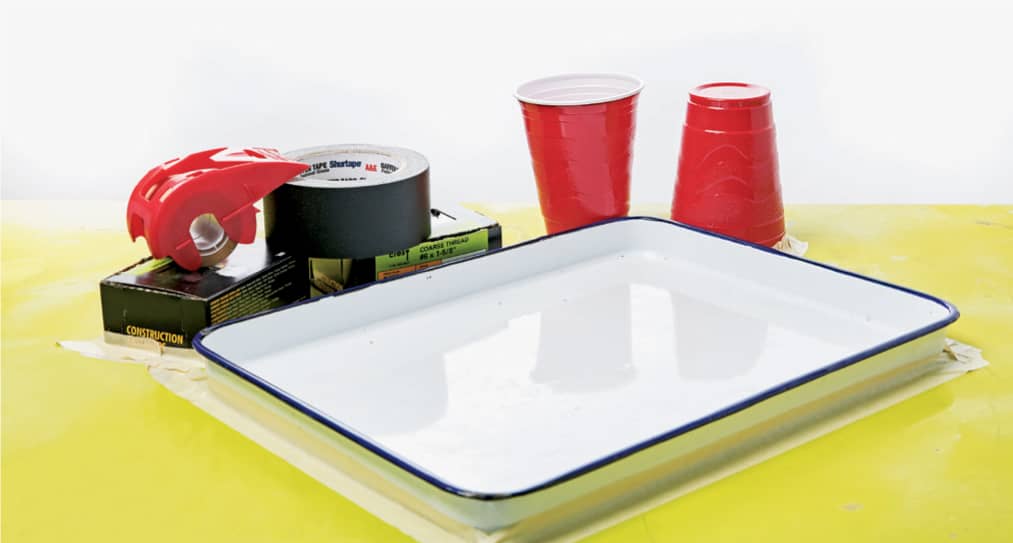
fig. 1. Tape down your “watering hole” tray.
2 Arrange the cardboard boxes and/or plastic cups around the tray, imagining that they are hills around the magic watering hole. Tape down the items securely to the table when you have put them in a place that you are happy with. Add bunched-up paper towels to create a more rounded shape.
3 Next, lay large sheets of felt or fabric down on top of the boxes, cutting and trimming as you see fit. Hot glue these sheets down to the items to make hills (fig. 2).
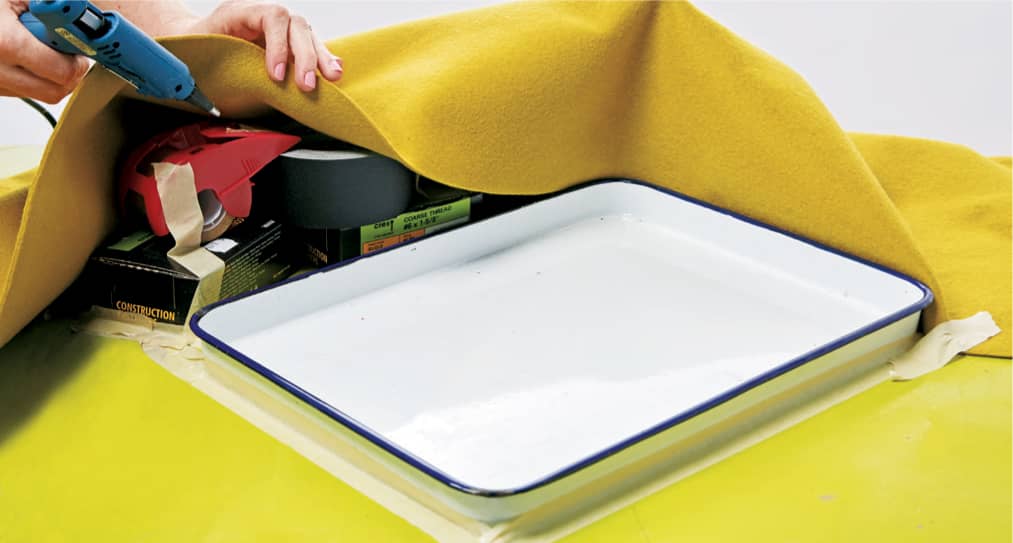
fig. 2. Hot glue the felt or fabric to the recycled materials.
4 Position your materials on your hills and around the watering hole. Use the hot glue gun to attach these securely as well (fig. 3).
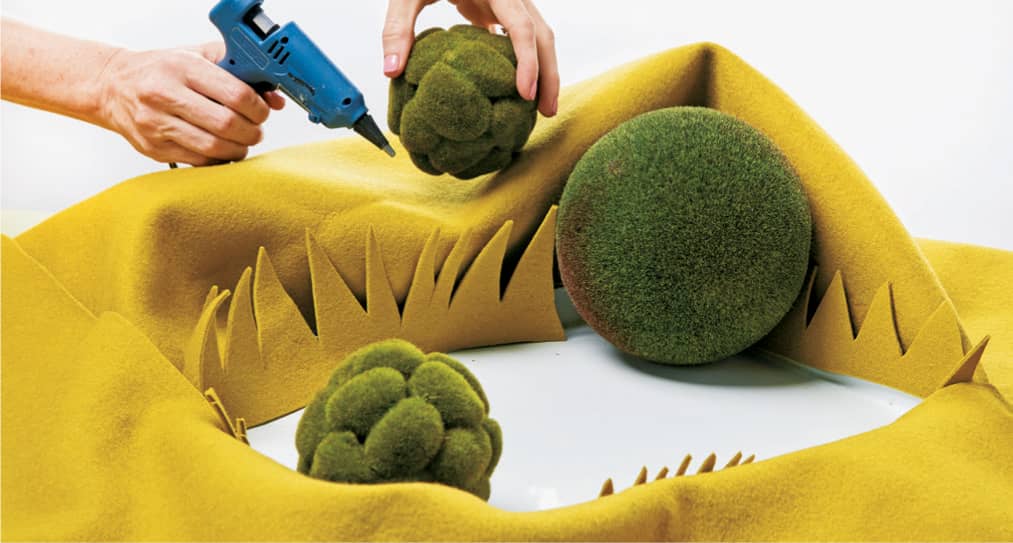
fig. 3. Add natural (or natural-looking) materials to your landscape.
5 Place a thin layer of shells and/or river rocks in the tray (fig. 4).
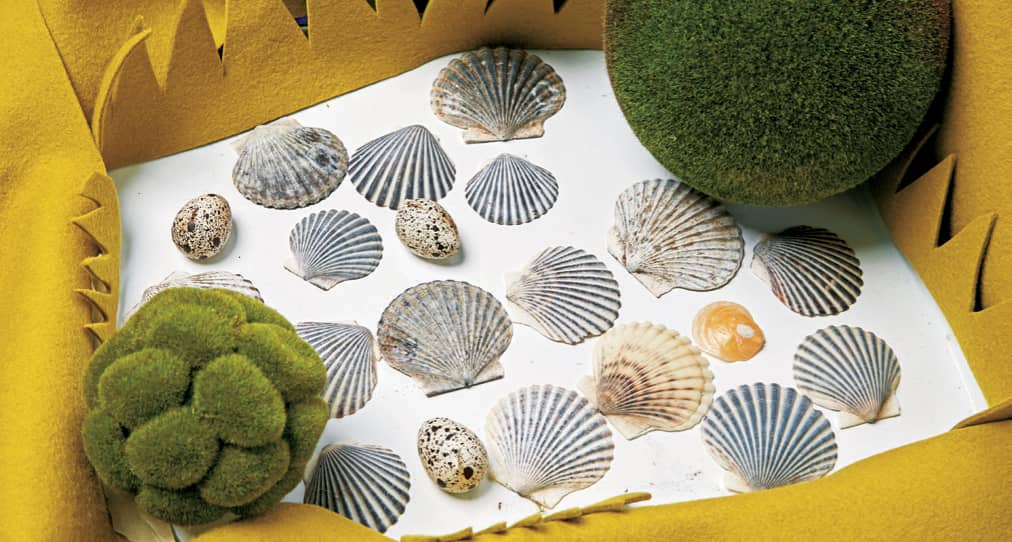
fig. 4. Add river rocks and shells to your watering hole.
6 To add “water,” pour the blue hair gel into the tray on top of the shells and/or river rocks (fig. 5). Now you’re ready to set up your camera and tripod and animate (fig. 6)!
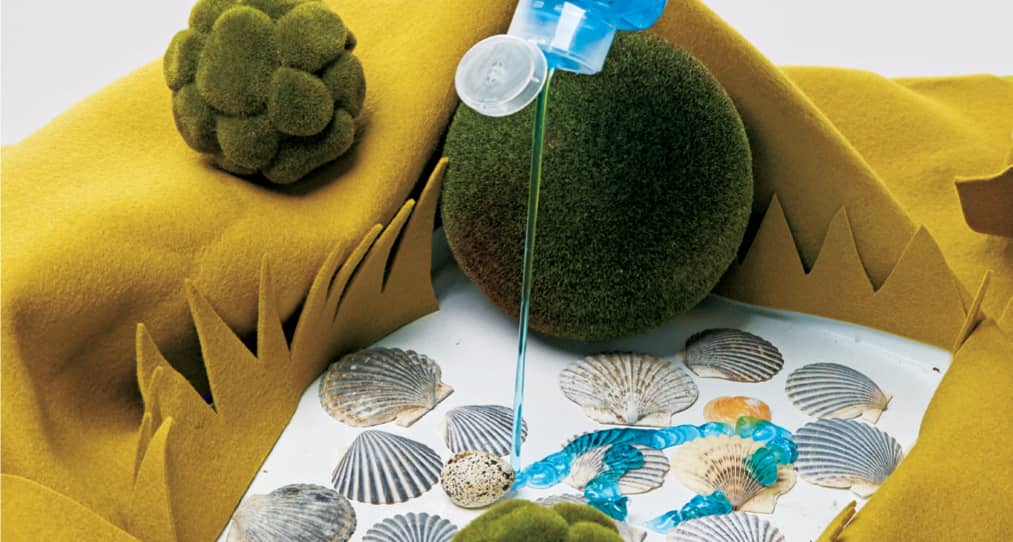
fig. 5. Add blue hair gel to look like water.
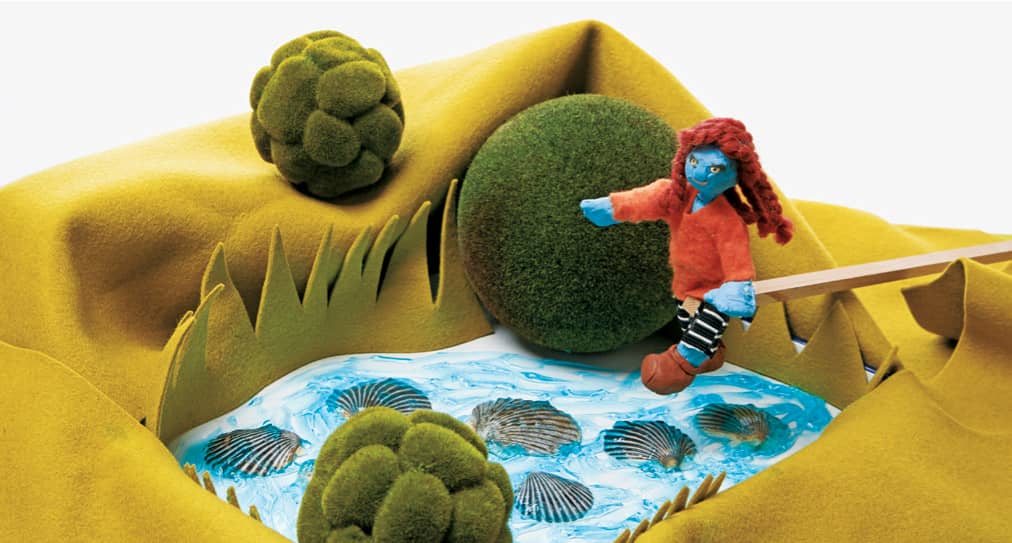
fig. 6. Set up a diving board so your puppet can go swimming!
MEET THE ANIMATOR
HAYLEY MORRIS
Hayley Morris is a director, an artist, and an animator based in New York City and Providence, Rhode Island, where she teaches stop-motion animation at her alma mater, the Rhode Island School of Design (RISD). Her company, Shape & Shadow, is a full-service animation studio that uses traditional animation techniques such as stop-motion and hand drawing to tell stories that unfold through layered textures, handcrafted details, and experimentation. Hayley creates her animations using many different art and craft media, including paper, fabric, and clay.
Hayley has directed commercials for companies including Burt’s Bees, Samsung, HumanaOne, Kate Spade, and the Detroit Zoo; has worked as an animator and a fabricator on commercials for Special K, McDonald’s, Toyota, the New York Times, Cadbury, and many other brands; and has created music videos for the singer-songwriter Iron & Wine as well as for the pianist Hauschka and Grammy Award–winning violinist Hilary Hahn. Hayley’s work has been featured at film festivals and museums around the world. Her short film Undone won the Grand Jury Prize for Best Animated Short at Slamdance in 2009. More recently, her sets, puppets, and music videos were shown at La Gaîté Lyrique’s “Motion Factory” exhibit in Paris, which showcased the work of fifteen directors from around the world who create handmade films in the digital age. To see more of Hayley’s work, visit www.hayleymorris.net.
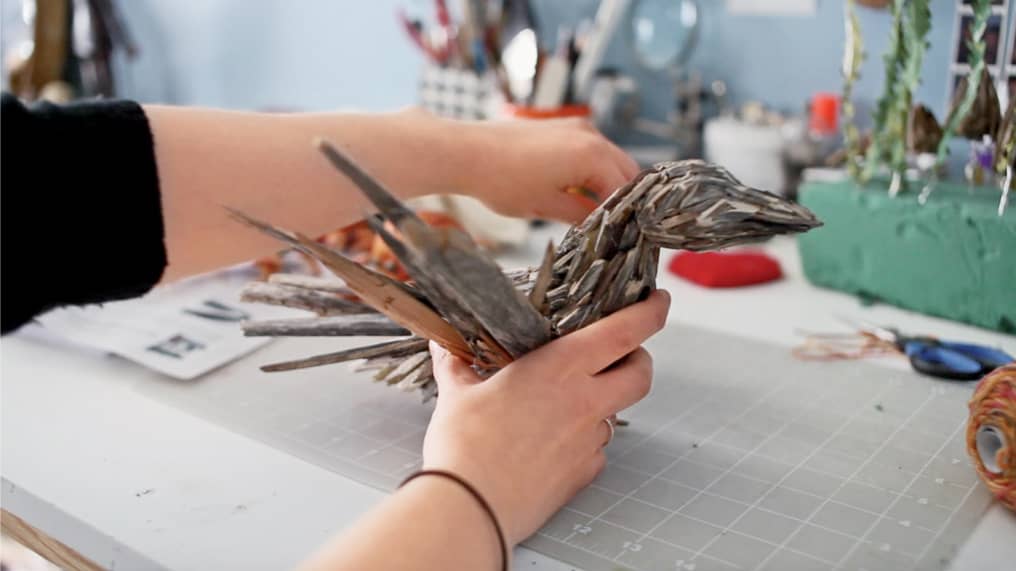
Hayley Morris works on a paper bird puppet for Bounce Bounce, a stop-motion music video for a collaboration between Hauschka and Hilary Hahn.
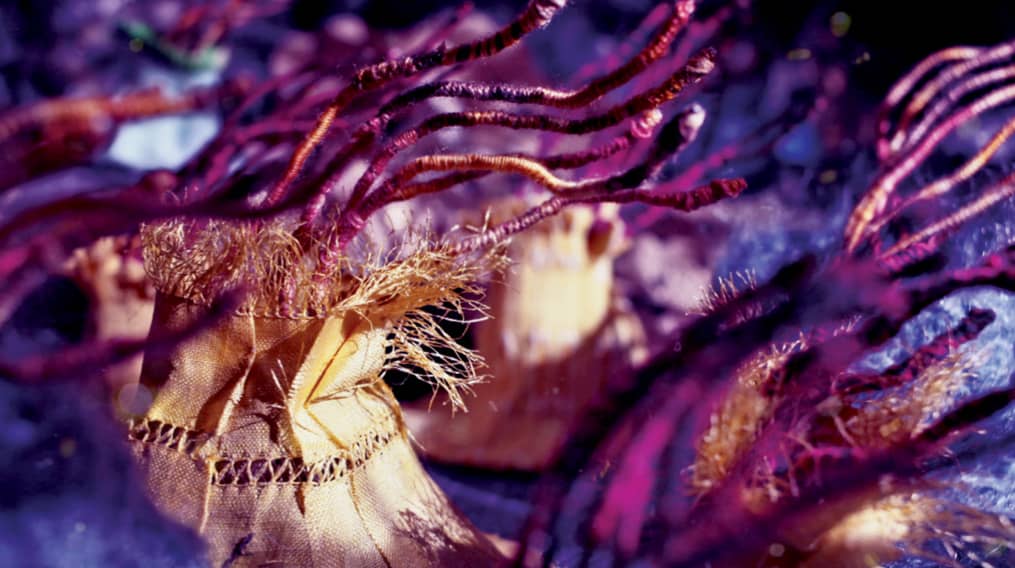
Above and Below: Most of the action takes place underwater and features dancing sea creatures.
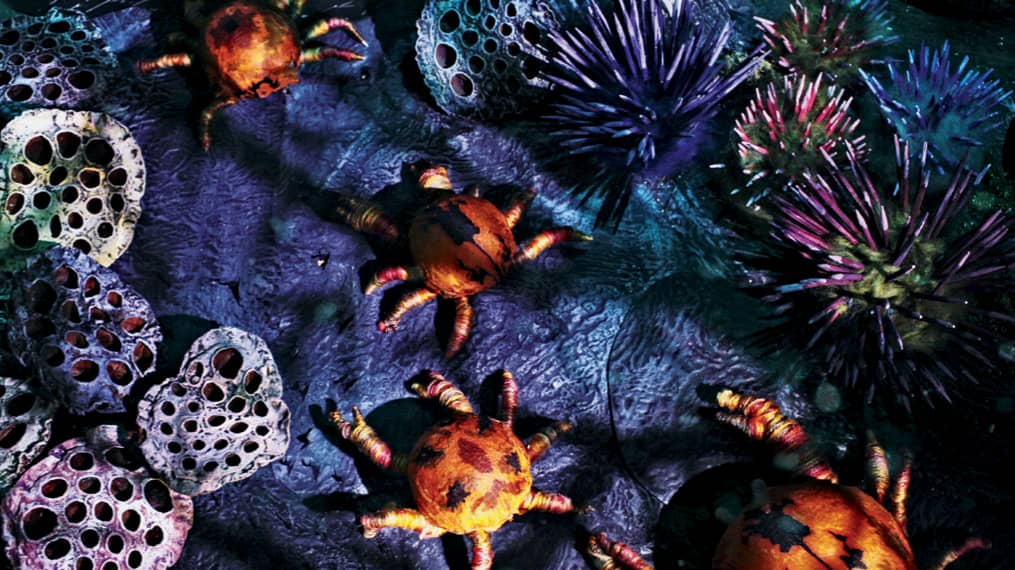
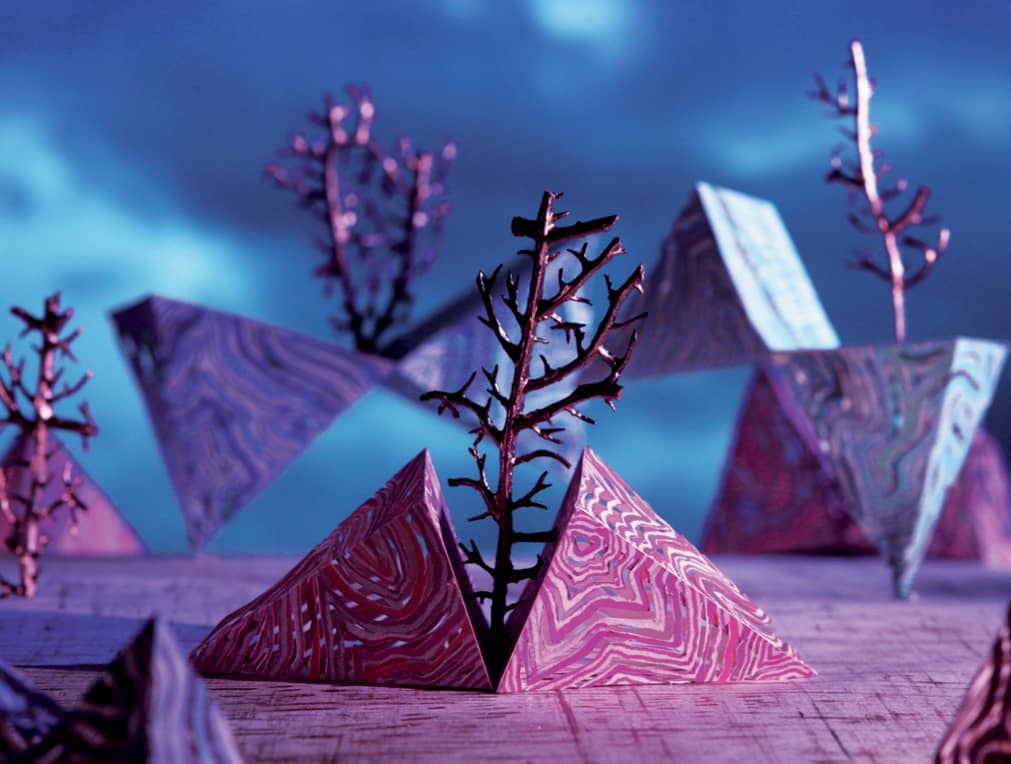
Whimsical paper structures from the music video “Dream the Dare,” a song written and performed by the band Pure Bathing Culture, from their album Moon Tides.
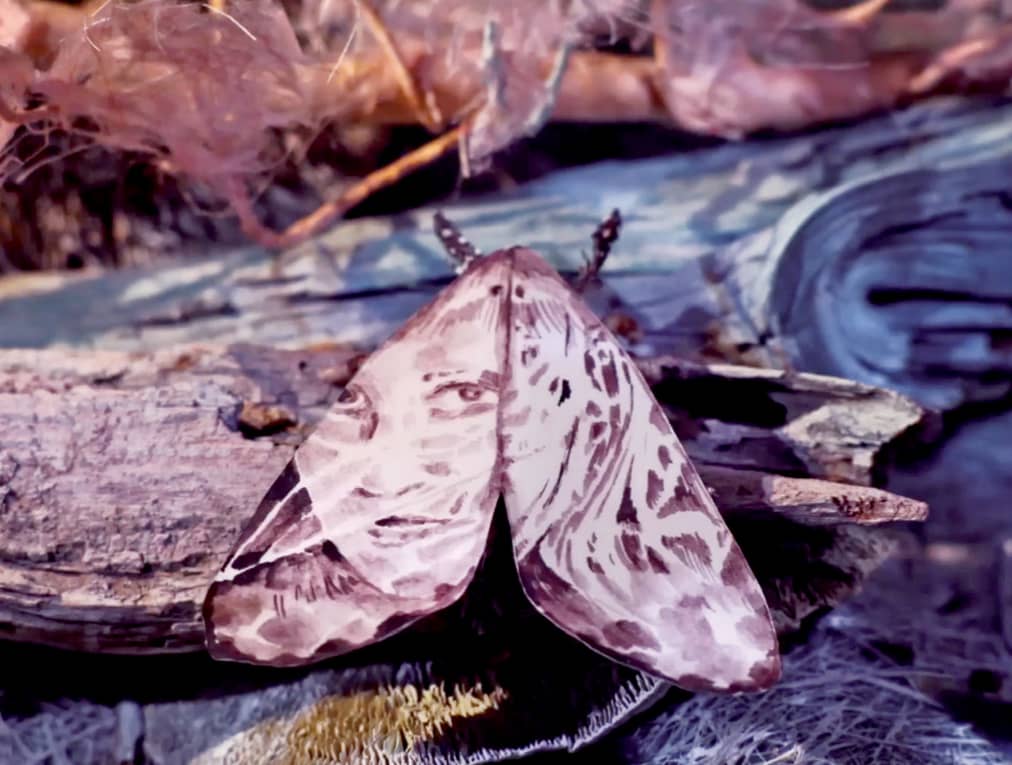
Whimsical paper structures from the music video “Dream the Dare,” a song written and performed by the band Pure Bathing Culture, from their album Moon Tides.
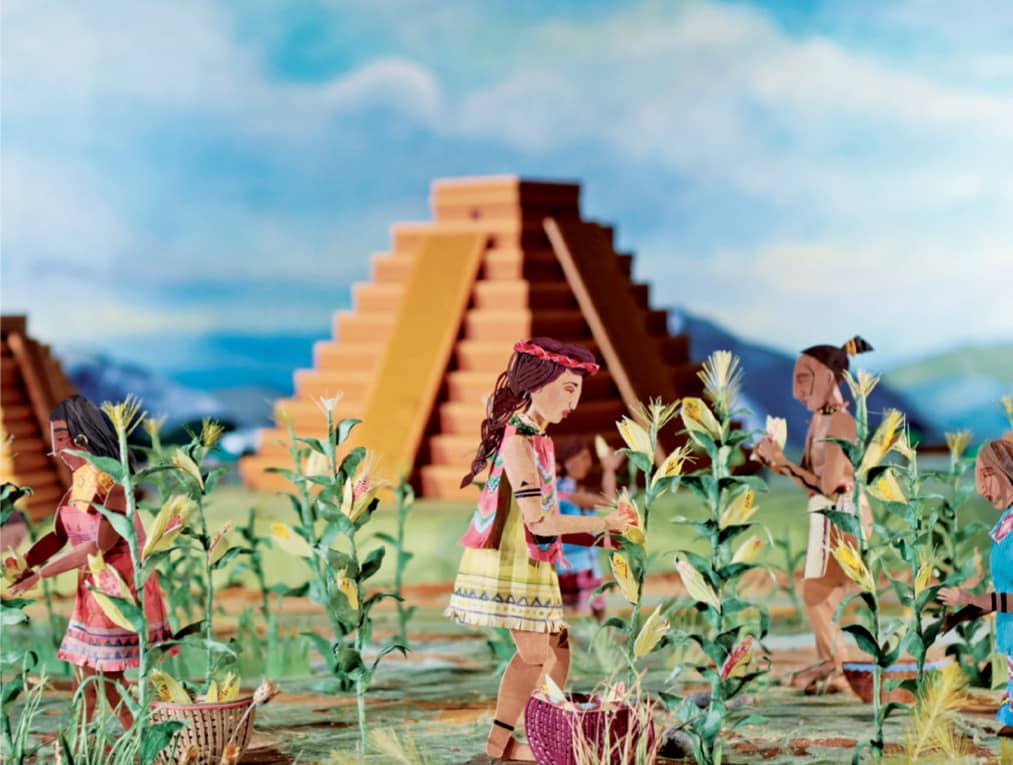
A scene of figures farming crops against a backdrop of Aztec temples is constructed entirely from paper. From the short film Seed: The Untold Story.
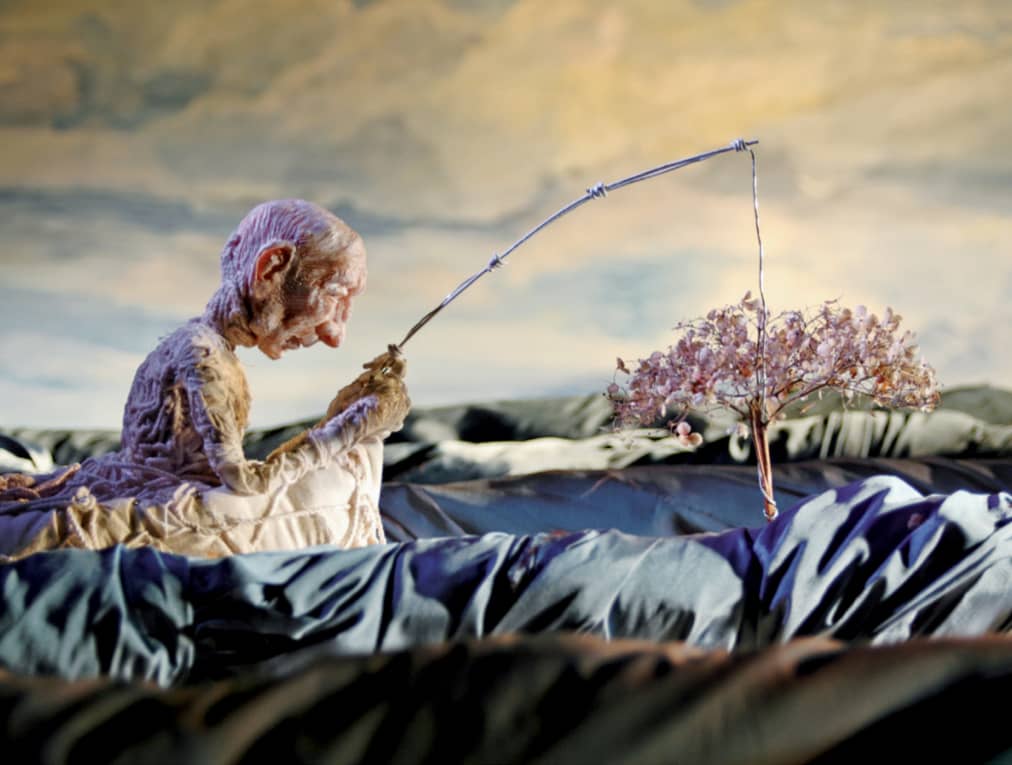
In the animated short film Undone, a polymer clay puppet fishes in a sea of fabrics in various shades of blue.