3 Adding Images, Graphics, and Text
Lesson overview
In this lesson, you’ll learn how to do the following:
Import images.
Transform images.
Bring in content from Adobe Photoshop.
Bring in content from Adobe Illustrator.
Mask content.
Add and format text.

This lesson will take about 45 minutes to complete. To get the lesson files used in this chapter, download them from the web page for this book at www.adobepress.com/XDCIB2020. For more information, see “Accessing the lesson files and Web Edition” in the Getting Started section at the beginning of this book.
In Adobe XD, images and text play an important part in any design. This lesson focuses on importing and transforming images, as well as adding and formatting text.
Starting the lesson
In this lesson, you’ll bring raster images and vector graphics into, and add text to, your app design. To start, you’ll open a final lesson file to get an idea for what you will create in this lesson.
Start Adobe XD, if it’s not already open.
On macOS, choose File > Open From Your Computer. On Windows, click the menu icon (
 ) in the upper-left corner of the application window and choose Open From Your Computer. Open the file named L3_end.xd, which is in the Lessons > Lesson03 folder that you copied onto your hard disk.
 Note
NoteIf you have not already downloaded the project files for this lesson to your computer from your Account page, make sure to do so now. See the “Getting Started” section at the beginning of the book.
NoteFor either macOS or Windows, if the Home screen is showing with no files open, click Your Computer in the Home screen. Open the file named L3_end.xd, which is in the Lessons > Lesson03 folder that you copied onto your hard disk.
If the Assets panel opens on the left and you see a Missing Fonts message, close the panel by clicking Assets panel icon (
 ) in the lower left. Note
The figures in the lesson were taken on macOS, so on Windows the XD interface will be a little different.
Press Command+0 (macOS) or Ctrl+0 (Windows) to see all of the content.

This file shows you what you will create by the end of the lesson.
You can either leave the file open for reference or close it. To close it, choose File > Close (macOS) or, on Windows, click the X in the upper-right corner of the open window to close the file.
Assets and Adobe XD
In the previous lesson, you set up your document and worked with artboards. In this lesson, you’ll learn about the different types of image assets you can import into Adobe XD; the different methods for bringing them in from programs like Illustrator, Photoshop, and Sketch; and how to work with them to fit your design.
Adobe XD supports PSD, AI, PNG, GIF, SVG, JPEG, and TIFF images. In Adobe XD, images (both raster and vector) that you import are embedded in the XD file, since there is no default image-linking workflow, as you would find in Adobe InDesign.
![]() Tip
Tip
In Lesson 6, “Working with Assets and CC Libraries,” we discuss CC Libraries, which do allow for an image-linking workflow.
Importing an image
In Adobe XD, there are several methods for adding assets to your projects. In this section, you’ll bring a few assets into your design using the Import command.
Choose File > Open From Your Computer (macOS) or click the menu icon (
) in the upper-left corner of the application window and choose Open From Your Computer (Windows). Open the Travel_Design.xd document in the Lessons folder (or where you saved it). NoteIf you are starting from scratch using the jumpstart method described in the section “Getting Started,” open L3_start.xd from the Lessons > Lesson03 folder.
Press Command+0 (macOS) or Ctrl+0 (Windows) to see all of the content.
To temporarily disable the square grids on the artboards, choose View > Hide Square Grid (macOS) or right-click in the gray pasteboard and choose Hide Square Grid (Windows).
NoteTo learn more about image sizing and Adobe XD, see the sidebar “Sizing raster images for Adobe XD”.
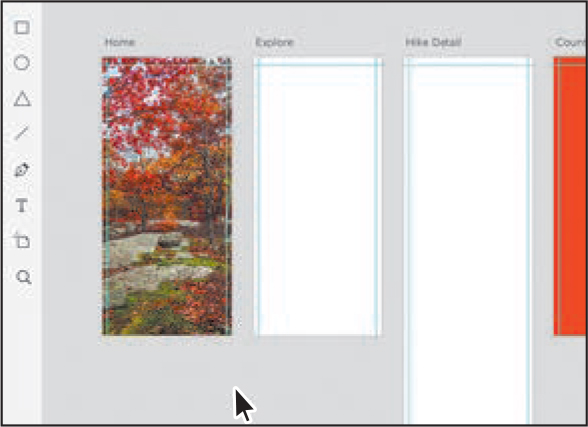
With the Select tool (
 ) selected, click in the Home artboard.
Choose File > Import (macOS) or click the menu icon (
) in the upper-left corner of the application window and choose Import (Windows). Navigate to the Lessons > Lesson03 > images folder. Click to select the image named home_1.jpg. Click Import.
JPEG images you import into Adobe XD are placed at half size. That means a JPEG that is 400 pixels x 400 pixels will be placed at 200 pixels x 200 pixels. The image is placed in the center of the selected artboard and is larger than the artboard. Any image content that is outside the bounds of the artboard is hidden. With the image selected, XD shows the masked content as semi-transparent to give you a preview of what is hidden.
With the Select tool (
) selected, drag the image until the bottom edge snaps to the bottom edge of the artboard, and ensure that it’s still centered on the artboard (a vertical aqua guide will appear when it’s centered). Tip
TipYou can also scale an image non-proportionally if needed. Before dragging to resize, with the image selected, you can turn off the Lock Aspect option (
 ) in the Property Inspector on the right.
Drag the top-middle handle of the image down until the image is as tall as the artboard.

The proportions of raster images are maintained when resizing by dragging.
Click away from the image, in a blank area of the document window, to deselect it. You should now see that the image content that is outside the bounds of the artboard is hidden.
Importing multiple assets
In Adobe XD, you can import multiple assets using a variety of methods. In this section, you’ll import an SVG file and a PNG using the Import command.
Choose File > Import (macOS) or click the menu icon (
) in the upper-left corner of the application window and choose Import (Windows). Navigate to the Lessons > Lesson03 > images folder. Click to select the image named journal_header.png and Command-click (macOS) or Ctrl-click (Windows) the image named red_map.svg. Click Import.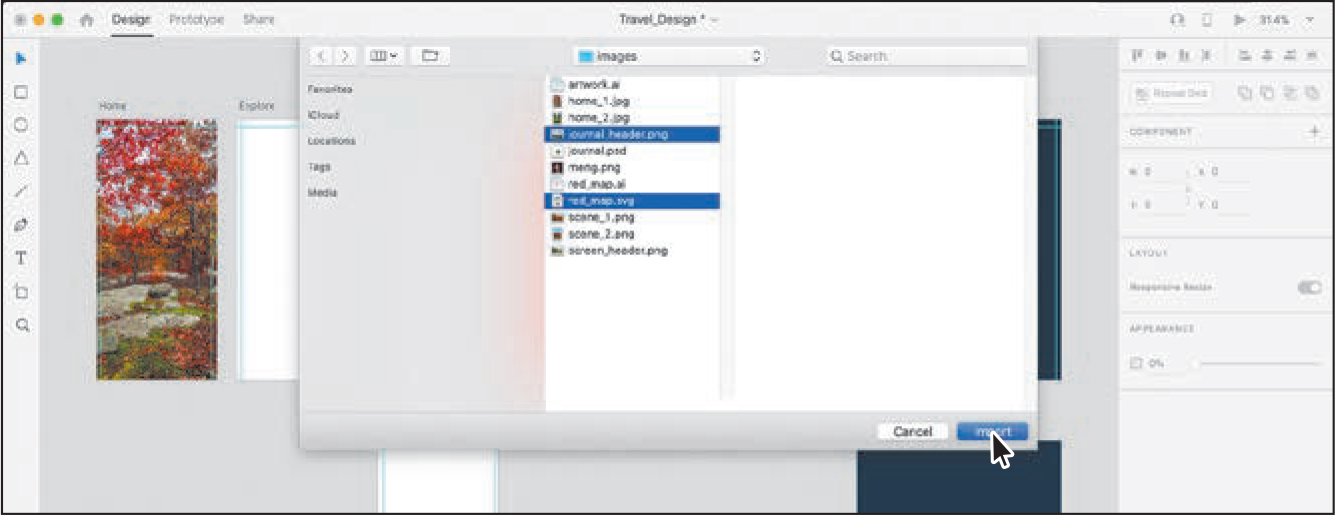 Note
NoteIn the images folder, you’ll see an Illustrator document named red_map.ai. You can import native Illustrator documents (.ai) into Adobe XD as well.
NoteIf an image seems to disappear, it’s because it was placed on one of the artboards, and most of it may be hidden. You can drag the image away from the artboard.
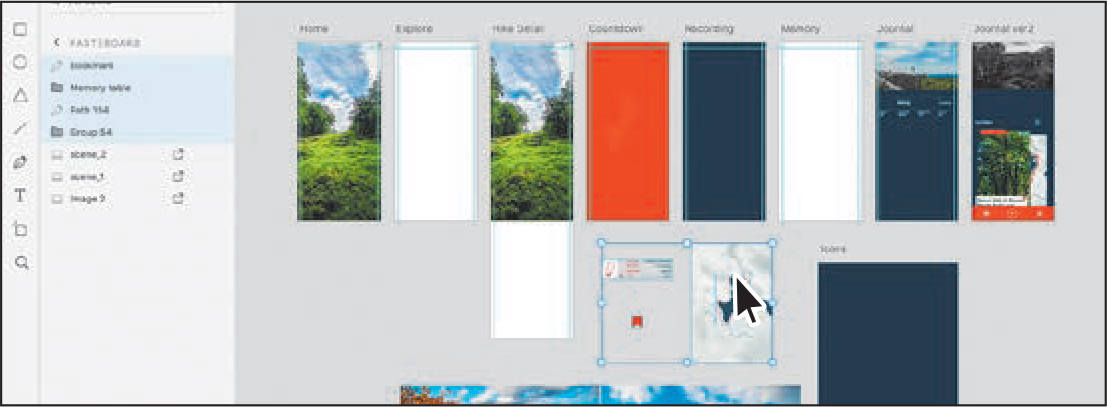
The assets are placed next to each other, in the center of the document window. Any imported assets that touch an artboard are placed on that artboard. If a placed image doesn’t overlap the first artboard, it will be placed on the next artboard to the right, and so on. Images that don’t overlap an artboard will be placed on the empty pasteboard.
Drag one of the assets down to drag them both away from the artboards.
With the Select tool selected, click in a blank area away from the selected assets to deselect them. Click the red map artwork to select it.
Right-click the selected map artwork and choose Cut. Right-click in the Countdown artboard and choose Paste.

Drag the other image you placed, journal_header.png, from its center, onto the Journal artboard. Make sure the person is approximately centered on the artboard and the pointer is within the bounds of the Journal artboard and release the mouse button.

The image is placed on the Journal artboard and is cropped by the bounds of the artboard.
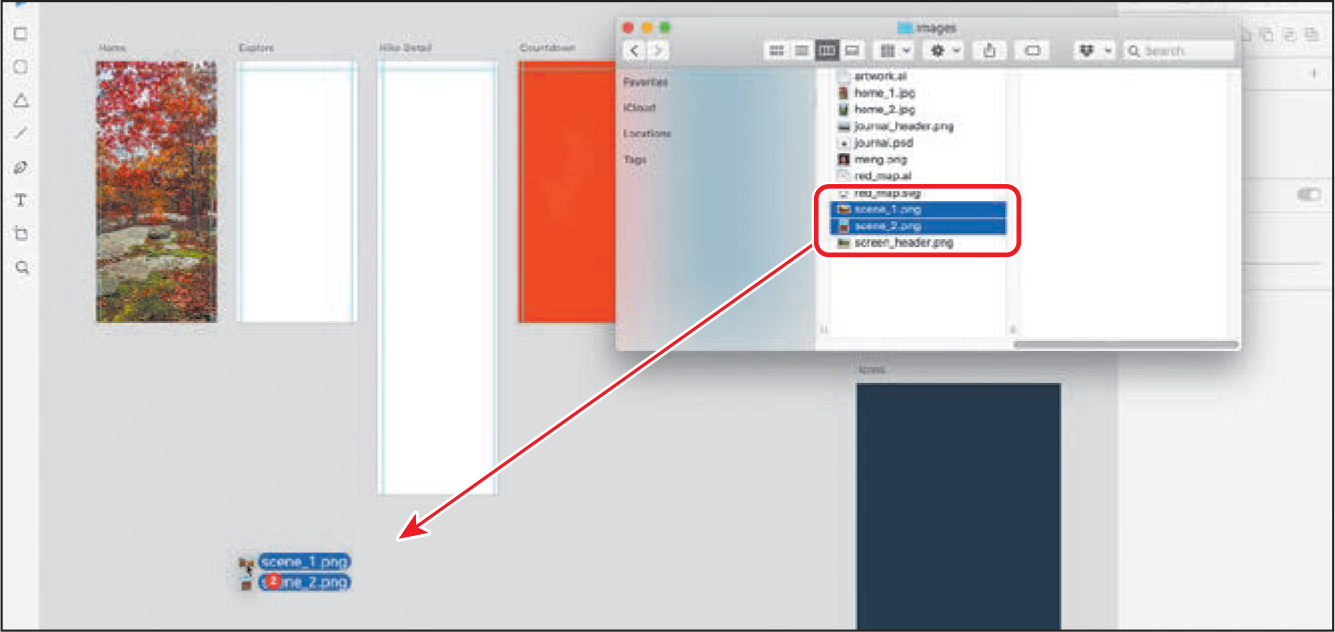
Importing assets via drag and drop
Another method for bringing assets into Adobe XD is to drag and drop from the Finder (macOS) or File Explorer (Windows). Aside from adding assets to your design, this is also a great way to insert images into existing frames (as you’ll see in a later section, “Masking with an image fill”) or as a more precise placement option.
With the Select tool (
) selected, click in a blank area away from the artboards to deselect all.Go to the Finder (macOS) or File Explorer (Windows), open the Lessons > Lesson03 > images folder, and leave the folder open with XD showing in the background.
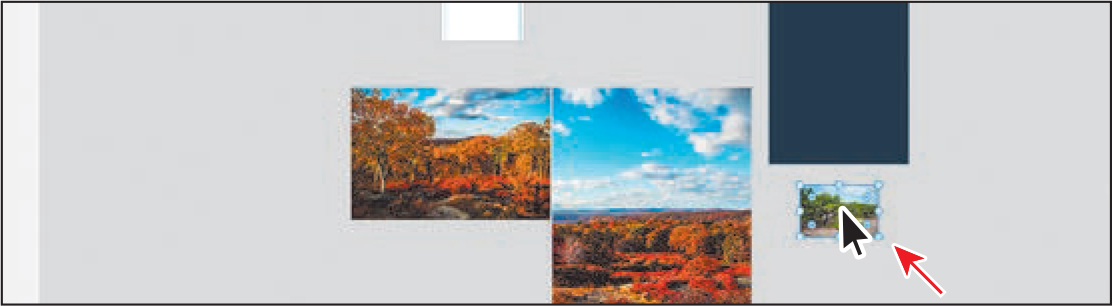
With XD and the folder showing, click the image named scene_1.png. Shift-click the image named scene_2.png to select both images. Release the key and drag either of the selected images into XD, just below the Home artboard.
 Note
NoteIf an image seems to disappear, it’s because it was placed on one of the artboards, and most of it may be hidden. You can drag the image away from the artboard.
The images are placed next to each other on the pasteboard as a row of images. If you were to release the mouse button over an artboard, any images that touch the artboard would be placed on that artboard. Images that don’t overlap an artboard will be placed on the empty pasteboard.
Click in Adobe XD to make it the focus again, if necessary.
Replacing an image
If you need to replace an image in your design, you can do so by dragging an image from your desktop onto an existing image to replace it. Next, you’ll replace a copy of an image in your design.
Go to the Finder (macOS) or Windows Explorer (Windows), open the Lessons > Lesson03 > images folder, and leave the folder open with XD showing in the background.
With XD and the folder showing, click the image named home_2.jpg. Drag the image on top of the home_1.jpg image on the Home artboard. When it shows a blue highlight, release the mouse button to replace the image.
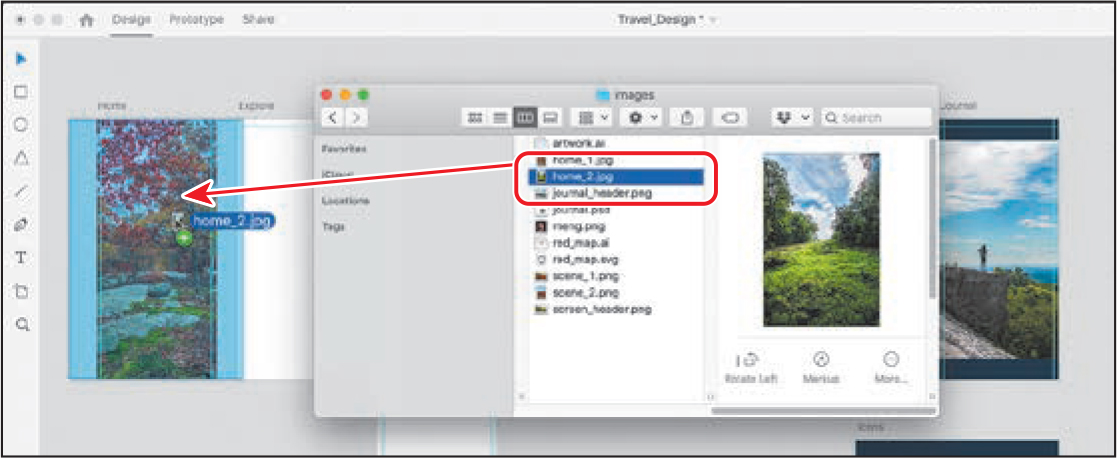
The image will resize to fit the shape but keep its proportions, and will most likely be masked by the shape (parts of the new image may be hidden). This may mean that the new image is scaled if the image you are replacing is larger or smaller than the image you are dragging in.
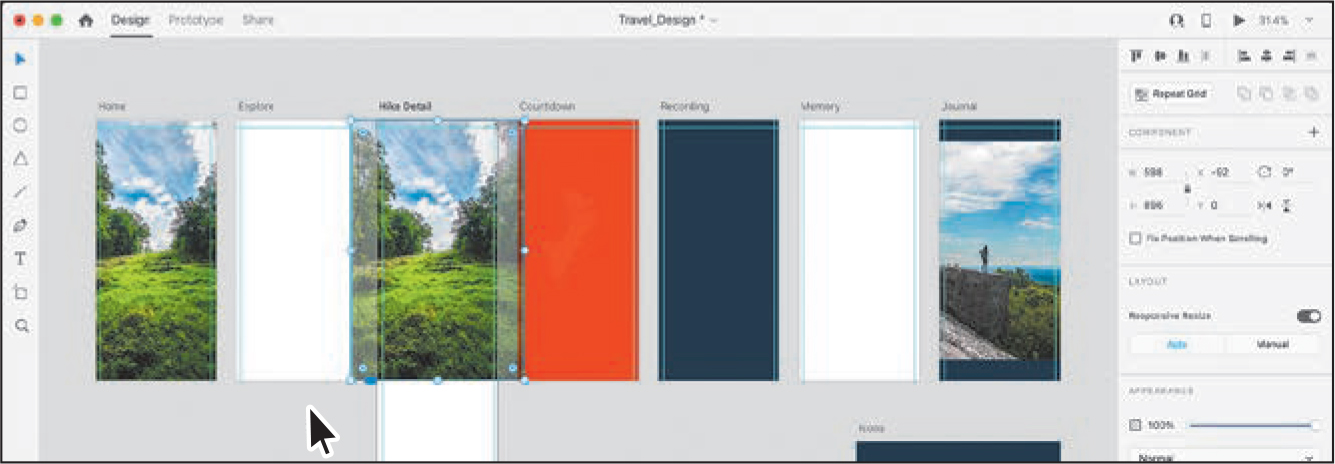
With the image on the Home artboard selected, press Command+C (macOS) or Ctrl+C (Windows) to copy it.
With the Select tool selected, click in the Hike Detail artboard to make it the active artboard. Press Command+V (macOS) or Ctrl+V (Windows) to paste it.
![]() Tip
Tip
If you copy and paste using keyboard commands or menu items (macOS) and you want to paste on a particular artboard, click in a blank area of an artboard or select it to make it the active artboard before pasting.
Content copied from one artboard to another is pasted in the same position, relative to the upper-left corner.
Transforming images
Images you import into Adobe XD can be transformed in a variety of ways—from scaling and rounding corners to rotating and positioning. In this section, you’ll apply a few transformations to the images you’ve imported so far.
Click the image on the Journal artboard. Press Command+3 (macOS) or Ctrl+3 (Windows) to zoom in to the selection.
Press Command and – (macOS) or Ctrl and – (Windows) a few times to zoom out.
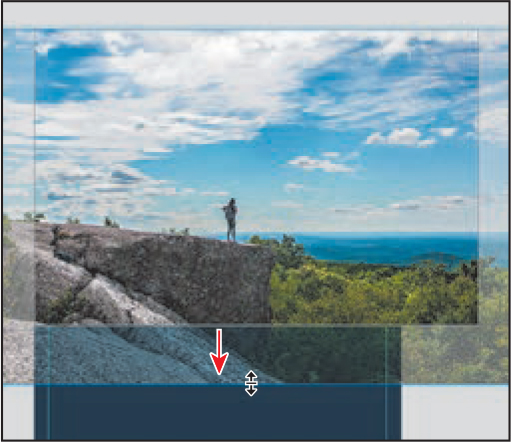
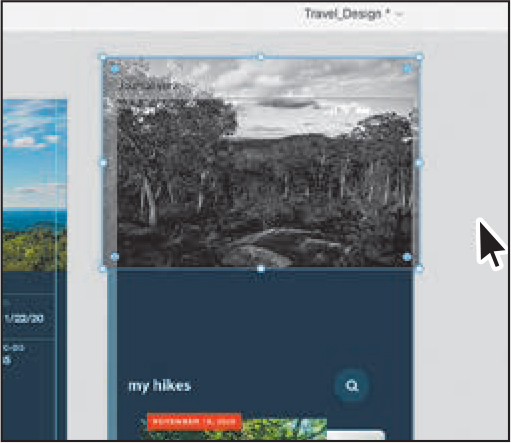
Drag the image to reposition it. Notice that as you drag, if an edge of the image comes close to an artboard edge or guide, it snaps. As you drag, press the Command (macOS) or Ctrl (Windows) key to temporarily turn off snapping. Position the image as you see in the second part of the following figure. Release the mouse button and then the key.
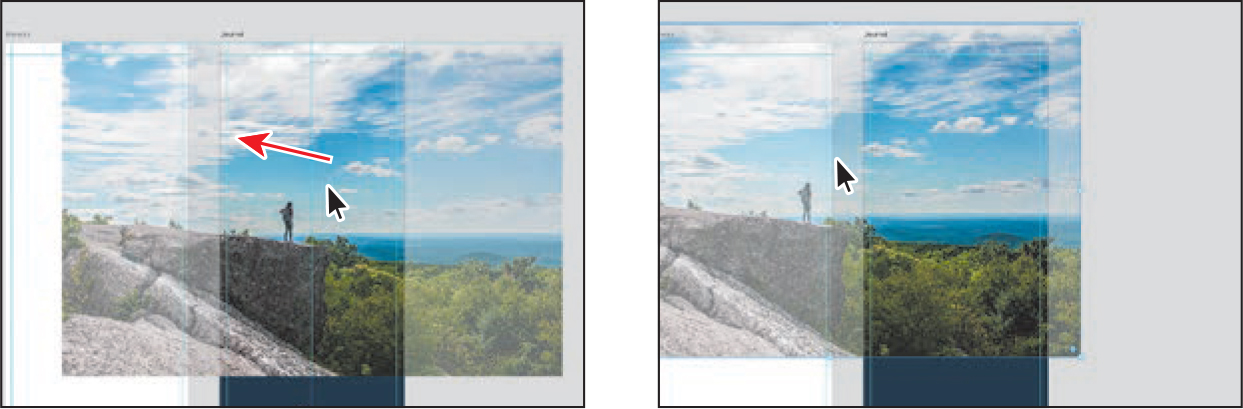
Drag the lower-left bounding point of the box around the image up and to the right to make it smaller. Make sure it’s still a little wider than the artboard.
 Note
NoteIf the image doesn’t scale in proportion, make sure the Lock Aspect (
 ) option is selected in the Property Inspector and try scaling it again. You can also press the Shift key while scaling to constrain the proportions.
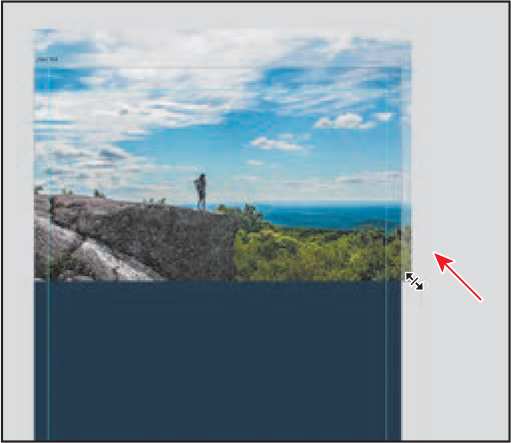
With the image still selected, in the Property Inspector, change the X value to 0 and press Return or Enter. Leave the Y value (vertical position) as is. Leave the image selected.
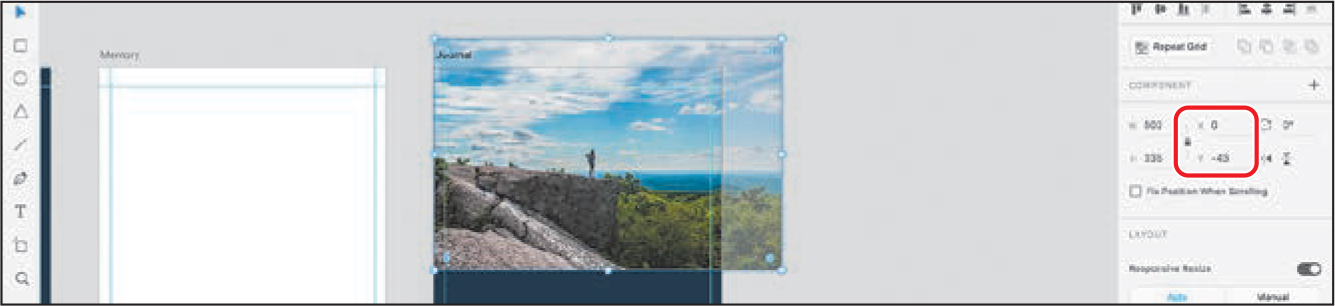
The X (horizontal) value and Y (vertical) value each start at zero (0) in the upper-left corner of each artboard. Content such as the image is positioned from its upper-left corner relative to the upper-left corner of the artboard. Positioning content using the X and Y values can help you work more precisely.
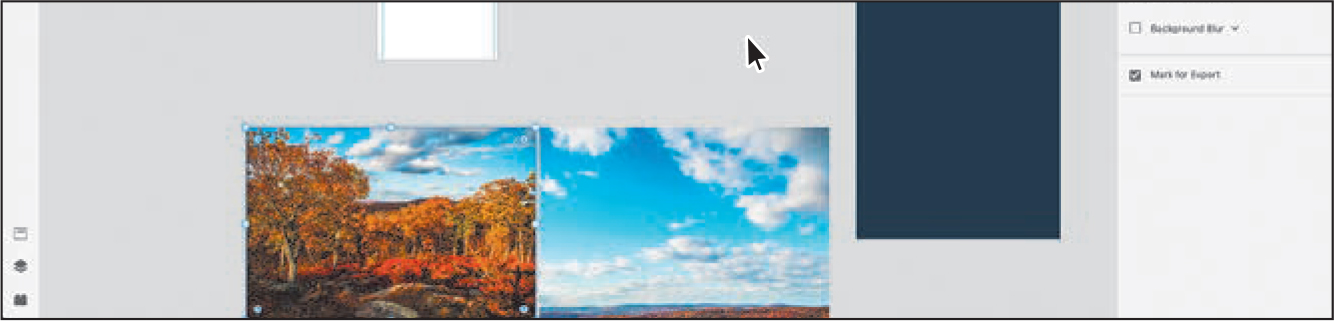
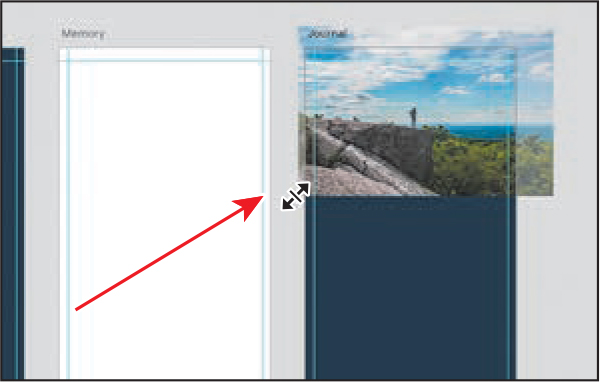
Resizing an image in its frame
Images you bring into XD are contained within a frame. When you transform an image frame, the image is transformed as well. You can also select the image within the frame and transform it separately. Next, you’ll resize an image within its frame. This can be an easy way to hide parts of an image you don’t want showing.
With the image at the top of the Journal artboard still selected, zoom in to the selected image by pressing Command+3 (macOS) or Ctrl+3 (Windows) or by using any other method you’ve learned up to this point.
To zoom out a little, press Command and – (macOS) or Ctrl and – (Windows).
Double-click the image to reveal bounding points around it.
The points you see around the perimeter of the image are used to resize the image within the frame. Currently you can’t edit the individual anchor points for the shape of the image frame.
Later in this lesson, you’ll learn about masking an image with a shape. In that case, you will be able to edit the frame or the image within the frame.
Drag the bottom-middle point of the image down to make it larger within the frame.
The bottom part of the image will be hidden, or cropped, when you drag beyond the edge of the frame it’s in.
Press the Esc key to stop resizing the image and show the bounding box of the image again.
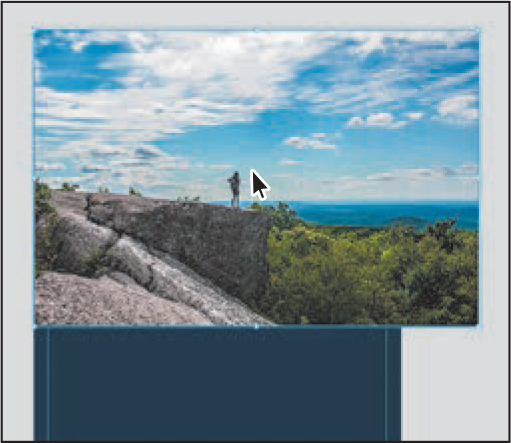
Drag the lower-right point of the bounding box toward the center of the image to make it a bit smaller. Make sure it still covers the width of the artboard.
Press Command+0 (macOS) or Ctrl+0 (Windows) to see everything.
Choose File > Save (macOS) or click the menu icon (
) in the upper-left corner of the application window and choose Save (Windows).
Bringing in content from Photoshop
There are a lot of ways to bring content from Photoshop into XD: copy and paste, export from Photoshop and import into XD, import a Photoshop file (.psd) (which places the PSD content into the XD file), open a Photoshop file (.psd) directly in XD (which opens the PSD as a separate XD file), or place the content in a Creative Cloud Library and drag it into your design from the Creative Cloud Library panel in XD. In this section, you’ll use a few different methods to bring content from Photoshop into your design in Adobe XD.
![]() Note
Note
If you don’t have the latest version of Adobe Photoshop installed on your machine, in Adobe XD you can choose File > Import (macOS) or, on Windows, click the menu icon (![]() ) in the upper-left corner of the application window and choose Import. Navigate to the Lessons > Lesson03 > images folder and import the screen_header.png image file.
) in the upper-left corner of the application window and choose Import. Navigate to the Lessons > Lesson03 > images folder and import the screen_header.png image file.
Copying and pasting from Photoshop to XD
To start, you’ll open a Photoshop document in Photoshop and copy content that you will then paste into your Adobe XD project.
Open the latest version of Adobe Photoshop.
Choose File > Open. Click On Your Computer in the dialog box that appears. Navigate to the Lessons > Lesson03 > images folder, select the file named journal.psd, and click Open. If the New Library From Document dialog box appears, click Cancel.
The Photoshop file contains a design with multiple artboards that contains layers of imagery, text, vector content, and more. Next, you’ll copy image content and paste it into Adobe XD as a flattened raster image.
Choose View > Fit On Screen.
The image at the top of the Journal artboard (the artboard on the left) needs to be copied into your XD project, without the time and other status bar information currently on top of it. You can make a selection, select specific layers, and copy what you need or simply copy a selected area and paste a flattened raster image of that content.
Make sure the Layers panel is open. You can choose Window > Layers to see it.
In Photoshop, the Layers panel lists artboards along with layers. They’re marked by disclosure triangles, as groups are, but they lack the folder icons that groups display.
In the Layers panel, click the disclosure triangle next to the Journal artboard name (it should be at the top of the list) to reveal the contents of the artboard. Scroll down in the Layers panel, if necessary, to see the layer named “Journal header image.” Click to select it, if it isn’t already.
Command-click (macOS) or Ctrl-click (Windows) the layer thumbnail to the left of the layer name in the panel to make a selection from the layer content.

Choose Edit > Copy to copy the image within the selection marquee.
Close Photoshop without saving, if asked. Back in Adobe XD, in the Travel_Design document, press Command+0 (macOS) or Ctrl+0 (Windows) to see all of the artboards, if you don’t already.
With the Select tool selected, click in the gray pasteboard away from the artboards to deselect all.
With nothing selected, press Command+V (macOS) or Ctrl+V (Windows) to paste the content into the center of the document window.
NoteContent you paste from Photoshop is a single flattened image in Adobe XD.
Drag the image below the Icons artboard.
Choose File > Save (macOS) or click the menu icon (
) in the upper-left corner of the application window and choose Save (Windows).
Opening a Photoshop file in Adobe XD
You can open Photoshop (.psd) files in Adobe XD, and they will be converted into XD files. When a Photoshop file is opened in XD, Photoshop elements and effects that can be mapped to XD’s functionality are available. The rest of the elements either are rasterized or don’t appear in the XD file.
Next, in Adobe XD you’ll open a design started in Photoshop.
In Adobe XD, choose File > Open From Your Computer (macOS) or click the menu icon (
) in the upper-left corner of the application window and choose Open From Your Computer (Windows). Open the journal.psd document in the Lessons > Lesson03 > images folder.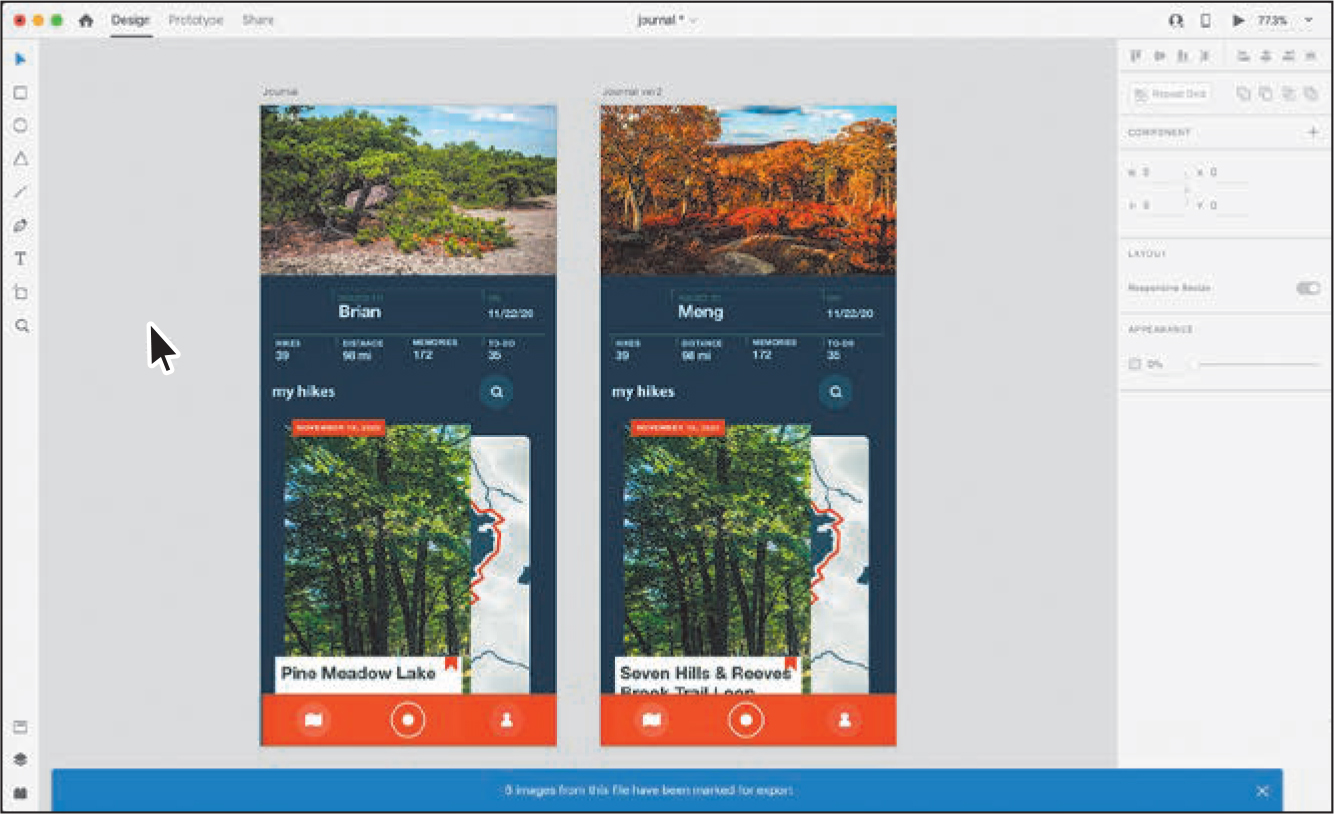
The Photoshop document is now an XD document called journal that is open in Adobe XD. You may see a blue bar at the bottom of the document window. You can click the X on the end to close it. By default, images in a PSD you open are marked for export. You’ll learn more about that in Lesson 11.
Press Command+0 (macOS) or Ctrl+0 (Windows) to see all of the content.
Most of the content on the two artboards is still editable in XD, but there are a few exceptions. For a listing of the supported features when you open Photoshop files in Adobe XD, see helpx.adobe.com/xd/kb/open-photoshop-files-in-xd.html.
With the Select tool (
) selected, click the text “Brian” in the Journal artboard.Open the Layers panel by clicking the Layers panel button (
 ) in the lower-left corner of the application window, if it isn’t already open. In the Layers panel, you’ll see a folder icon (
 ) to the left of the selected content named “Hike info,” which indicates a group of content. Click the folder icon to reveal everything in it. All of the text is still editable.
Click the white status bar content at the top of the Journal artboard on the left.
The status bar content has been rasterized and is now a single image. You can tell because of the image icon (
 ) in the Layers panel to the left of the name. Next, you’ll copy one of the artboards into your project.
Click in a blank area, away from the artboards, to deselect all. Then click the Journal ver2 artboard name above the artboard on the right. Press Command+C (macOS) or Ctrl+C (Windows) to copy the artboard and all of its content.

Choose File > Close (macOS) or click the X in the upper-right corner (Windows) to close the Journal document without saving it.
Back in the Travel_Design.xd document, press Command+V (macOS) or Ctrl+V (Windows) to paste the artboard and content to the right of the Journal artboard.
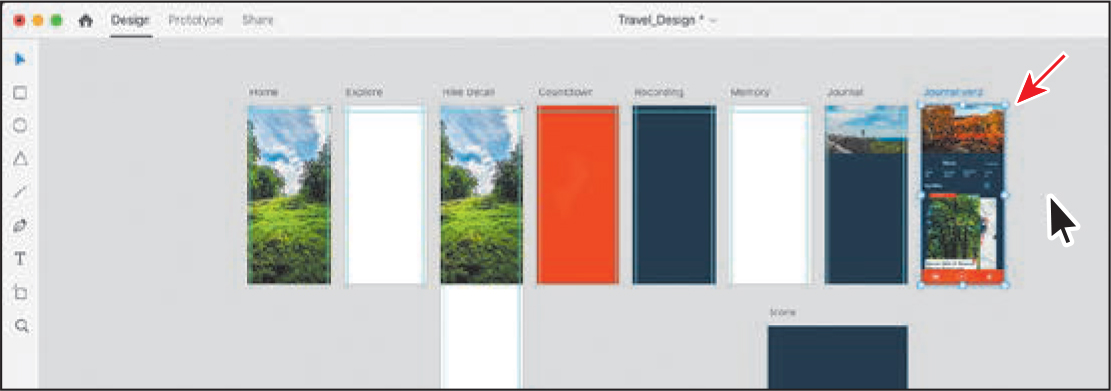
With the artboard still selected, zoom in by pressing Command+3 (macOS) or Ctrl+3 (Windows) or by using any other method you’ve learned up to this point.
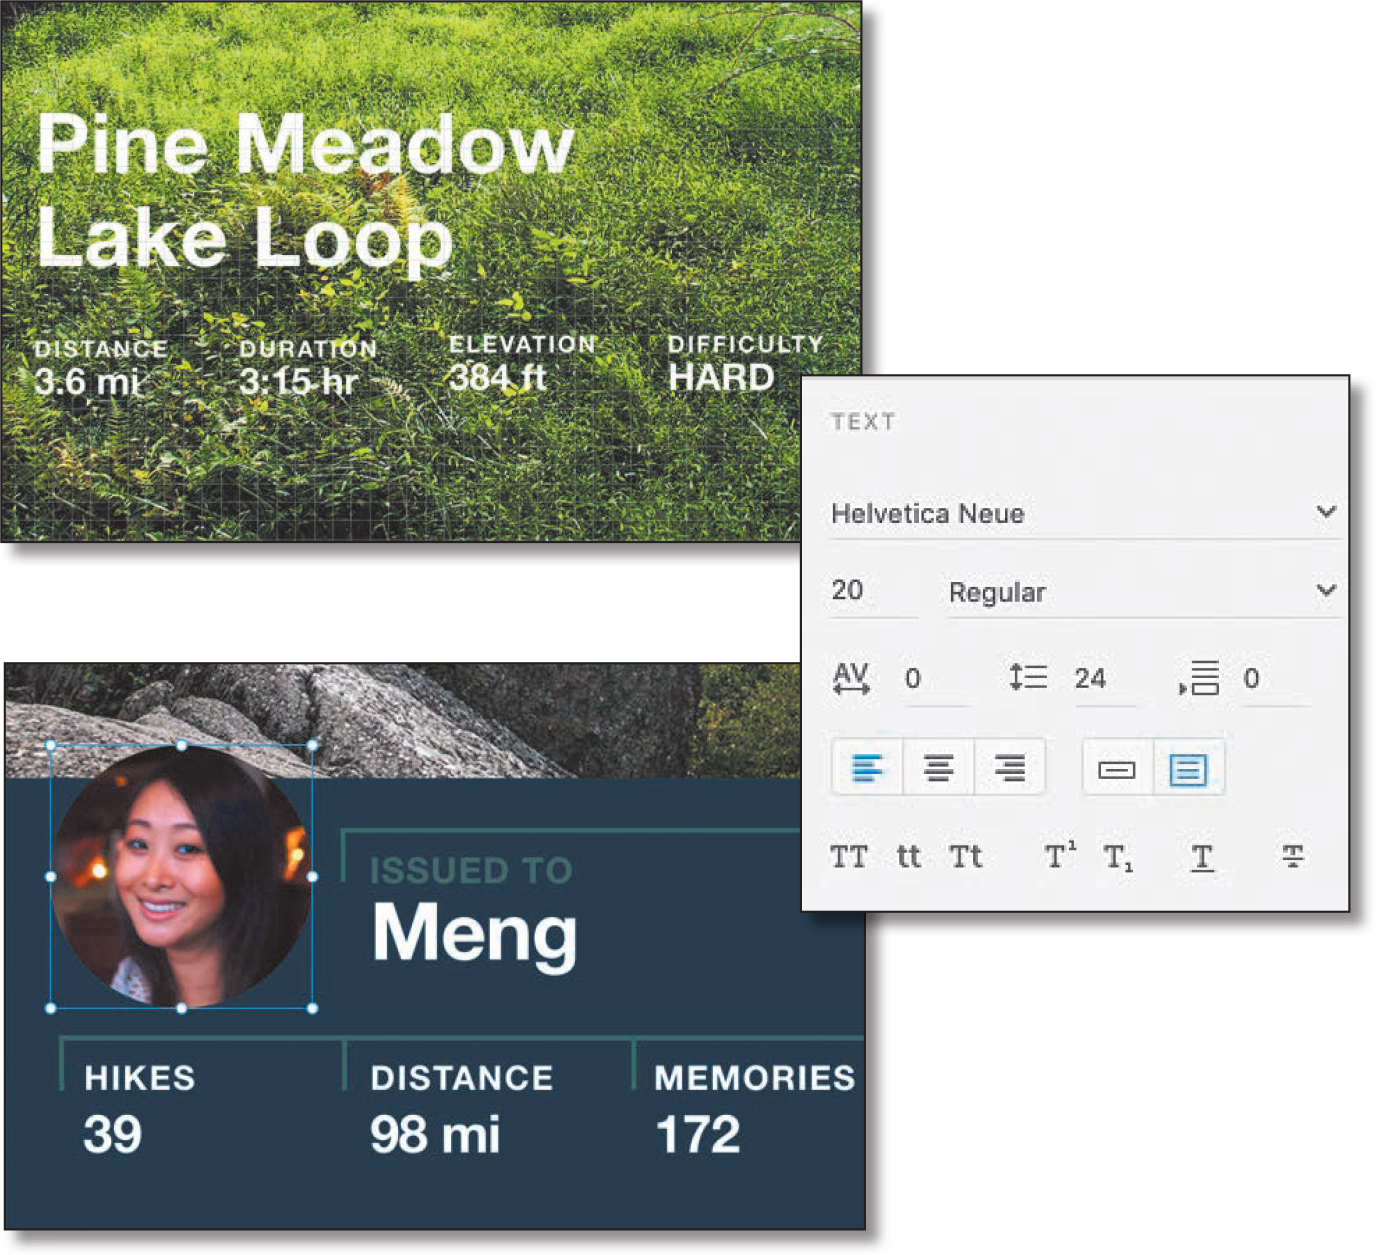
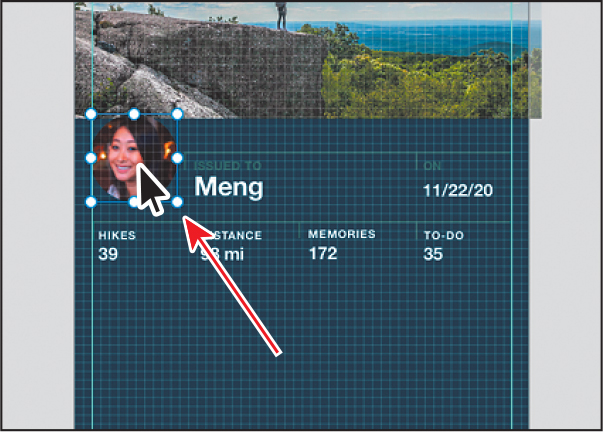
Drag the group with the “Meng” text to the Journal artboard and drop it below the image.

To center the content on the Journal artboard, click the Align Center (Horizontally) button (
 ) at the top of the Property Inspector. The group is aligned to the horizontal center of the artboard.
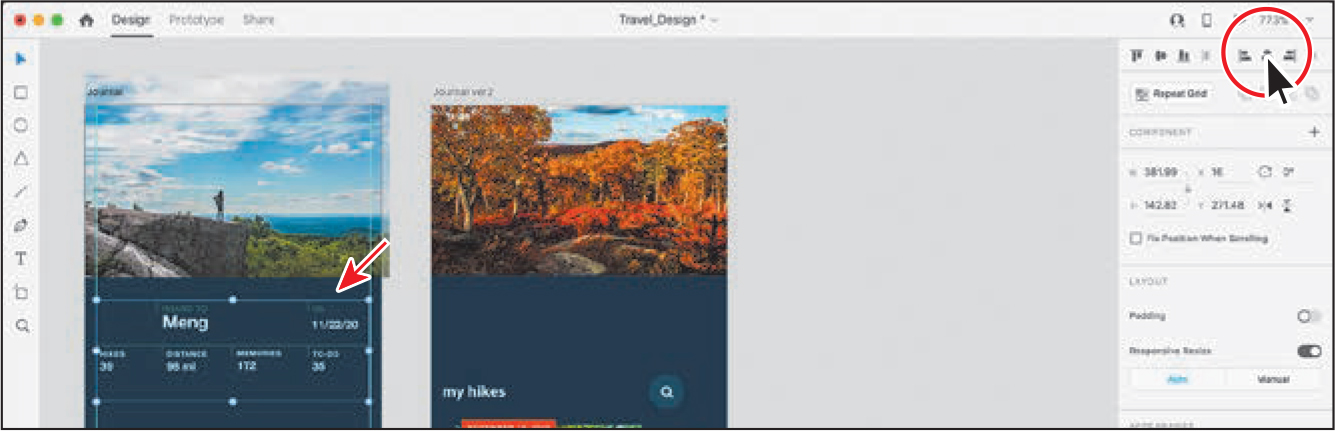
Editing an image in Photoshop
As you learned earlier, images you place in XD are embedded. But after placing JPEG, PNG, GIF, or BMP images in XD, you can update them in real-time in Photoshop. You need Photoshop installed for this to work. Next you’ll edit the image at the top of the Journal ver 2 artboard.
Move the pointer over the image at the top of the Journal ver 2 artboard and right-click. Choose Edit In Photoshop from the context menu that appears.
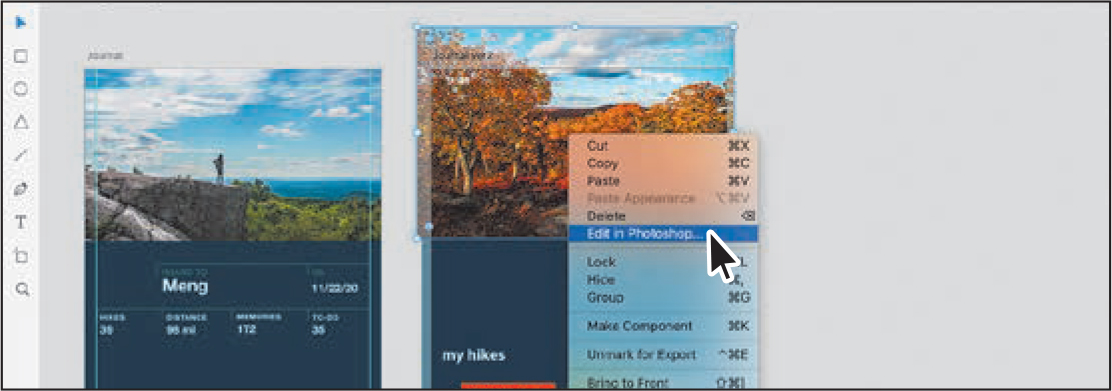
The image opens as a new file in Photoshop with the same name as the image layer name in XD. If Photoshop is not installed, this option is dimmed.
With the image open in Photoshop, choose Layer > New Adjustment Layer > Black & White. Click OK to create the new adjustment layer.
In the Properties panel (Window > Properties), click Auto to apply the auto settings.
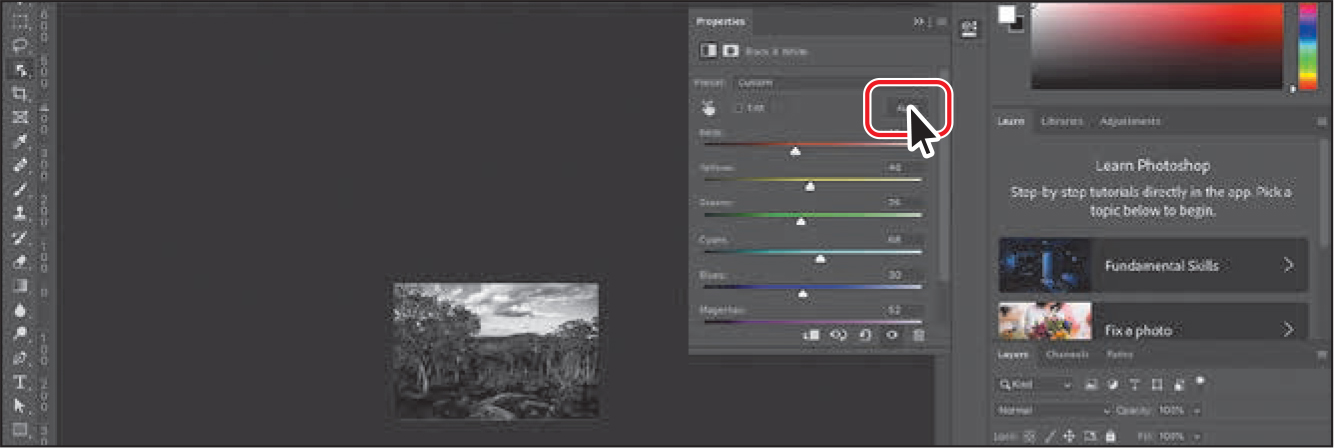
Choose File > Save. Quit Photoshop and return to XD.
The image is automatically sent to XD as a flattened bitmap image. If Photoshop were kept open when you returned to XD, you could go back to Photoshop and undo, revert, or make further changes to the image in Photoshop. The layers you create are preserved.
![]() Note
Note
You can only open Sketch files created using Sketch version 43 or newer. If you have an older file, save the file using the latest version of Sketch, and then open the file in XD.
![]() Tip
Tip
You can drag images directly from all modern web browsers onto your artboards. You can also drag the images into an object on an artboard; when you do so, the image size is automatically adjusted to fit the object.
Bringing in content from Adobe Illustrator
There are several ways to bring content from Illustrator into Adobe XD: open the Illustrator file directly in Adobe XD, copy and paste from Illustrator to XD, export assets from Illustrator, add the Illustrator artwork to a Creative Cloud library, and import into XD. In this section, you’ll open an Illustrator document (.ai) in XD.
In Adobe XD, choose File > Open From Your Computer (macOS), or click the menu icon (
) in the upper-left corner of the application window and choose Open From Your Computer (Windows). In the Lessons > Lesson03 > images folder on your hard disk, select the artwork.ai file, and click Open. NoteFor a list of supported and non-supported features when opening Illustrator files in XD, visit helpx.adobe.com/xd/kb/open-illustrator-files-in-xd.html.
The Illustrator file contains artwork that you will incorporate into your design in Adobe XD. There were two artboards in the Illustrator document that remain in the document opened in XD, and the vector graphics and text are still editable. You can now copy and paste or drag and drop this content into your other projects.
Press Command+0 (macOS) or Ctrl+0 (Windows) to see all of the content.
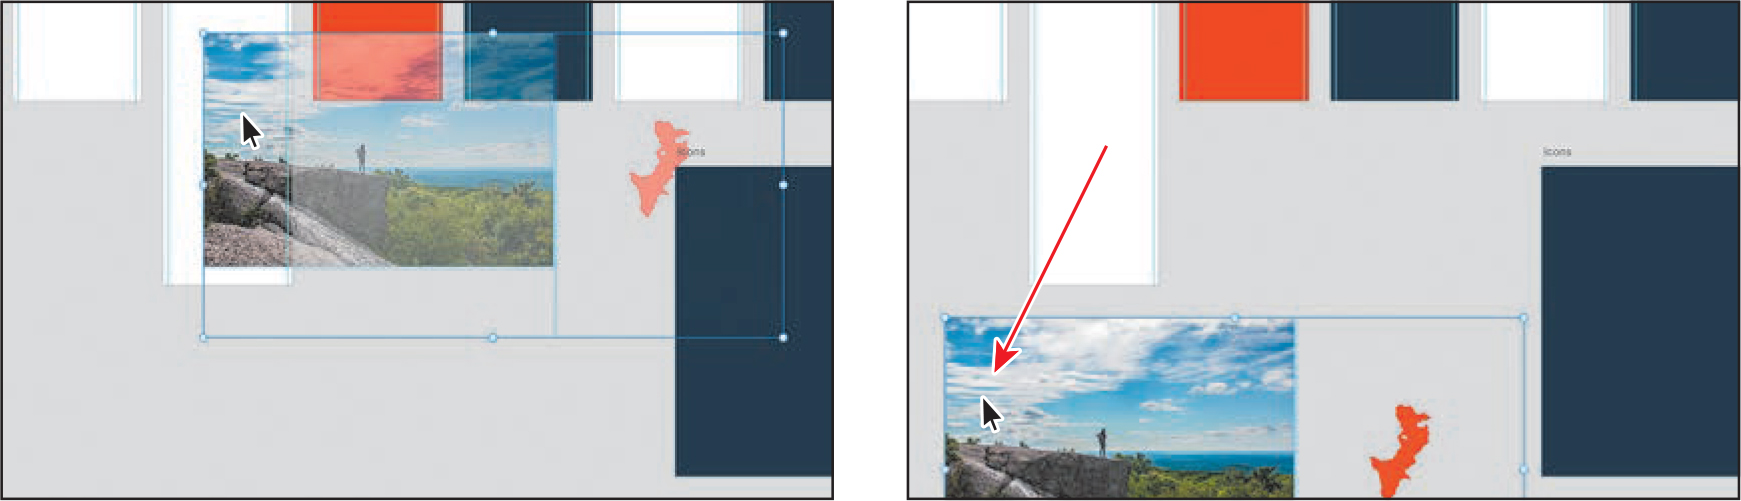
The content on the left artboard contains a banner icon and other content, and the artboard on the right contains a topographical map illustration. You’ll copy the content and paste it into your Travel_Design.xd document.
Press Command+A (macOS) or Ctrl+A (Windows) to select all of the content.
Right-click directly on the content and choose Copy to copy it.

Choose File > Close (macOS), or click the menu icon (
) in the upper-left corner of the application window and choose Close (Windows). Don’t save the file. XD converted it to a new XD file that you don’t need to keep.In the Travel_Design.xd document, press Command+0 (macOS) or Ctrl+0 (Windows) to see all of the content.
Click in the gray pasteboard to deselect. Press Command+V (macOS) or Ctrl+V (Windows) to paste the content. Drag the selected artwork away from the artboards so it doesn’t touch any of them.
Click away from the artwork to deselect it. Drag across the topography illustration (the map) to select it. To keep it together, group it by pressing Command+G (macOS) or Ctrl+G (Windows).
NoteIf some of the artwork disappears even when it’s not touching an artboard, you may want to restart XD and reopen the files and try again.
Drag the group onto the center of the Recording artboard.

Drag the artwork you pasted with the Location, Weather, Elevation, and Steps text (not the orange-red banner icon) onto the top of the Memory artboard.
Drag the remaining orange-red banner icon onto the Icons artboard.

Press Command+S (macOS) or Ctrl+S (Windows) to save the file.
Exporting artwork from Illustrator for Adobe XD 
To learn about how to easily export artwork from Illustrator to be used in Adobe XD, check out the video “Exporting Artwork from Illustrator for Adobe XD,” which is a part of the Web Edition of this book. For more information, see the “Web Edition” section of “Getting Started” at the beginning of the book.
Masking content
You can easily hide portions of images or shapes (paths) using two different methods of masking in Adobe XD: mask with shape or image fill. Masks are nondestructive, which means that nothing that is hidden by the mask is deleted. In either case, you can adjust the mask, if required, to highlight another portion of the masked content.
Masking with a shape or path
The first method for masking you will learn is masking with a shape. This method of masking (hiding) portions of artwork or images is similar to masking in a program like Illustrator. The mask is either a closed path (shape) or an open path (like a path in the shape of an “s,” for instance). To mask content, the masking object is on top of the object to be masked. Next, you’ll mask a portion of artwork.
Click in the gray pasteboard area to deselect all.
Open the Layers panel, if it isn’t already open, by clicking the Layers panel button (
) in the lower-left corner of the application window. In the Layers panel, double-click the artboard icon ( ) to the left of the Recording artboard to select it and zoom in to it.
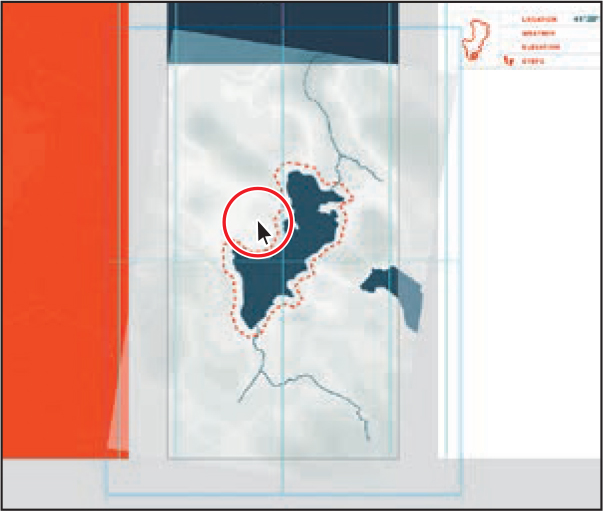
Click to select the topography illustration (the map) on the Recording artboard.
Select the Rectangle tool (
 ) in the toolbar on the left. Starting below the top edge of the map artwork on the left edge of the artboard, drag down and to the right corner of the artboard.
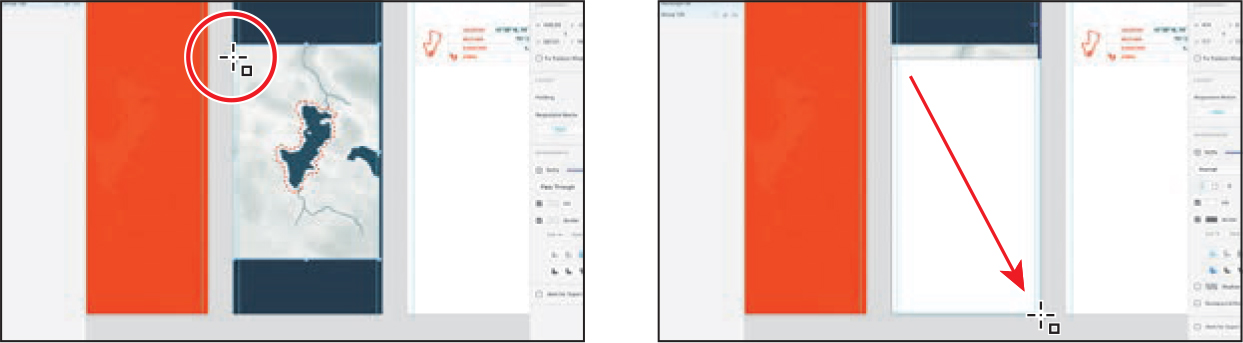 Tip
TipPressing the R key will select the Rectangle tool.
Press the V key to select the Select tool. With the shape still selected, in the Layers panel, Shift-click the Group 120 object name (or whatever you see) to select the map artwork behind the shape as well.

You selected the rectangle you just created and the map group so the rectangle can be used to mask the group. Also, the numbers you see in the names of objects in the Layers panel (“Rectangle 65,” for example) may be different, and that’s okay.
Choose Object > Mask With Shape (macOS) or right-click and choose Mask With Shape from the menu that appears (Windows).
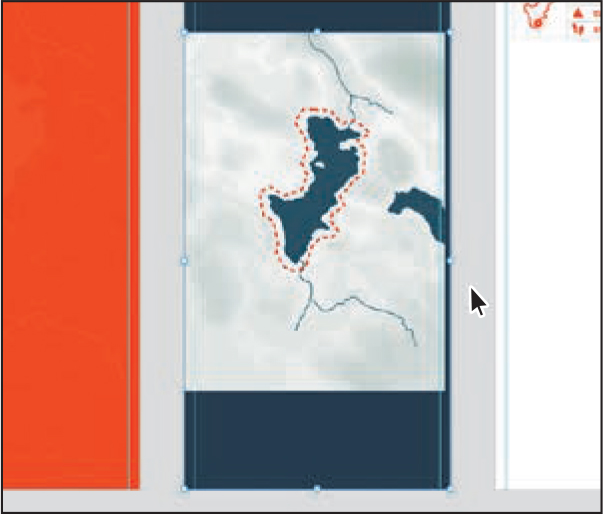
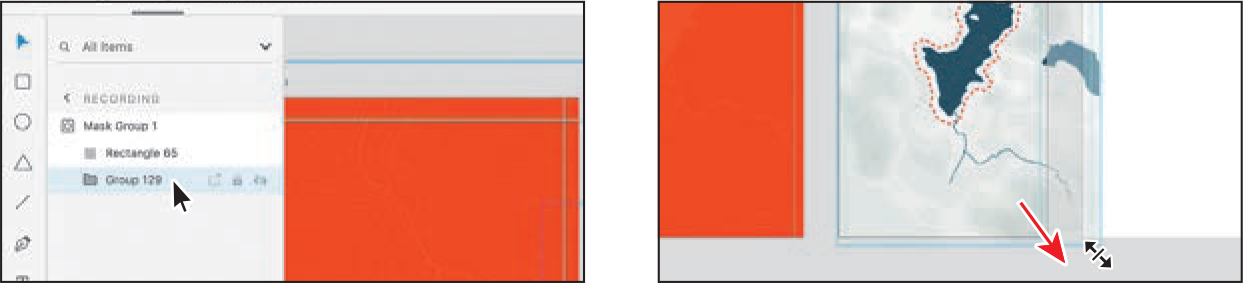
With the Layers panel open and the content still selected on the artboard, click the Mask Group 1 thumbnail in the Layers panel list to reveal the content, if necessary.
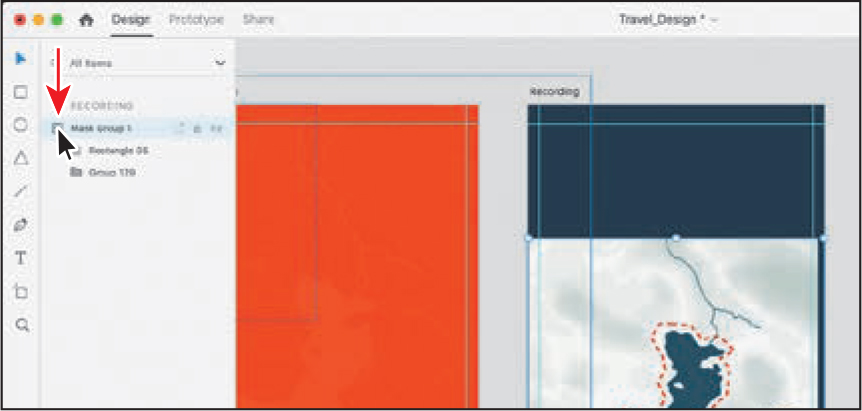
The mask shape and the object that is masked (the map group) are now part of a group.
Editing a mask
When you mask content, you may later want to crop it in a different way, revealing more or less of that content. When you mask with a shape, as you did in the previous section, you can easily edit both the mask and the object masked. Next, you’ll change how the content from the previous section is masked.
With the Select tool (
) selected and the content still selected, double-click the map artwork to enter mask editing mode. The mask (rectangle) will be selected. Note
NoteIf you select content within the map group, you can click in the pasteboard to deselect and double-click the map to try again to select the mask shape.
Double-clicking a masked object will temporarily show the mask and the masked object (the map artwork, in this instance) in the window. That way, you can edit either the mask or the object that is masked.
In the Layers panel, click the “Group 129” (or whatever you see) to select the map object. On the artboard, Shift-drag the lower-right handle of the map artwork down a little to make it larger than the artboard.
Move the pointer just off a corner of the artwork, and when you see rotate arrows, drag clockwise to rotate it a little. See the second part of the figure.
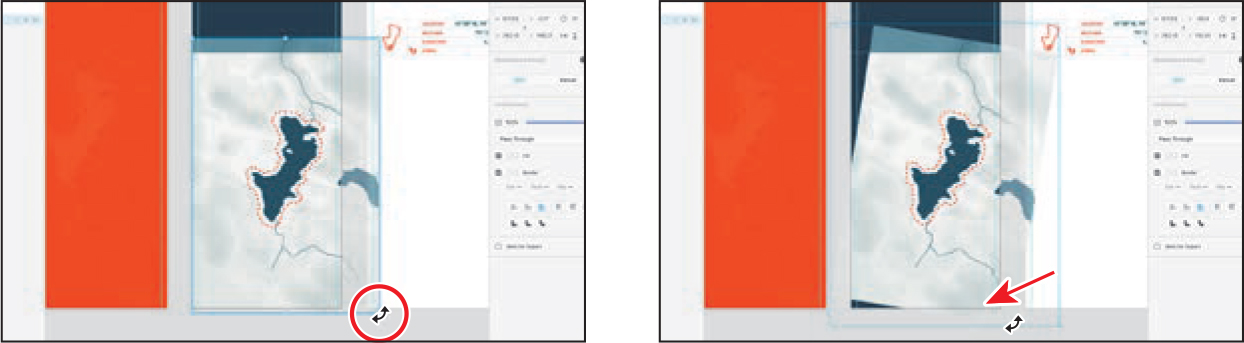
Drag the selected artwork into the center of the artboard. Make sure that it fills the mask shape and covers the lower corners of the artboard. You may need to make it larger.
You could transform the masked content in different ways, or you could select the shape that is the mask (the rectangle, in this case) and reposition or resize it. You can also copy and paste other content into the mask.
In the Layers panel, click the rectangle object (the mask you drew).
NoteAny appearance property changes you make to the rectangle shape that is the mask, like fill or border, will not show when you exit the editing mode.
In the Property Inspector on the right, click the Different Radius For Each Corner button (
 ). To round the top two corners of the rectangle, change the first two values to 30, pressing Return or Enter after typing in the second value. Leave the last two values at 0.
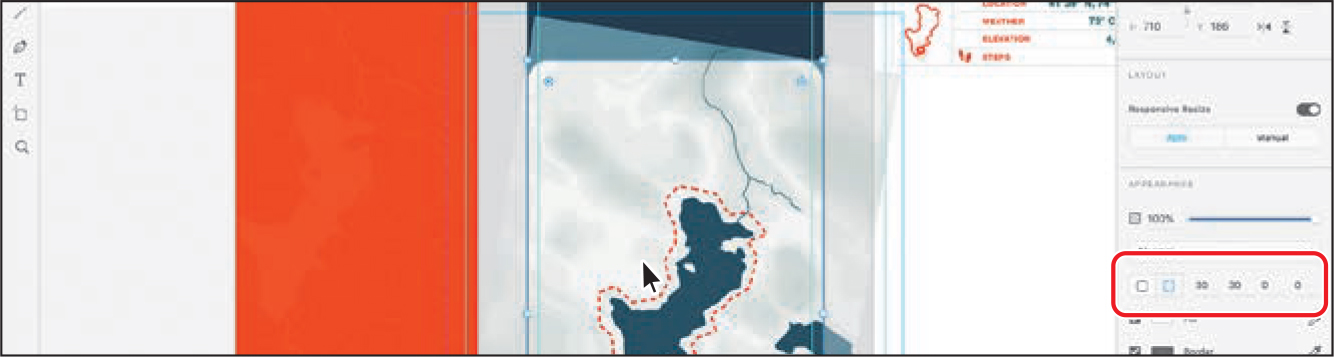 Tip
TipIn Path Edit mode, you can add, delete, and move anchor points as well as convert them between smooth and corner (and back) by double-clicking.
If you wanted to edit the mask shape further, you could double-click the edge of the mask and enter Path Editing mode to edit the anchor points.
TipTo remove a mask, you could select the mask group and choose Object > Ungroup Mask (macOS) or, on Windows, right-click the group and choose Ungroup Mask. You can also press Shift+Command+G (macOS) or Shift+Ctrl+G (Windows).
Press the Esc key to exit the mask editing mode. The map artwork is once again masked.
NoteMasked content is cropped like you see on the artboard when the asset is exported. You’ll learn about exporting in Lesson 11.
Click in a blank area away from the artboards to deselect the masked content.
Choose File > Save (macOS) or click the menu icon (
) in the upper-left corner of the application window and choose Save (Windows).
Masking with an image fill
Another method for masking is to drag and drop an image into an existing shape or path. The image becomes the fill of the shape. This method of masking is great when creating boxes as placeholders for content to come later, for instance. Next, you’ll import a new image for a profile picture and mask it with a shape.
Double-click the artboard icon (
) to the left of the artboard name “Journal” in the Layers panel to fit the artboard in the document window.To show the square grids on the artboards, choose View > Show Square Grid (macOS) or right-click in the gray pasteboard and choose Show Square Grid (Windows).
Select the Ellipse tool (
 ) in the toolbar. Shift-drag on the Journal artboard to create a circle. Release the mouse button and then the key when you see a width and height of approximately 144 in the Property Inspector.
 Tip
TipIf the circle doesn’t have a width and height of exactly 144, you could set the Lock Aspect option (
 ) in the Property Inspector and change either Width or Height to 144 to change both together.
As you drag, you’ll notice that the Width and Height values change by 8 because the circle is snapping to the square grid.
Go to the Finder (macOS) or File Explorer (Windows), open the Lessons > Lesson03 > images folder, and leave the folder open. With the folder showing and XD in the background, find the image named meng.png in the folder, and drag the image on top of the circle you drew in the Journal artboard. When the circle is highlighted in blue, release the mouse button to drop the image into the frame.
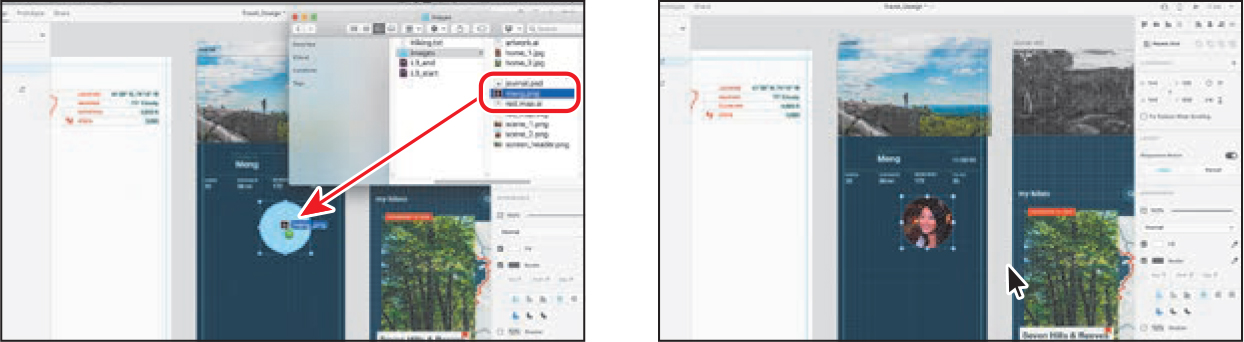
By dragging an image onto a shape, the image becomes the fill of the shape.
Editing an image fill mask
Dropping an image into a shape so that it becomes the fill of the shape means the image is always centered in the shape. Next, you’ll explore the editing capabilities of this type of mask.
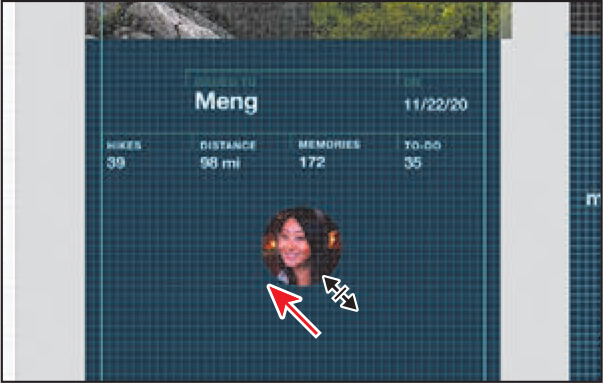
With the Select tool (
) selected, double-click the image to enter Path Edit mode. The image will be selected.Drag a corner of the image to make it larger. Then, drag within the image so that more of her face is in the circle.
 Note
NoteUnlike with the Mask With Shape command you used in the previous section, you cannot edit the anchor points of the shape in this type of mask.
Press the Esc key to stop editing the image within the circle.
Deselect the Border option in the Property Inspector to turn it off.
 Note
NoteThe Width and Height values may change by different values in the Property Inspector, depending on the zoom level of the document. If you are zoomed out far enough, the width and height will change by 8.
With the masked image still selected, Shift-drag a corner of the bounding box to make the image smaller. When Width and Height are 80 in the Property Inspector, release the mouse button and then the key.
 Tip
TipIf the circle doesn’t have a width and height of exactly 80, that’s okay. You could set the Lock Aspect option (
 ) in the Property Inspector and change either Width or Height to 80 to change both together.
The image remains centered in the shape. If the shape is resized, the image is resized proportionally to fill the shape. Unlike with images you place, the Lock Aspect option (
 ) is not selected for masked content by default. That’s why you held the Shift key down when resizing it.
Drag the image into position, as you see in the figure.
Choose File > Save (macOS) or click the menu icon (
) in the upper-left corner of the application window and choose Save (Windows).
Working with text
When adding text to your design in Adobe XD, you have two main methods to choose from: adding it at a point or in an area. Text at a point is a horizontal line of text that begins where you click and expands as you enter characters. Each line of text is independent—the line expands or shrinks as you edit it but doesn’t wrap to the next line unless you add a paragraph return or a soft return (Shift+Return [macOS] or Shift+Return [Windows]). Entering text this way is useful for adding a headline or a few words to your artwork.
Text in an area uses the boundaries of an object to control the flow of characters. When text reaches a boundary, it automatically wraps to fit inside the defined area. Entering text in this way is useful when you want to create one or more paragraphs. In this section, you’ll explore the different ways to create text and change the formatting of text.
Adding text at a point
With some design content on the Home artboard in place, next you’ll focus on adding text to it. Since this new text will be a single line, creating text at a point is the best option, as you’ll soon see.
Press Command+0 (macOS) or Ctrl+0 (Windows) to see all of the content.
Click in a blank area away from the artboards to deselect everything. In the Layers panel, double-click the artboard icon (
) to the left of the Home artboard to zoom in to it and select the artboard.To temporarily turn off the square grids, in the Property Inspector, deselect the Square grid option.
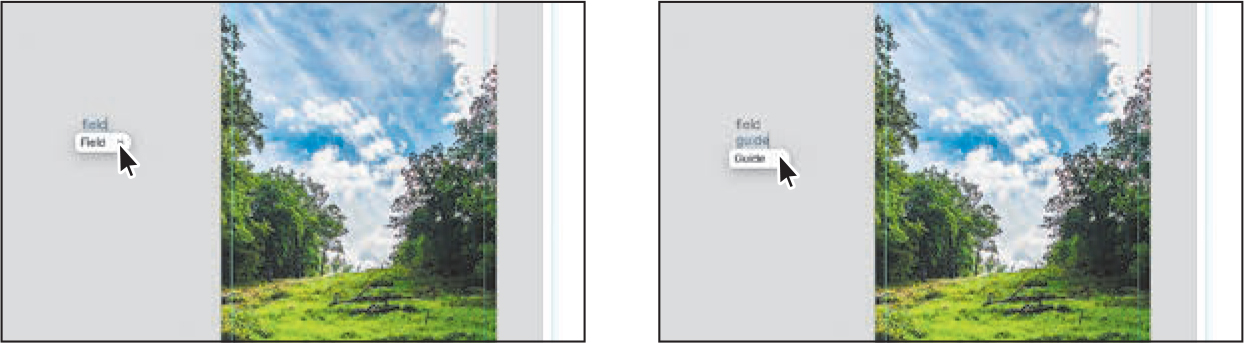
Select the Text tool (
 ) in the toolbar. Click to the left of the Home artboard and type field. If you see an auto-correct menu below the text that shows the text “Field,” click the X to the right to keep the lowercase “field.” Note
The figures in the lesson were taken on macOS, so you will see Helvetica Neue being used. The default font for Adobe XD on Windows is Segoe UI.
The auto-correct functionality is a part of Spelling and Grammar, which is turned on by default in Adobe XD. To learn more, see the sidebar “Spelling and grammar in XD.”
Press Return or Enter, and type guide to create text at a point. Once again, to keep the text lowercase, you may need to click the X to the right of the auto-correct menu that appears beneath the text.
If you continue to type, the text will continue to the right until you either press Return/Enter for a paragraph return or press Shift+Return (macOS) or Shift+Enter (Windows) for a soft return.
Press Esc to select the text object.
A single point appears at the bottom of the bounding box around the text. This is one way to tell that this is text at a point.
Drag the point at the bottom of the text object down and up to see the font size change. Stop dragging when you see a font size of approximately 100 in the Property Inspector.
 Tip
TipIf you move the pointer just off the single anchor point on text at a point, the pointer will change (
 ). You can then rotate the text.
With the text object still selected, click the Fill color box in the Property Inspector. Change the color to white in the Color Picker that appears.
Select the Select tool (
) and drag the text into the center of the Home artboard. Tip
TipTo reshape the text as paths, you can convert text to outlines (shapes) by selecting the text object and choosing Object > Path > Convert To Path (macOS) or right-clicking and choosing Path > Convert To Path (Windows).
Choose File > Save (macOS) or click the menu icon (
) in the upper-left corner of the application window and choose Save (Windows).
Creating a text area
To create text in an area, you drag with the Text tool (![]() ). Doing that creates an area to type text into. After you draw the text area, the cursor appears, and you can type. Next, you’ll create a text area for body copy that you’ll add to your design.
). Doing that creates an area to type text into. After you draw the text area, the cursor appears, and you can type. Next, you’ll create a text area for body copy that you’ll add to your design.
![]() Tip
Tip
You can convert selected text objects between point text (![]() ) and area text (
) and area text (![]() ) by clicking the desired option in the Text section of the Property Inspector.
) by clicking the desired option in the Text section of the Property Inspector.
Press the spacebar to access the Hand tool (
 ), and drag in the document window to see the Hike Detail artboard to the right of the Home artboard. You can also drag on a trackpad with two fingers to pan in the document window.
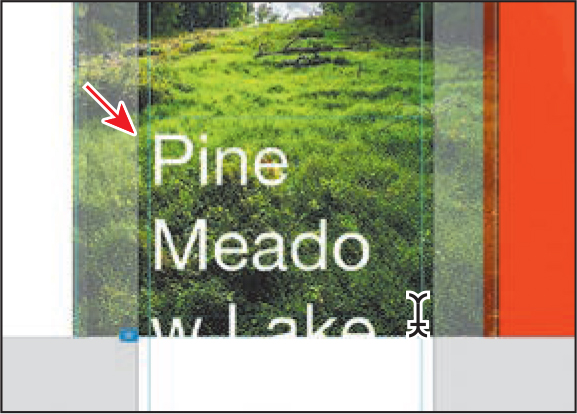
Select the Text tool (
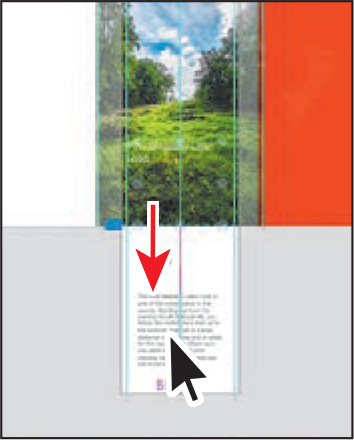
) in the toolbar, and over the bottom half of the image, drag from the left artboard guide to the right artboard guide to create a text area between them. Type Pine Meadow Lake Loop (without a period).You may notice that your text doesn’t fit within the text area (but you see it all) since the formatting is the same as the last text and is rather large. Also, the text is wrapping within the bounds of the text object.
 Note
NoteThe text formatting you see may be different and that’s okay.
Select the Select tool (
) and notice the very small dot in the bottom-middle point of the box around the text. That dot indicates that there is overset text, or text that doesn’t fit.To make all of the text visible, you could drag the bottom-middle point down until it all shows. Since the text is so large, in this case, you will simply change the font size.

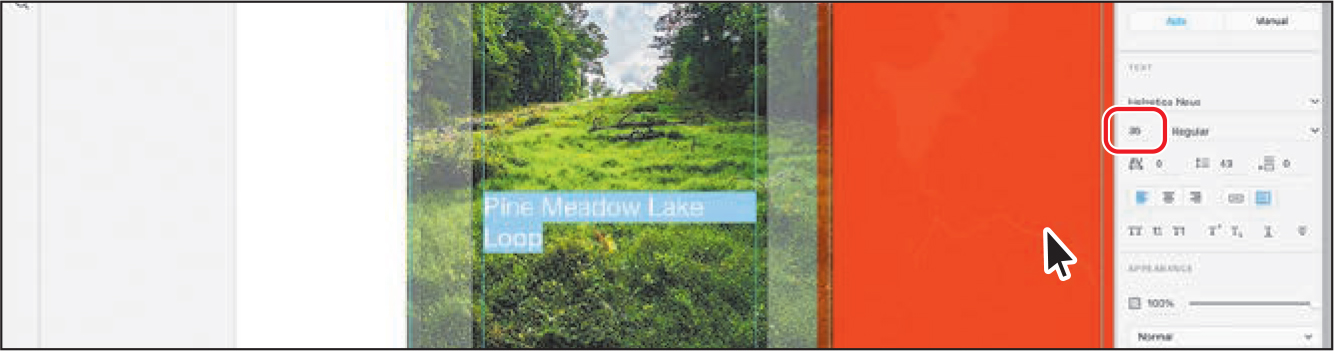
Double-click the text to select it. You should now see all of the highlighted text.
Select the Font Size value in the Property Inspector and type 36. Press Return or Enter to accept the change. Make sure the text color is white.
Press the Esc key to select the text object again and not the text within.
Importing text
Next, you’ll add more text to the design from a text file. This can be a great method for adding text to your designs from an external source.
Press Command+0 (macOS) or Ctrl+0 (Windows) to see all of the content.
Choose File > Import (macOS) or click the menu icon (
) in the upper-left corner of the application window and choose Import (Windows). Navigate to the Lessons > Lesson03 folder and select the file named Hiking.txt. Click Import to place the text in its own type object on the same artboard.With the Select tool (
) selected, drag the text you just placed down toward the bottom of the artboard.You may need to zoom in a little to see the bottom part of the artboard.
 Note
NoteIf you remove all of the text from a text area, the text area itself will also be removed.
Press Command+3 (macOS) or Ctrl+3 (Windows) to zoom in to the text.
Drag the text area so the left edge is snapped to the guide on the left (see the following figure).
Drag the middle-right point of the text area to the right to make it wider. Stop dragging when it snaps to the guide near the right edge of the artboard.

Press Command+0 (macOS) or Ctrl+0 (Windows) to see all of the content.
Click in a blank area of the document window away from content to deselect.
Styling text
In Adobe XD, the text-formatting options are found in the Property Inspector and include formatting such as type (point or area text), font size, text alignment, and more. In this section, you’ll get a feel for formatting text in Adobe XD by applying formatting to text.
Double-click the artboard icon (
) to the left of the artboard name “Home” in the Layers panel to fit the Home artboard in the document window.With the Select tool (
) selected, click to select the text “field guide.”Make sure that Helvetica Neue (macOS) or Segoe UI (Windows) is selected for the font in the Property Inspector. Click the arrow next to “Regular” to reveal the Font Weight menu, and choose Bold.
 Note
NoteThe figures in this lesson were taken on macOS, so you will see Helvetica Neue being used.
NoteThe Font menu in Adobe XD shows all of your system fonts and any active Adobe fonts.
For both text at a point and area text, you can change the formatting for all of the text by simply selecting the type object with the Select tool. If you want to apply different formatting to different text within text at a point or a text area, you can select text with the Text tool.
To adjust the space between the lines of text, change Line Spacing (
 ) to 96 in the Property Inspector. Press Return or Enter.
Line spacing is the space between lines of text and is similar to leading in programs like Adobe Illustrator.
Press the spacebar to access the Hand tool (
), and drag in the document window to see the “Pine Meadow Lake Loop” text on the Hike Detail artboard. You can also drag on a trackpad with two fingers to pan in the document window.With the Select tool (
) selected, click the text “Pine Meadow Lake Loop.” Make sure Font Size is 36 and Font Weight is Bold in the Property Inspector. Change Line Spacing to 40. Press Return or Enter after the last value entered. TipTo change values in fields, you can select the value and press the up arrow or down arrow key. If you press Shift+up arrow or down arrow key, the value changes by 10.
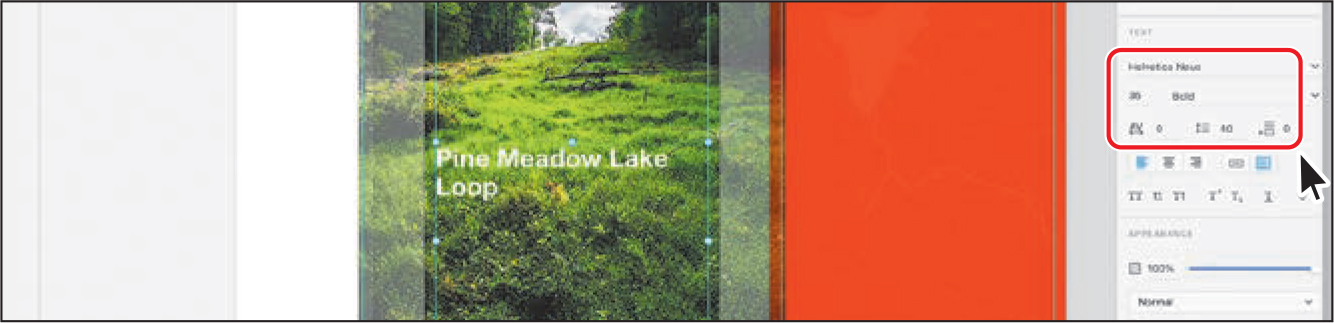
Drag the right-middle point of the text area to the left so the text wraps like it does in the figure.

Drag the bottom-middle bounding point up to just below the text (first part of the following figure).
This is meant to make the frames as small as they can be so that it will be easier to select a lot of content in a small area.
Drag the text to snap to the guide near the left side of the artboard, if it isn’t already (second part of the following figure).

With the Select tool (
) selected, click in the gray pasteboard to deselect.Select the Text tool (
 ), and below the Pine Meadow Lake Loop text, click the guide on the left side of the artboard, to add text. Type Distance, press Return or Enter, and type 3.6 mi.
Press Command+A (macOS) or Ctrl+A (Windows) to select all of the text in that type object. In the Property Inspector, change the font size to 10 and the line spacing to 16.
Double-click the text Distance to select it. Change the character spacing (the spacing between each character) to 100 and press Return or Enter. Click the Uppercase button (
 ) to make the text uppercase.
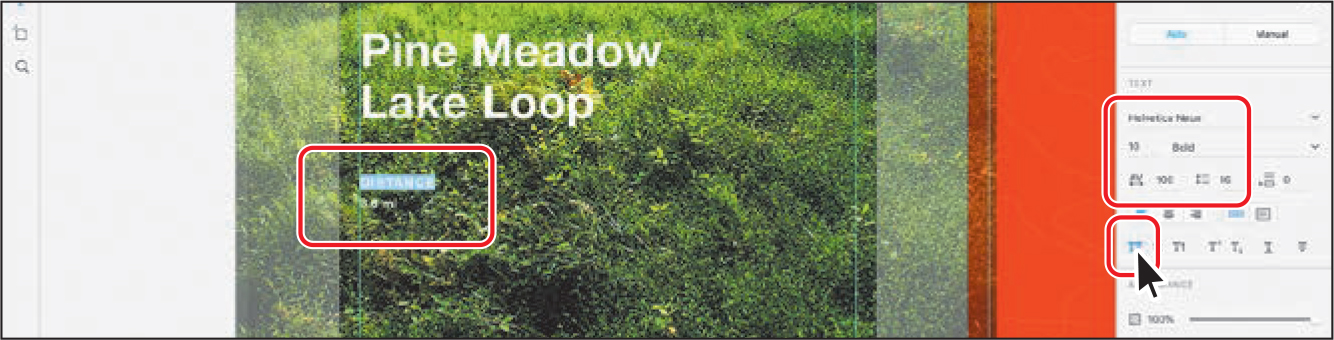
I zoomed in to the text to more easily see it.
Drag across the 3.6 mi text to select it. Change the font size to 16. Press Return or Enter. Press the Esc key to select the text area.

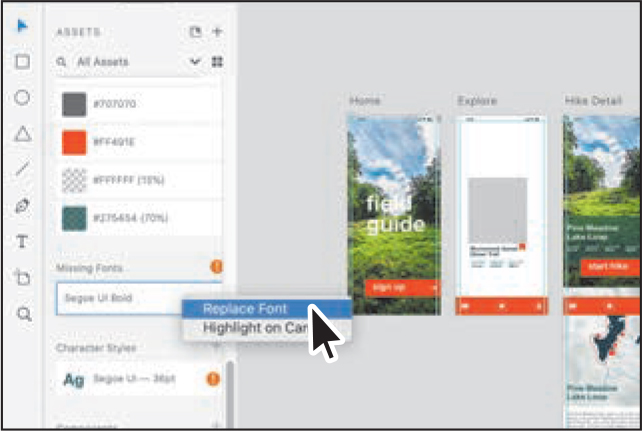
Fixing missing fonts
When you open an XD file that uses Adobe Fonts, they are automatically activated when you open your XD document. If non-Adobe fonts are used in the XD document that you don’t have installed on your computer, the Assets panel will open, indicating that the fonts are missing.
You can replace missing fonts by right-clicking the name of the font in the Assets panel list and choosing Highlight On Canvas to see where they are used, and choosing Replace Font to choose a different font to be used wherever the missing font appears.
Duplicating text
One way to reuse text formatting is to copy a text object that has the formatting you want and change the text. You can also click in text with formatting you want and then create a new text object and use the formatting from the original text. In this final section, you’ll copy text and change it.
With the Select tool (
) selected, drag the DISTANCE text object so its left edge aligns with the guide near the left edge of the artboard. See the first part of the following figure for the position. Also note the vertical position.Option-drag (macOS) or Alt-drag (Windows) the DISTANCE text object straight to the right. When horizontal alignment guides appear, indicating the copy is aligned with the original, release the mouse button and then the key.
NoteIf you see an auto-correct menu below the text, click the X to the right to keep the text uppercase.
Select the Text tool and double-click in the copied DISTANCE text to select it, and type duration to replace the text. The text should be uppercase because it inherits the formatting from the original DISTANCE text. Double-click in the copied 3.6 mi text to select it, and type 3:15 hr to replace the text.

Press Esc to select the text object. Select the Select tool (
 ), and Option-drag (macOS) or Alt-drag (Windows) the DURATION text object straight to the right. This time, you may see a gap value and a pink bar appear between all three text objects when the gap is the same value. Release the mouse button and then the key.
You may not see the gap values because the text is snapping to the square grid. If, when dragging, you don’t see the gap values, you can either zoom in further or turn off the square grid for the artboard and try dragging again. To turn off the square grid for the artboard, press Command+’ (macOS) or Ctrl+’ (Windows). After dragging, you can then turn the grid back on by pressing the same keyboard shortcut.
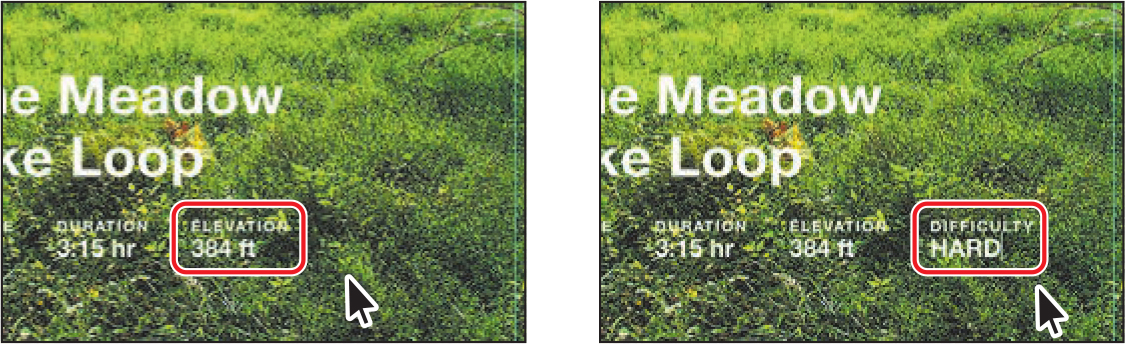
Change the text to elevation 384 ft (see the figure).
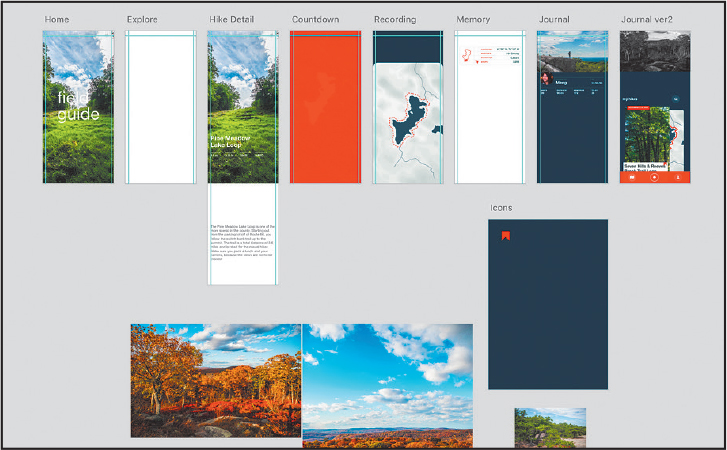
Repeat the last two steps to create another copy. Change the text to difficulty HARD (see the figure).
Press Command+0 (macOS) or Ctrl+0 (Windows) to see all of the artboards.
Click in a blank area of the document window away from content to deselect.

Choose File > Save (macOS) or click the menu icon (
) in the upper-left corner of the application window and choose Save (Windows).If you plan on jumping to the next lesson, you can leave the Travel_Design.xd file open. Otherwise, choose File > Close (macOS) or click the X in the upper-right corner (Windows) for each open document.
NoteIf you started with the L3_start.xd jumpstart file, then keep that file open.
Spelling and grammar in XD
In Adobe XD, by default, spelling check and grammar check are enabled. You can access Spelling and Grammar by choosing it from the Edit menu (macOS) or by clicking the menu icon (![]() ) in the upper-left corner of the application window (Windows).
) in the upper-left corner of the application window (Windows).
With Spelling and Grammar enabled, and the cursor in text or text selected, misspelled words are underlined in red. You can right-click the word and choose from alternatives, among other options.
Review questions
1. What are at least three asset types you can import into Adobe XD?
2. Briefly, how do you temporarily disable snapping when dragging an image?
3. How do you replace an image?
4. What are the two methods for masking?
5. What are at least two methods for bringing Photoshop content into Adobe XD?
6. What is the difference between text at a point and area text?
Review answers
1. Types of asset files you can import into Adobe XD are .txt, PSD, AI, Sketch, SVG, GIF, JPEG, PNG, and TIFF.
2. When dragging an image, you can press the Command (macOS) or Ctrl (Windows) key to temporarily disable snapping.
3. You can drag an image from your desktop onto an existing image to replace it.
4. In Adobe XD, you can easily hide portions of images or shapes (paths) using two different methods: mask with shape or image fill. Masks are nondestructive, which means that nothing that is hidden by the mask is deleted.
5. There are several ways to bring content from Photoshop into Adobe XD: copy and paste, export from Photoshop and import into XD, import a Photoshop file (.PSD) (which places the .PSD content into the XD file), open a Photoshop file (.PSD) directly in XD (which opens the .PSD as a separate XD file), or place the content in a Creative Cloud Library and drag it into your design from the CC Libraries panel in XD.
6. Text at a point begins where you click and expands as you enter characters. Each line of text is independent—the line expands or shrinks as you edit it but doesn’t wrap to the next line unless you add a paragraph return or a soft return. Text in an area uses the boundaries of an object to control the flow of characters. When text reaches a boundary, it automatically wraps to fit inside the defined area.