Memories
The Kind You See, Taste, and Hold
■ ■ ■
Think of the emotions you feel when looking at a photograph and remembering exactly what was happening when it was taken. When you hold a cherished item one of your parents passed along to you. Or when you taste a familiar meal that immediately transports you back to your grandma’s kitchen when you were a kid. These are the feelings you want to capture and, ideally, transfer to the next generation.
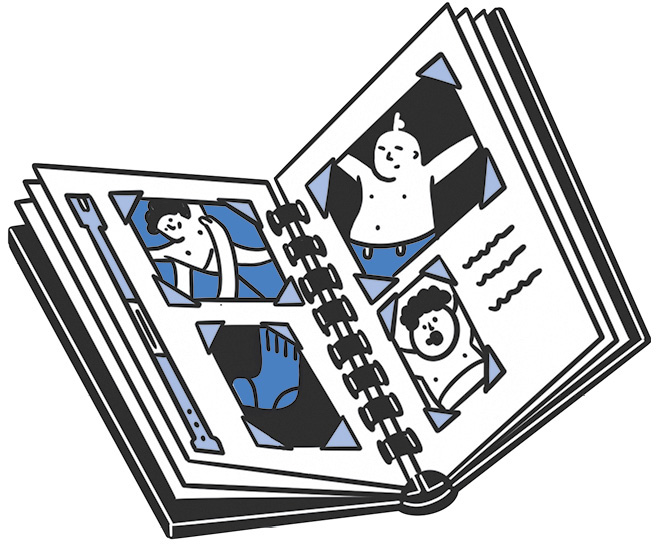
Photo Finish
We all have too many photos. It’s time to get them under control so they’re not lost in the cloud. Or the attic. Handing down photos from one generation to the next used to be a simple act of passing along a few framed photos, some leather-bound albums, and packed shoeboxes.
And, given all the effort that used to go into taking those photos, they held a certain power and value. You had to buy film, conserve the number of exposures so you didn’t run out, get that roll of film developed (when you had time), hope the person who developed them at the Fotomat* didn’t judge you too harshly, toss out half of them because they were blank or completely out of focus (digital viewfinders weren’t a thing), and then put them in an album (if you got around to it).
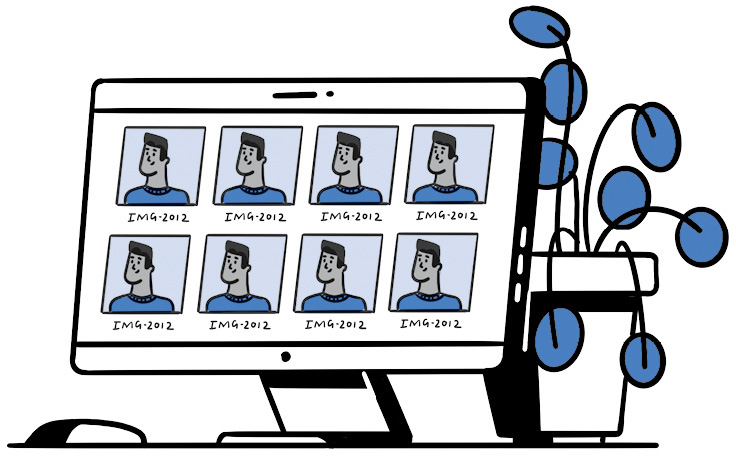
Now, you can immediately take a photo of anything and share it everywhere. It could be an adorable shot of your child frolicking in a field, a receipt for an expense report, or a funny-looking french fry. According to InfoTrends, 1.2 trillion digital photos were taken worldwide in 2017. Some are posted on social media or shared among family and friends, but most are left unsorted and unnamed on phones and computers, backed up on hard drives, or stored in the cloud. To help bring order to this digital disarray, consider these questions:
❏ What do you want to happen to them?
❏ Would your family know how to access them if something happened to you?
❏ Do you want your kids or grandkids sorting through an unmanageable number of digital photos to find the best ones?
❏ Should some of these photos disappear forever?
These digital assets are important because they’ve become our new memories. And we have too many of them. Here’s how to trim the fat and honor the photos that deserve it.
Hard & Fast Rules
The first rule is to never have a single point of failure. For example, if you never back up your phone and it falls out a car window, those irreplaceable digital photos can be gone forever. Second rule: Don’t get married to a particular photo storage platform. If the company running that platform changes rules or the way photos are stored and viewed, your photo archive could be in jeopardy.
Cloudy Backups: This is where the majority of your digital photos live, at least the ones you’ve taken since personal cloud storage became a thing (most likely when Dropbox launched in 2008). Since then, Google Drive, iCloud, and OneDrive have taken care of Android, iOS, and Microsoft users, and Amazon Photos has added unlimited storage as a Prime perk. Your cloud sorting and storage method should be a combination of security and quality.
When it comes to security, you want to guarantee they never get deleted, stolen, made inaccessible, or rendered unviewable. The storage giants may change the rules at some point in the future by making it difficult to export a copy of your photos in an open, nonproprietary format. We’ve seen this happen with music and video formats. Today’s standard format is tomorrow’s joke. Yes, we’re laughing at you, floppy disks.
How This Helps After You’re Gone
(Organizing keepsakes)
■ Your family won’t need to sort through tens of thousands of photos to find the best ones.
■ People will actually know who’s in the photos and when they were taken.
■ Favorite family recipes can still be enjoyed exactly as you remember them.
■ Heirlooms will end up in the right hands and won’t end up in donation bins or the trash.
Since the beginning of photography up until the early 2000s, photos were primarily on paper. In the past two decades, it’s all changed and keeps on evolving. We have photo files on backups from the mid-’90s that are incredibly difficult to view. Who knows what it’ll be like thirty years from now?
To assess quality, you’ll want to select only the best and most meaningful images. Looking through a shoebox of a few hundred photos that span decades is fun. Looking through the few hundred photos from your last vacation can be a chore. Add in the 25,000+ photos from the rest of your camera roll and it’s just too much. If you took 400 photos on your last vacation, pick ten to thirty of the best and archive the rest.
Physical Backups: A computer often serves as the mothership for photos, giving you a fast way to edit, rename, and delete large batches of them (sorry, smartphones). It needs to be regularly backed up, which brings to mind a stack of external hard and thumb drives. We covered them in Level 2 (Digital Estate Plan, see here), and now it’s time to deal with the photos taking up all that virtual space.
Backups are the new film negatives, which were those orange-y strips of plastic that came in an envelope with your developed film that allowed you to get more prints. Backups are lifesavers when your computer melts down, your phone is destroyed, or your data is deleted from the cloud. For those in favor of this classic digital storage method for photos, the best you can do is label each drive like you would the cover of a photo album, since they all look alike (“FAMILY, 2012”).
Hardware won’t completely future-proof your images for two reasons, the most obvious being that they break. The second issue is obsolescence, but more often they break before they become obsolete. This doesn’t stop them from being a cheap and reliable option, as long as you realize that one day they may become a collection of rectangular paperweights.
Digital Deluge: Organizing Your Files
The onslaught of digital photos is one of the newer challenges we face, one that can be approached from a few angles. If, for example, you take all your photos on an iPhone, consider the following options:
1 Pay for extra iCloud storage (currently, 99 cents a month for 50GB) and make sure it’s backing up the original full-sized images, so you never have to think about it.
2 Get a second cloud service like Dropbox or Google Photos to automatically dump a copy of all new photos or videos into a folder.
3 Periodically sort through photos and remove all the accidental pictures of your feet, unnecessary duplicates, and screenshots of what you needed to pick up at the store.
4 Create one organized and manageable photo archive on your main home computer.
5 Every six months or so—set recurring reminders on your calendar—copy all the new photos to an external hard drive. We recommend an SSD drive, since they don’t have as many moving parts inside that break . . . although they can still break.
6 If you’re really paranoid, make a second copy of the drive to keep at a secondary location, like a parent’s house (or a safe deposit box if you choose to go against everything we’ve said about them throughout this entire book).
Cloud Pricing
You can take a chance and trust in Google, Apple, Microsoft, or Amazon Photos, all of which have decent (and almost creepily accurate) search functionality, even though what’s free (or 99 cents a month) today could be expensive tomorrow. There are also security and privacy concerns when you give an algorithm full control over your personal memories.

■ Amazon Photos: Unlimited full-resolution storage with Prime membership, $20 per year for 100GB
■ Dropbox: 2GB free, $120 per year for 2TB
■ Google Photos: Unlimited for lower-resolution photos, $24 per year for 100GB
■ iCloud: 5GB free, $12 per year for 50GB
■ Microsoft OneDrive: 5GB free, $24 per year for 100GB
Disclaimer: Prices and storage limits may have changed by the time you read this.
Restrain Yourself
Sometimes having limits can be a good thing. Five gigabytes of storage equals about 1,000 photos. If you want to avoid paying a storage fee for the rest of your life, you can thin the herd to only the best whenever you hit the limit. Not easy, but 1,000 photos are still more than most of our grandparents ever took in their entire lifetime.
From professional photographers we learned there’s no perfect solution, but many workable options exist. Each has their own favorite programs (like Adobe Lightroom or even Google Photos) and workflow that suits them, but their situation is much more intensive. They may have only a few days (or hours) to sort and edit hundreds or thousands of photos into a tight collection for a client, be it a wedding or a media outlet. You’re not under that kind of pressure, so keep it basic and stay consistent.
It could be as simple as taking a few hours around the holidays and scrolling through that year’s photos, choosing only the best fifty or one hundred, and then using those to create an annual collection. If you’re really ambitious, you could become the photo point person for the family and include the best snaps taken by your spouse and children in one family collection. Although this may be too much work for you to manage, the least you can do is train them on a reasonable workflow, so you all know exactly where and how each person’s photos are stored and organized. On the next page, we explain how to incrementally tackle your mountain of photos so the best are on display or easily accessible, and the worthwhile extras can disappear into an archive never to be looked at again.
TIP: You can use an online service to get really nice prints to display around the house. Some popular ones are Snapfish, Shutterfly, Amazon Print, and Walmart Photo. (Yep, Walmart.)
How to Get Framed: Physical & Antique Photos
Even though we live in a world of digital photos, every family still has some good old-fashioned prints.
Although we’d like to introduce a fancy way to help you organize classic physical photos, sometimes the simplest way is the best. Start with sorting them into three piles:
1 Album-Worthy: These photos are worth preserving.
2 Box-Worthy: These photos are worth keeping but not worth honoring in an album (these are mostly similar to or duplicates of better photos you have).
3 Don’t Care: These can be shredded or tossed into a shoebox with “Don’t Care” written on the side so your family knows they weren’t important to you.
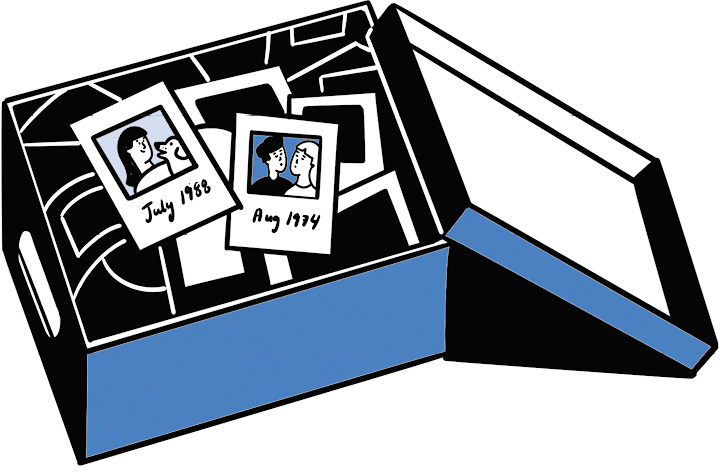
After the sort is complete, add some color (even if your photos are black and white) by including the following details on the back of each photo, either by hand or with a sticky note: the name(s) of people in the photo; the date and location if you can recall them (a rough estimate is fine); and any brief, relevant historical data (example: “Aunt Stephanie’s farm, Missouri”).
This shouldn’t feel like a chore. It should be a pleasant journey through the past, which you can do in increments while you’re bingeing a show, watching a game, or lounging around on a rainy afternoon. Basically, instead of messing with your phone, sort and catalog your photos.
You should still keep your phone close, because it’s a great way to preserve these photos. Take a photo of your photo, or have it digitally scanned if you want super-high quality. And be sure to include pertinent information in the file title (“Grandma-Zeina-Ohio-1945.jpg”). You can even send it around to family or friends. Suddenly, a photo that’s been hidden in a drawer for decades can instantly brighten their day.
Also, don’t neglect the photo albums that have already been filled, or half filled, over the years. Or any antique photos you may have on the walls of your home or in storage. A close colleague of ours told us a story about finding a stack of classic black-and-white photos of people who appeared to be his ancestors when cleaning out his late parent’s home. Since he never had the chance to ask about them, he told us how sad he was to realize he would never know who these people were.
Plan of  Attack
Sorting & Organizing Printed Photos
Time: Two hours to gather them all up—this includes albums, antique framed photos, packed boxes, and those you still keep in the folder from when they were developed. When they’re all in one place, take an hour to sort them into the piles we outlined earlier (Album-Worthy, Box-Worthy, Don’t Care). The final step of identifying the photos should be broken into four one-hour shifts over the course of a month to avoid fatigue. This also includes photos hanging on your walls that might be a mystery to everyone but you. Add some extra time for the photos that require research from family or friends (because there’s always an aunt or cousin who knows everything).
Cost: $50–$75 for new photo albums, sticky notes, pens
Sorting & Organizing Digital Photos
Time: One hour to list out every place you have digital photos on your computers, mobile devices, and external backups (including thumb drives) and in the cloud. Depending on how many you have, start consolidating them into one centralized collection, which should be done in four one- to two-hour shifts over the course of a month. Back up the main collection on a hard drive and decide on a primary and secondary cloud service. If you’re already using multiple cloud services, clean them out so you don’t have different collections floating around.
Maintenance: At least once a year, spend two hours sorting the photos you’ve taken since your last backup, prune your collection to the best, and add them to the main collection. Set a reminder so you don’t forget!
Cost: External drives: around $80 for 500GB SSD. Thumb drive: less than $10 for 32GB, around $30 for 128GB. For cloud pricing, see here and decide what works best for you.
To prevent this outcome, these priceless images need relevant information on their backs too. Providing even the most minor details will keep them alive for generations, and you can get all warm inside thinking of your grandkids holding the same photo many years from now and knowing exactly who’s in the picture.
Delicious History
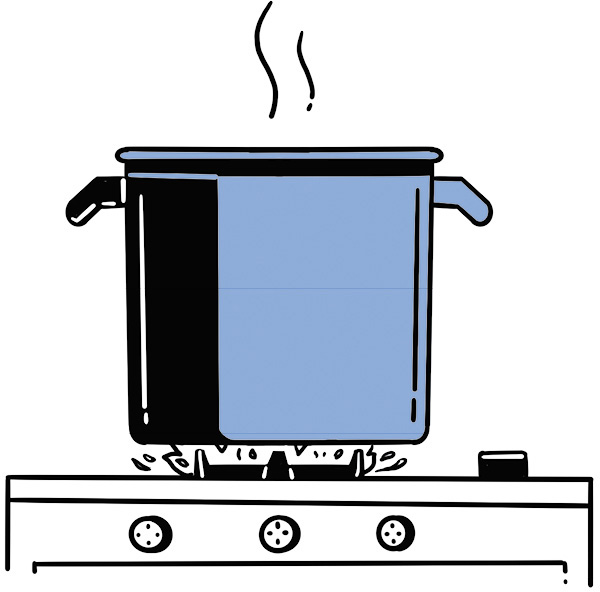
Think of recipes as passwords to tastiness. Start by asking yourself the following: How do you keep track of recipes now? Are you an index card traditionalist? Do you have a stained and battle-worn notebook? Have you gone digital and created a document or do you rely on a recipe app? Regardless of the method, your goal is to preserve them so future generations don’t lose their appetite. Literally.
Cooking family recipes transports you back in time with smells, tastes, and memories. Abby’s late beloved babysitter Lidia used to make the most incredible empanadas and shared the recipe before she died. Every time Abby misses her, she makes those empanadas and they bring back the warmest memories. Plus, she gets to share the deliciousness with her kids, which makes it a new memory for them.
Let’s get the basics out of the way, especially for those who love to cook but don’t have a recipe system in place that others would be able to understand. Think back to Levels 1 and 2, specifically the parts about organizing your passwords, the Home Operating System, and your Personal Medical Journal. All of those involved committing things you have in your head, or scattered all over the place, to one easy-to-understand system. How are recipes any different, apart from being an absolute joy to share and eat? The basic template for recipes is as simple as it gets:
❏ Name of recipe
❏ List of ingredients
❏ Preparation/cooking instructions
❏ Additional instructions and tips
❏ Optional: Sprinkle in family stories and history related to the recipe.
You can toy with the format, but this is the information that needs to be included. We’re even going to take it one step further and include two of our very own favorite recipes to show you how it should look.
Abby’s Mandel Bread (word for word as she has it)
Ingredients
½ cup peanut oil
1 cup sugar
3 eggs
1 tablespoon vanilla extract
3 cups flour
1 teaspoon baking powder
½ teaspoon salt
1 cup chopped walnuts (optional)
½ cup coconut (optional)
Strawberry jam (or a jam of your preference)
Cinnamon, sugar, chocolate chips (optional)
1 In mixing bowl, mix ½ cup oil (I use peanut oil), 1 cup sugar, 3 eggs, and 1 tablespoon vanilla extract.
2 Add 3 cups flour, 1 teaspoon baking powder, ½ teaspoon salt, 1 cup chopped walnuts, and, if you want, ½ cup coconut. I prefer walnuts but no coconut.
3 Mix well and put in fridge for 30 minutes to 3 hours. Line a baking sheet with foil. Divide the dough into three equal parts.
4 With two parts of the dough, make logs on the baking sheet. Using a spoon or your thumb, make an indentation down the length of each and fill with strawberry jam. I use a lot of jam (and sometimes include chocolate chips). Pinch the sides of the dough together to try to enclose the jam.
5 Flatten out the third part of the dough, create two long pieces, and cover as much of the jam that's still sticking out on each log (use water on your fingertips since it can get sticky). I sprinkle them with cinnamon and sugar (optional).
6 Bake at 350°F for 40 minutes. Let cool. Cut the logs into slices and lay them on their side on a baking sheet, sprinkle with cinnamon and sugar and bake for 20 minutes, then turn them over and sprinkle with more cinnamon and sugar.
7 Shut off the oven and leave them in until they get to the crispness you like.
Additional Info/Tips
I like strawberry jam, but you can use whatever jam you prefer. I like them crispy, so leave them in for at least 5 minutes after turning off the heat—sometimes up to an hour. This recipe was adapted from my grandmother’s and my mom’s recipe, and from Melanie Nussdorf. The peanut oil was a mistake that my mom made one time, but it was so good that now it’s the only way I make them.
Adam’s Chili (Pulled directly from Adam's spreadsheet)
Ingredients
8 strips thin-sliced bacon
3 large yellow onions
8 garlic cloves
Salt and pepper
2 lb. ground sirloin
4 teaspoons paprika
2 lb. cubed steak (or other thin sandwich steak)
28 oz. can diced tomatoes
12 oz. can tomato paste
1 chopped poblano (or other medium-hot) pepper
½ chopped serrano (or other hot-hot) pepper
6 teaspoons ancho chili powder
6 teaspoons chipotle chili powder
¾ teaspoon red cayenne pepper
4 teaspoons oregano
4 teaspoons cumin
2 bottles of beer (12 oz. each)
2 Hershey chocolate bars (1.5 oz. each)
30 oz. can small red beans (or pinto beans)
1 Cook the bacon in a pan until crispy. Reserve the grease in the pan. Set aside the bacon on paper towels for later.
2 Sauté chopped onions and garlic in bacon grease until translucent and a little soft. Season with salt and pepper. Place in the pot.
3 Brown ground sirloin in leftover grease from onions/garlic. Season with 2 teaspoons of paprika. Remove while medium rare. Place in pot.
4 Brown cubed steak in 1 tablespoon of leftover grease from sirloin (you will probably need to drain most). Season with the remaining 2 teaspoons of paprika. Remove while rare. Slice into small bits. Place in pot.
5 Add diced tomatoes with tomato paste, chopped peppers, chili powders, cayenne pepper, oregano, cumin, and 1 bottle of beer to the pot.
6 Bring to a slow boil and then simmer for at least 2 hours.
7 Add chocolate, bacon, and the other bottle of beer and simmer for 30 minutes.
8 Add beans and simmer for 15 minutes.
9 Serve with sour cream, shredded cheese, cornbread, rice, raw onions—whatever.
WARNING!
Be careful with the serrano and cayenne pepper—if you wipe your eyes after handling, you’ll be really sorry.
Additional Info/Tips
■ You can substitute any thin, sandwich-y kind of steak for cubed steak if you can’t find it.
■ You may want to add only half of the cayenne powder initially, then taste the chili after a couple of hours—it gets spicier the longer it cooks.
■ You might not need to add all the beer. If the chili looks wet enough, just drink the beer instead.
We’d love for you to make Abby’s bread and Adam’s chili and tell us what you think. We also want you to send your family favorites to us@incasethebook.com so we can try them out. And we will!
Greetings, Cards
There’s nothing like a classic tin box full of index cards on a kitchen counter. The cards themselves can be considered heirlooms, but what if everyone in the family wants them? One former Everplans team member and her sister did her family the greatest kindness by organizing, transcribing, and scanning all their grandmother’s index cards into a book, Ruth Whitman: A Life in Recipes, making sure to preserve as much of the original handwriting as possible. She gave everyone in the family a copy, and the reaction was incredible, ranging from “You captured our past so beautifully” to “You stirred up so many family traditions and memories!”
If making a book is too intense a project, you can take photos of the cards and share them in a digital “Family Recipe” folder so others can access them. Although we love the history of handwritten recipes, there’s always a worry that they could go missing or be accidentally ruined (spills happen). Same goes for recipes you may have cut out of a magazine, printed from a site, or ripped from the pages of a book.
Delectable Digital Delights
If you want to take your family heirloom recipes to new digital heights, settle on a system that makes it easy to add and update recipes, access them at a moment’s notice—especially if you need to gather ingredients at the store or you’re at a family member’s house over the holidays—and share them with others so they can enjoy them too.
If you want an app to do the heavy lifting, check out Paprika, BigOven, and Cookpad (among the slew of recipe apps available). Although these can be handy, you should still heed the advice we offered about digital photos. Technology’s forever changing, and there’s always a risk when putting all your eggs in one virtual basket. A software program you love today could be obsolete tomorrow, forcing you to redo all your hard work.
Plan of Attack
Recipes
Culinary Culling
Time: One-day time limit to round up all your recipes into a centralized place. To keep it from becoming an encyclopedia, take three one-hour shifts and focus only on personal recipes, ones handed down from parents and grandparents, and family favorites until you have the best of the best.
Digital: If you’re creating a digital cookbook in a Word document or Google Docs, start plugging away using the format we suggest (or one you’re comfortable using) until your pile is empty. Add new recipes at regular intervals or as they begin to stack up.
Physical: A bunch of online services allow you to self-publish your own family cookbook. Do a search to find a reasonably priced option that walks you through the process regarding format and design. This is a great option for a family heirloom cookbook, but not the best solution for one you’ll be using, updating, and sharing on a regular basis.
App: Almost all recipe apps have ways to import so you don’t have to type them all in, but you may have to do some editing so they’re easier to decipher.
Cost: A physical book varies, depending on the service you choose, ranging from $30 all the way into the hundreds. You can do it on the cheap if you create your own, but it’ll take longer. Most apps are a one-time cost to download (around $5–$30) or free with in-app subscription options.
When it comes to preserving something as important as family recipes, we suggest you choose a method that makes them always accessible regardless of what the future may hold. When Adam stores or creates a recipe, he’s all about business. He puts all the relevant text (ingredients/instructions) into a Google Doc or spreadsheet in his Drive recipes folder. This allows him to “quickly cut out all the unnecessary storytelling that every food blog seems to have in the middle of a recipe.” Since Google offers really good search capabilities, he doesn’t need them to be in an app or database.
Abby uses a similar method so her recipes are always at the ready (she saves all recipes in Gmail in a Recipe subfolder). She currently sticks to the basics when organizing her recipes, but always tells her kids the stories behind each scrumptious creation. Both of these methods allow for practicality, sentimentality, or both.
Even if you want to print out all your recipes and keep them in a binder, at least your family will know they can always make new copies, so no one ever goes hungry.
Personal Antiquing
You already understand the type of valuable or meaningful assets that should go in your Will or be clearly assigned to an heir. There are others, perhaps less financially valuable but nevertheless meaningful, that might get overlooked or end up in the wrong hands if you don’t tell the story behind them. It could be a set of cutlery you bought on your honeymoon in Italy, or a classic table clock that was passed down from your grandparents to your parents. If it has a story behind it that would resonate with anyone in your family, tell it!
Stories of people finding notes left attached to personal items give us the happy chills. It’s a beautiful way to express love and say goodbye, but it doesn’t have to be a surprise. Cleaning out a late parent’s home while grief-stricken could lead to discarding items that have a story to tell. The same goes for a family member swooping in and taking everything, especially if they think those items have value. A person who works closely with Everplans told us how an in-law looted all the classic furniture from a deceased parent’s house before anyone had a chance to claim anything. Although this was many years ago, and she’s not even sure she wanted any of it, it’s still a minor point of contention among the family.
All it takes to guarantee this doesn’t happen is a prominently placed note somewhere in your home, or included in a Letter of Last Instructions, saying something like this: “There are personal notes attached to many items in the house. Be sure to check the back and bottom of each before you discard anything you might not want.”
There is no template for what to include on these notes. You can offer the personal history of the item (“Bart, this letter opener was on my desk from my first day on the job until my last. Love, Dad”), a brief cute thought (“Dina, your father bought me this vase on our tenth anniversary, and it always craved fresh flowers”), or simple (“Yoko, I wanted you to have this”). It doesn’t have to be much, but it’s best to include the name of the person who should get it to prevent disagreements about where it should go. If Sarah wants the Thanksgiving serving bowl, but there’s a note with Casey’s name, it’s pretty clear to everyone in the family who should get it.
Plan of Attack
Time: Three 1-hour shifts over the course of a month to make a list (or spreadsheet) of all the heirlooms you would want others to have (include names next to the items). This list serves a dual purpose because it can be used by your family as an inventory and let them know who’s getting what. Once the list is final, grab some Post-Its, or index cards and tape, and start tagging the back or underside of each thing with personal notes.
■ ■ ■
*If you don’t know what a Fotomat is, imagine a shack in the middle of a parking lot that operated as a drive-thru, with an awesome 1970s vibe.