Of all the ways you can use your Droid X to keep track of your life, the calendar may be the most important. Need to remember the meeting this afternoon, the dinner date tonight, the tennis game tomorrow morning? Forget paper-based calendars—the Droid X puts them to shame.
Better still, Droid X’s calendar is actually Google’s Calendar, so whether you’re looking at your calendar on your Droid X or on your PC, you see the exact same thing, because the Droid X syncs with Google Calendar. So no matter where you are, you know where you need to be today, tomorrow, and beyond.
To run the calendar, tap the calendar icon in the Application Tray. The Calendar immediately loads. You’re looking at events imported from Google Calendar, so if you’re already using Google Calendar, you see your appointments instantly. If you’ve never used Google Calendar, you see a blank calendar.
Note
You can also get to the calendar is via the Calendar widget on the Productivity pane. The widget shows you the most recent appointment for the current day. Tap it to go to that day’s Agenda view or an event, if you tapped an event (see Making an Appointment for details).
The Google Calendar and the Droid X calendar automatically sync wirelessly, so you should see the most up-to-date calendar information on the Droid X calendar. Syncing means that not only will your Droid X calendar grab the latest information from your Google Calendar on the Web, but when you make any changes to your calendar on the Droid X, Google Calendar gets updated with that information as well.
If you have more than one calendar (Working with Multiple Calendars), you can see information from all calendars in one unified view.
Note
When you first set up your phone, you either chose to set it up with an existing Google account, or you created a new one. If you set it up with an existing account, your Droid X Calendar automatically syncs with your existing Google Calendar and displays all its events. If you created a new account, you start with a blank Google Calendar.
There are five different ways you can look at your calendar. Tap the Menu key, and choose from one of these views:
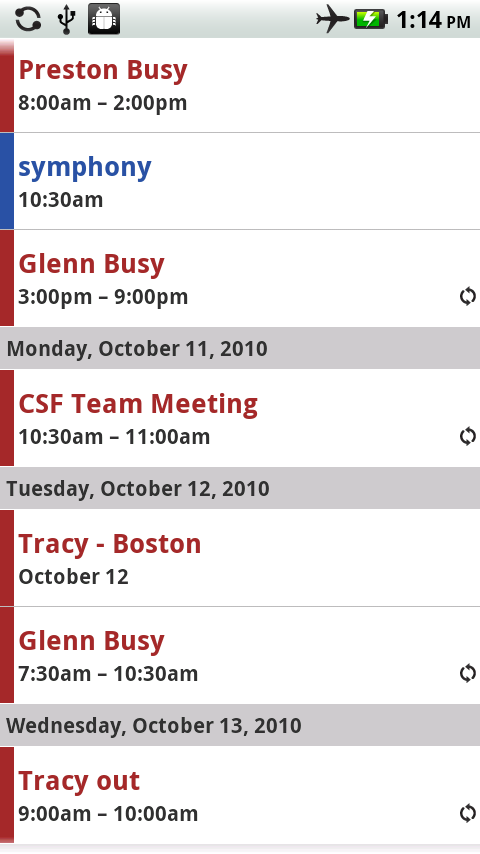
Agenda. This scrolling view displays a list of all your events and appointments, not just for today or this week or next month, but years into the future, and years back in the past. It’s a great way to see what’s on the horizon or to get an overview of where your time is going. Scroll through them all by flicking. To see the details of any event or appointment, tap it, and the appointment opens.
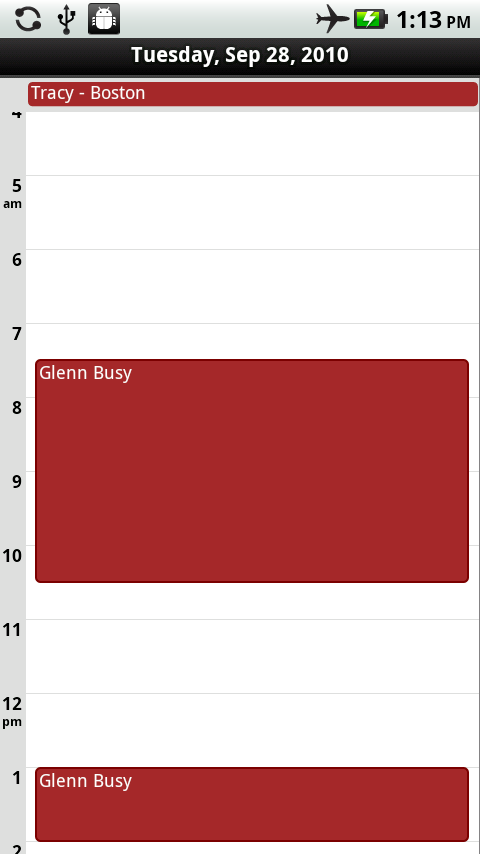
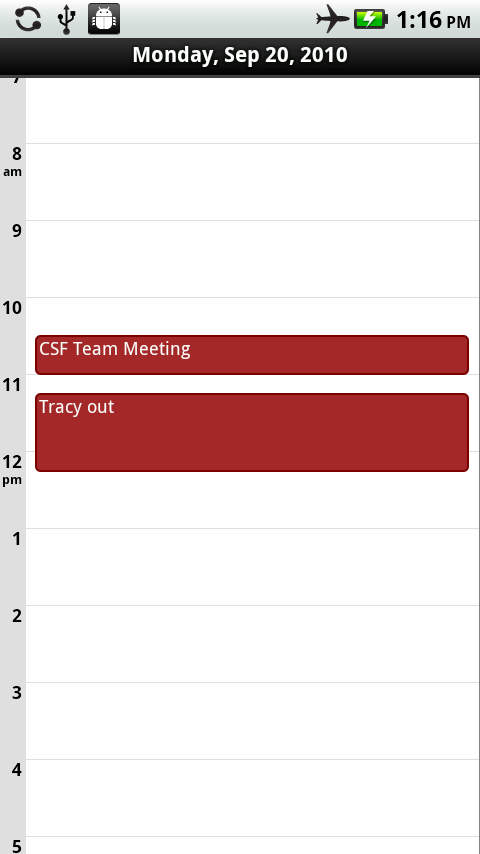
Day. Tap here to see the calendar for the day you’ve highlighted, arranged by hour. Flick up and down to go through all hours of the day. Swipe your finger to the left or right to see the next day’s calendar, or the previous day’s calendar.
Week. Here you get a weekly view. Swipe left or right to see the next week or previous week, and flick up and down to see later or earlier in the day.
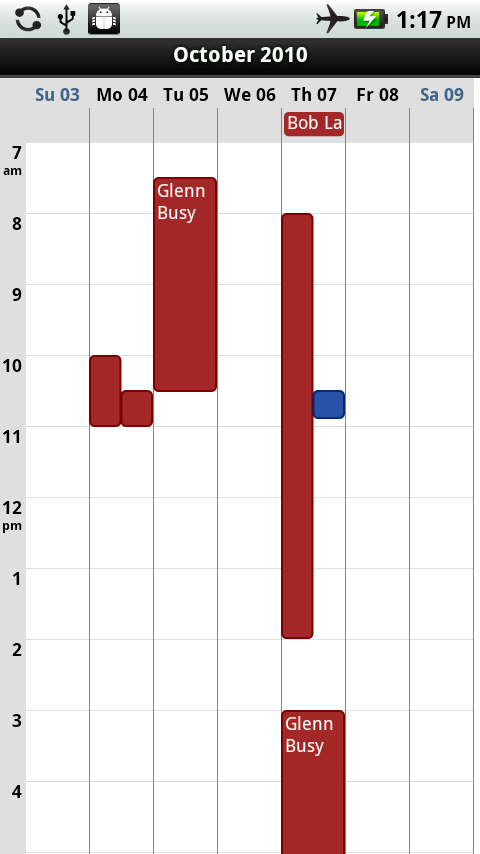
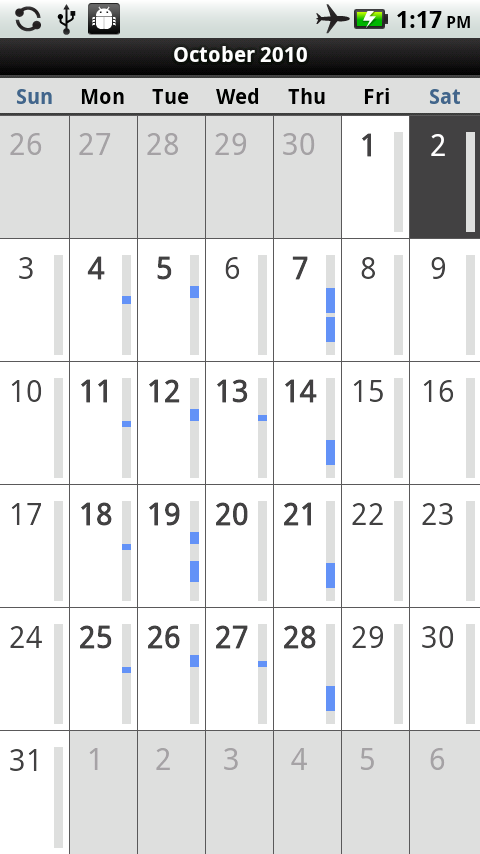
Month. This view shows you the entire current month. Green vertical bars indicate appointments and events, and show you their duration. Flick up and down to see the next or previous month.
Today. This choice can be confusing, because what it shows depends on what you’re viewing when you choose it. If you’re in Day view, it shows you the view of the current day. If you’re in the Week view, it shows you the view of the current week, and highlights the current day. And if you’re in the Month view, it shows the current month, and highlights the current day.
Tip
The Droid X calendar inexplicably doesn’t include a search capability, and when you use the Droid X general search tool, it doesn’t search through your calendar, either. If you want to search through your calendar, though, you can download and use the free Aurora Universal Search app from the Market. See details on Downloading and Installing Apps for downloading and installing apps.
Note
When you run the Droid X calendar, you’re not actually looking at Google Calendar on the Web. Instead, the Droid X calendar syncs with Google Calendar on the Web, but holds the information in the Droid X itself. So if you’re in an area without reception, and you’ve previously updated Google Calendar on the Web but not yet synced it to the Droid X calendar, the Droid X calendar won’t have any information you added since the last sync.
There are several different ways to create an appointment (which Calendar calls an event):
Press the Menu key and tap More→New event. You can do this in any view.
In Day view, hold your finger on the time you want to make an appointment. A screen appears, labeled “Create Event”. Tap it to create the event.
In the Week or Month view, hold your finger on the time you want to make an appointment. A screen appears that lets you create a new event or go to a different view of your calendar. Tap “New event”.
No matter how you get there, you arrive at a screen that has every bit of detail you can imagine—and most likely, a lot you can’t imagine—about the event you want to create.
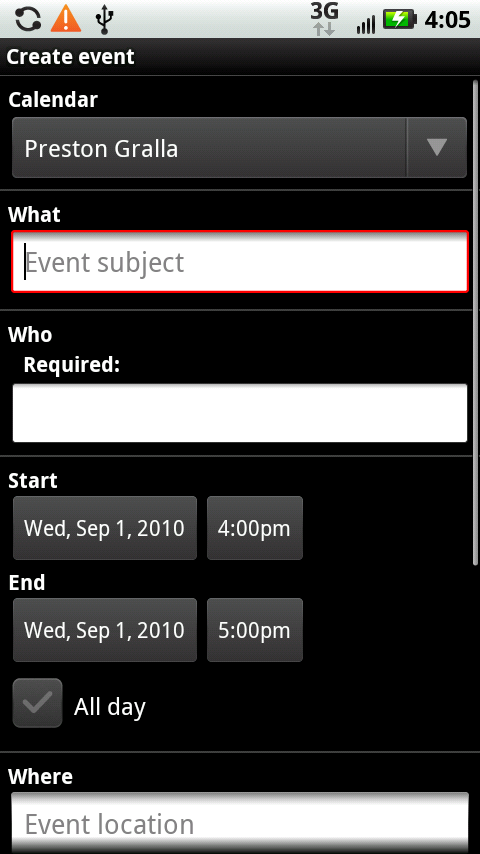
Here’s what you need to fill in:
Calendar. If you have more than one Google Calendar, start by selecting the calendar where you want the appointment to appear by tapping the down arrow, and then selecting the calendar. The event will appear only on that calendar. If you have only one calendar, then ignore this menu.
What. Type a name for the event or appointment.
Who. If other people are involved, either type their names here, or tap the little + and select names from your Contacts list. When you select someone, either from your list or one that you type in, and include her email address, she will automatically get sent an invitation via email to the appointment.
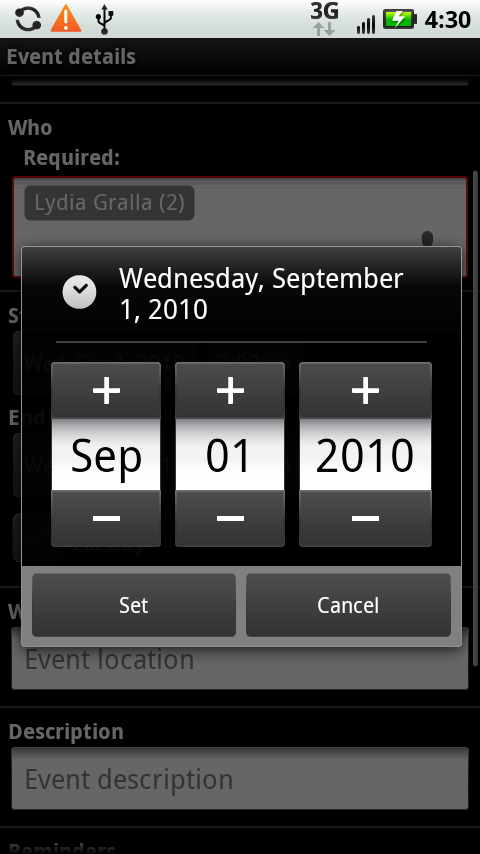
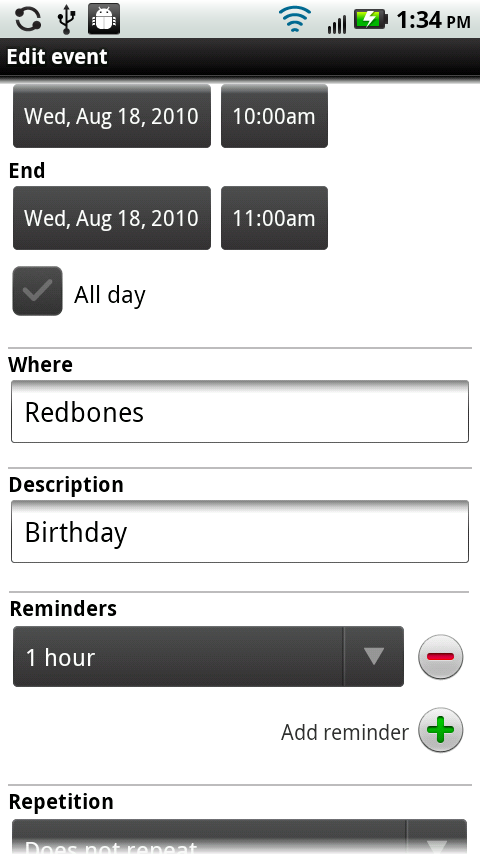
Start and End. Tap the date and time fields to choose the starting and ending times. From the screen that appears, tap the + or – buttons to move the dates and time forward or back. You can also use your keyboard to tap in the exact times.
All day. If the event lasts all day, forgot setting the start and end times. Instead, tap this checkmark, and the calendar automatically schedules the entire day for the event. When you select “All day”, though, the event will appear at the top of the calendar for that day, and will not be shown on each hour of the calendar for that day.
Where. Tap in the place where the event will be held and then type the location.
Description. What will you be doing? Having lunch? Meeting with your accountant? Skydiving? Tap in a description. If you’re inviting other people, keep in mind that the invitation will be sent to them, so make the description clear (and keep it clean).
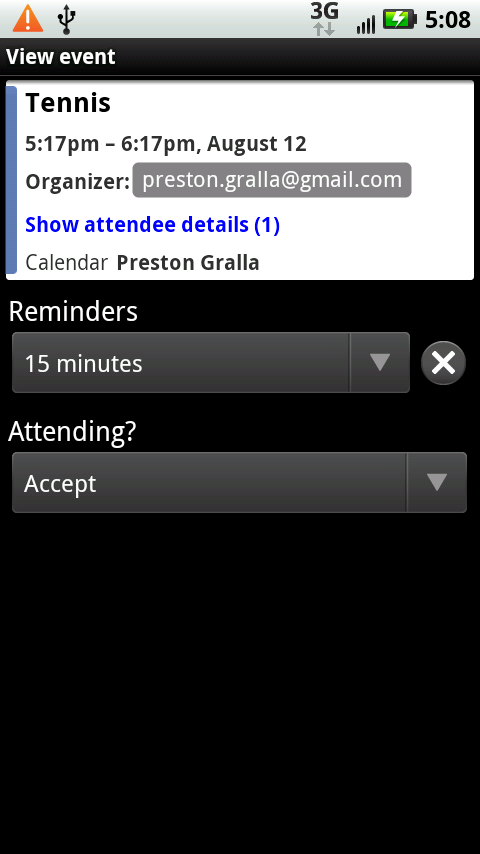
Reminders. After you create the event, the Droid X can flash reminders before the event, telling you that it’s about to happen. You can choose at what increment of time to send the reminder, anywhere from 5 minutes to 2 weeks. Or you can tell it not to flash reminders.
Note
You can set more than one reminder for an appointment. For details, see Adding multiple reminders.
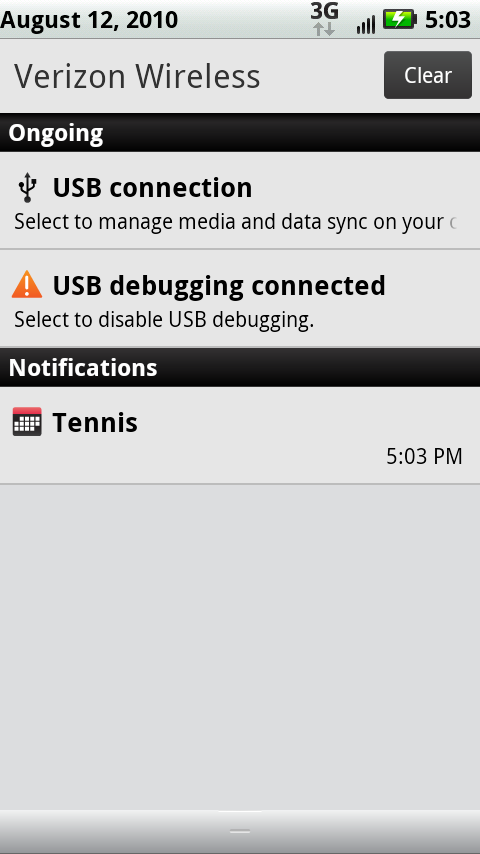
When you set a reminder time, you get a notification in the Notification bar the amount of time you’ve set before the appointment. Tap it, and you see more details, including the time. You can then Snooze the reminder so it’ll disappear until another interval of time passes (the interval that you’ve set), and then pop up again. Or you can instead dismiss it, which means it will vanish forever, never to be heard from again.
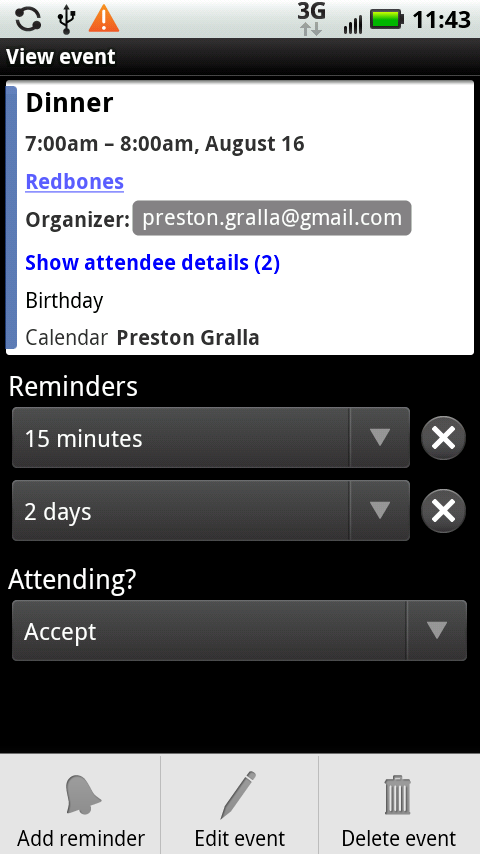
To get even more details, tap the event, and you see who organized the appointment, who will be attending, the time, and the reminder interval, You can also accept the invitation, decline it, or tentatively accept it.
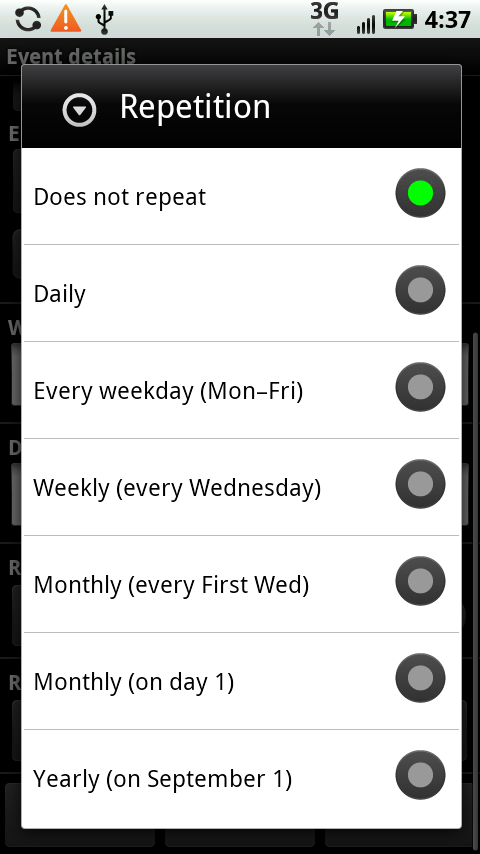
Repetition. Will this be a one-time event, or one that repeats? If it repeats, the Droid X gives you a lot of flexibility about how to choose that. You can choose an event to repeat every day at the same time, every weekday at that time, once a week at that time and day of the week, monthly, or even yearly on that date.
Note
When you choose to repeat an event on a monthly basis, you can’t have it repeat on a certain date of the month (the 15th, for example). Instead, you get the choice of having the event repeat on the same day of the week of the month—for example, the first Wednesday of the month, or the third Tuesday of the month.
When you’ve done all that—and don’t worry, it goes a lot faster than it sounds—tap the Save button. Your event now shows up on your calendar.
A few options don’t show up when you create a new appointment. They’re hidden, with good reason: You may never use them. However, just in case you’re the adventurous sort, you can make those options appear, and then use them. When you’re creating an event, press the Menu key, and choose “Show extra options”. Two new options appear, both relevant only if you’re using a group calendar:
Presence. This option lets you choose whether you appear to be available or not, if someone else wants to schedule you for an event held at the same time. Unless you change the default setting, the calendar assumes that you’re not available—after all, you’re already attending an event. But you can choose to make yourself available. For example, you may want to schedule an event for yourself tentatively, but be willing to change it in case someone needs to schedule an important appointment with you.
Privacy. Sometimes, you want others to see an event you put on your calendar (“Board meeting”), and other times you won’t want them to see it (“Dog grooming”). This option lets you make the event private, so only you can see it, or public, so others in the group calendar can see it.
Note
For more information about using a group calendar and how to set all its options, head to your Google Calendar on the Web, www.google.com/calendar.
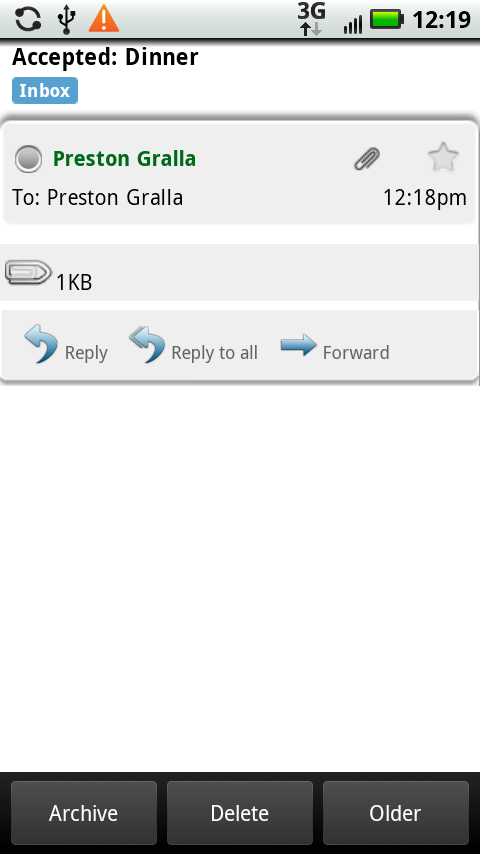
If the appointment you created requires someone else—a dinner invitation, let’s say—he gets an email, and either accepts the invitation or not. Either way, you get a notification emailed to you, with links for responding to the person who accepted if you wish, responding to multiple people, or replying. Tap the appropriate key, type your text, and your email gets sent.
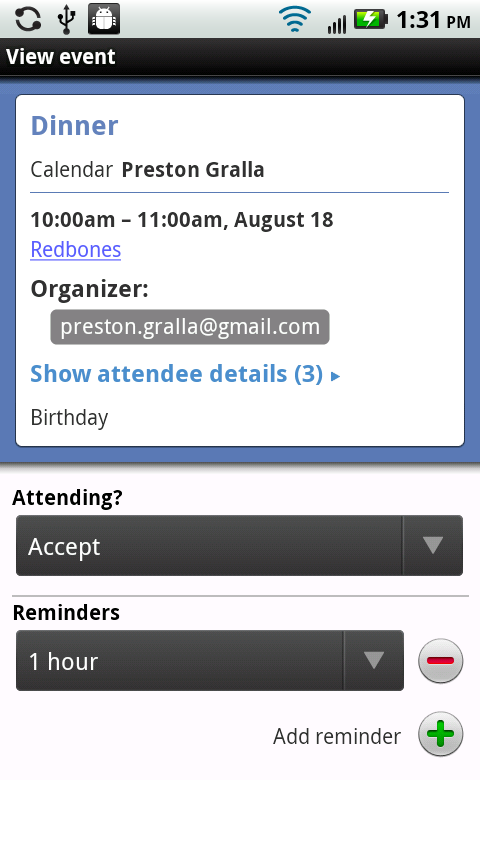
To look at one of your appointments, tap it. You see a summary of the appointment, including the date and time, place, attendees, and any reminders. The summary won’t show all the attendees; tap “Show attendee details” to see not just their names, but their email addresses as well.
To edit something you’ve scheduled, press the Menu key and tap “Edit event”. You’re now at the familiar screen you used to create the event. You can edit everything about the event—name, location, place, duration, and so on. When you’re done, tap Save. If you realize that you don’t want to make any changes after all, tap the Revert button, and your event stays the way it was before you started fiddling with it.
When you’re editing an event, there’s one additional button at the bottom of the screen—Delete. Tap it to get rid of the event.
You can also delete the event without having to look at the detail page. When you’re viewing the summary, press the Menu key, and then choose Delete.
Are you the kind of person who needs to be reminded multiple times about an appointment? The Droid X can do that for you, by reminding you, say, a day ahead of time, and then an hour ahead of time, and then 15 minutes ahead of time.
From the appointment’s summary page, press the Menu key, and then tap “Add reminder”. If you haven’t set any reminders yet, you’ll add your first. If you already have a reminder set, you’ll be able to add a second one. You can keep adding reminders by tapping the “Add reminder” button, because it stays onscreen even as you add additional reminders.
If you’re a social kind of guy or gal, you’ll not only invite other people to events, but you’ll sometimes get invited as well. If they use Google Calendar or the Droid X calendar, they can use them to invite you to events.
You’ll get the invitation by email, and it contains all the important information about the event, including the time and place, who scheduled it, who else is attending, and so on. Tap “More details” to get still more information. When you do so, you can choose to get more details via either your web browser or the calendar itself. In practice, both options have the same result—they launch your browser and take you to a Google Calendar page showing more details about the event.

Down at the bottom of the screen, you can say whether you’re going—Yes, No, or for those constitutionally unable to commit to anything (you know who you are), Maybe. Tap your response, and you go to a Google Calendar page confirming your choice. There you can write an additional note or change your response. The person creating the event gets notified of your status via email.
