Kathmandu, the capital of Nepal, is the gateway for all travelers to that country. While hopeful climbers of Mount Everest begin in Kathmandu and then provision and leave, Kathmandu is a city rich in history and charm, worthy of exploration.
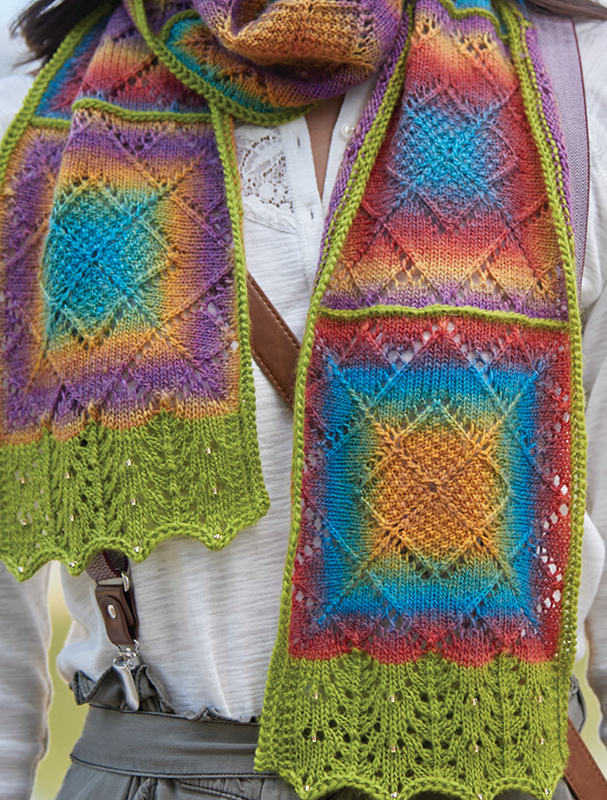
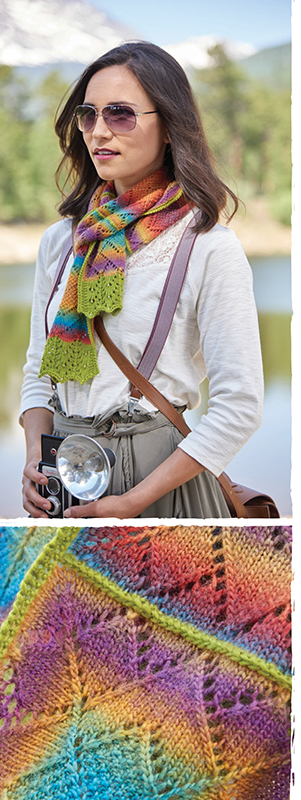
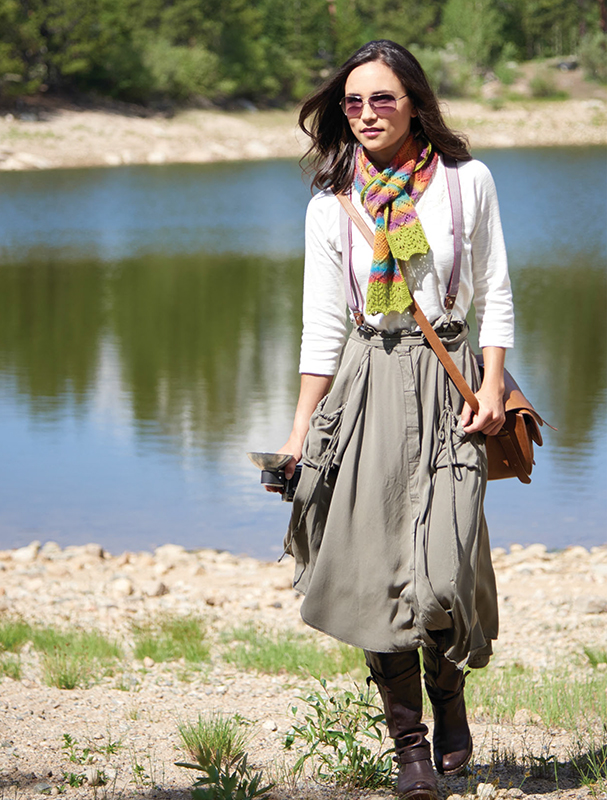
One of the most famous treks is the hike to Mount Everest’s base camp. This trip can take from fourteen to twenty-one days and is strenuous and at high altitude. Inspired by faded but still bright prayer flags on the mountains, this scarf or wrap is made of modular squares in bright colors. Each square is worked from the center out on double-pointed needles and then joined.
This piece can be made wider or longer very easily. It would make a lovely stole or baby blanket.
61⁄2" (16.5 cm) wide and 571⁄2" (146 cm) long.
Fingering weight (#1 Super Fine).
Shown here: Crystal Palace Mini Mochi (80% merino, 20% nylon; 195 yd [178 m]/50 g): #105 Tapestry Rainbow (A), 2 balls; #1110 Lily Pad (B), 1 ball.
See Notes on calculating yarn amounts for making a larger scarf.
Size U.S. 2 (2.75 mm): set of 5 double-pointed (dpn) and 16" (40 cm) and 32" (80 cm) circular (cir). Adjust needle size if necessary to obtain the correct gauge.
Locking marker (m) (optional); smooth waste yarn; 24 size 6/0 Czech seed beads in gold-lined crystal; size U.S. 16 (0.6 mm) steel crochet hook, or size to fit beads; tapestry needle; stainless T-pins; blocking mats; 4 short rigid blocking wires for squares; 4 long (or 2 very long) rigid blocking wires for scarf.
Each square = 61⁄2" (16.5 cm) square, blocked and relaxed.
Beads: See Techniques.
When you work on the double-pointed needles, use the yarn end from your cast-on to mark the beginning of the round. A locking marker can also be used if desired.
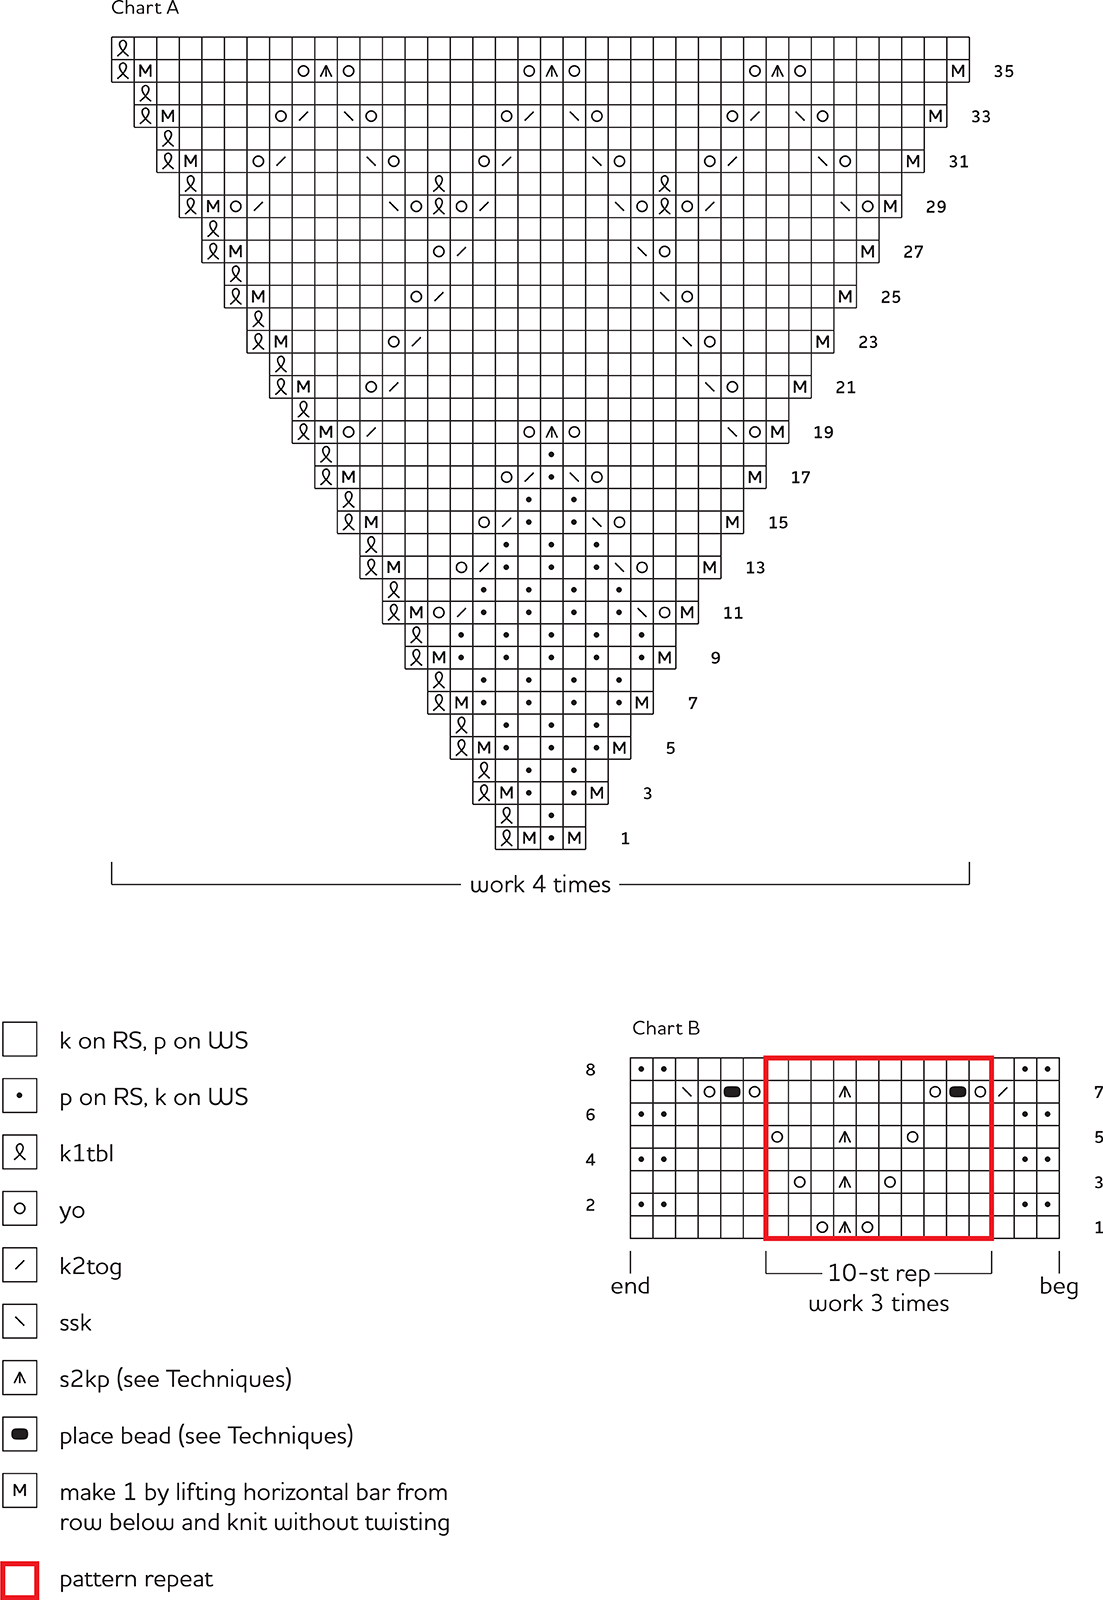
Every row is charted. Chart A is worked in the round; read all chart rows from right to left. Chart B is worked flat; read right-side (odd-numbered) rows from right to left and wrong-side (even-numbered) rows from left to right.
It is very simple to make this piece larger, in both width and length. One ball of the specified yarn will make four or five squares. Each square is 61⁄2" (16.5 cm) square, relaxed after blocking. So you can make the piece longer or wider in 61⁄2" (16.5 cm) increments. Be sure you get more yarn if you make the piece larger. If you make it wider, you will have to join the strips lengthwise using three-needle bind-off, and then work additional repeats of chart B across each edge.
I intentionally made each square different by starting at a different point in the yarn’s color sequence. To allow for even more options, I wound some of the yarn to reverse the color sequence.
With dpn and A, CO 8 sts using long-tail method (see Techniques). Distribute sts evenly over 4 dpn, with 2 sts on each needle. Use yarn end or place marker (pm) for beg of rnd and join for working in rnds, being careful not to twist sts.
Rnd 1: [P1, k1tbl] 4 times.
Next rnd: Work Rnd 1 of chart A 4 times around—8 sts inc’d.
Work Rows 2–36 as est, changing to cir needle when there are too many sts to work comfortably on dpn—152 sts, with 38 sts in each section.
Cut a piece of waste yarn at least 35" (89 cm) long. Place sts onto waste yarn and knot ends tog.
Make same as for square 1 (see Notes about beginning each square in a different point in the yarn’s color sequence).
Use yarn tail from the cast-on as your marker while on the double-pointed needles.
Weave in CO tails of squares but do not trim. Soak in cool water until fully saturated (about 30 minutes). Press to remove water, roll in a towel, and blot to remove extra water. Slip a rigid blocking wire in each edge of square, and pin out to 7" (18 cm) square.
Allow to dry completely before removing pins and wires. Squares will relax to finished measurements after removing pins. Trim ends of CO tails.
Note: When joining the squares, leave the waste yarn in place until all the squares are joined and the edging has been worked. Be careful not to split the waste yarn when returning stitches to the needles.
Return held 39 sts (from one twisted corner st to next twisted corner st) along one side of first square to one dpn leaving waste yarn in place until the end. Rep with a second square.
Holding 2 dpn parallel and with WS tog (RS facing out), with B, join squares using three-needle BO (see Techniques).
*Return held 39 sts along the opposite edge of square 2, from twisted corner st to next twisted corner st onto dpn as before.
Return held 39 sts along one side of third square to one dpn. Holding 2 dpn parallel and with WS tog, use B to join squares using three-needle BO.
Rep from * until all squares have been joined.
Return held 39 sts along opposite end of last square to shorter cir needle. Join B to beg with a RS row.
Row 1: Beg at right edge of chart B, work 3 sts, work 10-st rep 3 times, then work 6 sts at left edge of chart.
Work Rows 2–8 of chart as established. Rep Rows 1–8 once more, then work Rows 1–7 once.
Next row: (WS) Knit.
BO row: (RS) K2, [return 2 sts just worked to left needle tip, k2togtbl, k1] to last 2 sts, k2togtbl. Cut yarn leaving 9" (23 cm) tail, pull tail through rem st.
Work edge along rem short end same as first.
With longer cir needle, with B, and with RS facing, pick up and knit 13 sts in vertical strands of garter st along side of lace edging, pick up and knit 1 st in twisted corner st, [knit held 37 sts, pick up and knit 1 st in join between squares] 7 times, knit held 37 sts, pick up 1 st in twisted corner st, then pick up and knit 13 sts along side of lace edging—331 sts.
Next row: (WS) Knit.
BO same as for lace edging.
Work edging along rem long side same as first.
Remove all waste yarn carefully.
Weave in all ends, neatening up beg and end of each three-needle BO.
Soak in cool water until fully saturated (about 30 minutes). Press to remove water, roll in a towel, and blot to remove extra water. Weave one or two long wires along BO edge of each long edge. Pin wires out to even width. Pin out points along short edges at beads.
Allow to dry completely before removing pins and wires. Trim ends.
