Chapter 4
Chapter 4
Building up your strength: ‘nine months in, nine months out’
The six months beyond the fourth trimester brings huge changes for your baby: the transition from relatively passive, sleepy* and portable newborn to a fully fledged, moving, communicating, rapidly unfolding and demanding personality. The phrase ‘nine months in, nine months out’ is used as an encouraging way of saying that you built your baby for nine months, so you should look to that full period after your baby has left the premises to gradually ‘get back to the way you were’: whether that’s ‘shedding baby weight’ or feeling fitter and stronger, ‘your old self’. *(NB no eye rolls if that wasn’t your experience, it wasn’t mine either first time round – he was very cranky, neither passive nor sleepy…)
I definitely prefer this angle to the idea that you should be back in your ‘pre-pregnancy jeans’ (or modelling on the catwalk, thanks Heidi Klum) two weeks after birth, but I still feel that nine months is the blink of an eye postnatally for some of us and we should always look at ourselves as new, today, rather than trying to ‘get back’ to what we may have been before. In this six months after your fourth trimester, you are hopefully feeling ‘more normal’ and slightly more used to catering to the daily (and nightly) demands of a small person, and your energy levels may be beginning to rise. Any pelvic floor and diastasis recti issues may be feeling stronger and perhaps ‘fixed’. But equally … you may be wandering around in a zombie state, sighing about how tired you are, wishing your baby would sleep more … while simultaneously wondering where on earth the time has gone and deeply feeling you want to press pause and keep them from growing so fast. If you have a particularly sleepless baby/babies and/or have had no time to devote to mothering yourself, you might be feeling heavy and exhausted. Remember, lack of sleep/rest inhibits the healing process, so an element of depletion, fatigue and weakness is to be expected if you’re not getting any real rest.
Intense fatigue a few months in may be purely due to your beautiful little sleep vampire, or it could be related to something else – it’s worth investigating thyroid issues or iron deficiency (anaemia) for example at this stage to rule that out, if it’s a full-body type of fatigue that you’ve never experienced before. And, mental health flags – fatigue and depletion can have an impact on your emotional resilience, so be aware of your inner landscape. You may well have lost loads of weight and be in your pre-pregnancy jeans but still suffering from incontinence, which shows that although you’ve ‘bounced back’, your insides are still not fully healed. You may have ongoing weakness in your core, or pelvic organ prolapse, which means your rehab journey is looking like an extended one – it truly depends on you and your own personal postnatal experience. There is no ‘you should be feeling … at this stage’ to judge yourself against. Meet yourself where you are now.
In this six-month period the pressure to be ‘feeling fine’ is strong. Take it at your pace and don’t compare yourself to other mums – particularly not on social media. Physiologically, your systems will most likely have settled down by now and the hormonal fluctuation is minimal once your periods have returned. But there is always flux in our female cycles so it’s worth noticing when your cycle settles down to be even or regular once it has returned. And if it doesn’t, investigate with your GP why this might be. If you’re still breastfeeding, the scientific jury is out as to whether this impacts on your ligament strength beyond the first couple of months. I prefer to err on the side of caution to say that it possibly does, and that it’s a good idea to look after yourself with that in mind: try to take it easy with the HIIT and dynamic yoga if you’re breastfeeding. Even if you’re not, your menstrual cycle has an effect on your propensity to injury. Hormones may have an impact on prolapse symptoms, for example oestrogen dip may increase severity so just before your period you may find that symptoms are more apparent. It’s key not to see your recovery as linear: some weeks you may feel weaker than others. There will be times when you need to preserve energy, and others when you feel you’re raring to go. Try not to get frustrated, but instead piece it together by tracking how you feel on your cycle, and plan accordingly.
If you’re still breastfeeding (undoubtedly a wonderful thing beyond the first six months but, obviously, no judgement if you’re not and never did), it physically continues to deplete your energies so keep track of your water intake and optimise your diet in just the same way as you hopefully could in the fourth trimester.
Babies only get heavier, so at this stage you’re placing increasing, more repetitive pressure on your pelvic floor, abdominals, neck, shoulders and knees constantly lifting, carrying, and getting up and down from the floor as you play with your ever-more mobile and ‘into everything’ baby. You might be returning to work and into that adult world of desks and juggling stress. Your core needs to be strong to make sure you don’t succumb to aches and pains (it’s in this period and the early toddler time with both my children that I injured my knee and shoulder – both due to lack of deep core strength and sleep, and the general pack horse demands of small babies, so it’s a real hotspot in the postnatal healing process). You need to release the tension of all the additional weightlifting you’re doing day to day.
EXPERT ADVICE
Jo Diplock, PT and Pilates teacher specialising in Motherhood Core Restore, and mum of two
The biggest thing to remember is that your body has undergone a massive journey and change. Your organs will spend the nine months after birth reshuffling themselves back into their original positions. It’s never been a more important time to be kind to yourself and not succumb to pressures of an exercise workload that’s too progressive for the level your body is at.
Meet your body where it is now, and using Pilates and breath work you’ll be able to lay solid foundations for getting back into full fitness and strength. House foundations are made from concrete, which needs time to set and can never be rushed – that’s exactly the approach you need to take. Reconnecting, re-educating in a lot of parts and rehabbing your body one step at a time.
Symptoms of weakness – achy back, knees or leaking pelvic floor – are your body’s way of telling you it’s not strong enough for the level you are living life or training at. Never ignore those symptoms. The joy of Pilates and breath connection work is that you’ll heal all the deep core muscles and maybe even come back stronger than you were before.
Instagram @the_motherhood_movement
Facebook https://www.facebook.com/themotherhoodmovementofficial/
In this six-month period we’ll venture more into Stage 3 territory. But we’ll continue to revisit Stages 1 and 2. Be curious about your strength and how your body–mind is coping with motherhood. Postnatal recovery isn’t linear and you might find that in the six months after your baby emerges beyond ‘newborn’ you feel totally amazing and ‘back to normal’, full of energy and feeling great … but also you could feel even weaker than during the initial postnatal period, which can make you feel frustrated, depleted and low. This is to be expected with the cumulative depletion of sleep, of breastfeeding, and responding to your baby’s ever-changing needs and demands.
Check in with the four pillars: Rest, Rehydrate, Refuel, Revitalise. Look at where you are within your own personal progress framework: Stage 1, 2 … now ready for 3?
Posture tips for your changing shape
Revisit the posture tips regularly to notice your patterns of movement and your lifting technique. It’s these, rather than any ‘exercise’ that you might be doing, that put the most pressure on your pelvic floor and core muscles every day. Notice whether you’re beginning to carry your baby on the same side whenever you pick her up. Notice whether you have any awareness of engaging strength in your centre when you are putting him in the car seat, or lifting her out of the bath. If not, commit to checking in with that more regularly.
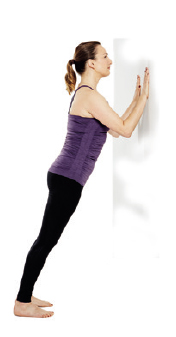
The buggy is a good trigger for reminding you to do so. Use the buggy handles: place your hands on the handle/s and exert a bit of pressure down into your hands while standing strong into your feet, to encourage you to soften your shoulders and stand tall. Do the Back Stretch Against the Buggy/Wall, some Pliés or Squats and a calf stretch whenever you find yourself standing still. Feel your shoulders soften into your back and your heart centre lift. Grow tall like a sunflower. Often, we’ll push the buggy with one hand and scroll on our phones with the other. This multitasking is doing our bodies (and spirit) no favours.
The Mummy MOT
Now is a great time to have a check-up with a women’s health physio if you haven’t already. Your initial stage of automatic healing has completed and now it’s up to you to take more responsibility for things going the way you want them to in terms of your strength and resilience. Remember, postnatal issues don’t just disappear if ignored. A client recently contacted me to begin postnatal core restore classes. Her ‘baby’ is now three and she was ‘hoping her diastasis recti would have gone away by now’ – healing doesn’t work that way sadly: not when you’re lifting ever-increasing weights every day but not adapting your posture or deep strength.
Maybe the newborn fog has lifted and you’re keen to pay more attention to your pelvic floor and core. Go to your GP as a first port of call to ask to be referred to a physio. If you can, invest privately in an assessment.
I’ve included details in the Resources for places to go for further information about women’s health physiotherapy and how to find a practitioner near you.
BUILDING UP YOUR STRENGTH
Your baby is getting bigger and more mobile. So, let’s get strengthening.
CURL-UPS
Stage 3
If you’re getting yourself out of bed every day, picking up your baby, lifting the car seat, pushing your buggy, you’re using your abdominals. A gentle Curl-up, performed with care and conscious breathing, creates less intra-abdominal pressure (load on your pelvic floor/pull on your diastasis recti) than getting up from the floor or lifting a heavyweight toddler. So, although we need to proceed with caution, it’s an important part of your healing toolkit. Wait for 12 weeks post Caesarean before making this a regular part of your workouts, or at least until you have no tenderness in the scar area and you feel you can recruit your pelvic floor (or have been checked by a physio).
Curl-ups ask you to find your X Factor – Body Control Pilates® describes the X factor as your rib-to-opposite-hip connection, an imaginary X across your body connecting your muscle energy together.
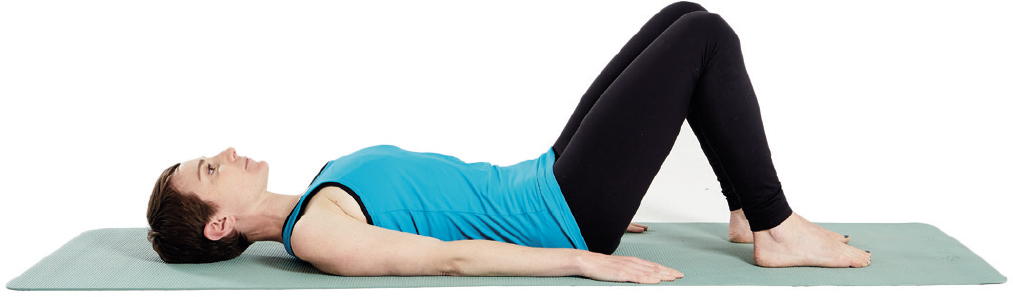
•Lie in Relaxation Position. Place your hands behind your head.

•Breathe in and lengthen the back of the neck. Keep your head on the floor but tuck your chin to your chest.
•Breathe out and draw in and up into your pelvic floor and lower abdominals. Begin to lift your head and the upper back off the mat.
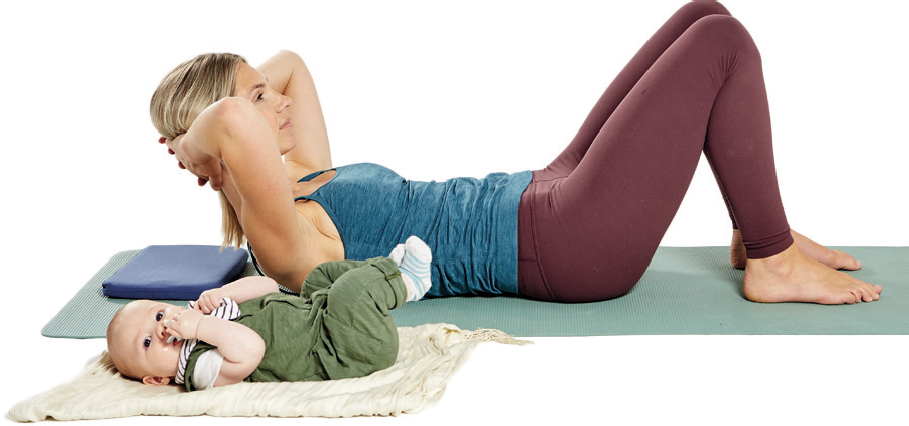
•Breathe in and release your hands, placing them behind your thighs. Maintain a neutral pelvis, with heaviness in your sacrum at the back of your pelvis. Think ‘soft, heavy bottom’.
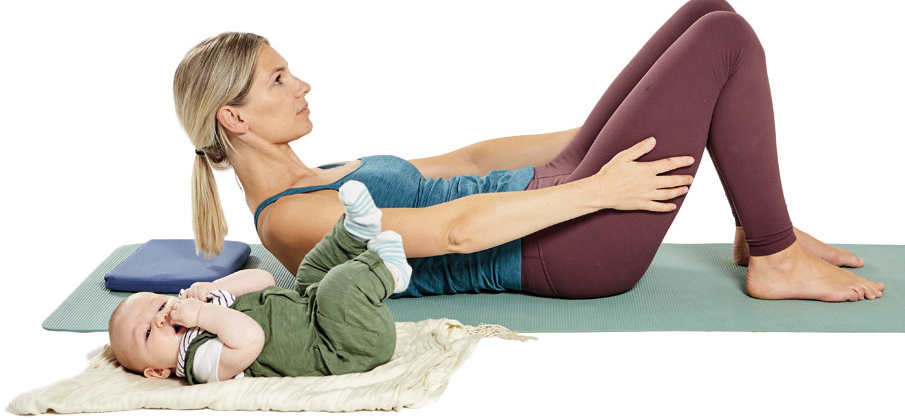
•Breathe out and gently hold on behind the thighs to support you lifting a few more segments off the mat.
•Breathe in to release the hands back behind the head.
•Breathe out to lower back down with control.
•Repeat 5 times.
If you see any doming in your abdominals or feel pressure in the pelvic floor – come back to try this later after you’ve continued with your Stage 2 deep core work.
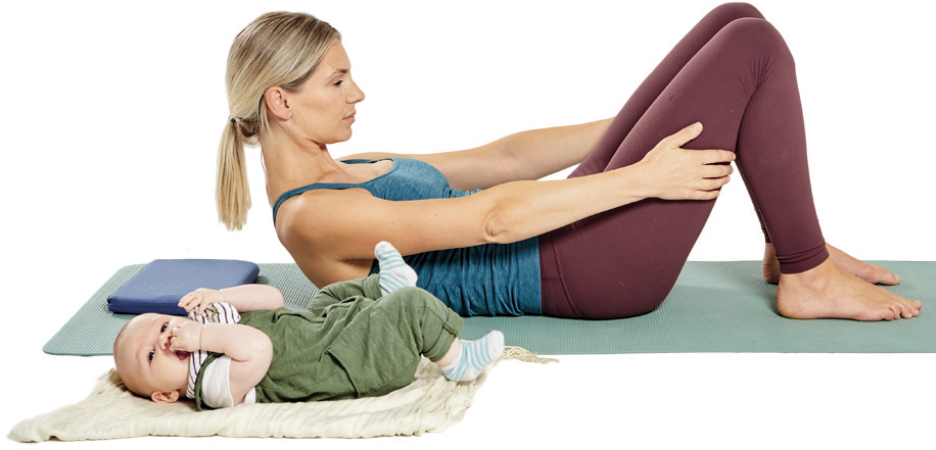
CURL-UPS WITH LEG SLIDE
Stage 3
This is a great way of really finding the deep core connection and awareness of your pelvic stability.
•Start in Curl-ups position.
•Breathe in to prepare. On an out-breath, curl up with control. Simultaneously, slide your leg away, as for Leg Slides.
•Breathe in and lower back down, as you glide the leg back in. Repeat up to 5 times on each leg.
Watchpoint
Control any movement of the pelvis with your deep core engagement.
DOUBLE KNEE FOLDS
Stage 3
This requires core control and abdominal strength. We need to deeply recruit pelvic floor and abdominals properly to control the movement and ensure that there is no doming. If there is doming, or you can’t prevent your pelvis from tilting/your back from arching, this exercise is too much for you right now so you need to bring it back to Stage 1 Awareness. Practise Single Knee Folds until you have the required deep strength.
•Breathe in to prepare.
•Breathe out, float one knee in as for Single Knee Folds. Try to maintain neutral spine and pelvis.

•On the same breath, deepen your connection to your centre, float the second leg in. If you need to, consciously tuck the pelvis and imprint your lower spine for support.
Make it a conscious movement rather than a result of the weight of the legs tipping your pelvis.
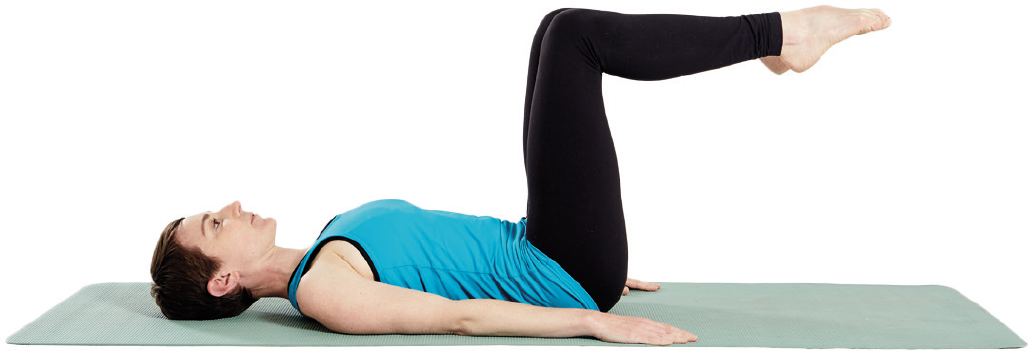
•Breathe in, soften the shoulders and relax your torso.
•Breathe out, stay connected to your centre as you float the first foot back down, followed by the second.
•Repeat up to 5 times.
Watchpoint
Try not to brace the body: there should be ease of movement.
BACK RELEASE OVER ROLLER
Stage 2
The foam roller is such a fabulous piece of kit for mums. This exercise really gets into those upper-back tense knots that babies and children create, plus it requires balance and control so we’re gently working our deep core muscles, too. If you don’t have a foam roller, I’d advise getting hold of one as even just lying your spine along the roller counteracts the mum hunch and stimulates core engagement. If not, you can simulate this by placing a small ball in between your shoulder blades, or even placing two tennis balls underneath your shoulder blade area.
•Place the roller on your mat. Sit down in front of it and then with control release yourself back so that your shoulder blades are balanced on the roller. Take your hands behind your head and release your bum down into the mat, knees bent. Breathe in to lengthen the spine and soften your ribcage into your torso.
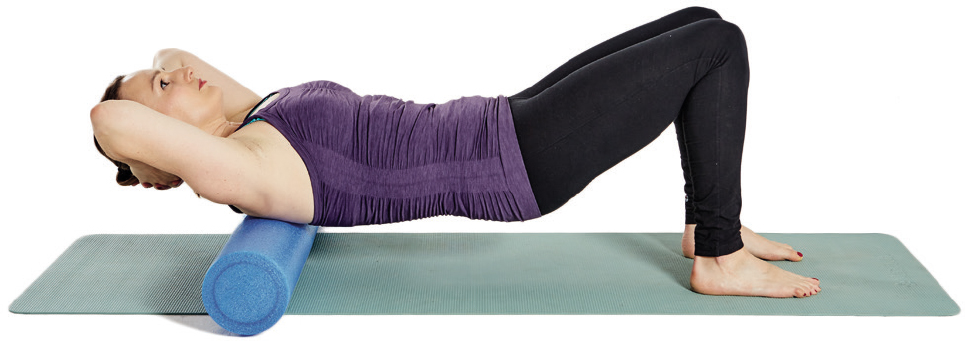
•Breathe out and lift your bum in line with your ribs. Breathing normally, roll your upper body slowly, forwards and back. Massage into the upper spine – maintaining neutral rather than doing any arching and tucking.
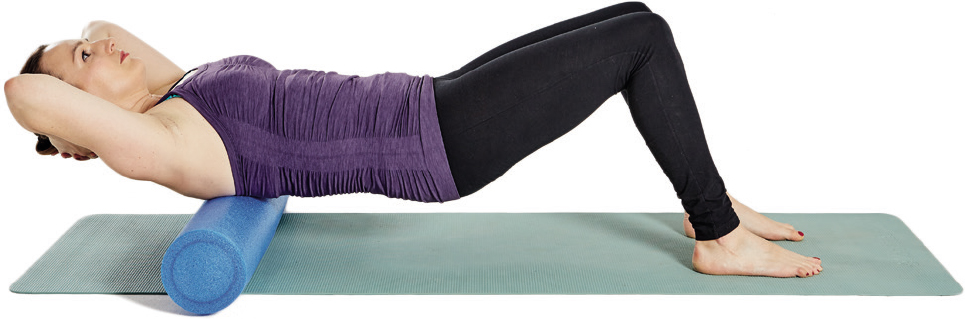
•Gently release your bottom back to the floor and roll yourself off the roller.
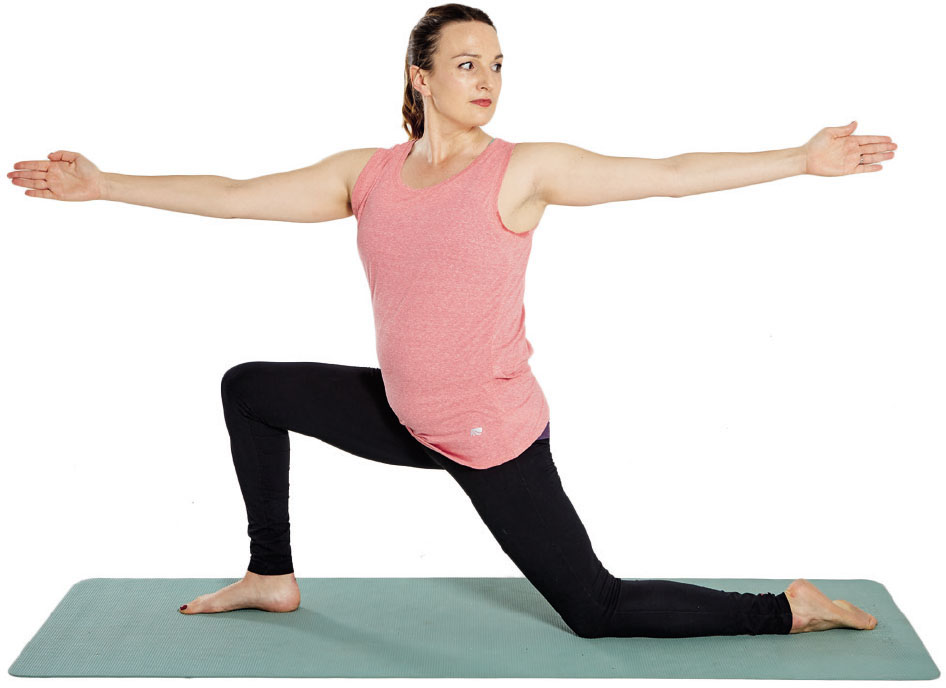
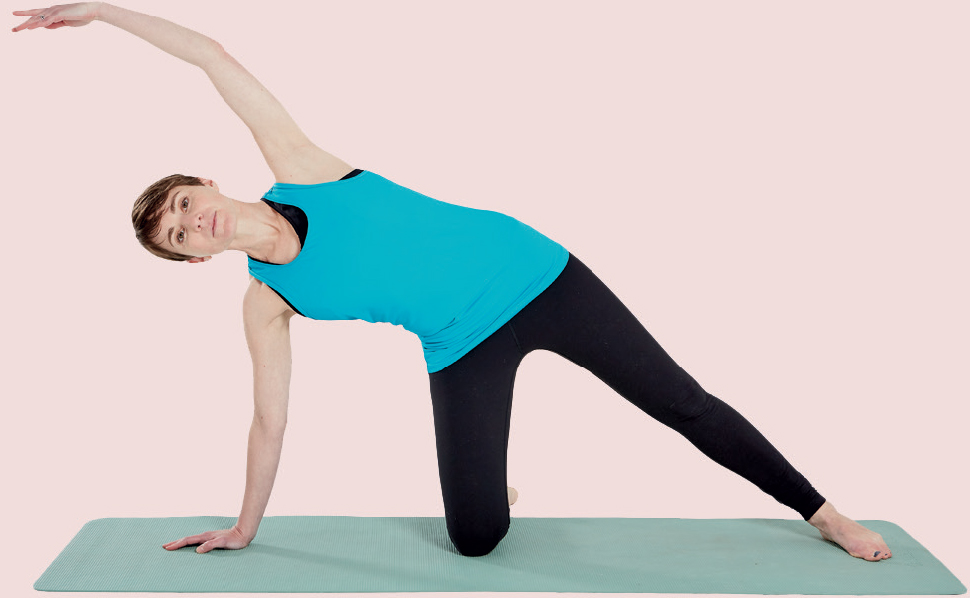
HIP FLEXOR BOW AND ARROW
Stage 3
This exercise challenges your balance and stretches the hip and shoulder area. Quite a lot of core work is required to keep you stable, but it’s low impact. If it’s too much, you can do exactly the same movement from High Kneeling.
•Come into a high Lunge as for upright Hip Flexor Stretch, then bring your right knee forwards. Release your weight with control forwards over your front knee, to open into the left hip. Lengthen both arms out in front of you at shoulder height. Relax the shoulders, your palms facing each other.
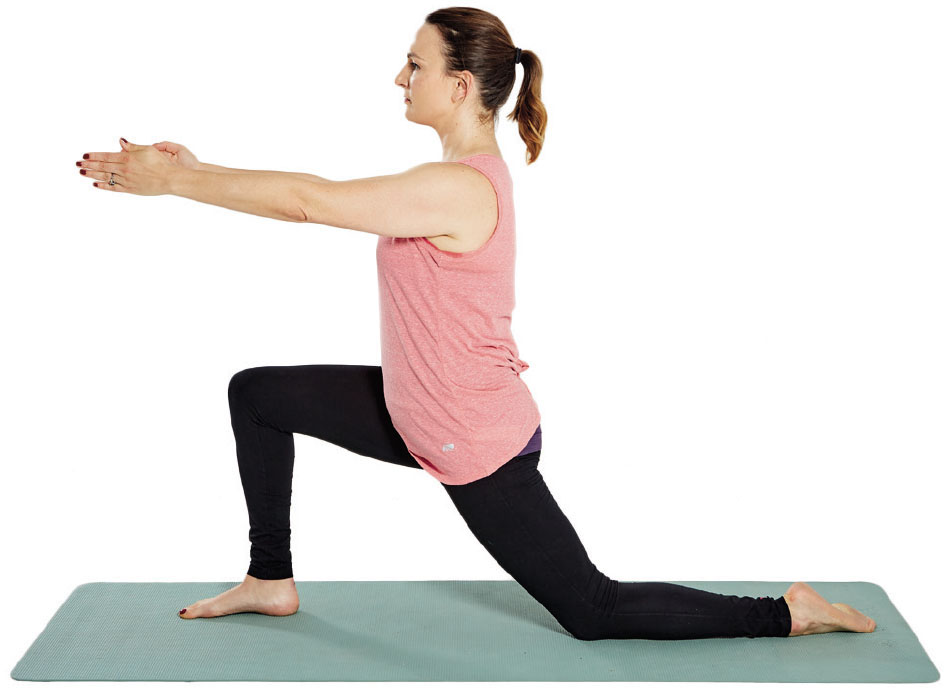
•Bend your elbow and draw back the left arm, twisting your spine to follow the movement. Straighten the arm and reach it back behind you, looking back. Open into your left hip as you stretch the chest.
•Float the arm back to centre. Repeat 5 times on this side, then swap to the other side.
Watchpoint
Make sure you aren’t arching your back. Maintain a strong centre all the time.
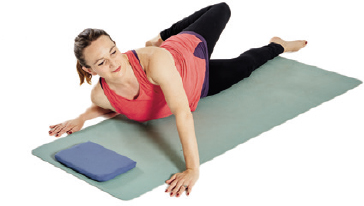
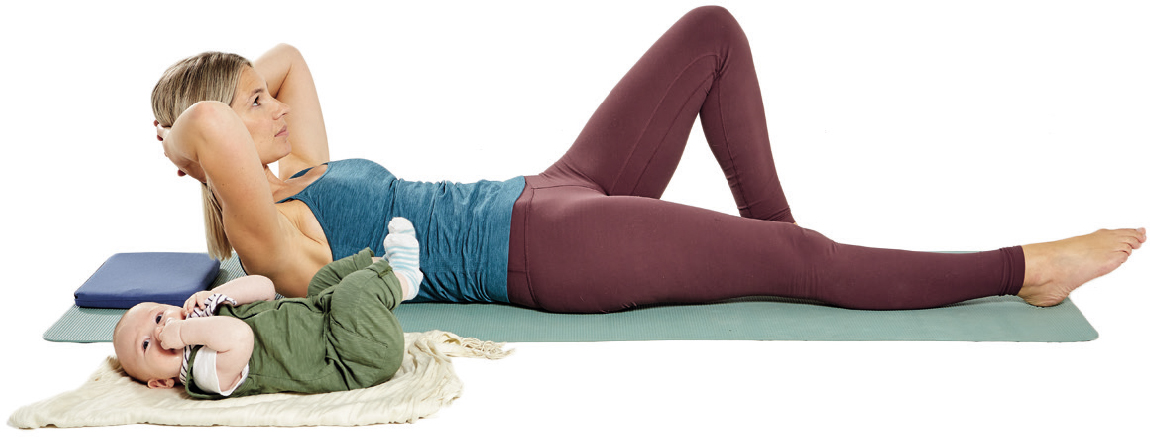
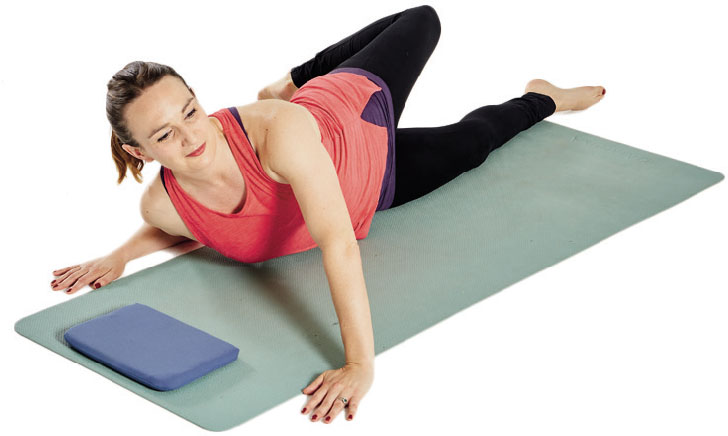
SIDE-LYING ELBOW TO KNEE
Stages 2–3
This exercise is brilliant for strengthening the oblique muscles and honing your coordination, working on the strength of your hips and bum. The aim is to keep your torso and spine long and stable while the limbs move. It’s slightly more dynamic and fast paced than some of the other exercises, so will get your blood flowing a bit more.
•Begin lying on your side, with your arm outstretched and a pillow in between your head and your arm. Bend your legs in to 90 degrees, your spine long and in neutral.
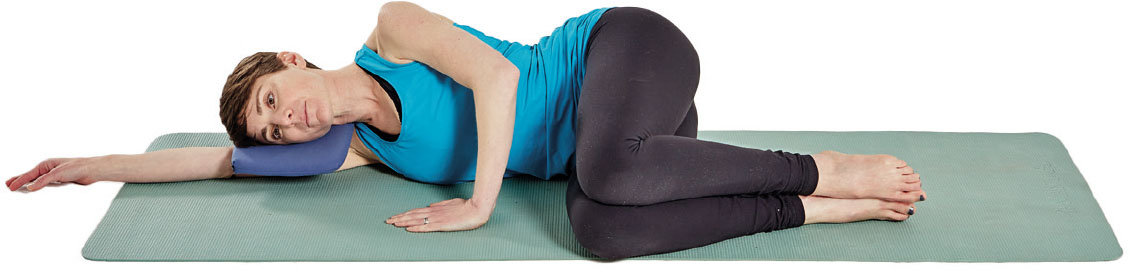
Breathe in to lengthen and prepare for movement, then breathe out to release your top arm up and over your head, and your top leg out in line with your hip.
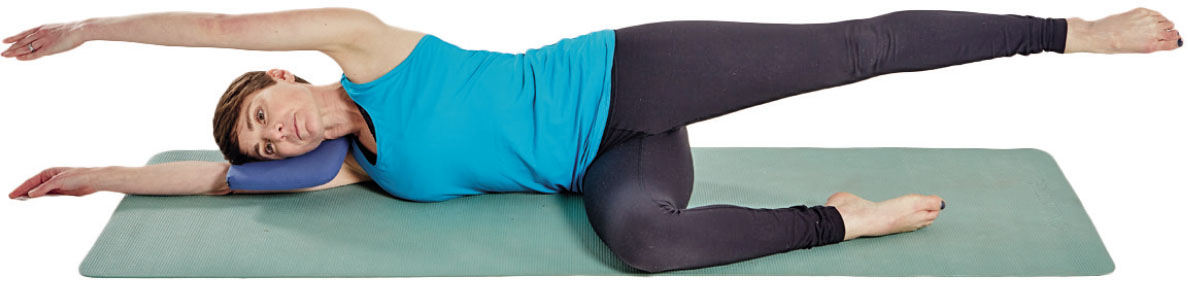
•On an out-breath, bend your top arm and knee in towards each other, then breathe in to release them away with control.
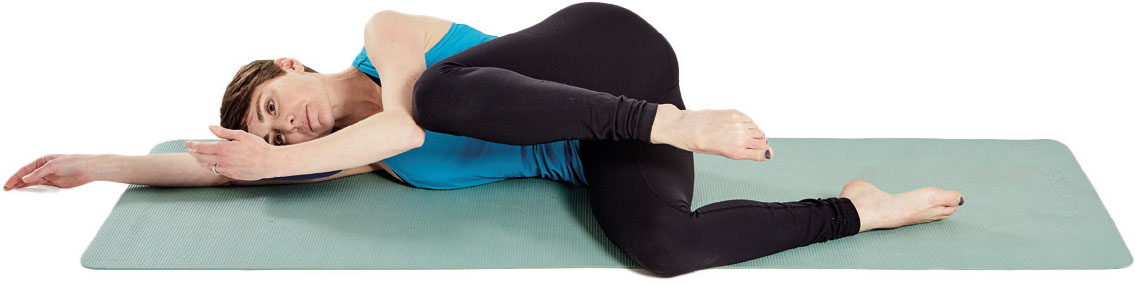
•Repeat 10 times.
•Finish by stretching the top arm and the top leg away, relaxing them on to the floor and breathe into the length of the top side of the waist. Then either move to another side-lying exercise, or move on to the other side.
MAKE IT HARDER
This is a much more challenging version that needs more core strength, balance and control.
Stage 3
•Come into a supported Side Plank position: from High Kneeling, reach your right arm down to the floor. Then reach your left arm up above your head in a diagonal and the left leg away from the body in the same diagonal. Breathe in to lengthen.
•On an out-breath, bend the top arm and leg in towards each other, above your waist. Stay lifted and strong in your centre. Reach them away to the start position as you breathe in.
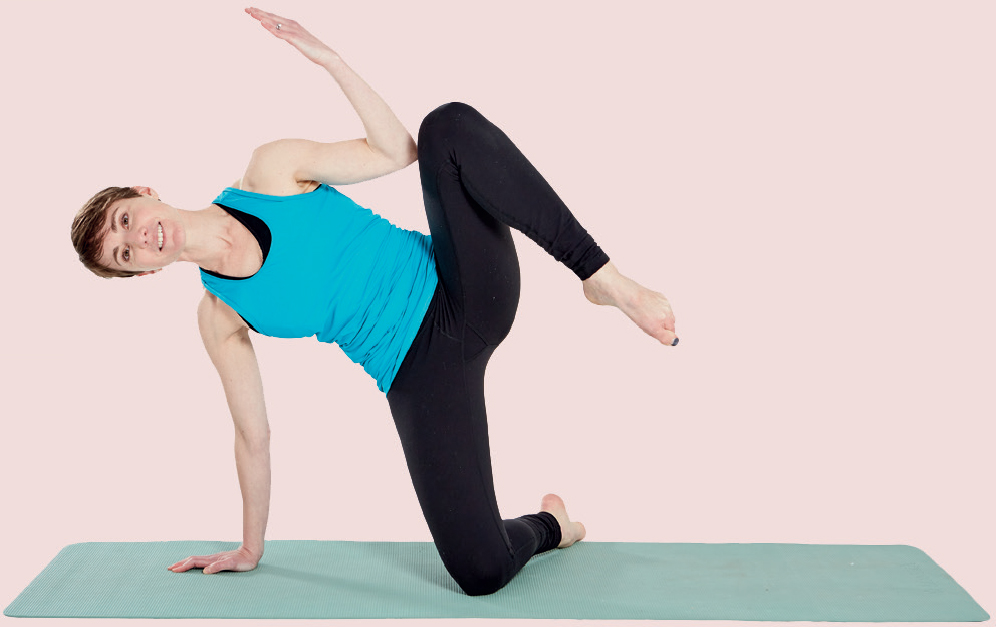
•Repeat 10 times. Finish by releasing into Rest Position, before changing sides.
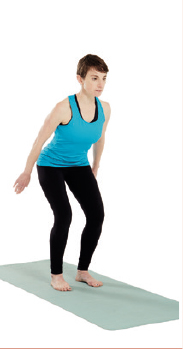
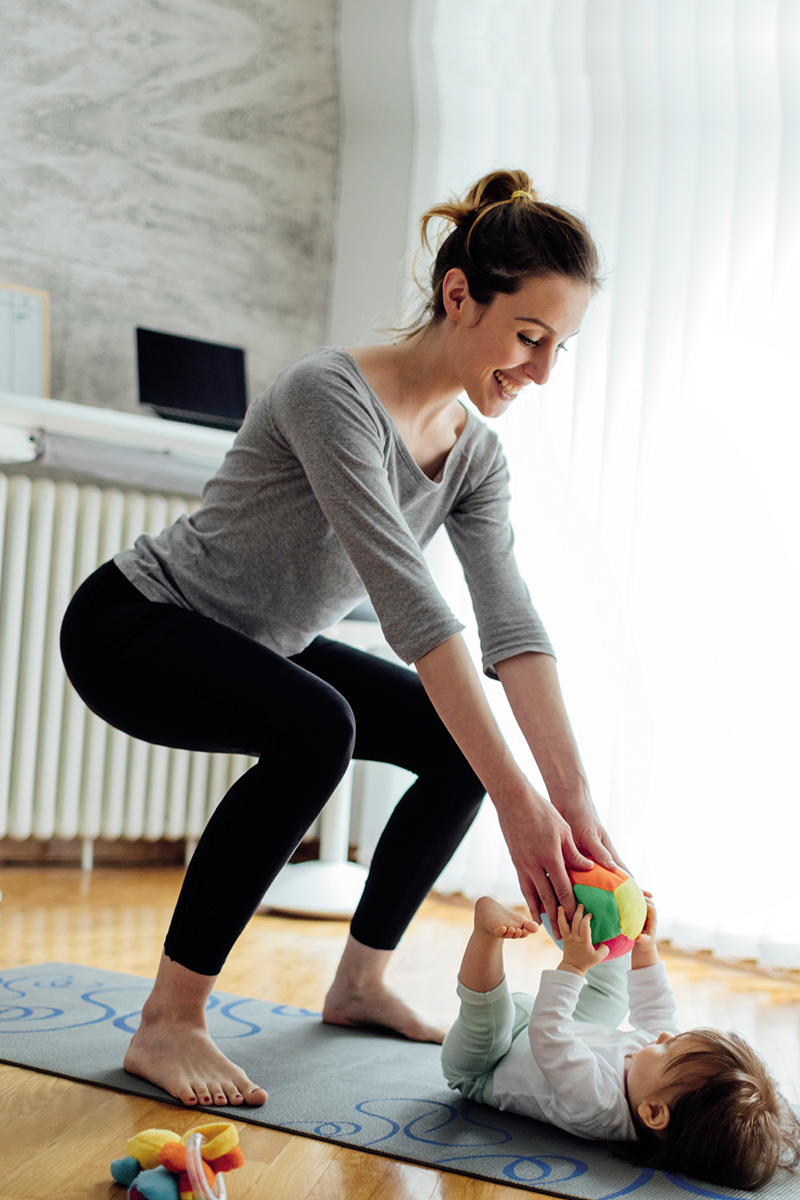
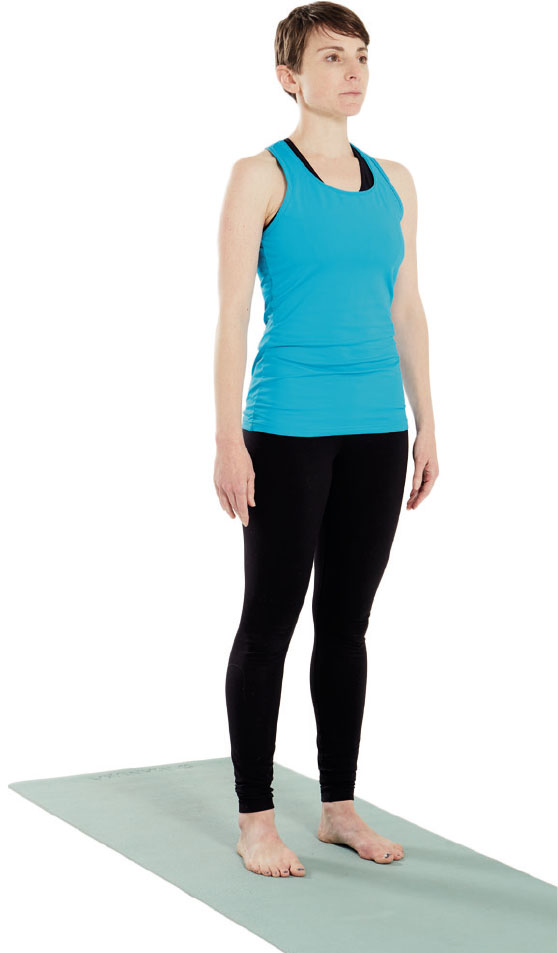
SQUAT WITH ARM CIRCLE
Stage 3
Squats are a brilliantly functional Pilates exercise. You’re squatting 1700 times a day with small babies and children anyway, so let’s make it count. Take care if you are still suffering from pelvic floor dysfunction or pelvic organ prolapse. Deep squats place quite a load into your pelvic floor so you must take care to hinge properly into your hip joints, rather than tucking the pelvis underneath you as you bend. If you feel any sensation of bearing down in your vagina, avoid this exercise and seek advice from your physio.
This version of the Squat helps you to learn to stabilise your pelvis, challenges your balance, opens your shoulders and strengthens your thighs, hips, knees and ankles.
•Stand, arms relaxed by your sides, palms facing in towards your thighs.
•Breathe in to lengthen the spine. Bend the knees and hips simultaneously and hinge forwards from the hips. Lengthen your arms back in line with your spine, palms pressing back.

•Breathe out and straighten through the backs of the legs to stand upright once more, simultaneously floating the arms forwards and up above the head.
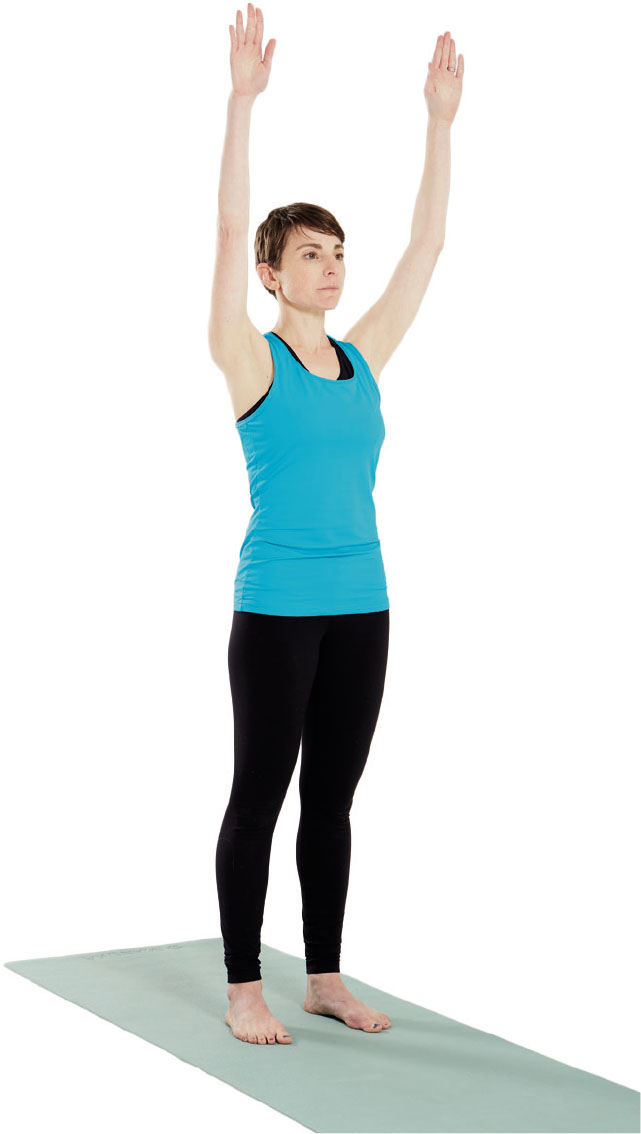
•Circle the arms out and back down by your sides as you breathe in and simultaneously rise up on to your toes.
•Lower your heels with control, back to the start position.
•Repeat up to 10 times.
Watchpoints
Imagine a pole resting down the back of your body as you squat: head, shoulders, lower back. Make sure you are sticking your bottom directly behind you, rather than tucking your pelvis under. Think long tail.
Only lower as far as you can comfortably lift yourself back up again.
Keep the hips, knees and ankles parallel.
Imagine the crown of the head and the tailbone lengthening away from each other.
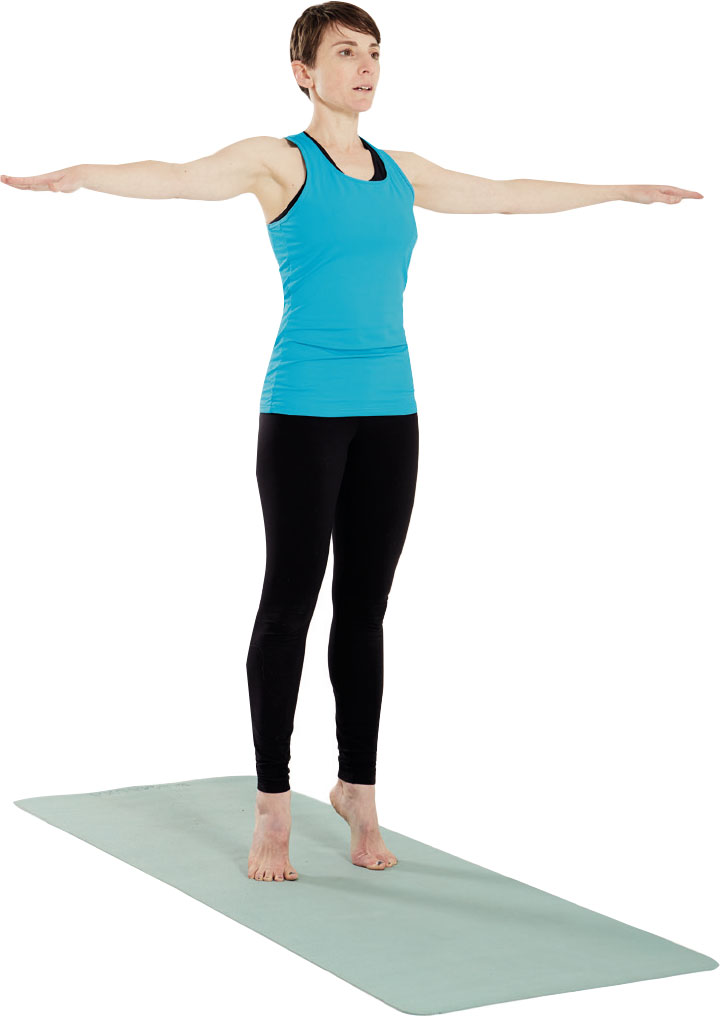
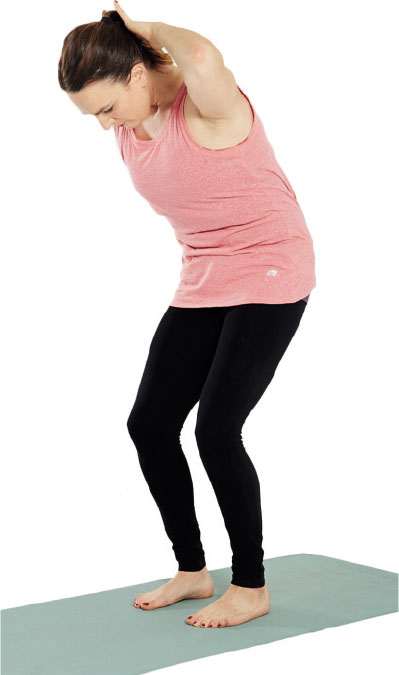
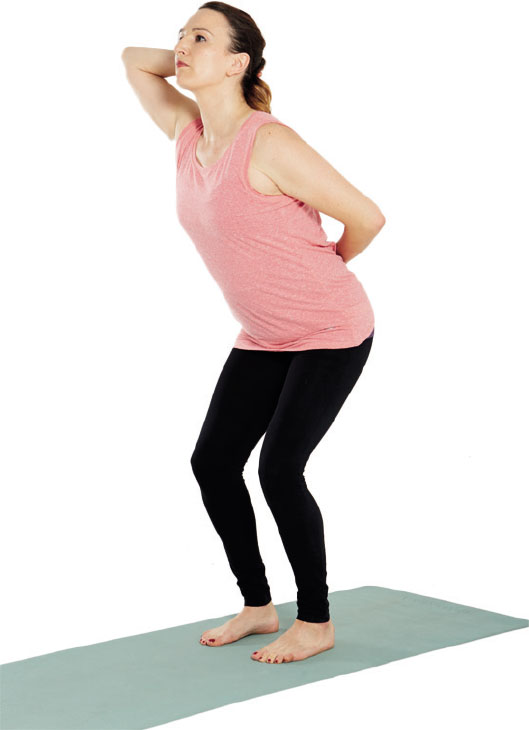
STANDING CAT WITH WINDMILL ARMS
Stages 2–3
This exercise gives you a great feedback for where your spine and pelvis are in space, which will help you gauge your posture day to day. It works your core strongly but in a supported position, and encourages flexible shoulders. You can also do this without the arm movement, resting the hands on your thighs.
•Standing tall, hinge forwards into a Squat.
•Take one hand on to your pelvis, palm facing out, the other palm behind your head. Lengthen your spine into neutral and actively connect the back of the head into the hand.

•Breathe in to lengthen, as you breathe out, tuck your tailbone underneath you and roll your spine into a standing Cat.
•Breathe in and maintain the curl of the spine, as you windmill your arms to swap positions.
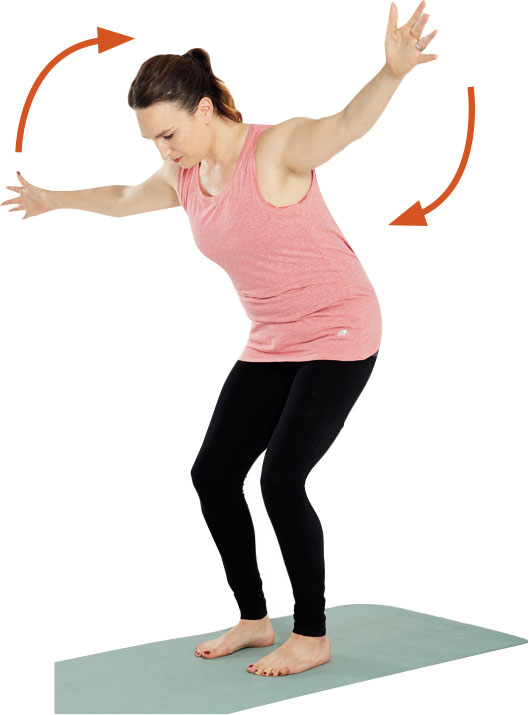
•Breathe out and uncurl, extending into a standing Cow with a gentle extension of the upper back. Windmill your arms back.
•Breathe in to return to neutral.
•Repeat 6–10 times.
ROLL-BACKS WITH BAND
Stages 2–3
This exercise is perfect for strengthening the deep abdominals without too much load, so it’s suitable for any diastasis recti. If you see any doming at all, remain at a lengthened active C-curve (Stage 2) rather than rolling back, until you can control the load and your deep supporting muscles can support you enough. You can do this without a band, either resting your hands lightly behind your thighs, or lengthen them out in front of you in line with your shoulders (which is harder).
•Sitting tall in your sit bones, lengthen the legs out in front of you and loop a band around your feet, taking one end in each hand. Soften the knees, heels down into the floor, toes up.
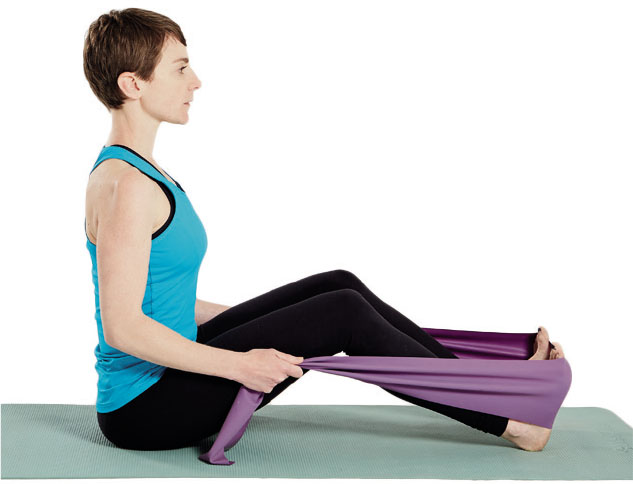
•Breathe in to lengthen tall. As you breathe out, connect to your centre and tuck your tailbone underneath you, lengthening into a C-curve.
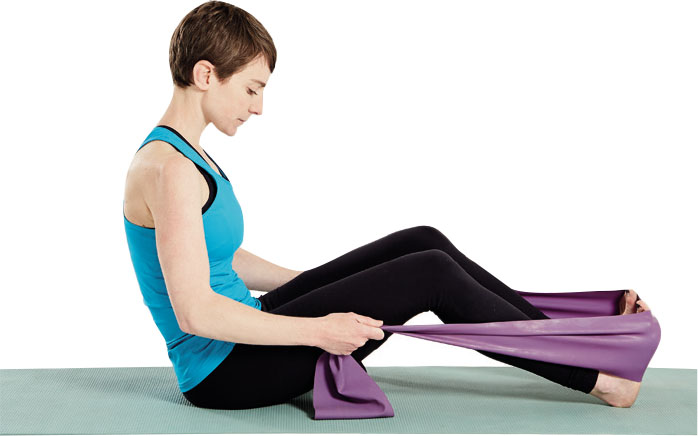
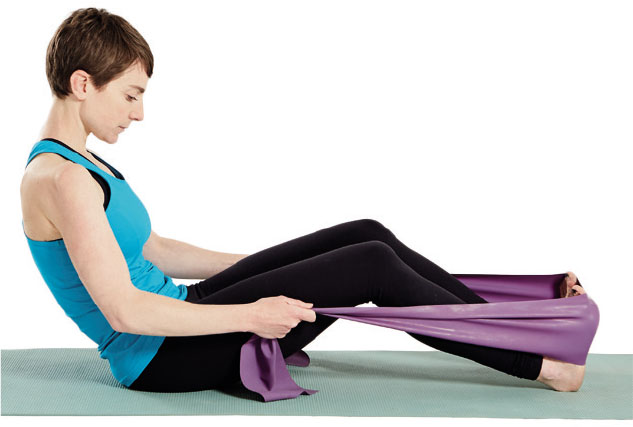
•Either stay here, or, release your C-curve back, holding softly on to the band, elbows bent.
•Breathe in to lengthen and stay engaged into your centre as you maintain the position.
•Breathe out to roll your C-curve forwards, then roll up on to your sit bones, back into neutral.
Watchpoints
Keep the shoulders relaxed, try not to let them creep up to your ears. Avoid slumping back – this is an active lifting curve, so maintain a strong centre, feeling opposing length between the crown of the head and tailbone. Try to avoid ‘gripping’ with the hip flexors – your strength comes from deep within your pelvic floor and lower abdominals.
MAKE IT HARDER
Stage 3
When you can definitely manage your abdominal strength with no doming, you can add more challenge with a rotation.
•When you are curled back, stay curled and bend your elbow to open your band out to one side, turning your torso to that side. Feel your waist muscles working to support your torso.
•Return to centre, then bring your C-curve forwards and release back to neutral.
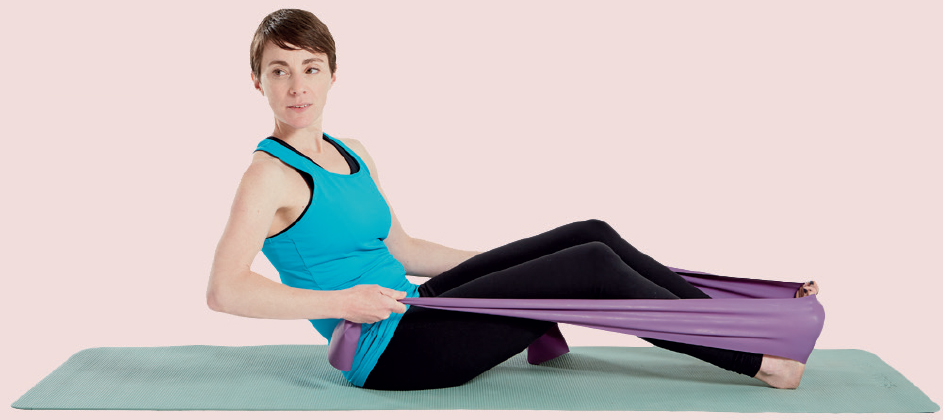
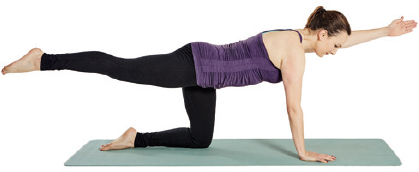
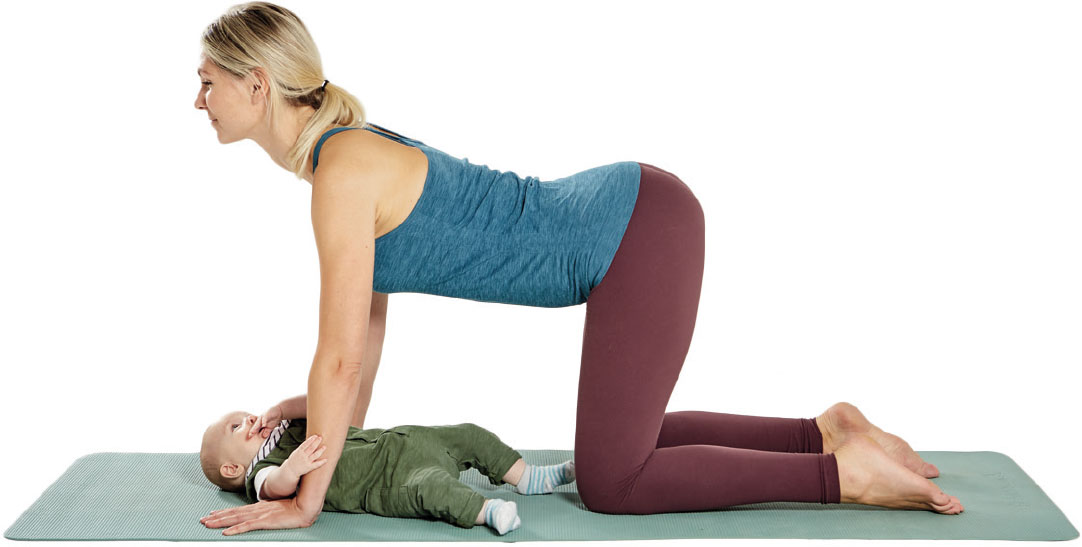
TABLE TOP LIFT AND LOWER
Stage 3
This exercise challenges the stability of your spine and shoulders, moving your limbs, developing your proprioception (sense of body placement and movement) and balance.
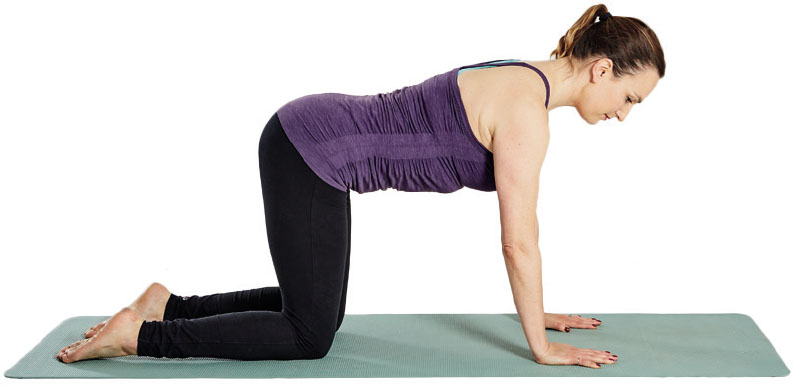
•Start in Four-point Kneeling. Imagine you have a tray of champagne balanced on your bottom.
•Breathe in, lengthen the spine.
•Breathe out. Keeping your tray of champagne balanced, slide one leg out behind you, in line with your hip. Keep the foot in contact with the mat. At the same time, release the opposite arm away along the floor in front of you, in line with your shoulder, keeping the fingers in contact with the mat.
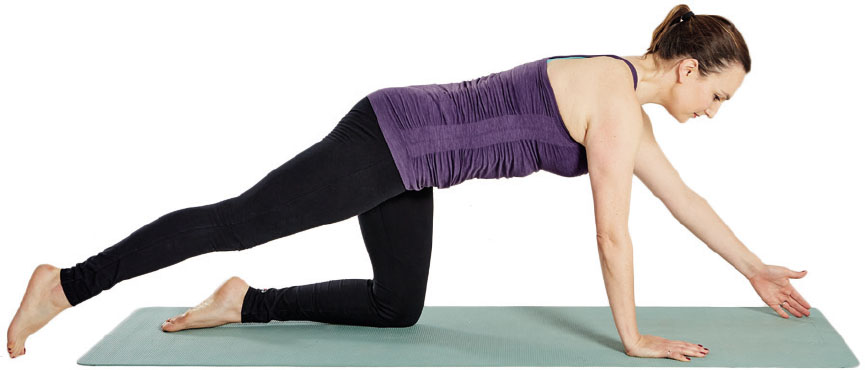
•Breathe in and maintain this lengthened position. Try not to allow your spine to waver and dip on one side – you’ll spill your tray!
•Breathe out and lift the arm and leg to hip height. Then lower. Repeat 5 times on the same leg.

•Breathe out to draw the leg and arm back to the start position.
•Repeat up to 5 times on each side.
Watchpoint
Ensure you’re not hip dipping – as you draw the leg back in it should slide back without you having to adjust the height of your pelvis.
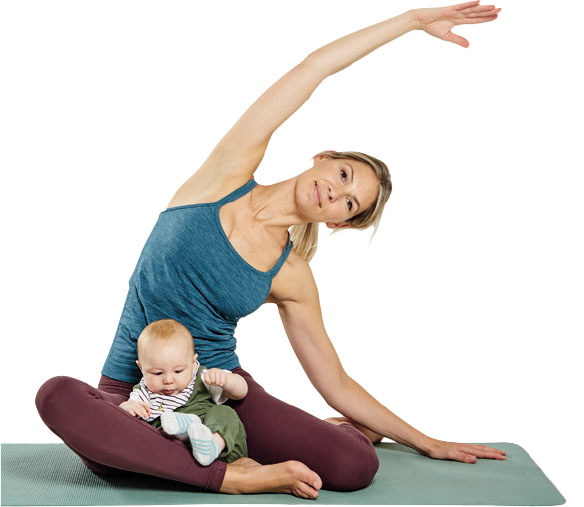
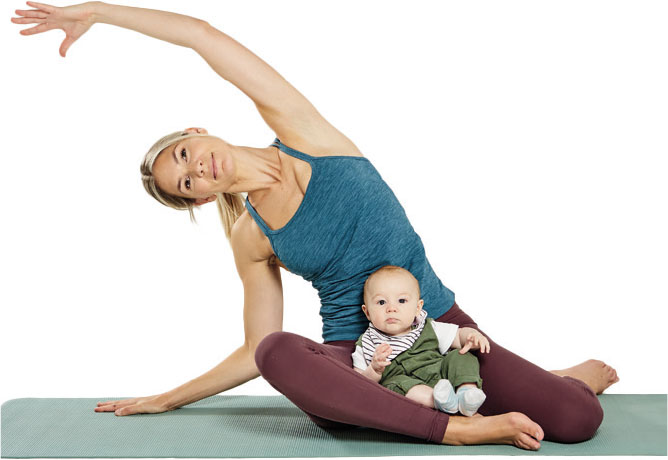
MERMAID WITH TWIST
Stage 3
This is a more challenging one for your core. It’s also a lovely hip opener and a stretch into the waist and upper back.
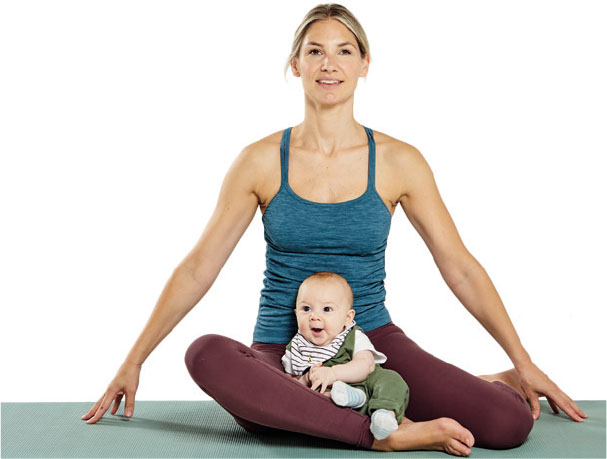
•Unusually for Pilates, this exercise begins in an asymmetrical position. Sitting tall with crossed legs, bring your right leg back behind you so your legs create a ‘fan’ shape. Try to ensure that you can sit evenly on your sit bones rather than slumping to one side – maybe take a pillow or a small ball underneath one sit bone if it’s raised. You want to be able to lift evenly out of the hips, so that your shoulders are even, not tilted.
•Breathe in to reach your right arm up, keeping your left arm resting on your left shin. Breathing out, lift up and out of your waist to reach your right arm over in a diagonal.
•Breathe in to feel the stretch in the right side of your waist, keeping the neck long.
•Breathe out as you lengthen back to centre and reach the left arm up and over to the left, reaching your right arm on to the floor. Take a breath in here.
•Then, as you breathe out, lower the left arm along the floor and twist your upper body to face the mat, bringing both arms out towards the mat. Breathe in here.
•Breathe out, strongly connecting to your core as you rise back to centre. Repeat 3 more times either side.
•Repeat, with the legs in a different cross.

Watchpoint
When you’re reaching across, keep the underside of your waist active and lifted.
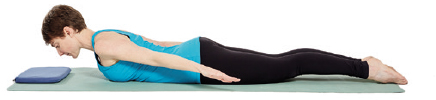
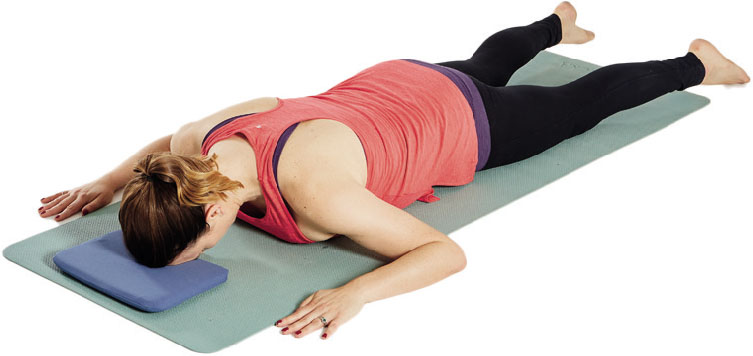
BABY COBRA WITH NECK ROLL AND TWIST
Stage 2
Your baby will have done exactly this extension when you first introduced him to tummy time, learning to lift the weight of his head away from the floor. You’re both working the same deep stabilising postural muscles. This also gives you a great massage for your hips and lower spine. You can do just the upper body movement, without taking the rotation into the legs, if it is too challenging.
•Begin on your front, your forehead released on to a small pillow. Bend your elbows and open your arms out by your sides, with your hands in line with your forehead, palms facing down. Make sure there’s a comfortable space between your elbows and your waist. Your wrists are in line with your elbows, not pressing in towards your shoulders. Ensure your collarbones feel open and wide. Your legs are slightly wider than hip width and turned out.
•Breathe in to prepare.
•Breathe out, look towards your left shoulder, and begin to peel your chest off the mat, straightening the left arm. Open the throat without overextending your neck. The bottom of your ribcage stays connected to the mat, right arm softly pressing into the floor.
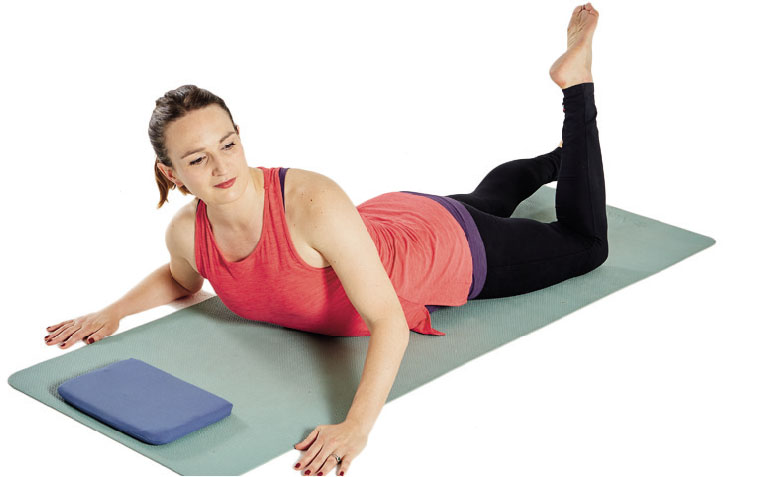
•As you open the spine and straighten the left arm, bend the left knee and begin to lift the leg off the mat. Twist the hips to dip the right toe across the right side.
•Breathe out and release your leg and hips back to centre and lower your chest back down, rolling the upper spine sequentially, as you did for a Spine Curl.
•Repeat up to 5 times on each side, then release back into Rest Position.
Watchpoint
Maintain a gentle engagement to your centre throughout to avoid the lower back becoming compressed.
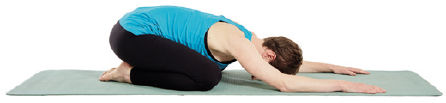
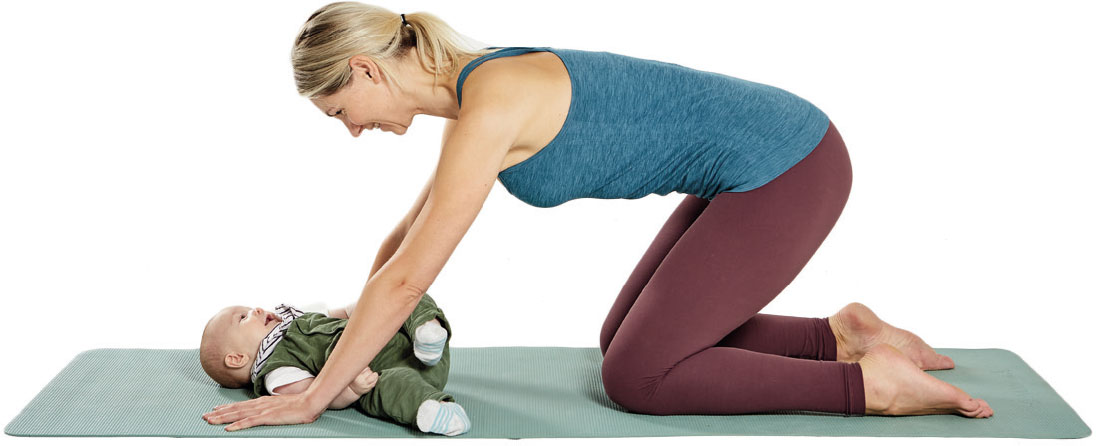
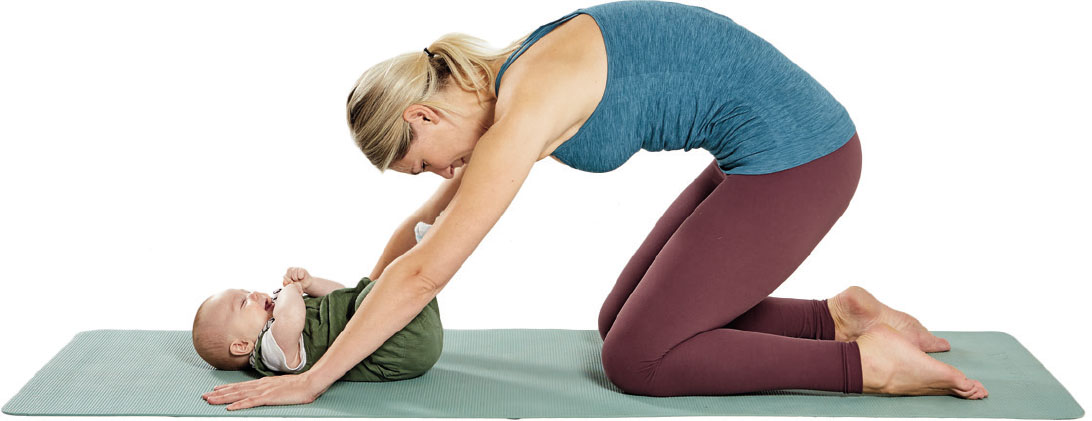
HIP HINGE/ROLLING CAT
Stage 3
This is a wonderful stretch for the lumbar spine and to release tightness in your hips. If you have wrist pain either avoid this exercise, or place a cushion underneath the heel of your hands, or lengthen your hands slightly further away from you rather than directly under your shoulder joints.
•Begin in Four-point Kneeling. Lengthen your spine into neutral as you breathe in.
•Breathe out and hinge from the hip to send your bottom towards your heels. Keep the spine long, without tucking the tailbone underneath you.
•Breathe in to push back to Four-point Kneeling, lengthening forwards over your hands to open at the hip joint. Repeat 5 times.
•Breathe out and curl the tailbone underneath you into a Cat, then release back towards your heels, maintaining this C-curve shape. This time feel the lumbar spine lengthening and stretching.
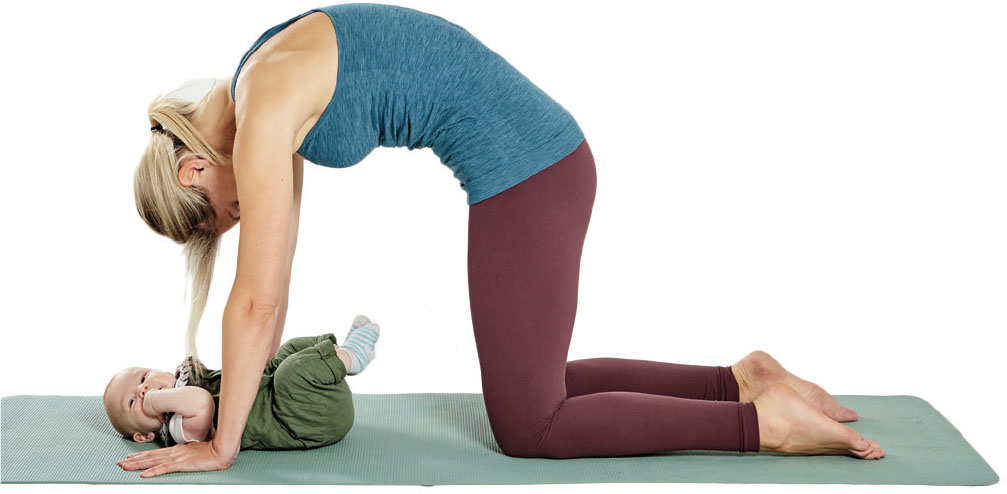
•Breathe in to push back to a neutral spine and release your weight forwards over your hands. Repeat 5 times.
•If you wish, you can create a ‘rolling wave movement’, leaning back in Cat then rolling forwards into an extension.
•Rest back into Rest Position.
THREE-MINUTE HEADSPACE MEDITATION
As a mum your time is more precious than ever before. You need some headspace to regulate your emotions and some breathing space for your body to soften, but don’t want another thing to add to your to-do list. The Mindfulness-based Cognitive Therapy (MBCT) three-minute breathing space meditation is perfect.
You can find three minutes – notice whether you spend more than three minutes on social media, see if you can swap some of that to do this meditation instead, once a day. You can even just do the first part, in less than a minute – this is more than good enough if it’s truly all you can find in your mothering day. Three deep breaths equals a meditation. A short meditation like this can serve to anchor you in a scattered day.
Step 1: Mind
Notice how things are in this moment, sit up tall and alert, like a meerkat. Close your eyes. Ask yourself, ‘How am I feeling, right now?’
•What THOUGHTS are going through your mind? Try to acknowledge your thoughts as separate mental events, like clouds passing in the sky.
•What FEELINGS are here? Notice your feelings and emotions. Turn towards any discomfort or unpleasant feelings, acknowledging them, give them a hug.
•What BODY SENSATIONS can you feel? Pick up any sensations: tingling, tightness, bracing. Move in close to the sense of the breath in the abdomen … feeling the sensations of the abdomen wall expanding as the breath comes in … and falling back as the breath goes out. Follow the breath all the way in and all the way out, using the breathing to anchor yourself into the present.
•Now, try to describe what you notice – label your experience and invite them in (e.g. say in your mind, ‘I feel a bit angry today’ or ‘Hello, self-critical thoughts’).
Step 2: Heart
Redirect your attention to focus on the physical sensations of the breathing itself, within your ribcage, abdomen and heart centre.
Step 3: Body
Now expand your awareness around your breathing, to include a sense of your whole body: your posture, facial expression. If you become aware of any sensations of discomfort, tension, or resistance, breathe into them. Then breathe out from those sensations, softening and opening with the out-breath. Say to yourself, ‘It’s OK … whatever it is ... Let me feel it.’

WORKOUTS FOR THE FIRST NINE MONTHS
| 5-minute workout | |
| Relaxation: Pelvic Floor: Pubic Bone Breathing |  |
| Compass | 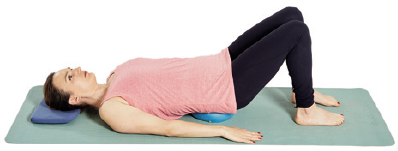 |
| Spine Curls | 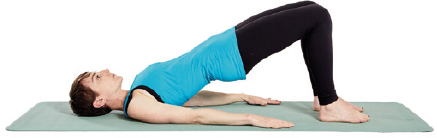 |
| Roll-backs with Band | 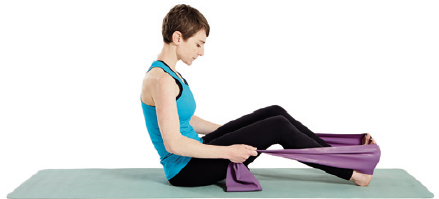 |
| Baby Cobra with Neck Roll and Twist |  |
| 20-minute workout | |
| Three-minute Headspace Meditation 164 | |
| Pelvic Floor: Lift and Pulse |  |
| Double Knee Folds | 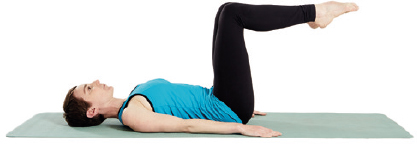 |
| Band Pull with Knee Drop | 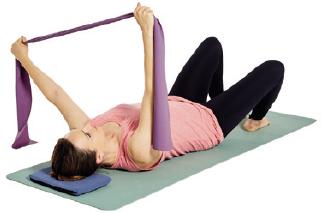 |
| Spine Curls | 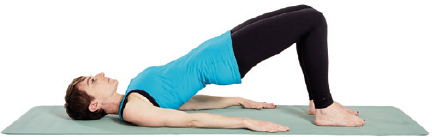 |
| Bridge with Double Knee Drop | 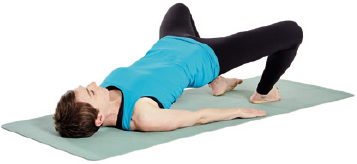 |
| Ribcage Closure with Leg Extension | 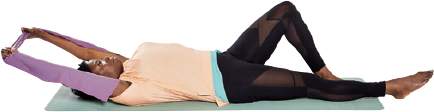 |
| Hip Rolls |  |
| Hip Flexor Stretch |  |
| Glute Stretch | 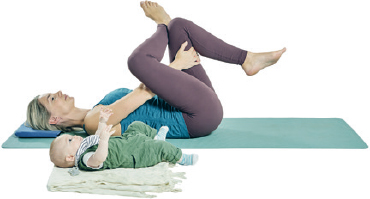 |
| Curl-ups | 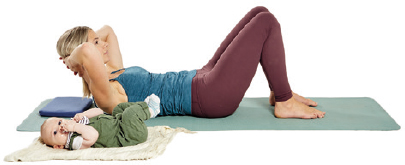 |
| Back Release over Roller |  |
| Oyster | 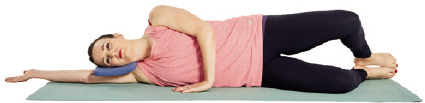 |
| Prone Leg Circles |  |
| Dart | 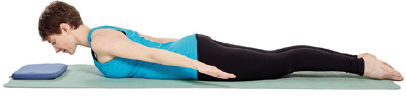 |
| Hip Hinge/Rolling Cat | 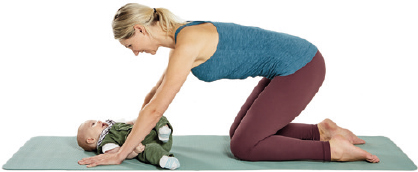 |
| Legs Up the Wall | 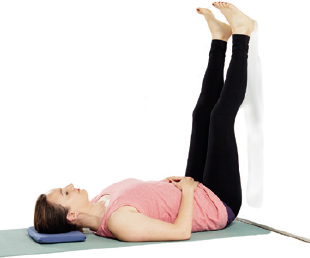 |