
BRING IN THE HARVEST
Harvest time tells us that the growing season has come to an end, but it also means the storage of seeds is beginning. Seeds are the wealth of any sower.
MICE
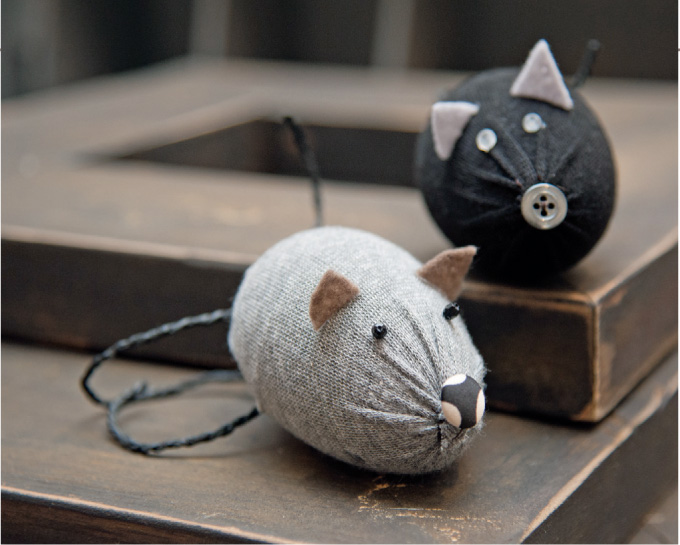
It’s so easy and cost effective to make these characterful little mice. If you have old socks (and who doesn’t have a collection of odd socks!) and plastic eggs hidden somewhere in a cupboard, the job is done. They add the most wonderful ambience to a harvest decoration.
RECYCLED ITEMS:
- 2 × plastic, styrofoam or wooden eggs
- socks
- small piece of felt fabric
- 4 × small beads (for eyes)
- 2 × small buttons (for noses)
- string
YOU WILL ALSO NEED:
- needle and thread
- fabric scissors
- fabric glue
- To form the body of the mouse, push an egg into a sock and pull the fabric tightly to ensure a snug fit (A).

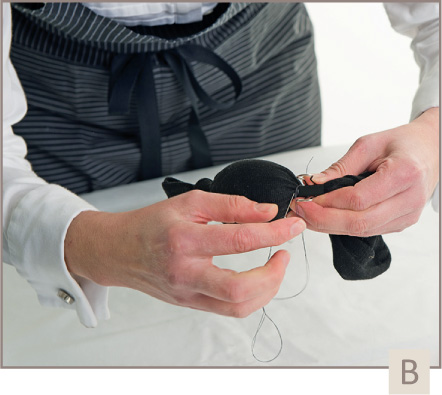
- Fasten the sock in this position with a needle and thread (B), then cut away the excess of the sock.
- Cut out four triangle-shaped ears from felt fabric.
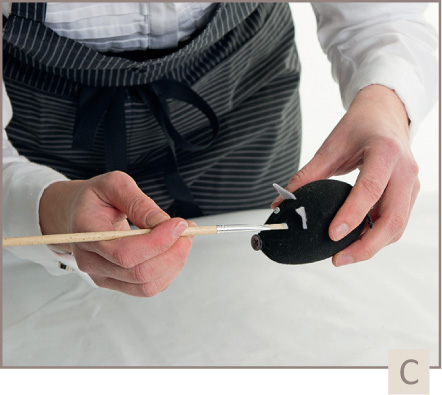
- Glue the small beads on as eyes and the felt triangles as ears. Sew the button on as a nose and a piece of string as the tail (C).
- The little mouse is ready to nibble away at the harvest.
WHITE ROSES
The bright whiteness of these roses is astounding. Plastic can be transformed to look like porcelain simply by heating it. You can use these roses for beautiful table decorations or as brooches. The options are endless.

RECYCLED ITEMS:
- 25–30 × white plastic spoons
YOU WILL ALSO NEED:
- free-standing candle
- protective gloves (optional)
- scissors
- glue gun
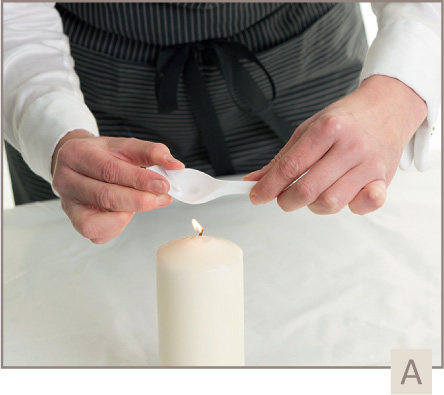
- To make the petals of your rose you will need about 25 spoons. Working with one spoon at a time, heat the convex outer bowl over the candle until it is soft (A). Remove the spoon from the heat source and reshape it into a petal shape with your fingers.
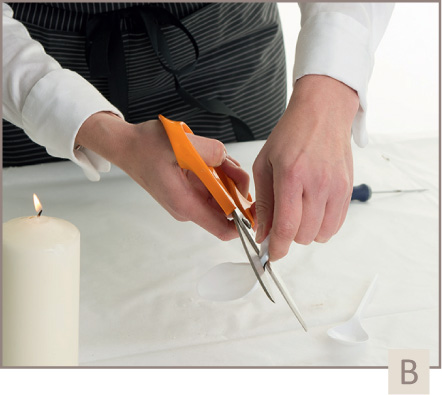
- Heat the neck of each spoon and snip off with scissors. Repeat this process until you have enough petals for your rose (B).
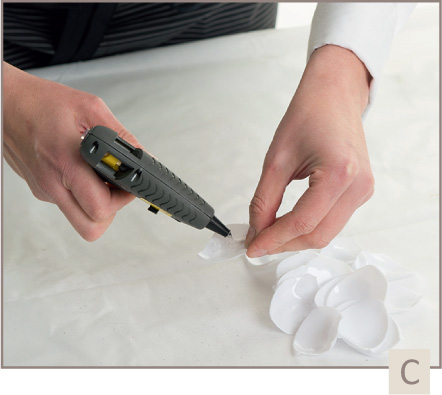
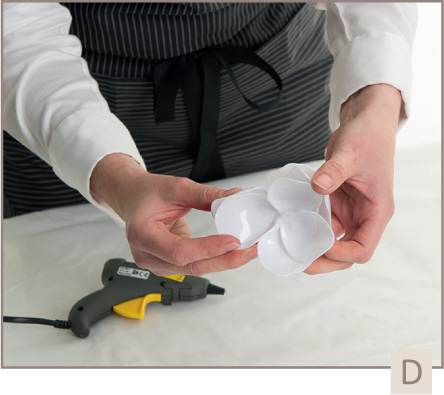
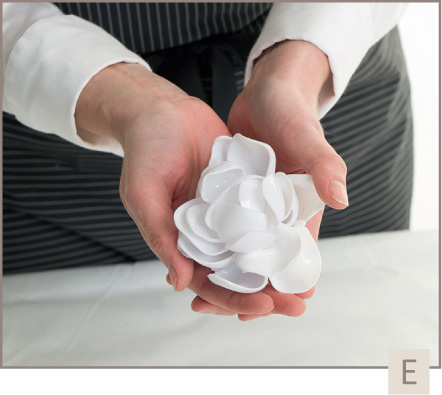
- Heat the neck of one more spoon and snip off its handle. This bowl will form the base of your rose. Fill it with hot glue from the glue gun and arrange the petals from the outside in, to form a rose shape. You will need to work quickly before the glue cools down (C, D, E).
Caution: If your fingers are very sensitive, you may need to wear protective gloves when working with the hot plastic.
ACORNS
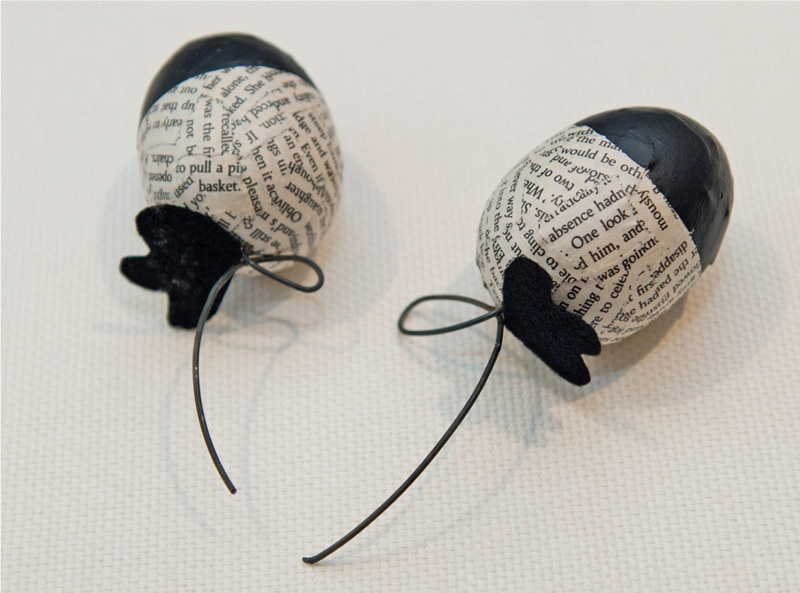
I live in the beautiful English countryside and have many oak trees in my garden. They produce the most perfect acorns, but the squirrel community collects them before I can pick any. The beauty of acorns, and the conquest of the squirrel community, inspired me to make my own.
RECYCLED ITEMS:
- old newspaper
- 2 × plastic, styrofoam or wooden eggs (a perfect shape for acorns)
- black felt fabric (for leaves)
- brown recycled paper seed pots or egg trays (see Supplier List on page 176)
YOU WILL ALSO NEED:
- PVA glue
- sponge brush
- 20 cm black wire
- wire cutter
- glue gun
- long nose pliers
- black acrylic paint
- Tear the newspaper into small pieces.
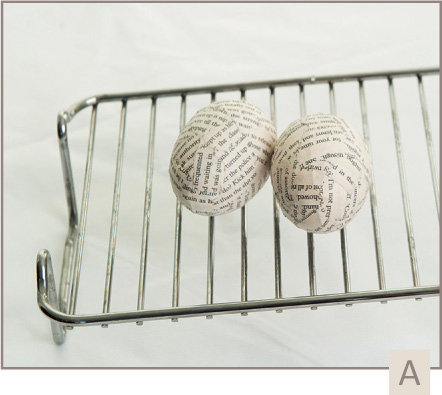
- Pour some glue into a saucer and, using a sponge brush, apply it to one half of each egg. Paste the small pieces of newspaper onto the eggs. Leave them to dry on a wire rack for about an hour-and-a-half then repeat the process with the remaining half-side of the eggs (A).
- Cut the piece of wire in half and bend a loop in each half with long nose pliers, to form acorn stems.
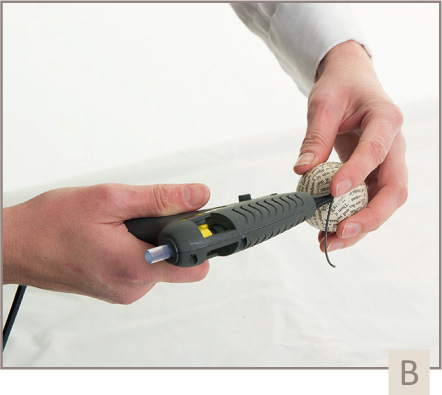
- When the eggs are completely dry, press a wire stem into each and give them a dot of hot glue to prevent them from slipping out. The glue from the glue gun dries very quickly (B).
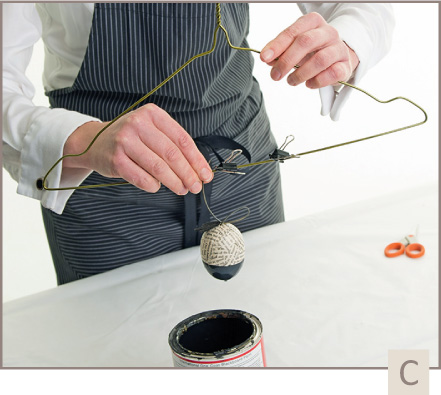
- Dip the lower portion of the acorns into the black paint. Hang the acorns by their stems to allow the paint to dry smoothly (C).
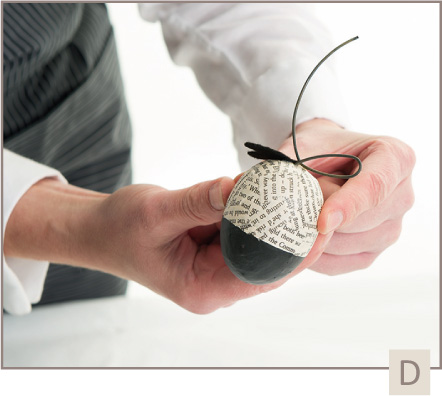
- Cut out oak leaf shapes from the black felt and glue them onto the stems with the glue gun (D).
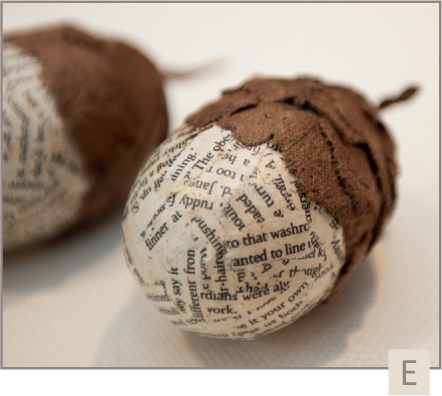
- Alternatively, if you’d like to make brown acorns (E), follow steps 1–4, but tear the paper seed pots into small pieces and glue them onto the top portion of your acorns using the PVA glue (F).
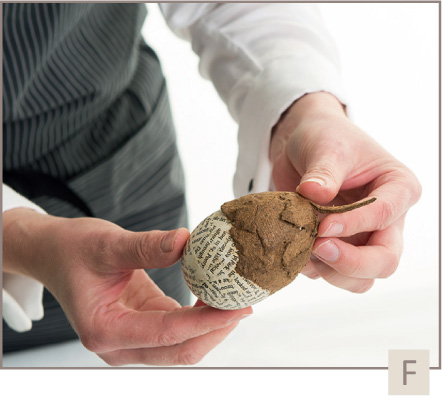
- Leave them to dry on a drying rack for about two hours.
CARDBOARD CONTOUR APPLES
Many entrepreneurial projects our children are tasked with at school spark good ideas for their parents as well. My son and I were grappling one day with a particularly challenging school assignment entitled ‘Born out of your habitation’, for which he was only permitted to use recycled materials. After much thought we decided that apples spend more time in cardboard boxes in cold-rooms than they ever do on a tree. Thus the idea of cardboard apples was born.
RECYCLED ITEMS:
- any old cardboard (especially corrugated board)
- string
YOU WILL ALSO NEED:
- paper for templates (newspaper will do)
- 3–4 × different-sized round objects to create templates
- pencil or pen
- scissors
- 6 mm round awl
- brush for glue
- PVA glue
- 20 cm medium-duty galvanised wire
- long nose pliers
- dried stems and leaves (cut a leaf with a 5 cm-length of stem from any plant and leave to dry)
- glue gun
- Draw three to four different-sized circles on paper and cut them out. These will be your templates.
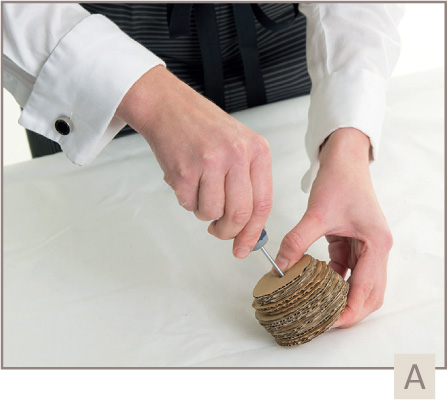
- Cut out two to three circles of each size template from the cardboard (corrugated board). Using the awl, make a hole in the centre of each cardboard circle (A).
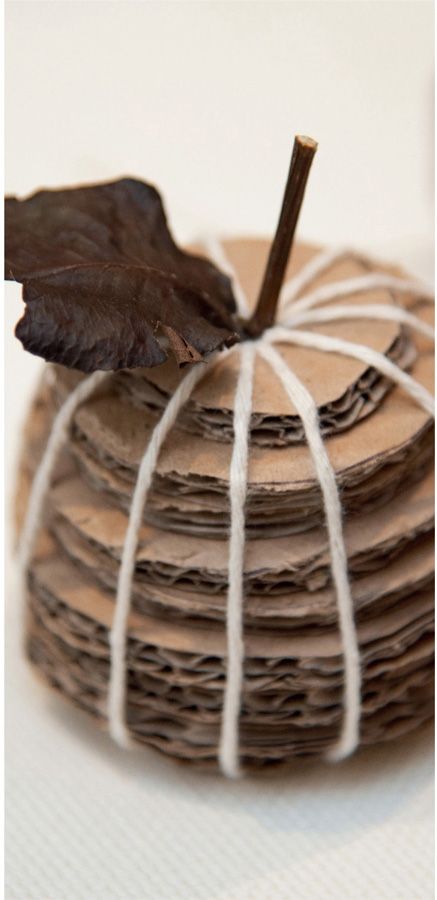
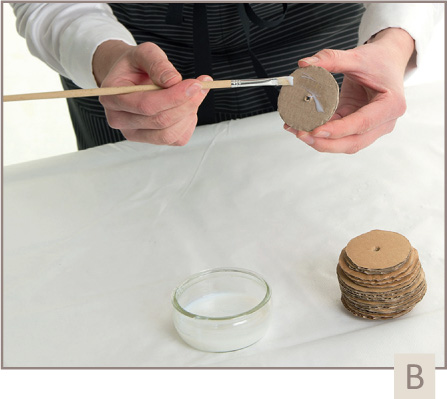
- Stack the cardboard circles evenly from the largest in the centre, cascading to the smallest on each side, or from the largest at the bottom to the smallest at the top (it’s up to you what shape you’d like to give them). When you are happy with the shape of the apple, glue the circles together by painting glue between each layer (B). Set aside until the glue is dry.
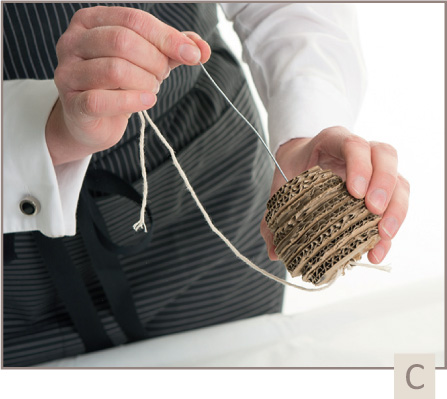
- Make a long ‘needle’ with the piece of wire by bending a loop at one end with long nose pliers. Use this needle to thread the string through the core of the apple and around the stack of circles, eight to ten times, finishing off with a knot at the bottom (C).
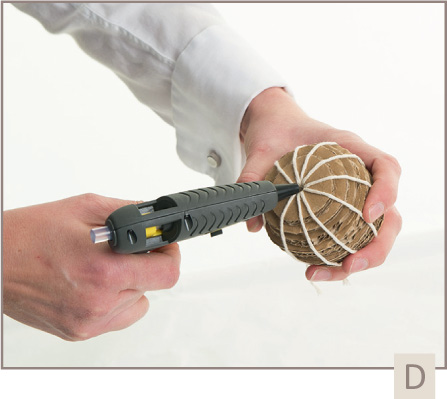
- Glue a dried stem and leaf to the cardboard apple with a glue gun (D).
MESH PUMPKIN
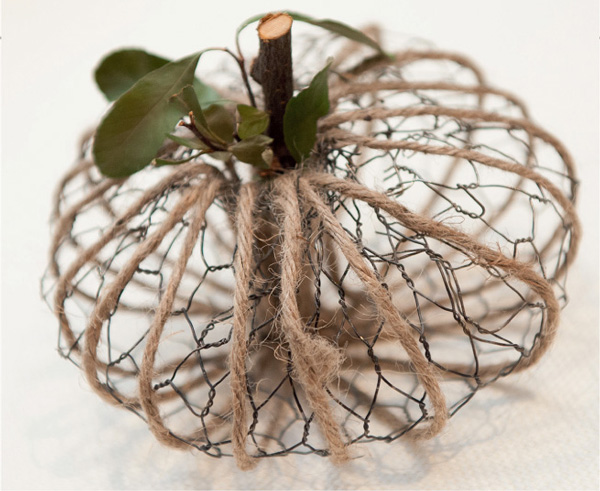
Harvest festivals have been held the world over, almost since the beginning of time. In England, harvest festivals are celebrated in churches and schools. My younger son takes great joy from the celebration as he is the one who buys all the farmers’ vegetables and praises them for their good harvest. He asked me once if we could also plant pumpkins and contribute to the festival in another form, and thus the ‘mesh pumpkin’ was crafted.
RECYCLED ITEMS:
- 1 piece (20 × 30 cm) 13 mm-hexagonal galvanised chicken wire
- brown string
- dried stems and leaves (cut a leaf with a short length of stem from a plant and leave to dry)
YOU WILL ALSO NEED:
- pumpkin-shaped bowl (any shallow, round bowl will work)
- wire cutter
- scissors
- wire needle (handmade from a 20-cm length of wire with a loop formed at one end, see example in Cardboard Contour Apples on pages 36 and 37)
- glue gun
- protective or heavy-duty gardening gloves
- Using the ageing technique on page 10, burn the chicken wire over a fire, leave to cool and wash.
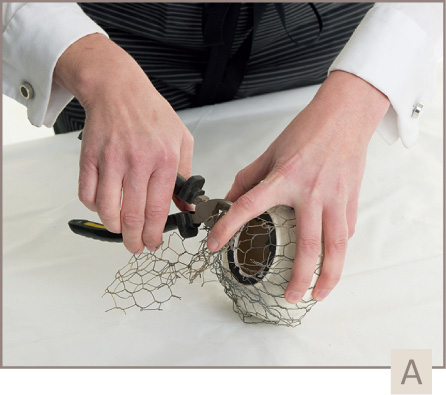
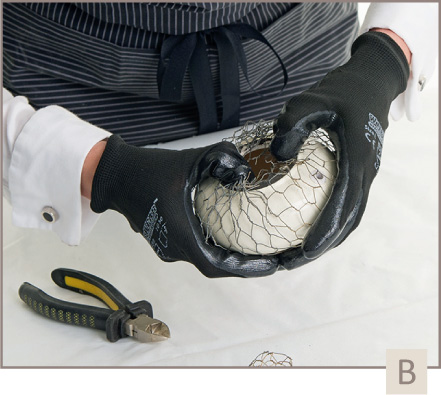
- The aim is to turn the chicken wire into a slightly flattened sphere and then to shape that to resemble a pumpkin. Using the bowl as a mould, pull the wire around it. Join the wire mesh together to complete the flattened-ball shape. Cut away any excess wire with a wire cutter and tidy any sharp edges by working them towards the centre with your fingers (A, B). Carefully remove the bowl and push the ‘pumpkin’ back into shape.
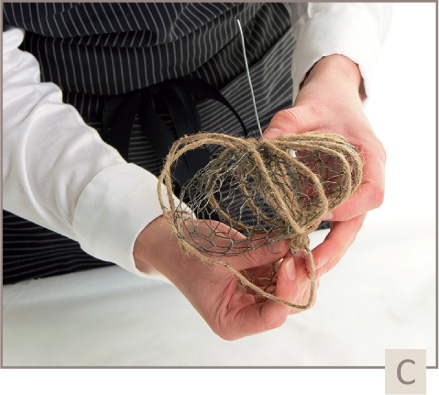
- Thread the string through the wire needle and weave it through the middle of the pumpkin and around the edges to give the wire mesh a supple (pumpkin) shape (C).
- Glue the dried stem and leaf to the wire mesh with a glue gun.
Caution: Wear protective or heavy-duty gardening gloves when working with sharp wire edges.
STRING PEARS
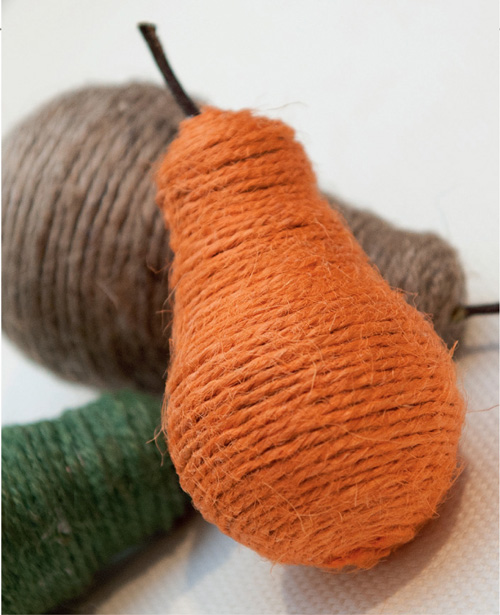
These pears are actually one of my favourite projects in this book. Any crafter can make them and the results are instant and delightful. Let’s get started!
RECYCLED ITEMS:
- pear-shaped light bulb
- coloured string (length depends on size of bulb)
- dried stem (use a twig from any plant)
YOU WILL ALSO NEED:
- fabric glue
- glue brush
- scissors
- glue gun
- Start at the broad end of the bulb and glue the string to the glass in a spiral pattern. Continue to wind and glue until the bulb is completely covered (including the electrical contact point) (A).

- Trim the string and work the end piece neatly in at the narrow end of the bulb, then use the glue gun to glue the stem to the pear (B).

- Repeat this process with different bulb sizes and string colours.


