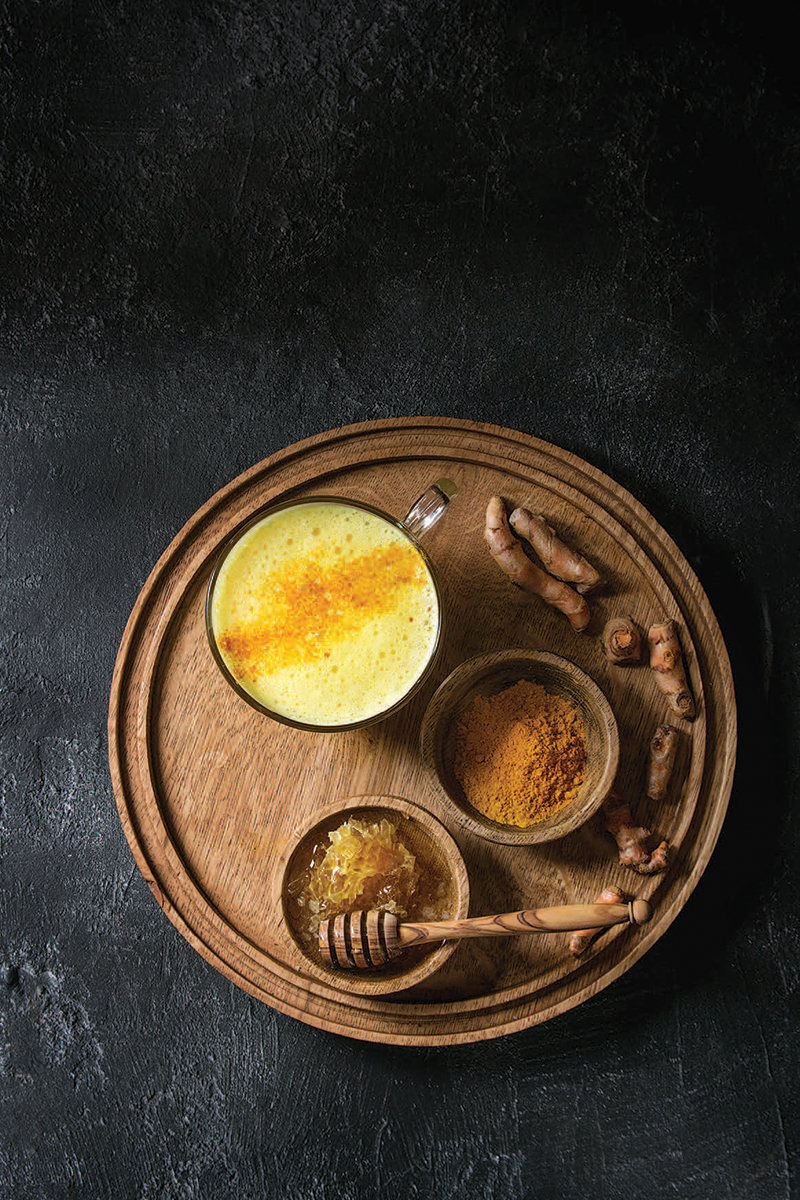
Simple and Perfect Fresh Ginger Tea 
I drink gallons of hot ginger tea, especially in the fall and winter, but really all year-round. I start just about every morning with some version of it. (Full transparency: after one single shot of espresso. I may kick that caffeine habit one of these days soon, and then it’ll be fresh ginger tea out of the gates!) Most often, it’s just a few slices of fresh ginger, a squeeze of lemon, and a shower of not-quite-boiling water. I steep it in a big mug or travel cup, which I sip from all day, adding more hot water as the tea disappears or gets cold. It’s bracing and awakening but also soothing, which is why I think it does me right at any hour. Yes, it’s anti-inflammatory, an amazing digestive aid, good for your heart, and even helpful in lowering cholesterol, but the real reason I drink it is because—you know what?—it’s GOOD! I mean, it tastes good! Spicy and pungent and so easy to tweak to make it appeal to whatever mood I’m in, ginger tea is definitely a must-have around my house. Sometimes, I add a little honey or maple syrup if I need sweetness. Often, I add black pepper and turmeric and occasionally even a shake or two of ground cinnamon for added flavor and health benefits. But most of the time, straight-up ginger tea is just the thing. This recipe makes a very generous mug of tea. Some might say it serves two, but, as discussed, I like to drink a lot of it. This is how I roll.
Serves 1 or 2
One 2-inch piece fresh ginger, sliced thinly
2 cups water
2 tablespoons fresh lemon juice
1 to 2 sprigs mint (optional)
2 teaspoons honey, ideally raw, or to taste
1. Put the ginger and water in a pot and bring to a boil. Cover and let simmer for 20 minutes.
2. Once the ginger has been infused into the water, add the lemon juice and mint and allow it to steep for another 2 to 5 minutes.
3. Add the honey and, voilà, delicious.
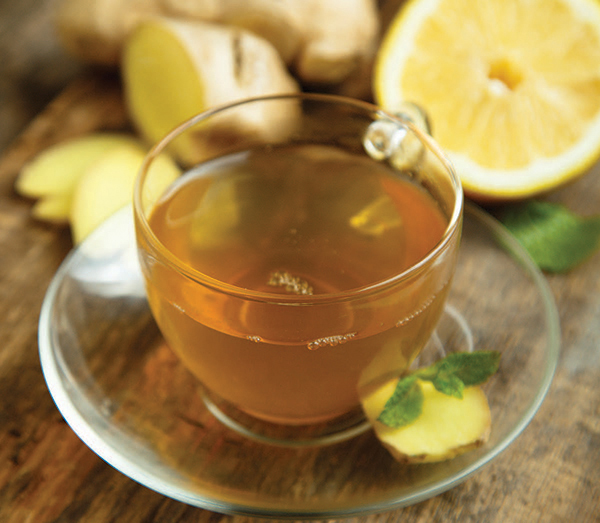
Golden Milk (a.k.a. Turmeric Latte) 
If you’re looking for a super delicious beverage with health benefits that are through the roof, look no further. Golden milk—a creamy, warm beverage—is, hands down, one of the easiest ways to get more turmeric into your diet. But, judging from the fact that every hipster coffee and juice joint now seems to have some sort of tricked-out, cashew-dusted, hemp milk–steeped, holiday-scented version of golden milk on the menu for $7, it is apparently also one of coolest ways to get more turmeric into your body, too. A riff on the traditional Indian haldi doodh, which is typically just half a cup of hot milk mixed with a tablespoon of ground turmeric, this version kicks things up a bit. Calling for a little healthy fat in the form of coconut milk as well as a pinch of black pepper (both of which help your body absorb turmeric’s nutrients) plus a touch of sweetener and warming spices, this drink will keep you healthy and so “on trend.”
Serves 1
½ cup coconut milk
1 tablespoon raw sugar, 1 tablespoon pure maple syrup, or 2 teaspoons raw honey
4 teaspoons grated fresh turmeric, or 1 teaspoon ground
1 teaspoon grated fresh ginger, or ¼ teaspoon ground
1/8 teaspoon ground cloves or nutmeg
A few grinds of black pepper
Pinch of kosher salt
¾ cup water
1. Whisk together all the ingredients in a small saucepan and bring to a boil.
2. Remove from the heat and let the mixture steep for 5 minutes. Pour into a mug—if using fresh turmeric and ginger, strain the mixture, using a fine-mesh sieve—and serve.
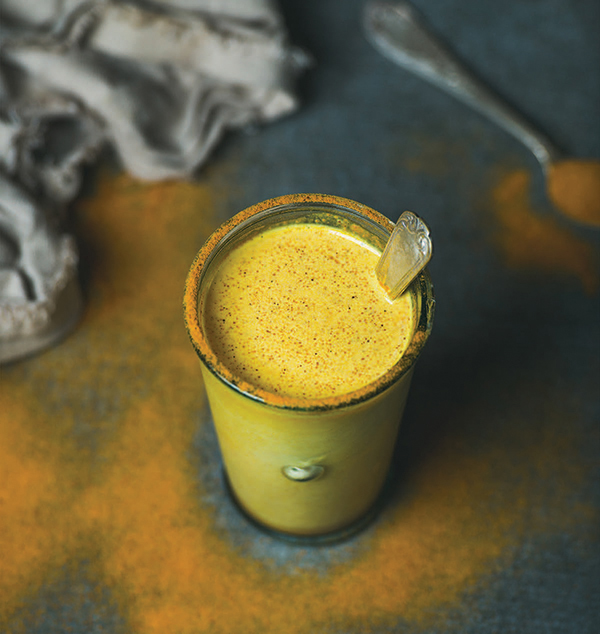
Antiaging Tea 
You know what they say: “The best defense is a good offense.” Wait—is that what they say? Maybe it’s “The best offense is a good defense.” Either way, when it comes to fighting the signs of aging, there are no truer words. But the thing is, the most powerful antiaging treatments don’t come in sleek little tubes of lotion or bottles of skin serum. Nope, true antiaging starts on the inside. In this powerful and delicious elixir, turmeric and white tea touch rings like the Wonder Twins to help turn back the clock so you can look and feel younger. Both turmeric and white tea contain sky-high levels of antioxidants, which protect your skin’s integrity by preventing free radicals from destroying its texture and elasticity. Plus, turmeric, with its anti-inflammatory superpowers, can help calm such conditions as arthritis, eczema, and inflammatory bowel disease and can help your body adapt to stressors, such as environmental toxins and lack of sleep. All of which is to say that I think there’s a pretty good chance the Fountain of Youth is flowing with this stuff.
Serves 1
1 cup water
1 teaspoon ground turmeric, or 1 tablespoon grated fresh
2 teaspoons loose white tea leaves or 1 tea bag
¼ teaspoon ground black pepper
¼ teaspoon ground ginger
1 teaspoon raw honey, or more to taste (optional)
1. Heat the water in a small saucepan until very hot but not boiling. Add the turmeric and white tea and allow to steep for 5 minutes.
2. Add the pepper, ginger, and honey, if using, stirring well to incorporate all the ingredients. Pour into a mug—if using loose tea or grated turmeric, strain the mixture, using a fine-mesh sieve—and enjoy your tea in small sips, gently shaking or stirring if the liquids and solids separate.

Anti-Inflammatory Pineapple, Watermelon, and Turmeric Smoothie 
Whether you suffer from digestive issues or allergies, have just seriously rocked it at the gym, are recovering from surgery, or have some other kind of persistent inflammation, meet your new best friend. This light, refreshing, sweet, and tangy smoothie may taste like a trip to the tropics but is actually a powerful way to help your body take things down a notch (or five)! With fresh watermelon, pineapple, mango, coconut water, and turmeric (all of which bring mad anti-inflammatory skills to the table), let’s just say this cool and frosty sipper tastes a whole lot better than anything you’d find in your medicine cabinet! Using frozen fruit instead of ice ensures a smoothie that’s, well, smooth and not watered down in the least. And for refreshment in a flash, prep a bunch of freezer bags with ready-to-go, preportioned watermelon, pineapple, mango, and turmeric. That way, when you want to make this smoothie, all you have to do is dump the contents of one of your freezer bags into the blender, add the coconut water, and blitz away!
Serves 1
1 cup coconut water
4 cups cubed frozen watermelon
2 cups cubed frozen pineapple
2 cups cubed frozen mango
1 teaspoon ground turmeric, or 1 tablespoon peeled and grated fresh
Combine all the ingredients in a blender and blend until smooth. Drink immediately.
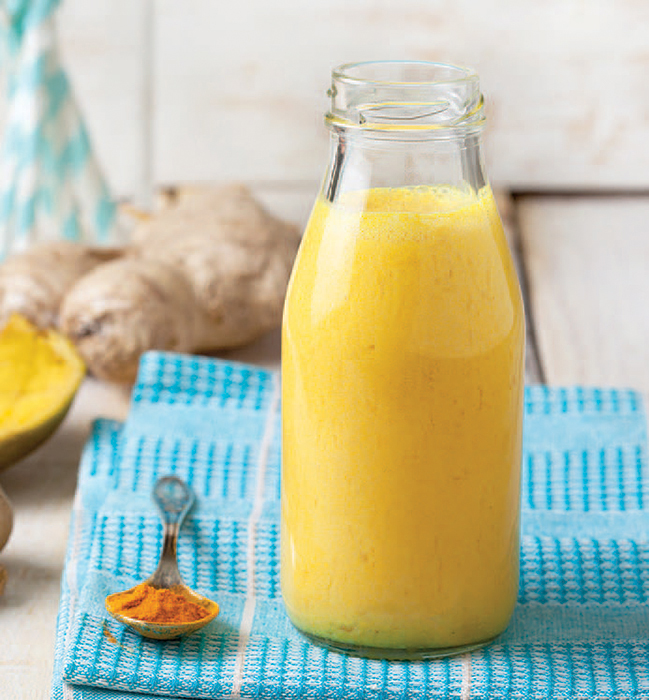
Homemade Ginger Beer (and My Favorite Ginger Margarita) 
First thing’s first: Let’s get the ginger ale vs. ginger beer distinction out of the way. What’s the difference? you wonder. Ginger beer is fermented with yeast to create carbonation (yes, the fermentation does result in a teensy amount of alcohol, though typically less than 1 percent, like kombucha or vanilla extract), whereas ginger ale gets its fizz from being force-carbonated with carbon dioxide. Also, ginger beer has real actual ginger in it, so it’s full of spicy, pungent ginger flavor, whereas ginger ale is usually much sweeter, with very little (if any) real ginger in it. From a flavor perspective (and, honestly, from a health benefit standpoint), there’s really no comparison. Ginger beer knocks the pants off ginger ale. My favorite part of this recipe, aside from its delicious result, is that you can make it in about an hour, and it’ll be ready the next day for simply sipping over ice or mixing into cocktails like Moscow Mules, Dark and Stormys, or—my fave—ginger margaritas. And don’t let the idea of having to track down champagne yeast turn you off. It’s incredibly easy to find, any homebrew supply store will stock it—or perhaps you’ve heard of this new thing called the Internet? It’s over there, too.
Makes about 2 quarts ginger beer
8 ounces fresh ginger, peeled and minced
2 quarts water
¾ cup packed dark brown sugar
¾ cup fresh lime juice
¼ teaspoon champagne yeast
1. Mix together the sugar, ginger, and 1 quart of the water in a saucepan. Bring to a boil, stirring to dissolve the sugar. Remove from the heat, cover, and let steep for 1 hour.
2. Strain the syrup through a mesh strainer and then use a funnel to pour the strained liquid into an empty 2-liter soda bottle.
3. Add the lime juice and remaining quart of water to the bottle until the liquid level is 2 to 3 inches from the top (you may not need to use all the water). Sprinkle the yeast on top of the liquid in the bottle.
4. Gently squeeze the bottle until the liquid comes to the neck, then screw the cap on tightly. Let the bottle sit at room temperature for at least 12 hours and up to 2 days, or until the bottle feels firm when squeezed. (Don’t let the mixture ferment too long at room temperature! The pressure will continue to build and you could end up with a geyser or even an exploded bottle on your hands.)
5. Once the bottle is firm, store your ginger beer in the refrigerator and drink it within a week. Now, hurry up and make My Favorite Ginger Margarita!

My Favorite Ginger Margarita
This is the margarita you’ve been waiting for! Make it with your very own homemade ginger beer, fresh lime juice, and reasonably good-quality tequila (preferably 100 percent agave, but let’s start at nothing in a plastic jug with a handle, mmk?). It’s as if a margarita and a Moscow Mule had a baby. A miracle of life. If you like things spicy, do what I do: garnish your drink with a couple slices of fresh jalapeño to kick up the heat.
Serves 1
2 lime wedges
Coarse salt, for rimming glass (optional, but is it really?)
2 ounces tequila
2 tablespoons fresh lime juice
½ cup ginger beer
2 to 3 teaspoons simple syrup, to taste
1. To prepare the glass: Run one of the lime wedges around the rim and press it into a small plate of coarse salt. Fill the glass with ice.
2. Pour the tequila, lime juice, ginger beer, and simple syrup directly into the prepared glass. Stir well and garnish with a lime wedge.
Note: To make simple syrup, combine 1 cup of water with 1 cup of sugar in a small saucepan. Bring it to a simmer, stirring, to dissolve the sugar, then remove from the heat, let cool, and store in the refrigerator until ready to use. It’ll keep pretty much indefinitely.
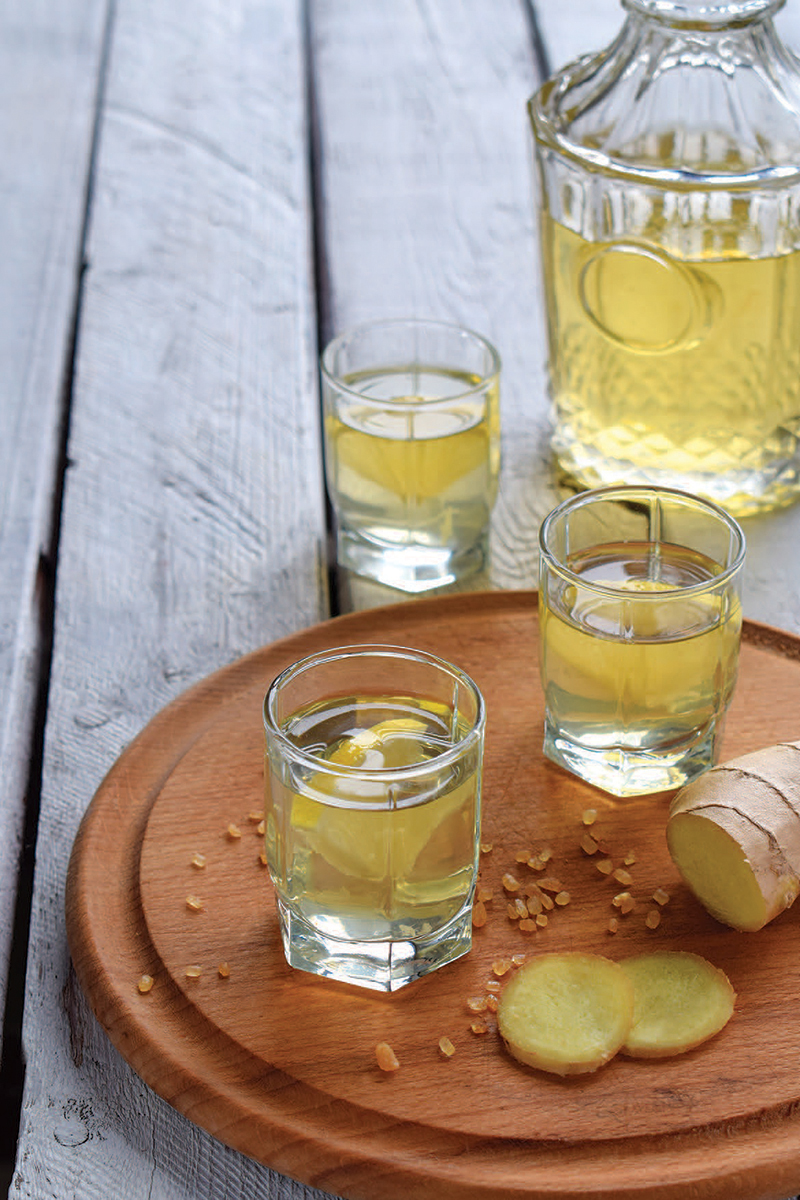
DIY Ginger Liqueur 
This crazy simple recipe for homemade ginger liqueur, infused with tons of zingy fresh ginger, orange zest, and vanilla, is one of my favorite ways to fool, ahem, delight family and friends. In case you didn’t know, if you put delicious things into some kind of liquor and let it steep for a good while in a cool, dark place, you wind up with liqueur that tastes like that delicious thing you put in it. It’s one of those tricks that will make you look like an alchemist or an artisan or both when really all you did was shove some stuff in a bottle and wait around for something to happen. Perfect for gift giving, this delicious, complex, and truly elegant liqueur will perk up a cup of tea or hot cider, add a bright and festive touch to a simple glass of sparkling wine, and lend a boozy-sweet kick to cocktails of all sorts. You can tweak the recipe a bit to suit your tastes and/or the season. For example, swapping out the brandy for vodka and/or subbing in lemon or even grapefruit zest for the orange gives the finished product more of a sunny, summery finish. Adding some whole spice, such as star anise, cloves, or a cinnamon stick, to your brew gives you a final result that is perfectly suited to all those warm, fall- or winter-spiced beverages that just scream “holiday season”! But no matter how you tweak it, this indispensable and incomparably delicious liqueur will surely become a fixture of your home bar.
Makes about 4 cups liqueur
6 ounces fresh ginger, peeled and thinly sliced
1 whole vanilla bean, split lengthwise
2 cups sugar, or 1 cup honey
1 tablespoon loose leaf chamomile tea (optional)
2 cups water
Zest of 1 orange
2 cups brandy
1. Combine the ginger, vanilla, sugar, chamomile tea (if using), and water in a small saucepan and bring to a boil. Lower the heat and simmer for 20 minutes. Remove from the heat and let the syrup cool.
2. Without straining it, pour the cooled syrup into a glass jar or container with a tight-fitting lid. Add the orange zest and brandy. Seal and shake the jar, then let steep for 1 day.
3. The next day, remove the vanilla bean and let the mixture steep for 1 day more.
4. Strain the liquid through a few layers of cheesecloth or a coffee filter while funneling into a clean glass bottle or jar. Cap (or cork) and let the mixture mellow for 1 more day.
5. Store the liqueur at room temperature for up to a year.
White Miso, Turmeric, and Ginger Dressing 
It’s common knowledge that, when it comes to salad, it’s not the vegetables or even the crunchy add-ins that make or break the finished product—it’s the dressing! Fortunately, this dressing is incredibly easy to make—it takes less than five minutes! All you need are a few simple ingredients, a jar, and the ability to shake your fist (and, by all means, your groove thang, if you think it’ll help). Here, turmeric, mellow white miso, ginger, and a few other flavorful friends come together in a gorgeous, vibrant dressing that you’ll love drizzled on salad—but don’t be surprised if you find that you can’t stop there. This stuff is great on grain bowls, drizzled over seared fish, tossed with cold noodles, and even stirred into hummus. Fresh turmeric will give you the best flavor and health benefits, but ground, dried turmeric works, too.
Makes about 1 cup dressing
1/3 cup unseasoned rice vinegar
¼ cup mirin
¼ cup neutral-flavored oil, such as grapeseed or canola
2 tablespoons finely grated carrot
2 tablespoons white miso
1 tablespoon peeled and finely grated fresh ginger
2 teaspoons peeled and finely grated fresh turmeric, or ½ teaspoon ground
1 teaspoon toasted sesame oil
Whisk together all the ingredients in a small bowl. Cover and chill. The dressing can be stored in the refrigerator for up to 1 week.
Ginger Broth 
Aside from bone broth, which is having some kind of a moment right now, broth is sort of a misunderstood food, often overlooked by home cooks, regarded as boring, difficult to make, unnecessary, and/or easily replaced with something from a can. So, let me set the record straight: homemade broth is important, it’s easy to make (you chuck stuff in a pot and walk away), and it’s so much more delicious than anything you’ll find on a grocery store shelf. Knowing how to make a tried-and-true broth is foundational to knowing how to cook good food, which is why (along with stock, which is similar to broth though not quite the same) it is among the first things we learn how to make in culinary school. If you’ve got a good broth or stock, then you’re well on your way to a good sauce or soup or wherever you’re headed with your cooking. If your broth is too bland, salty, or otherwise subpar, you’re not likely to end up with something that tastes very good. Simple as that. Chicken and/or beef broth is tasty and widely useful in the kitchen, but this light, bright, ginger-infused broth is equally indispensable and brings the added benefit of being really good for you: immunity-boosting, anti-inflammatory, and comforting yet energizing. You’ll want to sip this stuff as is; however, it is even better to use it to make heartier soups with the addition of such yummy add-ins as rice noodles, chicken and/or mushrooms, or whatever combination of soup ingredients you like. Use it in place of water when cooking grains or as the poaching liquid for fish. And if you don’t have time to watch over a simmering pot, toss all the ingredients for the broth into a slow cooker, set it to low, and let it go for eight hours.
Makes about 8 cups broth
8 cups water
1 medium yellow onion, peeled and quartered
2 celery stalks, cut in to 2- to 3-inch pieces
One 2-inch knob fresh ginger, peeled and cut into ½-inch pieces
6 large garlic cloves, peeled and roughly chopped
2 teaspoons whole black peppercorns
2 tablespoons fresh lemon juice
3 sprigs thyme
Salt
1. Combine all the ingredients in a large stockpot, adding salt to taste. Bring to a boil, then lower the heat to a simmer and cook for about 1 hour.
2. Strain the liquid through a fine-mesh sieve and discard the vegetables. Allow the broth to cool, then store in jars or other airtight containers with tightly fitting lids in the refrigerator for up to a week or in the freezer for up to 3 months.
Chile, Lime, and Ginger Salt 
Flavored salts (or finishing salts, as they’re sometimes called) are the secret weapon behind many a mouthwatering meal. Simply salts that’ve been infused with natural ingredients, such as herbs, spices, and fruits, they add a final pop of flavor and crunch to food. This lime and ginger salt is all at once spicy, earthy, tangy, and bright, making it work as a take-it-over-the-edge flavor enhancer for all manner of dishes, from grilled, sautéed, or fried foods to fresh salads, simple sliced tomatoes, eggs, and even plain yogurt drizzled with honey. It’s also fairly mind-blowing sprinkled over vanilla ice cream. Just saying . . . And it makes a great gift: fill a cute little tin or jar, add a pretty ribbon, and you’re officially a food gifter. Just remember, a little goes a long way with this stuff; all you need is a pinch sprinkled over a finished dish for a delicious result.
Makes about 1 cup salt
½ cup grated lime zest (from about 6 limes)
½ teaspoon crushed red pepper flakes
3 teaspoons ground ginger
1 cup coarse, flaky salt (I like Maldon salt, but you could use sel gris, coarse sea salt, or even kosher salt)
Spread the lime zest on a sheet of parchment or waxed paper; let dry overnight. Combine the dried zest, red pepper flakes, ground ginger, and salt in a medium bowl. Stir with a fork to break up any chunks. Store in an airtight container in a cool, dry place for up to 3 months.
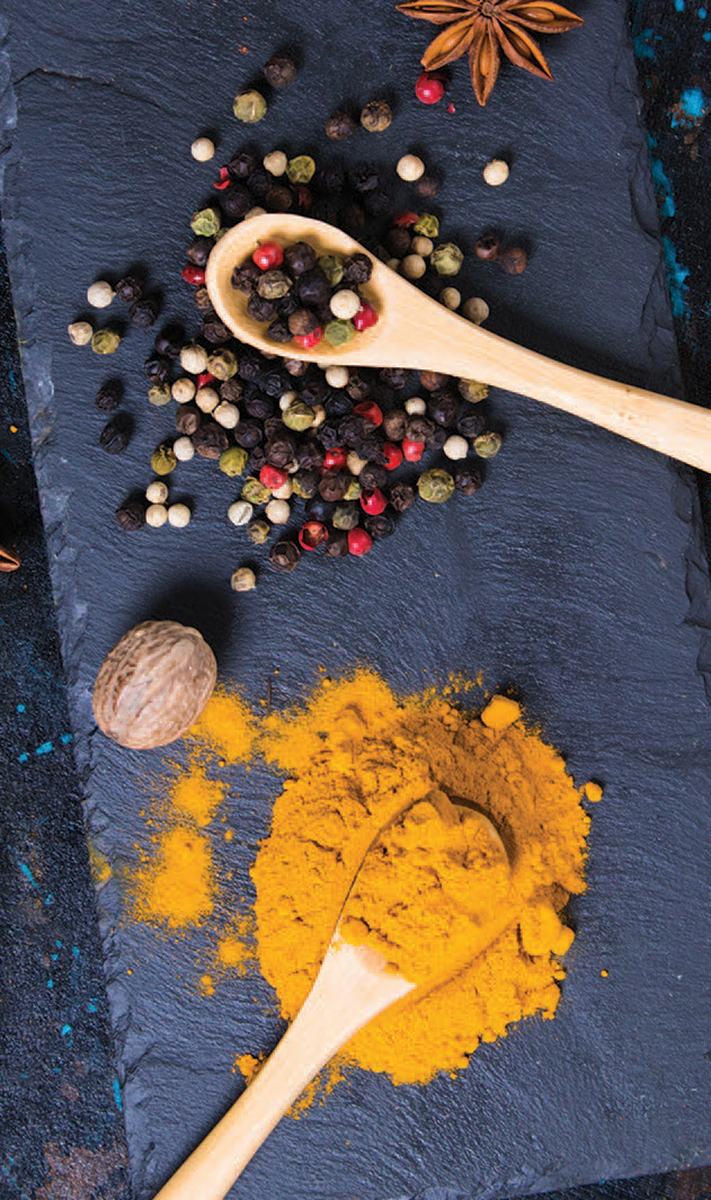
Essential Turmeric and Black Pepper Paste (a.k.a. Golden Paste) 
Think of this recipe as a sort of all-purpose turmeric shortcut that you can use to make tons of other dishes in minutes. It’s the turmeric equivalent of cake mix, bouillon cubes, or frozen juice concentrate, except without 4,000 preservatives and artificial who-knows-what. And so good for you. Not that it’s difficult to add a spoonful of turmeric to whatever you’re cooking, but as we know, taking turmeric in combination with black pepper and some sort of fat is the most surefire way to get that precious curcumin into the ol’ machine. Here you have all the key players premixed and ready to rock, so all you have to do is add a dollop to your next stir-fry, smoothie, tea, nut butter, soup, stew, or curry. In fact, you’ll probably find that once you start making this stuff, you won’t be able to stop dreaming up new ways of using it, which is why you might even consider making a double batch: one for now and one for the freezer. Fill ice cube trays with the paste, then freeze them, and you’ll have preportioned little flavor bombs on hand for your obsessive recipe tinkering.
Makes about 11/3 cups
½ cup ground turmeric
½ cup water
1/3 cup extra virgin coconut oil, olive oil, or flaxseed oil
2 to 3 teaspoons freshly ground black pepper
1 teaspoon ground cinnamon (optional)
1 teaspoon ground ginger (optional)
1. Combine the turmeric and water in a small saucepan and bring to a boil over high heat. Lower the heat and simmer for about 10 minutes, or until the mixture is reduced to a thick paste. If necessary, add more water, a tablespoon at a time, to keep the consistency thick, like paste.
2. Remove from the heat and allow it to cool to room temperature or just slightly warmer, then stir in the oil, pepper, cinnamon, and ginger (if using). Transfer to a glass or plastic container with a tight-fitting lid.
3. Store the paste in the refrigerator for up to a month or in the freezer for up to a year.
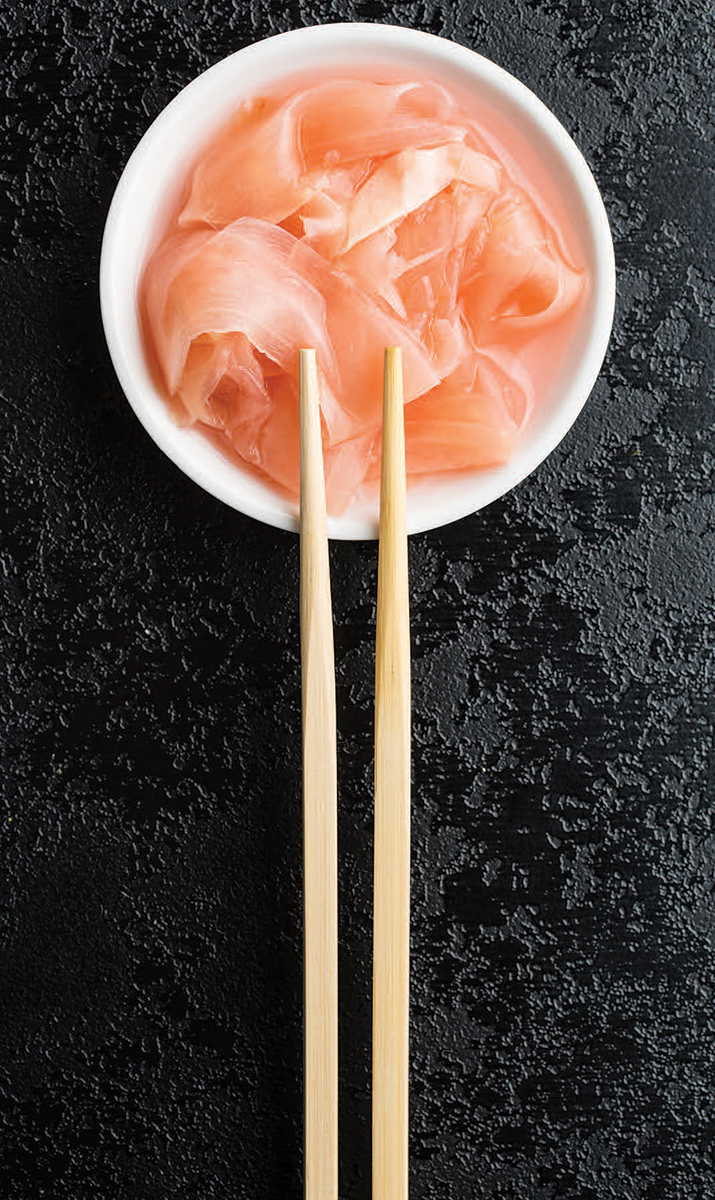
Pickled Ginger, Sushi Style 
Many sushi devotees would argue that the gari (pickled ginger) that comes alongside any sushi order is the most important part of the plate, because its job is to cleanse your palate between bites of maki and nigiri and whatnot. I seriously love sushi and could eat it every day, but in all honesty, I have always been pretty lukewarm on that little pink pile. To me, it’s always a bit too sweet, and I have to confess to being a little weirded out by the color. It turns out gari is supposed to be pink, but only because it’s supposed to be made with young ginger, which is naturally pink. Most of the stuff you’ll find at a run-of-the-mill sushi joint is not made with young ginger and, as such, is artificially colored. Because I am not content to simply dislike a food without putting up a fight—it’s something I’m working on, I swear—I had to tinker a bit to find a version of pickled ginger that I actually want to eat. This super easy recipe turns out an all-natural, snappy, spicy, just-sweet-enough pickle that is not only great with sushi but adds something special to salads, sandwiches, and rice bowls, too. Be sure to use unseasoned rice vinegar here; the seasoned kind contains added sugar and salt.
Makes about 1 cup pickled ginger
1 large piece ginger (about 4 ounces), peeled
1 medium radish (optional, for use by those who absolutely must have their ginger tinted pink)
1 teaspoon kosher salt
¼ cup unseasoned rice vinegar
¼ cup water
¼ cup sugar
1. Using a vegetable peeler or mandoline, slice the ginger and radish, if using, into paper-thin strips. Transfer the ginger to a bowl and sprinkle with the salt. Set radish aside. Stir ginger and salt until well combined, then set aside for 30 minutes.
2. Using your hands, squeeze any excess liquid from the ginger, then transfer to a clean, heatproof glass jar or container with a tight-fitting lid. Add the radish.
3. Combine the rice vinegar, water, and sugar in a small saucepan and place over medium-high heat, stirring until the sugar dissolves. Bring the mixture to a boil, then immediately pour the vinegar mixture over the ginger and radish, if using. Allow the jar to cool, uncovered, to room temperature, then seal and place in the refrigerator for at least 24 hours before diving in.
4. The pickled ginger will keep in the refrigerator for at least a couple of months.
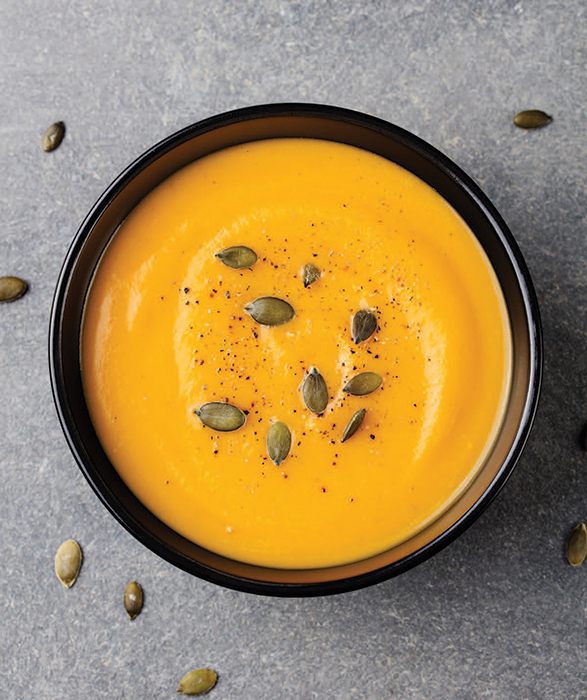
Quick and Comforting Butternut Squash and Turmeric Soup 
There are two kinds of people in this world: soup people and non–soup people. Soup people (my husband and younger daughter) are the people who eat soup year-round, no matter the weather, no matter the meal; they love soup and will eat it anytime, anywhere. Non-soup people (me and my elder daughter) may like soup just fine, but they are most likely to eat it in the cooler months, when it feels like “soup weather.” (I could break down the sociology even further into subcultures that include broth-based-soup eaters and chilled-soup eaters, but I’ll save that for The Soup Companion . . . ) This recipe is for soup people and non-soup people alike, perfect for warming everyone up from the inside out. Vibrantly colored, aromatic with the flavors of the cooler seasons, and scented with turmeric’s signature peppery earthiness, this soup is in heavy rotation in our kitchen from around Halloween to “Hey, I just saw a daffodil.” I love it because it’s super quick and weeknight friendly, incredibly nourishing, and easily adapted to incorporate whatever winter squash you like and/or happen to have on hand (pumpkin, acorn squash, even sweet potato, which isn’t a squash, but it works). My husband loves it because, well, because he’s a soup person; my kids love it because it’s neon orange, and orange food is exciting for some reason. I make the recipe in batches large enough to feed a small village and freeze it to enjoy through the fall and into the winter (after which I’m done with soup; bring on the salads instead!). Whatever kind of soup eater you are, you’ll be happy to have this one in your rotation.
Serves 4 to 6
2 tablespoons extra virgin olive oil
1 small white onion, cut into small dice
2 garlic cloves, minced
One 2-inch piece fresh turmeric, peeled and thinly sliced, or 2¼ teaspoons ground
¼ teaspoon ground cinnamon
1 teaspoon sea salt
Freshly ground black pepper
1 large butternut squash (about 3 pounds), peeled, seeded, and cut into 1-inch chunks
6 cups stock (any kind)
Optional garnishes: toasted seeds (use the seeds inside the squash!), chopped toasted nuts, crumbled goat cheese, sliced pears, beans, fresh herbs, plain yogurt, coconut milk
1. Heat the olive oil in a large saucepan or Dutch oven over medium heat. Add the onion and cook, covered, stirring occasionally until tender, 6 to 8 minutes. Add the garlic, turmeric, cinnamon, salt, and pepper to taste and cook for about 30 seconds more, or until aromatic.
2. Add the squash and stock and bring the mixture to a boil. Lower the heat to a simmer and cook for about 20 minutes, or until the butternut squash is fork tender.
3. Using an immersion blender (or standard blender, working in batches), puree the soup. Serve unadorned or sprinkled or swirled with your desired garnishes.
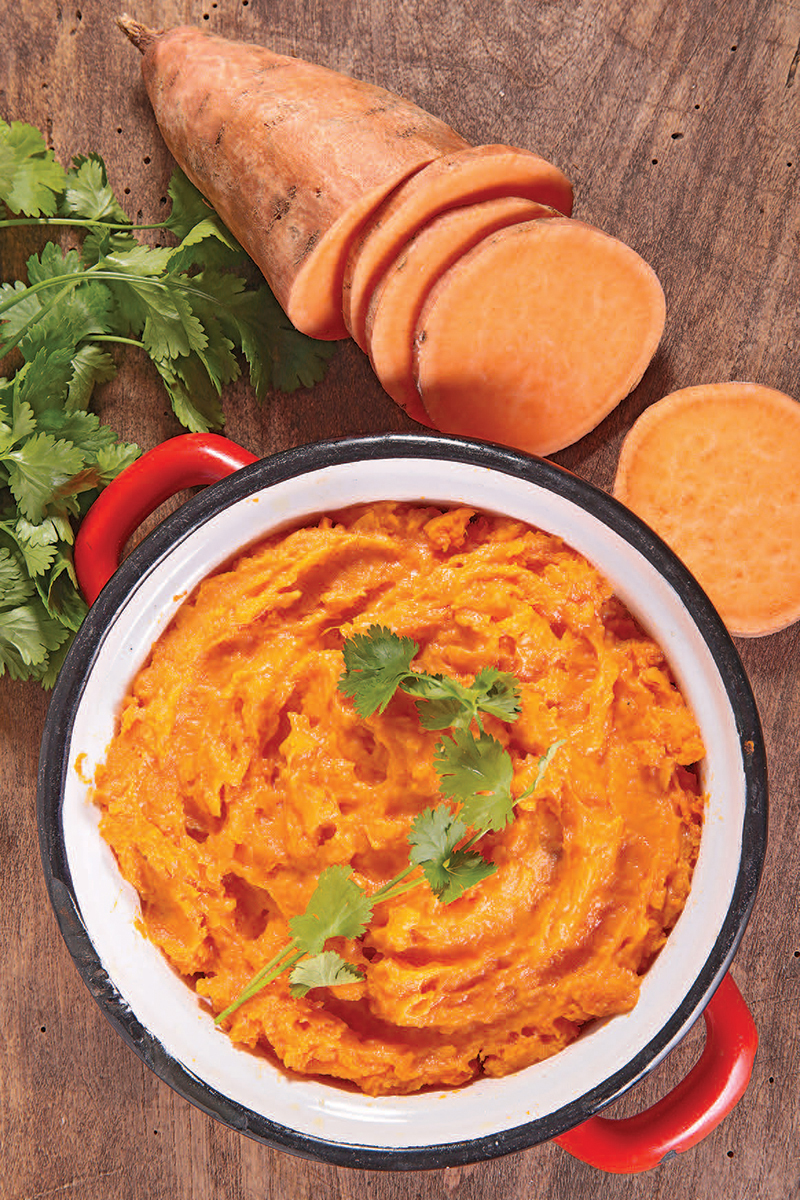
Ginger- and Coconut-Mashed Sweet Potatoes 
The idea of a sweet potato mash has honestly never done much for me. I have a funny relationship with sweet potatoes in the first place in that I always enjoy them when I eat them, and I buy them often, but for some reason I usually have to really psych myself up to cook them. I suspect I’m not alone in this. I think it may have something to do with the fact that they’re kind of sweet but not actually all that sweet—an indecisive food. How am I supposed to commit to a food that seemingly won’t commit itself to a category? Show yourself, tuber! Are you sweet or aren’t you?! Although I take a firm stance that a little butter and salt is all you need to make most foods delicious, when it comes to sweet potatoes, I need more. This recipe is more. With bright ginger and luxurious coconut milk, it is decadent, perhaps even holiday worthy (with nary a marshmallow in sight), yet quick and easy enough to whip up any night of the week. And, yes, it happens to be vegan, Paleo, gluten-free, and incredibly good for you, with fiber and healthy fat and tons of antioxidant power. There are lots of varieties of sweet potatoes, not all of them orange; make this mash with any kind you like.
Serves 4 to 6
4 large sweet potatoes
½ cup unsweetened coconut milk
1 tablespoon peeled and grated fresh ginger
¼ teaspoon kosher salt
Freshly ground black pepper
Ground cinnamon (optional)
1. Preheat the oven to 400°F. Pierce the sweet potatoes several times with a sharp knife and bake on a foil-lined baking sheet for 45 minutes to 1 hour, until tender.
2. When cool enough to handle, halve the potatoes and scoop the flesh into a large bowl. Discard the skin. Mash thoroughly with a potato masher or ricer. Add the coconut milk, ginger, salt, and pepper and cinnamon (if using) to taste, and mix well to combine.
3. If you’re not serving the potatoes right away, allow them to cool, then refrigerate for up to 3 days. You can rewarm the potatoes in a microwave on HIGH in 30-second intervals, stirring each time, until hot, or place them in a bowl over a pot of simmering water, stirring occasionally.
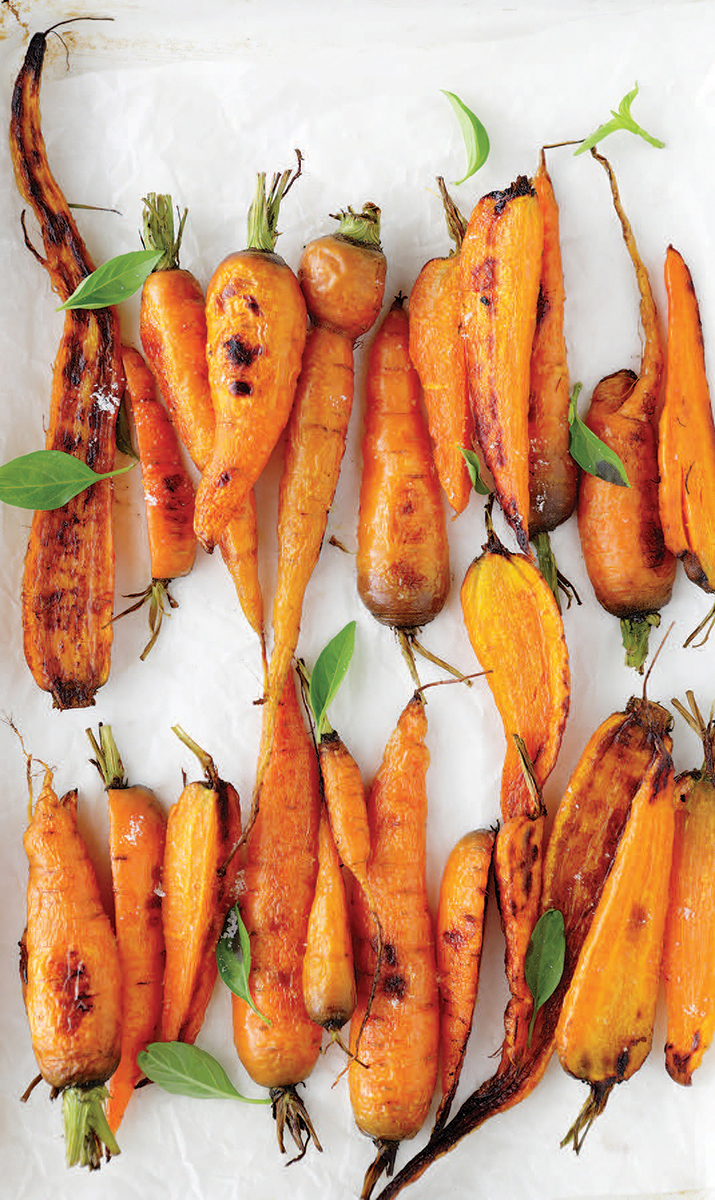
Honey-Roasted Whole Carrots 
I’m going to make a bold claim right now. Ready? This recipe is going to change the way you think about carrots. Or, at the very least, how you think about cooked carrots. Forget steaming, forget boiling, forget slicing. Forget mushy and limp. These carrots are deeply flavored, earthy with turmeric and whole cumin, just slightly chewy at the edges, and melt-in-your-mouth amazeballs. Although you could easily serve them as a side dish to elevate something like roast chicken or, frankly, just about any other entrée, you could also toss these gems onto, say, a bed of greens. Top that with some chopped nuts, plain yogurt, or tahini; a handful of fresh herbs and pomegranate seeds; and a drizzle of good extra virgin olive oil, and then, well, then you’d have yourself one heck of a main course salad. If you happen to have fresh turmeric on hand, use it here—the flavor and texture will be ever-so-slightly superior to using dried, though you can’t go wrong either way.
Serves 4
1 pound carrots, ideally on the thinnish side, scrubbed, greens removed (halve very large carrots lengthwise)
3 tablespoons olive oil
1 tablespoon finely grated fresh turmeric, or ½ teaspoon ground
2 teaspoons whole cumin seeds
2 teaspoons whole coriander seeds
½ teaspoon crushed red pepper flakes
Kosher salt
Freshly ground black pepper
1 tablespoon fresh lemon juice
1. Preheat the oven to 450°F.
2. Toss the carrots with the olive oil, turmeric, cumin, coriander seeds, and red pepper flakes on a parchment-lined baking sheet and season liberally with salt and black pepper. Roast, shaking the pan occasionally, until the carrots are evenly browned and tender (but not totally soft), 20 to 25 minutes.
3. Remove from the oven and drizzle with the lemon juice. Serve.
Note: I almost never peel carrots. If they’re reasonably fresh, you really don’t need to do so. Just give them a good scrub and get ready to roast. For the freshest carrots, grab a bunch at your farmers’ market; or, at your local supermarket, look for carrots that are vibrant in color—the pigment fades over time, so the freshest carrots will pop with color.
Perfect Yellow Rice 
Yellow rice is exactly what it sounds like: rice that has been turned yellow (usually from turmeric). It’s a delicious and simple accompaniment to all sorts of roasted and grilled meats and fish, a real crowd-pleaser that I’ve cooked many times for universally happy clients. Although I did have this one rather finicky “client”—who was five years old and lived in my house. In a desperate attempt to encourage my deeply rice-averse kid to expand her side dish horizons, I succumbed to buying a commercially produced package of yellow rice mix (full of sodium, artificial junk, and other additives that I don’t usually feed my family), thinking that just maybe, if I found the rice equivalent of boxed mac and cheese (I told you I was desperate), I’d achieve some kind of breakthrough. And then, naturally, she loved it in all its processed glory. And, yes, I am aware that I brought that on myself. Thankfully, it turned out that the packaged stuff was simply a gateway to the real stuff, which is literally just as easy to make, even more delicious, and a great way to show off turmeric’s gorgeous color. You can use virtually any kind of long-grain rice here, though if you’re going with brown rice, you’ll need to adjust the cooking time quite a bit.
Serves 4
1 cup uncooked basmati rice, rinsed
1 tablespoon unsalted butter, olive oil, or coconut oil
½ teaspoon ground turmeric
¼ teaspoon ground ginger
¼ teaspoon salt
1/8 teaspoon freshly ground black pepper
½ teaspoon onion powder
½ teaspoon garlic powder
2 cups chicken or vegetable stock
1. Combine all the ingredients in a medium pot.
2. Cover and bring to a boil; then lower the heat and simmer, covered, for 15 minutes.
3. Remove from the heat and let sit, still covered, for another 10 minutes before fluffing with a fork and serving.
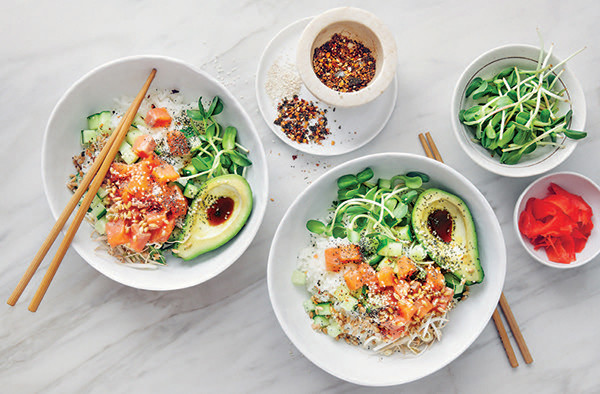
Sushi-ish Rice Bowls with Classic Ginger-Carrot Dressing 
Rice bowls are big in our house. They make for a quick and easy weeknight meal and/or a satisfying desk lunch. They’re extremely customizable, which is handy for managing assorted mealtime demands—ahem—requests from, say, small dining companions who may have some extremely specific ideas about what foods should and should not appear on their dinner plates and whether said foods should be allowed to touch one another. In other words, diners can pick and choose what ends up in their bowls. Burrito bowls, Indian rice bowls, Thai-style curry bowls, bits and bobs of whatever-is-hanging-around-the-fridge bowls—they’ve all come to my rescue on many a harried weeknight. But my favorite, hands down, and the bowl that ends up in my husband’s lunch more often than not, is a sort of deconstructed sushi bowl. Fresh, bright fish and vegetables (or just vegetables) atop simple sushi rice are then adorned with toppings galore, including a homemade version of the ubiquitous sushi restaurant ginger-carrot dressing. Sushi bowl, poke bowl, Buddha bowl . . . whatever you want to call it, it’s way better than calling it take-out!
Serves 4
2 cups sushi or short-grain rice (white or brown)
¾ pound sushi-grade raw fish, cut into bite-size pieces; leftover salmon (from recipe on page 76); or 1 pound cubed tofu, marinated in ¼ cup soy sauce, ¼ cup rice vinegar, and 1 teaspoon sesame oil
Ginger-Carrot Dressing (recipe follows)
SOME TOPPINGS TO CONSIDER:
1 or 2 avocados, peeled, pitted, and sliced
1 bunch scallions (white and light green parts), thinly sliced
2 seedless cucumbers, sliced
1 cup shelled edamame
Furikake (a dried seaweed, fish, and sesame seasoning, available at Asian markets)
Pickled ginger (for homemade see page 57)
Toasted sesame seeds
Crumbled nori sheets
Spicy mayo (mayonnaise plus sambal oelek)
Steamed spinach
Steamed sweet potato
Ponzu sauce
Pineapple
Peanut sauce
Sriracha
1. Prepare the sushi rice according to the package directions.
2. Divide the rice and fish or whatever protein you’re using among bowls, then go bananas with the toppings. That’s pretty much all there is to it!
Ginger-Carrot Dressing
Makes 2 cups dressing
½ cup vegetable oil
¼ cup rice vinegar
2 tablespoons soy sauce
1½ teaspoons sugar
1 teaspoon finely grated fresh ginger
1 medium carrot, peeled and roughly chopped
½ small yellow onion, roughly chopped
Kosher salt
Freshly ground black pepper
Combine the oil, vinegar, soy sauce, sugar, ginger, carrot, and onion in a food processor or high-speed blender and process until smooth; season to taste with salt and pepper. Store in an airtight container in the refrigerator for up to 2 weeks.
Halibut with Golden Sauce 
My mom gave me this recipe years ago. It is delicately flavored, absolutely beautiful to look at—as though it has been kissed by the sun—and one of my all-time favorite ways to use turmeric. And the best part, according to my mom, is that you can make any number of changes to it, including the type of fish, the citrus, and the herbs, and still end up with something that’s both easy to prepare and worthy of company. Although she isn’t a classically trained chef, she is one of the most inventive, spontaneous, problem-solving cooks (and people) I know. Just ask her about what she’s served most recently to dinner guests and you’ll see what I mean. The conversation could go like this:
Mom: I found out Jane and Tom lost power in the storm the other night, so I invited them over for dinner.
Me: That was nice of you. What did you make?
Mom: Well, it was last minute, so I made that chicken recipe, you know the one with the dried figs, almonds, and couscous?
Me: Yeah, that’s a yummy one.
Mom: It is, although I was out of figs, so I threw in some dried apricots instead. Oh, and pistachios instead of almonds. I thought the color would be nice.
Me: Still sounds good.
Mom: It was! Oh, and it’s a good thing I remembered that Jane is gluten-free; I served it over rice instead of couscous.
Me: I’m sure that worked.
Mom: Yeah, it did. I didn’t have any chicken in the house, but it was fine—I real quick defrosted some fish and used that. And, after the fact, I realized I forgot the cinnamon.
Me: So, you made fish with apricots and pistachios.
Mom: Yeah, and I think I liked it better that way.
Serves 4
3 large lemons
1 tablespoon ground turmeric
½ teaspoon salt
2 tablespoons olive oil, plus more for cooking and serving
4 garlic cloves, minced
½ teaspoon saffron threads steeped in 1/3 cup hot water
1 bunch fresh cilantro or parsley, chopped
Four 6-ounce halibut fillets (or sea bass, cod, or really any fish you like)
Freshly ground black pepper
1 cup pitted green olives (optional)
1. Peel and remove the pith from two of the lemons, then thinly slice. Juice the remaining lemon. Place the lemon slices in a small bowl and toss with the turmeric, ¼ teaspoon of the salt, 2 teaspoons of the olive oil, and the lemon juice. Set aside.
2. Heat 1 tablespoon of the remaining olive oil over medium-low heat in a large sauté pan. Add the garlic and cook, stirring occasionally, for about 1 minute, or until it is fragrant but not browned. Add half of the saffron infusion and simmer for another minute, until the liquid is reduced by about half.
3. Arrange the lemon slices on the bottom of the pan, reserving all the accumulated juices in their bowl. Scatter half of the cilantro over the lemon, then arrange the fish fillets in a single layer on the lemon slices. Sprinkle the fish with the remaining ¼ teaspoon of salt, pepper to taste, the remaining saffron infusion, the reserved juices from the lemons, the remaining cilantro, and the olives.
4. Increase the heat to medium-high, bring the liquid to a boil, lower the heat to low, cover, and simmer for 8 to 10 minutes, until the fish is just cooked through and flakes easily with a fork. Serve immediately, drizzled with remaining olive oil.
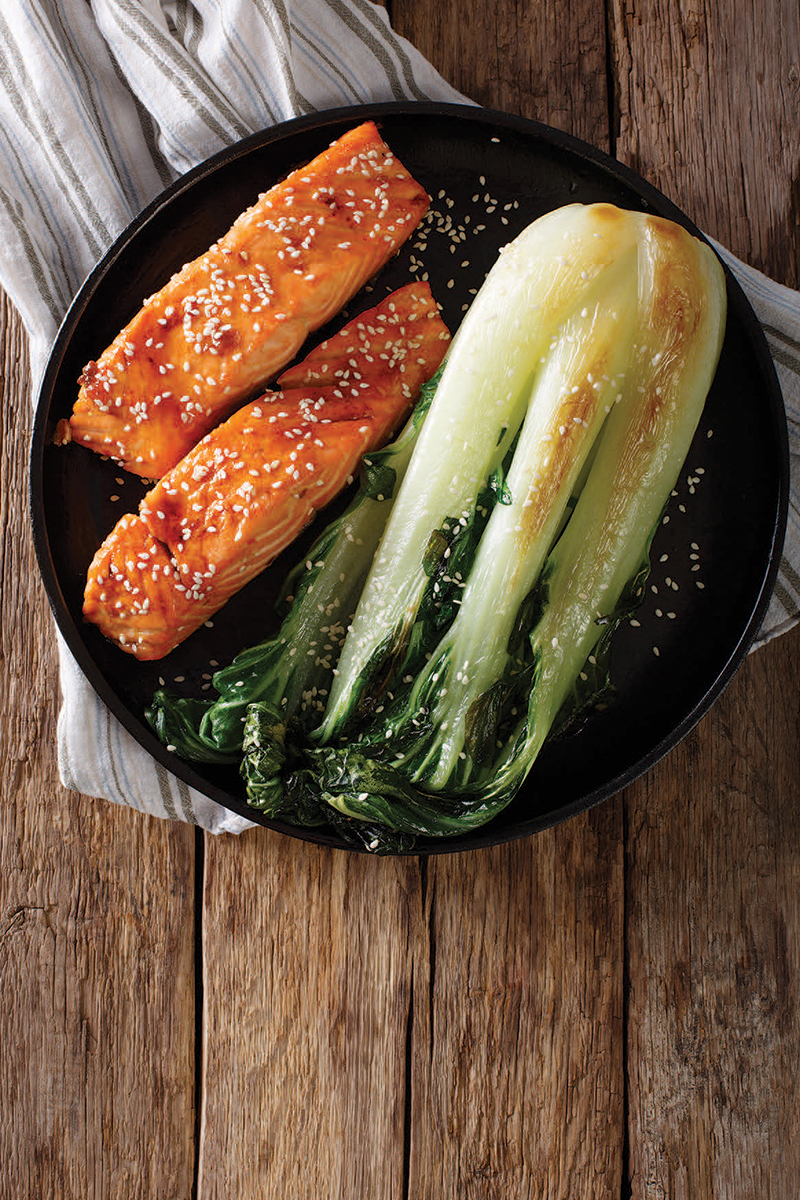
Ginger-Soy Marinated Salmon 
I love salmon and am content to eat it prepared pretty much any way at all. Perhaps this is because it is such a versatile protein that works with just about any cooking technique. I like it grilled, broiled, steamed, pan seared, cured, smoked, raw, poached, roasted. I like it served hot. I like it served cold. (I will eat it with a fox. I will eat it in a box. I will eat it here and there. I will eat it anywhere!) One of my most favorite ways to cook salmon is as follows: simply marinating it in a salty-sweet, gingery bath, and then blasting it under the broiler just until it’s caramelized on the outside and perfectly tender and silky within. The finished product is delicious served just from the oven, but it’s also good at room temperature. Leftovers are really great on a salad or, need I remind you, in a rice bowl (flip back to page 70).
Serves 4
¼ cup white miso
¼ cup mirin
2 tablespoons unseasoned rice vinegar
3 tablespoons soy sauce
1½ tablespoons minced fresh ginger
2 teaspoons toasted sesame oil
2 tablespoons minced scallion
Four 6- to 8-ounce salmon fillets
Salt and freshly ground black pepper
1. Combine the miso, mirin, vinegar, soy sauce, ginger, and sesame oil in a small bowl and whisk until smooth. Stir in the scallion.
2. Place the salmon fillets in a small baking dish, then pour the marinade over the fish. Turn the fillets a few times to coat them. Cover and let marinate in the fridge for 30 minutes, turning occasionally.
3. Remove the fillets from the marinade and season with salt and pepper. Discard the marinade.
4. Preheat your broiler. Place the fillets, skin side down, on a baking sheet or broiler pan. Broil them (without turning!) for 5 to 6 minutes, until the salmon is just barely cooked through and the top is beautifully caramelized. Serve immediately.
Ginger BBQ Shrimp Kebabs 
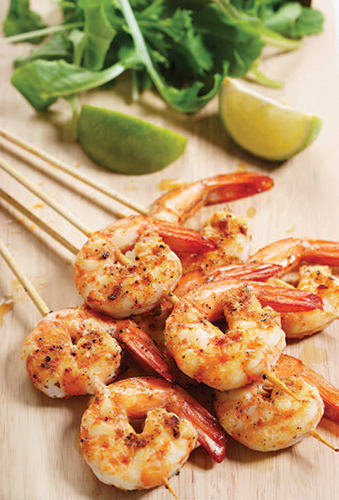
It’s easy to fall into a cooking rut anytime, but come summer it’s especially easy to fall into a grilling rut of burgers-dogs-chicken-repeat. Those foods, plus the occasional steak or vegetable kebab, are super tasty, so it’s no wonder they get stuck on replay, but who wants to be bored? Life’s too short for that. This summer, throw these sweet and gingery shrimp kebabs into the mix to liven things up. They’re quick enough for a weeknight meal (and can even be made under the broiler or on a stovetop grill pan if it’s not barbecue season), but are also the perfect one-handed food for entertaining—your guests won’t even need to put down their drinks to eat them. Buy shelled and cleaned shrimp to save on prep time, thread them onto skewers, then toss ’em “on the barbie” with a quick shellac of gingery barbecue sauce (which, by the way, you’ll want to use on all your other grilling standbys, too), and have dinner ready in no time.
Serves 4
SAUCE:
1½ cups apple cider vinegar
½ cup honey
½ cup ketchup
1½ tablespoons hot sauce
2 tablespoons minced garlic
2 tablespoons peeled and minced fresh ginger
1 teaspoon salt
SHRIMP:
2 tablespoons vegetable oil for grill
2 pounds jumbo or extra-large shrimp, shelled and deveined
½ teaspoon salt
1. Prepare the sauce: Combine all the sauce ingredients in a medium saucepan and bring to a boil over high heat. Lower the heat to medium-low and simmer, uncovered, stirring occasionally, for about 25 minutes, or until the sauce is thickened. Remove from the heat and set aside.
2. Prepare the shrimp: Soak eight to ten wooden skewers in water for 15 minutes. Heat a grill or grill pan to medium-high. Clean and lightly oil the hot grill.
3. Thread the shrimp on the prepared skewers. Grill until the shrimp begin to turn opaque, about 2 minutes. Brush them with the sauce, flip, and brush again. Grill until the shrimp are opaque throughout, about 3 minutes more. Serve with the reserved sauce.
Chicken Tagine with Olives and Lemons 
A tagine is a Moroccan stew. And it’s also the name for the conical earthenware pot it’s traditionally cooked in, an amazing junction of culinary and architectural ingenuity that promotes ideal heat conduction and even cooking temperature. There are a bazillion versions of tagine out there—chicken, lamb, beef, goat, vegetable—but what they all have in common is that they’re cooked low and slow. This recipe for braised chicken with green olives and lemons in a sauce perfumed with turmeric, saffron, and cilantro is based on one of the most classic tagines (and my favorite). Alas, this recipe is also pretty inauthentic (but undeniably delicious). For one thing, I don’t cook mine in a tagine dish. Why? Because I don’t have one, so you can stop worrying about whether you can make the dish in your regular-person kitchen. You can. Any wide, shallow pot with a tight-fitting lid will work. Second, people may tell you that preserved lemon is a must in this recipe. I am here to tell you that if you can find preserved lemon in your supermarket or specialty store, its unique sour/bitter/savory flavor will add lovely depth to your tagine, but if you can’t find it, you can use regular lemon and all will work out. Third, I always serve a tagine with couscous, which is certainly a Moroccan ingredient but not usually served with a tagine in Morocco, as couscous is its own dish there. You can use bread or rice, if you like, but you’re going to want some vehicle for mopping up all that yummy, saucy business.
Serves 4 to 6
3 tablespoons olive oil
2 large yellow onions, sliced
3 garlic cloves, minced
½ teaspoon salt
2 teaspoons ground ginger
1 teaspoon ground turmeric
½ teaspoon crushed saffron threads
1 teaspoon ground cinnamon
Juice of ½ lemon
Rind of 2 small preserved lemons, cut into slivers, or grated zest of 1 large fresh lemon
2 tablespoons chopped fresh parsley
1 small bunch cilantro, coarsely chopped
6 whole chicken leg quarters or 6 drumsticks and 6 thighs
3 tablespoons cracked green olives
1 cup water or chicken stock
1. Heat a tagine or heavy-bottomed, shallow, lidded pan (a Dutch oven works well) over low heat. Add the oil, then the sliced onions. Sprinkle with the garlic, salt, ginger, turmeric, saffron, and cinnamon, followed by the lemon juice and the rind of the preserved lemons (reserve the pulp for another use) or the grated zest of one large fresh lemon. Add the parsley and 2 tablespoons of the chopped cilantro and toss the mixture to combine.
2. Arrange the chicken on top of the onion mixture and scatter with the olives. Pour the water or stock into the pan and bring to a boil. Lower the heat, cover tightly, and simmer gently for 40 to 45 minutes, until the chicken is cooked through.
3. Season to taste and top with the remaining cilantro.

Ginger-Scallion Chicken Thighs 
Oh, this chicken. With a perfectly crispy skin, juicy interior, and a sweet-spicy sauce, it hits all the marks. So delicious. And, frankly, it’s pretty hard to mess up. Relying on my favorite piece of chicken (bone-in, skin-on thighs) with my favorite cooking method, the result is not only a great dish but a solid blueprint for lots and lots of other great dishes down the road. Here, ginger is the flavor star—bright, spicy, and warming—but the cooking method is actually what makes the recipe work, so you could make it the same way but vary the flavoring and still knock it out of the park. (Don’t believe me? Check out my Honey Lime Chicken Thighs recipe in The Honey Companion—guaranteed déjà vu.) It’s simple: You start with the thighs, skin side down in a cold skillet, cook them until they’re bronzed and crisp, then blast them in a hot oven until they’re perfectly done. Super easy, quick, and reliably tender. You’ll have just enough time to pull together some rice and a salad or a green vegetable (and open a bottle of wine?) while they finish in the oven.
Serves 4
¼ cup pure maple syrup
¼ cup fresh lemon or lime juice, or rice vinegar
1 tablespoon soy sauce
2 tablespoons minced fresh ginger
1 garlic clove, minced
2 pounds bone-in, skin-on chicken thighs (4 to 6 thighs)
2 tablespoons olive oil
½ teaspoon salt
Freshly ground black pepper
2 scallions, white and green parts, thinly sliced
1. Arrange a rack in the middle of the oven and preheat the oven to 400°F.
2. Combine the maple syrup, lemon juice, soy sauce, ginger, and garlic in a small bowl. Mix well.
3. Drizzle the chicken thighs with the olive oil and season well with the salt and pepper.
4. Place the thighs, skin side down, in a single layer in a large, cold, cast-iron skillet. Place the skillet over medium heat and cook for 14 to 15 minutes, until the skin is crispy and browned. Turn the chicken and pour the sauce mixture over the thighs.
5. Transfer the skillet to the oven and roast until the chicken reaches an internal temperature of 165°F, about 15 minutes. Garnish with the scallions and serve immediately.
Lemongrass and Ginger Meatballs in Coconut Curry Broth 
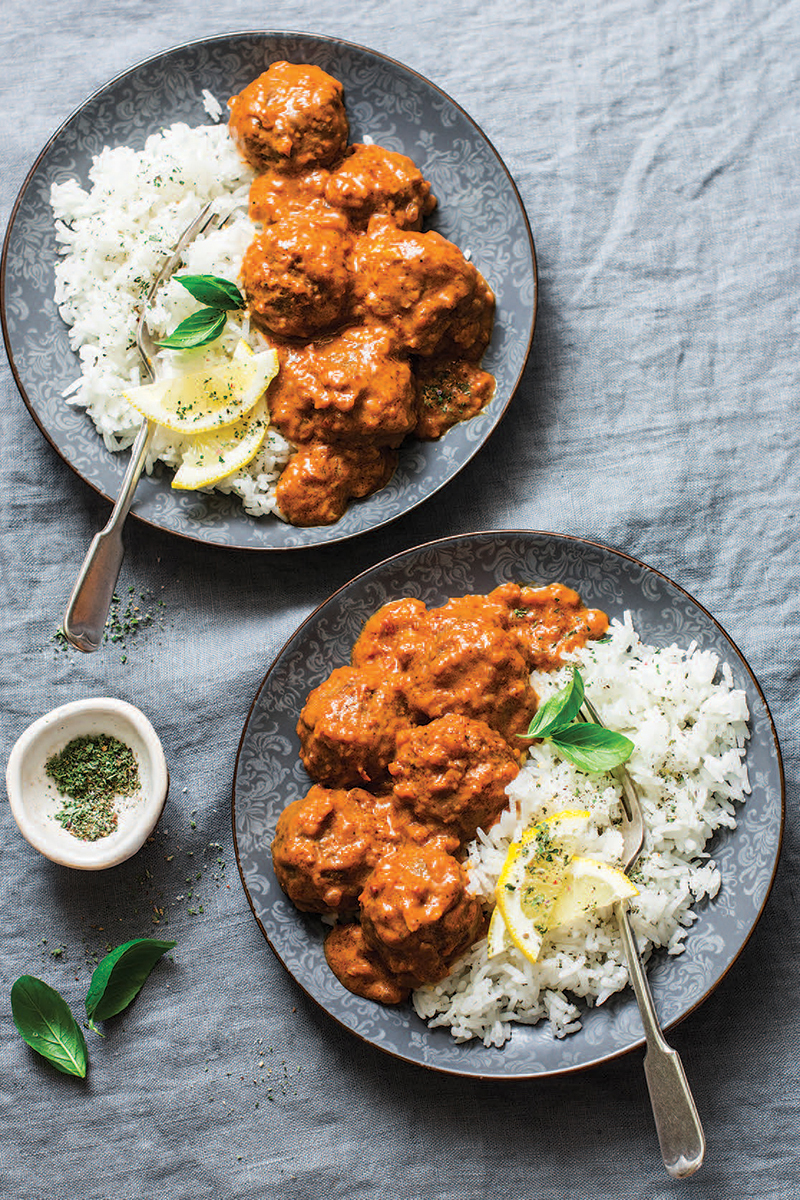
If the word meatballs immediately conjures images of spaghetti and red sauce for you, prepare to experience a serious mind shift—this meal is going to change the way you think about meatballs. Here, ground chicken (or really any ground meat you like) is mixed with a killer roster of bright, Thai-inspired ingredients, including ginger, cilantro, basil, and lemongrass, rolled into bite-sized balls, then bathed in a fragrant broth of coconut milk and yellow curry paste. Served in a bowl with a heap of jasmine rice or a tangle of noodles, this dish is a comfort food experience like no other. Bear in mind, while yellow curry paste is relatively mild, it does pack some heat, so feel free to adjust the amount you use to suit your level of spice tolerance.
Serves 4
MEATBALLS:
1 pound ground chicken (or another ground meat, if you prefer)
4 scallions, minced
2 cloves garlic, minced
1 tablespoon grated fresh ginger
1 tablespoon Thai yellow curry paste
¼ cup panko bread crumbs
1 tablespoon finely chopped fresh cilantro, plus more for serving
1 tablespoon finely chopped fresh basil
1 tablespoon finely chopped lemongrass (tender white part only)
1 teaspoon salt
½ teaspoon freshly ground black pepper
BROTH:
1 tablespoon canola oil
1 tablespoon minced garlic
1 tablespoon minced ginger
2 tablespoons Thai yellow curry paste
Zest of 2 limes
1 cup coconut milk
2 cups chicken or vegetable stock
TO SERVE:
Juice of 2 limes
A few handfuls fresh spinach, mustard greens, or other dark green leaves of your choosing (optional)
Fresh ground black pepper (optional)
1. Adjust the oven rack to the center position and preheat the oven to 375°F.
2. Prepare the meatballs: Place all the meatball ingredients in a large bowl and, using your hands, mix together until blended. Form the meat mixture into 1- to 1½-tablespoon-sized meatballs.
3. Place the balls about an inch apart on a parchment-lined baking sheet. Bake for 15 to 20 minutes, until cooked through.
4. Meanwhile, prepare the broth: Heat the oil in a medium saucepan over medium heat. Add the garlic and ginger and sauté for about 30 seconds, or until fragrant. Add the curry paste and cook for another 30 seconds, then stir in the lime zest, coconut milk, and stock. Bring to a simmer.
5. To assemble: When the meatballs are fully cooked, remove them from the oven and place them in the broth. Toss in the spinach or greens of your choosing (if using) and cook for another 2 to 3 minutes, until they’re bright green and wilted. Remove the pan from the heat and stir in the lime juice. Add more black pepper to taste, if desired. Serve.
Garlic-Ginger Marinated Flank Steak 
I don’t eat a lot of red meat. In fact, I eat very little red meat. As in, maybe once every couple of months. I’m definitely not a vegetarian, as I eat plenty of fish, eggs, and some poultry, but I do lead a relatively plant-centric existence. This is all partly for health reasons, partly for karmic reasons, and partly for planetary reasons, but mostly it’s because I just don’t love meat that much. Except every once in a while I do decide that I’m in the mood and that I want to splurge on some red meat, in which case I want it to be really, really good. Like. Really. Good. I want it to be a little salty, a little tangy, a little punchy, and definitely beefy. I want it to be this here steak. This recipe makes a whole flank steak, which is either great for entertaining or for generating leftovers, which you’ll undoubtedly be happy to have lingering about, because it’s excellent served cold as part of a steak salad (think: sliced cucumbers, blanched green beans, julienned peppers, crushed peanuts, cilantro, and lime) or in a sandwich. And if you’re more partial to another cut of meat, you can easily use skirt or hanger steak instead.
Serves 6 to 8
1 tablespoon water
¼ cup light or dark brown sugar
1½ tablespoons Asian fish sauce, or more to taste
3 tablespoons fresh lime juice
1 garlic clove, minced
1½ teaspoons fresh ginger, minced
½ teaspoon crushed red pepper flakes
1 whole flank steak, about 2 pounds
Salt
Freshly ground black pepper
1. Combine the water, brown sugar, fish sauce, lime juice, garlic, ginger, and red pepper flakes in a small bowl and stir to combine.
2. Place the flank steak and the marinade in a resealable, gallon-sized plastic bag. Press out the air, seal the bag, and place the steak in the refrigerator to marinate for at least 1 hour and up to 12 hours.
3. Meanwhile, preheat (and clean the grates of) an outdoor grill, indoor grill pan, or oven broiler.
4. Remove the steak from the marinade, season both sides with salt and black pepper, and place on the hot grill. Cook for 3 to 5 minutes per side, depending on the thickness of the meat and your preference for doneness. I like mine medium rare, which is about 125°F and takes less than 4 minutes per side, but you do you.
5. Remove the steak from the grill and allow it to rest for 5 to 10 minutes. Slice the meat very thinly against the grain. Serve.
Coconut and Red Lentil Dal 
This easy, vegan, gluten-free, dairy-free, flavor-packed Indian-style curry is a great weeknight meal: ready in under 30 minutes and cooked in one pot. What more can one ask of a workweek dinner? The coconut milk makes the dish feel decadent, while the lentils and spices keep it homey yet, somehow, still light and revitalizing. And about those red lentils . . . should you get halfway through the recipe and panic that things have gone terribly wrong because the once teensy, coral-colored lentils have morphed into what can only be described as yellow “mush,” rest assured, that’s supposed to happen. Unlike black lentils or yellow split peas, red lentils cook down really quickly and become lusciously creamy. Feel free to bulk up the dish by adding whatever vegetables you have around, such as a few handfuls of spinach, sliced carrots, diced sweet potato, or winter squash. Then serve the whole shebang over white or brown rice to round out the meal. Or add a bit more liquid to thin things out and make it more soup-like and less of a stew. Any way you serve it, this one-pot wonder will quickly become a favorite dish.
Serves 6 to 8
2 tablespoons vegetable oil
1 medium onion, chopped finely
1 tablespoon peeled and finely chopped fresh ginger
2 garlic cloves, minced
1 teaspoon ground cumin
½ teaspoon ground coriander
1 teaspoon ground turmeric
1 teaspoon salt, plus more to serve
¼ teaspoon freshly ground black pepper
1 fresh jalapeño or serrano chile, finely chopped, including seeds (optional)
2 cups water
1½ cups dried red lentils
One 14-ounce can unsweetened coconut milk
2 tomatoes, seeded and chopped
1 cup loosely packed fresh cilantro sprigs
Lime wedges for serving
1. Heat the oil in a heavy, 3½- to 4-quart pot over moderate heat. Add the onion and cook until translucent, about 6 minutes. Add the ginger and garlic and cook for 1 minute. Add the cumin, coriander, turmeric, salt, black pepper, and chile and cook for 1 minute more.
2. Add the water, lentils, and coconut milk. Stir to combine, then simmer, covered, stirring occasionally, for 5 minutes. Stir in the tomatoes and simmer, covered, until the lentils and tomatoes are tender, about 15 minutes.
3. Season with salt and serve with cilantro sprigs and lime wedges.

Turmeric Cake with Honey Cream Cheese Frosting 
Unexpected as it may seem to see turmeric turn up in a cake recipe, this idea is far from a new one. You see, there’s a delicious and very old Lebanese cake called sfouf, which is made from semolina flour and turmeric. It is brightly hued, just sweet enough to perfectly complement a cup of coffee or tea, and is perfumed with the unique, earthy, and delicate touch of turmeric that mingles just so with the modest dose of sugar and orange flower water. On the spectrum of baked goods, traditional sfouf sits closer to biscotti and corn bread than a true dessert. This recipe, however, is a riff on the original: it’s sweeter, moister, and (with apologies to purists and traditional sfouf lovers) it gets a slathering of decadent honey-kissed cream cheese frosting, which not only places it squarely in the dessert category but makes it perfectly suited to celebrations—just add candles. Perhaps my favorite part of this recipe is the use of tahini (sesame paste) to grease the pan. It’s a very common instruction in many traditional sfouf recipes, and I just love how it adds to the unique character and richness of the cake. Of course, you can coat the pans with oil or butter instead and still end up with a showstopper of a treat!
Serves 12
CAKE:
1 to 2 tablespoons tahini for pan
2½ cups all-purpose flour
4 teaspoons ground turmeric
2 teaspoons baking powder
½ teaspoon salt
12 tablespoons (1½ sticks) unsalted butter, at room temperature
2 cups granulated sugar
3 large eggs
1 cup whole milk
½ teaspoon vanilla extract
1 teaspoon rose water or orange flower water (optional)
FROSTING:
8 ounces cream cheese, at room temperature
4 tablespoons (½ stick) unsalted butter, at room temperature
Pinch of salt
1/3 cup honey, preferably raw
3 to 4 cups powdered sugar
1. Prepare the cake: Preheat the oven to 350°F. Line the bottoms of two 8- or 9-inch round pans with parchment paper and grease the sides with the tahini.
2. Whisk together the flour, turmeric, baking powder, and salt in a bowl. Set aside.
3. Using a separate bowl and a hand mixer or a stand mixer fitted with the paddle attachment, beat the butter and granulated sugar together until light and fluffy, then add the eggs, one at a time, beating until fully incorporated and the mixture is pale yellow. Add the flour mixture and beat at low speed until just barely mixed. Add the milk, vanilla, and rose water (if using) and beat together on low speed until everything is fully incorporated, scraping down the sides of the bowl as needed.
4. Divide the batter evenly between the prepared pans and bake for 25 to 30 minutes, until the tops spring back slightly when pressed and the cake pulls away from the sides of the pan. Let cool on wire racks for at least 15 minutes, then flip each pan over onto the rack to cool the cakes completely.
5. Prepare the frosting: Combine the cream cheese, butter, salt, and honey in a bowl to mix with a handheld mixer or in a stand mixer fitted with the paddle attachment. Beat until fluffy, 2 to 3 minutes. Gradually add the powdered sugar and beat until smooth, about 1 minute more.
6. Frost and assemble the cake: Place one cake layer on a cake plate or platter. Spread about one-third of the frosting over the layer, all the way to the edge. Place the second layer on top of the first and frost the top and sides of the cake with the remaining frosting.
Note: Unfrosted and wrapped in plastic wrap, the cakes will keep at room temperature for 1 week or frozen for up to 3 months.
One-Bowl Ginger Apple Cake 
Sometimes you need a cake fast. Like, when you suddenly remember a coworker’s birthday, or you’re invited to a last-minute coffee, or you are just having one of those days when you need cake. Need it. Right now! These are times when I imagine a cake mix would come in handy; they come together quickly and there’s almost no mess to clean up. I don’t really have anything against cake mixes; I just don’t like the artificial taste, so I don’t use them. Instead, when faced with a cake emergency, I opt for this moist, gooey, no fuss, no muss, gingery apple cake. Like a cake mix, it’s literally a dump, stir, pour, and bake undertaking with only nine ingredients, and one mixing bowl, and very little measuring or cleanup. You can use dried ginger in place of the fresh; the flavor won’t be quite the same, but it definitely works and will, obviously, save time. Serve this quick-as-a-wink cake plain or with a scoop of ice cream, a dollop of whipped cream, or—my favorite—a schmear of cream cheese.
Serves 8 to 10
½ cup vegetable oil, plus more to oil pan
2 large eggs
1¾ cups sugar
2 teaspoons ground cinnamon
1 tablespoon grated fresh ginger, or 1 teaspoon ground
6 medium apples, peeled and thinly sliced
2 teaspoons baking soda
¼ teaspoon salt
2 cups all-purpose flour
1. Preheat the oven to 350°F. Oil a 9-by-13-inch baking pan with a little vegetable oil.
2. Mix together the oil, eggs, sugar, cinnamon, and ginger in a large bowl. Add the apple slices and toss to coat. Sprinkle the baking soda and salt over the apple mixture, then add the flour and stir just until no raw flour is visible in the batter.
3. Pour into the prepared pan and bake in the center of the oven until the cake is golden brown and a toothpick inserted into the center comes out clean, 40 to 50 minutes. Remove from the oven and let cool for 10 minutes before serving.
Sweet and Spicy Candied Ginger 
We are a family that takes a lot of long-distance car rides. For many holidays and other family functions, we pack up our car full of toys, snacks, games, and other assorted tricks and tools for keeping our kids entertained. Oh, and suitcases. If there’s room. It can be a long ride. One year, what should have been a four-hour drive took us nine hours and 37 minutes. All of which is to say that I am a very experienced car-based flight attendant. I’ve got a pretty good system for stuck-in-traffic emergency preparedness, including entertainment, sustenance, side-of-the-road bathroom needs, and motion sickness. As such, my kit always includes a stash of this homemade candied ginger, which solves snacking-related problems as well as motion sickness, as ginger is one of the best anti-nausea treatments around. Spicy, sweet, easy to make, and so much less expensive to DIY than it is to buy, you’re going to feel so silly for not having made your own before. When we’re not in the car, I bake with it (love it chopped and added to cookies!) or serve it on its own as a little after-dinner treat for party guests. It’s lovely just as is or, even better, dipped in dark chocolate.
Makes about 1 pound ginger
1 pound fresh ginger, peeled and sliced as thinly as possible
4 cups sugar, plus more for coating the ginger slices
4 cups water
Pinch of salt
1. Place the ginger slices in a large saucepan and add enough water to fully cover them. Simmer, uncovered, over medium-high heat for 20 minutes. Drain.
2. Mix together the sugar, 4 cups of water, a pinch of salt, and drained ginger in the same saucepan and cook until a candy thermometer reads 225°F or the liquid thickens and becomes syrupy, 20 to 30 minutes.
3. Remove the pan from the heat and allow it to stand for about an hour. Strain the ginger through a colander or fine-mesh sieve set over a large bowl to catch the syrup (use it to make cocktails or sweeten your tea!), allowing it to drip for a good 30 minutes or so.
4. Toss the drained slices in additional sugar. Shake off any excess sugar and spread the ginger slices on a parchment-lined baking sheet or wire rack. Let dry for at least 3 hours or overnight, until they’re quite dry.
5. Store in an airtight container at room temperature in a dry place and away from direct sunlight. Your candy will keep for several months.
Amazing No-Churn Turmeric and Mango Sorbet 
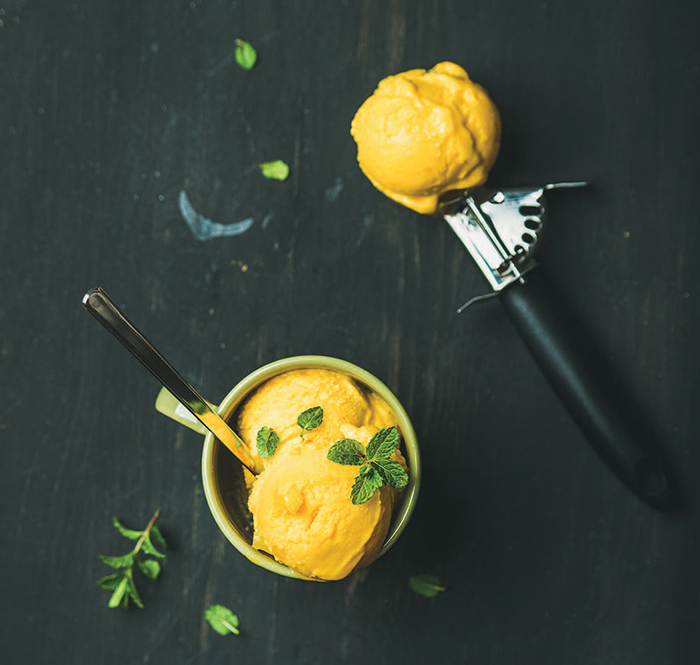
The people in my house are big fans of frozen treats. Ice cream, ice pops, sorbet, granita, Italian ice . . . they love it all. When my kids say, “Mommy, can we have a treat?” they don’t usually mean “Can we have a cookie?” or “Can we have a piece of cake?” Generally, what they’re asking for (and what my frozen-treat-fanatic husband has trained them to think of as real dessert) is something from the freezer. As such, I have been known to churn some lavish and involved concoctions in the ice cream maker for such special occasions as birthdays and Father’s Day and when we’ve gone peach or berry picking as a family. But for everyday purposes, when I’m not interested in serving them a ton of sugar and when I’m short on time, I love the genius of a no-churn recipe. Here, you combine frozen mango, turmeric, and a few other very simple ingredients to achieve sorbet that’s fast; low in added sugar; packed with fresh, vibrant flavor; gorgeous to look at; and a great way to squeeze a little more turmeric into your day. The beauty is that you don’t even need an ice cream maker to concoct this delicious icy treat!
Makes about 2 cups sorbet
12 ounces frozen mango chunks
1 teaspoon grated lime zest
Juice of ½ lime
2 teaspoons ground turmeric, or 2 tablespoons grated fresh
⅔ cup water
Pinch of salt
5 tablespoons sugar, or more to taste
1. Put the frozen mango chunks into a high-speed blender or food processor fitted with a metal blade. Add the remaining incredients.
2. Pulse and process until the ingredients are completely blended and resemble soft-serve ice cream. Eat immediately or transfer the mixture to a container and freeze 2 to 3 hours, until firm enough to scoop.
Chewy Triple-Ginger Chocolate Cookies 
Once upon a time, in our early dating days, my husband and I rented a car and took an adorable little day trip to go apple picking in “the country.” We were in that flirty, wooing stage of our courtship, and I decided to try to impress him with a batch of homemade cookies for the drive. I’d learned he was partial to a chewy cookie, but I wanted to make something sort of out of the box. Standard-issue chocolate chip cookies, while never a bad choice, were just too pedestrian for the impact I wanted to make; after all, I was still trying to snag this guy! I ended up finding a version of this recipe somewhere on the Internet and thought it would be perfect: sweet, spicy, and interesting enough to be memorable. I tweaked it quite a bit to include chopped crystallized ginger in addition to the ground and fresh ginger, a heftier dose of chocolate, and a crunchy coating of turbinado sugar. In the end, triple the ginger, double the chocolate . . . slam dunk! So, to all the single ladies and gentlemen out there, while I can’t say for sure that these were the cookies that sealed the deal, my husband still remembers eating them in the car that day and asks me to make them often. If you’ve got your eye on someone special, these beauties are probably worth a try.
Makes about 3 dozen cookies
1½ cups all-purpose flour
½ cup unsweetened cocoa powder
1 teaspoon baking soda
½ teaspoon kosher salt
1¼ teaspoons ground ginger
1 teaspoon ground cinnamon
¼ teaspoon ground cloves
¼ teaspoon freshly ground black pepper
¼ teaspoon ground nutmeg
8 ounces good-quality dark chocolate, chopped into ¼-inch chunks
8 tablespoons (1 stick) unsalted butter
1 tablespoon peeled and grated fresh ginger
1 cup dark brown sugar
¼ cup unsulfured molasses
2 large eggs
⅓ cup coarsely chopped crystalized ginger
⅓ cup turbinado sugar, or another coarse sugar, for coating cookies
1. Whisk together the flour, cocoa powder, baking soda, salt, and spices in a medium bowl; set aside.
2. Melt 4 ounces of the chopped chocolate with the butter in a small, heatproof bowl set over a pan of simmering water, or microwave in 30-second intervals on HIGH until melted.
3. Transfer the chocolate mixture to a large mixing bowl to use with a handheld mixer, or the bowl of an electric mixer fitted with the paddle attachment. Add the fresh ginger, brown sugar, molasses, and eggs and mix until combined. Gradually mix in the flour mixture. Fold in the remaining chocolate chunks and crystallized ginger. Cover the bowl with plastic wrap and refrigerate for 1 hour.
4. Scoop the dough into ½-inch balls and place 2 inches apart on parchment-lined baking sheets. Refrigerate for 20 minutes, then roll in turbinado sugar. Meanwhile, preheat the oven to 350°F.
5. Bake the cookies, rotating the pan at about the 6-minute point, until they flatten and their surfaces begin to crack, 10 to 12 minutes. Do not overbake! Remove from the oven and cool on a wire rack. Serve and live happily ever after.
6. The cookies can be stored in an airtight container at room temperature for up to 3 days.

