
Treehouse Basics
Measure the circumference of potential host trees for your treehouse to determine if the tree is big enough for the job. To support a treehouse, a single tree should be at least 5 ft. in circumference.

Measure the circumference of potential host trees for your treehouse to determine if the tree is big enough for the job. To support a treehouse, a single tree should be at least 5 ft. in circumference.
The design process for treehouses is often a bit more freewheeling than it may be for terrestrial structures. In fact, the traditional way to design a treehouse (and a technique still used frequently today) is basically to climb up into a tree with boards and fasteners and start to build, making it up as you go along. One of the great attributes of treehouses is that there are very few rules. But the rules that do exist are important ones. And even experienced treehouse builders spend time up-front learning the rules, assessing the needs of the treehouse occupants and performing one of the most critical design tasks: choosing the best tree.
In this chapter:
 Choosing a Tree
Daydreaming aside, finding your host tree is the first real step in the treehouse process. This is because the tree will have the most say in the final design of the treehouse. More ambitious treehouse plans require healthier trees. In the end, if your host tree isn’t up to the task, you’ll have to consider a smaller treehouse or figure in some posts for structural support.
Lots of treehouses are hosted by multiple trees. This is usually a good idea from a strength standpoint. However, designing the house can be a lot like working by committee, since trees, like people, tend to act independently when the going gets tough. For most treehouse builders, the selection process isn’t a question of which tree to use but rather, “Will old Barkey in our backyard support a treehouse?” For them, the health test is crucial. You don’t want to kill your one, beloved tree by burdening it with a temporary structure.
This chapter provides some general tips and rules to help you find a suitable host for your dream house. But before you start, there’s this advice (it won’t be the last time you hear it): When in doubt, ask an arborist. They’re in the phone book, they’re not expensive, and they can advise you on everything from tree diagnosis to healthy pruning to long-term maintenance.
 General Tree Health
A tree doesn’t have to be in the absolute prime of its life to be a suitable host, but it must be healthy. Asking a tree how it’s been feeling lately probably won’t teach you much, so you have to take a holistic approach by piecing together some standard clues. Other factors, such as location, can rule out a candidate more decisively.
Mature trees are best. They’re bigger, stronger, and move less in the wind than young ones. They also have more heartwood (the hard, inner core of dead wood). When you drive a lag screw into a tree, it’s the heartwood that really offers gripping power.
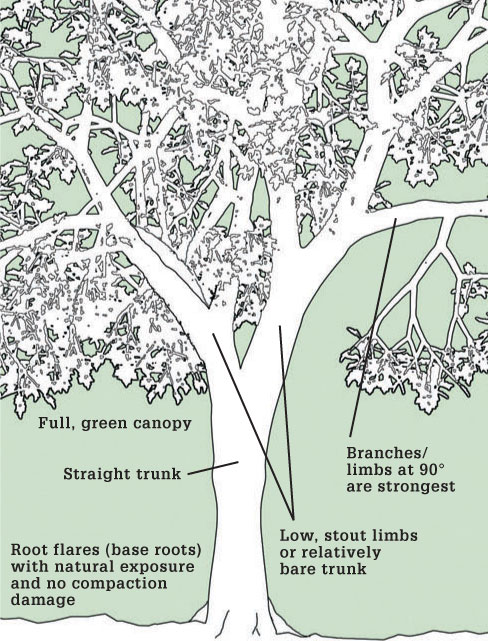
For some reason people don’t like the sight of exposed roots at the base of a tree. So they cover them with dirt and flower beds. This is like burying someone at the beach and forgetting to stop at their neck. It suffocates the tree roots and can affect the health of the whole tree. If your tree’s root flares are buried from re-grading or gardening, take it as a warning sign that there might be problems below.
Another thing to check for is girdling, where newer roots—often from nearby plants—have grown around the tree’s primary anchoring roots, cutting off their life supply. Trees next to unpaved driveways or heavily trodden paths may have suffered damage from all the traffic; another warning sign.
To make sure your tree’s foundation stays healthy, don’t grow grass or add soil over the root flares. Keep shrubs and other competing plants outside of the ground area defined by the reach of the branches. And by all means, keep cars and crowds off the base roots, especially on trees with shallow root systems (see Choosing a Tree Species, on page 27).
Inspect the largest members of the tree—the trunk and main branches. Look for large holes and hollow spots, rot on the bark or exposed areas, and signs of bug infestation. Check old wounds and damaged areas to see how the tree is healing. Avoid trees with a significant lean, as they are more likely to topple in a storm.
Trees with multiple trunks often are fine for building in; however, the trunk junction is vulnerable to being pulled apart, especially under the added stress of a treehouse. The recommended remedy for this is to bind the tree up above with cables to prevent the trunks from spreading. This is a job for an arborist.
When it comes to branches, look for stout limbs that meet the trunk at a near-perpendicular angle. Typically, the more acute the angle, the weaker the connection, although several suitable tree species naturally have branches set at 45°. Dead branches here and there typically aren’t a problem. These can, and should, be cut off before you start building.
Finally, look at the canopy. In spring and summer the leaves should be green and full with no significant bare spots. Needles on evergreen trees should look normal and healthy.
 Is It Big Enough?
Well, that depends on how big a house you want. The truth is, in the end, you’ll have to be the judge of what your tree can safely support. Here are some general guidelines for assessing tree size, assuming the tree is mature and healthy and the treehouse is a moderately sized (100 square feet or so), one-story affair:
• A single tree that will be the sole support for the house should measure at least five feet in circumference at its base.
• Main supporting limbs (where each limb supports one corner of the house’s platform) should be at least 6" in diameter (19" circumference).
• The bigger the tree, the less it will move in the wind, making it a more stable support for a treehouse.
• Different types and shapes of trees have different strength characteristics—a professional’s assessment of your tree can help you plan accordingly.
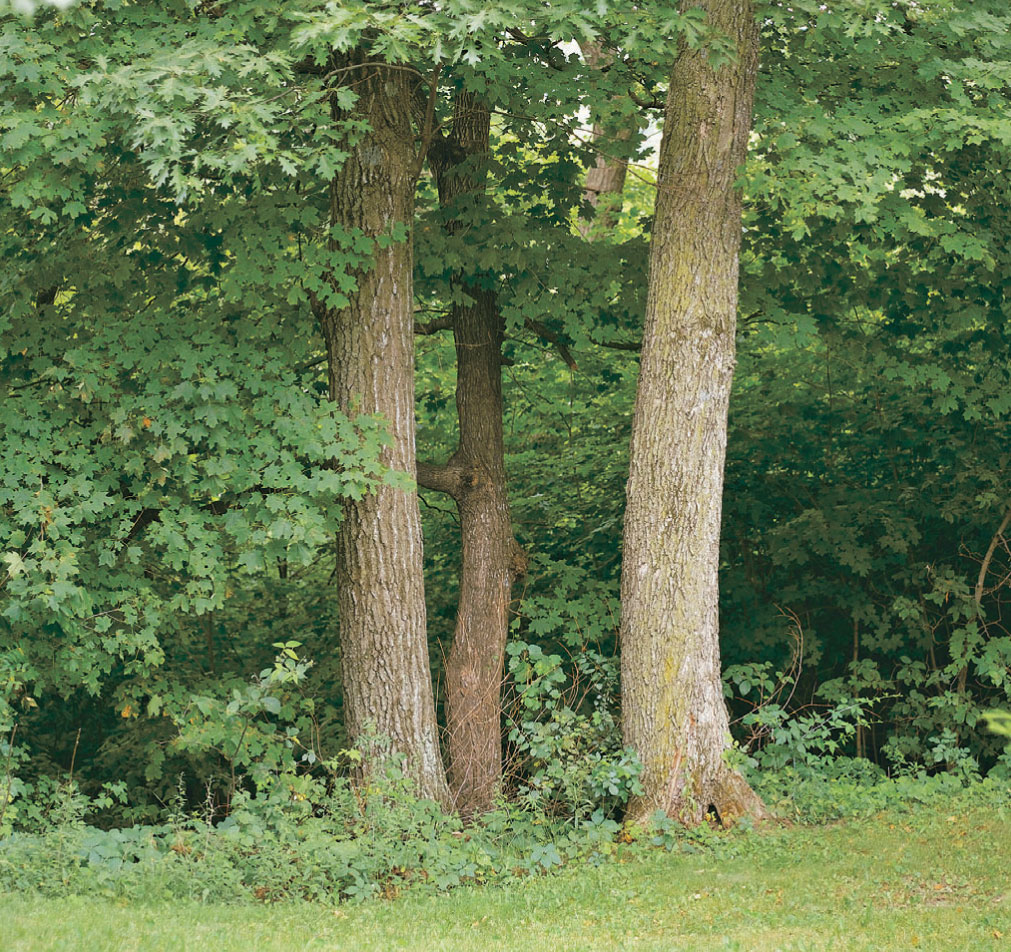
Building in a group of trees is a good way to provide adequate support for a treehouse, but it comes with the added challenge of dealing with multiple forces and directional movement.
 Location
Other important considerations for siting your treehouse are where the tree sits on your property and what sits around the tree. The wrong location can immediately rule out a tree as a good host.
Let’s start with the neighbors. If the tree is too close to your neighbor’s property line, thus making your treehouse all too visible, they might complain to the authorities. Soon there’s a guy on your doorstep with one of those official-looking metal clipboard boxes full of citation papers and other things you hate to see your name on. Of course, your neighbors might not care what you do, but it’s best to talk with them now rather than later. Also, building too close to your property line may involve the authorities simply because you’re breaking setback laws of the local zoning code (see page 29).
Trees located on a steep hillside may be too stressed already to handle the added weight and wind resistance of a treehouse. Likewise, trees at water’s edge are likely to be unstable and may be fighting a constant battle with erosion.
Treehouses in plain view of roads, paths, or other public byways are begging for trouble because people are fascinated by treehouses. Motorists driving by might be distracted, and kids and teenagers walking by may be tempted to explore (or trash) the house.
Other hazards to look for: nearby power lines or utility poles, roofs or chimneys that come close to the treehouse site, and fences and other potentially dangerous obstacles in the “fall line” underneath the treehouse. Any parent knows how creatively kids court danger. Try not to make it too easy for them.
 What to Look For
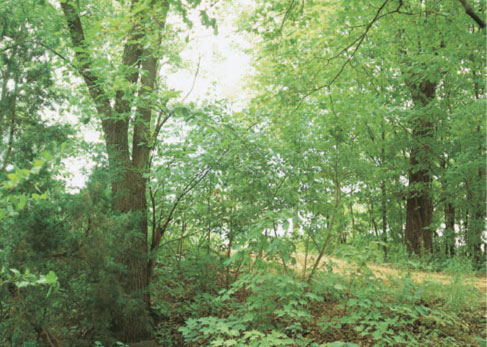
Avoid trees near roads and busy pathways. Cars, kids, and pets don’t always mix well.
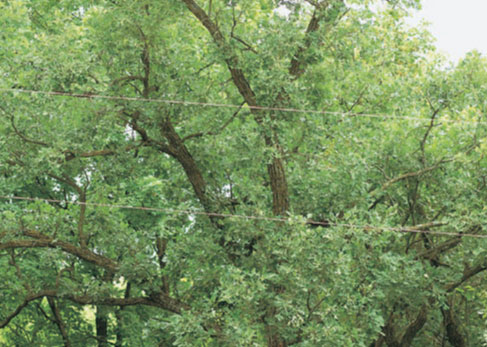
Trees tend to grow. Take into consideration the proximity of utility lines.
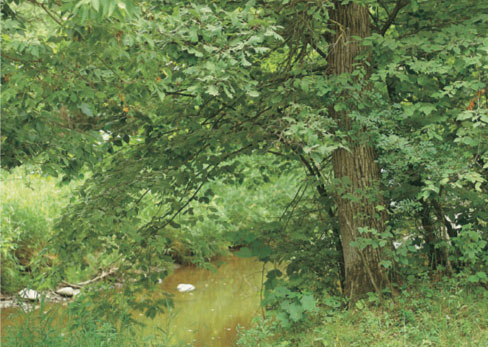
Trees close to water are vulnerable to erosion and will require constant adult supervision. Consider trees that have a fence between children and water.
 Behavior
How your tree acts when the wind blows will become a critical factor in many of your design decisions. That’s why, at this selection stage, it’s wise to rule out any tree that moves too much. You should never try to weather a storm from inside a treehouse. However, the house itself has no choice but to stay put.
Get to know the tree. If there’s a wild branch that likes to swing like a scythe in the wind, you’ll have to plan around it, restrain it in a healthy manner, or (if necessary) chop it off. The problem of high winds is only compounded when you build in multiple trees where independent movement of individual trees can exert some nasty opposing forces on your little dream house. Tree movement is a basic reality of treehouse construction, and there are effective methods for dealing with it. The more you know about the tree, the better you can design your house to get along with its host in all conditions.
 Grooming the Winner
Once you’ve selected the best candidate, it’s time to get it prettied up for the big event. A routine pruning is a good idea, but don’t start hacking off healthy limbs to make room for a backyard McMansion (see Proper Pruning, below). Get rid of dead branches in the tree and clear the ground underneath. If you’d like a soft ground cover beneath (a recommended kid-safety measure), cover the area with several inches of wood chips, preferably from the same species of tree. Don’t cover the area with soil.
Later, when you have a better idea of the size of your treehouse, make sure the structure won’t be blocking the roots’ source of rainwater. If it will, find out how much and how often you’ll need to water the tree to compensate.
 Choosing a Tree Species
| GOOD TREES | |||
| DECIDUOUS (BROADLEAF) TREES | |||
| Characteristics | Native Area | Average Height | |
| Oak | Strong, durable, low branches | Black Oak: California, eastern US | 30-80 ft. |
| White Oak: eastern US | 50-90 ft. | ||
| Live Oak: California, Texas, southern US | 40-50 ft. | ||
| Northern Red: central and eastern US into Canada | 60-80 ft. | ||
| Maple | Sugar Maple is preferred over Red, but both are good hosts | Sugar Maple: northeastern US, north into Canada | 60-80 ft. |
| Red Maple: eastern half of US, north into Canada | 50-70 ft. | ||
| Beech | Smooth bark, horizontal branches | Eastern US, southeastern Canada | 60-80 ft. |
| Apple | Low, stout branches | Most of US, southern Canada | 20-30 ft. |
| Ash | Strong, straight trunk; should be checked for good health | Eastern half of US, southeastern Canada | 60-80 ft. |
| EVERGREEN (NEEDLELEAF) TREES | |||
| Characteristics | Native Area | Average Height | |
| Douglas Fir | Long-living; large, mature trunks have few low branches | Pacific coast, US and Canadian Rocky Mountains | 180-250 ft. |
| Pine | Fast-growing; branches often numerous but small and flexible | Ponderosa Pine: western half of US, British Columbia | 100-180 ft. |
| Eastern White Pine: northeastern, Great Lakes, and Appalachian regions of US | 75-100 ft. | ||
| Sugar Pine: California, Oregon, western Nevada | 175-200 ft. | ||
| Spruce | Can be prone to infestation; shallow roots | Black Spruce: Alaska, Canada, northeastern US | 30-40 ft. |
| Engelmann Spruce: Pacific Northwest, Rocky Mountain states | 100-120 ft. | ||
| Hemlock | Immature trees may have little trunk exposure | Great Lakes and Appalachian regions of US, southeastern Canada | 60-75 ft. |
| NOT-SO-GOOD TREES | |
| DECIDUOUS TREES | DRAWBACKS |
| Cottonwood | Soft, spongy wood |
| Birch | Short lifespan, weak branches |
| Poplar & Aspen | Shallow roots, short lifespan |
| Black Walnut | Branches are brittle and break easily |
 Planning & Design
If you built a treehouse as a kid you probably didn’t spend a lot of time planning it beforehand. You had plenty of ideas and knew what you wanted—a trap door, a lookout post, a tire swing, and maybe a parachuting platform or helicopter pad—you just weren’t exactly sure how everything would come together. In the end, you decided to figure it out along the way and got started.
Of course, some people might use the same approach today (good luck on the helicopter pad), but be advised that a little planning up front could save your project from disaster. Remember the guy with the metal clipboard from the city office? You don’t want him showing up with a demolition order just as you’re nailing up the last piece of trim.
This chapter will get you thinking about general design features, such as the size and style of the treehouse, where it will sit in the tree, and how you’ll get from the ground to the front door—if you want a front door. In this section we cover the all-important construction details, like anchoring to the tree and building the platform, walls, and roof. Inevitably there’s plenty of give-and-take between design dreams and structural necessity. But that’s what makes treehouse building such a fun and satisfying challenge.
Note: Before refining your treehouse plans, see Treehouse Safety (page 50) for important safety-related design considerations.
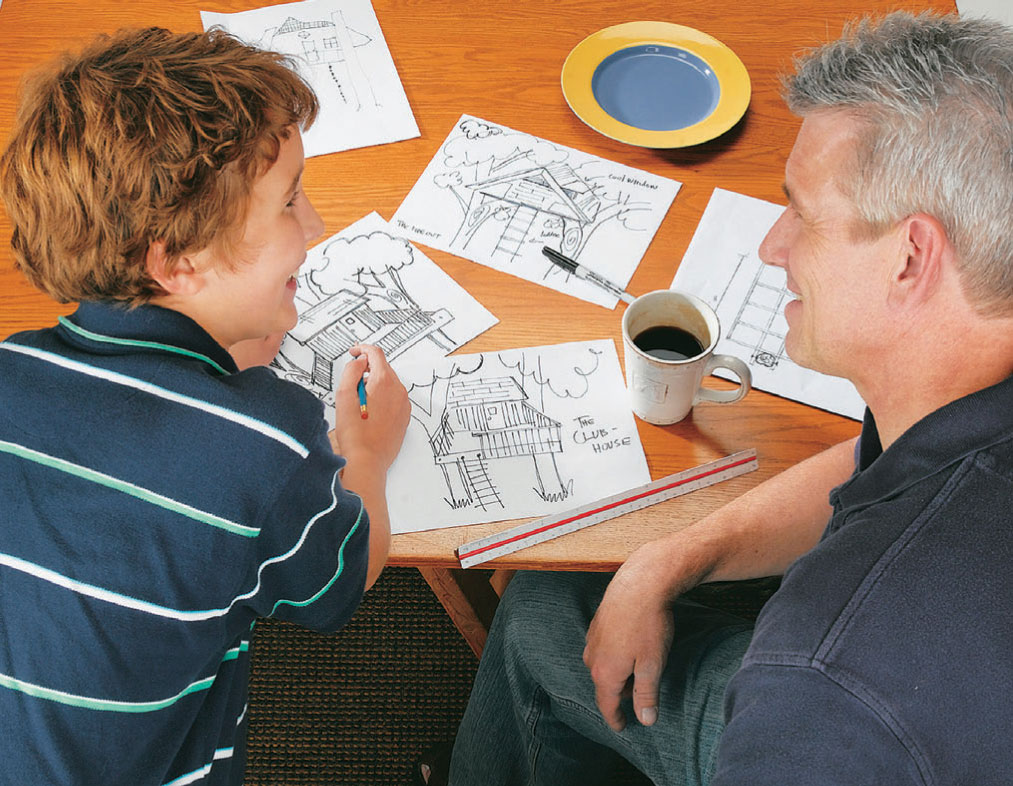
Planning and designing a treehouse is a fun, instructive activity that everyone in the family can enjoy.
 Building Codes & Zoning Laws
It’s time to pinch your nose and swallow the medicine. The sooner you get it over with, the sooner you can go out and play. By checking into the building and zoning rules for your area you can avoid the mistake of spending time on elaborate plans only to run into a brick wall of bureaucracy.
When it comes to building codes and treehouses, the official word is that there is no official word. Many municipalities—the governing powers over building and zoning laws—consider treehouses to be “temporary” structures when they fit within certain size limits, typically about 100 to 120 square feet and not more than 10 to 12 feet tall. If you have concerns about the restrictiveness of the local laws, keeping your treehouse within their size limits for temporary structures is a good precaution to take.
It’s often likely that city officials consider treehouses too minor to be concerned with them. On top of that, building codes for earth-bound buildings are based on measurable, predictable factors that engineers use to calculate things like strength requirements. Drafting a set of standards for structures built on living, moving, and infinitely variable foundations (trees) quickly becomes a cat-herding exercise for engineers. Thus, few codes exist that set construction standards for treehouses. This means more responsibility is placed on the builder.
When it comes to zoning laws, the city planning office is concerned less with a treehouse’s construction and more with its impact on your property. They may state that you can’t build anything within 3 feet or more of your property line (a setback restriction) or that you can’t build a treehouse in your front yard (the Joneses might not be the treehouse type).
The bottom line is this: Your local planning office might require you to get a building permit and pass inspections for your treehouse, or they might not care what you do, provided you keep the building within specific parameters. It’s up to you to learn the rules.
Some of the elements that may be regulated by your local building code and zoning laws include:
• Size restriction (square footage of floor plan).
• Height restriction (from the ground to the top of the treehouse).
• Setback (how closely you can build to the property line).
• Railing height and baluster spacing.
Although city laws are all over the place regarding treehouses, here are a few tips that might help you avoid trouble with your treehouse:
• Talk with your neighbors about your treehouse plans. A show of respect and diplomacy on your part is likely to prevent them from filing a complaint with the authorities. It also smooths the way for later when you have to borrow tools for the project.
• Be careful where you place windows (and decks) in your treehouse. Your neighbors might be a touch uncomfortable if you suddenly have a commanding view of their hot tub or a straight shot into their second-story windows.
• Electricity and, especially, plumbing services running to a treehouse tell the authorities that you plan to live there, which means your house crosses a big line from “temporary structure” to “residence” or “dwelling” and becomes subject to all the requirements of the standard building code.
• Don’t build in a front-yard tree or any place that’s easily viewed from a public road. The point is not to hide from the authorities, it’s that conspicuous treehouses attract too much attention for the city’s comfort, and the house might annoy your neighbors.
• In addition to keeping the size of your house in check, pay attention to any height restriction for backyard structures. Treehouses can easily exceed these, for obvious reasons, but nevertheless may be held to the same height limits as sheds and garages.
• Even if the local building laws don’t cover treehouses, you can look to the regular building code for guidance. It outlines construction standards for things like railings, floor joist spans, and accommodations for local weather and geologic (earthquake) conditions. With appropriate adaptations for the treehouse environment, many of the standards established for ground-houses will work for your perched palace.
 Elements of a Treehouse
Treehouses can range in style from miniature versions of traditional houses to funky masterpieces of original inspiration. Of course, your ideal treehouse might be nothing more than a lofty hammock slung above a pine deck. Personal taste is what it’s all about. Here are some design options to get you thinking.
Walls define the look and shape of a house and do more than any other element to create the feel of the interior space. A treehouse can have solid walls for privacy and a greater sense of enclosure, or it can open up to the elements and let the tree define its boundaries. If you’d like both options, consider an awning-style wall with a hinged top section that flips open.
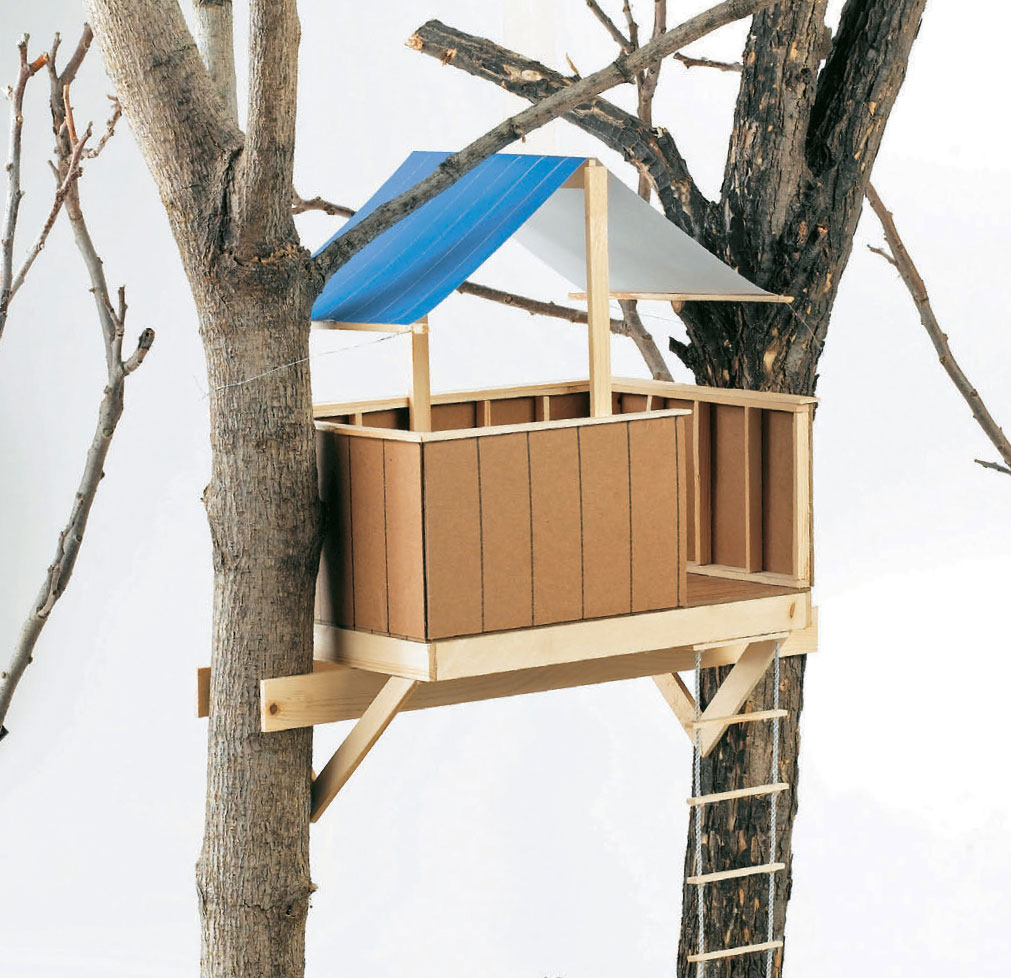
Enclosed walls, either full height or stub walls like these, block or partially block views into the neighbors’ yard and create a secret room for kids.
Open walls admit breezes and allow unobstructed views, plus they’re easier and cheaper to build than enclosed walls. If you choose not to build walls, build safety railings instead.
Flip-up panels let you open up a section of the wall or roof for airflow when you don’t need to batten down for shelter.
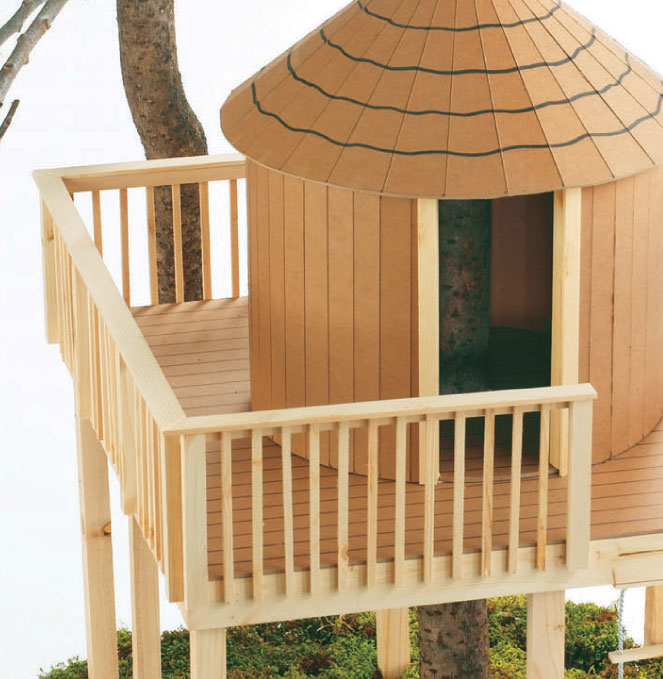
Round or curved walls blend naturally with the shape of a tree.
Treehouse roofs can take on almost any shape and often exhibit a combination of styles. Incorporating branches and trunks into the roof design makes for interesting, organic forms. A common approach to designing a roof is to start with a traditional style then improvise as needed to fit your house. Or, you might decide to skip the roof altogether, preferring the shelter of the tree’s canopy rather than boards and shingles.
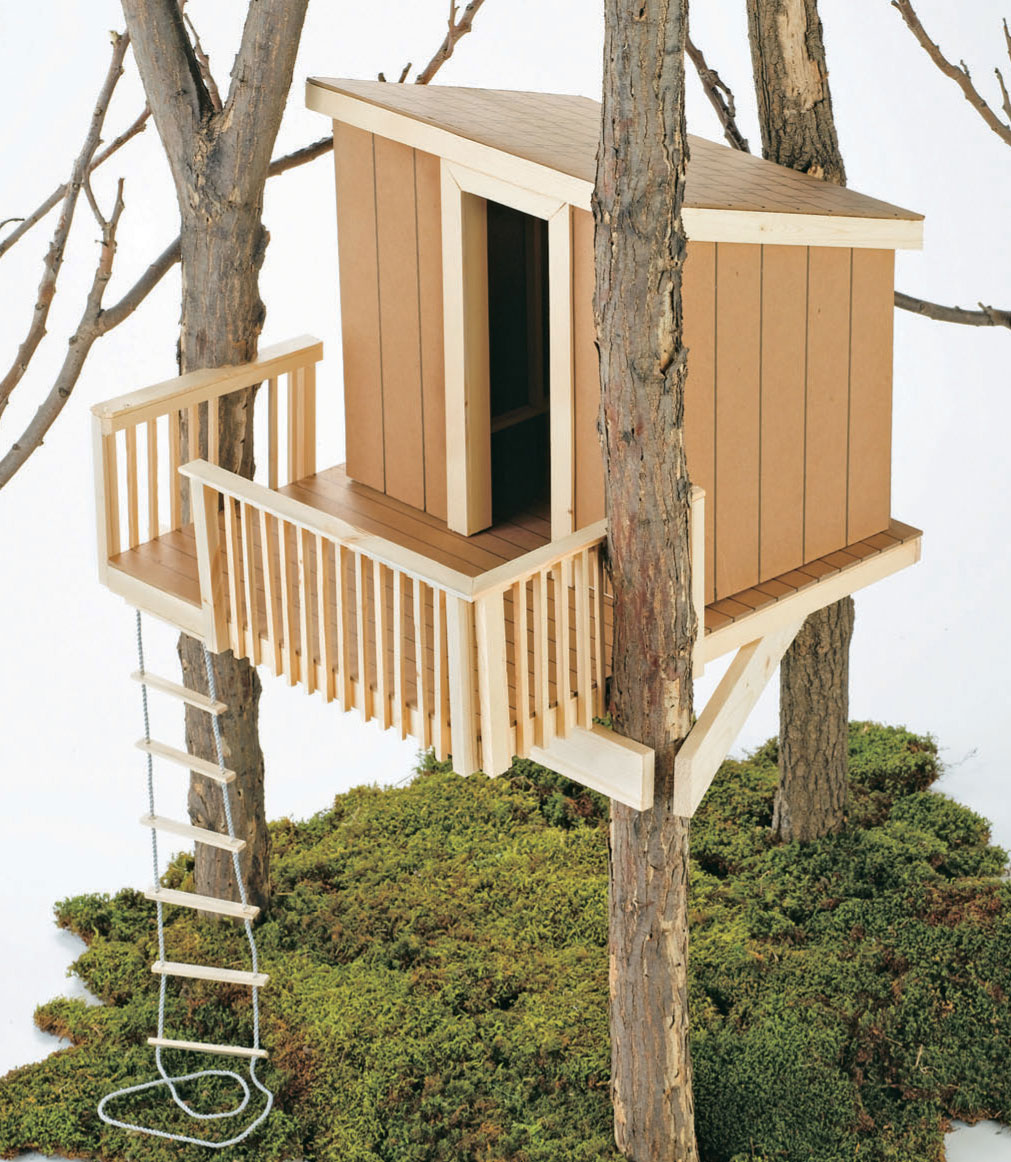
Shed roofs have an easy-to-build, flat shape, making them a good choice for all types of treehouses.
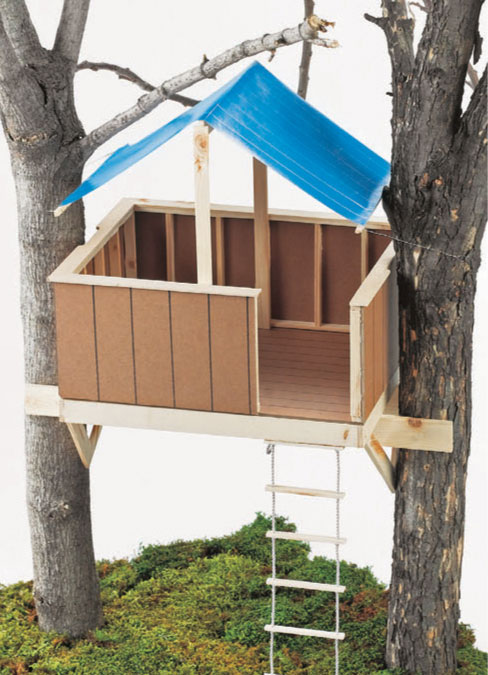
A removable roof made from canvas or a plastic tarp may be all you need to shelter a tree fort or sun deck.
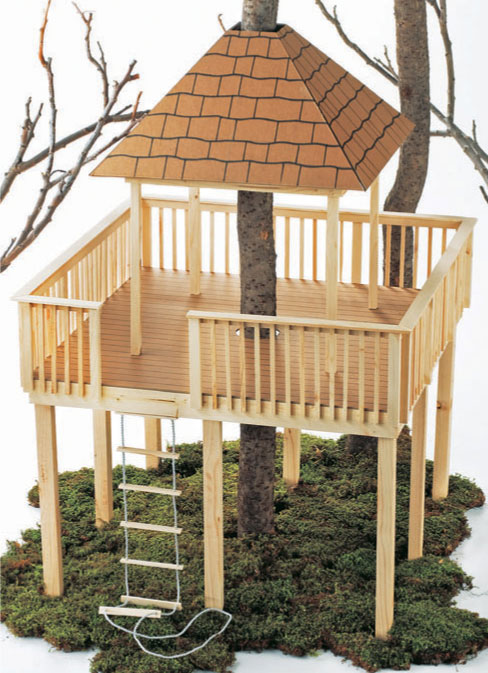
Hip roofs are sloped on all sides and are more difficult to frame than sheds and gables.
A conical roof is an impressive way to top a rounded wall. They’re built with closely spaced rafters fanning out from the roof peak.
The best doors and windows to use on treehouses are either found or homemade. It’s fun to design a wall or entryway around salvaged materials—maybe a reclaimed ship’s porthole window or a creaky old cellar door. You could use new, factory-made units, but their large size and polished appearance don’t fit most treehouses. Kids especially love playful designs, such as Dutch doors, with swinging top and bottom halves, or little peek-a-boo openings through which they can demand, “Who goes there?!”
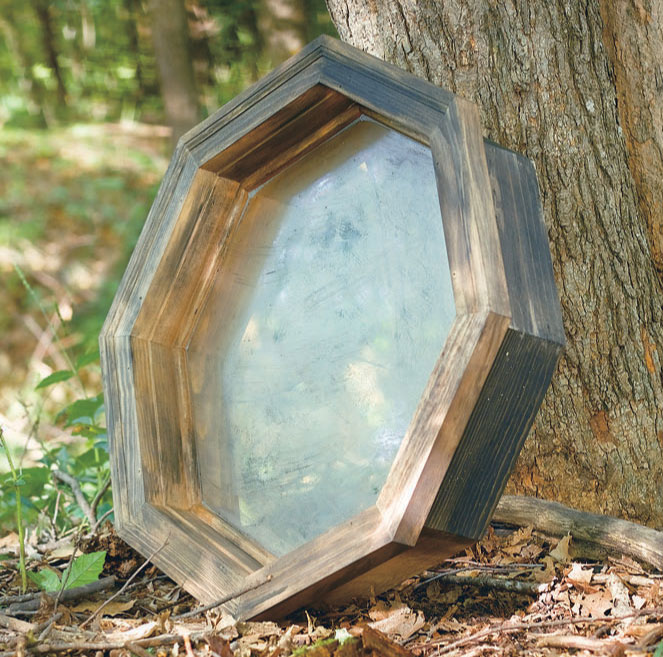
Architectural salvage shops are full of interesting finds for windows and doors.
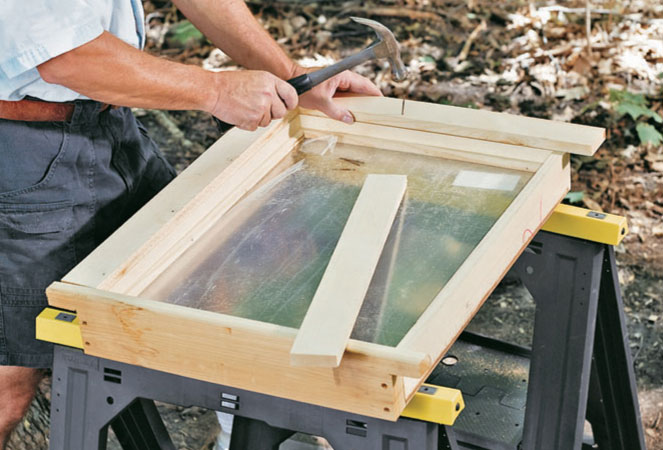
Simple homemade windows are easy to make with plastic glazing and scrap lumber.
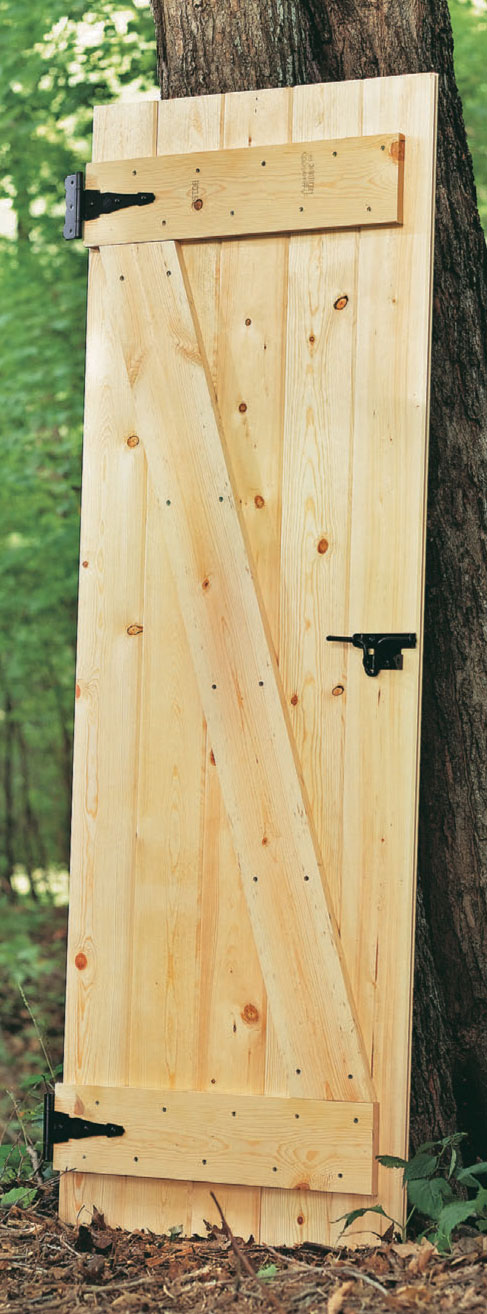
A solid door with a padlock or bolt latch may be a good idea, if not necessary, for securing a remote treehouse.
Perhaps the best thing about a treehouse is all the cool stuff that you can’t have in a real house, like trap doors and cargo nets and fireman’s poles. And who needs a front door when you can exit SWAT-style down a climbing rope? Okay, not everyone is the right age for the ninja lifestyle. A sturdy ladder or even a staircase are also perfectly respectable modes for accessing a treehouse. But just to be safe you might want to include a secret escape hatch and zip line...in case of an alien air assault.
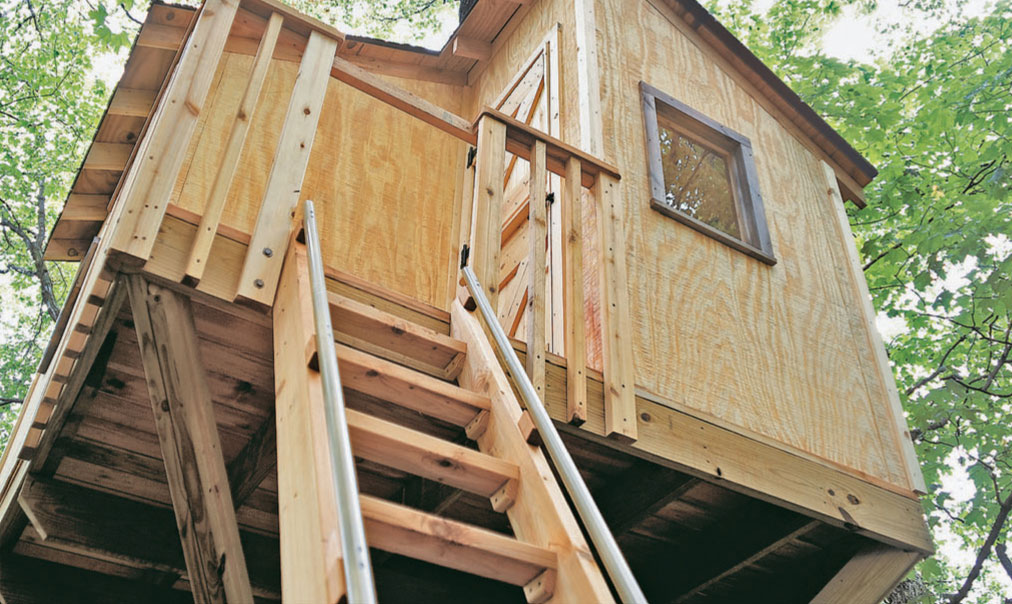
Ladders provide safe and easy access while maintaining a sense of remoteness.
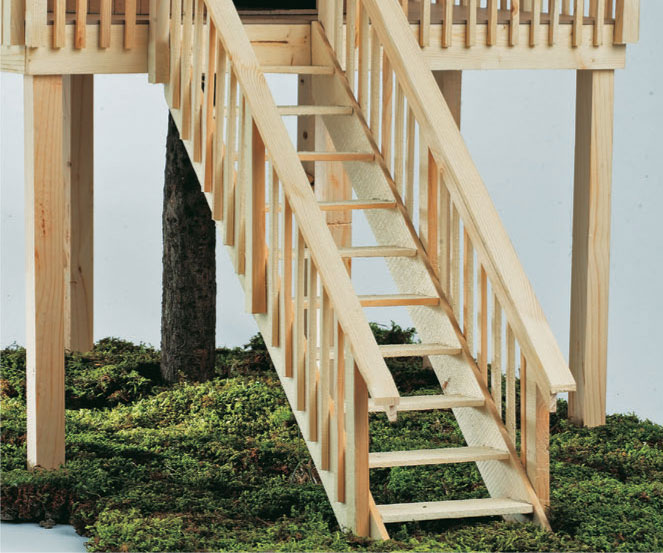
Stairs are a good, practical option for multi-use and multi-user treehouses.
One of the most popular treehouse designs includes a house covering about 1/2 to 2/3 of its supporting platform, leaving the rest open for a small deck or sitting porch. This is a nice way to provide both open and enclosed spaces for your lofty getaway. A small deck in front makes a good, safe landing for a staircase or access ladder, while a large deck can be the perfect spot for having a drink with friends at sunset.
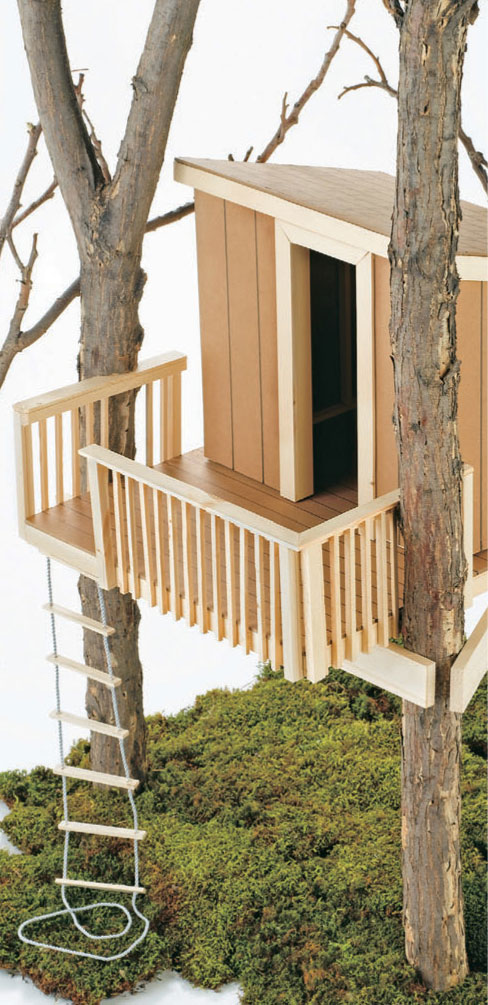
With the platform in place, it’s easy to make room for a tree deck.
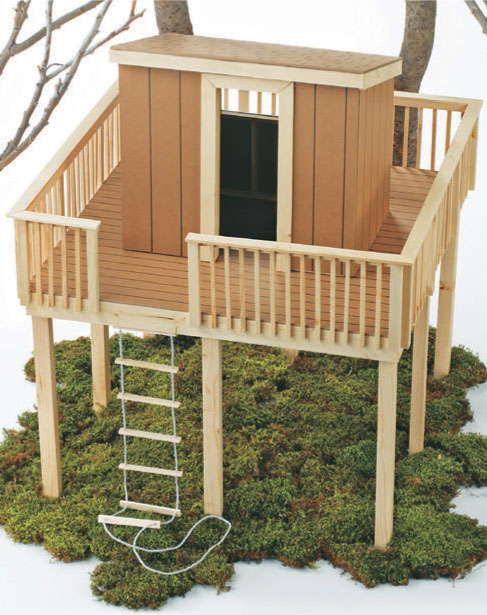
Centering a small house on a platform makes an instant wraparound deck.
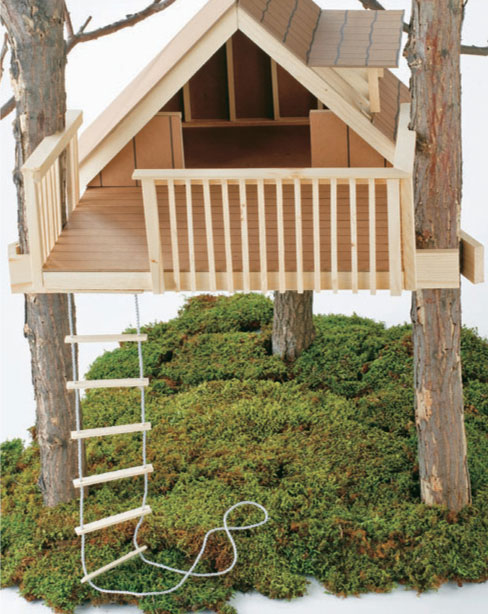
Stairs or a ladder require a top landing; adding a foot or two of space to the landing lets it double as a sitting area.
 Design Considerations
Ask any treehouse nut about design and you’re bound to be advised to let the tree lead the way. This means respecting the tree’s natural strengths and weaknesses and not over-stressing it with an unsuitable or excessive house design. It also speaks to aesthetics. Much of a treehouse’s appeal comes from its host, and the best house designs complement the tree’s character or make use of special natural features. Designing within the branches, as it were, is also good treehouse philosophy and makes the planning and construction—not to mention the enjoyment—of your house as fun as it should be.
So, now that you’ve picked a tree and had a talk with the folks at the local planning office, it’s time to give your house some shape; in your mind at least. As you mull over the height, size, and features of your new home, don’t be afraid to make sketches of your ideas—despite what we’ve all been told, doodling during work is actually a good thing. This will also help with the final step of the design process—making scaled drawings.
The first big decision to make is how high to set the treehouse. If it will be used by kids, keep the platform no more than six to eight feet above the ground. Any higher is dangerous, and kids will have just as much fun at six feet as they would at 12 or 20 feet If your treehouse is designed mostly for adults, you can go higher, but before deciding ask yourself:
• Will you need easy access? If you’re using the house as an office or studio, consider the difficulty of hauling up supplies (and lunch).
• Is construction feasible? Building a treehouse is generally the most potentially hazardous aspect of treehouse life. Also, construction could be slowed considerably by a very high platform.
• Will neighborhood kids be able to climb up into the house? If so, you could be courting trouble with a lofty placement.
Regardless of where you build, you must make sure the treehouse placement is good for the tree. Arborists recommend building below the tree’s center of gravity. This is something you’ll just have to get a feel for, based on the tree’s size and behavior. One general guideline is to build in the lowest 1/3 of the tree’s overall height. If you’re lucky, your host tree will make it easy for you and have a perfect open cradle of stout limbs at just the right height. Alas, it’s usually not that obvious.
Another consideration is pruning the tree to make room for your house. While thoughtful, therapeutic pruning is good, and recommended by tree experts, removing large, healthy limbs to pave the way for easy construction is really straying from the point of building in a tree. If an obstructing limb becomes a deal-breaker for your house plans, consult an arborist to make sure that removing it won’t harm the tree.
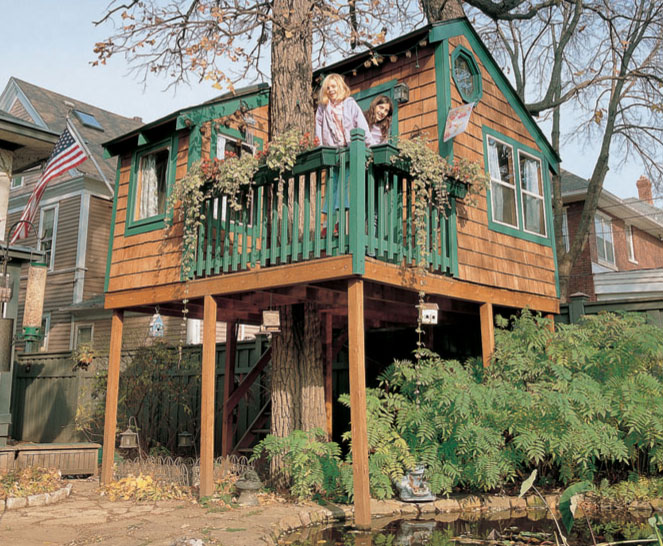
It doesn’t take much elevation for kids to get that lofty feeling in their own treehouse.
Finally, give yourself a good, old fashioned visual reference: Climb up in the tree (or onto a ladder) and stand at the proposed platform height. Check out the view and the headroom. Picture yourself lounging like there’s no tomorrow. Happy? Good. Now you can decide how to get from the ground to your finished house.
To help determine the means of access, look again to the users of the treehouse. Older—that is, mature—people probably would prefer stairs or a comfortable ladder, while kids usually want a more challenging or fun route (just say no to mini-tramps and pole vaulting, however). Do you want a ladder or stairs that are easy to reach from your regular house? Or out of view from the house?
Make sure your planned means of access is viable for the chosen platform height. One mode of access to rule out: steps or rungs individually fastened along the tree trunk. Even when built properly—with threaded screws, not nails—these are fraught with safety problems and require an unnecessary amount of hardware placed into the tree.
Don’t use the familiar nailed-on steps for access. They can easily give way to the side or pull completely out of the tree while you’re climbing.
As with a regular house, sunlight and weather are important design considerations. Perhaps you’ve dreamed of waking up with the summer sunrise or climbing into your perch to catch the sunset after a long day at the office. Position your house carefully to make the most of your favorite outdoor hours. For kids, some full shade is a must to avoid prolonged sun exposure.
With deciduous trees, the changing seasons come with a potential shocker. When fall hits and your host tree is suddenly a bare skeleton, your treehouse might stick out like an embarrassing tattoo. Just something to keep in mind if you’re building when the tree’s canopy is full.
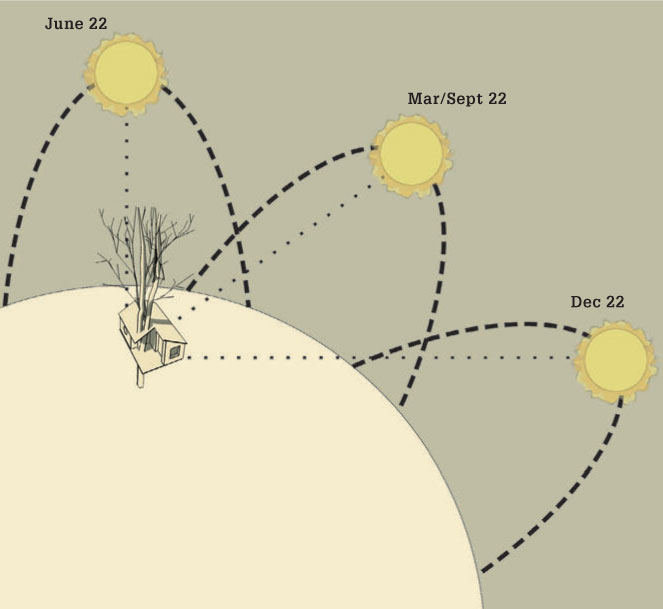
The sun moves from its high point in summer to its low point in winter. Shadows change accordingly. Try and keep the sun in mind as you plan.
Think small. Or at least start by thinking small. Here’s why: Weight is an important factor for any treehouse. The larger the house, the greater the weight burden on the tree. A big house will also catch more wind, stressing the branches more than they’re used to and generally making it harder for the tree to stay upright. It’s not unheard of to have a disproportionately large treehouse create such a windsail that the entire tree blows over. If you feel the need to go big, find a big tree or build in a group of very stable trees.
In treehouses, wall heights don’t need to be the standard 8 feet that they are in regular houses. For adults, 6-1/2 feet is a better place to start. This makes the house cozier and more nest-like. The necessary headroom for a kids’ treehouse depends on their ages and how long they’re likely to use the house. Generally, 6 feet of headroom should give them plenty of room to grow.
To determine how much floor (platform) space you need, try this: Clear out a corner of a room where two walls meet at a right angle, then grab two tape measures. Pull out the tapes and lock them in place at any desired dimensions—for example, set both at 6 feet for a 36 square feet floor, or set one at 8 feet and one at 10 feet for an 80 square feet floor.
Lay the tapes on the floor so they meet at a right angle, representing the two imagined walls of your area. Step inside the area to get a feel for its size. Bring in some chairs and other furniture you might want in the treehouse to see how everything fits. Don’t forget to factor in the tree, especially if you’re building your platform around the trunk.
Not that your treehouse has to be square. In fact, this is a rare opportunity to build out of square. Why not a triangle or rhombus or something more amoeba-like? There are no points off for ignoring traditional design principles, like symmetry. You already have a house that follows the rules. When it comes to treehouses, quirks and funny angles add character and make it more personal.
Two walls or railings and two tape measures make it easy to visualize floor space you’ll need in your new treehouse.
Treehouse snobs may balk at the use of support posts, but this is nothing to be ashamed of. Posts offer an effective way to compensate for trees that can’t solely support a treehouse or for cases where a design calls for more trees than you have. Posts can also serve to shore up support beams with long spans between trees.
Keep in mind that using posts places limits on the house design. Namely, the house must be close to the ground. This is because the post will be cemented in the ground and essentially immovable, while the tree remains free to sway with the wind. In mature trees, movement typically is minimal in the lowest 10 to 12 percent of the tree’s total height. Therefore, if you use posts as main support members, and the tree is 60 feet tall, for example, keep the platform within 6 to 7 feet of the ground.
As a final design tip, keep an open mind about changes. You might find yourself installing the walls when you discover that a window that was supposed to overlook the garden actually gives you a better view of the alley. Or, you might be surprised by the shadows within the canopy and decide to add an opening to bring in more sunlight. Building a treehouse is an organic process. Be ready to adapt.
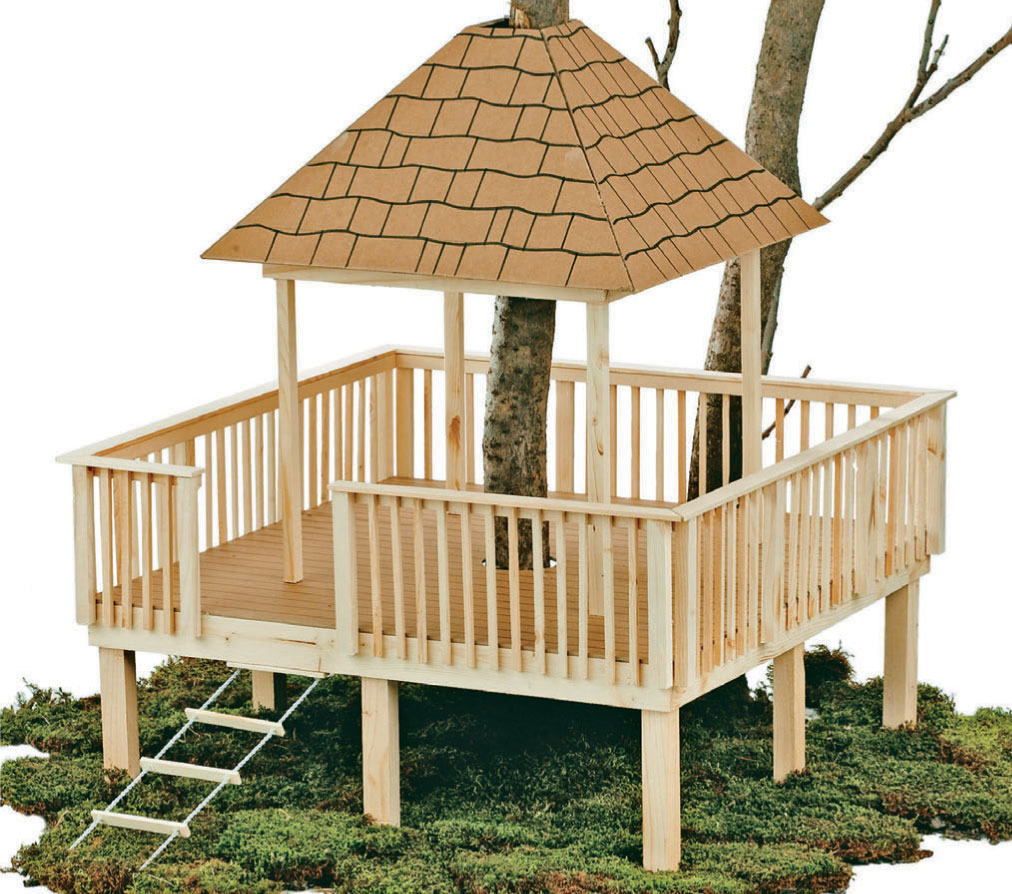
Sturdy posts make strong treehouse supports, but are recommended only for treehouses with very little potential movement.
 Drawing Plans
Spending a little time testing your ideas on paper almost always pays off when it comes time to build a treehouse. It’s a lot easier to make changes to a few pencil lines than a lumber frame butted to a tree 10 feet in the air.
Start by taking some measurements of the building site; that is, the host trees. Measure the trunks, main branches, and relative positions of distinguishing marks and features. With those measurements and a little freehand sketching of the tree, you’ll be able to make reasonably accurate scale drawings of the tree and treehouse from various perspectives.
Draw the platform first. Getting the platform right is the most challenging part of building a treehouse and usually requires some trial-and-error at the drawing board. If you don’t want to make a complete set of plans, at least draw up the platform to test your ideas before you start building.
To experiment with ideas for the walls and roof, take a digital photo of the tree. Print it out at full-page size, then use your measurements of distinguishing features to get a sense of the photo’s scale. Lay tracing paper over the photo to sketch your ideas. Take additional photos at different angles to the tree to create the various elevation drawings.
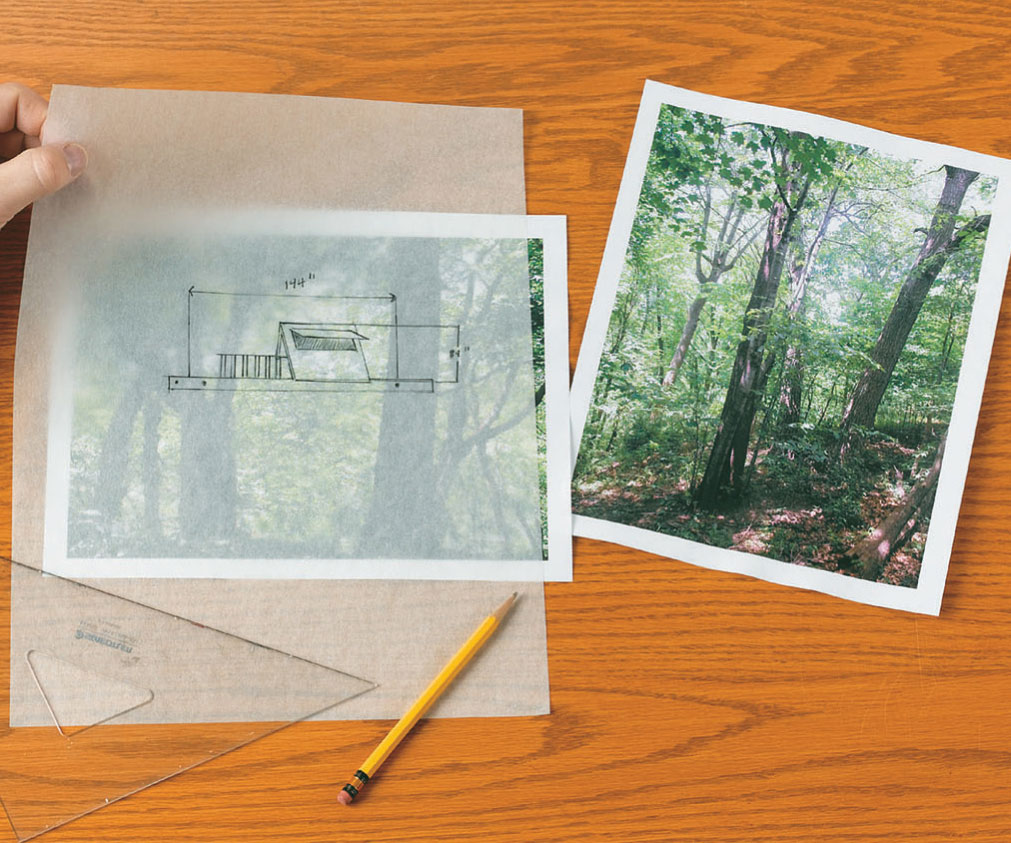
Elevation drawings show the house from various angles. These are helpful for judging proportions and planning for intervening branches, etc. Sketching over digital photo printouts gives you an accurate picture of how the finished project will look in the tree.
A floor plan showing the completed platform helps you divide up the floor space and allocate room for decks, landings, and other open areas.
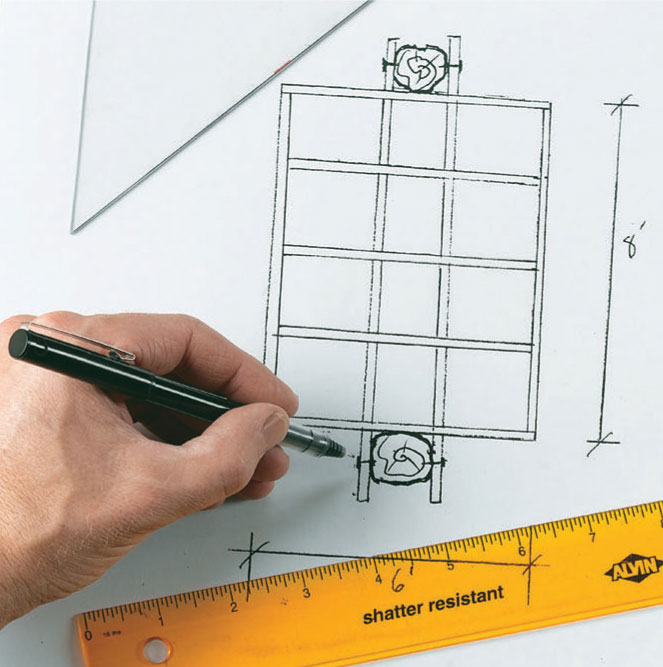
A plan view of the platform framing gives you a bird’s-eye perspective of the host trees and main treehouse support members.
 Lumber & Hardware
The classic kid-built treehouse is made with scrap wood, often “found” at a neighborhood construction site, and rusty nails fished out of a coffee can. Add some tar paper and carpet remnants, and you have yourself an awesome hideaway. It’s still a great way to build a treehouse. But if that’s what you had in mind, you probably wouldn’t be reading this book (you’d be using it as a roof shingle). So what materials should you use on your next treehouse? The short answer is: everything rot-resistant and corrosion-resistant.
For lumber, the most commonly available types of rot-resistant wood are pressure-treated pine, cedar, and sometimes redwood. All of these can withstand years of weather without rotting. Even if your treehouse is kept dry with a sealed roof, it’s a good idea to use one of these outdoor wood types on the interior parts as well, because you’re bound to get some moisture inside.
Keep in mind that the reputations of cedar and redwood for rot-resistance really apply only to all-heartwood material, the higher quality lumber cut from the tree’s hard center. Common-grade sapwood cedar and redwood aren’t much more rot-resistant than standard untreated lumber. Also, cedar and redwood have lower load-bearing capacity than standard SPF and treated lumber, so be sure to check span ratings before using them for platform beams or other critical structural members.
If you use plywood in your project, choose the material based on how much it will be exposed to the elements: “Exterior” plywood is suitable for permanent exposure, while “Exposure 1” plywood is designed for outdoors but should be covered by other materials, such as roofing. Marine plywood is a premium plywood product designed for good looks and outdoor exposure. It’s made with waterproof glue and won’t delaminate with moisture, but the panels should be finished to prevent decay and discoloration of the wood.
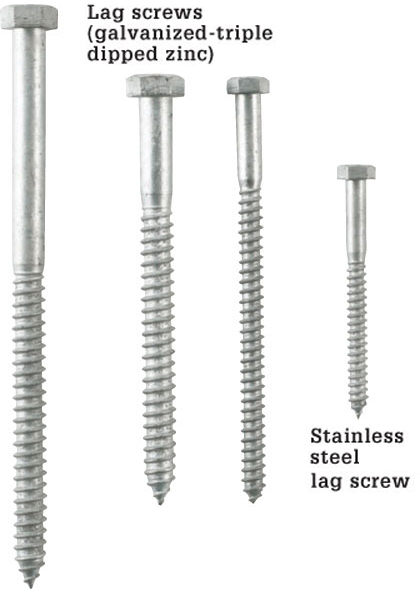
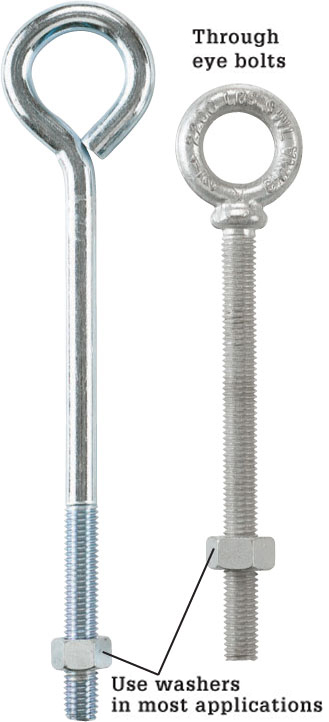
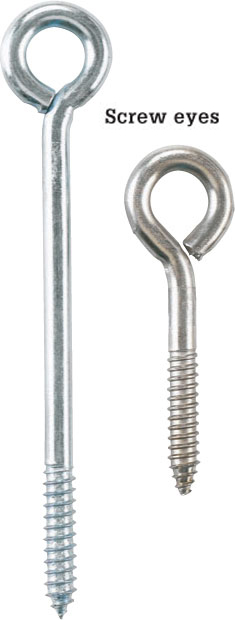
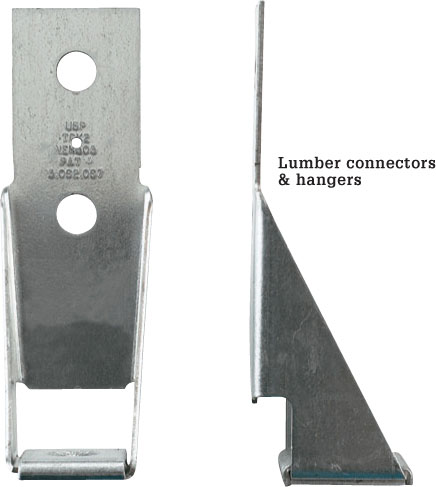
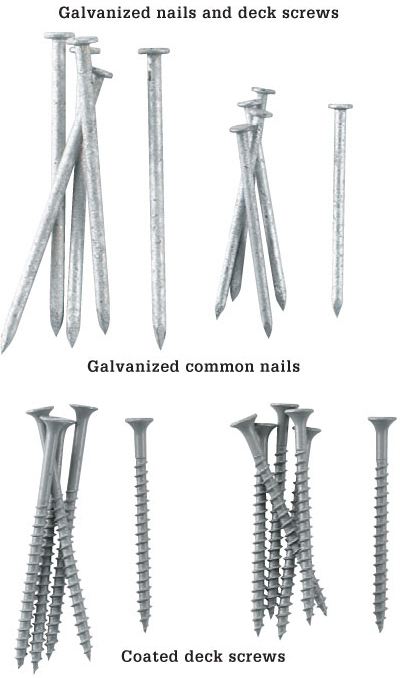
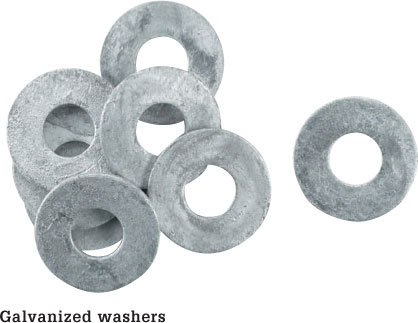
For hardware, use hot-dipped or drop-forged galvanized steel—available in many types of bolts, screws, and connectors. Aluminum roofing nails are also acceptable. Stainless steel is the best and strongest rust-proof material but comes in a somewhat limited variety of hardware and costs a lot more than galvanized steel.
For any structural connections to the tree, use screws and bolts instead of nails. Bolts should be at least 1/2" in diameter and always galvanized for corrosion protection (or made of rust-proof material). Nails simply can’t be trusted in trees. There’s too much movement, and the live wood doesn’t hold nails as consistently or predictably as dry lumber does. Galvanized nails are fine for framing connections and general construction of the house parts, although in many cases you might prefer to use deck screws or galvanized wood screws. With the smaller 2 × 2 and 2 × 3 framing used in treehouses, assembly is easier with screws.
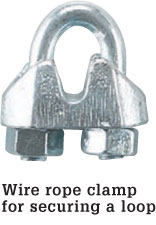
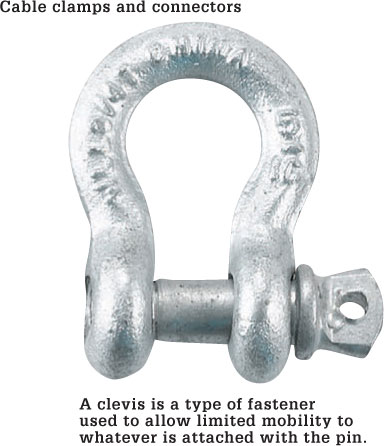
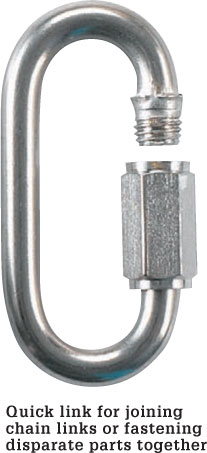
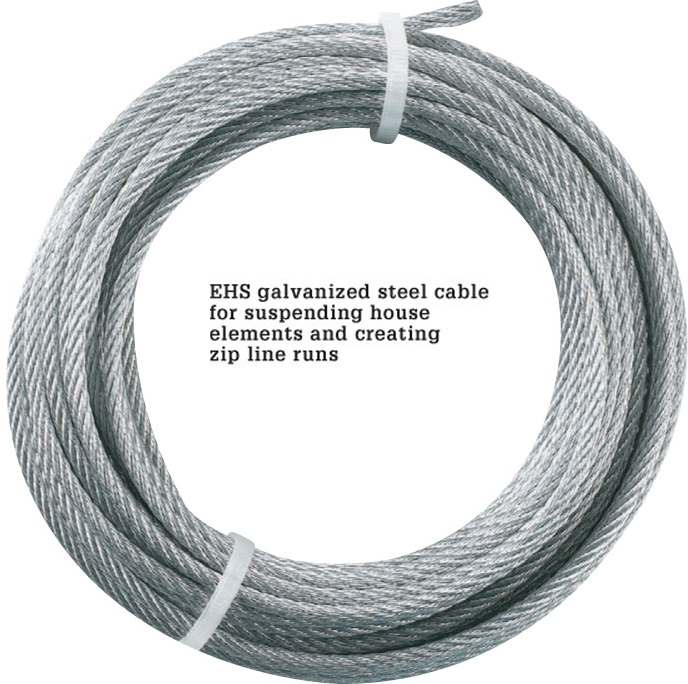
Specialty connections and anchoring systems might call for Extra High Strength cable and high-tensile galvanized chain. Another hardware option available through a specialty supplier is the Garnier Limb (GL) treehouse anchor, which screws into the tree’s trunk to serve as a heavy-duty limb for supporting platforms (see page 62).
Building a treehouse offers a great opportunity to scrounge around recycled lumber yards and architectural salvage shops for materials like weathered old timbers and one-of-a-kind fixtures. On top of being a fun scavenger hunt, this is also the best way to “build green.” One note of caution, however: Inspect old lumber carefully before using it for structural members. Significant cracks, excessive knots, and evidence of rot are common indications that the wood might not be reliable or strong enough for its intended use.
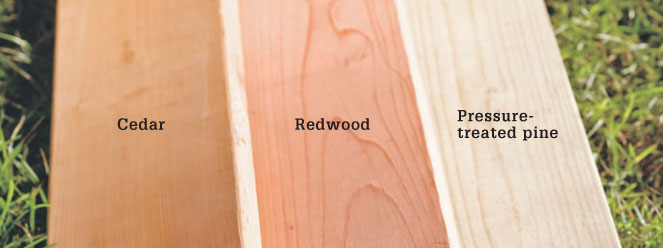
Lumber for treehouses must be suitable for outdoor exposure. This includes cedar, redwood, pressure-treated pine, and exterior-grade or marine plywood (not shown).

 Treehouse Safety
A house up in a tree comes with some risks. But so does an elevated deck off of your kitchen or a jungle gym in your backyard. What makes you comfortable using these things on a daily basis is your belief that they were designed thoughtfully to prevent common hazards, combined with your own regular maintenance of the structures to ensure their safety. The same applies to treehouses, although treehouses present an additional safety consideration: building off the ground.
Therefore, treehouse safety can be divided into two categories: safe design and safe working conditions. Both are equally important and perfectly manageable, and both should be followed regardless of who uses the house. A kids’ treehouse naturally involves more safety concerns than one used exclusively by adults. However, keep in mind that you never know when children might visit, and it’s too late once they’re up there. It’s like bringing a two-year-old into a non-babyproofed home. The adults are suddenly scrambling madly as they discover all the things that are perfectly safe for them but potentially deadly for a toddler.
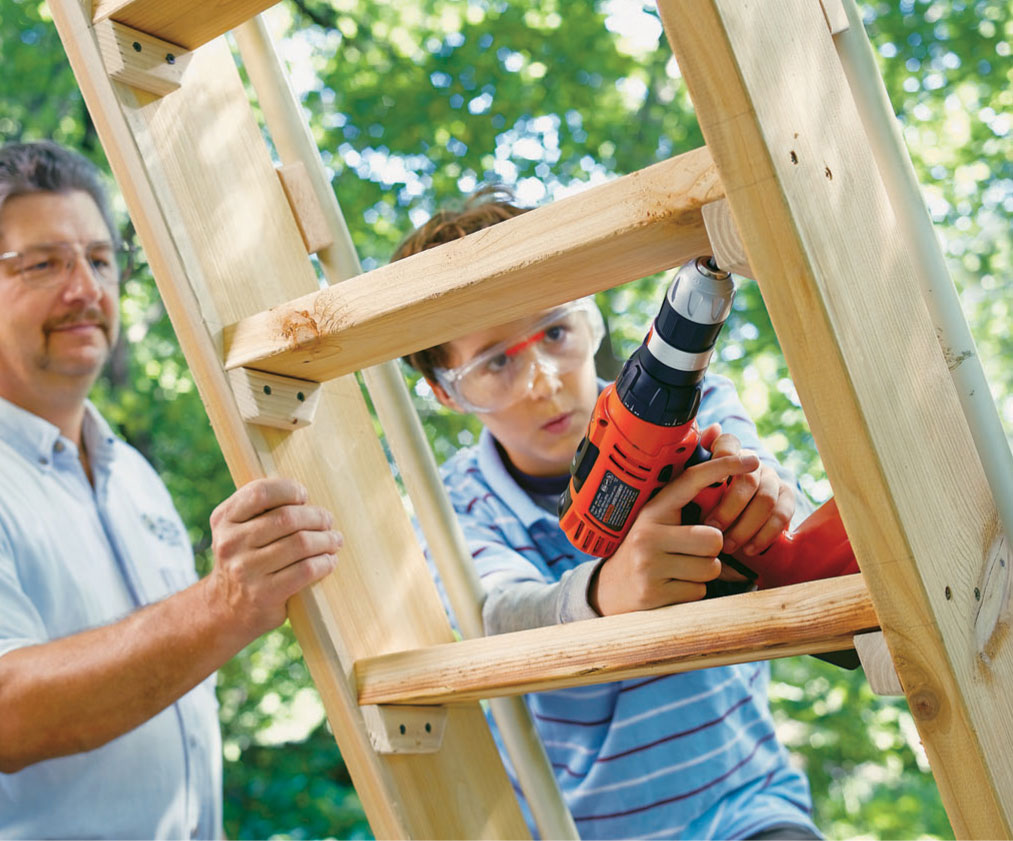
Safety is important during all phases of construction.
 Safe Treehouse Design
The primary safeguard on any treehouse is the supporting platform. It alone keeps the house and its occupants aloft. Even if every other element is designed to the highest standards, a treehouse is completely unsafe if the platform isn’t sound. A later chapter covers platform construction in detail, so for now, just two quick reminders:
1. Keep platforms for kids’ treehouses at 8 feet above the ground or lower.
2. Inspect the platform support members and tree connections regularly to make sure everything’s in good shape.
With a strong, stable platform in place, you can turn your attention to the other elements of safety in design.

Everything’s riding on the treehouse platform. Be sure to keep it in good condition.
Every part of a treehouse platform that isn’t bound by walls must have a sturdy railing. Building codes around the country agree on railing specifications, and these are the best rules to follow for treehouses, too.
In general, railings must be at least 36" tall, with vertical balusters no more than 4" apart. A railing should be strong enough to withstand several adults leaning against it at once, as well as roughhousing kids. On treehouses for small children, use only standard 2 × 2 lumber or other rigid vertical balusters, not rope or cable balusters. For kids of all ages, don’t use horizontal balusters. These work well for cattle fencing, but kids are too tempted to climb them. See page 93 for more railing specifications and instructions on building railings.
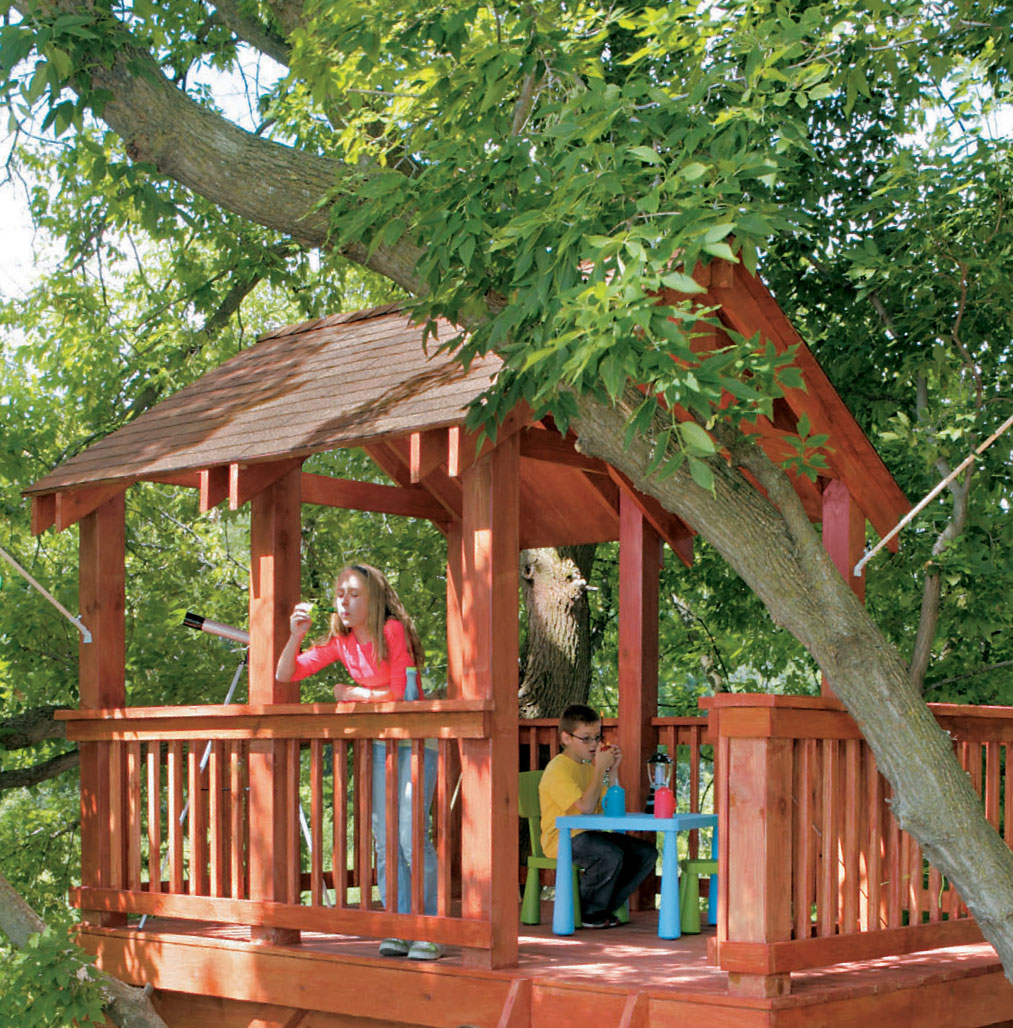
Sound, code-compliant railings are a critical safety feature for treehouse users of all ages.
A sturdy handle is a welcome sight to tired climbers. Make sure all handles and mounting hardware are galvanized or otherwise corrosion-protected.
Each type of access to a treehouse—ladder, rope, stairs, etc.—has its own design standards for safety, but all must have a landing point at which to arrive at or depart from the house. In many cases, the landing necessitates a gap in a railing or other opening and thus a potential fall hazard. Keep this in mind when planning access to your treehouse, and consider these recommendations:
• Include a safety rail across openings in railings.
• Leave plenty of room around access openings, enough for anyone to safely climb onto the treehouse platform and stand up without backing up.
• Consider non-slip decking on landings to prevent falls if the surface gets wet.
• Add handles at the sides of access openings and anywhere else to facilitate climbing up and down; handholds cut into the treehouse floor work well, too.
• Install a safety gate to bar young children from areas with access openings.
The obvious safety hazard for windows and doors is glass. So the rule is: Don’t use it, especially in kids’ treehouses. Standard glass is too easily broken during play or by swaying branches or rocks thrown by taunted older brothers. Instead, use strong plastic sheeting. The strongest stuff is 1/4"-thick polycarbonate glazing. It’s rated for outdoor public buildings, like kiosks and bus stops, so it can easily survive the abuse from your own little vandals. Plastic does get scratched and some becomes cloudy over time, but it’s easily replaced and is better than a trip to the emergency room.
Even more important than the glazing is the placement of doors and windows. All doors and operable windows must open over a deck, not a drop to the ground. If a door is close to an access point, make sure there’s ample floor space between the door and any opening in a railing, for example.
Since occasional short falls are likely to occur when kids are climbing around trees, it’s a good idea to fill the area beneath your treehouse with a soft ground cover. The best material for the health of the tree is wood chips. A 6"-thick bed of wood chips effectively cushions a fall from 7 feet, according to the National Resource Center for Health and Safety in Child Care. Also, keep the general area beneath the house free of rocks, branches, and anything else one would prefer not to land on.
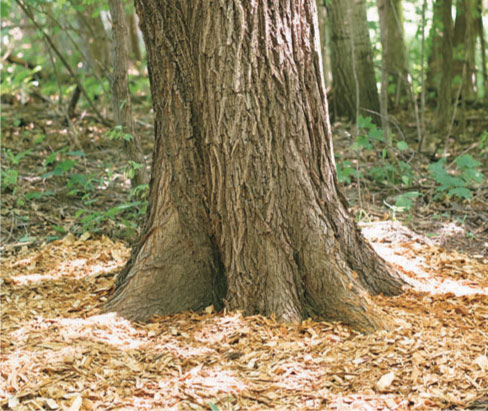
A soft bed of loose ground cover is recommended under any kids’ treehouse or areas where kids will be climbing.
One of the first rules of building children’s play structures is to countersink all exposed hardware, and for good reason. If you fall and slide along a post, you might get a scrape and some splinters, but you’re much better off than if your kneecap hits a protruding bolt on the way down. Follow the countersink rule for all kids’ treehouses.
Speaking of splinters, take the time to sand rough edges as you build your house. Your kids and guests will be glad you did. Also keep an eye out for sharp points, protruding nails, and any rusty metal.
Treehouses fight a constant battle with gravity. This, combined with outdoor exposure and the threat of rust and rot, make regular inspections of the house a critical safety precaution. Inspect your treehouse several times throughout the year for signs of rot or damage to structural members and all supporting hardware. Also check everything after big storms and high winds, as excessive tree movement can easily cause damage to wood structures or break anchors without you knowing it. Test safety railings, handholds, and access equipment more frequently.
Inspect the tree around connecting points for stress fractures and damage to the bark. Weighted members and tensioned cables and ropes rubbing against the bark can be deadly for a tree if they cut into the layers just below the bark. Check openings where the trunk and branches pass through the treehouse, and expand them as needed to avoid strangling the tree. Finally, remove dead or damaged branches that could fall on the house.
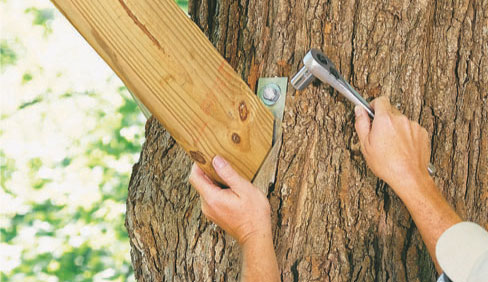
Neglected support beams and connections are the most common causes of treehouse disasters. Check these parts often for rot, corrosion, and damage.
 Working Safely
Off-the-ground work has its own long list of safety guidelines on top of the regular set of basic construction safety rules. Since you can learn about general tool and job site safety anywhere (please do so), the focus here is on matters specific to treehouse building and related gravity-defying feats. But here are some good points to keep in mind.
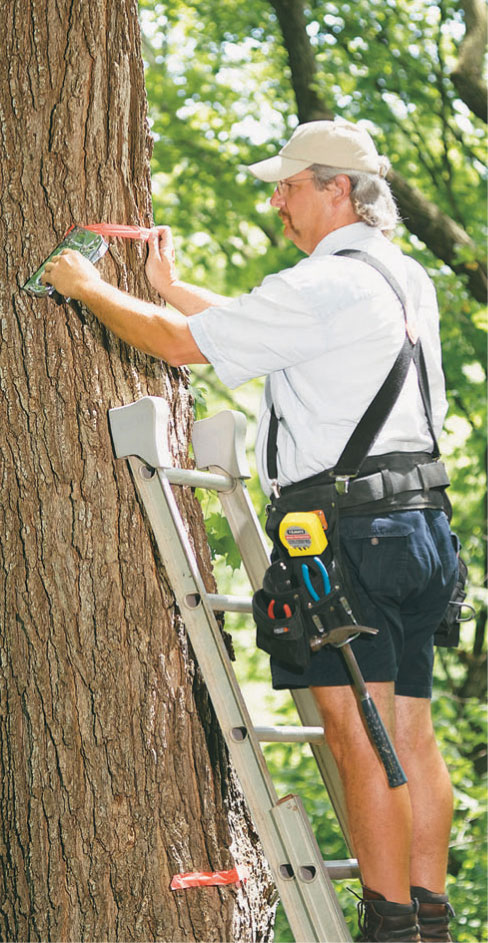
During construction, ladder management is an exceptionally important aspect of jobsite safety. Since trees generally do not afford flat, smooth areas for the ladder rungs to rest, adding padded tips will help stabilize the ladder. And remember, a fall of just a couple of feet from a ladder can cause a fractured elbow or worse.
Working outdoors presents challenges not faced in the interior, such as dealing with the weather, working at heights, and staying clear of power lines. By taking a few common-sense safety precautions, you can perform exterior work safely.
Dress appropriately for the job and weather. Avoid working in extreme temperatures, hot or cold, and never work outdoors during a storm or high winds.
Work with a helper whenever possible—especially when working at heights. If you must work alone, tell a family member or friend so the person can check in with you periodically. If you own a portable phone, keep it with you at all times.
Don’t use tools or work at heights after consuming alcohol. If you’re taking medicine, read the label and follow the recommendations regarding the use of tools and equipment.
When using ladders, extend the top of the ladder three feet above the roof edge for greater stability. Climb on and off the ladder at a point as close to the ground as possible. Use caution and keep your center of gravity low when moving from a ladder onto a roof. Keep your hips between the side rails when reaching over the side of a ladder, and be careful not to extend yourself too far or it could throw off your balance. Move the ladder as often as necessary to avoid overreaching. Finally, don’t exceed the work-load rating for your ladder. Read and follow the load limits and safety instructions listed on the label.
The general area underneath the tree should be off limits to anyone not actively working on the project at hand. Someone walking idly underneath to check things out might not be engaged enough to react if something falls. Hard hats are a good idea for anyone working on the project and for kids anywhere close to the job site.
To keep an extension cord from dropping—and sometimes taking your tool with it—wrap the cord around a branch to carry the bulk of the weight. Also, wear a tool belt to keep tools and fasteners within reach while keeping your hands free to grab lumber or use tools.
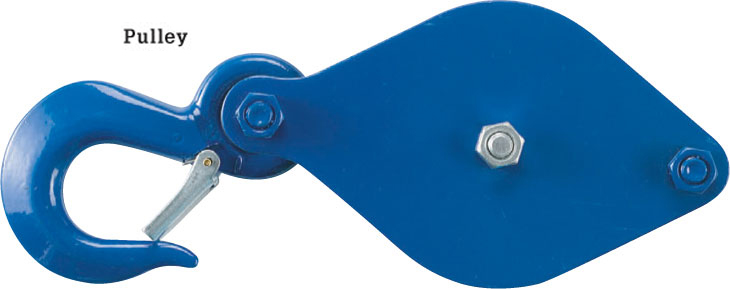
A pulley is one of the fun features found on a lot of treehouses. They’re great for delivering baskets full of food and supplies. During the build, a simple pulley set up with a bucket or crate is handy for hauling up tools and hardware.
Here’s an easy way to set up a simple, lightweight pulley:
1. Using a strong nylon or manila rope (don’t use polypropylene, which doesn’t stand up under sun exposure), tie one end to a small sandbag and throw it over a strong branch.
2. Tie a corrosion-resistant pulley near the end of the rope, then tie a loop closer to the end, using bowline knots for both (see below).
3. Feed a second rope through the pulley and temporarily secure both ends so the rope won’t slip through the pulley.
4. Thread the first rope through the loop made in step 2, then haul the pulley up snug to the branch. Tie off the end you’re holding to secure the pulley to the branch.
For heavy-duty lifting, use a block and tackle (see next page), which is a pulley system that has one rope strung through two sets of pulleys (blocks). The magic of multiple-pulley systems is that the lifting power is increased by 1× for each pulley. For example, a block and tackle with 6 pulleys gives you 6 pounds of lifting force for each pound of force you put onto the pulling rope. If you weigh 150 pounds and hang on the pulling end, you could raise a nearly 900-pound load without moving a muscle. The drawback is that you have to pull the rope 6× farther than if you were using a single pulley. For a high treehouse, you’ll need a lot of rope.
When hauling up loads with a block and tackle, try to have a second person on the ground to man a control line tied to the load. This helps stabilize the load and steer it through branches and other obstacles. Additional control like this makes it safer for those up in the tree.
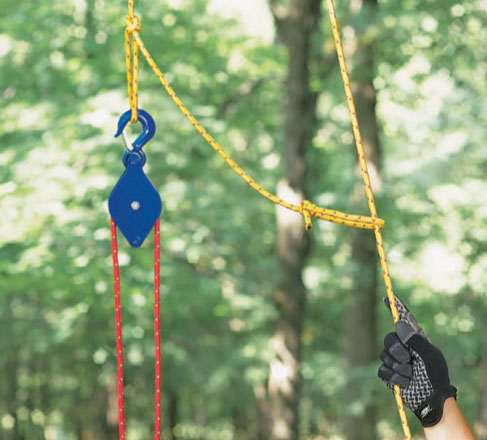
One rope raises and affixes the pulley to the tree; a second rope operates the pulley.