
Building a treehouse is mostly an exercise in carpentry. But even if you have years of experience pounding nails and planing doors with your feet firmly on the ground, you’ll find that everything changes once you’re up in the air. The simplest tasks take on new challenges as you struggle to keep the counterforces of work from knocking you to the ground. But in the end, whether you’re building a treehouse or an outhouse or a doghouse, the success of the project comes down to good design and sound techniques. We’ve discussed good design already. Now it’s time to take a look at treehouse building techniques.
In this chapter:
It’s time to get this house off the ground. The platform is the first and most important part of the building process. It also tends to be the most challenging.
To build a proper platform, you’ll need to determine what types of anchors will hold up best against the host tree’s natural movement throughout the year. You’ll also decide on sizing for support beams and floor framing, based on the size of your house and how much it will weigh (don’t worry, you won’t have to stand on a scale with each 2 × 4). As before, the tree should be your primary guide.
This chapter walks you through some basics of platform construction, the main types of anchors for support beams, and installation of the floor decking. You’ll then get a construction overview of platforms for several popular treehouse configurations. Please keep in mind that all methods and configurations shown here are merely drawn from examples that have worked on other treehouses. On your own treehouse, you alone are the architect, engineer, and builder, and it’s up to you to determine what is suitable for your situation. If you have any concerns about the structural viability of your platform or the health of your tree, consult a qualified building professional or arborist.
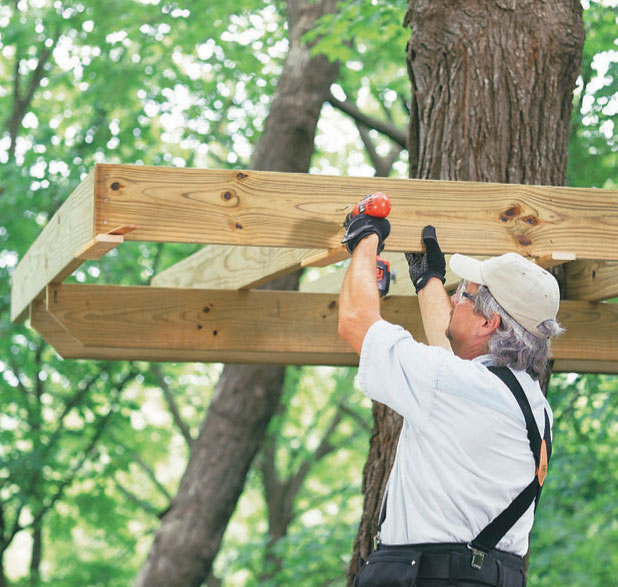
The treehouse platform needs to be solidly constructed, square, level, and (above all) securely attached to the tree or trees.
 Platform Basics
A typical treehouse platform is made up of support beams and a floor frame. The beams are anchored to the tree and carry the weight of the entire structure. The frame is made up of floor joists that run perpendicular to the beams. Topped with decking, the floor frame becomes the finished floor of the treehouse, onto which you build the walls and everything thereafter. Some small kids’ treehouses have only a floor as the supporting structure, particularly when the house is low to the ground and well supported by branches.
Sizing beams and floor joists isn’t an exact science as it is with a regular house, but standard span tables can give you an idea about load limits for your treehouse. Contact your local building department for span tables and materials requirements for beams (also called girders), floor joists, and decking materials. What’s unique to treehouses is the additional stress of the tree’s motion and possible twisting forces applied to the floor frame. Flexible anchors are the best defense against tree motion, as you’ll see later. In any case, it’s better to err on the side of oversizing support members.
The trick to building a successful platform is not just in the strength and stability. The platform must also be level. If you’ve ever been in an old house with a sloping floor, you know why. It messes with your sense of equilibrium and gives you an uneasy “funhouse” feeling. In a treehouse this can lead to a perceived sense of instability; worse, it gives your friends and family something to make fun of. One handy technique for locating anchor points to create a level platform is to set up a mason’s string and line level. A few more tips for building platforms:
• Use a single 3/4"-diameter galvanized lag screw to anchor lumber directly to the tree. For lightweight supports, you can get away with 1/2" screws, but don’t use anything smaller.
• If a situation calls for more than one screw in any part of the tree, never place two screws in a vertical line less than 12" apart. To the tree, each screw is treated as a wound; if the screws are too close together, the wounds might coalesce, causing the area to rot.
• Never remove bark to create a flat surface for anchoring, etc. If done carefully, it’s okay to shave the surface slightly, but always leave the protective layer of bark intact. A better solution is to use wood wedges to level out brackets and other anchors.
• When you’re building a platform up in the tree, it’s often helpful to cut beams or joists long at first, allowing some play as you piece the frame together. Cut off the excess after the framing is completed, or leave beam ends long to use as outriggers for pulleys, swings, etc.
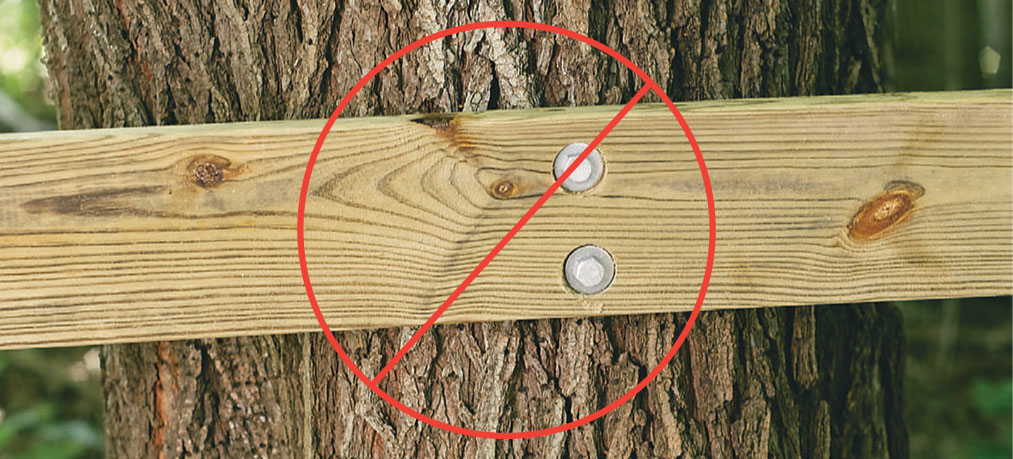
Fasteners placed close together in a vertical line can lead to rot in the tree, causing the anchors to fail.
 Platform Anchoring Techniques
Anchoring the platform is all about dealing with tree movement. Here’s the problem: If you’re building in or around a section of the tree that’s used to moving a lot in the wind and you tie multiple parts of the tree (or parts of different trees) together, something’s got to give. Usually it’s your platform’s support beams or anchors that lose the battle by breaking or simply shearing off. The best solution is to respect Mother Nature by using anchors that make allowances for movement.
Treehouse builders have come up with a range of anchoring methods for different situations, but most fall into one of the four categories shown here. Knowing the main types of anchors will help you decide what’s best for your project. Often a combination of different anchors is the most effective approach.
A fixed anchor is the most basic type, with the support beams firmly anchored to the tree with large lag screws. Because they allow for zero tree movement, fixed anchors are typically used on single-tree houses anchored exclusively to the trunk, or perhaps used in conjunction with a flexible anchor (sliding or hanging—see below) at the opposite end of the beam.
To install a fixed anchor, drill a slightly oversized hole for a lag screw through the beam, just below the center of the beam’s depth. Drill a pilot hole into the tree that’s slightly smaller than the screw’s shank. Add one washer on the outside of the beam and one or two large, thick washers on the tree side, and anchor the beam to the tree with the lag screw. The washers on the tree side of the beam help prevent chafing of the beam against the bark.
Sizing the screw: Use a 3/4" galvanized lag screw that’s long enough to penetrate at least 5" to 6" into the tree’s solid wood. Accounting for a 2× (1-1/2-thick) beam, the washers, and the bark, you need at least a 9" screw for a major beam connection.
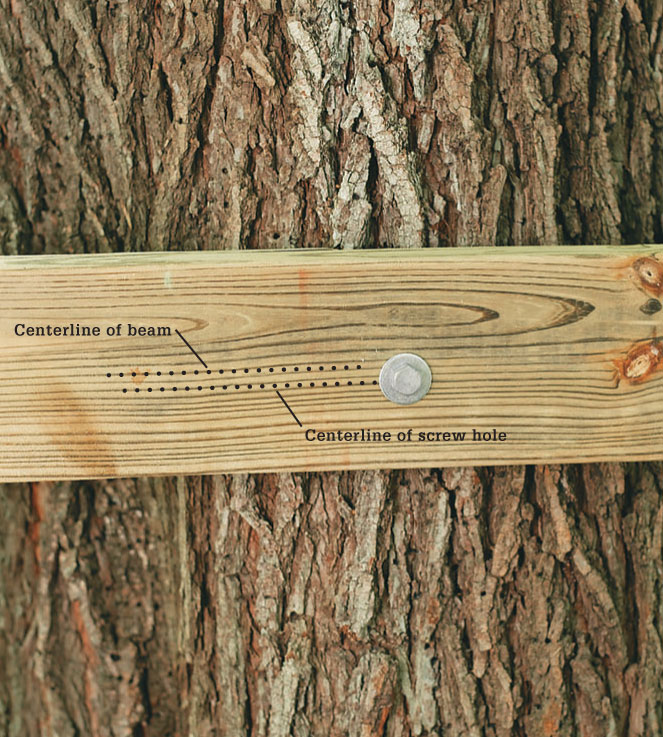
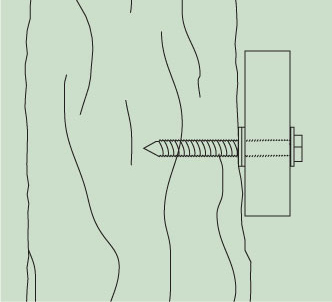
A single lag screw is an adequate fixed anchor for a beam, provided the screw is heavy enough. Multiple screws can cause damage to your tree. Thread a washer between the screw head and the beam, and add at least a couple washers between the beam and the tree to prevent the beam from rubbing against and damaging the bark.
There are two main types of sliding anchor: slot-type and bracket-type. The slot-type is a simple variation of the fixed anchor, but instead of drilling a hole in the beam for the lag screw, you cut a slot that allows for a few inches of lateral movement. This anchor is suitable for relatively small, low treehouses that don’t warrant the heavy-duty support of a bracket-type connection. Using a 3/4" lag screw and extra-large washers on both sides of the beam, make the slot 1" wide and 3" to 6" long. Leave the screw slightly loose to allow a little play for the beam to slide.
A bracket-type sliding anchor uses a metal bracket or cleat mounted to the tree to support the beam from below. As the tree moves, the beam is free to slide along the top of the support without rubbing against the tree. A properly engineered and installed bracket makes a very strong anchor suitable for large treehouses.
Unfortunately, they don’t sell treehouse brackets at your local hardware store. So how do you get them? One way is to have them custom built to your specifications by a qualified welder. Another option is to use the Garnier Limb (see page 46), a manufactured metal anchor specifically designed for supporting treehouse beams. The GL has a threaded screw end that screws into the tree and a smooth “limb” end that supports the beam.
The developers of the GL have come up with many variations based on their basic anchor to accommodate various treehouse configurations. You can see the GL in action and get ordering and installation information on their website: www.treehouses.com. According to the website, the basic installation of a GL has a load rating of 4,000 pounds.
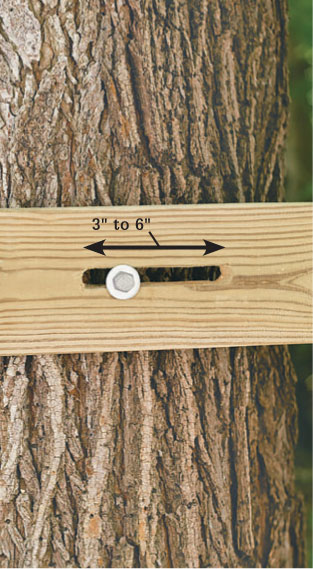
A slot-type sliding anchor allows single-directional movement between the tree or trees and the platform beams.
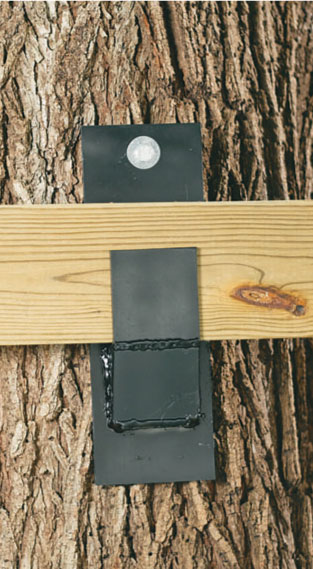
A bracket-type sliding anchor allows two-directional movement while offering solid support. Unfortunately, you’ll have to have these custom-fabricated at a local metal shop.
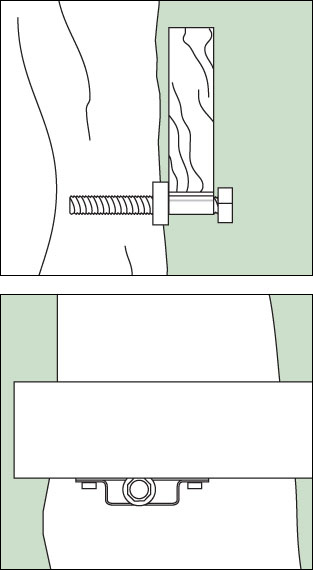
A specialty treehouse anchor offers the best combination of strength and movement allowance. The GL anchor illustrated here is very popular with professional treehouse builders and can be purchased on the Internet (see Resources, page 220).
With a hanging anchor, the beams are actually suspended from the tree by cables or moveable hardware, making it the most flexible type of joint. This flexibility makes it ideal for difficult applications, such as when tree movement is significant or when the branch or trunk configuration won’t easily accommodate a platform. Note: The minimum branch size for hanging anchors (at the connection point) is 6" diameter, depending on the tree and treehouse.
A hanging anchor with cable attaches to a screw eye in the tree and a doubled 3/4" chain wrapped around the beam.
As with the sliding anchor, there are different styles of hanging connections. A basic cable setup offers the best flexibility: Cut a 6-foot length of heavy-duty rust-proof cable, then cut enough high-tensile rust-proof chain to wrap around the beam twice, plus a few extra links. Drive a 5/8" eye lag screw into the tree, about 4 feet above the desired beam elevation. Position the eye screw so its shaft will be perpendicular to the cable when hung. This ensures that the load will rely more on the screw’s shear strength than the grip of the threads.
Hang the beam in the tree at the desired elevation, using temporary lines. Thread the cable through the eye screw, using a cable thimble to protect the cable, then secure the end with three cable clamps. Wrap the beam with the chain and secure the ends to the cable, again using a thimble and three clamps. To prevent the beam from slipping out of the anchor, make sure plenty of beam extends past the chain, and install a strong metal bracket that loosely captures the chain at the bottom edge of the beam.
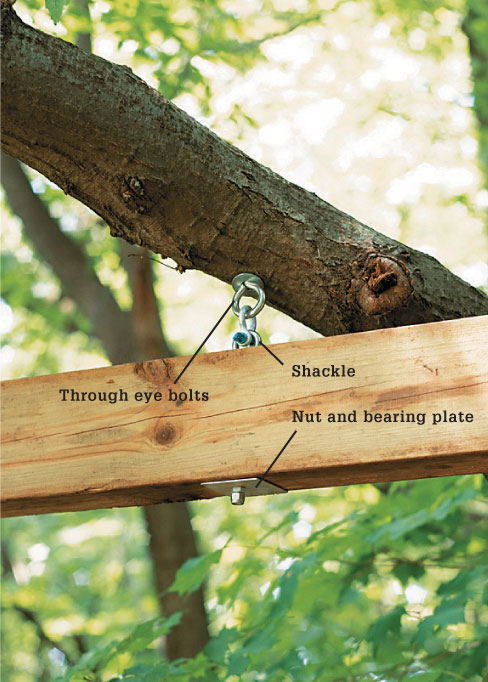
A through bolt hanging anchor requires a tree limb at least 6" in diameter.
Another type of hanging anchor uses a long, 5/8" eye through bolt that extends completely through a support branch. At the other end, another eye bolt extends through the beam and is secured below. The two eyes are connected with a heavy-duty shackle, allowing some movement in all directions.
Bolting through the branch won’t hurt the tree, but the branch must be at least 6" in diameter for this application. Make sure to use a strong washer on the top side of the branch, as well as a washer or steel bearing plate below the beam. If you use a built-up beam (with two 2× boards nailed together), add pairs of carriage bolts along both sides of the eye bolt to keep the beam members together when the anchor is under stress.
With any type of hanging anchor, it’s important that the beam and cable or hardware do not rub against the tree. If your setup doesn’t allow for at least 6" of play between the beam/hanger and the tree, fasten a wood block to the tree to protect against chafing that could damage the bark and underlying layers. Also, never hang a support cable or chain by running it over a branch or wrapping it around a branch or trunk. This can kill part or all of the tree.
Knee braces help support many types of platforms after the main beams have been attached to the tree. As such, they might be considered secondary anchors but nevertheless are critical to many platform designs.
A knee brace essentially is an angled strut that forms a structural triangle with the platform and the tree. It is strongest when set at 45° (or as close as possible to that angle). There are numerous designs of braces for treehouses, but all follow the same principle of the triangle.
For strength, the top end of the brace should meet the beam or frame at least 2/3 of its total distance from the tree. Don’t worry if the braces aren’t all the same length; it’s more important to maintain the 45° angle. To join the top end of the brace to the corner of a platform frame, use adjustable framing connectors. To anchor to the underside of a beam or joist, use pairs of metal joining plates, bolted to both members with carriage bolts.
Attaching the brace to the tree is another matter. Large, professionally built (yes, there are people who get to do this for a living) treehouses often use custom metal brackets to affix knee braces to the tree. An easy amateur method is to use an adjustable framing connector screwed to the tree and fastened to the brace with nails.
Knee braces support the platform, distributing the load onto the trunk and off of the lag screws that attach the beams to the tree trunk.
 Installing Decking
If you’re thinking that you’ve just jumped from platform beams to decking and skipped the floor framing, you’re right. Because the configuration of the floor framing tends to follow the platform design, you’ll get a better picture of that with the individual construction overviews starting on page 66.
Most treehouse platforms are decked using standard decking techniques. It’s a lot like decking a . . . well, a deck, or a floor, depending on the materials used. Standard decking materials include 5/4 × 6 decking boards, 2 × 6 lumber, and 3/4" exterior-grade plywood. Of these, plywood is the cheapest and easiest to install, but it comes with one drawback: treehouse floors tend to get wet, and the water has no place to go on a solid plywood surface. By contrast, decking boards can—and should—be gapped to allow water through and eliminate pooling. If you’re really committed to creating a dry interior on your house, you might consider plywood or tongue & groove decking boards, which make a smooth, strong floor without gaps.
Install decking boards with deck screws driven through pilot holes (although you would normally nail T&G boards). Use screws that are long enough to penetrate the floor framing by at least 1-1/4". Gap the boards 1/4" apart, or more, if desired. Two screws at each joist are sufficient. Install plywood decking with 2" deck screws, driven every 6" along the perimeter and every 8" in the field of the sheet.
To allow for tree growth, try to leave a 2" gap between the decking and the tree. This means you’ll have to scribe the decking and cut it to fit around tree penetrations. To scribe a board, set it on the floor as close as possible to its final position, then use a compass to trace the contours of the tree onto the board.
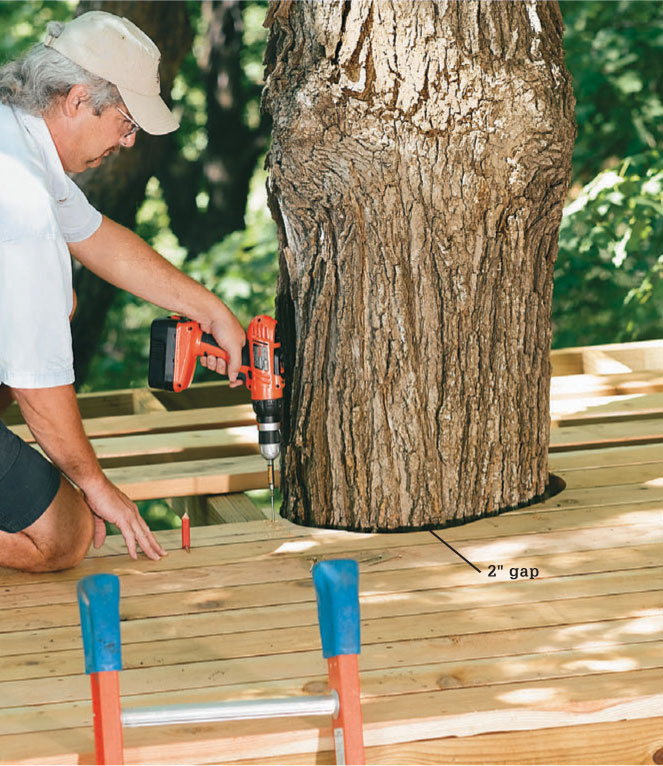
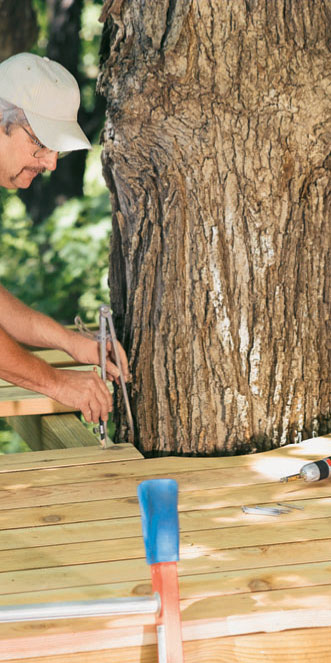
Fasten the decking to the floor frame with corrosion-resistant deck screws. Use a compass (right) to scribe decking boards at tree penetrations.
 Platform Designs
Following are five examples of platforms in different tree configurations, along with construction overviews for building the platforms as shown. Hopefully they will help you generate ideas for building your own platform. These examples are for demonstration purposes only. The proper sizing of support beams, joists, and hardware, as well as platform configuration, must be based on your tree and house project.
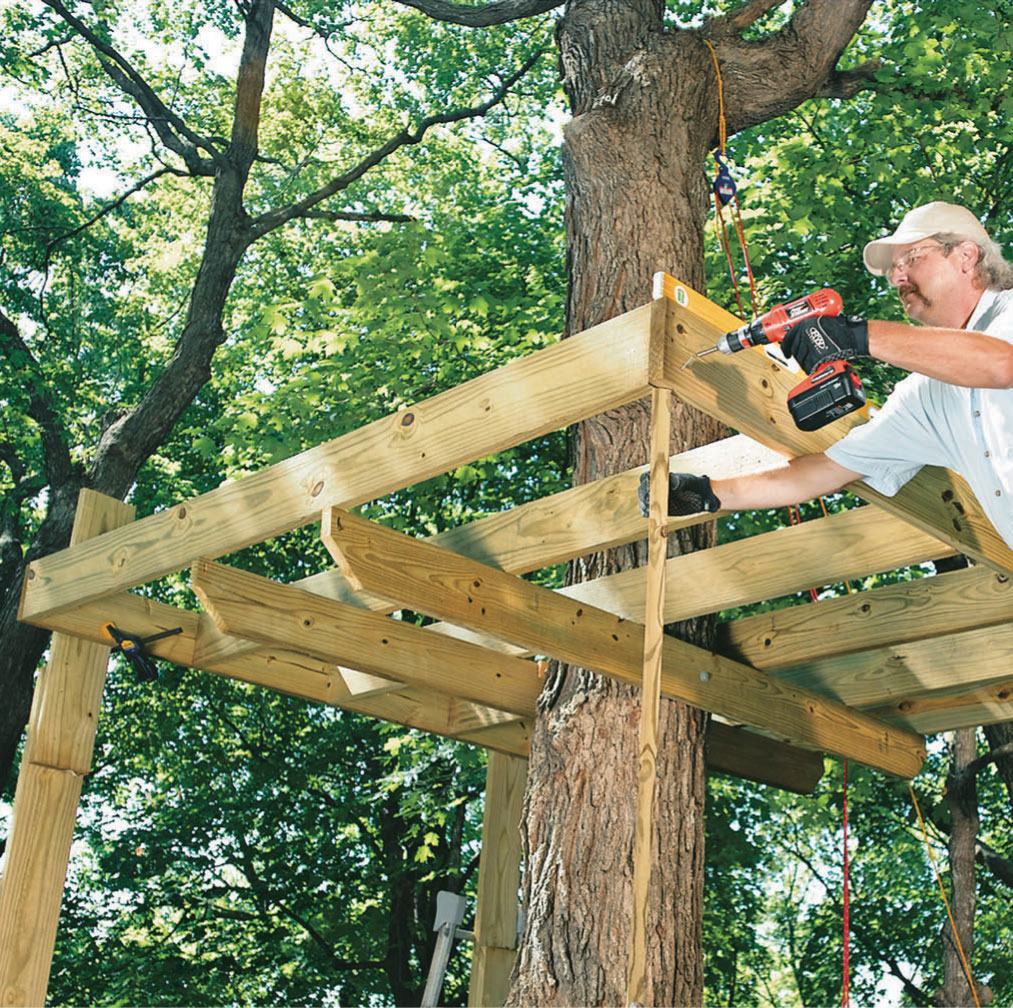
A single-tree treehouse often is constructed so the tree penetrates the platform more or less in the middle. The platform is supported by beams that are lag-screwed to the tree. This platform will be reinforced with knee braces.
 Single Tree: Platform Nestled in Branches
This is a simple platform design suitable for a small kids’ treehouse. Because the platform is small (about 5 × 6 feet) and has support from several branches, there are no support beams. Instead, a sturdy floor frame made with 2 x6s is anchored directly to the tree. To account for slight branch movement, two of the four anchors are slot-type sliding connections and two are fixed anchors. The floor decking is 3/4" plywood. For this type of platform, the support branches should be at least 6" in diameter.

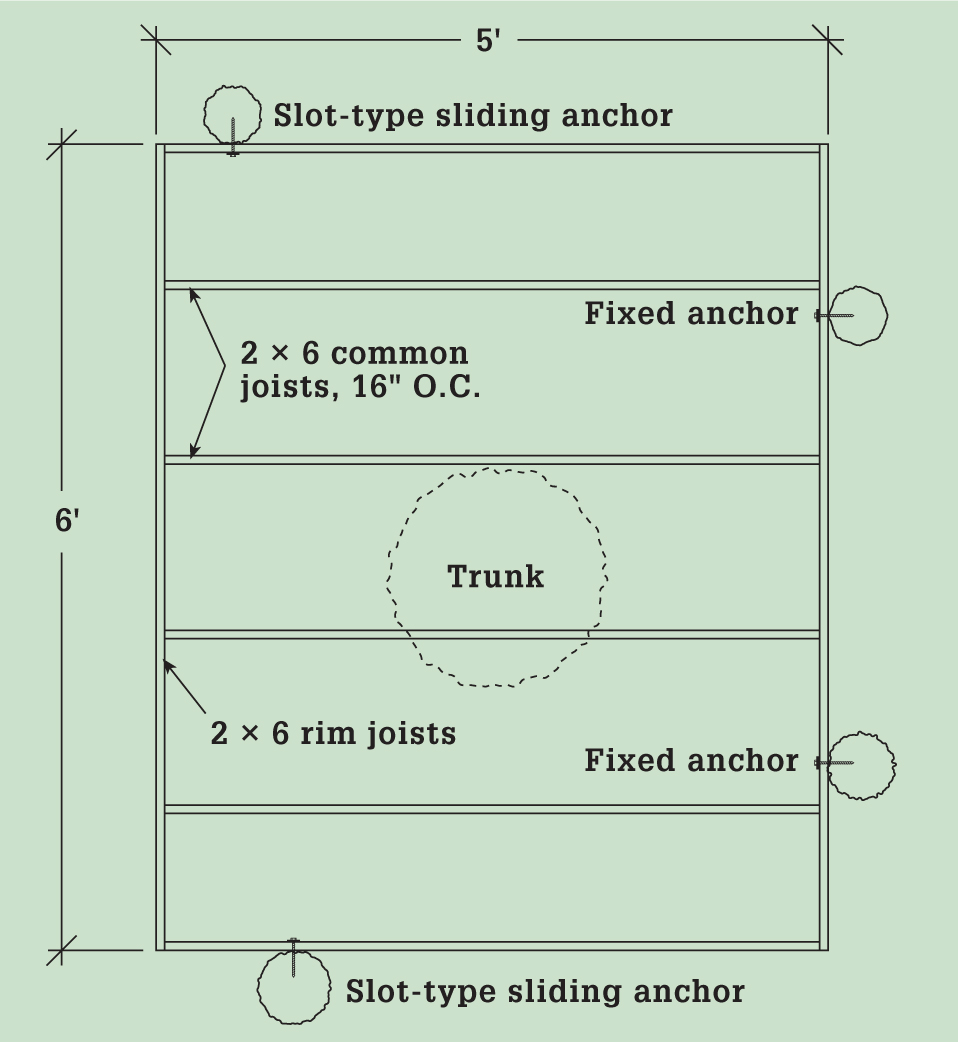
Using four nails and a mason’s string, plot the rough platform shape onto the support branches. Attach a line level to the string, and work your way around the four sides, adjusting the nails up or down as needed to create a level layout. Each nail represents an anchor point, as well as the approximate center of the floor frame members. When you’re satisfied with the layout, remove the string, but leave the nails in place to help with measuring and positioning the frame members.
Using the nails for reference, measure the approximate length of the first rim joist. Cut the joist long by about 12" to allow for some play when positioning the two perpendicular rim joists. Mark the locations of the two fixed anchor points onto the board, then drill a through hole for a 3/4" lag screw, a little below the center of the board’s depth (see page 61). Reposition the joist in the tree, then check it for level. Drill a 5/8"-diameter pilot hole into the tree at one of the anchor points. Add washers to both sides of the joist, and fasten the joist with a lag screw. Holding the joist level, drill a pilot hole and install the second fixed anchor.
Tip: If the joist won’t install plumb because the branch is not vertical, glue a wood wedge behind the joist with construction adhesive.
Cut the two rim joists that run perpendicular to the first rim joist. Have a helper hold one end while you level and mark the anchor point on the other end. Cut a 1 × 3" to 1 × 6" slot for the sliding anchor, and fasten the joist to the tree with a lag screw and washers (see page 62). Then, endnail the joists together with 16d galvanized common nails. Install the opposing joist and fasten it to the first rim joist. Cut the fourth rim joist to fit and fasten it with endnails. Cut off the long ends of the first rim joist so they’re flush with the mating joists.
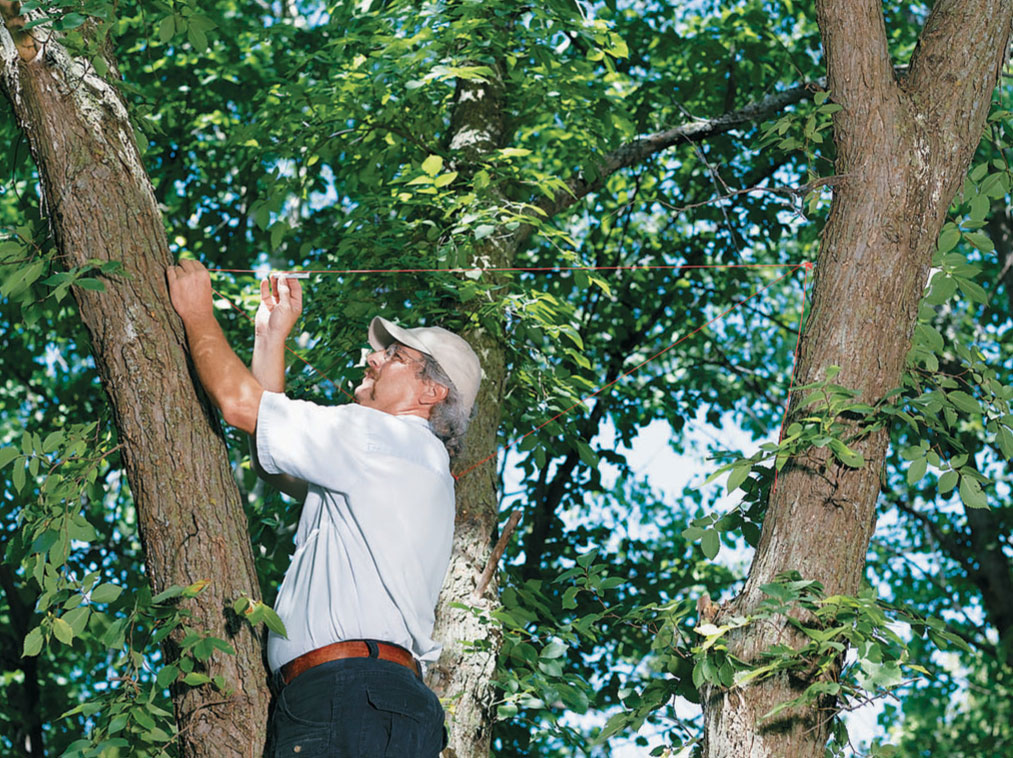
Use a mason’s line and line level to find at least four level anchor points for the platform.
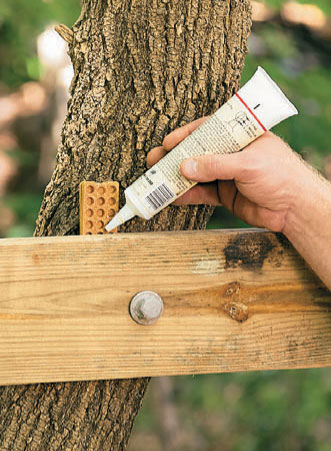
Anchor one end of the rim joist, then level the joist and anchor the other end. Glue a custom-cut wedge (right) between the joist and the tree.
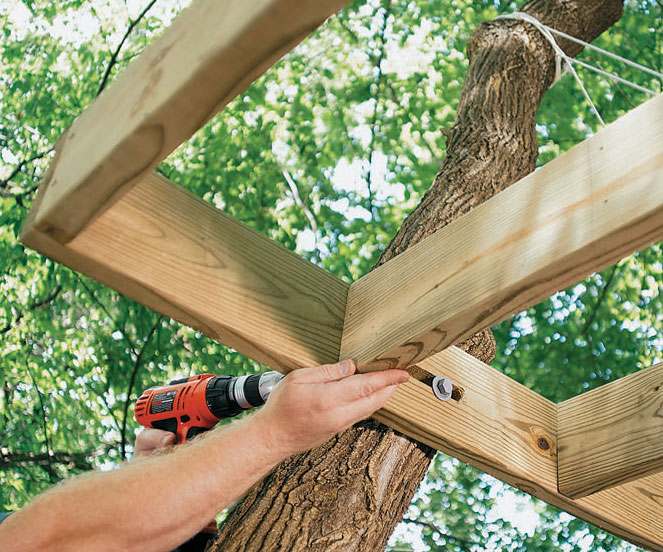
Cut the common joists to fit and tack them in place with deck screws so the tops are level. Then drive three 16d nails at each joint (nails have much greater shear strength than screws).
Mark the common joist layout onto the two long rim joists so they will run parallel to the short sides of the frame. Space the joists at 16" or 24" on center; either spacing is strong enough for a small treehouse. Cut the 2 × 6 joists to fit and install them with three 16d galvanized nails at each end.
Cut the 3/4" exterior-grade plywood decking to fit so any seams fall on the center of a common joist. Fasten the decking to the joists with 2" deck screws.
 Single Tree: Trunk as Center Post
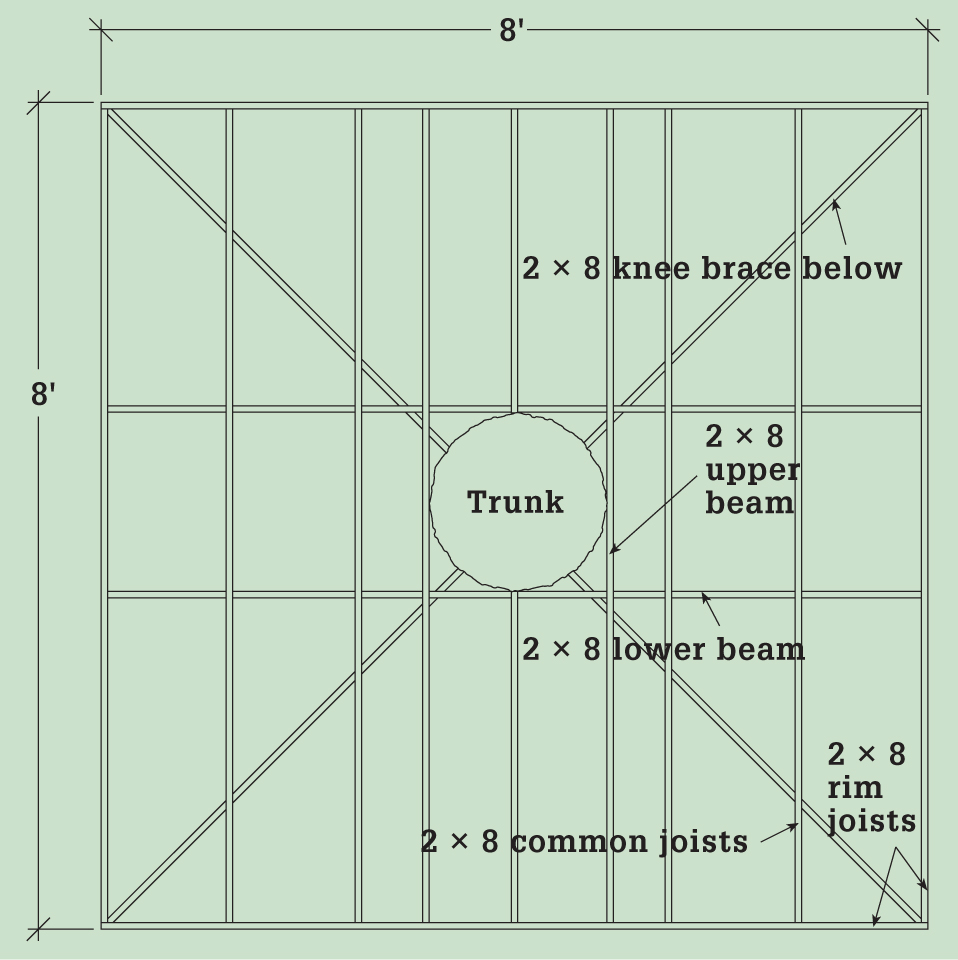
A tall, straight trunk is the foundation for this platform design that measures 8 feet square. It starts with two intersecting sets of 2 × 8 beams stacked on top of each other. All beams are fastened to the tree with a single fixed anchor screw. The upper two beams become floor joists in the finished frame. Each corner of the frame is supported by a knee brace, transferring much of the load back down to the tree trunk. The braces are fastened to the frame and tree with galvanized metal framing connectors. The decking is 5/4 × 6 boards, which saves a little on weight compared to 2 × 6 decking. The tree for this type of platform should measure at least 5 feet in circumference at its base.
Note: The platform frame is not safe to stand on before the knee braces are installed.
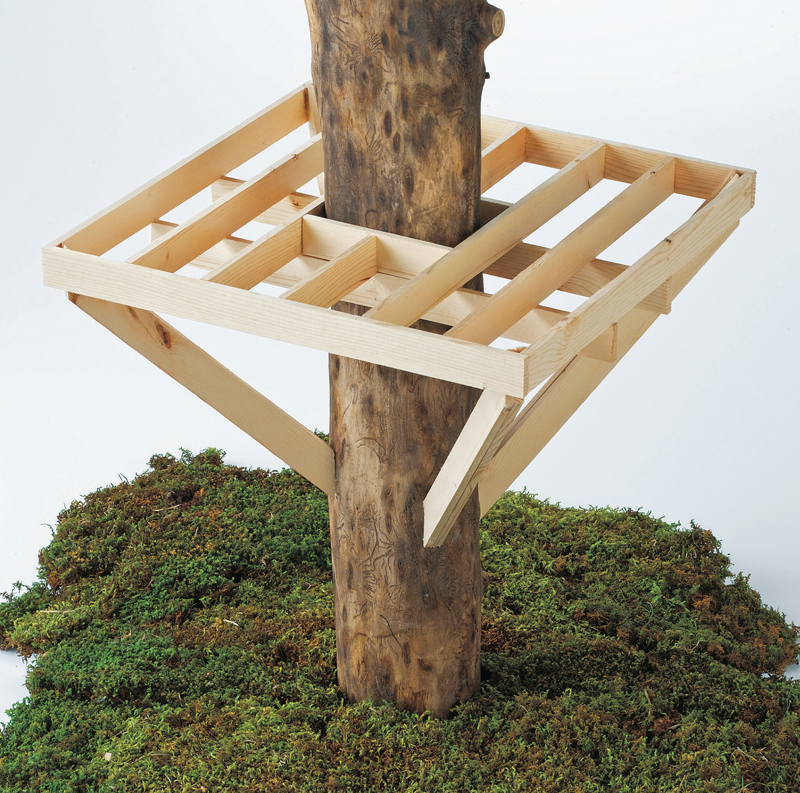
A single-trunk treehouse will accomodate most designs for small to medium size treehouses.
 How to Build a Single-tree Platform
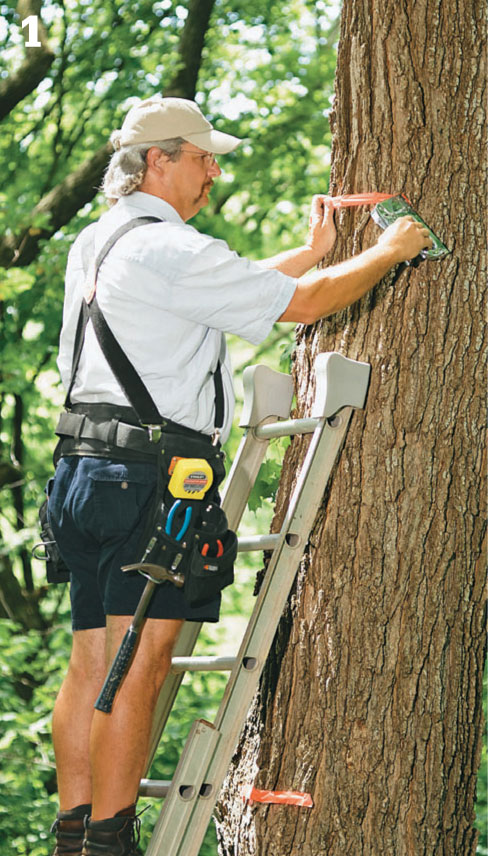
Measure to find locations of platform and bracing, and mark them on the tree with colored tape.
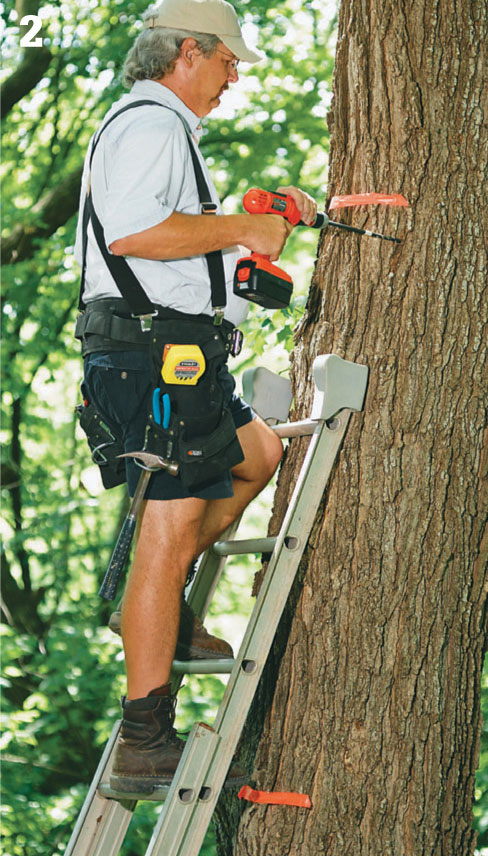
Drill into the tree to make pilot holes for the lag screws. Because you will be driving only one screw per beam, you can thread the screw through a guide hole in the beam with washers on both sides of the beam, then insert the screw tip into the pilot hole in the tree.
Cut the lower 2 × 8 beams at 96", and cut the upper 2 × 8 beams at 93". If possible, find a relatively flat, smooth area of the tree trunk to install the beams. Anchor the first lower beam to the tree with a lag screw, centering the screw along the board’s length and on the tree’s trunk. Install the second lower beam on the opposite side of the trunk, making sure the two beams are level with each other and are even on the ends. Install the upper beams on top of the lower beams, following the same procedure.
Cut two 2 × 8 side rim joists at 96" and two end rim joists at 93". The end joists are parallel to the upper beams. Fasten the side joists over the ends of the end joists, using three 16d common nails at each joint. Check the frame for square, then toenail the rim joists to both sets of beams.
Secure the lower support beam to the tree trunk using a large socket wrench. Check for level as you tighten the bolt.
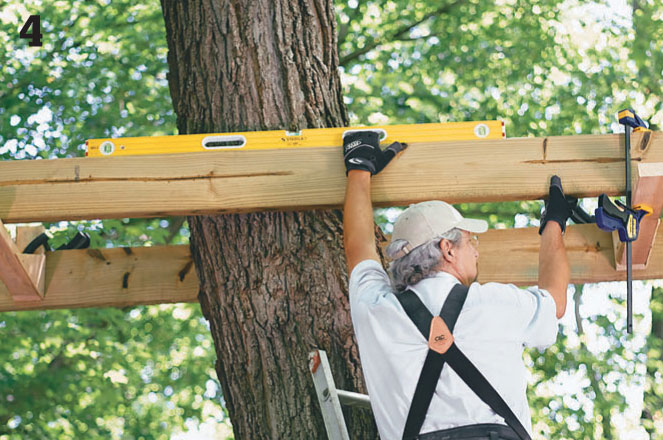
Level the second lower support beam of the platform base, making sure it is parallel with the first.
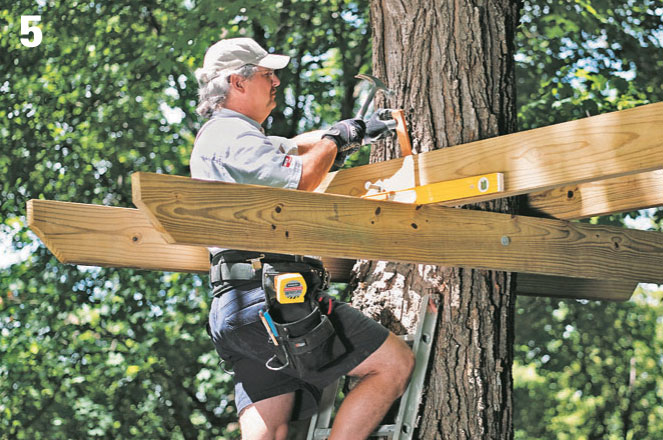
Use shims as needed to help any beams stand plumb where the tree surface is not vertical.
Cut each 2 × 8 knee brace to length so it extends at a 45° angle from one of the inside corners of the rim joist frame to the tree trunk; miter the ends of the braces at 45°. Install an adjustable framing connector (typically used for rafters) at each corner of the frame to secure the top end of each brace. Install a bracket to the tree for the bottom end of each brace. Then, install the braces.
Note: For a large or heavy treehouse, you might need to use two 2 × 8s or a 4 × 6 or larger timber for each knee brace to ensure adequate support.
Cut two 2 × 6 common joists to fit between the side rim joists and install them midway between the upper beams and the end rim joists. Install two short joists that span from the side rim joists to the trunk. Install these midway between the upper beams.
Install the 5/4 × 6 decking boards perpendicular to the common joists, keeping the decking flush with the outsides of the floor frame. Gap the boards by 1/4" and fasten them to the rim joists, common joists, and upper beams with 2-1/2" deck screws.
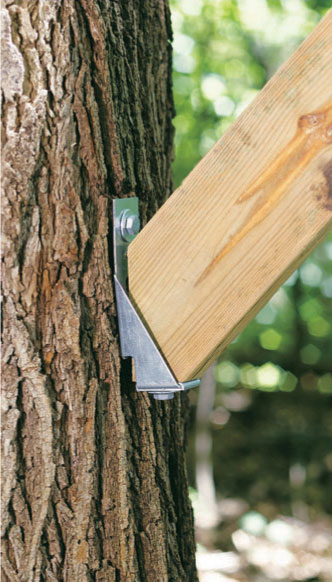
Framing connectors make for strong joints at both ends of the knee braces.
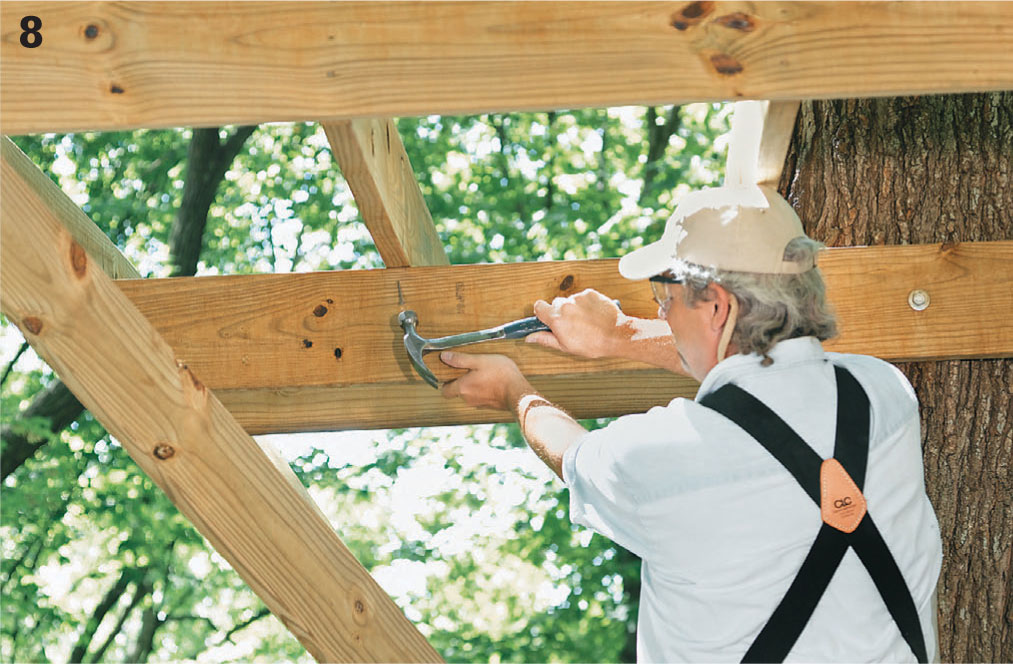
Toenail all of the joists to the lower beams with 16d galvanized common nails.
 Two Trees: Platform Spanning Between Trunks
Two large trees spaced about 6 feet to 8 feet apart allow for an open platform with a simple structure. This platform is supported by two 2 × 10 beams attached on both sides of the host trees with fixed anchors. The floor frame cantilevers to the sides of the beams and must be supported at each corner with a 2 × 6 knee brace anchored to the side of the tree. This rigid design is suitable for mature trees (at least 10" in diameter) at a low height where movement is slight. As shown, the platform decking is made of 2 × 6 boards. Thinner decking boards require two additional common joists to reduce the joist spacing to about 16" on center.
Note: The platform frame is not safe to stand on before the knee braces are installed.
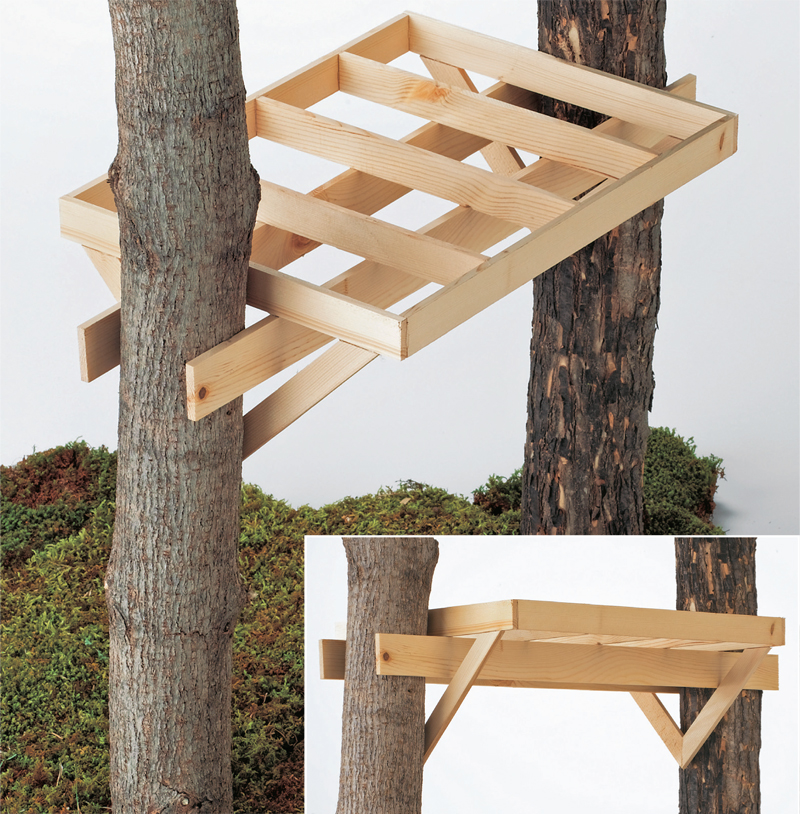
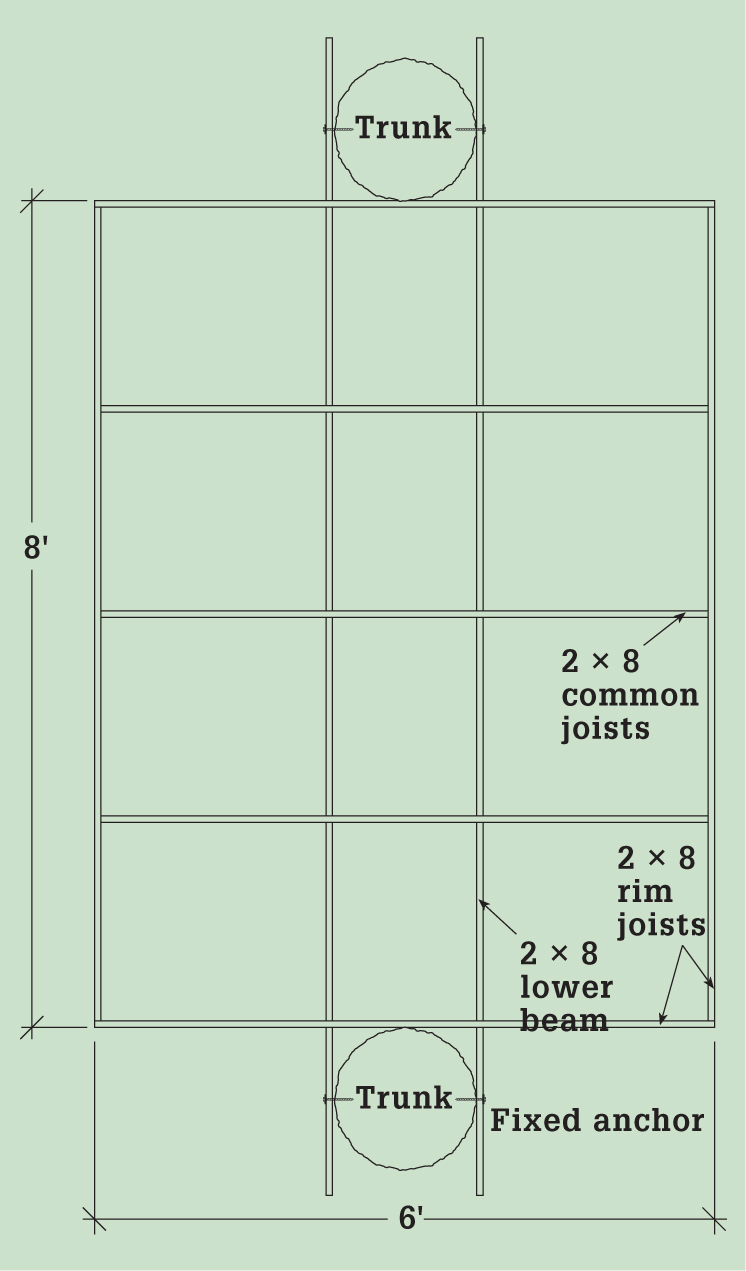
Two-trunk treehouse platforms require more planning and engineering but can support a larger structure.
Cut the two 2 × 10 beams to extend several inches beyond the trees at both ends. Anchor one end of the first beam using a 3/4" lag screw and washers. Hold the beam perfectly level, then anchor the other end to the other tree. Install the second beam on the opposite sides of the trees, making sure the beam is level and that both beams are level with each other.
You can build the entire floor frame on the ground, then install it on top of the beams. Just make sure the frame will fit between the trees before completing the frame. Cut the two 2 × 8 end rim joists at 72" and the two side rim joists at 93". Cut the three 2 × 8 common joists at 69".
Nail the end rim joists over the ends of the side rim joists with three 16d common nails per joint so the joists are flush at their top edges. Space the common joists evenly between the end joists, and fasten them to the side joists with 16d nails.
Center the frame on top of the platform beams. Check the frame for square, then toenail the common joists and end rim joists to the beams.
Each 2 × 6 knee brace starts about 3" in from the end of the end rim joist and extends down to the center of the tree trunk at a 45° angle. Cut each brace so its top end is flush with the bottom edge of the rim joist (or you can fit the brace into a notch in the joist, as shown below) and its bottom end has a plumb cut at 45°. Attach the braces to the rim joists with pairs of galvanized metal jointing plates and carriage bolts (see below). Anchor the bottom end of each brace to the tree with a 3/4" lag screw and washers.
Cut the 2 × 6 decking boards at 96" to run parallel to the side rim joists. Space the boards 1/4" apart and fasten them to the floor joists with 3" deck screws, keeping all edges flush to the outsides of the floor frame.
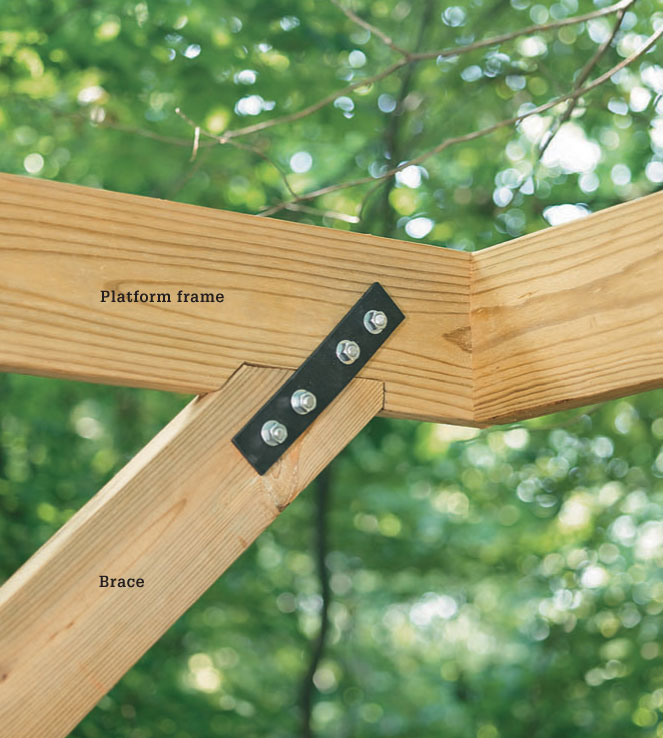
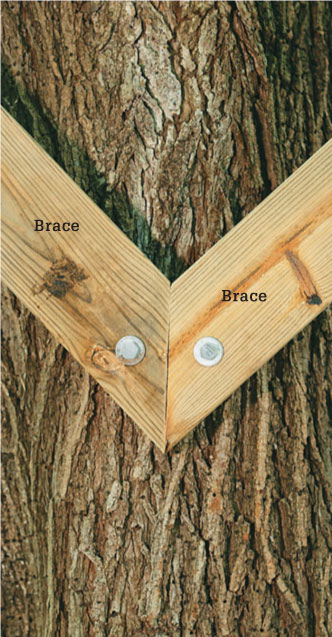
Secure the braces to the floor frame with metal plates and carriage bolts. Anchor the braces to the tree with lag screws (right).
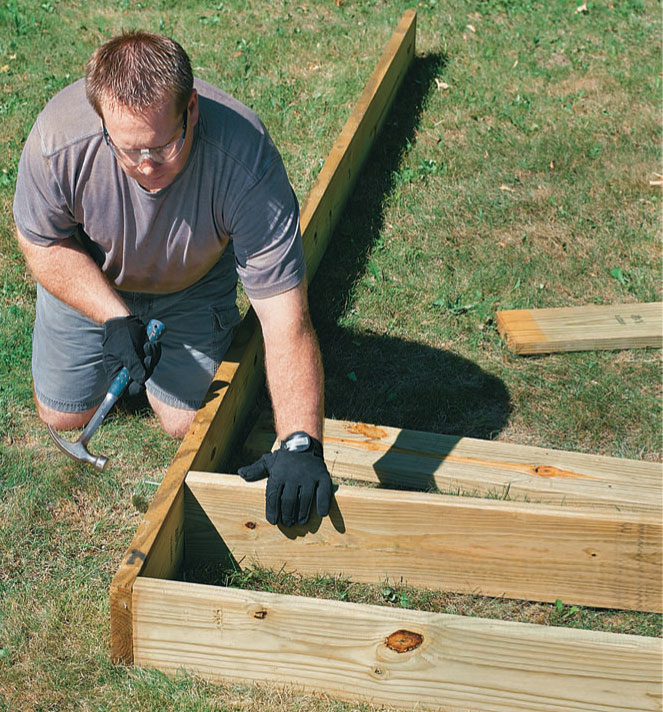
Build the 2 × 8 joist frame on the ground, then lift it up onto the platform beams.
 Three Trees: Platform Spanning Between Trunks
With the strength of three large trees and heavy-duty bracket-type anchors, this platform is ready for a large, one-story treehouse. The main supports are three 4 × 12 beams, each anchored to a pair of tree trunks.
The platform floor frame is built with 2 × 10 joists spaced 16" on center. It cantilevers about 18" over the front beam, creating a nice spot for a deck area. For decking, the front third of the platform will be laid with 5/4 × 6 decking lumber, while the rear two-thirds will be decked with 3/4" exterior-grade plywood in the area where the treehouse will sit.
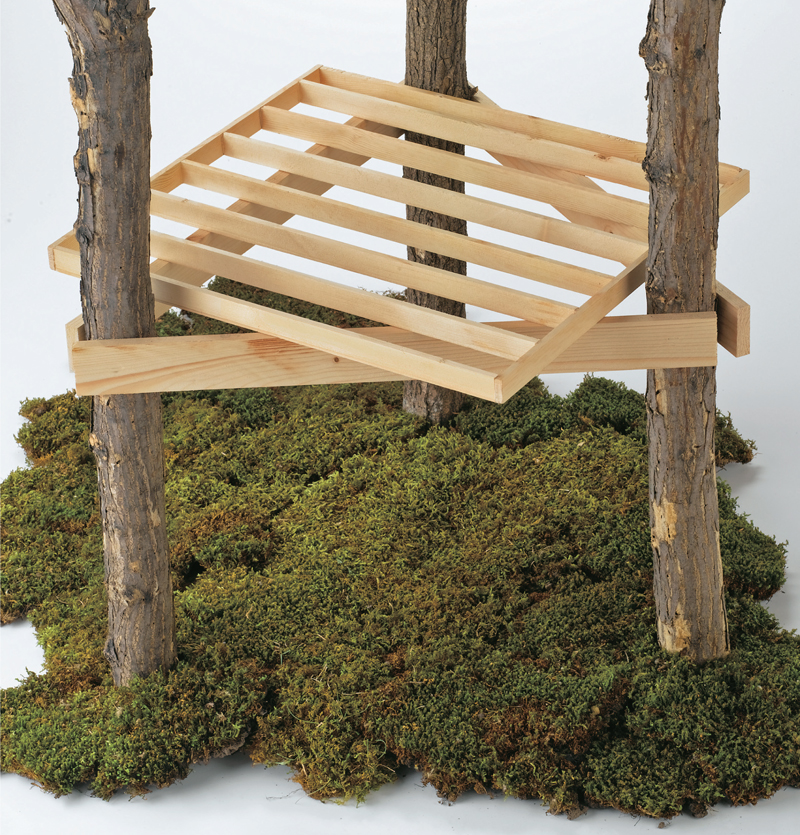
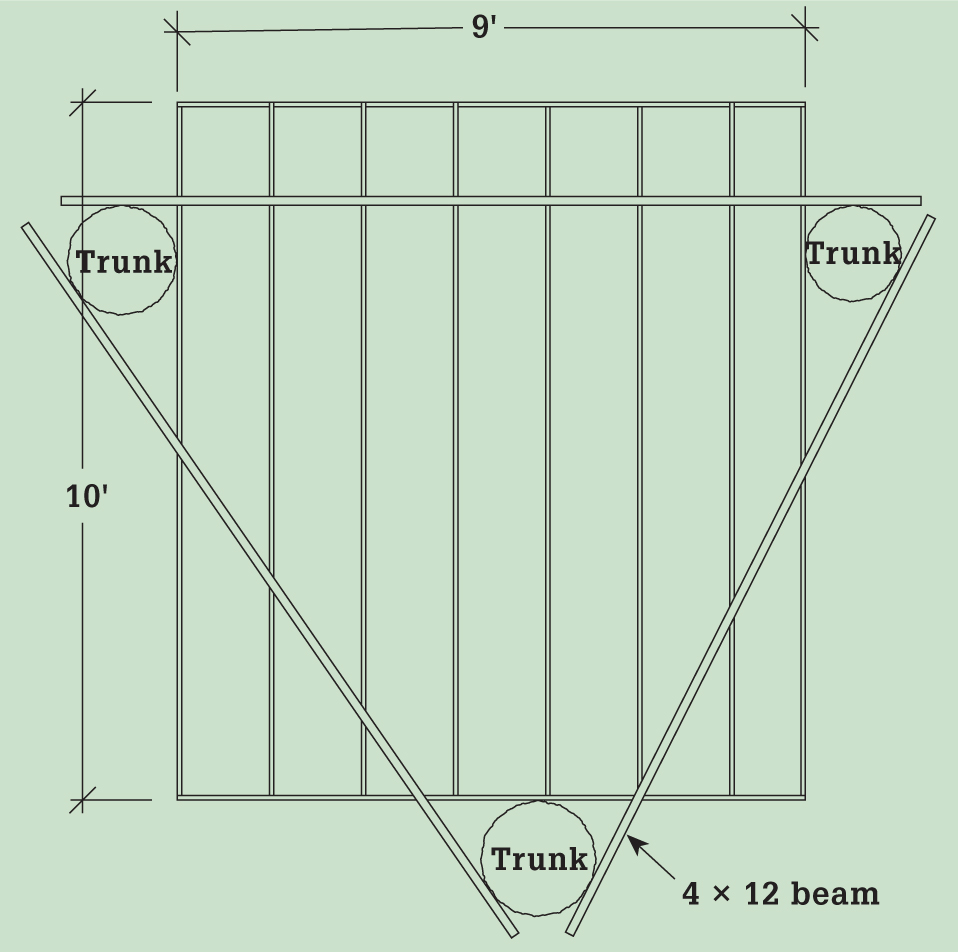
Use the three-trunk platform for spaceships, pirate ships, and other larger-than-life treehouse ideas.
Cut the 4 × 12 beams to length so they will overhang the mounting brackets by at least 12" at each end. Working on one beam at a time, mark the positions for the brackets onto the tree trunks. Note: If you’re installing a GL (see page 62), you’ll need a specially sized bit available for purchase or rent through the GL supplier. Using the bit, drill a pilot hole into the trunk so that the GL will be perfectly level when installed. Drive the threaded end of the GL into the pilot hole, using a large pipe wrench, until the flange is firmly seated against the tree.
Install the brackets and beams one at a time to make sure each beam is level and all beams are level with one another. With a GL system, install a GL floating bracket at each anchor point, following the manufacturer’s instructions. Also install a stopper nut on the end of each GL to prevent the beam from slipping off the GL.
Cut the two 2 × 10 end rim joists to length so they fit between the two front trees with a few inches of play at each end (108" in this example). Cut the two side rim joists and six common joists at 117". On the end rim joists, mark the layout of the common joists, using 16" on-center spacing. Assemble the rim joist frame on top of the beams, using 16d common nails. Measure the diagonals to make sure the frame is square, then install the common joists.
When the common joists aren’t supported by a side beam at the rear of the floor frame, reinforce the joists with joist hangers where they meet the rear end rim joist. Check the frame again for squareness, then toenail all of the joists to the beams with pairs of 16d galvanized nails.
Snap a chalkline across the joists to represent the outside edge of the treehouse’s wall framing. Install 5/4 × 6 decking boards perpendicular to the common joists, starting at the front edge of the floor frame and stopping at the chalk line. Fasten the boards with 2-1/2" deck screws. Install 3/4" exterior-grade plywood from the edge of the decking to the rear edge of the floor frame, using 2" deck screws.
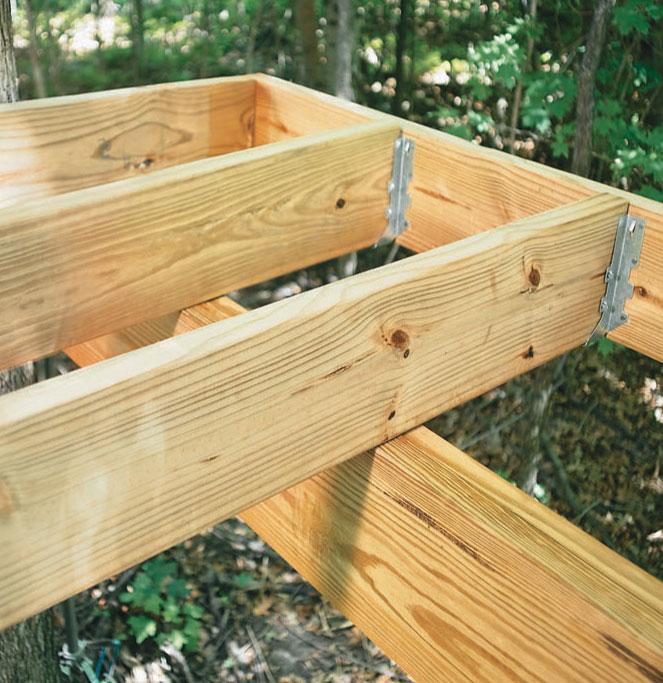
Add joist hangers to the longest-spanning joists to strengthen their connection to the rear rim joist.
 Two Trees & Two Support Posts
Four trees forming a perfect square or rectangle makes for an easy treehouse foundation, but this just doesn’t occur often in nature. The platform design shown here provides the same layout with only two trees, and it takes care of tree movement with a floor frame that slides along the top of a support beam. The two posts are 4 × 4 or 6 × 6 timbers buried in the ground, set in concrete and reinforced laterally with knee braces. The posts and 2 × 10 floor frame create a very rigid structure, while the 4 × 12 beam has the freedom to move on two sliding anchors (see page 62). Using 2 × 6 boards for decking helps to strengthen the floor frame. For a moderately sized treehouse, the trees for this platform design should be at least 10" in diameter.
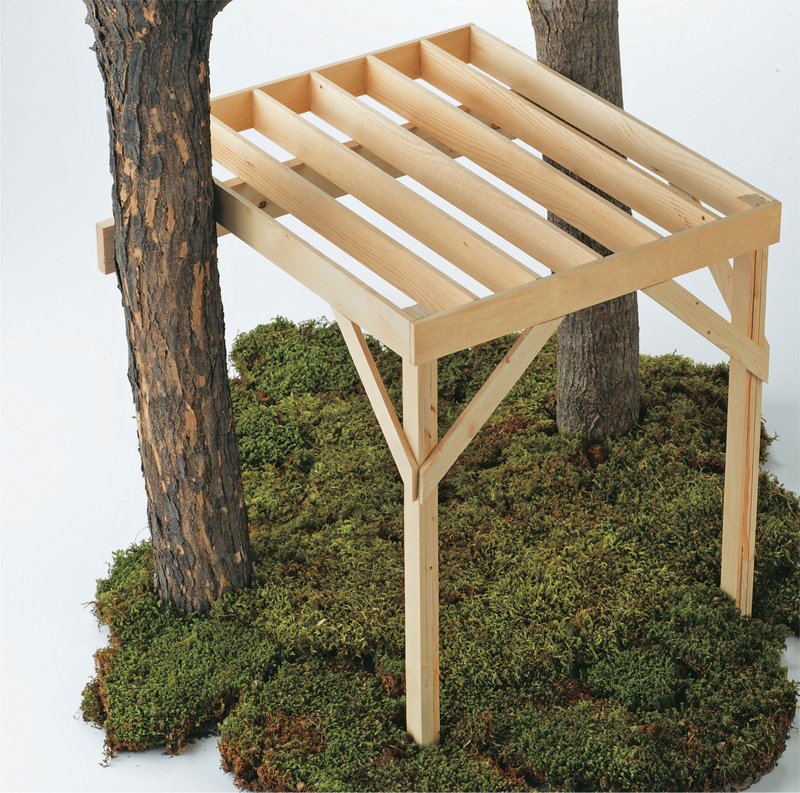
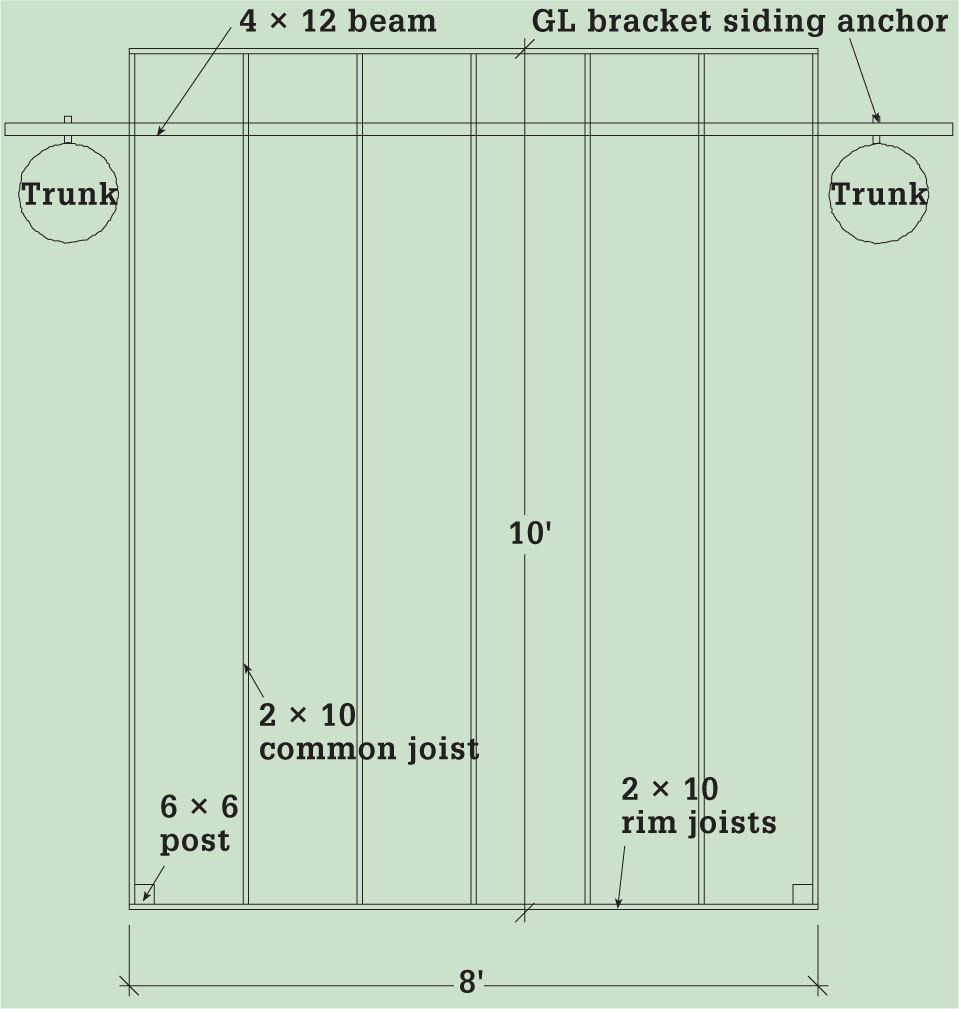
A support-post design makes building a treehouse possible on sites with extreme slopes or where trees are scarce or do not lend themselves to your preferred configuration.
Mark the post locations on the ground, allowing for several inches of play between the trees. Dig the post holes 14" in diameter and down to a depth below the frost line (check with the local building department for post-depth requirements in your area), plus 4". Fill the holes with 4" of compactible gravel for drainage.
Cut the posts long, then trim them to the platform height after the frame is installed. Set the posts in their holes and secure them with temporary cross bracing so they are perfectly plumb and are square to the platform layout. Fill the holes with concrete and let it dry.
Cut the 4 × 12 beam to extend at least 12" beyond the tree anchor points at each end. Transfer level over from the posts with a mason’s string and line level, and mark the post height onto the trees; measure down 9-1/4" (or the depth of the floor frame, if not 9-1/4") from these marks to determine the top of the support beam. Install the beam using support hardware at each end.
Cut the two 2 × 10 end rim joists at 96". Cut the two side rim joists and five common joists at 117". Install the side rim joists and one end rim joist flush with the tops of the post, using pairs of 1/2" lag screws. Fasten the other end rim joist over the ends of the side joists with 16d common nails. Install the common joists using 16" on-center spacing, fastening them to the end rim joists with joist hangers.
Cut the four 2 × 6 knee braces at 48", mitering the ends at 45° to fit flush to the rim joists and post corners, respectively. Fasten the braces to the side/end rim joists using galvanized metal joining plates and carriage bolts. Fasten the bottom ends of the braces to the outsides of the posts with pairs of 1/2" lag bolts or carriage bolts.
Measure the diagonals of the floor frame to make sure it’s perfectly square. Install 2 × 6 decking perpendicular to the common joists, using 2-1/2" deck screws. Space the boards 1/4" apart.
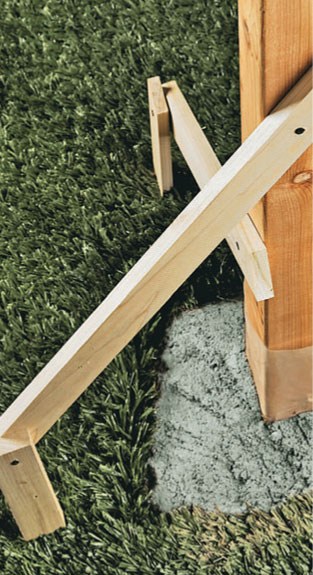
Secure the posts with cross bracing, then anchor them in place with concrete.
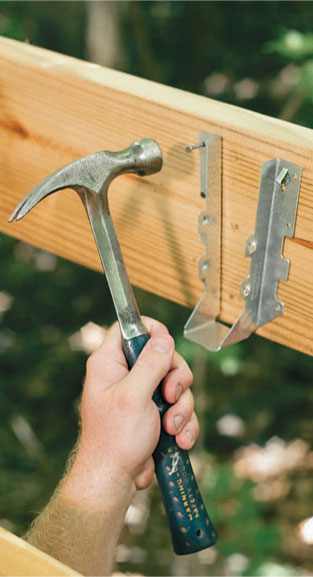
Install the common joists with joist hangers using the manufacturer’s recommended fasteners.
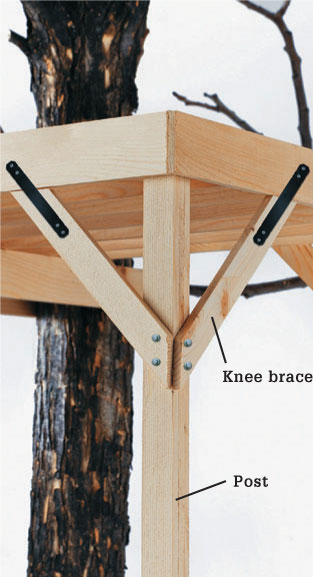
Secure the knee braces to the outsides of the posts with 1/2" lag screws and metal straps.
 Framing & Finishing Walls
With the platform done, you’re now free to cut loose with your fine carpentry and creative design skills . . . well, you can use them if you have them. If not, it’s ok. The point is, treehouse walls are fun and easy to build, and your new house will start to take shape before you know it. And because much of wall building is relatively lightweight work, it’s also a good time to get the kids more involved, for those lucky enough to have some helping hands.
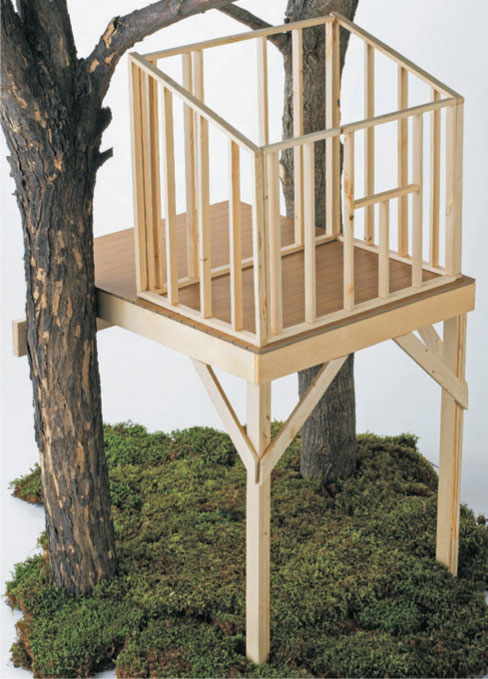
When building a regular house, carpenters frame the walls on the platform, then tip them into place and fasten them to the floor. That can be difficult in a treehouse; instead frame the walls on a driveway or other flat spot. In most cases, you can add the siding, windows, and doors, and even the exterior trim, before sending the whole shebang up into the air. Assemble the completed wall panels with some screws, and presto! you have a house (a topless house, at least; roofs are covered in the next chapter).
Before you get started with the wall framing, plan all the steps of the wall building process—framing, siding, trim, and building windows and doors—to establish the best order of things for your project. If you’re using plywood siding, for example, you’ll add the siding before the windows, doors, and trim. Other types of siding go on after everything else. In any case, the sequence of information given here should not be interpreted as a specific order to follow.
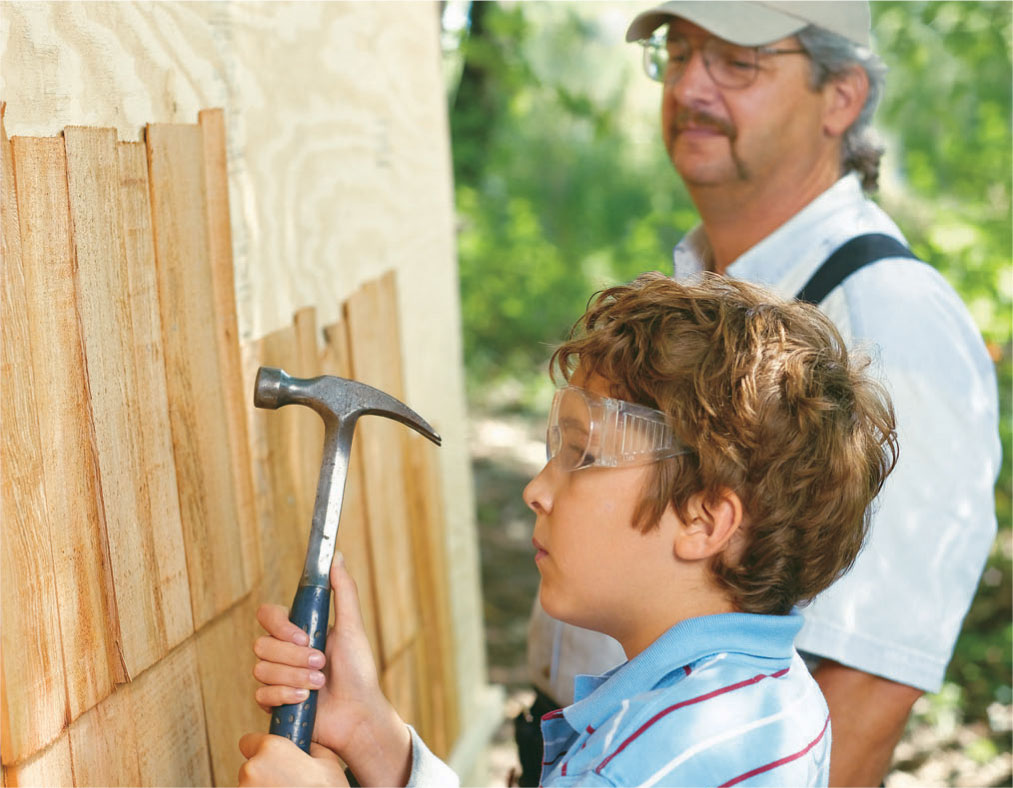
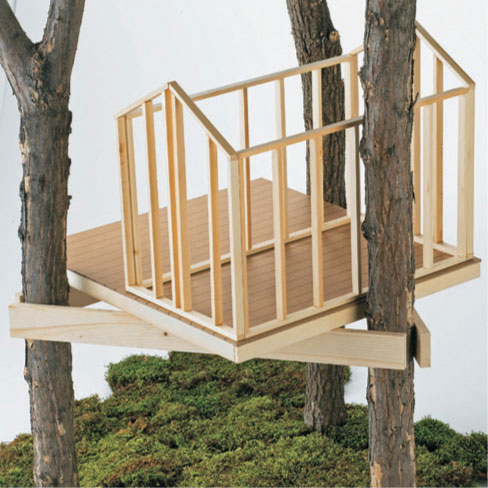
Once the walls of your treehouse begin to take shape the excitement over your castle in the clouds will build tremendously.
 Framing Walls
In the interest of making friends with gravity, treehouse walls are typically framed with 2 × 2 or 2 × 3 lumber, as opposed to the standard 2 × 4 or 2 × 6 framing used in traditional houses. Single-story treehouses can usually get away with 24" on-center stud spacing instead of the standard 16" spacing. However, the siding you use may determine the spacing, as some siding requires support every 16".
How tall you build the walls is up to you. Standard wall height is 8 feet. Treehouses have no standard, of course, but 6 feet to 7 feet gives most people enough headroom while maintaining a more intimate scale appropriate for a hideaway. Another consideration is wall shape. Often two of the four walls follow the shape of the roof, while the two adjacent walls are level across the top. Building wall shapes other than the rectangle or square are discussed later.
A wall frame has horizontal top and bottom plates fastened over the ends of vertical studs. Where a window is present, a horizontal sill and header are installed between two studs to create a rough opening (door rough openings have only a header, along the top). On treehouses, similar framed openings can be used to frame around large tree penetrations.
In a four-walled structure, two of the walls are known as “through” walls and two are “butt” walls. The only difference is that through walls overlap the ends of the butt walls and are made longer to compensate for the thickness of the butt walls. For simplicity, the two through walls and two butt walls oppose each other so that both members of each type are made the same length.
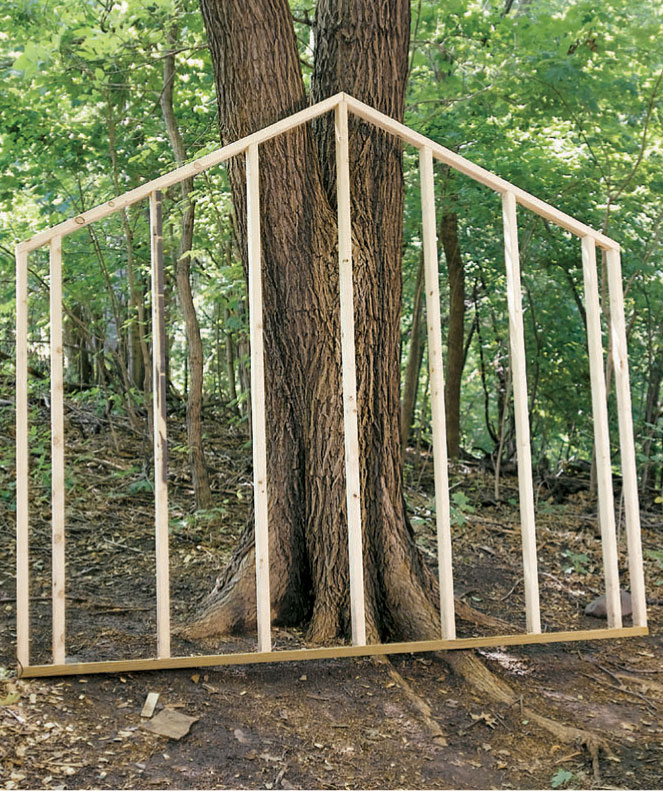
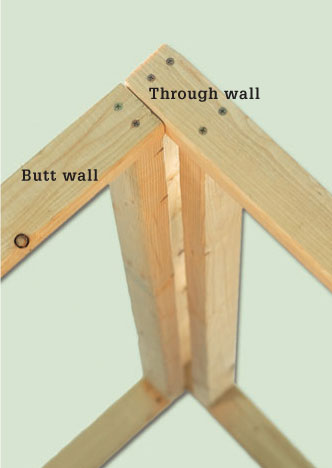
Build stud walls on the ground and then lift them up onto the platform one wall at a time. Through walls overlap butt walls (right) and are fastened together to form a corner of the house.
Assemble the wall frame with screws or nails. Add short cripple studs to continue the general stud layout at window and door openings.
To build a wall frame, cut the top and bottom plates to equal the total wall length (not counting the siding and trim). Lay the plates together on the ground—or driveway or garage floor—with their ends even. Mark the stud layout onto the plates, using 16" or 24" on-center spacing. Mark for an extra stud at each side of window and door openings; these are in addition to, and should not interrupt, the general stud layout. If you plan to install interior paneling or other finish, add an extra end stud to each end of the through walls. This gives you something to nail to when the walls are fitted together. Extra studs might also come in handy for nailing exterior siding.
Cut the studs to equal the total wall height minus 3", the combined thickness of the plates. Position the plates over the ends of the studs, and fasten them with two 3" galvanized wood screws or deck screws driven through pilot holes. You can screw through the plates into the ends of the studs, or angle the screws (toenail) through opposing sides of the studs and into the plates. You can also use 10d or 16d galvanized nails instead of screws.
To frame a window opening, measure up from the bottom of the bottom plate and mark the sill and header heights onto both side studs. Note: If you’re using a homemade window, make the rough opening 1-1/2" wider and 2-1/4" taller than the finished (glazed) window dimensions. This accounts for the window jambs made from 3/4"-thick lumber and a sill made from 2 × 4 lumber. If you’re using a recycled window sash (without its own frame), make the rough opening 1-1/2" wider and 2-1/4" taller than the sash. Cut the sill and header and install them between the side studs, making sure the rough opening is perfectly square. Install short cripple studs below the sill and above the header to complete the general stud layout. Follow the same procedure to frame a rough opening for a door, making it 2-1/2" wider and 1-1/4" taller than the finished door opening (for a homemade door).
If you’re going with a gable or shed roof for your treehouse, frame the two end walls to follow the roof slope. This not only encloses the walls up to the roof, it also establishes the roofline so you have an easy starting point for framing the roof. Houses with hip roofs have four standard walls—with horizontal top plates. Curved walls (for conical roofs) are also flat across the top but are framed a little differently than standard walls.
To frame an end wall for a gable or shed roof, first determine the roof’s slope. In builders’ parlance, roof slope, or pitch, is expressed in a rise-run ratio. For example, a 6-in-12 roof rises 6" for every 12" of horizontal run, equivalent to an angle of about 26.5°. A 12-in-12 roof slopes at 45°. For most do-it-yourselfers, it’s easier to determine the roof slope using only the angle. Another trick to simplify roof framing is to lay out the entire outline of the wall by snapping chalk lines onto a garage floor or mat of plywood sheets. Then you can simply measure to your lines to find the lengths of the pieces.
For a gable end wall, let’s say the roof slope is 30° (that’s a little flatter than a 7-in-12 pitch). That means the top ends of all the studs, as well as the top ends of the two top plates, are cut at 30°. Snap a chalk line to represent the bottom of the wall, then snap two lines perpendicular to the first, representing the ends of the wall. Note: The gable end wall must be a through wall. Measure up from the bottom line and mark the side lines at the total wall height; this is equal to the total height of the side (non-sloping) walls.
Gable end wall layout with 30° roof pitch.
Now make a center line running up through the middle of the wall layout. Cut one end of each of the two top plates at 30°, leaving the other ends long for now. Set the angled ends of the plates together so they meet on the center line and each plate also intersects one of the top-of-wall marks on a side line. See your wall now? You can trace along the undersides of the top plates, or just leave them in place, then measure up from the bottom line to find the lengths of all the studs. Remember to take off 1-1/2" from the stud lengths to account for the bottom plate. Cut the top plates to length so their bottom ends will be flush with the outside faces of the side walls.
To lay out an end wall for a shed roof—let’s say at 15°—snap a bottom chalk line and two perpendicular side lines, as with the gable end wall. The end walls for a shed roof must also be through walls. Mark the wall heights onto the side lines. Snap a chalk line between those two marks, and your layout is done. All of the top ends of the studs are cut at 15°.
Shed end wall layout with 15° roof pitch.
Structurally, curved walls are essentially the same as standard walls. They have top and bottom plates, studs, and similar rough openings for windows and doors. The main difference, and the trick to making the curve, is in using a double layer of 3/4" plywood for each of the plates. Also, the stud spacing is set according to the exterior siding material. Use 2 × 3 or larger studs for framing curved walls.
Lay out curved wall plates using a trammel: a thin, flat board with a pivot nail near one end and two holes for a pencil near the other end. Space the pencil holes to match the width (depth) of the wall’s studs. The distances between the pencil holes and the pivot nail determine the inner and outer radii of the curve. Mark the plate outlines onto full or partial sheets of 3/4" exterior-grade plywood, and make the cuts with a jigsaw (or circular saw for gentle curves). You can piece together the plates as needed to minimize waste.
Space the studs according to the siding you’ll use: For plywood, space the studs 2" for every 12" of outside radius on the curve—a 36" radius gets studs every 6". For other types of siding, such as vertical 1 × 4 T&G boards, lay out the studs at 24" on center, then install 2× nailers horizontally between the studs along the midpoint of the wall. The nailers must be cut with the same radius as the wall plates.
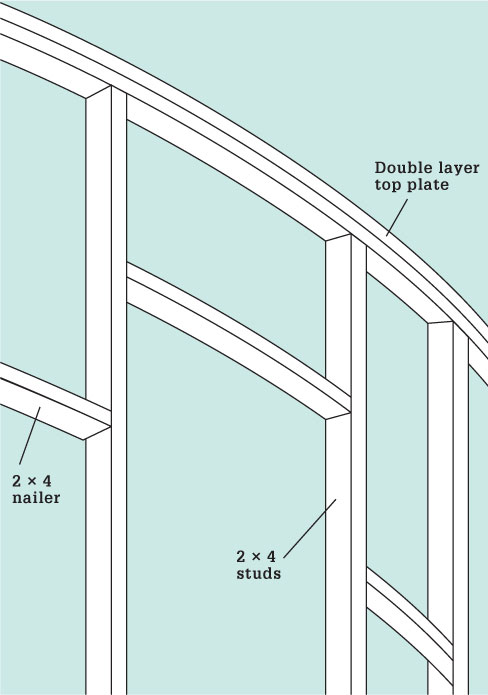
Install 2× nailers between studs for vertical siding. Stagger the nailers up and down to allow room for fastening.
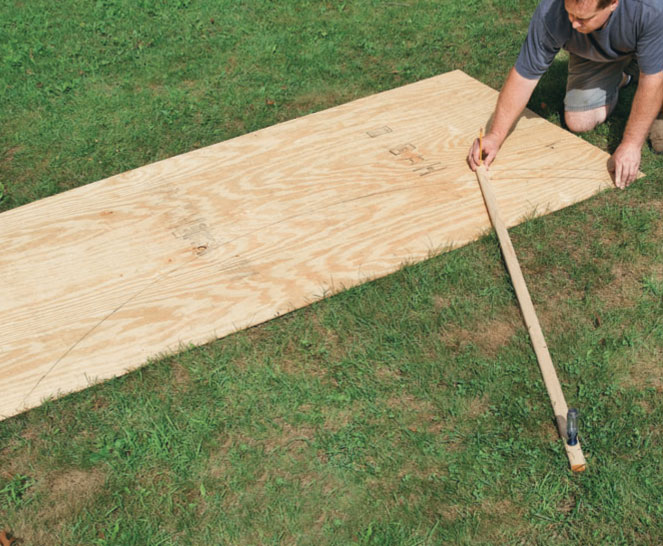
Use a trammel to mark the cutting lines for curved wall plates, pivoting the trammel from a centerline.
 Siding & Trim
Most standard types of house siding are suitable for a treehouse. You might want to match the siding on your regular house or go with something unconventional, such as corrugated metal. Just try to keep the overall weight in check. For that reason, heavy material like hardboard siding isn’t a great choice. Three of the most popular types of siding are shown here.
Note: Always make sure your wall frame is square before installing siding or trim.
Available in a variety of styles, in 4 × 8-foot panels and thicknesses from 3/8" to 5/8", plywood siding is quick and easy to install, and it adds a lot of strength to walls. It is somewhat heavy though, so you should use the thinnest material that’s appropriate. For regular houses, 3/8" plywood siding can be used over studs spaced 16" on center, while 1/2" or thicker is recommended for 24" stud spacing. On a treehouse, 3/8" is usually fine for either spacing, but it’s up to you. Trim goes on after the plywood siding.
Install plywood siding vertically, so the panels meet over the centers of the wall studs. Many types of siding have special edges that overlap at the joints to keep out water; join these according to the manufacturer’s instructions. If the panel edges are square, leave a 1/8" gap at the joint, and fill the gaps with caulk after installation. Fasten the panels to the wall framing with galvanized box or siding nails. Nail every 6" along the perimeter and every 12" in the field of the panel.
On through walls, wrap the wall ends with a narrow strip of siding. On butt walls, stop the siding flush with the ends of the walls.
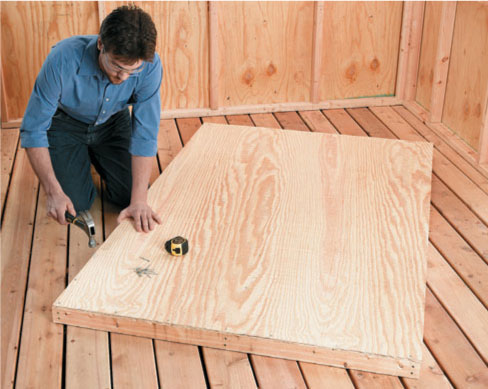
Use the square factory edges of plywood siding panels to square-up the wall frame. Fasten along one edge of the panel, then align the framing and fasten along the adjacent panel edge.
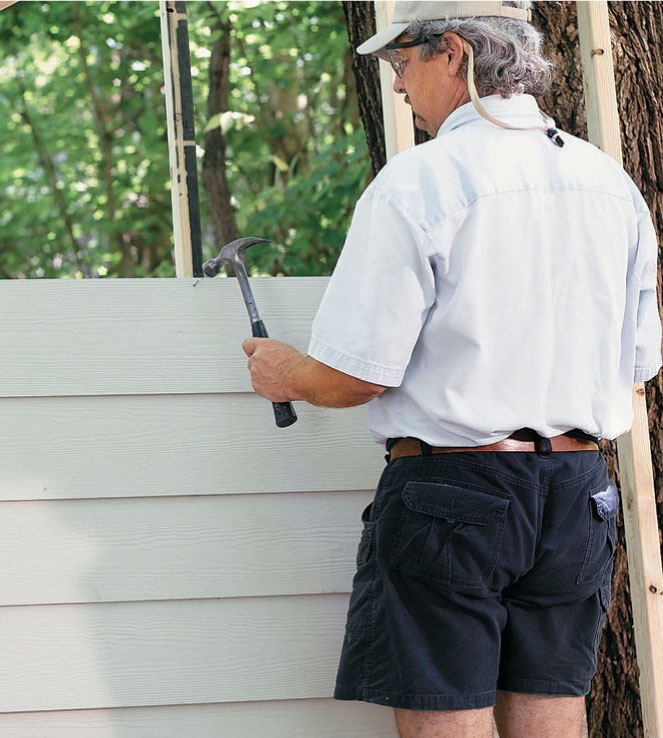
Classic cedar lap siding is an attractive, lightweight material. It takes more time to install than plywood, and it’s more expensive, but it definitely adds charm to a treehouse. Most lap siding requires studs spaced 16" on center. It’s easiest to install after the trim. Note: For a large or multi-story treehouse, you might need a base layer of plywood sheathing underneath lap siding, to give the wall sufficient shear strength; consult your local building department or a qualified building professional.
To install lap siding, cut the boards one at a time so they fit snugly between the vertical trim boards. Begin with a starter strip at the bottom of the wall, then work your way up, overlapping each preceding course by at least 1". Nail into each stud with galvanized box nails or siding nails, driving the nails just above the top edge of the siding board below. You may have to add studs near the ends of walls to provide a nailing surface for the ends of the siding.
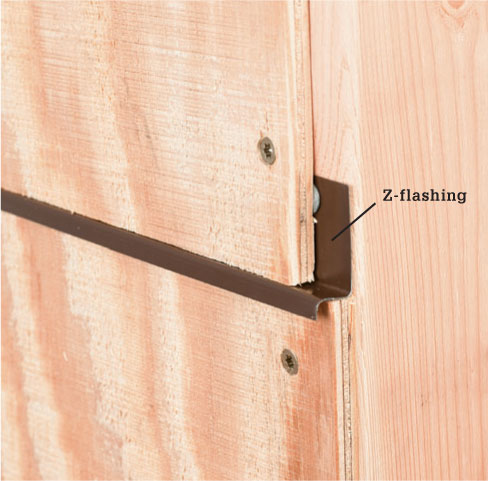
For walls over 8 feet tall, you can special order 9-ft. or 10-ft. panels, or use Z-flashing to join upper and lower panels. The flashing keeps water from getting in through the joint.
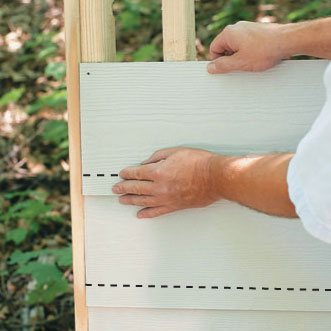
Install lap siding after the trim is up, overlapping each course by 1" or more. Nail cement board siding at the top. Wood siding is nailed just above the overlap.
Another relatively pricey but very attractive and lightweight option is cedar shingle siding. Tapered cedar shingles are typically sold in 16" and 24" lengths in random widths. They are installed over spaced, or “skip,” sheathing: 1 × 2 or 1 × 3 boards fastened horizontally across the wall framing. Like lap siding, each course of cedar shingles overlaps the one below it. The amount of shingle left exposed is called the exposure. The spacing of the skip sheathing should be equal to the exposure.
Note: For a large or multi-story treehouse, you might need a base layer of plywood sheathing underneath cedar shingle siding, to give the wall sufficient shear strength; consult your local building department or a qualified building professional.
To install shingle siding, first add the skip sheathing or plywood, then the trim, then the siding. Install the skip sheathing over the wall framing with screws, spacing it according to the shingle exposure, which is determined by the length of your shingles: For 16" shingles, use a 6" to 7" exposure; for 24" shingles, an 8" to 11" exposure.
After the trim is up, begin the shingling with a double starter course along the bottom of the wall. Fasten the shingles with 5d siding nails or 1-1/4" narrow crown staples driven with a pneumatic staple gun. Overlap the vertical joints between shingles by at least 1-1/4". Install the remaining courses, overlapping each course below to create a uniform exposure. Fasten the shingles 1" to 2" above the exposure line of the succeeding course.
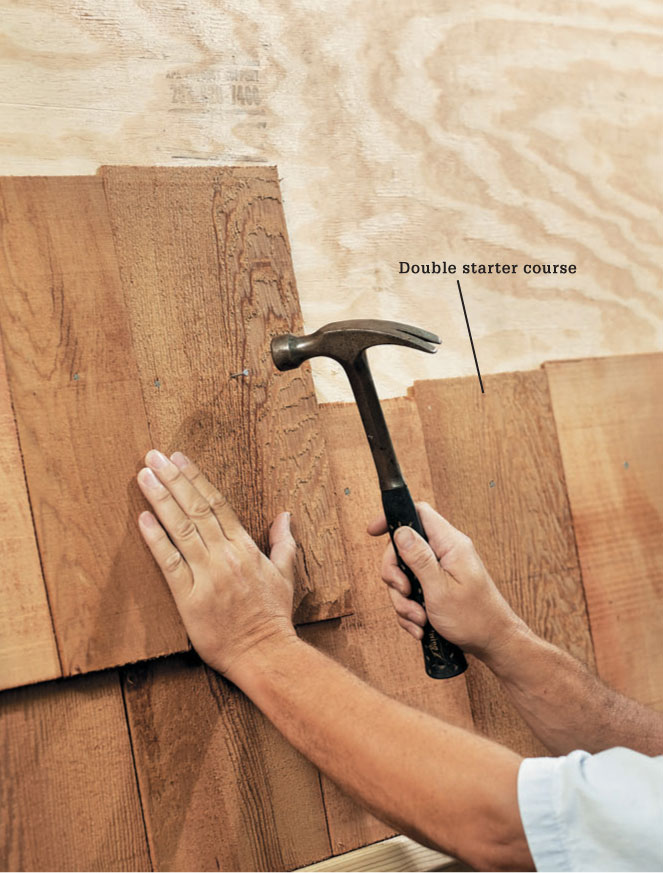
Butt together adjacent shingles, making sure that vertical joints are offset row-to-row and that amount of reveal is proportional to the shingle width.
Roof trim may include fascia—1× lumber that covers the sides of gable-end rafters and, if desired, the rafter ends along the eaves. A 1 × 2 along the top of the fascia adds definition and a nice transition line under the roof deck.
On a regular house, standard exterior trim is typically used to dress up wall corners, door and window openings, and roof edges. Adding simple trim elements is an easy way to create a finished look on a treehouse. On the other hand, if you want your house to look rustic or authentically kid-built, you may use little or no trim. The most common material for exterior trim is 1× cedar, available with either rough or smooth outside faces, but any rot-resistant or well-painted standard lumber will do. Install trim boards with galvanized box nails or siding nails.
Use 1 × 4 boards for outside wall corners, overlapping the boards with a butt joint. Inside (not interior) corners often get a single 2 × 2 board that fits against both adjacent walls.
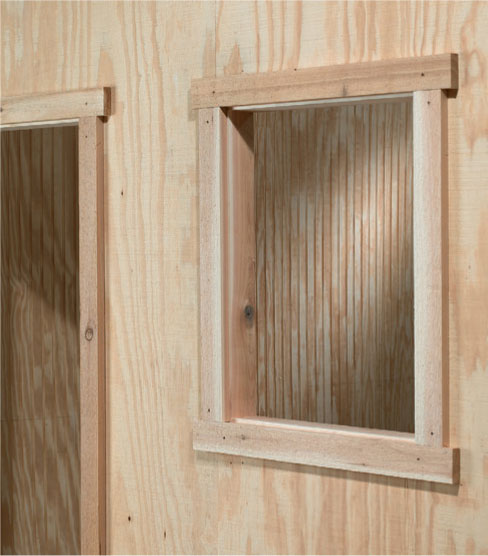
Framed doors and windows can be trimmed with 1 × 2, 1 × 3, or 1 × 4 lumber to cover the joint between the jamb and the wall framing or siding. It usually looks best to leave a 1/4" or so of the jamb exposed, creating a reveal.
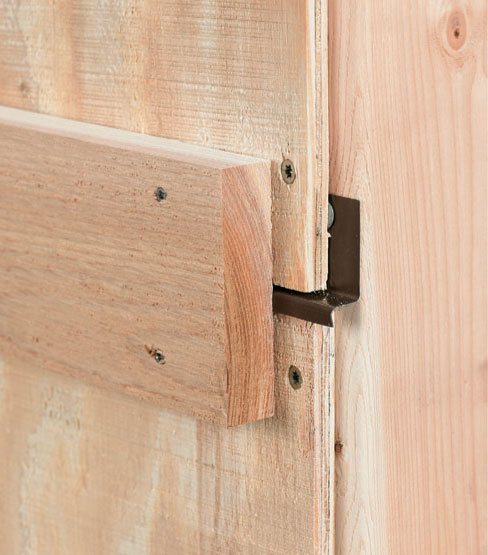
Horizontal siding joints and similar seams can be covered with trim so they look like design elements instead of construction joints.
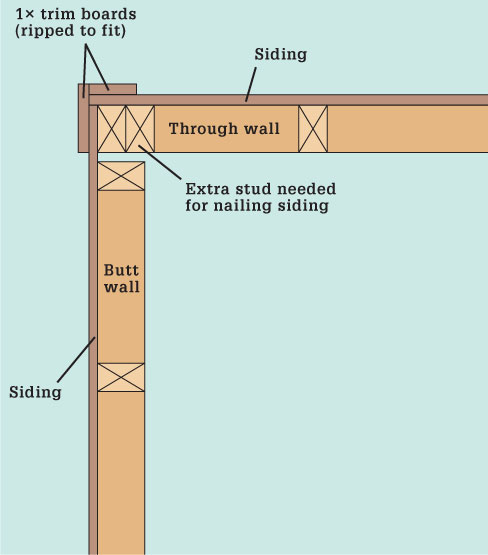
Cut trim boards to fit around the ends of through walls. Butt walls will appear to be trimmed when the walls are assembled.
 Installing Walls
On an ordinary construction job, a wall raising is the day when a few extra helpers show up to tip up the walls and assemble the house frame. With a treehouse, wall raising gets a whole new meaning. It’s time to call out your burliest neighbors, or get a little mechanical help from a block and tackle.
To get ready for the wall raising, snap chalk lines on the platform floor to represent the inside edges of the walls’ bottom plates. With an accurate chalk line layout, you won’t have to worry about squaring the walls as you assemble them.
For a small treehouse with light walls, lift two adjacent walls up onto the platform, set them on their chalk lines, and fasten them together through the end studs with 3" deck screws. Install the remaining walls one at a time, then anchor all of the walls to the platform floor framing with 3-1/2" screws. Drive a few longer screws at floor joist locations.
For larger houses with heavy walls, lay one wall flat on the platform, then tip it up and set it on the chalk line. Anchor the wall’s bottom plate to the platform with 3-1/2" screws or 16d galvanized common nails, then add temporary 2 × 4 bracing to keep the wall upright. Hoist up the adjacent wall and fasten the bottom plate, then fasten the two walls together through the end studs. Repeat for the remaining two walls.
When all of the walls are up, cut out the bottom plate at the bottom of the door opening, using a handsaw.
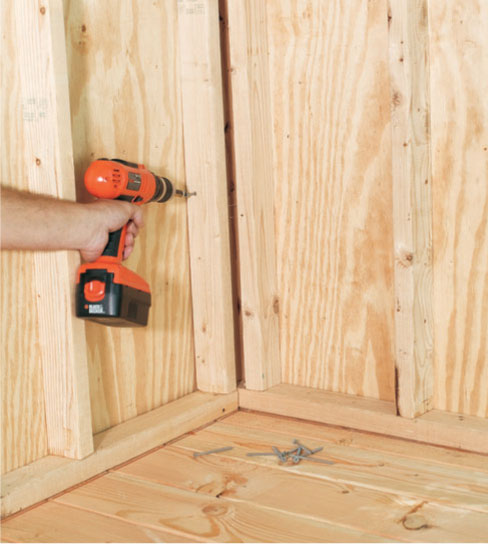
Join the walls with screws driven through the end studs.
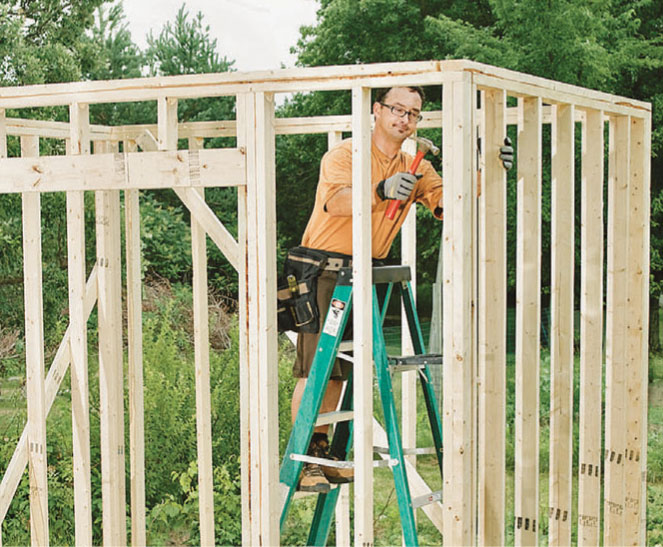
Top plates can be used to tie walls together at the corners, as well as provide a load-bearing surface for roof structures.
 Building Railings
A railing is primarily a safety device. All too often, amateur and even professional designers (especially professional designers) see railings as an opportunity to get creative. The result is an unsuitable railing, which is essentially useless. Build a strong, solid railing with closely spaced balusters and you won’t have to worry about who uses the treehouse, whether it’s small children or tipsy adults. That means no ropes, no cables, and no twigs. Okay. Lecture over.
A good treehouse railing employs the basic construction details of a standard deck railing. Many treehouse railings are even simpler, eliminating features like the broad horizontal cap rail commonly found on house decks. The important thing is to adhere to the basic design requirements:
• Tops of railings must be at least 36" above the platform surface.
• Balusters (vertical spindles) may be spaced no more than 4" apart.
• Horizontal balusters are unsafe for children, who like to climb them.
• Railing posts (4 × 4 or larger lumber) may be spaced no more than 6 feet apart and must be anchored to the platform frame, not the decking.
• Top and bottom rails must be securely screwed to the posts, if possible on the inside faces of railing posts.
• Balusters should be fastened with screws; if nails are used, balusters must be on the inside of horizontal rails.
• All openings in railings—for access to the treehouse platform—must have a safety rail across the top.
To build a simple railing, cut 4 × 4 support posts to extend from the bottom edge (or close to the edge) of the platform’s floor joists to 36" above the decking surface. Anchor the posts on the outside of the joists with pairs of 1/2" carriage bolts with washers. Install posts at the ends of railing runs, every 6 feet in between, and at both sides of access openings and stairways.
Cut 2 × 4 or 2 × 6 horizontal rails to span between the top ends of the posts. Fasten the rails to the inside faces of the posts with pairs of 3" deck screws. Continue the rail through access openings to create a safety barrier. Mark the baluster layout onto the outside faces of the rails, spacing the balusters no more than 4" apart. Cut 2 × 2 balusters to extend from the top of the rail down to the floor framing, overlapping the joists by at least 4". Fasten the balusters to the rails and joists with pairs of 2-1/2" deck screws driven into pilot holes at each end.
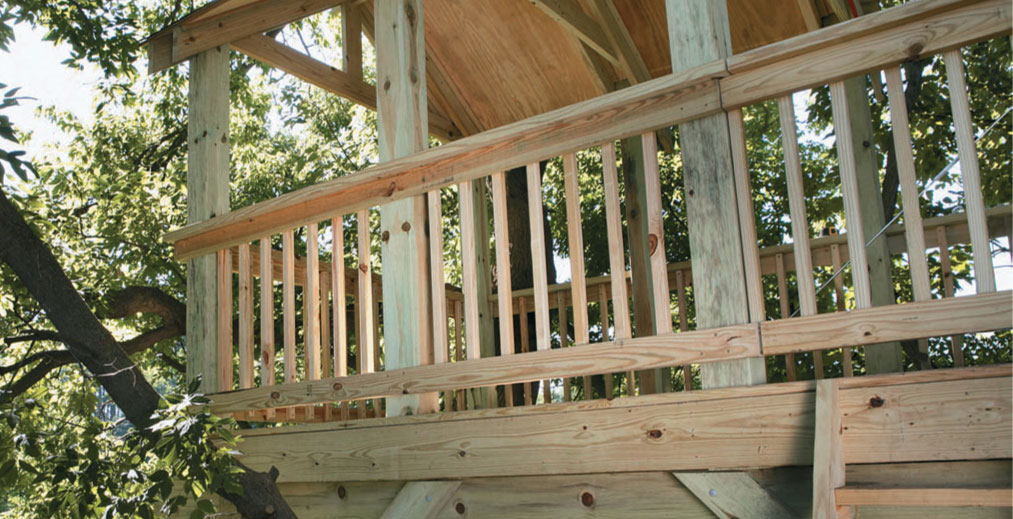
The best railing is a simple one. Simple designs yield functional railings, providing a fair level of safety for those in the treehouse and peace of mind for those on the ground.
 Finishing Interiors
In keeping with the rule that treehouses should be all about personal choice, the interior finishes present one of the best opportunities to create your own space—it’s amazing how a little bit of paneling and trim can doll up the joint. At this stage, you want to ask yourself how the interior should feel: should it be tidy and refined like a house interior (or at least a summer cabin), or should it remain rustic and outdoorsy, something like a fire lookout tower?
Thinking about how you will use the treehouse will guide your choice of finishes as well as any functional features, like shelves and tables. On the other hand, you might decide to skip the interior finish altogether, string up a hammock, and get right down to business on an ideal treehouse pastime: napping.
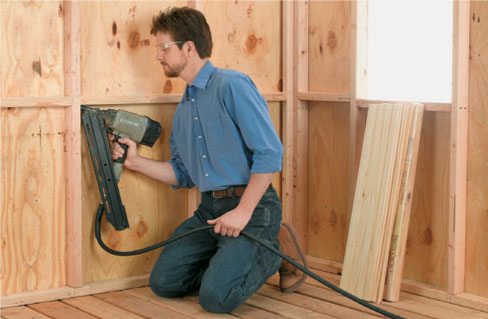
Vertical T&G boards require blocking for nailing into. Install 2× lumber blocks between the studs every 2 or 3 ft. in each stud bay. For wainscoting, install blocking so that the top edge of the wainscot boards is centered on the blocks.
 Wall & Ceiling Paneling
Almost any wood paneling can work for interior treehouse walls and ceilings, including T&G boards, sheet paneling, plywood, and even knotty pine planks. Keep in mind that many paneling materials aren’t intended for outdoor exposure, so if your interior isn’t pretty well dried in (protected from rain), be prepared for some serious weathering. No big deal; after all, it is a treehouse.
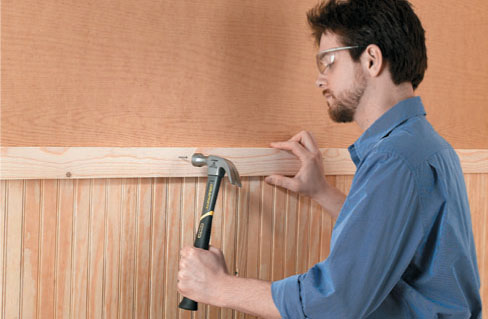
A 1 × 3 or 1 × 2 chair rail quickly hides the transition between a wainscot and the upper-wall paneling. If your door/ window trim (page 112) is on top of the paneling, install the chair rail after the trim is up.
T&G paneling is a good choice for treehouses because it’s pretty forgiving with temperature and moisture changes—it won’t show gaps when the boards shrink with dry weather—and it strikes a nice balance with a finished yet rustic look. It’s also easy to install over the typically less-than-perfect surfaces of a treehouse structure, allowing you to custom-cut small pieces to fit odd spaces, as opposed to having to trim large panels, as with sheet paneling.
You can install T&G paneling in a few different ways: running the boards horizontally or vertically over the entire wall or creating a wainscot effect by running them vertically over the first 32" or so from the floor, then running them horizontally up to the ceiling. The transition between the wainscot and upper paneling typically is covered with a band of trim or molding known as a chair rail. T&G paneling is equally appropriate for ceilings, and you can nail it directly over the rafters for a highly finished look.
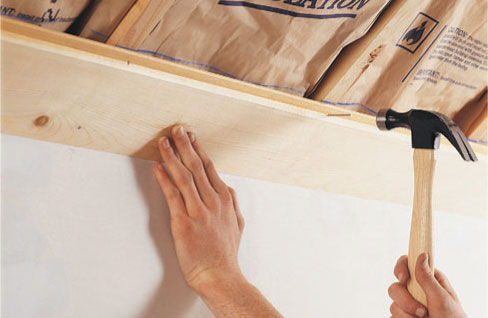
Blindnail T&G boards to the wall framing or roof rafters by nailing through the base of the tongue at an angle. The T&G joints hold the bottom edges of the boards in place and hide the nails along the tongue. Only the first and last boards in a run need nails through their faces.
Sheet paneling installs quickly and is cheaper than board materials. The most popular type, beaded paneling, mimics the look of traditional T&G beadboard. It’s commonly available in 4 × 8-foot sheets, sometimes in exterior grades for outdoor or high humidity areas—the best option for a treehouse.
If your sensibilities tend toward the modern, you can achieve a sleeker look with smooth marine plywood, a high-grade plywood made with waterproof glue. Sand the panels so they’re smooth to the touch, and apply a clear finish of exterior polyurethane or furniture oil, if desired. Install the sheets with adhesive and nails (as with beadboard), use trimhead screws set just below the surface, or use exposed screws with finish washers.
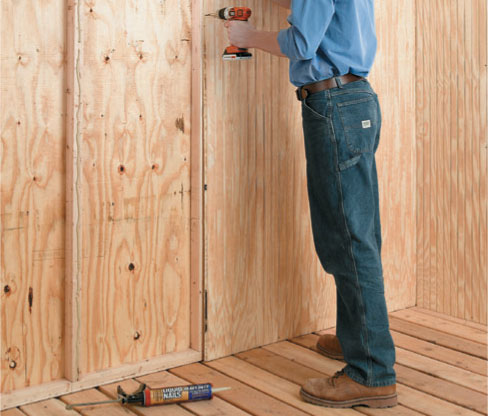
Install beadboard paneling with construction adhesive and finish nails or paneling nails, running the panels vertically from floor to ceiling. The joints between panels should fall over the center of a stud.
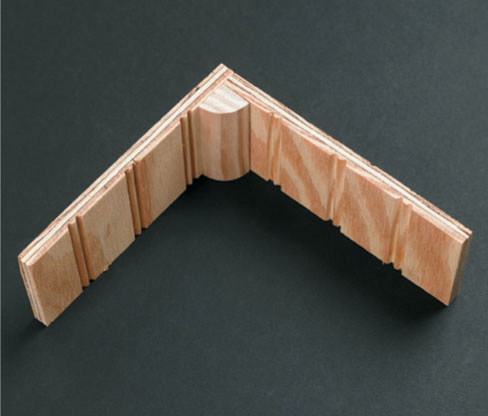
Trim along the edges where the panels meet the floor (or ceiling) with a 1 × 3 or any simple molding that matches the wood paneling. Use quarter-round to hide any gaps between panels at inside wall corners.
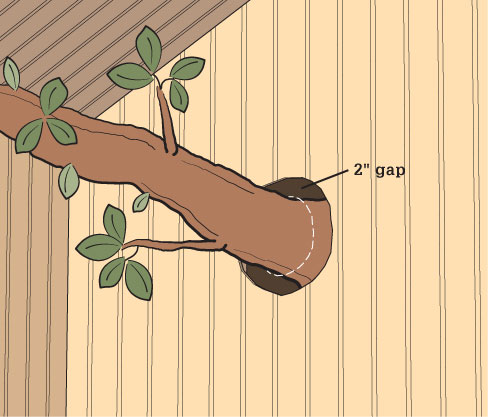
Mark paneling for custom cuts by scribing around the obstruction with a compass. Hold the panel or board in place and use the compass to mark the piece as it follows the contours of the obstruction. Remember to leave a 2" gap around any tree parts to allow for growth.
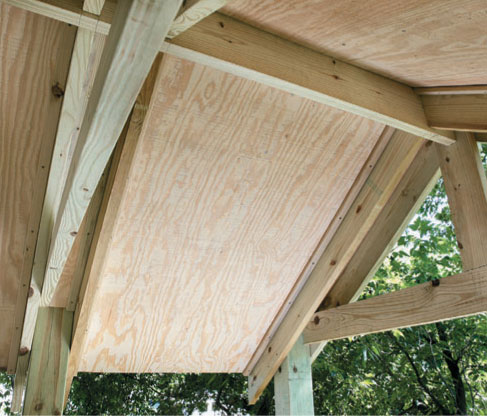
Ceilings look good with a finish of T&G boards or, for a rustic touch, rough-sawn cedar plywood. Run boards and panels perpendicular to the roof rafters. Install them using the same techniques used for wall paneling, starting at the walls and working up to the peak of the roof.
 Shelves & Tables
Even the simplest enclosed treehouse can be made a touch more homey and certainly more functional with a few shelves and some kind of useable table surface. But with space at such a premium, standard bracketed shelves are probably overkill, and a secondhand coffee or bistro table might overwhelm the room. A custom built-in is a better way to go on both counts. You can size and configure any of the following designs to suit your needs.
These cheap and simple shelves are designed for unfinished interior walls, where they make good use of the empty spaces between wall studs. They can also make good use of scrap lumber left over from the treehouse build. 2 × 4 shelves are suitable for 2 × 2 and 2 × 3 wall framing. For 2 × 4 studs, use 2 x6s for the shelves.
To make each shelf, cut a straight 2 × 4 to length so it spans across at least two neighboring wall studs, plus the desired amount of overhang on each end. For a custom look, you can angle the ends of the shelf back toward the rear edge with a 10° (or so) miter. Since the shelves protrude from the wall plane just a bit, it’s a good idea to round-off the front corners with a 3/4" or larger radius. Mark the radii with a compass or anything round, such as a small juice glass. Cut the rounded corners with a jigsaw.
Mark a level line across the front edges of the studs at each shelf location. To mark the notches for the studs, position each shelf board on its level lines so the board overhangs the outermost studs equally on both ends, then transfer both edges of each stud to the board. Measure the stud depth and transfer that to the board to mark the depth of each notch. Cut out the notches with a jigsaw.
To install the shelves, place each on its level lines and drill a single pilot hole through the shelf and each stud, with the hole centered on the edge of the shelf and the stud. Countersink the pilot holes for a finished look. Mount the shelves with 2-1/2" deck screws.
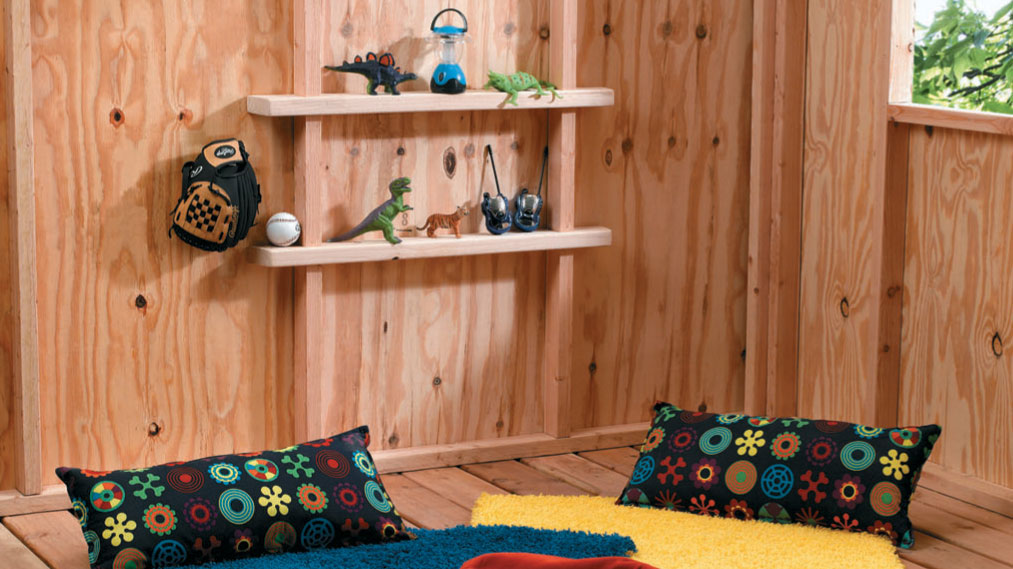
2 × 4 shelves are easy to make and provide some much-needed wall space for favorite toys and games.
 How to Build 2 × 4 Shelves
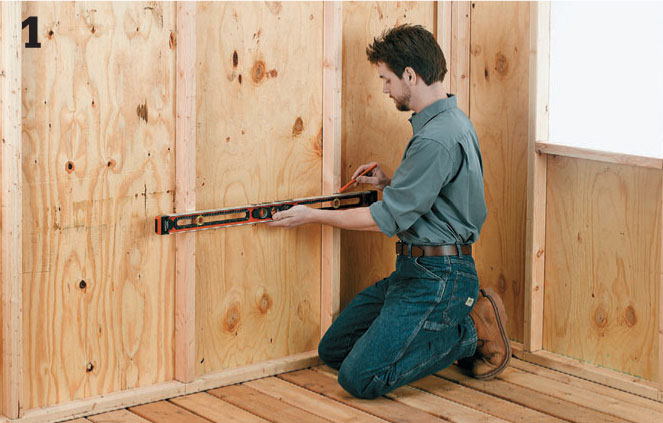
Draw level lines across the stud to represent the top face of each shelf. For wall studs spaced 24" on center, a good shelf length is about 33-1/2", which yields a 4" overhang on the ends.
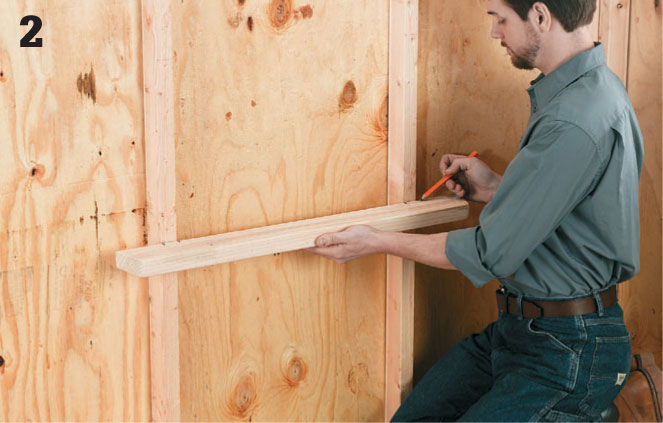
Mark the stud notches with the shelf board held in place. If a stud is twisted, hold a square or straightedge along the stud face to transfer the angle to the shelf board, or you can simply oversize the notch.
Fasten the shelves to the studs with screws. Use 2-1/2" screws for 2 × 4 shelves with 2 × 3 studs. Use 3" screws for 2 × 4 shelves with 2 × 2 studs or 2 × 6 shelves with 2 × 4 studs.
A rounded corner shelf makes a nice streamlined nook for a finished wall. And, as with the 2 × 4 shelves, you can probably make a few corner shelves with leftover material. Start with a piece of 3/4" plywood (1/2" will work, too, if that’s what you have), preferably with two adjacent factory edges making a 90° corner.
Draw the radiused front edge of the shelf, using a homemade compass (like the one shown on page 101 (Flip-up Table). A good size for this type of shelf is about 10" to 16", measuring from the rear corner to the front edge. Shelves larger than 16" or so might require a support bracket or a knee brace centered underneath the shelf. Cut the curved front edge of the shelf with a jigsaw, then smooth the curve and remove any rough or flat spots, as needed, with coarse sandpaper and a sanding block.
Use a level to mark the shelf location onto the two adjacent walls. These lines will represent the top edges of the 1 × 2 cleats, so the finished shelf surface will be 3/4" above the lines. Cut two straight pieces of 1 × 2 to length about 2" shorter than the shelf depth to serve as the support cleats. If desired, round off or otherwise shape the front ends of the cleats for decorative effect. Tip: If the cleats will go all the way into the wall corner (no corner trim), cut one of them 3/4" shorter than the other. Install the longer cleat first, then butt the shorter one against the face of the longer. This way, both cleats will extend the same distance relative to the shelf.
Fasten the cleats to the wall with deck screws or exterior drywall screws driven through countersunk pilot holes. The top edges of the cleats should be on the level lines. Set the shelf onto the cleats to test the fit against the walls. If the walls are out of square, scribe a cutting line along one side edge of the shelf, then trim the edge with a jigsaw or circular saw. Also notch the shelf corner to fit around any corner trim, as needed. Sand the shelf smooth and apply a finish, if desired. Install the shelf with 5d or 6d finish nails driven through the shelf and into the cleats.
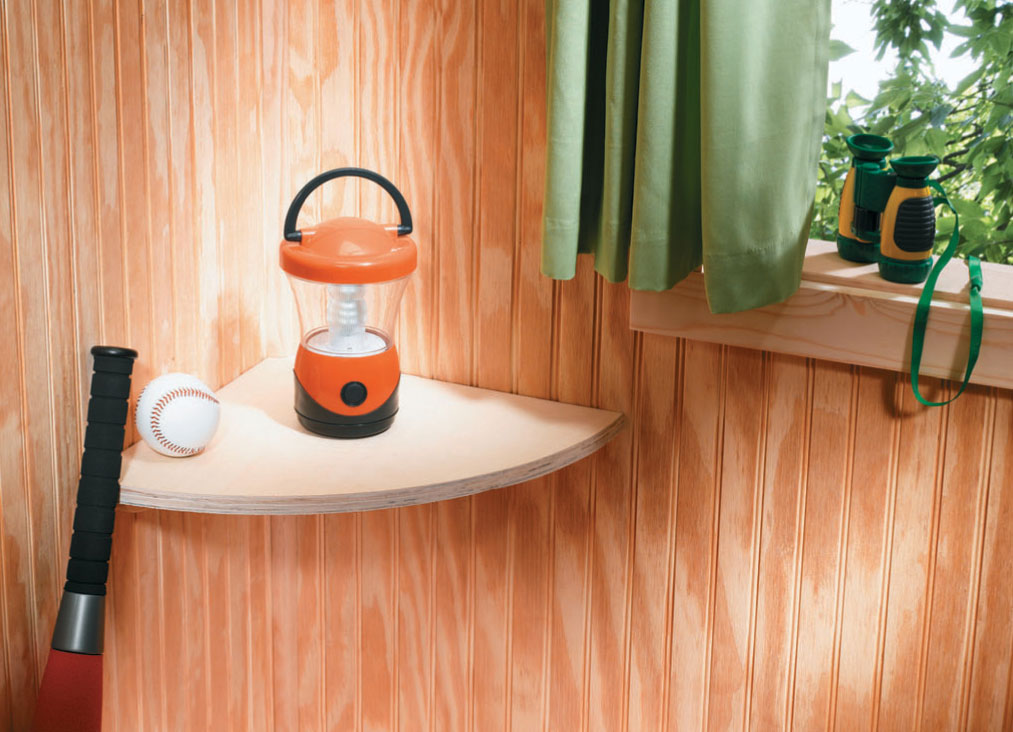
A trusty light or other handy treehouse item will fit perfectly on the corner shelf.
 How to Build a Corner Shelf
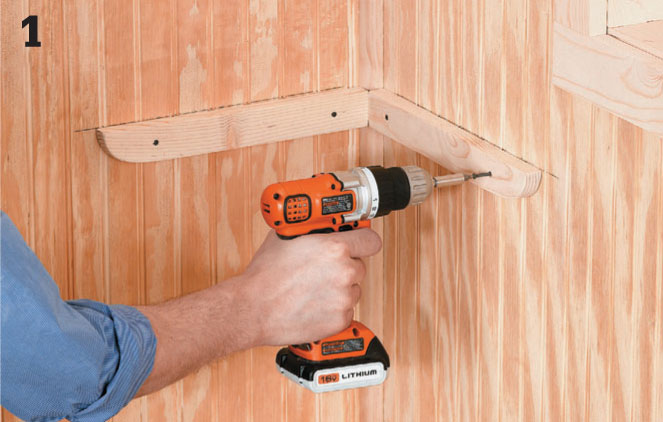
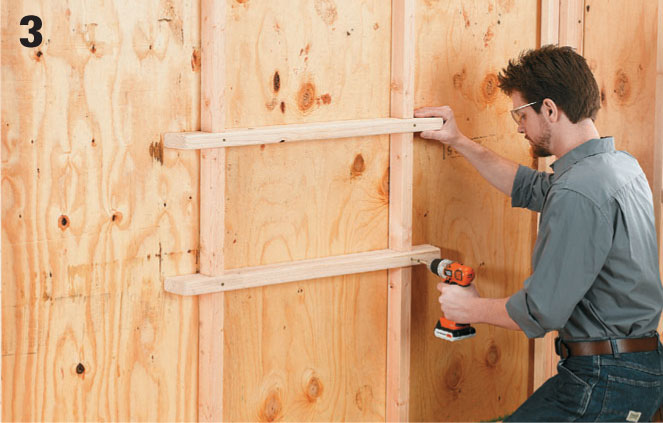
Install the cleats by screwing into the wall studs whenever possible. Otherwise, going into 5/8" or thicker board paneling or 3/8" or thicker plywood paneling should be plenty strong enough for a small shelf.
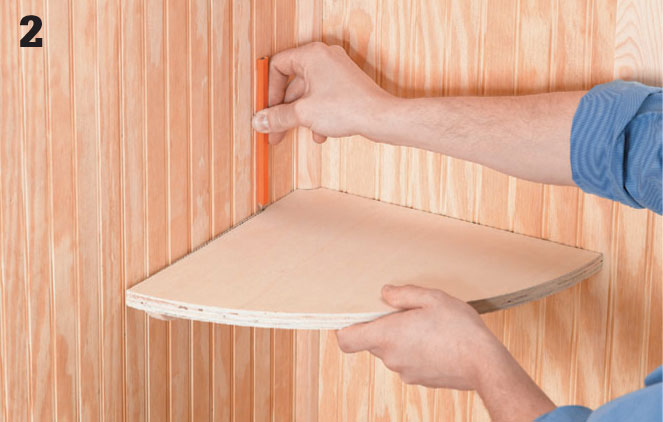
Eliminate unsightly gapping by scribing along one of the walls with a carpenter’s pencil while holding the shelf tight to the adjacent wall. Trim along the scribed cut line, then check the fit.
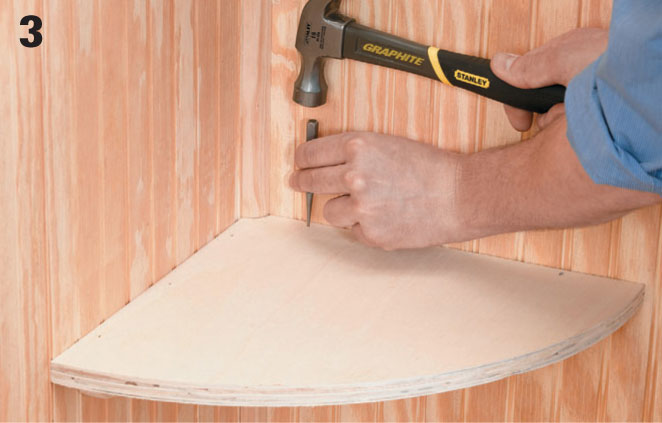
Nail the shelf to the cleats with finish nails: Drill pilot holes (which have to be slightly angled, being so close to the wall), drive the nails, and set the nail heads just below the surface with a nail set.
Space-saving flip-up tables are popular features on boats, motor homes, and camping trailers, which means they’re perfect for adding function in a treehouse. This table design includes a 48"-wide (24"-deep) semicircular table and a swing-out brace. Both pieces can be cut from a 4 × 4-foot half-sheet of 3/4" plywood, and both are mounted with piano hinges. When swung down and out of the way, the table projects only about 1-1/2" from the wall.
To cut the semicircular shape of the tabletop, mark the center along one edge of the plywood. Using an old wooden yardstick or a flat strip of wood, make a small notch in one end with a utility knife. Make a mark on the center of the stick, 24" from the bottom of the notch. Drill a small finish nail at the mark. Pin the stick to the plywood, just inside the marked edge, at the centerpoint. Using a pencil seated in the notch, rotate the stick to mark the semicircular cutting line. Cut out the tabletop with a jigsaw, and sand the edges smooth with coarse sandpaper and a sanding block.
Lay out and cut the swing-out brace from one of the remaining factory corners of the plywood sheet, following the diagram on page 101. Use the yardstick compass to draw the 10-1/2" radius and a standard compass to draw the 2" radius at each end of the brace. Cut along the marked lines with a jigsaw, and sand the edges smooth. Apply a wood finish or paint the tabletop and brace, if desired.
Cut a straight 1 × 3 or 1 × 4 to length at 48-1/2". This will become the ledger to which the tabletop hinge is mounted. Next, cut two lengths of piano hinge (a.k.a. continuous hinge), one at 48" and one at 20", using a hacksaw. Mount the piano hinge to the bottom face of the tabletop, using the provided screws. The plywood edge should come up to the hinge barrel but not overlap it. Fasten the other leaf of the hinge to the ledger so the leaf’s edge is flush with the ledger’s bottom edge. The ledger should extend slightly beyond the hinge at each end.
Mark a level line on the wall (or wall studs) to represent the top edge of the ledger, based on the desired tabletop height. With a helper, mount the ledger to the wall with 2-1/2" deck screws driven into the wall studs. Install the 20" length of piano hinge to one side face of the swing-out brace, flush with the back edge of the brace. Mark the center of the ledger, along its bottom edge. Draw a plumb line down the wall at the mark. Mount the brace’s other hinge leaf to the wall so the brace plywood is centered on the plumb line. The top edge of the brace should just clear the ledger above.
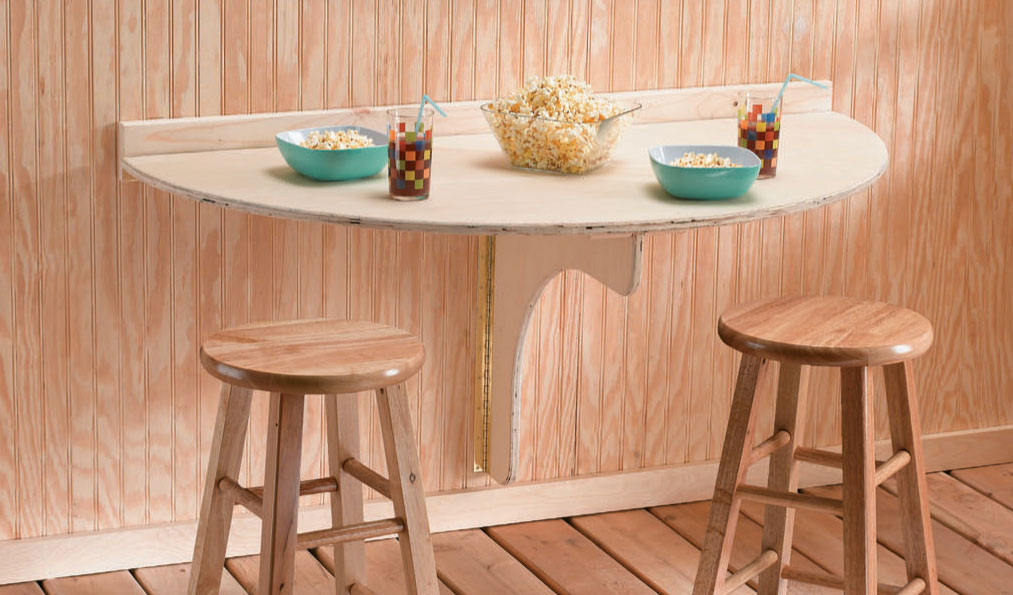
A flip-up table is just the thing when space is at a premium and important plans, puzzles, or popcorn needs a place to sit.
Test the tabletop and brace operation. Cut a 3"-long block from a scrap of 2 × 4 material. Use a circular saw and/or a chisel to cut a shallow channel down the center of the block, setting the depth so that the tabletop sits level when the block is placed between the tabletop and the swing-out brace. Fine-tune the fit, as needed, then fasten the block to the underside of the tabletop with 2" screws.
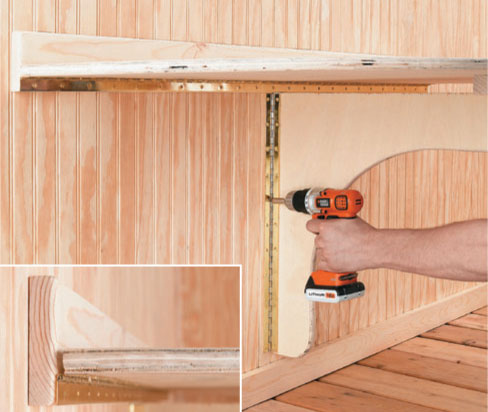
Mount the swing-out brace to the wall so it’s centered under the tabletop. The barrel of the tabletop hinge should be on the inside of the hinge when installed (inset).
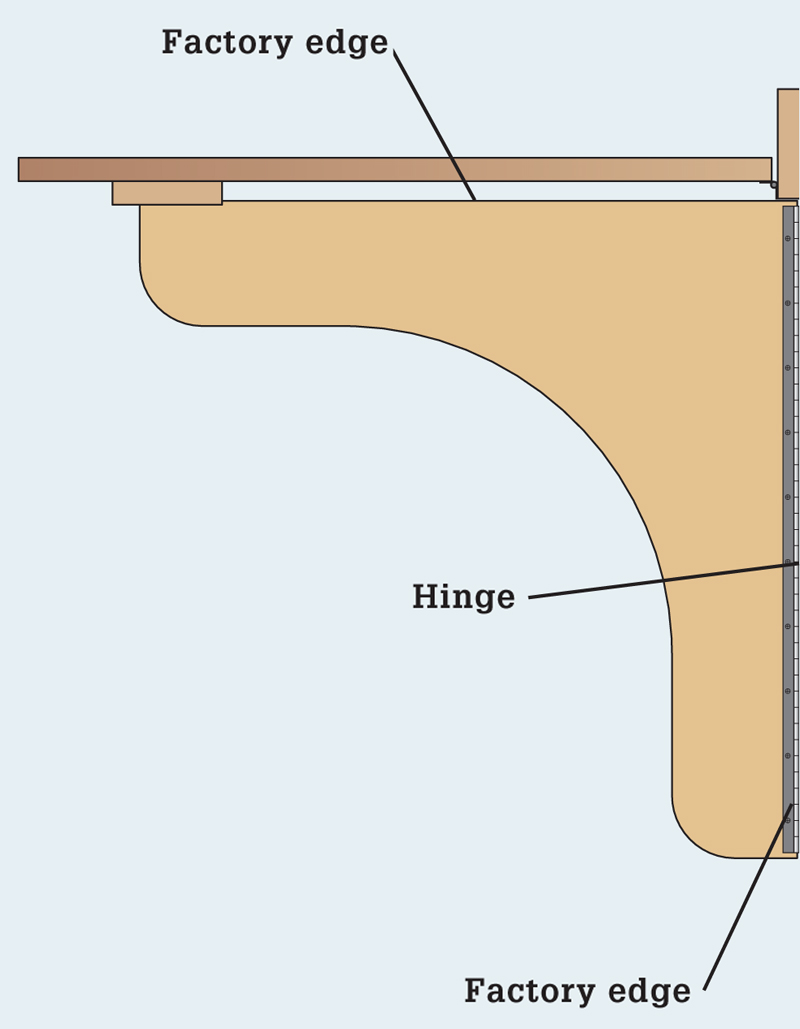
The swing-out brace has symmetrical curves cut into its front edge and uses the plywood’s factory edges for its top and rear finished edges.
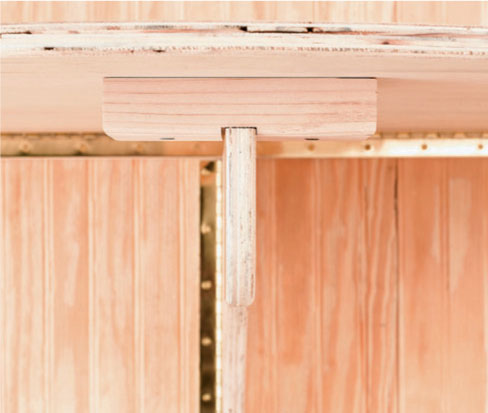
When the tabletop is up, the brace is captured inside the block’s channel to keep the brace in position. Fine-tune the channel depth so the tabletop sits level before installing the block.
 Flip-down Table & Bunk
Small living spaces often necessitate multifunctional furniture. This simple project singlehandedly covers the most essential needs of treehouse dwellers: eating, sleeping, and lounging. It’s also a handy general work surface for things like conducting scientific experiments, writing memoirs, and mapping out plans for precision water balloon air strikes. In the upper position, the table unit sticks out only about 5-1/2" from the wall. And the table surface quickly converts to a bed or lounge perch with the addition of a foam pad, which stores inside the cavity of the table’s frame.
Construct the table frame with 2 × 4 lumber, making the width (depth) at least 24" and the length so it will accommodate the tallest sleeper. Cut two 2 × 4 side rails to match the finished length, and cut two ends to the finished width minus 3". Fit the side rails over the ends and fasten the pieces with 3" deck screws.
Cut the tabletop from 3/4" plywood to match the outer dimensions of the 2 × 4 frame. For a smooth table surface, use AC or ACX plywood. Both have one smooth face, while ACX is made with water-resistant glue for outdoor applications. ACX is commonly sold as tongue-and-groove subflooring; you can use this if you cut off the tongue or groove, as applicable. If you’re using a circular saw, cut from the C face (the ugly side) of the panel so any splintering occurs on what will be the bottom surface. Fasten the plywood top to the frame with 2" deck screws, using the panel’s edges to square up the frame as you go.
Cut another 2 × 4 equal to the table length (or longer, as needed to meet wall studs); this is a ledger for mounting the hinges. Install three 3" (or larger) door hinges onto the top edge of the ledger and the top face of the tabletop. Use the provided screws if they seem suitable, or substitute with longer, heavy-shank wood screws for more strength. Pop out the hinge pins to separate the hinges, then mount the ledger to the wall studs with 3" deck screws, making sure it’s level.
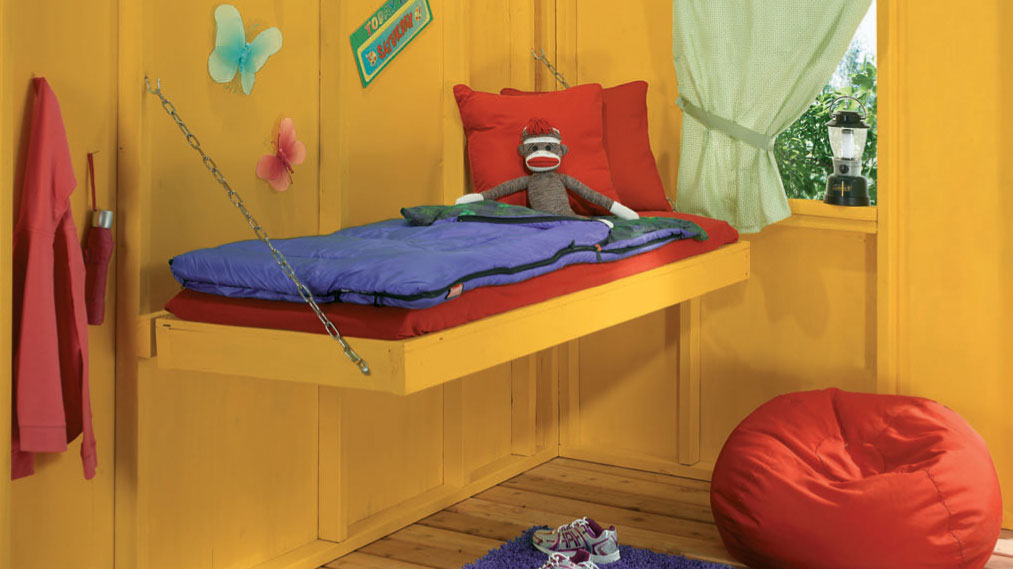
Enjoy an afternoon snooze on the flip-down bunk, then store the pad underneath and use the table to have fun all night.
 How to Build a Flip-down Table & Bunk
Screw the plywood tabletop panel to the frame with the smooth face up. Drilling slightly countersunk pilot holes helps prevent deforming or splintering of the plywood for a smoother surface.
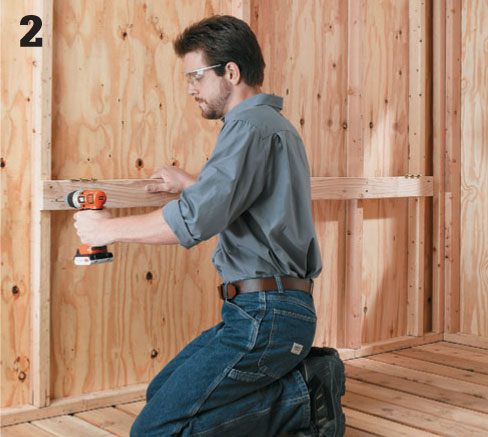
Install the ledger at the desired height for the tabletop. Standard table height is 29" to 30". If you go lower, make sure there’s enough legroom under the table frame.
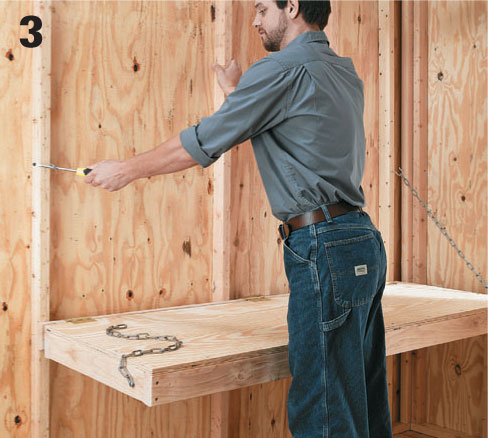
Support the tabletop with a strong steel chain bolted to the table frame and hooked onto screw hooks driven into the studs. Position the hooks so the table is level in the down position and both chains are equally taut.
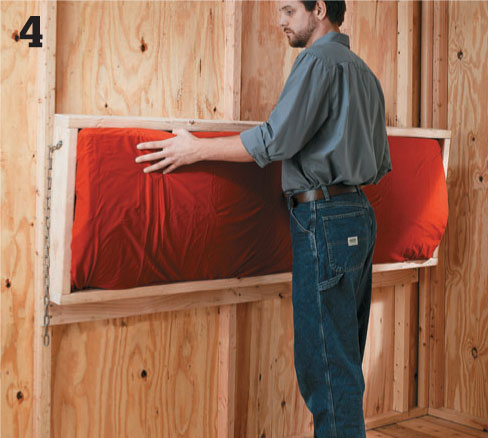
Size the foam pad so it fits snugly into the frame cavity and won’t fall out of its handy storage space.
Secure a length of chain to each end of the table, using a through bolt and nut. Attach the table to the ledger by assembling the hinges. Prop up the table so it sits level, then pull up each chain and install a heavy-duty screw hook into a stud or solid blocking so the chain is taut and forms about a 45° angle with the tabletop and wall.
Hold the table in the up position by hooking the chain links as close as possible to the tabletop. Measure the interior dimensions of the table frame and cut a piece of thick (up to 3-1/2") foam padding to fit snugly into the frame cavity. Cover the padding with durable fabric, if desired.
 Doors & Windows
Doors and windows for treehouses can range from holes cut in the wall to standard prehung units complete with weatherstripping and matching trim. Somewhere in the middle lie the most popular options: custom homemade units and salvage pieces, both of which are great for adding a little extra character and usually available at just the right price (preferably free). Doors and especially windows are a big part of what makes a treehouse fun for kids, so making homemade pieces is a perfect time to get the kids’ creative input and have some fun with unconventional designs.
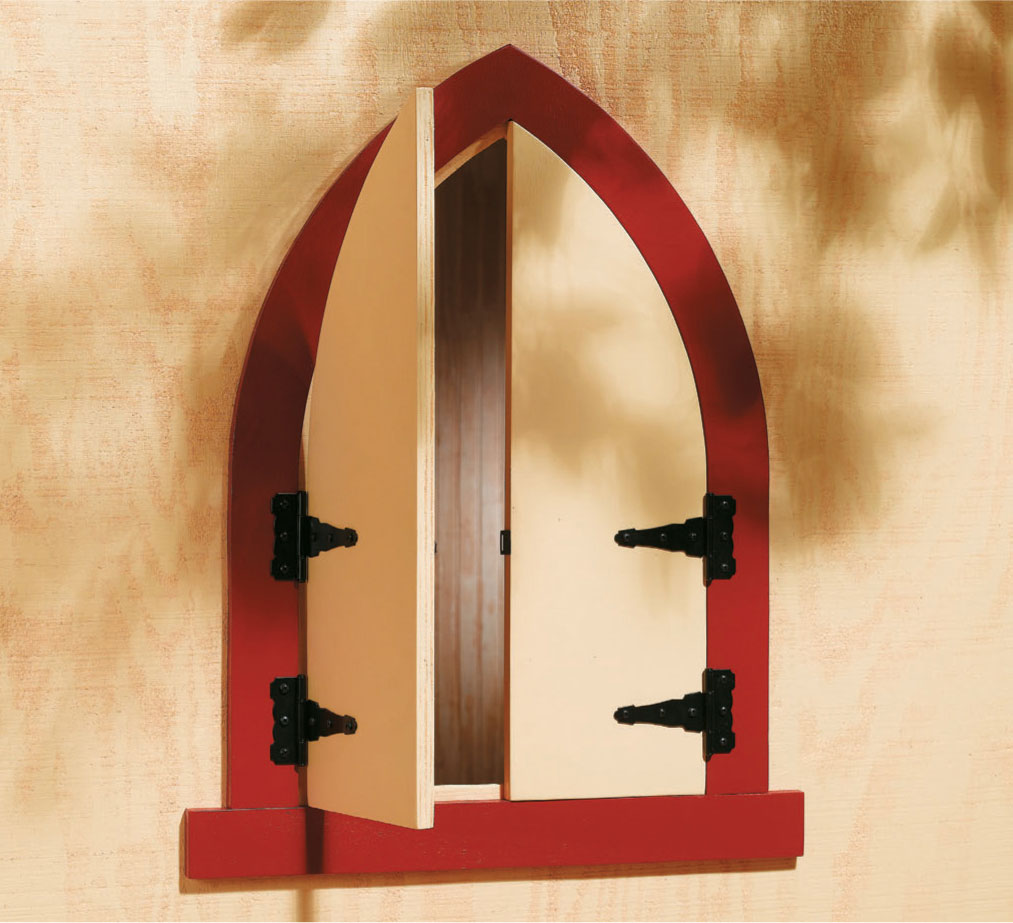
Treehouses offer the opportunity to let your imagination run wild, even in elements like doors and windows.
But before you get to the fun parts, here’s a quick refresher course on door and window safety:
• Plastic glazing is much safer than glass and is recommended for all treehouse glazing. Polycarbonate is more resistant to UV damage than acrylic (Plexiglas) but more expensive.
• Any glass used should be tempered or laminated. Stained glass or salvaged windows with very small panes might present an acceptable risk, and therefore an exception to this rule, but you can improve safety here with safety film or a protective panel of clear plastic glazing.
• Windows that open shouldn’t be large enough to climb through unless they’re located over a suitable deck or platform area. Kids are guaranteed to hang out of open windows (and let’s face it, young people aren’t very smart about physics and important things like gravity).
• Doors must have ample platform area on either side. It’s usually safest for doors to open in to the treehouse, but some layouts dictate otherwise.
Now that the safety lesson is over, you can learn the basics of building a few different styles of homemade windows and doors that you can easily customize with a bit of creativity and the practical help of a good jigsaw.
The natural light that windows provide can also embellish interior design choices, like these simple built-in shelves, country-style chairs, and log stool.
 Building a Window
It all starts with a simple square frame. Cut a 2 × 4 sill to equal the span of the window’s rough opening, plus 2× the width of the exterior trim. The extra length is used to create “horns” that mate with the bottom ends of the trim on the outside of the wall. Cut a 15° slope into the top face of the sill, leaving a flat portion equal to the thickness of the wall framing. The angled cut should run the full length of the sill. (If you want to get fancy, create a drip edge underneath the sill with an 1/8"-deep saw cut.) Notch out the horns so the sill fits snugly inside the window opening, and fasten the sill to the rough opening sill with galvanized finish nails.
Option: You can use a 2 × 6 to create an extended ledge inside the window.
For the jambs, rip 1 × lumber to match the wall thickness. If your framing is 2 × 2, you can use full-width pieces of 1 × 2 for the jambs. Cut the top jamb to span the top of the rough opening, and fasten it to the framing with finish nails. Cut and install the side jambs between the sill and top jamb.
Wrap the inside of the window frame with 1/2" quarter-round molding, to act as a stop for the glazing. Miter the molding at the corners, and nail it in place so its outside edge is flush with the outside of the window frame. Cut 1/4" polycarbonate glazing to fit the framed opening and set it against the stops with a bead of clear silicone caulk. Add an inner frame of quarter-round stops, sealed with caulk against the glazing and nailed to the jambs and sill.
If desired, add muntin bars (see page 107) made from 1/2" strips of wood. Join the bars at the window’s center with a half-lap joint (made with opposing notches of equal size), and cope the ends to match the quarter-round window stops.
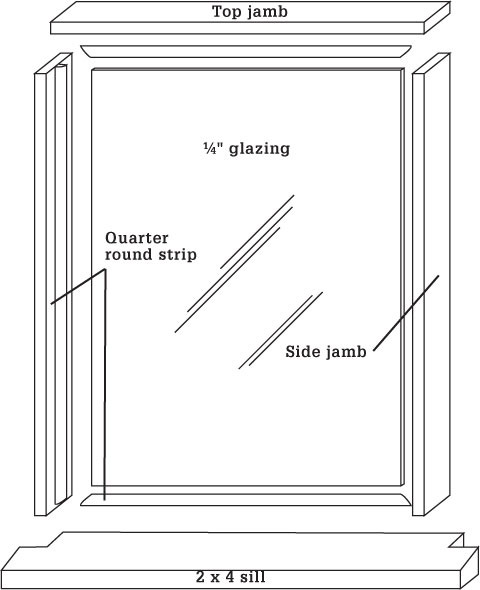
Anatomy of a homemade window.
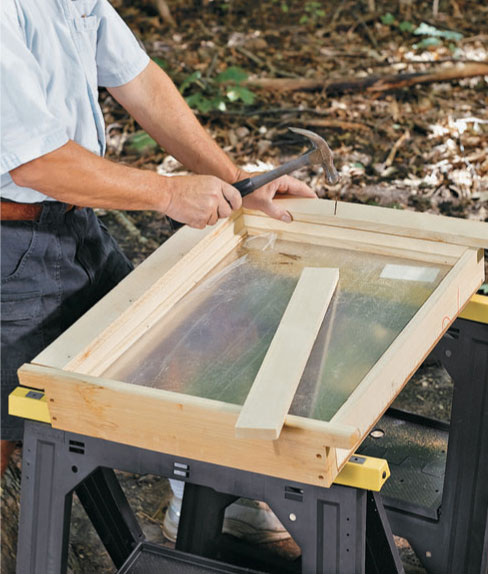
Add trim to cover the edges of window and door jambs. Create a reveal by leaving a thin strip of jamb exposed.
Muntin bars add a nice traditional touch to glazed windows. Join the pieces with half-lap joints cut with a handsaw and chisel.
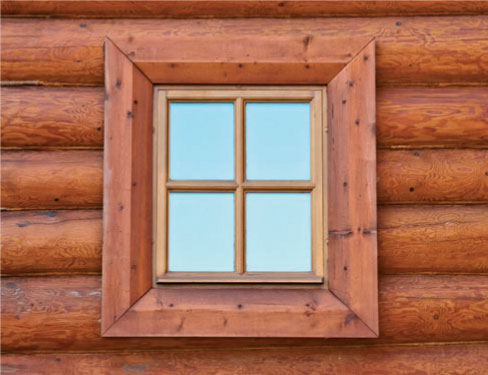
Salvaged windows and frames are perfect for treehouses, and are easily incorporated into existing design plans.
 Window Cutouts
Another form of fixed window is a simple cutout made right into the exterior wall siding. You can glaze these with a plastic panel attached to the interior of the siding and add trim to either side, or you can leave them open to the breezes. Because there are no frames or hinges to worry about, you can make window cutouts highly decorative or intricate, depending on your jigsaw skills and the siding material. Plywood siding is the easiest to work with, and you can make the cutout in any area between framing members. Board siding usually needs framing around the edges of the opening to support the cut ends of the boards.
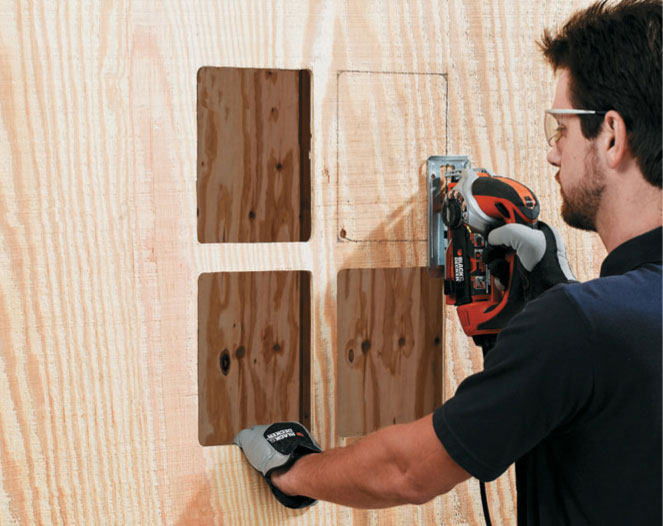
Cut out the siding in the window shape, using a jigsaw. Tip: If framing gets in the way of the saw, transfer the outline to the exterior side (with the aid of small locator holes) where you can complete the cut.
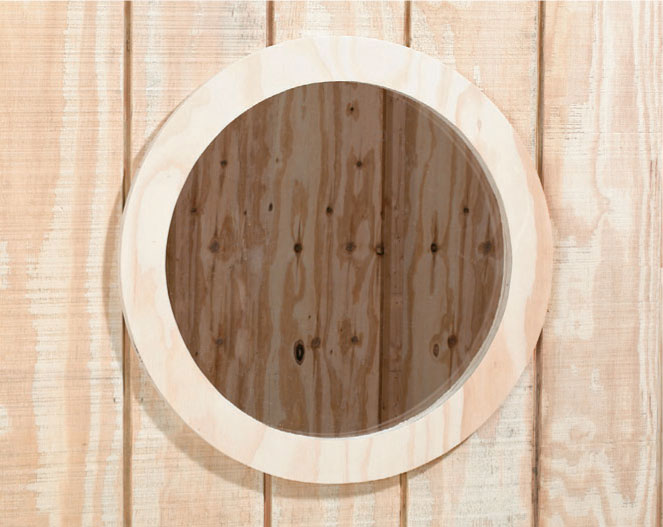
Use plywood for trim around circular and other oddly shaped windows. You can cut a round trim ring with a jigsaw or with a router and trammel, as described on page 141 (Button Swing).
To make a window cutout, draw the shape of the opening onto the interior face of the siding (so you won’t accidentally overlap onto the framing). Add blocking as needed to support board siding. Drill a starter hole inside the marked cutout, then make the cut with a jigsaw. To prevent splintering along the cut edges, use an ultra-fine-tooth wood blade (around 20 teeth per inch) or “scroll” blade. These cut slower but much cleaner than standard blades.
Sand the cut edges to smooth out roughness and prevent splinters. If desired, cut a piece of acrylic or polycarbonate sheeting (see photo, below) to cover the opening and fasten it to the inside of the siding with short screws driven through oversized pilot holes (make the holes in the plastic a little bigger than the screws so the sheet can expand and contract without cracking). Seal the front of the plastic to the siding with a fine bead of clear exterior caulk. Add trim, if desired.
 How to Make Window Cutouts
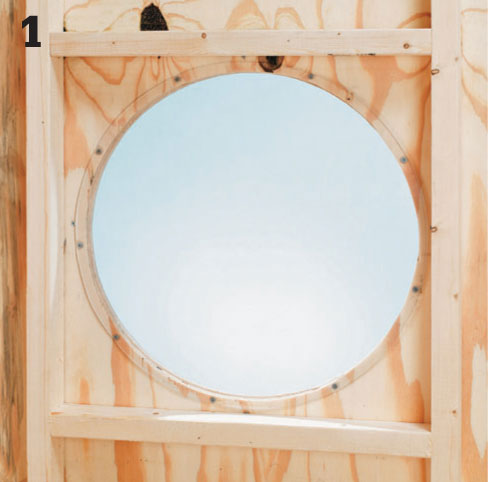
Frame around openings for board siding, using scrap wall-stud material. Blocking below the opening can serve as a small window sill.

Cutouts can be anything you want. If you’re artistically challenged (like most of us), search online for a printable pattern that you can cut out and trace around to mark the outline onto the wall.
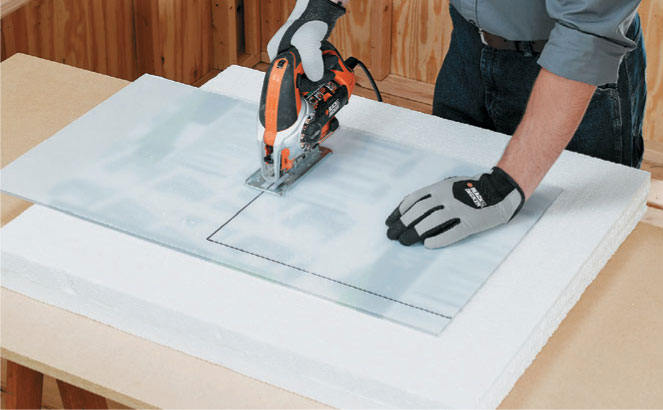
Tip: Cut plastic sheeting with a jigsaw and a 10 tpi (or finer) blade. To prevent cracking, lay the sheet onto rigid foam insulation board for support and cut through the foam and plastic at the same time.
 Shutters & Pop-up Windows
These pop-up windows and shutters work like little doors and essentially follow the same design, apart from how they are hung. The windows are mounted horizontally on hinges and open upward, and the shutters are hung vertically and open out to the side. Both are good for opening up a treehouse to cool airflow and for battening down the hatches for campouts and rainstorms.
The best materials for these windows and shutters is exterior plywood and tongue-and-groove siding. You can also use standard board lumber (1 × 4, 1 × 6, etc.), but this can get a bit heavy and might show gaps between the boards. The size and shape are up to your imagination. Just make sure the hinges can be installed in a straight line and that they adequately support the weight of the window or shutter.
One interesting shape that works well for both single and double shutters is the Gothic arch. To make a set of double shutters (and matching trim) with plywood, start by laying out the doors onto a panel of 3/4" or 5/8" exterior-grade plywood, using one of the panel’s factory edges as the bottom edge of the doors. You will cut out both doors as a single piece, then cut down the center to create two matching doors. Be sure to leave a few inches of material at both sides of the door layout, from which you will cut the trim.
To lay out a Gothic arch, start with three parallel vertical lines: a long centerline and two flanking lines that represent the outside edges of the shutter doors. Draw a horizontal line between the two sides at the height where the arch will begin; this is line A-B, as shown the photo below. Set up a homemade compass (yardstick-style; see page 101) to match the length of line A. Place the pivot point of the compass at point A and draw an arch from B to C. Place the pivot point at B and draw an arch from A to C.
Lay out the arched trim before cutting out the door piece: Extend line A-B 2-1/2" on each end, stopping at points D and E. Set the compass to the distance between A and E, and draw an arch between E and F, pivoting on point A. Move the pivot to point B, and draw arch D-F. Draw straight lines down from points D and E to complete the layout. The material removed during cutting will create the necessary gaps between the doors and the trim.
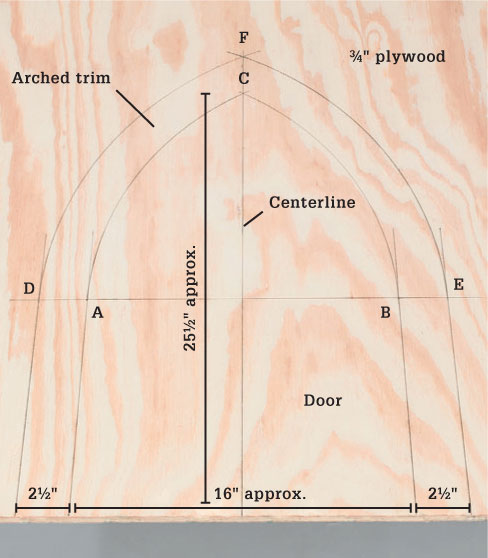
Draw the layout for the doors and arched trim, using a homemade compass to create the archs. The cut for the outsides of the doors also creates the inside profile of the arched trim.
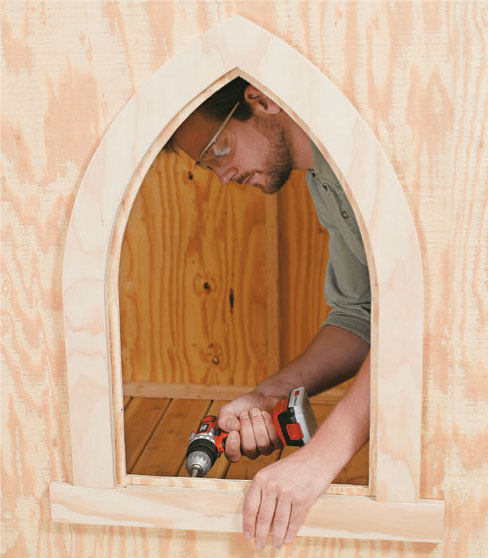
Install the plywood trim with exterior screws or siding nails, exposing 1/2" of siding around the door opening on all sides.
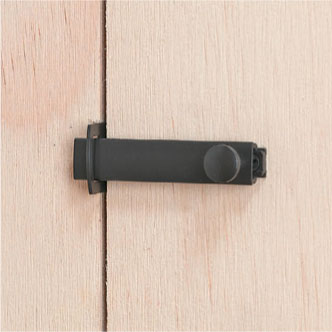
Mount the doors to the sides of the arched trim with the provided exterior-grade screws. Make sure the gapping between the doors and trim is even and consistent (left). A bolt or latch on the inside keeps the shutters closed (right).
Cut out the door piece with a jigsaw, cutting to the outside of your lines. Then, cut out the trim. Cut the doors down the centerline, using a circular saw or jigsaw and a straightedge guide to ensure a straight cut. Make this cut directly down the middle of the centerline to remove the same amount of material from both doors. Finally, cut a rectangular piece of base trim to the same width as the arched trim. The base can be flush with the outsides of the arched trim, or it can extend a little beyond, as desired.
Make the wall cutout for the shutters to match the shape of the doors as a single unit, but making it 1" narrower and shorter. This creates a 1/2" lip that the doors will close against. Install the arched trim on the outside face of the wall so the trim is centered over the wall cutout. Add the base trim. Hang the shutter doors with strap-style hinges (the kind with a hammered or antique look enhances the Gothic styling), mounting the hinges to the outside faces of the doors and arched trim. Add a flat hook-and-eye or slide-bar door latch to the inside faces of the doors so the shutters lock securely when closed.
Door & Window Trim. Doors and windows need trim to cover the joints or any gapping between the jambs of the door or window frame and the surrounding wall surface. For this reason, a little trim is a good idea even for simple, rustic structures. Without trim, doors and windows tend to look like a job that was never finished.
If you’re paneling the interior walls of your treehouse, trim hides any gaps between the wall finish and the door and window frames. Gaps here are normal, because there’s no sense in taking the time to fit the paneling perfectly to the jambs if you’re covering the joints with trim.
Any 1× board lumber (1 × 2, 1 × 3, 1 × 4, etc.) is fine for treehouse trim. You can also rip down any T&G or other board paneling to make your own trim material. As a general rule, it looks best if all of the doors and windows have the same trim material and decorative detailing—a few of the classic joint options are shown here. Install trim with finish nails driven into the wall framing, and use a nail set to drive the nail heads slightly below the surface of the wood for a finished look.
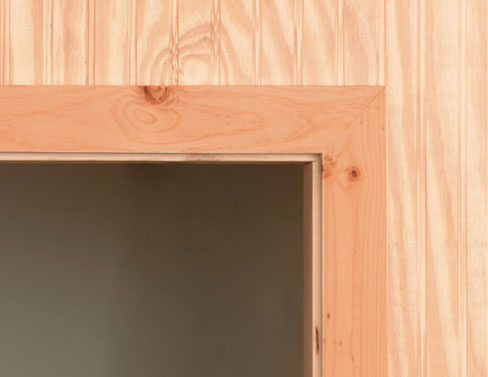
Mitered trim corners are made with each piece cut at 45°, creating the classic picture frame effect. On windows with extended sills (stools; see photo below), only the top two corners are mitered. Hold the trim back from the jambs’ edges to create a 1/8"-wide (or as desired) reveal.
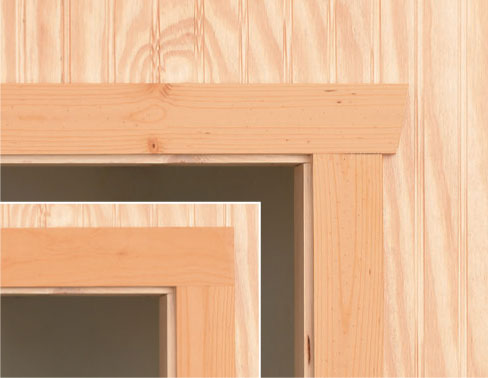
Butted corners tend to look a little more rustic than mitered joints—and they’re easier to make. You can cut the pieces so they’re all flush on the outside or have the top piece overhang the sides, with or without a slight bevel on the ends.
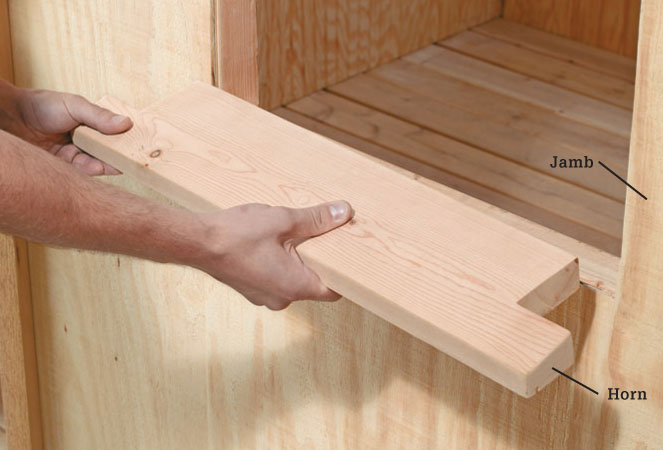
A window sill traditionally has horns that extend beyond the jambs on both sides, creating a natural stopping point for the side pieces of the window trim, if your trim strategy includes side casing. The sill should slope away from the treehouse slightly to promote runoff of water.
 Fun Doors
Not to suggest that a Dutch door isn’t fun . . . it’s just that a door doesn’t have to be rectangular. In fact, a door can be almost any shape as long as a good portion of the hinge side is straight and vertical—this is required for the hinges to work properly and ensure that the door is balanced (so it won’t fly open or slam shut on its own).
Here’s a fun arched door design that uses the exterior trim for a stop, which saves you from having to build an arched door frame. Both the door and the single, continuous trim piece are cut from a sheet of plywood. The little inset (Minnie-Me) door is a playful option that’s built just like the full-size unit. If your taste leans toward Gothic arches more than round, follow the basic layout procedure for the Gothic arch shutters (page 110) to lay out the door and trim arches.
To build the rounded-arch door, lay out the door and trim pieces onto 3/4" exterior-grade plywood. Draw three parallel lines marking the sides and centerline of the door (25" is a good minimum width for the door), then make a mark on the centerline to represent the top of the door. Set a homemade compass (yardstick-style; see page 101) to half of the door width. Using the same dimension, measure down from the top of the door and mark the centerline. Place the pivot nail of the compass on the new mark and draw the arch to complete the door shape.
On another part of the plywood sheet, lay out the trim, following the same process as with the door. Make the inner profile 1" narrower and 1/2" shorter than the door. Draw the outer profile 2-1/2" outside the inner profile. Use the same techniques to mark the little inset door and trim at the desired size, centering the little door on the centerline of the main door. The arched trim for the little door is about 3/4" wide and overlaps the opening about 1/4" on the sides and top. The rectangular base trim is about 1" wide.
Cut out the main door with a jigsaw and a fine wood blade (to minimize splintering). To cut out the inset door, drill a small starter hole just below the bottom of the little door, then make the cutout, following your lines carefully. The cutout piece will become the door, and the starter hole will be covered by the base trim. Use the doors to check your layout of both arched trim pieces, then cut the trim with the jigsaw.
Cut the door opening into the wall siding, making it 1/2" larger than the door profile (see tip, page 114). Install the main door trim with trimhead screws so the trim overlaps the door opening by 1/2" at both sides and along the arch. Using glue and brads, install the trim for the little door so it overlaps the opening at the sides and top but not the bottom. Install the base trim flush with the little door opening. Hang the little door to the main door with two small hinges mounted to the backsides of both doors. Add a small knob and a magnetic catch or a hook-and-eye latch to keep the little door closed.
Hang the main door with butt hinges screwed into the interior side of the door and siding. Use long screws on the siding-side of the hinges to penetrate the door trim for extra holding strength. Be sure to center the door in its opening so it clears the siding about 1/2" on both sides and about 1/4" at the top and bottom. Add a door handle or gate latch to the door, as desired. It’s best not to have a locking handle or latch on this door, lest you find yourself locked out of the treehouse in an emergency or when you need to retrieve a recalcitrant child.
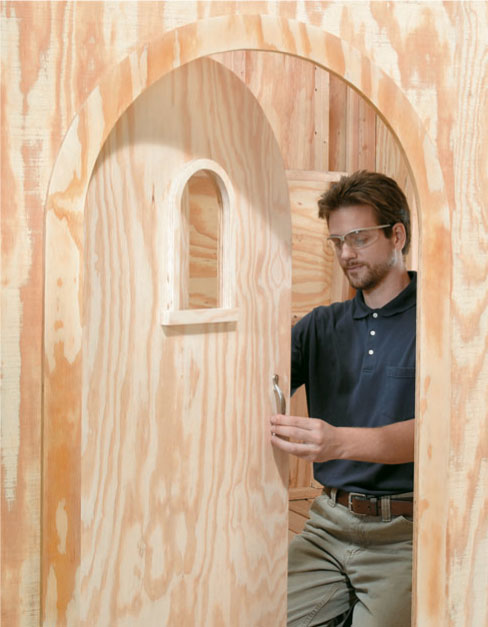
Fun doors tend to be small, for kids, but it’s a good idea to make them wide enough (at least 24") for adults to fit through.
Lay out the cut for the inset door (if you’re making one), using a standard compass. Position the little door at the right height for kids to look through.
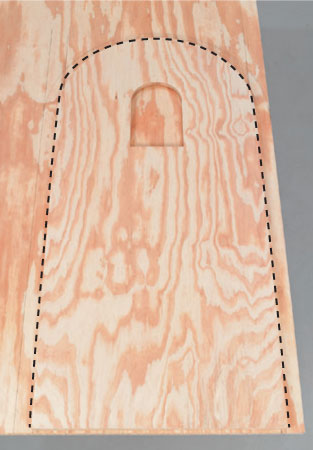
Test your trim layout using the cut door piece. When in doubt, you can trace around the door, then mark 1/2" inside the traced line to create the inner edge of the trim.
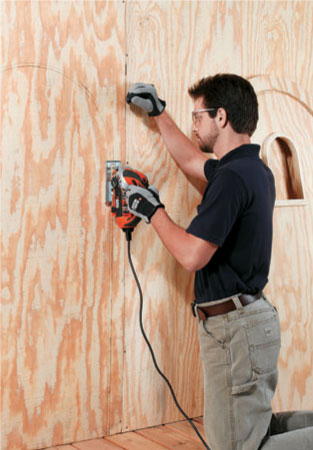
Cut out the door opening with a jigsaw. This matches the shape of the door but is offset by 1/2" to allow for a 1/2" clearance gap on both sides and 1/4" at the top and bottom of the door.
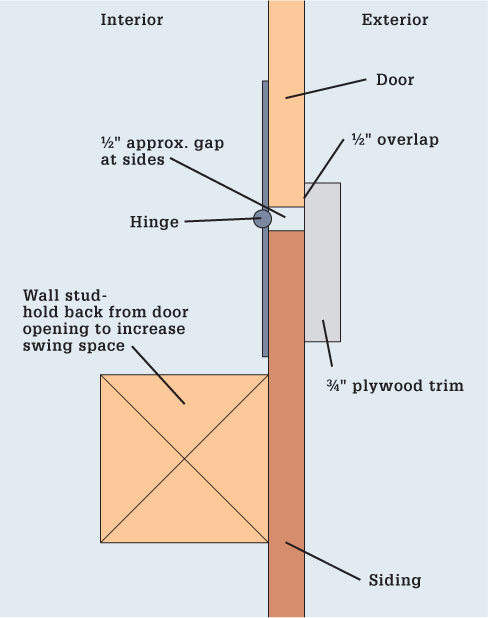
Tip: If possible, leave some space between the hinge-side edge of the door cutout and the nearest wall stud. Because the door is mounted to the siding (instead of a door frame) an offset here allows the door to swing wider.
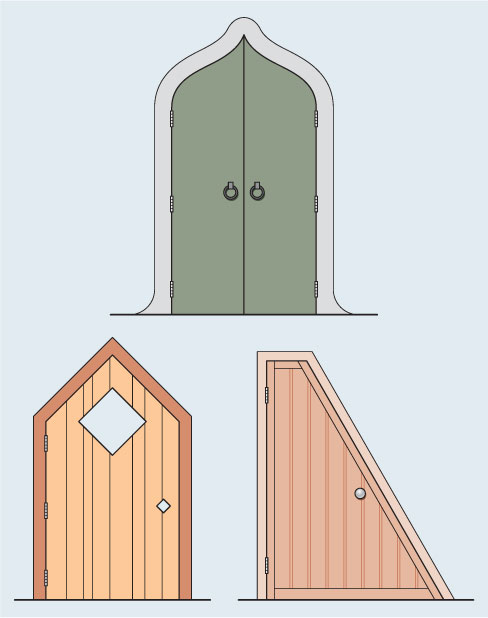
A door can add a lot of personality to a treehouse, so don’t be afraid to get creative. You can do just about anything with a sheet of plywood and a jigsaw. All of the doors shown here work fine because the hinges are mounted along the straight sides.
 Classic Doors
Here’s how to build traditional Z-brace doors using board siding and standard 1× lumber. As with a window, start with a basic frame. Rip 1× lumber to equal the thickness of the wall frame, plus 3/4". Cut the top jamb to span the top of the rough opening. Fasten the jamb to the header with galvanized finish nails so its outside edge is flush with the outside of the rough opening. Cut and install the side jambs to fit snugly between the top jamb and the floor.
Build the door to fit the dimensions of the new frame, leaving a 1/8" or so gap around the perimeter of the door. Be sure to factor in any offset created by the hinges when determining the door dimensions. Pine 1 × 6 T&G boards make great door material. Cut the boards to length and fit them together. Rip one or both side boards as needed to get the desired door width. Cut 1 × 6 Z-bracing to span across the door at the top and bottom hinge locations, then cut an angled piece to fit in between. For strength, the angled piece should point down to the bottom hinge. Assemble the door with screws driven through the Z-bracing and into the T&G boards.
To install the door, first add 1× trim along the inside of the door’s rough opening, flush with the room-side edges of the jambs. Mount the door to the jambs using outdoor-type hinges, making sure the door opens and closes freely. Note: As shown here, the door opens in to the treehouse interior. With the door closed, install 1/2" stops (cut from trim material) along the sides and top of the door. Add a gate latch or other handle to keep the door closed.
You can use the same construction techniques to create a Dutch door. Build two short doors with a slight gap in between, and add a 1 × 4 shelf to the top of the lower door. Hang the door with two separate sets of hinges. Install a barrel bolt latch vertically onto the top door so the bolt extends down into a hole or plate in the bottom door’s shelf.
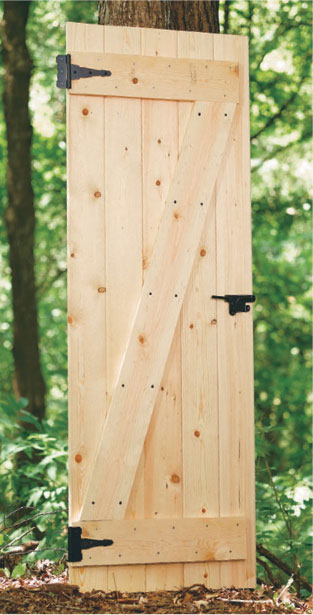
A plain batten door made from 1 x 6 pine has a certain rustic charm. A single Z-brace stiffens the door, but adding a middle rail and second Z-brace prevents warping.
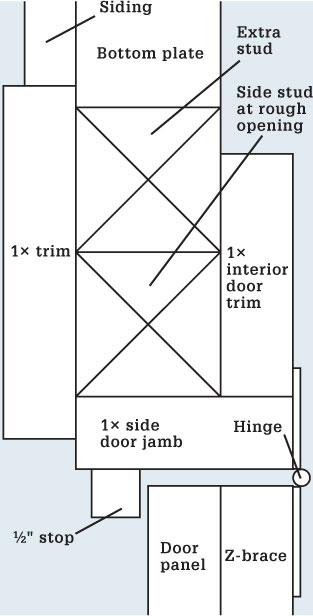
Because DIY doors are not prehung, you’ll need to build your own jambs and door stop using the basic configuration above.
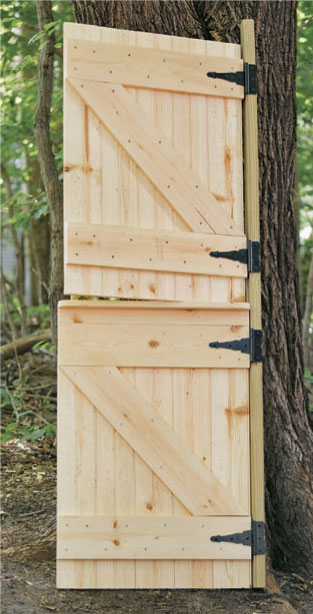
A Dutch door has a top and a bottom that open independently (or together if you connect them).
 Building Roofs
This is it. The home stretch. You’re about to become a certified treehouse builder. Or certifiable, depending on how the project has gone. By now your hands are a little callused and your skills honed. That’s good, because roof framing usually requires some experimentation and trial-and-error. Oh, yes, and patience.
If you framed your walls with extreme care and everything came out square and perfectly level, you could design your roof frame on paper and use mathematical calculations to find all the angles and locate the necessary cuts. But because you’re building in a tree, it can safely be assumed that you improvised here and there and had to wing it on occasion, or you might not be the type who cares much for calculations. At any rate, most treehouse roof building works best with a cut-to-fit approach.
After the framing is done, you’ll sheath the roof and install the roofing material. If the roof is free of intervening tree parts, you stand a good chance of keeping the interior of the house dry. If there are penetrations, you can try to seal them, but you should still find another place to store your signed copy of Swiss Family Robinson.
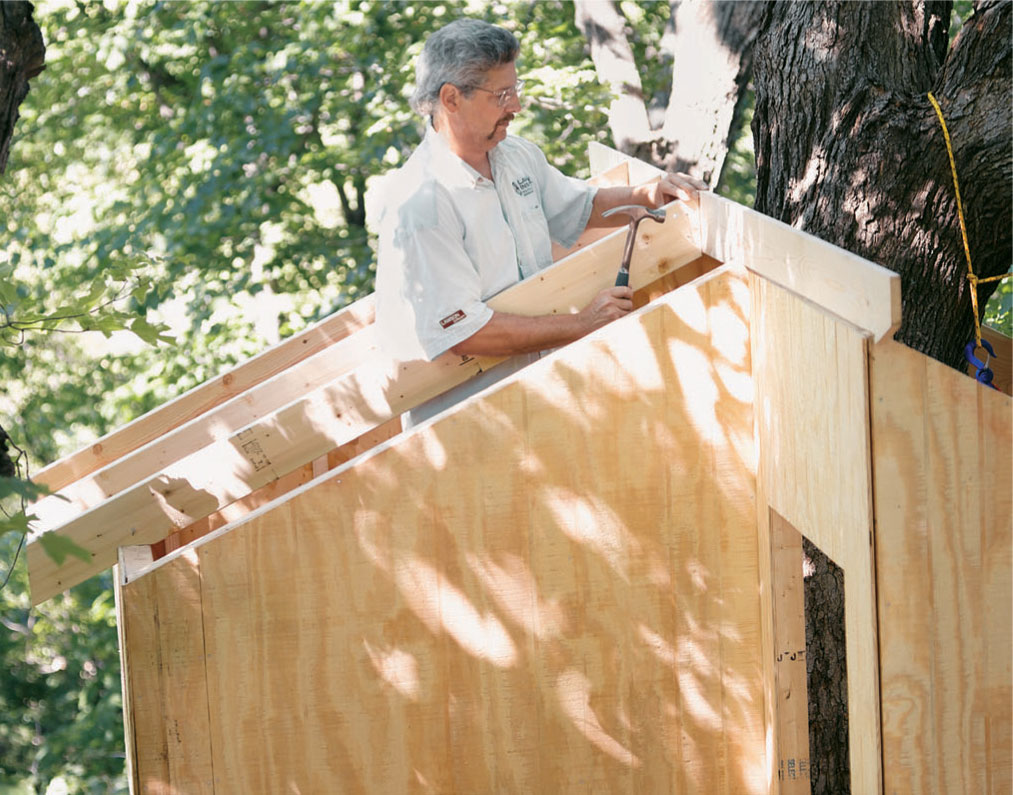
The structural members that support a treehouse roof generally don’t need to be as beefy as the boards used for structures made with traditional building techniques. Here, a 1 × 6 ridge board provides adequate support while keeping down the weight of the treehouse.
 Framing the Roof
The main structural members of any framed roof are the rafters—the lumber ribs that support the sheathing, or roof deck. On a gable roof, the rafters sit on top of the side walls and meet at a ridge board, or ridge beam, at the roof’s peak. Rafters on hip roofs also form a peak, meeting at a ridge beam, or, more commonly in treehouses, at the tree’s trunk. A shed roof has no peak, and the rafters simply span from wall to wall.
A roof’s overall strength is determined primarily by the size of rafters and how closely they’re spaced. Because treehouses tend to be small buildings, their roofs are typically built with 2 × 3 or 2 × 4 rafters spaced 16" or 24" on center. A small kids’ treehouse might be fine with 2 × 2 rafters, while an arboreal palace, with rafter spans over 7 feet, might call for 2 × 6 framing. Snowfall is also a primary consideration in figuring rafter size. If you live in a snowy climate, check with the local building department for rafter span recommendations for your area.
The tricky part to framing any type of roof is figuring out the cuts where the rafters meet the walls and the peak. The cut at the peak is easy in theory: Its angle is equal to the pitch of the roof. If your end wall is built for a 30° roof pitch, the top ends of the rafters for this wall should be cut at 30°. In reality, this cut may need some adjusting, but the theoretical angle is the best starting point.
At the wall-end of the rafter a special cut called a bird’s mouth allows the rafter to make level contact with the wall’s top plate. The bird’s mouth is made with two perpendicular saw cuts. The vertical cut, or heel, cut forms an angle with the bottom edge of the rafter that’s equal to 90° minus the roof pitch (in our example: 90° – 30° = 60°). The horizontal, or seat, cut is level when the rafter is installed, and meets the bottom edge of the rafter at the same angle as the roof pitch. You don’t have to memorize this geometry, but it helps to know the goal when cutting the bird’s mouth to fit.
For each type of roof, make some conservative test cuts on a single “pattern” rafter, then adjust the cuts as needed through trial and error. When the rafter fits well on your house structure, use the pattern rafter as a template to mark the remaining rafters. If the rafters are tying into an uneven surface such as a tree part, cut and test-fit the remaining rafters one at a time.
To make a bird’s mouth cut, mark the seat and heel cuts, using a rafter square to set the angles (see sidebar on page 120). Cut from one side with a circular saw, then flip the rafter over to complete the cuts, or use a handsaw. Don’t overcut the lines to complete the cut, as this can significantly weaken small rafters.
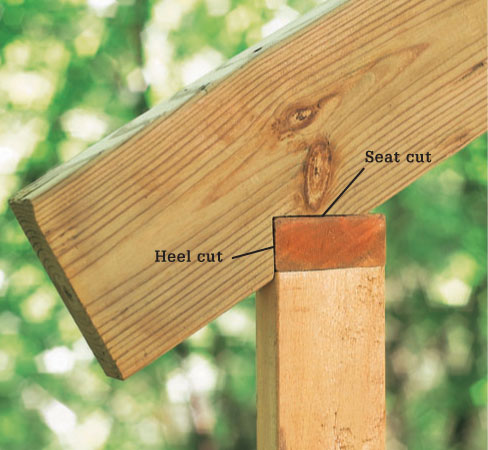
The angles of a bird’s mouth cut for a 30° roof pitch.
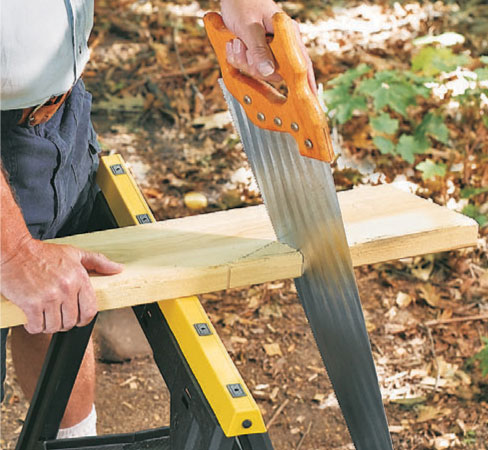
Cut the bird’s mouth with a circular saw, cutting from both sides (or finishing with a handsaw) to avoid overcutting lines.
Congratulations. You’ve chosen the simplest and easiest roof of the lot. You’ll be even happier with your choice when it’s time to install the roofing. To frame your shed roof, mark the rafter layout onto the wall plates, working from one end wall to the other. For the layout, count the end-wall top plates as rafters; for these, you’ll cut special rafters after the others are installed.
Cut a pattern rafter to length so it overhangs the side walls as desired to create a nicely proportioned eave. Set the rafter on the layout marks on top of the two side walls. Mark where both sides of each wall intersect with the rafter (on one side the rafter won’t touch the plate, so you’ll have to plane up from the wall with a straightedge). These marks represent the outside ends of the bird’s mouth seat cut.
Use a rafter square to mark the bird’s mouth cuts. Make the cuts and test-fit the rafter. Adjust the cuts as needed until the joints fit well on both walls, then use the pattern rafter to mark the remaining rafters. Cut the rafters and fasten them to the wall plates with 16d galvanized common nails. At each joint, toenail two nails on one side of the rafter and one nail on the opposite side.
The two special outer rafters go right on top of the end-wall plates. Because they have no bird’s mouth cuts, they must be ripped down so they’re flush at the top with the other rafters. Use a level or straightedge to plane over from the adjacent rafters and measure down to the top plate to find the required depth for the outer rafters. Rip the outer rafters to size and fasten them to the top plates with 16d nails.
The first step to framing a gable roof is preparing the ridge beam. The ridge beam gives you something to nail the rafter ends into and ties them all together for added stability. A 1 × 6 board makes a good ridge beam for 2 × 3 or 2 × 4 rafters. Cut the ridge beam to length so it spans the house between the inside faces of the gable-end walls.
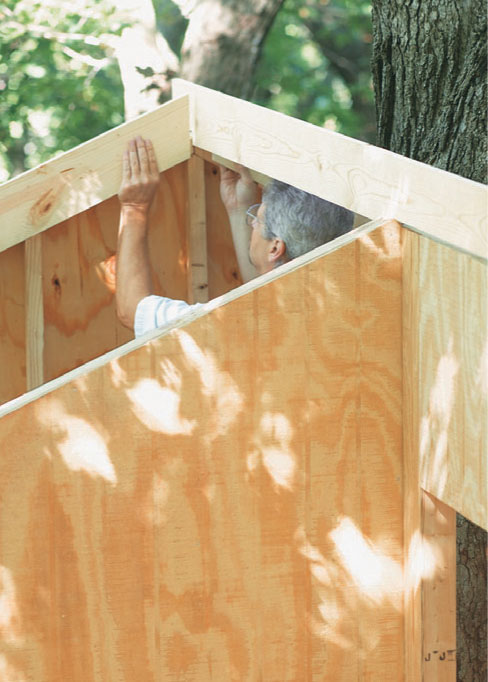
Test-fit the pattern rafters on the walls, using a scrap piece to act as the ridge beam.
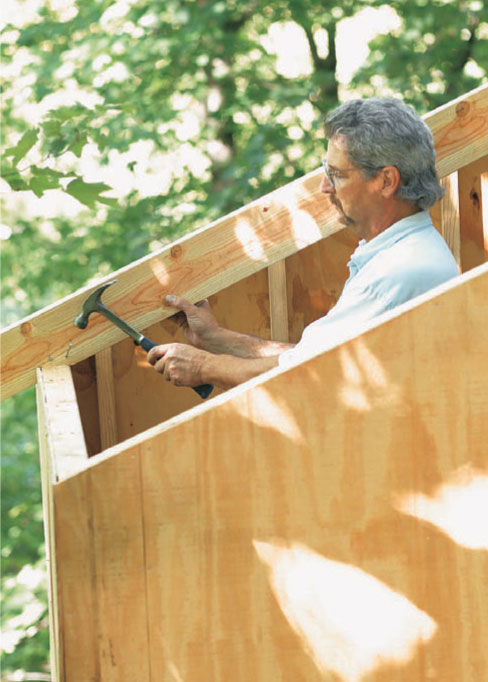
Toenail the rafters to the wall-top plates with three nails driven into the plates.
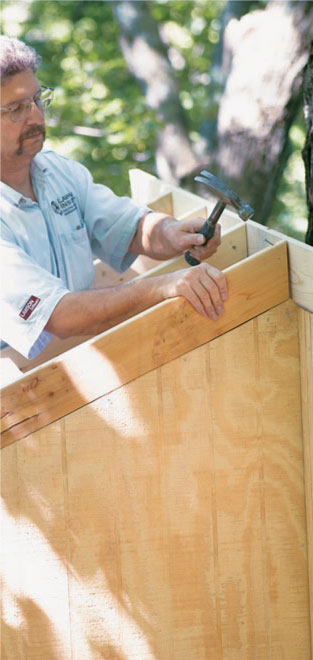
Install the outer rafters over the end-wall plates so the rafter ends meet at the roof peak.
Mark the rafter layout onto the ridge beam, working from one end to the other. For the layout, count the end-wall top plates as rafters; for these, you’ll cut special rafters after the others are installed. Mark the layout onto both side faces of the beam. Hold the ridge beam next to each wall plate and transfer the layout onto the plate.
From this point, you’ll need at least one helper until several of the rafters are installed. Cut two pattern rafters to length so they will overhang the side walls as desired to create a well proportioned eave. Using a scrap cut from the ridge beam, set the rafters on the side walls with the scrap held between their top ends. Mark where both sides of each wall intersect with the rafters (on the inside of the wall the rafter won’t touch the plate, so you’ll have to plane up from the wall with a straightedge). These marks represent the outside ends of the bird’s mouth seat cut.
Use a rafter square to mark the bird’s mouth cuts. Make the cuts and test-fit the rafters. Adjust the cuts as needed until the joints fit well on both walls, then use the pattern rafters to mark the remaining rafters. Starting at one end of the house, install two opposing rafters with the ridge beam in between so the top ends of the rafters are flush with the top edge of the beam (you can temporarily tack the other end of the ridge to the far wall to hold it up while you work). Toenail the rafters to the wall plates with two 16d galvanized common nails on one side of the rafter and one nail on the other side. At the top ends, toenail through the rafters and ridge with three 10d nails. Repeat to install the remaining pairs of rafters.
The four special outer rafters install on top of the end-wall plates. They have no bird’s mouth cuts, so they must be ripped down so their tops sit flush with the tops of the other rafters. Use a level or straightedge to plane over from the adjacent rafters and measure down to the end-wall top plates to find the required depth of the outer rafters. The outer rafters will meet together at the peak, without the ridge beam in between. Rip the outer rafters to size and fasten them to the top plates with 16d nails.
A simple hip roof has the perfect shape for capping off a square treehouse surrounding a central trunk. Since the roof pitch has yet to be determined, first pick an angle that looks good to you—let’s say 40°. Cut one end of a pattern rafter at 40°. Use a handsaw or circular saw to bevel the edge of one of the outside wall corners at 40°. This creates a flat surface for receiving the rafter. Set the rafter on the wall and the tree. If everything looks good, mark where the top of the rafter meets the tree. Use a level to extend this mark around the perimeter of the trunk.
Using the pattern rafter, mark the cuts for three more corner rafters (the hip rafters). Cut off the remaining three wall corners to match the first. Install the four hip rafters so their top ends are on the tree marking and their bottom ends rest on the walls. Fasten the rafters to the tree with 3-1/2" galvanized wood screws; fasten to the walls with screws or 16d galvanized common nails. Drive two toenails (or screws) on one side of the rafter and one nail on the other side.
To cut the interior, or common, rafters, set up two mason’s lines: one line running between the tops of the hip rafters, directly above where they meet the walls, and one line strung around the ends of the hip rafter tails. Use the lines for reference as you cut the common rafters to fit the structure. Mark the common rafter layout onto the top wall plates, centering a full-length rafter between each pair of hip rafters. You’ll probably also need two or more short rafters that run from the hip rafters to the walls. These are called jack rafters.
The commons and jacks get a bird’s mouth cut to rest on top of the wall. Cut and test-fit the rafters one at a time, using the strings to help with measurements. Cut the common rafters long to start with, then miter the top ends to fit roughly to the tree, followed by the bird’s mouth. To cut the jack rafters, bevel the top ends to fit flush against the side faces of the hip rafters. This can be a difficult cut, but it doesn’t have to be perfect; just get it close enough to make a strong joint. When all joints fit well, cut the bottom end of each rafter to length so it meets the outer mason’s line. Fasten the rafters as you fastened the hip rafters.
A clipped corner has part of the siding and cap plate cut away so the hip rafter can sit squarely on top of the wall.
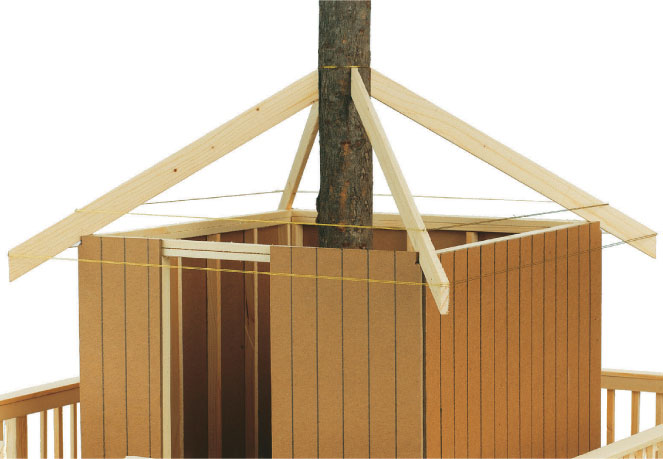
String mason’s lines from rafter tip to rafter tip and test with a line level to make sure that the rafters are all level with one another.
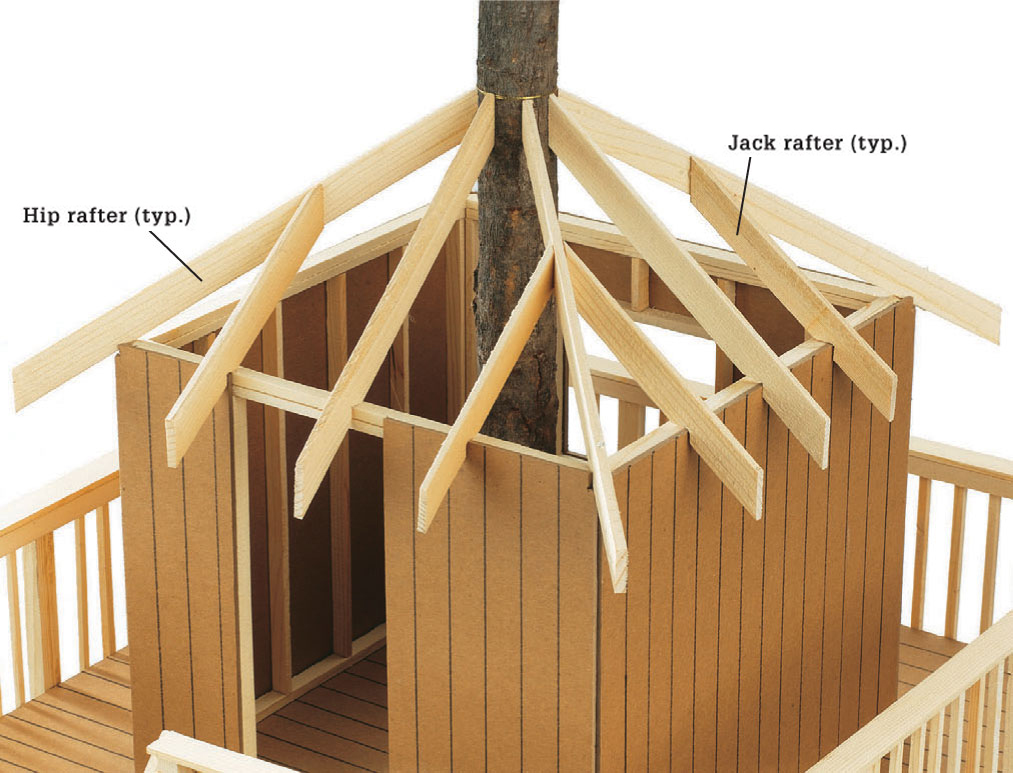
Fasten the top ends of the jack rafters to the sides of the hip rafters.
 Sheathing & Roofing
If you’ve ever built a shed or even a doghouse, you know that roofing a small building can be particularly satisfying. You get to learn and practice basic roofing skills without the backbreaking work of endless roof expanses. The same is true for treehouses.
The first step is choosing a roofing material, and that will determine what you’ll use for the roof deck, or sheathing. If you’re building a small treehouse, you might want to take the easy route and use a couple of sheets of plywood as the sheathing and the roofing. On any house with a gable or shed roof, consider adding 1× trim up against the underside of the roof sheathing along the end walls, to hide the faces of the outer rafters.
Asphalt shingles are cheap, durable, and easy to install. They’re laid over plywood sheathing and a layer of 15-pound building paper. They are, however, the heaviest of the standard roofing materials and might not be the best choice if you’re trying to minimize weight.
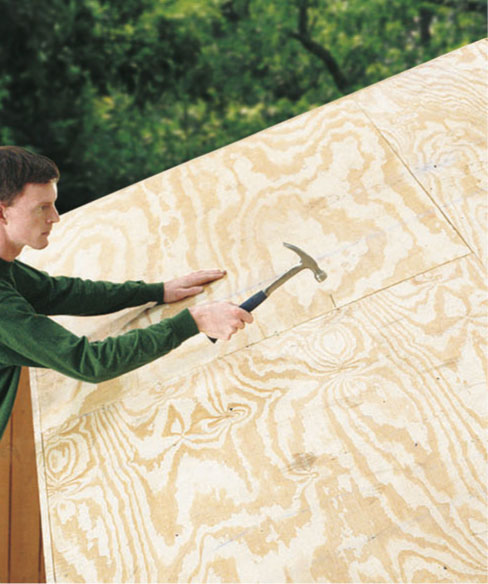
Plywood roof decking is the fastest and usually cheapest type of decking to install. Make sure the plywood you use is rated for use in roofing. If you’ll be installing asphalt shingles, a plywood deck is the way to go.
To install an asphalt shingle roof, start with a single layer of 1/2" exterior-grade plywood sheathing. Working up from the ends of the rafters, fasten the sheathing to the rafters with 8d galvanized box nails, driven every 6" along the edges and every 12" in the field of the sheets. Overhang the rafter sides and ends as desired. Leave extra overhang at the sides of the outer rafters if you plan to install trim there. Cut the plywood as needed so vertical joints between sheets break on the center of a rafter, and stagger the vertical joints between rows.
Add the building paper, overhanging the sheathing along the eave by 3/8". For a hip roof, also overhang the hip ridges by at least 6". Secure the paper to the sheathing with staples. Install the remaining rows, overlapping the row below by at least 2", and overlap any vertical joints by at least 4". On a gable, overlap the roof peak by 6", then install paper on the other side, working up from the eave.
Begin the shingle installation with a starter course: Snap a chalk line 11-1/2" up from the eave (for standard 12"-wide shingles). Cut off half (6") of the end tab on the first shingle and position the shingle upside down so the tabs are on the chalk line. Overhang the side edge (on gable and shed roofs) by 3/8". Fasten the shingle with four 2d roofing nails, about 3-1/2" from the bottom edge. Install the rest of the starter row in the same manner, using full shingles and butting their ends together.
Note: For a hip roof, completely shingle one roof section at a time, trimming the shingles along the hip peaks before moving on to the next section.
Install the next course directly on top of the starter course but with the tabs pointing down. Begin with a full shingle to establish a 6" (half-tab) overlap of the tabs between courses. Use four nails for each shingle: one nail 5/8" above each tab and one nail 1" in from both ends. For each successive course, snap a chalk line 17" up from the bottom of the last installed course; this helps you keep the shingles straight and maintains an even 5" exposure. Overhang the first shingle in each course by a half tab until you get to a 1-1/2-tab overhang, then start over with a full shingle.
To shingle the peaks of gable and hip roofs, cut ridge cap pieces from full shingles, as shown in the photo (page 123). Cut one cap for every 5" of ridge. Center the caps over the ridge and fasten them with two nails.
Start installing asphalt three-tab shingles from the eave area of the roof and work your way up toward the peak. If you’ve never shingled a roof before, make sure to get some experienced help or at least plenty of good information before attempting it.
When the field shingles are all in, cut three cap shingles from each three-tab shingle, tapering the side edges slightly as shown (inset). Nail the caps over the ridge so the nails are covered by the next cap.
Cedar roof shingles look terrific up in a tree. Installing them is very similar to installing shingles for siding. Be sure to read the shingle manufacturer’s directions carefully to find recommended exposures and installation practices.
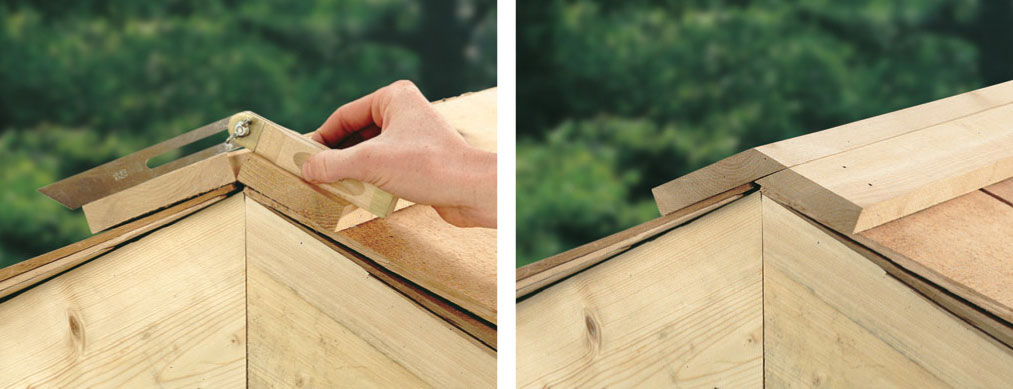
The peak of a roof created with wood shingles will naturally have a seam that needs covering. The easiest way to do this is by beveling two pieces of ridge trim so one piece fits over the other piece.
Installing a cedar shingle roof is almost identical to siding a wall with cedar shingles, which is covered in detail on page 89. The few differences for a roof application are explained here. Note: Don’t use cedar shingles on roofs with less than a 3-in-12 pitch (about 14°).
Sheath the roof with 1 × 4 skip sheathing, spacing the boards to equal the shingle exposure. Follow the shingle manufacturer’s recommended exposure for the size and grade of your shingles and the roof slope. Install a double starter course of shingles along the eave, overhanging the roof edge by 1-1-1/2" at the eave and 1" at the side. Leave a 1/4" gap between adjacent shingles to allow for expansion, and overlap the gaps by at least 1-1/2" between courses.
To complete the peak of a gable roof, layer strips of 15-pound building paper (tar paper) into the last two courses of shingles, as shown in the photo (above). Cap the peak with custom-beveled 1× trim boards or pre-made ridge caps. Cap the ridges on a hip roof with pre-made ridge caps.
With its history as a popular roof material for farm buildings and cabins, corrugated roofing has the right character for treehouses. The material usually comes in 2-foot wide panels in various lengths. Order panels long enough to span each roof section so you won’t have to deal with horizontal joints. Installation of corrugated roofing is specific to the type and manufacturer of the panels you use, and you should follow the manufacturer’s instructions carefully.
Here is a general overview to give you an idea of the roofing process: Start by installing 1× or 2× lumber purlins perpendicular to the rafters. Fasten the roofing panels to the purlins with screws or nails fitted with self-sealing rubber washers. Overlap adjacent panels at the ribs, then fasten through both panels to seal the seam. Cap roof ridges with a preformed ridge cap, sealing it to the roofing panels with a sealer strip and caulk.
Corrugated metal or fiberglass roof panels are lightweight and easy to install, making them a good choice for a treehouse. They are usually installed over foam or plastic filler strips that have the same profile as the roof panels. The filler strips are attached to boards (called purlins) that fit between the roof rafters.
 Modes of Access
Getting from point A to point B can be half the fun of a treehouse. It’s one of the things that separates treehouses from other hangouts and play areas. With a little creative thinking, you can devise all kinds of access points and build your own conveyances using standard materials. It’s also fun to check out the equipment available through specialty dealers.
So, what’s going to be your mode of access? Kids will usually choose the more adventurous routes, like climbing ropes or zip lines. Then again, kids ride bikes with their eyes closed. For you, perhaps a flat-rung ladder is a better choice for balancing ease-of-use and out-of-the-ordinary. Often a combination of travel options is best—maybe a ladder for getting up to the treehouse with an armload of stuff, and a fireman’s pole for swashbuckling exits.
A traditional staircase is also an option, and a good idea for anyone with limited agility or for treehouses that receive lots of regular traffic.
 Ladders
A handmade, permanently attached wood ladder is perhaps the best all-around means of access for a treehouse. Two good ladder designs are the double-rung and the flat-rung, both of which are suitable for primary means of access. The rope ladder, a kids’ favorite, is more difficult to use and serves better as a fun, secondary route.
This ladder works much like an extension ladder but with greater foot stability offered by the doubled rungs. To build the ladder, start with two long, straight 2 × 6s that are relatively knot-free. These are used for the stringers (side uprights) of the ladder. Set one of the boards on the ground, and lean it against the treehouse platform at an angle that looks comfortable for climbing—60° to 70° is a good range for most situations; we’ll use 65° for this example.
Cut the bottom ends of the stringers at 65°. Lean them against the platform at 65° and mark the top ends for cutting. When the ladder is finished, you can fasten the stringers to the platform or to railing posts at either side of the ladder landing. At this point, decide whether the stringers should stop flush with the platform surface or extend above the platform to serve as handholds. Cut the top ends of the stringers, rounding them over or squaring off, as desired. The stringers must be identical in length and shape.
The idea of a firepole may fill you with alarm, but kids love them. If you provide supervision and a soft landing place you’ll find that a firepole may become the preferred method for exiting (or even entering) a treehouse.
A double-rung ladder employs pairs of 1-1/2" dowels at each step to create a more stable stepping point. The dowels are glued (with a water-resistant adhesive such as polyurethane glue) into 1"-deep holes in the stringers.
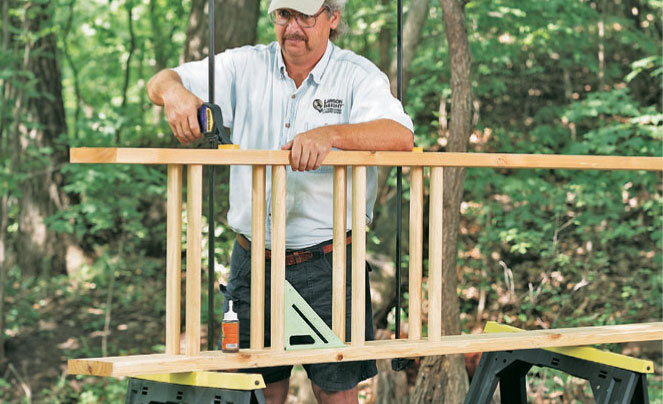
Clamp and glue the doubled rungs as you go. If you space the rung pairs at roughly 12" intervals you should have sufficient flex in the stringers so you can successfully insert each new pair without unclamping the preceding pair.
Mark the rung layout onto the front edge of one of the stringers, marking every 10" to 12" and starting at the bottom, front end of the stringer. Standard rung spacing is 12", but 10" is more comfortable for kids. Make sure the spacing is uniform over the entire layout. Place the stringers together and transfer the rung layout to the unmarked stringer. Extend each layout mark across the inside face of each stringer at 65°, using a rafter square or a template cut at 65°.
Measure 1-3/4" in from the front and rear edges of the stringers and mark the rung centers on each layout line. Note: This measurement is for a 1-1/2"-diameter dowel. Cut the rungs to length at 20". This gives you a useable rung width of 18" and a total ladder width of 21". At each rung centerpoint, drill a 1-1/2"-diameter × 1"-deep hole, using a spade bit marked with masking tape to gauge the hole depth. Test-fit several rungs to make sure they fit snugly in the holes.
Lay out all the parts so everything’s ready for the glue-up. Working on one stringer, coat the insides of the rung holes with waterproof wood glue; avoid filling up the holes with excess glue, as this will prevent the dowels from setting to full depth. Seat the dowels completely in the holes, using a rubber mallet, if necessary. Make sure each dowel is perpendicular to the stringer. When all dowels are in, glue up the other stringer (it helps to have another person working ahead of you) and set it over the dowel ends, completely seating them in the holes. Clamp the stringers so the ladder is square, and let the glue dry. Secure the completed ladder to the treehouse platform or railing posts with screws.
A flat-rung ladder feels a little more like a staircase and is a little easier to climb than a standard ladder. However, for safety, climbers should always face the ladder when going up or down. An optional handrail on each side is a good idea for additional safety. To build a flat-rung ladder, follow the steps given for the double-rung ladder (page 126) to establish the ladder angle, cut the 2 × 6 stringers, and mark the rung layout. For the flat-rung ladder, the layout lines for the rungs represent the top of each rung.
Cut 2 × 4 or 2 × 6 rungs to length at 18". This gives you a total ladder width of 21". Fasten each rung with three 3-1/2" galvanized deck screws driven through pilot holes in the outside of each stringer and into the ends of the rungs. Make sure the top of the rung is on the layout line and its back edge is just touching the back edges of the stringers. Reinforce each rung connection with a 1 × 2 cleat. The cleats should extend from just behind the rung’s front edge to the rear edge of the stringers. Fasten the cleats with 2" screws driven through pilot holes in the cleats and into the stringers.
To add handrails, cut 3"-long blocks from 2 × 2 lumber, and sand all edges smooth. Install the blocks on the front edges of the stringers at 36" intervals, using pairs of 3-1/2" screws. For the railing, install 1-1/4" or 1-1/2"-diameter dowel rods centered side-to-side on the blocks. Fasten through the railing and into the blocks with 3-1/2" screws driven through counterbored pilot holes. Make sure all screw heads are below the surface of the railing. If you need more than one wood dowel rod for each side of the railing, butt the railing pieces together over the center of a block, and pin the ends together with a couple of angled finish nails to ensure a smooth transition.
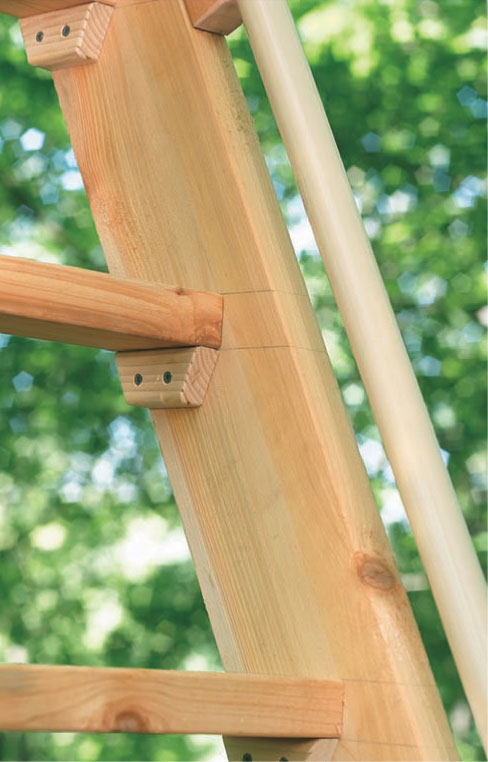
Fasten the rungs to the stringers, then back up each rung with a pair of 1 × 2 cleats.
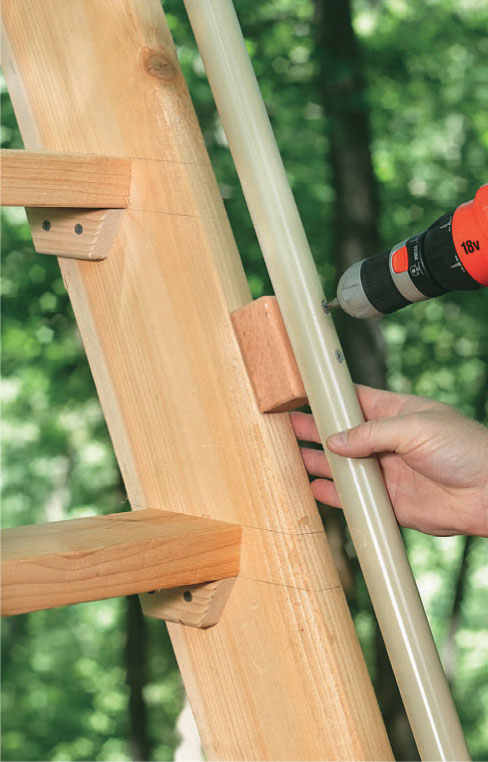
Countersink the railing screws so there’s nothing protruding above the railing surface.
Not your everyday ladder. Rope ladders take a little getting used to, but they’re a lot of fun. They’re easiest and safest to use when they’re anchored at the bottom to prevent swaying (you can snap the ladder onto the anchor with a carabiner so it can be pulled up into the treehouse if desired).
Rope ladders can be a little tricky to climb, but that’s what makes them fun. Kids can pretend that they’re scaling up the rigging of a pirate’s ship to reach the crow’s nest atop the main mast. A handy trick for making a rope ladder more stable is to secure the bottom end to the ground. Once you’ve hung the ladder, tie the two rope ends together at the bottom with a locking carabiner attached. Clip the carabiner into an eye bolt set in some concrete in the ground. You can easily unclip the carabiner to pull up the ladder into the treehouse.
To make a rope ladder, cut two lengths of 3/4" nylon or manila rope, including several extra feet of slack. For the rungs, cut 1 × 4 boards or 1-1/2"-diameter wood dowels at 21". You’ll need one rung for every 10" of vertical rise of the ladder. Drill a 3/4" hole through each rung, 2" in from each end and centered side-to-side on the rung. Leaving plenty of slack for tying off the rope ends, mark the ropes every 10". Working from the top down, thread each rung onto the ropes and tie a simple knot below the rung so the top of the rung is on the layout lines. Repeat to install the remaining rungs.
Secure the top ends of the ladder ropes to the treehouse’s platform framing, railing, or overhead beams using a bowline knot on each rope. If desired, anchor the bottom end of the ladder to the ground, as described above.
 Stairs
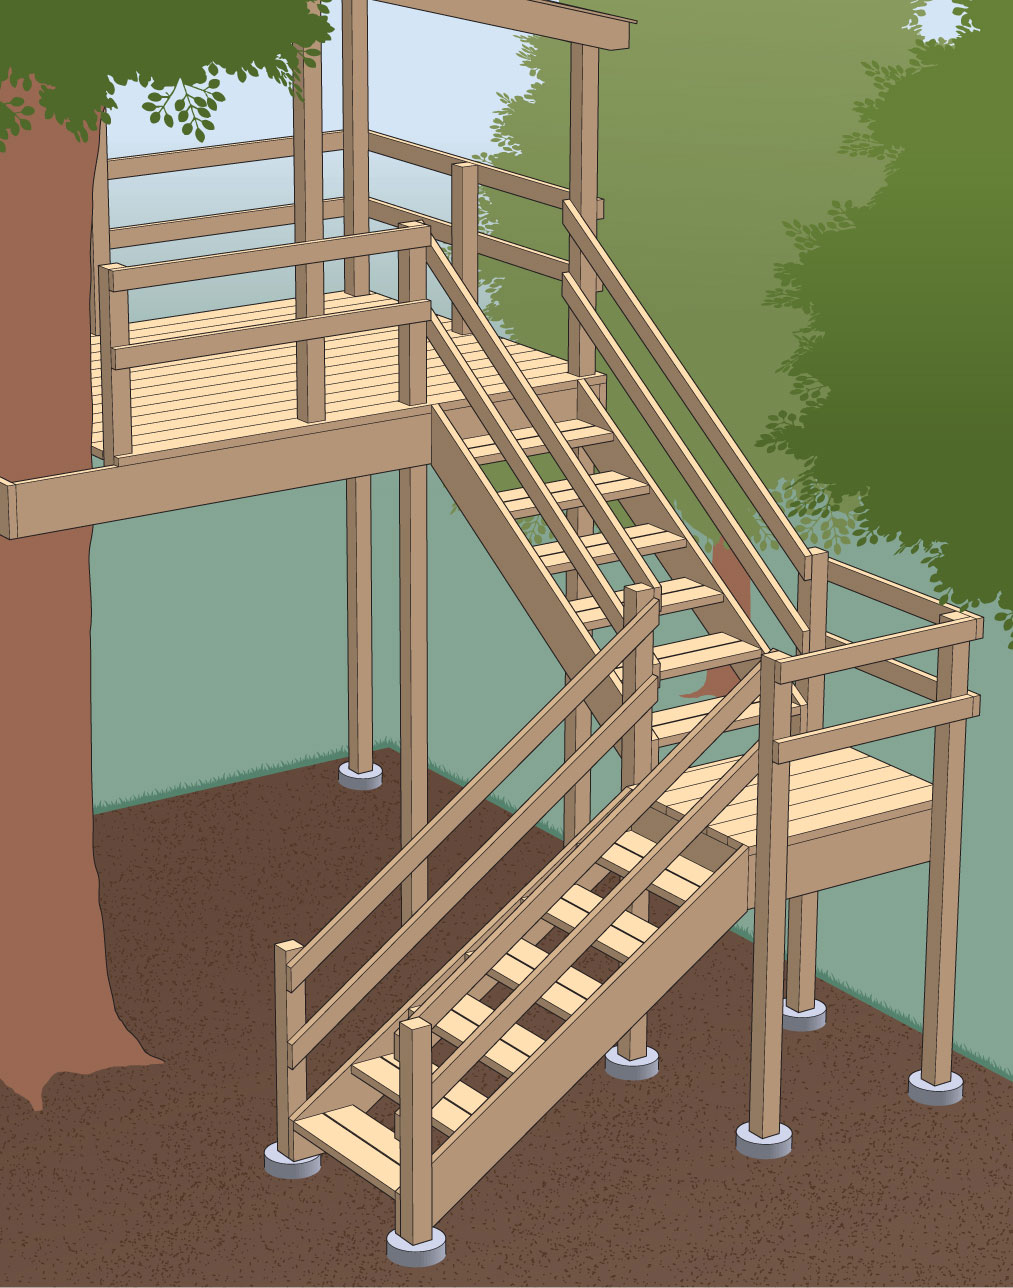
Basic carpentry and math skills are all you need to build a fine staircase to the treehouse. See page 131 for a schematic cutaway of this design.
Traditional stairs might be a preferable mode of treehouse access for any number of reasons. They’re safer and easier to climb than a ladder or ladder steps. They’re also a good idea for treehouses that are used for work or other activities that frequently require hauling supplies (or lunch) up and down.
While stairs inside your house and those serving attached decks and the like are strictly governed by building codes, the design specifications for treehouse stairs typically aren’t as stringent. You might choose to build your steps narrower than the standard 36" minimum or to make them a bit steeper to save space. However, be sure to include strong railings all the way up and to make the steps uniform in height and depth. An unexpected variation in step size will always trip you up, if not worse.
The stairbuilding technique outlined here is a simplified version of how most carpenters do it. The basic construction involves two relatively short flights of stairs joined by a small landing. You can use the same methods described to build a longer set of single-flight stairs, but landings are recommended for any staircase with more than 12 steps total. For staircases that rise well over 8 feet and require more than one landing, consult a building pro for help with the staircase design and construction.
A staircase can be particularly useful for the treehouse build, and you can construct the stairs as soon as the treehouse platform is complete. However, if there’s any chance that your kids and neighborhood youngsters will find their way up the stairs before the house is finished, don’t build the stairs until the platform railing is complete and there isn’t any place around the platform where an unwitting (or witless) person could get hurt or fall. Also be sure to rope off or barricade a staircase when you’re not around during the construction phase.
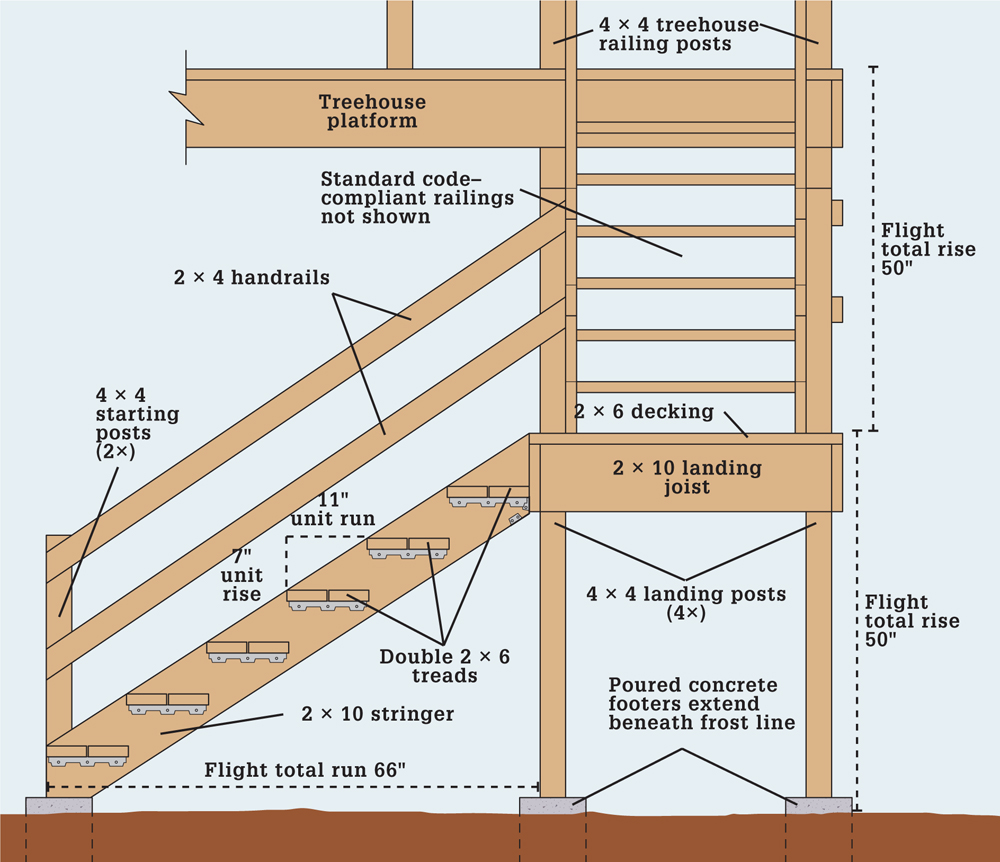
Cutaway view of stair path. To see how stair teminology works, see page 132.
Once you’ve calculated the stair dimensions, you can lay out and install the landing posts. Locate the house-side edge of the landing at half the distance of the total run—66" in our example. The posts will go inside the landing’s joist frame, so install them 1-1/2" inside the footprint of the landing on all four sides.
For each post, dig a 12"-diameter hole at least 42" deep (or as needed to extend 6" below the frost line). Add 6" of compactible gravel to the bottom of the hole and tamp it down. Locate the two starting posts with the bottom end of the first-flight run and aligned with the landing posts. The starting posts should extend at least 43" above the ground.
Mark the top of the finished landing onto the four landing posts. This should be exactly half of the total rise for the entire staircase. Cut four 2 × 10 joists to wrap around the outsides of the posts. Install these 1-1/2" below the marks, fastening to the posts with pairs of lag screws with washers. Cover the joists with 2 × 6 decking, spacing the boards about 1/4" apart for drainage. Make sure the decking is flush with the outsides of the joist frame on the two sides that will receive the stair stringers.
Install the metal stair angles onto the inside faces of both stringers, centering the angles under each tread marking. Note: One commonly available type of stair angle has three screw holes on one flange and four on the other. You can invert the angle so the four-hole flange is against the tread boards, allowing you to drive two screws into each board. Fasten the angles to the stringers using the manufacturer’s specified screws (don’t use standard deck screws, which are much more vulnerable to shearing off under weight).
Mount the stringers to the landing with metal framing connectors designed for stair stringers, using the manufacturer’s specified fasteners. The outside faces of the stringers should be aligned with the inside faces of the landing posts. Anchor the bottom ends of the stringers to the insides of the starting posts with lag screws and washers.
Cut 2 × 6 tread boards to fit snugly between the stringers. The stringers should be perfectly parallel, so you should be able to cut all of the treads at the same length. Each step gets two tread boards. Install each pair of boards starting with the front piece. Align the front edge of the tread with the top edges of the stringers. Fasten the tread with the specified screws driven up through the horizontal flange of the stair angle and into the tread. Each tread gets two screws. Install the second board, leaving a 1/4" gap in between for drainage.
The upper section of stairs is constructed almost identically to the first flight, with a couple of minor differences: When cutting and fitting the first stringer, start by making the plumb cut at the top end, matching the angle of the top plumb cuts on the first-flight stringers. Test-fit this cut, and make any necessary adjustments, then trace along the landing to mark the bottom plumb cut.
When laying out the steps, the bottom tread should be 7-1/8" higher (measuring vertically) than the top corner of the bottom plumb cut on the stringers. Anchor the stringers to the treehouse platform and the landing with the same stringer connectors used on the first flight. The tops of the stringers should be flush with the tops of the landing and treehouse platform, respectively.
Install a 4 × 4 railing post at the outside of each stringer at the top of the stairs to support the staircase railings.
For short flights of stairs, you might be fine with 2 × 4 railings spanning between the landing posts and the starting or treehouse railing posts. For longer runs, install mid-span support posts onto the outside faces of the stringers.
Cut the ends of the railings with plumb cuts so they’re flush with the faces of the posts. Install the top railings so their top edges are 34" to 36" above the tops of the treads, measuring vertically. Fasten the railings to the inside faces of the posts with long deck screws. Install the bottom railings about halfway between the top railings and the stringers, or you can have three evenly spaced railings on each side. If toddlers will use the stairs, you might want to include vertical balusters spaced just under 4" apart. In any case, both sides of the staircase must have a railing.
Secure the two open sides of the landing with a standard code-compliant railing that matches the railing on the treehouse platform.
 Trap Doors
Climbing ropes, secret ladders, and other cool modes of access need an equally cool point of entry: a trap door, of course. The classic trap door is square, with a frame built into the floor joists, and the door itself made from a cutout of the floor boards. Using this basic design you can come up with your own variations—triangular, hexagonal...practically any shape you wish.
To build a trap door, first decide on the size of the opening. With floor joists framed at 24" on center, you’re already halfway to making a 22-1/2" square opening. Just add two side pieces between the joists, and the frame is done. With 16" joist spacing, the joists are only 14-1/2" apart—a little too tight for most trap doors. To make a larger opening, cut out the joist running through the planned opening and install two joist headers to carry the cut ends. Then install one or two side pieces between the headers to complete the framed opening. Use the same lumber for the frame as you used for the joists.
Next, add a 1 × 2 stop at each side of the frame, flush with the underside of the floor. Cut out the floor boards flush with the frame pieces (not the stops). Fasten the boards together with 1× cleats or a square of plywood to create the door. Maintain the original spacing between the floor boards so the trap door will blend with the rest of the floor. Mount the door with hinges installed on the back edge of the door so only the barrels of the hinges stick up above the floor. For a handle, cut a finger hole in the door, or install a recessed cabinet pull.
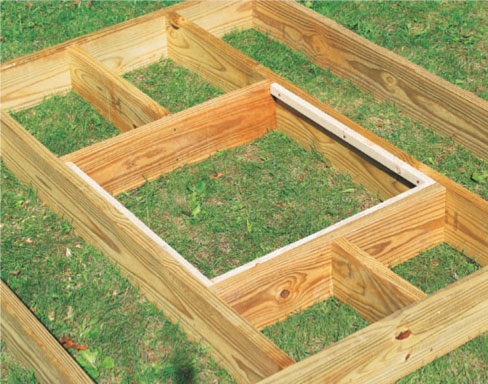
Joist headers support the ends of the cut joist and become two sides of the door opening frame.
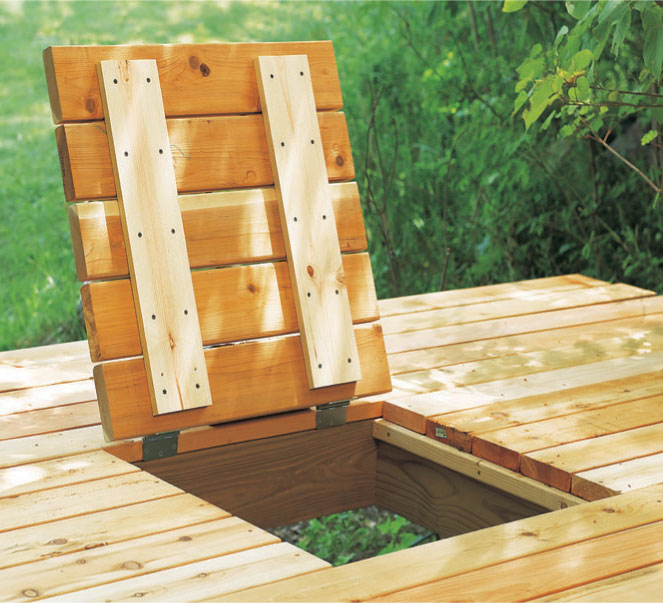
A trap door is a fun, secret entry to a treehouse, but it offers some structural advantages as well. For example, if you employ a trap door as your only point of entry you can encircle the treehouse completely with railings.
 Fireman’s Pole
There’s nothing better than a fireman’s pole for speedy exits. All it takes to build one is a length of plastic pipe, some concrete, and a piece of plywood or lumber. In a firehouse, firefighters zip down a pole through a large, round opening, but you can set yours up through a square trap door—just cut a slot in the door to fit over the pole when closed.
To make a fireman’s pole, cut a length of 3" diameter PVC plumbing pipe to extend from an anchor point on the treehouse down to a foot or so below the ground level. Secure the pole at the top with a 3/4" plywood or lumber collar with a hole drilled through it that just fits over the pole. Fasten the collar to the roof framing or other support members. With the bottom of the pole on the ground, the top end should extend about 18" above the collar. Position the pole so it’s perfectly plumb, then mark where the pole hits the ground. Dig a 12"-diameter × 12"-deep hole centered around the pole mark. Set the pole in the hole and fill the hole with concrete. Check the pole again for plumb and let the concrete dry.
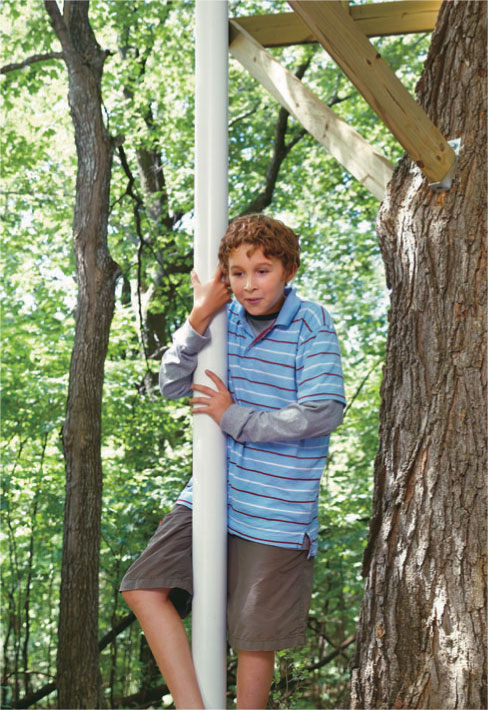
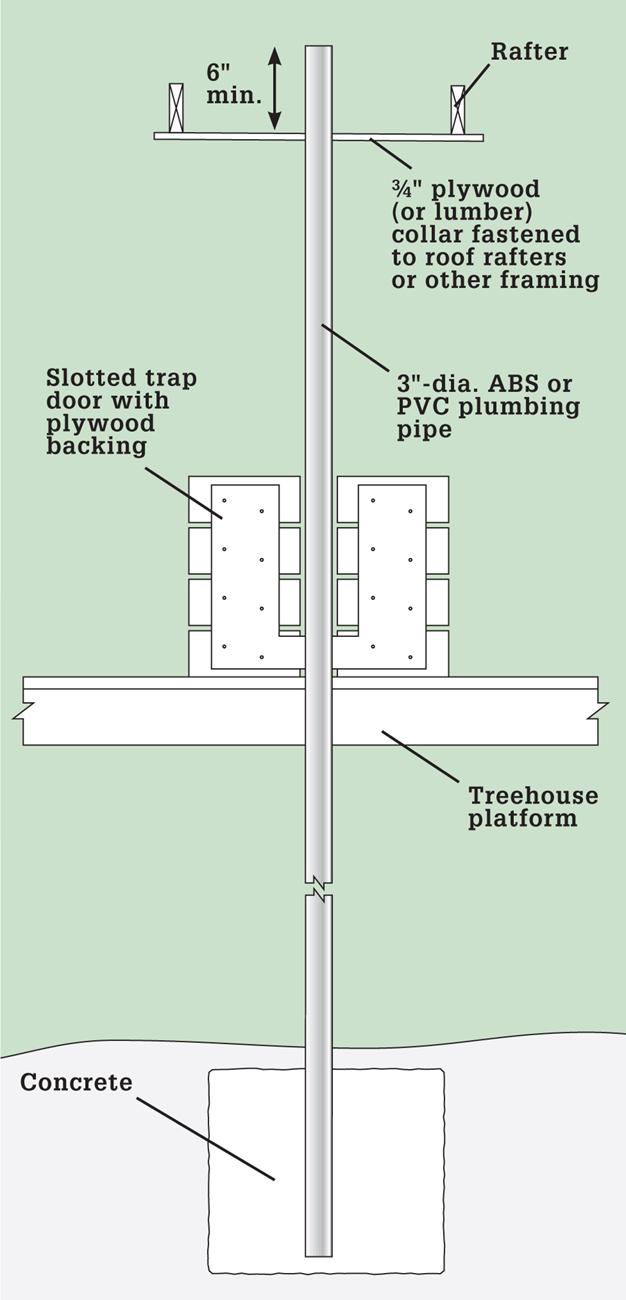
A length of plastic plumbing pipe makes a great fireman’s pole. A slotted trap door closes up the access opening.
 Swings & Playthings
If you came to this chapter first, you’re in the right state of mind for owning a treehouse. If you’ve just finished your treehouse and are wanting to jazz it up a little, congratulations (you’re way ahead of the other guy). One thing that most new treehouse owners learn right away is how much their creation becomes a hub of activity. Kids not only play in treehouses, they play under them and around them and, sometimes, when no one’s watching, over them. So it makes sense to add a few extra things for kids to do at the treehouse site. And for the adults? This author recommends a hammock. Period.
A few treehouse accessories are easy to make yourself, like climbing ropes and simple swings. Other add-ons are better purchased from reputable retailers. “Reputable” isn’t used lightly, either; you don’t want a zip line manufactured from shoddy materials, for example. Since there’s no place to shop for treehouse accessories at your local mall, you’ll have to be a little resourceful. The best place to start is with an online search under “play structures,” “playground equipment,” etc., or with keywords for specific items, such as “climbing walls” or “hammocks.” A lot of equipment made for play structures can easily be adapted for a treehouse play area.
A reminder about ground covers: While many of us grew up playing on blacktop playgrounds and sports fields that felt like rammed earth, things are different now. Covering a play area with a thick layer of wood chips or other shock-absorbing material is an easy, effective way prevent injury to kids. It’s really a no-brainer, as in no one gets brained from a minor fall.
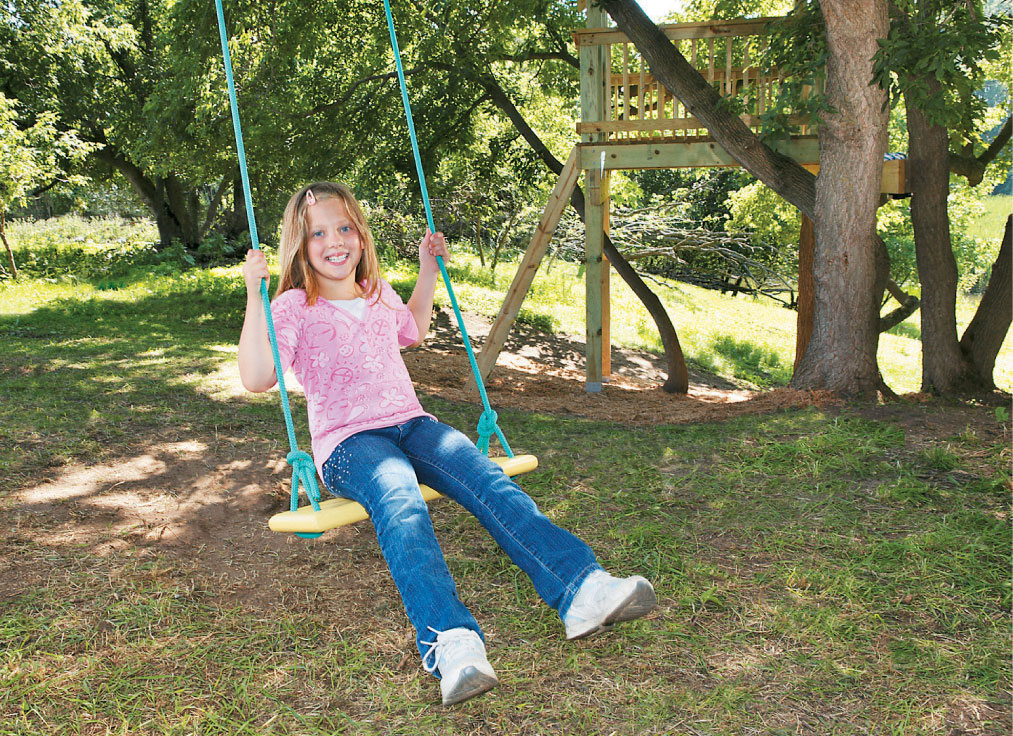
Swing through the air with the greatest of ease! A tree swing can hang from any suitable limb or a stout treehouse beam, but the connecting point should be at least 10 ft. above the ground for a nice ride (swings for small children can be lower).
 Classic Tree Swings
For most people, the love of swinging starts sometime in the first year of life and ends when you realize they just make you too dizzy. We love swings because they make us feel, if only for a brief but repeatable moment, like we’re flying. Homemade tree swings are the best, because you can hang them from a tall limb for a long, swooping flight, and you can make them big enough and strong enough for adults.
The two swings shown here are easy to make and equally fun to use, yet each offers a different feel in both the ride and the seating. This is good news, as you’ll likely discover that one swing just isn’t enough. Note: To prevent damage to the tree, inspect the rope or hardware connections periodically. You may have to move and/or retie rope connections occasionally if the bark becomes worn or the knot is strangling the limb.

Choose braided Dacron (polyester) or nylon rope for swings. Twisted rope tends to be too slippery for a good handhold, while polypropylene breaks down in sunlight and manila (though strong) is prone to rotting.
Plank Swing. A traditional plank swing is a good choice for kids of all ages and for adults who prefer a ride that’s a little more leisurely than a single-rope button swing. The plank seat is nothing more than a sturdy board with four holes, and no special hardware is needed. The only requirement is a relatively level tree limb to ensure that the swing travels in a straight line. The limited sideways travel on a plank swing makes it the best type for hanging from treehouses or where a tree limb doesn’t extend far from the trunk.
You can cut and shape the swing seat from almost any nice piece of lumber, such as a treated or cedar 2 × 8. A 1"-thick piece of solid oak or maple makes an especially nice, classic seat. The size is up to you. A standard size is about 6-1/2" to 9-1/4" wide and 24" to 30" long for a single rider, or larger for a two-seater. Cut the seat to length, rounding the corners with a jigsaw, if desired. Use coarse sandpaper or a router and roundover bit to ease all of the edges of the plank to remove sharpness and prevent splinters.
Lay out and drill four holes through the seat that match the diameter of the swing ropes (5/8"- or 3/4"-diameter braided rope is good for plank swings). Center the holes about 1-1/2" to 2" from the ends and side edges of the plank, taking care to lay them out as evenly and symmetrically as possible. Sand the plank smooth, working up to 220-grit sandpaper, then apply exterior-grade polyurethane, exterior paint, or another suitable exterior finish, as directed.
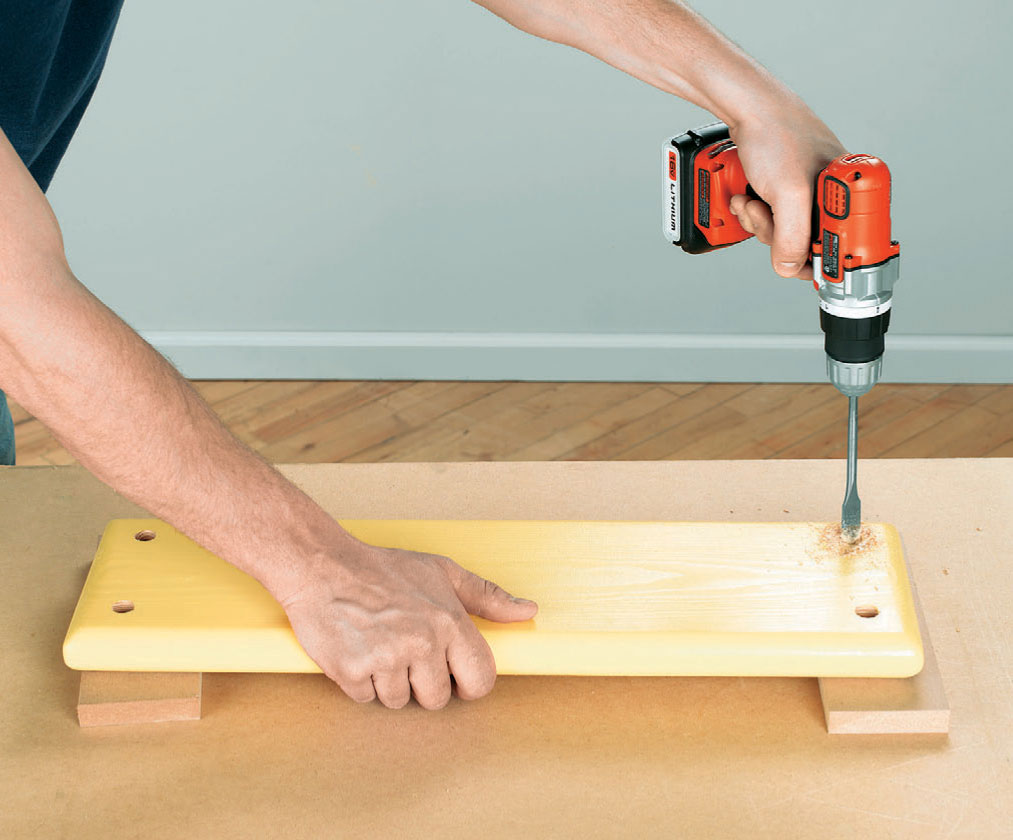
When sizing the plank seat, keep in mind that the usable portion of the seat is limited to the clear area between the rope holes.
A running double bowline setup wraps around the tree limb. It cinches tight when pulled but expands easily as the limb grows in diameter.
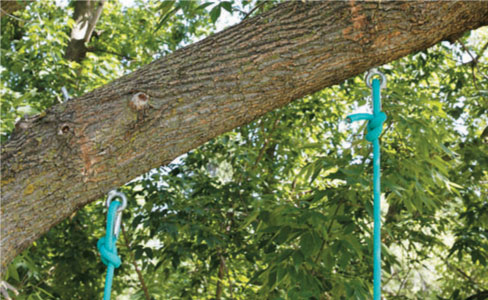
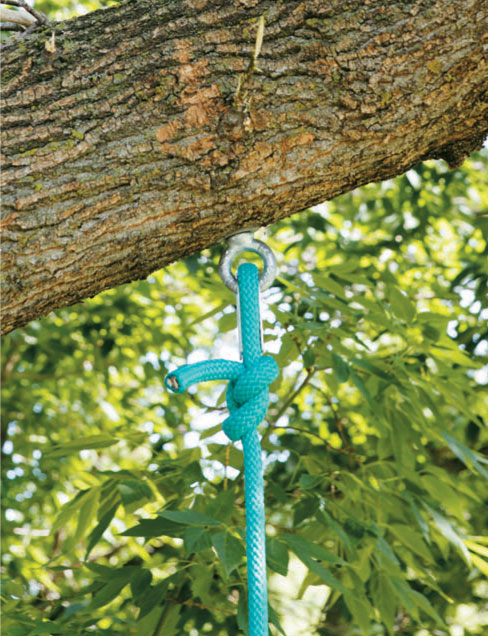
Use eye bolts to tie ropes to a treehouse beam or tree limb. Run the bolts up through the center of the beam or limb, and secure the top ends with large washers and locknuts.
You can use a number of different knots to secure each rope end to the tree. A swing hitch is one reliable standard. Another is the double bowline knot in a running configuration, a legitimate version of a simple lasso setup. The advantages of the running bowline are that you can tie it off without having to reach the limb, and it expands with the tree’s growth without affecting the knot’s strength (see How to Tie a Double Bowline Knot, page 140).
You’ll need two lengths of rope with plenty of extra for tying off at both ends. Tie one end of each rope to a level section of limb, spacing them the same distance as the hole pairs on the swing seat. Once each rope is secure, hang from the rope with your full weight, to test the knot and take out any initial stretch in the line. The ropes should hang straight down and extend onto the ground at least 2 feet.
Run the ropes underneath the seat plank and tie them off to themselves several inches above the seat. The triangular formation helps stabilize the seat to prevent tipping.
Holding the seat plank with its top (better) face up, run the rope down through a hole on each end of the plank, then up through the neighboring hole in each pair. Position the plank so it is level and at the desired height from the ground, based on the smallest swinger. Then, tie off the loose end of each rope to the standing section, using a bowline knot (see How to Tie a Bowline Knot, on page 56). Adjust the knots as needed so that the swing seat is level, and give it a test ride. When all looks good, trim the ends of the ropes, if necessary, then melt the ends with the flame of a lighter or match, to prevent unraveling.
Button Swing. Because it hangs from just one rope, a button swing (or disc swing) can tie to almost any strong tree limb, whether it’s level or not. A single rope also means you can swing in any direction and can spin until your eyes are crossed. This makes the button not only versatile but a little more adventurous than a plank-style swing. It can be difficult for kids younger than four or five, depending on their arm strength, but they’re really fun for bigger kids and adults, especially if the swing hangs from a high limb for a long, sweeping arc.
The best way to make a perfectly round seat with a clean edge is by using a router and a simple homemade jig called a trammel. You can also cut the shape with a jigsaw, either freehand or using a trammel. A good standard size for the seat is about 12" in diameter. Suitable materials include 3/4" exterior (or marine) plywood, solid 1× lumber, or a piece of redwood or cedar 2 × 12 (with a 1 × 12 or 2 × 12, the maximum diameter will be around 1-1-1/4", which is fine).
Whichever cutting technique you’re using, the first step is to mark the centerpoint of the seat at least 6" from the nearest edge of the material (for a 12"-diameter disc). To draw the outline of the disc, cut a small notch in the end of a wood slat or yardstick, then drill a small hole for a pivot nail at 6" from the bottom of the notch. Tap a small finish nail into the hole and then into the centerpoint of the workpiece to pin the slat in place. Place the point of a pencil in the notch, and rotate the slat around the nail to draw the circle.
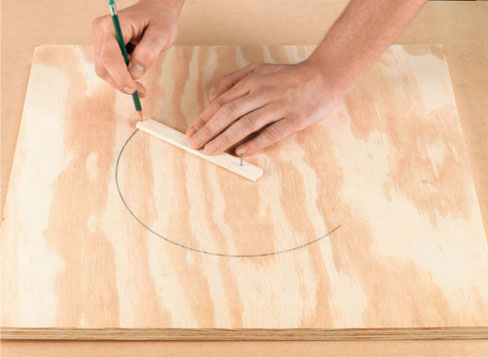
Mark the circular cutting line of the disc using a homemade compass.
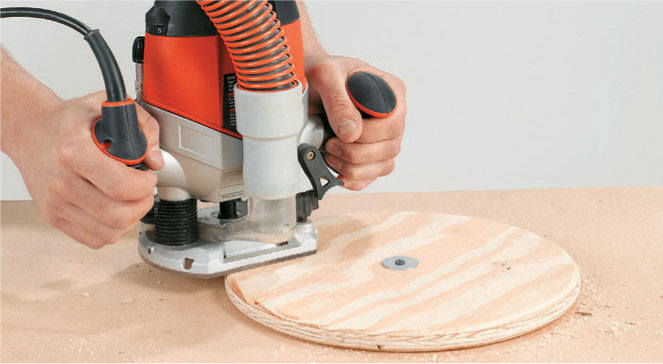
Round the edges of the disc with a router or sandpaper for a comfortable ride and to help prevent splinters.
Cut out the disc along the outline, using your preferred method. If you’re using a router and trammel, it’s a good idea to rough-cut the shape first with a jigsaw (preferably) or a circular saw, staying about 1/8" outside of the cutting line. Then clean up the cut with the router. Cutting off most of the waste saves considerable wear on expensive router bits.
A trammel is essentially a large version of the wood-slat compass, with the router (instead of a pencil) fixed to the outside end. To make a trammel, cut a strip of hardboard or thin plywood to roughly the same width as your router’s base. Drill a clearance hole through the board for the router bit, and fasten the trammel to the base with machine bolts set into countersunk pilot holes (you usually have to remove the router’s plastic baseplate first). Nail the trammel to the workpiece centerpoint, as with the compass, and rotate the router around the disc to complete the cut. It’s best to make the cut in several passes of about 1/8" deep each.
To cut out the disc with a jigsaw, simply do it freehand or attach the saw’s foot (base) to a trammel with double-stick tape. Once the disc is cut, smooth any rough spots or saw marks with a router or coarse sandpaper and a sanding block.
Drill a hole for the rope through the center of the disc, using the finish nail hole to pilot the bit. The hole should be just big enough for threading the rope through. A good choice of rope for a button swing is 5/8" or 3/4" braided nylon or Dacron. Nylon is more likely to stretch than Dacron but may be easier to find. Either type should have a working load of at least several hundred pounds.
Round the outside edges on both sides of the disc, using a router and roundover bit or sandpaper. Round the edges of the rope hole slightly to prevent unnecessary wear on the rope. Sand all surfaces of the disc smooth, then apply exterior-grade polyurethane or other exterior finish.
Tie the rope to a stout tree limb using a swing hitch, a running double bowline knot (see page 140), or other appropriate knot, or use an eye bolt to attach to a treehouse beam, as shown on page 139. Make sure the swing will have plenty of clearance from the tree trunk and other obstructions, keeping in mind the universal travel of the swing.
Hang on the rope to take out any initial slack or stretch. Thread the loose end of the rope through the hole in the disc, and tie off the end underneath the disc with an Ashley Stopper Knot, as shown below. Created by the famed knotsman, Clifford Ashley, the knot has a broad flat top that’s perfect for button swings. Melt the cut end of the rope with a lighter or match to prevent fraying.
 Zip Line
A zip line is a simple contraption consisting of a seat or handle hanging from a heavy-duty pulley that is suspended from a steel cable. The cable is tied between a pair of trees, posts, or other sturdy structures you can find or build—as long as one is higher than the other. If you’re starting the cable from a treehouse or platform, make sure any framing that the eyebolt attaches to is rock solid.
A zip line can be slow, gentle, and close enough to the ground to push off and stop yourself with your feet. Or, it can be very high and very fast, carrying you down mountainsides or across lakes, rivers, and canyons. The longest known zip line is 1.2 miles, drops almost 1,000 feet, and reaches speeds of up to 100 miles per hour. These “extreme” zip lines should be created by professionals only and used under the supervision of a qualified professional.
You can create a smaller, safer version of that mind-bending ride in your own backyard with a length of steel cable, some long eyebolts, and a zip line kit with a heavy-duty tandem pulley. Do not use the standard pulleys sold at hardware stores for zip lines—they’re not meant for this application. Similarly, use only braided cable (usually stainless steel) that has been specifically selected and packaged for a zip line. You’ll find a number of purveyors of zip line products on the Internet (see Resources, page 220).
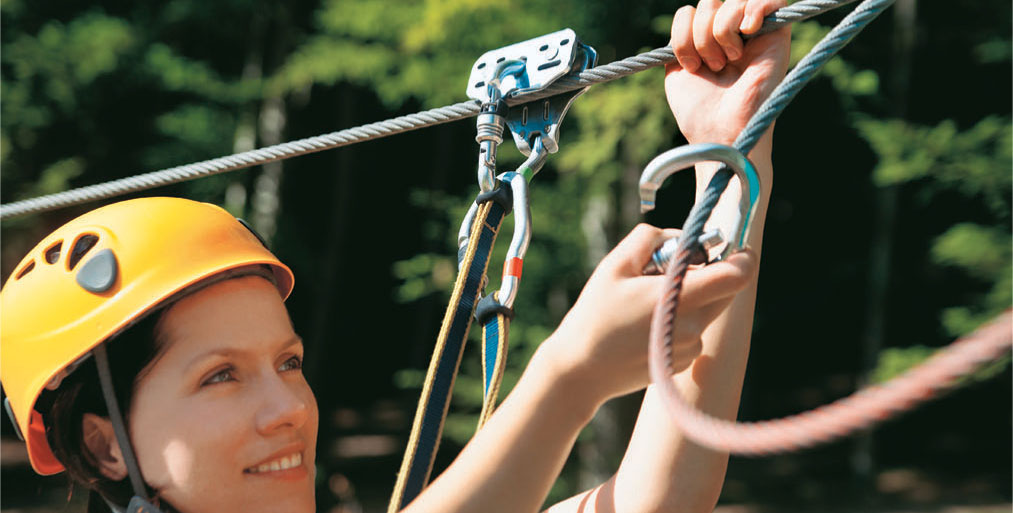
A zip line is a braided metal cable stretched from a point of access to a point of lower elevation. Add a pulley and a tow bar or handlebars and let the joy rides start.
A kit and a few basic tools are all you need to install a zip line. Be sure to buy heavy-duty stainless steel or galvanized fittings (kits are available from online suppliers).
Lighter-duty zipline kits made for use by children are sold in relatively inexpensive kits. Their maximum distances traveled range from 30 to 90 ft.
A high-adventure zip line requires a very unusual backyard with tall trees and ample space, as shown here. But setting up a slightly tamer run from your deck to the old maple tree is a great way for active people of all ages to learn and develop skills.
 How to Install a Zip Line
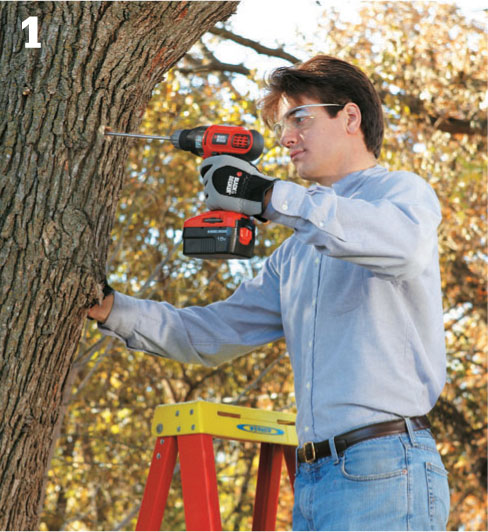
Drill a hole through the center of each tree (high end and low end) for an eyebolt. The holes should be the same diameter as the eyebolt shaft. You’ll need to use an extra-long spade bit or a bit extender to clear a tree trunk, which should be at least 10" in diameter.
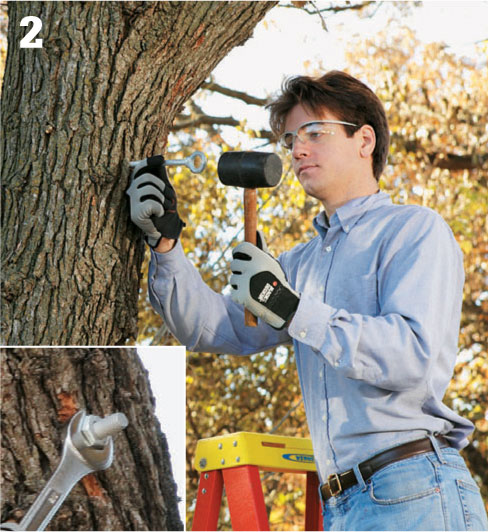
Insert an eyebolt (stainless steel or triple-dipped galvanized) through the guide hole and then secure it to the tree with a wide washer, such as a fender washer, and a nut. The end of the bolt (inset) should protrude 1 to 2" past the tree. Inspect the nut periodically to make sure it is still tight.
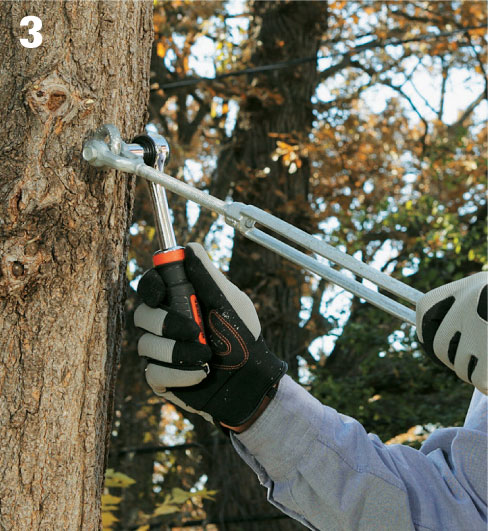
Attach a turnbuckle to the eyebolt on the low end of the cable run. The turnbuckle should be sized and rated for the cable size, the total span and the maximum weight load of your zip line.
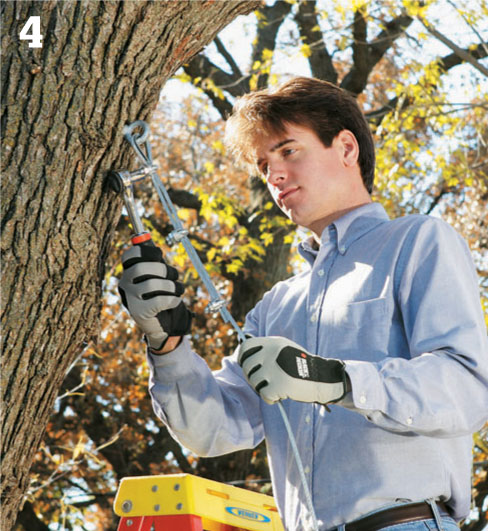
Loop the cable (use only braided, stainless steel cable rated for zip line usage) through the eyebolt on the high side, place a metal thimble at the loop, then secure it in place with three cable clamps.
Thread the loose end of the cable through a non-steel-belted car tire to serve as a safety bumper at the low end of the run. Drill two holes to pass the cable through the center of the tire, then drill several holes in the bottom of the tire for drainage. An alternative option is to install a bungee brake sold by zip line suppliers.
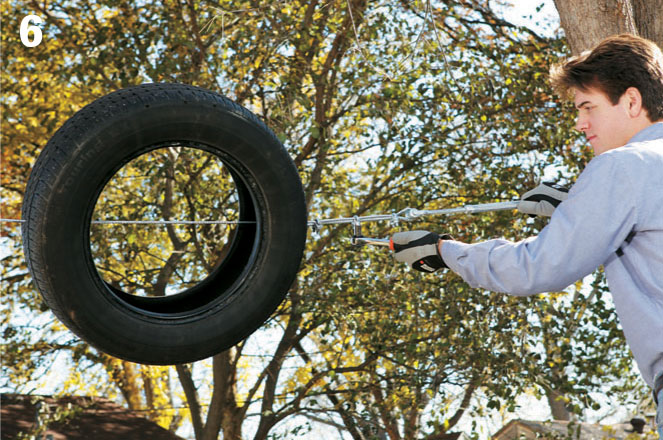
Secure the cable to the turnbuckle at the low end. The turnbuckle should be loosened almost all the way so you can tighten the cable. Pull the cable through the turnbuckle as tightly as you can, and then lock it in place with three cable clamps. Test the tension in the cable, and tighten the turnbuckle as needed.
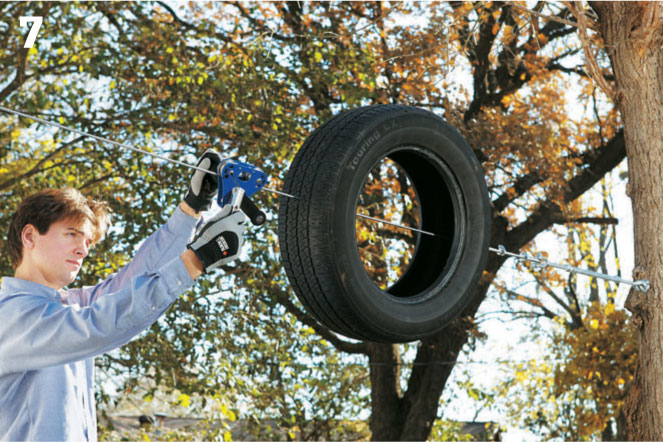
Clip the handle or trolley onto the cable according to the manufacturer’s instructions and test out the zip line, taking care to follow all safety precautions.
Zip lines and launching platforms are perfect additions to treehouses, provided the proper safety equipment is available. Launching platforms should not be considered play areas, and the launching platform should be almost fully enclosed by a 36" code-compliant railing and balusters.
Zip lines need an elevated platform for starting the ride. A treehouse can be ideal for this, offering plenty of elevation for most zip lines, as well as a nice, solid base for launching. Perhaps most importantly, if you’re up in the treehouse having fun when Mom calls you in for dinner or bedtime, at least you can end your play on a high note, with a triumphant last ride down the zip line. Sure beats trudging down the ladder grumbling about how unfair it is that you have to eat and sleep.
If it isn’t feasible to use your treehouse as a launching platform, you can simply build a standalone platform designed specifically for this purpose. This can be quite small—say, 3 × 3 feet—and can hang from a tree or from one or more support posts.
In any case, it’s important to note that a launching platform should not be designed or used as a general play area. For one thing, it has a fairly large opening without a safety railing, and second, the rider should not be distracted as he prepares for the launch, lest he forget to grip the trolley bar with both hands, for example. The first rule of the launching platform must be: One person at a time on the platform. With a group of kids crowding around itching to take a ride, one can only imagine the kinds of hazards they might invent.
A standalone launching platform can employ any of the platform design elements and anchoring techniques discussed in the treehouse building techniques section (pages 60–83). A simple version uses a saddle design in which the platform joists anchor to either side of the tree, with two knee braces doing the same a few feet below.
Depending on the size of the host tree, the platform deck can be around 3 to 4 feet wide and 3 to 4 feet deep. It should have a 36"-high railing on the sides, with balusters spaced just under 4" apart. The weight loads are pretty minimal here, so a 2 × 6 frame with a 2 × 4 railing is suitable for a small platform like this.
For access to the platform, a permanently attached ladder, such as the double-rung and flat-rung styles shown on pages 126 through 128, is a good option that’s relatively easy to build. The access ladder should approach from the side and include a safety rail across the top of the opening. The height of the platform is up to you, but it must provide a sufficient drop in elevation for a good ride; a good rule-of-thumb dictates at least a 75-foot run and a 5-foot drop in elevation.
 Rock Climbing Wall
There seems to be something Darwinian in a kid’s innate desire and ability to climb. And they’ll use anything to “get off the deck,” as rock climbers say. This makes a climbing wall a good bet for a treehouse accessory. Climbing walls build muscles and confidence and are probably the most fun of all modes of access for getting up into a treehouse.
A climbing wall is easy to build, but it takes the right equipment to make sure it’s safe, versatile, and suitable for the resident climbers. While the wall structure is a simple assembly of framing lumber and painted plywood, the holds—the roughly textured, contoured pieces used for climbing—should be chosen carefully to accommodate the climbers’ ages and abilities. Rock climbing equipment manufacturers make this easy by offering a variety of sets of holds in a range of sizes and shapes.
The climbing holds are secured to the wall with bolts and T-nuts, which affix themselves to the backside of the plywood, so they’re always there when it’s time to change the climbing route. Therein lies the unique benefit of climbing walls: You can easily rearrange the holds to create new routes at any time. The wall’s versatility depends on a few factors: the overall size of the wall, the number of holes (and T-nuts) in the plywood, and the number of holds you have to work with.
For toddlers and elementary-school-aged climbers, plan to purchase about 32 holds per 4 × 8-foot section of wall. Older climbers can do well with fewer holds—about 18 to 24 holds per 4 × 8-foot section. It’s well worth it to buy a good set up front to make the wall both versatile and fun to use. A set of 32 holds with hardware costs around $80 to $120. It’s also recommended that you buy from a legitimate rock climbing gear supplier, rather than a toy company, which might have cheap plastic holds that aren’t sturdy and don’t simulate the feel of real rock.
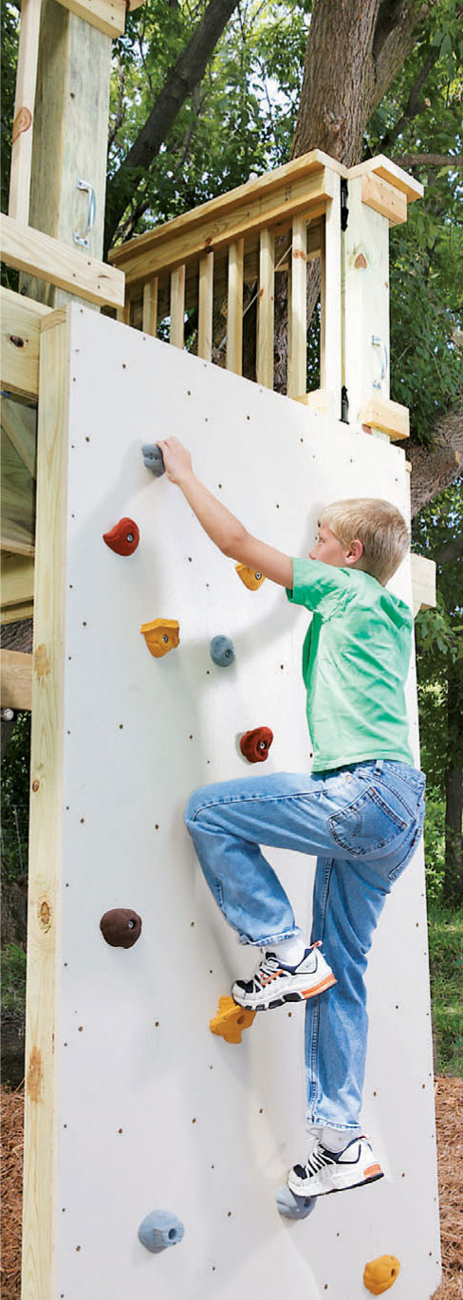
Rock walls are great skill-builders for climbers of any age. With a sizeable wall and plenty of holds, you have the flexibility to change the routes periodically to keep things interesting and challenging.
A variety pack of holds—with plenty of medium- and large-size pieces—is ideal for a treehouse rock wall. Make sure the holds and all hardware are rated for outdoor use.
To build a simple vertical wall that’s attached to the ground at the bottom and the treehouse structure at the top, start by constructing a 2 × 4 frame sized to match the overall dimensions of the wall. Cut the outside studs the full length of the wall minus 3", then cut a top and bottom plate to fasten to the studs. Assemble the frame with 3" deck screws or 16d galvanized common nails. Install interior studs between the plates, spacing them 16" on center. If the wall is wider than one 4 × 8 sheet of plywood, make sure there’s a stud centered behind every plywood seam.
Prime each panel of 3/4" exterior-grade plywood on all surfaces, using an exterior-grade primer. Paint the front faces of the panels (which should be the “A,” or better, side) with exterior house paint mixed with a texture material, or use non-slip flooring paint. Creating a textured surface offers several advantages: it makes the wall surface less slippery, to facilitate climbing; it helps to prevent the holds from turning under force—a common problem with some single-bolt holds; and, perhaps most importantly, it keeps the holds from sticking to the paint.
You can create the textured surface by simply adding a texture material, such as SharkGrip, to exterior house paint, or use an exterior flooring paint designed for patios and pool surrounds, such as Floor-Tex. Apply the products following the manufacturer’s directions. Paint the edges and back faces of the panels with ordinary exterior house paint.
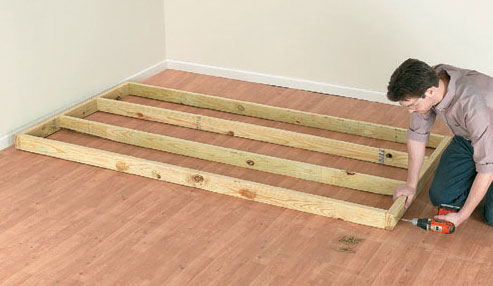
Build the wall frame with pressure-treated 2 × 4s. Large or freestanding walls might require larger framing members.
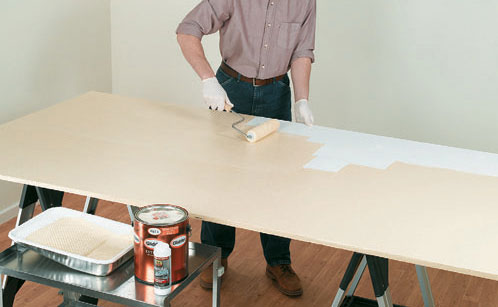
A texture additive turns ordinary house paint into a highly workable texture paint. Lightweight, low-density materials, such as polymer beads, are easy to work with because they remain suspended in the paint; sand and other heavy materials tend to sink, requiring frequent mixing.
Offsetting the holes for the climbing holds by 4" between rows gives you the best distribution over the wall area. Keeping the holes 2" from the side edges ensures the T-nuts will be clear of the wall framing.
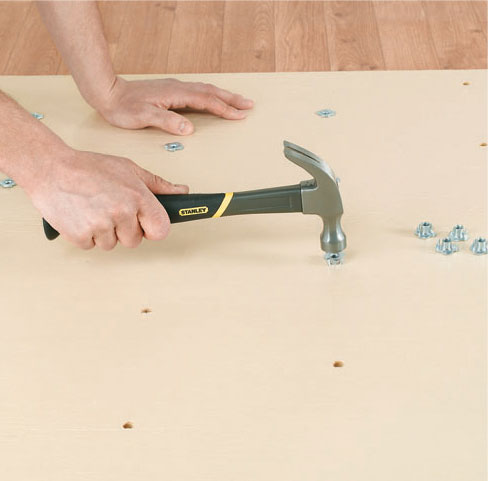
Hammer the T-nuts into back of the wall panel(s). Make sure that the nuts are perfectly flat so that the threaded sleeves are properly aligned for the bolts.
Lay out the hole pattern onto the front faces of the panel(s), as shown here. A full 4 × 8-foot panel gets 72 holes. Drill each hole with a 7/16" spade or twist bit, keeping the bit straight and drilling from the front face of the panel to prevent tearout on the exposed surface. If desired, prime and/or paint the hole interiors for added moisture protection.
Install the T-nuts onto the back face of the panel(s), using a hammer. Center each nut over a hole, with the nut’s sleeve facing into the hole. Carefully hammer the nut, driving the pointed tips into the plywood, until the rear flange of the nut is flush with the plywood surface. Every hole in the panel(s) should get a nut. Note: To prevent corrosion, be sure to use exterior-grade nuts and bolts. Most climbing wall suppliers offer stainless steel bolts and zinc-plated T-nuts—a good combination for long-term strength and corrosion resistance.
Fasten the panel(s) to the 2 × 4 frame with 15/8" deck screws driven every 6" along the edges and every 8" in the field of the sheet. Countersink the screw heads slightly below the surface of the plywood. If the wood splinters around the heads, drill countersunk pilot holes for the screws. To automatically square up the frame as you work, start at one corner of the wall, aligning the plywood with the two adjacent edges of the frame. If you’re using more than one panel, make sure the joints between panels are tight and flush, with no gaps or raised edges.
To install the wall onto the treehouse, first dig a small trench under the wall location, about 4" deep. Fill the trench with gravel, then level and compact it firmly. Cut a base from a pressure-treated 4 × 4 to match the width of the wall. Drill three 3/8" holes through the base. Level the base atop the gravel. Measure to confirm that the wall will be flush with or slightly below the top of the treehouse platform when installed. Anchor the base to the ground with 12" lengths of #4 rebar.
Set the wall on top of the base. Anchor the top end of the wall to the platform structure with 3/8" carriage bolts or machine bolts and washers. The bolt heads should be on the front face of the wall and should be countersunk into the wood if they’re not rounded. Fasten the bottom end of the wall to the 4 × 4 base with 4" lag screws.
Arrange the holds as desired, securing them to the T-nuts with 3/8" stainless steel bolts (most have Allen heads). Torque the bolts as specified by the hold manufacturer.
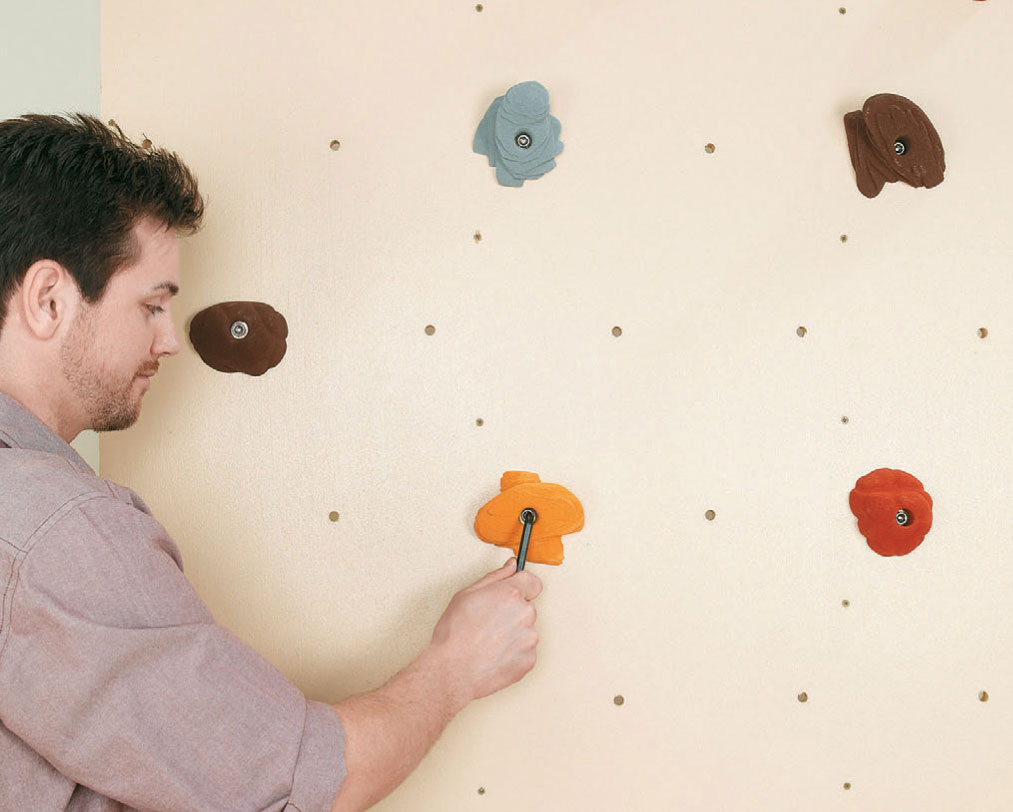
Bolt the holds to the wall, making sure they’re tight and properly positioned. Now it’s time
 Water Cannon
This is without question the most fun you can have with pressurized water. And after putting in a number of weekends on the treehouse itself, you’ll be glad to know that you can easily create this cannon in an hour, using parts that cost less than $15 at your local home center. That means you can start the project during the cool hours of a summer morning and have the cannon installed and ready for battle in the midday heat.
The cannon shown here is made with 3/4" PVC pipe and fittings. All of the unthreaded connections are glued with PVC cement (solvent glue). If you’re handy with a torch, you could create a similar version using copper pipe. Once assembled, the cannon mounts onto a swiveling caster screwed into a post or the top of a treehouse railing.
The nozzle at the end of the cannon barrel is an ordinary straight-style garden nozzle, the type that you twist to turn on the water and adjust the spray. In this case, it’s best to leave the nozzle open and use the ball valve located on the cannon’s handle to control the water flow. Nozzles are available in a few different styles. Standard twist types offer the most adjustment capability and plenty of power at full concentration, while jet-style nozzles deliver a highly concentrated stream and the longest range (but this might be overkill for most applications).
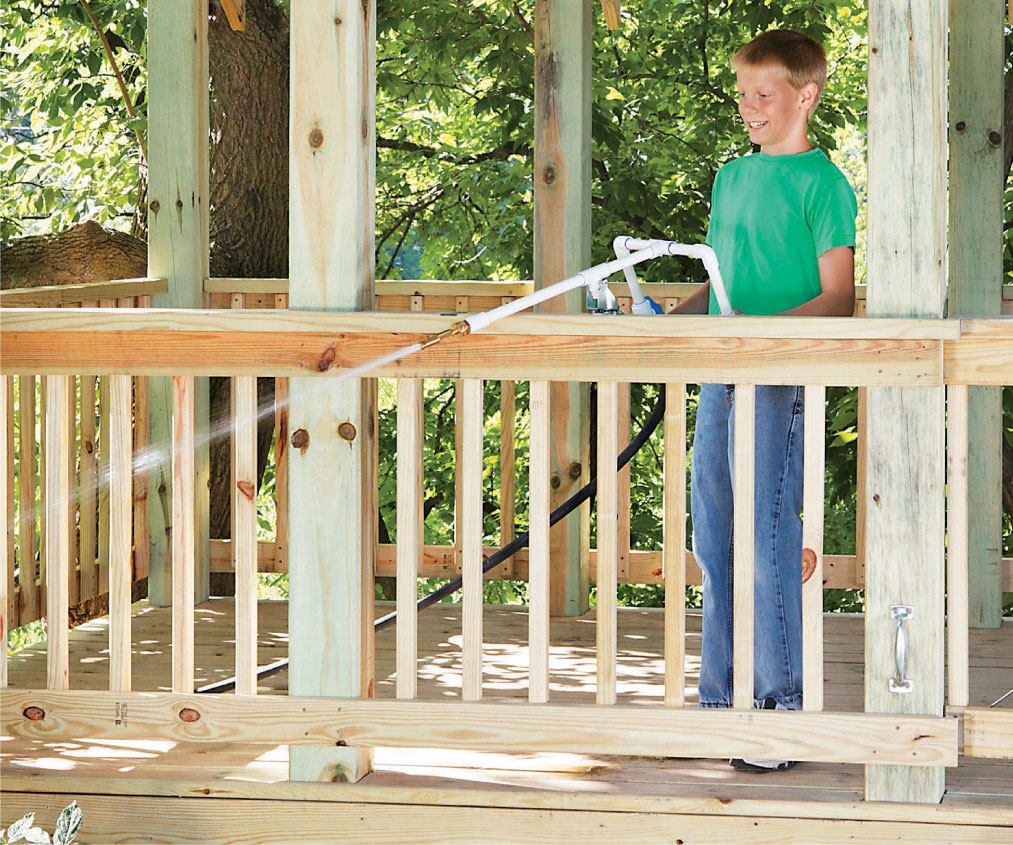
Man the ramparts (and water the lawn while you’re at it)! This water cannon has its own shutoff valve and nozzle control, so you’ll never have to leave the castle unguarded to reload or retool.
A coil-type garden hose provides the best maneuverability at the cannon end of the water line. You can attach a short coil hose to a standard garden hose, leaving plenty of slack in the coil for easy movement.
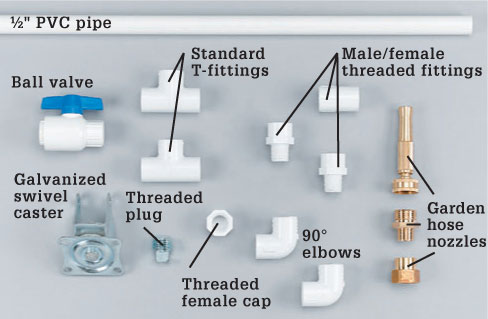
The cannon is as easy to build as it is fun to use.
To build the cannon, cut two lengths of pipe at 11" and 6" for the long and short barrel pieces. Cut the pipe with a hacksaw, tubing cutter, or miter saw. A jigsaw with a fine-tooth blade works well, too. Clean the cut ends. Onto one end of the long barrel piece, prime and solvent-glue a pipe to hose fitting with a 1/2" male threaded end.
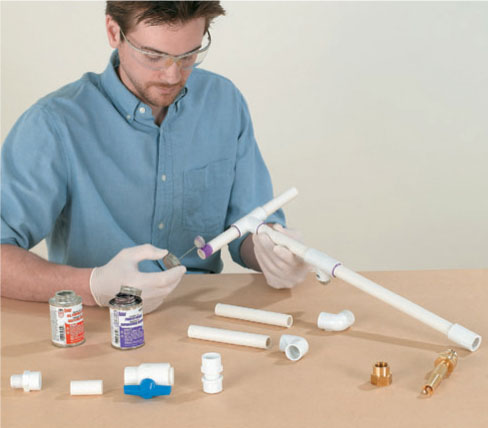
Solvent-gluing plastic pipe is easy: Brush primer onto the mating parts, then brush on the cement. Quickly fit the pieces together, giving them a 1/4-turn to spread the glue, and hold firmly for 30 seconds. The directions on the can tell you exactly what to do—just be sure to follow them carefully.
The assembled cannon. You can set the angle of the handles to suit the installation and the gunner’s position. Drill the hole for the caster axle bolt (inset), making sure the upper portion of the plug will maintain a watertight seal.
Glue the other end of the long barrel to a T fitting with a threaded down tube, then glue the short barrel to the opposite unthreaded tube of the T. The threaded tube end of the T is where the cannon mounts to the caster, via a hole you will drill through the T. To prevent water from escaping through the T and the hole, cap off the T end with a threaded male plug glued in place and threaded in as far as possible.
Next, glue a standard T to the bare end of the short barrel so the two top tubes are level. Cut two lengths of pipe at 4", and glue these to the T. At the end of each 4" piece, glue an elbow that angles down and back about 20 degrees from vertical, or as desired. To the open ends of the elbows, glue two 5-1/2" lengths of pipe to create the handles. Then, glue on a pipe to male threaded fitting. Set the assembly aside for two hours (or as directed) to let the solvent glue cure.
At this stage, the cannon is perfectly symmetrical, and the remaining fittings are screwed on. This means you can always change which side receives the valve and hose. Onto one of the male threaded ends, screw a PVC ball valve, followed by a threaded pipe to hose fitting (1/2" male end screws into valve; 3/4" female end receives garden hose). On the other handle’s fitting, screw a threaded cap. You can remove this cap to drain the handle, as desired. To facilitate tightening and prevent leaks, use Teflon tape for all threaded connections (except the glued plug on the barrel T).
To mount the cannon, remove the wheel from the caster’s axle bolt. Carefully drill a hole through the T on the cannon barrel, drilling all the way through the fitting and plug and keeping the hole close to the bottom end of the T—you want to leave plenty of threaded area to ensure a watertight seal above the hole. The hole should be just large enough to fit the axle bolt. Fasten the caster upside down onto the treehouse railing, a post, or other anchor point, using deck screws. Fit the axle bolt through the caster arms—with the cannon T in the middle—and secure it with the nut.
Attach a coil-type or other garden hose to the handle, and run the water full blast for a few seconds to flush out any plastic debris. Add the nozzle, and you’re ready to defend the fortress!
 Speaking Tube
For the average treehouse dweller, a speaking tube is a special telephone useful for spies, pirates, and clubhouse top brass. By standard definition, a speaking tube is a 19th-century intercom system that uses pipes to transmit sound over relatively long distances. They were used in Victorian homes to talk with visitors at the front door and to summon servants from distant rooms. And kids will like to know that speaking tubes have long been important for communication on naval ships, where some are still in use today.
You can get a sense of the effectiveness of speaking tubes by whispering back and forth through a long pipe at the home center or through a garden hose at home. Even the slightest murmur can be clearly heard across the longest pipe. This is because sound travels on air, which is channeled through the pipe directly from the speaker to the listener, without being dispersed and dissipating into the open.
Constructing a speaking tube is very simple, and you can use a variety of pipe or tube materials—really anything that moves air efficiently. Here, you’ll see how to install an underground speaking tube made of PVC pipe and learn about a vertical version made with copper pipe. PVC pipe also works just as well as copper for an aboveground tube. For long underground runs, you might prefer to use flexible PE tubing for the underground portion and construct the exposed ends with rigid PVC or copper pipe and fittings. Whatever tubing you use, it’s a good idea to test out the material and the overall tube design before installing or burying any parts.
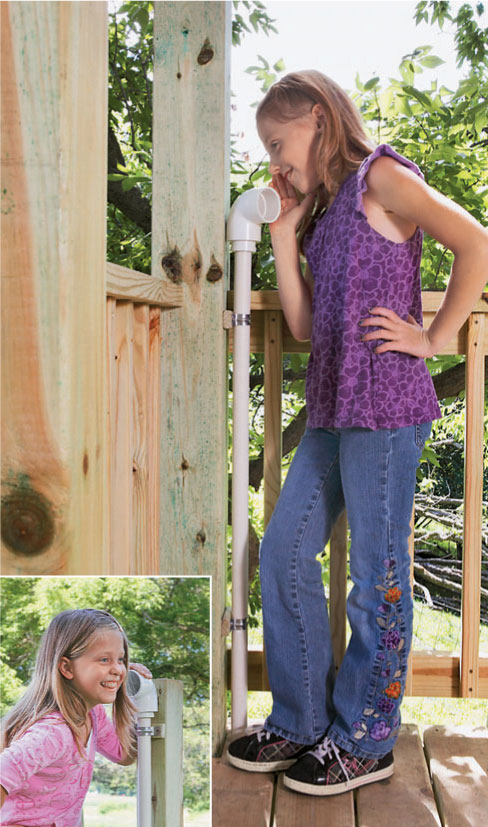
A speaking tube is a fail-safe communication device for transmitting top-secret information or fresh knock-knock jokes. You may have tried one of these at a public playground, but your own version is likely to work much better.
Underground tubes seem especially magical because you don’t see any of the tubing connecting the visible talking/listening uprights at the ends. The buried piping can run under an entire play area and make turns as needed along the way. An underground tube can also be connected to a vertical tube to send messages between a treehouse and a point on the ground some distance away.
A speaking tube can work well at 50 yards or even farther between the ends. That’s probably a lot more than you need—especially when you consider that an underground tube requires trenching. But it’s useful information if you’re planning to make long distance calls. The important thing is to test the system before digging the trench. Fortunately, PVC pipe is cheap enough that you can buy a couple of extra lengths to test a longer tube, even if you end up not using it.
To plan your tube route, lay out lengths of 1" rigid PVC pipe above the intended underground path, using PVC couplings to join the pieces. Use a 45° or 90° elbow to make turns, as needed. Just keep in mind that the more efficiently the air flows through the pipes, the better the sound will be at the receiving end. Cut the pipes to length as needed, using a tubing cutter, hacksaw, or jigsaw with a fine-tooth blade.
Each end of the buried portion of the speaking tube feeds into an upright section that includes the open end for listening or speaking into. These can be any height you like. To create each upright, dry-fit (no glue) a 90° elbow onto the end of the underground pipe so the open end of the elbow is pointing straight up. Add a vertical section of pipe, followed by another 90° elbow and a 1-1/2" or larger reducer fitting. The reducer serves as the mouthpiece, the equivalent of the cone-shaped “trumpet” end found on traditional speaking tubes.
The uprights should be secured to some kind of rigid structure, such as a tree, a treehouse support post, or a short 4 × 4 post installed for this purpose. Install a short post by setting it into a hole and backfilling around the post with tamped layers of soil and compactible gravel. With both uprights dry-assembled, give the speaking tube a test run.
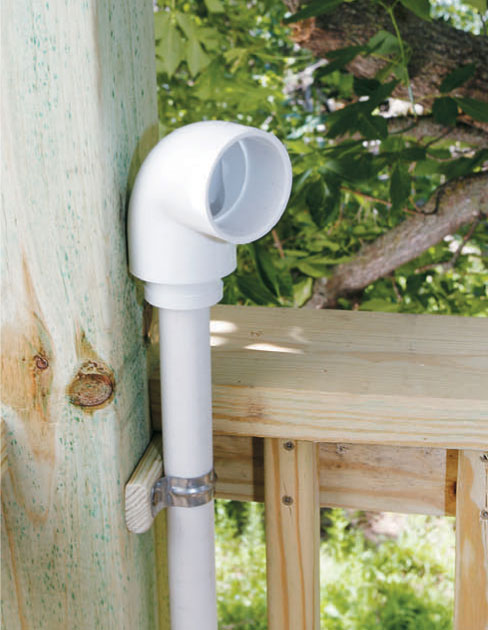
The end of the tube is made with a PVC reducing fitting. You can embellish this with a larger cone-shaped device, which may enhance the sound somewhat but is not necessary.
When all looks good, dig the trench for the underground pipe, and permanently install any support posts for the uprights. Be sure to “call before you dig,” so you know for sure there aren’t any utility lines in the installation area. Dig the pipe trench about 6" deep in an unsodded play area or 9" to 12" deep under a lawn.
Assemble the underground pipe run using PVC primer and cement (solvent glue), as directed by the manufacturer. The basic gluing process is to brush primer onto the mating parts, then brush on a coating of cement. Quickly fit the pieces together, giving them a twist to spread the glue, and hold the pieces firmly for 30 seconds. Make sure the 90° elbows at the ends of the underground section are pointing straight up.
Lay the completed pipe into the trench. Glue together the pieces of the uprights, starting with the straight pipes leading from the underground elbows and finishing with the reducing fittings. Let the entire pipe assembly rest undisturbed for at least two hours, or as directed.
Join the tube parts with solvent glue. The glue sets up in 30 seconds, but the joints shouldn’t be stressed for two hours.
After the solvent glue has cured, lay the pipe into the trench. Secure the uprights to their supports with metal or plastic pipe straps and deck screws. Backfill the trench with the displaced soil, tamp it flat, and replace the sod or ground cover, as applicable.
Tip: To prevent kids from dropping stuff down into the tube’s ends, cut a piece of hardware cloth to fit inside the reducer, securing it with a little caulk or epoxy. Anything dropped into the pipe will reduce the tube’s effectiveness, and extricating something valuable requires digging up and cutting into the tubing.
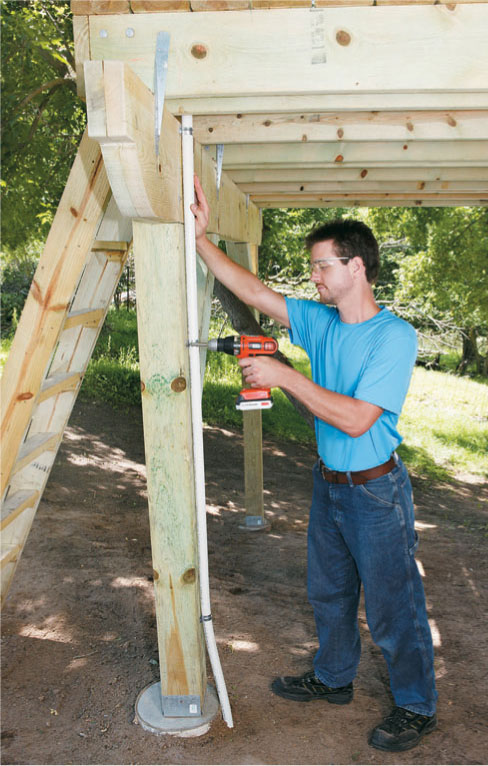
PVC pipe is flexible and strong, but it is breakable. Secure the uprights with pipe straps to prevent any damage.
 Slides
As an elevated perch and play structure, a treehouse for young kids pretty much has to have a slide. This leaves you with two options: buying a plastic prefab slide or building your own with lumber and (the secret ingredient) plastic laminate. That’s right, the countertop material. But we’ll get to those details later.
Prefab slides come in a wide range of sizes and shapes, from straight waves to curlicue “turbo” tubes. They also range widely in price, from sort of pricey to turbo expensive. Large or elaborate models may require assembly, but otherwise all you have to do is anchor the slide at the top and bottom and add a mid-span support, if applicable.
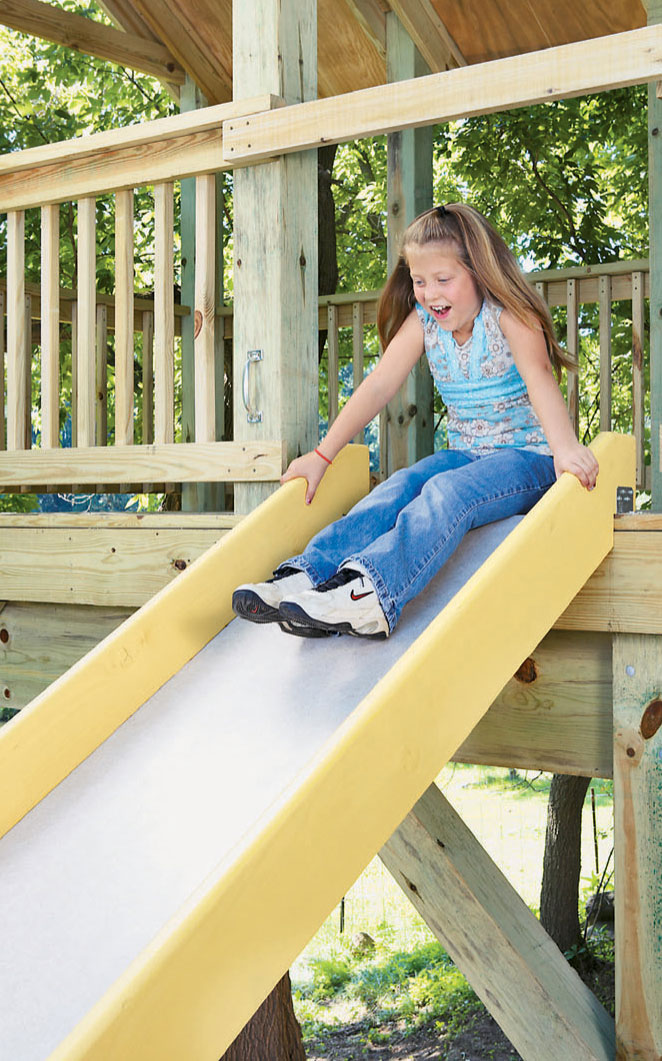
A slide is an ideal accessory for any kids’ treehouse that’s close to the ground. All slides should have a safety rail that continues the line of the railing across the opening at the top of the slide.
There are a few reasons you might prefer a homemade design. First, DIY slides can be extra slippery and fast. That’s what slides are for, right? Many plastic slides create too much friction for a smooth, swift glide. Second, while a homemade slide contains some plastic, it doesn’t have to look like a monstrous toy in a glaring primary color, as do most prefab models. The sides are painted redwood, and the slide surface can be any (light) color you choose from your laminate supplier. And finally, you might be tempted to build a slide simply because you can, and because it certainly will be the only one like it on the block.
The stringers are the two structural sides of the slide, which also create the side walls to prevent sliders from making an early dismount. For a slide that’s roughly 8 feet long, 2 × 8 redwood or cedar stringers (at 10 feet long) are a good option. Be sure to use lumber that’s smooth on all sides and edges. In terms of grade, “all-heart” redwood will last longer in the weather than lower grades. You’ll start by custom-cutting one stringer to fit the installation, then use the cut piece as a pattern to mark and cut the remaining stringer so the two are identical.
Hold one of the stringer boards in place so it spans from the treehouse platform (the launching area) to the ground (the landing area). The standard slope for slides is about 30 degrees, and you can adjust this as desired. The steeper the slope, the faster the slide. Just keep in mind that this slide doesn’t level out at the bottom like most playground slides, so be careful not to make it too fast.
Mark the bottom edge of the board at both ends for the initial cuts to fit them to the platform and ground. You’ll probably cut more than once for a good fit. Cut the ends with a circular saw or jigsaw. Test the fit and fine-tune the cuts as needed. The top ends of the stringers are notched to fit over the end of the platform (see photo on 160). The bottom end has a level cut that follows the ground and a plumb end cut that’s perpendicular to the level cut.
Shape the top corners of the stringer with 1"-radius roundovers, or as desired. Make the cuts with a jigsaw or handsaw, and sand them smooth. Lay the cut stringer over the remaining board and transfer all of the cuts and roundovers, then cut the remaining stringer.
The slide surface is 3/4" ACX plywood covered on its top face with plastic laminate (a.k.a. Formica). Laminate sheets are commonly available in widths of 3 to 5 feet and lengths of 6 to 12 feet. For most slides, a 3-foot-wide piece is more than enough. Be sure to choose “standard” laminate designed for countertops; thinner VT (or vertical-grade) laminate isn’t as durable. Also be sure to select a light color to reflect heat. A standard textured surface is preferable to a high-gloss surface.
You can build the slide surface in a few different ways. One is to rough-cut the plywood to size, apply the laminate, then trim the edges of both the plywood and laminate with a saw (cutting from the backside of the plywood). Another is to cut both materials to the finished size before gluing on the laminate. A third method follows the standard process for countertops and other finished surfaces: Cut the plywood to size, apply the laminate so it overhangs all of the plywood edges, then trim the laminate flush to the plywood with a router and flush-trimming bit. This method leaves the most room for error when gluing the laminate, and it’s the best way to cut the laminate without chipping the edges.
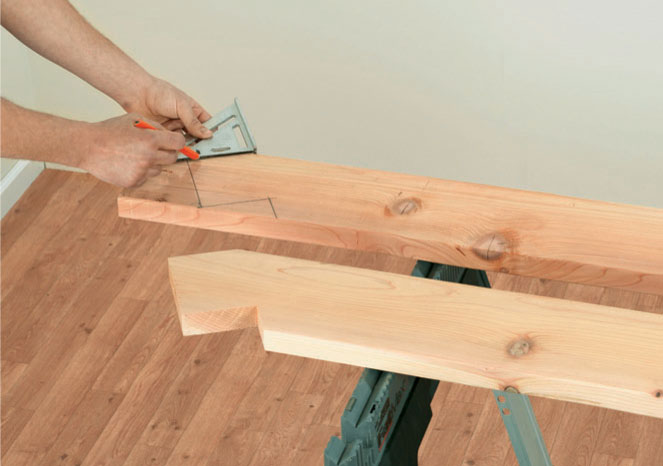
Position the first stringer board at approximately 30°, and mark the ends for a notch cut at the top and a level cut at the ground.
Glue the laminate to the smooth face of the plywood, using contact cement. Using old mini blind slats or clean wood strips as spacers helps you position the laminate before sticking it down. Once it’s fully bonded, trim the laminate flush to the plywood edges.
Cut the plywood to the desired length and width, using a circular saw. It’s a good idea to make the finished slide at least 24" wide, to accommodate thrill-seeking adults. Add 1" to the desired width of the slide surface, because 1/2" of each side edge will be captured in a dado groove in the stringer. Sand the top face of the plywood (the good “A” side) so it is smooth and flat.
Cut the laminate sheet to a manageable size, about 3" longer and wider than the plywood piece, using tin snips, a router, or a circular saw. Apply the laminate with waterproof contact cement, following the manufacturer’s directions. After the laminate is stuck, roll it out carefully with a J-roller to strengthen the bond and remove any air bubbles. Trim the excess laminate along the edges of the plywood with the router.
Using the router and a roundover bit, round over all exposed edges of each stringer. This is a critical step for safety and to prevent splinters, so if you don’t have a router, round over the edges with coarse sandpaper and a sanding block. Don’t rout or sand the edges of the dadoes.
Sand all surfaces (except the dadoes) thoroughly, making sure everything is smooth and splinter-free, working up to at least 150-grit sandpaper. Tape off the dadoes, then prime and paint the stringers with quality exterior primer and house paint. It’s a shame to hide redwood with a thick coat of paint, but it’s necessary to prevent weathering that leads to splinters and cracks.
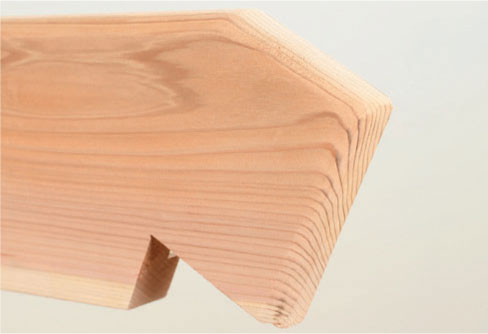
Smooth surfaces are a key safety feature. Rounding the edges of the stringers helps prevent splintering and makes them more comfortable for gripping and gliding.
The best way to join the slide surface with the stringers is by setting the surface’s edges into dadoes, which you can mill with a router or cut with a table saw and a dado blade. If you don’t have one of these tools, you can simply use 2 × 2s underneath the slide surface, fastening them to the stringers and plywood with glue and screws.
To mill the dadoes with a router, set up an edge guide on the router base so the bottom of the dado will be 1-1/2" from the bottom edge of each stringer. Mill the dadoes with a straight bit so the finished groove matches the thickness of the slide surface (it will probably be a little over 3/4").
Assemble the slide by applying exterior-grade (waterproof) wood glue to the dadoes and fitting the stringers over the sides of the slide surface. Clamp the assembly together, making sure the stringers are perpendicular to the surface. After the glue cures, seal the joints from moisture with fine beads of exterior caulk applied along the corners where the surface meets the stringers.
Mount the completed slide to the treehouse platform using galvanized metal brackets or another appropriate anchoring method. Fasten a bracket to each stringer using short carriage bolts or screws, then fasten the brackets to the platform with lag screws or heavy-duty deck screws.
At the bottom end, the slide should be resting on firm, level ground. Add plenty of soft mulch or other suitable groundcover in the slide landing area. Replenish the groundcover as needed to ensure a soft landing.
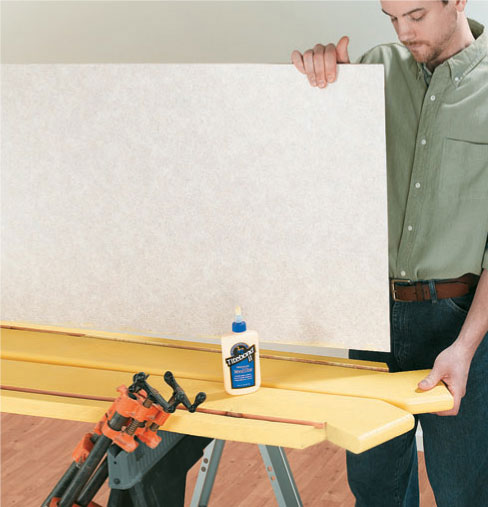
Dadoed stringers make for the cleanest assembly. Be sure to use waterproof glue (polyurethane glue or exterior-rated wood glue) to permanently bond the slide surface into the stringers.
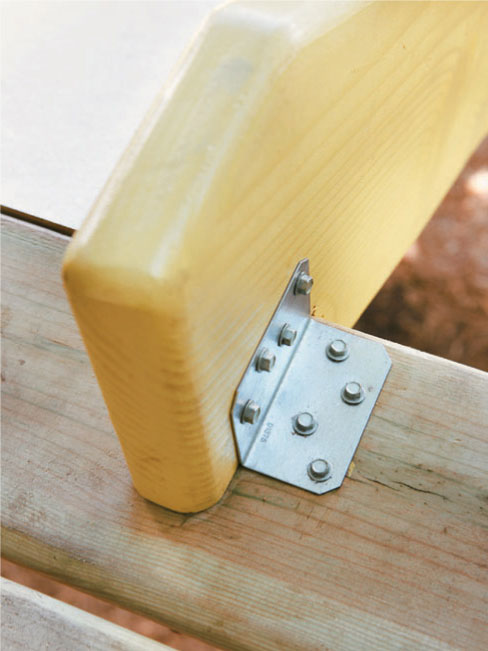
Mount the top ends of the slide stringers to the treehouse with metal brackets and screws (or bolts)—all materials must be corrosion-resistant.