REST – this folder is where we put the class for managing REST API calls.
Services – this folder is where we put the interfaces that the application is going to need.
Classes – this folder is where application-specific classes such as Helpers, Settings, and Data Manager are stored.
Pages – this folder is where the XAML files needed for the application are stored.
We are doing it this way in order for us to easily manage the files by just looking at the folder for ease of navigation and maintainability.
Implementing the Service Interfaces
We are going to use an interface to define a common method in which other applications can implement it. This is because Android and iOS platforms have different code implementations to deal with device vibration, playing a sound, and storage.
An interface is just a skeleton of a method without the actual implementation. This means that the application which implements the interface will create a class to perform a concrete platform-specific implementation.
The IHaptic Interface

Adding a new interface file
The preceding code is nothing but a simple interface definition that contains a void method called ActivateHaptic() .
The ILocalDataStore Interface
The ILocalDataStore interface contains two main methods: SaveSettings() takes a file name and a text as the parameter. The LoadSettings() method takes a file name as a parameter and returns a string type.
The ISound Interface
The ISound interface contains two main boolean methods: PlayMp3File() and PlayWavFile() , which takes a file name as the parameter.
The reason we are creating the preceding services/interfaces is because iOS and Android have different code implementations for setting device vibration and sound. That’s why we are defining interfaces so both platforms can just inherit from it and implement code-specific logic.
Helper.cs
Settings.cs
PlayerManager.cs
MemoryGame.cs
The Helper Class
The Helper.cs file is composed of two classes: StringExtension and Utils . The StringExtension class contains a ToIntenger() extension method that accepts a string containing a valid numerical value and converts it into an integer type. The Utils class, on the other hand, contains an IsConnectedToInternet() method to verify Internet connectivity. We will be using these methods later in our application.
The Settings Class
The Settings.cs file contains a few static properties that we are going to use in the application. They are defined static so that we don’t need to create an instance of the class when calling them; that’s what the Helper or Utility class is meant for. We are defining them in the Settings.cs file to separate them from the Helper class for one sole purpose: having a central location for shared properties that can be accessed across all our applications. You can think of it as a local data store for the user’s data and application configuration.
The PlayerFirstName is a static property that contains Expression-Bodied Members for getting and setting values. Expression-bodied functions are another syntax simplification in C# 6.0. These are functions with no statement body. Instead, you implement them with an expression following the function declaration.
The preceding code gets the value of PlayerFirstName and sets a default value to string.Empty.
The preceding code sets the PlayerFirstName with the new value assigned and stores it locally in the device.
For more information on Expression-Bodied Members, read the following: https://docs.microsoft.com/en-us/dotnet/csharp/programming-guide/statements-expressions-operators/expression-bodied-members
The Settings plug-in saves specific properties directly to each platform’s native setting APIs (NSUserDefaults in iOS, SharedPreferences in Android, etc.). This ensures the fastest, securest, and most reliable creation and editing settings per application.
For more information about the Settings plug-in, see the following: https://jamesmontemagno.github.io/SettingsPlugin/
The DTO Class
The DTO file contains three main classes: The PlayerProfile, PlayerScore, and PlayerData. We will use these classes as DTOs for passing information from one place to another.
The GameAPI Class
The preceding code is pretty much self-explanatory, as you could probably guess by its method name. The class just contains a method that calls the API endpoints that we created in the previous section. If the code does not make sense to you now, don’t worry as we will talk about it later in this section.
Async and Await Overview
Before we dig into the code implementation details of the GameAPI class, let’s have a quick overview of the Async and Await concepts in C#.
Asynchronous programming is all about writing code that allows several things to happen at the same time without “blocking,” or waiting for other things to complete. This is different from synchronous programming, in which everything happens in the order it is written. In order to perform an asynchronous operation, a method should be marked as async: this tells the compiler that the method can run asynchronously. The await keyword is used in conjunction with the async keyword to tell the compiler to wait for the Task without blocking code execution.
The async keyword only enables the await keyword. The await keyword is where things can get asynchronous. Await is like a unary operator: it takes a single argument, an awaitable Task or Task<T> (an “awaitable” is an asynchronous operation). Await examines that awaitable to see if it has already completed; if the awaitable has already completed, then the method just continues running (synchronously, just like a regular method).
The Task and Task<T> represent an asynchronous operation that can be waited. A Task does not return a value, while Task<T> does.
Note
If an async method doesn’t use an await operator to mark a suspension point, the method executes as a synchronous method does, despite the async modifier. The compiler issues a warning for such methods.
Here’s a brief definition of the async and await keywords taken from the official documentation here: https://docs.microsoft.com/en-us/dotnet/csharp/programming-guide/concepts/async/
The async and await keywords in C# are the heart of async programming . By using those two keywords, you can use resources in the .NET Framework, .NET Core, or the Windows Runtime to create an asynchronous method almost as easily as you create a synchronous method . Asynchronous methods that you define by using the async keyword are referred to as async methods.
Method Definitions
The APIUri is a private variable that holds the base API endpoint value. In this example, it uses the value http://localhost:56393/api/game/players, which points to my local development IIS Express host. The value “http://localhost:56393” is automatically created for you once you run the application in Visual Studio. You need to change this value with the published URI to where your API is hosted. We’ll talk more about that later in the Chapter 6.
It was my intent to put the value of APIUri within the GameAPI class for the sake of simplicity. In real-world applications, it is recommended to store the value of APIUri in a configuration file, where you can easily modify the value.
The HttpClient object is declared on the second line. HttpClient is a modern HTTP client for .NET. It provides a flexible and extensible API for accessing all things exposed through HTTP.
On the next line is the GameAPI class constructor. This is where the HttpClient is initialized and configured with a few properties for setting the MaxResponseContentBufferSize and DefaultRequestHeader media type.
The SavePlayerProfile() takes a PlayerProfile object and an optional bool isNew flag parameter. This method is defined as asynchronous by marking it as async and returns a Task of type bool.
Inside the method, we define a new Uri object that takes the APIUri as the parameter. We then serialize the data using Newtonsoft’s JsonCovert.SerializeObject() method and pass the result into a json variable. After the data has been serialized, we create a StringContent object with the format “application/json” and the encoding set to UTF8. The StringContent class creates a formatted text appropriate for the http server/client communication. After a client request, a server will respond with an HttpResponseMessage and that response will need a content; that can be created with the StringContent class.
In the next line, we create an instance of the HttpResponseMessage object and we check for the isNew flag to do some validation. If the flag value is true, we call an awaitable Task called ProcessPostAsync() and pass along the uri and content values. The awaitable Task return is then assigned to an HttpResponseMessage object called response. If the response is successful, then we set the value of Settings.IsProfileSync to true and return true to the method. Otherwise, if the flag value is false or the response isn’t successful, we simply return false to the method.
The SavePlayerScore() method is also an asynchronous method that takes a PlayerScore object as a parameter. The first line in the method defines a new Uri object that takes the $“{APIUri}/score” as the parameter. The $ character denotes an interpolated string. You can think of it as a shorthand syntax for the string.Format method, but it’s more readable and convenient. In this case, the value of $“{APIUri}/score” will be translated to “http://localhost:56393/api/game/players/score”.
Next, we serialize the data using Newtonsoft’s JsonCovert.SerializeObject() method and pass the result into a json variable. After the data has been serialized, we then create a StringContent object with specific formatting. It then returns true for a successful response and otherwise returns false.
The GetPlayerID() method is an asynchronous method that takes a string as a parameter and returns a Task of type int. Just like the previous async methods, the first line defines a new Uri object that takes an interpolated string value. The $“{APIUri}/{email}/” will be translated to something like “http://localhost:56393/api/game/players/testemail.com/”.
The next line initializes a variable called id of type int with a default value of 0. It then calls an awaitable Task called ProcessGetAsync()and passes the uri variable to it. If the response is successful, it calls another awaitable Task called ReadAsStringAsync() and assigns the result to a variable called content. It then deserializes the content value using Newtonsoft’s JsonConvert.DeserializeObject() and assigns the result to the variable called id. Finally, the value of id is returned to the method.
The preceding method is pretty much similar to the GetPlayerID() method except that it returns an object rather than an int. The GetPlayerData() method is also an asynchronous method that takes a string as a parameter and returns a Task of type PlayerData. The PlayerData is a class we defined in the DTO file that houses a few properties. The first line within the method defines a new Uri object that takes an interpolated string value. The $“{APIUri}/profile/{email}/” value will be translated to something like “http://localhost:56393/api/game/players/profile/testemail.com/”.
The next line initializes a variable called player of type PlayerData. It then calls an awaitable Task called ProcessGetAsync() and passes the uri variable to it. If the response is successful, it calls another awaitable Task called ReadAsStringAsync() and assigns the result to a variable called content. It then deserializes the content value using Newtonsoft’s JsonConvert.DeserializeObject() and assigns the result to the variable called player. If the response is not successful, then it returns the player variable with a null value to the method; otherwise, it returns the player variable with the associated data assigned from the API response.
The last two private methods in the preceding are used to handle common operations. The ProcessPostAsync() is an async method that takes a Uri and StringContent as parameters and returns a Task of type HttpResponseMessage. This method basically calls the PostAsync() method of the HttpClient object.
On the other hand, the ProcessGetAsync() takes only a Uri as a parameter and returns a Task of type HttpResponseMessage. This method calls the GetAsync() method of the HttpClient object.
For more information on consuming Web API from a .NET client, see the following: https://docs.microsoft.com/en-us/aspnet/web-api/overview/advanced/calling-a-web-api-from-a-net-client
The PlayerManager Class
The PlayerManager class is composed of a few methods for handling data retrieval and syncing. The class and methods are marked with the keyword static , so we can directly reference them without instantiating the object. Since this class is not tied up to any object that can change the behavior of the class itself and its member, it makes more sense to use static. Notice that each method calls the method defined in the GameAPI class. We did it like this so we can separate the actual code logic for ease of maintenance and separation of concerns.
The Save() method takes a PlayerProfile object as a parameter. The PlayerProfile is an object that we define in the DTO file, which houses a few properties. The code basically stores the value from the PlayerProfile object properties to the Settings properties. In other words, this method saves the player profile such as FirstName, LastName, and Email in the device’s local storage for future use.
The GetPlayerProfileFromLocal() method is the opposite of the Save() method. The code fetches the player information from the local device data storage and assigns them to the PlayerProfile object.
As the method name suggests, the UpdateBest() method updates the challenger score. The code checks for the existing top score from the local data store and updates the TopScore property with the current score if the challenger score is greater than the existing top score.
The GetBestScore() method takes an int as a parameter. The code basically compares the current score/level with the score from the local data storage and returns the highest value.
The Sync() method is an asynchronous method that returns a Task of type bool. The first line creates an instance of the GameApi object. If you remember, the GameApi class contains the code for communicating with the Web API endpoints. The next line of code initializes a bool flag in a variable called result.
Within try-block, the code checks if the challenger profile is already synced. If not, then it calls an awaitable Task from the GameApi class called SavePlayerProfile(), which takes a PlayerProfile object as the parameter and a bool parameter that indicates if the profile is new. The next if-condition checks for the existence of the challenger profile by validating the PlayerID property, which is stored in the local data storage. If the value is 0, then it calls an awaitable Task called GetPlayerID(), with an e-mail as the parameter, and assigns the result back to the Settings.PlayerID property. Otherwise, if the challenger already did a sync, it just updates the challenger score by calling the SavePlayerScore() Task.
If the code within the try-block fails, then it should go to the catch-block and return a false value to the method, indicating that the sync wasn’t successful.
Note
In real-world applications, it is recommended to handle specific exceptions and log them for debugging and easy troubleshooting.
The CheckScoreAndSync() is also an asynchronous method that takes an int as a parameter and returns a Task of type bool. The code basically validates the score; if the current score is greater than the existing top score, then it updates the existing top score from the local data storage with the current score and ultimately calls the Sync() method.
The CheckExistingPlayer() is an asynchronous method that takes a string as a parameter and returns a Task of type PlayerData. This method simply calls the awaitable Task called GetPlayerData() from the GameApi class and takes an e-mail as the parameter.
The Save() method saves the player information in the local device storage using the Settings plug-in.
The GetPlayerProfileFromLocal() method fetches the player information from the local device storage.
The GetPlayerScoreFromLocal() method fetches the player score details from the local device storage.
The UpdateBest() method updates the player score in the local device storage.
The GetBestScore() method fetches the player top score from the local device storage.
The asynchronous Sync() method syncs the player profile and score details with data from the database into the local data storage.
The asynchronous CheckScoreAndSync() method updates the top score to the database.
The asynchronous CheckExistingPlayer() method verifies the existence of a challenger from the database.
Adding the Needed Graphics and Sound File
Android
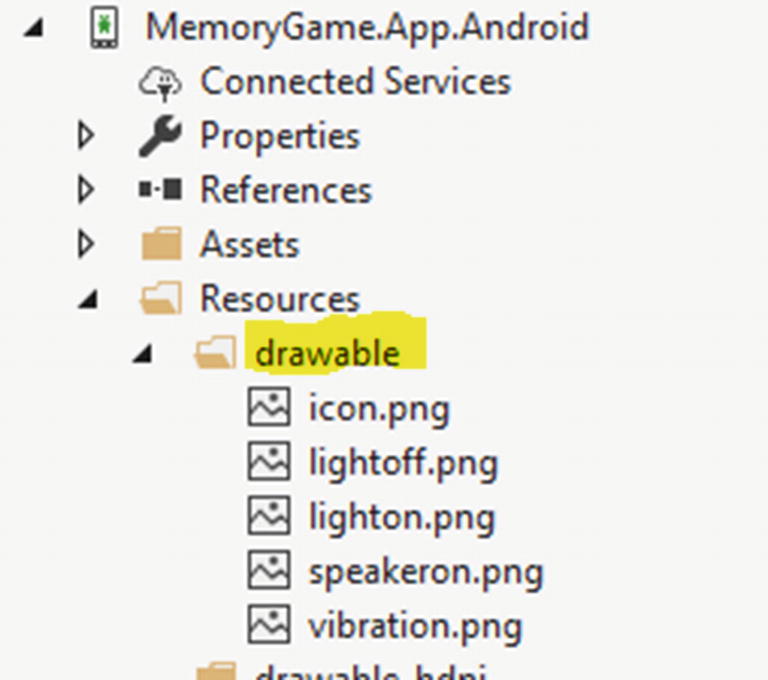
Adding the graphics file
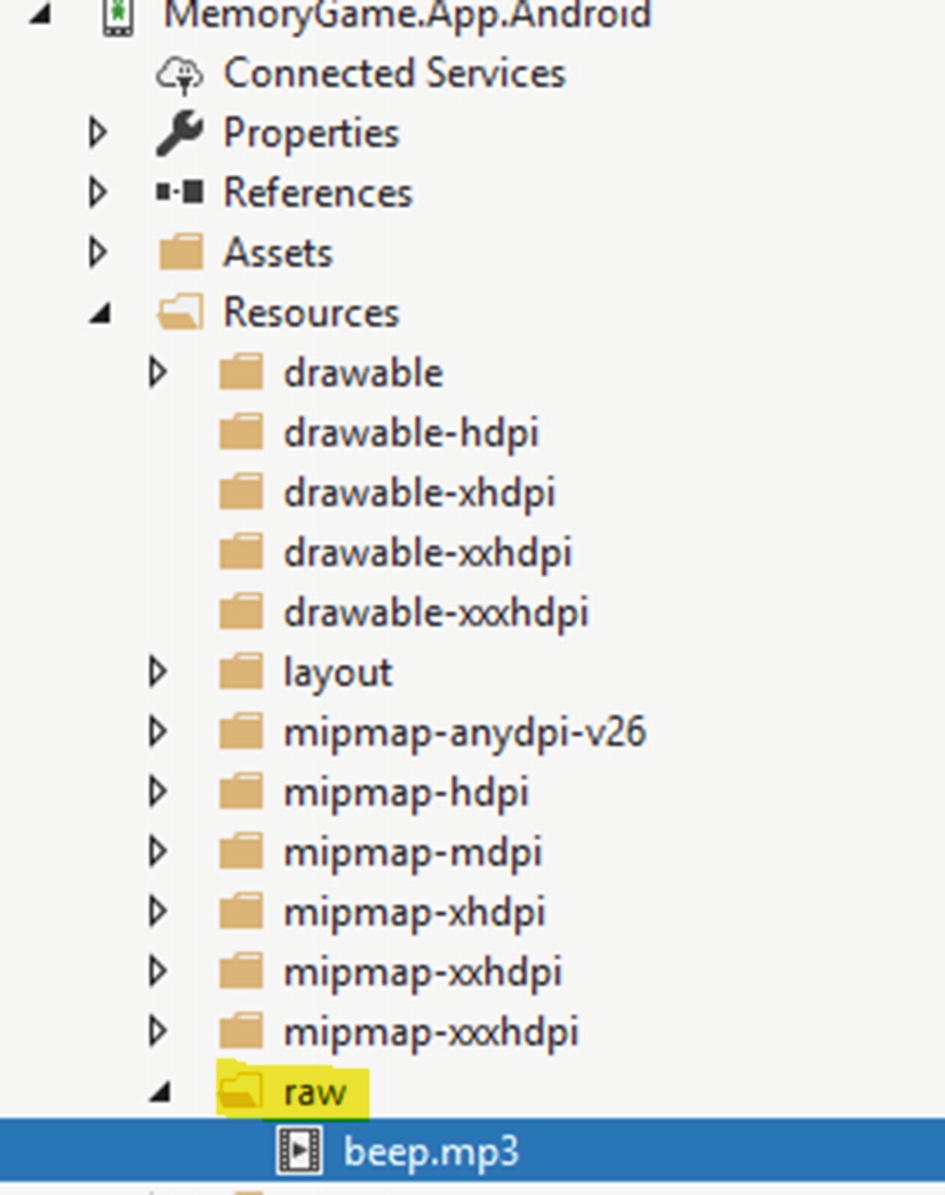
Adding the sound file
iOS

Adding the graphics and sound files
The Required XAML Pages
App.xaml, the XAML file; and
App.xaml.cs, a C# code-behind file associated with the XAML file.
If you are working with ASP.NET WebForms, you will notice that the concept of the XAML file is pretty much the same as that of the WebForm’s ASPX files. You’ll need to click the arrow next to App.xaml to see the code-behind file. Both App.xaml and App.xaml.cs contribute to a class named App that derives from Application. Most other classes with XAML files contribute to a class that derives from ContentPage; those files use XAML to define the visual contents of an entire page.
Register
Home
Result
The Register Page
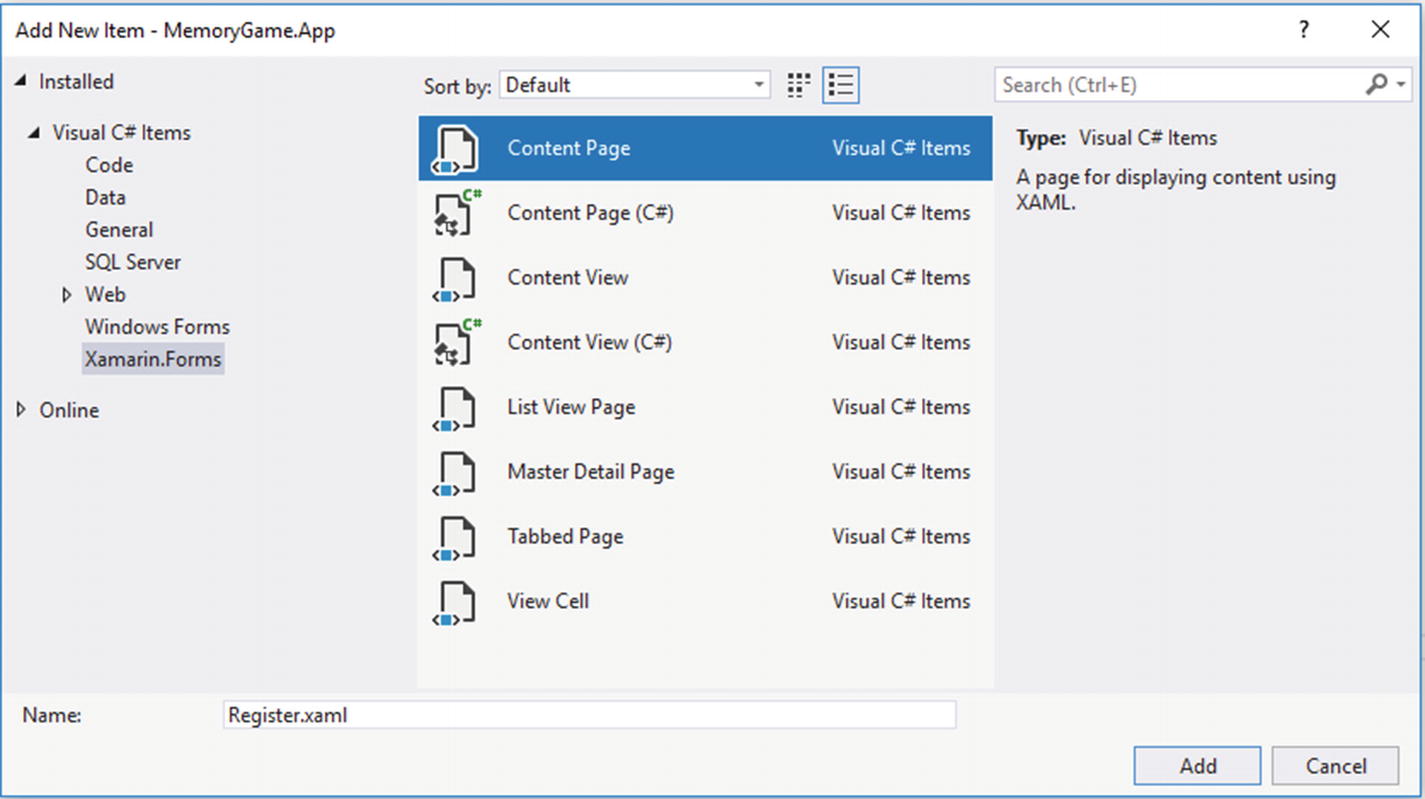
Creating a new ContentPage file
Name the page “Register” and click Add.
The preceding markup uses XAML to build the application UI. XAML allows you to define UIs in Xamarin.Forms applications using markup rather than code. You may have noticed that it contains some StackLayout elements to group controls in certain areas in the form. The controls are used to present the form to UI and are referred to as Button, Entry, Label, and more. Each button from the preceding markup has a Clicked event attached to it to perform a certain action in the server (a.k.a. code-behind).
For comprehensive documentation about XAML in Xamarin.Forms, see the following: https://docs.microsoft.com/en-us/xamarin/xamarin-forms/xaml/xaml-basics/
At the very top, you’ll find a series of using keywords. This type of keyword is typically used as a directive, when it is used to create an alias for a namespace or to import types defined in other namespaces. In other words, when you want to access a certain class in your code, you need to define the namespace first.
The Register class is a partial class that derives from a ContentPage class. In XAML, a ContentPage is a page that displays a single View, often a container like a StackLayout or ScrollView. Within the class constructor, it calls the method InitializeComponent(), which initializes a new ContentPage instance.
The preceding code is an enumeration used for toggling the buttons on the page.
The OnAppearing() is a built-in event of a page. This event is marked as virtual, meaning that we can override this event to customize the behavior immediately prior to the page becoming visible. In this case, we call the SetHasBackButton() method to hide the back button navigation when the Register page is loaded. The if-condition line checks the existence of the challenger’s name. If the property PlayerFirstName has a value, then it redirects the view to the Home page; otherwise, it stays in the Register page .
For more information about Xamarin.Forms navigation, see the following: https://docs.microsoft.com/en-us/xamarin/xamarin-forms/app-fundamentals/navigation/
The CheckExistingProfileAndSave() is an asynchronous method that takes a string as the parameter and returns a Task. The first line within the try-block calls the awaitable Task called CheckExistingPlayer() and assigns the result to a type of PlayerData. If the FirstName and LastName of the PlayerData object are null or empty, then it displays an error stating that the e-mail provided does not exist. Otherwise, it stores the challenger information in the local data storage via Settings properties.
The Save() method stores the basic challenger information such as FirstName, LastName, and Email and then automatically redirects to the Home page.
The ToggleEntryView() method takes an EntryOption enumeration as a parameter. This method basically handles the switching of register and login container layout in the Register page.
The preceding code comprises event handlers for buttons that invoke the ToggleEntryView() method . The OnbtnNewClicked event shows the Register view with a cancel button. The OnbtnReturnClicked event, on the other hand, shows the Login view with a cancel button. The remaining events are used to revert the view to original state.
The OnbtnRegisterClicked is an asynchronous event that returns void. As you may know, async methods can return Task<T>, Task, or void. In almost all cases, you want to return Task<T> or Task, and return void only when you have to. Returning void for async event handlers is great, as we can perform asynchronous operations without blocking the UI thread.
The first line of the code within the event disables the button btnRegister and then performs some asynchronous operations. If the FirstName, LastName, and Email fields are left empty, then it shows an error. Otherwise, it calls the Save() method.
The OnbtnLoginClicked event is also an asynchronous event that returns void. This event is where the user credential is validated: in this case, the e-mail address value. The first line of code within the event handler checks for the e-mail address value. If it’s empty, then it displays an error; otherwise, it saves the challenger information to the local data storage by calling the CheckExistingProfileAndSave() method.
The Home Page
The preceding XAML markup contains three Label, three Button, and five Image. The Label elements are used for displaying the existing saved top score, the current top score, and the instructions to play the game. The Button elements are used for syncing data to the database, logging out, and starting the game. The Image elements are used for displaying a bulb (on and off), speaker, and haptic indication.
The code-behind for the Home page is expected to be long, because this is where the game logic is handled. I keep it this way in order for you to easily reference the relevant code logic in one place and for simplicity’s sake. In a real-world scenario, you may want to break the code into classes and identify components that can be reusable.
Just like any other XAML page, the Home class inherits the ContentPage class. Within the class constructor, it calls the method InitializeComponent() to initialize a new ContentPage instance.
The PlayType is an enum that consists of three main entries: Blink, Sound, and Haptic. This enum will be used later in the code to identify the type of event played.
The preceding code comprises the private global variables of type int that will be used within the class. The _cycleStartInMS variable value is expressed in milliseconds and defaults to 0. This variable indicates the time when the app should trigger a new cycle to start the play. The cycleMaxInMS variable indicates the maximum time to when the app stops the play. The default value is 10,000 milliseconds, or 10 seconds. The last two variables are marked as const, meaning the value assigned to them won’t change. The _cycleIntervalInMS variable indicates the time interval between playing different event types such as blinking an image, playing a sound, or activating vibration on the device. The interval value is 2000 milliseconds, equivalent to 2 seconds. The eventTypeCount variable indicates the number of event types, for which the value in this case is 3.
The preceding code comprises the public properties for the class. They are marked public and static, so other class can access them without having to create an instance of the Home class. The preceding syntax uses property initializers, which was introduced in C# 6.0.
The CurrentGameBlinkCount property holds the number of blink counts with the default value of 0. The CurrentGameSoundCount property holds the number of sound counts with the default value of 0. The CurrentGameHapticCount property holds the number of haptic counts with the default value of 0. Last but not least, the CurrentGameLevel holds the level/score value.
The OnAppearing() method fires before the page gets visible. The preceding code disables the back navigation of the app and then updates the challenger top score. The if-condition checks the value of _answered from the Result page. If true, then it calls the LevelUp() method, otherwise it calls the ResetLevel().
The last two lines of code within the method sets the label’s Text property to display the top score and current score.
The IncrementPlayCount() method takes a PlayType object as a parameter. This method basically increases the number of each event type based on the enum value.
The IncrementGameLevel() increases the level/score value. This method is marked as public so other class can invoke it.
The ResetLevel() method resets the level/score and play cycle time and clears the time displayed in the view.
The StartRandomPlay() is an asynchronous method that returns a void. The preceding code is the core method of the Home class. The method is responsible for activating different criteria on a random basis, whether invoking a sound, making a vibration, or just blinking an image. Notice that we’ve used the DependencyService class to inject the interface that we’ve defined in previous section of this Chapter. This allows us to perform platform specific implementations for playing a sound or activating a device vibration.
The preceding code simply resets the properties value to 0.
The preceding code decreases the cycle interval for triggering a new random event. In other words, the 2-second cycle will be decreased by 200 ms per level. This is where the game gets exciting, because the higher your level/score goes, the faster the different event types are triggered until you can’t remember which type of event has occurred.
The preceding code invokes two methods for starting a timer on the view. The Device.StartTimer() starts a recurring timer on the UI thread using the device clock capabilities. The first one creates a countdown timer in the view starting from 10 seconds to 0 and displays the result to a Label element in real time. The second invokation of the Device.StartTimer() method is responsible for triggering a new random event based in the current value of the _cycleMaxInMS value.
The OnButtonClicked event activates and starts the game by calling the Play() method.
The OnbtnSyncClicked() is an asynchronous event handler that syncs data to the database. The first line of the code within the method checks for the connection using the Utils.IsConnectedToInternet() method. If the device is connected to an Internet or wifi, then it enables data sync by calling the awaitable Sync() method from the PlayerManager class.
The OnbtnLogoutClicked event handles the logout functionality of the application. Just like the sync feature, it first checks for Internet connectivity. If the device is connected, it will then invoke the Sync() method to persist the data in the database. If it syncs successfully, then it clears the data from the local device storage using the Settings.ClearEverything() method and redirects the user back to the default page.
The Result Page
The preceding XAML markup contains a few Label, Button, Picker and Image elements. The Picker elements are used for storing a list of items for a challenger to pick. The Label elements are used for displaying the answer count for each event type that has occurred. The Button elements are used for submitting the answers or navigating back to the Home page to restart the game. The Image elements are used for displaying a bulb, a speaker, and a haptic indication.
The preceding code handles the logic for validating the answers against the actual count of each event type occurred. If all answers are correct, then it will prompt you with a message asking if you want to proceed to the next level or not.
Setting the Page Navigation
Now that we have the required pages set up, let’s declare them on the App class to create a simple navigation with a default page.
A MainPage property, which is where to set the initial page for the app.
A persistent Properties dictionary to store simple values across lifecycle state changes.
A static Current property that contains a reference to the current application object.
The code within the app class defines a public static NavigationPage object and the three Pages that we’ve created in the previous section: Register, Home, and Result. These objects are then initialized in the class contractor with the default page set to the Register page. The MainPage property on the application class sets the root page of the application.
For more information about the Xamarin.Forms app class, see the following: https://docs.microsoft.com/en-us/xamarin/xamarin-forms/app-fundamentals/application-class
Summary of Files Added
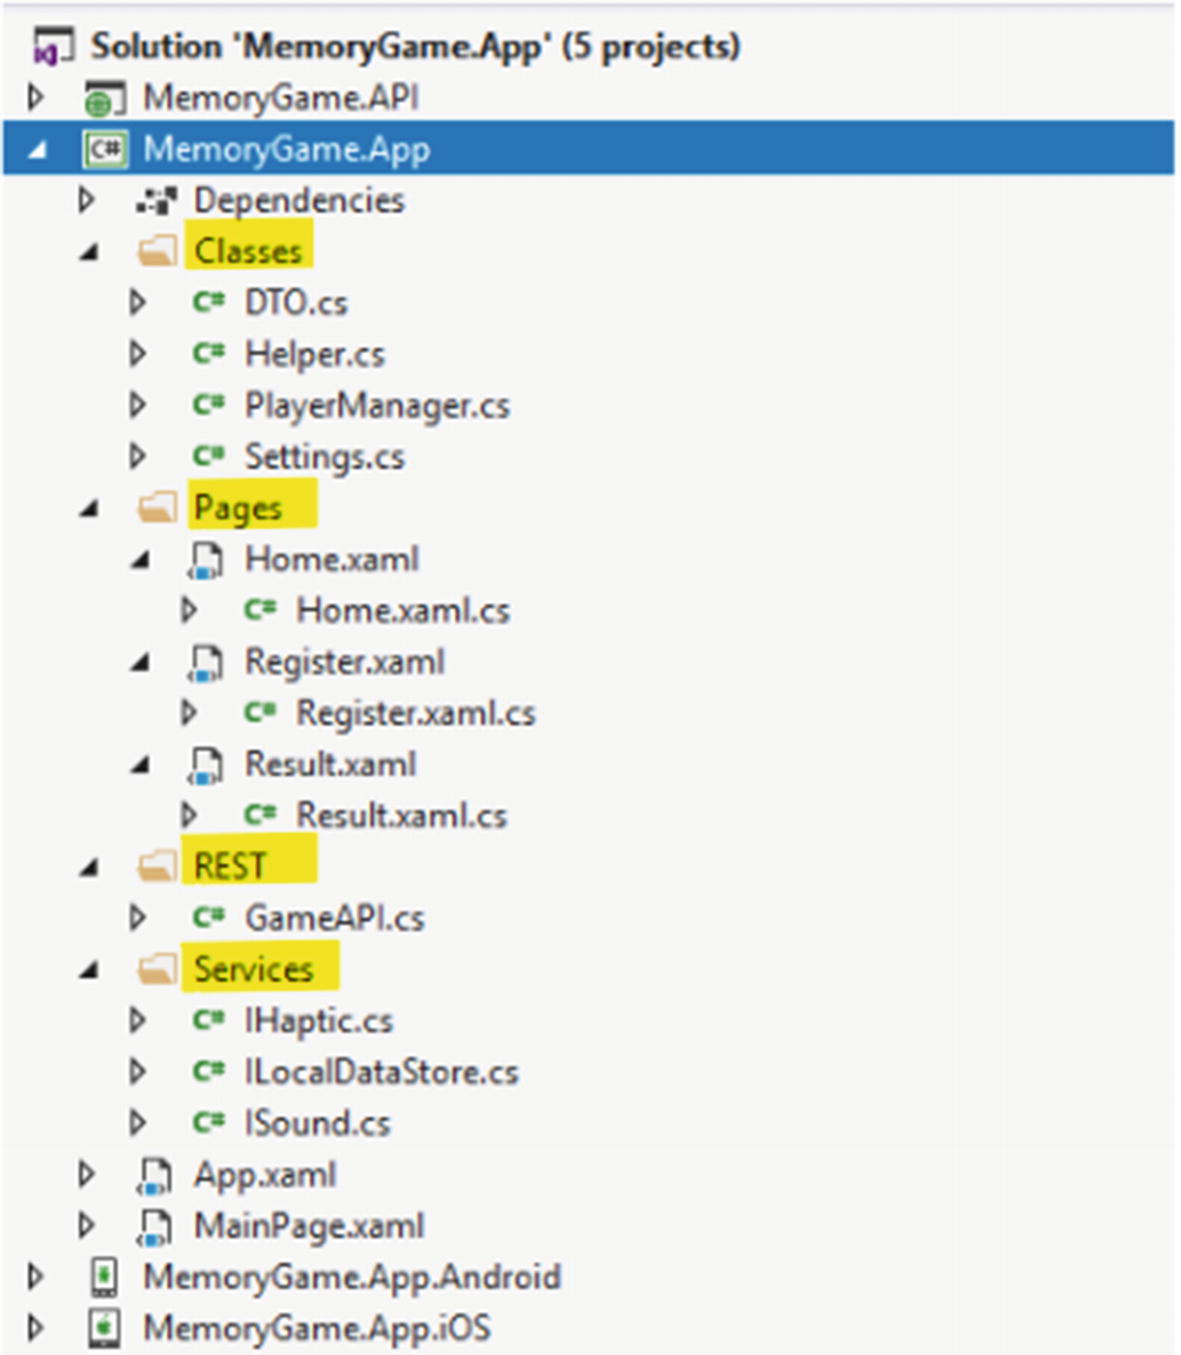
Summary of newly added files
Implementing the Haptic and Sound Services
HapticServer.cs
SoundService.cs
Xamarin.Android Haptic Service
The HapticService class implements the ActivateHaptic() method of the IHaptic interface. The preceding code contains Android-specific implementation for activating the device vibration.
Xamarin.Android Sound Service
The SoundService class implements the PlayMp3File() method of the ISound interface. The preceding code contains Android-specific implementation for playing a media.
HapticServer.cs
SoundService.cs
Xamarin.iOS Haptic Service
The preceding code contains iOS-specific implementation for activating device vibration. It uses the SystemSound.Vibrate.PlaySystemSound() to vibrate the device in iOS.
Xamarin.iOS Sound Service
The SoundService class implements the PlayMp3File() method of the ISound interface. The preceding code contains iOS-specific implementation for playing a media.
Note
For iOS, add the required images and sound file under the Resource folder.
Setting Permissions
Xamarin.Android

The AndroidManifest.xml file
Xamarin.iOS
An iOS device doesn’t require any permissions. In Android, the system seeks the user’s permission while the app is being installed. But iOS allows you to go ahead with an installation, seeking permission when the user is using a feature that requires specific permission.
Note
Apple has made several enhancements to both security and privacy in iOS 10 (and greater) that will help the developer improve the security of their apps and ensure the end user’s privacy. For the new iOS 10 Privacy Permission Settings, see: https://blog.xamarin.com/new-ios-10-privacy-permission-settings/